

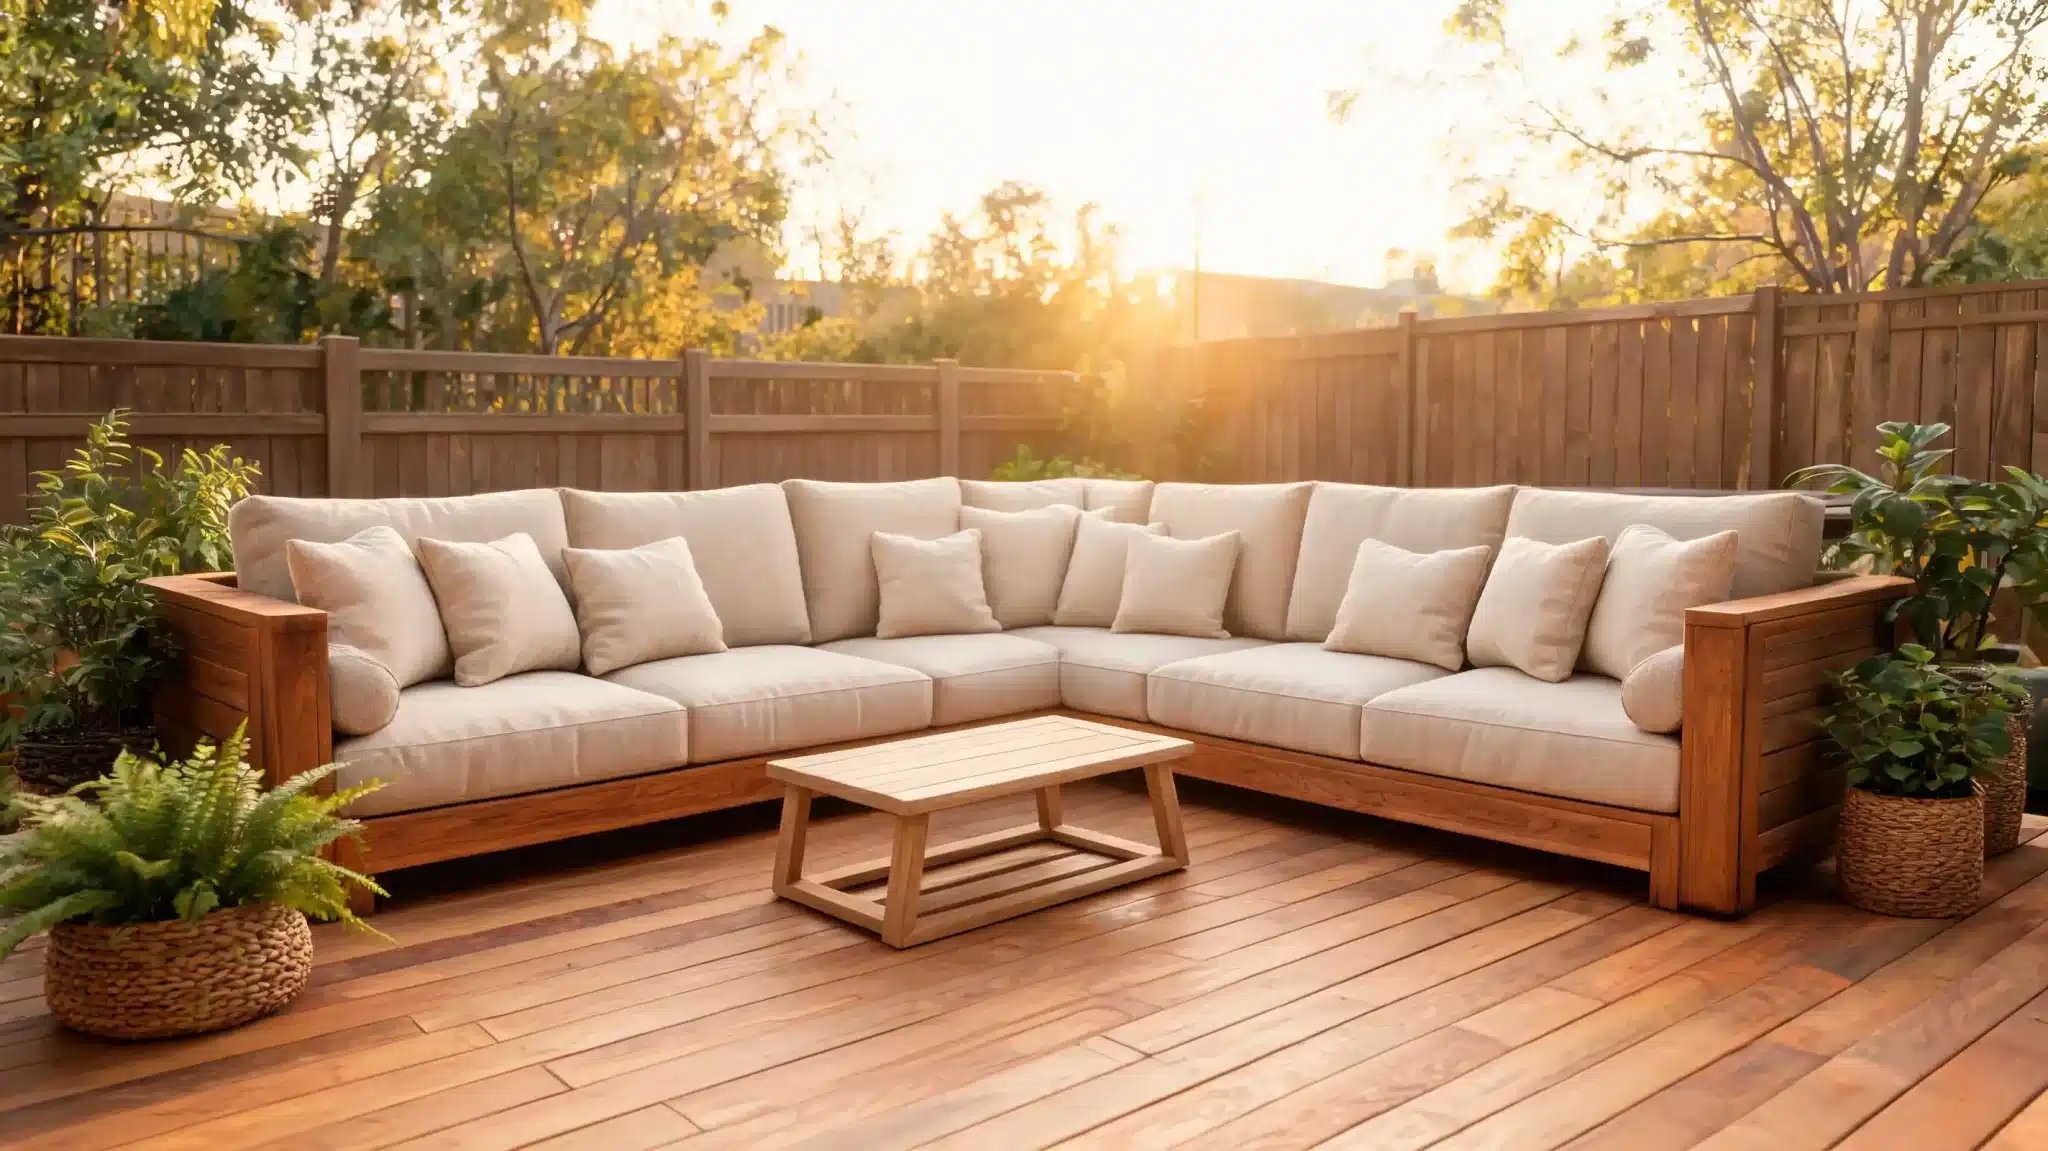


A diy outdoor sectional built from standard 2×4 lumber is one of the more durable patio projects you can tackle on a weekend budget, but only if the frame is squared properly, the wood is sealed before the first rain, and the joints are fastened with exterior-rated hardware.
Skip any one of those, and you’ll be replacing boards by year two. Most failed builds come down to the same three mistakes: indoor screws that rust out, no center support on a long span, and a finish coat that didn’t cover the cut ends.
This guide covers material selection, frame construction, weatherproofing, design layouts, and the failure points most tutorials skip. If you’re planning an L-shaped sectional for a corner patio or a modular setup you can store seasonally, the steps below will get you a frame that holds up.
| Cost Note: Figures in this article are estimates based on national averages. Actual costs vary by region, lumber pricing, cushion sourcing, and hardware. Always check current material costs at your local lumber yard before finalizing your budget. |
| Difficulty | 3/5 — Basic woodworking skills are enough, but square cuts and consistent measurements matter on every section. |
| Time | 1 to 2 weekends for framing, sanding, and assembly, plus additional drying time for stain or sealer. |
| Cost | $400 to $800 in materials, depending on wood species, cushion choice, finish type, and hardware. |
| Tools Needed | Circular saw or miter saw, drill/driver, clamps, level, tape measure, speed square, orbital sander. |
| Skill Required | Beginner to intermediate — comfortable measuring, cutting, drilling, and fastening boards square. |
The project card above is a realistic starting point. Labor and finish coats will push the upper end of that range if you’re working with cedar or adding decorative rope details.
What Fails After Two Winters on a DIY Outdoor Sectional
Before the build plan, it’s worth knowing exactly what breaks down on outdoor sectionals that weren’t built for real weather. These are the failure modes I see most often on lumber-framed builds.
- Joint failures from indoor screws: Standard interior screws corrode within one season of outdoor exposure. The rust expands, splits the surrounding wood, and loosens the joint. Use only exterior-rated screws — 2.5-inch ACQ-compatible deck screws for structural joints, stainless steel where visible.
- Seat sag on long spans: Any frame section longer than 48 inches without a center support will deflect under load. The seat boards bow downward, the joints work loose, and the frame eventually racks. Add a center leg and mid-span brace before you add a single seat board.
- Wood rot at unfinished cut ends: Factory-milled lumber has sealant on the surface. The moment you cut it, the end grain is exposed and unprotected. Cut ends absorb moisture at roughly ten times the rate of the face grain. Seal every cut end with exterior stain or end-grain sealer before assembling the frame.
- Cushion mold from trapped moisture: Seat boards installed without gaps trap water under the cushions. Leave consistent 3/16-inch spacing between slats, use a standard drill bit as a spacer. That gap drains rain and lets the frame dry between uses.
- White stain yellowing: White or light exterior stain on exposed lumber yellows in UV within one full season. If you want a light finish, choose a higher-grade exterior product rated for UV resistance, or go with a medium-tone stain that hides weathering better over time.
Choosing the Right Wood for an Outdoor Sectional Frame
The wood decision determines how much maintenance you’ll be doing every year. The table below covers the most practical options for a DIY sectional frame.
| Wood Type | Best Use | Cost Range | Durability | Notes |
| Pressure-treated 2×4 | Frame, legs, braces | $0.80 to $1.20/lf | Very high | Needs 90 days drying time before staining. Not ideal for exposed seat surfaces. |
| Western red cedar | Seat slats, armrests, visible surfaces | $2.50 to $4.00/lf | High | Naturally rot-resistant. Lighter weight. Takes stain well. Best visible-surface choice at reasonable cost. |
| Douglas fir 2×4 | Frame and bracing | $0.90 to $1.40/lf | Moderate | Strong and available. Needs full sealing. Not as naturally rot-resistant as cedar. |
| Teak | Entire frame and surface | $12.00 to $20.00/lf | Excellent | Best long-term outdoor performer. Overkill for a first build. Better suited for a premium second project. |
Each of these species behaves differently once it’s outside for a full year, the wood types for furniture guide goes deeper on grain behavior, finish absorption, and what each species looks like after weathering. For most first-time builds, a pressure-treated frame with cedar seat slats is the most practical combination. You get structural durability from the PT lumber and a clean, stainable surface from the cedar.
Why Build a DIY Outdoor Sectional Instead of Buying One
Store-bought sectionals are a valid option, but they solve a standard problem. A diy outdoor sectional solves your specific problem — an oddly shaped corner, a patio that’s three inches too narrow for a standard sofa, cushions you already own. That’s the practical argument for building.
| Factor | DIY Outdoor Sectional | Store-Bought Outdoor Sectional |
| Cost | $400 to $800 for a full L-section with cushions | $1,000 to $3,000+ for comparable size and quality |
| Fit | Built to your exact patio dimensions | Limited to manufacturer sizes |
| Style | Full control over finish, cushion, and layout | Limited to available product designs |
| Time | 1 to 2 weekends of build time | Faster to unbox and assemble |
| Repairs | Replace a single board or screw, you know the frame | Proprietary hardware often unavailable after a few years |
| Best for | Unusual patio dimensions, modular needs, budget builds | Standard patios, quick setup, low DIY interest |
If your patio is a standard rectangle and time is the constraint, a store-bought option is the honest answer. If you have a corner space, a tight budget, or specific cushions already purchased, building makes more sense.
Choosing Your Layout and Measuring Your Space
Get the layout decision done before you buy a board. Changing the shape mid-build wastes lumber and time.
Measure the space first
Check the available floor area, walking clearance (36 inches minimum behind the sofa), door swing room, and the distance to any grill, fire pit, or railing.
A sectional that seats six people comfortably needs roughly 100 to 120 square feet of floor space, including clearance paths.
Pick the shape based on your corner or wall
An L-shape fits corner spaces and creates a natural seating zone with minimal footprint. A U-shape works on larger patios where you want a full conversation area.
A modular layout, individual identical units, is the best choice if you need to move or store pieces seasonally. A chaise-side sectional adds one extended section for reclining without committing to full lounge furniture.
Choose cushions before you frame
This is the single most important pre-build step. Standard outdoor seat cushions come in 20×20, 21×21, and 24×24 inch sizes. The cushion width sets the seat depth, and the cushion thickness (typically 4 to 5 inches) determines how high your seat surface needs to sit.
Buy or select the cushions first, then build the frame around their dimensions. Rebuilding a frame because the cushions don’t fit costs more time than the cushions themselves.
Tools and Materials You’ll Need
Gather everything before the first cut. Stopping mid-build to buy screws or clamps slows the work and risks dried glue joints.
| Item | Quantity | Purpose |
| Pocket hole jig | 1 | Cleaner frame connections, especially on arm joints |
| Circular saw or miter saw | 1 | Cuts lumber to length and angle |
| Drill/driver | 1 | Drives exterior screws |
| Clamps | 4 to 6 | Holds boards flush and square while fastening |
| Tape measure | 1 | Frame and spacing measurements |
| Speed square | 1 | Checks square corners before tightening screws |
| Orbital sander | 1 | Smooths exposed edges before finishing |
| 120-grit sandpaper | As needed | Initial surface prep for stain |
| 2×4 lumber | Multiple boards | Main frame, cross braces, arm supports, backrest |
| 2×6 lumber | Optional | Wider armrests or additional backrest support |
| 2.5-inch exterior screws | 2 to 3 lbs | Structural fastening throughout |
| Exterior wood glue | 1 bottle | Reinforces joints before screwing |
| Decking boards | Per seat section | Seat surface |
| Exterior stain or sealer | 1 quart minimum | UV and moisture protection for the frame |
| Outdoor cushions | As needed | Seat and backrest padding |
| Rubber feet or glides | Per leg | Keeps legs off wet ground |
Every fastener, glue, and finish product you use needs to be rated for exterior use. Indoor equivalents will fail, and the failures usually start at the joints where water collects.
Step-by-Step DIY Outdoor Sectional Build
These steps follow the build sequence from the frame up. Complete each one before moving to the next, the frame needs to be square before the arms go on, and the arms need to be level before the seat boards are cut to length.
Step 1: Build the main sofa frame
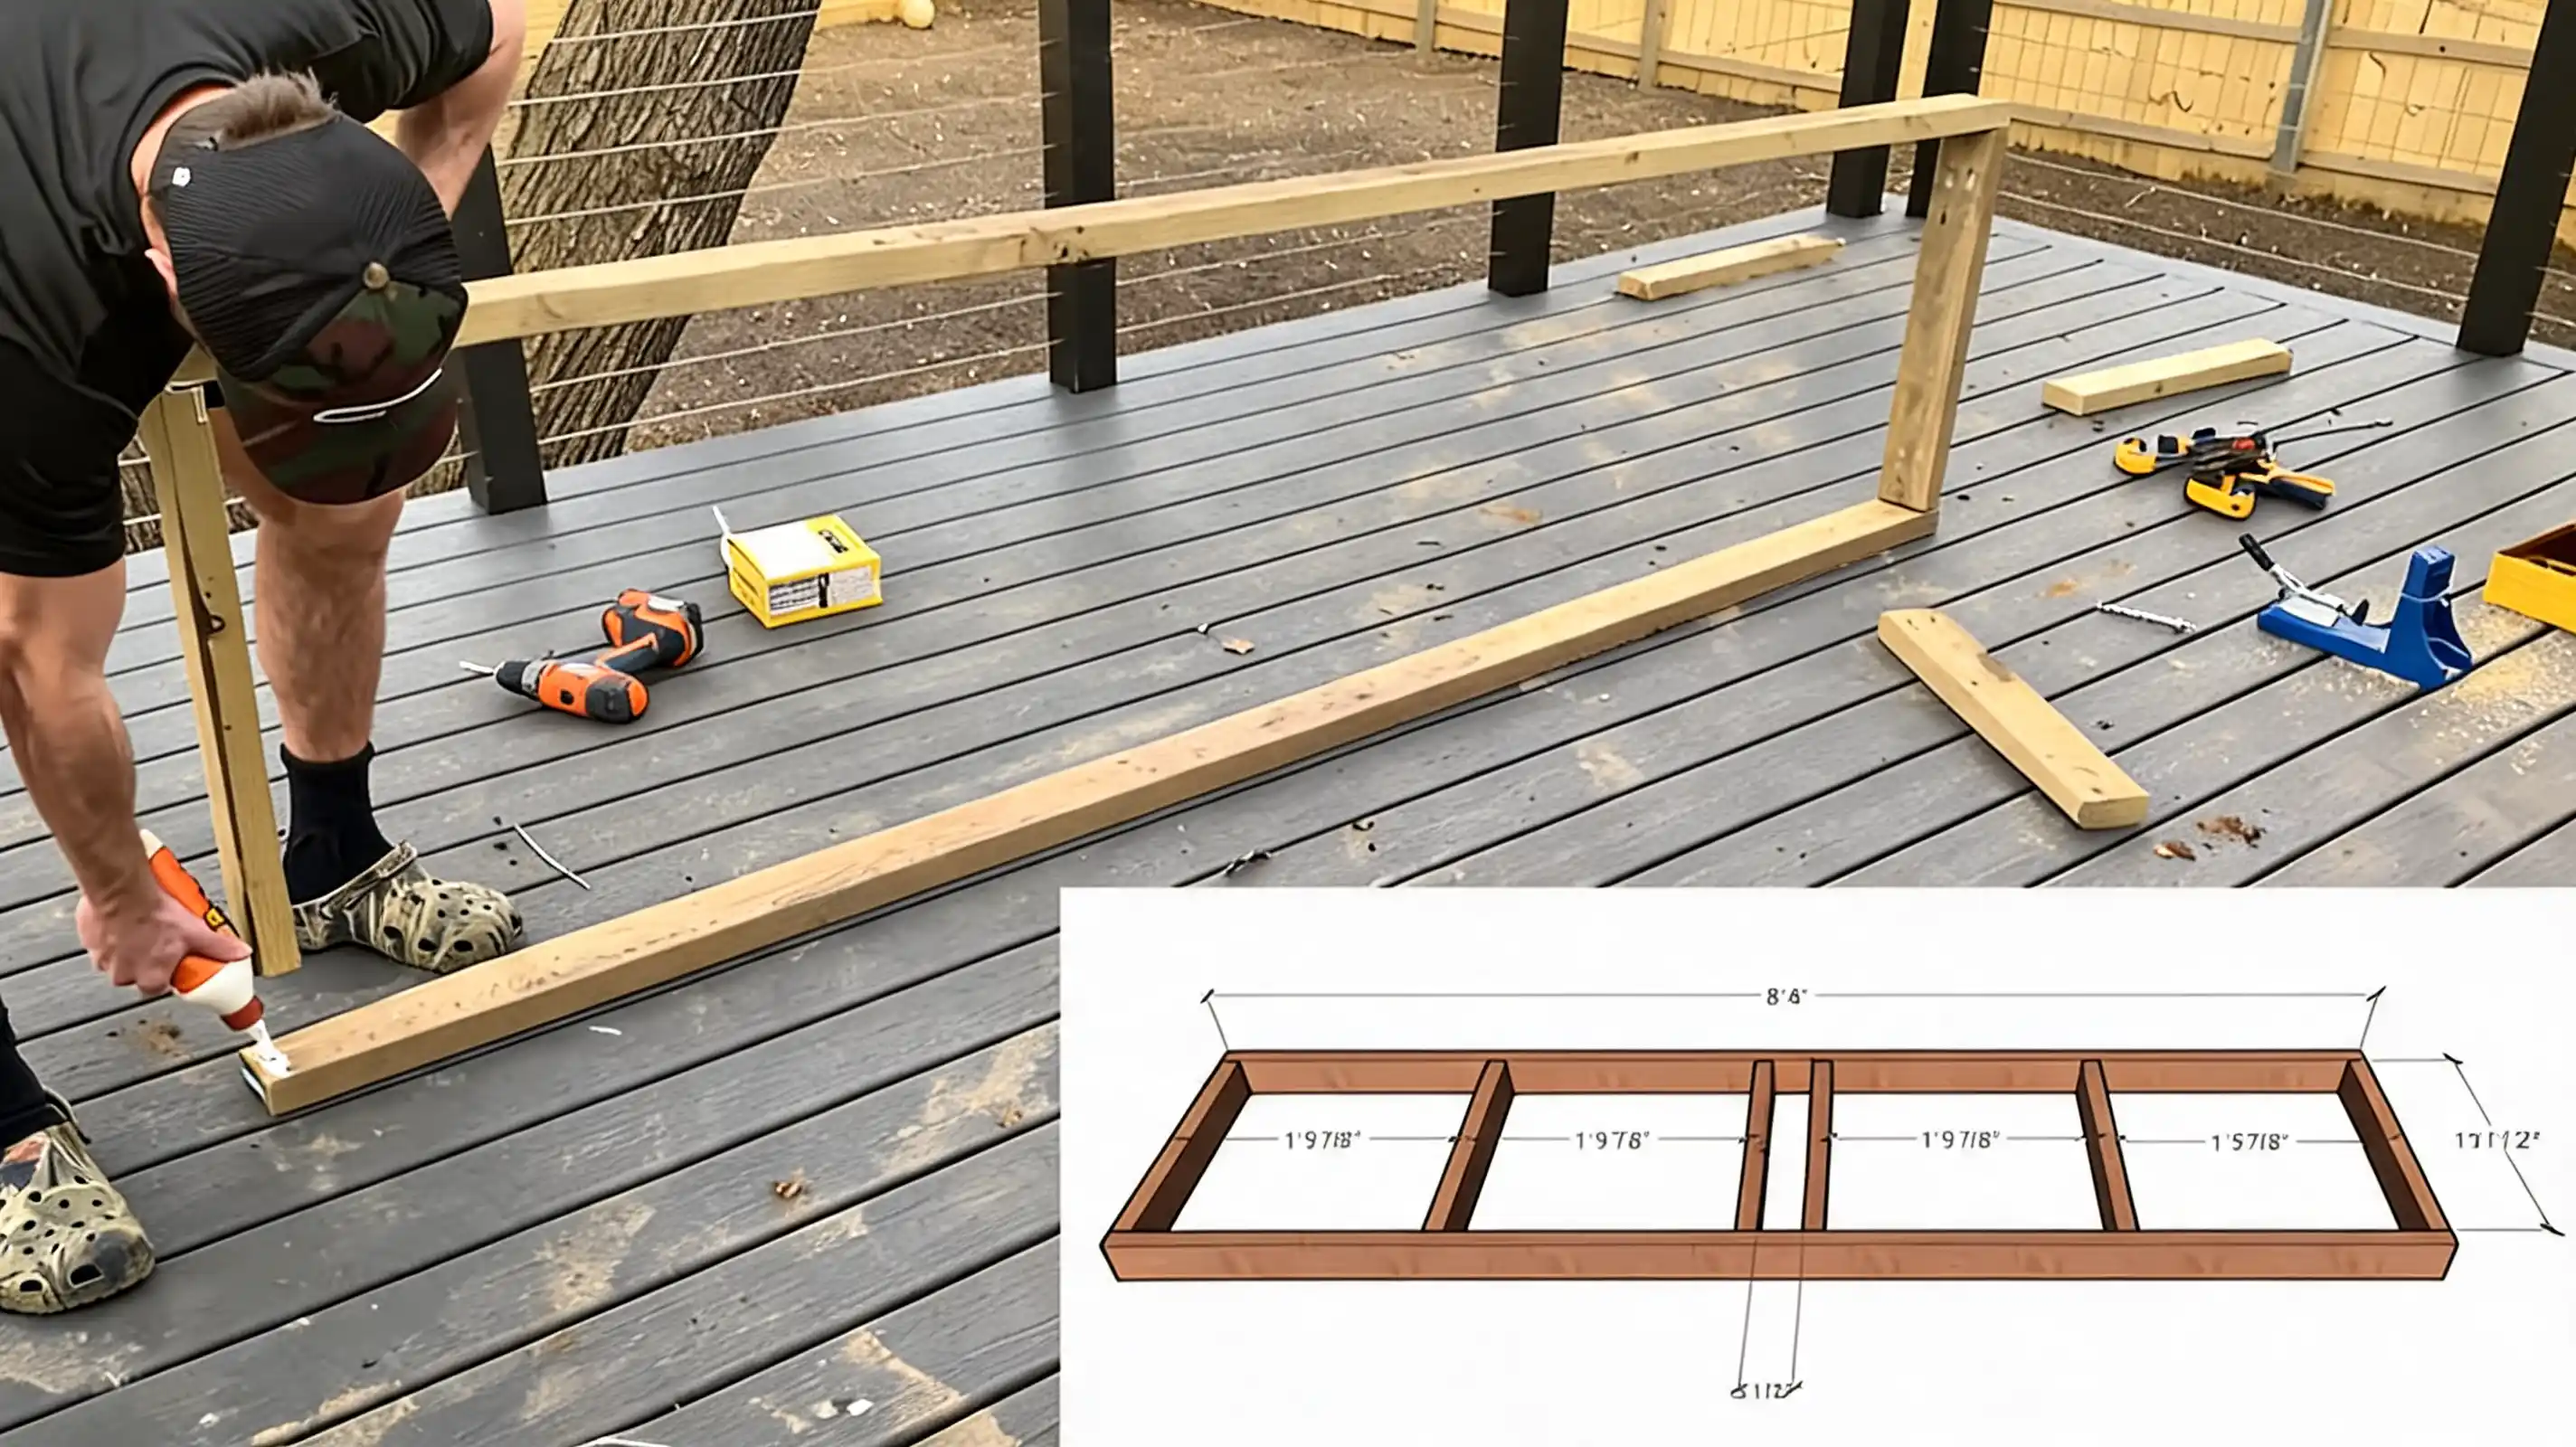
Cut the long outer frame boards and shorter cross pieces for the main sofa base. Join them into a rectangular box frame using a pocket-hole jig, exterior wood glue, and 2.5-inch exterior screws. Check the frame for square before the glue sets, measure diagonally corner to corner. Both measurements should be identical. A frame that goes in crooked produces problems at every step that follows.
Once the outer box is secured, add interior cross braces spaced evenly across the frame. These carry the seat board load and resist any lateral flex in the long section.
Step 2: Add center support for long sections
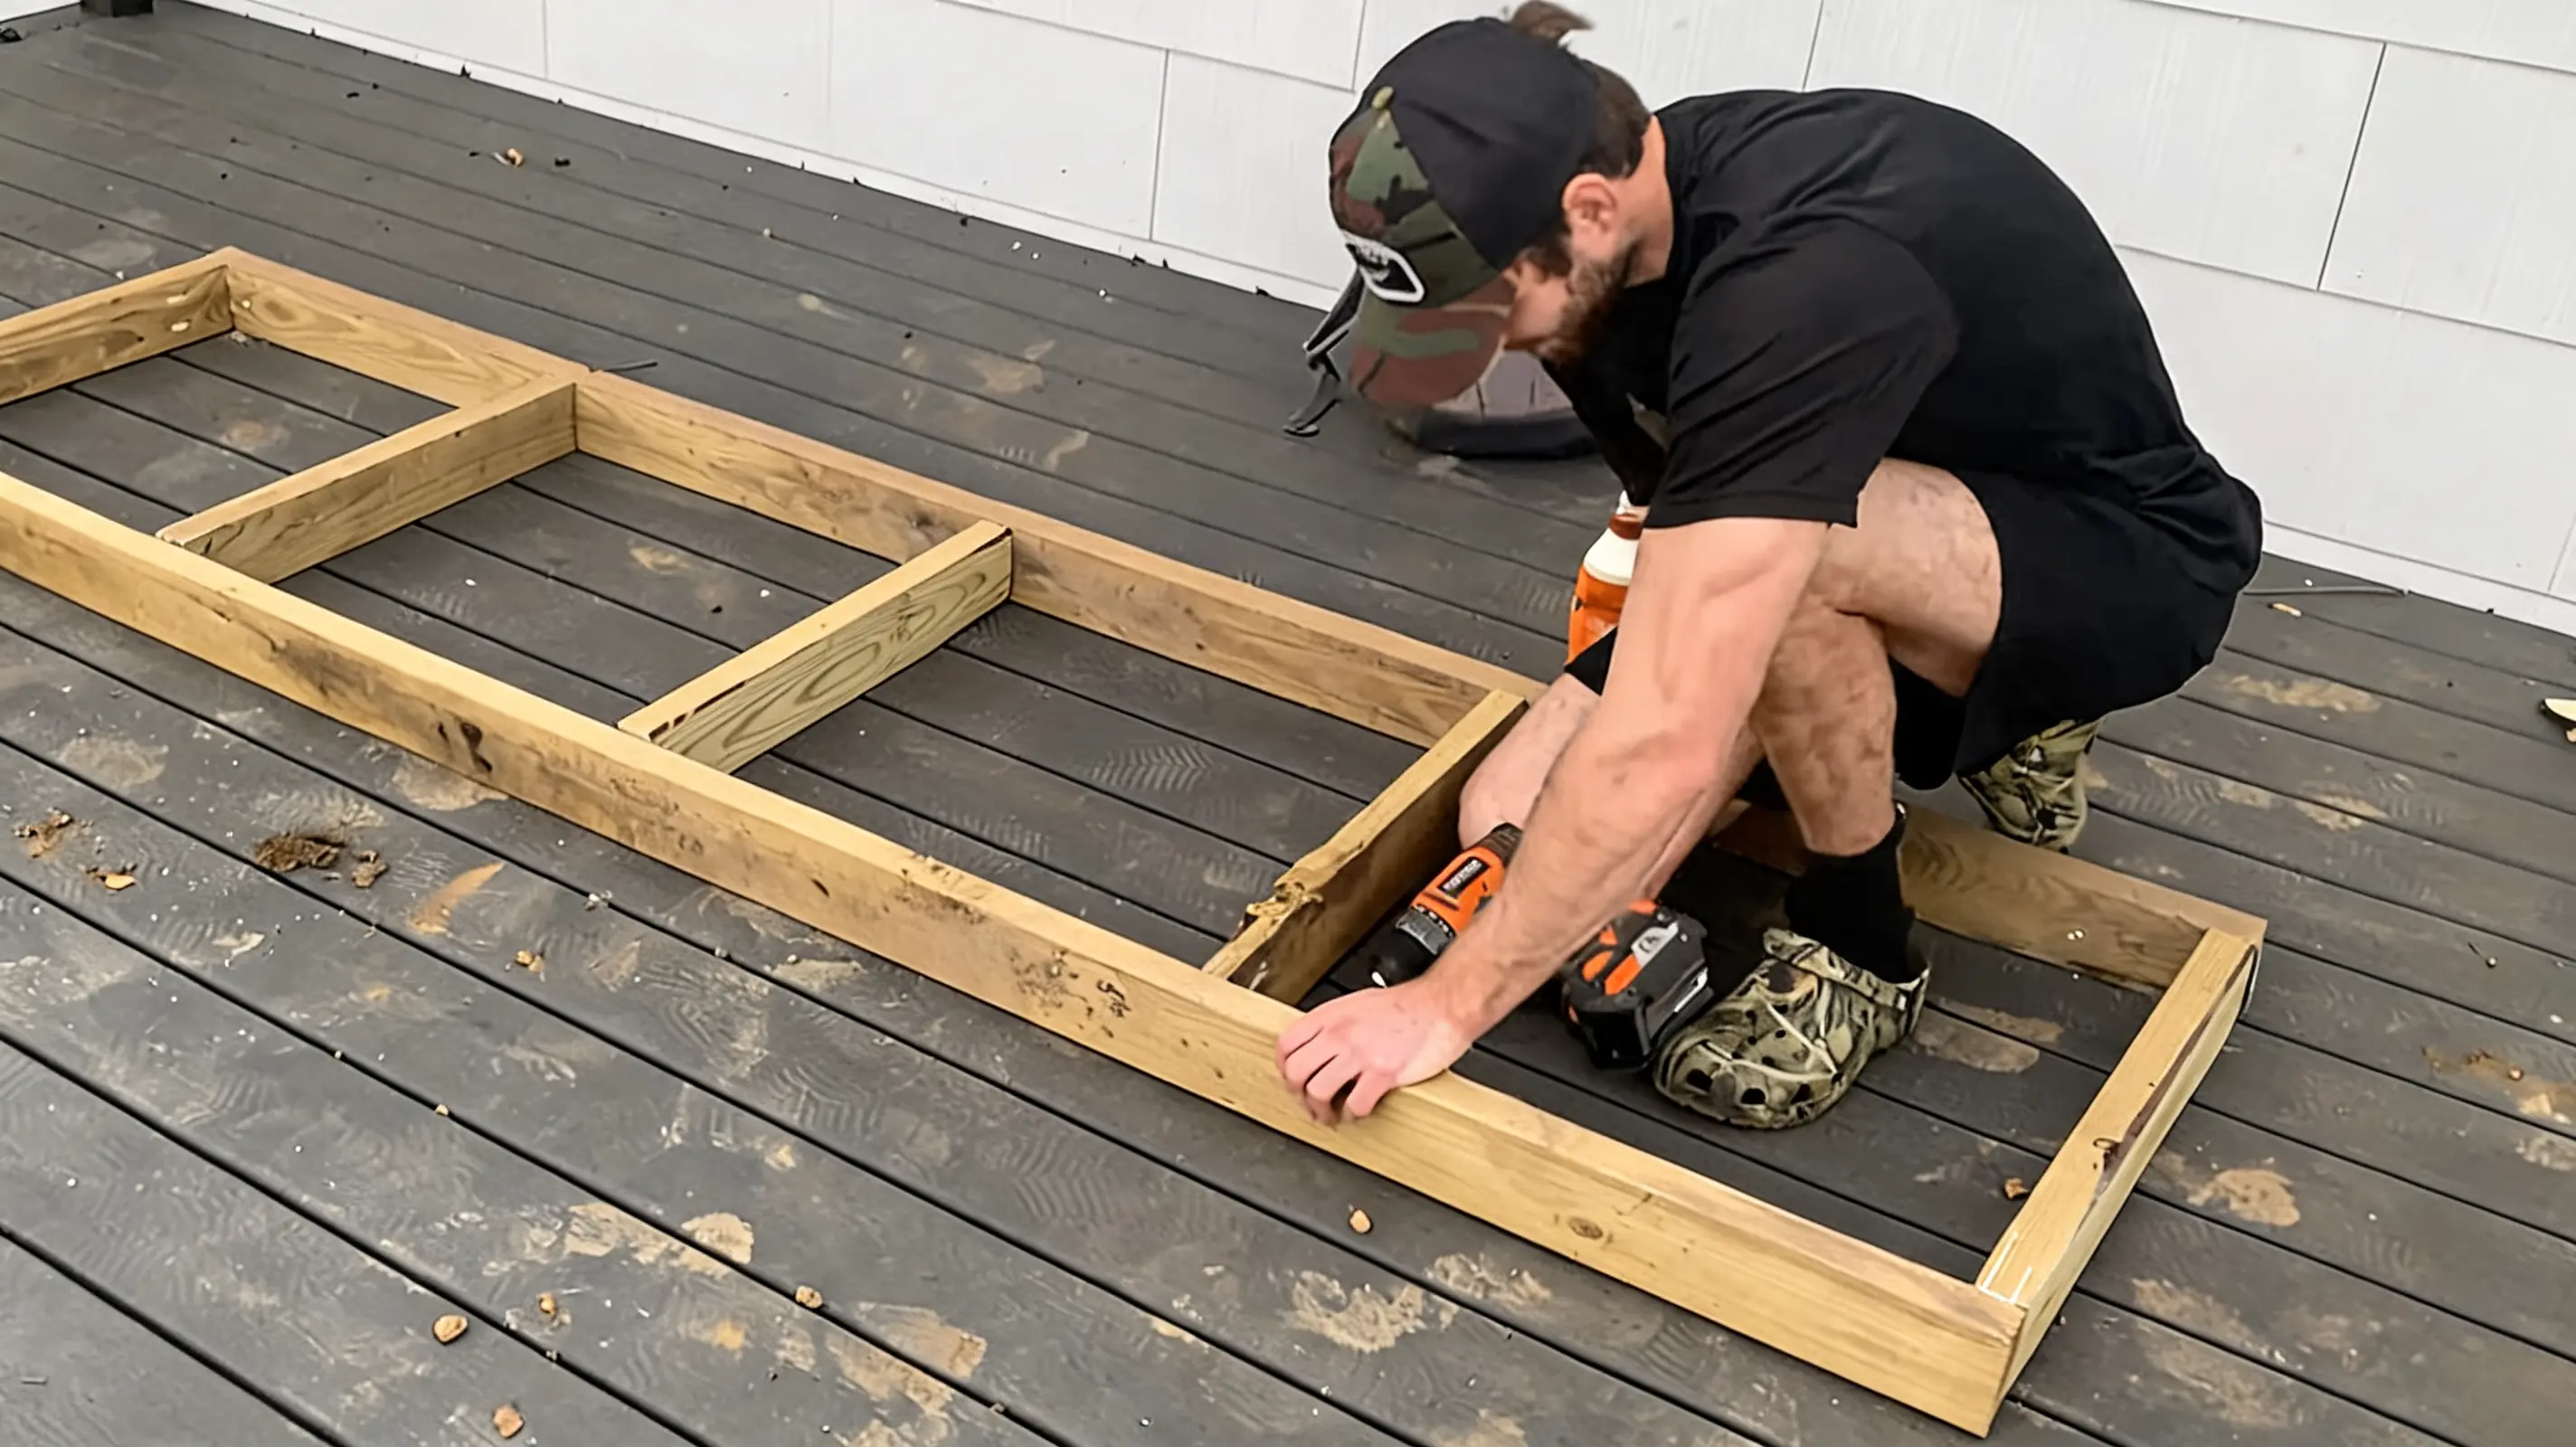
Any section longer than 48 inches needs a center leg and additional mid-span brace. Install both before adding any seat boards.
Place the center leg directly under the mid-span brace, and fasten it with exterior screws from above and through the brace from the side. This is a ten-minute step that prevents the seat sag that collapses most long-span builds within a year of regular use.
Step 3: Build and attach the arm frames
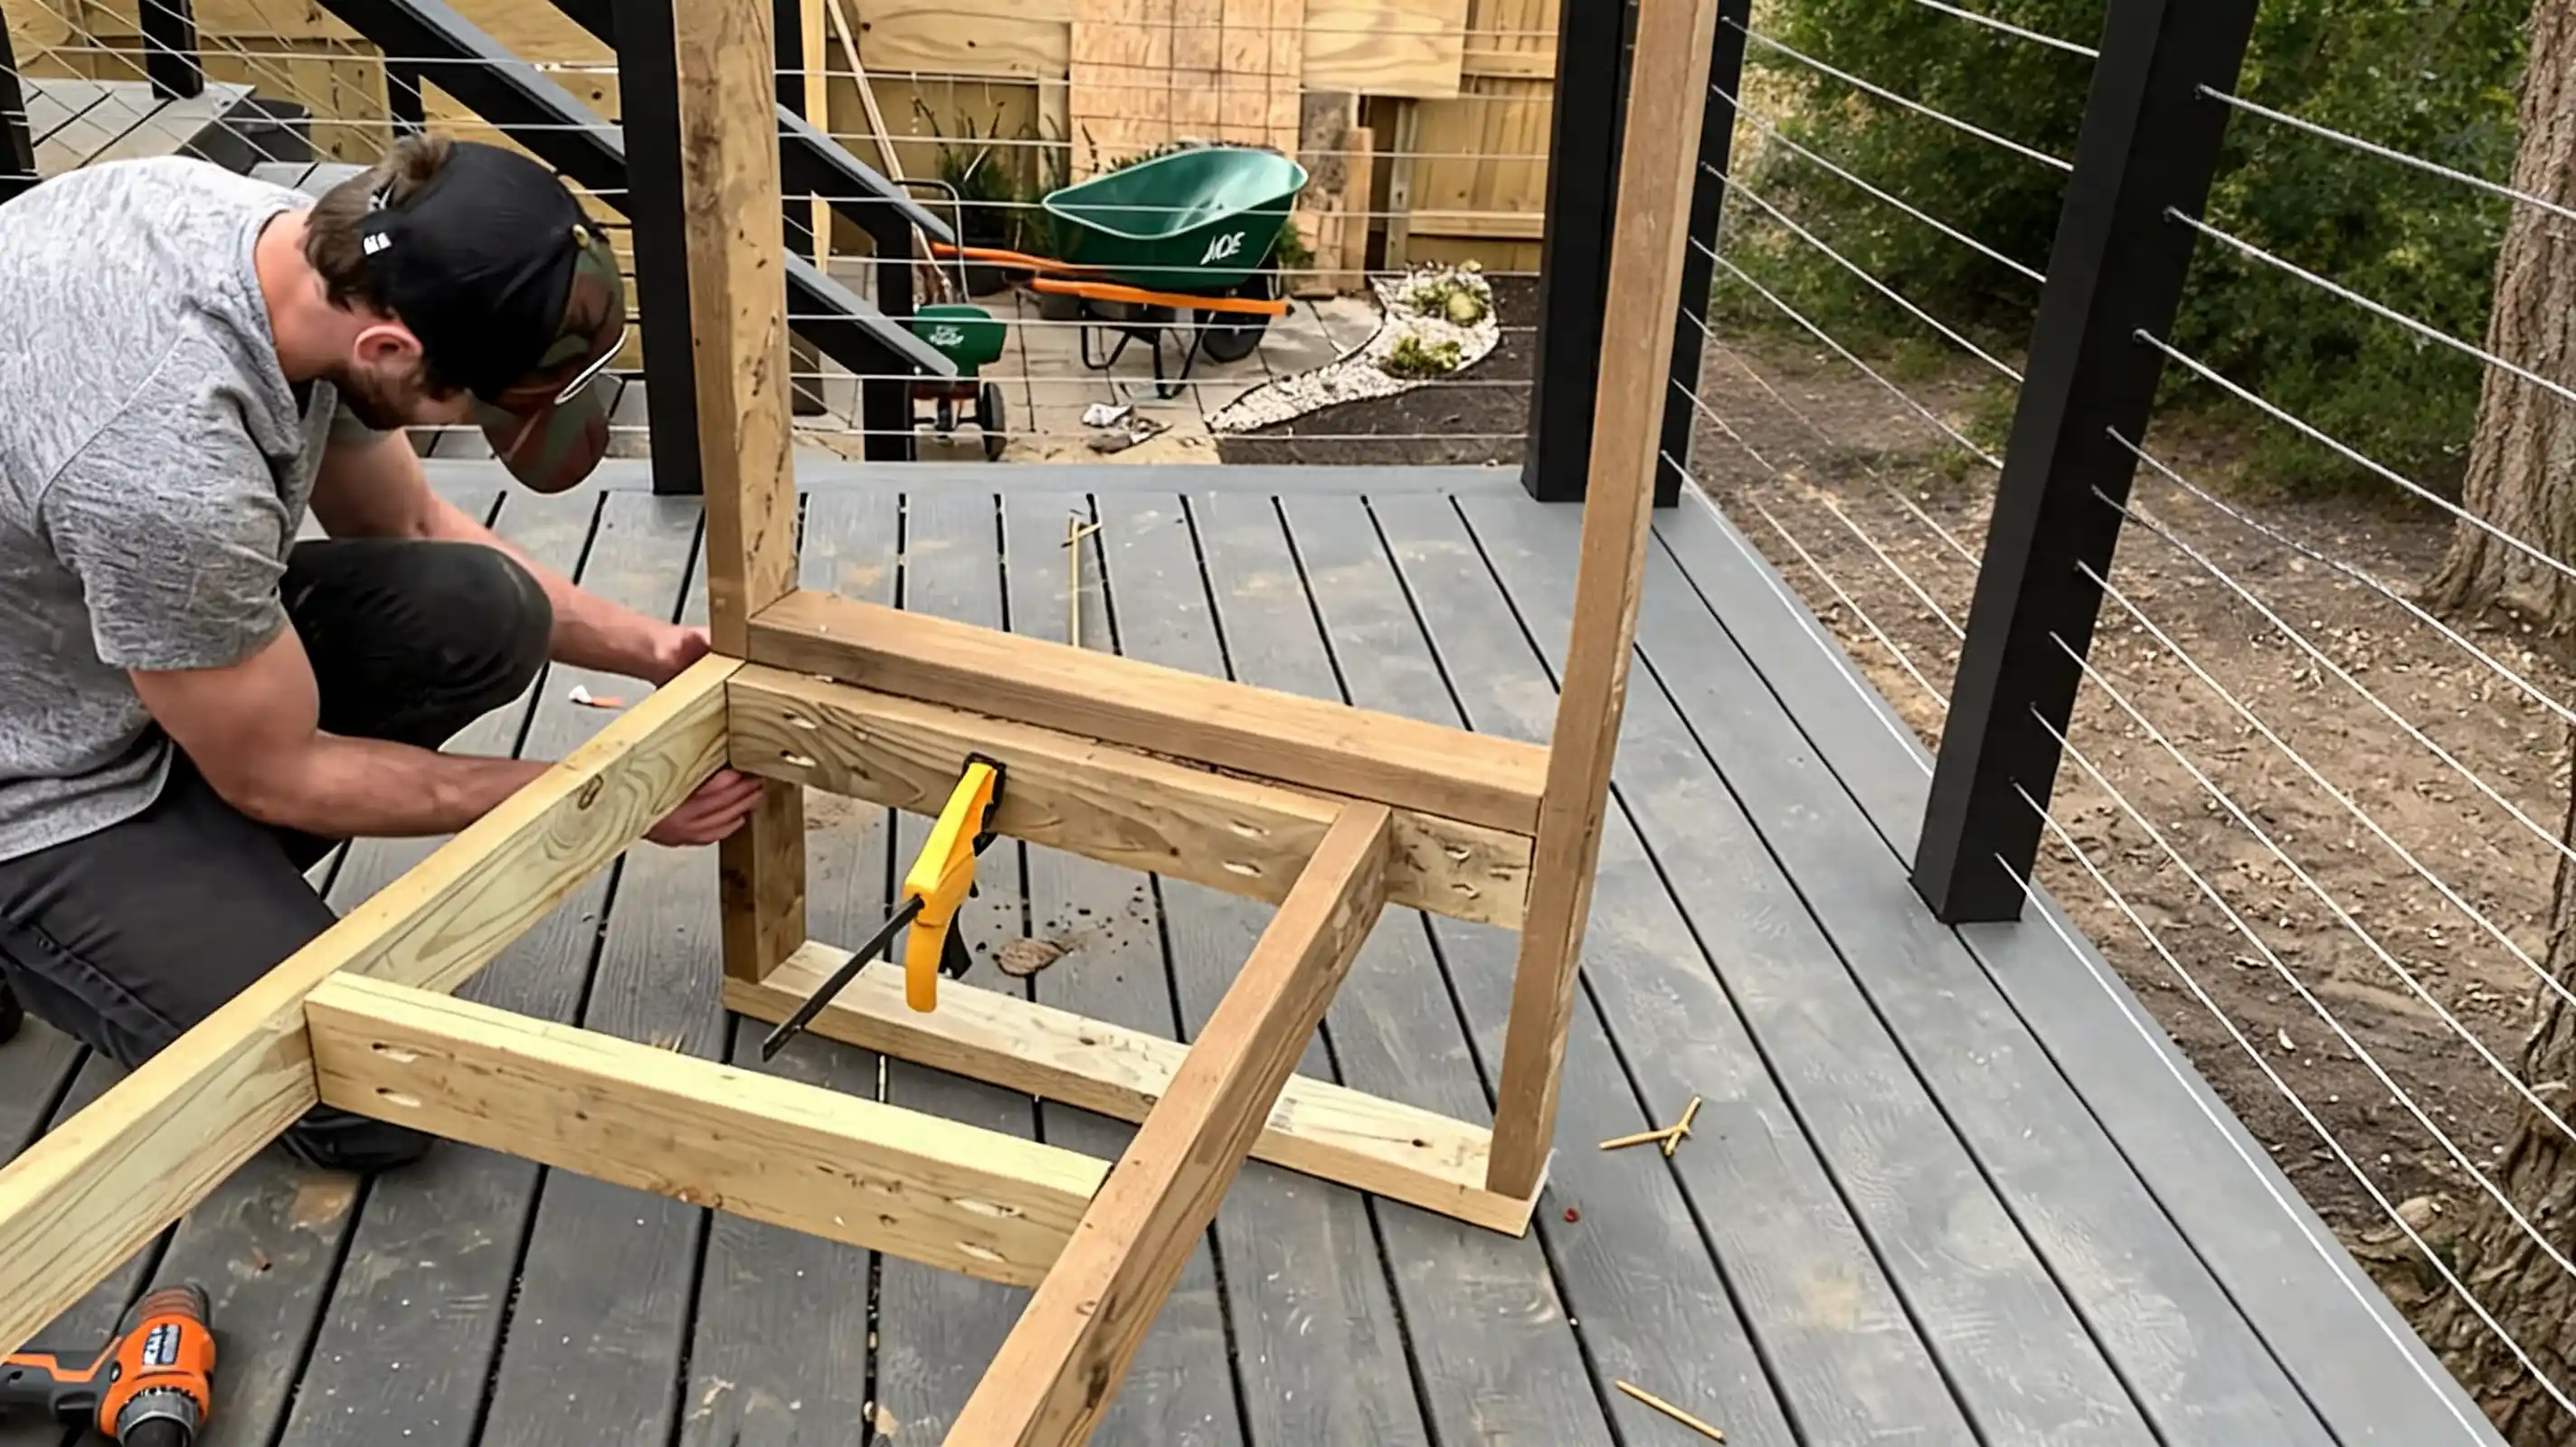
Build each arm frame from vertical uprights, a bottom board, and a center blocking piece that gives the main frame a solid landing surface.
Clamp the main frame between both arm assemblies and check that the top edges are flush and the corners are level before driving any screws. The arms set the finished height of the sectional, getting this level at this stage avoids shimming problems with cushions later.
Step 4: Install the seat boards
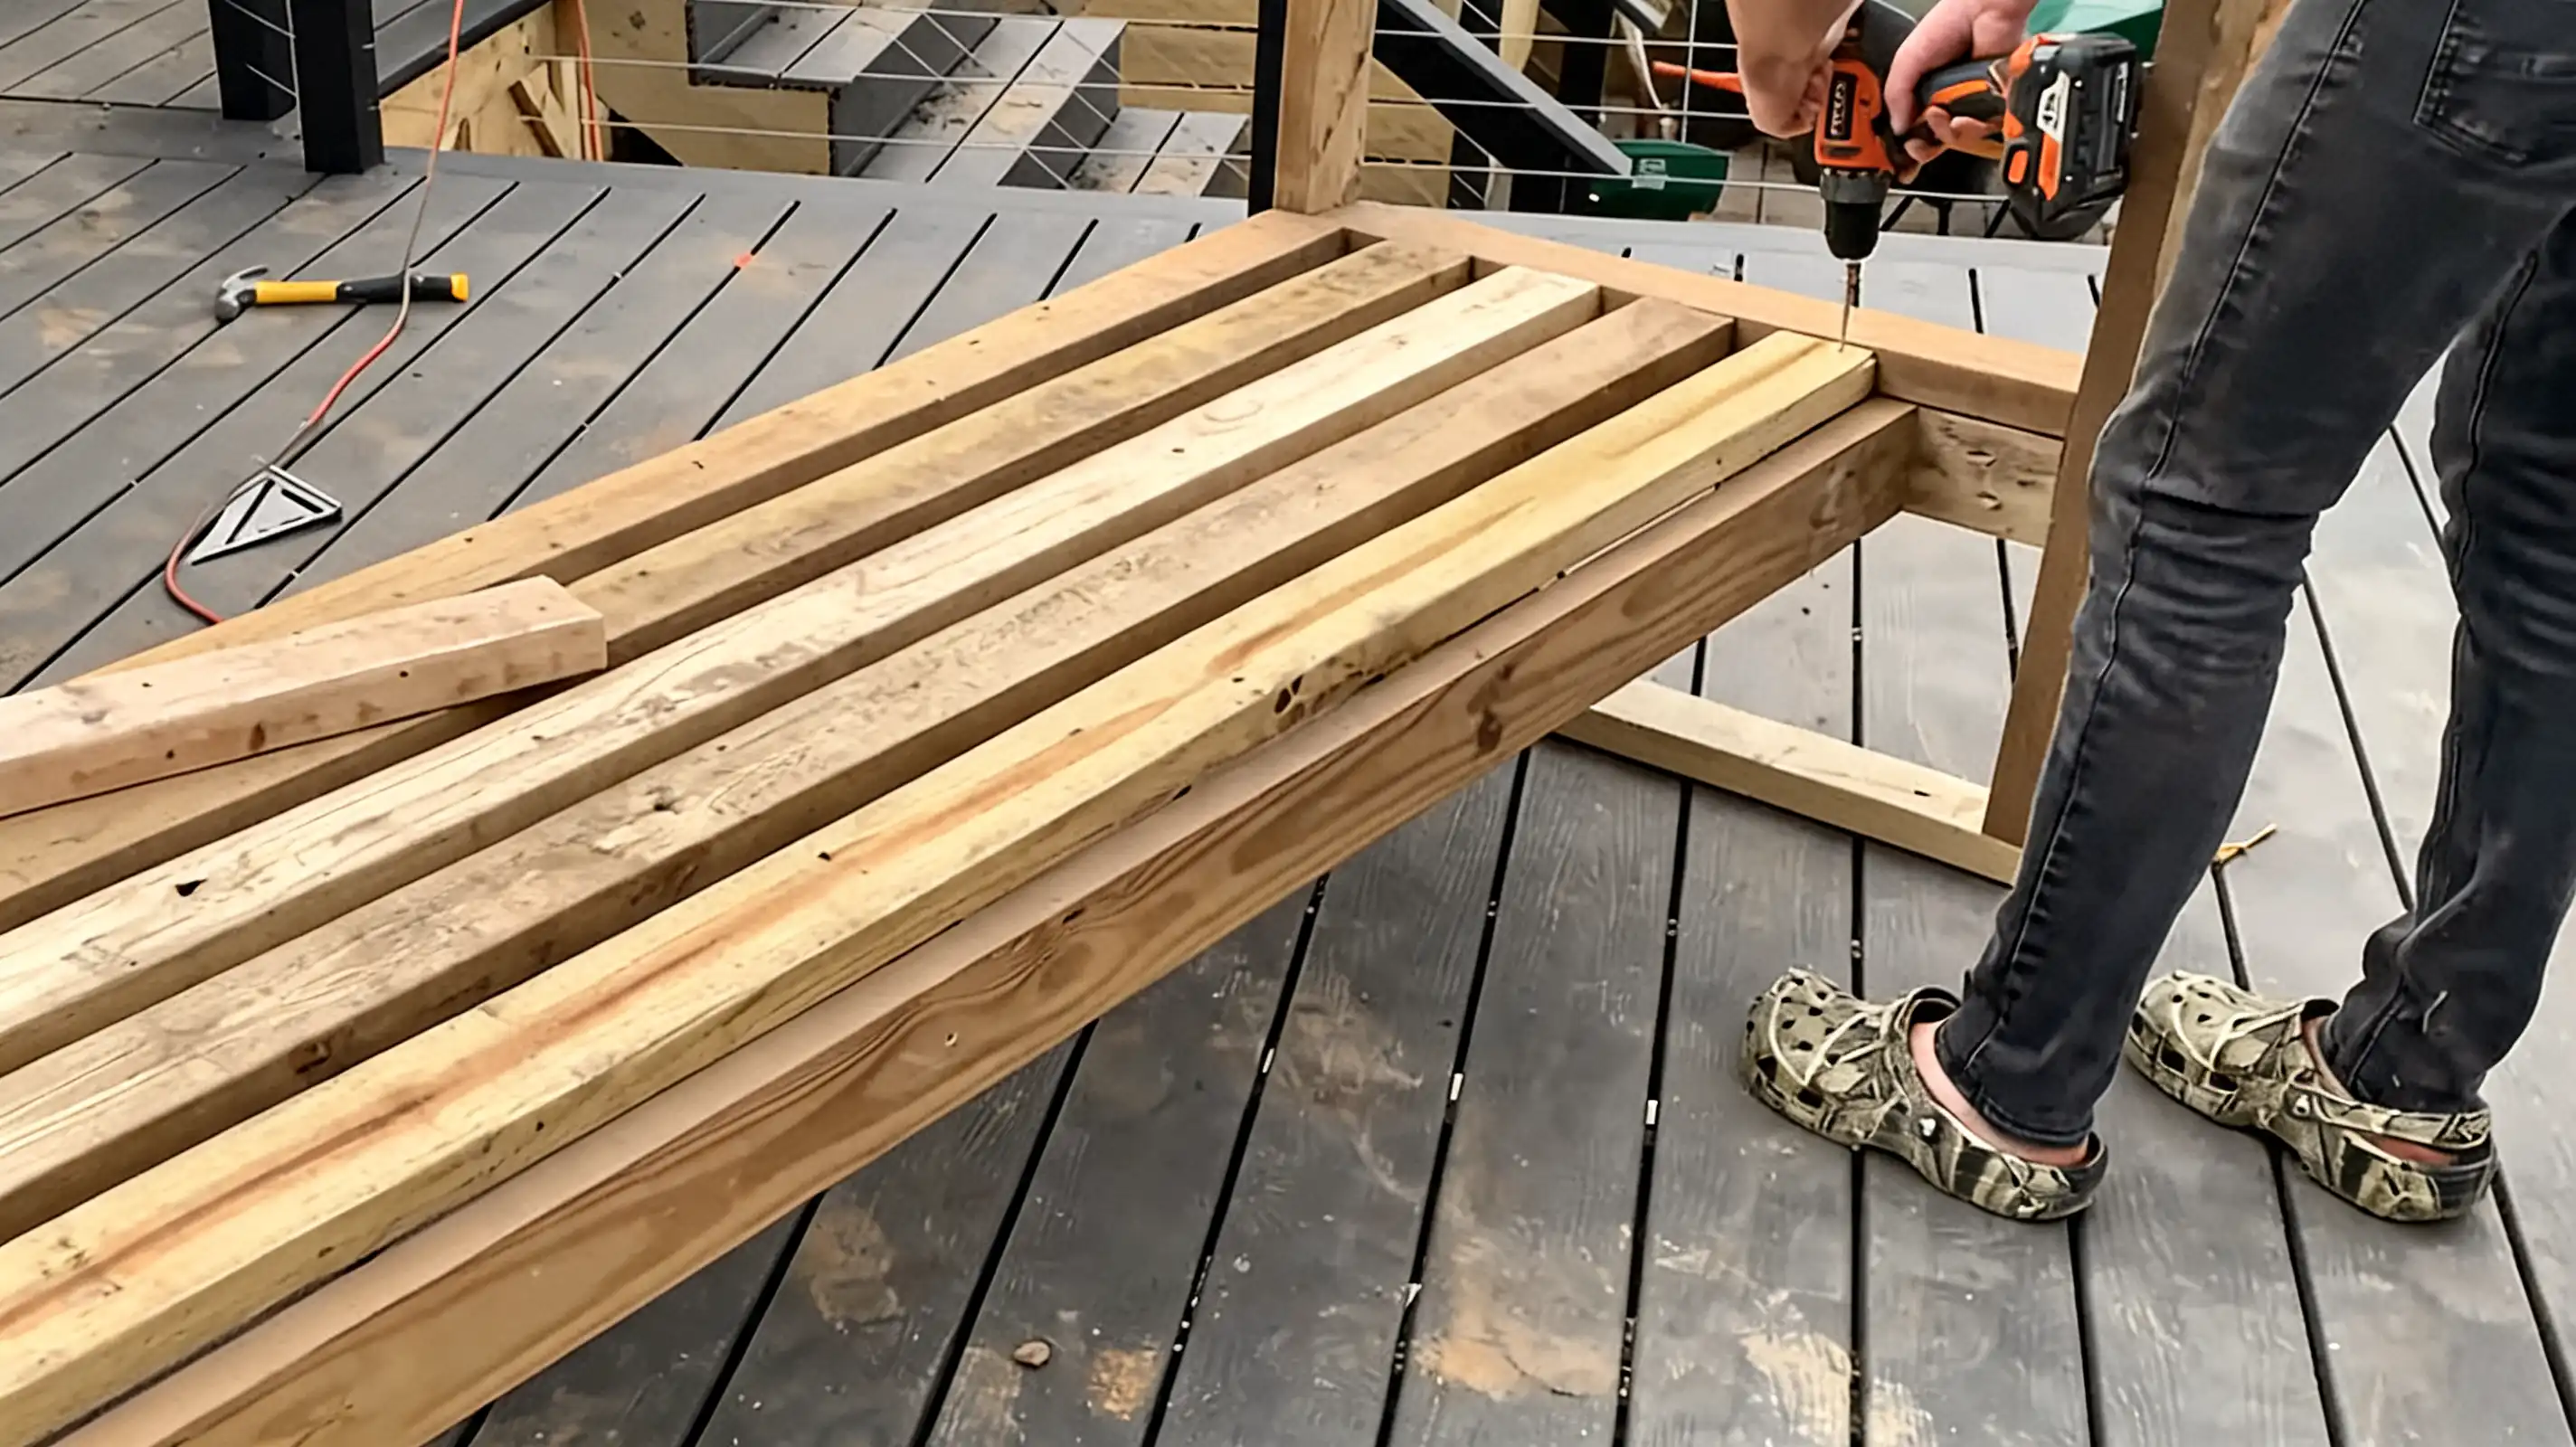
Cut the seat boards to length and start the first board flush with the front frame edge. Use a consistent spacer — a 3/16-inch drill bit works well — between each board to keep the drainage gaps even across the full seat depth.
Leave the rear portion of the frame open for the backrest pieces. Fasten each board with two screws per frame contact point, pre-drilling to prevent splitting.
Step 5: Build the angled backrest
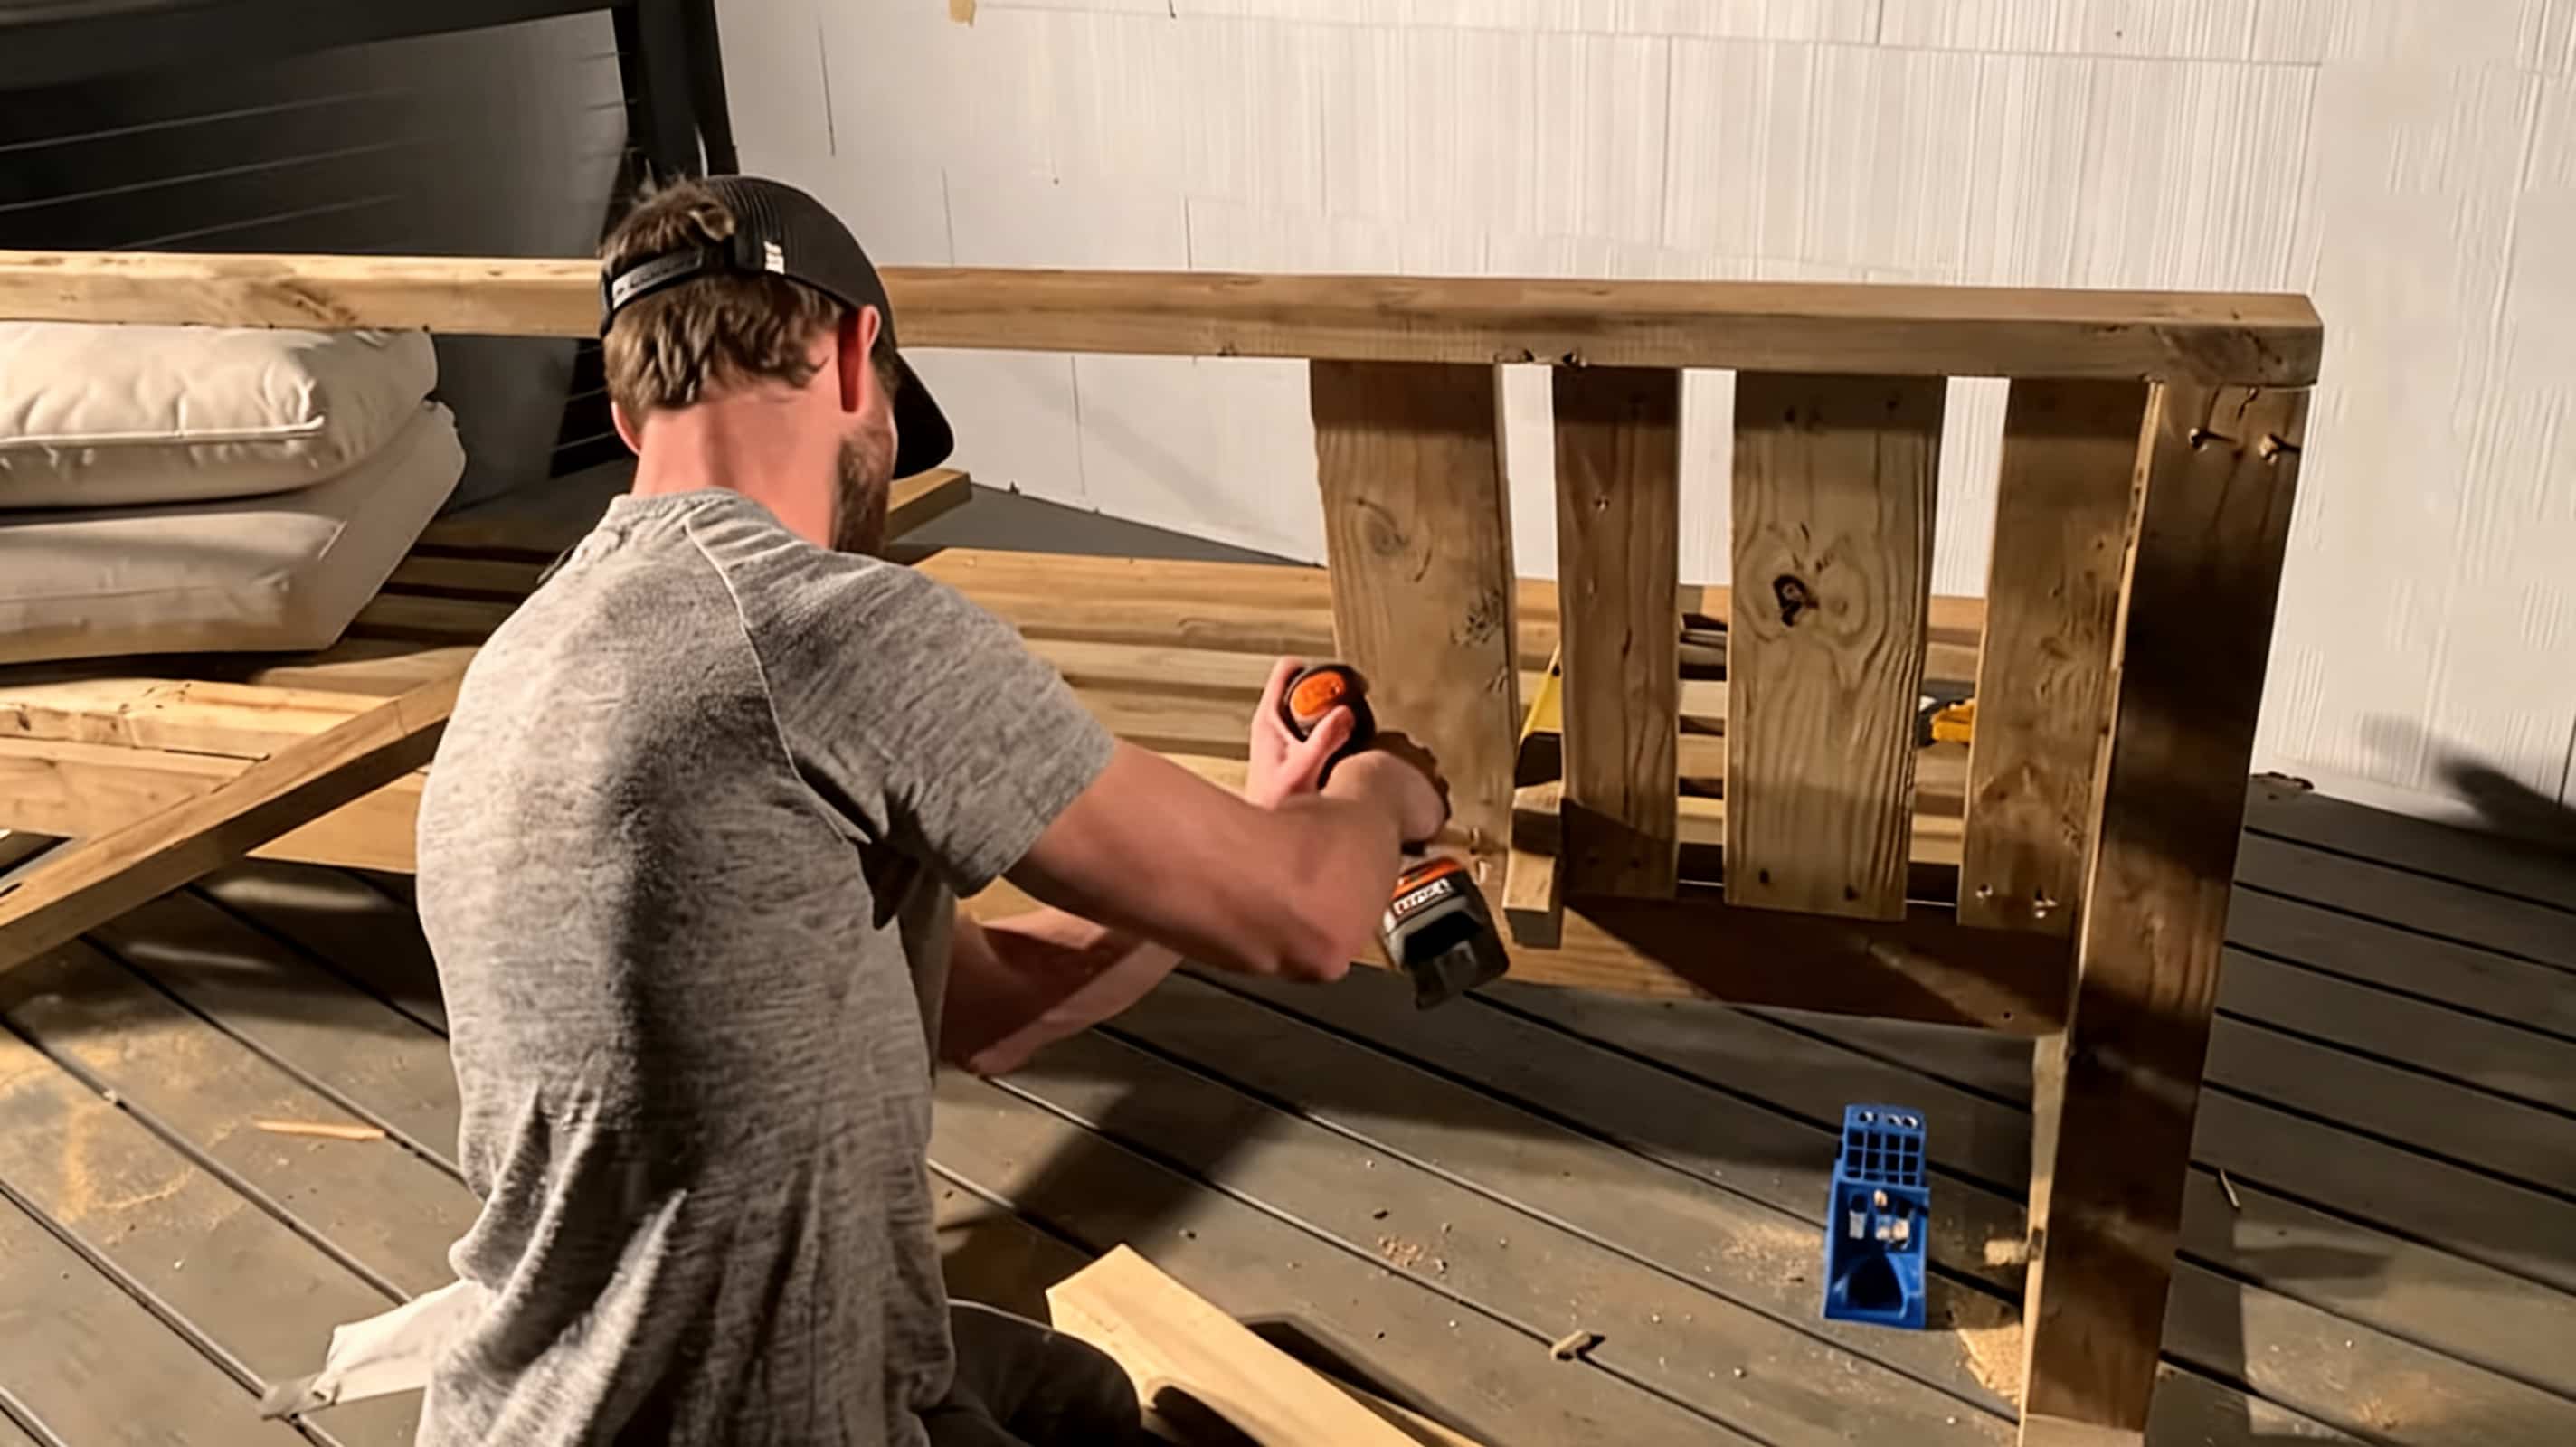
Install the long back rail first, then cut one template for the angled backrest pieces. A 12.9-degree miter cut on both ends of each piece, at approximately 1 foot 8 inches long, produces the right lean angle for comfortable seating.
Cut one piece, test the fit, and adjust the template before cutting the full set. Fasten each backrest board with screws at the top and bottom rail.
Step 6: Build the smaller L-section
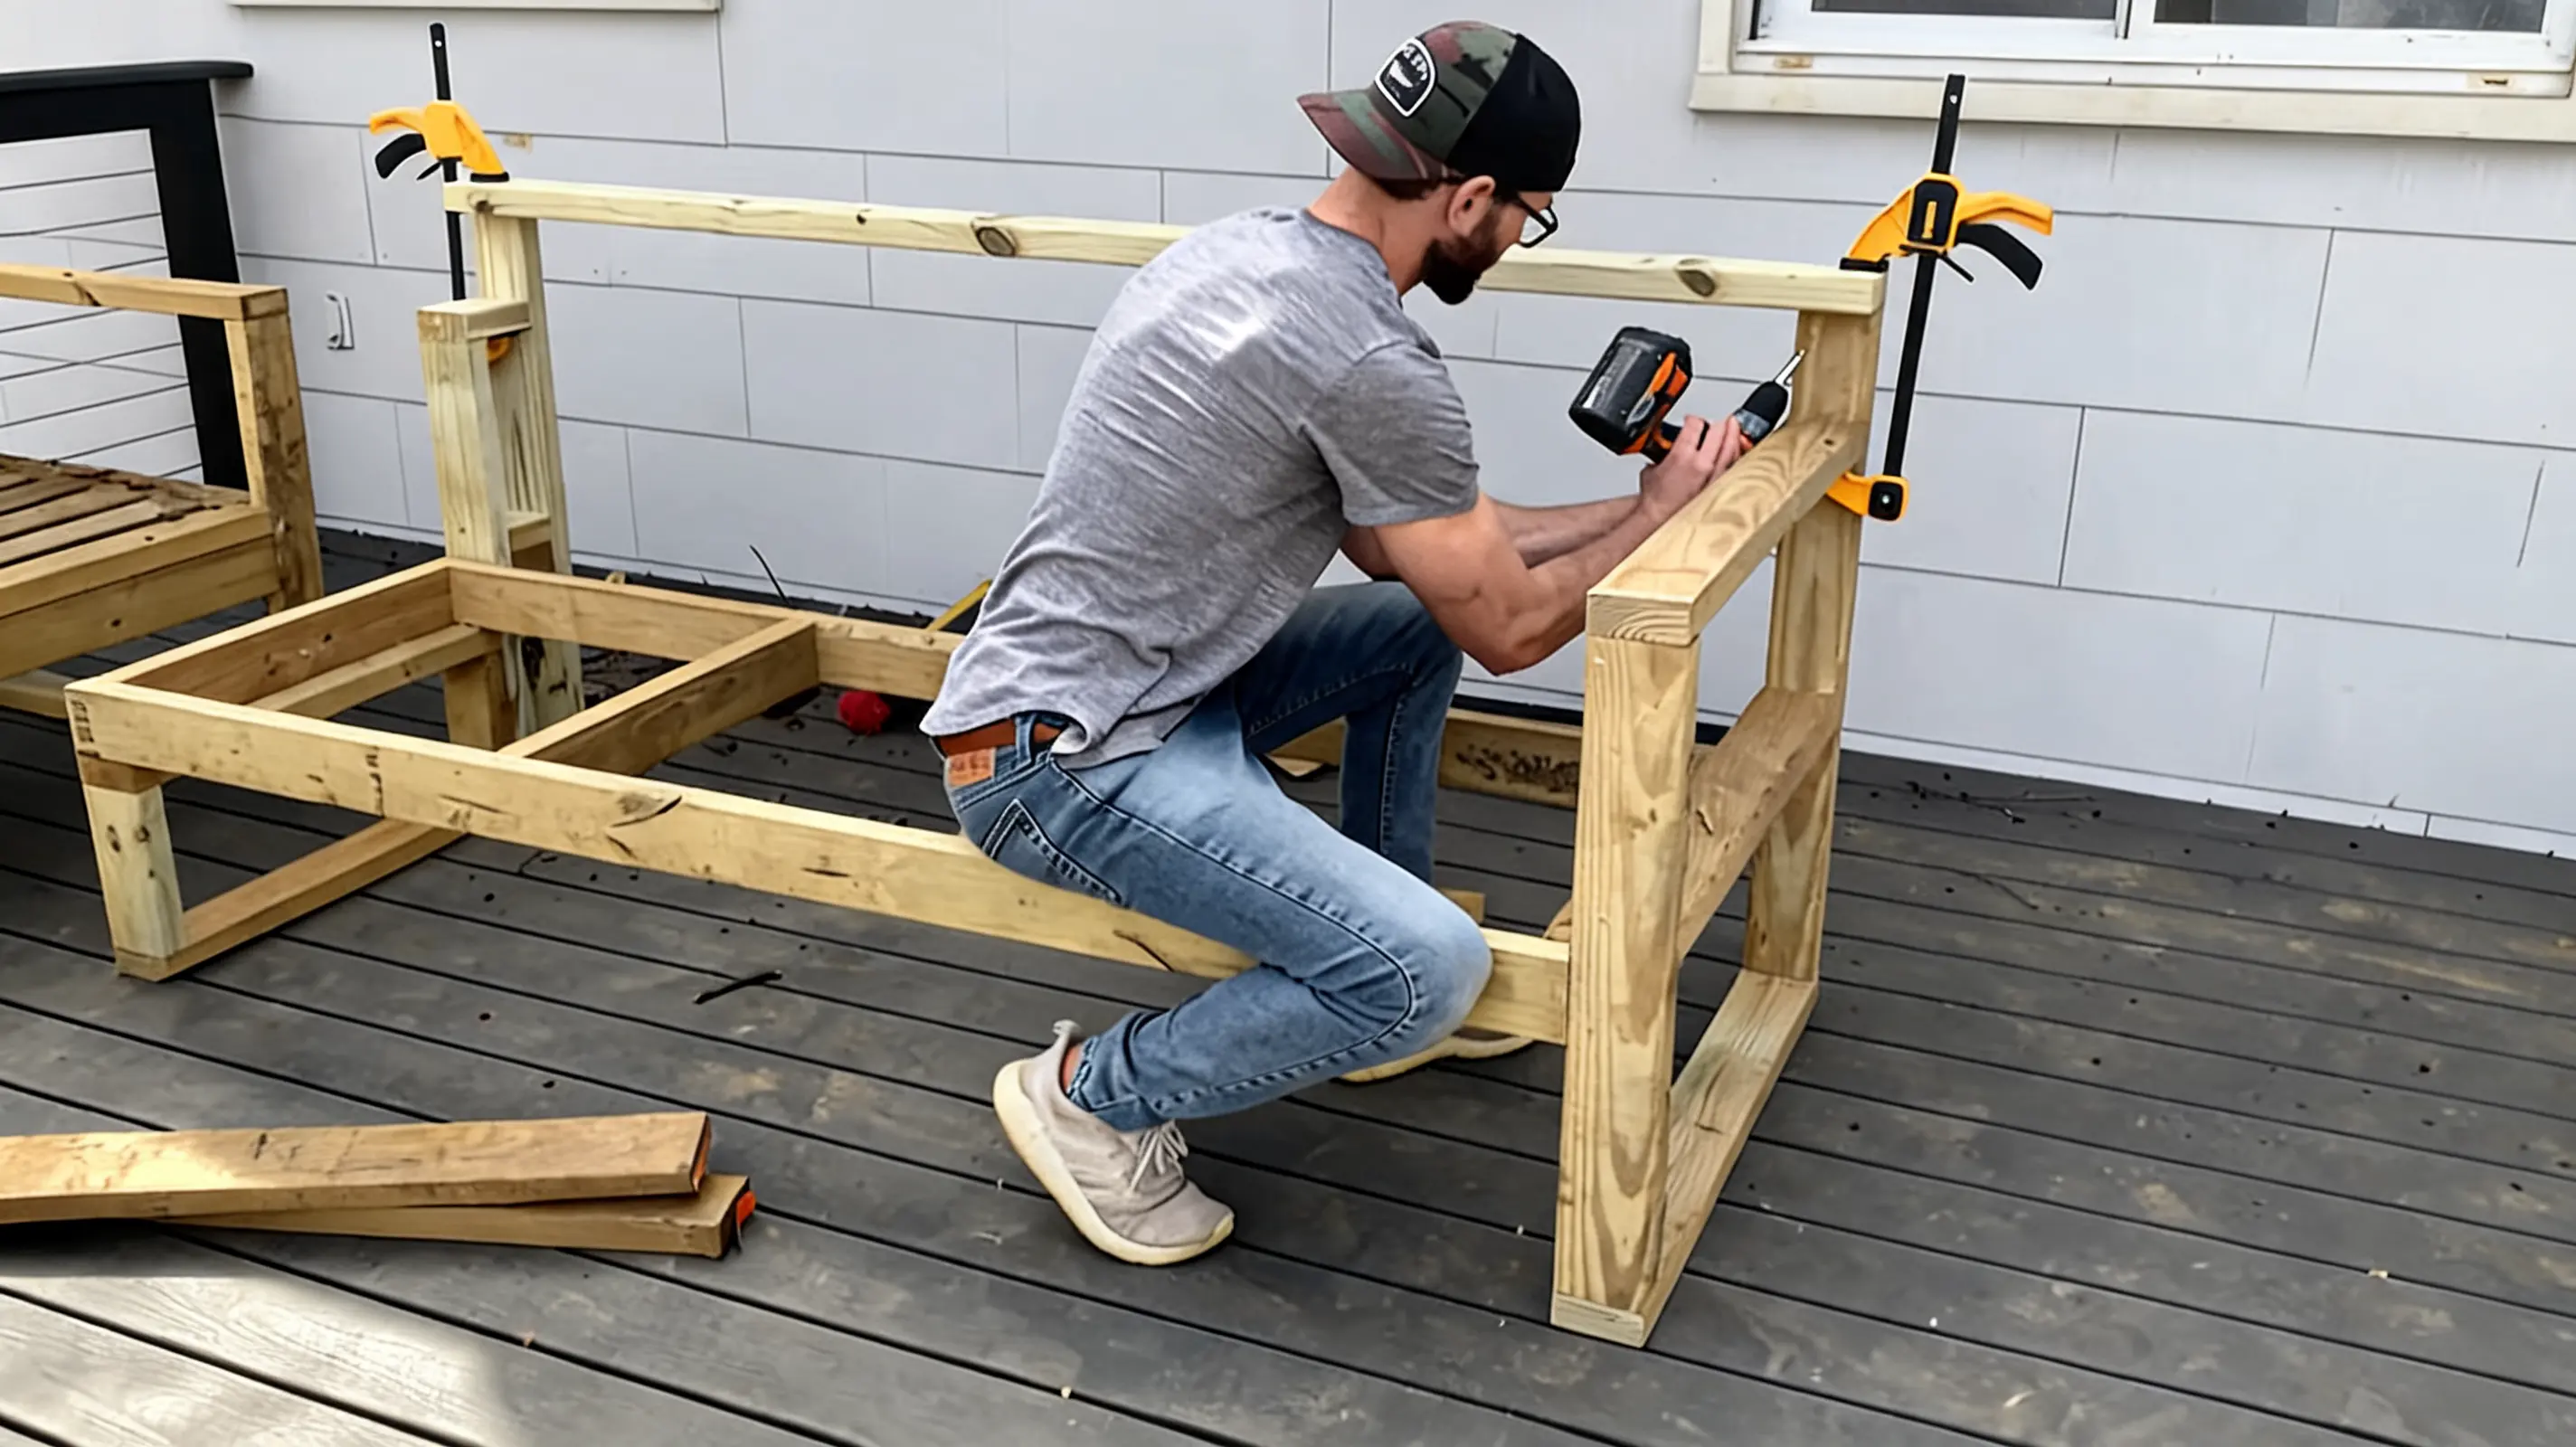
The second section uses the same frame method as the main sofa. One side gets a standard arm, while the connecting side is modified to fit flush against the main section for the L-layout.
Install seat boards with the same spacing and use the same backrest template for consistent angles across both pieces.
Step 7: Sand and clean the wood
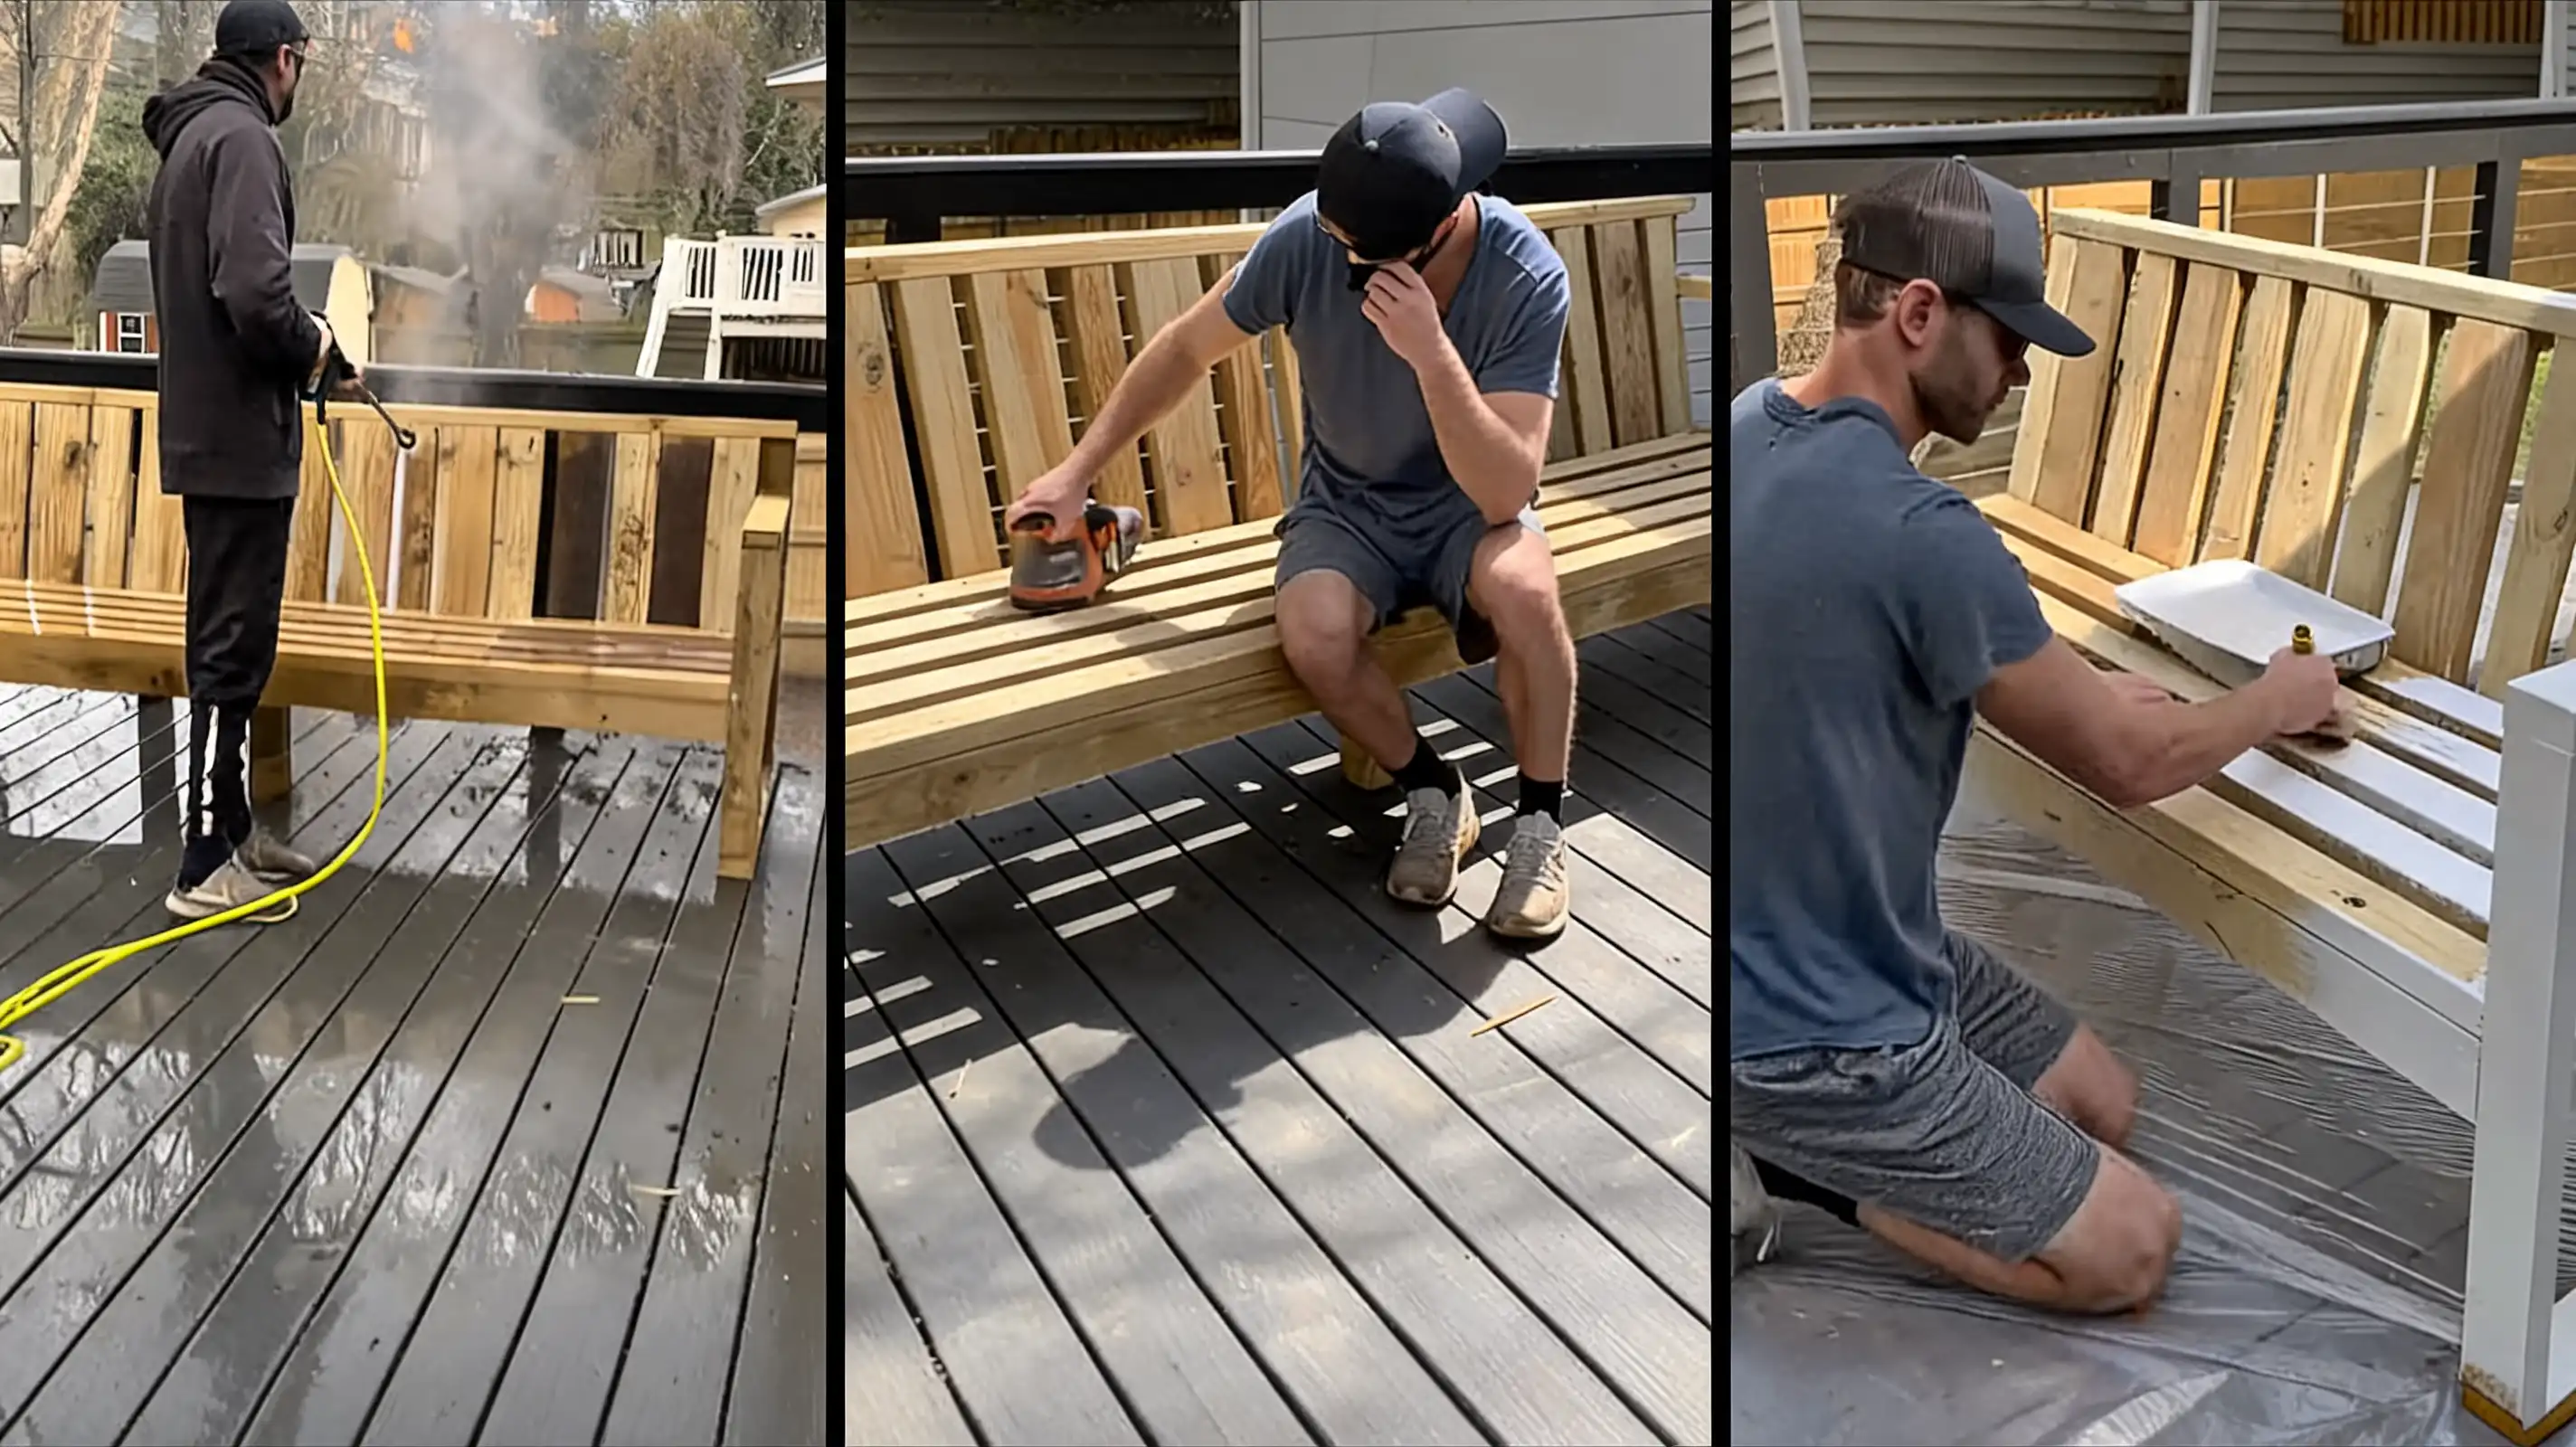
If the lumber has been stored outdoors or is rough from the mill, power-wash the frame first and let it dry fully before sanding. Work through the arm tops, corners, seat board edges, and any surface people will regularly touch.
Sand at 120-grit with an orbital sander, then wipe clean before applying any finish. A smooth surface lets the stain penetrate evenly rather than pooling in rough spots.
Step 8: Apply exterior finish
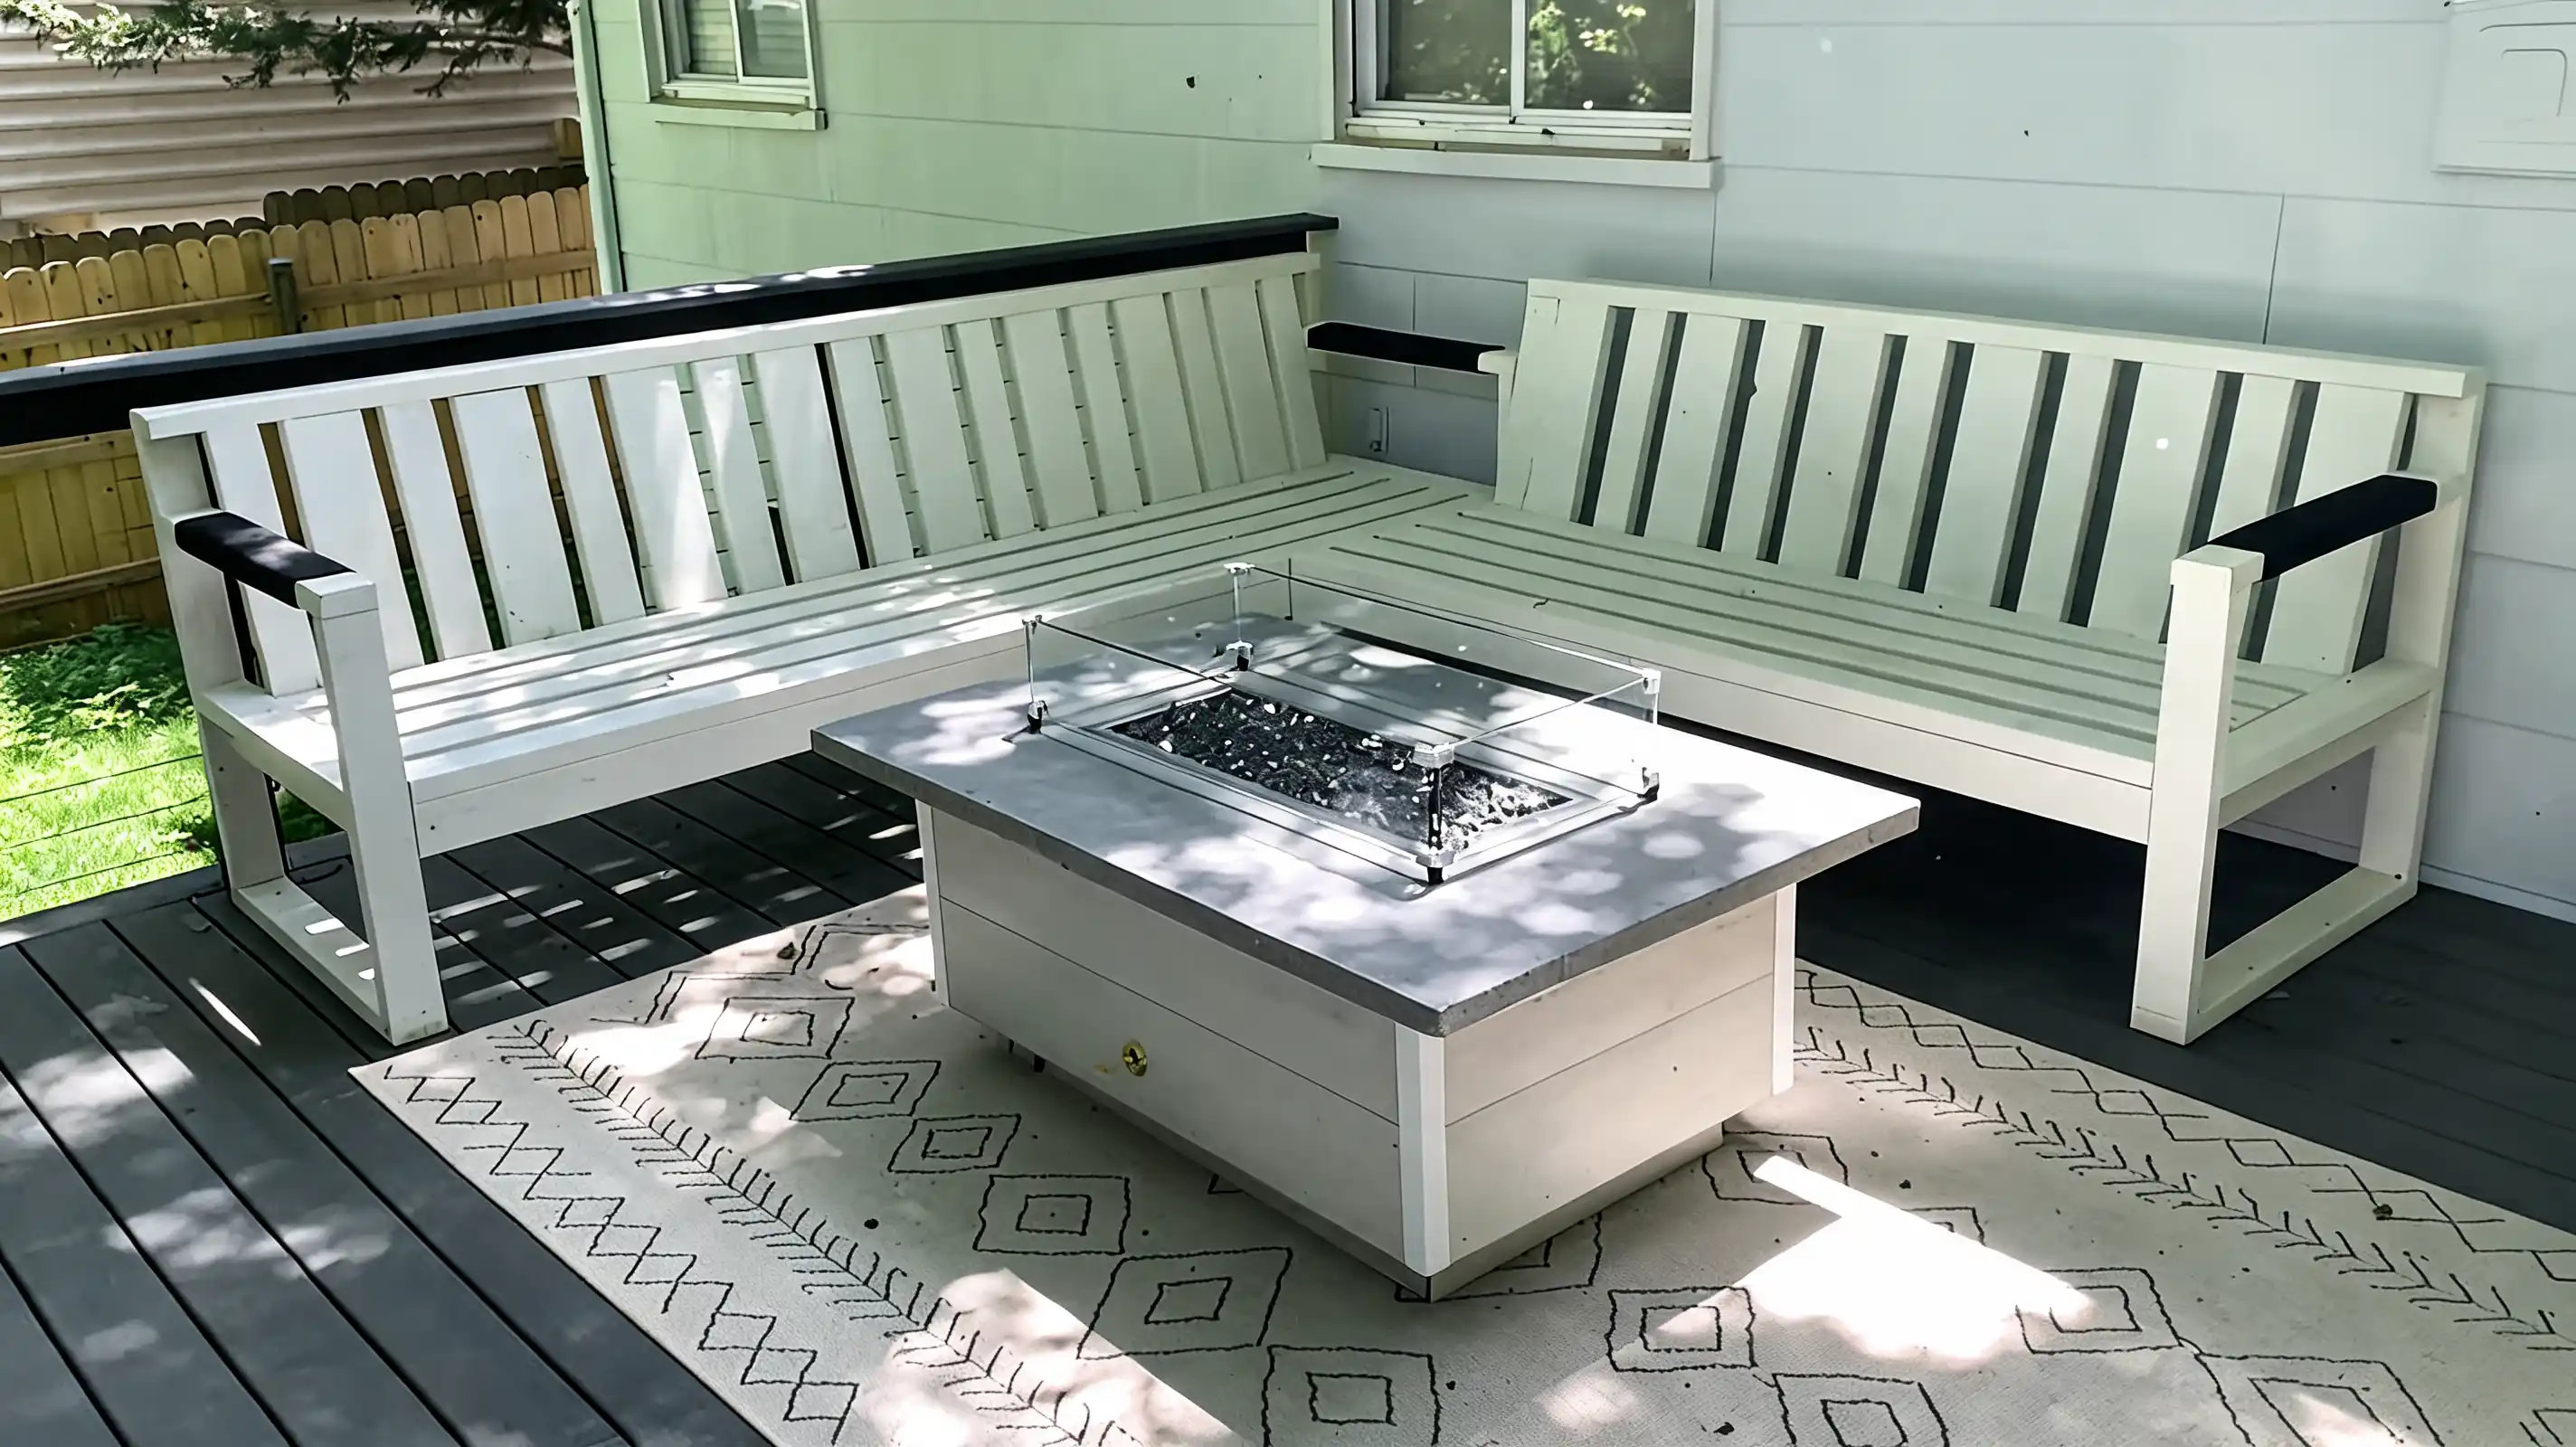
Apply an outdoor-rated stain, paint, or penetrating sealer to both sections. Pay extra attention to cut ends — brush stain directly onto the end grain and let it soak in before the face coat goes on.
Light-colored exterior stain tends to yellow in UV within one season. A medium or dark-toned exterior stain hides weathering better and holds its color longer without annual touch-ups.
Step 9: Add decorative details and cushions
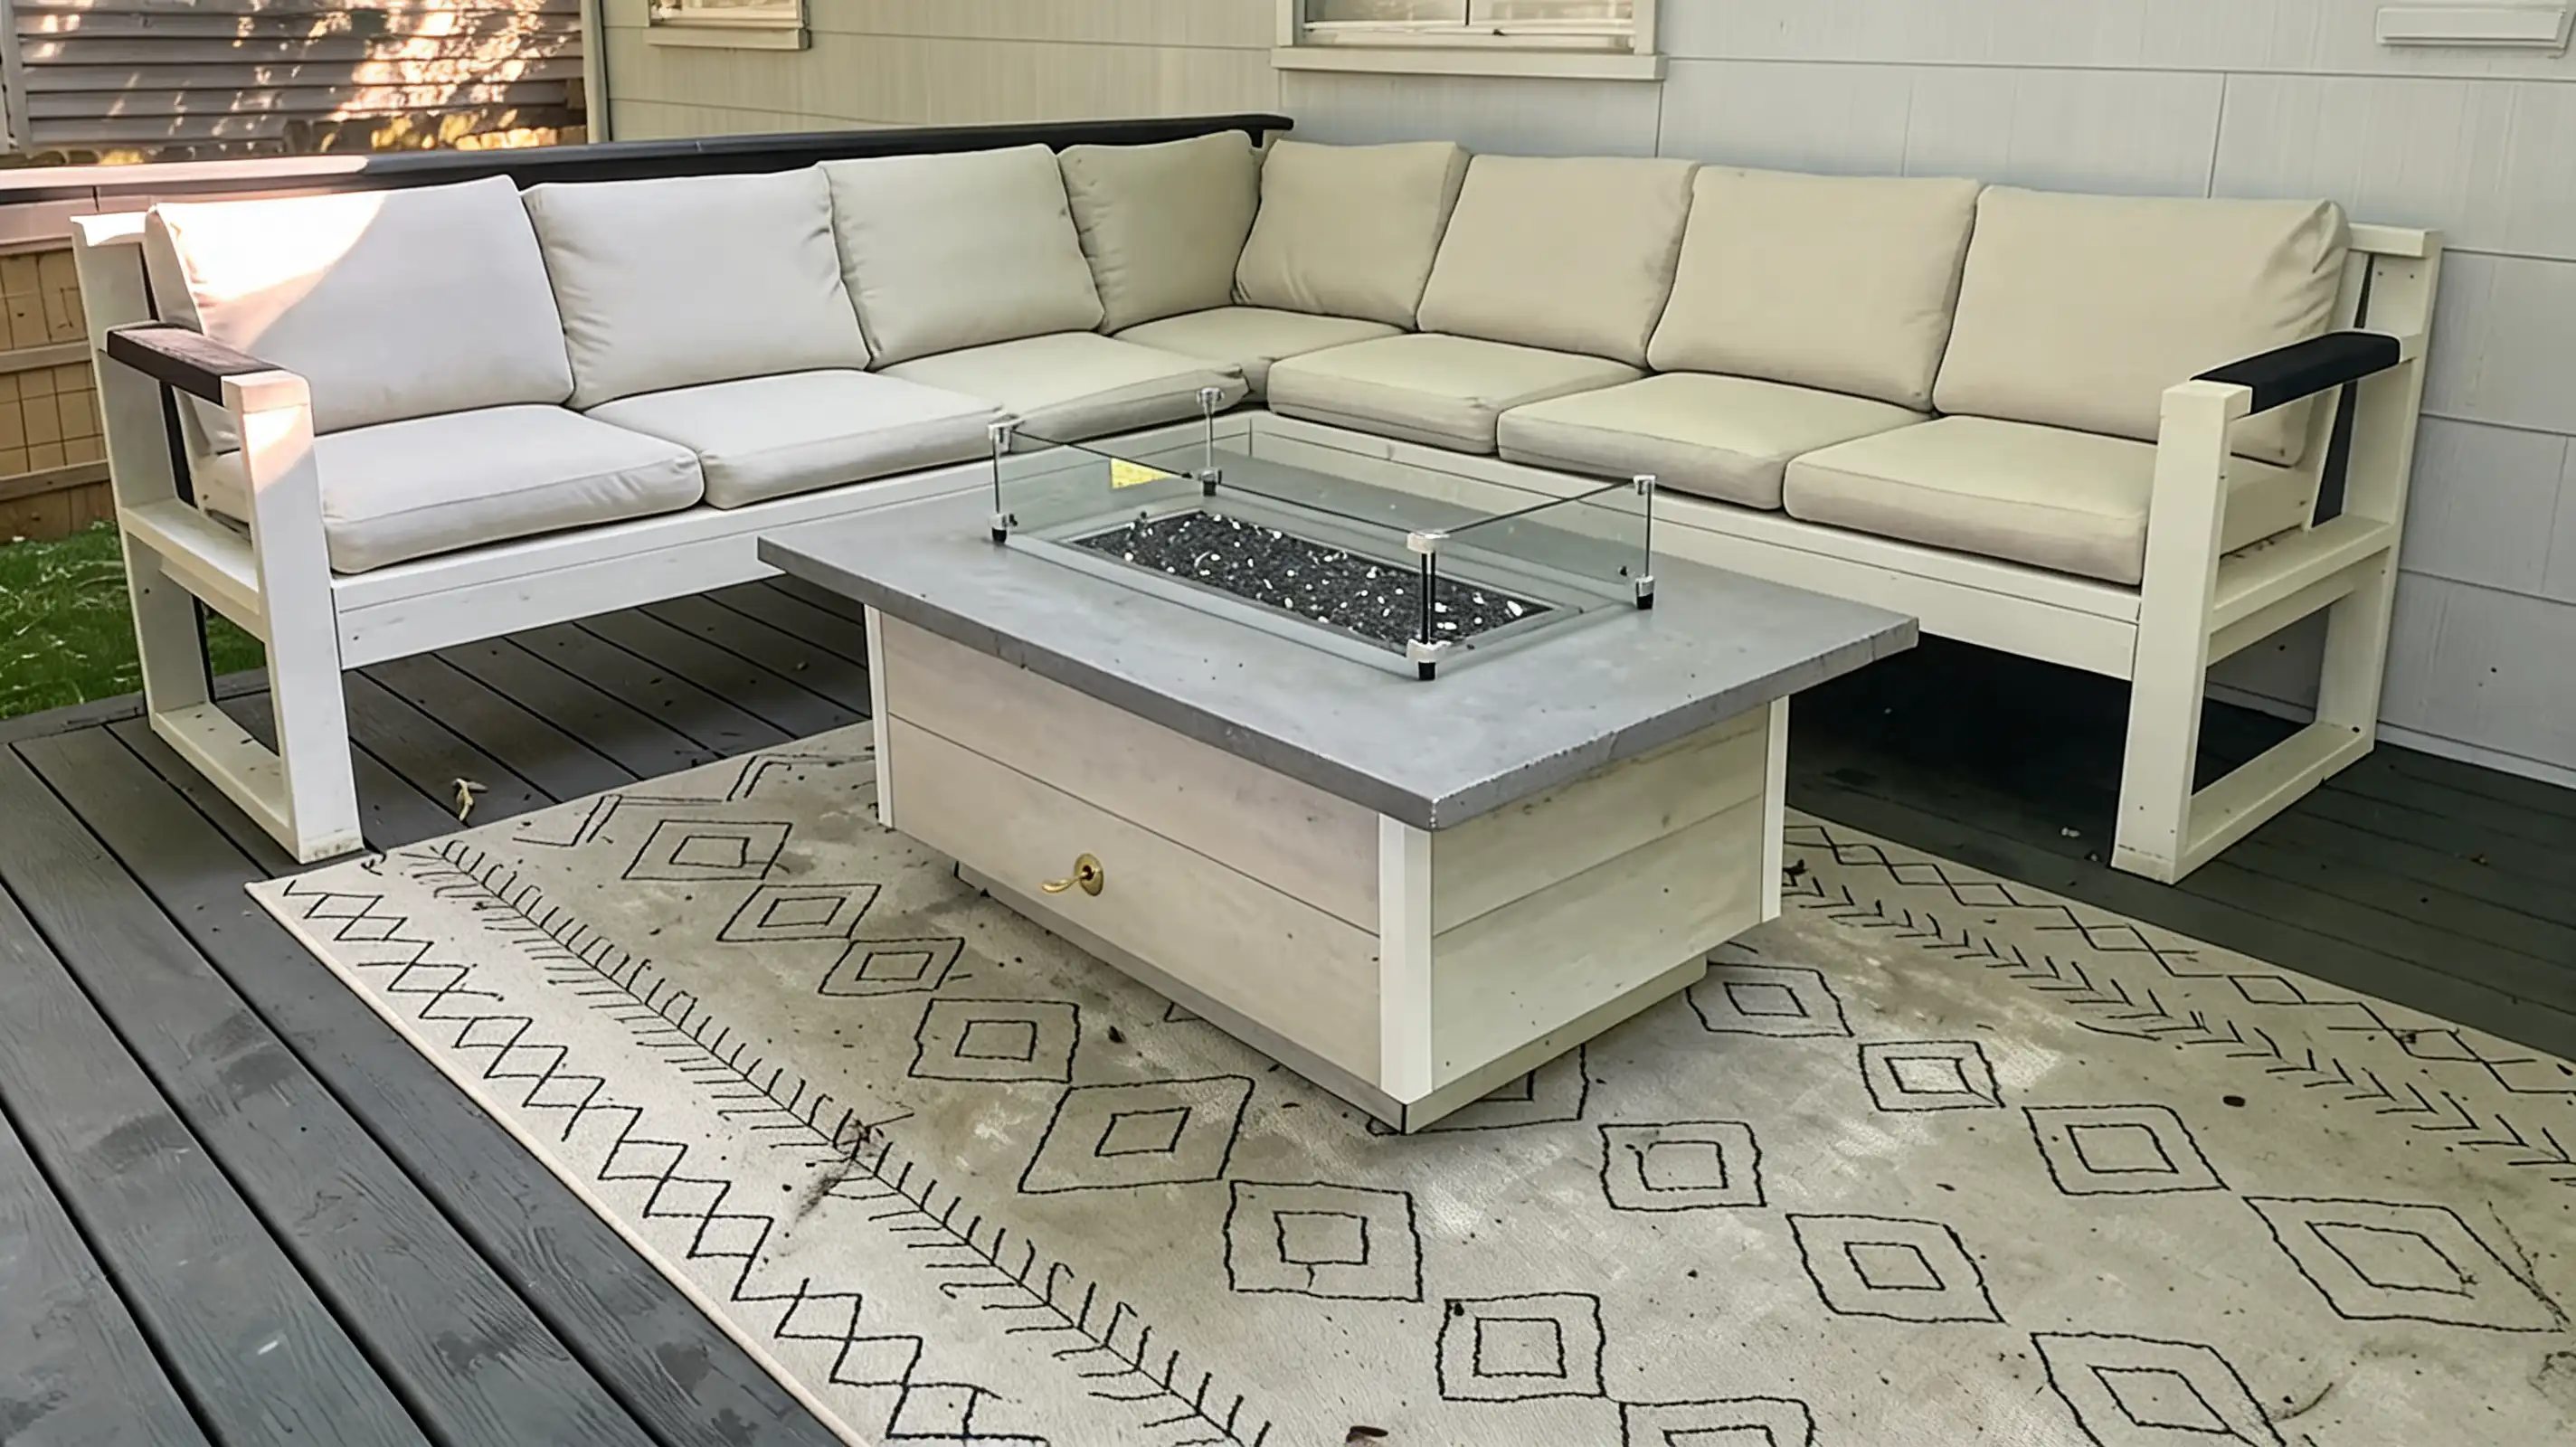
Once the finish has cured fully, add any decorative rope wrapping or trim details, then place the cushions. The angled backrest creates a small gap at the rear, the seat cushions cover it and the visual reads as intentional.
Check every joint and fastener for tightness before putting the sectional into regular use.
DIY Outdoor Sectional Design Layouts
The frame method is the same regardless of layout. What changes is how many sections you build and how they connect. Start with the layout that matches how the space actually gets used, not how it looks on a product page.
1. Small Patio Sectional
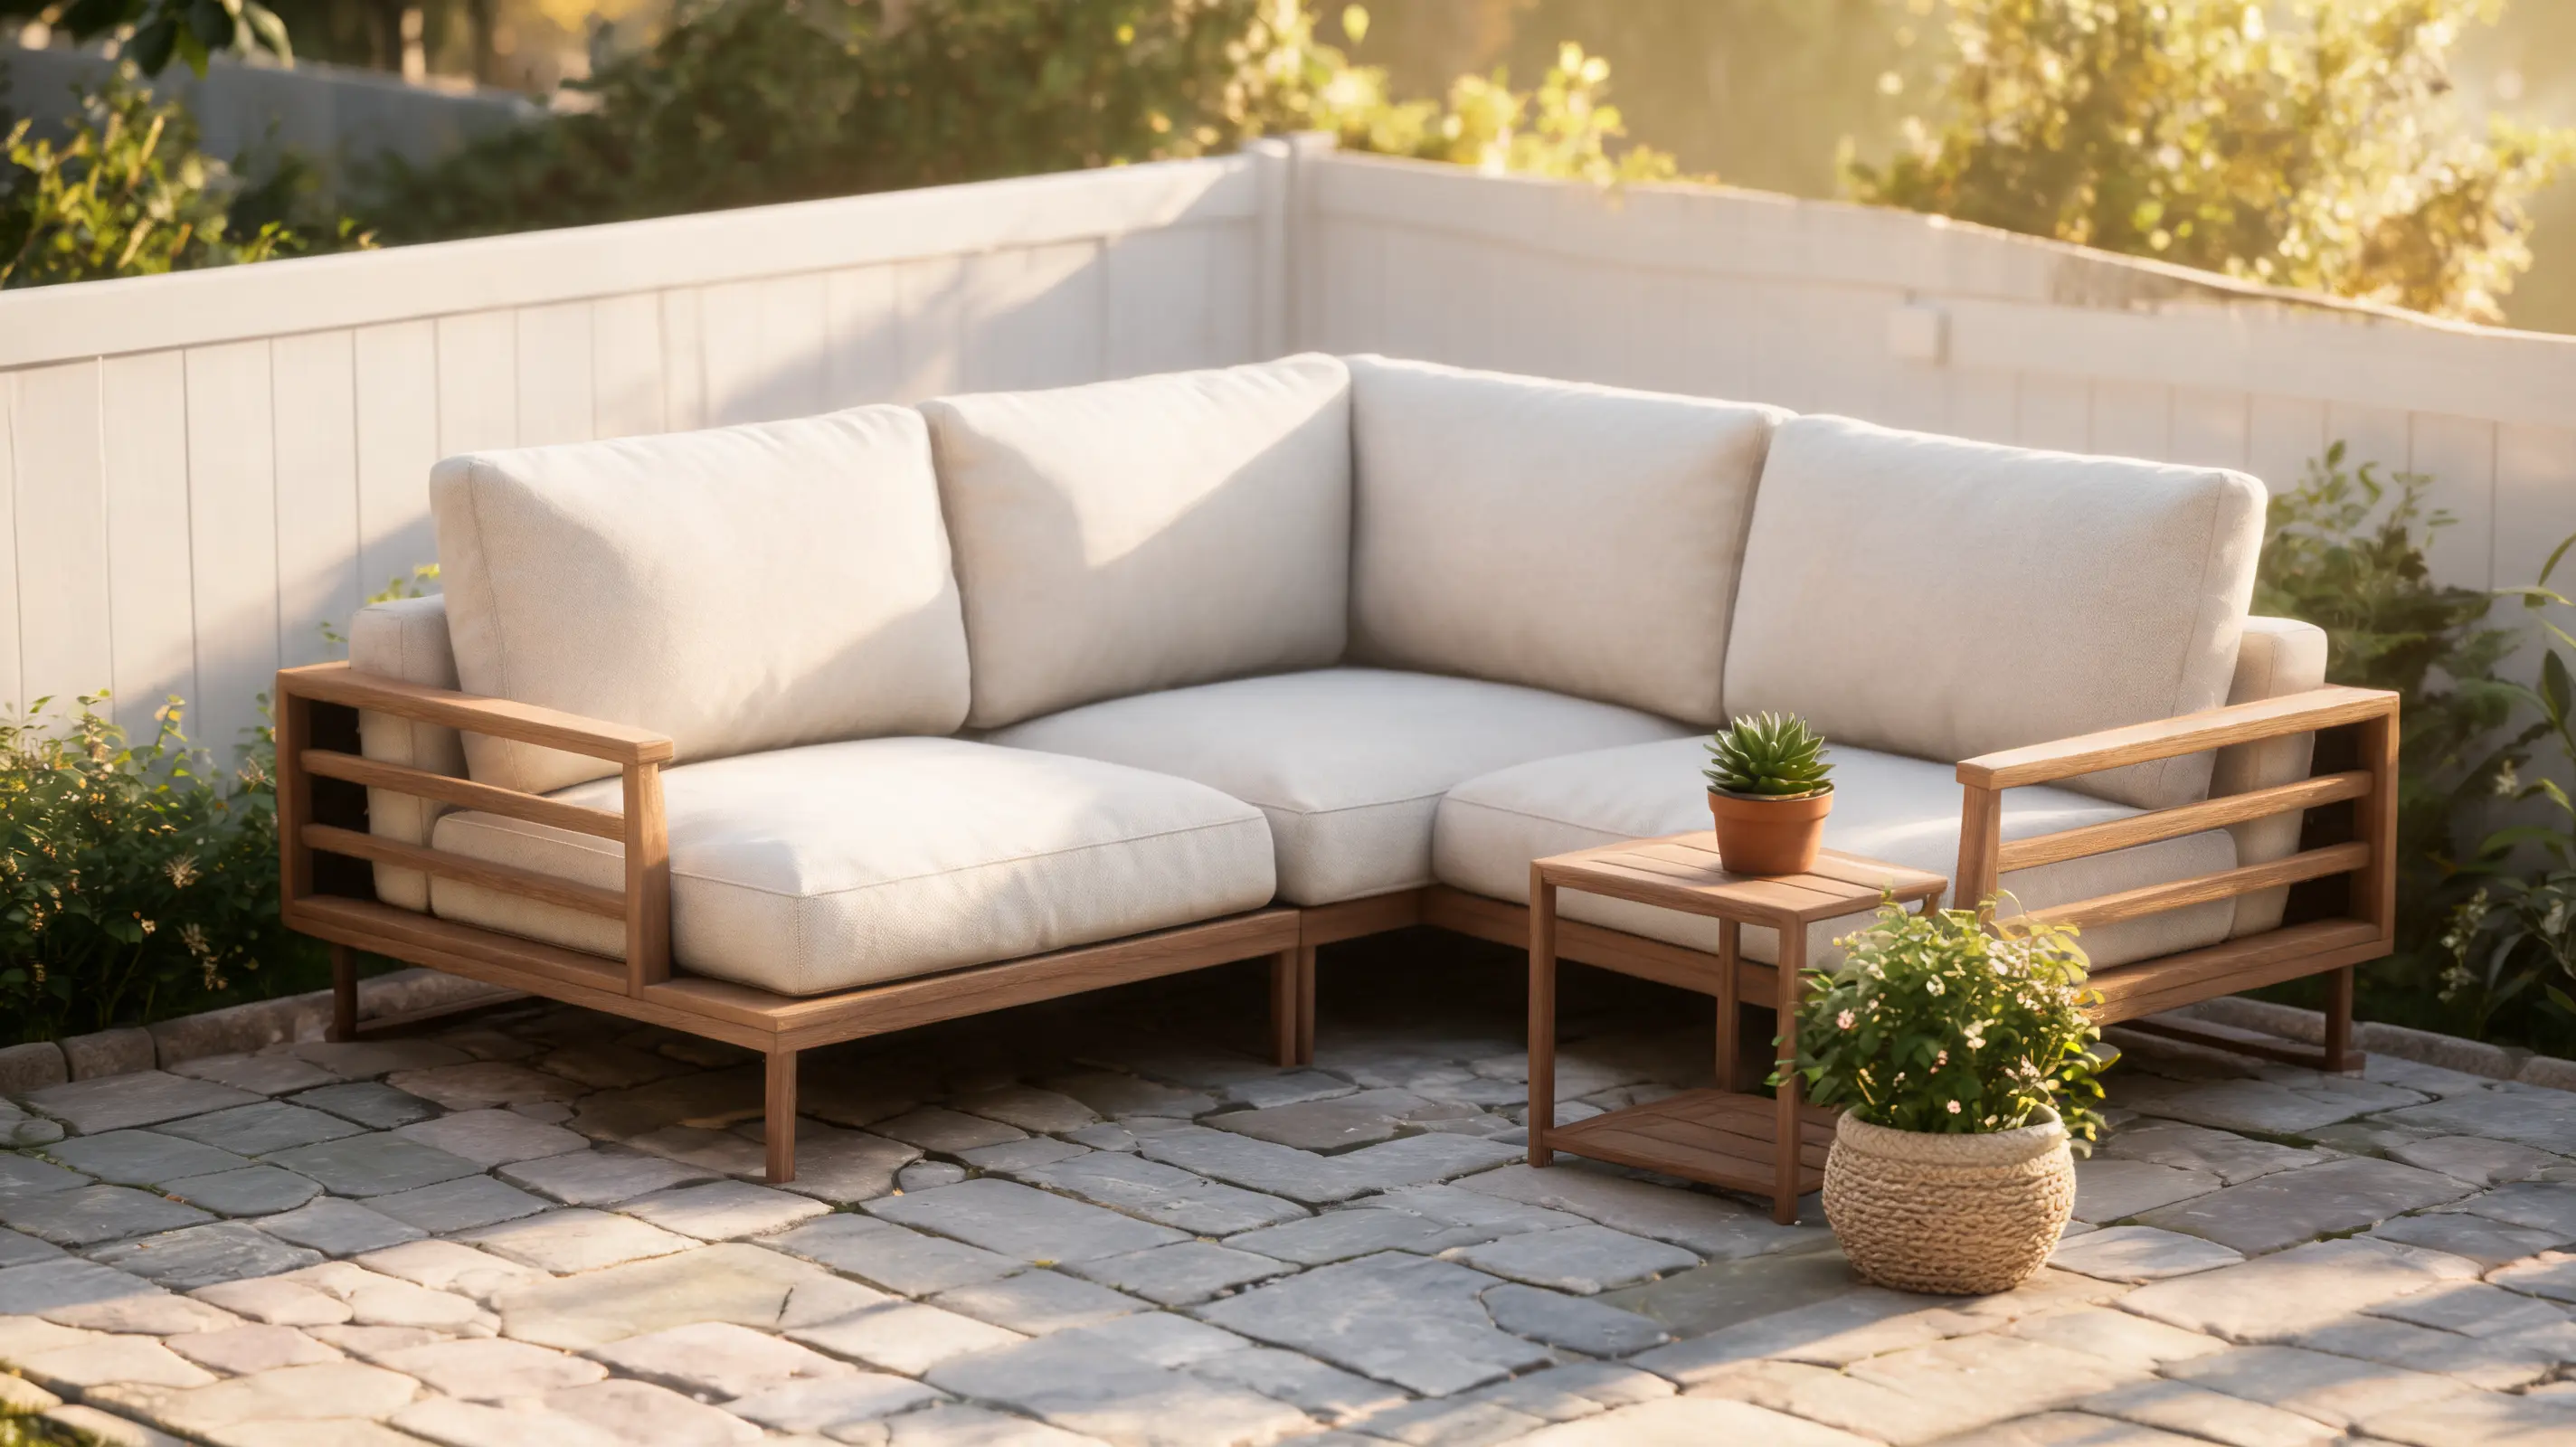
Two short sofa sections and one corner connector give you adequate seating on a smaller patio without crowding the walking path. Keep the arm profiles narrow, wide arms eat into the seating width fast on a compact build. A slim side table at one end handles drinks without a separate furniture piece.
2. L-shaped Outdoor Sectional
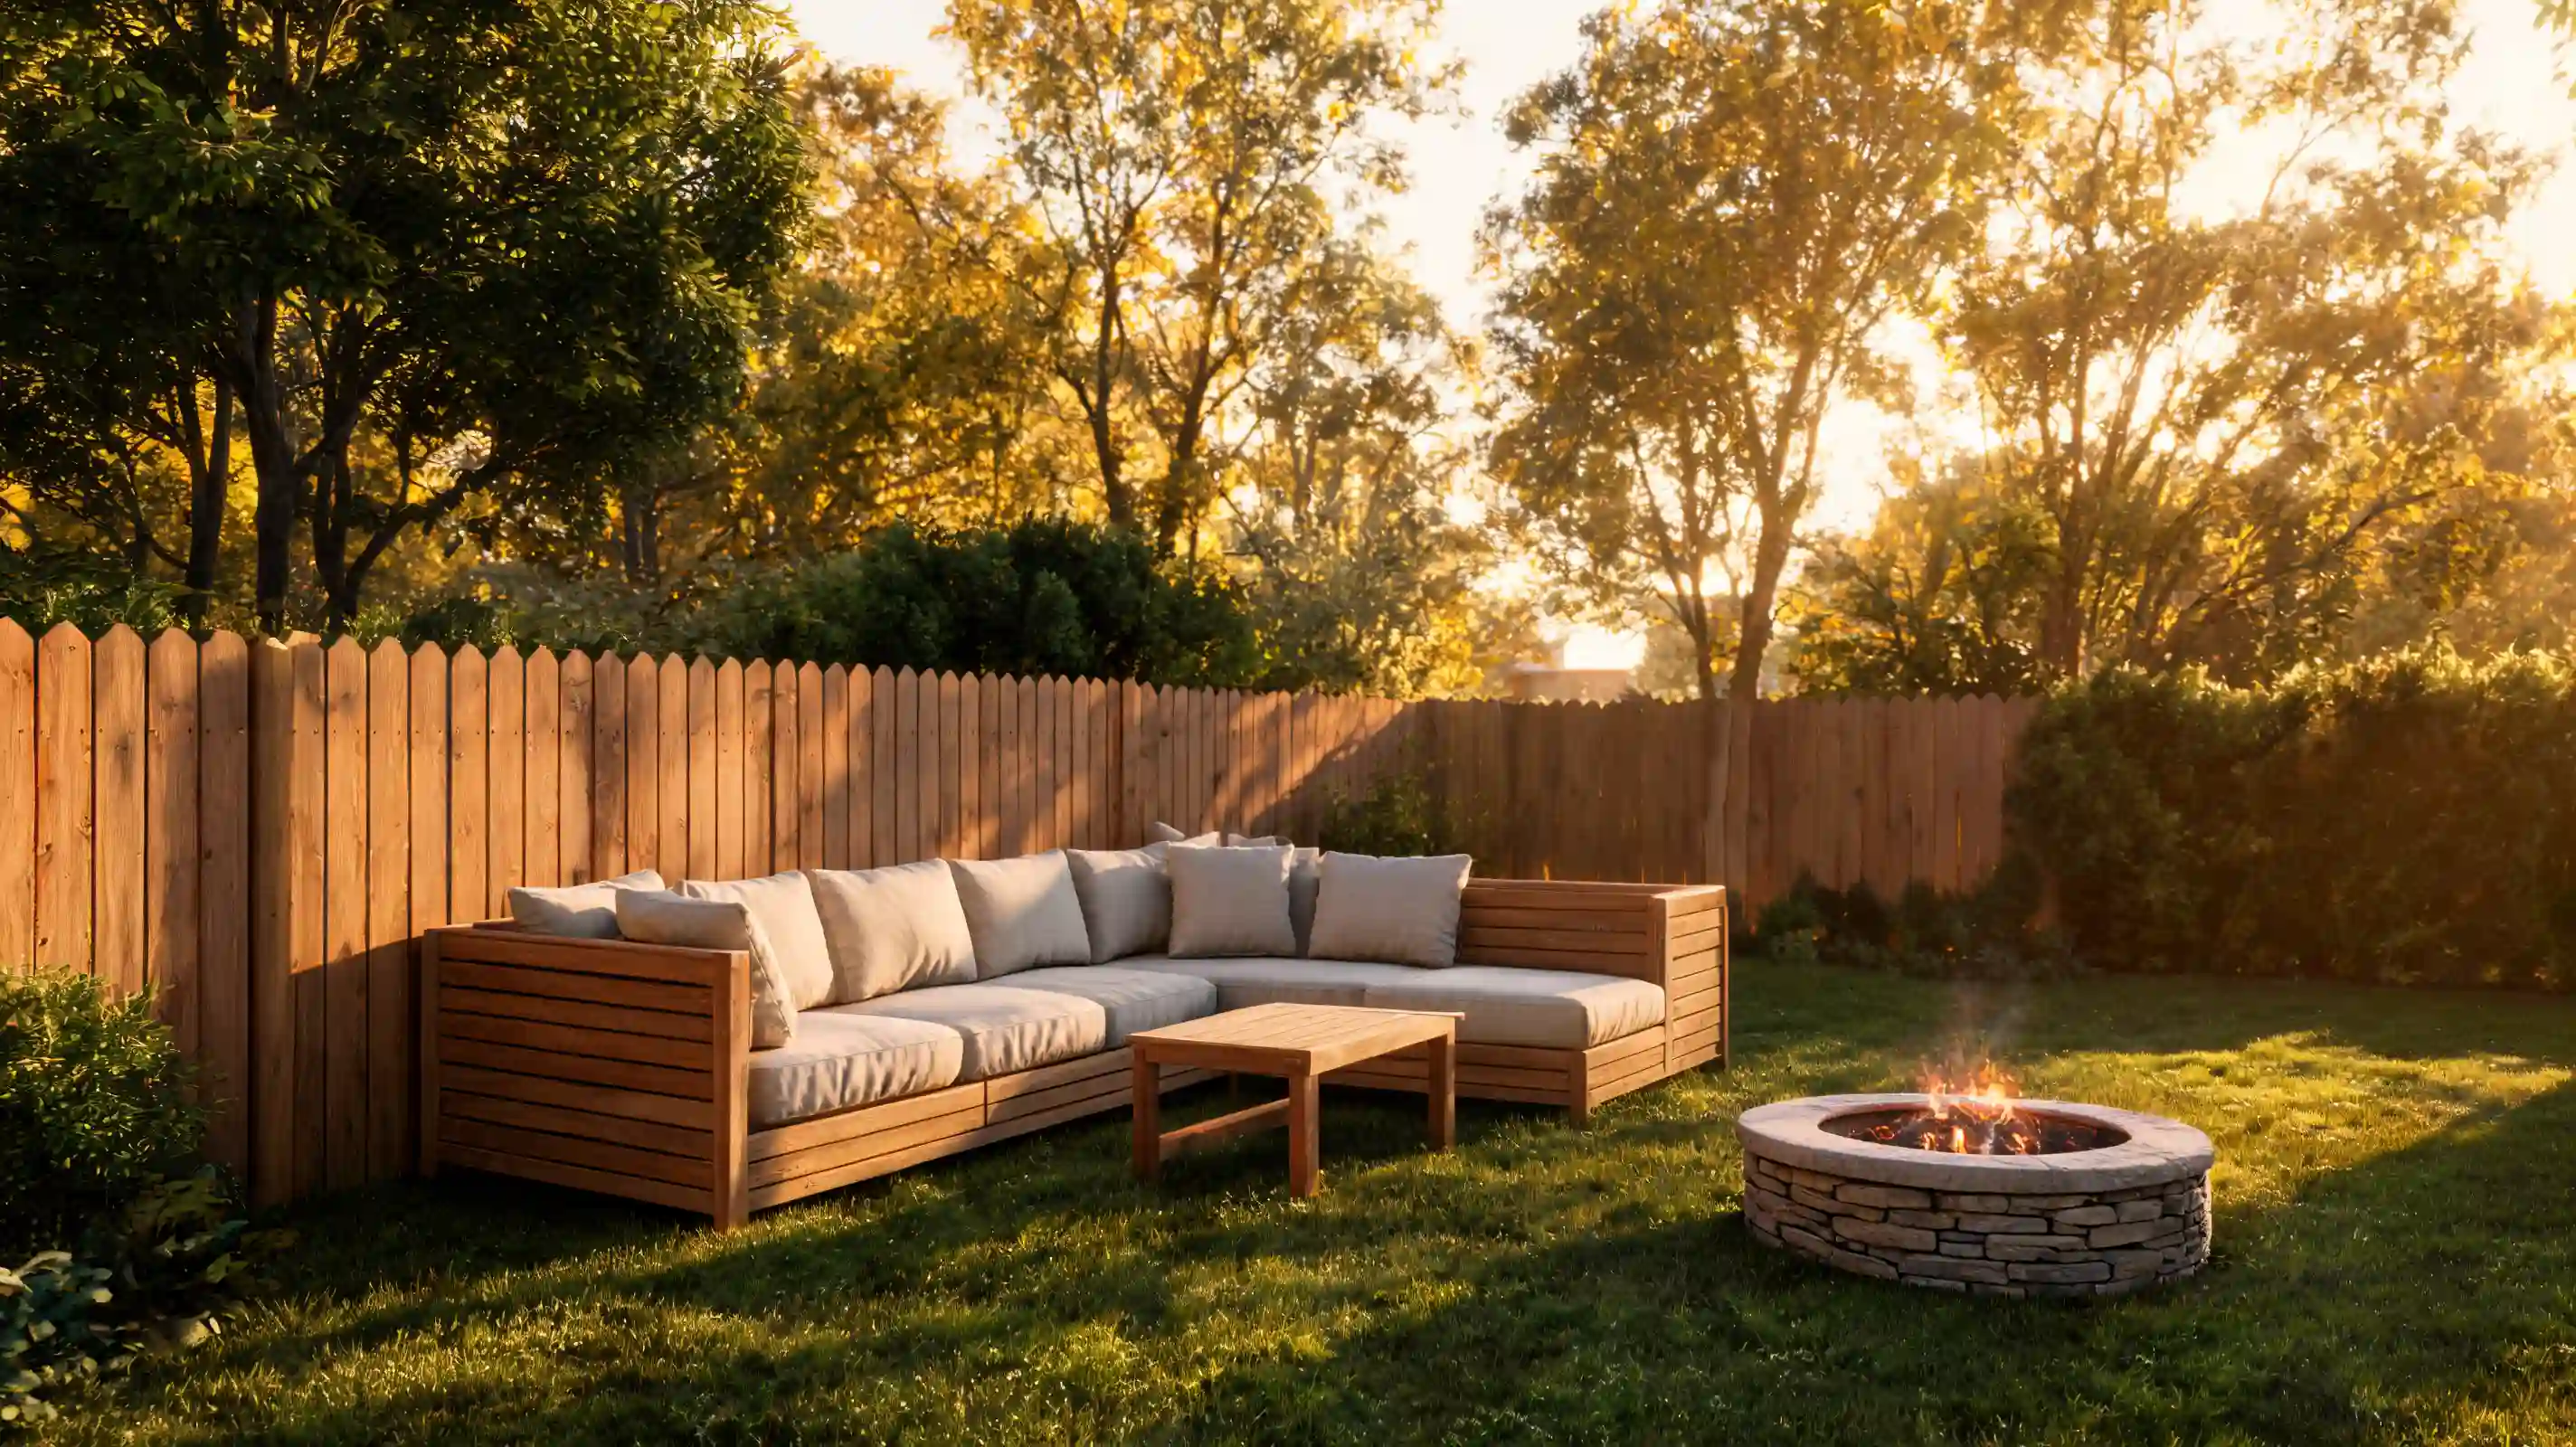
The L-shape is the most practical layout for corner patios and deck edges. One long side handles the main seating load, while the shorter return creates a natural boundary for the space.
This design pairs well with a central coffee table and works for both conversation and fire pit setups. If you’re considering how the sectional integrates with your broader deck skirting ideas, the L-shape gives you clean lines along two edges simultaneously.
3. Modular Outdoor Sectional
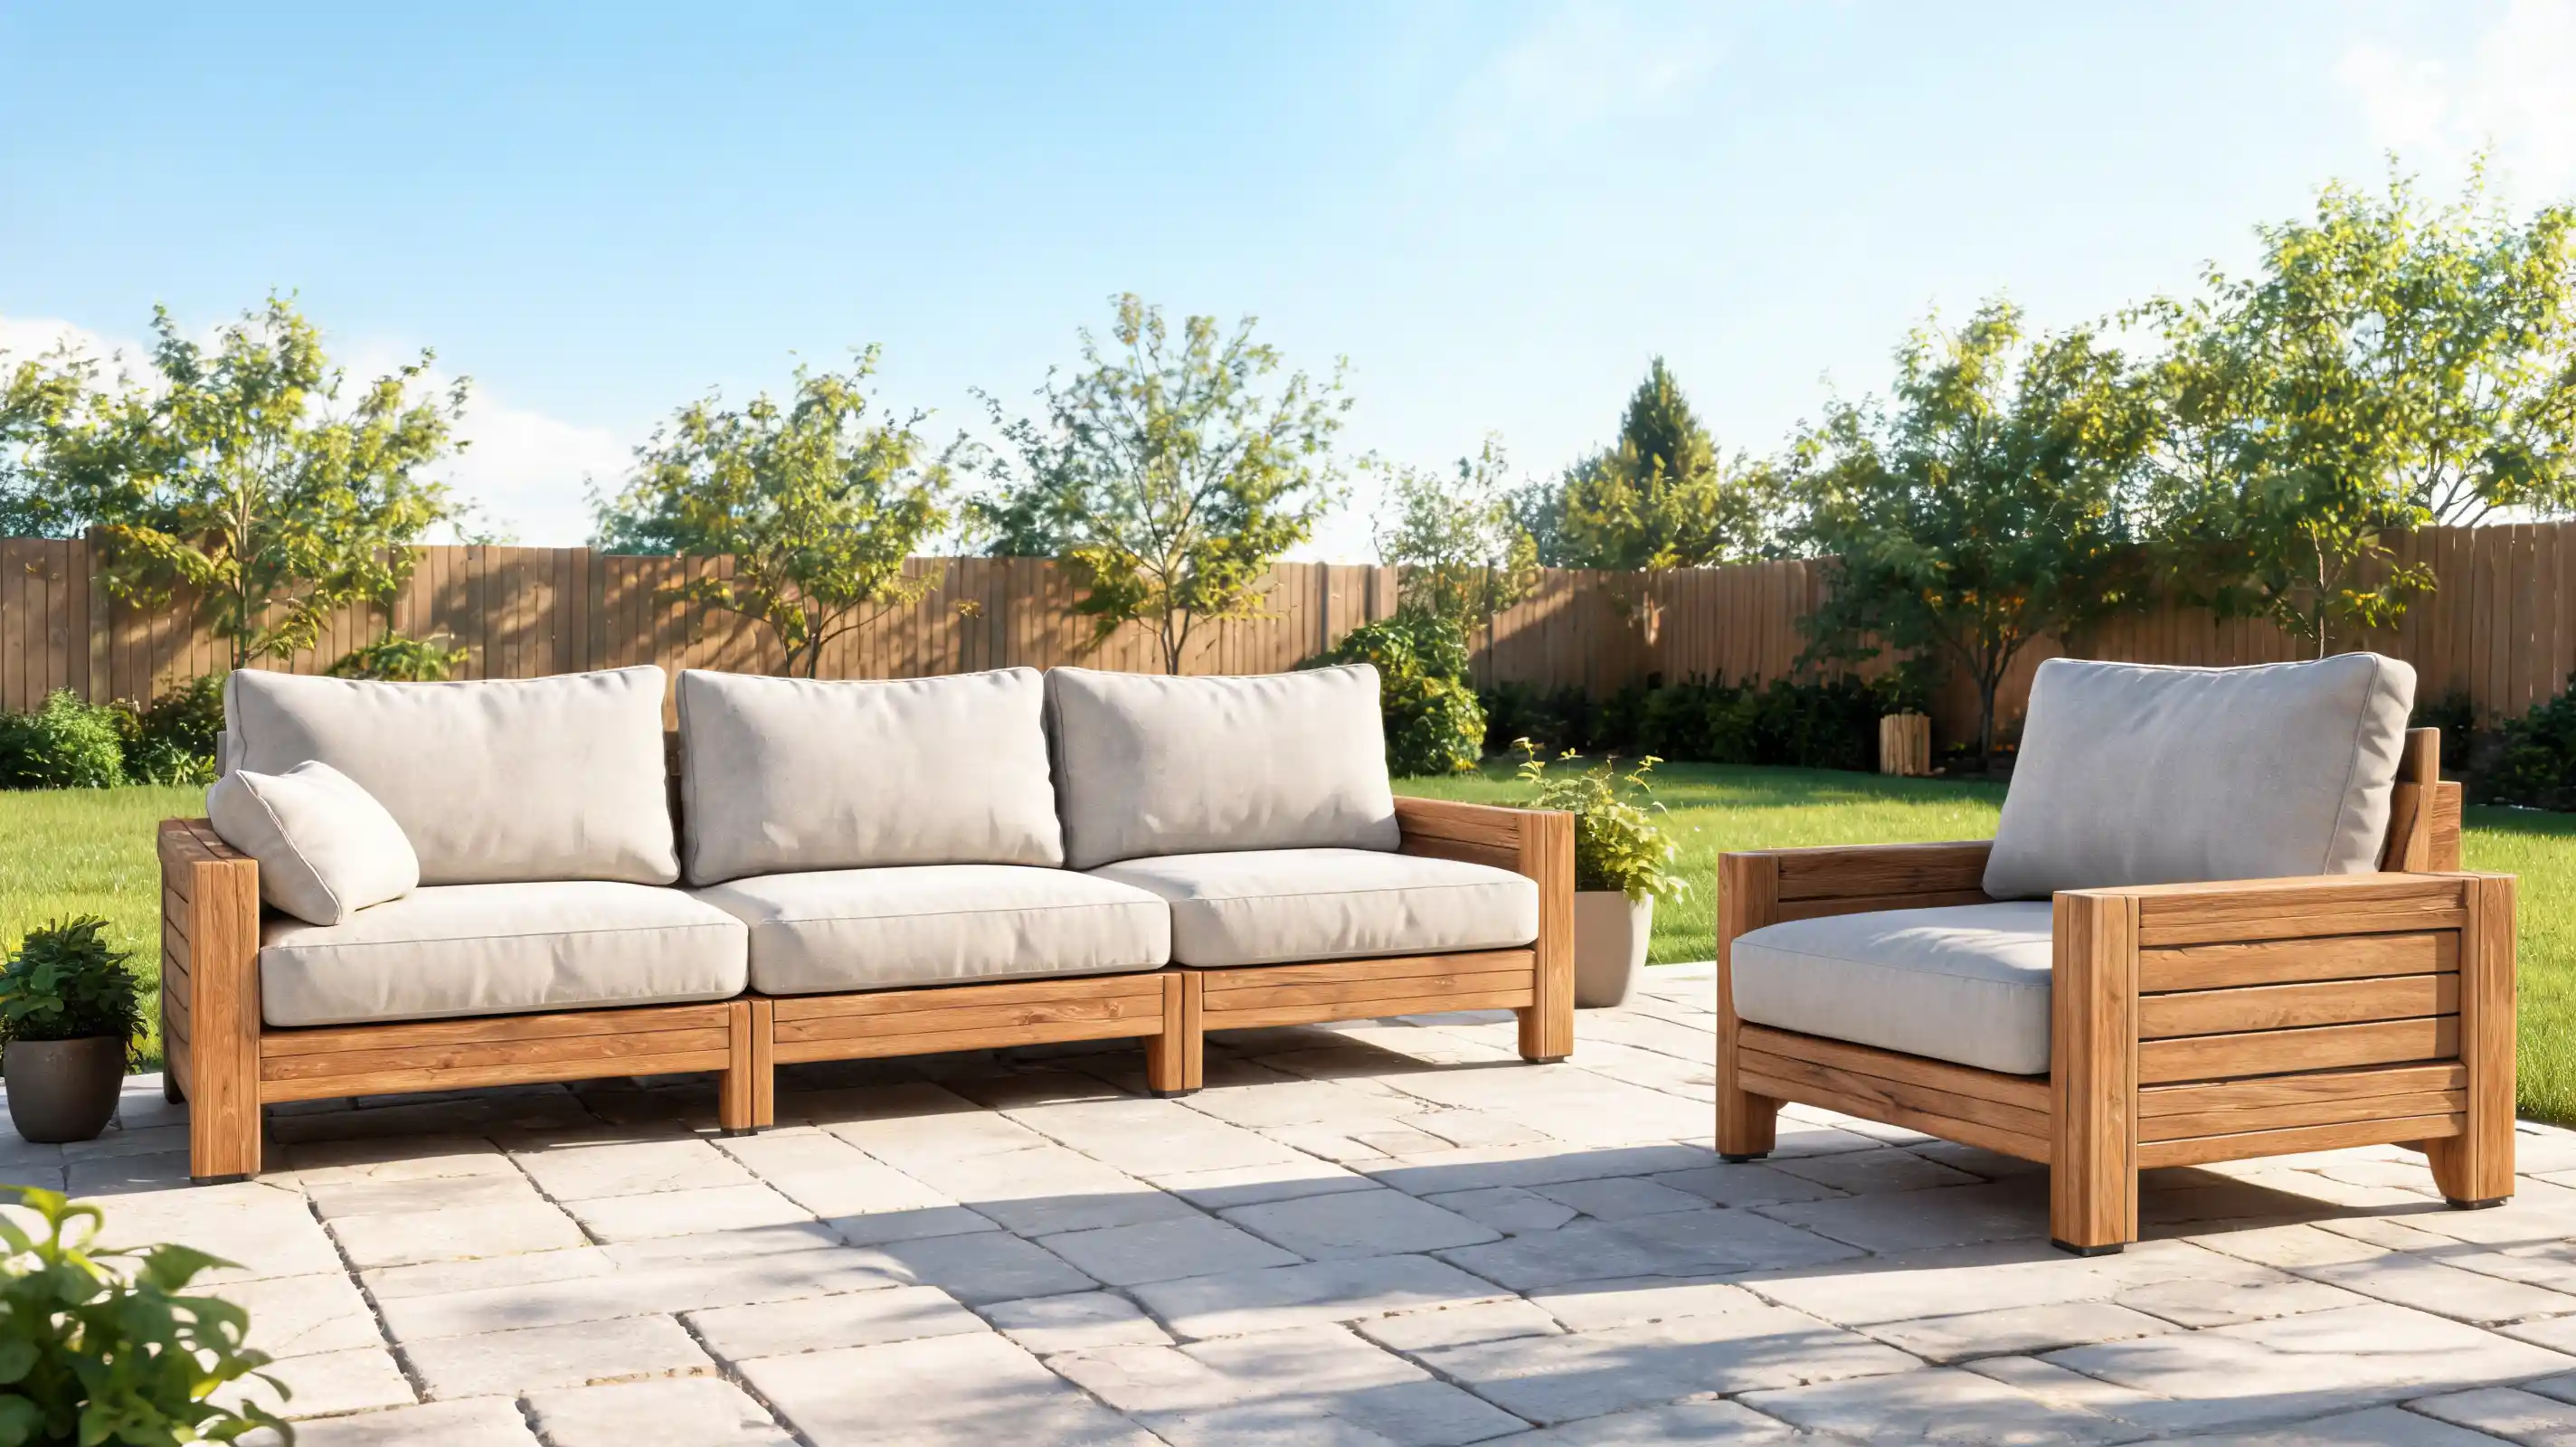
A modular build uses individual identical seat units that can be arranged in any configuration and stored separately during winter. Each unit is standalone — no connecting hardware required. This is the right choice for renters, for patios that double as entertaining space, and for anyone who wants to add sections later without rebuilding from scratch.
4. Outdoor Sectional with Chaise
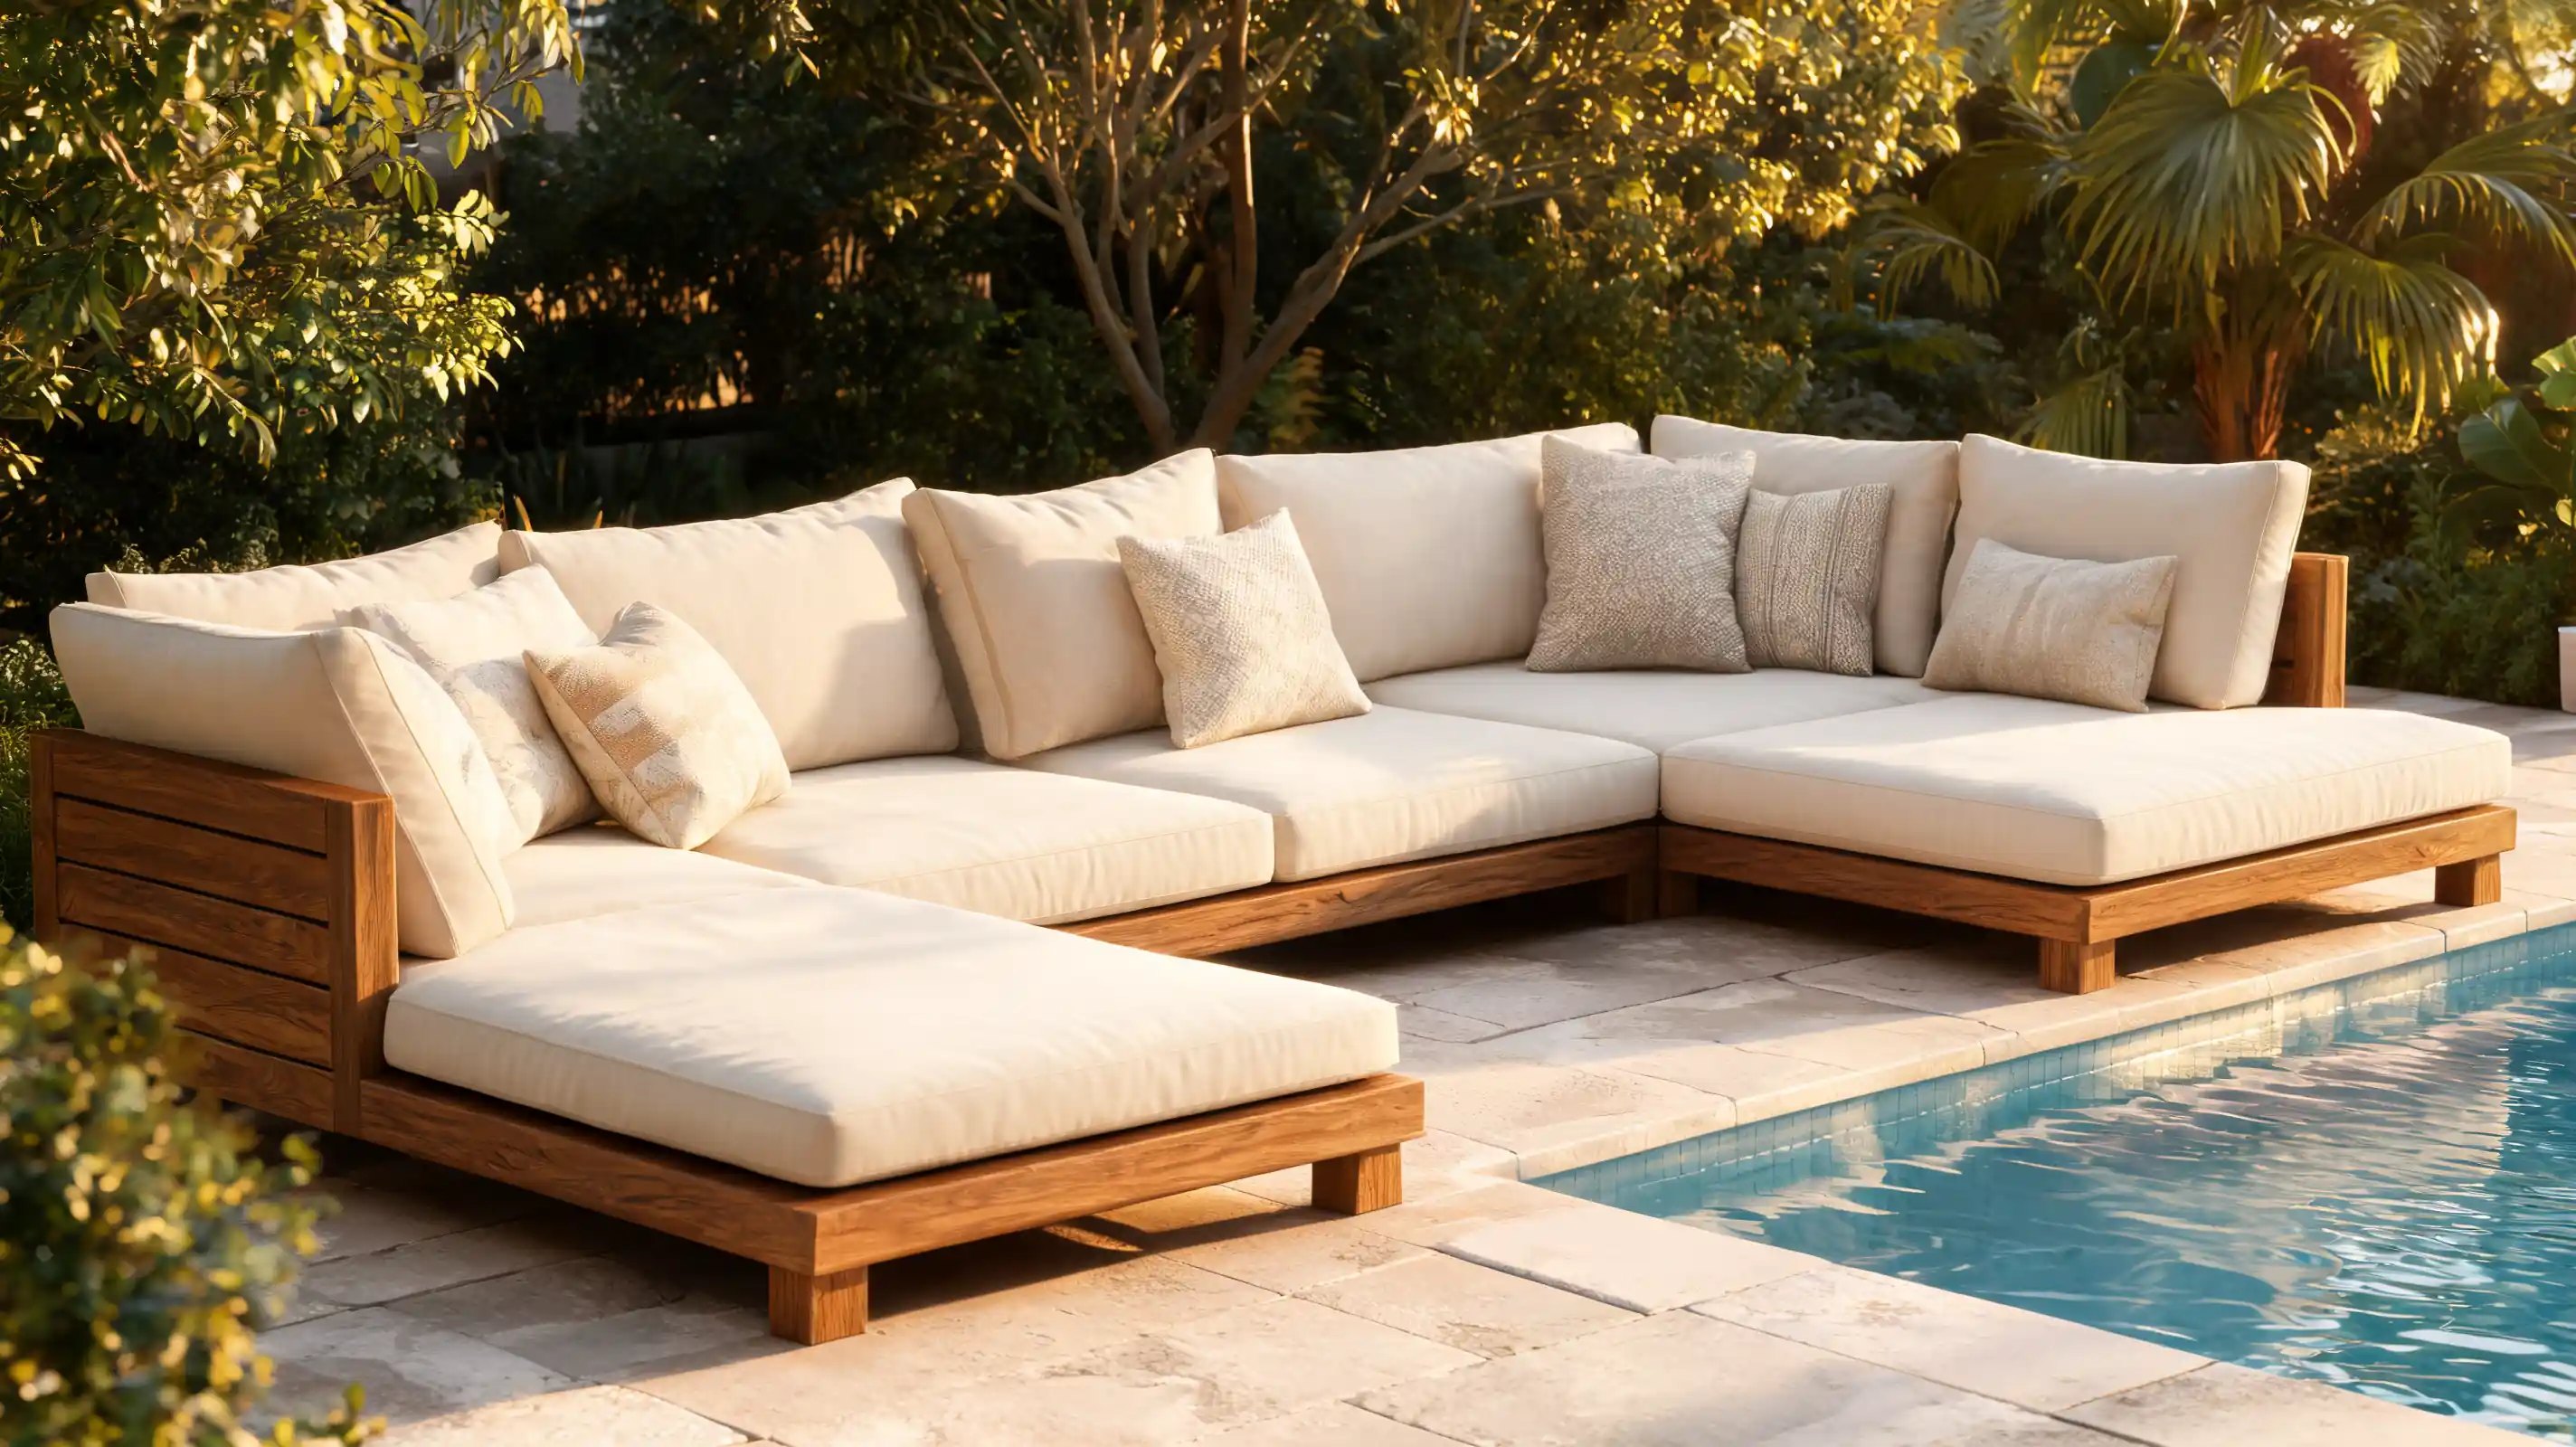
One section is extended to full chaise length, typically 60 to 70 inches, while the rest of the sectional uses standard seat depth. The longer section works alongside a pool, garden edge, or shaded wall. Use thicker cushions (5 to 6 inches) on the chaise section to compensate for the flatter angle.
5. Sectional with Built-in Storage
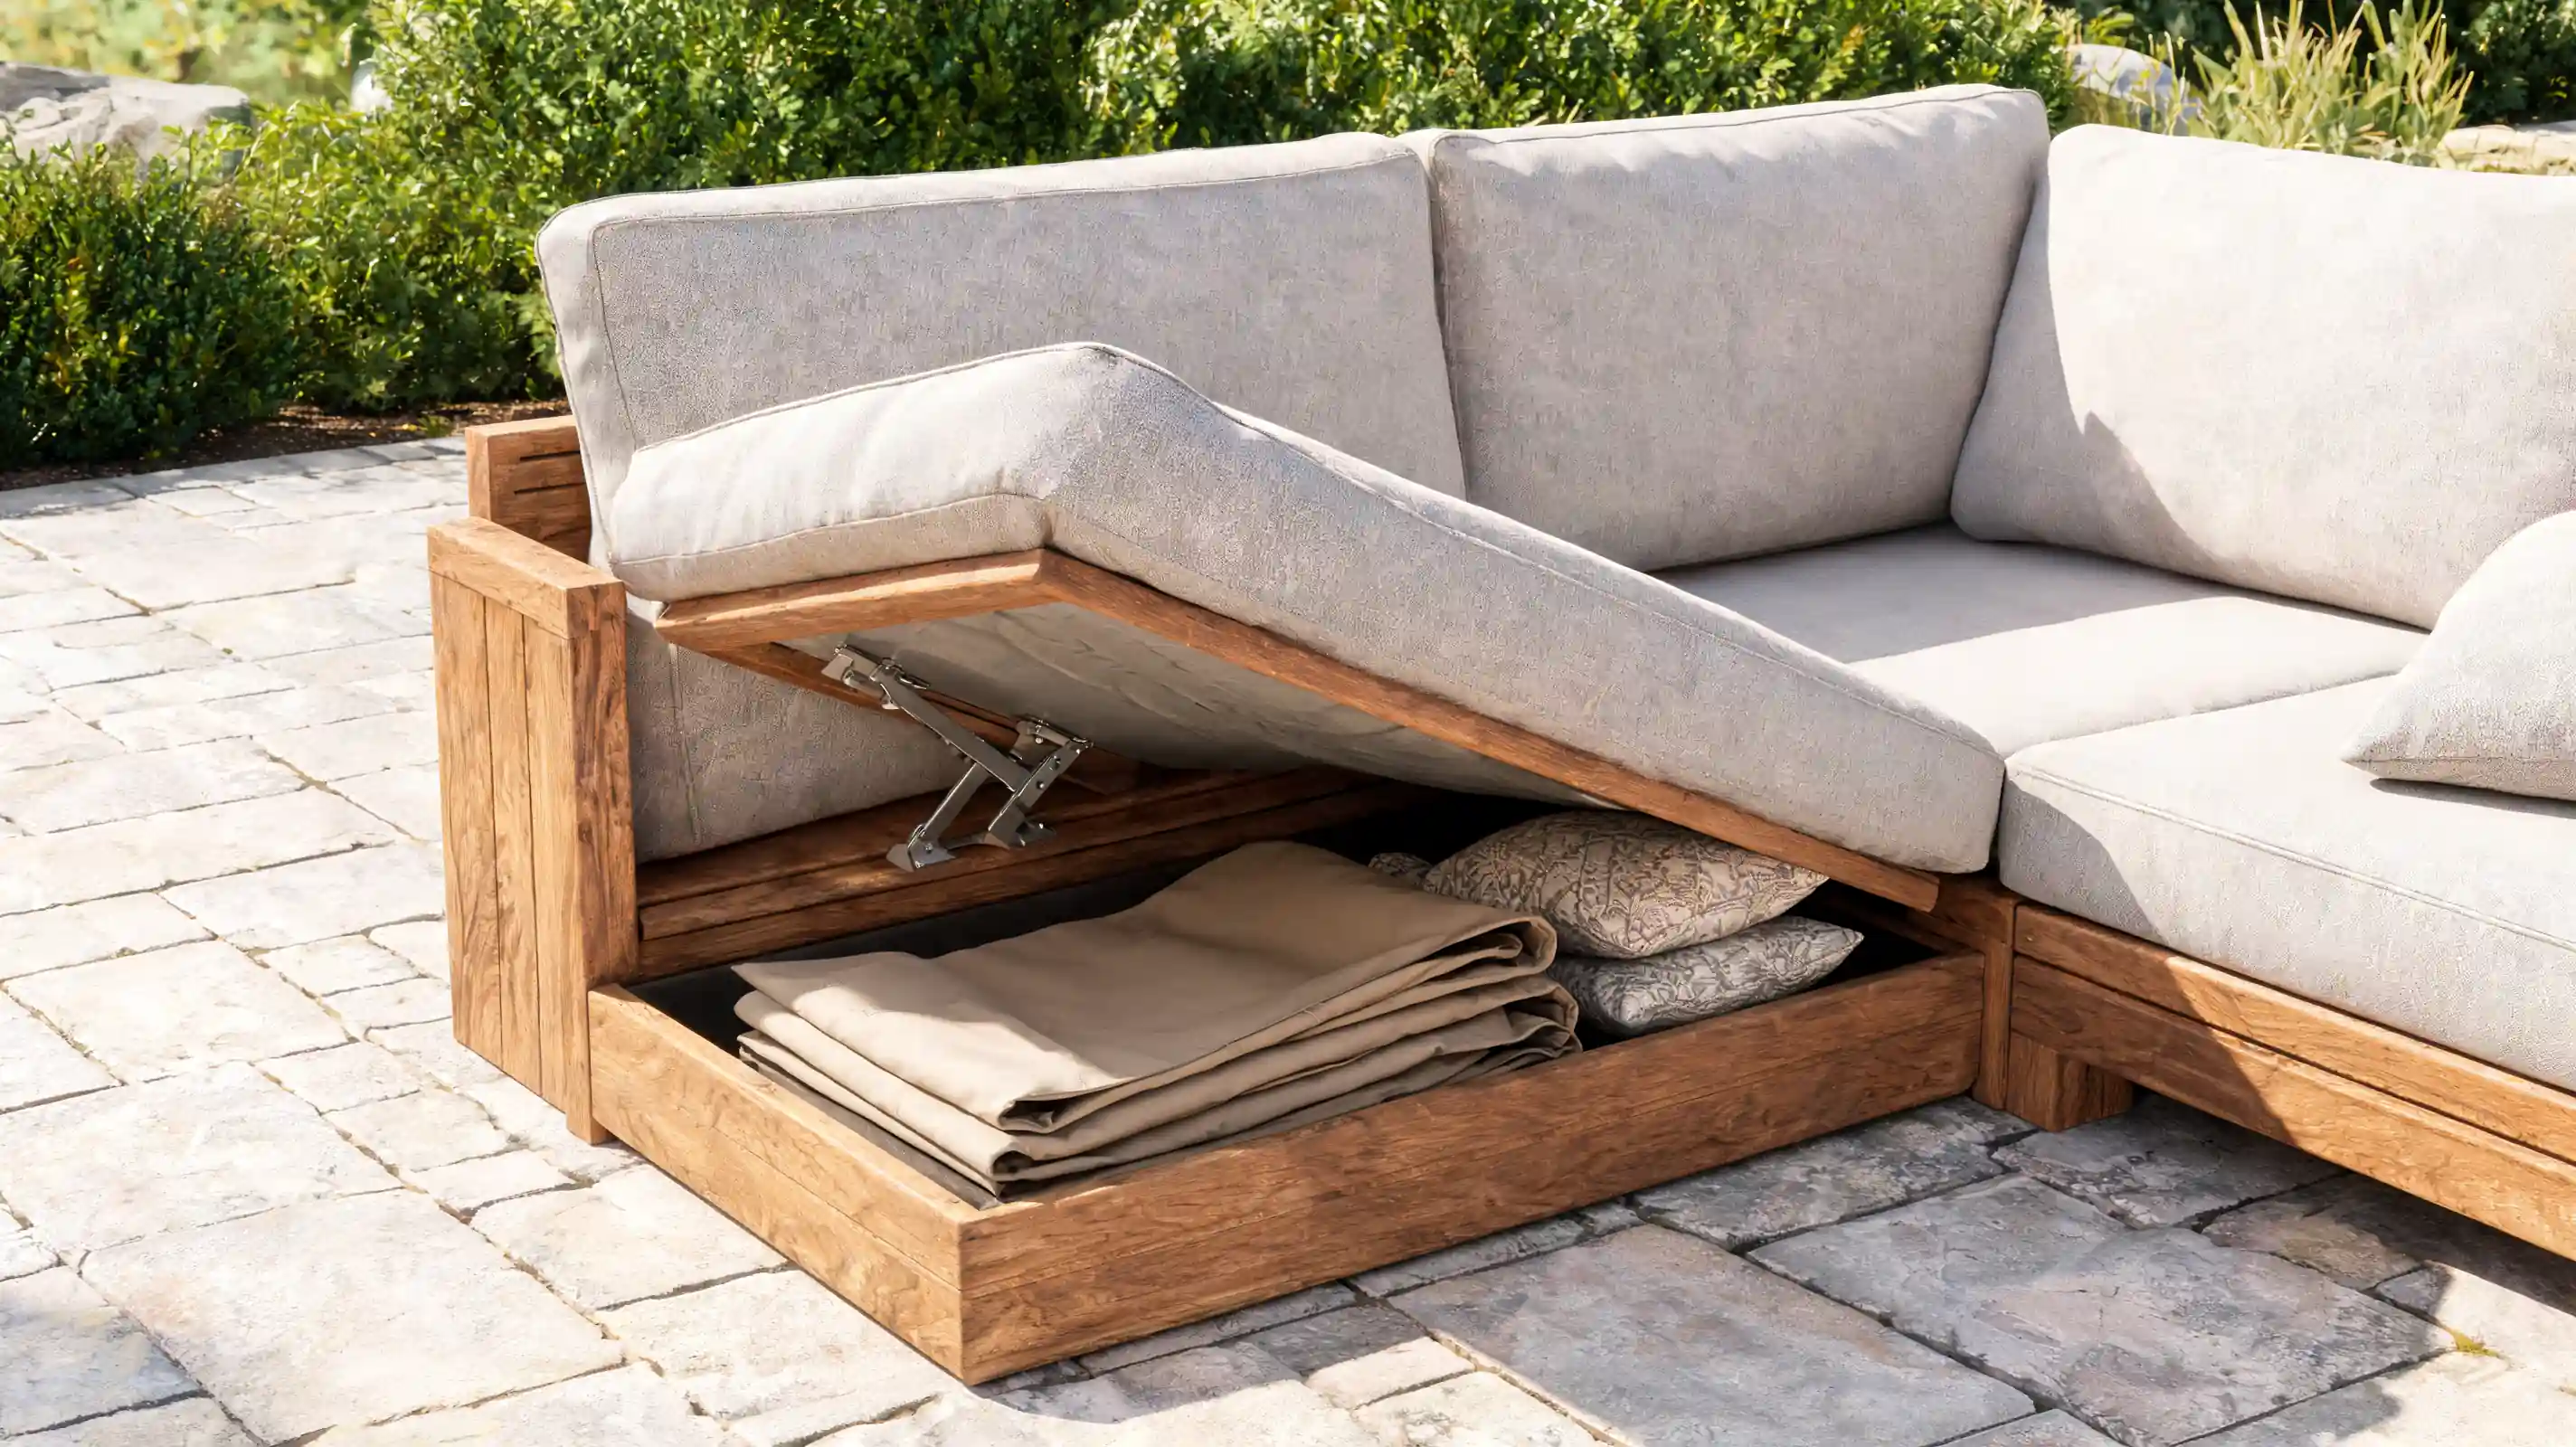
The seat frame height on a standard 2×4 sectional leaves 10 to 12 inches of usable space beneath the seat boards. Add hinged seat panels or open-front cubbies to store cushions, throws, and covers. Keep the storage area ventilated — a gap at the front or back prevents moisture from building up around stored fabric.
Weatherproofing for Long-Term Durability
A sectional that isn’t finished properly will need board replacements within three to four years. These steps extend the frame lifespan to a decade or more.
- Sand before you seal: Rough wood doesn’t hold finish. Sand all exposed surfaces to 120-grit, clean off the dust, and then apply stain or sealer within 24 hours of sanding so the wood doesn’t reabsorb ambient moisture.
- Use a penetrating exterior oil or stain: Film-forming finishes like standard exterior paint sit on top of the wood and peel when the wood moves seasonally. A penetrating oil or deck stain moves with the wood and doesn’t peel. Two thin coats outperform one heavy coat every time.
- Raise the legs off wet surfaces: Rubber glides or adjustable foot levelers keep the leg bottoms out of standing water. Even pressure-treated lumber will rot at the base if it sits in a puddle for weeks at a time. Four-dollar rubber feet per leg are the cheapest long-term maintenance decision on this build.
- Re-seal every two years: Check the finish condition each spring. If water no longer beads on the surface, the finish has worn down and needs a fresh coat. This takes less than an hour per section and prevents the full refinishing job that comes when bare wood absorbs a full winter’s worth of moisture.
- Store or cover cushions: Quick-dry foam cushions with removable covers are the most practical choice for outdoor use. Store them under the sectional in the built-in cubbies, or bring them inside during extended rain. Even water-resistant cushions left out for weeks will eventually absorb enough moisture to mold.
Common Mistakes to Avoid on a DIY Outdoor Sectional
These are the problems that show up most often on first-time builds. None of them are difficult to avoid — they just need to be caught before the mistake becomes load-bearing.
Buying cushions after the frame is built. The frame dimensions follow the cushion. Build the frame first and you’ll be cutting new boards to match a cushion that doesn’t fit. Choose cushions before the first measurement goes on paper.
Skipping the center support on long sections. A 72-inch sofa section without a center leg sags under two adults. Add the support before the seat boards go on, retrofitting it afterward means removing every board you just installed.
Not checking for square at each stage. A frame that’s two degrees out of square produces a backrest that doesn’t sit flush and seat boards that need to be scribed to fit. Check with a speed square at the outer corners before tightening any joint.
Using standard interior screws. They’ll hold for one season and start pulling out by the second. Exterior-rated deck screws are the same price at most hardware stores, there’s no reason to use anything else on an outdoor build.
Closing up the seat gaps. Gaps between seat slats are not a design choice, they’re a drainage function. Without them, water pools under the cushion and rot begins from the center of the frame outward.
Rushing the finish coat. Stain applied to damp or dusty wood doesn’t adhere properly. It peels within a season and leaves the end grain exposed. Sand, clean, let the wood dry fully, and then apply finish in dry weather above 50 degrees Fahrenheit.
Frequently Asked Questions About DIY Outdoor Sectionals
These are the questions that come up most often once someone is mid-build or planning their second section.
What is the best wood for a DIY outdoor sectional?
Pressure-treated lumber for the frame and cedar for the seat slats is the most practical combination. Cedar is naturally rot-resistant and takes stain well. Pressure-treated framing gives structural durability at a lower cost. Avoid untreated pine outdoors — it rots within two seasons without heavy maintenance.
How deep should the seat be on a DIY outdoor sectional?
Match the seat depth to your cushion. Standard outdoor seat cushions are 20 to 24 inches deep. Add 1 to 2 inches to the frame depth for overhang at the front edge. Most comfortable outdoor seating ends up between 22 and 26 inches of total frame depth.
What height should a DIY outdoor sectional be?
Seat height for outdoor sectionals typically runs 15 to 18 inches from the floor to the top of the seat board, before cushions. Adding a 4-inch cushion brings the seated height to 19 to 22 inches — low enough for a relaxed lounge feel, high enough to stand up from without difficulty.
How do I keep the sectional pieces from sliding apart?
Furniture connector bolts or sectional clips fasten the sections together at the frame. Two connectors per joint — one at each end of the connecting side — are enough for daily use. For modular builds that separate seasonally, removable pin connectors work better than fixed hardware.
Can I build a DIY outdoor sectional without a pocket hole jig?
Yes. A pocket hole jig produces cleaner joints and hides the fasteners, but the same frame can be built using through-bolts or face screws at each joint. The result is structurally equivalent. Pre-drill pilot holes to prevent splitting, and countersink the screw heads so they sit flush.
How much does it cost to build a DIY outdoor sectional?
An L-shaped sectional in pressure-treated lumber with cedar seat slats and standard outdoor cushions typically runs $400 to $800 in materials. Cedar throughout, custom cushions, and a higher-grade exterior finish can push the total toward $1,000 to $1,200. Either figure is still well below comparable store-bought quality.
Is a DIY outdoor sectional renter-friendly?
A modular build is the best option for renters. Individual seat units can move without anchoring to the patio, store indoors during winter, and disassemble for a move. Avoid permanent anchors or fastening the sectional to the deck surface.
Final Verdict
Building outdoor seating gets much easier when you start with a clear plan instead of guessing through each step. I’d focus first on your space, cushion size, layout, and materials, because those choices shape the whole build.
You also want strong supports, exterior screws, drainage gaps, and a proper finish so the sectional holds up outside. Adiy outdoor sectional gives you control over comfort, size, style, and cost, which is why it works so well for tricky patio spaces.
You do not need to make it perfect on the first try. Start simple, measure carefully, and improve the design as needed. Try these tips on your build, and share what layout you’re planning.





