

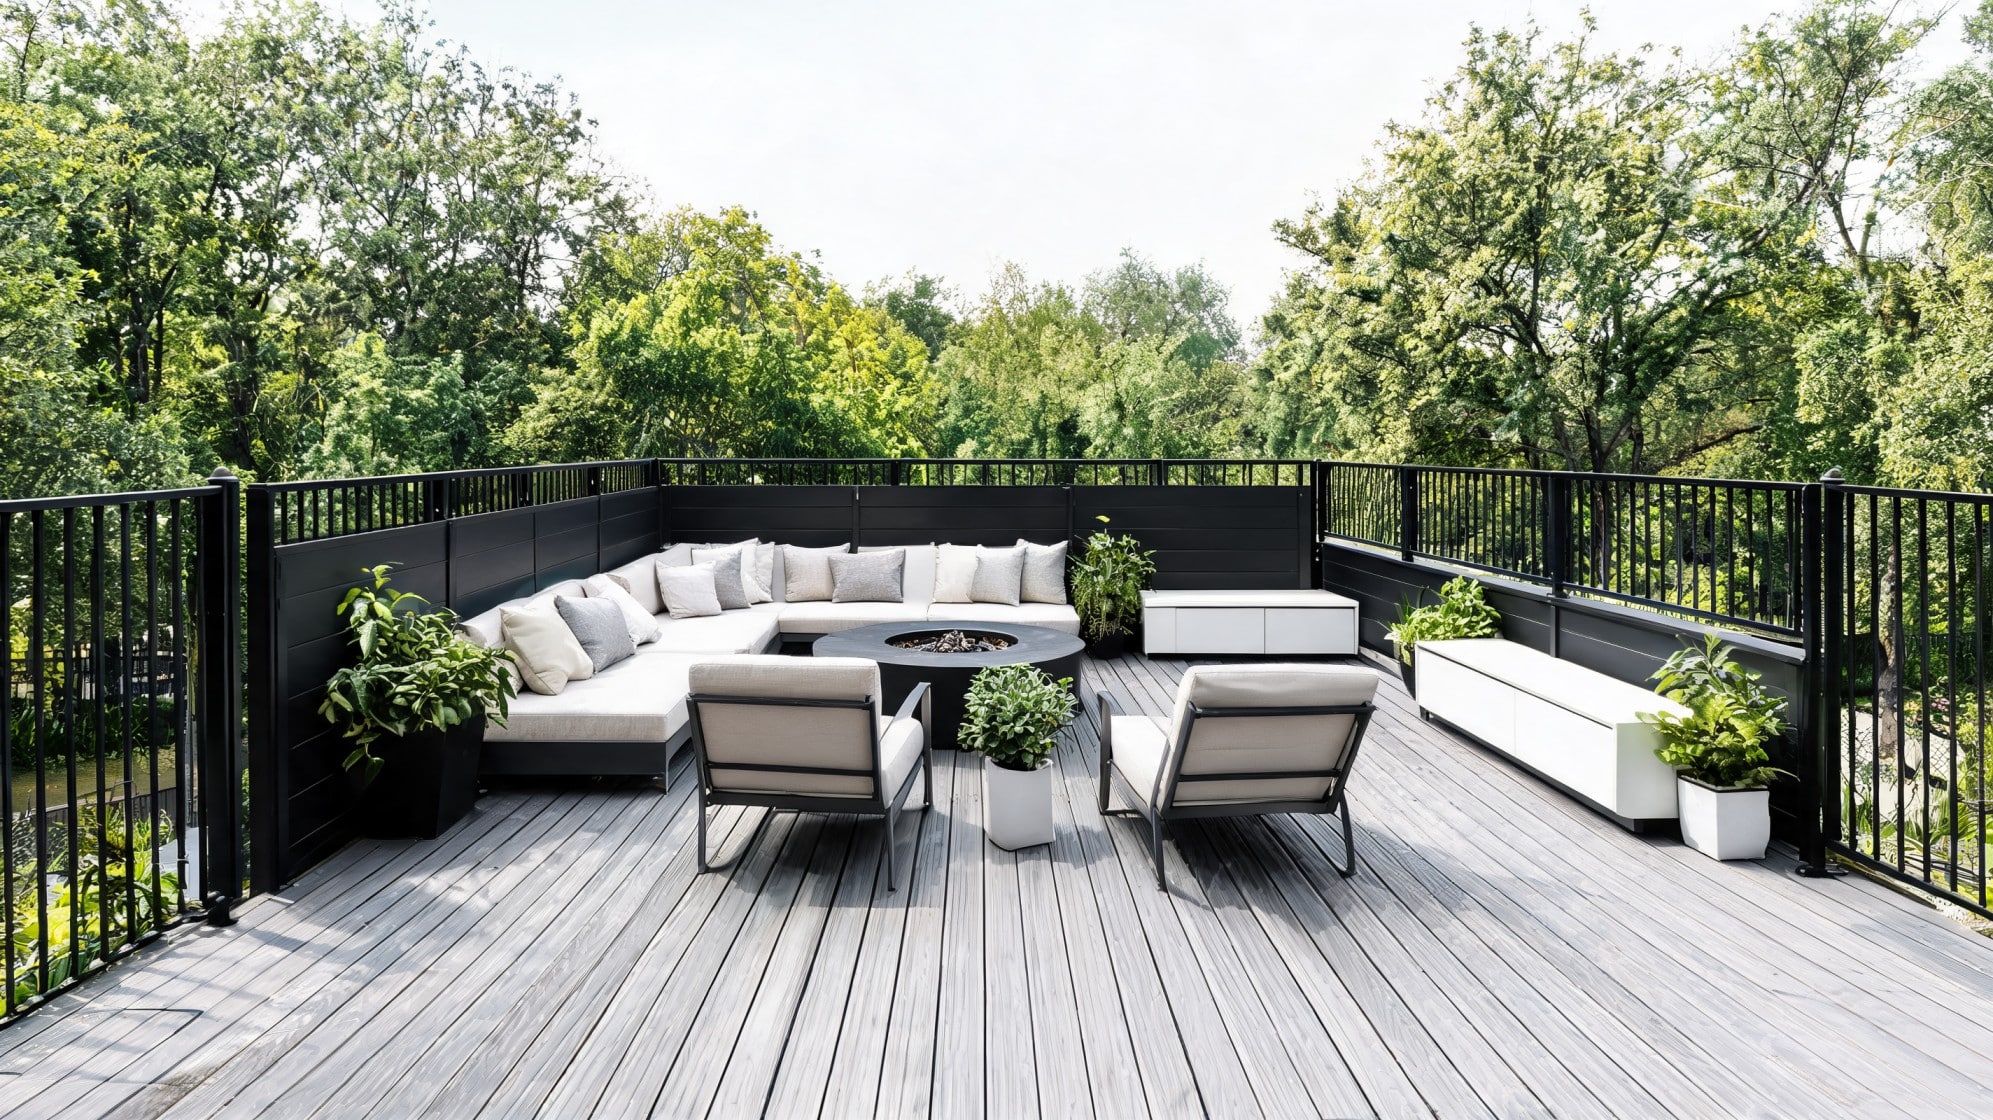
Before you buy a single piece of deck furniture, you need to know what the space will actually do to it. Resin wicker fades in two seasons on a south-facing deck. Powder-coated metal rusts at the feet if water pools on wood decking. Teak holds up in almost any climate but needs annual oiling if you want it to stay honey-brown rather than silver-grey for a full breakdown of how each outdoor wood species behaves over time, that comparison covers what the material labels on furniture tags rarely tell you. These deck furniture ideas are organized around what holds up, what fits, and what you will actually use every day, not just what photographs well on a showroom floor. Material Cost Range Lifespan (avg) Maintenance Climate Suitability Teak $$$-$$$$ 20-30+ years Annual oiling (optional); weathers to silver without it All climates; excellent in coastal and high-humidity Powder-coated aluminum $$-$$$ 10-20 years Wash annually; touch up chips before rust sets in at feet Most climates; watch feet contact points in wet regions Resin wicker (all-weather) $$-$$$ 5-10 years Minimal; keep out of prolonged direct UV with a cover Covered decks best; UV degrades weave faster than most sellers admit HDPE (poly lumber) $$-$$$ 20+ years Soap and water; no sealing or staining needed All climates; does not splinter, crack, or absorb moisture Acacia wood $$ 5-10 years outdoors Seal every 6-12 months; will crack and grey faster than teak Dry climates best; avoid coastal or high-humidity without consistent sealing Sling / mesh fabric $-$$ 5-8 years Rinse clean; replace slings when sagging Excellent for pool decks; dries fast, no mildew in fabric Use that table before you read another word. The ideas below only hold their value if the furniture you pick is matched to the climate your deck actually lives in. What to Know Before You Choose Deck Furniture Measure the usable space first, not the footprint. Account for the door swing, stairs, railing edge, grill clearance, and any umbrella you plan to open. I mark furniture zones with tape on the deck surface before ordering anything. It shows you immediately where the space feels open and where it feels tight. Standard clearances that keep a deck safe to walk through: 30 to 36 inches for main paths, 18 inches between a coffee table and sofa, 3 feet behind dining chairs so people can push back without hitting a wall or railing. Keep stairs and door swings fully clear. Fire pits and fire tables need at least 3 feet of clearance from railings, walls, furniture legs, and any cushion fabric. Then match the furniture type to how you actually use the deck: Lounging: Sofa, loveseat, chairs, and ottoman for a relaxed seating area with deep cushions. Dining: Table, chairs, or bench seating for outdoor meals. Hosting: Sectional, bar cart, or fire pit table with room for 4 to 8 people to sit comfortably. Relaxing alone: Chaise lounge, egg chair, or hammock chair for quiet time outside. Family daily use: Storage bench, rounded edges, washable cushion covers, and furniture that cleans fast after meals. Small Deck Furniture Ideas Small decks require discipline. Every piece earns its place by doing more than one job, or it does not belong. Here is what works when the square footage is tight. 1. Folding Bistro Set A folding bistro set is the most flexible piece you can put on a tight deck. It gives you a table and two seats, and when you need open floor space you fold the chairs flat and lean them against the railing. Round tables work better than square on narrow decks because they are easier to walk around and do not catch your hip on the corner. On a wood or composite deck, check the feet on powder-coated metal bistro sets before you buy. Rubber or plastic glides on the feet prevent the rust marks that bare metal leaves on sealed decking after one wet season. Materials that hold up: Powder-coated steel with rubber foot caps, teak, or all-weather resin. 2. Railing Bar Table A railing bar table mounts to the railing or sits flush against it, which means it uses zero floor space except for the two bar stools that tuck underneath it when not in use. This idea works on any deck where the view or the light is the reason you are outside. You eat at the railing, keep the center of the deck open, and the whole setup breaks down in about 60 seconds if you need the space for something else. One thing most people overlook: check that your railing can handle the lateral load before you mount anything to it. Most residential deck railings are built to code for a 200-pound horizontal force, so a clamping bar table is generally fine, but a sagging or loose railing is not the right anchor for furniture people lean on. Materials that hold up: Powder-coated steel, aluminum, or sealed composite surfaces. 3. Storage Bench A storage bench placed along a wall or railing gives you seating and a place to store cushions, throws, and small gear without adding a separate deck box. On small decks, that trade matters. The lid doubles as a seat and keeps cushions dry so you are not pulling out damp fabric every time you sit down. Look for a bench with a lid that stays propped open on its own, drainage holes in the bottom, and a seal on the lid edge. HDPE and resin benches last longest because they do not absorb moisture. Untreated or poorly sealed wood benches can rot from the inside out within two or three seasons in wet climates. Materials that hold up: HDPE poly lumber, resin, or teak with a sealed lid edge. 4. Compact Outdoor Loveseat A two-seat outdoor loveseat gives you a cozy lounge area without the footprint of a full sofa. Push it against the house wall or the railing edge to preserve walking space, and put a glass-top or lightweight aluminum coffee table in front. The glass top keeps the visual space open on a small deck because it does not block sight lines the way a solid wood surface does. If the deck gets full afternoon sun, check the cushion fabric rating before you buy. Fabrics with a UV fade rating below 1,000 hours of direct sun exposure will look washed out in two seasons. Solution-dyed acrylic fabric (the category name most sellers list) holds color significantly longer. Materials that hold up: Aluminum frame, high-quality resin wicker, teak, and solution-dyed acrylic cushion fabric. 5. Stackable Chairs Stackable chairs let you keep four or six seats available without dedicating floor space to all of them every day. They stack in a corner or go into storage, and you pull them out when guests arrive. The ones worth buying are light enough for one person to carry but solid enough that they do not flex or rack when someone sits hard into them. Avoid chairs with hollow aluminum legs that are unsealed at the bottom. Water gets in and sits, and the leg rusts from the inside over one or two winters without any visible warning on the outside surface until it gives way. Materials that hold up: Solid aluminum, resin, or powder-coated steel with capped or sealed legs. Large Deck Furniture Ideas A large deck that is furnished without a plan ends up feeling scattered. Think in zones before you think in pieces. One zone for dining, one for lounging, one for quiet or reading. Each zone gets its own anchor piece, and the rest of the furniture is placed around it. The ideas below are the ones that work hardest in a large-deck layout. 6. Outdoor Sectional Sofa A sectional sofa is the anchor piece for a large deck lounge zone. An L-shape works for corners; a U-shape works when you want conversation seating for eight or more. Either way, the sectional needs to be paired with an outdoor rug underneath it, or the zone just looks like furniture sitting on a deck rather than a space someone designed. The frame material matters more than people realize. Resin wicker over a steel frame is the standard at mid-price points, and the steel frame is where problems start. An unpainted or poorly coated steel frame corrodes at the welds within three to five years in coastal or humid climates. Pay more for an aluminum frame, or buy wicker over powder-coated steel and plan to cover it through wet seasons. Materials that hold up: Aluminum frame, high-grade resin wicker weave, solution-dyed acrylic cushions with removable covers. 7. Chaise Lounge Zone Two or three chaise lounges placed where the sun hits best create a dedicated sunbathing and reading zone on a large deck. Put a small side table between every pair of lounges for drinks and sunscreen. Adjustable backs matter more than most people expect: fixed-flat lounges are fine for napping but frustrating when you want to sit up and read without propping cushions behind you. Near a pool, sling-fabric chaises are the better long-term call. Quick-dry mesh or sling fabric does not hold water in the weave and does not develop the mildew smell that thick cushion foam builds up when it stays damp for weeks at a time. Materials that hold up: Aluminum frame with sling fabric for pool-adjacent decks; teak or HDPE for dry-climate decks away from water. 8. Long Outdoor Dining Table A long dining table on a large deck changes how the whole space gets used. It gives you enough room for a full family dinner or a cookout without running a second table out every time. Figure 24 inches of table length per person seated, plus at least 36 inches on the long sides for chair pull-back and server clearance. On a wood deck, use furniture pads or glides under all four legs and under any cross-stretcher that contacts the surface. Metal or rough-cut wood edges leave permanent marks in composite and wood decking that no amount of sanding fully removes. Materials that hold up: Teak, aluminum, HDPE, or powder-coated steel with a sealed or powder-coated surface finish. 9. Outdoor Bar With Stools An outdoor bar table with stools earns its place on a large deck when the deck is close to a grill or kitchen. It keeps guests out of the cooking zone while still close to the action. Stools with footrests matter here: bar-height seating without a footrest forces people to brace their legs constantly, and most will migrate to lower chairs within 20 minutes. A freestanding bar table is more practical than a built-in one for most homeowners because you can reposition it for different events. Built-ins look sharp but commit you to a layout that may not suit everything you do on the deck across the seasons. Materials that hold up: Powder-coated aluminum, teak, HDPE, or stainless steel for bar surfaces that get heavy wet-glass use. 10. Deep Seating Set With Outdoor Rug Deep seating with thick cushions and an outdoor rug underneath turns a section of a large deck into a space that people actually want to sit in for two hours, not just visit for a few minutes. The rug is doing structural work here: it defines the zone, ties the pieces together visually, and reduces the hollow sound that furniture makes on an open deck surface. Choose cushions with removable, machine-washable covers. After a season of regular use, outdoor cushion covers hold bird droppings, sunscreen, food, and pollen. If you cannot wash them easily, they either get thrown away or they stay dirty, and neither outcome is acceptable for furniture you want to keep for five or more years. Materials that hold up: Aluminum frame, high-grade resin wicker, solution-dyed acrylic cushions with zip-off covers, and a polypropylene outdoor rug that drains and dries fast. Covered Deck Furniture Ideas A covered deck changes the calculus on material selection because direct rain and UV exposure are reduced. That does not mean you can use indoor furniture outside, but it does mean softer fabrics, tighter weaves, and lighter frames hold up better than they would on an open deck. What kills furniture on a covered deck is usually condensation, not rain: trapped humidity with poor airflow will mildew cushions and corrode metal joints just as thoroughly as direct weather, just more slowly. 11. Rocking Chairs With a Side Table Two rocking chairs with a small side table between them is the most durable covered-deck arrangement there is. Nothing mechanically complicated, nothing that fails. Place them where they have enough room to rock without the rear legs catching on the wall or railing edge: most rocking chairs need 12 to 18 inches of clear space behind the back legs when at full extension. Add seat cushions with ties so they stay put as the chair moves. Non-tied cushions slide forward on every forward rock and end up on the floor within 10 minutes of anyone actually sitting in the chair. Materials that hold up: Teak, HDPE poly lumber, or acacia with a quality sealant and cushion ties. 12. Hanging Egg Chair A hanging egg chair gives a covered deck a focal point and a dedicated spot for someone to sit away from the main conversation area. Freestanding models are the smarter choice for most homeowners because they do not require a structural assessment of the ceiling joists. If you go ceiling-mounted, have the mounting point load-rated by whoever built your deck cover. The chairs plus a 200-pound person plus the dynamic swing load is more force than people expect, and a failed mount pulls the ceiling material with it. Materials that hold up: Steel or aluminum freestanding frame; resin wicker seat with a cushion that ties in at the base. 13. Lantern Side Tables Overhead lighting on a covered deck rarely gives you the kind of light that makes the space feel worth sitting in after dark. Lanterns at table height, around chairs, and at the edges of the deck create warm pools of light that overhead fixtures never match. A lantern table pulls double duty: it gives you a surface for drinks and warm directional light without running a cord from the house to a floor lamp. For anything electric on a covered deck, confirm the fixture is UL-listed for damp or wet locations. “Indoor-rated” fixtures will corrode at the sockets inside two seasons of covered outdoor exposure, even without direct rain. Materials that hold up: Powder-coated metal or aluminum lanterns rated for outdoor damp locations; aluminum or teak table surface. 14. Wicker Conversation Set A wicker conversation set on a covered deck works well because it gets the UV and direct rain protection it needs to hold its color and weave integrity for longer. The standard layout is a loveseat or small sofa, two matching chairs, and a coffee table between them sized so the person at the far end of the sofa can still reach it. That usually means 18 to 24 inches from sofa edge to table edge. Keep the layout tight enough that people can actually talk at a normal volume. If the chairs are more than 7 feet apart, the conversation stops working and the zone feels like a waiting room. Materials that hold up: Resin wicker over an aluminum frame; outdoor-performance fabric cushions with removable covers. 15. Outdoor Daybed An outdoor daybed in a shaded corner of a covered deck gives the space something that chairs and sofas cannot: room to lie fully flat outside. Useful for naps, reading, or just watching the yard from a horizontal position without going back inside. Place it against a wall or privacy screen so it does not block foot traffic across the deck. The frame and mattress support need to be genuinely rated for outdoor use, not just listed as “weather-resistant.” Fully enclosed foam with no drainage will stay damp after any moisture exposure and grow mildew inside the cover within a season. Look for a mattress insert with drainage channels or an open-cell foam that dries from the inside out. Materials that hold up: Teak, resin wicker over aluminum, or powder-coated steel frame with a drainage-designed outdoor mattress insert. Deck Dining and Serving Furniture Ideas Dining and serving furniture is where layout and material decisions overlap most directly. The wrong table placement forces awkward traffic around every meal, and the wrong materials mean you are resanding or replacing a dining surface long before the frames wear out. 16. Bar Cart A bar cart on a deck serves a different function than a fixed serving station: it goes where you need it for each event and rolls back into a corner when the meal is over. The locking wheel is not optional on a deck with any slope. A cart without locked wheels on a slightly pitched surface will migrate into the backs of people’s chairs over the course of an evening. If a more permanent outdoor bar structure interests you, the whiskey barrel project ideas show how to build a functional bar surface from reclaimed materials at a low cost. For outdoor use, stick to metal or teak shelving. Painted MDF or untreated wood shelves on outdoor carts fail quickly when drinks spill repeatedly into them across a summer of use. Materials that hold up: Powder-coated metal or stainless steel frame with teak, aluminum, or sealed tile shelving. Deck Lounge Furniture Ideas Every deck benefits from at least one piece of furniture that is built for sitting longer, not just stopping by. These ideas are for the lounge corner, the reading spot, and the end-of-day seat that makes the deck worth coming back to. 17. Hammock Chair A hammock chair fills a corner without requiring as much floor clearance as a rocking chair. Freestanding models work on any deck surface and do not require drilling into a beam or a ceiling. The rope or fabric seat keeps air moving underneath you, which matters on a warm evening in a way that upholstered seats do not. Check the weight rating of the freestanding frame before buying, not just the chair itself. The combined dynamic load of a person settling hard into the chair plus swinging exceeds the static weight rating. A 250-pound dynamic rating on a freestanding frame is generally adequate for most adults; a 200-pound rating is too close to the line for daily use. Materials that hold up: Powder-coated steel freestanding frame; cotton-blend or polyester rope seat; weather-safe fabric cushion with insert ties. 18. Outdoor Poufs Outdoor poufs are the most flexible piece of furniture on this list. They work as a footrest, extra seat, or side table with a tray on top, and they weigh almost nothing, so rearranging the deck layout for a party takes about 90 seconds. Firm poufs hold shape through a season of daily use; soft-fill ones flatten permanently within a few weeks. Cover poufs or store them inside during extended rain. The fabric itself can handle moisture, but the fill does not dry quickly and will mildew if left saturated for several days in a row. Materials that hold up: Solution-dyed polyester or olefin outer cover; firm foam or compressed fill insert; waterproof inner liner. 19. Compact Corner Sofa A corner sofa seats four or five people in a compact L-shape and converts a dead corner into the most-used part of a small or mid-size deck. Low-back styles preserve sight lines across the deck and into the yard; high-back styles give more wind and privacy protection but make the corner feel enclosed. Modular corner sofas that connect with standard hardware are easier to clean and transport than single-moulded sectionals. Being able to separate the pieces and wash or replace individual cushion covers without dismantling the whole frame is worth paying for if you plan to use the deck year-round. Materials that hold up: Aluminum frame, resin wicker, or teak with solution-dyed acrylic cushion covers. 20. Nesting Side Tables Nesting side tables solve the problem of having somewhere to put drinks without adding a table that sits in the middle of the traffic path every day. They stack together on quiet days and pull apart when you need the surface area. Round shapes move around tight spaces more easily than rectangular ones. For outdoor use, avoid glass-top nesting tables unless the legs lock together when stacked. A set of nested glass tables that tips in the wind ends up with at minimum a cracked top and at worst an injury. Aluminum, teak, or resin tops are the practical call here. Materials that hold up: Aluminum, teak, or resin tops with powder-coated or corrosion-resistant leg bases. 21. Adirondack Chairs Adirondack chairs are one of the oldest outdoor furniture designs still in production because the geometry works. Wide armrests at the right height for resting a drink, a reclined seat angle that is comfortable for two or three hours, and a slatted back that sheds rain without trapping it. They suit fire pit areas, lake decks, cabin decks, and any outdoor space where the point is to sit and not do anything urgent. HDPE poly lumber Adirondacks are the practical choice for most homeowners. They will not splinter, crack, warp, or need painting or staining. Wood Adirondacks look better for the first two years but require consistent maintenance to stay that way. If you are not going to seal or paint them annually, buy the HDPE and save yourself the work. For a full overview of outdoor deck ideas beyond furniture, including material choices and layout planning for the deck structure itself, that resource covers the broader context around where these furniture decisions sit. Materials that hold up: HDPE poly lumber for low-maintenance use; teak or cedar for those who will commit to annual maintenance. What Fails Two Winters Later This is the section most deck furniture roundups skip, so here it is plainly. Steel frames under resin wicker corrode at the welds first, usually at the bottom where moisture pools. By the time you see rust on the surface, the joint is already compromised. The wicker weave itself looks fine until the frame fails beneath it. Fix: buy aluminum frames, or plan to replace mid-range wicker sets every five to seven years. Acacia dining tables sold as outdoor furniture at budget price points will crack along the grain within two seasons in any climate with seasonal humidity swings. The species is not the problem; insufficient thickness and inadequate sealing at the factory are. A properly finished, thick-slab acacia table can last years. A 1-inch slab with one coat of outdoor oil on it will not. Cushion foam without drainage fails even on covered decks. Morning condensation, the occasional spilled drink, and the first time the covers run through the wash leave damp foam that never fully dries. Mildew follows. Fix: buy cushions with drainage channels in the foam insert, or use thin quick-dry cushions and store them inside when the deck is not in use. Umbrella bases rated for 25 to 50 pounds are not adequate on a deck that gets afternoon wind. A standard 9-foot market umbrella generates 40 or more pounds of horizontal force at 15 mph. A base that is too light tips the umbrella into the furniture or off the deck entirely. Fix: use a 75-pound or heavier base, or anchor the umbrella through the center of a table with an adequately weighted table base. Budget Level Deck Furniture Ideas Not every deck needs the same investment, and the right budget decision depends on how much use the deck gets, how long you plan to stay in the home, and how much maintenance you are willing to do. This table maps budget levels to the furniture that makes sense at each. Budget Level Best Deck Furniture Ideas Best For Affordable Folding bistro set, HDPE Adirondack chairs, stackable chairs, storage bench, outdoor rug, solar lighting Small decks, renters, short-term use Mid-range Aluminum-frame loveseat set, fire pit table, dining set with benches, chaise lounges, storage deck box Family decks, weekend hosting, 5 to 10-year use High-end Teak dining set, modular aluminum sectional, outdoor bar with built-in counter, outdoor daybed, built-in benches Large decks, permanent setups, long-term ownership Start with the pieces you use every day and add the extras when the budget allows. A good dining table and four durable chairs will serve you better than a full eight-piece set where the frame quality was compromised to hit a price point. Deck Furniture Layout Ideas by Style Once the material decision is made, the style direction narrows what you actually look at. Pick one of these before you start shopping and the whole process moves faster. Modern: Black powder-coated aluminum frames, neutral cushions, low-profile silhouettes, and glass or concrete side tables. Coastal: Teak furniture with white or washed-out fabric, rope detailing, and light natural fiber rugs. Rustic: HDPE or cedar Adirondack chairs, reclaimed-look wood tables, iron lanterns, and warm-toned cushions. Boho: Rattan or resin wicker seating, layered outdoor rugs, patterned throw pillows, and a lot of container plants. Minimalist: Fewer pieces, clean lines, one anchor piece per zone, and consistent material across the full deck. Luxury: Teak or high-grade aluminum sectionals, fire table, outdoor kitchen or bar, and premium cushion fabric throughout. Repeat two or three materials and two or three colors across the deck and the space reads as intentional rather than assembled from different purchases over the years. Best Furniture for Different Deck Types The deck surface and structure affect which furniture choices make sense long-term. Deck Type Best Furniture Choices Key Consideration Wood deck Teak, aluminum, resin wicker with rubber foot caps Glides or pads on all legs; bare metal leaves permanent marks Composite deck Aluminum pieces with rubber or HDPE foot pads; no fire tables without a heat-rated mat underneath Composite surfaces scratch and soften under direct heat; protect accordingly Pool deck Sling chairs, aluminum chaise lounges, quick-dry cushions Everything gets wet constantly; choose material and fill that drains and dries in under 24 hours Rooftop deck Low-profile aluminum seating, heavy or anchored tables, no lightweight décor Wind load matters; avoid anything that can become a projectile at 20 mph Narrow deck Railing bar table, folding bistro chairs, slim benches placed along one edge Keep all furniture on one side; the walking path needs to stay clear the full length Match the furniture to the deck type before you match it to a style. A beautiful teak sectional on a rooftop deck with regular 20 mph gusts needs to be weighted and anchored or it will move, scratch the surface, and eventually damage something. Deck Furniture Mistakes to Avoid Buying before measuring: A sectional or dining set that looked right in a product photo can block the door or leave no clear walking path once it is actually on the deck. Blocking doors or stairs: The deck should be easy to walk through in the dark, carrying food or drinks, without squeezing past furniture. Oversizing for the space: One piece too large for a small deck makes the whole area feel unusable. Forgetting walkway clearance: Leave 30 to 36 inches for main paths and 3 feet behind every dining chair. Bare metal legs on wood or composite: Use pads, glides, or rubber caps on every contact point. No cushion storage plan: If cushions live outside in all weather without covers or storage, they last two seasons instead of six or eight. Ignoring sun and wind conditions: Lightweight furniture on a windy deck and dark-colored metal furniture in full afternoon sun are problems that become obvious immediately after purchase. Fire pit too close to furniture or railings: Keep all fire features at least 3 feet from fabric, wood surfaces, and railings. Indoor furniture moved outside: MDF, particleboard, untreated fabric, and standard indoor foam are not rated for outdoor humidity and will fail within one season. No lighting plan: A deck that is not usable after dark gets half the use of one that is. Solar lights, wall-mounted fixtures, and lanterns do not require electricians and add significant evening functionality. Frequently Asked Questions What is the best material for outdoor deck furniture? Teak and HDPE poly lumber are the two most durable choices. Teak handles almost every climate and lasts 20 to 30 years with basic maintenance. HDPE requires no maintenance at all and holds up equally well. Powder-coated aluminum is the best value option if you are not ready to spend on teak. What deck furniture holds up best in rain? HDPE poly lumber is the single best choice in consistently wet climates because it does not absorb moisture, crack, or develop mildew. Teak is close behind and recovers quickly from rain. Avoid acacia and standard powder-coated steel with unsealed joints in high-rainfall areas. How do I arrange furniture on a small deck? Push all major pieces to the perimeter, leave the center open for walking, and use furniture that folds or stacks when not in use. A folding bistro set or a compact corner sofa along one edge typically gives you seating without blocking the main path. What is the most durable outdoor furniture for sun exposure? Aluminum frames with solution-dyed acrylic cushions handle direct sun best. The fabric’s color stays stable for 1,000-plus hours of UV exposure before visible fading. Resin wicker degrades faster in full direct UV; keep it shaded or covered when not in use to extend its lifespan. What patio furniture is best for a pool deck? Sling-fabric or mesh chaise lounges on aluminum frames. They dry in under two hours, do not hold mildew in the fill, and resist pool chemical exposure better than thick-cushion alternatives. Save deep-seating cushions for the deck area away from the pool edge. How much should I spend on outdoor deck furniture? A practical mid-range setup for a standard 12 by 16-foot deck runs $800 to $2,500 depending on how many pieces you need. HDPE or aluminum furniture at the mid-range lasts 10 or more years. Budget sets under $400 often need full replacement within three to four seasons, which costs more over time. What is trending in deck furniture right now? Curved sectional seating, modular layouts that can be rearranged easily, earthy and natural tones, and outdoor furniture that mimics indoor living room comfort are the current directions. Sustainable materials including recycled aluminum and HDPE made from reclaimed plastic are also growing in the market. Should I cover deck furniture when not in use? Yes, for anything with cushions or with steel frame components. Good outdoor furniture covers extend cushion life by two to four seasons and prevent the rust at feet and joints that starts invisibly and becomes structural. Teak and HDPE can go uncovered year-round without meaningful degradation. Final Verdict Choosing the right layout and materials changes how you experience your outdoor living space. I want you to step onto your deck and feel relaxed, not stressed by upcoming maintenance or cramped walkways. By measuring your actual usable clearance and matching your materials to your specific climate, you avoid the costly replacements that catch most homeowners off guard. If you opt for space-saving railing tables or a durable teak sectional, your setup should work hard for your daily lifestyle. Take these practical layout strategies, check your local weather patterns, and build an outdoor oasis that remains both functional and beautiful for many seasons ahead.
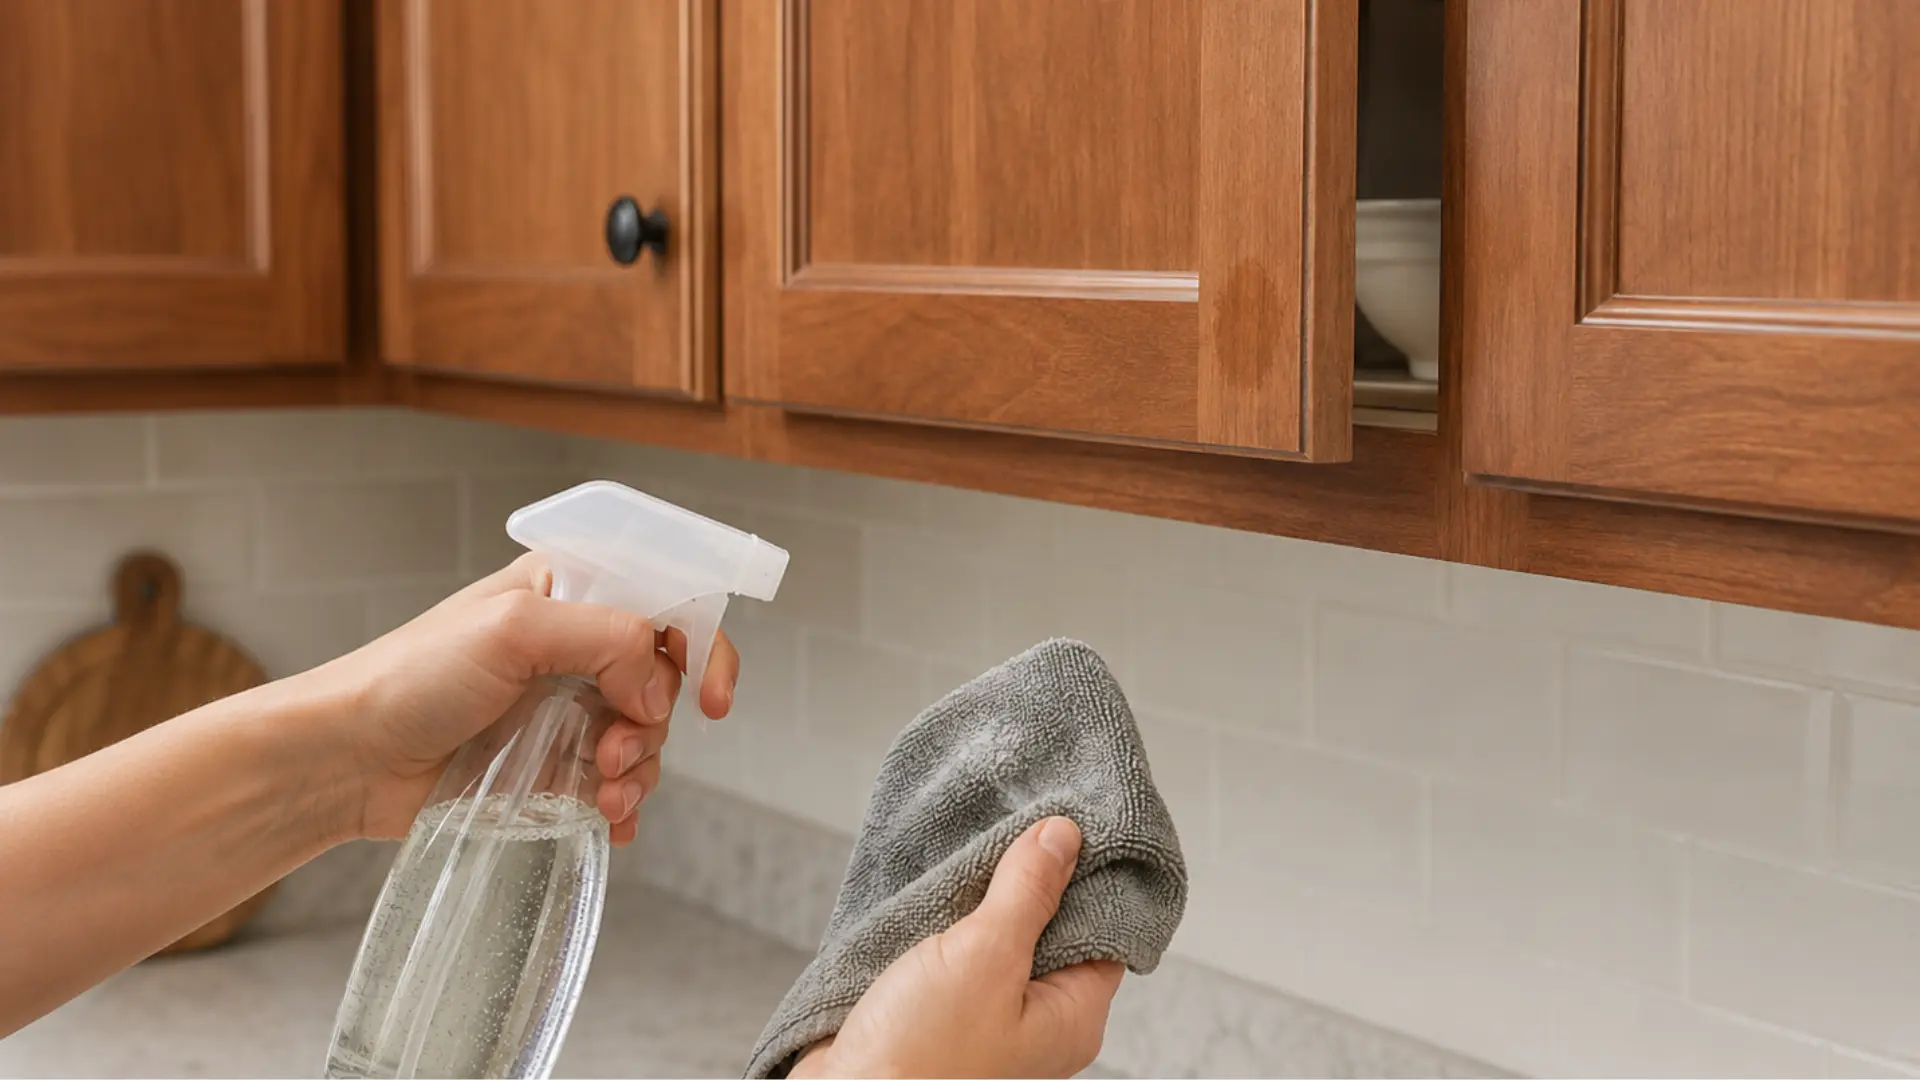
Most people reach for the wrong cleaner first. The greasy, sticky film on wood cabinets near the stove doesn’t need a harsh chemical to come off. it needs the right gentle method applied consistently. Use too much water and the finish clouds. Use a solvent or ammonia-based cleaner and you’ll strip the surface permanently. I’ve seen both outcomes in kitchens that were cleaned with good intentions using the wrong tools. Here’s what actually works when you’re cleaning wood cabinets: mild dish soap for routine grime, Dawn or Murphy Oil Soap for grease buildup, a toothbrush for corners, and a dry towel immediately after. Everything else in this guide is detail around that core method, including what to do with cherry wood, how to remove stubborn buildup without scratching, and which products will quietly ruin a cabinet finish over time. Primary Method Mild dish soap + warm water + microfiber cloth Grease Removal Dawn dish soap or Murphy Oil Soap spray Stubborn Spots Baking soda paste, small areas only What to Avoid Bleach, ammonia, undiluted vinegar, excess water, steel wool Finishing Step Dry immediately with a soft towel, every time Cleaning Frequency High-touch areas weekly; full deep clean twice a year That reference is your baseline. The sections below explain exactly how to execute each step and why getting the order right matters for the finish. What You Need Before You Start Set everything up in one place before touching the cabinets. Stopping to search for a dry towel while soapy water sits on wood is how water damage starts. These are the tools worth having on hand for a thorough clean: Swiffer-style duster or vacuum with soft brush attachment Two buckets, one for cleaning solution, one for clean rinse water Murphy Oil Soap or mild dish soap Blue Dawn dish soap (for stove-area grease only) Three microfiber cloths, one for cleaning, one for rinsing, one for drying Soft toothbrush (for corners, grooves, and around hardware) Non-scratch sponge like a Scrub Mommy, dampened and warmed Baking soda (for stubborn sticky spots) Plastic tote for emptying drawers and cabinet contents Parchment paper or paper towels for cabinet tops (after cleaning) The three-cloth setup is the part most people skip, and it’s the reason cabinets come out streaky or damp. One cloth washes. One rinses. One dries. Each task needs its own cloth, using the same one for all three steps just pushes grime and moisture around. How to Clean Wood Cabinets: Step by Step Step 1: Dust First, Always Start dry. Work from the top of each cabinet down so loose debris, pet hair, and kitchen dust fall toward the floor rather than landing on areas you’ve just cleaned. A Swiffer duster handles flat cabinet fronts well. For grooves, ledges, and recessed detail trim, a vacuum with a soft brush attachment does a cleaner job than any cloth. Skip this step and any dry debris turns to a muddy film once your wet cloth hits it, harder to clean, not easier. Step 2: Mix Your Cleaning Solution Fill one bucket with warm water and add one capful of Murphy Oil Soap. That’s it. Murphy Oil Soap is concentrated, more product doesn’t mean better cleaning. It means stickier residue that attracts dust after the cabinets dry. In the second bucket, put clean warm water with nothing added. That’s your rinse water, and it stays clean for the entire job. Step 3: Use Three Cloths, Not One Dip cloth one into the cleaning solution. Wring it out firmly, it should feel damp, not wet. Wipe one cabinet at a time, top to bottom. Then take cloth two, dip it in clean rinse water, wring it out, and wipe the same surface to remove any soap residue. Finish with cloth three, dry, buffing the surface immediately. This sequence prevents watermarks, residue buildup, and the moisture seeping into seams that causes wood to swell or finishes to peel. Step 4: Handle Tough Buildup Gently For buildup in corners, around hinges, or along groove detail, use a soft toothbrush dipped in the cleaning solution. Gentle pressure. The goal is to loosen the grime and let the cleaner do the work, not to scrub through it. A dampened Scrub Mommy, warmed under hot water first so it’s soft rather than stiff, works well for larger sticky sections. If your cloths are turning brown mid-job, replace them. Cleaning with a saturated cloth just redistributes old grease back onto the wood. Step 5: Use Dawn for Stove-Area Grease Cabinets directly above the oven or range hood collect a different kind of buildup, grease that has been aerosolized by heat and then settled and cooled into a sticky film. Murphy Oil Soap handles general kitchen grime, but this type of grease needs a degreaser. Blue Dawn dish soap is the one I reach for. Apply a small amount to a soft sponge, work in sections, let the soap sit for about 30 seconds to break down the fat, then wipe away. Rinse with clean water and dry immediately. Use Dawn only on grease-heavy areas — it’s effective, but repeated use on the rest of the cabinet surface can dry out the finish over time. Step 6: Clean Inside Cabinets One at a Time Empty one cabinet at a time into a plastic tote. Don’t unload the whole kitchen at once, the clutter will overwhelm the counter space and stall the job. Vacuum the interior first, then run the same three-cloth sequence: clean, rinse, dry. While the cabinet is empty, it’s worth checking what goes back in. Expired items, rarely used equipment, and anything that belongs in a different cabinet slow down the next cleaning session too. Step 7: Vacuum Drawers Before Wiping Drawers collect crumbs and fine debris that a cloth will push around rather than remove. Always vacuum drawers first with a soft brush attachment before introducing any moisture. Empty each drawer into the plastic tote, vacuum the inside thoroughly, especially corners and back edges, then clean, rinse, and dry with the three-cloth method. Only return items you actively use. Step 8: Clean Cabinet Tops and Add a Liner Cabinet tops near the stove are some of the most neglected surfaces in a kitchen and often the most contaminated. The buildup is a combination of kitchen grease and settled dust, it has a tacky, dark texture that a cloth alone won’t cut. Dust first, then use your cleaning solution with a softened Scrub Mommy for any sections with heavy accumulation. Clean, rinse, dry. Once the surface is dry, lay parchment paper or paper towels across the top. Next time, you pull off the liner instead of scrubbing old grease again. Best Products for Cleaning Wood Cabinets The right product depends on what you’re dealing with. Routine grime needs a different approach than thick grease buildup, and stained wood that’s gone dull after cleaning needs something different again. Here’s how the product options stack up across those scenarios. Product Best For Why It Works Use Carefully Mild dish soap Everyday cleaning and light grease Gentle, affordable, safe for most finished wood Keep cloth damp, not wet Dawn dish soap Greasy doors near the stove Cuts kitchen grease better than regular soap Rinse thoroughly and dry right away Murphy Oil Soap spray Heavier buildup on finished wood Penetrates grime without stripping finish Spray onto cloth, never directly on wood Diluted vinegar and water Light residue, natural cleaning Dissolves mild grease and old residue Never full strength — high acidity damages finish Baking soda paste Small sticky spots Lifts stubborn grime when used gently Small areas only — avoid hard scrubbing Microfiber cloths Wiping cabinet doors and frames Lifts dust, fingerprints, and grease without scratching Wash often — dirty cloths spread grime Soft toothbrush Corners, grooves, and hardware recesses Gets where cloths can’t reach Light pressure only Cabinet-safe polish Dull stained wood after cleaning Adds light protective sheen Use sparingly — overuse collects dust Wood conditioner Dry-looking stained wood Restores depth and richness to flat-looking grain Test first, follow label directions Paste wax Protective sheen on suitable stained wood Adds thin protective layer when used lightly Avoid overuse — wax collects dust over time Glass cleaner on a cloth Glass cabinet panels only Removes smudges without wetting the wood frame Keep glass cleaner off surrounding wood finish Start with mild dish soap and water for weekly maintenance. Move to Dawn or Murphy Oil Soap only when grease needs more than routine cleaning can handle. Polish, conditioner, or paste wax belong at the end of a deep clean, not as a substitute for it. How to Remove Grease from Wood Cabinets Grease is the main reason cabinets feel sticky even after a wipe-down. The stove, oven, range hood, and high-touch handles are the primary collection points. How you remove it depends on how long it’s been building up. Light Grease: Mild Dish Soap and Warm Water For recent, light grease, a few drops of mild dish soap in warm water is enough. Dip a microfiber cloth, wring it out well, and wipe the greasy area. Pay attention to handles, lower door edges, and the corners where people grab without thinking. After cleaning, wipe with a second clean-water cloth to remove soap residue, then dry immediately with a third cloth. Stove-Area Grease: Dawn or Murphy Oil Soap Cabinets near the stove accumulate a different kind of grease — aerosolized cooking fat that settles and hardens into a sticky film. Dawn dish soap or Murphy Oil Soap spray handles this better than regular dish soap. Apply to the cloth, not directly to the wood. Work in small sections. If grease remains after one pass, hold the damp cloth on the spot for 30 seconds before wiping again — let the product break down the fat rather than scrubbing through it. Stubborn Sticky Buildup: Baking Soda Paste For spots that survive both of the above methods, mix baking soda with just enough water to form a soft paste. Apply it to the problem area with a cloth, rub gently, and let it work for about a minute. The mild abrasion lifts embedded grime without harsh chemicals. The critical word here is gently — baking soda is abrasive enough to dull or scratch a finish if you apply pressure. After the spot clears, wipe away the paste with a clean damp cloth and dry the surface fully. How to Clean Different Cabinet Finishes The finish on your cabinets matters more than the wood species underneath. The same cleaning method that works on stained oak can damage painted maple or thermofoil. Here’s how to match the approach to the surface. 1. Stained Wood Cabinets Stained wood shows the grain, which makes it look better than painted wood but also makes moisture damage more visible. Clean with mild dish soap, warm water, and a well-wrung microfiber cloth. Always wipe with the grain direction — across the grain leaves micro-scratches that catch light badly over time. Dry immediately after rinsing. If the surface looks flat or dull after cleaning, a light application of cabinet-safe conditioner or paste wax restores depth — and if you’re thinking about changing the color entirely, it helps to know what’s involved in painting over stained wood before committing. 2. Painted Wood Cabinets Paint finishes are more fragile than most people expect. Bleach discolors them. Ammonia-based cleaners lift the sheen. Abrasive pads leave dull scratches that don’t polish out. Mild dish soap and water with a soft microfiber cloth is the only method I’d use regularly on painted cabinets. For stubborn spots, wet the area and let it soak for 30 to 60 seconds before wiping, mechanical scrubbing is more likely to damage the surface than more dwell time with a gentle cleaner. 3. Cabinets with Glass Panels Glass panels need separate treatment from the surrounding wood frame. Many glass cleaners contain ammonia, which causes wood finishes to go cloudy or peel near the seams. Spray the glass cleaner onto your cloth first, then wipe the glass only. Clean the wood frame separately with the soap-and-water method. Dry the entire assembly, glass and frame, before moving to the next cabinet. How to Clean Cherry Wood Cabinets Cherry wood darkens with age and light exposure. That patina is one of the things that makes it worth the price. It’s also exactly what tells you when you’ve used the wrong cleaner, bleached patches, cloudy spots, or uneven darkening are permanent on cherry. The method is the same as stained wood, but executed with more care at every step. Use mild dish soap and warm water with a well-wrung microfiber cloth. Wipe with the grain. Remove every trace of soap residue with a second clean-water cloth before drying. For greasy areas, a small amount of Dawn or Murphy Oil Soap on the cloth, never sprayed or poured onto the surface. Dry immediately and completely, especially around edges, hinges, and panel seams where moisture accumulates. Avoid bleach, ammonia, rough scrubbers, and straight vinegar entirely on cherry. What Not to Use on Wood Cabinets The products below come up regularly in cleaning forums and general household guides. None of them belong on finished wood cabinets. Some cause damage on first use. Others degrade the finish gradually until you notice one day that a section looks different from the rest. Avoid Why It Damages Wood Cabinets Bleach Discolors wood and degrades the protective finish. Damage is permanent. Ammonia-based cleaners Strips finish and leaves wood looking dull and flat. Common in all-purpose sprays. Abrasive scrub pads Scratches the surface and removes protective coatings, even on the first use. Steel wool Leaves fine scratches and risks rust staining on light wood finishes. Undiluted vinegar High acidity gradually wears down finish. Diluted 50/50 is the safe limit. Excess water Seeps into seams, causes swelling, warping, and finish separation over time. Wax buildup products used too often Residue accumulates and becomes tacky, attracting dust and grime. Strong solvents Dissolve or soften cabinet finishes. Often found in spray-and-wipe general cleaners. Check the ingredient list on any “all-purpose” or “kitchen” cleaner before using it near cabinet surfaces. Ammonia appears under several names including ammonium hydroxide. The absence of “wood-safe” or “safe for finished wood” on the label is a reason to test on a hidden area first, or to skip it entirely. How to Protect Wood Cabinets After Cleaning Cleaning removes what’s already built up. Protecting the cabinet means changing the conditions that let the buildup happen in the first place. Three habits make a noticeable difference over six months. Install knobs or pulls on every cabinet door and drawer if they’re not already there. Most grease and fingerprint buildup happens at the edges where hands grab. Hardware redirects that contact away from the wood finish entirely. It’s the single highest-return change you can make to a cabinet that keeps getting grimy. Keep wet dish towels off cabinet fronts. A damp towel hung over a lower cabinet door for an hour is enough to cause moisture damage along the bottom edge — peeling, swelling, or a watermark that doesn’t buff out. Use a towel bar or drying rack positioned away from cabinet surfaces. Wipe spills immediately. Grease, sauce, coffee, and food splatter are easy to remove when fresh and require serious effort once they dry and bond to the finish. A quick pass with a damp microfiber cloth right after cooking saves a much harder cleaning session later. DIY vs. Commercial Cleaners: Which Is Better for Wood Cabinets Both work, depending on what you’re trying to accomplish. The real difference isn’t cleaning power — it’s convenience and control. Factor DIY (dish soap + water) Commercial (Murphy Oil Soap, dedicated cabinet cleaners) Cost Pennies per use Higher upfront, but ready to use Convenience Requires mixing and two buckets Spray and wipe — faster for spot cleaning Cleaning strength Handles light dirt and routine maintenance well Better for grease and heavier buildup Safety for finishes Excellent when properly diluted and used with damp (not wet) cloth Generally safe as labelled, but still test on hidden area first Ingredient control You know exactly what’s in it May contain fragrance, solvents, or other agents Long-term care Effective for keeping up, not for restoring Some products include conditioners for added protection For weekly maintenance, DIY soap and water is the better choice — lower cost, no residue risk, full control. For a quarterly deep clean or stove-area grease that resists lighter cleaners, Murphy Oil Soap spray or a purpose-made cabinet cleaner is worth the convenience. Common Mistakes That Damage Wood Cabinets Most cabinet finish damage doesn’t come from one catastrophic cleaning session. It accumulates from small repeated errors — usually the same four or five mistakes. Too much water on cloth damages cabinets by soaking seams and causing swelling. Always use a barely damp cloth and dry surfaces immediately after wiping. Scrubbing instead of soaking can scratch finishes. Let cleaner sit briefly to loosen grime, then wipe gently instead of forceful scrubbing. Skipping spot testing is risky because finishes react differently. Always test cleaners on a hidden area before full use. Spraying directly on wood leads to drips and moisture in gaps. Spray onto the cloth first for better control. Ignoring drying leaves watermarks and damage. Always finish with a dry cloth to protect the surface. Frequently Asked Questions About Cleaning Wood Cabinets These are the questions I hear most often after people have already read the basic method and run into something the general guide doesn’t cover. What is the best cleaner for greasy wood cabinets? For light grease, mild dish soap in warm water handles it well. For stove-area buildup, Dawn dish soap or Murphy Oil Soap spray cuts grease more effectively. Use a damp cloth — never a wet one — and dry the surface immediately after rinsing. Can you use Dawn dish soap on wood cabinets? Yes, on finished wood. Dilute it in warm water, apply with a damp microfiber cloth, rinse with a second clean-water cloth, and dry right away. Use it only on grease-heavy areas, not as the routine cleaner across all surfaces — repeated use can dry out the finish. How do I clean sticky wood cabinets? Start with warm water and mild dish soap. If residue remains, try Murphy Oil Soap spray on a cloth. For persistent stickiness, a baking soda paste applied gently to the spot, rinsed and dried fully, handles what soap alone won’t. How often should wood cabinets be cleaned? High-touch areas and handles need a quick wipe weekly. Stove-adjacent cabinets need attention after heavy cooking sessions. A full inside-and-outside deep clean twice a year is enough if you maintain the weekly wipe-down routine. How do I make dull wood cabinets shine again? Clean the surface first to remove grease and residue, polish over grime doesn’t restore shine, it just seals it in. Once clean and fully dry, apply a thin coat of cabinet-safe conditioner or paste wax and buff with a soft microfiber cloth. Is vinegar safe on wood cabinets? Diluted vinegar (50/50 with water) is safe for most finished wood cabinets in small quantities. Undiluted vinegar is acidic enough to degrade finishes with repeated use. Don’t let it sit on the surface, wipe and dry quickly. Test on a hidden area before using it broadly. Can Murphy Oil Soap damage wood cabinets? Not when used correctly. One capful per gallon of water is enough, more product creates a residue that attracts grime after drying. Spray onto the cloth, not the cabinet, and dry the surface fully after rinsing. How do I clean wood cabinets without removing the finish? Use mild dish soap or Murphy Oil Soap with a damp (not wet) microfiber cloth. Avoid bleach, ammonia, abrasive pads, steel wool, and straight vinegar. Dry the surface immediately after every cleaning step. Final Verdict The three-cloth method, clean, rinse, dry, is what separates a cleaning session that protects the finish from one that gradually degrades it. Mild dish soap handles most of what kitchens produce. Dawn or Murphy Oil Soap handles stove-area grease when regular soap isn’t enough. Baking soda paste handles what neither of those will shift. Everything beyond that, bleach, ammonia, abrasive pads, excess water, direct spraying, removes more than the grime. If your wood cabinets are already looking flat or dull, clean them first, let them dry completely, then apply a light coat of cabinet-safe conditioner. That’s the order. Clean before you condition. Dry before you polish. And test any new product on a hidden surface before you commit to the rest of the cabinet. Get those three sequences right and wood cabinets hold up for a long time. Sources:Murphy Oil Soap, “How to Clean Wood Cabinets.” murphyoilsoap.comLowe’s Editorial Team, “How to Clean Wood Cabinets.” February 2025. lowes.com/n/how-to/how-to-clean-wood-cabinets
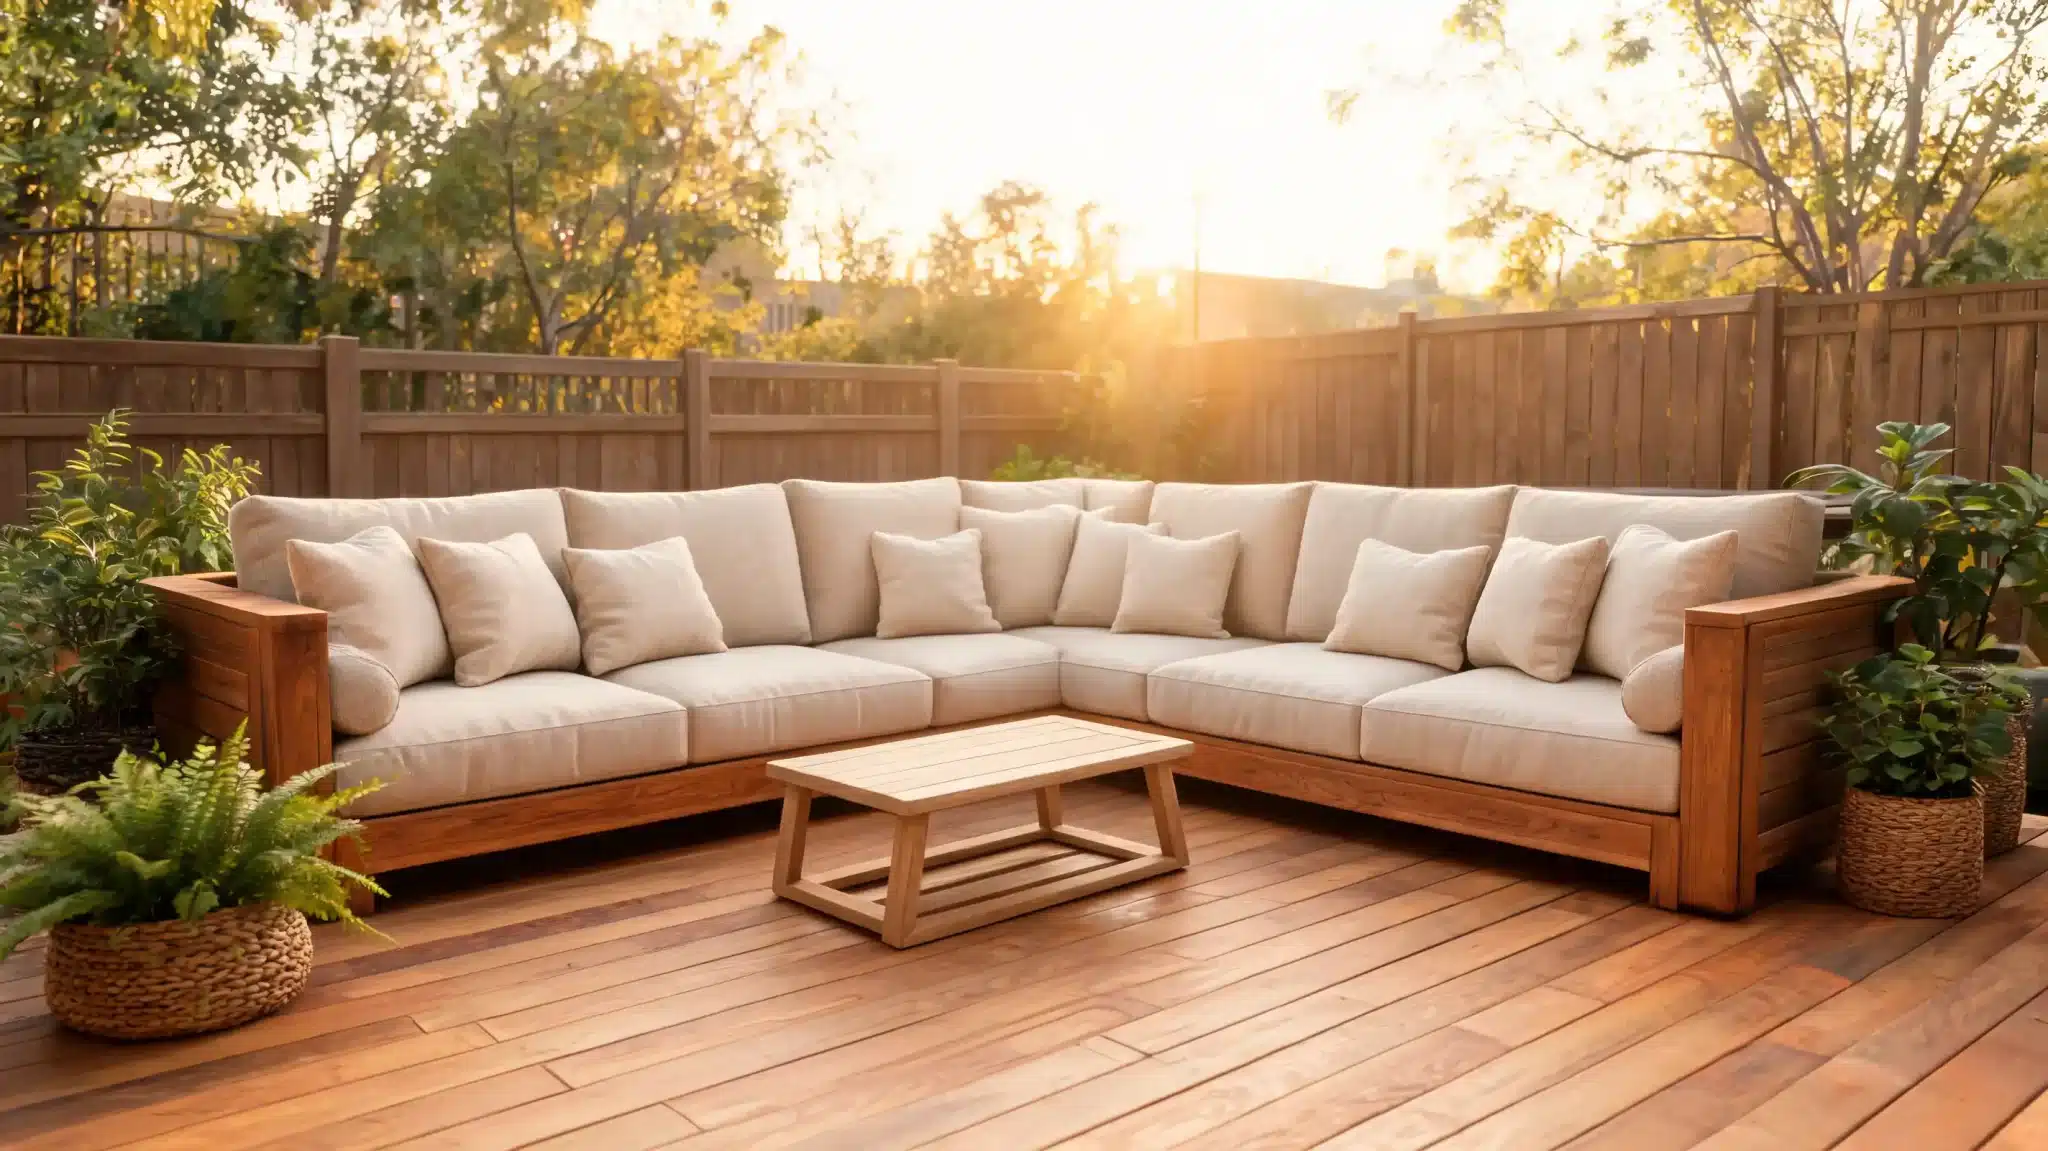
A diy outdoor sectional built from standard 2×4 lumber is one of the more durable patio projects you can tackle on a weekend budget, but only if the frame is squared properly, the wood is sealed before the first rain, and the joints are fastened with exterior-rated hardware. Skip any one of those, and you’ll be replacing boards by year two. Most failed builds come down to the same three mistakes: indoor screws that rust out, no center support on a long span, and a finish coat that didn’t cover the cut ends. This guide covers material selection, frame construction, weatherproofing, design layouts, and the failure points most tutorials skip. If you’re planning an L-shaped sectional for a corner patio or a modular setup you can store seasonally, the steps below will get you a frame that holds up. Cost Note: Figures in this article are estimates based on national averages. Actual costs vary by region, lumber pricing, cushion sourcing, and hardware. Always check current material costs at your local lumber yard before finalizing your budget. Difficulty 3/5 — Basic woodworking skills are enough, but square cuts and consistent measurements matter on every section. Time 1 to 2 weekends for framing, sanding, and assembly, plus additional drying time for stain or sealer. Cost $400 to $800 in materials, depending on wood species, cushion choice, finish type, and hardware. Tools Needed Circular saw or miter saw, drill/driver, clamps, level, tape measure, speed square, orbital sander. Skill Required Beginner to intermediate — comfortable measuring, cutting, drilling, and fastening boards square. The project card above is a realistic starting point. Labor and finish coats will push the upper end of that range if you’re working with cedar or adding decorative rope details. What Fails After Two Winters on a DIY Outdoor Sectional Before the build plan, it’s worth knowing exactly what breaks down on outdoor sectionals that weren’t built for real weather. These are the failure modes I see most often on lumber-framed builds. Joint failures from indoor screws: Standard interior screws corrode within one season of outdoor exposure. The rust expands, splits the surrounding wood, and loosens the joint. Use only exterior-rated screws — 2.5-inch ACQ-compatible deck screws for structural joints, stainless steel where visible. Seat sag on long spans: Any frame section longer than 48 inches without a center support will deflect under load. The seat boards bow downward, the joints work loose, and the frame eventually racks. Add a center leg and mid-span brace before you add a single seat board. Wood rot at unfinished cut ends: Factory-milled lumber has sealant on the surface. The moment you cut it, the end grain is exposed and unprotected. Cut ends absorb moisture at roughly ten times the rate of the face grain. Seal every cut end with exterior stain or end-grain sealer before assembling the frame. Cushion mold from trapped moisture: Seat boards installed without gaps trap water under the cushions. Leave consistent 3/16-inch spacing between slats, use a standard drill bit as a spacer. That gap drains rain and lets the frame dry between uses. White stain yellowing: White or light exterior stain on exposed lumber yellows in UV within one full season. If you want a light finish, choose a higher-grade exterior product rated for UV resistance, or go with a medium-tone stain that hides weathering better over time. Choosing the Right Wood for an Outdoor Sectional Frame The wood decision determines how much maintenance you’ll be doing every year. The table below covers the most practical options for a DIY sectional frame. Wood Type Best Use Cost Range Durability Notes Pressure-treated 2×4 Frame, legs, braces $0.80 to $1.20/lf Very high Needs 90 days drying time before staining. Not ideal for exposed seat surfaces. Western red cedar Seat slats, armrests, visible surfaces $2.50 to $4.00/lf High Naturally rot-resistant. Lighter weight. Takes stain well. Best visible-surface choice at reasonable cost. Douglas fir 2×4 Frame and bracing $0.90 to $1.40/lf Moderate Strong and available. Needs full sealing. Not as naturally rot-resistant as cedar. Teak Entire frame and surface $12.00 to $20.00/lf Excellent Best long-term outdoor performer. Overkill for a first build. Better suited for a premium second project. Each of these species behaves differently once it’s outside for a full year, the wood types for furniture guide goes deeper on grain behavior, finish absorption, and what each species looks like after weathering. For most first-time builds, a pressure-treated frame with cedar seat slats is the most practical combination. You get structural durability from the PT lumber and a clean, stainable surface from the cedar. Why Build a DIY Outdoor Sectional Instead of Buying One Store-bought sectionals are a valid option, but they solve a standard problem. A diy outdoor sectional solves your specific problem — an oddly shaped corner, a patio that’s three inches too narrow for a standard sofa, cushions you already own. That’s the practical argument for building. Factor DIY Outdoor Sectional Store-Bought Outdoor Sectional Cost $400 to $800 for a full L-section with cushions $1,000 to $3,000+ for comparable size and quality Fit Built to your exact patio dimensions Limited to manufacturer sizes Style Full control over finish, cushion, and layout Limited to available product designs Time 1 to 2 weekends of build time Faster to unbox and assemble Repairs Replace a single board or screw, you know the frame Proprietary hardware often unavailable after a few years Best for Unusual patio dimensions, modular needs, budget builds Standard patios, quick setup, low DIY interest If your patio is a standard rectangle and time is the constraint, a store-bought option is the honest answer. If you have a corner space, a tight budget, or specific cushions already purchased, building makes more sense. Choosing Your Layout and Measuring Your Space Get the layout decision done before you buy a board. Changing the shape mid-build wastes lumber and time. Measure the space first Check the available floor area, walking clearance (36 inches minimum behind the sofa), door swing room, and the distance to any grill, fire pit, or railing. A sectional that seats six people comfortably needs roughly 100 to 120 square feet of floor space, including clearance paths. Pick the shape based on your corner or wall An L-shape fits corner spaces and creates a natural seating zone with minimal footprint. A U-shape works on larger patios where you want a full conversation area. A modular layout, individual identical units, is the best choice if you need to move or store pieces seasonally. A chaise-side sectional adds one extended section for reclining without committing to full lounge furniture. Choose cushions before you frame This is the single most important pre-build step. Standard outdoor seat cushions come in 20×20, 21×21, and 24×24 inch sizes. The cushion width sets the seat depth, and the cushion thickness (typically 4 to 5 inches) determines how high your seat surface needs to sit. Buy or select the cushions first, then build the frame around their dimensions. Rebuilding a frame because the cushions don’t fit costs more time than the cushions themselves. Tools and Materials You’ll Need Gather everything before the first cut. Stopping mid-build to buy screws or clamps slows the work and risks dried glue joints. Item Quantity Purpose Pocket hole jig 1 Cleaner frame connections, especially on arm joints Circular saw or miter saw 1 Cuts lumber to length and angle Drill/driver 1 Drives exterior screws Clamps 4 to 6 Holds boards flush and square while fastening Tape measure 1 Frame and spacing measurements Speed square 1 Checks square corners before tightening screws Orbital sander 1 Smooths exposed edges before finishing 120-grit sandpaper As needed Initial surface prep for stain 2×4 lumber Multiple boards Main frame, cross braces, arm supports, backrest 2×6 lumber Optional Wider armrests or additional backrest support 2.5-inch exterior screws 2 to 3 lbs Structural fastening throughout Exterior wood glue 1 bottle Reinforces joints before screwing Decking boards Per seat section Seat surface Exterior stain or sealer 1 quart minimum UV and moisture protection for the frame Outdoor cushions As needed Seat and backrest padding Rubber feet or glides Per leg Keeps legs off wet ground Every fastener, glue, and finish product you use needs to be rated for exterior use. Indoor equivalents will fail, and the failures usually start at the joints where water collects. Step-by-Step DIY Outdoor Sectional Build These steps follow the build sequence from the frame up. Complete each one before moving to the next, the frame needs to be square before the arms go on, and the arms need to be level before the seat boards are cut to length. Step 1: Build the main sofa frame Cut the long outer frame boards and shorter cross pieces for the main sofa base. Join them into a rectangular box frame using a pocket-hole jig, exterior wood glue, and 2.5-inch exterior screws. Check the frame for square before the glue sets, measure diagonally corner to corner. Both measurements should be identical. A frame that goes in crooked produces problems at every step that follows. Once the outer box is secured, add interior cross braces spaced evenly across the frame. These carry the seat board load and resist any lateral flex in the long section. Step 2: Add center support for long sections Any section longer than 48 inches needs a center leg and additional mid-span brace. Install both before adding any seat boards. Place the center leg directly under the mid-span brace, and fasten it with exterior screws from above and through the brace from the side. This is a ten-minute step that prevents the seat sag that collapses most long-span builds within a year of regular use. Step 3: Build and attach the arm frames Build each arm frame from vertical uprights, a bottom board, and a center blocking piece that gives the main frame a solid landing surface. Clamp the main frame between both arm assemblies and check that the top edges are flush and the corners are level before driving any screws. The arms set the finished height of the sectional, getting this level at this stage avoids shimming problems with cushions later. Step 4: Install the seat boards Cut the seat boards to length and start the first board flush with the front frame edge. Use a consistent spacer — a 3/16-inch drill bit works well — between each board to keep the drainage gaps even across the full seat depth. Leave the rear portion of the frame open for the backrest pieces. Fasten each board with two screws per frame contact point, pre-drilling to prevent splitting. Step 5: Build the angled backrest Install the long back rail first, then cut one template for the angled backrest pieces. A 12.9-degree miter cut on both ends of each piece, at approximately 1 foot 8 inches long, produces the right lean angle for comfortable seating. Cut one piece, test the fit, and adjust the template before cutting the full set. Fasten each backrest board with screws at the top and bottom rail. Step 6: Build the smaller L-section The second section uses the same frame method as the main sofa. One side gets a standard arm, while the connecting side is modified to fit flush against the main section for the L-layout. Install seat boards with the same spacing and use the same backrest template for consistent angles across both pieces. Step 7: Sand and clean the wood If the lumber has been stored outdoors or is rough from the mill, power-wash the frame first and let it dry fully before sanding. Work through the arm tops, corners, seat board edges, and any surface people will regularly touch. Sand at 120-grit with an orbital sander, then wipe clean before applying any finish. A smooth surface lets the stain penetrate evenly rather than pooling in rough spots. Step 8: Apply exterior finish Apply an outdoor-rated stain, paint, or penetrating sealer to both sections. Pay extra attention to cut ends — brush stain directly onto the end grain and let it soak in before the face coat goes on. Light-colored exterior stain tends to yellow in UV within one season. A medium or dark-toned exterior stain hides weathering better and holds its color longer without annual touch-ups. Step 9: Add decorative details and cushions Once the finish has cured fully, add any decorative rope wrapping or trim details, then place the cushions. The angled backrest creates a small gap at the rear, the seat cushions cover it and the visual reads as intentional. Check every joint and fastener for tightness before putting the sectional into regular use. DIY Outdoor Sectional Design Layouts The frame method is the same regardless of layout. What changes is how many sections you build and how they connect. Start with the layout that matches how the space actually gets used, not how it looks on a product page. 1. Small Patio Sectional Two short sofa sections and one corner connector give you adequate seating on a smaller patio without crowding the walking path. Keep the arm profiles narrow, wide arms eat into the seating width fast on a compact build. A slim side table at one end handles drinks without a separate furniture piece. 2. L-shaped Outdoor Sectional The L-shape is the most practical layout for corner patios and deck edges. One long side handles the main seating load, while the shorter return creates a natural boundary for the space. This design pairs well with a central coffee table and works for both conversation and fire pit setups. If you’re considering how the sectional integrates with your broader deck skirting ideas, the L-shape gives you clean lines along two edges simultaneously. 3. Modular Outdoor Sectional A modular build uses individual identical seat units that can be arranged in any configuration and stored separately during winter. Each unit is standalone — no connecting hardware required. This is the right choice for renters, for patios that double as entertaining space, and for anyone who wants to add sections later without rebuilding from scratch. 4. Outdoor Sectional with Chaise One section is extended to full chaise length, typically 60 to 70 inches, while the rest of the sectional uses standard seat depth. The longer section works alongside a pool, garden edge, or shaded wall. Use thicker cushions (5 to 6 inches) on the chaise section to compensate for the flatter angle. 5. Sectional with Built-in Storage The seat frame height on a standard 2×4 sectional leaves 10 to 12 inches of usable space beneath the seat boards. Add hinged seat panels or open-front cubbies to store cushions, throws, and covers. Keep the storage area ventilated — a gap at the front or back prevents moisture from building up around stored fabric. Weatherproofing for Long-Term Durability A sectional that isn’t finished properly will need board replacements within three to four years. These steps extend the frame lifespan to a decade or more. Sand before you seal: Rough wood doesn’t hold finish. Sand all exposed surfaces to 120-grit, clean off the dust, and then apply stain or sealer within 24 hours of sanding so the wood doesn’t reabsorb ambient moisture. Use a penetrating exterior oil or stain: Film-forming finishes like standard exterior paint sit on top of the wood and peel when the wood moves seasonally. A penetrating oil or deck stain moves with the wood and doesn’t peel. Two thin coats outperform one heavy coat every time. Raise the legs off wet surfaces: Rubber glides or adjustable foot levelers keep the leg bottoms out of standing water. Even pressure-treated lumber will rot at the base if it sits in a puddle for weeks at a time. Four-dollar rubber feet per leg are the cheapest long-term maintenance decision on this build. Re-seal every two years: Check the finish condition each spring. If water no longer beads on the surface, the finish has worn down and needs a fresh coat. This takes less than an hour per section and prevents the full refinishing job that comes when bare wood absorbs a full winter’s worth of moisture. Store or cover cushions: Quick-dry foam cushions with removable covers are the most practical choice for outdoor use. Store them under the sectional in the built-in cubbies, or bring them inside during extended rain. Even water-resistant cushions left out for weeks will eventually absorb enough moisture to mold. Common Mistakes to Avoid on a DIY Outdoor Sectional These are the problems that show up most often on first-time builds. None of them are difficult to avoid — they just need to be caught before the mistake becomes load-bearing. Buying cushions after the frame is built. The frame dimensions follow the cushion. Build the frame first and you’ll be cutting new boards to match a cushion that doesn’t fit. Choose cushions before the first measurement goes on paper. Skipping the center support on long sections. A 72-inch sofa section without a center leg sags under two adults. Add the support before the seat boards go on, retrofitting it afterward means removing every board you just installed. Not checking for square at each stage. A frame that’s two degrees out of square produces a backrest that doesn’t sit flush and seat boards that need to be scribed to fit. Check with a speed square at the outer corners before tightening any joint. Using standard interior screws. They’ll hold for one season and start pulling out by the second. Exterior-rated deck screws are the same price at most hardware stores, there’s no reason to use anything else on an outdoor build. Closing up the seat gaps. Gaps between seat slats are not a design choice, they’re a drainage function. Without them, water pools under the cushion and rot begins from the center of the frame outward. Rushing the finish coat. Stain applied to damp or dusty wood doesn’t adhere properly. It peels within a season and leaves the end grain exposed. Sand, clean, let the wood dry fully, and then apply finish in dry weather above 50 degrees Fahrenheit. Frequently Asked Questions About DIY Outdoor Sectionals These are the questions that come up most often once someone is mid-build or planning their second section. What is the best wood for a DIY outdoor sectional? Pressure-treated lumber for the frame and cedar for the seat slats is the most practical combination. Cedar is naturally rot-resistant and takes stain well. Pressure-treated framing gives structural durability at a lower cost. Avoid untreated pine outdoors — it rots within two seasons without heavy maintenance. How deep should the seat be on a DIY outdoor sectional? Match the seat depth to your cushion. Standard outdoor seat cushions are 20 to 24 inches deep. Add 1 to 2 inches to the frame depth for overhang at the front edge. Most comfortable outdoor seating ends up between 22 and 26 inches of total frame depth. What height should a DIY outdoor sectional be? Seat height for outdoor sectionals typically runs 15 to 18 inches from the floor to the top of the seat board, before cushions. Adding a 4-inch cushion brings the seated height to 19 to 22 inches — low enough for a relaxed lounge feel, high enough to stand up from without difficulty. How do I keep the sectional pieces from sliding apart? Furniture connector bolts or sectional clips fasten the sections together at the frame. Two connectors per joint — one at each end of the connecting side — are enough for daily use. For modular builds that separate seasonally, removable pin connectors work better than fixed hardware. Can I build a DIY outdoor sectional without a pocket hole jig? Yes. A pocket hole jig produces cleaner joints and hides the fasteners, but the same frame can be built using through-bolts or face screws at each joint. The result is structurally equivalent. Pre-drill pilot holes to prevent splitting, and countersink the screw heads so they sit flush. How much does it cost to build a DIY outdoor sectional? An L-shaped sectional in pressure-treated lumber with cedar seat slats and standard outdoor cushions typically runs $400 to $800 in materials. Cedar throughout, custom cushions, and a higher-grade exterior finish can push the total toward $1,000 to $1,200. Either figure is still well below comparable store-bought quality. Is a DIY outdoor sectional renter-friendly? A modular build is the best option for renters. Individual seat units can move without anchoring to the patio, store indoors during winter, and disassemble for a move. Avoid permanent anchors or fastening the sectional to the deck surface. Final Verdict Building outdoor seating gets much easier when you start with a clear plan instead of guessing through each step. I’d focus first on your space, cushion size, layout, and materials, because those choices shape the whole build. You also want strong supports, exterior screws, drainage gaps, and a proper finish so the sectional holds up outside. Adiy outdoor sectional gives you control over comfort, size, style, and cost, which is why it works so well for tricky patio spaces. You do not need to make it perfect on the first try. Start simple, measure carefully, and improve the design as needed. Try these tips on your build, and share what layout you’re planning.
Ever watch a gorgeous showroom table fall apart in less than two years? It’s incredibly frustrating to spend hard-earned money on pieces that look solid but secretly rely on cheap materials. When you are hunting for the most durable furniture material, you aren’t just buying a look, you are investing in structural survival. Navigating the marketing jargon to find what actually lasts can feel like guesswork. I have laid out the ultimate breakdown of structural materials, high-traffic fabrics, and outdoor options. By the end of this guide, you will know exactly how to spot generational quality, decode rub counts, and avoid the beautiful fakes that compromise your home. What is the Most Durable Furniture Material? A piece can look solid in the showroom and fall apart in 18 months. I’ve seen it happen with oak-finish particleboard dining tables, bonded leather sofas, and powder-coated steel outdoor chairs that weren’t actually powder-coated, just painted. The most durable furniture material depends entirely on what the piece is, where it lives, and how hard it gets used. There is no single answer that works for every room. What there is: a clear hierarchy of materials that hold up versus ones that don’t, and a set of construction details that separate long-lasting furniture from furniture that just looks like it should last. Most Durable Furniture Materials: Quick Comparison Different materials serve different functions. A dining table, a sofa frame, an outdoor bench, and a dresser all face different types of stress, weight, friction, moisture, UV exposure, and mechanical impact. This table covers the materials that consistently perform across those categories. Material Janka / Hardness Best Use Cost Range Durability Hickory (hardwood) 1,820 lbf Frames, tables, chairs $6–$10/board ft Very High Hard maple (hardwood) 1,450 lbf Dining tables, dressers $5–$9/board ft Very High White oak (hardwood) 1,360 lbf Tables, bed frames, cabinets $6–$12/board ft Very High Teak (hardwood) 1,155 lbf Outdoor furniture $20–$35/board ft Very High (outdoor) Steel (powder-coated) N/A — tensile Frames, patio, shelving Mid–high (finished piece) Very High Aluminum N/A — tensile Outdoor chairs, frames Mid High (rust-resistant) Granite / Quartz N/A — Mohs 6–7 Tabletops High Very High Performance fabric (Crypton) N/A — rub count Sofas, dining chairs Mid–high High Full-grain leather N/A — rub count Sofas, chairs High Very High (maintained) HDPE N/A — plastic Outdoor benches, chairs Mid High High-pressure laminate N/A — surface Desks, kids’ furniture Low–mid Medium Low-grade particleboard Very low Budget decorative only Low Low Hardwood Janka ratings from the Wood Database. Janka hardness measures the force required to embed a steel ball halfway into the wood, higher numbers mean harder wood and better resistance to denting and wear. Most Durable Materials for Frames, Tables, and Storage 1. Solid Hardwood Solid hardwood is the benchmark for frame durability. What makes it different from engineered alternatives isn’t appearance, it’s how the material responds to stress over time. Kiln-dried hardwood resists warping and cracking because the moisture has been removed before the wood was milled. A dining table frame made from kiln-dried white oak (1,360 lbf Janka) will absorb daily use, minor impacts, and seasonal humidity changes without losing structural integrity. The same table built from undried or low-grade softwood will start showing movement within a few years. Species matter. Oak, maple, hickory, walnut, and ash all outperform pine, poplar, or rubber wood in a structural role. Teak sits in its own category for outdoor applications because of its natural oil content, which makes it resistant to moisture and insects without annual treatment. Durability: Very high when kiln-dried and properly finished.Best for: Dining tables, bed frames, bookshelves, dressers, sofa frames, cabinets.Worst for: Perpetually damp spaces, solid wood moves with moisture, and a basement or bathroom will eventually work against it regardless of finish quality. 2. Metal (Steel and Aluminum) Steel is one of the strongest structural materials available for furniture, and it’s used in commercial seating and shelving specifically because it doesn’t flex under sustained load the way wood eventually can. The catch is finish quality. Bare steel rusts. Powder coating, where electrostatically charged pigment particles are baked onto the surface, creates a protective layer that resists chipping and corrosion. Ask specifically whether outdoor metal furniture uses powder-coated steel or just painted steel. Painted steel looks identical and fails within two to three seasons in a wet climate. Aluminum is the right choice where rust resistance is the priority. It weighs about a third as much as steel, doesn’t corrode, and holds up well in coastal and high-humidity environments without any protective coating. The trade-off is that aluminum dents more easily than steel under impact. Durability: Very high for structural use; powder-coated steel and aluminum outperform bare metal significantly outdoors.Best for: Bed frames, desk frames, shelving, patio chairs, dining chair bases.Worst for: Coastal outdoor settings if untreated, saltwater accelerates corrosion even on coated steel. 3. Stone (Granite and Quartz) For tabletops, granite and quartz are about as close to indestructible as a surface material gets. Granite rates 6–7 on the Mohs hardness scale, harder than most metals. Quartz tabletops are engineered from about 90% crushed quartz bound with resin, which makes them slightly more consistent and less porous than natural stone. Marble belongs in a separate category: it scores 3–4 on the Mohs scale, which means it scratches easily and etches permanently when exposed to acids, wine, citrus, vinegar, even sealed. The practical limitation of stone is weight and brittleness at the edges. A dropped pot or a sharp corner impact can chip granite, and replacing a stone tabletop section isn’t possible the way refinishing wood is. Durability: Very high for scratch and heat resistance; edge vulnerability is the weak point.Best for: Dining tables, coffee tables, console tables where the surface takes regular use.Worst for: Homes where the furniture gets moved frequently, stone tabletops are heavy and the edges don’t tolerate rough handling. Most Durable Upholstery Materials for Sofas and Seating Frame durability and upholstery durability are separate questions. A sofa can have an excellent kiln-dried hardwood frame and fail in three years because the fabric couldn’t handle daily use. Upholstery wear is measured differently, look for rub count ratings, which measure how many double rubs (back-and-forth passes) the fabric survives before breaking down. For a family sofa in daily use, anything below 15,000 double rubs is a risk. 30,000 and above is where the fabric starts to become genuinely long-lasting. 4. Performance Fabric (Including Crypton)
Mid-century modern is one of those design terms that gets used constantly and explained poorly. So, what is MCM furniture? MCM furniture refers to mid-century modern pieces designed with clean lines, tapered legs, warm wood tones, low profiles, and practical function. Most people can point to an Eames chair or a walnut credenza and say “that’s MCM,” but knowing what actually makes a piece fit the style is what separates a room that works from one that just looks like a vintage prop store. This guide covers the history, defining features, furniture details, and how to use mid-century modern style in a real home without over-theming it. Where Mid-Century Modern Came From MCM is a design movement that ran roughly from 1945 to 1969, shaped almost entirely by the events of World War II. Returning soldiers needed affordable, functional homes. Manufacturers were sitting on new materials, molded plywood, fiberglass, plastic, tubular steel, developed for wartime production. Architects and furniture designers had a practical question to answer: how do you build something that works well, uses these new materials efficiently, and doesn’t look heavy or oppressive in a small postwar house? The answer became mid-century modern furniture. Designers like Charles and Ray Eames, George Nelson, Arne Jacobsen, and Eero Saarinen created pieces that were structurally light, visually open, and centered on how people actually used a room. The Bauhaus movement and Scandinavian design, particularly Danish Modern, heavily influenced their approach, form follows function, materials are honest, and decoration adds nothing if the form is already right. The term “mid-century modern” was formally defined in Cara Greenberg’s 1984 book Mid-Century Modern: Furniture of the 1950s. The style itself had been named by then, but the book gave it a framework that design historians and collectors use today. What Defines Mid-Century Modern Furniture MCM furniture has a few features that appear across nearly every piece, regardless of who designed it or when it was made. Once you know what to look for, the style becomes easy to identify. Feature What It Looks Like Tapered or angled legs Slim, splayed legs that lift furniture off the floor and keep it feeling light Low profile Sofas, beds, and case goods sit closer to the floor than traditional furniture Warm wood tones Walnut, teak, and oak dominate — chosen for grain, durability, and warmth Organic curves Chairs and accent pieces use soft curves drawn from natural forms, not pure geometry Minimal hardware Sideboards and dressers use recessed pulls, small handles, or no visible hardware Mixed materials Wood paired with leather, metal, molded plastic, or glass — often on the same piece What connects all of these features is the same logic: the piece should be useful, it should feel light in the room, and the form itself should do the work that decoration would otherwise be doing. Walnut and teak are the two woods that appear most consistently across original MCM pieces; both have a warm grain, take a clear finish well, and hold up over decades of use. A good overview of how wood species compare for furniture is worth knowing before you buy, because not all woods sold as “walnut-finish” actually use walnut. Key Features of Mid-Century Modern Style The full MCM look is a combination of principles that work together. Individually, most of them also appear in other styles. The combination, and the restraint in how each is applied, is what makes a room read as mid-century modern rather than just clean or contemporary. Here’s the concise version: Clean Lines and Simple Shapes: MCM furniture uses clear forms like rectangles, circles, and soft angles. The shape itself is the detail, not carved trim or extra decoration. Organic Curves With Geometry: MCM balances straight-lined pieces with curved chairs and accents. This keeps rooms from feeling cold while still looking clean. Functional Design First: Every piece should be useful, comfortable, and practical. MCM design is not just about looks; it has to work well in daily life. Natural Materials: Walnut, teak, leather, stone, metal, and glass are common. The look is warm and refined, not rustic or distressed. Open Space and Outdoor Connection: MCM rooms feel open, light, and uncluttered. Large windows, plants, and natural light help connect the indoors with the outdoors. Color Palette: MCM uses neutral bases with earthy accents such as olive, rust, mustard, and terra cotta, plus bold pops like teal, avocado, and burnt orange. If you’re choosing wall colors to pair with warm wood furniture, the principles of choosing paint colors for your decor apply directly to an MCM palette. How to Identify Real MCM Furniture Not everything with tapered legs is mid-century modern. Here’s what to check when evaluating a piece, whether you’re buying vintage, secondhand, or new. Shape first: Clean lines, low profile, clear silhouette with no ornamental additions. If the shape is busy, it’s probably not MCM. Check the legs: Tapered, angled, or splayed legs are a consistent MCM marker. Straight boxy legs, turned legs, or no legs at all lean toward other styles. Material matters: Walnut, teak, oak, leather, molded plywood, and glass are period-correct. Distressed pine, ornate veneers, and glossy lacquer are not. Look at the hardware: Small handles, recessed pulls, or no hardware. Large decorative pulls, bin handles, and ornate knobs are off-style. Proportions: The piece should look balanced at a glance. Not too heavy, not too thin. If anything about the silhouette feels awkward or overpowered, the proportions are off. Function: Can it do what it’s supposed to do comfortably? A chair that looks right but doesn’t seat well is not MCM in spirit. Pro Tip: If you’re buying secondhand MCM-style furniture, check the leg attachment points. Original or quality reproductions use a solid wood-to-wood joint or a metal plate. Furniture with legs attached by a single bolt through thin particleboard will wobble within months of regular use. Mid-Century Modern vs. Modern, Contemporary, and Scandinavian Style These four styles share enough DNA that they get confused regularly. The differences are real, and knowing them helps when you’re trying to mix pieces or evaluate what fits. Style Mood Key Difference Mid-Century Modern Warm, clean, slightly retro Rooted in 1945-1969 design; defined by warm wood tones, tapered legs, and organic curves alongside clean geometry Modern Minimal, neutral, streamlined A broader movement; tends cooler and more spare than MCM, with less emphasis on warm wood and organic form Contemporary Current, flexible, trend-driven Reflects present-day design preferences; absorbs whatever is current, so it shifts year to year Scandinavian Light, cozy, simple Pale woods, white walls, soft textures, and hygge-influenced warmth; similar bones to MCM but noticeably lighter and airier The practical way to think about it: MCM is warmer than modern, more structured than Scandinavian, and less trend-dependent than contemporary. If you’re mixing styles, MCM pieces tend to work alongside Scandinavian furniture well — the materials and scale are compatible, and the warmth of one offsets the lightness of the other without conflict. How to Use Mid-Century Modern Style Room by Room The method is the same regardless of the room: start with one or two anchor pieces that establish the MCM character, then build around them with open space, warm materials, and minimal decoration. Resist the urge to fill corners. 1. Living Room A low-profile sofa, a walnut or oak coffee table, and one sculptural accent chair are all you need to establish the look. Float the furniture away from the walls, at a minimum of 18 inches of clearance behind the sofa, to keep the room from feeling like a furniture showroom. A textured rug grounds the seating area. Warm overhead lighting or a mid-century-style arc floor lamp handles atmosphere. Keep surfaces clear. If the room has a low ceiling, the low-profile MCM furniture scale actually works in your favor; the same principle applies in these low ceiling design tricks. 2. Dining Room A solid wood dining table with tapered legs and four to six matching chairs is the core. Wood choice matters more in a dining table than almost any other piece of furniture because it takes daily wear, scratches, moisture, and heat exposure. The comparison of wood options for dining tables is a useful reference before committing. A sputnik-style pendant or a clean drum shade above the table does the decorating. Keep the tabletop clear between meals, a small tray or a low centerpiece at most. One piece of framed abstract art on the wall is enough. 3. Home Office A solid wood desk, ideally walnut veneer or solid oak, with a task chair and open shelving handles most of what the room needs to do. Keep desk storage in a credenza or a low sideboard rather than bulky overhead cabinets, which break the clean sightline. One plant, a focused desk lamp, and a rug under the chair if the floor is hard. The room should be calm enough to work in, not decorative enough to distract. 4. Bedroom A low platform bed frame in walnut or oak is the anchor. Match the nightstands to the bed frame, the consistency matters more here than it does in other rooms. A dresser with tapered legs and minimal hardware against one wall keeps the room from needing additional storage pieces that clutter the floor. Soft, layered lighting matters: a small lamp on each nightstand, and either overhead dimmer control or no overhead light at all. Bedding in neutral linen or cotton keeps the room restful. 5. Entryway A slim console table, a simple round or rectangular mirror above it, and a small lamp or plant are enough. The entryway sets the expectation for the rest of the home; it should feel organized and uncluttered, not like a landing zone. If you need shoe storage, look for a bench with hidden storage or a low cabinet that fits cleanly under the console. One hook strip for bags and coats, mounted cleanly, handles the functional side without visual chaos. Common Mistakes That Undercut Mid-Century Modern Style Most MCM rooms that don’t work have the same problems. None of them is hard to avoid once you know what to look for. Too many statement pieces are competing at once. Pick one: the chair, the sofa, the light fixture. Three sculptural pieces in the same sightline cancel each other out. Prioritizing looks over function. MCM furniture is supposed to be used. A sofa that photographs well but is uncomfortable to sit on is a category error. If you’re buying for daily use, sit in it first. Overcrowding the room. The open space is part of the design. A credenza needs breathing room. A chair needs clearance. If every surface has something on it and every corner has a piece of furniture, the clean lines disappear. Stacking too many retro accents. A vintage-style lamp, a starburst clock, a record player, and a rotary phone on one shelf is not curated — it’s themed. Two or three well-chosen vintage-inspired pieces are enough. Forgetting texture. All-wood, all-leather rooms can read cold. A textured rug, a bouclé throw, or upholstered seating in a warm fabric adds the sensory layer that makes an MCM room livable rather than museum-like. Frequently Asked Questions These are the questions that come up most often from people who are actively furnishing a space rather than just researching the style. What makes furniture mid-century modern? Tapered legs, low profile, clean geometric or organic silhouette, warm wood tones (walnut, teak, oak), and minimal hardware or decoration. The piece should feel visually light and serve a functional purpose — together, these two things define the aesthetic more accurately than any single feature. Is mid-century modern still popular in 2025? Yes, and consistently so for the past decade. The style holds because it’s genuinely functional and pairs well with other aesthetics. It doesn’t depend on a single trend cycle. A quality walnut credenza bought in 2010 fits as naturally in a 2025 room as it did then. What colors are mid-century modern? Warm neutrals as a base — white, warm beige, soft gray — with earthy accent tones like olive, mustard, rust, and terra cotta. Bold pops of teal, avocado green, or burnt orange add energy in small doses through upholstery or accessories. The key is restraint: one or two accent colors, not five. What is the difference between mid-century modern and contemporary style? MCM is period-specific — its forms are rooted in 1945-1969 design logic. Contemporary style reflects current trends, which change year to year. A contemporary room in 2025 may look nothing like one from 2018. A mid-century modern room has a consistent reference point regardless of when it’s built. Can you mix mid-century modern with other styles? Yes. MCM works particularly well with Scandinavian furniture (similar scale and material palette), Japandi-influenced decor (shared emphasis on natural materials and negative space), and even some industrial elements. The constraint is consistency in proportion and material quality. MCM pieces tend to lose coherence when mixed with heavy traditional or ornate furniture. How do I make mid-century modern feel cozy rather than cold? Add texture and warmth through soft goods: a wool or jute rug, linen or bouclé upholstery, a chunky throw, and layered lighting. Plants help. Wood accessories — a tray, a small bowl, a lamp base — reinforce the warmth of the furniture. The cold reading usually comes from too much hard surface with no soft counterpoint. Does mid-century modern work in a small apartment? It’s well-suited to small spaces. The low profiles keep rooms feeling open vertically, the tapered legs leave floor space visible under furniture (which reads as more room), and the emphasis on built-in or consolidated storage keeps clutter from accumulating. Avoid oversized MCM pieces — scale matters more in small rooms than in large ones. Final Verdict Mid-Century Modern remains popular because it makes a simple design feel warm, useful, and refined. I find its strength in how clean lines, natural materials, practical furniture, and open layouts create a home that feels calm without feeling empty. If you came here wondering what MCM is, the answer is clear: it is a design style built around comfort, purpose, and visual balance. Once you understand its history, key features, colors, and furniture details, the style becomes easier to recognize and apply. Use these ideas to choose Mid-Century Modern pieces that feel timeless, practical, and true to your home. Now that Mid-Century Modern style feels a little clearer, I’d love to hear your take. Which part of the style stands out most to you: the furniture, colors, history, or simple design? Let me know in the comments. Sources:Cara Greenberg, Mid-Century Modern: Furniture of the 1950s. 1984.The Spruce, “Mid-Century Modern Design Guide.” https://www.thespruce.com/mid-century-modern-design-guideHouzz, “Mid-Century Modern Style Guide.” https://www.houzz.com/ideabooks/mid-century-modern

