


| Difficulty | 2 out of 5, no special skills required, just some measuring and basic assembly |
| Time | One weekend (frame build: 2–3 hours, filling: 1–2 hours) |
| Cost | $40–$120 depending on bed size and how much bagged soil you buy |
| Tools Needed | Drill, countersink bit, skill saw, measuring tape, level, pitchfork, wheelbarrow |
| Skill Required | Beginner |
The first raised bed I filled, I bought nine bags of bagged garden soil and still ran short. I hadn’t accounted for settling, I’d mixed in too much fresh grass clippings, and by week three, the whole thing had sunk three inches and smelled faintly sour.
The fix was simple once I understood how diy raised garden bed layers actually work: rough organic material at the bottom, finished soil at the top, and nothing wet or green piled in thick.
A layered raised bed costs less to fill because you’re not buying premium soil from the bottom board to the top. You’re using what you have: branches, dry leaves, compost, and putting the good stuff only where roots actually live.
The result is a bed that drains better, settles less chaotically, and feeds itself as the lower layers break down over time.
Below is the layer order, the right approach by bed height, five filling methods ranked by cost and setup time, and the step-by-step build sequence I’d use today.
What Shapes Your Layer Plan Before You Start
Before you add the first shovel of soil, take a minute to check your bed depth, budget, and planting timeline. These three choices shape the whole fill plan.
A shallow bed needs more finished soil because roots have less room to spread, so bulky filler can quickly get in the way. A deep bed gives you more space to use safe lower materials, such as branches, leaves, straw, or compost, without crowding the top growing area.
Your budget matters too. If bagged soil feels too costly, layering it can reduce how much you need to buy. Timing is just as important. If you want to plant right away, keep more finished compost and soil near the top.
If you can wait, lasagna-style layers can settle first. The goal is simple: keep rough material low and keep the root zone soft, clean, and ready for planting. Once you know your bed depth and planting timeline, the next step is to stack the layers in the right order.
The Right Order for Raised Bed Layers
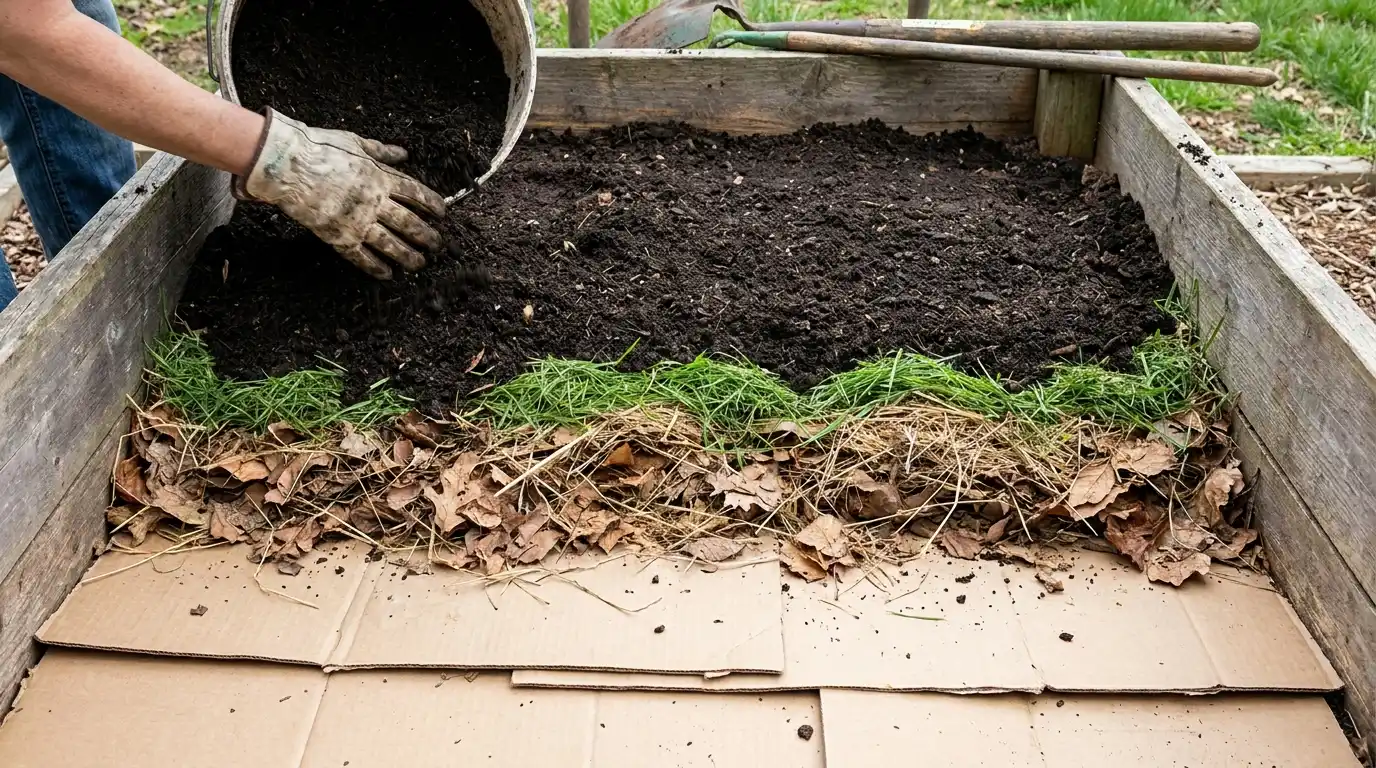
A raised bed works better when you build it from the bottom up instead of mixing everything together. After a few messy fills, you learn fast that each layer needs one job. The bottom creates a base, the middle adds bulk, and the top gives roots the clean growing space they need.
- Base layer: Add cardboard or newspaper first when the bed sits over grass or weedy soil. This gives you a cleaner starting point before the rest of the materials go in.
- Pest layer: Use hardware cloth only if digging pests are common in your yard. It belongs under the fill, not mixed into the soil.
- Filler layer: Place logs, branches, or sticks low in deep beds. This helps fill the space without using bags of soil from the top to the bottom.
- Brown layer: Add dry leaves, straw, or shredded paper on top of the filler. These materials create a light bulk and support slow breakdown.
- Compost layer: Spread finished compost or aged manure above the rougher materials. This brings better nutrition closer to the growing area.
- Growing layer: Finish with planting soil at the top, then add mulch after planting. This keeps roots in the cleanest and softest part of the bed.
The main rule is simple: keep rough materials low and finished soil high. That one habit prevents most raised bed problems, from sinking too fast to roots hitting sticks too soon. Next, match this order to your bed height so you do not add bulky filler where roots need space
Layer Choices by Bed Height
Not every raised bed has enough room for the same materials. After working on small and deep beds, you learn that height changes everything. A short bed needs to stay simple because roots need most of that space.
A taller bed gives you more room to use lower filler without wasting money on soil from the bottom to the top. Once the basic order is clear, check the bed height before choosing how much filler to use.
| Bed Height | Safe Filler Amount | Best Use | What to Skip |
|---|---|---|---|
| 8 to 12 inches | Little to none | Herbs, lettuce, spinach, and leafy greens | Logs, thick branches, heavy filler |
| 12 to 18 inches | Light filler only | Small vegetables, herbs, mixed greens | Large wood and packed grass clippings |
| 18 to 24 inches | Moderate lower filler | Most vegetables and budget-filling | Premium soil from bottom to top |
| 24+ inches | More lower filler | Tall beds, deep boxes, larger garden builds | Loose gaps around wood and raw waste near roots |
This keeps the choice simple: the shorter the bed, the less filler you use. The deeper the bed, the more room you have to save soil with lower materials. After that, you can choose the filling method that fits your budget and your planting timeline.
Five Cost-Effective Methods to Fill Raised Garden Beds
This is where the real savings happen. Instead of asking, “What should I put in my raised bed?” it helps to ask, “Which filling method fits my bed depth, budget, and materials?” I use different methods depending on what I have around the yard.
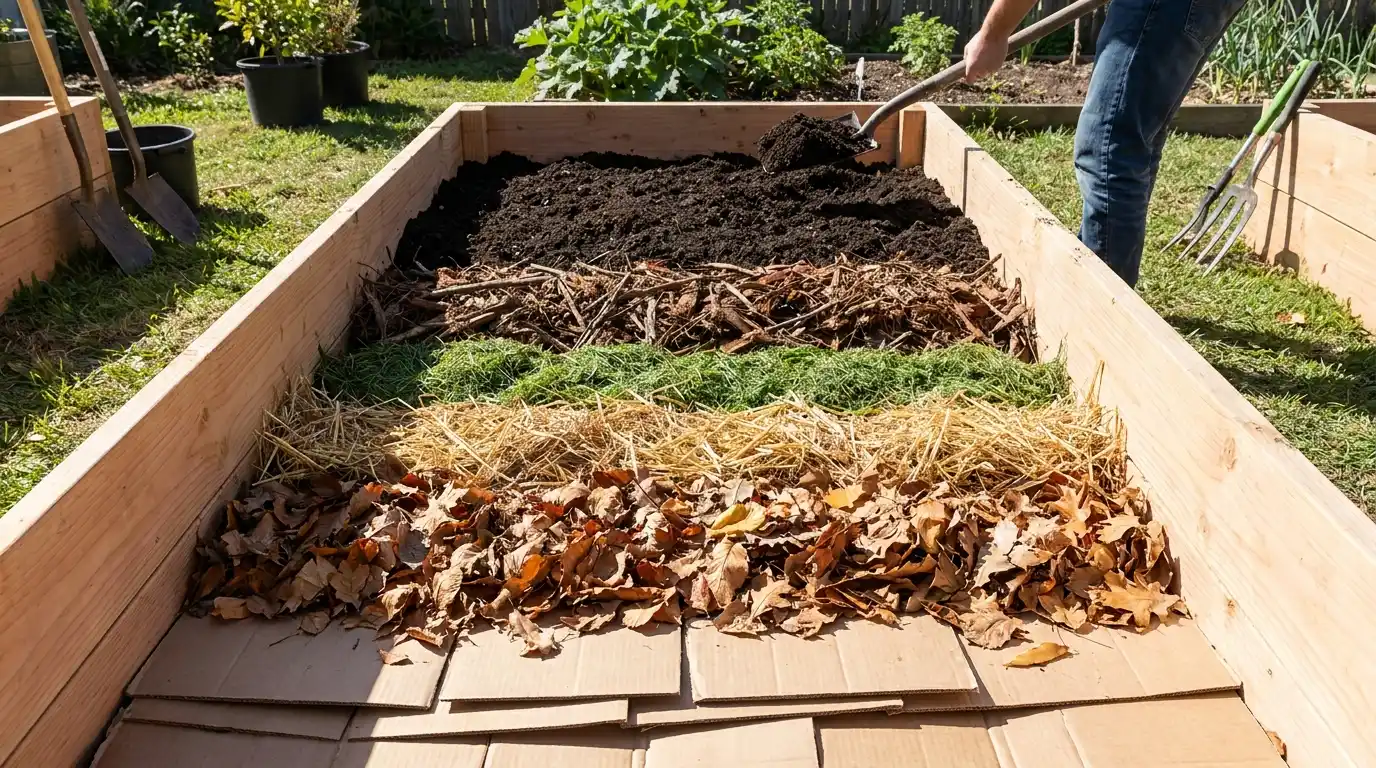
Method 1: Lasagna Gardening Method
Lasagna gardening works best when you are not rushing to plant right away. It uses organic materials that break down slowly, so the bed becomes better over time. This method is a good fit for medium- or deep-raised beds where you want to save money and build healthier soil.
Here’s how to think about this method before using it:
- Common materials: This method uses items that many gardeners already have, such as cardboard, dry leaves, straw, grass clippings, plant trimmings, and compost. That makes it useful when you want to fill the bed without buying too many bags of soil.
- Lower cost: Organic layers occupy the lower part of the bed, so you do not need to fill the entire frame with an expensive soil mix. It works especially well when the bed has enough depth for materials to settle.
- Long-term soil: As the layers break down, they add organic matter and improve the bed season after season. This makes lasagna gardening better for gardeners who want a slow soil-building method, not just a quick fill.
Note: I’d use the lasagna method for medium or deep beds when the goal is to save soil and build better material over time. Skip it for heavy root crops if you’re planting right away, since fresh layers need time to settle and break down
Method 2: Hugelkultur-Style Base Method
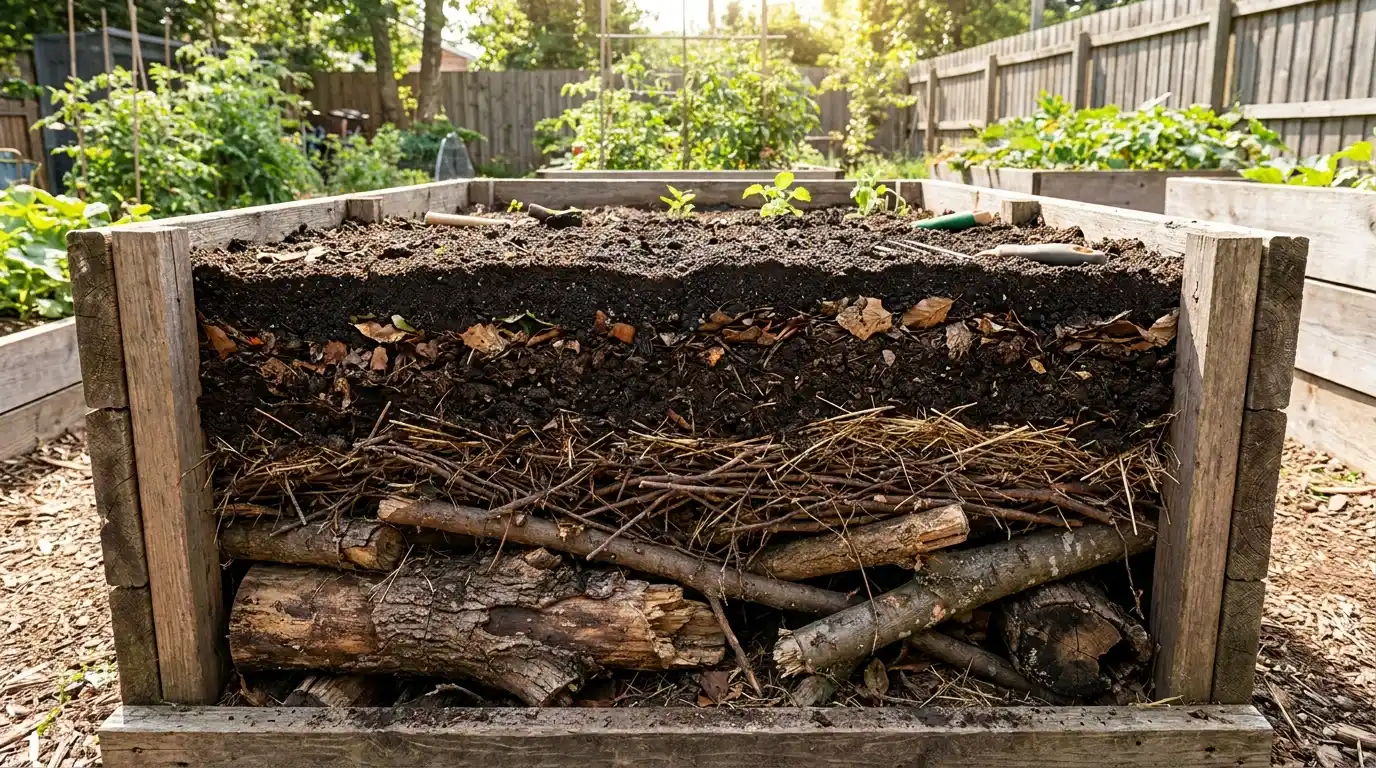
A hugelkultur-style base is useful for deep raised beds, where the lower space can be filled with woody material rather than additional soil. It works best when the bed is high enough to keep rough wood away from the main growing area. Use this method when the bed is deep, and you want a lower fill that lasts:
- Wood placement: Put the largest pieces at the very bottom, then use smaller sticks around them. This keeps the heaviest material low and gives the bed a steadier base before lighter layers are added.
- Gap filling: Add leaves, straw, or loose soil between wood pieces so large empty pockets do not collapse later. This step helps the bed settle more evenly after watering.
- Top separation: Cover the woody base with compost and planting soil before anything goes in the bed. Young roots should start in soft, finished material, not against logs or rough branches.
Method 3: Compost-and-Soil Layering Method
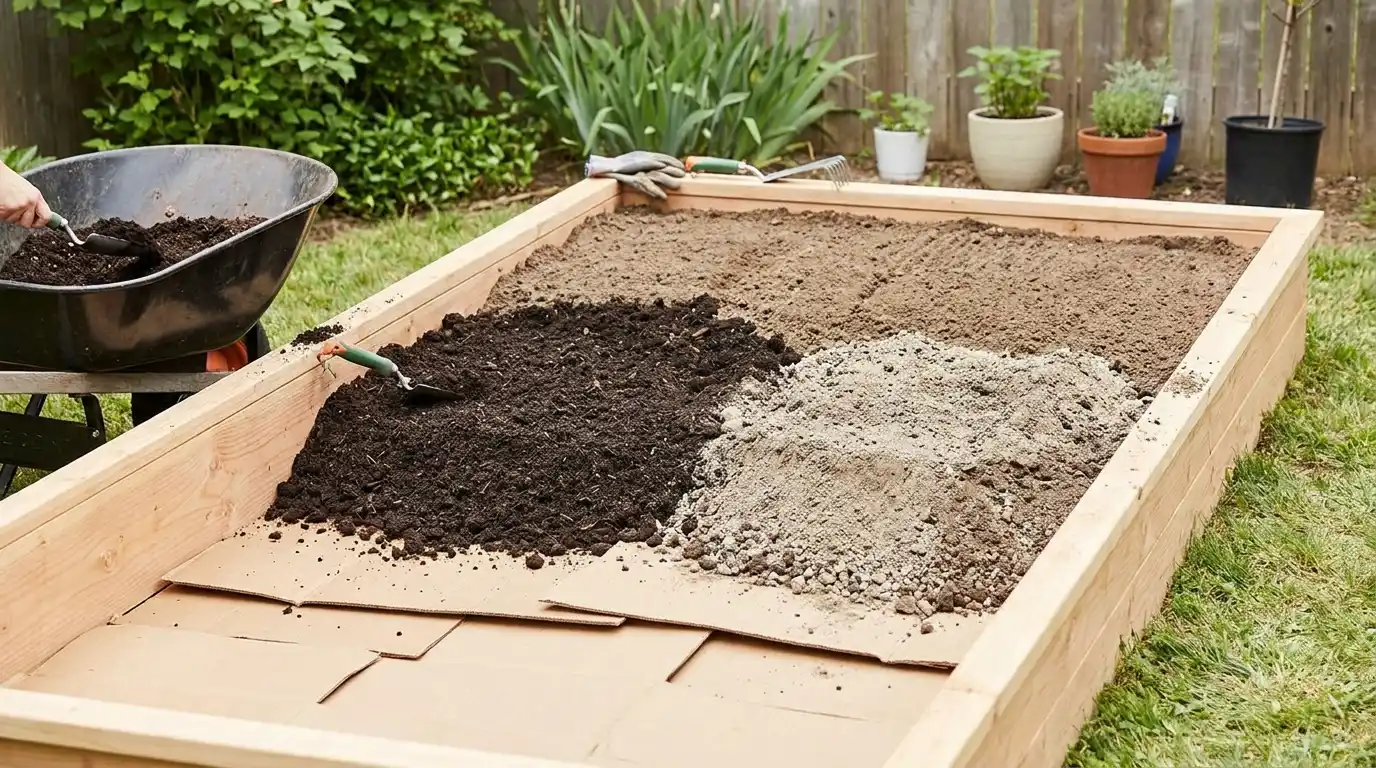
The compost-and-soil method is best when the bed needs to be ready soon. It suits shallow beds, herb beds, and small vegetable beds because it does not rely on bulky filler or long breakdown time.
Use this method when you want a clean, fast setup:
- Few supplies: You only need finished compost, topsoil, and cardboard if weeds are present. This keeps the project simple and easier to control, especially for a smaller bed.
- Smooth surface: The upper layer remains loose and even, which facilitates direct sowing, transplanting, and watering. This is useful for herbs, lettuce, and other shallow-root crops.
- Less settling: Since the fill is already finished, the bed will not sink as much as one packed with fresh leaves, grass, or rough yard waste.
Note: For smaller planter boxes or shallow herb beds, this is the cleanest choice. You spend a little more than you would with yard waste, but you get a planting surface that feels ready right away instead of waiting on buried materials to settle.
Method 4: Yard-Waste Layering Method
Yard-waste layering is useful when you already have clean garden material. It is a budget-friendly choice, but it needs balance so the bed does not become wet, sour, or packed too tightly. Use this method when your yard gives you enough safe material:
- Brown first: Dry leaves, straw, and shredded paper should make up most of the fill. They help the bed stay lighter and stop fresh scraps from clumping together.
- Small greens: Grass clippings and soft plant trimmings should be added in thin amounts. A light spread breaks down better than a thick wet pile.
- Safe only: Keep out diseased plants, seed heads, pet waste, and oily food scraps. Free material is only helpful when it does not bring pests, weeds, or plant problems.
Method 5: Hybrid Budget Method

The hybrid budget method works best for tall raised beds where you want to lower soil costs while still keeping the planting area dependable. It combines different materials without making the bed too messy or slow to use. Choose this method when you want savings with better control:
- Lower support: Sticks or small branches can sit in the lowest part of the bed to take up space. This keeps expensive soil where it actually helps the plants.
- Middle body: Leaves, straw, or similar dry material can be placed around the lower layer to reduce large air gaps. This helps the bed settle more evenly after watering.
- Top quality: Finished compost and planting soil should stay near the surface. That gives roots a cleaner growing area while the lower materials slowly break down underneath.
DIY Raised Garden Bed Layers Step by Step
Raised beds let you grow fresh vegetables even if your soil is rocky, compacted, or full of tree roots. With a few affordable materials and a simple weekend project, you can build a productive growing space that is easy to maintain and harvest from.
Whether you have a small backyard or need more room for your favorite crops, the steps below show you how to build and fill a sturdy raised bed garden from start to finish:
Material Required:
- 3 untreated 2×10 boards, 8 feet long
- 3 untreated 2×4 boards, 8 feet long
- extra 2×4 scrap or one 8-foot 2×4 for cleats
- 3-inch deck screws
- cardboard or contractor paper, optional
- peat moss
- black leaf mulch
- homemade compost
- drill
- countersink bit
- skill saw
- measuring tape or marking tool
- level
- pitchfork
- wheelbarrow
Step 1: Find a Spot That Works for Your Garden
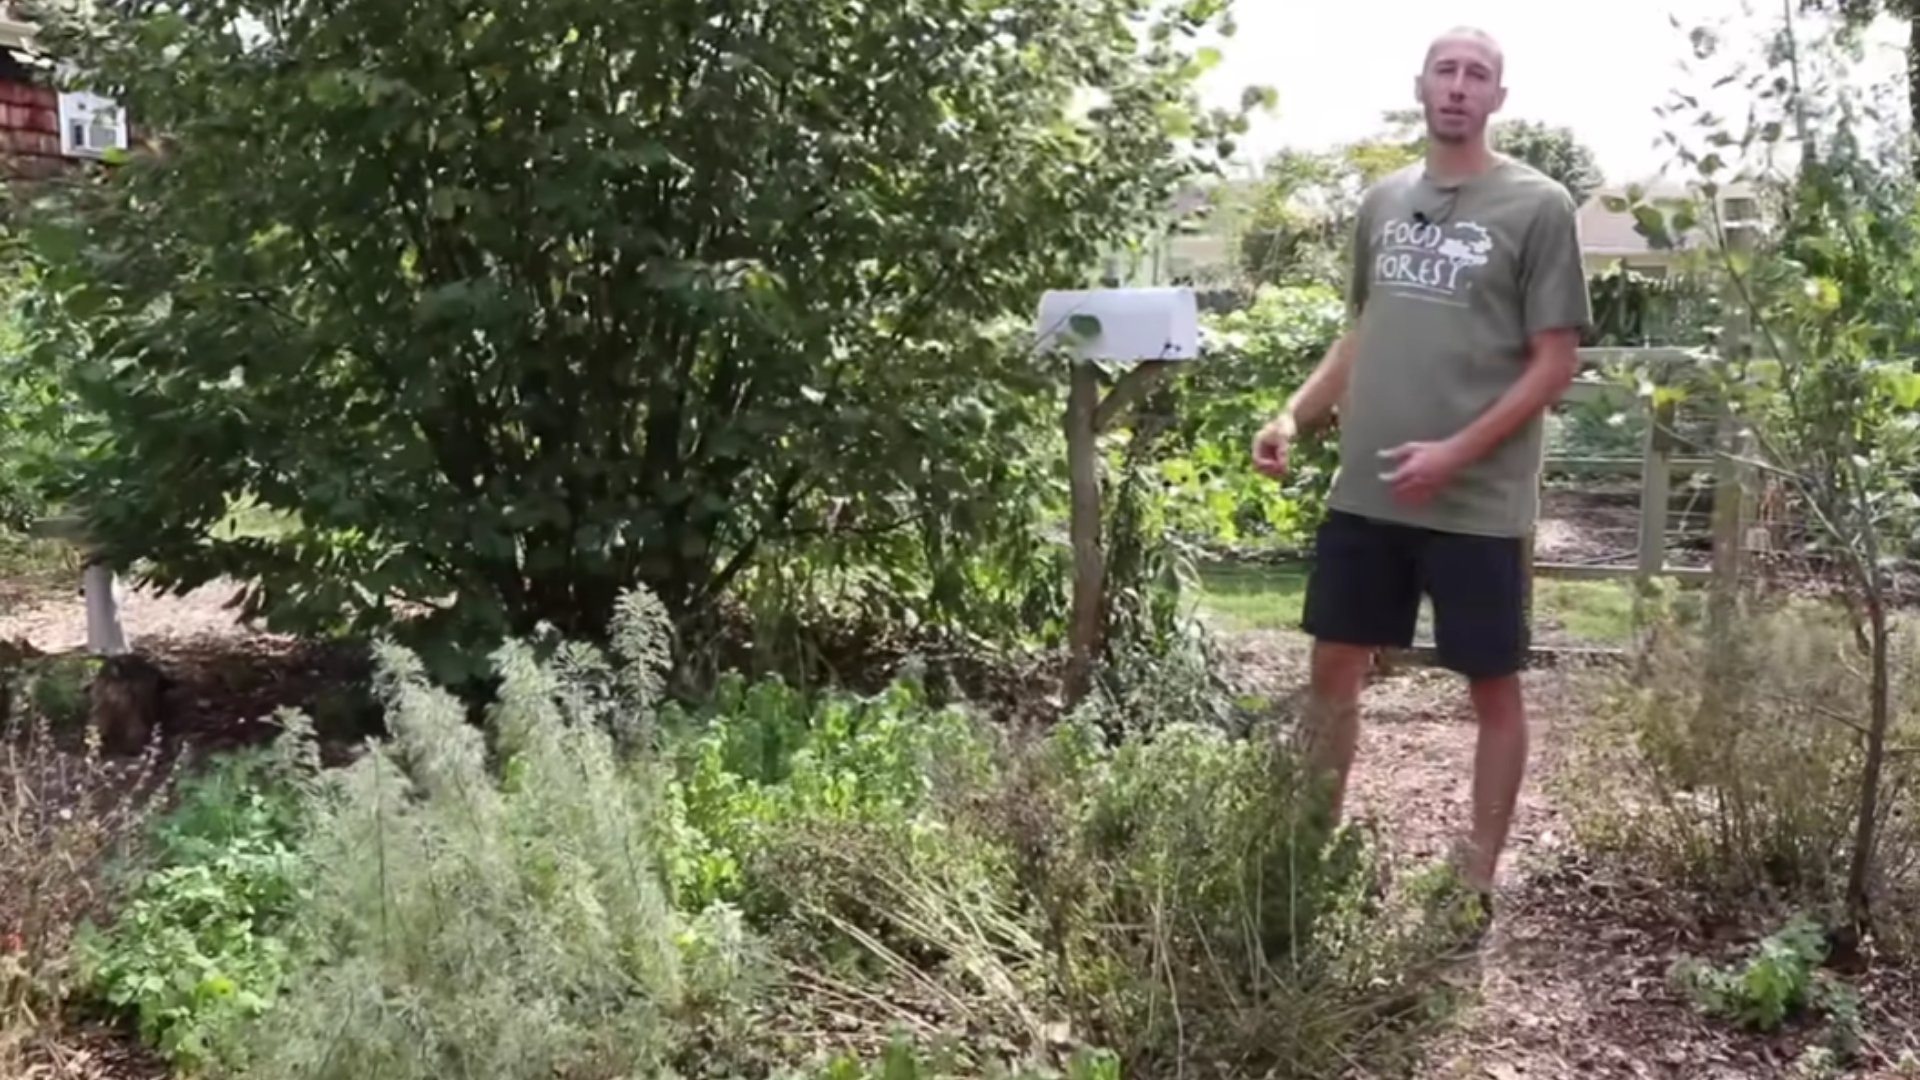
Before picking up any tools, take a good look at the space available in your yard. You may have an area where plants struggle because of tree roots, poor soil, or limited sunlight.
A raised bed can solve many of these problems without requiring major changes to the ground below. In this project, the bed replaced a tree that was no longer thriving due to heavy shade.
If you’re working with a similar situation, choosing the right location now will save you a lot of frustration later and give your vegetables a much better start.
Step 2: Measure, Cut, and Prepare the Wood
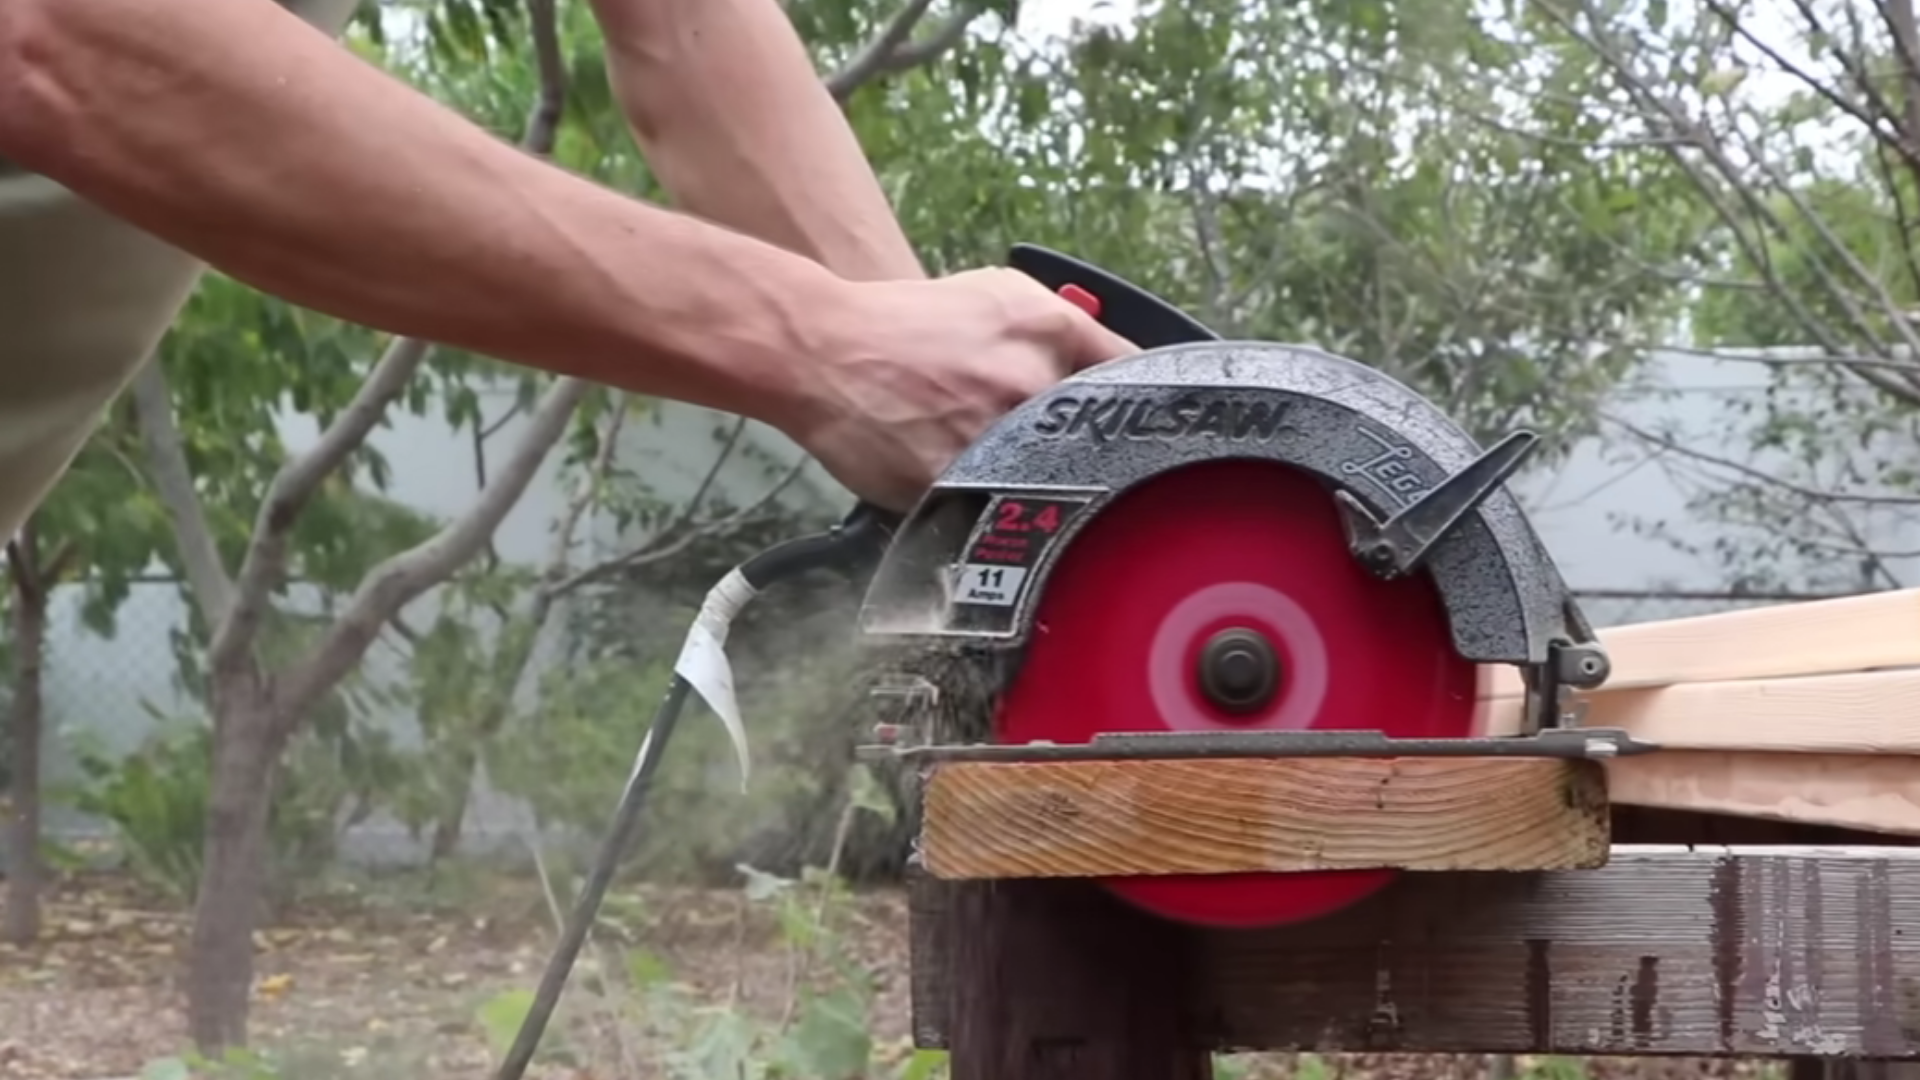
Once your materials are ready, start preparing the wood for the raised bed frame. For this build, the bed size is four feet by eight feet, which provides enough growing space while remaining easy to reach from both sides.
Use untreated lumber for a safer vegetable garden, and check each board for bends, twists, or cracks before cutting. If cutting wood feels difficult, most home improvement stores can cut the boards for you when you provide the measurements.
After the boards are cut, clear the garden spot before assembling the frame, so you do not have to move the heavy bed later
Step 3: Build a Strong Frame
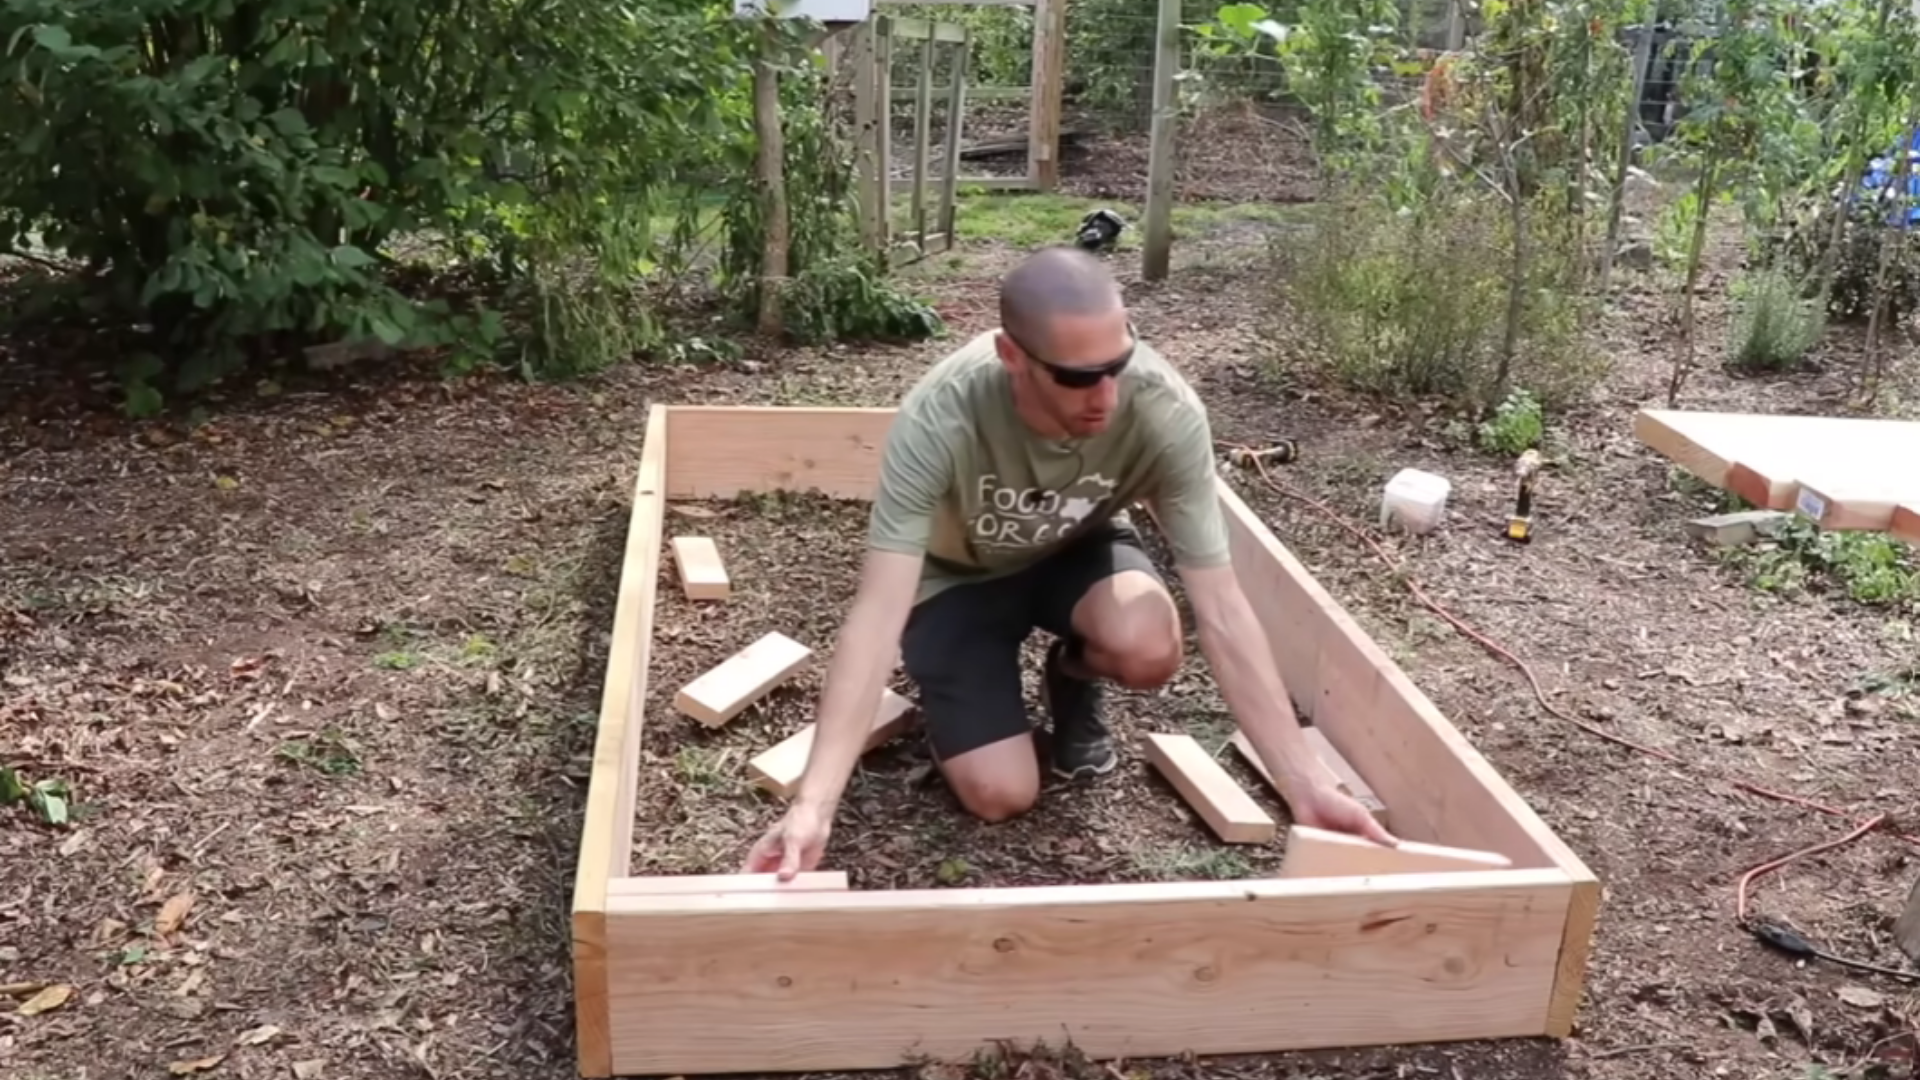
Now comes the exciting part where your raised bed starts taking shape. Assemble the frame in the exact spot where it will stay because moving it later can be difficult. Using outdoor deck screws helps create a sturdy structure that can withstand years of exposure to the elements.
Pre-drilling the holes is a small step that makes a big difference by preventing the wood from splitting. As you connect each piece, check that the corners remain square. A little extra attention here will give you a stronger and more professional-looking garden bed.
Step 4: Add Support Rails for Comfort and Stability
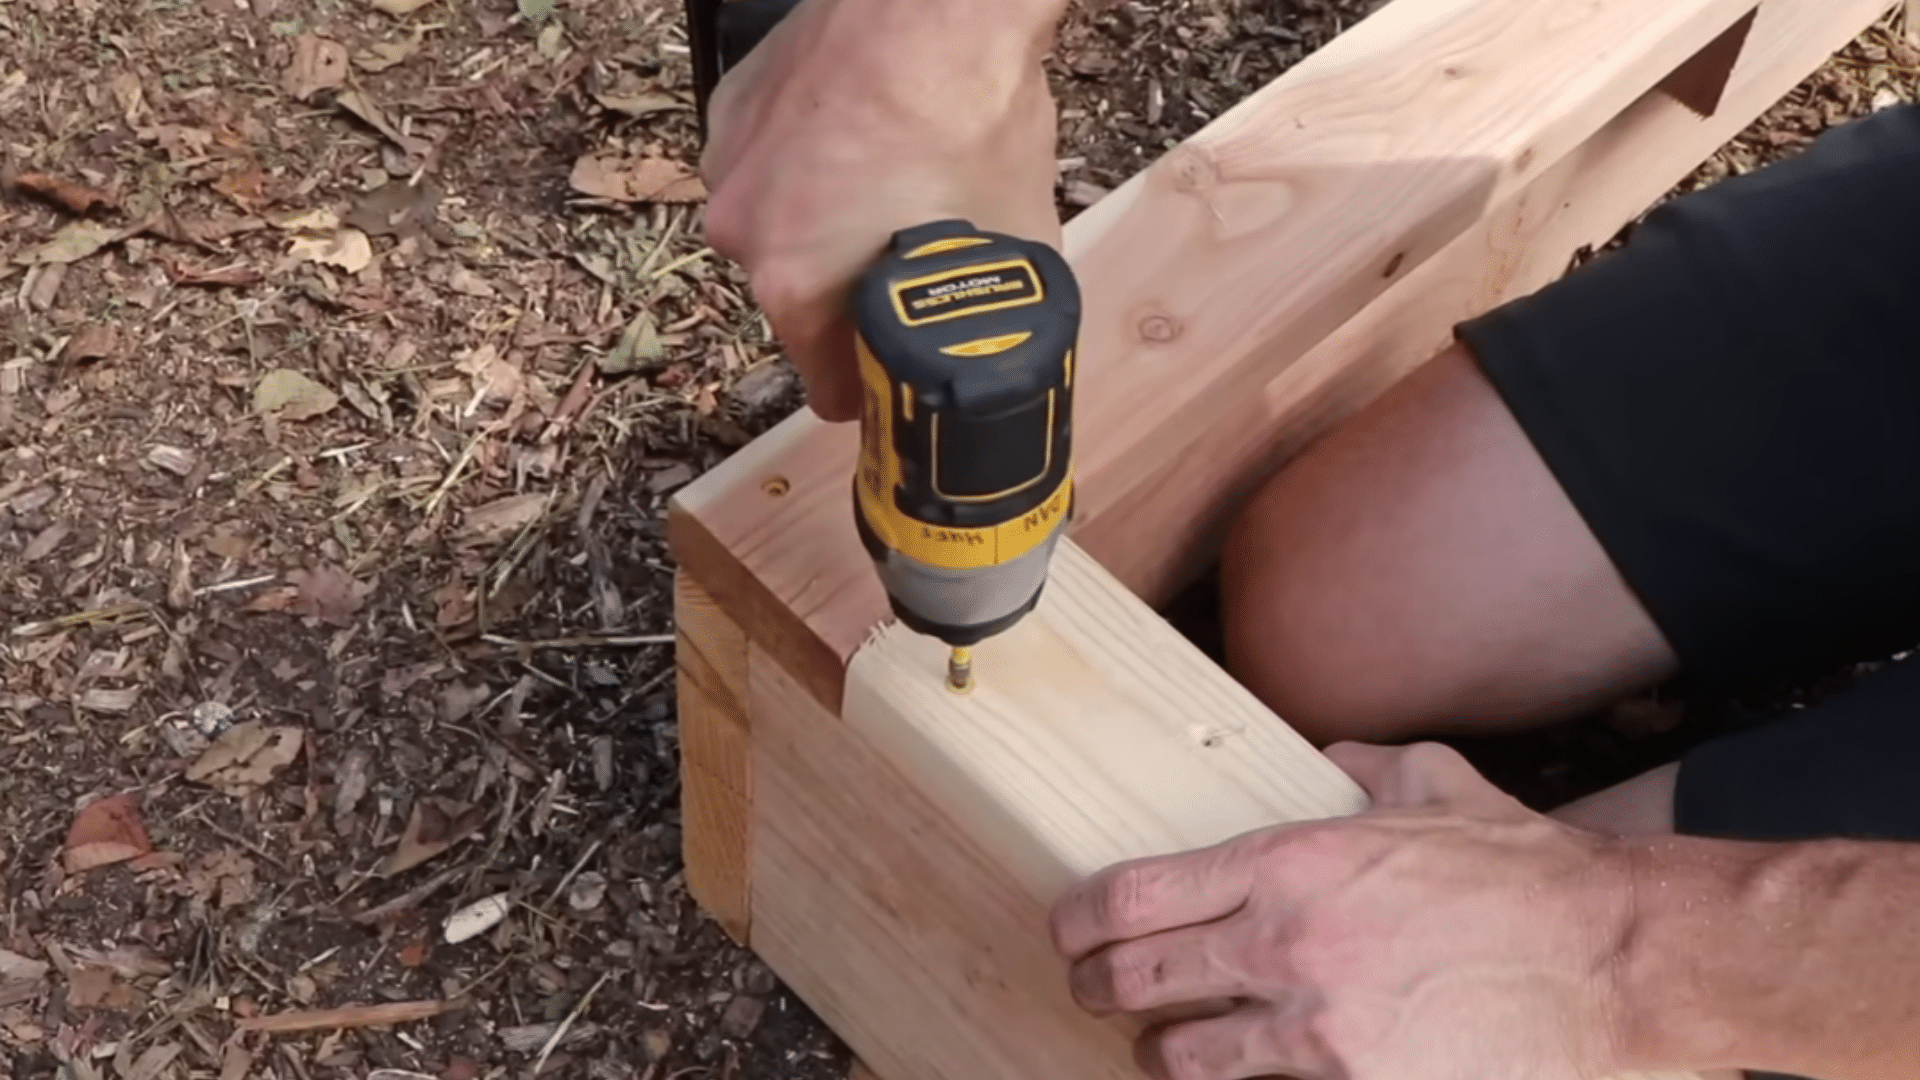
This step may seem optional, but it’s one of those small upgrades you’ll appreciate every time you garden. Adding top rails strengthens the bed while also creating a convenient place to sit as you plant, weed, or harvest.
Once the rails are attached, check that the entire structure sits level on the ground. Instead of raising low spots, removing excess soil from higher areas often creates a more stable foundation. Taking the time to level the bed properly now will make watering easier and help your garden look neat and well planned.
Step 5: Create Rich Soil That Helps Plants Thrive

For this specific build, peat moss was mixed with leaf mulch first, then compost was added as the final layer. That combination holds moisture better than topsoil alone and doesn’t compact as quickly after watering.
If you’re using yard-waste layers below, add them first and compress each 6-inch layer before adding the next. Save your best compost and planting mix for the top 10 to 12 inches; that’s where the roots live. For weekend builds with basic tools, filling the bed is genuinely the easiest part of the whole project.
Quick Soil Calculation: Multiply bed length × width × soil depth to estimate how much planting mix you need. A 4 ft × 8 ft bed with a 12-inch top layer needs 32 cubic feet of soil. One 1.5 cubic foot bag covers about 2.25 square inches at 8-inch depth, buy more than you think you need on the first fill.
Watch the video for a step-by-step tutorial:
What Not to Put in Raised Garden Bed Layers?
Some free materials are not worth using in a raised bed. The wrong filler can cause drainage issues, bring pests, spread weeds, or make the soil unsafe for vegetables and herbs. Check every material before it goes into the frame. Use this list as a quick safety check before filling the bed:
- Coated materials: Avoid treated wood, painted wood, glossy cardboard, and plastic sheets. These materials can break down poorly, block drainage, or bring unwanted chemicals into the bed.
- Problem plants: Keep out diseased plants and seeded weeds. Diseased material can carry trouble into the next crop, while weed seeds may sprout after watering.
- Unsafe waste: Do not add pet waste, meat, dairy, or oily scraps. These can smell bad, attract animals, and make the bed unsafe for food crops.
- Heavy fresh greens: Thick piles of fresh grass clippings can mat together, heat up, and turn sour. Use only thin amounts mixed with dry material.
- Unknown scraps: Skip anything you cannot clearly identify as clean and garden-safe. Random wood, coated paper, old debris, or questionable yard waste can create more problems than they solve.
When in doubt, leave it out. Clean leaves, straw, plain cardboard, finished compost, and healthy plant trimmings are the safe baseline for every raised bed, if you’re building a larger outdoor DIY project or a single small bed off a concrete patio.
Can You Plant Right After Filling a Raised Bed?
Yes, you can plant right after filling a raised bed if the top layer is finished, the soil is loose, and the lower layers are not packed with fresh green material.
The safest setup is a compost-and-soil top layer because roots can settle into it without coming into contact with scraps, clumped grass, or half-broken-down yard waste. If you used lasagna layers, lots of leaves, or fresh plant trimmings, water the bed well and give it 1 to 3 weeks to settle before planting.
New layers often sink after the first few waterings, so check the soil level and add more compost or topsoil if needed. For the first planting, choose easy crops like lettuce, herbs, beans, peppers, or tomatoes.
Save carrots, beets, and radishes for beds with deeper, smoother soil because their roots need fewer lumps and less resistance.
Common Mistakes to Avoid When Layering a Raised Bed
Most raised bed problems start before the first seed goes in. These are the mistakes I see most often when beds sink, smell, dry out, or grow poorly fast later. Use this table as a quick check before planting.
|
Mistake |
Why It Causes Trouble |
Better Move |
|
Building the bed too wide |
You may step into the soil and compact it |
Keep the width easy to reach |
|
Skipping the level check |
Water and soil can shift to one side |
Level the frame before filling |
|
Using logs in shallow beds |
Roots lose needed growing space |
Save wood filler for deep beds |
|
Adding thick fresh grass |
It can mat, heat, and smell sour |
Use thin green layers only |
|
Forgetting cardboard in weedy areas |
Grass may grow through the bed |
Overlap plain cardboard at the base |
|
Adding too little topsoil |
Roots hit rough material too soon |
Keep enough soft soil at the surface |
|
Planting before watering |
Air pockets may collapse later |
Water first, then top off low spots |
Catch these issues early, and the bed becomes easier to water, fill, and plant. I always check the frame, base, and soil before the first planting day of the season.
How to Maintain Layered Raised Beds
A layered bed settles over time, so maintenance is mostly about topping up, feeding, and keeping the soil protected. You don’t need to rebuild the layers each season. The goal is to keep the top growing layer loose, rich, and covered while the lower organic layers slowly break down underneath.
- Add compost yearly: Spread a thin layer of finished compost before planting each season. This refreshes nutrients, improves soil texture, and helps replace what heavy-feeding vegetables used during the last growing cycle.
- Top off sinking soil: Add compost, topsoil, or raised bed mix when the soil level drops. Some settling is normal as leaves, sticks, and other buried materials break down inside the bed.
- Mulch the surface: Straw, dry leaves, bark, or untreated grass clippings over bare soil hold moisture, reduce surface temperature, and suppress weeds between plants. If you’re also building other backyard DIY projects, wood chip mulch from those builds works well here too.
- Avoid stepping inside: Keep your feet out of the bed so the growing layer stays light and loose. Compacted soil makes it harder for roots, water, and air to move through the bed.
- Loosen the top only: If the surface gets crusty or hard, gently fluff the top few inches with a hand fork. Avoid deep digging because it can disturb the layered structure below.
- Water deeply: Raised beds can dry out faster than in-ground beds, especially in warm weather. Check the moisture with your finger, and water slowly so it reaches the root zone rather than just wetting the surface.
- Cover rough filler: If sticks, leaves, or coarse material start showing near the top, add more finished compost or soil. Plant roots should grow in loose, finished soil, not directly through rough filler.
Maintenance is not about starting over. It is about adding back what the plants and the breakdown process use up. A little care each season keeps the bed productive, easier to plant, and better prepared for the next crop.
Frequently Asked Questions
What is the best soil mix for raised garden beds?
A mix of roughly 60% topsoil, 30% compost, and 10% perlite or coarse sand works well for most vegetables. Straight topsoil compacts too fast; straight compost dries out and shrinks. The combination drains well, holds moisture without waterlogging, and gives roots the loose structure they need to spread.
How deep should a raised garden bed be?
Twelve inches is the practical minimum for most vegetables. Eighteen to 24 inches works better for deeper-rooted crops like tomatoes, peppers, and squash. Anything shallower than 8 inches limits you to herbs and leafy greens with very compact root systems.
Can I use treated lumber for a raised garden bed?
Many gardeners prefer untreated cedar, redwood, or pine for vegetable beds. If you do use treated boards, line the inside of the frame with heavy plastic before filling. This keeps soil from sitting directly against the wood and extends the frame life without the concern of chemical contact with crops.
Can I build a raised garden bed on concrete or a patio?
Yes, you just need to plan for drainage. Water must exit the bed rather than sit at the base. A deeper bed helps because roots can’t reach ground soil below. This setup works well on patios, driveways, and balconies. For tight spaces or rented properties, a smaller planter box built from 2×6 boards is a practical alternative that still uses the same layering approach.
How often should I water a raised garden bed?
In mild weather, two to three times per week is usually enough. In heat above 85°F, daily watering may be needed. Push your finger one inch into the soil; if it’s dry, water. Aim for the base of plants, not the leaves, and water slowly enough that it soaks in rather than running off the sides.
What vegetables grow best in a shallow raised bed?
Lettuce, spinach, chard, green onions, radishes, most herbs, and compact greens do well in beds under 12 inches deep. Save tomatoes, carrots, potatoes, and beets for deeper beds, their root systems need more than a shallow frame allows.
How long before a lasagna garden bed is ready to plant in?
Two to four weeks after building, once the layers have settled and the initial heat from decomposing greens has dissipated. If you top the lasagna layers with a 4 to 6 inch layer of finished compost, you can plant annual transplants immediately into that top layer and let the lower layers break down beneath them.
Bottom Line
DIY raised garden bed layers can make the whole project easier, cheaper, and more practical. You do not have to fill the entire bed with expensive soil. Instead, you can use safe organic materials in the lower layers and save your best mix for the top, where young roots need it most.
Your bed may settle over time, and that is completely normal. Just add more compost, refresh the top layer, and keep adjusting as each season teaches you what works best. The right method depends on your bed depth, what materials you have, and how soon you want to plant.
Start small, keep the growing zone clean, and choose layers that support healthy plant growth. A well-filled raised bed can save money, reduce waste, and give your plants a stronger start.
For more simple garden ideas, raised bed tips, and DIY growing guides, read the other blogs and keep building a garden that works for your space.


