

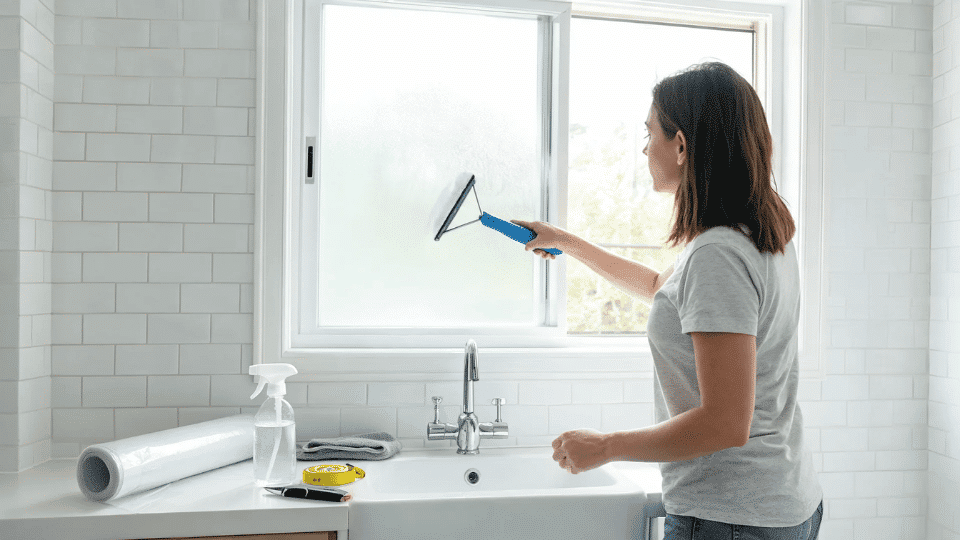


| Difficulty | 2/5, No specialist tools needed, but film application takes patience |
| Time | 30 minutes (film) to 2–3 hours (etching cream with prep and cure) |
| Cost | $8–$40 depending on method and pane size |
| Tools Needed | Glass cleaner, squeegee, utility knife, straight edge, painter’s tape |
| Skill Required | Beginner, most methods are forgiving if you work slowly |
Frosted glass is one of those small changes that quietly change a space. It softens the light, adds privacy without making a room feel closed off, and gives even the most ordinary window a more finished look.
I first got curious about it when I moved into a place with a bathroom window that faced directly into the neighbor’s garden. Not ideal.
Turns out, learning how to frost glass is easier than I expected, and there are more options than most people realize.
Here I’ll cover the most practical DIY frosted glass methods, which ones are temporary, which ones are permanent, and when it makes more sense to call a professional.
What Frosted Glass Actually Does?
Frosted glass works by scattering light rather than letting it pass through cleanly. You still get natural light, but the view from either side becomes blurred or completely opaque, depending on how heavily the glass is treated.
That’s why you’ll find it in bathrooms, entry doors, sidelights, office partitions, cabinet inserts, mirrors, and decorative panels.
Not every frosting method works the same way. Some are removable. Some are permanent. Some hold up in wet rooms; others do not.
The right choice depends on how much privacy you need, whether the space gets moisture or heavy cleaning, and whether you rent or own.
Different Ways to Frost Glass at Home
Here’s a quick look at all the main methods side by side. Some of these are proper privacy solutions, and some are more craft-project territory.
| Method | Best For | Finish Type | Removable? | Difficulty |
|---|---|---|---|---|
| Frosted window film | Windows, doors, rentals | Smooth privacy layer | Yes | Easy |
| Frosted glass spray | Small panes, mirrors, cabinet glass | Semi-transparent coating | Difficult | Easy, Medium |
| Glass etching cream | Small permanent designs | Permanent etched surface | No | Medium |
| Cornstarch and tissue paper | Temporary privacy | Papered privacy finish | Yes | Easy |
| Glue or Mod Podge | Craft glass, jars, vases | Cloudy handmade finish | Sometimes | Easy |
| Epsom salt crystallization | Seasonal decor | Icy crystal effect | Yes | Easy |
| Sandblasting | Permanent glass frosting | Abraded matte surface | No | Advanced/Pro |
| Acid-etched glass | Professional privacy glass | Smooth permanent finish | No | Professional |
| Patterned obscure glass | Renovations and showers | Textured privacy glass | No | Professional |
The top five DIY methods are the ones worth covering in detail. The rest get a shorter mention further down.
Method 1: Frosted Window Film
Frosted window film is one of the easiest ways to add privacy without permanently changing the glass. It works well for bathroom windows, sidelights, glass doors, and rental-friendly projects. The film creates a smooth frosted layer that softens the view while still letting natural light through.
Materials
- Frosted window film
- Glass cleaner
- Microfiber cloth
- Spray bottle with water
- Squeegee or smoothing tool
- Measuring tape or ruler
- Utility knife
- Straight edge
Step 1: Clean the Glass Thoroughly
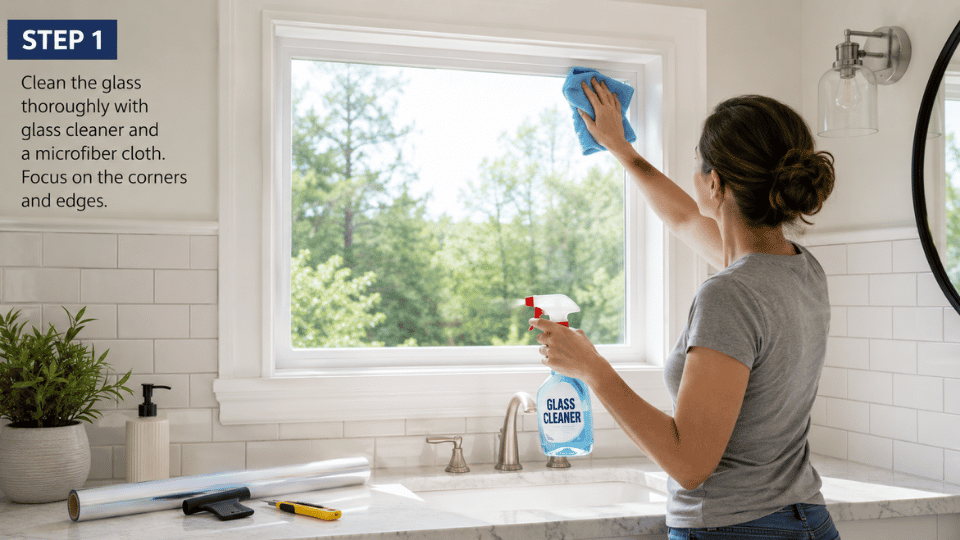
Clean the glass thoroughly with glass cleaner and a lint-free cloth. Wipe away all grease, fingerprints, and dust, paying attention to the edges and corners.
Any residue left on the surface will show through the frosted coating once it dries. Leave the glass to dry completely before moving on.
Step 2: Measure and Cut the Film
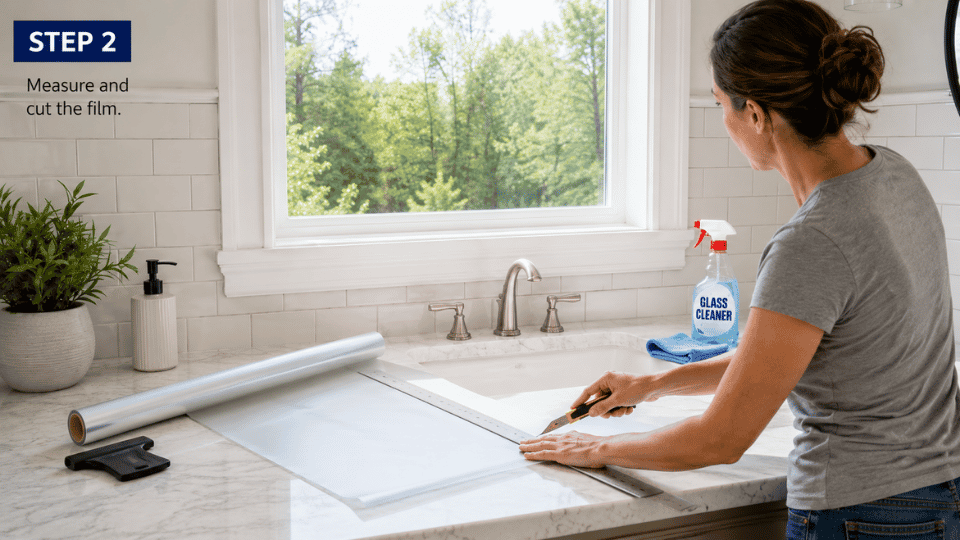
Measure the glass carefully, then cut the frosted window film slightly larger than the pane. Use a ruler or straight edge to keep the cut neat.
A little extra film gives you room to adjust during installation. You can trim the excess cleanly once the film is in place.
Step 3: Apply the Film to Wet Glass
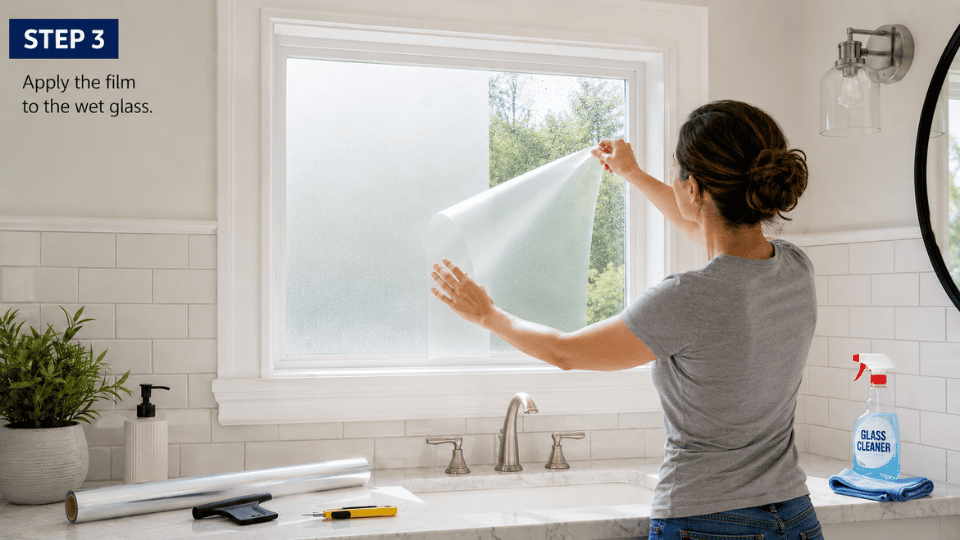
Spray the glass lightly with water so the film can slide into position. Peel the backing away, then place the film onto the wet pane.
Start from one side and guide the film across the glass slowly. Adjust the corners until the sheet sits straight inside the frame.
Step 4: Smooth and Trim the Film
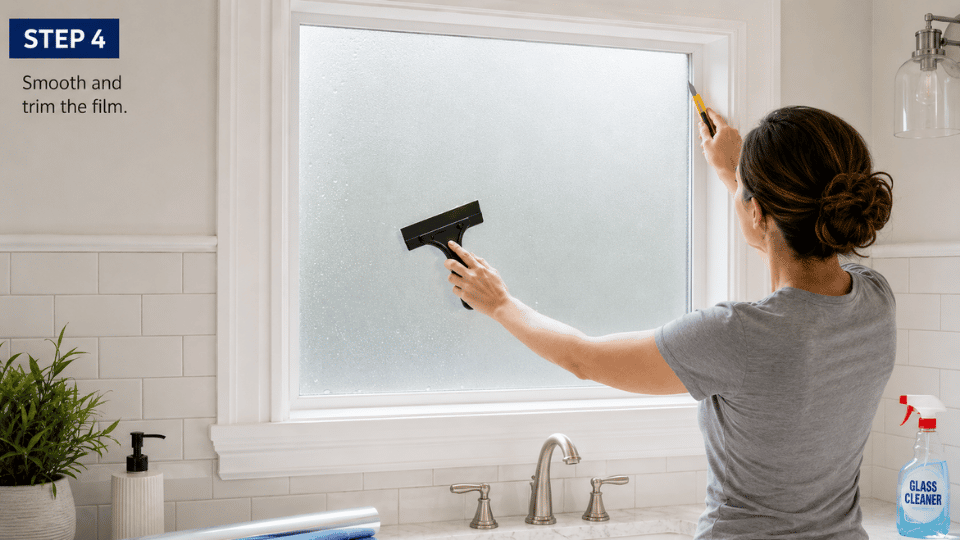
Use a squeegee to push air bubbles and water toward the edges. Work from the center outward so the film settles evenly.
Once the surface looks smooth, trim the excess film along the frame with a sharp utility knife. Keep the blade steady for cleaner edges.
Step 5: Let the Frosted Window Set
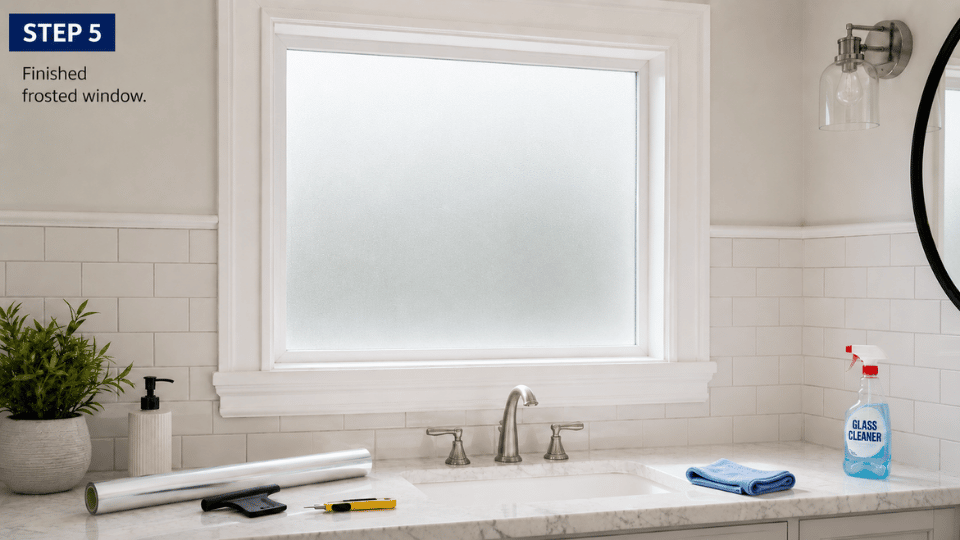
Leave the window undisturbed so the film can settle and bond properly. Wipe away any remaining moisture from the frame or sill.
The finished glass should look smooth, softly blurred, and evenly frosted. Avoid heavy cleaning for at least a day so the edges stay secure.
Watch out for: dust and rushed trimming. Tiny specks can create bumps under the film, and a dull blade can drag or tear the edges.
Method 2: Using Frosted Glass Spray
Frosted glass spray works best for smaller decorative jobs, cabinet inserts, mirrors, vases, jars, and small glass panels.
It creates a semi-transparent coating that softens the surface and diffuses light, but it’s not as durable as film and doesn’t hold up well in bathrooms where it’ll be cleaned regularly.
If you’re updating cabinet glass as part of a broader refresh, the same painter’s tape and masking approach applies, whether you’re spraying a frosted finish or working through a bathroom tile painting project; clean surfaces and thin coats are everything.
You will need: frosted glass spray paint, painter’s tape, newspaper or a drop sheet, glass cleaner, a clean lint-free cloth, gloves, and a well-ventilated space.
Application Method
- Clean the glass with glass cleaner and a lint-free cloth. Remove grease, dust, and fingerprints, especially near the edges and corners.
- Let the glass dry completely. Any moisture left behind can make the spray dry patchy or uneven.
- Tape around the frame, edges, or design areas you want to protect. Press the tape down firmly to stop spray bleeding underneath.
- Cover nearby surfaces with newspaper or a drop sheet. Overspray can travel farther than expected.
- Shake the spray can well, then hold it about 30 cm from the glass.
- Apply the first coat in slow, steady strokes, moving in one direction only. Keep the can moving to avoid drips.
- Let the coat dry according to the product label, usually around 10 to 15 minutes.
- Apply a second light coat in the opposite direction. This helps fill thin spots and gives a smoother finish.
- Remove the tape slowly while the final coat is still slightly tacky.
- Leave the glass undisturbed for at least 24 hours before touching or cleaning it.
Watch out for: spraying one thick coat. Heavy coats can drip, streak, and dry with a rough texture. Several thin coats always look cleaner and more controlled.
Method 3: Etching Cream
Glass etching cream permanently frosts glass by chemically roughening the surface. It becomes part of the glass rather than a coating on top, which means no peeling, no bubbling, and no wear over time.
It’s ideal for cabinet glass, decorative mirrors, stencil designs, and anywhere you want a finish that looks deliberate and professional.
I’ve used it most on cabinet door inserts, paired with a dark cabinet paint like Greenblack, the frosted glass panel creates a contrast that looks genuinely custom rather than DIY.
You will need: glass etching cream, nitrile gloves, eye protection, a stencil or painter’s tape, a foam brush or small paintbrush, a timer, running water nearby, and glass cleaner.
Application Method
- Put on your gloves and eye protection before opening the etching cream.
- Clean the glass thoroughly with glass cleaner and let it dry completely. Any grease or fingerprints will cause the cream to react unevenly.
- Apply your stencil or painter’s tape to the glass, pressing down all edges firmly so no cream can seep underneath.
- Apply the etching cream in a thick, even layer over the stenciled area using a foam brush. Work quickly and cover the area completely.
- Set a timer for the time shown on your etching cream packaging. Most products require 1 to 5 minutes. Do not leave it longer than recommended.
- When the timer goes off, rinse the glass under running water immediately. Hold the glass under the tap and let the water fully wash the cream away. Do not wipe it, just rinse.
- Remove the stencil or tape while the glass is still under running water.
- Continue rinsing the entire glass surface for at least 30 seconds after all the cream is gone.
- Dry the glass with a clean cloth and check the result.
Watch out for: skipping the test patch. Etching cream can react differently depending on the glass type. Test on a small hidden corner before committing to the full pane, and remember that etching is permanent and cannot be undone.
Other Frosted Glass Methods Worth Knowing
These methods are still worth knowing, but not all belong on the main DIY list. Some work better for decorative projects, while others need professional equipment, safety control, or proper glass replacement.
1. Cornstarch and Lace
Cornstarch and lace create a temporary privacy layer that works well for renters, kids’ rooms, craft spaces, or short-term window fixes.
The paste helps the paper stick to clean glass and can usually be removed with water later. It is affordable and forgiving, but moisture, condensation, and frequent cleaning can make it lift or wrinkle.
- Best detail to know: Rice paper or tracing paper usually looks cleaner than thin tissue or thick lace because it wrinkles and clumps less and gives a smoother, softer finish.
2. Glue or Mod Podge
Glue or Mod Podge creates a soft, cloudy handmade finish on jars, vases, lanterns, and craft panels. It can look charming when the glass is decorative, textured, or intentionally imperfect.
I would not use it for serious window privacy because it may show brush marks, soften when wet, or wear unevenly during regular cleaning.
- Best detail to know: A sponge brush gives a softer finish than a bristle brush, which can leave visible lines once the glue dries.
3. Epsom Salt Crystallization
Epsom salt crystallization creates an icy, crystal-style pattern as the solution dries on the glass. It looks striking on jars, mirrors, and seasonal panels, especially when you want a wintery effect.
The finish is fragile, though. Moisture, wiping, and condensation can break it down quickly, so it belongs in decor territory rather than practical privacy.
- Best detail to know: This method looks best when light hits it from behind, so it suits windows, candle jars, and backlit decor pieces.
4. Sandblasting
Sandblasting permanently abrades the glass surface to create a matte frosted finish. It suits architectural panels, commercial glass, and custom designs that need durability, crisp masking, or a professional-grade finish.
Because it requires equipment, dust control, masking skills, and safety gear, this method is usually better handled by a trained professional.
- Best detail to know: Sandblasting is useful for crisp patterns because masked areas stay clear while exposed glass turns permanently matte.
5. Acid-Etched Glass
Acid-etched glass gives a smooth, permanent frosted finish for doors, showers, office partitions, and premium privacy projects.
It usually looks more controlled than DIY etching cream and can suit larger panes better. If you are planning a longer renovation and want the glass to hold up for years, this option is worth considering.
- Best detail to know: Acid-etched glass often has a smoother feel than sandblasted glass, which can make it easier to clean in busy spaces.
6. Patterned or Obscure Glass
Patterned or obscure glass includes reeded, fluted, rain, ribbed, and other textured privacy styles. These are not DIY frosting methods, but they solve the same problem with a more permanent design finish.
They work especially well for bathrooms, showers, entry doors, and renovations where replacing the glass is already part of the plan.
- Best detail to know: Reeded or fluted glass gives privacy while adding vertical texture, so it can feel more designed than plain frosting.
Common Mistakes to Avoid
Most frosted glass projects go wrong for simple, avoidable reasons. These are the ones that come up most often.
- Skipping the test patch. Some finishes react differently depending on the glass type. A quick test on a small corner saves a lot of grief.
- Using permanent methods in rentals. Etching cream and sandblasting cannot be undone. Film is almost always the right call when you don’t own the glass.
- Applying film over dust. Tiny specks create visible bubbles and bumps that won’t smooth out no matter how much you squeegee.
- Spraying too heavily. Thick coats drip, streak, and dry unevenly. Thin coats built up slowly are always better.
- Choosing craft methods for wet rooms. Glue, tissue, and salt effects do not handle moisture well. Bathrooms and kitchens will destroy them.
- Ignoring nighttime privacy. Frosted glass blurs details during the day, but with a light on inside at night, shadows can still show clearly from outside.
- Cleaning too soon. Dry to the touch is not the same as cured. Coatings and adhesives often need 24 to 48 hours before they can be handled.
The best finish is the one that survives everyday use in the space it’s meant for. Choosing based on your actual conditions beats choosing based on what looks best in a product photo.
When DIY Is Not the Best Choice?
DIY frosting works well for rentals, small panes, cabinet glass, craft projects, and low-risk privacy upgrades where mistakes are easy to fix. For bathroom windows, sidelights, or interior cabinet doors, one of the five methods above usually gives a solid result.
Professional work makes more sense for large shower screens, commercial partitions, exterior glass, custom entry doors, or expensive glass. The DIY learning curve has a cost, and on a statement piece, that cost is not always worth it.
For help, search for decorative window film installers, glass etching services, sandblasting services, architectural glass suppliers, or shower glass companies.
Frequently Asked Questions
Does frosted window film work on all types of glass?
Static-cling film works on most smooth glass surfaces. It doesn’t adhere well to textured, patterned, or heavily tinted glass. Check the product specifications before buying; most brands list compatible surfaces on the packaging.
Which side of the glass should I frost?
The interior face is the better choice for most DIY methods. The outside surface takes weather, UV exposure, and more aggressive cleaning, all of which degrade spray coatings and film adhesives faster. Frosting the inside gives the finish a longer life.
Can you frost only the bottom half of a window?
Yes, and it often looks more intentional than full-pane frosting. A lower-third or lower-half treatment gives privacy at eye level while leaving the top clear for light and sky. Use painter’s tape or a pre-cut film template to get a straight horizontal line.
How long does frosted window film last?
Quality static-cling film typically lasts 5 to 10 years with normal use. Self-adhesive films may last longer but are harder to remove. Heat, humidity, and frequent cleaning with harsh products will shorten the lifespan of any film.
Is frosted glass hard to clean?
Film-based and factory-etched glass clean easily with mild soap and a soft cloth. Spray coatings are more delicate; wipe gently, and avoid abrasive cleaners. Craft finishes like Mod Podge or Epsom salt shouldn’t be scrubbed at all.
Can you use frosted film on a shower screen?
Yes, but use a film rated for wet environments. Standard window film degrades faster in steam and high humidity. Check that the product is explicitly rated for bathroom or shower use before applying.
How do you remove frosted glass film?
Static-cling film peels off cleanly from most glass. Self-adhesive films may leave residue, apply rubbing alcohol or a commercial adhesive remover and work slowly with a plastic scraper. Avoid metal blades, which scratch the glass surface.
Wrap Up
Knowing how to frost glass gives you more choices than it might at first seem. Film is best for clean, removable privacy.
Spray works well for smaller decorative pieces. Etching cream suits permanent designs. Cornstarch, paper, and glue are better for quick, temporary fixes.
My own preference is a half-panel approach: frost the bottom half and leave the top clear. You get privacy without blocking the sky, and it looks intentional rather than improvised.
Try a test pane first, choose what your space actually needs, and comment with your project if you have tried one of these methods.





