


Kitchen cabinet refinishing is a weekend project that can save a tired kitchen without tearing out solid cabinets, and done right, the finish holds for a decade.
I’ve refinished cabinets in three different kitchens, and the honest truth is that the difference between a result you’re proud of and one that chips by month three comes down almost entirely to prep. This guide walks through every step in sequence, including the ones most tutorials skip over.
Plan for one to two full weekends depending on cabinet count, plus another week before the doors go back on. Total material cost for a typical 10-cabinet kitchen runs $150 to $400 DIY.
Hiring a professional cabinet refinishing service runs $1,000 to $3,500 for the same kitchen.
| Cost Note: Figures in this article are estimates based on national averages. Actual costs vary significantly by region, cabinet count, materials, and project scope. Always get at least three quotes before committing to any professional cabinet refinishing above $1,000. |
What Is Kitchen Cabinet Refinishing?
Kitchen cabinet refinishing means removing the existing surface finish like old paint, stain, or lacquer , and replacing it with a fresh one. The cabinet boxes, doors, and drawer fronts stay in place. Nothing structural changes. The work is entirely surface-level: stripping, sanding, priming, and applying a new finish coat.
This is different from repainting, which works over an intact existing finish, and from full cabinet replacement.
Refinishing goes deeper than a repaint but stops short of removing or rebuilding anything structural. When the finish has failed, peeling, chipping, staining that won’t clean off, kitchen cabinet refinishing is the targeted fix that addresses the actual problem without replacing what is still working.
Refinishing vs. Repainting vs. Refacing: Which One Do You Actually Need?
These three terms get used interchangeably online, but they involve different scopes of work, different costs, and different skill levels. Getting clear on which one matches your situation is the first step before buying a single supply.
| Approach | What It Involves | Best For |
| Refinishing | Strip existing finish, sand, prime, apply new stain or paint | Solid wood or plywood cabinets where the finish has failed |
| Repainting | Clean, scuff-sand, prime, paint , no stripping required | Cabinets with a sound existing finish that just needs a new color |
| Refacing kitchen cabinets | Keep existing boxes, replace doors, drawer fronts, and veneer | Outdated door style where the structure underneath is still solid |
Refinishing is the deepest surface fix short of full replacement. If the existing finish is peeling, chipping, or stained beyond cleaning, refinishing is the right scope.
Refacing is a completely different project that addresses door style rather than finish condition – if you want to understand the options before committing, this breakdown of kitchen cabinet styles and construction types covers what’s worth keeping versus what’s worth replacing.
What Actually Happens to Cabinet Finish Over Time
Most people notice the signs , peeling corners, chipping near handles, discoloration above the stove, but the cause usually goes unaddressed. Knowing what breaks finish down explains why the prep steps ahead are not optional.
- Heat from appliances causes the finish layer to expand and contract repeatedly. Over time that cycle breaks the bond between the coating and the surface beneath it.
- Cooking grease builds up as a thin film across every cabinet face. Over months and years it works under the finish at vulnerable points like edges, corners, and around hardware holes.
- Moisture near the sink and dishwasher gets absorbed into cabinet bases constantly. Wood moves with humidity, and paint or stain moves with the wood until the surface cracks.
- The wrong primer is often the hidden cause. A primer that sits on the surface rather than bonding to it allows the topcoat to follow every movement until it lifts and peels.
- Finish failure starts underneath, not at the topcoat. The paint itself is rarely the problem. Grease, moisture, and poor adhesion beneath it are what cause the surface to break down.
This is why cleaning and priming correctly matter more than any other step, and why the most common mistakes all happen in prep, not in the painting itself.
What Can Go Wrong (Read This Before You Start)
I learned most of these the hard way. Every one of them shows up in prep, not after the topcoat is on, which means they’re all avoidable if you catch them early.
- Skipping the degreaser. Sanding alone does not cut through cooking grease. Without a liquid deglosser or TSP substitute, primer sits on grease rather than wood , and it lifts within months.
- Using wall primer. Standard drywall primer does not bond to pre-finished cabinet surfaces. Bonding primer is formulated specifically for slick, sealed, or previously painted surfaces. This single substitution is behind more DIY cabinet failures than anything else I’ve seen.
- Applying one thick coat. Thick coats trap solvent underneath and crack as they cure. Two thin coats dry faster and cure significantly harder.
- Re-hanging doors before the finish cures. Alkyd finish feels dry within hours but does not reach full hardness for 7 to 14 days. Closing doors too soon causes the finish to stick and tear when opened.
- Removing doors without labeling them. Re-hanging unlabeled doors means adjusting every single hinge from scratch , a 30-minute job becomes a two-hour one.
Project Card
| Difficulty | 3/5 , Manageable with basic tools, but patience in prep is what determines the result |
| Time | 1–2 full weekends of active work, plus 7–14 days cure before re-hanging |
| Cost (DIY) | $150–$400 for a typical 10-cabinet kitchen (materials only) |
| Tools Needed | Screwdrivers, painter’s tape, tack cloth, 120- and 220-grit sandpaper, foam roller, angled brush, sawhorses |
| Skill Required | Intermediate , comfortable with sanding, priming, and thin-coat paint application |
How to Refinish Kitchen Cabinets Step by Step
The sequence is specific, and skipping any part of it , especially around sanding and priming , is the primary reason finishes fail within a season.
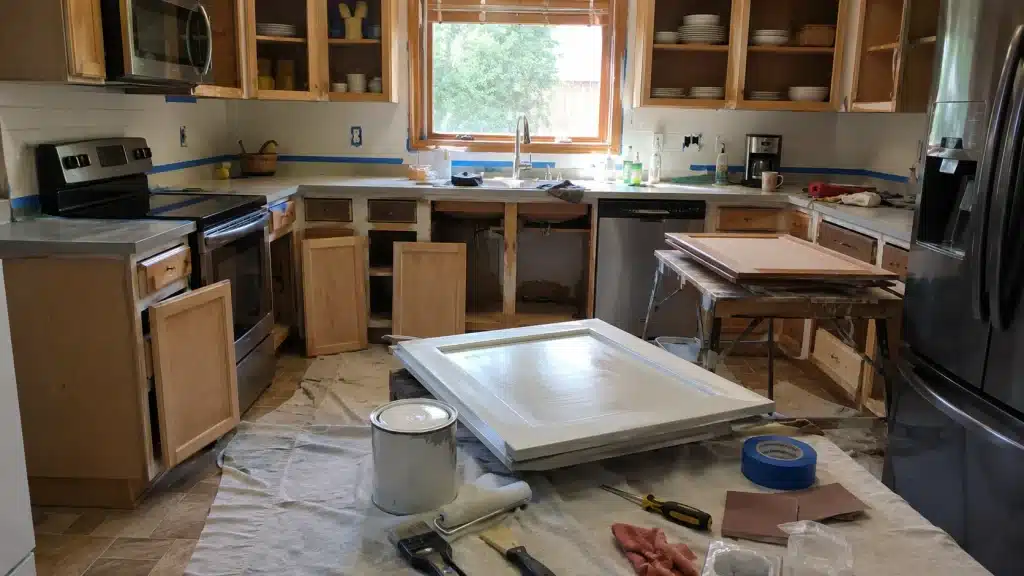
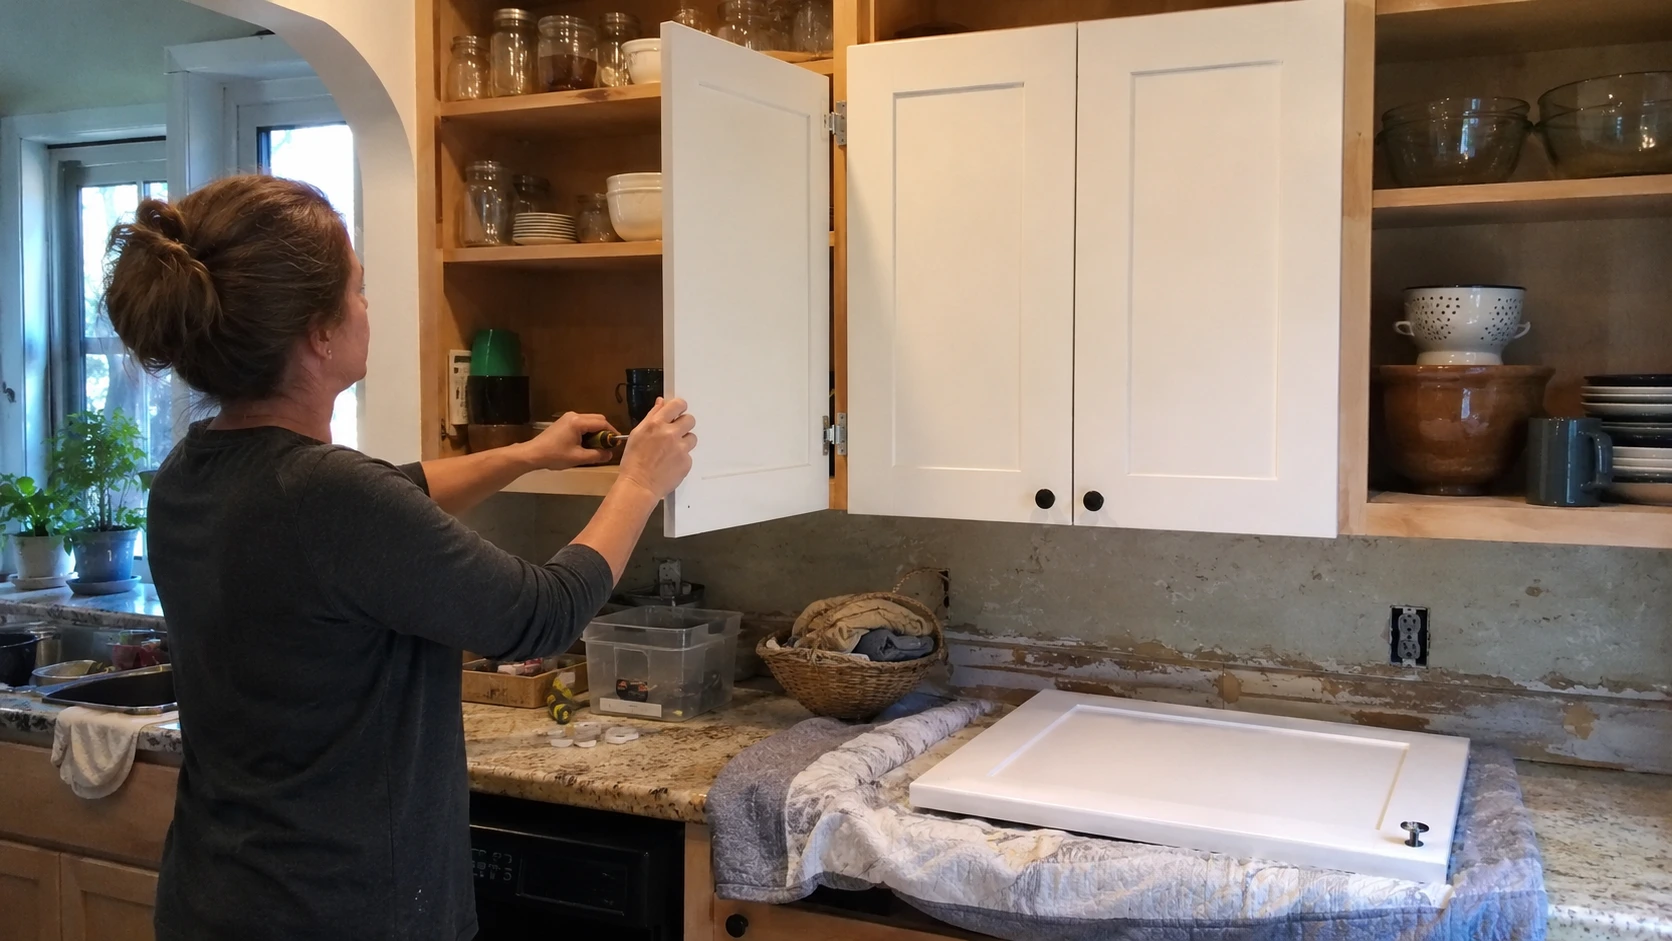
Step 1: Remove and Label Everything

Take off all cabinet doors, drawer fronts, hinges, knobs, and pulls before any prep starts. Label each piece using painter’s tape on the back and keep screws in separate labeled bags.
Take a quick phone photo of each cabinet section before anything comes off, it saves real time when everything goes back on.
Working on doors laid flat across sawhorses prevents drips and produces more even coverage than painting them hanging in place.
Step 2: Degrease All Surfaces

Cabinets collect oil, steam, fingerprints, and food film over time. Sanding before cleaning pushes grime deeper into the surface rather than removing it.
Wipe everything with a TSP substitute or liquid deglosser made for painted or wood surfaces. Follow with a clean water wipe if the product label calls for it. Let everything dry fully , at least 30 minutes , before moving to the repair or sanding stage.
Step 3: Fix Small Damage First
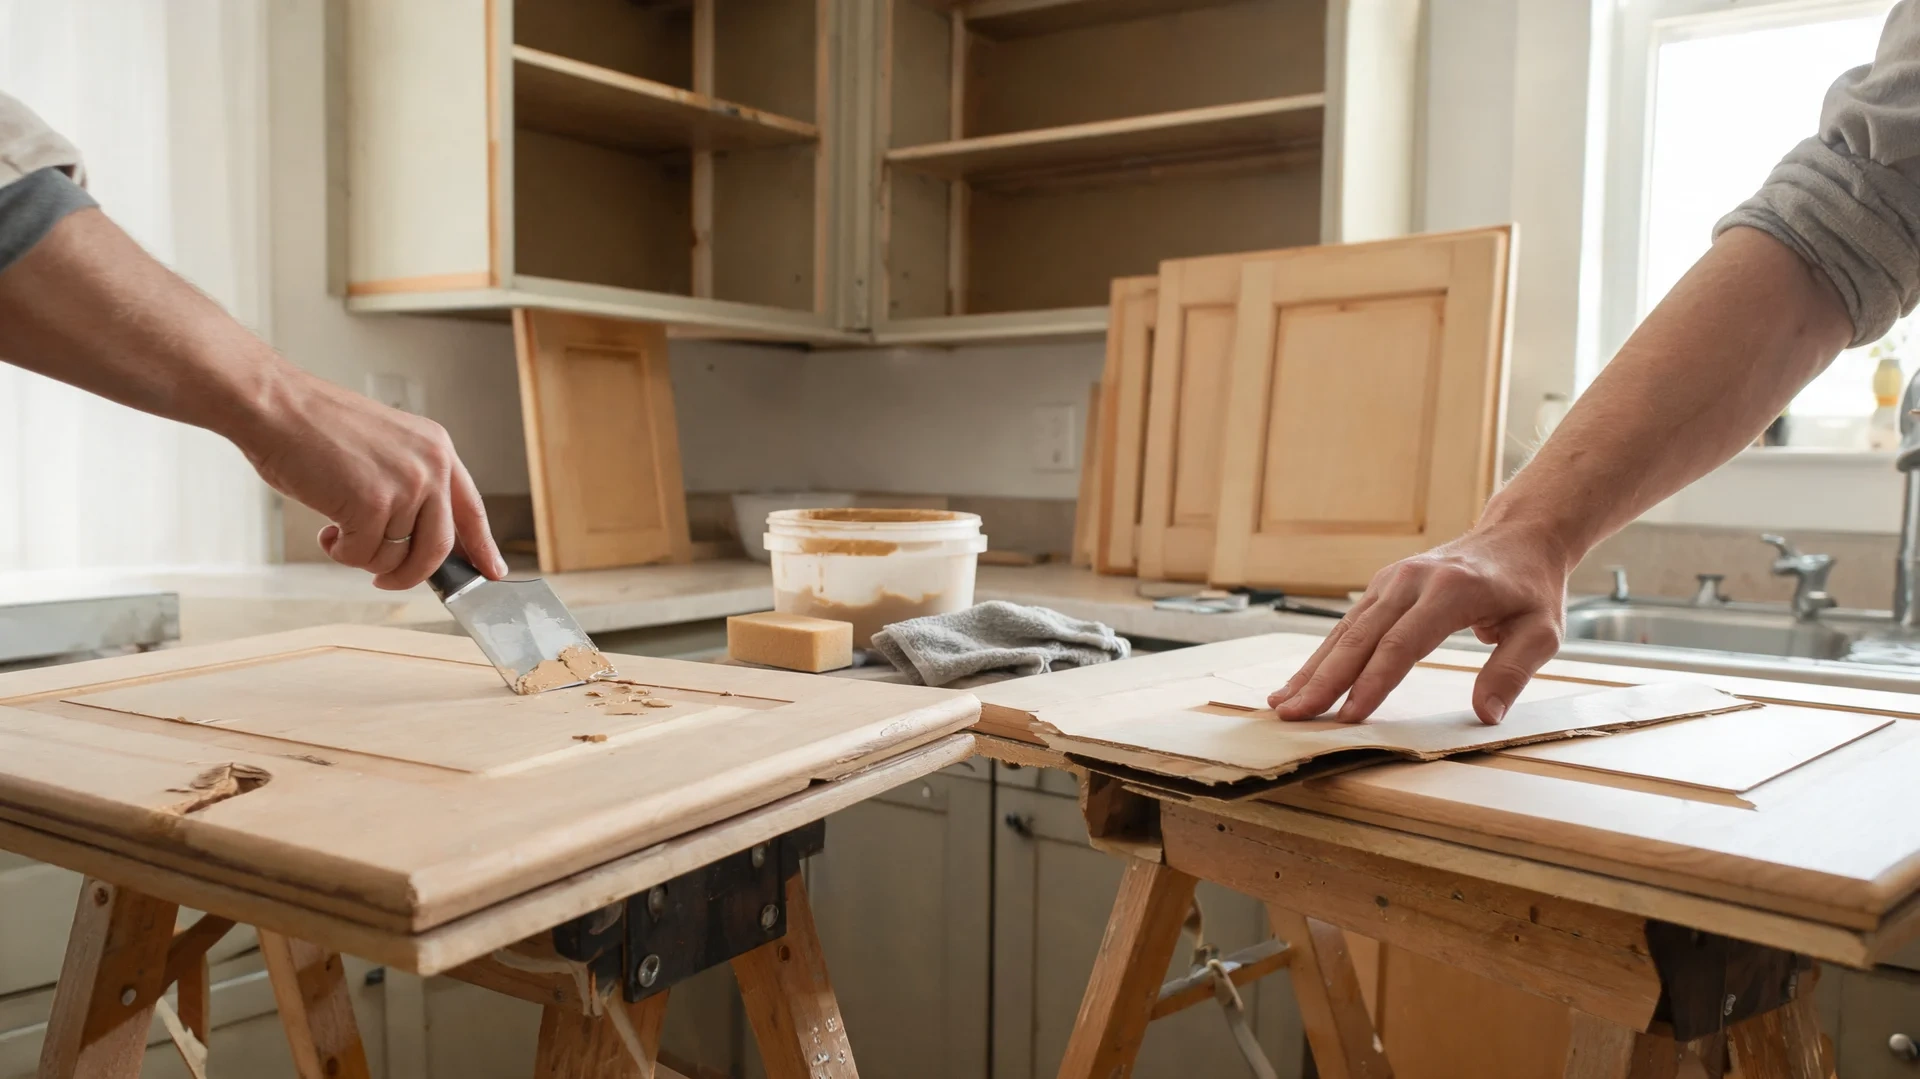
Fill dents, nail holes, open seams, and damaged corners with wood filler before sanding. Press loose veneer flat only if it can be glued down and held tight.
If veneer keeps lifting, refinishing may not hold in that area. Let all repairs dry fully and sand flush before moving forward, repairs that aren’t sanded flat will show through primer and every coat applied over them.
Step 4: Sand or Degloss the Surface
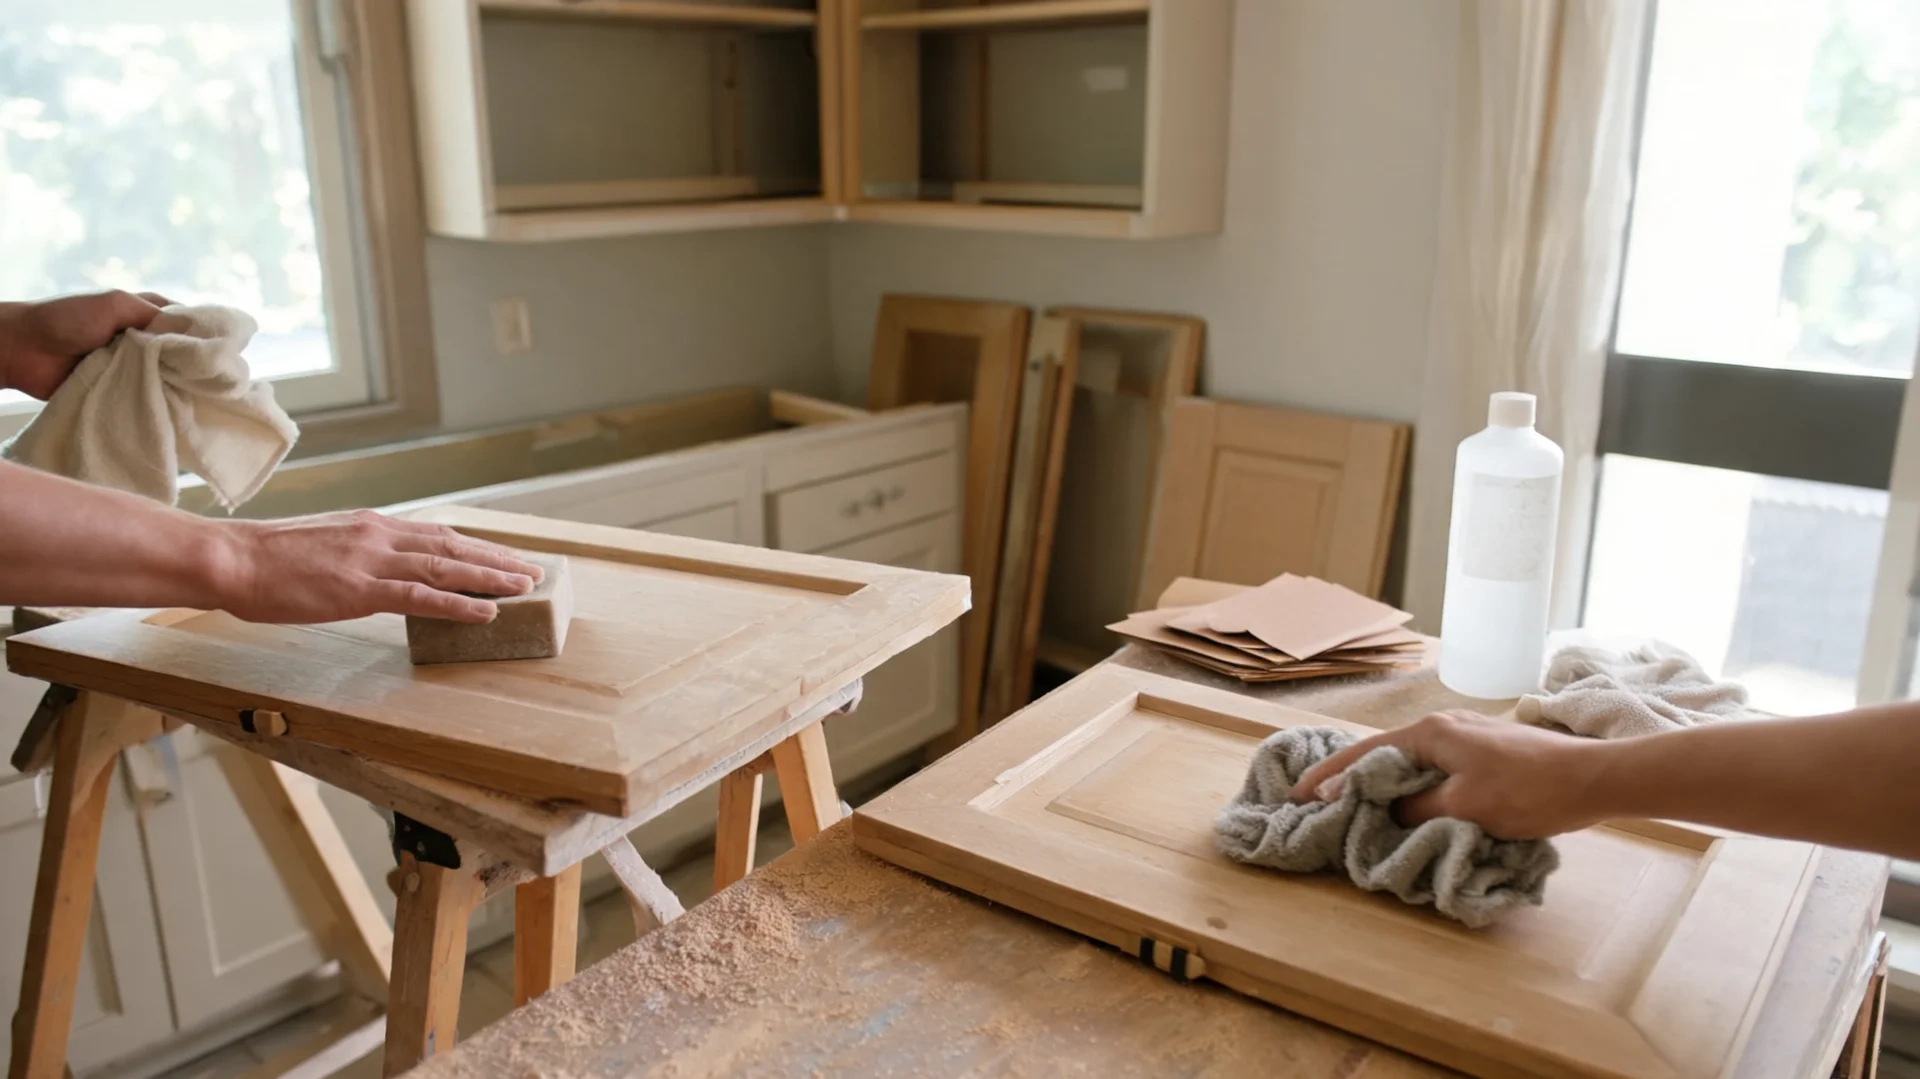
Sanding dulls the shine and gives primer a mechanical grip. The goal is a smooth, dull surface , not bare wood. Sand with 120-grit to scuff, then 220-grit to smooth.
Glossy factory finishes may need both a liquid deglosser and light sanding depending on the primer being used. Wipe with a tack cloth after each stage, dust bumps are very visible once paint dries.
Step 5: Fill Oak Grain If Needed

Oak cabinets show open grain through paint if this step is skipped. If you’re going for a smooth painted finish, not a texture look , apply grain filler after cleaning and sanding, then sand it flat once fully dry before priming.
This step adds half a day but prevents the wood pattern from telegraphing through every coat applied over it. For maple, birch, or other tight-grained species, this step is usually not needed.
Step 6: Apply the Right Primer
Primer is where DIY cabinet jobs win or fail. Laminate needs a bonding primer.
Stained wood may need a stain-blocking primer, if you’re working over an existing stain and want to understand what’s under the finish before you commit to a product, this guide on painting over stained wood covers how to identify the finish type and pick the right primer for it.
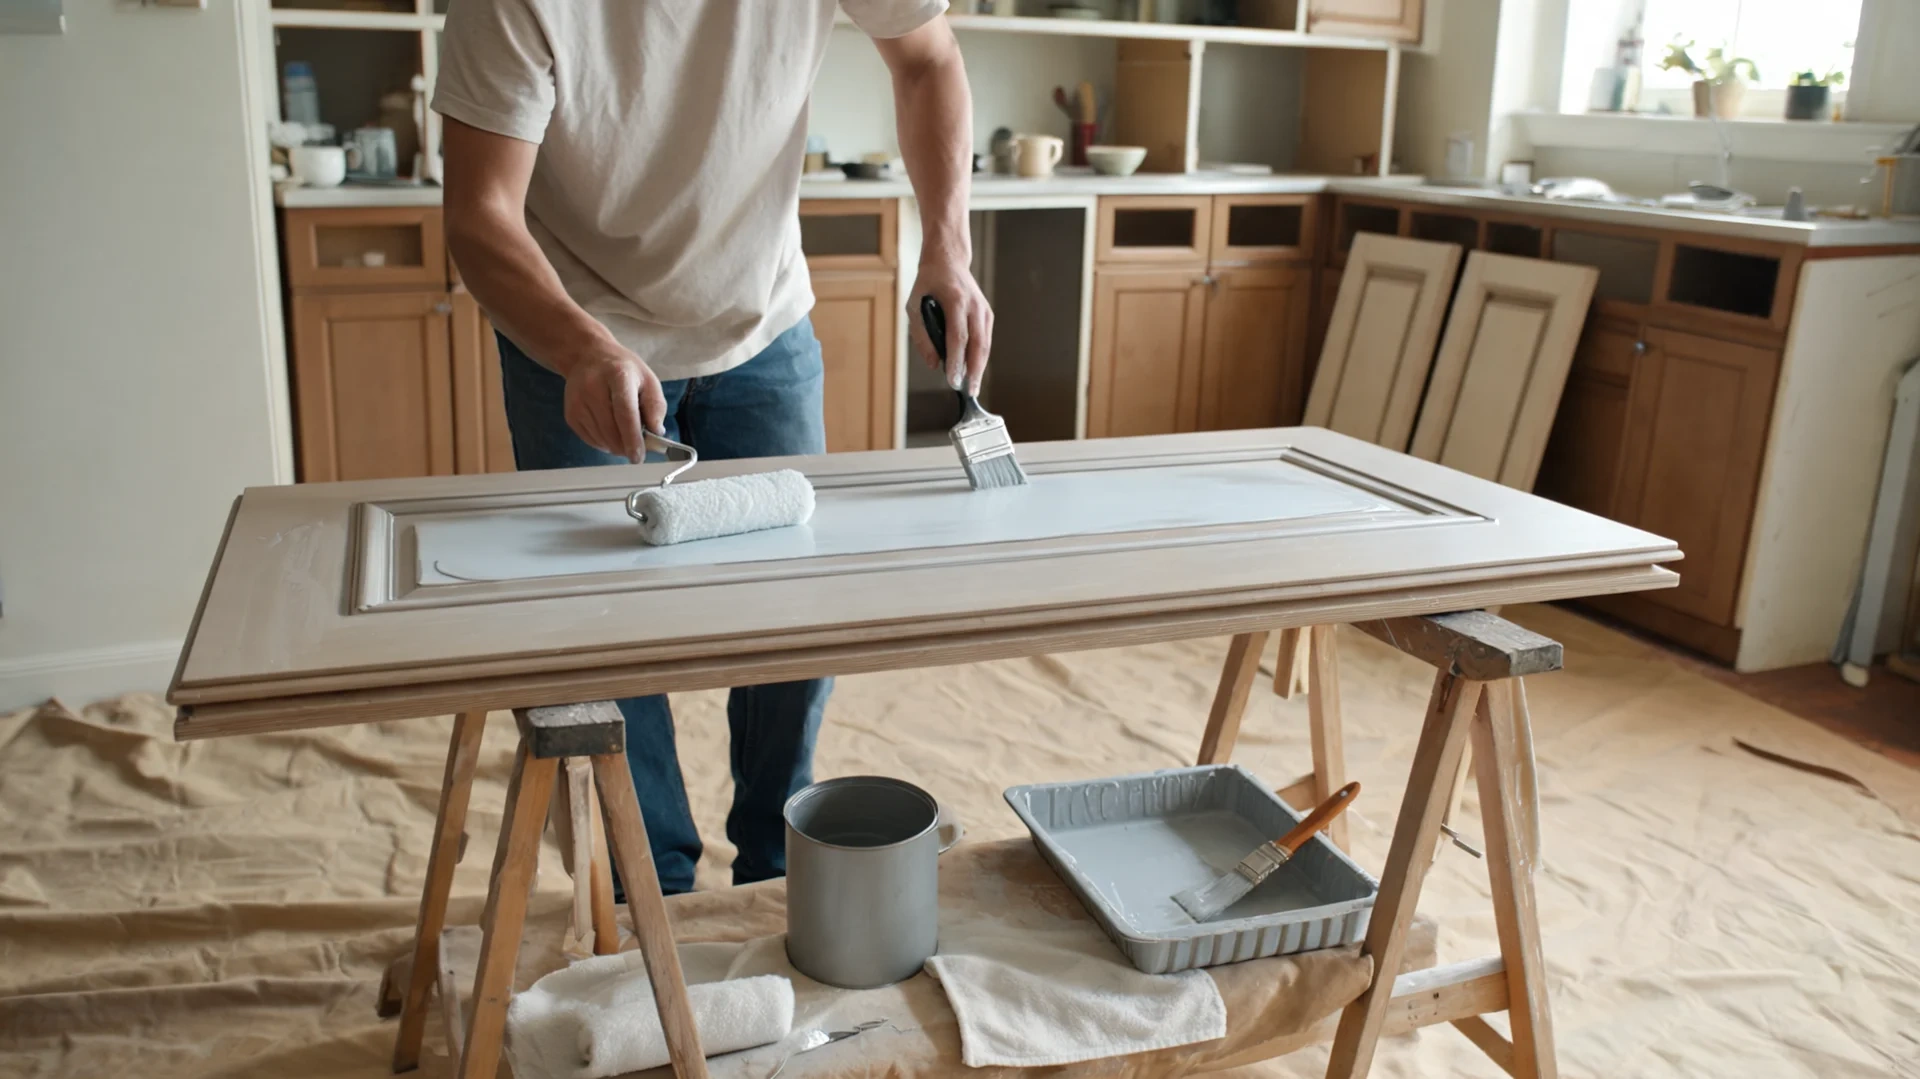
Older finishes may need an oil-based primer depending on product rules and available ventilation. Read the label, match the primer to the cabinet material, and don’t guess. Apply with a foam roller on flat panels and an angled brush on edges.
Step 7: Paint, Stain, or Use a Kit
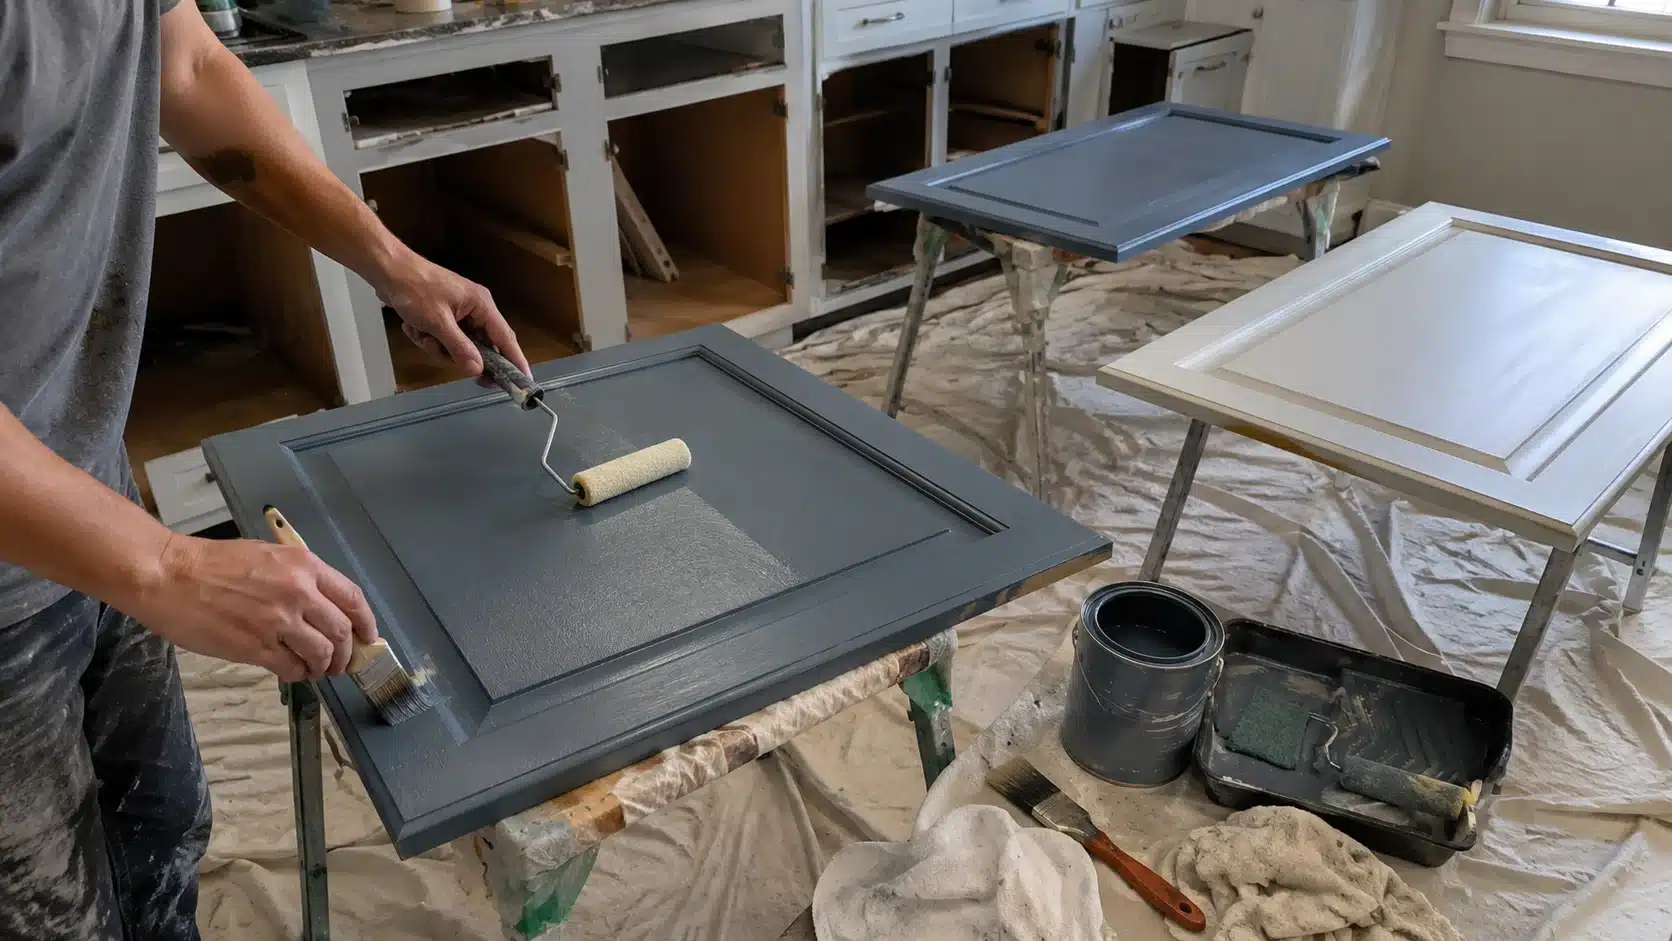
Thin coats work better than heavy ones every time. Cabinet enamel, stain, and refinishing kits each have their own dry times and prep requirements.
Rust-Oleum Cabinet Transformations uses a three-stage process – surface prep, bond coat, protective topcoat. Two to three thin coats of cabinet-specific alkyd paint with light sanding between coats produces a harder, more durable finish than one thick application. Paint upper cabinets before lower ones so any drips land on unpainted surfaces.
Step 8: Let It Cure Before Re-Hanging
Dry and cured are not the same. Dry means the surface can be handled lightly.
Cured means the finish has hardened enough for normal daily use. Rehang doors gently, add door bumpers to protect the fresh finish at closing points, and avoid hard cleaning until the coating reaches full cure in typically 7 to 14 days after the final coat.
If you want to understand the timing difference between dry and cure across different paint types, this breakdown of how long to wait between coats of paint is worth reading before you hang anything back up.
The “Faster the Second Time” Tip
The thing I do differently now that I didn’t do the first time: test color on a removed drawer front before coating any doors.
Kitchen lighting reads completely differently than store swatches, what looks like a warm white at the hardware store goes greenish under fluorescent under-cabinet lights. One drawer front test costs you an afternoon. Re-coating all your doors costs a full weekend.
| Pro Tip: Vacuum all surfaces before each coat, then follow with a tack cloth. Don’t skip the tack cloth pass even if the vacuum looked thorough , fine dust that’s invisible to the eye becomes very visible once paint dries. |
Tips for Refinishing Kitchen Cabinets Yourself
- Photo before you remove anything. A quick phone photo of each cabinet section shows door placement and hinge position, saving real time when everything goes back on.
- Bag hardware by cabinet. Keep screws and hinges from each cabinet in its own labeled bag , mixed hardware causes fitting problems when doors go back on.
- Paint top to bottom. Always coat upper cabinets before lower ones. Drips from the top land on unpainted surfaces instead of freshly coated ones below.
- Skip the knob towels for two weeks. The finish feels dry but is still curing. Avoid hanging towels, slamming doors, or putting stress on the surface early.
- Follow kit instructions exactly. Refinishing kits like Rust-Oleum Cabinet Transformations use a specific stage process. Skipping any step changes how the finish bonds and holds.
- Control temperature and airflow. Rooms that are too hot, cold, or humid slow cure time and affect how each coat lays. Ideal range is 65–75°F with moderate humidity.
Finish Options That Actually Work in a Kitchen
The process stays the same across most finishes, but the product choice at the primer and topcoat stage shifts depending on the look and the material. These three cover the most common directions for US kitchens.
| Finish Type | Best For | Prep Needed | Product |
| White or Off-White Paint | Solid wood and plywood | Grain filler on oak before priming | Alkyd or waterborne alkyd, satin or semi-gloss |
| Natural Wood Stain | Solid wood only | Full strip to bare wood, sand with the grain | Oil-based stain plus kitchen-rated topcoat sealer |
| Deep Colors (Navy, Green, Black) | Lower cabinets or island accent | Two coats tinted bonding primer | Alkyd paint for color depth and hard cure |
If you’re going with a natural wood stain finish, the species you’re working with matters , maple, oak, and pine each take stain differently.
A maple stain color chart is worth checking before you commit to a shade, since the same stain product can read very differently on different wood species. The right finish comes down to material type and how much prep the surface actually needs.
What Does Kitchen Cabinet Refinishing Cost?
Cost is one of the top reasons people tackle this project themselves , and the gap between DIY and professional cabinet refinishing is significant.
| Approach | Typical Cost Range | What Drives the Variation |
| DIY (materials only) | $150–$400 | Cabinet count, primer type, whether a kit or individual products are used |
| Professional cabinet refinishing service | $1,000–$3,500 | Kitchen size, finish type, regional labor rates, spray vs brush application |
| Full cabinet replacement | $5,000–$25,000+ | Cabinet grade, kitchen size, installation complexity |
The DIY cost range assumes solid wood or plywood cabinets in reasonable condition. Laminate cabinets add cost for bonding primer. Heavily damaged doors that need filler work and extensive grain-filling push toward the higher end of materials cost.
When Is the Right Time to Refinish?
Timing affects both the cure quality and how much rework the project creates when it’s sequenced incorrectly around other updates.
Season matters. High humidity slows alkyd cure time and can cause adhesion issues during application. Late spring or early fall, when indoor humidity is moderate, produces the most consistent results in most parts of the US.
Renovation sequence. Refinish cabinets after any plumbing, tile, or backsplash work is complete. Dust and moisture from those jobs settle on fresh finish. Paint walls after cabinets, not before, to avoid cutting in around a finished surface.
Signs the timing is right. Peeling at edges and corners, chipping near hardware, and discoloration that won’t clean off are signs of adhesion failure , the point where cleaning and touch-up stop working and kitchen cabinet refinishing becomes the only real fix.
Frequently Asked Questions About Kitchen Cabinet Refinishing
These are the questions I hear most often from people who’ve already decided to tackle this project themselves.
How much does kitchen cabinet refinishing cost?
DIY materials for a typical 10-cabinet kitchen run $150–$400. Professional cabinet refinishing services typically charge $1,000–$3,500 for the same kitchen. Full cabinet replacement starts around $5,000 and goes well above that for custom work.
Do kitchen cabinets need to be sanded before refinishing?
Yes , even when using a liquid deglosser. Scuff sanding with 120-grit creates the surface texture primer needs to bond. Following with 220-grit smooths before the topcoat. Skipping sanding leaves the surface too slick for reliable adhesion over time.
Can laminate kitchen cabinets be refinished?
Yes, but laminate requires a dedicated bonding primer. Standard primer won’t adhere to slick laminate reliably. Results also depend on the laminate condition , peeling or bubbling laminate won’t hold a new finish regardless of how carefully it’s applied.
Can cabinets be refinished without stripping?
Yes, if the existing finish is sound with no peeling or bubbling, and the surface is cleaned and scuff-sanded properly. If the old finish is already failing, skipping the strip means the new coat bonds to a compromised surface and will peel regardless.
What is the difference between cabinet refinishing and cabinet door refinishing?
Cabinet door refinishing focuses on just the door panels and drawer fronts. Full kitchen cabinet refinishing includes the doors plus all the face frames, cabinet boxes, and any exposed surfaces. Doors-only costs less but leaves mismatched finishes if the box faces show wear.
How long does a refinished cabinet finish last?
A properly prepped finish using alkyd or waterborne alkyd paint typically lasts 8–15 years with normal kitchen use. Prep quality and primer type matter more than topcoat brand. Allowing full cure time , 7 to 14 days , before daily use is what separates a long-lasting result from early peeling.
What is the best primer for kitchen cabinet refinishing?
For previously painted wood or plywood, a waterborne bonding primer or shellac-based primer works well. For laminate, use a dedicated bonding primer. For cabinets with heavy stain bleed risk, an oil-based stain-blocking primer is the safest choice. Never use standard drywall primer on cabinet surfaces.
Final Verdict: Is Kitchen Cabinet Refinishing Worth It?
If the cabinet boxes are structurally solid and the finish is what’s failing, kitchen cabinet refinishing is the most cost-effective fix available – $150 to $400 in materials versus $5,000 and up for replacement.
The project is manageable at difficulty 3 out of 5, but the prep stages are where the result is actually decided. Don’t rush the degreasing, don’t skip the bonding primer, and give the finish the full 7 to 14 days to cure before you hang anything back.
Start with one door through the full process before committing to the whole kitchen , you’ll know within a day whether the prep is dialed in and whether your chosen finish lands the way you expected.


