

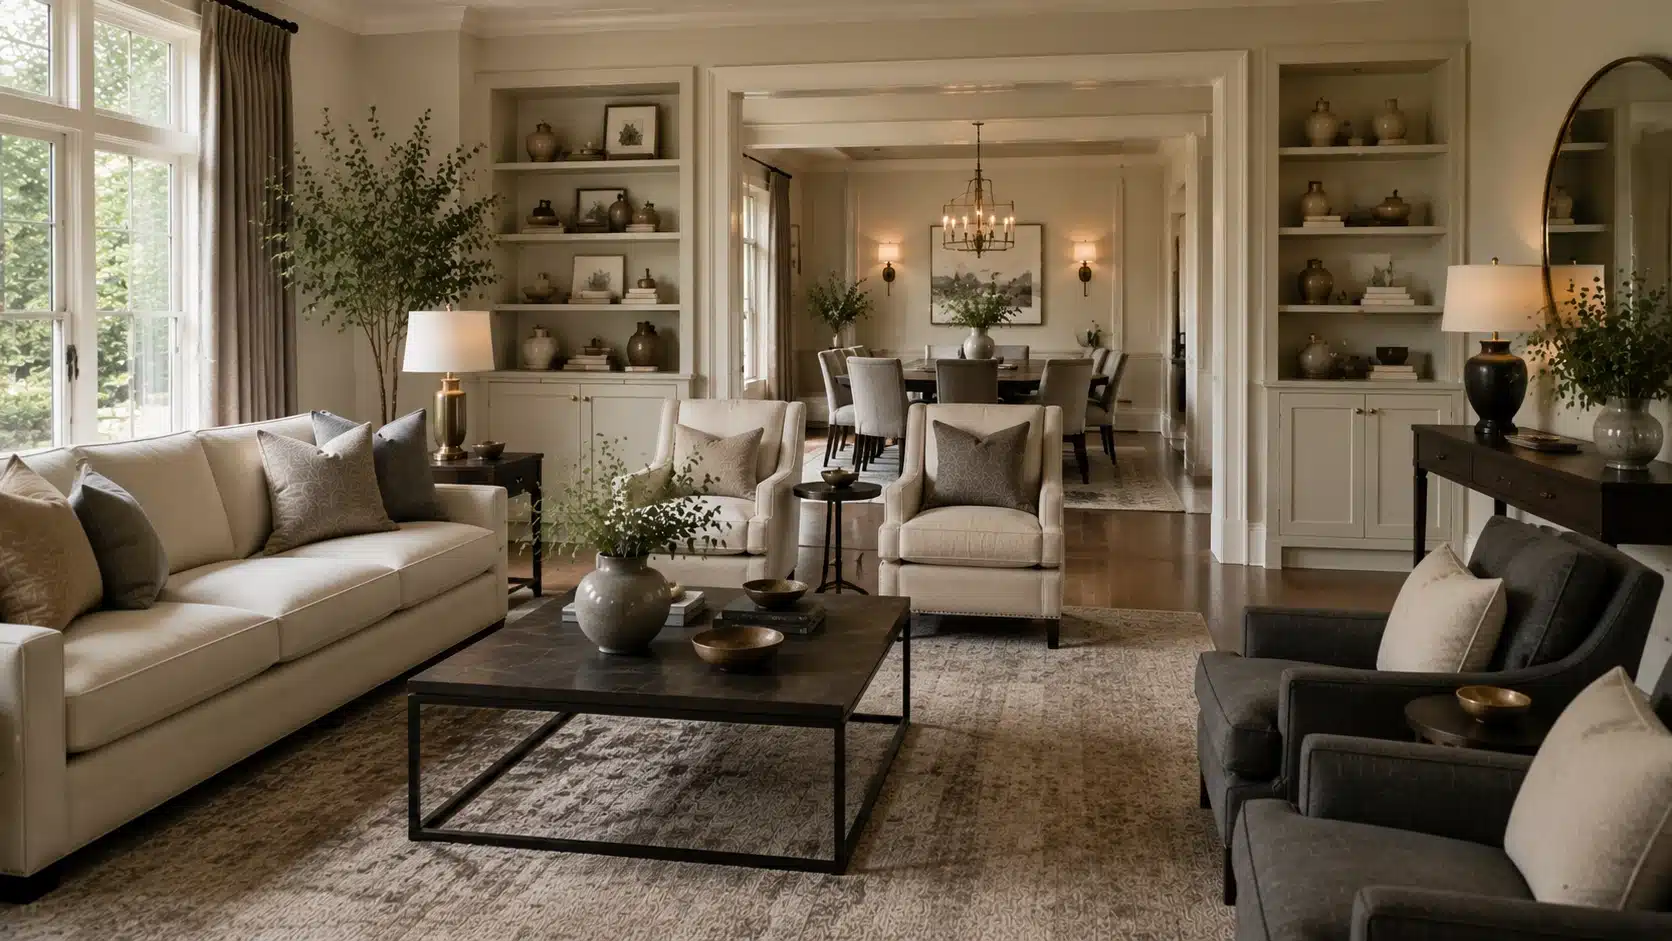
I’ve spent years walking into clients’ homes, where beautiful antique furniture sits awkwardly next to sleek modern lighting, and neither piece looks quite right. That mismatch is usually the moment someone calls a designer. It’s also exactly the problem this style was built to solve. This style sits in the middle ground between traditional warmth and contemporary simplicity. It borrows the comfort and detail of classic rooms while keeping the clean lines and restraint of modern spaces. In this blog, you’ll learn what defines the Transitional Interior Design, the key elements that make it work, how to apply it room by room, the mistakes that trip up, and how to get the look without a full renovation budget. What Is Transitional Interior Design? This style blends traditional furniture and details with the simplicity of contemporary design. It isn’t a strict rulebook so much as a balancing act. You keep the warmth and craftsmanship of traditional rooms, then pair it with the restraint and cleaner silhouettes of modern interiors. The style grew out of a simple shift in how people wanted to live. Formal, heavily decorated rooms started to feel impractical, while fully modern spaces often felt cold. Transitional design emerged as the middle path, and it has stayed popular because it doesn’t chase trends. A room designed a decade ago can still look current today, since it relies on proportion and material choices rather than whatever’s fashionable that year. Designers describe it the same way: understated, textural, and comfortable rather than heavily ornamented. The goal isn’t to notice the furniture first. It’s worth noticing how the whole room feels. Key Elements of Transitional Interior Design No single piece of furniture defines transitional style on its own. It’s a handful of choices working together: color, furniture, texture, architecture, and materials. Each one plays a small part, but together they create the balanced, comfortable feel the style is known for. 1. Neutral Color Palettes With Warm Undertones Transitional rooms almost always begin with a neutral base, typically featuring whites, beiges, taupe, warm greys, and soft browns. These colors don’t compete with the furniture or architecture, which is exactly the point. A neutral wall lets a carved wood console and a simple modern sofa sit in the same room without visual conflict. The trick is avoiding a flat, one-note space. Warm gray walls paired with wood furniture add depth. Cream upholstery grounded by black or bronze accents keeps a neutral room from feeling washed out. 2. A Mix of Traditional and Modern Furniture This is the clearest visual signal of the style. You’re not filling a room with only antiques or only contemporary pieces. You’re pairing them. A few combinations that consistently work: A tufted, traditional-shaped sofa with a simple modern coffee table Classic dining chairs under a contemporary pendant light A carved wood mirror above a streamlined console The one rule worth remembering is not to match every piece to the same era. A room full of only traditional furniture reads as traditional rather than transitional. The mix is the style. 3. Layered Textures Instead of Heavy Patterns Traditional rooms often rely on bold patterns; modern rooms often rely on none at all. This approach leans on texture instead, using linen curtains, wool rugs, leather accents, velvet cushions, and natural wood finishes to add depth without visual noise. This layering is what gives a transitional room its sense of comfort. A plain sofa in the right fabric can feel more inviting than a heavily patterned one, simply because of how the material reads and feels. 4. Balanced Architectural Details Crown molding, paneling, built-in shelving, and simple trim work all have a place in transitional homes, but the details are kept simpler than in fully traditional interiors. Ornate crown molding gets swapped for a cleaner profile. Elaborate paneling gets simplified into flat panels. The architecture still nods to tradition, just without the extra flourish. 5. Mixed Materials and Finishes Wood, glass, stone, and metal working together is a hallmark of transitional spaces. A stone fireplace surround, a glass coffee table, and matte black hardware can all coexist in the same room because none of them is fighting for attention. Mixing materials, rather than repeating a single finish throughout, is what keeps the space from feeling flat or overly matchy. Transitional Interior Design Ideas For Different Rooms The principles behind transitional design stay the same from room to room, but how they show up changes. A living room leans on furniture and lighting, while a kitchen or bathroom leans more on materials and finishes. 1. Living Room A transitional living room typically starts with a neutral sofa, rugs, and a mix of classic and contemporary lighting. Traditional details like a fireplace mantel or molding stay in place, while the furniture around them leans simpler. Classic artwork in a clean frame and a balanced furniture arrangement (rather than a rigid, formal layout) complete the look. 2. Kitchen Shaker cabinets are the backbone of most transitional kitchen designs because the door style itself bridges traditional paneling and modern simplicity. Pair them with marble or clean quartz countertops, mixed metal hardware, and simple backsplash tile. Wood accents, whether on an island or on open shelving, keep the space feeling warm rather than clinical. 3. Bedroom An upholstered headboard is one of the fastest ways to bring transitional style into a bedroom. Keep bedding neutral, then layer in texture through textiles like a knit throw or linen duvet cover. Traditional bedside tables paired with modern lamps are a small detail that does a lot of visual work. 4. Bathroom Bathroom designs lean transitional through a freestanding tub, classic tile patterns, and modern fixtures like a wall-mounted faucet or minimal cabinet hardware. Natural stone finishes on countertops or flooring add the same warmth that wood does in other rooms. Once a foundation is in place, repetition, ratio, and scale work together, and a mixed room stops looking accidental. Transitional Interior Design vs. Similar Styles It’s easy to confuse transitional design with the styles sitting on either side of it. Modern, contemporary, and traditional all overlap, but each treats ornamentation, trend sensitivity, and formality differently. 1. Transitional vs. Modern Interior Design: Modern design prioritizes minimalism, sharp lines, and little to no ornamentation. This style keeps some warmth and softness in furniture shapes and finishes, making it feel more lived-in than a strictly modern room. 2. Transitional vs. Contemporary Interior Design: Contemporary design house style shifts with current trends, which means a contemporary room from ten years ago can look dated fairly quickly. This look is built around longevity rather than trend cycles, so it tends to age better. 3. Transitional vs. Traditional Interior Design: Traditional interiors lean into ornamentation, formal furniture arrangements, and detailed millwork. Transitional spaces simplify it all: less decoration, more relaxed layouts, and cleaner finishes throughout. Quick comparison: Style Ornamentation Trend Sensitivity Overall Feel Transitional Simplified, selective Low, built for longevity Balanced, comfortable Modern Minimal to none Low Sleek, sparse Contemporary Varies with trends High Current, ever-changing Traditional Heavy, formal Low Ornate, classic The common thread across all three comparisons is balance. Transitional design borrows just enough from each neighboring style to feel current and comfortable, without fully committing to any single extreme. Errors to Avoid in Transitional Interior Design Even residential owners who understand the style well can tip a room too far toward one side without realizing it. These four mistakes come up the most, and each one is easy to fix once you know what to look for. Using too many decorative details. Overcrowding a room with antiques, patterns, and accessories pulls it back toward traditional design and away from transitional balance. Creating a completely neutral room without contrast. An all-neutral room without contrast can feel unfinished. Darker woods, metal accents, or textured fabric give the eye somewhere to land. Mixing styles without repeating elements. Furniture from different eras without a shared color, material, or finish feels disconnected rather than curated. Choosing trendy pieces over timeless ones. Trend-driven pieces undercut the entire point of the style. Ask if you’ll still want it in five years. Most of these mistakes come from the same root cause: overcorrecting in one direction, whether that’s too much decoration, too little contrast, or too much trend-chasing. Catching them early keeps a room feeling balanced instead of unfinished or overdone. How to Create Transitional Style on a Budget A full transitional redesign doesn’t require a renovation. Most of the look comes down to smart, targeted swaps rather than tearing out what’s already there, which means you can work room by room and spread the cost out over time. A few lower-cost changes go a long way: Keep existing architectural features rather than removing them Update lighting first, since fixtures change a room’s feel quickly Add texture through throw pillows, a new rug, or linen curtains Replace cabinet or door hardware with an inexpensive material update Mix in a vintage or secondhand find alongside newer furniture Repaint walls in a warm neutral tone None of these require a contractor, and most can be done over a weekend. Here’s a rough sense of what each change tends to cost: Change Approx. Budget Effort Repaint walls in a warm neutral $50–$200 Weekend project Replace cabinet or door hardware $30–$150 A few hours Add a new rug or throw pillows $50–$300 Same day Swap in linen curtains $60–$200 Same day Update a light fixture $75–$400 Weekend project Mix in a vintage or secondhand find $20–$150 Ongoing, as you find pieces Costs will vary by room size and materials, but none of these require touching the budget you’d set aside for a full renovation. Is Transitional Interior Design Right for Your Home? This interior design style tends to suit people who like classic details but don’t want a formal, museum-like room, and works less well for anyone drawn to a fully bare, minimal space or a heavily ornate, maximalist one. I’m not sure your taste fits the style. Here’s a quick gut check: If Your Vibe Is… Transitional Design Fit “I love antiques, but I don’t want my living room to look like a museum” Strong fit “I want a calm, neutral space that still feels warm” Strong fit “I keep collecting furniture from different eras and can’t tie it together” Strong fit “I want a completely bare, ultra-minimal room” Not a fit; lean modern instead “I want every piece ornate, patterned, and formal” Not a fit; lean traditional instead “I want a space that still feels current in ten years” Strong fit If most of your answers land in the “strong fit” column, transitional design is likely your style. If you’re drawn to the extremes on either end, one of its close cousins, fully modern or fully traditional, will probably serve you better. Frequently Asked Questions What is the 3-5-7 rule in interior design? It’s a styling guide for grouping decor in odd numbers, since asymmetrical groupings tend to look more natural and balanced than even ones. What colors are used in transitional interior design? Neutral tones dominate transitional spaces, including white, beige, taupe, warm gray, and soft brown, often layered with darker wood or metal accents for contrast. Is transitional design outdated? No. It’s built around timeless proportions and materials rather than trends, which is why it tends to stay relevant far longer than trend-driven styles. How do you make a room look transitional? Pair traditional furniture shapes with modern finishes, keep the palette neutral, layer in texture through fabrics, and simplify architectural details rather than removing them entirely. The Sweet Spot Between Old and New Good design rarely asks you to pick a side, and transitional style proves it. It takes the comfort of a room your grandmother would recognize and pairs it with the ease of one built for how you actually live now. No strict rulebook, no chasing whatever’s trending this year, just repetition, proportion, and texture doing the quiet work of holding a room together. That’s also why it lasts. A well-styled transitional living room today will still feel right in ten years, long after trend-driven looks have cycled out. If you’re ready to try it, don’t overhaul the whole house at once. Pick one traditional piece and one modern piece you already love, put them in the same room, and build outward from there. The balance tends to reveal itself once you stop overthinking it.
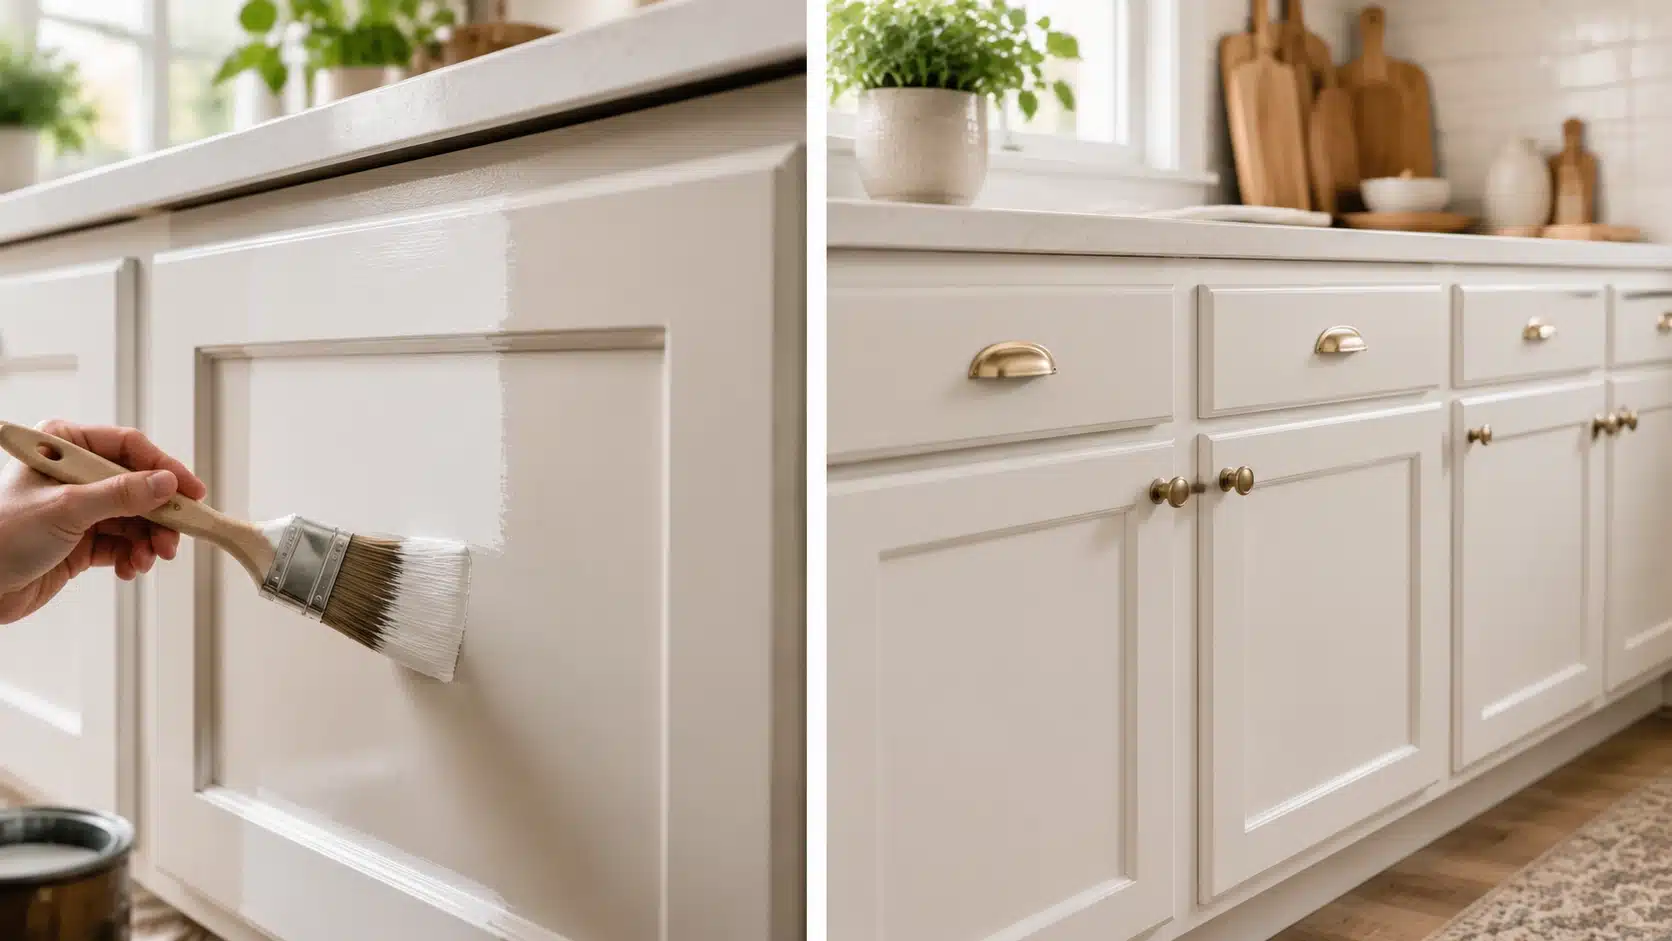
To paint kitchen cabinets, remove the doors and hardware first. Clean, sand, then apply a bonding primer. Add two thin coats of cabinet enamel paint. Let each coat cure before reinstalling doors. Old cabinets can drag down an entire kitchen. Chipped edges and dull paint make the room feel tired. Replacing them costs thousands, while painting costs a fraction of that. This blog will walk you through the entire process. It covers cleaning, sanding, priming, and painting in order. It also covers paint types, drying times, and mistakes to avoid. The table above gives a rough sense of the full timeline. Each stage matters, and rushing any one of them shows up in the final result. Tools and Materials You Need Good prep starts with the right supplies. Gathering everything first saves time once you begin. Having every item on hand also stops mid-project trips to the store. It keeps momentum going once you start cleaning and sanding. A quick checklist before you start also helps you spot anything missing early. Tool/Material Purpose Degreaser or TSP substitute Removes grease and buildup Sandpaper (120-220 grit) Creates surface adhesion Bonding primer Helps paint stick properly Cabinet paint or enamel Creates a durable finish Foam roller Reduces visible roller marks Quality brush Covers edges and detail work Painter’s tape Protects surrounding surfaces Drop cloths Protects floors and counters Also set aside safety gear, such as gloves and a dust mask. Dust control supplies, such as a shop vacuum, help keep the workspace clean. Label your cabinet and cupboard doors and hardware with tape and a marker before you take anything apart. This one habit saves hours of confusion later. How to Paint Kitchen Cabinets Step by Step This is the full process from start to finish. Follow each step for the best result. Each step builds on the one before it. Skipping ahead often causes poor adhesion or a rough finish. Set aside a few days for the full project rather than rushing it into one weekend. Working in order, without skipping steps, gives you a smoother, longer-lasting finish. 1. Remove Cabinet Doors and Hardware Take off every hinge, handle, and knob first. Label each door and drawer with painter’s tape. Store all screws in a labeled bag per cabinet. Avoid painting over hinges, since paint buildup stops them from closing properly. Set hardware aside in one spot so nothing gets lost during the project. 2. Clean Cabinets Thoroughly Kitchen paint clings to grease on every surface, even ones that look clean. This film stops paint from bonding correctly, no matter how many coats you add. Use a degreaser or a TSP substitute on all surfaces. Clean corners, edges, and the inside of cabinet frames too. Rinse with clean water afterward and let everything dry fully. Case example: One homeowner skipped degreasing and saw paint peel within three weeks near the stove. A second attempt with proper degreasing held up for years. 3. Repair Imperfections Before Painting Fill any dents or small holes with wood filler. Repair cracks in doors or frames before sanding. Replace the veneer that has already started peeling. Let all filler dry fully before you sand it smooth. Sand patched areas gently to blend them with the surrounding surface. 4. Sand the Cabinet Surfaces You do not need to strip cabinets down to bare wood. Light sanding creates enough texture for primer to grip. Start with 120 grit, then move to 220 grit for a smoother feel. Always sand along the grain of the wood, not against it. Wipe away all dust with a tack cloth before moving forward. A shop vacuum first, then a tack cloth, catches dust a dry rag would miss. Do you need to sand kitchen cabinets before painting? Yes, sanding is recommended for glossy finishes or any damaged surface. Some deglossing products allow lighter sanding, but full prep still improves how long the paint lasts. 5. Apply Primer Primer helps paint stick and stops stains from bleeding through. Use a bonding primer for laminate or slick surfaces. Use a stain-blocking primer on wood with visible tannins. Apply primer in thin, even coats. Let it dry fully, then sand lightly before painting. Two thin coats of primer usually work better than one heavy coat. 6. Paint Cabinet Doors and Drawers Lay doors flat on a table or sawhorses. Paint flat surfaces first, then work on the edges. Brush detailed areas and roll larger flat panels. Apply thin coats instead of one thick layer, since thick paint causes drips and slow drying. Working flat also stops paint from pooling along the bottom edge. 7. Paint Cabinet Boxes Protect countertops and walls with drop cloths and tape. Start from the inside edges and work outward. Keep your brush strokes moving in one steady direction for a smooth look. Pay close attention to corners and the undersides of upper cabinets, since these spots are often skipped. 8. Apply Additional Coats Most cabinets need two to three coats for full coverage. Lightly sand between each coat with fine sandpaper. Let each layer dry completely before adding the next one. Rushing this step is the most common cause of a rough finish. A light, even sanding between coats also helps each layer bond better than the last. 9. Reinstall Doors and Hardware Wait several days before you reinstall doors, even if the paint feels dry. Adjust hinges if doors do not sit evenly. Consider adding new hardware for a refreshed, updated look. Step back and check for gaps or uneven spacing before you tighten every screw. Pick the Right Cabinet Paint Finish Sheen level changes both looks and durability. A higher sheen resists moisture and wipes clean faster. Cabinets take a lot of daily contact, from hands to spills to steam. The right sheen can make cleanup much easier over time. Satin: Balances a soft look with easy cleaning. Works well for most kitchens and hides light imperfections without looking flat. Semi-gloss: More durable and moisture-resistant. A common pick for busy households with kids, pets, or frequent cooking. Matte: Usually not recommended for cabinets. It shows fingerprints and stains more easily, and it is harder to wipe clean. High-gloss: Gives a sleek, reflective look and cleans up easily, but it highlights every dent, scratch, or brush mark. Very high gloss finishes can also be a problem. They highlight every small dent or brush mark. Satin or semi-gloss tends to hide small flaws better while staying easy to wipe down. How Long Does it Take to Paint Kitchen Cabinets? Task Approximate Time Removing hardware 1-2 hours Cleaning and prep 1 day Priming Several hours plus drying Painting 2-3 days Final curing Several days to weeks Dry time and cure time are not the same thing. Paint can feel dry to the touch within hours. Full curing, when the finish reaches its hardest state, takes much longer. Avoid heavy kitchen use until the paint has fully cured. How Much Does it Cost to Paint Kitchen Cabinets? Cost depends on cabinet size, paint quality, and surface condition. A DIY project costs far less than hiring a professional. Project Type Average Cost DIY painting $100-$500 Professional cabinet painting $1,000-$5,000+ Factors that raise the price include door count, repair needs, and paint brand. Larger kitchens with more cabinet doors naturally cost more to finish. Spray Painting vs Brush Painting Cabinets Both methods can give great results, but they suit different setups. Spraying takes more equipment and space, while brushing and rolling stay simple enough for most home kitchens. Method Advantages Drawbacks Spray painting Smooth, factory-like finish Needs more setup and equipment Brush and roller Affordable and beginner-friendly More visible brush or roller marks Spray painting dries fast, and it works well if you have an outdoor space or a garage where you can set up a spray tent. Brushing and rolling remain the better choice for most beginners working indoors. Quick tips for choosing a method: Choose spraying for a smooth, factory-like finish outdoors Choose a brush and roller for an easier indoor setup Use a quality foam roller to get close to a sprayed look without extra equipment Frequent Errors When Painting Kitchen Cabinets Even careful painters run into the same few problems again and again. Knowing them ahead of time helps you avoid them. Skipping degreasing: Grease left behind stops paint from bonding properly. This causes peeling weeks or months after the project is finished, even with quality paint. Using wall paint: Wall paint is not built for kitchen wear. It lacks the durability that cabinets need for daily use, steam, and constant wiping near the stove. Applying thick paint layers: Thick coats cause drips and take far longer to dry. They also create a rougher, uneven texture that is hard to fix once it sets. Reassembling too quickly: Paint can feel dry on the surface while staying soft underneath. Reinstalling doors too soon leads to sticking, smudging, and visible marks on the finish. Ignoring cabinet material: Wood, MDF, and laminate all require different primers. Treating every material the same way leads to poor adhesion and an uneven, short-lived finish. How to Maintain Painted Kitchen Cabinets Painted cabinets need gentle, regular care to stay looking fresh. A little daily attention goes a long way toward protecting the finish. Most upkeep takes just a few extra minutes during normal cleaning. Use mild soap and a soft cloth for cleaning. Avoid abrasive scrubbers or harsh chemical cleaners. Wipe up spills quickly, especially near the stove. Touch up small chips as soon as you spot them. Keep excess moisture away from cabinets near the sink. Open a window or use a fan to reduce steam buildup. Check hinges and handles now and then to keep doors closing evenly. Following these habits keeps your paint job looking fresh. Freshly painted kitchen cabinets with a brush painting process and finished white cabinet makeover in a bright modern kitchen. Choose the Right Paint for Kitchen Cabinets The paint you choose affects how long your cabinets look good. Kitchens deal with grease, steam, and constant wiping. Regular wall paint cannot handle that kind of daily wear. 1. Cabinet Enamel Paint: Cabinet enamel is the top choice for most kitchens. It resists scratches and holds up to frequent cleaning. You can find it in both water-based and oil-modified formulas. 2. Acrylic Paint: Acrylic paint is water-resistant and easier to clean up after use. It works well in kitchens with lighter daily use but still needs the right primer for better bonding. Skipping primer can cause early chipping. 3. Oil-Based Paint: Oil-based paint creates an extremely hard, durable finish. It takes much longer to dry between coats. The smell is strong, and cleanup requires mineral spirits. Many painters now prefer water-based enamel for this reason. Paint Type Pros Cons Best For Waterborne enamel Durable, easy cleanup Costs more Most kitchens Acrylic Low odor May need extra topcoat Light-use cabinets Oil-based Very tough finish Slow drying of paint, strong smell Traditional cabinet jobs Frequently Asked Questions How Many Coats of Paint Do Kitchen Cabinets Need? Most cabinets need two to three coats. The exact number depends on the paint color, primer, and the cabinet’s starting condition. Darker colors covering a light base often need one extra coat. What is the Best Paint for Kitchen Cabinets? Cabinet enamel or urethane-based paints hold up best in busy kitchens. They resist scratches and clean more easily than standard wall paint. Look for a formula labeled specifically for cabinets or trim work. Can You Paint Cabinets without Removing the Doors? Yes, but removing the doors gives better coverage. It also creates a smoother, more even finish overall. Painting doors flat on a table also helps you avoid drips and uneven edges. How Long Should Painted Cabinets Cure Before Use? Most cabinets need several days of light use before they are ready. Full curing can take longer depending on the type of paint used. Avoid placing heavy items on shelves until the finish has fully hardened. Do You Need to Prime Cabinets Before Painting? Yes, primer is a key step for most cabinet materials. It helps the paint bond and stops stains from showing through. Skipping primer often leads to peeling within the first few months. Can You Paint Laminate Kitchen Cabinets? Yes, laminate can be painted with a bonding primer made for slick surfaces. Regular primer will not stick well to laminate alone. Light sanding before priming also helps the paint grip better. Bringing Your Cabinets Back to Life Painting kitchen cabinets is one of the most affordable ways to update a kitchen. The final result depends far more on prep work than on the paint itself. Clean, sand, and prime with care before you ever open a paint can. Give each coat enough time to dry and cure fully. A little patience during this process leads to a finish that lasts for years. Take your time with each step instead of rushing to the finish line. Read your paint can labels for exact dry times, since products vary. Keep the kitchen well-ventilated while you work, and let it air out after each coat. A well-painted set of cabinets can make an old kitchen feel brand new. With the right prep and a bit of patience, your cabinets can look sharp for years to come. Quick recap before you start your project: Clean and repair cabinets before you sand or prime Choose a paint and finish built for kitchen wear Apply thin coats and let each one dry fully Wait for full curing before heavy daily use
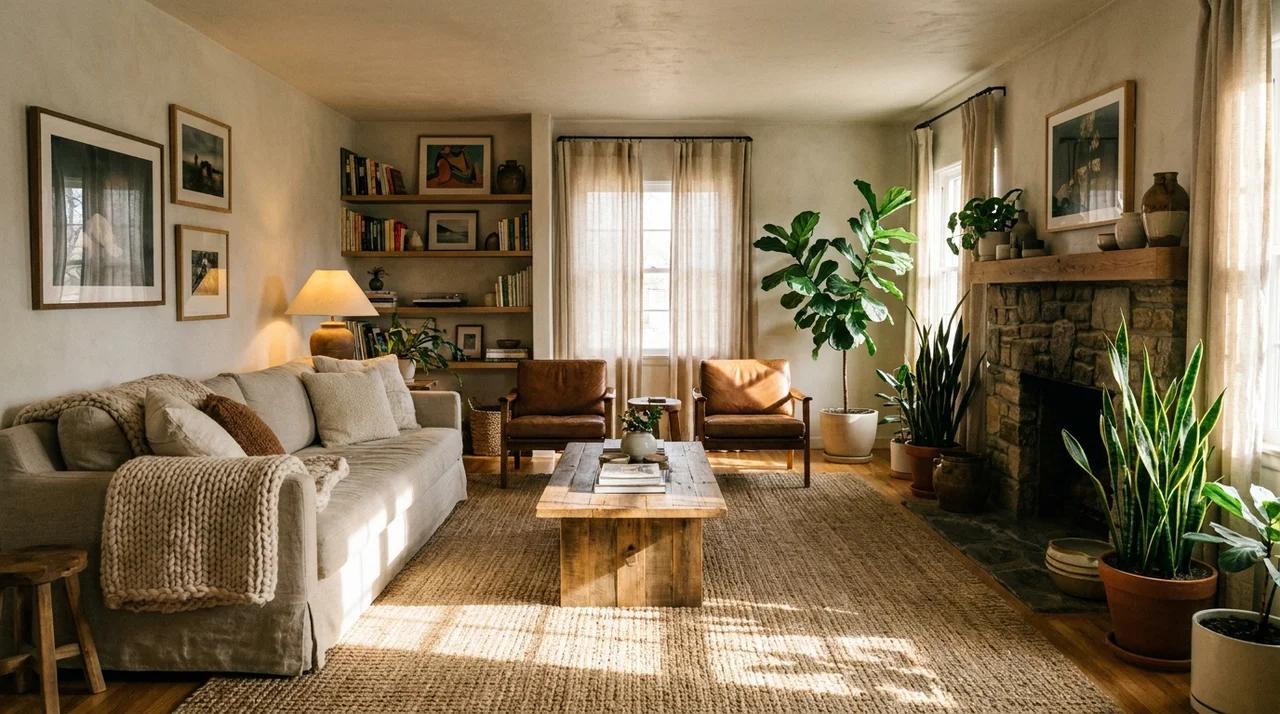
A room can still feel incomplete even after adding quality furniture and decor. The missing piece is often not the items themselves but how everything works together. A well-decorated space comes from the right balance of layout, colors, lighting, textures, and personal details. Small updates like moving furniture, adding soft fabrics, improving lighting, or changing wall art can make a noticeable difference. Creating a comfortable home does not always require a large budget or major changes. These practical decorating tips will help you make thoughtful updates that improve the look and feel of your space. 21 Simple Ways to Improve Your Home Decor Small changes can have a big impact on how a room looks and feels. These decorating ideas focus on furniture placement, colors, lighting, textures, and personal touches to help create a more balanced and comfortable home. 1. Define How You Want the Room to Feel Before selecting furniture, colors, or decorative pieces, think about the mood you want the room to create. Every space serves a different purpose, so the design should match how you want to feel when you spend time there. A bedroom may need calming colors and soft textures, while a living room can feel warm and welcoming. Defining the atmosphere first helps you make better decorating decisions and prevents random purchases that do not work well together. 2. Create a Decorating Plan Before Shopping A decorating plan helps you avoid mistakes and create a more balanced interior. Start by measuring your room, noting existing furniture, and deciding which pieces you want to keep or replace. Consider your budget, preferred colors, and how you use the space daily. Planning your layout before shopping makes it easier to choose furniture and accessories that fit properly. It also prevents overcrowding and ensures every item serves a purpose in the room. 3. Choose a Color Palette That Connects the Room A coordinated color palette can make a room feel more organized and visually comfortable. Instead of choosing colors separately for walls, furniture, and accessories, select a few shades that work together. Use a main color as the foundation, supporting colors for larger pieces, and accent shades through smaller decorations. Repeating similar tones in cushions, artwork, rugs, or curtains creates a connected look and makes the interior feel thoughtfully designed rather than randomly decorated. Before choosing colors or finishes, it is helpful to know the expected cost to paint the interior of a house. 4. Create One Main Focal Point A focal point gives a room direction and creates a natural place for the eye to rest. Without one, a space can feel scattered because every element competes for attention. Choose a feature that stands out, such as a large artwork piece, a fireplace, a statement furniture item, an accent wall, or a decorative mirror. Arrange the rest of the room around this feature so it supports the overall design. A strong focal point can make simple interiors feel more intentional. 5. Arrange Furniture Based on Room Function Furniture placement plays an important role in how comfortable and practical a room feels. Instead of arranging pieces only based on appearance, consider how people move and use the space. Create seating areas that encourage conversation, keep pathways open, and avoid blocking doors or windows. In smaller rooms, thoughtful placement can make the area feel larger and easier to use. A well-planned furniture layout improves both the look and everyday function of your home. 6. Choose Furniture That Fits the Room Scale Selecting furniture that matches your room’s size is crucial for a balanced and comfortable space. Oversized sofas or tables can overwhelm small rooms, while tiny pieces in large spaces can feel lost. Consider the dimensions of the room and the proportion of each item relative to others. Balancing larger furniture with smaller accents or accessories ensures harmony. The material of your furniture also affects the overall look and feel of a room. Choosing the right wood type for your furniture can influence the durability, style, and character of each piece, especially when selecting long-lasting furniture. 7. Add Texture to Make Rooms Feel Complete Layering different textures gives depth and warmth to any space. Mixing materials like wood, metal, glass, fabric, and stone creates visual interest and prevents rooms from looking flat. Incorporate soft textiles such as cushions, rugs, and throws alongside harder surfaces like furniture or flooring. Even small decorative objects with unique textures, like woven baskets or ceramic vases, can elevate the feel of a room. 8. Use Multiple Lighting Sources Lighting is one of the most powerful decorating tools. Combining ambient, task, and accent lighting creates a balanced and inviting environment. Ambient light provides overall illumination, task lighting focuses on specific activities like reading or cooking, and accent lighting highlights artwork, architectural features, or decorative objects. Layering different sources prevents harsh shadows and adds warmth. Using multiple lighting options also makes rooms more flexible, allowing the mood to be adjusted depending on the time of day or activity. 9. Maximize Natural Light Natural light brightens spaces, enhances colors, and makes rooms feel larger. To maximize it, keep windows clear of heavy drapes or obstructions and use sheer curtains to diffuse sunlight. Position mirrors to reflect light into darker corners or across the room, and choose furniture with reflective surfaces to enhance brightness. Light wall colors also help distribute sunlight. Proper use of natural light reduces the need for artificial lighting during the day while making interiors feel more open, airy, and welcoming. 10. Add Mirrors to Improve Space and Light Mirrors are a simple yet effective way to enhance both space and light. Placing a mirror opposite a window can reflect natural light, making rooms feel brighter and more open. Decorative mirrors above furniture or in small spaces add depth and create the illusion of additional square footage. Choosing frames and shapes that match your decor ensures they feel integrated. Mirrors are especially helpful in hallways, bathrooms, and compact rooms where visual expansion is needed without structural changes. 11. Bring Greenery into Your Interior Adding plants and natural elements instantly breathes life into a room. Indoor greenery adds color, texture, and freshness while improving mood and air quality. Place tall plants in empty corners, small potted plants on shelves or tables, and hanging plants in rooms with limited floor space. Combining plants of different heights and leaf shapes creates visual interest, while integrating them with furniture and decor ensures the space feels cohesive and inviting. 12. Style Shelves with Balance Well-styled shelves can transform a room’s look and add personality. Mix books with decorative items such as vases, sculptures, and small plants to create variety. Arrange objects in odd-numbered groupings for a natural feel, and vary heights and textures to maintain interest. Leave some empty space to avoid visual clutter. Thoughtful shelf styling combines organization with artistry, making shelves both functional and visually appealing within your interior decorating plan. 13. Decorate Walls without Overcrowding Walls offer a canvas for personality, but overdecorating can make spaces feel chaotic. Choose artwork, mirrors, or shelves that complement the room’s scale and color palette. For gallery walls, plan spacing carefully and mix frame sizes and orientations for balance. Leave portions of the wall empty to allow breathing space. Even a single statement piece can serve as a focal point when paired with complementary furniture and accessories. Minimal but intentional wall decor elevates the interior without overpowering the room. 14. Choose Artwork That Matches Your Space Artwork significantly influences a room’s character. Select pieces that harmonize with the color scheme, scale, and overall style of your space. Oversized artwork can anchor a room, while smaller pieces may work best in groupings or gallery walls. Incorporate personal or meaningful pieces to add authenticity. Position artwork at eye level to maintain balance, and ensure surrounding decor complements rather than competes with it. 15. Use Rugs to Define Areas Rugs are versatile tools for both function and style. They anchor furniture, define zones in open-plan spaces, and add warmth and texture. In living areas, ensure the rug is large enough for at least the front legs of furniture to rest on it. Layering smaller rugs or using runners in hallways can add visual interest. Choose materials, patterns, and colors that complement the overall design. A thoughtfully placed rug can visually unify a room, provide comfort underfoot, and make the interior feel polished and intentional. 16. Layer Curtains and Soft Furnishings Layering fabrics and soft furnishings adds depth, comfort, and a finished look to any room. Use curtains with texture or pattern to frame windows and add height, while coordinating with cushions, throws, and bedding for visual harmony. Mixing fabrics like linen, velvet, or knitted materials creates tactile interest. Rotating pillows and throws seasonally can refresh the space without major changes. Thoughtful layering balances aesthetics and functionality, making interiors feel cozier, welcoming, and carefully styled while reflecting your personal decorating taste. 17. Mix Old and New Decor Pieces Combining vintage and contemporary items brings character and personality to a room. Pair modern furniture with antique accents, such as a reclaimed wooden table or a vintage mirror. Mixing materials and styles prevents interiors from looking flat or overly matched. Carefully selected old and new pieces can complement one another, creating a cohesive yet dynamic look. This approach makes a home feel curated and personal while allowing you to incorporate meaningful or heirloom items alongside stylish modern decor. 18. Add Personal Items to Make the Space Yours Personal items give your home a sense of identity. Display meaningful objects such as framed photographs, travel souvenirs, handmade crafts, or personal collections. Integrate them with existing decor to maintain balance and avoid clutter. Including personal items ensures your home feels authentic, inviting, and reflective of your lifestyle. Even small touches like a decorative bowl or a favorite sculpture can add personality. Thoughtfully curated personal pieces elevate your interior decorating while making the space uniquely yours. 19. Keep Decorative Surfaces Organized Cluttered surfaces can make even a stylish room feel chaotic. Use trays, boxes, or baskets to group smaller items together. Limit the number of decorative objects on tables, shelves, or consoles to maintain balance. Rotate accessories occasionally to keep spaces fresh and interesting. Prioritize items that are both visually appealing and functional. Organized surfaces contribute to a clean, intentional look, allowing key decorative elements to stand out. This strategy enhances the overall harmony and professionalism of your interior decorating. 20. Use Vertical Space Effectively Vertical space is often underutilized, but it can make rooms feel taller and more organized. Install tall shelves, wall-mounted storage, or artwork to draw the eye upward. Floor-to-ceiling curtains create the illusion of height, while tall plants add both vertical interest and greenery. Using vertical space is especially valuable in smaller rooms where floor area is limited. By decorating upward, you maximize functionality, improve storage, and create a visually balanced interior that feels open, dynamic, and thoughtfully designed. 21. Add Seasonal Updates with Small Changes Refreshing a room for different seasons can keep your interior lively without major renovations. Swap cushion covers, throws, or curtains to reflect seasonal colors. Add fresh flowers, candles, or small decorative accents for a timely feel. These simple adjustments can create a sense of change and novelty while maintaining your core design. Seasonal updates are a cost-effective way to make a home feel dynamic and welcoming, allowing each space to reflect the time of year and keep your interior decorating fresh. Common Decorating Mistakes to Avoid Over time, I have noticed that many decorating mistakes come from making choices too quickly. A little planning can help a room feel more balanced and comfortable. Buying furniture without measuring is one of the most common issues. A piece that looks perfect in a store may feel too large at home, so checking dimensions first makes a big difference. I have also found that rooms feel more inviting when they mix textures instead of matching everything. Combining wood, fabric, metal, and different finishes adds depth and personality. Lighting is another detail that can change a space. Adding lamps and using natural light helps create a warmer feel than relying only on overhead lights. Trends can inspire ideas, but personal style matters more. Leaving some open space and choosing pieces that fit your lifestyle keeps a home comfortable and timeless. Create a Home That Feels Like You A well-decorated home is not about adding more things. It comes from making thoughtful choices with your space, furniture, colors, lighting, and decor. Small changes can make a room feel completely different. Moving a sofa, updating a lamp, adding texture, or choosing artwork that fits the space can improve the overall look without major changes. You do not have to redesign your entire home at once. Start with one room or one corner, make changes that suit your needs, and build from there. The best interiors are the ones that feel comfortable, personal, and easy to live in every day. Frequently Asked Questions How Often Should I Update My Home Decor? Small decor changes can be made seasonally, while larger updates depend on your preferences. Refreshing textiles, accessories, and layouts keeps your space feeling fresh. What are the Basic Rules of Interior Decorating? Focus on balanced layouts, suitable colors, layered textures, proper lighting, and a focal point to create a comfortable and well-designed space. HowCan I Decorate My Home Without Spending a Lot of Money? Refresh your home by rearranging furniture, updating soft furnishings, adding plants, improving lighting, and using existing decor in new ways. What Should I Decorate First in a Room? Start with the room layout and larger furniture pieces, then add colors, lighting, rugs, artwork, and accessories to complete the look. How Do I Make My Home Look Professionally Decorated? Use a cohesive color scheme, mix textures, improve lighting, choose the right furniture size, and keep the space balanced without adding too much clutter.
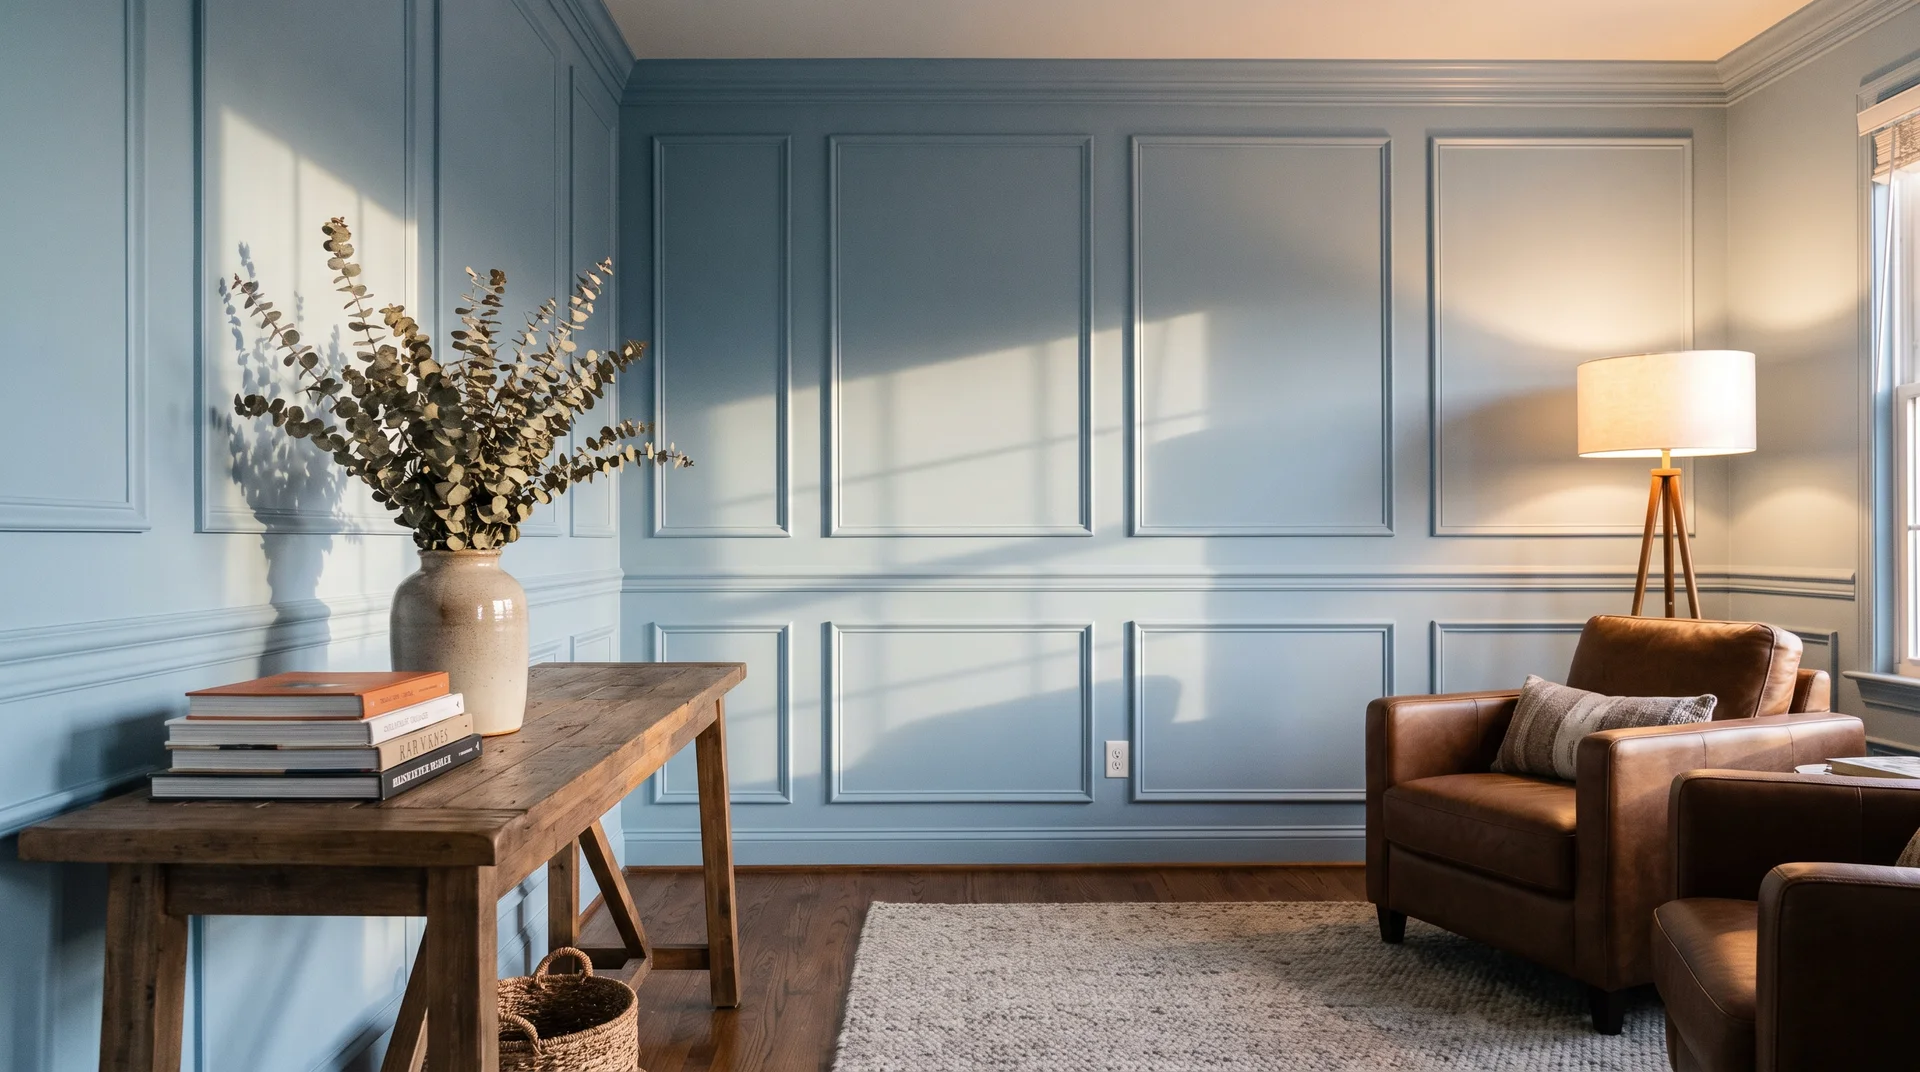
A DIY accent wall with trim and paint is one of the highest-impact home upgrades you can complete in a single day without calling a contractor. The materials cost a fraction of what most people expect, the tools are basic, and the result is the kind of architectural detail that makes a room look intentionally designed rather than casually assembled. This guide covers exactly how to build a picture frame trim accent wall from start to finish, the same method I used on a 9-by-14-foot recessed wall next to my front door that completely changed how the entryway felt. Whether this is your first time picking up a brad nailer or your tenth weekend project, the process is more forgiving than it looks and more rewarding than almost anything else you can do to a wall in a day. Tools and Materials for Your DIY Accent Wall Before the first nail goes in, having everything on the work surface saves multiple trips and keeps the project moving at the pace it should. Speed square Contractor framing square Angle finder Tape measure Chop saw / miter saw Brad nailer CA glue with accelerator Stud finder DAP Patch and Paint spackle Random orbital sander Caulk gun and paintable caulk Painter’s tape and drop cloths Respirator1x2 MDF trim, 10-foot lengths How to Build a DIY Accent Wall With Trim and Paint in 10 Steps Everything in this project follows a sequence that builds on itself. Skipping steps costs more time fixing problems later than the step itself would have taken. Step 1: Choose Your Wall and Plan Your DIY Accent Wall Layout Recessed walls, walls beside entryways, and walls directly opposite doorways produce the strongest visual impact. The wall I worked on sat in a recessed area next to my front door, approximately 9 feet tall by 14 feet long, and it changed how the whole entryway felt. Sketch the layout on paper first and decide between a picture frame system, a grid pattern, or a mixed panel arrangement before touching the lumber. And if you are wondering whether accent walls are out of style, the picture frame trim version has been gaining ground in US home design since the early 2020s and shows no sign of slowing. What dated was the single painted stripe with nothing behind it. Trim-based detail is architecture, not a trend. Step 2: Measure the Space and Calculate Your Materials Take the total square footage of the wall, add a 20% waste factor, and round up to the nearest whole number of 10-foot MDF lengths. Running short mid-installation costs you an afternoon. MDF comes off the shelf straight, stays that way during installation, and costs less per linear foot than solid wood. Step 3: Locate and Mark Your Studs Run the stud finder across the full wall before marking a single trim position. Stud locations determine where you can fasten securely and shape where trim sections begin and end. Mark every stud with painter’s tape at the top. For sections where no stud is reachable, CA glue with accelerator holds MDF panels firmly without a nail. Step 4: Set Up Your Chop Saw and Start Cutting Elevate the saw before making a single cut. Kneeling for dozens of cuts adds real fatigue to a project that already demands a lot. Use the angle finder to verify wall corners before setting the miter. Drywall corners often run closer to 46 degrees than 45. Mark cuts directly on the board rather than transferring tape measurements. Step 5: Install the Outer Frame First The outer frame defines the entire picture-frame accent wall. Any error in the perimeter carries through the whole wall. Start with the horizontal top and bottom lengths, then add the vertical sides. Check each board for level. For spans longer than 10 feet, cut 45-degree angles and overlap them. The angled splice disappears under paint. A butt splice never does. Step 6: Install the Interior Trim Sections With the outer perimeter secured, cut the interior horizontal and vertical panels that create the framed sections. Work from the center outward to keep spacing symmetrical on both sides. Factory drywall corners are slightly rounded, so boards butting into corners need a small back-edge adjustment with a utility knife before they sit flush against the wall. Step 7: Caulk All Edges of Your DIY Trim Accent Wall Every gap between MDF and drywall will show through paint. Apply a thin bead of paintable caulk along every edge where trim meets drywall, and smooth it with a damp finger before it skins over. Caulk corners where boards meet, and anywhere trim meets the adjacent wall. The difference is visible from across the room. Step 8: Fill Nail Holes and Sand the Surface Smooth Apply DAP Patch and Paint spackle to every nail hole, splice joint, and trim intersection. It dries in 30 minutes, does not shrink, is sandable, and needs no primer before paint. Once dry, sand every filled area with 320-grit paper until no seam is detectable by touch. Wipe all dust off the wall before taping for paint. Step 9: Tape Off the Space and Paint Your Modern Accent Wall Flat-finish paint adds depth that eggshell and satin cannot match. Benjamin Moore Regal Select in flat covers in two passes. Spray with the Wagner Flexio 3000, thinned 5% to 10% with water, for full coverage in about 20 minutes per coat. Remove painter’s tape while the second coat is slightly damp, not fully dry. Step 10: Remove Tape and Reinstall Outlet Covers Pull tape back at a 45-degree angle rather than straight away from the wall. Work the full run slowly rather than pulling in one fast strip. Reinstall outlet covers once the paint is dry. A painted-over cover is the first thing any trained eye notices. Step back from the doorway. If the proportions landed, you will know. Tips to Get a Professional-Looking Accent Wall Small details often make the biggest difference when building an MDF accent wall. These simple habits help avoid visible mistakes and give the finished design a cleaner, more polished look. Buy 10 to 15% extra MDF for mistakes: Extra material covers imperfect cuts, split edges, and measurement errors. It also saves you from stopping the project for an unexpected store run. Label every cut piece before installation: Mark each MDF piece on the back as soon as it is cut. Similar-looking boards can easily get mixed up and cause unnecessary rework. Apply and smooth caulk right away: Work in one direction and smooth the bead immediately. Once caulk starts drying, going back over it can create ridges that show through paint. Allow paint coats to dry before removing tape: Removing painter’s tape too early can pull up wet paint and leave uneven edges. Let the first coat fully cure for cleaner lines. Conclusion A DIY accent wall with trim and paint is the kind of project that permanently changes how a room reads, not temporarily. The wall you are looking at right now is one day of work away from looking like something a designer charged four figures to produce. The materials are affordable, the tools are accessible, and the process outlined here removes every guessing point that turns a motivated homeowner into a frustrated one halfway through. Pick the wall. Buy the trim. Cut the angles. The transformation that follows is not subtle, and the next person who walks into that room will ask who you hired. Tell them you did it yourself, because you did. Frequently Asked Questions What is the most trending color for a DIY accent wall? Deep olive green, warm beige, charcoal gray, muted terracotta, and dark navy are the top accent wall colors, pairing well with natural wood furniture and warm lighting throughout US homes. Can a DIY Accent Wall Make a Small Room Look Bigger? Yes. Vertical trim lines draw the eye upward and add perceived ceiling height. Lighter colors on the accent wall combined with balanced furniture placement improve the overall sense of space considerably. How Much Does a DIY Accent Wall Cost Compared to Hiring a Contractor? A DIY trim accent wall typically runs $150 to $400 in materials. Professional installation on the same wall costs $2,000 to $3,500, making the DIY route a significant saving for most homeowners.