

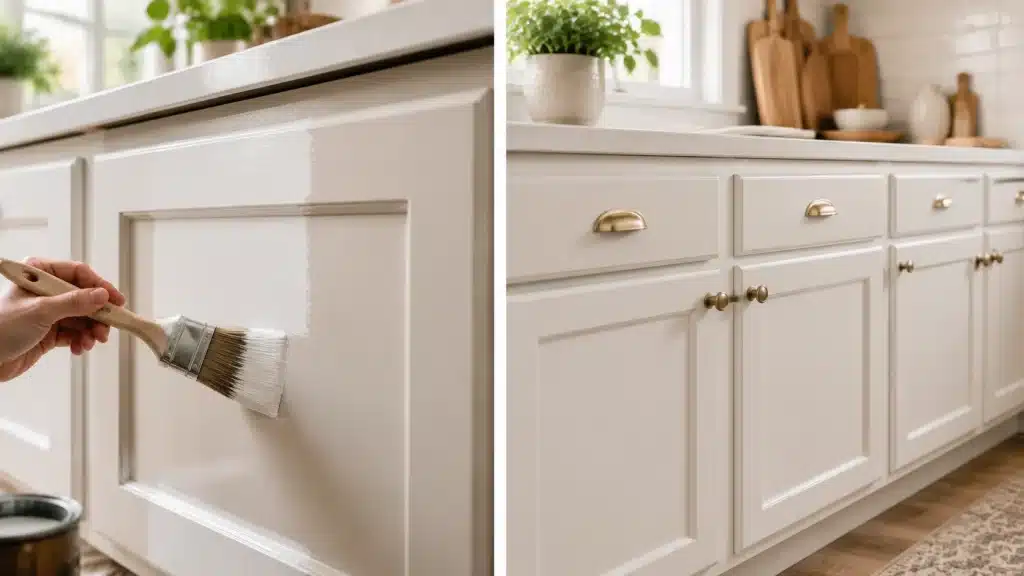


To paint kitchen cabinets, remove the doors and hardware first. Clean, sand, then apply a bonding primer. Add two thin coats of cabinet enamel paint. Let each coat cure before reinstalling doors.
Old cabinets can drag down an entire kitchen. Chipped edges and dull paint make the room feel tired. Replacing them costs thousands, while painting costs a fraction of that.
This blog will walk you through the entire process. It covers cleaning, sanding, priming, and painting in order. It also covers paint types, drying times, and mistakes to avoid.
The table above gives a rough sense of the full timeline. Each stage matters, and rushing any one of them shows up in the final result.
Tools and Materials You Need
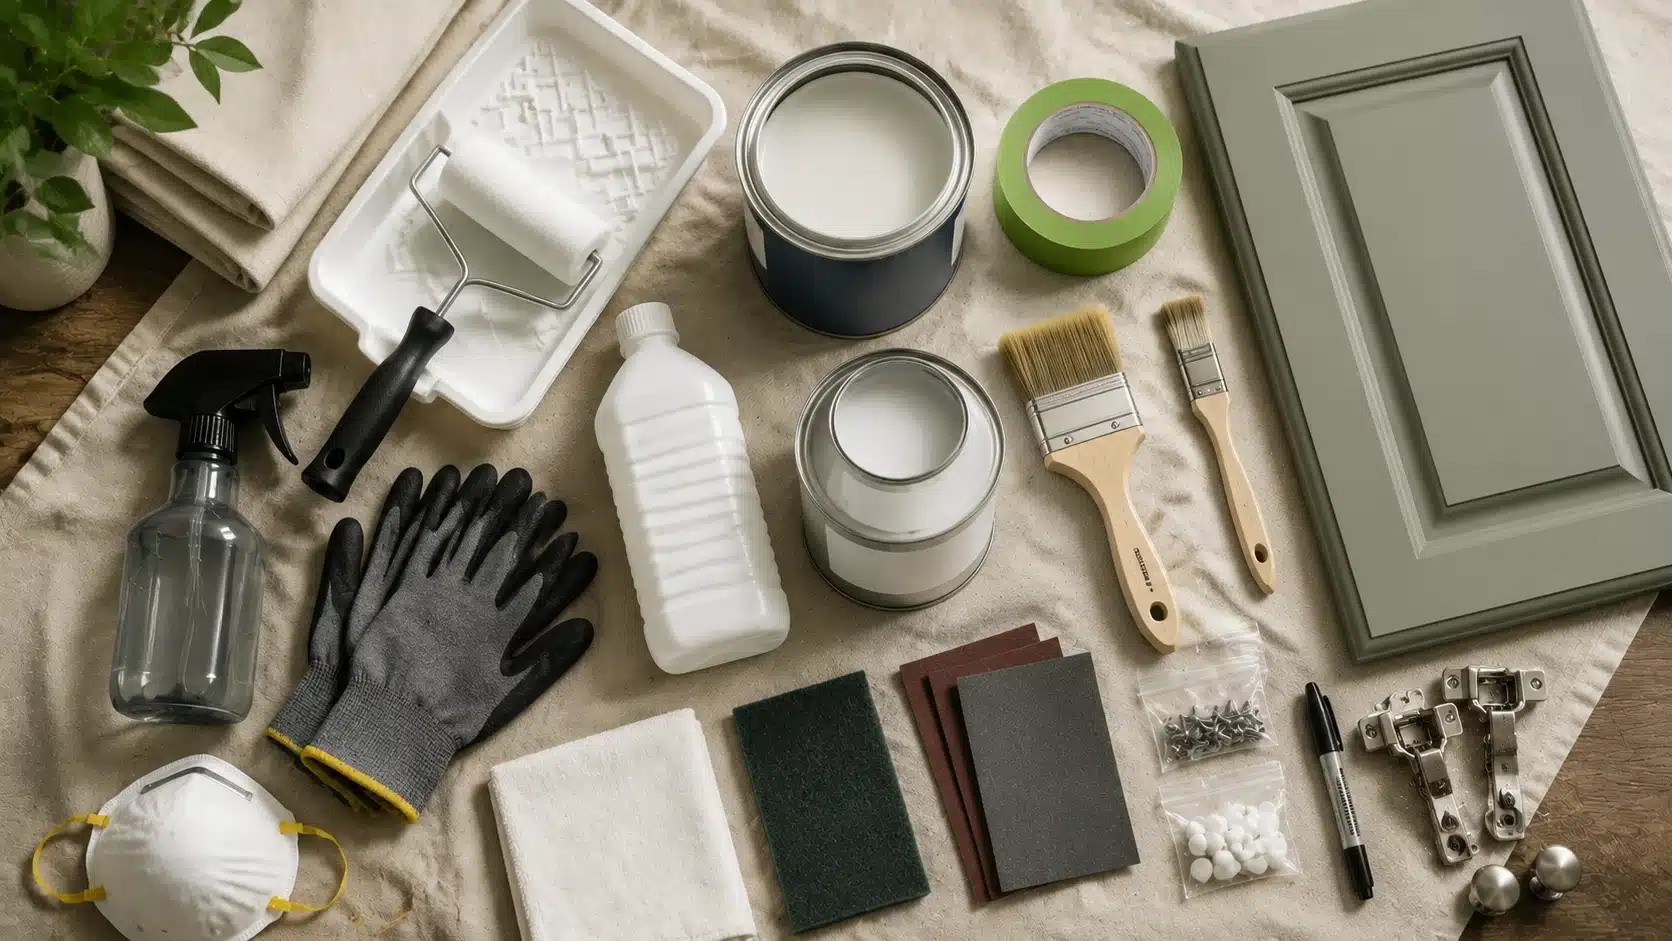
Good prep starts with the right supplies. Gathering everything first saves time once you begin.
Having every item on hand also stops mid-project trips to the store. It keeps momentum going once you start cleaning and sanding.
A quick checklist before you start also helps you spot anything missing early.
| Tool/Material | Purpose |
|---|---|
| Degreaser or TSP substitute | Removes grease and buildup |
| Sandpaper (120-220 grit) | Creates surface adhesion |
| Bonding primer | Helps paint stick properly |
| Cabinet paint or enamel | Creates a durable finish |
| Foam roller | Reduces visible roller marks |
| Quality brush | Covers edges and detail work |
| Painter’s tape | Protects surrounding surfaces |
| Drop cloths | Protects floors and counters |
Also set aside safety gear, such as gloves and a dust mask. Dust control supplies, such as a shop vacuum, help keep the workspace clean. Label your cabinet and cupboard doors and hardware with tape and a marker before you take anything apart. This one habit saves hours of confusion later.
How to Paint Kitchen Cabinets Step by Step
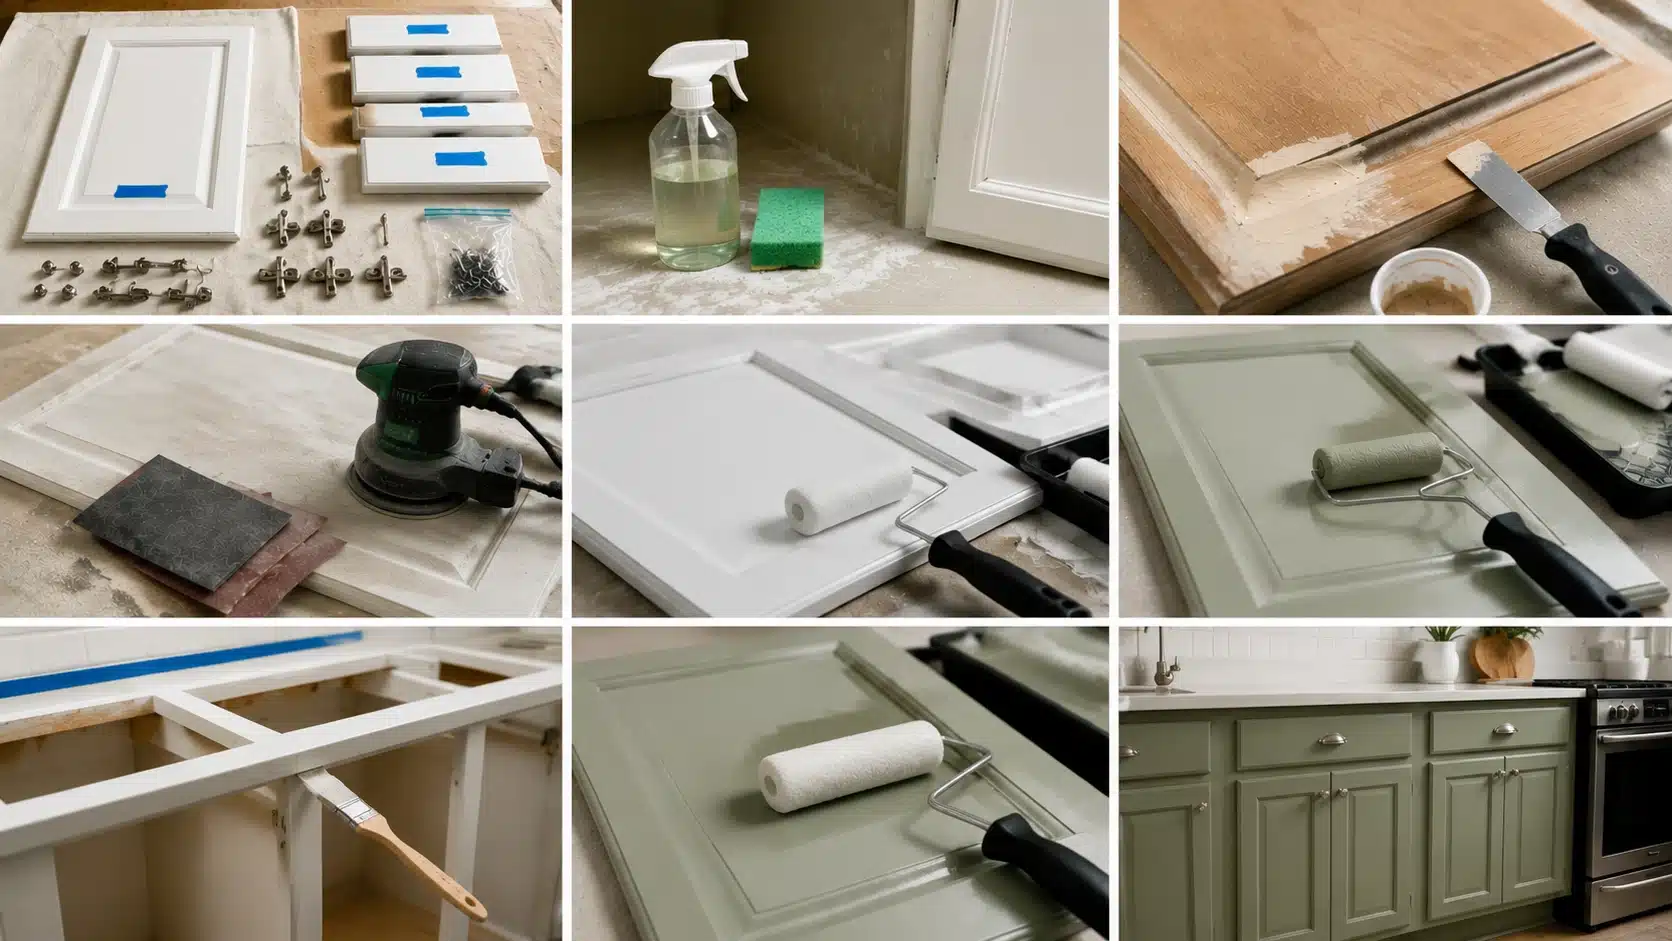
This is the full process from start to finish. Follow each step for the best result. Each step builds on the one before it. Skipping ahead often causes poor adhesion or a rough finish.
Set aside a few days for the full project rather than rushing it into one weekend. Working in order, without skipping steps, gives you a smoother, longer-lasting finish.
1. Remove Cabinet Doors and Hardware
Take off every hinge, handle, and knob first. Label each door and drawer with painter’s tape. Store all screws in a labeled bag per cabinet.
Avoid painting over hinges, since paint buildup stops them from closing properly. Set hardware aside in one spot so nothing gets lost during the project.
2. Clean Cabinets Thoroughly
Kitchen paint clings to grease on every surface, even ones that look clean. This film stops paint from bonding correctly, no matter how many coats you add. Use a degreaser or a TSP substitute on all surfaces.
Clean corners, edges, and the inside of cabinet frames too. Rinse with clean water afterward and let everything dry fully.
Case example: One homeowner skipped degreasing and saw paint peel within three weeks near the stove. A second attempt with proper degreasing held up for years.
3. Repair Imperfections Before Painting
Fill any dents or small holes with wood filler. Repair cracks in doors or frames before sanding. Replace the veneer that has already started peeling.
Let all filler dry fully before you sand it smooth. Sand patched areas gently to blend them with the surrounding surface.
4. Sand the Cabinet Surfaces
You do not need to strip cabinets down to bare wood. Light sanding creates enough texture for primer to grip. Start with 120 grit, then move to 220 grit for a smoother feel.
Always sand along the grain of the wood, not against it. Wipe away all dust with a tack cloth before moving forward. A shop vacuum first, then a tack cloth, catches dust a dry rag would miss.
Do you need to sand kitchen cabinets before painting? Yes, sanding is recommended for glossy finishes or any damaged surface. Some deglossing products allow lighter sanding, but full prep still improves how long the paint lasts.
5. Apply Primer
Primer helps paint stick and stops stains from bleeding through. Use a bonding primer for laminate or slick surfaces. Use a stain-blocking primer on wood with visible tannins.
Apply primer in thin, even coats. Let it dry fully, then sand lightly before painting. Two thin coats of primer usually work better than one heavy coat.
6. Paint Cabinet Doors and Drawers
Lay doors flat on a table or sawhorses. Paint flat surfaces first, then work on the edges. Brush detailed areas and roll larger flat panels.
Apply thin coats instead of one thick layer, since thick paint causes drips and slow drying. Working flat also stops paint from pooling along the bottom edge.
7. Paint Cabinet Boxes
Protect countertops and walls with drop cloths and tape. Start from the inside edges and work outward. Keep your brush strokes moving in one steady direction for a smooth look.
Pay close attention to corners and the undersides of upper cabinets, since these spots are often skipped.
8. Apply Additional Coats
Most cabinets need two to three coats for full coverage. Lightly sand between each coat with fine sandpaper. Let each layer dry completely before adding the next one.
Rushing this step is the most common cause of a rough finish. A light, even sanding between coats also helps each layer bond better than the last.
9. Reinstall Doors and Hardware
Wait several days before you reinstall doors, even if the paint feels dry. Adjust hinges if doors do not sit evenly. Consider adding new hardware for a refreshed, updated look.
Step back and check for gaps or uneven spacing before you tighten every screw.
Pick the Right Cabinet Paint Finish
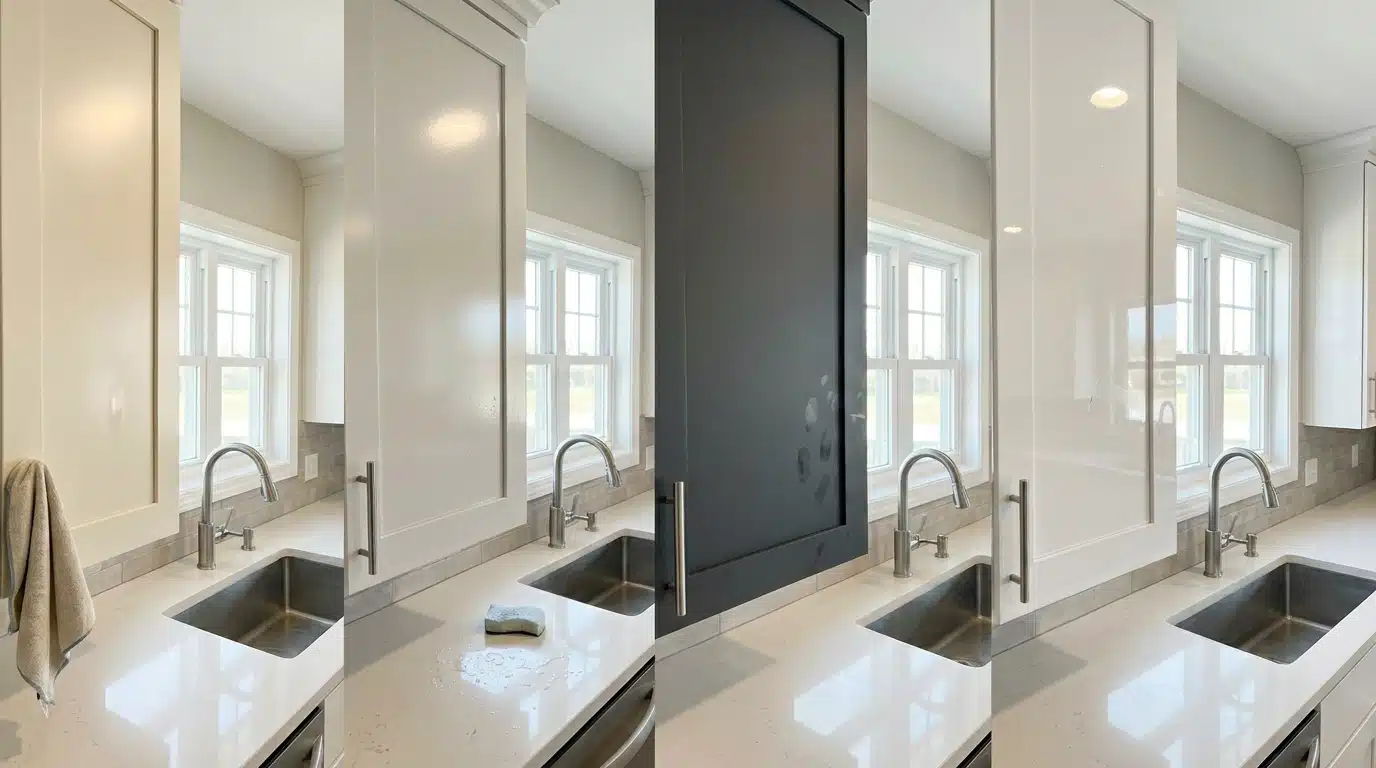
Sheen level changes both looks and durability. A higher sheen resists moisture and wipes clean faster.
Cabinets take a lot of daily contact, from hands to spills to steam. The right sheen can make cleanup much easier over time.
- Satin: Balances a soft look with easy cleaning. Works well for most kitchens and hides light imperfections without looking flat.
- Semi-gloss: More durable and moisture-resistant. A common pick for busy households with kids, pets, or frequent cooking.
- Matte: Usually not recommended for cabinets. It shows fingerprints and stains more easily, and it is harder to wipe clean.
- High-gloss: Gives a sleek, reflective look and cleans up easily, but it highlights every dent, scratch, or brush mark.
Very high gloss finishes can also be a problem. They highlight every small dent or brush mark. Satin or semi-gloss tends to hide small flaws better while staying easy to wipe down.
How Long Does it Take to Paint Kitchen Cabinets?
| Task | Approximate Time |
|---|---|
| Removing hardware | 1-2 hours |
| Cleaning and prep | 1 day |
| Priming | Several hours plus drying |
| Painting | 2-3 days |
| Final curing | Several days to weeks |
Dry time and cure time are not the same thing. Paint can feel dry to the touch within hours. Full curing, when the finish reaches its hardest state, takes much longer. Avoid heavy kitchen use until the paint has fully cured.
How Much Does it Cost to Paint Kitchen Cabinets?
Cost depends on cabinet size, paint quality, and surface condition. A DIY project costs far less than hiring a professional.
| Project Type | Average Cost |
|---|---|
| DIY painting | $100-$500 |
| Professional cabinet painting | $1,000-$5,000+ |
Factors that raise the price include door count, repair needs, and paint brand. Larger kitchens with more cabinet doors naturally cost more to finish.
Spray Painting vs Brush Painting Cabinets
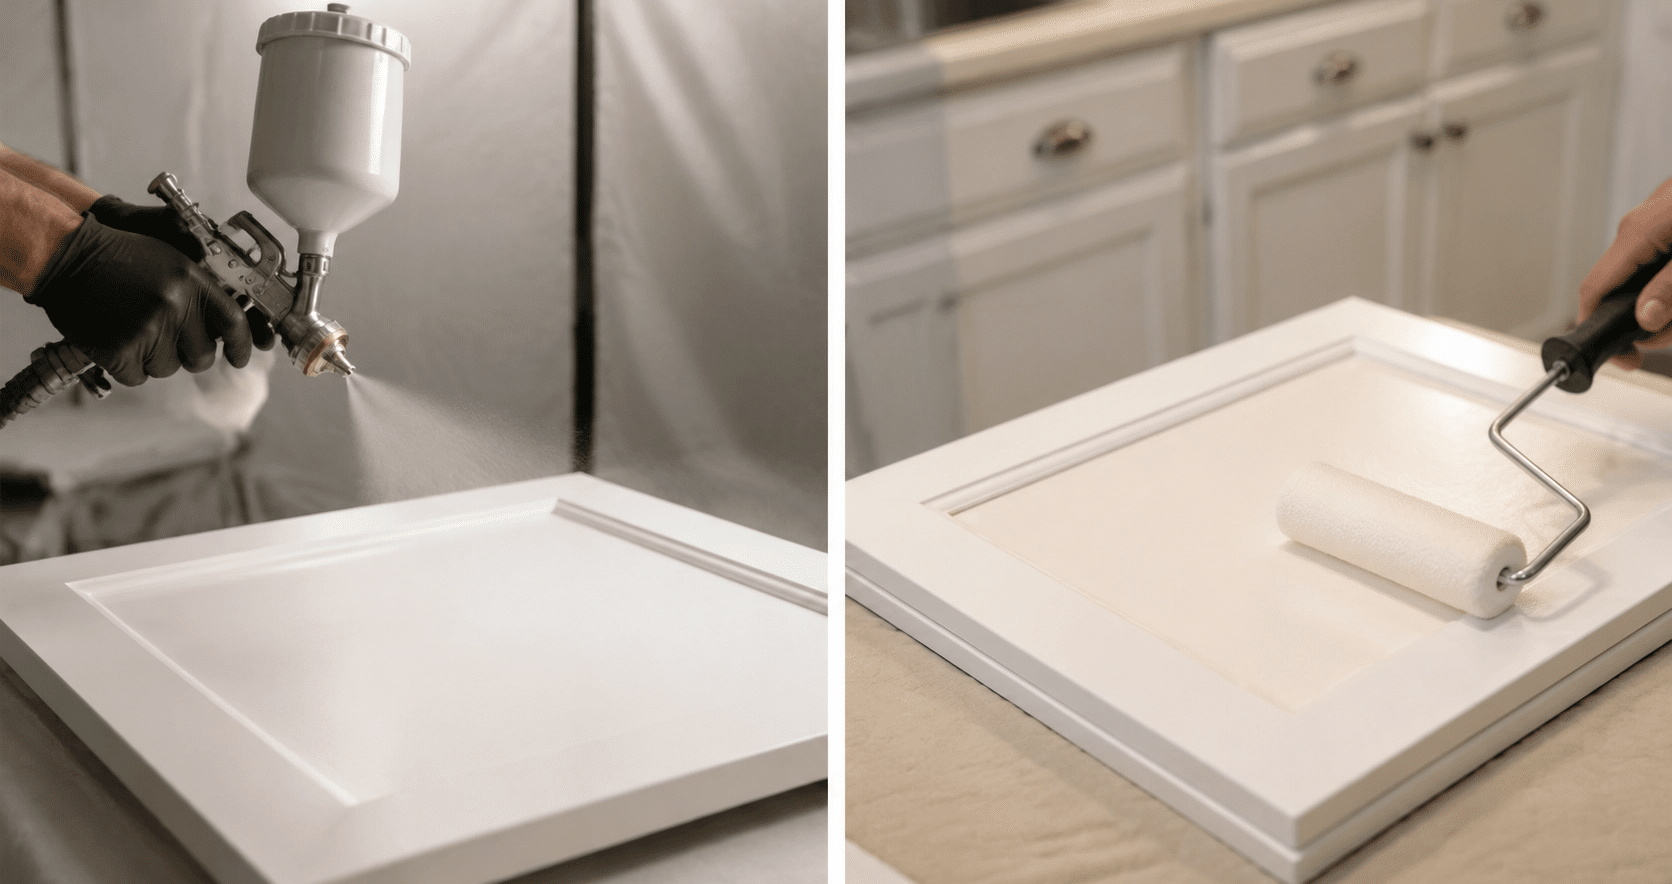
Both methods can give great results, but they suit different setups. Spraying takes more equipment and space, while brushing and rolling stay simple enough for most home kitchens.
| Method | Advantages | Drawbacks |
|---|---|---|
| Spray painting | Smooth, factory-like finish | Needs more setup and equipment |
| Brush and roller | Affordable and beginner-friendly | More visible brush or roller marks |
Spray painting dries fast, and it works well if you have an outdoor space or a garage where you can set up a spray tent. Brushing and rolling remain the better choice for most beginners working indoors.
Quick tips for choosing a method:
- Choose spraying for a smooth, factory-like finish outdoors
- Choose a brush and roller for an easier indoor setup
- Use a quality foam roller to get close to a sprayed look without extra equipment
Frequent Errors When Painting Kitchen Cabinets
Even careful painters run into the same few problems again and again. Knowing them ahead of time helps you avoid them.
- Skipping degreasing: Grease left behind stops paint from bonding properly. This causes peeling weeks or months after the project is finished, even with quality paint.
- Using wall paint: Wall paint is not built for kitchen wear. It lacks the durability that cabinets need for daily use, steam, and constant wiping near the stove.
- Applying thick paint layers: Thick coats cause drips and take far longer to dry. They also create a rougher, uneven texture that is hard to fix once it sets.
- Reassembling too quickly: Paint can feel dry on the surface while staying soft underneath. Reinstalling doors too soon leads to sticking, smudging, and visible marks on the finish.
- Ignoring cabinet material: Wood, MDF, and laminate all require different primers. Treating every material the same way leads to poor adhesion and an uneven, short-lived finish.
How to Maintain Painted Kitchen Cabinets
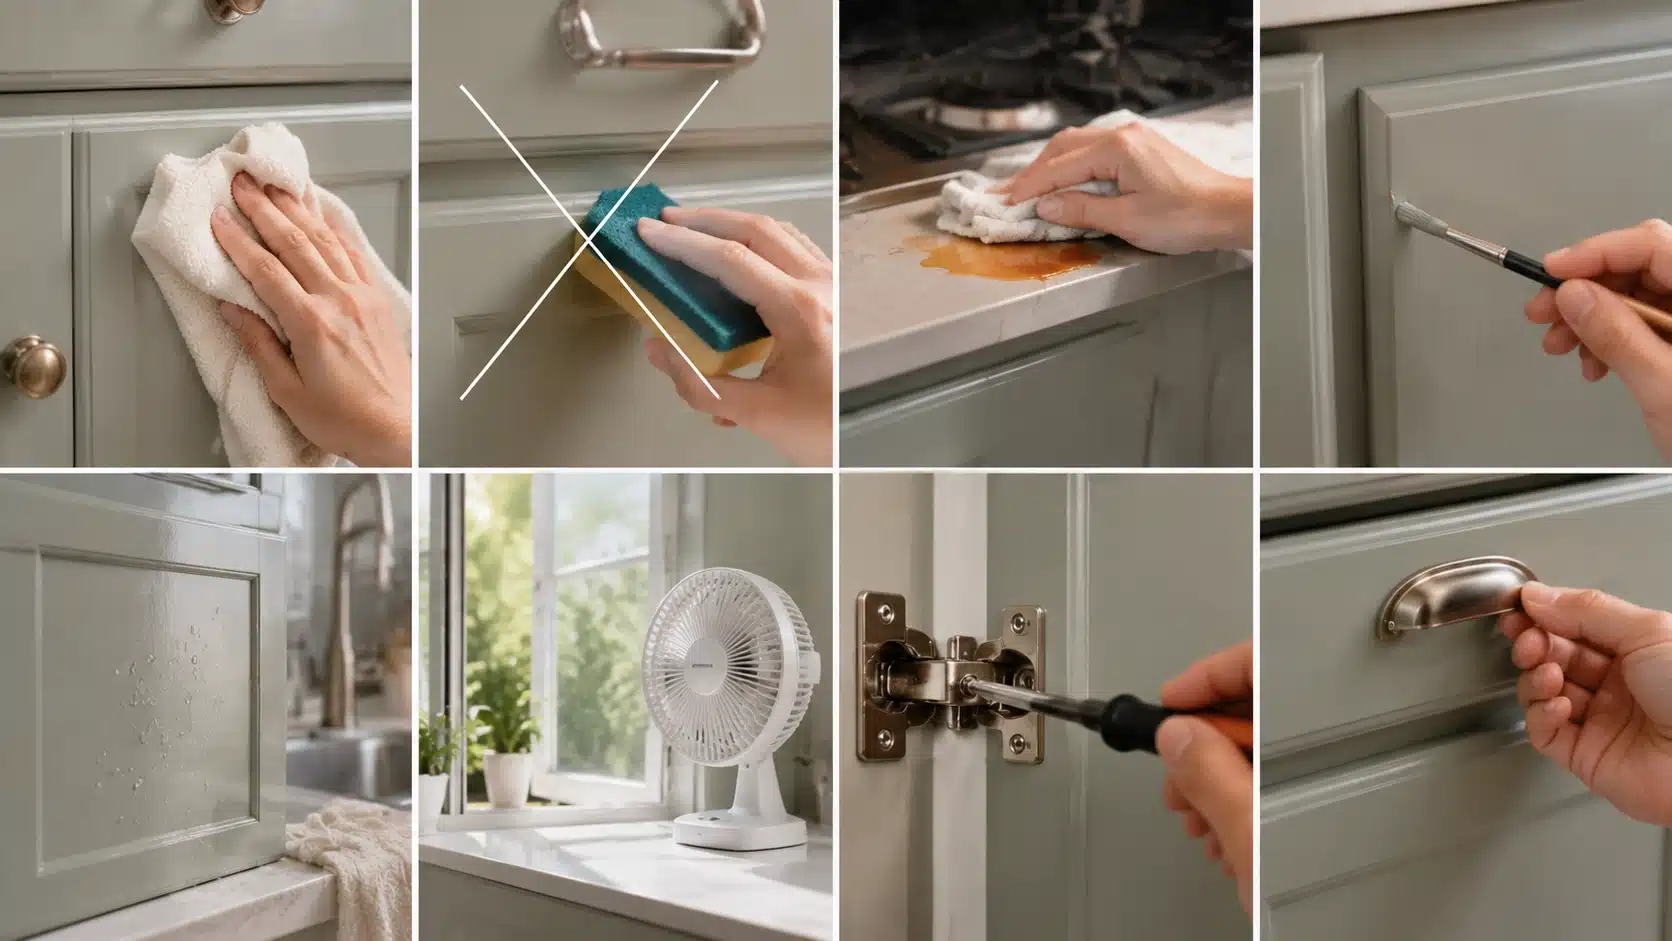
Painted cabinets need gentle, regular care to stay looking fresh. A little daily attention goes a long way toward protecting the finish. Most upkeep takes just a few extra minutes during normal cleaning.
- Use mild soap and a soft cloth for cleaning.
- Avoid abrasive scrubbers or harsh chemical cleaners.
- Wipe up spills quickly, especially near the stove.
- Touch up small chips as soon as you spot them.
- Keep excess moisture away from cabinets near the sink.
- Open a window or use a fan to reduce steam buildup.
- Check hinges and handles now and then to keep doors closing evenly.
Following these habits keeps your paint job looking fresh. Freshly painted kitchen cabinets with a brush painting process and finished white cabinet makeover in a bright modern kitchen.
Choose the Right Paint for Kitchen Cabinets
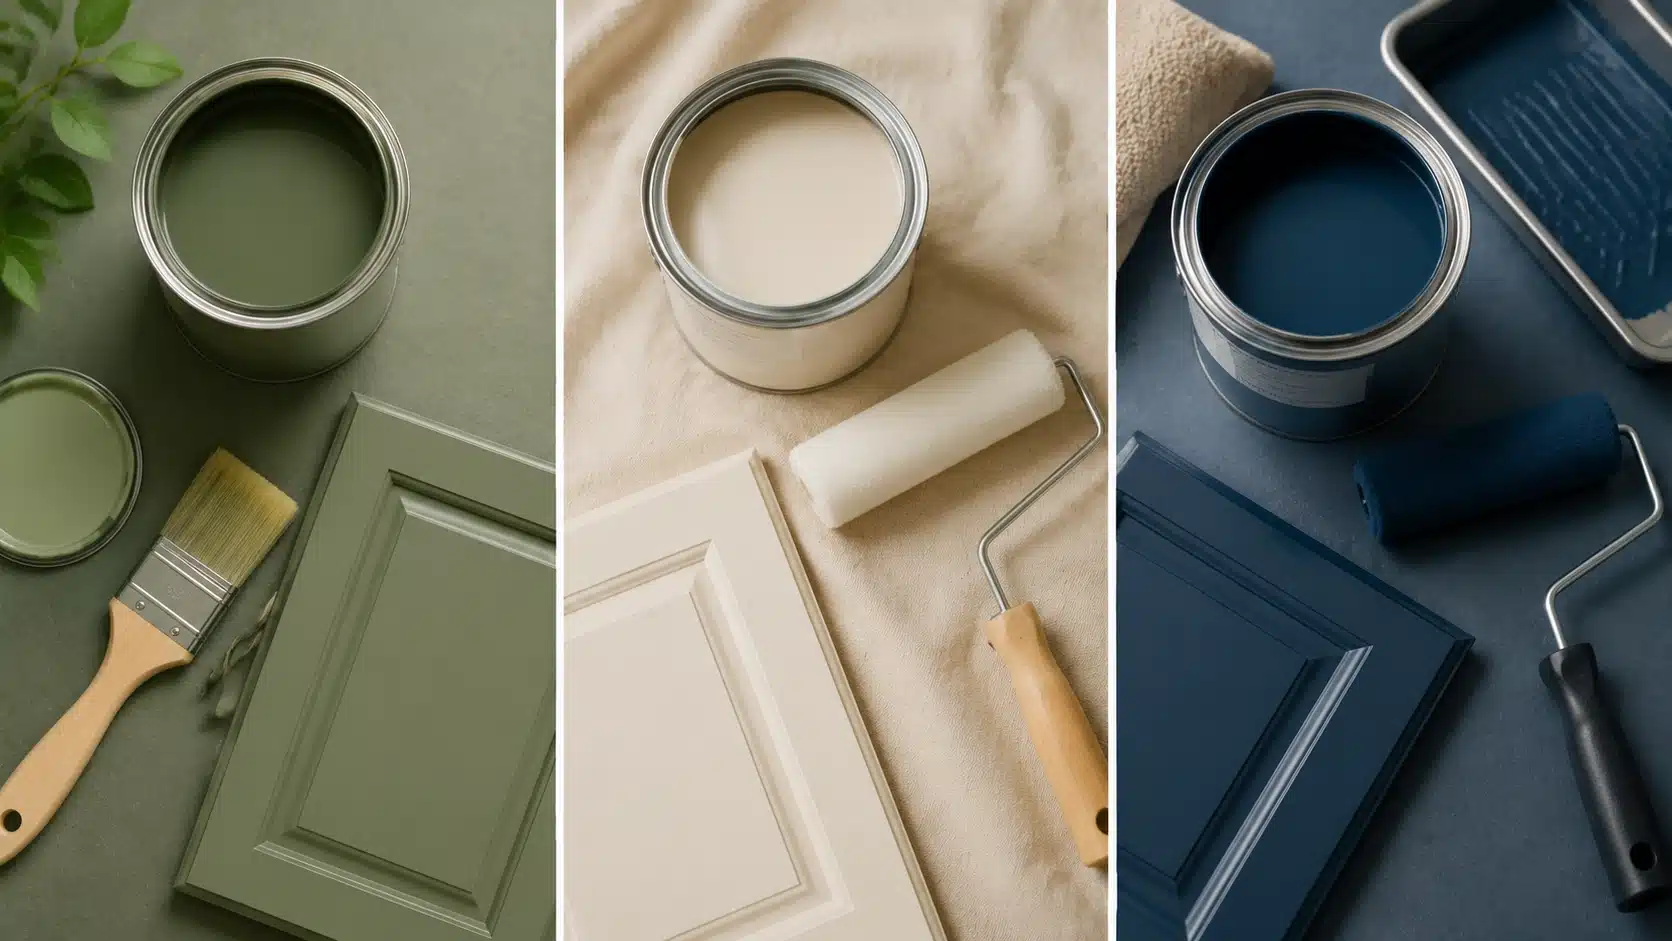
The paint you choose affects how long your cabinets look good. Kitchens deal with grease, steam, and constant wiping. Regular wall paint cannot handle that kind of daily wear.
1. Cabinet Enamel Paint: Cabinet enamel is the top choice for most kitchens. It resists scratches and holds up to frequent cleaning. You can find it in both water-based and oil-modified formulas.
2. Acrylic Paint: Acrylic paint is water-resistant and easier to clean up after use. It works well in kitchens with lighter daily use but still needs the right primer for better bonding. Skipping primer can cause early chipping.
3. Oil-Based Paint: Oil-based paint creates an extremely hard, durable finish. It takes much longer to dry between coats. The smell is strong, and cleanup requires mineral spirits. Many painters now prefer water-based enamel for this reason.
| Paint Type | Pros | Cons | Best For |
|---|---|---|---|
| Waterborne enamel | Durable, easy cleanup | Costs more | Most kitchens |
| Acrylic | Low odor | May need extra topcoat | Light-use cabinets |
| Oil-based | Very tough finish | Slow drying of paint, strong smell | Traditional cabinet jobs |
Frequently Asked Questions
How Many Coats of Paint Do Kitchen Cabinets Need?
Most cabinets need two to three coats. The exact number depends on the paint color, primer, and the cabinet’s starting condition. Darker colors covering a light base often need one extra coat.
What is the Best Paint for Kitchen Cabinets?
Cabinet enamel or urethane-based paints hold up best in busy kitchens. They resist scratches and clean more easily than standard wall paint. Look for a formula labeled specifically for cabinets or trim work.
Can You Paint Cabinets without Removing the Doors?
Yes, but removing the doors gives better coverage. It also creates a smoother, more even finish overall. Painting doors flat on a table also helps you avoid drips and uneven edges.
How Long Should Painted Cabinets Cure Before Use?
Most cabinets need several days of light use before they are ready. Full curing can take longer depending on the type of paint used. Avoid placing heavy items on shelves until the finish has fully hardened.
Do You Need to Prime Cabinets Before Painting?
Yes, primer is a key step for most cabinet materials. It helps the paint bond and stops stains from showing through. Skipping primer often leads to peeling within the first few months.
Can You Paint Laminate Kitchen Cabinets?
Yes, laminate can be painted with a bonding primer made for slick surfaces. Regular primer will not stick well to laminate alone. Light sanding before priming also helps the paint grip better.
Bringing Your Cabinets Back to Life
Painting kitchen cabinets is one of the most affordable ways to update a kitchen. The final result depends far more on prep work than on the paint itself.
Clean, sand, and prime with care before you ever open a paint can. Give each coat enough time to dry and cure fully. A little patience during this process leads to a finish that lasts for years.
Take your time with each step instead of rushing to the finish line. Read your paint can labels for exact dry times, since products vary. Keep the kitchen well-ventilated while you work, and let it air out after each coat.
A well-painted set of cabinets can make an old kitchen feel brand new. With the right prep and a bit of patience, your cabinets can look sharp for years to come.
Quick recap before you start your project:
- Clean and repair cabinets before you sand or prime
- Choose a paint and finish built for kitchen wear
- Apply thin coats and let each one dry fully
- Wait for full curing before heavy daily use



