

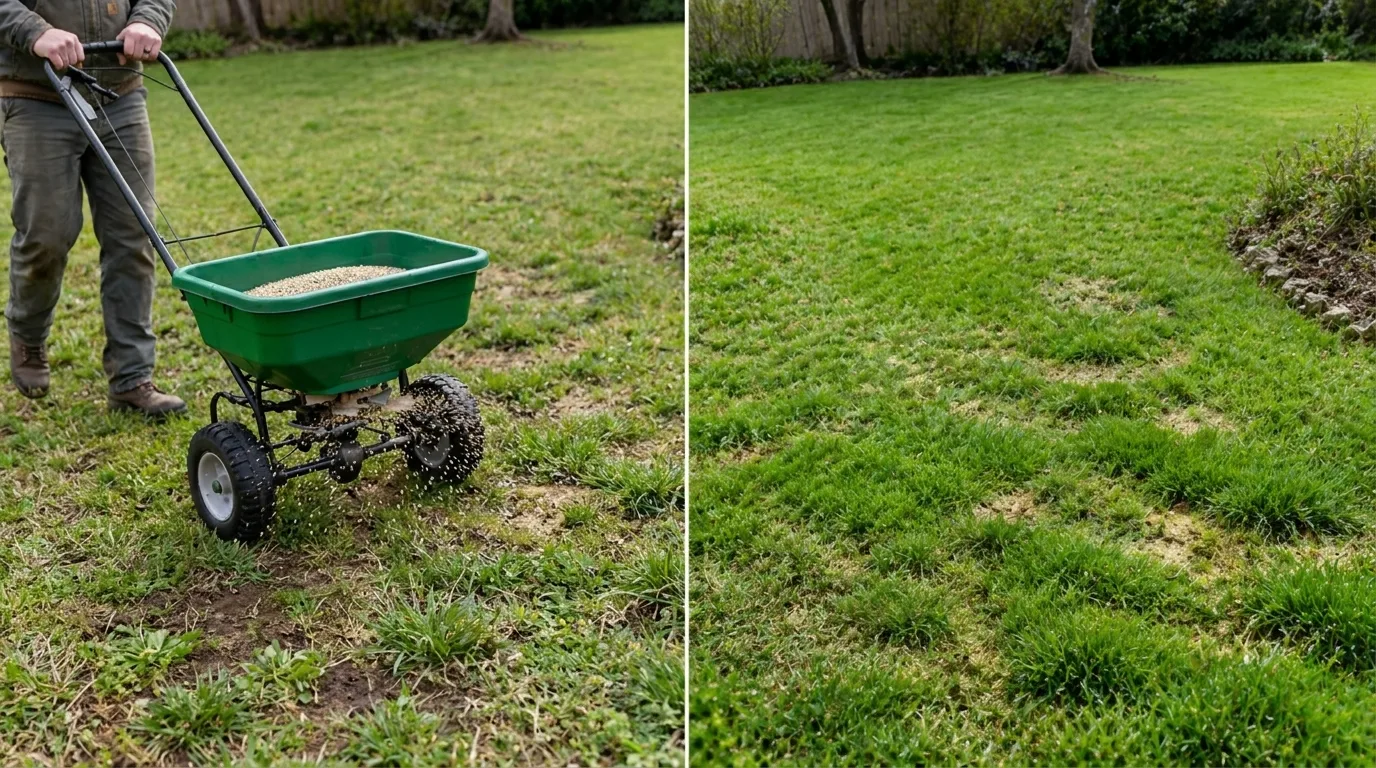
Grass Type Feedings Per Year Best Months Avoid Cool-season grass 3 to 4 times Early spring and early fall Heavy feeding during summer heat Warm-season grass 2 to 4 times Late spring through summer Late-season nitrogen before dormancy Newly seeded lawn 4 to 5 times Every 6 to 8 weeks during the first season Skipping starter fertilizer A healthy lawn needs more than regular watering. Grass also depends on properly timed fertilizer to support stronger roots, steady growth, and rich green color throughout the growing season. Timing matters as much as the fertilizer itself. Feeding too early can encourage weak top growth, while applying too much during hot weather can scorch the grass. Fertilizing too late may also interfere with dormancy and increase stress. Below, you’ll learn how often to fertilize, the best months to apply it, how to understand N-P-K ratios, and which application mistakes can damage your lawn. How Often Should You Fertilize Your Lawn? Most lawns need 2 to 4 fertilizer applications per year, but the right schedule depends on your grass type, climate, and growing conditions. University of Illinois Extension suggests roughly one pound of nitrogen per 1,000 square feet per application. Split that across the growing season rather than applying it all at once. Grass Type Feedings Per Year Best Months Cool-season grass 3 to 4 Early spring and early fall Warm-season grass 2 to 4 Late spring through summer Newly seeded lawn 4 to 5 Every 6 to 8 weeks during the first season Cool-season grasses usually need more feeding in spring and fall, while warm-season grasses benefit from applications during their active summer growth. Avoid fertilizing just because the calendar says it is time. Grass absorbs nutrients most effectively during active growth, while extreme heat, drought, or dormancy can reduce the effectiveness of applications. Pro Tip: Your lawn’s fertilizer needs can also change based on soil quality, sunlight exposure, mowing habits, and rainfall. A soil test can help identify nutrient gaps and prevent unnecessary applications. Lawn Fertilizer Schedule by Region and Season Local climate and grass type determine when your lawn can actually use fertilizer. A northern cool-season lawn follows a different schedule than a southern warm-season lawn, so timing applications to coincide with active growth prevents wasted nutrients. Region Spring Fall Winter Northern Regions Light feeding as grass starts growing Heavy feeding for root strength Little to none after dormancy Southern Regions Begin feeding as warm-season grass wakes up Reduce feeding as growth slows Apply only if grass stays active Transition Zones Feed based on dominant grass type Fall feeding benefits many lawns Usually minimal feeding Seasonal fertilizing follows the way grass grows throughout the year. It feeds the roots and blades so they can actually use the nutrients, rather than wasting product on dormant grass. Key factors to adjust your schedule: Grass type: Cool-season and warm-season grasses have different growth cycles. Soil temperature: Fertilizer works best when grass is actively absorbing nutrients. Weather conditions: Avoid feeding during drought, extreme heat, or when soil is frozen. This approach is stronger than separating season and region because readers usually want to know when to fertilize based on where they live. Best Time to Fertilize Your Lawn Based on Grass Type Grass type determines when your lawn is actively growing and ready to use fertilizer. Cool-season and warm-season grasses have different peak growth periods, so their feeding schedules shouldn’t follow the same calendar. Grass type Category Best feeding months Feedings per year Kentucky bluegrass, ryegrass, tall fescue Cool-season Early spring, early fall 3 to 4 Bermuda, zoysia, St. Augustine, centipede Warm-season Late spring through summer 2 to 4 1. Cool-season grass fertilizer schedule Kentucky bluegrass, perennial ryegrass, and tall fescue all grow fastest in spring and fall. Plan your heaviest feedings for those two windows. Use a lighter touch, or skip feeding entirely, during peak summer heat. A typical schedule spreads two to four feedings between early spring and late fall. 2. Warm-season grass fertilizer schedule Bermuda grass, zoysia, St. Augustine, and centipede grass all grow most actively once summer temperatures climb. Fertilize these types through late spring and summer. Then taper off as they head into dormancy in fall. Applying nitrogen too late in the year can leave warm-season grass open to winter injury. How N-P-K Ratios Affect Your Lawn Fertilizer Schedule Every fertilizer bag lists three numbers for nitrogen, phosphorus, and potassium. Most established lawns need far more nitrogen than phosphorus. Nutrient What it does Nitrogen (N) Drives the green color and leaf growth you notice first Phosphorus (P) Supports root development, especially in young or newly seeded lawns Potassium (K) Helps grass handle drought, cold, and general wear The University of Illinois Extension recommends an N-P-K ratio of about 3-1-2 or 4-1-2 for typical home lawns. Most soils already contain enough phosphorus. What Fertilizer Should You Use on Your Lawn? The right fertilizer depends on what your grass needs and what your soil already has. It also depends on timing and the results you want to see. Understanding fertilizer labels: The three numbers on every bag indicate the percentage by weight of nitrogen, phosphorus, and potassium. An 18-6-12 fertilizer is 18 percent nitrogen. Higher numbers mean you need less product to reach one pound per 1,000 square feet. Granular vs liquid fertilizer: Granular fertilizer spreads evenly with a spreader and often uses slow-release nitrogen to feed the lawn over several weeks. Liquid fertilizer is absorbed faster and corrects deficiencies quickly, but it requires careful, even application to avoid streaking or burning. Slow-release vs. quick-release fertilizer: Slow-release nitrogen breaks down gradually, lowering the risk of burn even at higher percentages. Quick-release nitrogen delivers a fast green-up but can scorch grass if overapplied, so many fertilizers blend both types of nitrogen. Signs Your Lawn Needs Fertilizer? Watching for signs of nutrient deficiency tells you when your lawn actually needs feeding. This works better than relying only on a fixed date on the calendar. Signs of nutrient deficiency Sign What it looks like Pale green or yellow color Shows up first in the older sections of the lawn Slow growth Grass needs mowing less often than usual Thin or patchy areas Bare spots that never fill in on their own Poor recovery Struggles to bounce back after mowing or foot traffic Weak roots Shallow root systems that pull up easily Other causes of yellow grass Yellowing grass is not always a nutrient issue. Overwatering, poor drainage, and compacted soil can all starve roots of oxygen. These problems can look just like a nutrient deficiency. Diseases and pests, such as grubs feeding on roots, can also cause grass to turn yellow or brown in patches. A soil test, or a close look at the roots, can help you rule fertilizer in or out. How to Apply Lawn Fertilizer Correctly Correct application spreads nutrients evenly across the lawn. It also reduces the risk of burned grass, product runoff, and fertilizer waste during the growing season. Step 1: Prepare your lawn before fertilizing Check the forecast and skip heavy rain or drought conditions. Mow at your normal height beforehand, clear away debris, and run a soil test if needed. Step 2: Apply the correct amount of fertilizer Follow the rate printed on the bag rather than guessing, since more product does not speed up greening. Use a calibrated spreader to cover the lawn evenly without stripes. Step 3: Water after fertilizer application Granular fertilizer needs a light watering, and the best time to water is during the daytime unless rain is expected. Liquid fertilizer instructions vary by product. Either way, avoid overwatering, which can wash fertilizer into the street. Factors That Affect Fertilizing Frequency A soil test takes the guesswork out of feeding your lawn. It measures existing levels of nitrogen, phosphorus, and potassium, as well as soil pH. That tells you exactly what your grass is missing, instead of guessing with a generic bag every few weeks. Factor Why it matters Grass variety Faster-growing types need more frequent feeding Soil nutrient levels Existing nutrients reduce how much you need to add Lawn age Newly established lawns often need different rates than mature turf Sun exposure Shaded lawns grow more slowly and need less nitrogen than those in full sun Rainfall and irrigation More water moves nutrients through the soil faster Mowing habits Leaving clippings on the lawn returns some nitrogen naturally Prior applications Fertilizer already applied earlier in the season affects timing The University of Illinois Extension recommends testing every few years. Adjust fertilizer type and rate based on the results, not a fixed calendar alone. What Lawn Fertilizer Mistakes Should You Avoid Avoiding these errors protects your grass and field, making every feeding count throughout the growing season, season after season. Applying too much fertilizer: Excess nitrogen scorches grass blades (a problem known as fertilizer burn) and promotes weak growth that invites disease. Fertilizing at the wrong time: Feeding dormant grass in deep summer heat or hard winter cold wastes product and further stresses the lawn. Ignoring soil conditions: Skipping a soil test means guessing what your lawn needs, which can lead to unnecessary nutrient runoff. Using the same schedule every year: Rainfall, temperature, and lawn condition shift year to year, so watch how your lawn responds and adjust. Frequently Asked Questions How many times a year should I fertilize my lawn? Most lawns need two to four feedings a year. Cool-season grasses do best with spring and fall applications, while warm-season grasses need feeding mainly during active summer growth months. What month is best to fertilize a lawn? Cool-season lawns benefit most from feedings in early spring and again in early fall. Warm-season lawns respond best to applications from late spring through summer, once the soil has warmed. Can I fertilize my lawn too often? Yes. Over-fertilizing can burn grass, push weak growth that invites disease, and raise nutrient runoff. Stick to labeled rates and space applications several weeks apart, rather than feeding on a whim. Should I fertilize before or after mowing? Fertilize after mowing, once the grass has a day or two to recover. Mowing right after fertilizing can remove fertilized leaf tips and reduce the benefit the lawn gets. How long should I wait to water after fertilizing? Water lightly within a day of applying granular fertilizer, unless rain is expected soon. This helps nutrients settle into the soil without washing the product off the lawn entirely. Building Your Fertilizer Schedule A steady lawn fertilizer schedule feeds grass when it can actually use the nutrients. It does not rely on a fixed date every month. The right timing depends on your grass type, climate, soil, and how the lawn responds throughout the seasons. Most yards do better with a handful of well-timed feedings than frequent, scattered ones. Testing your soil and picking a fertilizer suited to your lawn will help you avoid common problems.

Some rooms just feel off. Not cluttered, not dirty, just heavy. The kind of feeling that settles in after a stressful week, a big life change, or simply too much time spent indoors without a real reset. For that kind of heaviness, people have been turning to sage for centuries. Rooted in Indigenous and spiritual traditions across cultures, the ritual uses the slow drift of sage smoke to clear stagnant energy and invite calm back into a space. It’s less about belief and more about intention, a deliberate, unhurried act that signals to your mind and your home that something is shifting. If you’ve been curious about trying it, this blog covers everything you need to know: what to gather, how to move through each room, and how to do it safely from start to finish. What Does Saging a House Mean? House saging is the practice of burning dried sage and letting the smoke drift through each room to clear stagnant energy and refresh the space. Many people use it after a stressful event, a move, or simply when a home starts to feel heavy or unsettled. It can also become part of a broader home-reset routine, alongside decluttering, opening windows, rearranging furniture, or creating a calmer atmosphere. The smoke itself isn’t magic. What matters most to practitioners is the intention behind the ritual and the sense of a fresh start it creates. What You Need to Sage Your House Gathering supplies ahead of time keeps the ritual calm and uninterrupted. A sage bundle or loose sage A fireproof bowl or abalone shell Matches or a lighter Sand or water for extinguishing the sage An open window or maybe a bathroom door An optional feather or hand fan to guide the smoke. How to Prepare Your House Before Burning Sage A little prep work before lighting the sage makes the whole process safer and more effective. Tidy clutter and remove trash. Open windows and interior doors. Turn off fans that may spread embers. Move flammable objects away from your path. Keep children and pets in a safe area. Decide on an intention for the ritual. How to Sage Your House for the First Time Safely First-timers often worry about doing it wrong, but the process is forgiving. The steps below walk through everything from lighting the bundle to finishing near the front door. Step 1: Set a Clear Intention Choose a simple purpose for the cleansing before you begin, like creating a peaceful environment or marking a fresh start after a hard week. Keeping it short and specific makes it easier to stay focused on the rest of the ritual. Safety tip: Keep your fireproof bowl and extinguishing material within reach before you begin. Step 2: Open a Window or Door Ventilation lets smoke leave the home rather than build up indoors, so open at least one window or door before lighting the sage. This single step does more to keep the air breathable than almost anything else in the process. Safety tip: Check that smoke alarms near the opened window won’t trigger from drifting smoke. Step 3: Light the Sage Bundle Safely Hold the sage bundle over your fireproof bowl, light the tip, let it burn for a few seconds, then gently blow out the flame so it smolders and produces smoke instead of fire. A steady stream of smoke, rather than an open flame or flickering light, is the sign that the sage is smoldering properly and producing smoke as intended. Safety tip: Never light the bundle near curtains, paper, or other flammable materials. Step 4: Begin at the Main Entrance Many people start at the front door since it’s considered the main point where energy enters the home, then move through the house in one continuous direction. Starting here also gives you a clear reference point to return to later. Safety tip: Keep pets and children away from the entryway while the sage is lit. Step 5: Move Slowly Through Each Room Carry the sage in its fireproof bowl and walk slowly through each room, letting a small amount of smoke drift into the space as you go. There’s no need to fill the room with smoke, just enough to pass through each area. Safety tip: Watch for falling ash and keep the bundle angled downward over the bowl as you walk. Step 6: Focus on Corners, Doors, and Windows Direct the smoke toward corners, closets, entryways, and painted vinyl windows other spots where air tends to sit still, since these areas are often the focus of the ritual. These are the same spots that tend to collect dust and stale air day to day. Safety tip: Keep a safe distance from window treatments and stored items in closets. Step 7: Repeat Your Intention As you move from room to room, repeat your chosen intention quietly or aloud. Keeping the same words in mind can help you stay focused and present throughout the process. There is no need to rush. Move at a comfortable pace and repeat the intention whenever you feel your attention drifting. Safety tip: Don’t let focus on the intention distract you from watching the burning tip. Step 8: Return to the Starting Point Finish your path near the main entrance or the open window you started with, completing the loop through the home. This closes out the ritual with the same clear structure it started with. Safety tip: Do a quick visual check of the bundle for any active embers before setting it down. Step 9: Extinguish the Sage Completely Press the burning end firmly into sand or a fireproof container and check closely for any remaining embers before setting it aside. This last step matters just as much as the ritual itself. Safety tip: Confirm the bundle is fully cold to the touch before storing it away. How Often Should You Sage Your House? There’s no fixed schedule for saging a house. Many people do it after moving into a new home, following an argument, before starting something new, after guests leave, or simply whenever the space starts to feel unsettled. The ritual is performed as needed rather than on a strict routine. Some people prefer a light, regular rhythm, like once a season or at the start of a new month, while others reach for sage only when something specific prompts them. Neither approach is more correct than the other. The right frequency really comes down to how often the home feels like it needs a reset, not a set number of times per year. Which Direction Should You Move While Saging? There’s no single required direction for staging a house, so the table below covers the most common approaches. Approach How It Works Best For Clockwise Starts at the front entrance and follows a consistent clockwise path room to room People who want a simple, repeatable routine Counterclockwise Moves in the opposite direction from clockwise, starting at the same entry point Practitioners with a personal or traditional preference Natural layout Follows the home’s floor plan in whatever order feels easiest to walk through Larger or irregularly shaped homes What matters more than the exact direction is covering every room at a steady, unhurried pace; sticking to the same path each time can make the ritual feel more familiar over time. How to Complete Your House Cleansing Ritual A few simple steps wrap up the ritual once you’ve worked through every room. Let fresh air circulate for a few minutes before closing the windows. Dispose of ash safely and store the cooled sage bundle in a dry, fire-safe place. Take a quiet moment to acknowledge the fresh start before returning to your routine. Check the room where you started one last time to make sure no embers remain. How to Choose Sage for House Cleansing When buying sage for house cleansing, look beyond price and packaging. The more important details are the type of sage, where it was grown, and whether the seller explains how it was harvested. You can find white sage from established herb suppliers such as Mountain Rose Herbs, which offers organically cultivated white sage of California origin, and Taos Herb Company, which carries California white sage sourced from private land. For smaller growers, marketplaces can also be useful, especially when sellers provide clear details about cultivation and harvesting. For example, Blossom Valley Sage grows and harvests white sage on private property in San Diego, California. Before buying, check whether the sage is cultivated or wild-harvested, where it comes from, and whether the seller provides transparent sourcing information. White sage is particularly vulnerable to overharvesting, so cultivated plants or responsibly harvested sage from private land are better options when available. Common Mistakes to Avoid When Saging a House A few small missteps account for most of the problems people run into with this ritual. Creating too much smoke is one of the most common mistakes, since a light, steady stream works better than a heavy cloud that overwhelms the space. Skipping ventilation quickly compounds the problem, so keep windows and doors open throughout. Carrying the bundle without a fireproof bowl underneath it is another oversight worth correcting before you start, as ash and embers drop without warning. Moving too quickly through each room undermines the whole process; slow, deliberate movement gives the smoke time to do its work. Keep an eye on anything flammable nearby, including curtains, loose papers, and dry decorative pieces, since sage burns longer than it appears to. When you’re done, make sure the bundle is fully extinguished rather than just set aside, since smoldering sage left unattended is a fire risk. Frequently Asked Questions What time of day should you smudge your house? You can smudge at any time, though many people prefer the morning or before a new beginning to create a fresh atmosphere. Does burning sage invite bad spirits? No, there is no evidence that burning sage invites bad spirits; many people use it as a symbolic cleansing practice based on personal or cultural beliefs. Does sage have to be gifted? No, Sage does not have to be gifted; you can purchase it yourself if you choose to use it respectfully. What is the prayer for powerful home cleansing? There is no single required prayer; you can say a simple, sincere intention asking for peace, protection, and positive energy in your home. Does dried sage ever go bad? Dried sage does not spoil quickly, but it can lose its fragrance and burn quality over time if stored in a damp or humid place. A Fresh Start for Your Home Sagging a house comes down to a few simple stages: preparing the space, lighting the bundle safely, moving smoke through each room with intention, and finishing the ritual with care. Keep the smoke light, the ventilation open, and let the process bend to your own beliefs and your household’s needs rather than a rigid set of rules. Long after the smoke has cleared, what stays behind is the quiet shift in how the home feels. That’s the real point of the ritual, not the smoke itself.

