


A fire pit area that looks planned and holds up over time does not have to cost a lot, and that is the premise worth starting from. The biggest mistake most people make is skipping the planning stage and going straight to buying materials.
From my experience watching these projects play out, the ones that end up looking finished and feeling safe are never the most expensive.
They are the ones where someone took the time to decide on placement, surface material, seating distance, and a clear border before a single bag of gravel was opened.
Below I’ll cover low-cost fire pit landscape design ideas, organized by material type, backyard size, and layout style, with budget ranges, safety notes, and common failures over time.
What Makes a Budget Fire Pit Area Look Planned
A budget fire pit landscape is not just a metal bowl dropped onto the lawn with a few chairs around it. It is a defined outdoor zone, one with a clear non-combustible surface, a seating circle at the right distance from the flame, a border that keeps loose materials contained, and some form of low-level lighting so the space is usable after dark.
The materials that make this happen well at low cost are pea gravel, crushed stone, concrete pavers, retaining wall blocks, and metal fire rings. Portable fire pits, secondhand chairs, and solar stake lights round out a setup that functions and looks considered.
The four questions worth answering before buying anything: where does the pit go, what surface goes under and around it, where does seating land, and how does the area stay safe and easy to maintain season to season.
| Cost Note: Figures in this article are estimates based on national averages. Actual costs vary by region, supplier, and project scope. Always get at least three quotes before committing to any project above $1,000. |
Budget Ranges Before You Buy Anything
The total spend on a fire pit seating area depends almost entirely on three variables: how large the ground surface is, what material covers it, and what the seating costs. Everything else is secondary. Here is a clear breakdown of what each budget tier realistically delivers:
| Budget Range | What It Gets You | Key Trade-offs |
| Under $100 | Portable fire bowl, small gravel ring, reused chairs | No permanent structure, minimal edging |
| $100 to $300 | Metal fire ring, gravel pad up to 12 ft wide, steel edging, solar lights | Still movable, no built-in seating |
| $300 to $700 | Paver or block fire pit, larger gravel zone, consistent seating | More material weight, harder to relocate |
| $700+ | Fire pit kit, paver patio base, built-in bench options | Closest to a permanent outdoor room |
Most people building on a real budget land between $150 and $400. That range covers a metal fire ring with a gravel pad, decent edging, and four chairs, which is enough to create a space that functions well for years.
Choosing the Right Spot First
Start with fire pit placement before buying materials because the spot affects safety, comfort, and cost. Choose flat, open ground at least 10 feet from the house, fence, shed, dry shrubs, low branches, and stored items.
Check local burn rules and HOA limits before digging, since some areas restrict open flames or permanent pits. Test the location with chairs first to check wind, smoke flow, slope, and walking space. Then choose the fire type.
A wood-burning fire pit costs less but needs dry wood, ash cleanup, and smoke control. A propane fire pit starts easily and burns cleaner, but costs more and needs tank storage.
A portable fire bowl works well for renters, small yards, and flexible layouts. Keep every surface stable, non-burnable, clearly edged, and easy to walk on.
Low-Cost Fire Pit Landscaping Ideas for a Clean Backyard Setup
Use these ideas to compare fire pit layouts by cost, space, safety, upkeep, and style, so you can plan a clean backyard setup without wasting money or extra effort today.
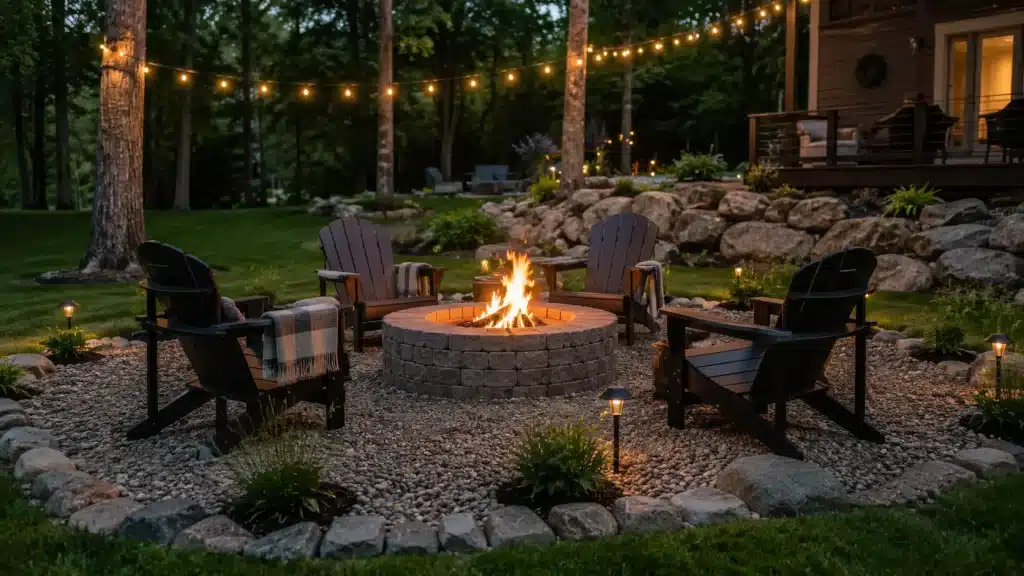
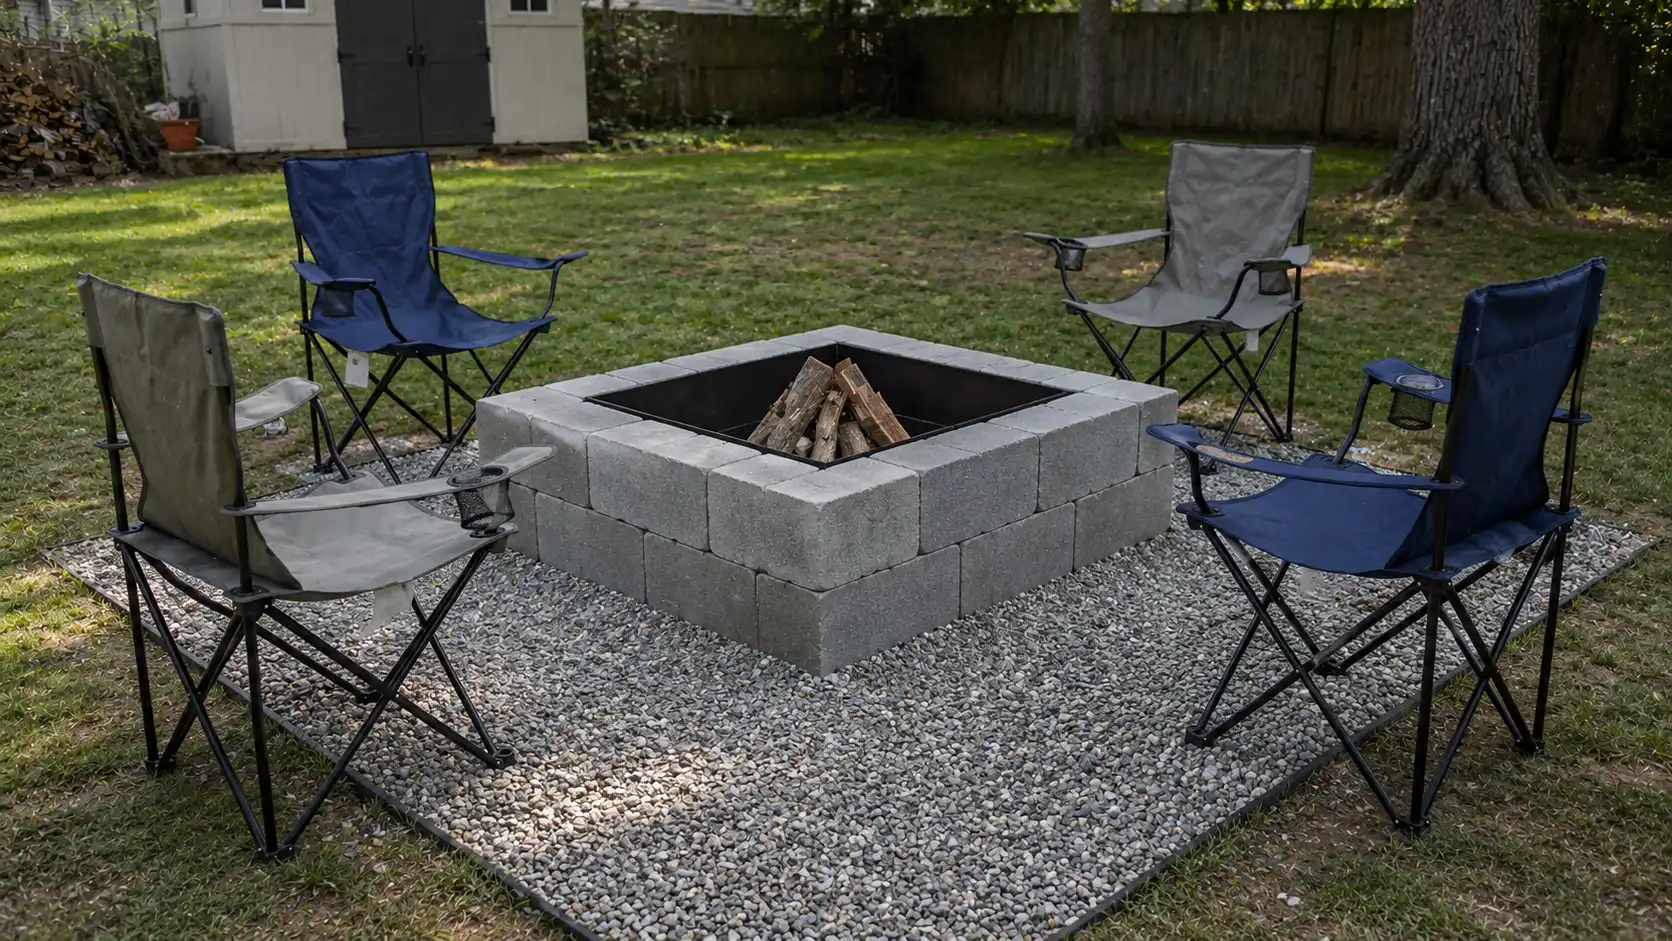
1. Round Pea Gravel Fire Pit Circle
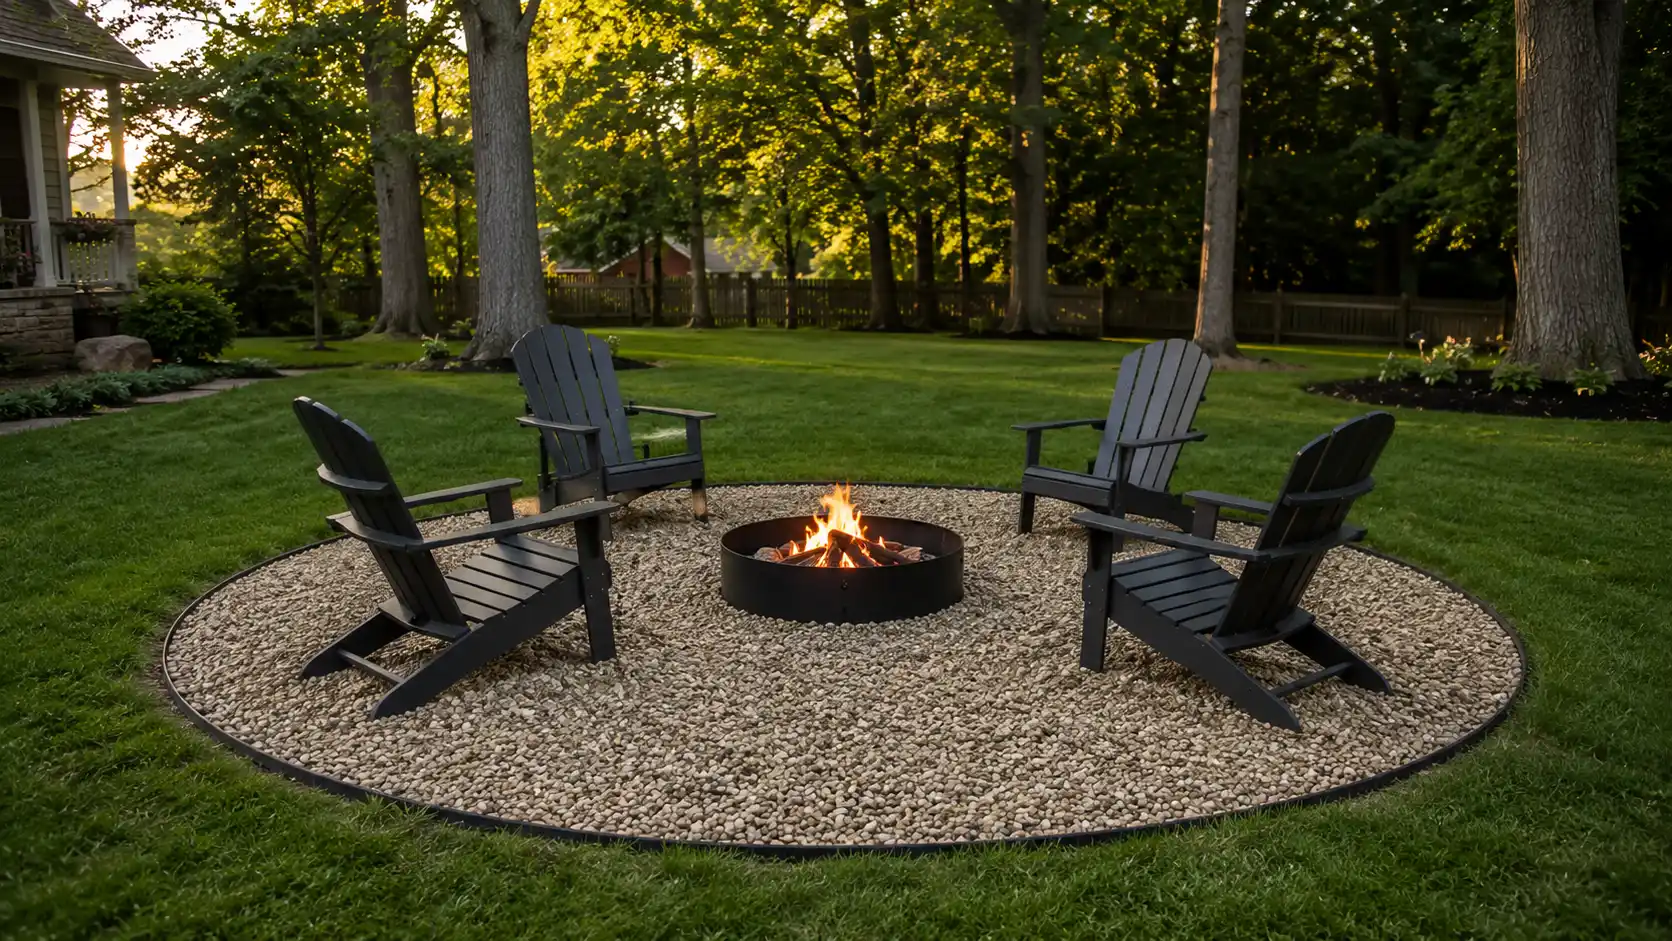
Cost: Low
Best for: Open lawn areas
Setup: Metal edging, pea gravel, and fire ring
Safety: Keep gravel level and chairs set back
A round pea gravel fire pit circle is one of the easiest budget layouts to picture and build. Remove the grass, level the soil, add landscape fabric, then spread 2 to 3 inches of pea gravel. A black metal edge keeps the circle clean and stops stones from spreading into the lawn.
2. Square Crushed Stone Fire Pit Pad
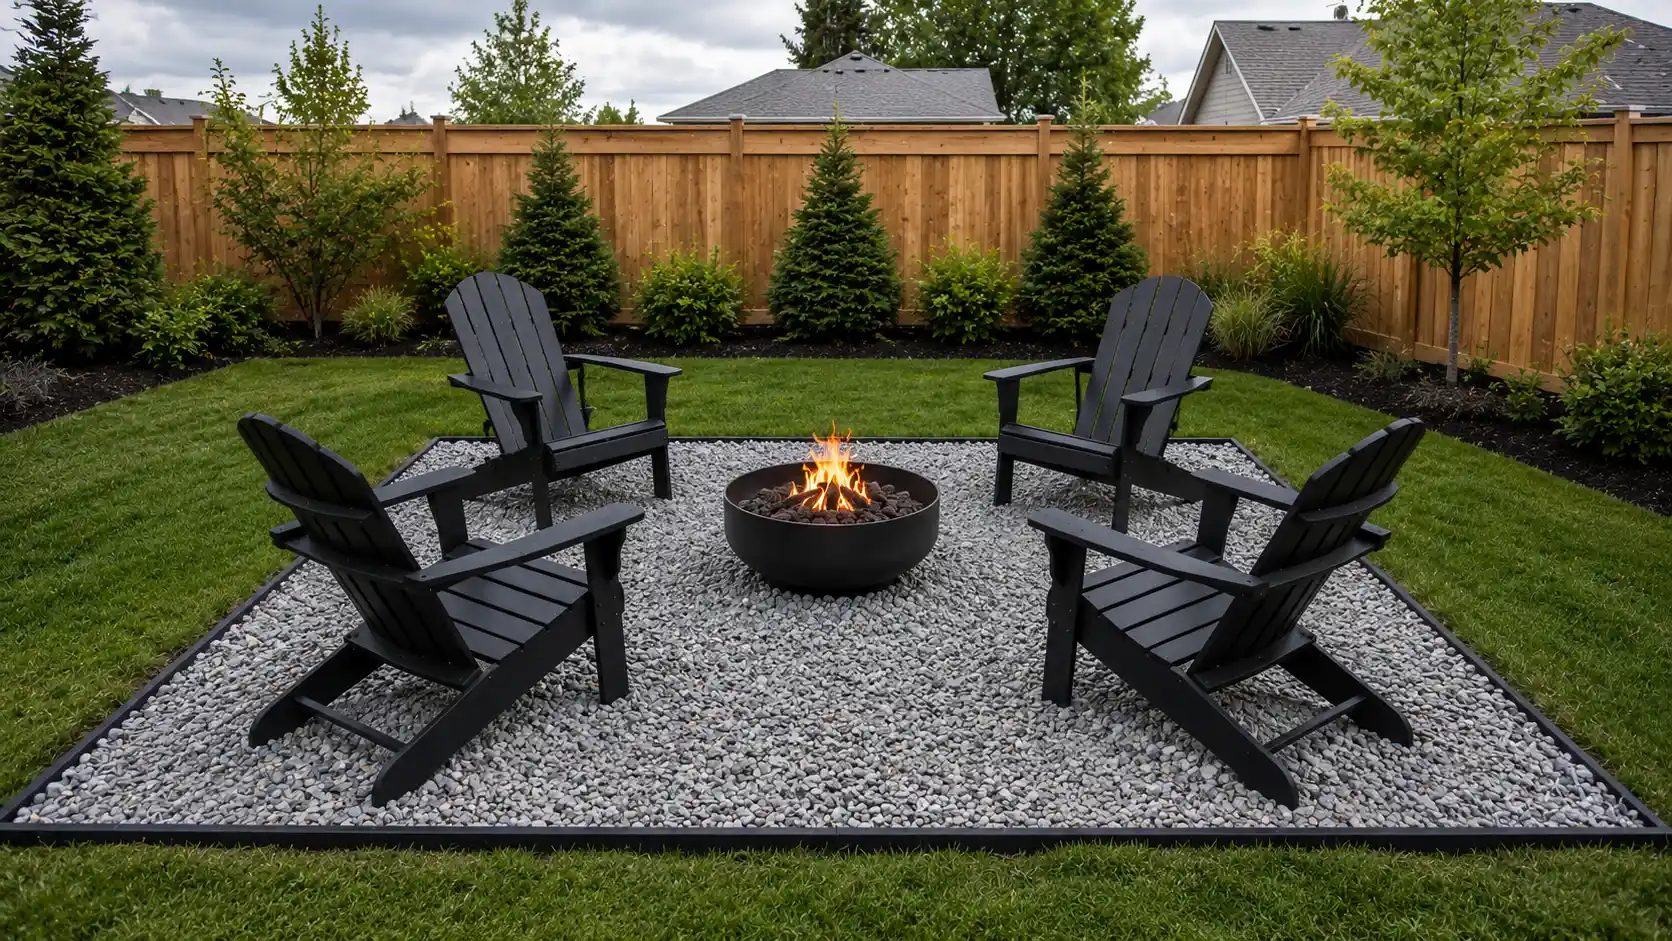
Cost: Low to medium
Best for: Modern backyards and soft ground
Setup: Compacted crushed stone with straight edging
Safety: Check for sinking chair legs
A square crushed stone pad gives the fire pit area a clean, simple shape. It works well with four chairs, a centered fire bowl, and straight steel or paver edging. Crushed stone is firmer than pea gravel, so chairs sit better after rain and the surface needs less fixing.
3. Small Paver Patio With a Fire Bowl
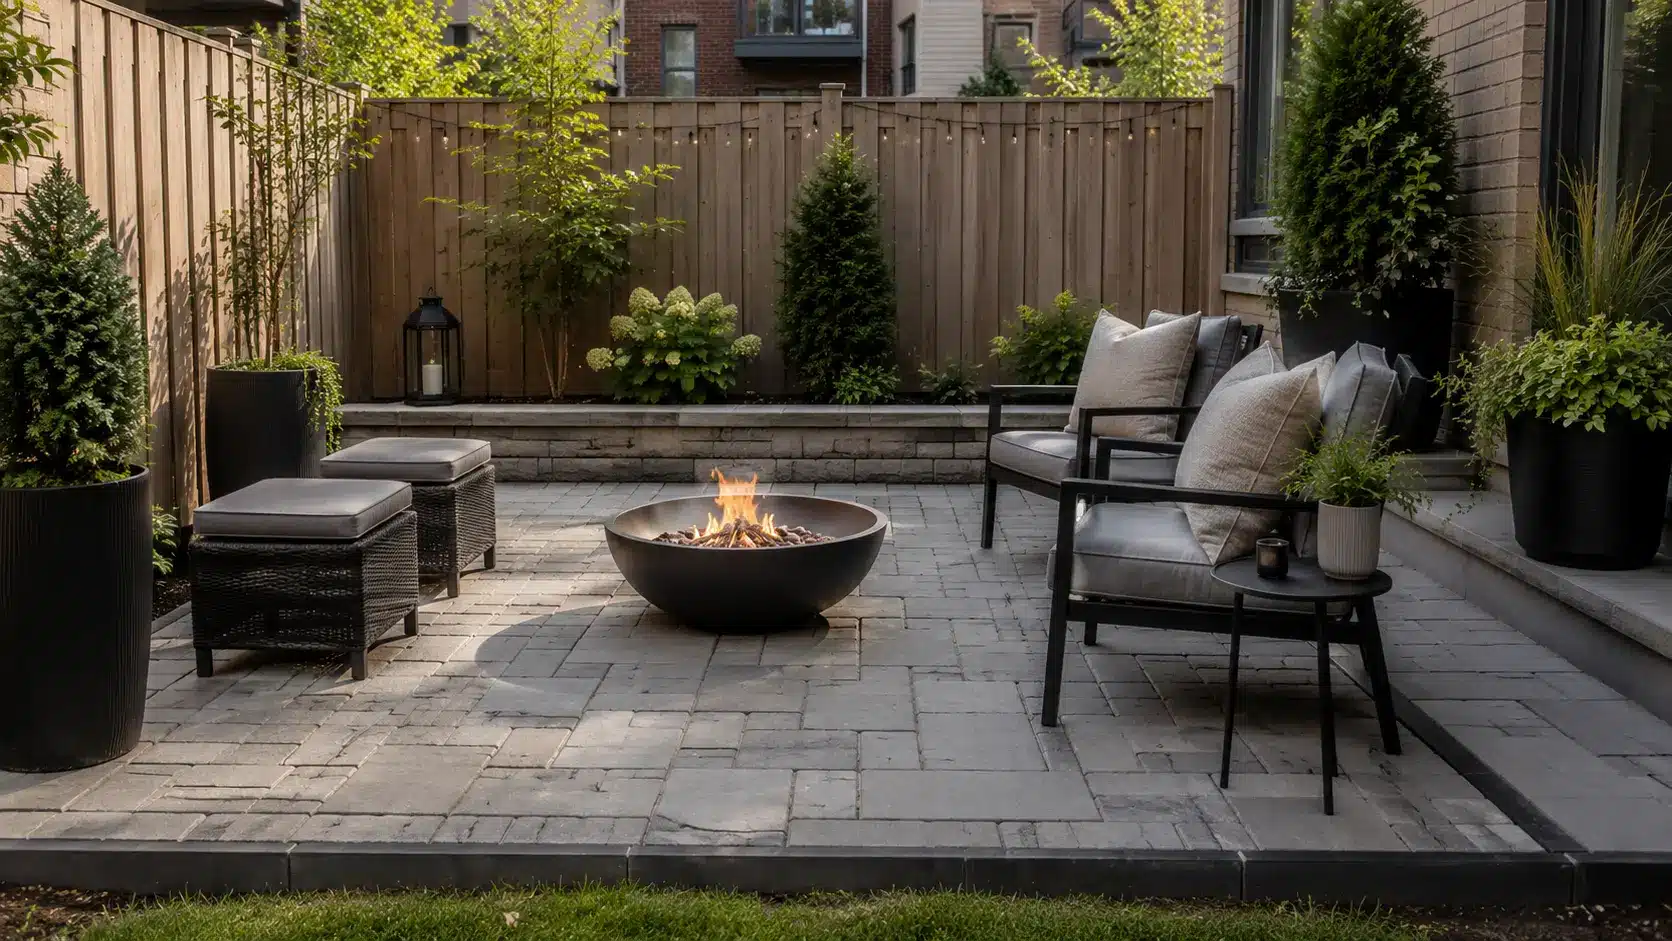
Cost: Medium
Best for: Stable seating and small yards
Setup: Pavers under chairs and portable fire bowl
Safety: Keep pavers flat and non-slip
A small paver patio makes the fire pit area feel finished without building a full outdoor room. Use pavers only under the fire bowl and chairs, then keep the shape simple. The paver pattern creates a clear, solid seating zone that holds up better than loose stone when chairs are pulled in and out frequently.
Anyone planning to add outdoor furniture nearby should check what a DIY patio sofa build requires in terms of frame depth and cushion clearance before sizing the pad.
4. Cinder Block Square Fire Pit
Cost: Very low
Best for: Straight-line backyard layouts
Setup: Stacked cinder blocks on gravel
Safety: Add a metal liner when possible
A cinder block fire pit gives you a low-cost square build with a strong shape. Stack the blocks two or three rows high on a level gravel base. Add a metal insert to reduce direct heat on the blocks. This works best in casual yards where simple materials fit the setting.
5. Retaining Wall Block Fire Pit Ring
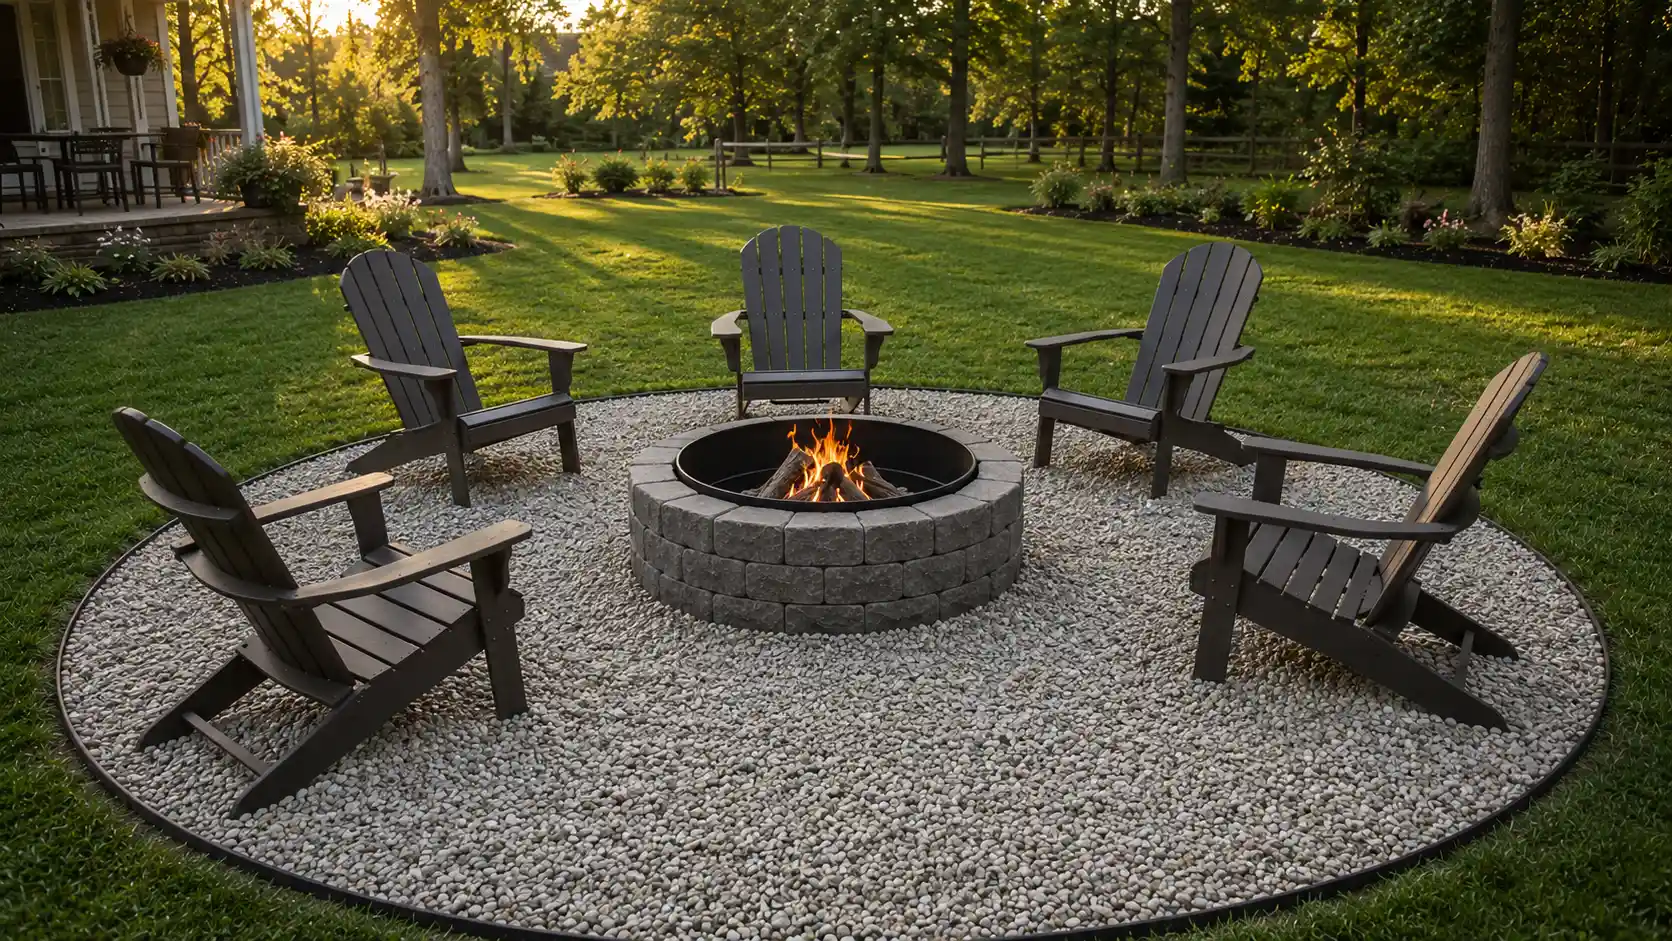
Cost: Medium
Best for: Built-in look on a budget
Setup: Curved wall blocks with gravel base
Safety: Keep each row level
A retaining wall block ring looks more finished than loose stones but stays beginner-friendly. Use curved blocks to form a round pit, then place a metal ring inside for heat protection. This idea is easy to photograph because the stacked wall, gravel base, and chairs create a clear focal point.
6. Brick Fire Pit With Gravel Seating Area
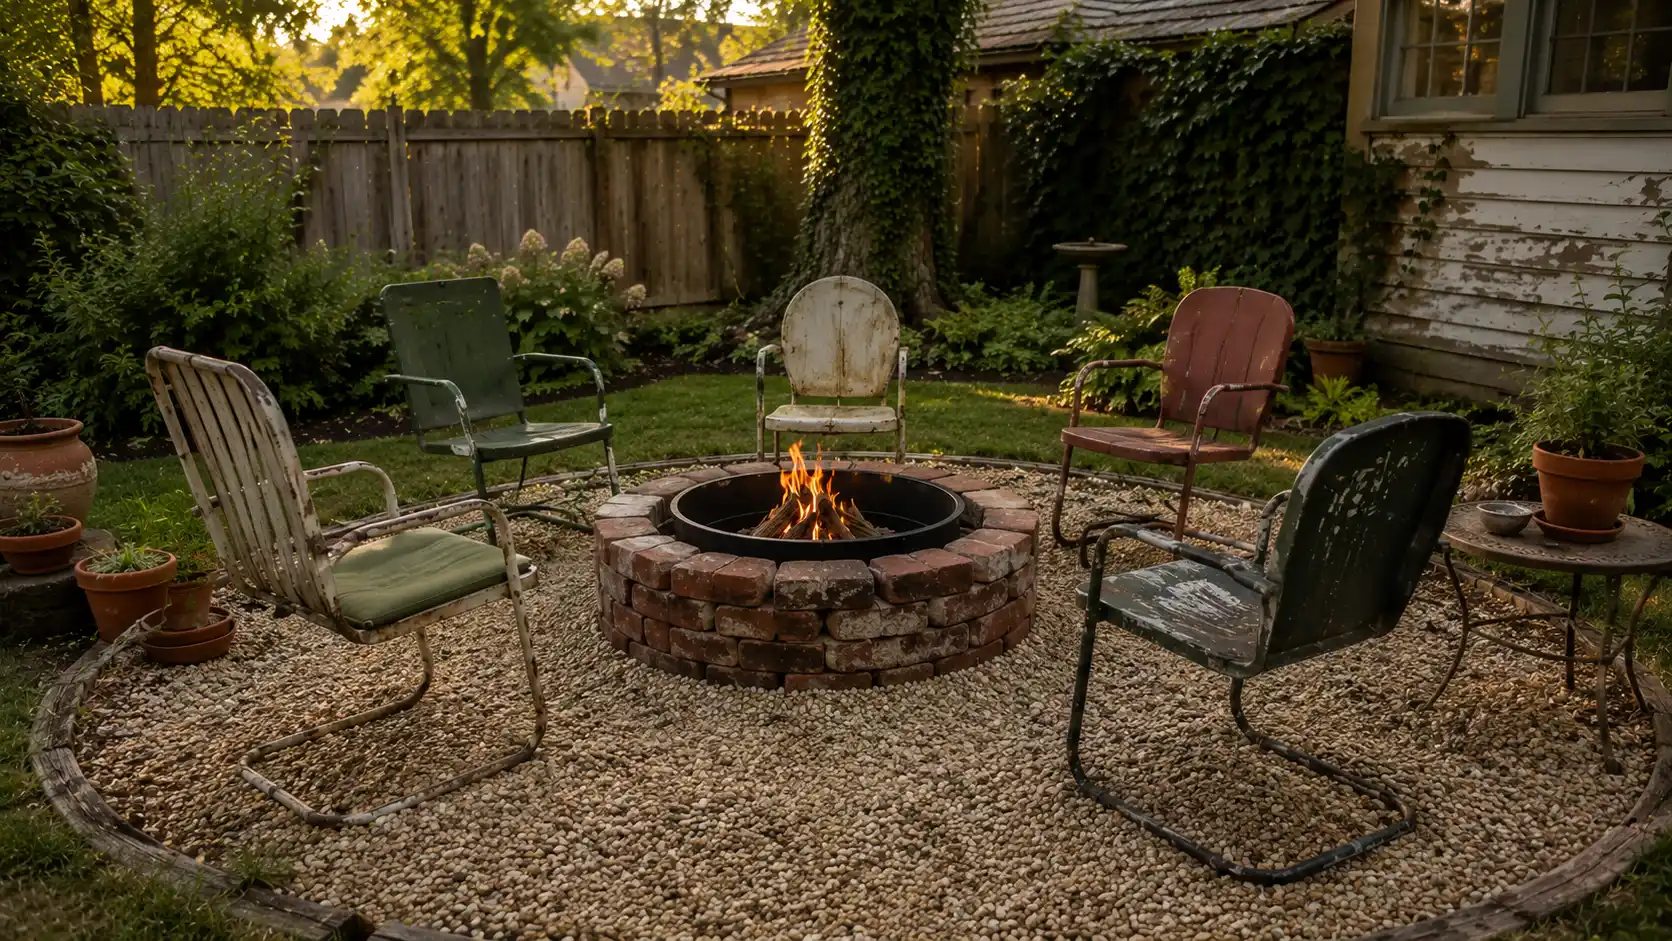
Cost: Low if brick is reused
Best for: Older homes and rustic yards
Setup: Brick ring, gravel pad, and simple seating
Safety: Keep unknown brick away from direct flame
A brick fire pit works well when you have leftover or secondhand brick. Use the brick as the outer ring or border, then place a metal insert inside. Surround it with gravel and a few basic chairs. The finished look feels warm, simple, and different from block or metal-only setups.
7. Fire Pit With Stepping Stone Paths
Cost: Low to medium
Best for: Linking patios, lawns, and garden areas
Setup: Gravel pad with stepping stones
Safety: Keep stones level to prevent trips
Stepping stones make a fire pit area feel connected to the rest of the yard. Place flat stones from the patio or back door to the gravel fire zone. This gives guests a clear path and makes the space look planned, even when the main fire pit setup stays very simple.
8. Corner Fire Pit With L-Shaped Seating
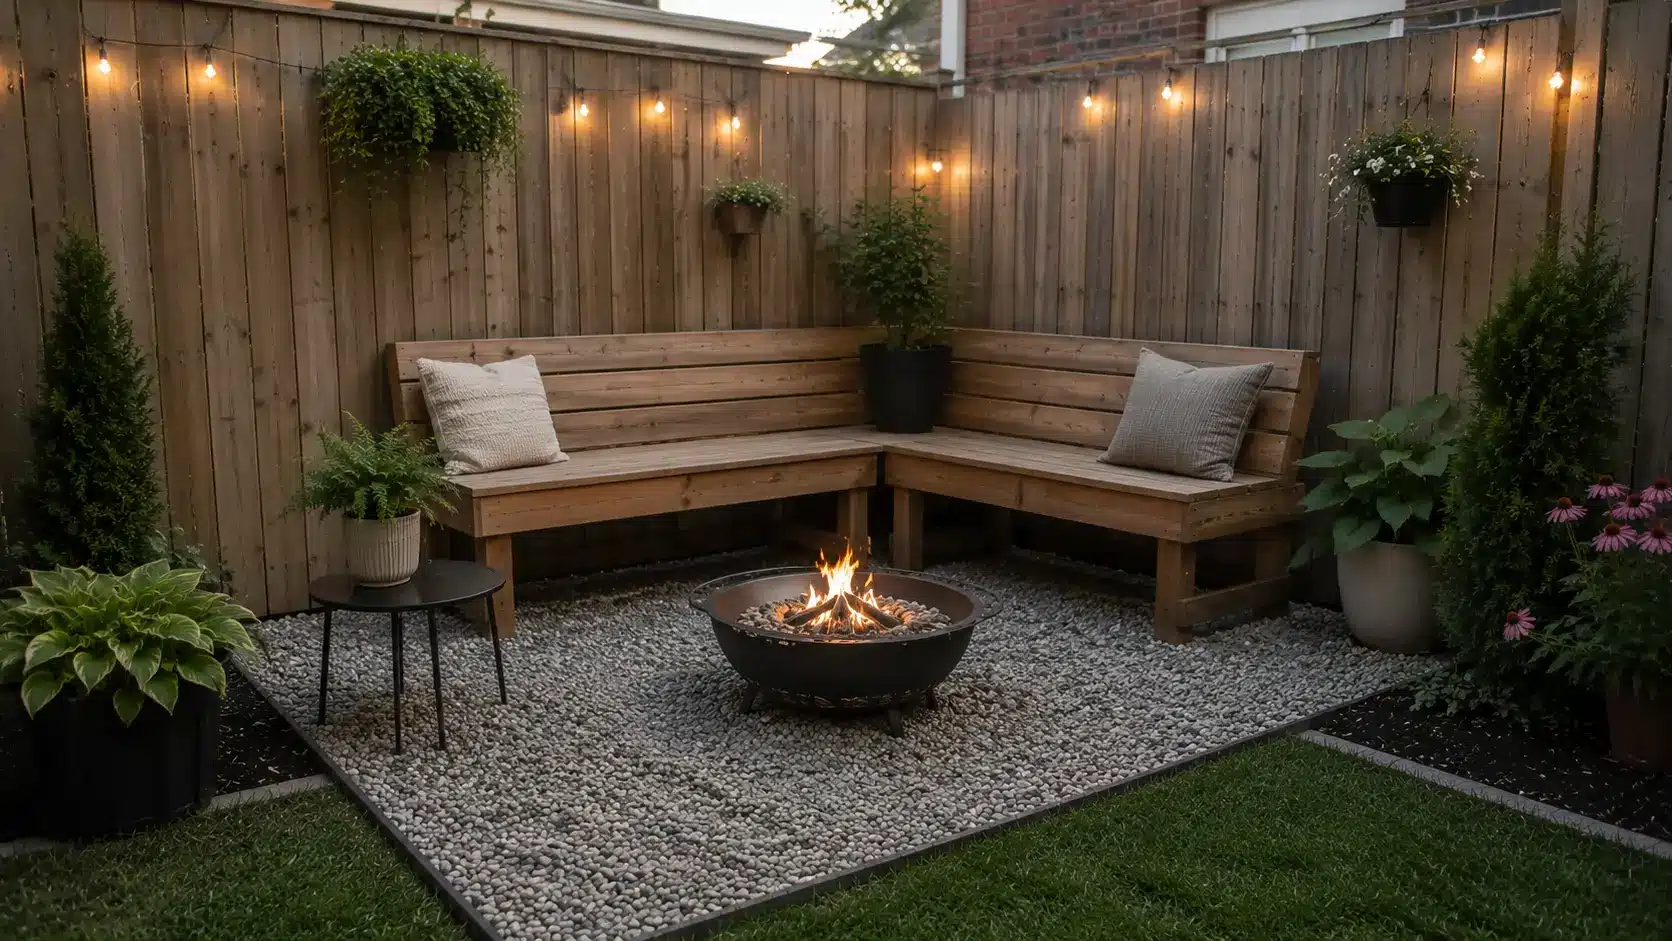
Cost: Low
Best for: Small backyards and tight layouts
Setup: Corner gravel pad with bench or chairs
Safety: Leave open space around the flame
A corner fire pit uses yard space that often goes unused. Place a small gravel pad in one corner, add a portable fire bowl, then use an L-shaped bench or two chairs with a small table. This layout is easy to show because it looks different from a standard circle.
9. Fire Pit With Built-In Block Bench
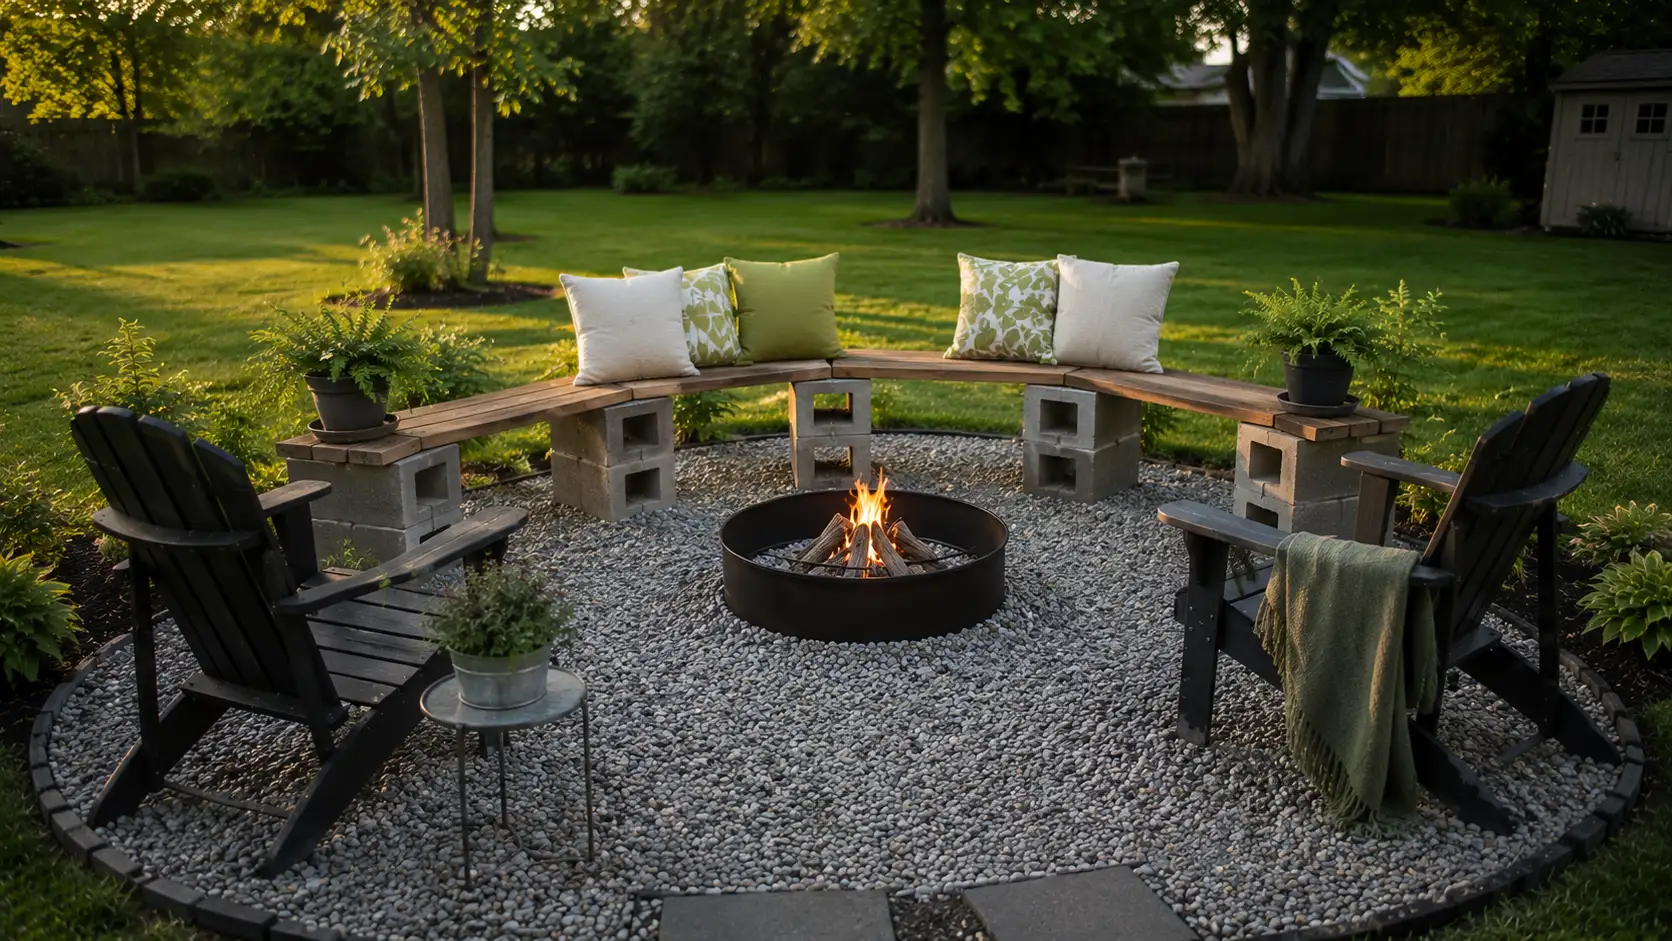
Cost: Low to medium
Best for: Fixed seating on a budget
Setup: Cinder blocks, treated boards, and cushions
Safety: Keep the bench set back from the heat
A block bench gives the seating area a steady shape without buying a full patio set. Stack cinder blocks as supports, slide treated boards through or across them, and add outdoor cushions. Place the bench outside the heat zone so people can sit comfortably without being too close to the fire.
10. Log Seat Fire Pit Area
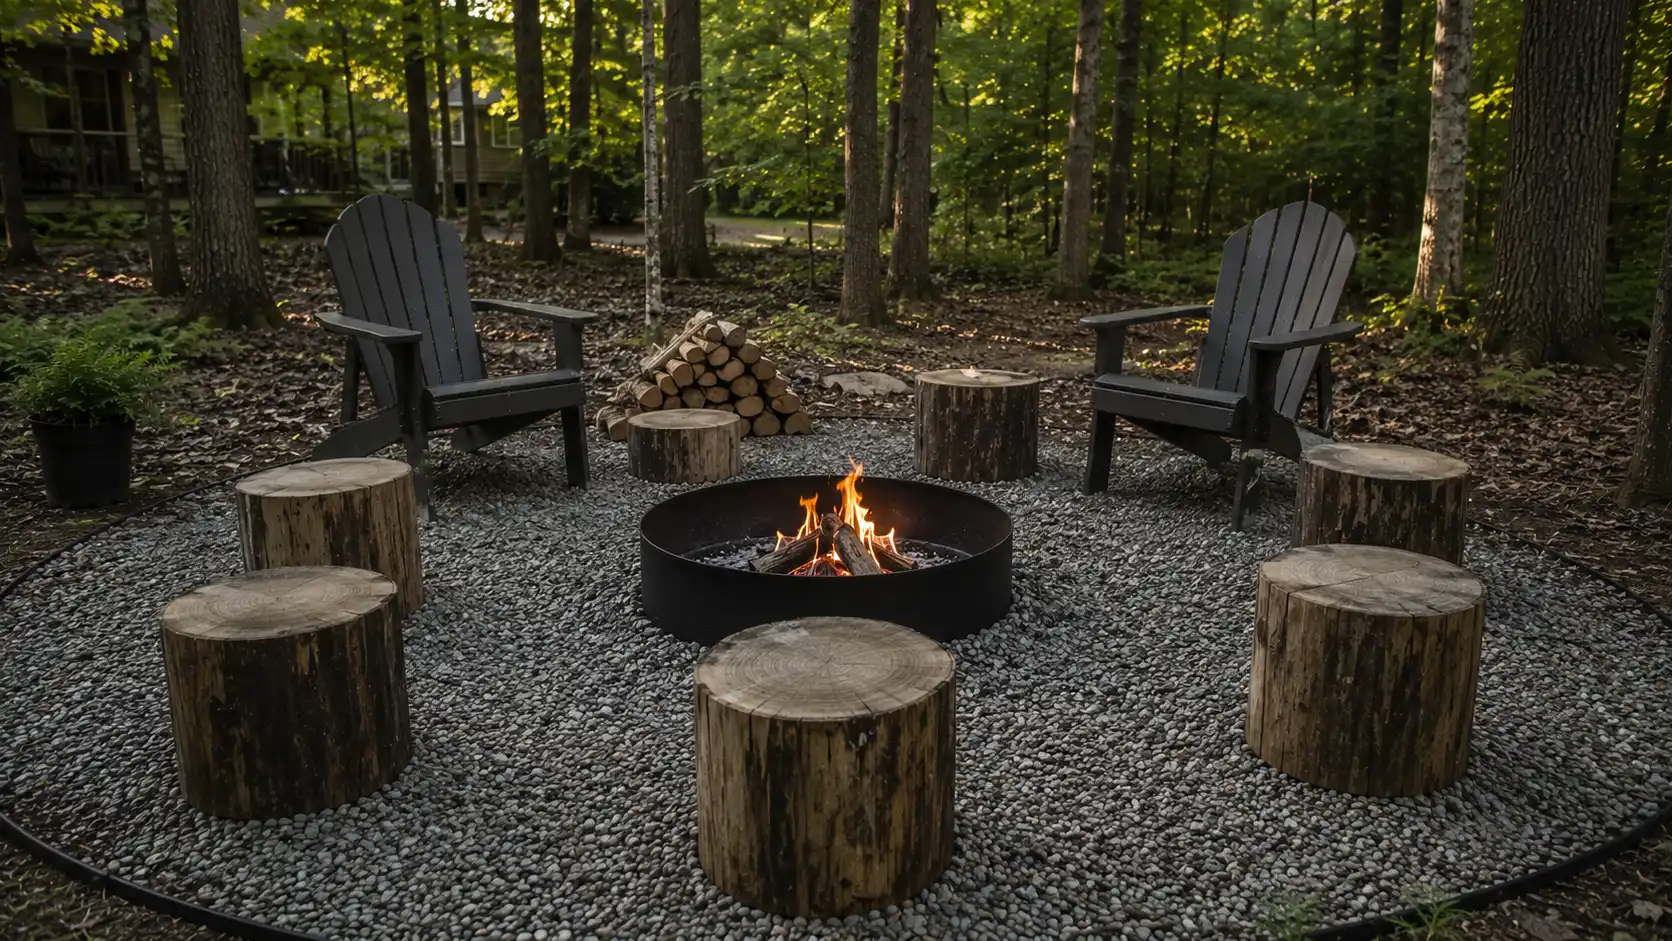
Cost: Very low
Best for: Rustic yards and wooded lots
Setup: Gravel fire zone with sanded log seats
Safety: Keep logs away from sparks
Log seats make sense when the yard already has a woodland or cabin feel. Use thick, flat-cut logs or stumps as extra seating around a gravel fire area. Sand the tops, seal the wood, and place them on stable ground. Pair them with regular chairs for better comfort.
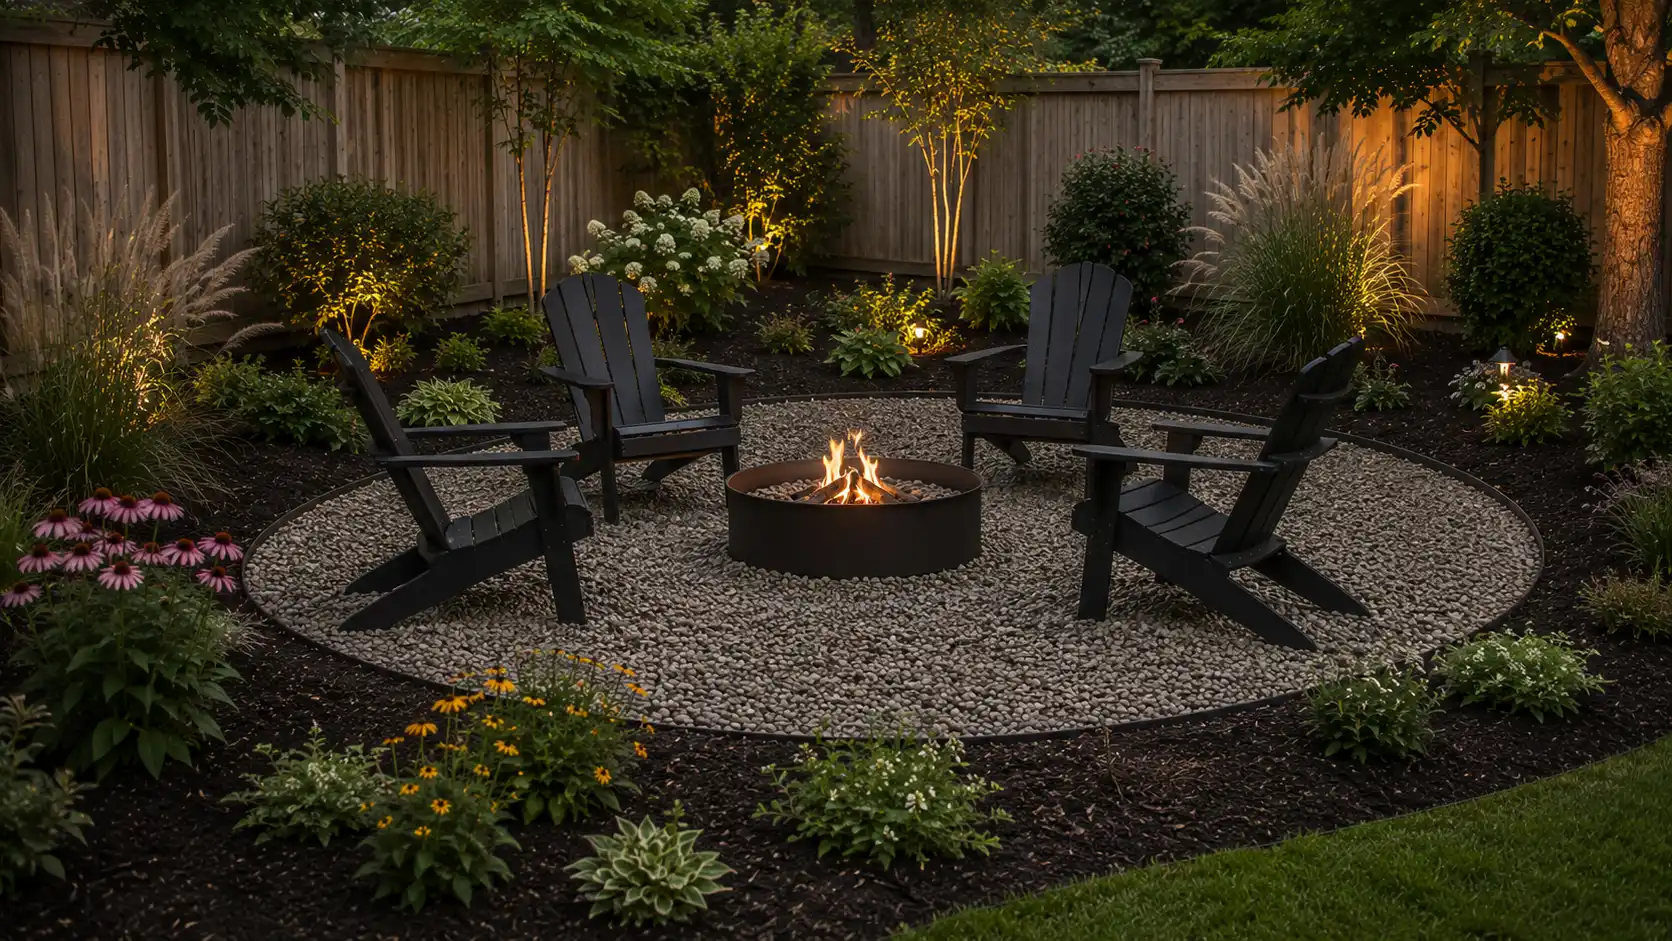
11. Fire Pit With Potted Grass Border
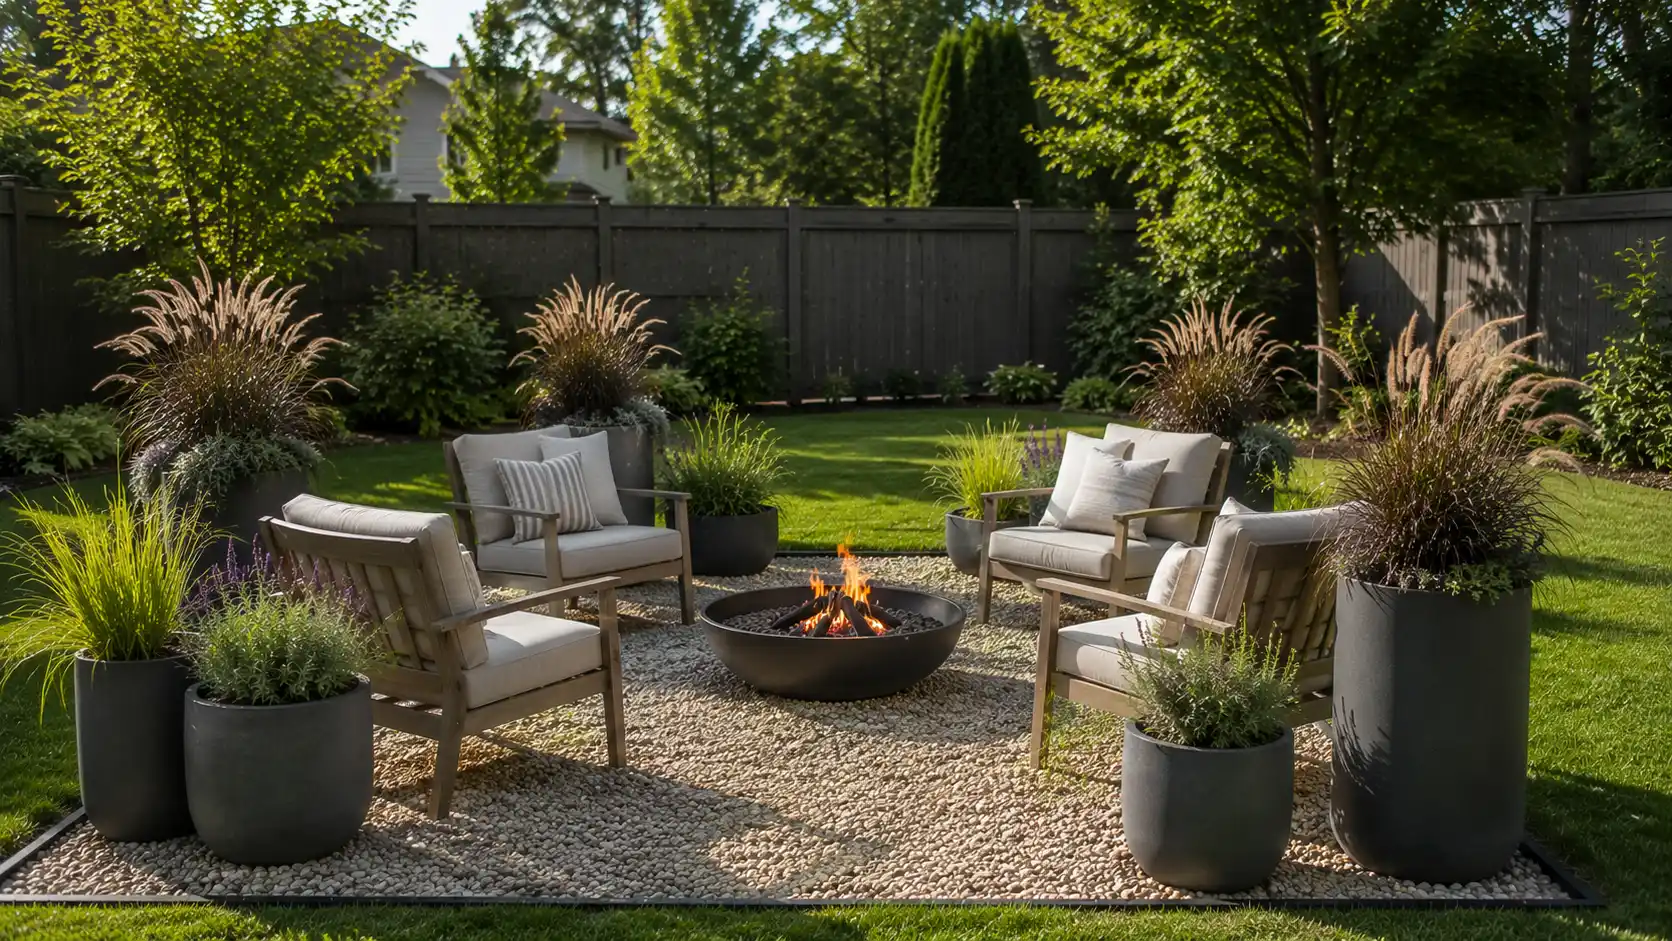
Cost: Low to medium
Best for: Softening gravel and stone areas
Setup: Gravel pad with large planters around the edge
Safety: Keep plants outside the spark zone
A potted grass border makes a basic fire pit area feel more styled without planting new beds. Use large pots with ornamental grasses, small shrubs, or hardy perennials around the outer edge. Keep every pot far from the flame. This idea gives you a clear visual frame and easy seasonal changes.
12. Fire Pit With Solar Path Lights and Gravel Border
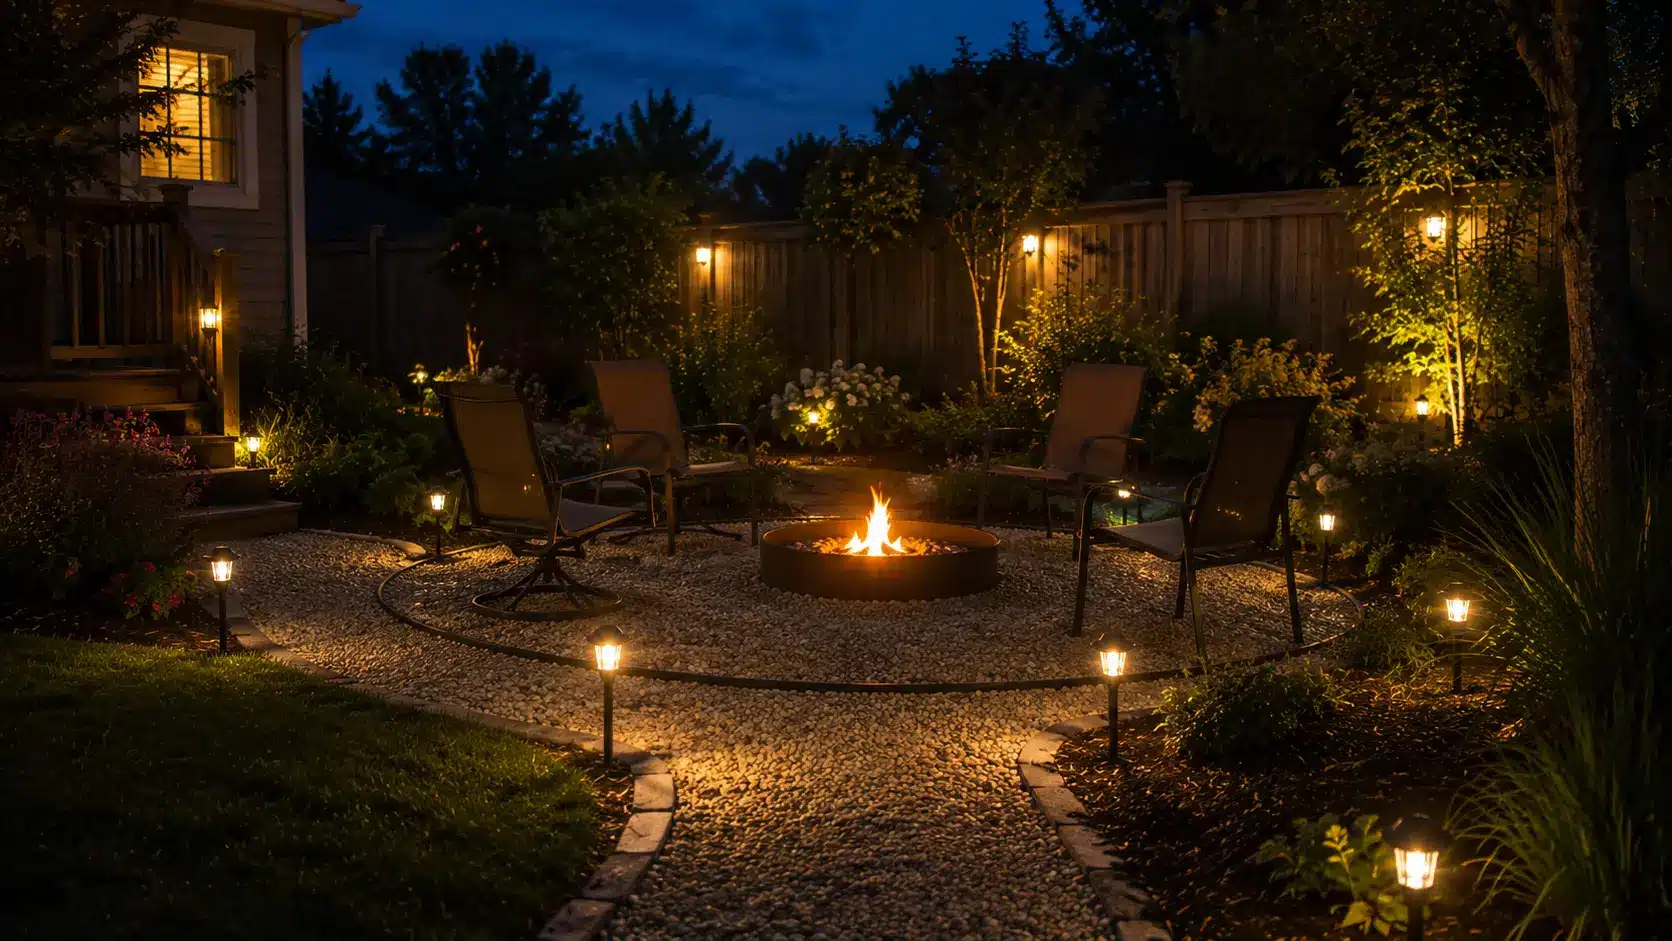
Cost: Low
Best for: Night use and clear walkways
Setup: Fire pit pad, path lights, and simple chairs
Safety: Keep lights secure and away from foot traffic
Solar path lights make the area easier to use after dark without wiring. Place stake lights along the path, around the gravel edge, or behind the chairs. Warm white bulbs look best near a fire. This idea photographs well because the lighting shows the full layout and walking path.
13. Fire Pit With a Simple Privacy Panel
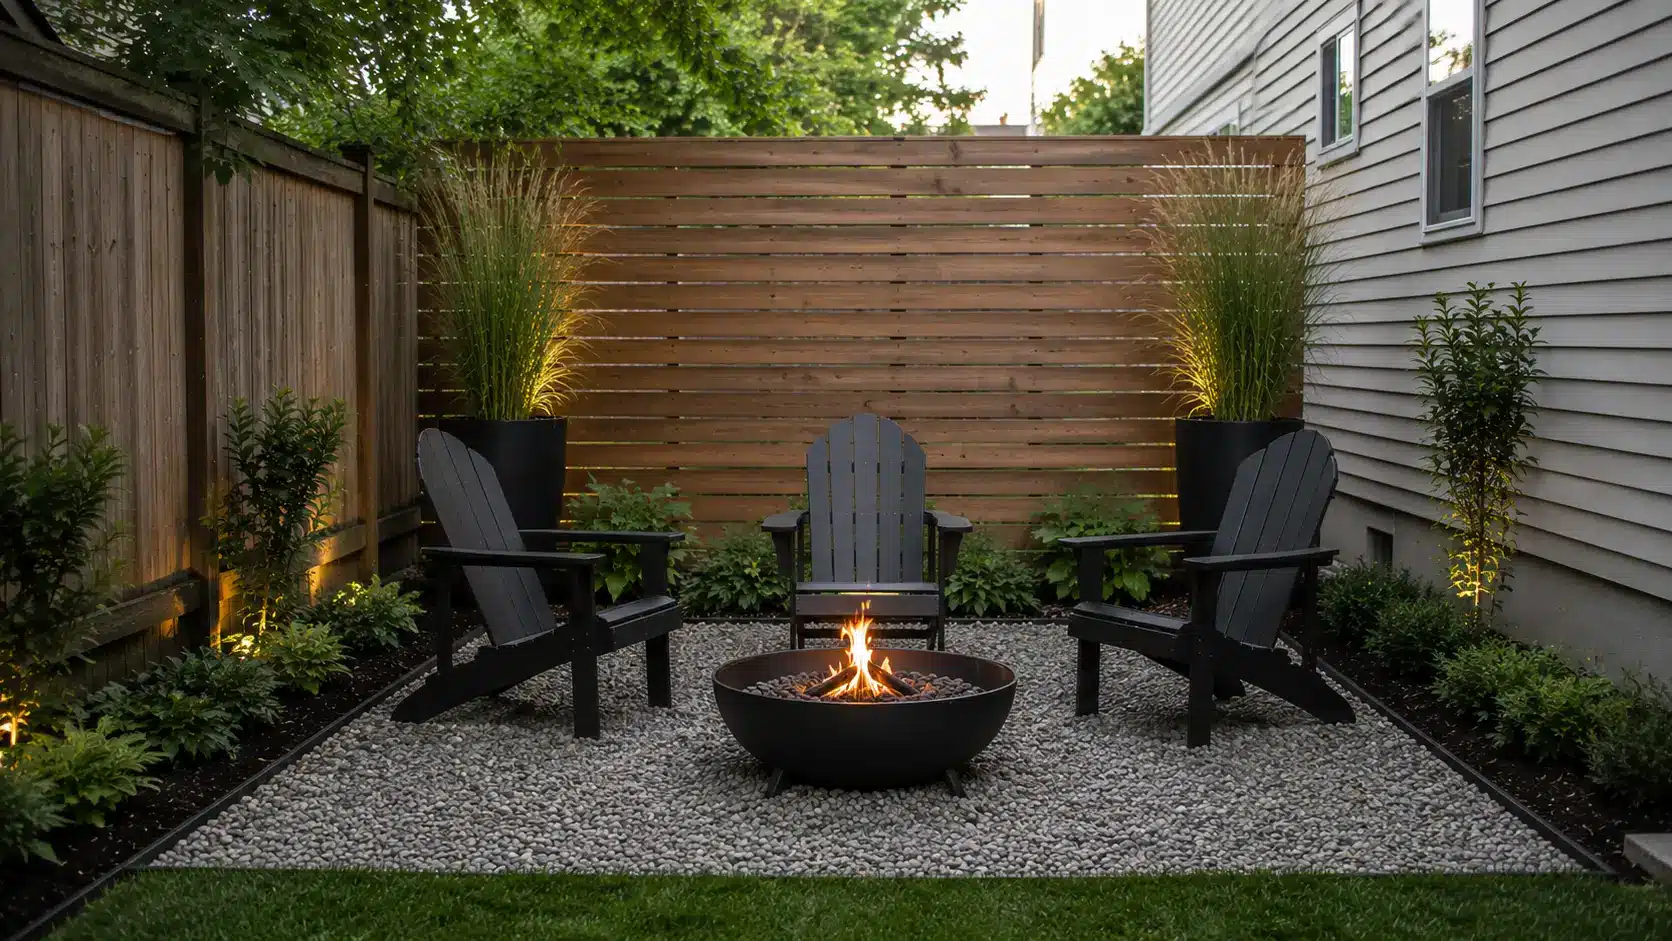
Cost: Low to medium
Best for: Yards near neighbors or fences
Setup: Gravel pad with one privacy screen on one side
Safety: Keep panels away from heat
A privacy panel can make a fire pit area feel more tucked away. Use lattice, reed panels, slatted wood, or tall planters on one side only. Keep the screen well outside the heat zone. This gives the layout a clear backdrop and makes the image look different from open lawn setups.
14. Fire Pit With a Gravel and Mulch Combo
Cost: Low
Best for: Garden-style yards
Setup: Gravel fire zone with mulch planting border
Safety: Keep mulch outside the fire area
A gravel and mulch combo helps separate the fire zone from the planting area. Use gravel under the fire pit and chairs, then add mulch only outside the border near shrubs or flowers. This keeps the flame area non-burnable while still giving the yard a softer, more finished edge.
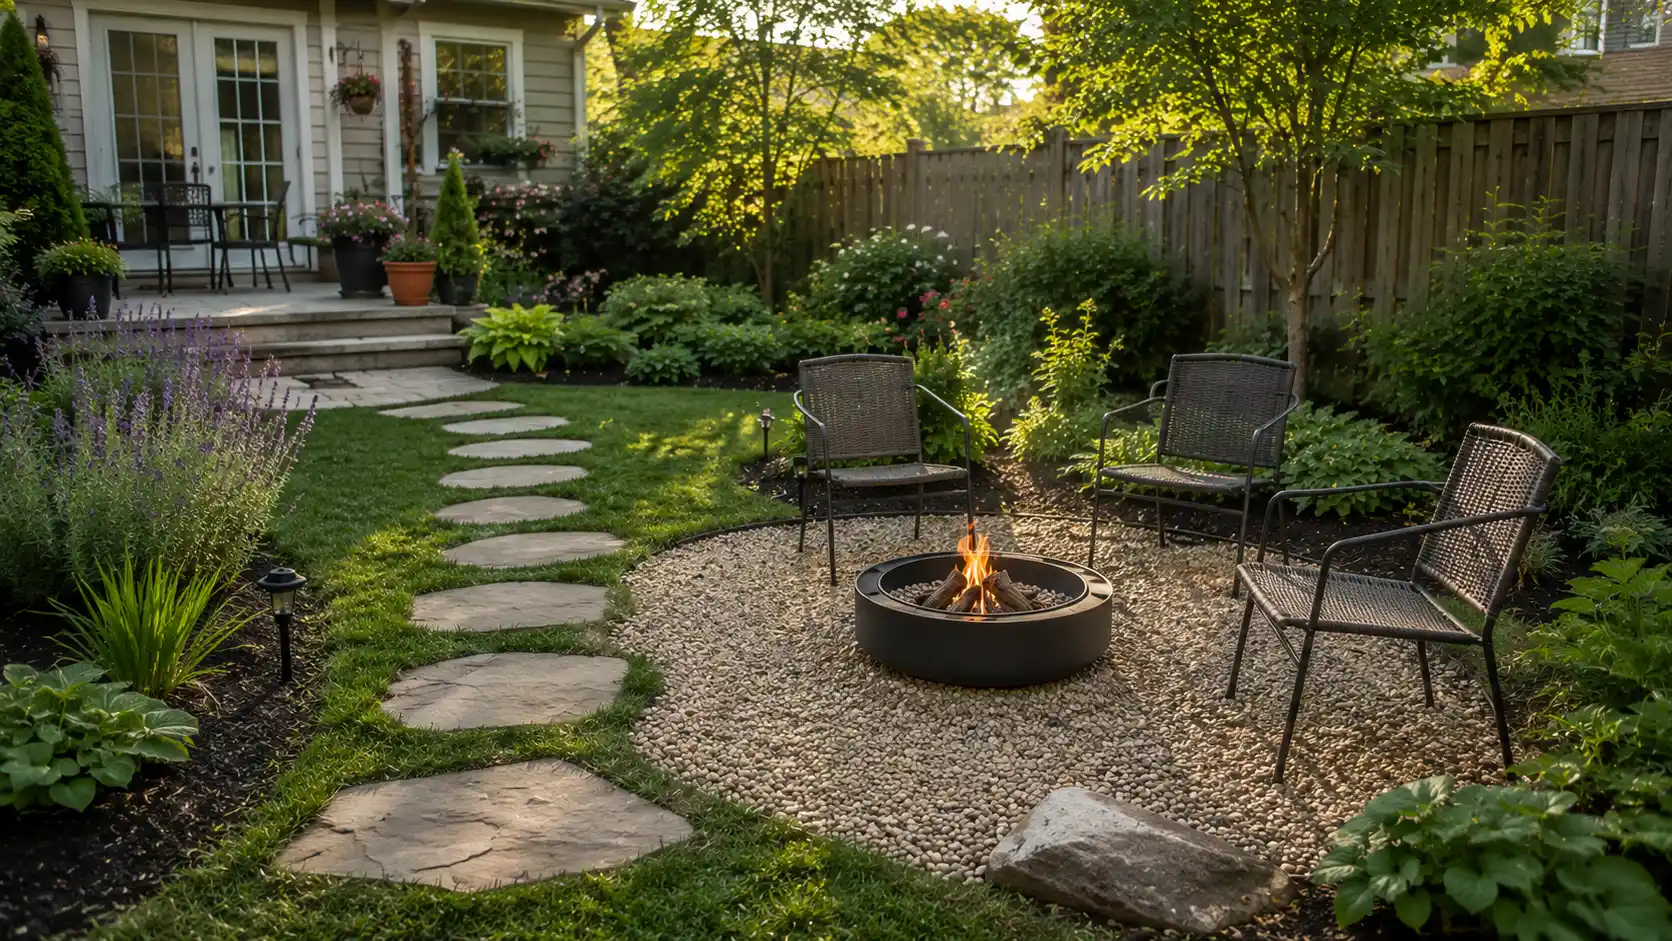
15. Portable Fire Pit on a Small Stone Pad
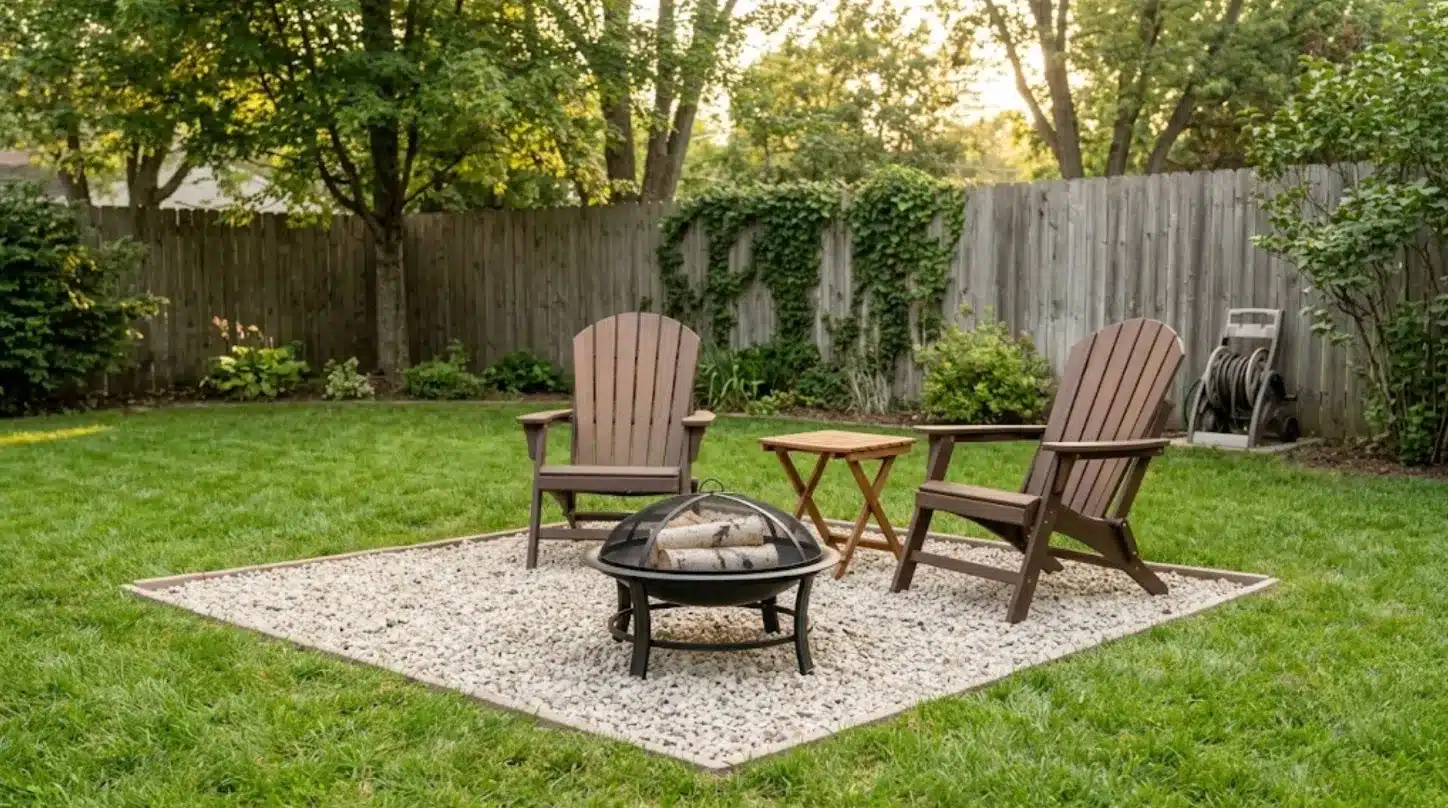
Cost: Low
Best for: Renters and flexible layouts
Setup: Portable fire bowl on compact stone
Safety: Follow the product clearance rules
A portable fire pit on a small stone pad is the easiest setup to move or change later. Use an 8-by-8 or 10-by-10 crushed stone area, two to four chairs, and a small side table. This works well for renters, starter yards, and anyone testing a layout before spending more.
Fire Pit Layout by Backyard Size
The ground surface size, seating count, and fire pit type should scale with the yard. Here is what works at each scale:
| Yard Size | Recommended Pad Size | Fire Pit Type | Seating Count |
| Small (under 500 sq ft usable) | 8 x 8 ft | Portable bowl or small metal ring | 2 to 4 chairs |
| Medium (500 to 1,200 sq ft usable) | 12 x 12 ft | Metal fire ring, block pit | 4 to 6 chairs |
| Large (over 1,200 sq ft usable) | 14 to 18 ft wide circle | Block fire pit, fire pit kit | 6 to 8 chairs plus side tables |
Scaling the pad to the yard size is the single most common planning error. An oversized fire pit area in a small yard leaves no usable lawn. An undersized one in a large yard looks like an afterthought.
Step-by-Step Build Plan
Use this plan after choosing your fire pit type and location. It keeps the work simple, safe, and organized, so each step supports drainage, seating, and steady yard use later:
- Codes, rules, site: Check burn restrictions, HOA rules, and permit needs. Pick flat, open ground at least 10 feet from structures, fences, shrubs, and low branches.
- Mark, measure, outline: Use marking paint, string, or a garden hose to show the fire pit footprint and the full outer edge of the seating zone.
- Sod, soil, slope: Remove grass inside the marked area. Level the soil, then slope it slightly away from the house so rainwater can drain.
- Base, gravel, support: Add 2 inches of compacted gravel base. Three-quarter-inch crushed stone works well and helps stop chairs or fire pit parts from sinking.
- Pit, ring, center: Set the metal ring, portable bowl, or block fire pit in the middle of the pad. Follow all product safety directions closely.
- Edging, border, shape: Add steel, aluminum, stone, or paver edging around the outside. This holds gravel in place and gives the area a neat edge.
- Seating, spacing, path: Place chairs at least 36 inches from the fire pit rim. Leave a clear walking path behind the chairs for safe movement.
- Lights, cushions, finish: Add solar stake lights, string lights, and weather-safe cushions. Keep lighting secure and place soft items away from heat and sparks.
After the build, check the area each season for loose edging, sinking chairs, weeds, and light placement. Small fixes keep the fire pit area safer and easier to use.
| Safety Reminder: Keep the fire pit at least 10 feet from any structure, fence, or low tree branch. Use only a non-combustible surface beneath and around the pit. Never burn on windy days, and keep a bucket of water, sand, or a fire extinguisher within reach at all times. Never leave a fire unattended. |
Materials That Hold Up vs. Materials That Don’t
Outdoor materials need to handle rain, heat, chair weight, and seasonal ground movement. This table shows which low-cost fire pit materials hold up best over time:
| Material | Approx. Cost | Lifespan | Common Issue |
| Pea gravel | $0.50 to $1.50 per sq ft | Indefinite with upkeep | Moves without edging; chairs may sink |
| Crushed stone | $0.50 to $1.25 per sq ft | Indefinite with upkeep | Needs light to respread over time |
| Concrete pavers | $2 to $6 per sq ft | 20 to 30 years | Can lift in freeze-thaw areas without a proper base |
| Retaining wall blocks | $1.50 to $4 per block | 10 to 20 years | May shift without adhesive; heat can damage edges |
| Standard cinder blocks | $1 to $2 per block | 3 to 7 years near flame | Can crack or flake without a metal liner |
Loose stone is the easiest to repair and refresh. Blocks near direct heat need a metal liner to last longer and stay safer.
For anyone choosing outdoor furniture to pair with the seating area, the same durability logic applies, and it’s worth understanding how Polywood holds up outdoors compared to wood alternatives before spending on chairs or benches that face real weather.
Styling the Area on a Budget
A budget fire pit area looks better when the details feel simple and planned. Repeat one or two materials, such as pea gravel for the pad and crushed stone for the path, so the space feels connected.
Add a steady fire pit border with metal edging, brick, stone, or pavers because a clear edge makes even cheap materials look neat. Keep the color mix to two or three tones from your house, fence, patio, or nearby plants.
Let the fire pit remain the main feature instead of filling open spaces with small decor.
Use a few potted plants, one set of solar lights, and chairs placed in a clean circle or half-circle. That is enough to make the area feel useful, calm, and ready for regular nights outside.
| Pro Tip: Buy the cushions before building the seating frame. Standard outdoor cushions come in 20×20, 21×21, and 24×24 inch sizes. The cushion width sets the seat depth, and getting this wrong means rebuilding what you just built. |
Common Mistakes Worth Skipping
Most fire pit problems come from poor spacing, weak surfaces, or rushed layout choices. Skip these mistakes early so your backyard setup stays safer, cleaner, and easier to use:
- Building too close to the house, fence, shed, shrubs, or tree canopy.
- Placing the fire pit on grass, mulch, or wood decking without fire-safe protection under it.
- Making the gravel pad too small, which leaves chair legs in the grass or soil.
- Skipping edging, which lets gravel spread into the lawn within one season.
- Buying chairs before measuring the full layout and safe walking space.
- Mixing too many surface materials in a small area, which makes the layout feel messy.
- Burning wet or green wood, which creates heavy smoke and weak flames.
A simple plan avoids the most costly fixes. Measure first, use a non-burnable base, add edging, leave safe chair space, and burn dry wood for cleaner, easier nights outside.
Frequently Asked Questions
Do I need a permit to build a fire pit?
Permit requirements vary by municipality. Permanent structures, including block or concrete fire pits, are more likely to require a permit than portable fire bowls. Check with the local building department and fire code office before starting any permanent build.
What is the minimum distance between a fire pit and seating?
Most fire pit manufacturers recommend at least 36 inches between the fire pit rim and the nearest seating edge. For larger fire pits producing more heat, 48 inches is a more comfortable distance in practice.
Does gravel around a fire pit need to be replaced over time?
Gravel does not wear out, but it migrates, compacts, and accumulates debris over time. Raking annually and adding a fresh top layer every two to three years keeps the surface level and clean without full replacement.
Can a propane fire pit be used on a covered patio?
Propane fire pits require adequate ventilation. Using one under a solid, enclosed cover creates a carbon monoxide risk.
An open pergola with good airflow is generally acceptable, but always check the manufacturer’s clearance specifications before using any gas fire feature under overhead structure.
What type of gravel is best for a fire pit area?
Three-quarter-inch crushed limestone or crushed granite compacts well, drains effectively, and keeps chair legs from sinking.
Pea gravel is fine for aesthetics but shifts more underfoot and around chair legs. Avoid smooth river rock, it can crack or pop when exposed to direct heat.
How do I keep weeds from growing through a gravel fire pit area?
Lay landscape fabric over leveled soil before spreading gravel. Overlap fabric seams by at least 6 inches and pin the edges under the border edging.
This is not a permanent fix, some weeds push through after several seasons, but it delays the problem significantly and makes pulling them easier when they do appear.
Final Thoughts
A low-cost fire pit landscape design works when the planning comes before the spending.
The ideas covered here, from a simple gravel pad with a metal fire ring to a compact cinder block bench setup, all share the same core logic: define the zone clearly, use a non-combustible surface, keep seating at the right distance, and add a border that makes the whole thing look considered.
The material that holds up best for most people at most budgets is crushed stone or pea gravel with steel edging, a metal fire ring centered in the pad, and chairs positioned at least 36 inches out.
Start with the base and fire pit. Add seating next. Lighting and plants come last, as the budget allows. Every detail after that is just refinement, not foundation. Drop a comment below and let me know if your pit landscape turned out as good as you hoped.


