


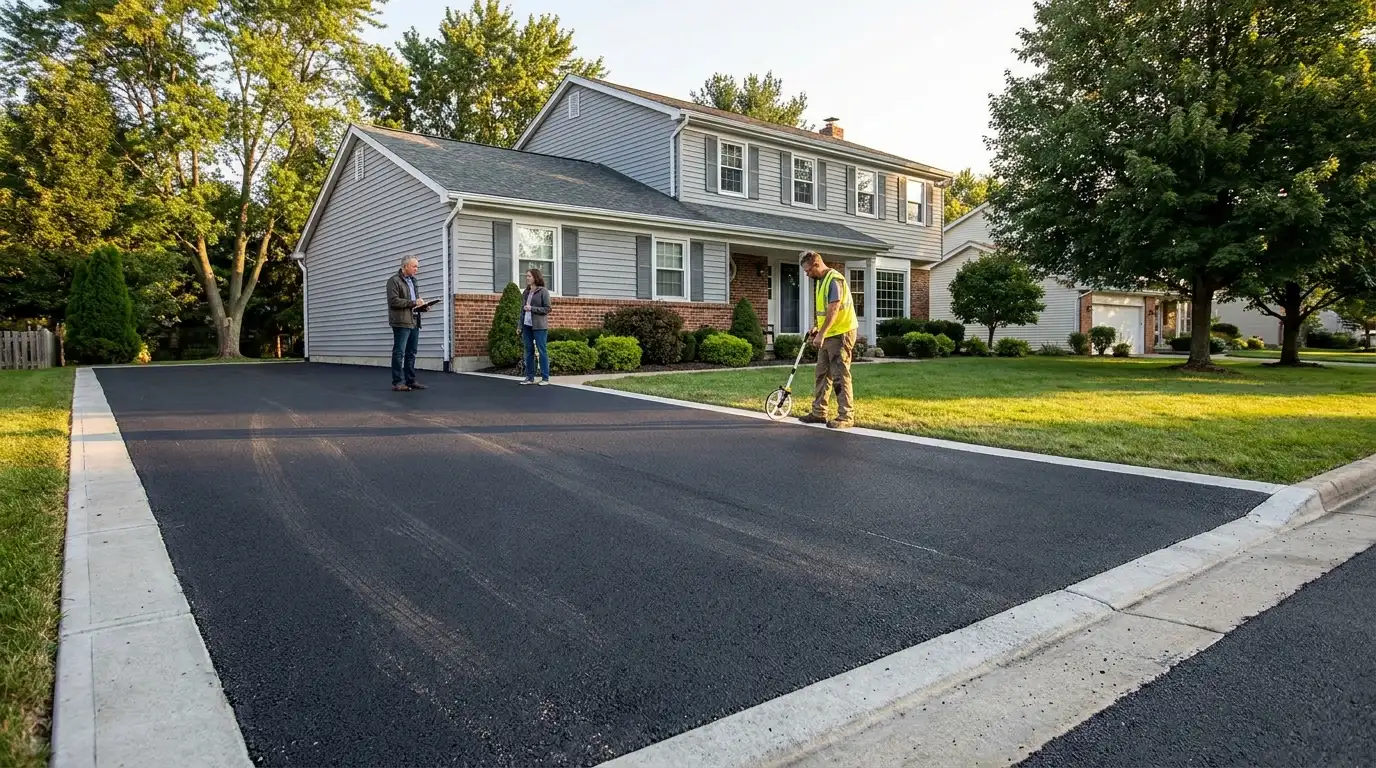
Let’s be honest: looking at your cracked, fading driveway doesn’t exactly trigger warm and fuzzy feelings. Instead, it usually triggers one massive question mark: How much is this going to cost me? If you’ve started looking online, you already know the national averages can feel like a total guessing game. One site says a few thousand, while another quotes a small fortune. It’s incredibly frustrating trying to build a real budget when you don’t know what’s actually included. That’s why we’re cutting through the contractor fluff. From the hidden groundwork fees that sneak onto final invoices to regional price swings, here is exactly what you will pay for a new asphalt driveway, and how to keep those costs down Asphalt Driveway Cost: What You Will Actually Pay A new driveway costs between $7 and $13 per square foot installed, which puts a standard two-car driveway (roughly 600 square feet) somewhere between $4,200 and $7,800 before extras like old surface removal, drainage corrections, or heated systems enter the picture. That range is what you see after base prep, grading, and compaction, not just the asphalt layer itself. Most homeowners end up paying around $5,300 for a typical residential project, according to current data from Angi and HomeAdvisor. If you are trying to set a real budget, the range above is the starting point, not the finish line. What moves you toward the high end or well past it is worth understanding before you call a single contractor. Cost Note: Figures in this article are estimates based on national averages from Angi, HomeAdvisor, and Bob Vila (2025–2026). Actual costs vary significantly by region, contractor, materials, and project scope. Always get at least three written quotes before committing to any project. Asphalt Driveway Cost by Size Square footage is the most reliable anchor for a rough budget. Measure only the area that will be paved — not nearby landscaping, garage space, or walkways — and price removal, grading, base repair, drainage, and permits as separate line items. Driveway Size Approx. Area Basic Install Mid-Range Install Complex Install Small, 10×20 ft 200 sq ft $1,400–$2,600 $2,600–$3,600 $3,600–$5,000+ Standard, 16×40 ft 640 sq ft $4,500–$7,500 $7,500–$10,000 $10,000–$14,000+ Large, 24×60 ft 1,440 sq ft $10,000–$16,000 $16,000–$21,000 $21,000–$28,000+ Extra Large, 30×80 ft 2,400 sq ft $16,800–$24,000 $24,000–$33,000 $33,000–$45,000+ Long Rural Drive Per linear foot $7–$10/ft $10–$16/ft $16–$25+/ft Basic installs apply to flat, accessible sites with an existing gravel base that does not need full replacement. Mid-range is the most common scenario for homeowners who want a driveway built to last through normal weather and daily parking. Complex installs come into play when the site needs old surface removal, excavation, drainage corrections, or a completely rebuilt base layer, the line items that most initial quotes quietly leave out. These figures are planning ranges. A contractor still needs to walk the property, check the soil, review drainage, and confirm asphalt depth before any number becomes a real quote. What Installing an Asphalt Paving Cost Actually Includes The paved surface you see at the end is the last step of a multi-stage process, and most of what determines the final price happens before a single load of asphalt arrives. Here is what a complete installation typically involves. 1. Site Clearing Clearing prepares the driveway area before excavation. The crew removes grass, roots, debris, old edging, and loose surface material. Simple open sites may cost $100 to $300. Thick roots, tight access, or buried debris can push clearing to $1,000 or more. Make sure any quote includes hauling and disposal, not just surface clearing. 2. Excavation and Grading Excavation removes weak soil. Grading creates the right slope so water runs away from the driveway, garage, and foundation rather than pooling beneath the surface. Basic grading on a simple, flat site runs around $500. Sloped land, soft soil, or drainage corrections can push this stage toward $3,000 or more. Ask how the contractor will direct water away from the paved surface after installation. 3. Gravel Base The compacted gravel base is what keeps asphalt from cracking, sinking, or failing at the edges. Contractors spread crushed stone and compact it in layers. Standard base work costs roughly $1 to $3 per square foot, though deeper base requirements on weak soil can exceed that. Skipping a proper base saves money now and causes structural failure within a few years. Ask what base depth is included and whether additional stone will be charged separately if the soil is soft. 4. Asphalt Paving This covers material delivery, spreading, leveling, edge shaping, and compaction. Standard residential paving runs $5 to $12 per square foot for the paving stage itself, depending on asphalt thickness, labor rates, and site access. Tight corners, garage tie-ins, or custom edges require more hand work and raise labor costs. Confirm whether the quoted asphalt thickness is measured before or after compaction, the number can change meaningfully. 5. Final Cleanup and Finish Light cleanup is usually included in the project price. If the crew needs to haul old asphalt, concrete, heavy debris, or excess soil off the property, expect an additional $100 to $800 or more, depending on disposal needs. Make sure the cleanup includes hauling, edge finishing, and final site clearing before you sign anything. A detailed quote should show clearing, grading, base depth, asphalt thickness, cleanup, and any extra fees as separate line items. If those items are vague or bundled together without explanation, ask for a written breakdown. Cost Breakdown by Line Item The table below shows where a typical asphalt driveway budget actually goes. These ranges are based on a standard residential installation in the 600 to 800 square foot range. Line Item Low End High End What Drives the Variation Site Clearing $100 $1,000+ Root density, access, and debris volume Excavation and Grading $500 $3,000 Slope, soil condition, drainage needs Gravel Base $600 $2,400 Depth required, soil stability Asphalt Materials and Labor $3,000 $9,600 Thickness, driveway size, regional labor rates Old Surface Removal $600 $2,400 Material type (concrete vs. asphalt), area Cleanup and Disposal $0 $800 Amount of material hauled off-site Permits $0 $500 Local jurisdiction requirements The asphalt materials and labor line is the number most people focus on — but site clearing, grading, and base work together can easily add $1,200 to $6,400 to a project that quoted low on the surface paving alone. What Determines Your Asphalt Driveway Cost Several variables shape the final price before paving begins. Getting clear on these before calling contractors means you can compare bids fairly and catch the gaps that lead to change orders later. Driveway Size and Square Footage: A larger surface area means more materials and more labor hours. Measure accurately before requesting quotes, a low quote built on an underestimated area will always grow. Asphalt Thickness: Standard residential driveways use a 2-to-3-inch layer. Sites that handle heavier vehicles need 3 to 4 inches. Thicker installs cost more upfront but hold up significantly longer, which changes the math over 15 to 20 years. Grading and Site Preparation: Sloped or uneven land requires grading before paving. Poor drainage sites need additional groundwork. These prep costs regularly surprise homeowners and can add $500 to $3,000 to the project before asphalt arrives. Sub-Base Material and Depth: A proper crushed stone base — typically 4 to 8 inches deep depending on soil — is what keeps asphalt stable over time. The base often accounts for 15 to 20 percent of the total project cost and is one of the first items a low bid quietly skips. Old Driveway Removal: Tearing out existing concrete or asphalt runs $1 to $2 per square foot on average. A 600-square-foot removal adds $600 to $1,200 before new paving begins. Factor this in from the start — it is not always included in the paving quote. Regional Labor Rates: Labor costs in the Northeast and West Coast run 20 to 40 percent higher than in the Midwest or Southeast. Always get local quotes rather than relying solely on national averages, which can mislead in either direction depending on your market. Asphalt Type: Hot mix asphalt is the standard for residential driveways. Porous asphalt manages water runoff better but costs more. Recycled asphalt costs less and is environmentally sound, but needs more frequent maintenance. Each option is a real trade-off, not just a price difference. Regional Variation: Where You Live Changes the Number The national averages above are useful for orientation, but actual bids will reflect your local market. Here is what that looks like in practice. Region Typical Cost per Sq Ft (Installed) Key Factors Northeast $9–$15+ High labor costs, freeze-thaw cycles, require a thicker base, and strict disposal regulations Midwest $7–$12 Clay soils often need a deeper gravel base (8 inches or more), a seasonal paving window Southeast $6–$11 Lower labor rates, longer paving season, and heat can soften asphalt during the summer West Coast $9–$15+ High labor costs, urban access fees, and strict permitting in many municipalities Mountain / Plains $7–$12 Variable soil conditions, shorter paving season, moderate labor market Cold-climate installations carry a hidden cost many homeowners do not anticipate: heavier base requirements. Minnesota clay soils, for example, typically need an 8-inch compacted base to handle frost heave, compared to 4 to 6 inches in warmer, sandier regions. That extra material cost shows up in the quote, whether or not the contractor spells it out. New Installation vs. Resurfacing vs. Repair Not every damaged driveway needs a full replacement, and paying for more work than the condition warrants is a budget mistake that happens more often than it should. If the damage is limited to surface cracks, concrete crack repair costs are worth reviewing before assuming a full overlay or replacement is necessary. Option Estimated Cost What It Includes Best For When to Avoid New Installation $7–$13 per sq ft Excavation, grading, base layer, asphalt paving, compaction Bare soil, gravel driveways, new driveway areas Existing driveways with only light surface wear Resurfacing (Overlay) $3–$7 per sq ft New asphalt layer over existing stable surface Worn surface, faded asphalt, shallow cracks, solid base Sinking, major cracking, potholes, or drainage failure Crack Filling and Patching $100–$600 Filling cracks, sealing gaps, patching isolated damage Driveways in fair condition with a few problem areas Widespread damage, base failure, or repeated potholes Full Replacement $8–$15 per sq ft Old surface removal, base rebuild, grading, new asphalt Failed base, severe cracking, major structural damage Driveways with only cosmetic surface wear Quick decision framework: surface cracks only, seal and patch. Top layer worn but base solid, resurface. Base compromised or sinking, full replacement. Choosing based on condition rather than the lowest available option is what separates a $600 repair from a $10,000 fix five years later. Asphalt vs. Other Driveway Materials If you are still deciding on surface material, a look at modern driveway materials shows how concrete, pavers, gravel, and asphalt compare in real residential settings. The cost table below focuses specifically on what each option costs per square foot and what you are trading off at each price point. Material Cost per Sq Ft (Installed) Lifespan Maintenance Best For Asphalt $7–$13 15–25 years Moderate Cold climates, budget-focused projects Concrete $8–$20 25–40 years Low Warmer climates, long-term value Gravel $1–$5 10–20 years High Rural areas, large spaces, tight budgets Pavers $10–$30 30–50 years Low Premium driveways, design-focused homes Asphalt’s real advantage is upfront cost; it comes in meaningfully below concrete and far below pavers. It also handles freeze-thaw cycles better than concrete, which is why it dominates in northern markets. The trade-off is that it needs maintenance every few years and reaches end-of-life sooner. If you are leaning toward concrete or pavers instead, the stamped concrete vs paverscost gap is narrower than most quotes suggest. Hidden Costs Most Homeowners Do Not See Coming This is where budgets go wrong. These are the expenses that contractors do not always surface in the first conversation, and the ones most likely to turn a $5,000 quote into a $7,500 final invoice. Anyone planning wider backyard hardscaping costs alongside a new driveway will recognize most of these as common across all exterior paving projects. Drainage correction: Poor grading or existing water pooling can add $500 to $3,000 to groundwork costs before a single load of asphalt arrives. Contractors are supposed to flag this during a site visit — some do not unless you ask directly. Tree root removal: Roots running under the driveway path require excavation and removal. Expect $200 to $800 added to the project depending on root density and depth. Retaining walls or curbing: Sloped properties often need these. Concrete curbing alone adds $10 to $20 per linear foot. On a driveway with 80 feet of edge, that is $800 to $1,600 before any other work begins. Heated driveway coils: Hydronic or electric heating systems installed beneath asphalt run $12 to $27 per square foot. On a 600-square-foot driveway, that is a $7,200 to $16,000 addition on top of standard paving costs. HOA restrictions: Some associations require specific finishes, colors, or surface types. Variance requests or special materials add time and real cost to the approval and installation process. Disposal fees for demolished material: Hauling demolished concrete or asphalt runs $50 to $150 per load. Larger projects generate multiple loads. Ask before you assume hauling is included in the quote. The best protection against all of these is asking your contractor to walk the site with you before signing anything and to note in writing what the quote does and does not include. Asphalt Driveway Cost Estimator Use this formula to build a rough planning figure before contractor conversations begin: Length × Width = Total Square FeetTotal Square Feet × Cost Per Square Foot = Estimated Paving Cost Measurement Example Number Length 40 feet Width 20 feet Total Area 800 square feet Estimated Rate $10 per square foot Estimated Paving Cost $8,000 Then add your likely extras, old surface removal, grading, drainage, permits, and any access complications. The more work your site needs before asphalt can go down, the wider the gap between your formula estimate and the actual bid. Long-Term Maintenance: What Asphalt Actually Costs Over 10 Years Installation is the first cost, not the only one. What you spend on maintenance over the first decade will determine whether the driveway holds together or becomes a repair cycle that costs more than replacement. Maintenance Task Frequency Estimated Cost Sealcoating Every 3–5 years $100–$400 per application Crack Filling Annually as needed $50–$300 Pothole Repair As needed $100–$500 Resurfacing Every 10–15 years $1,500–$4,000 10-year cost estimate for a 600 sq ft driveway: Installation at $4,200–$7,800, plus three sealcoats ($300–$1,200), plus crack repairs ($200–$600) puts the realistic 10-year range at approximately $4,700 to $9,600. Concrete installed at $8–$20 per square foot comes in higher upfront but carries lower maintenance costs over the same window. Skipping sealcoating and crack repairs is the single fastest way to turn a mid-range asphalt driveway into a full replacement project before year 12. Tips to Lower Your Asphalt Driveway Cost Smart planning choices reduce the final bill before paving begins. The goal is to avoid unnecessary labor and limit add-ons without cutting anything that protects the surface long-term. Measure accurately and avoid over-paving: Extra width or unnecessary parking area adds cost with no functional return. Know your measurements before calling anyone. Keep the design straight: Curved and circular layouts require more hand work and shaping, which adds labor cost. A straight run is almost always cheaper for the same total area. Fix drainage before paving: Addressing water flow issues now costs less than repairing the cracking and sinking they cause two to four years after installation. Reuse a stable base: If the existing base is solid and well-drained, keeping it reduces excavation, hauling, and new material costs. A contractor willing to assess this rather than automatically rebuilding is worth more than one who quotes base replacement by default. Book in fall or winter: Contractors discount work in slower seasons to keep crews busy. In many markets, fall and early winter bookings can save 10 to 20 percent versus peak summer scheduling. Separate must-haves from upgrades: Get borders, extra thickness, heated systems, and sealcoating quoted as line items so you can see exactly what each adds — and decide which ones make sense for your budget and how long you plan to stay. Questions to Ask Before You Sign A reliable contractor should answer these clearly and put the details in writing before any deposit changes hands. Vague answers or rushed timelines are worth slowing down for. Does the quote include site clearing, excavation, grading, old surface removal, and final cleanup? What asphalt mix will be used, and what is the thickness after compaction? How deep will the crushed stone base be, and will it be compacted in layers? How will water drain away from the driveway, garage, and foundation? Are permits included, or will they be charged separately? What happens if weak soil or drainage problems are found during the work? How are change orders priced, approved, and added to the final bill? What is the payment schedule, and how much is due before work begins? What warranty covers the materials, surface, and workmanship? Can you provide references from recent local projects similar in size? Tie the final payment to a walkthrough of the finished driveway, not to a completion date. That one condition protects your budget and gives you a clear moment to confirm the base, slope, edges, and surface match what was promised. Frequently Asked Questions How much does a new asphalt driveway cost for a two-car garage? A standard two-car driveway covering roughly 600 square feet costs between $4,200 and $7,800 installed in 2026 at $7 to $13 per square foot. Old surface removal, drainage corrections, or base rebuilding can push the total higher. How long does an asphalt driveway last? A properly installed and maintained asphalt driveway lasts 15 to 25 years. Regular sealcoating every 3 to 5 years, prompt crack repair, and avoiding heavy loads in extreme heat extend that range. Skipping maintenance shortens it significantly. Is asphalt cheaper than concrete for a driveway? Yes, asphalt costs $7 to $13 per square foot installed versus $8 to $20 for concrete. Asphalt has a lower entry cost but requires more maintenance and a shorter replacement cycle. Over 25 years, total cost of ownership is closer than the install price suggests. Can asphalt be installed over concrete? Yes, asphalt can be laid over a stable concrete base at $3 to $7 per square foot. It is not a long-term solution — concrete expands and contracts, which eventually cracks the asphalt layer above it. It works as a temporary upgrade, not a permanent fix. When is the best time of year to pave an asphalt driveway? Late spring through early fall when ground temperatures stay above 50°F. Asphalt needs warm ground to compact properly. Fall bookings often come with better contractor availability and modest pricing discounts versus summer peak season. Does asphalt increase home value? A new asphalt driveway can add $5,000 to $7,000 to resale value, meaning most homeowners see a near-full return on investment when selling. Condition matters — a cracked or poorly maintained driveway has the opposite effect. Can asphalt be installed in rain? No. Rain during installation affects bonding, compaction, and surface quality. A reputable contractor will reschedule rather than pave in wet conditions. Surface moisture or a damp base can cause long-term adhesion failures. What causes asphalt driveways to crack? The most common causes are freeze-thaw cycles, an inadequate base layer, tree root pressure, and UV degradation of the surface oils. Most are preventable with proper base depth and regular sealcoating. Final Thoughts A smart driveway budget starts with knowing what the price really covers. I would look beyond the surface and pay attention to size, base work, grading, drainage, materials, and long-term care. You now have a clearer way to compare quotes, spot weak estimates, and decide when repair, resurfacing, or full replacement makes sense. An asphalt driveway can be a strong value when it is installed well and maintained before small problems spread. That matters because the right choices now can prevent bigger costs later. Use the tips, tables, and contractor questions before starting your project. Share your thoughts in the comments or check related blogs for more home improvement cost help.
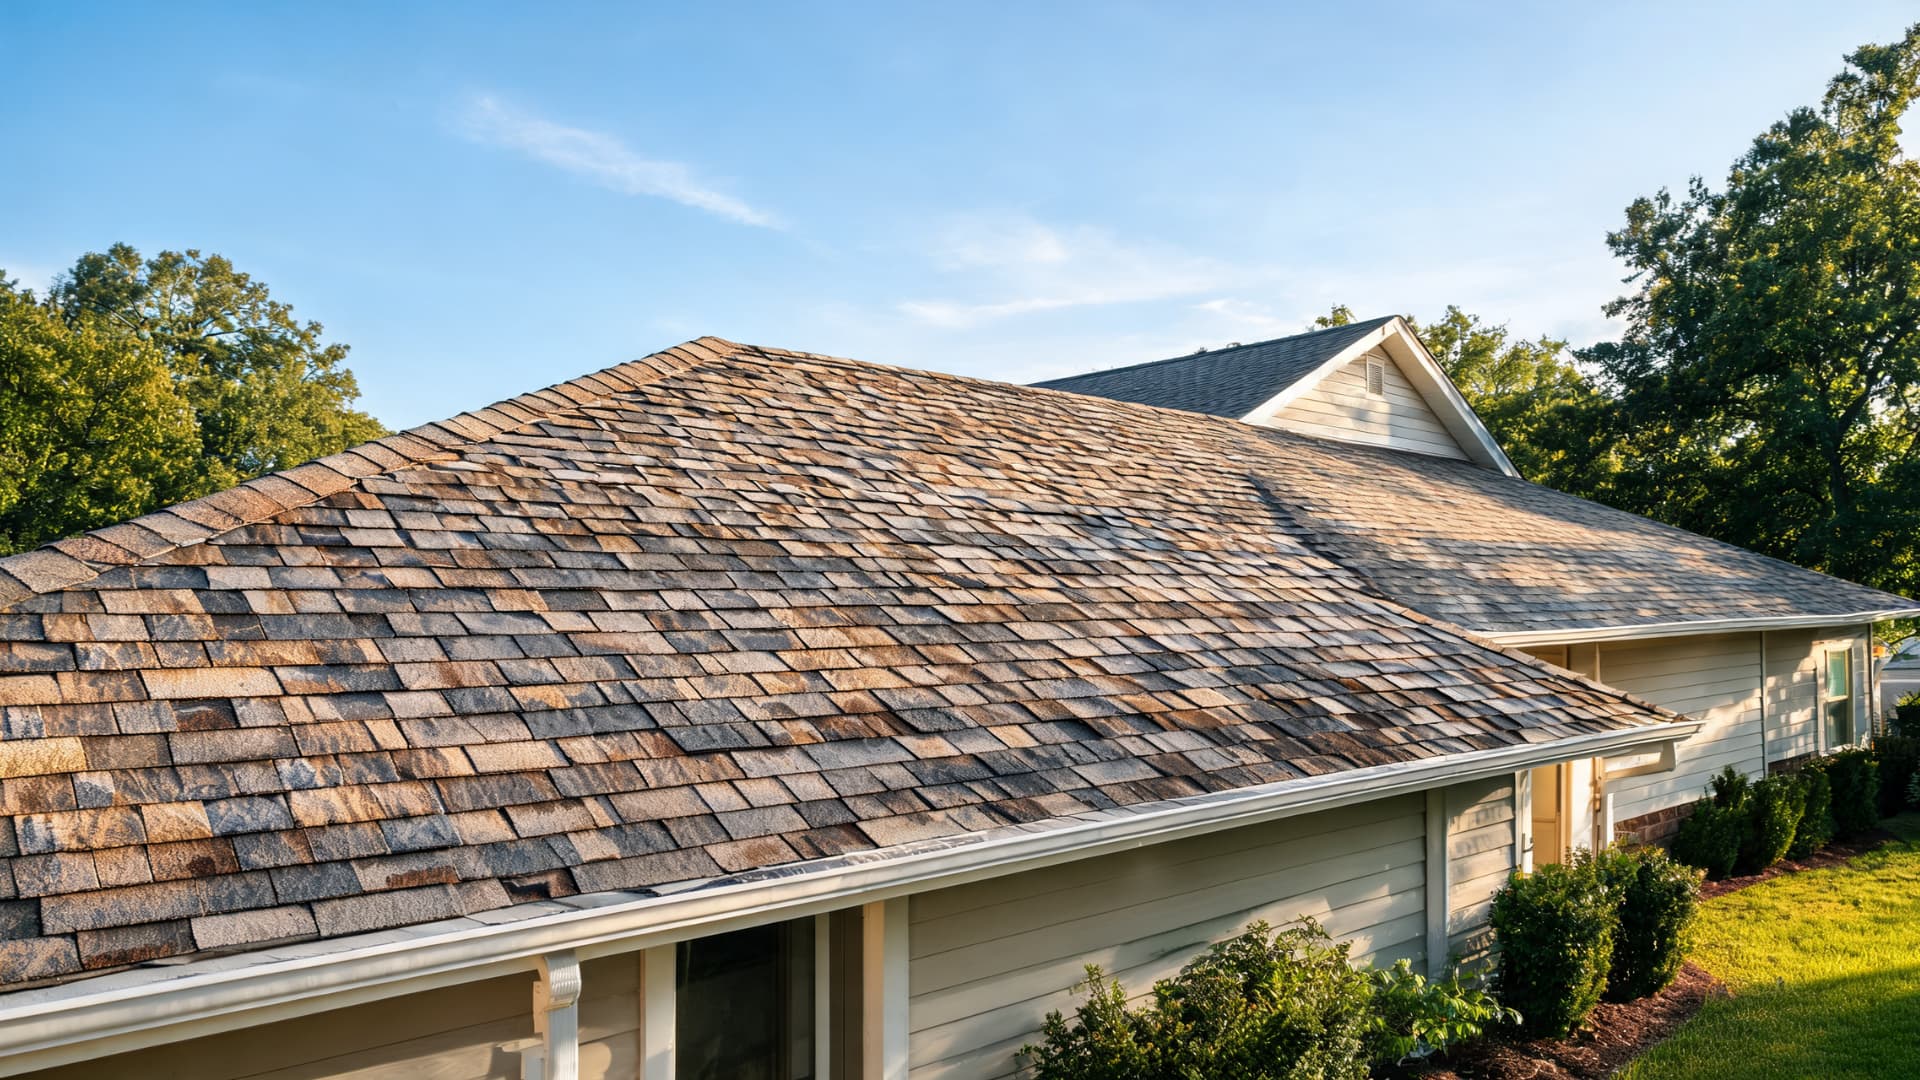
Are you confused by all the roofing options out there? Picking the right shingles can feel overwhelming, especially when you hear terms like What Are Architectural Shingles thrown around. I’ve seen homeowners struggle to understand what makes them different, how much they cost, and if they’re actually worth it. You don’t need to guess or rely on contractor jargon. By the end of this post, you’ll know exactly what architectural shingles are, how they compare to other shingles, the materials they’re made of, and what factors affect cost, lifespan, and performance. You’ll be able to make a confident, informed decision for your roof. What Are Architectural Shingles? Architectural shingles are laminated asphalt shingles built from multiple bonded layers, which makes them thicker, heavier, and more durable than standard 3-tab shingles. If you are comparing roofing options and trying to figure out whether architectural shingles are worth the cost, that layered construction is the whole story. It is what drives the price difference, the longer lifespan, and the dimensional look that makes a roof stand out from the street. Most residential roofs installed in the US today use architectural shingles. They have largely replaced 3-tab shingles as the default option because the performance gap is real, and the cost premium over 3-tab is smaller than most homeowners expect. Cost Note: Figures in this blog are estimates based on national averages. Actual costs vary significantly by region, contractor, materials, and project scope. Always get at least three quotes before committing to any project above $1,000. How Architectural Shingles Are Made The performance difference between architectural and 3-tab shingles starts at the material level. Architectural shingles use more of everything: more asphalt, thicker fiberglass matting, denser mineral granules, and stronger adhesive strips. That additional mass, roughly 50 percent more material per square than a 3-tab shingle, is what gives them better wind resistance and a longer useful life. Here is what the layers actually do: Fiberglass base mat: Provides structural strength and fire resistance. Thicker than the mat used in 3-tab shingles. Multiple asphalt layers: Bonded together for flexibility and waterproofing. The laminated structure is what creates the dimensional appearance. Mineral granules: Protect against UV degradation and add color. Denser coverage on architectural shingles versus 3-tab. Waterproof asphalt coating: Seals the shingle against moisture penetration. Adhesive sealant strips: Bond adjacent shingles together during installation and help hold them in high-wind conditions. The combined weight of an architectural shingle runs between 250 and 400 pounds per roofing square, compared to 200 to 250 pounds per square for a 3-tab. That weight is a reasonable proxy for durability. Architectural Shingles vs. 3-Tab Shingles The two options look similar in a roofing catalog but perform very differently over a 20-year horizon. The table below covers the categories that actually matter when you are deciding between them. Feature Architectural Shingles 3-Tab Shingles Structure Multi-layered laminated build Single-layer flat design Appearance Dimensional, textured surface Flat and uniform Wind resistance 110 to 130+ mph rated 60 to 70 mph rated Lifespan 25 to 30 years (standard); longer for premium lines 15 to 20 years Cost per square (materials) $100 to $250 $80 to $130 Installed cost premium vs. 3-tab Typically $500 to $1,500 more on a standard roof Baseline Common use New construction and replacement on residential homes Budget replacements, garages, outbuildings The cost difference is narrower than most homeowners assume. For a typical 25-square residential roof, architectural shingles add $500 to $1,500 to the installed cost compared to 3-tab shingles. When you account for a lifespan that runs 10 to 15 years longer, the per-year cost of architectural shingles is usually lower. If you are replacing a roof you plan to live under for more than a decade, 3-tab rarely wins the math. If you are replacing a roof you plan to live under for more than a decade, 3-tab rarely wins the math, and the gap looks even clearer when you factor in roof replacement costs, which apply equally to both options. Types of Architectural Shingles Architectural shingles come in four main product categories. The right choice depends on your climate, how long you plan to stay in the home, and what your neighborhood looks like from the street. 1. Standard Dimensional Shingles These are the baseline products. A raised, textured surface creates depth without mimicking a specific premium material. Blended colors on each shingle help hide aging and dirt over time. Standard dimensional shingles are the most common choice for residential replacements because they balance performance, cost, and availability. Entry-level lines from Owens Corning (Oakridge) and GAF (Timberline HDZ) typically run $100 to $130 per square for materials. 2. Shake-Style Shingles Shake-style shingles replicate the look of cedar shakes using laminated asphalt construction. The irregular cut patterns and shadow lines give a handcrafted, rustic appearance without the maintenance demands of real wood. They suit craftsman, colonial, and traditional home styles. Wind and moisture resistance are better than actual cedar shakes because the fiberglass base does not split or absorb water. 3. Slate-Style Shingles Slate-style shingles are cut in rectangular or hexagonal patterns and colored in muted, natural tones to replicate natural slate. They weigh a fraction of real slate and cost significantly less, while delivering a high-end curb appearance. Premium lines often include algae resistance and enhanced weatherproofing. These work particularly well on steeply pitched roofs, including hip roof designs, where the visual effect of the tile pattern reads clearly from the street. How Much Do Architectural Shingles Cost? Most homeowners pay between $7,000 and $16,000 for a full architectural shingle roof replacement on a standard single-family home. That range moves based on roof size, pitch, shingle tier, tear-off requirements, and local labor rates. Here is what the major cost components look like in practice. Line Item Low End High End What Drives Variation Shingle materials (per square) $100 $250 Product tier, brand, wind rating Installation labor (per square) $300 $350 Pitch, complexity, region Old roof tear-off $1 per sq ft $3 per sq ft Number of layers, disposal fees Underlayment $0.10 per sq ft $0.80 per sq ft Felt vs. synthetic; ice barrier requirements Decking repairs $0 $2,000+ Rot and water damage were found after the tear-off Permits $150 $500 Local jurisdiction requirements Full project total $7,000 $16,000+ All factors combined Labor accounts for roughly 60 percent of the total project cost on most architectural shingle replacements. That proportion does not change much with shingle tier because the installation process is the same regardless of whether you choose an entry-level or premium product. Where you can move the number is in the shingle selection, and whether decking repair turns out to be needed. Roofing contractors cannot tell you about decking condition until after tear-off, so budget a contingency of $500 to $1,500 for that line item on older homes. Regional cost variation is significant. California homeowners pay around $21,500 for a full architectural shingle installation; Texas homeowners pay closer to $13,700 for a comparable roof. Labor market conditions, local permitting requirements, and climate-driven material choices all affect where your project falls within the range. To understand where roofing fits within a new-build budget, the cost of building a house’s roof is relative to other major line items. Where Budgets Go Wrong on Architectural Shingle Projects A quote that looks clean on paper can grow by several thousand dollars once the project starts. These are the line items that routinely surprise homeowners. Decking damage found after tear-off: Rot and water-damaged sheathing are invisible until old shingles come off. If a roofer finds damaged decking, it has to be replaced before new shingles go on. Decking repairs run $2 to $5 per square foot. On a 2,000-square-foot roof, even a modest amount of damage can add $1,000 to $3,000 to the final invoice. Multiple shingle layers requiring full tear-off: Installing over existing shingles saves money on a single layer. Two existing layers typically require full removal, which adds labor time, dumpster weight, and disposal fees. Some jurisdictions prohibit adding a third overlay by code, making removal mandatory regardless of cost. Steep pitch surcharges: Roofs steeper than 7:12 require additional safety equipment and slow down installation considerably. Always ask the contractor to break out the pitch factor in their per-square labor rate so you can compare quotes accurately. System components omitted from the initial quote: Underlayment, starter strips, ridge caps, drip edge, flashing, and ice-and-water barrier are part of a complete roofing system. Some contractors price shingles and labor only, leaving system components as add-ons. A quote that does not include these items is not a complete project price. Ventilation upgrades: If attic ventilation is inadequate, new shingles will not perform to their rated lifespan. Ventilation upgrades run $1,500 to $4,000 and should be assessed before installation, not after. How Long Do Architectural Shingles Last? Standard architectural shingles carry 25 to 30-year warranties. Premium and performance lines extend to 50 years or a lifetime warranty, depending on brand and installation requirements. Actual lifespan depends on four factors that warranties do not fully control. Correct installation is the biggest variable. Improper nailing, inadequate ventilation, or skipped system components shorten shingle life regardless of the product quality. Climate is the second factor: sustained heat, freeze-thaw cycling, and heavy hail all accelerate wear. Attic ventilation affects both. An under-ventilated attic traps heat against the underside of the shingles, degrading them from below. And maintenance matters: regular gutter clearing, debris removal, and prompt repair of damaged or missing shingles prevent small problems from turning into larger ones. A roof showing water stains on ceilings is often the first visible sign that shingles, flashing, or underlayment have failed somewhere in the system. Questions to Ask a Roofer Before Choosing Architectural Shingles Before approving any roofing quote, these questions separate contractors who know the system from those who are pricing shingles only. Product tier: Is this entry-level, mid-range, or a premium performance shingle? What is the specific product name and model? Wind rating: What is the shingle’s rated wind resistance, and how does that compare to your area’s common storm conditions? Full system scope: Does the quote include starter strips, ridge caps, underlayment, drip edge, and flashing replacement? Ventilation assessment: Will attic ventilation be inspected before installation? If ventilation is inadequate, will that be flagged and quoted separately? Tear-off plan: Will old shingles be removed? How many layers are currently on the roof? Workmanship warranty: What does the contractor warrant on their own labor, separate from the manufacturer’s material warranty? Decking contingency: How will decking damage be handled if found during tear-off? Will you be notified before additional work proceeds? Frequently Asked Questions Are architectural shingles worth the extra cost over 3-tab? For most homes, yes. The installed cost premium is typically $500 to $1,500. Architectural shingles last 10 to 15 years longer than 3-tab shingles, which means fewer replacements over the life of the home. The per-year cost usually favors architectural shingles on any home you plan to own for more than 10 years. What is the difference between architectural shingles and dimensional shingles? They are the same product. “Dimensional,” “laminated,” and “architectural” are all industry terms for the same multi-layer asphalt shingle category. The terminology varies by contractor and brand, not by product type. How much do architectural shingles cost to install on an average home? Most homeowners pay between $7,000 and $16,000 installed for a standard residential replacement. Larger roofs, steep pitches, premium shingle tiers, and significant decking damage all push costs toward the upper end. Get three itemized quotes before committing. Can architectural shingles be installed over existing shingles? Sometimes, but only if one layer of shingles is currently on the roof and the decking is sound. Overlays skip tear-off costs but prevent inspection of the decking and underlayment beneath. Most roofers recommend full tear-off to check for hidden damage before new shingles go on. How do I know when architectural shingles need to be replaced? Look for curling or cupping at the shingle edges, missing granules (visible as bare patches or granule buildup in gutters), cracked or missing shingles, and any interior water stains. At 20 to 25 years old, an architectural shingle roof warrants a professional inspection even without visible symptoms. Do architectural shingles perform better in hot climates? Standard architectural shingles absorb heat, which can reduce attic comfort in hot climates. Performance and cool-roof-rated shingles use reflective granules to reduce heat absorption. In hot climates, ventilation also matters as much as the shingle itself. What wind rating should I look for in architectural shingles? Standard architectural shingles are rated to 110 mph. Performance lines reach 130 mph or higher. In storm-prone regions, match the shingle wind rating to local historical gust speeds and check whether your homeowner’s insurance provides discounts for higher-rated products. Conclusion Choosing the right roof doesn’t have to feel confusing. Understanding What Are Architectural Shingles gives you a clear picture of what they are, how they differ from 3-tab or other asphalt shingles, and what affects their lifespan, cost, and performance. You now know the materials used, the styles available, and the pros and cons to consider. I hope this helps you feel more confident when reviewing quotes or talking to a roofer. With this knowledge, you can make a decision that protects your home and adds value over time. Take a look at your roof, ask the right questions, and choose the shingles that fit your needs best
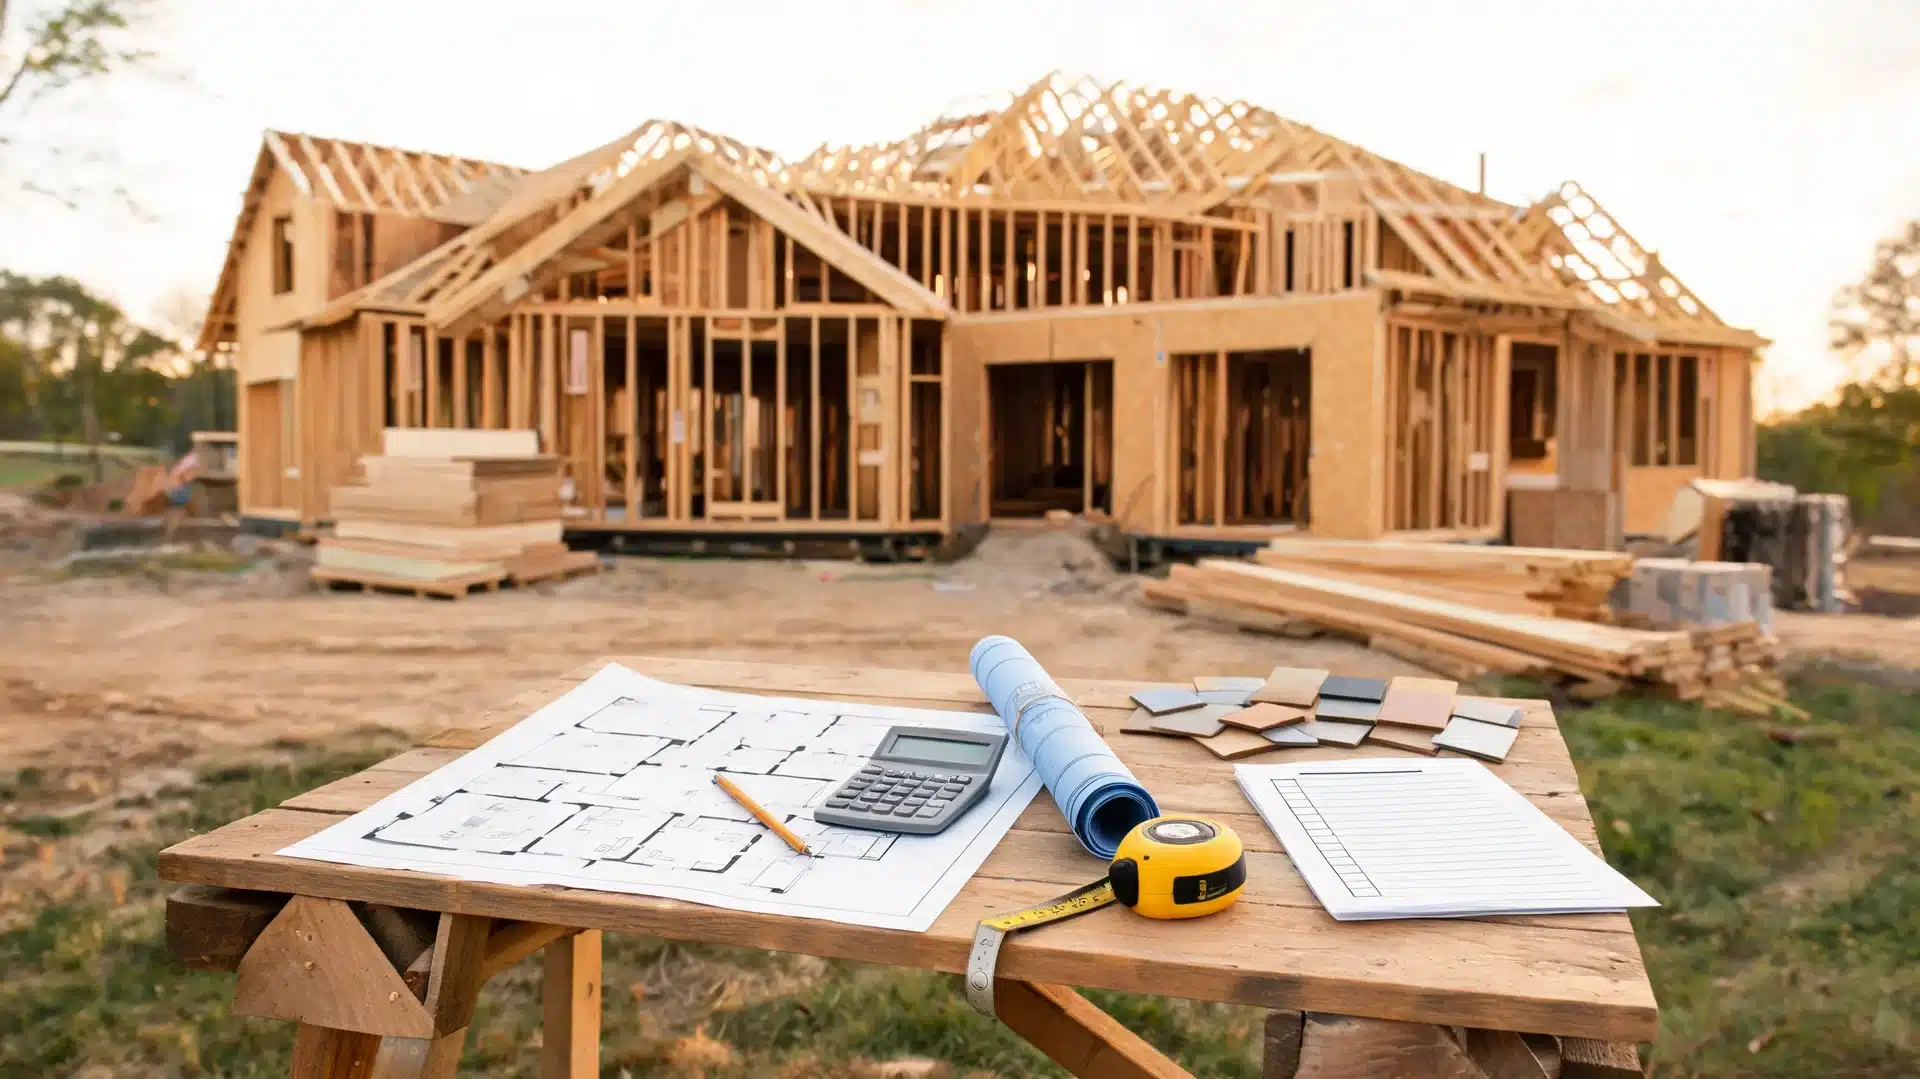
Building a 4 bedroom house in the US typically runs between $280,000 and $600,000 in construction costs, not including land. That range is wide because a compact 4-bedroom ranch on a flat lot and a custom 4-bedroom home with a basement, wraparound porch, and premium windows are genuinely not the same project, even if the bedroom count is identical. Cost Note: Figures in this article are estimates based on national averages from NAHB and US Census Bureau data. Actual costs vary significantly by region, contractor, materials, and project scope. Always get at least three local quotes before committing to any build above $1,000. Most 4-bedroom homes fall between 1,800 and 3,000 square feet, but size alone doesn’t determine price. The lot condition, finish level, foundation type, and labor market where you build shape the number just as much as the bedroom count. Here’s what that means in real dollar terms. Build Type Typical Size Estimated Construction Cost What It Usually Means Basic build 1,800–2,200 sq ft $270,000–$400,000 Stock plan, simple shape, standard finishes Mid-range build 2,200–2,800 sq ft $380,000–$560,000 Common family layout, mid-grade finishes Custom build 2,800+ sq ft $500,000–$900,000+ Custom plans, premium finishes, complex site High-end build 3,000+ sq ft $700,000–$1,500,000+ Full custom design, luxury finishes, high-cost market These are construction-only estimates. Land, site prep, permits, utility connections, and landscaping come on top of whatever the builder quotes you. What the National Data Says About 4 Bedroom Build Costs The Census Bureau reported that the median size of a new single-family home sold in 2024 was 2,210 square feet, with a median sales price of $420,300. That sales price includes land, lot prep, and builder margin. It is not a construction-only figure. NAHB’s 2024 Cost of Construction Survey put the average construction cost at $428,215 for a 2,647-square-foot home, with construction making up 64.4% of the average sales price. For a 4-bedroom home in the mid-range (roughly 2,400 square feet with standard finishes), that data puts you broadly in the $380,000 to $480,000 construction range before land or site work. Neither number is a quote. Both are useful anchors before you start talking to builders. Why the Cost Range on a 4 Bedroom House is So Wide The biggest swing factors are location, lot condition, foundation type, finish level, and builder model. None of them are small variables. Location and labor market. Construction costs ranged from $154 per square foot in Mississippi to $230 per square foot in Hawaii in 2024, a 49% gap driven entirely by labor rates, material delivery costs, and local code requirements. The same floor plan priced in the Midwest and re-priced on the West Coast can differ by 40% to 60%. To understand what drives that variation, the construction cost per square foot breaks down the state-by-state factors in detail. Lot condition and site prep. A flat lot with good soil and nearby utilities costs far less to build on than a wooded slope with clay soil and a long utility run. On a difficult lot, site prep alone (clearing, grading, drainage, driveway base) can add $20,000 to $80,000 before a single board is framed. Foundation type. A slab costs less than a crawl space, and a crawl space costs less than a full basement. That choice alone can shift the budget by $30,000 to $100,000. Soil type, frost depth, and drainage usually determine which foundation is correct for your lot, not personal preference. If you’re still deciding, house foundation types cover the full cost comparison across all 13 options. Finish level. Cabinets, countertops, flooring, plumbing fixtures, and lighting are where most budgets shift from planned to over budget. The same structural shell with builder-grade finishes versus semi-custom finishes can differ by $60,000 to $100,000 on a 2,400-square-foot home. Builder model. Production builders repeat plans, systems, and materials. That repetition lowers per-square-foot cost. A fully custom builder designs for your specific lot and program, which adds both design time and construction complexity. Full Cost Breakdown: What Every Line Item Actually Covers A 4-bedroom home budget is a chain. Land condition sets site prep costs. Site prep determines the foundation. The foundation and layout shape framing. Framing affects how systems route. And finish choices decide how expensive the final stage becomes. Here’s how that chain breaks down by category for a mid-range 2,400-square-foot build. Line Item Low End High End What Drives the Variation Land (if purchasing) Varies Varies Location, acreage, zoning Site prep $10,000 $80,000+ Slope, soil, trees, utility distance Design and permits $5,000 $40,000 Stock vs. custom plans, municipality fees Foundation $15,000 $100,000+ Slab vs. crawl space vs. full basement Framing $40,000 $95,000 Plan complexity, roofline, wall height Exterior shell $50,000 $100,000+ Siding material, window count, roofing type Plumbing, electrical, HVAC $60,000 $100,000+ Bathroom count, climate zone, home size Interior finishes $75,000 $180,000+ Cabinet line, countertop material, flooring type Appliances and fixtures $15,000 $60,000 Appliance tier, fixture brands Builder overhead and profit 10% 20% of the construction total Builder type, market demand Contingency 10% 15% of project total Surprises, change orders, delays These ranges cover a mid-range build at standard finish levels. Custom finishes, difficult sites, high-cost markets, or premium systems push each category toward and past its upper end. 1. Land and Site Prep Land purchase and closing costs are almost never included in a builder’s quote. Site prep (clearing, grading, excavation, and driveway base) is also usually quoted separately. A builder’s base price typically starts after the lot is already ready to build on. On a challenging lot, everything before framing can add $40,000 to $80,000 to a project that looked straightforward on paper. 2. Design, Permits, and Fees Stock plans cost $500 to $5,000. Custom architecture runs $3,000 to $30,000 or more, depending on complexity and the architect’s fee structure. Permit and impact fees vary enormously by municipality: $2,000 in a rural county can become $15,000 to $30,000 in a higher-density jurisdiction. Budget this line item early, before you fall in love with a lot. 3. Foundation Slab foundations are the lowest-cost option, typically $15,000 to $30,000 for a 2,400-square-foot home. A crawl space adds access and moisture management complexity, usually $25,000 to $50,000. A full basement can add $50,000 to $100,000 or more to the base cost, depending on size, soil conditions, and whether it’s finished. Frost depth requirements in cold climates can also raise foundation costs independent of type. 4. Framing and Exterior Shell Lumber, trusses, sheathing, roofing, siding, windows, and exterior doors make up this stage. Simple rectangular plans with clean rooflines cost less to frame than complex shapes with dormers, multiple gable ends, or tall walls. According to NAHB’s 2024 data, framing and exterior finishes together represent around 30% of average construction costs. Brick house construction runs higher than vinyl or fiber cement siding, sometimes by $20,000 to $40,000 on a 4-bedroom footprint. 5. Plumbing, Electrical, and HVAC More bathrooms mean more pipe runs, more vent stacks, and more fixture connections. A 4-bedroom home with three full bathrooms runs meaningfully more in rough-in plumbing than the same footprint with two. Climate zone also determines HVAC equipment sizing. A home in Minnesota needs substantially more heating capacity than one in Georgia. NAHB’s 2024 survey found that system rough-ins accounted for nearly one-fifth of average construction costs, over $82,000 per home. Understanding what’s included in rough-in plumbing helps you compare contractor quotes accurately and catch line items that get billed separately. 6. Interior Finishes Interior finishes accounted for the largest single share of construction costs in NAHB’s 2024 survey: 24.1%. This is where the most discretionary money goes. Cabinets, countertops, flooring, trim, paint, lighting, and hardware all sit here. Three full bathrooms and an upgraded kitchen in a 4-bedroom home can carry $80,000 to $150,000 in those rooms alone. Cabinet choice and countertop material are the two decisions that most commonly cause builder allowances to run short. Always review your allowance figures before signing. 7. Builder Overhead, Profit, and Contingency Builder margin typically runs 10% to 20% of the construction cost. Beyond that, hold a 10% to 15% contingency in reserve. Site surprises, material delays, code-required changes, and mid-build decisions all pull from this cushion. Projects that skip the contingency line don’t avoid surprises. They just fund them with stress and rushed decisions. How to Estimate Your Build: The Square Footage Formula Once you know your local cost per square foot, the formula is direct: multiply your planned square footage by that rate, then stack on every cost your builder’s quote won’t include. Base formula: Square footage × local cost per square foot = construction estimate. Then add: land, site prep, driveway, utility connections, design fees, permits, builder overhead, upgrades above allowances, and a 10–15% contingency. The two most common mistakes: using a national per-square-foot average instead of a local one, and treating the builder’s quote as the total project cost. The builder’s quote is the structure. The project cost is everything else on top of it. Home Size What’s on Top of Construction Total Project Budget Direction 1,800 sq ft Land, site, permits, utilities, finishes Lower end, simple plan, easy lot 2,400 sq ft Same categories, more of each Mid-range, standard finishes 2,800 sq ft Same categories, higher quantity Higher range, more rooms, and systems Two to three local builder bids, with the full scope listed, will always produce a more useful number than any national average. The per-square-foot figure is a starting point for conversations, not a final budget. Where 4 Bedroom Build Budgets Go Wrong This is the section most people skip when reading about construction costs, and it’s the one that matters most to your actual budget. These aren’t rare edge cases. They’re patterns that come up on builds of every size. Site work surprises. Sloped lots, clay soil, tree clearing, and long utility runs regularly add $15,000 to $60,000 to the project. Almost none of it shows up in the initial builder quote, because the builder hasn’t done a full site survey yet. Ask for a site prep estimate as a separate line item before signing anything. Finishes running over allowances. Builder allowances for cabinets, countertops, and flooring are frequently set below what a buyer actually selects. The shortfall gets billed as a change order after the contract is signed. A $5,000 cabinet allowance on a kitchen that actually costs $18,000 is a $13,000 surprise you can avoid by verifying that allowances match your real finish preferences. Confusing the builder’s quote with the total project cost. Land, utility hookups, landscaping, driveway paving, window treatments, and move-in costs are not in most contractor bids. A $420,000 builder quote for a 4-bedroom house is not a $420,000 project. The average cost to build a house guide walks through how to layer a complete project budget beyond the builder’s base price. Change orders after framing starts. Every plan modification after the frame is up adds labor and material costs and pushes the schedule. Decisions made after framing cost three to five times more than the same decisions made before breaking ground. Lock in finish choices, room layouts, and structural details before construction begins. Location gaps larger than expected. A Texas builder commented directly on NAHB’s Eye on Housing data in 2025: “no one in Texas is building true custom homes for $138 per square foot.” National averages mask real regional and project-type gaps. What a production builder in Mississippi charges per square foot is not what a custom builder in Texas or New York charges. What’s Negotiable and What Isn’t Knowing which line items have flexibility (and which don’t) helps you make smarter decisions before and during the build. Not negotiable (or very hard to change after you’ve started): foundation type once the lot is assessed, structural framing once engineered plans are drawn, permit fees and impact fees set by the municipality, and soil or site conditions that require specific engineering solutions. Where you have real control: finish tier (cabinets, countertops, flooring, fixtures), plan complexity (a simpler roofline and rectangular footprint genuinely cost less), square footage (building only what you need is the most reliable cost reducer), and timing (some markets are more competitive in certain seasons). Where to push back on bids: builder overhead margin (10–15% is standard; 20%+ is worth questioning on a large contract), allowance levels (always verify they reflect your actual finish preferences), and landscaping scope (this is frequently overbid and easy to phase). What to Ask Your Contractor Before Signing These five questions catch most of the common problems before they become expensive ones: What exactly does your base quote include, and what is explicitly excluded? Get the scope in writing before comparing bids. What are all of my allowances, and what happens when I go over them? Ask for the change order process in writing. Have you reviewed the site survey results? Are there any conditions that could affect cost? Don’t sign until the lot has been assessed. What does the payment draw schedule look like, and what triggers each draw? Understand when money leaves your account and why. What is the contingency process if we hit something unexpected during construction? Know how decisions and approvals work mid-build. Planning a 4-bedroom build from scratch involves more decisions than most people expect before breaking ground. Building a house on your own land walks through the full pre-construction sequence from site verification to permit approval. Smart Ways to Reduce the Cost of Building a 4 Bedroom House The most reliable savings come from plan simplicity, early decisions, and finish control, not from negotiating on line items you don’t fully understand yet. Use a stock or semi-custom plan. Reduces design fees and avoids costly layout revisions before the project starts. Keep the shape simple. Rectangular footprints, fewer corners, and clean rooflines cost less to frame. A complex roofline with multiple gable ends can add $15,000 to $30,000 to framing costs alone. Lock in finish choices before construction starts. Decisions made after framing cost more, take longer, and create scheduling conflicts. Every unresolved selection on day one is a potential change order by week eight. Spend on what you can’t change easily later. Structure, foundation, windows, HVAC equipment, insulation, and air sealing quality matter more long-term than countertop material or cabinet hardware. Use standard sizes. Standard windows, doors, cabinets, and fixtures are faster to source and install. Custom sizing adds lead time and labor. Build only the square footage you’ll use. Extra bonus rooms, oversized garages, and spaces without a clear purpose raise both construction cost and long-term operating costs. Review every allowance line before signing. A low allowance for cabinets or flooring doesn’t make the bid cheaper. It moves the cost to a change order you’ll pay later. Keep the lot as simple as possible. Wooded lots, steep grades, and distant utilities add cost before framing starts. If you have a choice of lots, the easier one usually saves $20,000 to $60,000 before you’ve made a single finish decision. Ongoing costs to factor in: A 4-bedroom home carries real monthly costs after move-in: electricity, gas, water, insurance, property taxes, maintenance, and landscaping all scale with home size. Insulation quality, window performance, and air sealing decisions made during construction directly affect energy costs for the life of the home. The payback on a better building envelope is measured in years, not decades. Spending more upfront on those systems typically costs less over ten years than recovering the energy savings you gave up by going with minimum standards. For a full picture of how construction time affects your budget, how long it takes to build a house covers each phase and the common delays that add cost to every stage. Frequently Asked Questions These are the questions I hear most often from people who’ve looked at a first bid and realized the number doesn’t tell the full story. How much does it cost to build a 4 bedroom house in the US? Most 4-bedroom builds run between $280,000 and $600,000 in construction costs, depending on size, location, finish level, and foundation type. That figure does not include land, site prep, or permits. Total project cost, including everything, often runs 25% to 40% higher than the construction-only quote. What is the average cost to build a 4 bedroom house per square foot? National averages ran $154 to $230 per square foot in 2024, depending on the state. Adding builder overhead and profit typically puts the effective rate at $175 to $275+ per square foot. High-cost markets like California or the Northeast sit well above that range. How much would it cost to build a 4 bedroom 2 bath house? A 4-bedroom, 2-bathroom home in the 1,800 to 2,200 square foot range typically runs $270,000 to $400,000 in construction. Two bathrooms rather than three keep plumbing costs lower. Expect rough-in plumbing to run $25,000 to $45,000 less than a comparable three-bathroom build. How much does a 4 bedroom house cost to build vs. buy? In many markets, buying an existing home costs less than building new when you account for the full project cost. Building new gives you control over finishes, layout, and systems, but total cost, including land, site prep, and permits, often exceeds the purchase price of a comparable existing home in the same area. What part of a 4 bedroom build costs the most? Interior finishes consistently account for the largest single cost category: 24.1% of average construction costs, according to NAHB’s 2024 survey. Kitchens and bathrooms concentrate the most expensive work in the smallest footprints. Major systems (plumbing, electrical, HVAC) typically account for nearly one-fifth of the construction cost. How much does a brick 4 bedroom house cost to build? Brick construction adds $15,000 to $40,000 over vinyl or fiber cement siding on a typical 4-bedroom footprint, depending on the percentage of brick coverage and local labor rates. Full-brick construction costs more than brick veneer. In some southern markets with strong brick traditions, the labor premium is smaller than in areas where brick is less common. Does the number of stories affect the cost to build a 4 bedroom house? A two-story home typically costs less per square foot to build than a single-story of the same square footage because it has a smaller foundation and roof footprint. However, it adds structural complexity: framing stairs, floor systems between levels, and load path engineering. The savings per square foot usually run $5 to $15 depending on the market. How much do 4 bedroom house plans cost? Stock plans range from $500 to $5,000. Semi-custom plans with site-specific modifications run $3,000 to $12,000. Full custom architecture typically costs $15,000 to $50,000 or more for a 4-bedroom home, billed either as a flat fee or a percentage of the project cost (typically 5% to 15%). Final Words The cost to build a 4 bedroom house lands between $280,000 and $600,000+ in construction, but the number that matters to your project isn’t the national average. It’s what a local builder quotes for your specific lot, plan, and finish preferences. The biggest budget risk on a 4-bedroom build isn’t the foundation or the framing. It’s the gap between the allowances in the builder’s contract and what you actually choose in the showroom. Verify every allowance line against your actual preferences before you sign, and get at least 3 local bids that include the full scope. That comparison will tell you more than any national figure can. Cost estimates based on the NAHB Cost of Construction Survey 2024 and the US Census Bureau 2024 national averages. Verify current pricing with local contractors and suppliers before budgeting.
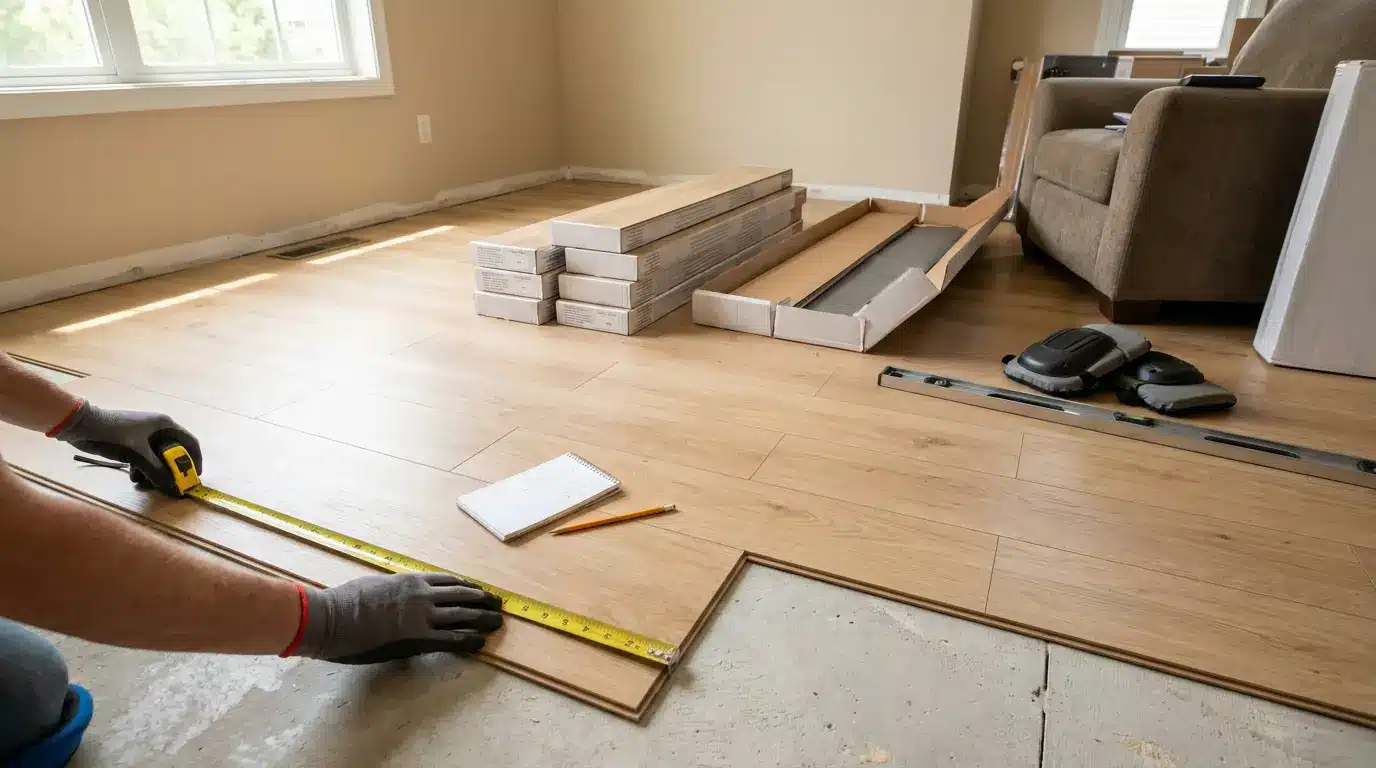
Laminate flooring installation costs between $4 and $14 per square foot installed, which puts a typical 500 sq. ft. room somewhere between $2,000 and $7,000. That range is real, but it is wide for a reason: laminate flooring labor cost per square foot, subfloor condition, plank quality, and whether you have stairs all pull the number in different directions. If you go in with just a per-square-foot figure in your head, you will be caught off guard by what the quote actually includes. This guide breaks down where that money actually goes, what the labor charge covers, which cost lines are negotiable, and how to read a quote before you sign anything. Cost Note: Figures in this article are estimates based on national averages. Actual costs vary significantly by region, contractor, materials, and project scope. Always get at least three quotes before committing to any project above $1,000. How Much Does It Cost to Install Laminate Flooring? Most homeowners pay between $4 and $14 per square foot for laminate flooring, all in. That figure covers materials and labor together. The low end applies to basic planks in a simple, rectangular room with a clean subfloor. The high end reflects premium planks, subfloor repairs, stair installations, and higher labor markets. Labor alone typically runs $3 to $8 per square foot on top of material costs, which range from $1 to $6 per square foot depending on plank quality and thickness. Line Item Low End High End What Drives Variation Laminate planks (materials) $1 per sq. ft. $6 per sq. ft. Thickness, water resistance, attached underlayment Labor and supplies $3 per sq. ft. $8 per sq. ft. Room complexity, region, installer experience Total installed cost $4 per sq. ft. $14 per sq. ft. Materials + labor combined 500 sq. ft. project $2,000 $7,000 Common open-plan room or living area 1,000 sq. ft. project $4,000 $14,000 Multi-room or whole floor install The mid-range project covers better planks, a room with a couple of doorways, and normal prep, landing around $7 to $10 per square foot. A high-cost project involves damaged subfloors, stairs, or premium laminate and pushes toward $11 to $14 per square foot. Cost to Install Laminate Flooring by Room Size Your square footage gives you the quickest rough estimate. Multiply your room’s length by its width, add 10% for waste and cuts, then apply the installed cost range. Formula: length x width = sq. ft., then multiply by your cost range Room Type Square Feet Low Estimate Mid Estimate High Estimate Small bedroom 100 $400 $900 $1,400 Standard bedroom 150 $600 $1,350 $2,100 Living room 300 $1,200 $2,700 $4,200 Large open room 500 $2,000 $4,500 $7,000 Whole floor 1,000 $4,000 $9,000 $14,000 Room type shifts the number too. Bedrooms tend to land at the lower end because they are simple rectangles with one or two doorways. Hallways, kitchens, and stairways push toward the higher end because of the cutting complexity involved. For basement installs, budget for moisture protection as well, since that cost shows up in both materials and prep. Laminate Flooring Labor Cost Per Square Foot: What the Charge Covers A lot of homeowners look at the labor line and assume it is mostly physical installation. It is not. The labor charge covers several things before a single plank goes down and a few things after the last one is in place. Most installers include room measurements and layout planning, determining the direction to run the planks, cutting planks to fit walls and door frames, fitting around vents and cabinets, installing transition strips at room boundaries, and basic cleanup of debris and scraps. Some include baseboard removal and reinstallation; others charge for that separately. Ask before assuming. Laminate flooring labor cost per square foot varies by region. Higher labor markets in major coastal metros tend to sit toward the $6 to $8 range. Smaller markets and rural areas often land between $3 and $5. The same room, same plank, different zip code can produce a $1,500 difference in labor alone. Pro Tip: Ask every installer to break out the quote line by line: labor, materials, underlayment, removal, trim, and disposal, listed separately. Quotes that show only a single total number are harder to compare and easier to lowball. Where Budgets Go Wrong: The Cost Lines Most Homeowners Miss The plank cost is almost never what surprises people. The surprise usually comes from one of these five areas. Old Flooring Removal Carpet removal is the easiest and cheapest, but the padding and tack strips still take time. Tile removal is more labor-intensive and often costs more because breaking up tile and cleaning the adhesive residue is slow work. Glued-down vinyl or old laminate may require scraping, which adds to both time and cost. Budget $1 to $3 per square foot for removal, depending on the existing floor type. Subfloor Repair Laminate needs a flat, stable, dry surface. If the subfloor has dips deeper than 3/16 inch over 10 feet, squeaks, soft spots, or moisture damage, those need to be addressed before installation, not after. Skipping subfloor prep to save money is the single most common reason laminate floors develop gaps, movement, and noise within the first year. Repairs range from minor leveling compound ($100 to $300) to replacing sections of the subfloor ($500 to $1,500 or more). Underlayment and Moisture Barrier Some laminate planks come with underlayment attached. Others require a separate layer, which adds $0.30 to $0.80 per square foot in materials. In basements or rooms over concrete, a moisture barrier is not optional. It is the line item that determines whether your floor lasts 10 years or 3. Check what the plank manufacturer requires before assuming attached underlayment is sufficient for your specific subfloor. Trim, Transitions, and Stair Nosing Transition strips where laminate meets tile, carpet, or another room are often not included in a base quote. Neither is door undercutting (so planks slide cleanly under the frame) nor stair nosing. Stairs are a separate labor category entirely, since each step requires precise measuring and fitting, and most installers price them per step rather than per square foot. Expect $30 to $60 per step. Furniture Moving and Disposal Large furniture, including beds, sofas, and full bookcases, takes real time to move. Some contractors include light furniture moving; others do not. Waste disposal of old flooring, underlayment, and packaging is frequently a separate line. Get clarity on both before the crew arrives. DIY vs. Professional Installation: Which Makes Financial Sense? DIY laminate installation saves the labor cost, which, on a 300 sq. ft. room at $5 per square foot, means $1,500 back in your pocket. Whether that savings is real depends on the room and the condition of your subfloor. DIY makes sense- DIY makes sense when the room is square, the subfloor is flat and clean, the old flooring is already removed, and the space has minimal doorways and no stairs. Bedrooms and offices are the most DIY-friendly. You will need a miter saw or circular saw, spacers, a tapping block, a pull bar, a tape measure, and a square. The job itself is learnable. The risk is in the prep: an uneven subfloor that a pro would flag before starting will cost more to fix after the planks are already down. Professional installation makes sense- Professional installation makes sense for rooms with multiple doorways, hallways, kitchens, basements, and anything involving stairs. A professional also provides a warranty on labor, which matters if something shifts in year one. For a basement install where the moisture risk is real, hiring out is the lower-risk financial decision even if it costs more upfront. For a comparison of flooring options that work below grade, the guide to basement finishing costs covers when laminate and luxury vinyl plank make the most sense in that environment. How Laminate Compares to Other Flooring Types Laminate earns its place in the market by delivering a wood-look finish at roughly half the installed cost of hardwood. Whether it is the right choice depends on the room and how you plan to use the space. Flooring Type Installed Cost Range Best For Avoid In Laminate $4 to $14 per sq. ft. Dry rooms, wood-look finish Wet rooms, high-moisture areas Luxury vinyl plank $3 to $10 per sq. ft. Basements, kitchens, bathrooms High-heat direct sunlight exposure Carpet $3 to $8 per sq. ft. Bedrooms, low-traffic areas High-traffic zones, households with allergies Tile $7 to $20 per sq. ft. Bathrooms, laundry rooms Cold climates where tile feels uncomfortable Hardwood $8 to $25 per sq. ft. Long-term investment, refinishable floors High-moisture areas, over concrete Laminate is not refinishable. When the wear layer is gone, the floor needs to be replaced. If you want a floor you can sand and refinish in 15 years, hardwood is the call. If you want a wood-look floor in a dry room without the hardwood price, laminate delivers that well. For anywhere moisture is a concern, luxury vinyl plank handles it better and costs slightly less to install. The guide to vinyl plank flooring layout covers what to consider if you are deciding between the two. What to Ask Your Contractor Before Signing Anything The contractor who seems cheapest on a single-number quote may not be the cheapest once every line item is visible. Ask these questions before you agree to anything. Is subfloor inspection and leveling included, or is that quoted separately if issues are found? Some contractors discover subfloor problems on day one and present a change order. Knowing the policy upfront prevents a $600 surprise. Does the quote include old floor removal and disposal, or only new floor installation? These are frequently two separate line items with different costs. Is underlayment included in the material price, or is it a separate charge? If the plank does not have attached underlayment, this is a real cost line. Are transition strips, door undercutting, and stair nosing included? Trim work is one of the most commonly excluded items. What is the warranty on labor, and what does it cover? A one-year labor warranty on a laminate install is standard. Anything shorter is worth noting. If a contractor is reluctant to break the quote into line items, that is useful information on its own. Most experienced installers have seen enough scope disputes to prefer itemized quotes. The ones who resist usually have a reason. If you are also renovating the kitchen or another room at the same time, it is worth reading the kitchen remodel cost guide to understand how flooring interacts with the broader scope and which line items overlap. How to Build Your Laminate Flooring Budget Before Getting Quotes You do not need a contractor quote to build a working budget. Here is how to do it yourself before anyone walks through the door. Measure your room in square feet, add 10% for cuts and waste, then apply the cost range. A 250 sq. ft. room with 10% waste is 275 sq. ft. of material. Price Level Calculation Estimated Total Low (basic planks, clean subfloor) 275 x $4 $1,100 Mid (better planks, standard prep) 275 x $9 $2,475 High (premium planks, repairs needed) 275 x $14 $3,850 On top of that base estimate, add possible fees for old floor removal ($150 to $600), separate underlayment ($80 to $220), subfloor repairs ($100 to $1,500), trim and transitions ($100 to $400), furniture moving ($50 to $200), and disposal ($75 to $200). Build those contingencies into your budget before the first quote arrives, so you are evaluating actual scope rather than reacting to sticker shock. For larger renovation projects where laminate is just one line item, the basement remodel cost guide and the average cost to build a house article both cover how flooring fits within a larger scope and where it is most likely to shift mid-project. Frequently Asked Questions These are the questions that come up most often once someone has gotten a first quote and wants to verify whether what they are seeing is normal. What is the average labor cost to install laminate flooring? Labor typically runs $3 to $8 per square foot. The exact rate depends on your region, room complexity, and whether prep work like old floor removal or subfloor leveling is included. How much does it cost to install laminate flooring in one room? A standard bedroom (150 sq. ft.) runs $600 to $2,100 installed. A living room (300 sq. ft.) runs $1,200 to $4,200. Add 10% for material waste and ask separately about trim and disposal. Is it cheaper to install laminate or vinyl plank flooring? Laminate and luxury vinyl plank are similarly priced at $4 to $14 per square foot installed. Vinyl plank handles moisture better, so for kitchens and basements it is typically the better financial decision even if the material cost is slightly higher. Can laminate flooring go over existing flooring? It can go over flat, stable, dry surfaces like vinyl or tile if the base is sound and does not raise floor height to a problem level. It should not go over carpet, soft vinyl, uneven tile, or any surface with moisture damage. How long does laminate flooring installation take? Most single-room installations take one day. Multi-room or whole-floor projects typically run two to three days, depending on prep, number of doorways, stairs, and whether old floor removal is included. Do you need permits for laminate flooring installation? No permit is needed for standard laminate installation in most jurisdictions. Permits may apply if structural subfloor repairs are required, if you are in a condo with HOA rules, or if the project is part of a larger renovation that already requires permits. Does laminate flooring installation cost more for stairs? Yes. Stairs are typically priced per step rather than per square foot because each step requires individual measuring, cutting, and nosing installation. Expect $30 to $60 per step, separate from the flat floor installation quote. Final Words The $4 to $14 per square foot range for laminate flooring installation is accurate. But the number that lands in your quote will be driven by factors the range does not show: your subfloor condition, how many doorways and transitions exist, and whether removal, underlayment, and trim are included. The homeowner who goes in knowing those variables is the one who can evaluate a quote rather than just accept it. Before you call the first installer, measure your room, note the condition of your current floor, and build your budget with contingency lines for the five cost categories most quotes leave out. Then ask for three itemized quotes, not three totals, and you will have what you need to make a clean decision on how much it costs to install laminate flooring in your specific space. Cost estimates based on the 2025 national averages from HomeGuide, HomeAdvisor, and This Old House. Verify current pricing with local contractors and suppliers before budgeting.
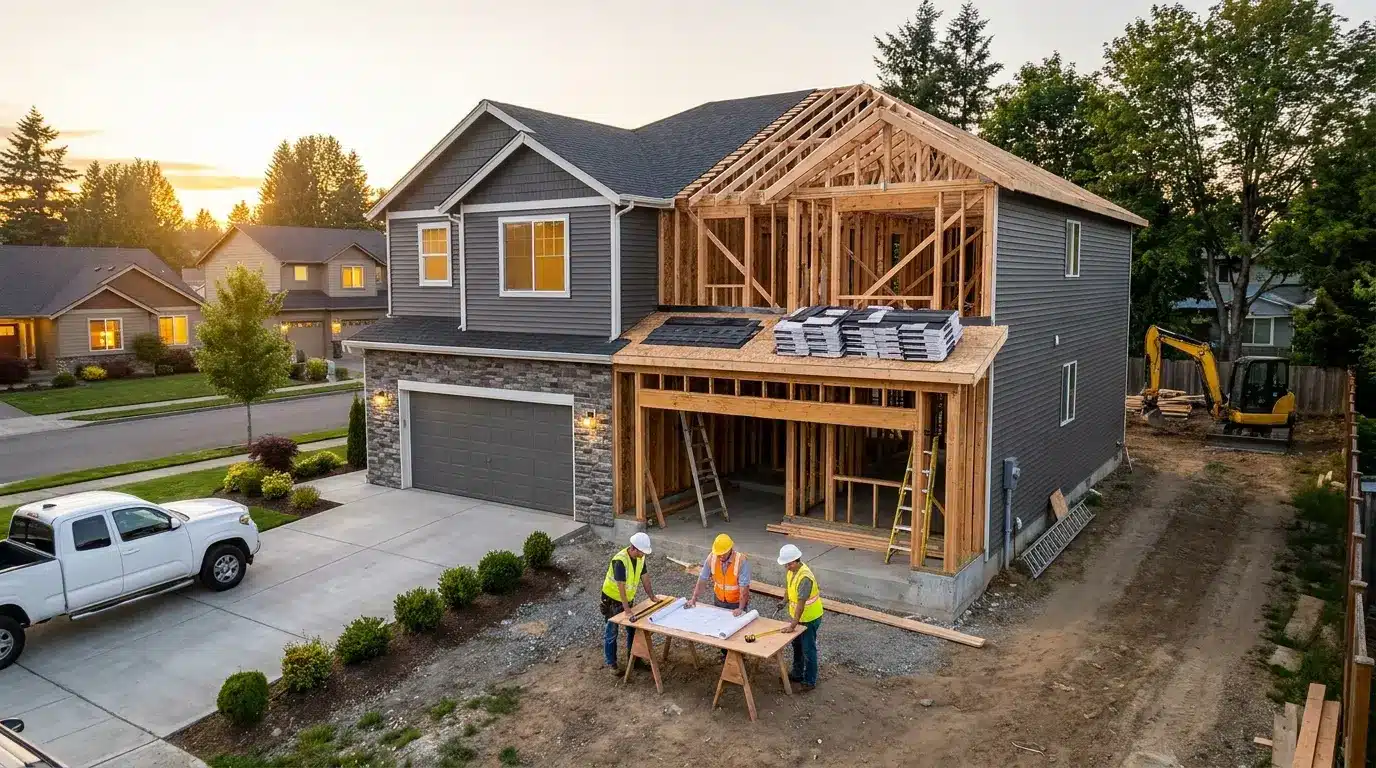
Building a duplex in the USA costs between $180,000 and $1,250,000 depending on size, state, and finish level. Most mid-range builds land between $300,000 and $550,000 for a 2,500 sq ft structure. If that range feels wide, it is because location and design decisions move the number more than anything else. I’ve sat through enough contractor conversations to know that the homeowners who get surprised mid-project are almost always the ones who budgeted off a national average without accounting for their specific state, lot conditions, or layout complexity. This guide breaks down exactly how much does it cost to build a duplex, by construction phase, by state, by floor plan type, and by finish level, so you have what you need before the first contractor quote lands in your inbox. Small duplex (1,500 sq ft) $180,000 (budget) to $450,000 (premium) Mid duplex (2,500 sq ft) $300,000 (budget) to $750,000 (premium) Large duplex (3,500+ sq ft) $420,000 (budget) to $1M+ (premium) Cost per sq ft (national range) $100 (Midwest budget) to $500 (California premium) Typical build time 4 to 8 months Contingency reserve (recommended) 15% of the construction budget Cost estimates based on national contractor averages and NAHB data, 2025–2026. Verify current pricing with local contractors before budgeting. Duplex Construction Cost Breakdown by Phase Most duplex budgets are divided across several construction phases, and each one affects the final number differently. Understanding what drives cost at each stage is the difference between a project that stays on budget and one that runs 30% over before the roof goes on. Line Item Low End High End What Drives Variation Land purchase & site prep $20,000 $150,000+ Urban vs rural lot, soil conditions, grading complexity Foundation & framing $40,000 $120,000 Slab vs basement, single vs multi-story, lumber costs Roofing & exterior $25,000 $80,000 Asphalt vs metal roof, vinyl vs brick siding, roof pitch Plumbing, electrical & HVAC $35,000 $100,000 Separate utility panels per unit, bathroom count, smart upgrades Interior finishes $30,000 $120,000+ Flooring type, kitchen spec, tile work, trim level Permits, inspections & contractor fees $10,000 $50,000+ State regulations, project timeline, contractor experience level The single biggest surprise in most duplex budgets I’ve tracked is mechanical systems. Both units need separate plumbing stacks, electrical panels, and HVAC connections. That duplication adds up fast, and it’s the line item most early estimates understate. Land Purchase and Site Preparation City lots cost more than rural ones, and that gap is significant enough to change your state-level strategy entirely. Beyond the purchase price, soil testing, grading, excavation, and utility trench work all hit the budget before a single wall goes up. If the site slopes, expect grading and excavation to run $10,000 to $30,000 on their own. California builders will tell you this phase alone has derailed more projects than bad contractors. One Reddit discussion on the topic summed it up directly: grading and excavation are a high-potential cost, and the percentage of construction budgets they consume is underestimated at the planning stage. Foundation and Structural Framing A slab foundation runs significantly cheaper than a basement, and wood framing is less expensive than steel. Simple rectangular footprints are faster to build than custom shapes. These choices don’t feel dramatic at the design stage, but they determine whether your foundation and framing line item runs $40,000 or $120,000. For single-story duplexes specifically, simpler structural requirements mean faster plan approvals and fewer engineer-billable hours, a real cost advantage that compounds throughout the project. Roofing and Exterior Construction Asphalt shingles cost less than metal or tile roofing, and vinyl siding is the material most Midwest duplex builders rely on to keep rental properties affordable over time. A Reddit discussion on siding costs put the vinyl figure at $15,000 to $20,000 for a mid-size build, which is why experienced Midwest investors keep choosing it over premium alternatives that add curb appeal but raise both build cost and long-term maintenance expense. Steep roof pitches also add labor cost regardless of the material you choose, so a simpler roofline is worth designing for early. Plumbing, Electrical, and HVAC This is where duplex costs structurally diverge from single-family builds. Both units require completely separate plumbing systems, electrical panels, meter connections, and HVAC installs. The mechanical phase alone typically accounts for 15 to 25 percent of a duplex’s total construction cost. Adding smart home upgrades, extra bathrooms, or a third half-bath per unit pushes this figure higher. Separate utility meters are non-negotiable for a rental-ready build. Tenants who pay their own bills stay longer and treat the property better. Interior Finishing Costs Interior finishes are where most homeowners overspend relative to the return they’ll see in rent. Hardwood flooring costs more than vinyl plank, upgraded kitchens add $10,000 to $25,000 per unit, and premium trim throughout a whole duplex adds up faster than people expect. For a rental property, the practical test is whether the finish level justifies a rent increase that covers the extra cost within two to three years. Most of the time, mid-grade finishes clear that bar; premium ones don’t. Permits, Inspections, and Contractor Fees Permit costs vary dramatically by state and municipality. In California, permitting a duplex can run $15,000 to $50,000 and take months. In Indiana or Ohio, you might clear permits for $3,000 to $8,000 in a few weeks. Contractor fees follow the same pattern; experienced builders in high-cost metros charge more, but they also reduce the risk of costly mid-project corrections. Delays increase project costs regardless of who’s at fault, so a slower permitting environment means higher carrying costs on your construction loan. Cost per Square Foot by State Where you build matters as much as what you build. The table below shows the realistic cost per square foot and estimated total cost for a 2,500 sq ft duplex across ten states, from the most affordable to the most expensive. A duplex that costs $300,000 in Texas can run $800,000 in California once labor rates, code compliance requirements, and permit timelines are fully accounted for. State Cost per sq ft Total cost (2,500 sq ft) Permit difficulty Indiana $100–$140 $250,000–$350,000 Simple Ohio $110–$150 $275,000–$375,000 Simple Texas $120–$160 $300,000–$400,000 Moderate Florida $130–$175 $325,000–$437,000 Moderate North Carolina $130–$170 $325,000–$425,000 Moderate Illinois $140–$185 $350,000–$462,000 Moderate Colorado $160–$220 $400,000–$550,000 Complex Washington $180–$250 $450,000–$625,000 Complex New York $200–$300 $500,000–$750,000 Very complex California $220–$500 $550,000–$1,250,000 Very complex State is not just a location choice; it is a financial one. Indiana and Ohio offer straightforward permitting processes and labor markets that keep a mid-range duplex under $400,000. California and New York bring high labor costs, strict zoning requirements, and permit timelines that extend your construction loan period and add to the carrying cost before a single tenant moves in. If you’re comparing states as part of an investment decision, the permit difficulty column matters as much as the per-square-foot figure. Single Story Duplex Floor Plans Single story duplex floor plans cost 10 to 25 percent less to build than multi-story designs, and the savings don’t stop at the build date. No staircase to repair, simpler roof structure, lower long-term maintenance costs, and a layout that works for families and older homeowners without the mobility complications a second floor introduces. For first-time investors in particular, the single-story design offers the strongest combination of build simplicity, tenant appeal, and long-term cost control. Side-by-Side Layout Two mirror-image units sharing one structural wall, each with a separate front entrance facing the street. This is the most commonly built and most easily rented duplex format in the USA. The shared wall reduces framing and insulation costs without compromising either tenant’s privacy. Each unit reads like a standalone home from the street, which matters more than most people realize for attracting long-term family tenants over transient ones. If you’re planning a single-story build on a standard rectangular lot, this is the default layout for a reason. Front-Back Layout One unit faces the street, the second sits directly behind it. This layout requires a deeper lot rather than a wide one, which makes it well suited for urban infill plots where lot width is the constraint. The rear unit typically commands slightly higher rent because it’s quieter and more private, a genuine advantage you can price into the lease from day one. The practical drawback is access: the front unit is always easier to reach, so factor in whether either tenant has mobility considerations before committing to this layout. Space Planning Inside Single-Story Units Room arrangement matters more than total square footage in a single-story duplex. An open kitchen and living area makes a 1,200 sq ft unit feel significantly larger than a closed floor plan of the same size. Placing bedrooms on the outer walls, away from the shared partition, keeps noise transfer low and keeps tenants from complaining about each other. That one placement decision reduces turnover more effectively than any amount of acoustic insulation added after the fact. Long-Term Cost Advantages of Single-Story Duplexes Single-story structures have simpler engineering drawings, which means faster plan approval times, lower structural fees, and fewer surprise costs during the build. After construction, a single-story duplex is easier and cheaper to re-roof, inspect, and repair: no upper-floor waterproofing concerns, no staircase structural work, and any local contractor can handle maintenance without specialist rates. If you’re planning to hold the property for ten years or more, those long-term savings add up to real money. The outdoor finishing decisions you make around a single-story build also tend to cost less: no upper-level deck work, no second-floor balcony drainage to manage. 3 Bedroom Duplex Floor Plans The 3 bedroom duplex is the most rented, most searched, and most commonly built configuration in the USA. It hits the sweet spot between construction cost and rental income potential: large enough for families, small enough to keep per-unit build cost manageable. The floor plan you choose determines how well the layout works for real tenants, not just how it looks on paper. Standard 3-Bedroom Layout The classic approach puts bedrooms on the outer walls, shared living spaces toward the center, and bathrooms between the two zones. The master bedroom sits on the outer wall away from the shared partition, where noise isolation matters most. Secondary bedrooms group together on the same side, which makes them easier to soundproof and better for families with children who want bedrooms in proximity. One full bath and one half-bath per unit is the standard count that satisfies most family tenants without overbuilding on plumbing costs. Open-Concept Designs Removing the wall between the kitchen and the living room makes a smaller unit feel substantially larger, a genuine advantage when you’re trying to rent a 1,100 sq ft space to someone comparing it against 1,300 sq ft options elsewhere. An island or peninsula kitchen layout defines the cooking zone without closing it off from the living area. Windows positioned to carry light across the full open space is a detail that consistently shortens the time units sit vacant. Modern renters expect this layout; closed kitchen floor plans read as dated in the current rental market. Rental-Focused Layout Decisions A duplex built for long-term tenants needs privacy, separate utilities, and practical storage built into the plan from day one. Proper soundproofing in the shared wall (not just standard drywall) makes each unit feel genuinely detached. Separate utility meters from the start to ensure tenants pay their own bills, which reduces energy waste and improves how carefully they treat the property. One dedicated parking spot per unit is a hard requirement for family tenants in suburban markets, and in-unit laundry is consistently one of the top reasons tenants choose one rental over another at the same price point. Outdoor Spaces, Garages, and Extras A single-car garage per unit adds $15,000 to $30,000 to the build cost and justifies $150 to $300 more in monthly rent, and it pays for itself within five years in most markets. A private patio or small deck gives each tenant a clearly defined outdoor space rather than a shared yard that creates friction. A simple fence dividing the backyard is low-cost and high-impact: it delivers genuine privacy without a structural addition. For a long-term rental property, the landscaping and outdoor hardscaping decisions around a duplex affect perceived value and tenant retention more than many internal finish upgrades do. Financing a Duplex Build Financing a duplex construction project works differently from financing a home purchase, and getting the structure wrong costs more than most people expect. Here is what matters before you sign anything. Construction loans release funds in stages, not as a lump sum. Your builder hits a milestone, funds are released, and you pay interest only on what has been drawn so far. Understand the draw schedule before you choose a lender. FHA financing allows owner-occupants to get in at 3.5% down, compared to 20 to 25 percent for a pure investment property. Projected rental income from the second unit can count toward your loan qualification, a meaningful advantage for first-time duplex buyers. Construction loans carry higher interest rates than standard mortgages. Every delay in your build timeline extends your loan period and increases carrying costs. Build that risk into your contingency budget, not your margin. Budget a 15% contingency before you break ground. Material prices shift, permits slip, soil conditions surprise you. Something unexpected almost always comes up mid-build; this reserve is what keeps it from derailing the project. Your true monthly cost includes more than the mortgage. Landlord insurance, property taxes, and a maintenance reserve all begin the day your first tenant moves in. A detailed look at how these figures stack up against a standard single-family build is worth reviewing as part of your initial planning. The comparison between duplex and single-family home construction costs often changes how people think about their investment structure. Single-Story vs. Multi-Story Duplex The choice between a single-story and multi-story duplex comes down to lot size, build budget, maintenance preference, and long-term ownership goals. Factor Single-Story Duplex Multi-Story Duplex Construction cost Lower: no staircase, simpler framing Higher: structural support, staircase, multi-level engineering Land requirement Larger lot needed for horizontal footprint Smaller lot: vertical design maximizes land efficiency Maintenance complexity Simpler: one roof level, easier access for repairs More complex: upper-floor waterproofing, staircase upkeep Best tenant profile Families, retirees, anyone prioritizing accessibility Investors maximizing rentable square footage on smaller lots Long-term cost of ownership Lower: simpler structure ages with fewer costly repairs Higher: more components to maintain over time Single-story wins on cost, accessibility, and long-term simplicity. Multi-story wins on land efficiency and rentable square footage on constrained urban lots. Neither is universally better; the right answer depends on where you’re building and who you’re building for. Where Duplex Budgets Go Wrong After reviewing hundreds of real duplex construction projects, the budget overruns almost always trace back to the same handful of decisions made before the build started. Underestimating mechanical costs. Separate systems for two units add up faster than any single-line estimate captures. Get a dedicated mechanical quote early, before the general contractor’s bid. Ignoring site preparation costs. Grading, excavation, and utility connections are wildly variable by location. Budget these as line items, not as part of a lump-sum estimate. Interior finish creep. Every upgrade from standard to premium adds cost across two full units. Flooring alone (switching from vinyl plank to hardwood) adds $10,000 to $20,000 to a mid-size build. Set your finish tier before you meet contractors, not during the design conversation. No contingency reserve. A 15% contingency is not pessimism; it is construction reality. Most projects hit unexpected conditions at foundation or framing stage. The ones that don’t use the reserve end up ahead; the ones that need it and don’t have it end up in trouble. Underpricing permit timelines. In complex-permit states, waiting three to six months for approvals while carrying a construction loan is a real cost. Build this delay into your financing plan, not your wish list. What to Ask Your Contractor Before Signing These five questions separate contractors who will keep your duplex project on budget from those who will cost you significantly more than their initial quote suggested. “Is your quote fixed-price or cost-plus?” Fixed-price contracts protect your budget; cost-plus contracts transfer all cost risk to you. Know which one you’re signing. “What’s your timeline for the permit approval phase?” A contractor with no clear answer to this has never built in your permit jurisdiction before, or doesn’t track it carefully. “What subcontractors do you use for mechanical work, and are they already scheduled?” Subcontractor availability is one of the most common causes of project delays. “What does your draw schedule look like, and how does it align with the construction loan milestone requirements?” Misalignment here creates cash flow gaps mid-project. “What site conditions would change this quote materially?” Soil surprises, unexpected utility relocation requirements, and drainage issues are the three most common cost increases after signing. A good contractor will tell you the answer before you ask. Cost Note: Figures in this article are estimates based on national averages from NAHB Cost of Construction Survey data and 2025–2026 contractor pricing. Actual costs vary significantly by region, contractor, lot conditions, and finish level. Always get at least three quotes before committing to any duplex construction project. Frequently Asked Questions How much does it cost to build a duplex in 2026? Most duplex construction projects in 2026 cost between $293,000 and $549,000 nationally, with an average near $400,000 for a 2,500 sq ft build. Low-cost states like Indiana run $250,000 to $350,000 for the same size. California and New York projects regularly exceed $750,000 once permit delays and labor rates are factored in. How much to build a duplex per square foot? The national range is $100 to $240 per square foot depending on location, finish level, and design. Single-story builds at the simpler end of the design spectrum sit around $110 to $135 per sq ft. Premium multi-story builds in high-cost states run $250 to $500 per sq ft, with California at the top of that range. How long does it take to build a duplex? Most duplex construction timelines run 4 to 8 months for the physical build. Add the permit approval phase, which ranges from 2 to 4 weeks in simple-permit states to 3 to 6 months in California and New York. Total project duration from permit application to occupancy typically runs 6 to 14 months depending on state and municipality. Is it cheaper to build or buy a duplex? Building gives you control over layout, finish level, and long-term maintenance cost. Buying an existing duplex is typically faster and has lower up-front carrying costs. In most markets, building a new duplex costs 10 to 30 percent more than buying comparable existing stock, but a new build carries lower immediate maintenance expense and can be designed for specific tenant needs. Can you build a duplex on a single-family lot? It depends entirely on local zoning. Many municipalities have historically prohibited duplexes on single-family-zoned lots, though this is changing in a growing number of states as housing shortage legislation passes. California, Oregon, and several other states have passed laws requiring cities to permit duplexes on single-family lots. Check your specific municipality’s zoning code before purchasing land for this purpose. What zoning do you need to build a duplex? You typically need residential zoning that permits two-family or multi-family construction, often classified as R-2 or MF-1 zoning in most US municipalities. Some areas require a conditional use permit or variance. In states with recent housing reform legislation, duplex construction rights on single-family-zoned lots have expanded significantly. Verify current local requirements with your county planning department before purchasing land. How much does it cost to build a 2-unit duplex? A 2-unit duplex (the standard duplex configuration) costs $180,000 to $1,250,000 depending on size, state, and finish level. The national average for a 2,500 sq ft two-unit build is approximately $400,000. Budget and mid-range builds in affordable states run $250,000 to $500,000; premium California builds commonly exceed $800,000. Can I build a duplex on my land? Yes, if your land is zoned appropriately and the lot is large enough to meet local setback and footprint requirements. Minimum lot sizes for duplexes vary by municipality. Many require 6,000 to 10,000 sq ft minimum for a side-by-side layout. Have your land’s zoning classification and lot dimensions confirmed before drawing plans or hiring a contractor. Final Verdict If you’re choosing between a $400,000 duplex build in Texas and sitting on cash, the numbers are straightforward: rental income from one unit offsets a substantial portion of your monthly mortgage, and you own an appreciating asset with income-producing potential from day one. If you’re comparing the same duplex build in California at $800,000 to $1,200,000, the return calculus changes significantly, and the permit timeline adds real carrying cost that doesn’t show up in per-square-foot estimates. The question of how much does it cost to build a duplex is really two questions: what does it cost where you’re building, and what does that cost look like against realistic rental income in that market. Run that calculation with local contractor quotes and local rental comps before signing anything. That’s the one question worth getting right before a single permit application is filed.
Basement finishing cost runs between $15,000 and $75,000 for most US homeowners, with a national average around $30,000 to $50 per square foot for standard work. That is the honest answer up front. Where your project lands within that range depends on four things: the size of the space, the condition it is in before anyone picks up a framing nail, the finish level you choose, and where you live. The spread is wide because the variables are real, not vague. A 600-square-foot open-plan family room with existing rough-in plumbing in suburban Ohio lands very differently than a 1,200-square-foot build-out with a bathroom, a bedroom, and a wet bar in a Seattle suburb. Both are “basement finishing projects.” Neither belongs in the same budget conversation. This guide breaks down the real cost drivers, shows you where contractor quotes hide the surprises, and tells you what to ask before you sign anything. Cost Note: Figures in this article are estimates based on national averages from HomeAdvisor/Angi (2025) and NAHB Cost of Construction Survey data. Actual costs vary significantly by region, contractor, materials, and project scope. Always get at least three quotes before committing to any project above $1,000. Basement Finishing Cost by Size Square footage sets the floor on your budget, not the ceiling. Every additional room, fixture, or upgrade builds on top of the base per-square-foot cost. The table below uses the national $30–$50–$75 per square foot range for low, mid, and high-end finishes respectively. Basement Size Low End ($30/sq ft) Mid-Range ($45/sq ft) High End ($75/sq ft) 500 sq ft $15,000 $22,500 $37,500 750 sq ft $22,500 $33,750 $56,250 1,000 sq ft $30,000 $45,000 $75,000 1,200 sq ft $36,000 $54,000 $90,000 1,500 sq ft $45,000 $67,500 $112,500 These figures cover standard framing, drywall, insulation, flooring, lighting, and electrical. They do not include bathroom additions, egress windows, waterproofing, or structural repairs. All of those sit on top as separate line items. The next section covers those specifically, because they are where most budget overruns actually happen. How to Estimate Your Basement Finishing Cost Before Calling Anyone A quick working estimate before your first contractor conversation looks like this: (Square footage × cost per square foot) + feature additions + permits + 15% contingency Walk through a real example: a 1,000-square-foot basement at $40 per square foot costs $40,000 as a base. Add a full bathroom at $12,000, permits at $1,500, and a 15% contingency buffer of $8,025. Total working estimate: $61,525. Pro Tip: Do not skip the contingency. Of every basement finishing project I have seen go over budget, the single most common reason is that the contingency line was cut before work began. Budget 15% minimum on any project in a home more than 20 years old. What Actually Drives Basement Finishing Cost: A Line-by-Line Breakdown Knowing the number on paper is different from knowing where it comes from. Here is a breakdown of the real cost drivers, ordered by how often they surprise homeowners after a project starts. 1. Framing, Drywall, and Insulation This is the skeleton of the project, the line item contractors will quote first and the one where open layouts save real money. Fewer interior walls mean fewer linear feet of framing, less drywall, and a faster installation schedule. A 1,000-square-foot open plan can cost $8,000–$14,000 in framing and drywall. Divide that space into four separate rooms and the same work climbs to $14,000–$22,000. 2. Waterproofing and Drainage This is the cost most homeowners do not price in until a contractor opens the walls and finds moisture. A full interior waterproofing system runs $3,000 to $15,000 depending on scope. Crack injection, sump pump installation, and interior drain tile each carry separate costs. Exterior waterproofing pushes well past that. The full guide to basement waterproofing costs covers each method and what drives the price. Budget for this before anything cosmetic moves, because finishing over an active moisture problem is not a solution. 3. Electrical and Lighting A finished basement needs dedicated circuits for outlets, a subpanel connection, and lighting throughout. Standard work for a 1,000-square-foot basement runs $3,500–$7,000. Recessed lighting, smart switches, or home theater wiring adds to that. If your existing panel is at capacity, which is common in homes built before 1990, a panel upgrade adds $1,500–$4,000 to the electrical scope before a single fixture goes in. 4. Flooring Below-grade spaces need moisture-tolerant flooring. Luxury vinyl plank ($2–$5 per square foot installed) handles this well and is among the most cost-effective choices for finished basements. Engineered hardwood runs $6–$12 installed. Carpet over a vapor barrier is cheaper upfront at $1.50–$4 per square foot but is the first thing you will be ripping out if moisture becomes a problem. Tile works well in bathrooms but adds labor cost to the general living area. For a 1,000-square-foot basement, flooring ranges from roughly $1,500 to $12,000 depending on material choice. 5. HVAC Extensions An unfinished basement typically sits outside the home’s climate control loop. Extending existing ductwork or installing a ductless mini-split unit for a finished space runs $1,500–$6,000 for most projects. Older HVAC systems may need assessment before the extension is added; if the main unit lacks capacity, upgrading it becomes a separate cost. Proper ventilation is also a permit requirement in most jurisdictions. It is not optional. 6. Permits and Inspections Permit fees vary significantly by municipality but typically add $500–$2,000 to a basement finishing project. Structural changes, electrical, and plumbing all require separate permits in most jurisdictions. Staged inspections are common. Expect a framing inspection, an electrical rough-in inspection, and a final inspection at minimum. Missing any of these creates rework that costs more than the permit fee ever would have. Pull the permits. Added Features: What Each Room Costs The base per-square-foot cost covers the space, not the upgrades inside it. Each of the following is a line item that sits on top of your base estimate. Basement Bathroom Addition: $8,000–$25,000 A full bathroom is the single largest add-on cost in most basement projects. The range is wide because the cost depends almost entirely on whether rough-in plumbing already exists. If it does, a basic full bath adds $8,000–$15,000. If there is no rough-in, which is typical in older basements, you are looking at breaking concrete, installing an ejector pump for below-grade waste, running supply lines, and meeting inspection requirements. Full scope on a no-rough-in bathroom runs $15,000–$25,000 before fixtures. A half bath runs $5,000–$12,000 by comparison. Keep new plumbing as close to existing lines as possible, because every foot of new pipe run across a concrete slab adds labor cost. Basement Bedroom Addition: $5,000–$12,000 Additional A below-grade bedroom has one non-negotiable requirement: an egress window. Building code in most US jurisdictions requires a minimum net clear opening of 5.7 square feet, with a minimum opening height of 24 inches and minimum width of 20 inches. Installation of a code-compliant egress window, including excavation for the window well, runs $2,500–$5,000 per window. Add to that the bedroom framing, closet, HVAC extension, and electrical, and a compliant basement bedroom adds $5,000–$12,000 to the project above what the base square footage cost covers. Wet Bar or Kitchenette: $5,000–$15,000 A wet bar requires a sink, supply lines, drain routing, cabinet installation, and electrical circuits for appliances. Keeping it near existing plumbing controls cost significantly. A basic wet bar with a prep sink and stock cabinets runs $5,000–$8,000. A full kitchenette with a small refrigerator, microwave, and dishwasher circuits pushes to $10,000–$15,000. Plan the electrical load before choosing appliances, because additional circuits for a kitchenette may require a subpanel. Home Theater, Home Office, or Gym: $3,000–$10,000 Additional Dedicated-use rooms add specific requirements on top of the base cost. A home theater needs dedicated electrical circuits, acoustic considerations, and structured wiring for audio and video. Budget $3,000–$10,000 above base depending on equipment. A home office adds network drops and electrical outlets; $1,500–$3,500 covers most configurations. A home gym needs impact-resistant flooring (rubber flooring runs $2–$8 per square foot installed) and increased HVAC capacity for the heat load. If the basement is part of a larger renovation, the guide to house additions before and after shows how homeowners typically sequence these decisions. The Complete Cost Summary: All-In Line Items Line Item Low End High End What Drives Variation Framing + drywall + insulation $8,000 $22,000 Number of interior walls, ceiling height Waterproofing + drainage $0 $15,000+ Existing moisture problems, system type Electrical + lighting $3,500 $9,000 Panel capacity, circuit count, fixture type Flooring $1,500 $12,000 Material choice, moisture prep required HVAC extension $1,500 $6,000 Existing system capacity, duct vs. mini-split Bathroom addition $8,000 $25,000 Existing rough-in, ejector pump, fixture grade Egress window (bedroom) $2,500 $5,000 Excavation depth, soil conditions Permits and inspections $500 $2,000 Municipality, scope of work Contingency (15%) Built into budget Built into budget Age of home, unknown conditions This breakdown makes it clear why two homeowners with the same square footage can end up with vastly different total costs. The line items above the base, specifically waterproofing, bathroom, and egress, are not optional depending on project scope, and they are the items most commonly missing from initial contractor quotes. Where Budgets Go Wrong Most basement finishing projects that overshoot their budget do so at the same points. These are not unusual surprises. They are predictable costs that did not make it into the original estimate. Waterproofing discoveries after walls open: This is the most common mid-project cost addition. A contractor removes old paneling or starts framing and finds active seepage, crack damage, or evidence of past flooding. Addressing it at that point is non-negotiable. You cannot frame over a moisture problem. Budget for it before work starts, or assume the contingency covers it. Panel and electrical upgrades: More circuits, more outlets, and more fixtures routinely push older electrical panels to their limit. An inspector will flag this before sign-off. A panel upgrade that was not in the original scope adds $1,500–$4,000 mid-project. Floor leveling: Uneven concrete affects every subsequent trade: flooring, door installation, and trim fitting. Self-leveling compound adds cost and time that rarely appears in a first quote. Check your slab before the project starts. Debris removal: Old insulation, carpet, paneling, and drywall from demo work needs to be hauled. Dumpster fees, disposal charges, and labor hours for cleanup can add $500–$1,500 to the early phase of the project. Mold remediation: Any visible growth or persistent musty smell requires professional assessment and clearance before walls close. Enclosing active mold is not a solution. Remediation costs vary widely based on the extent. Budget $500–$6,000 if there is any indication of growth before the project starts. What’s Negotiable vs. What Isn’t Not every line item has the same flexibility. Understanding which costs are fixed and which have real room to move helps you have a more productive conversation with any contractor. Not negotiable: Permit fees (set by municipality), electrical panel upgrades required to pass inspection, egress window specifications required by code, and waterproofing remediation for identified moisture problems. These are compliance and safety items. Cutting them creates liability and future cost. Negotiable: Finish level on flooring and fixtures, brand and grade of cabinets and hardware, lighting fixture type, layout complexity (fewer walls cost less), and project phasing. The bathroom can be framed and roughed in during the main project and finished later. Flooring can be luxury vinyl rather than hardwood. DIY-able: Painting, trim installation, basic flooring over an existing subfloor, cleanup, and storage assembly. These are the tasks where DIY labor makes a real dent without creating code compliance or safety risk. Leave electrical, plumbing, structural work, and HVAC to licensed contractors. Regional Cost Variation: Where You Live Changes the Number Labor rates for finishing work differ significantly across the country. The same 1,000-square-foot project that costs $40,000 in suburban Ohio will cost closer to $55,000–$65,000 in the San Francisco Bay Area or New York metro, and may run $32,000–$38,000 in parts of the Midwest or Southeast. The difference is almost entirely labor. Material costs are more consistent nationally, though lumber and drywall prices have shown volatility in recent years. Urban markets also tend to have longer permit timelines and more stringent inspection schedules, both of which affect contractor pricing. If you are in a high-cost metro, the mid-range per-square-foot figures in this article will run toward the upper end. What to Ask Your Contractor Before Signing The questions below are not small talk. They are the specific items that determine whether a quote is complete or whether it has hidden costs you will discover mid-project. Is waterproofing included, or is it a change order if you find moisture? Nail down the answer before work starts. What is your permit process? Do you pull all required permits, and is the fee included in this quote? Some contractors price permits separately. If my electrical panel needs an upgrade to support this scope, is that included or additional? This is the most common mid-project addition on older homes. What is your process for handling unexpected structural or foundation issues? Get the change order protocol in writing. What is the payment schedule, and what are the specific completion milestones tied to each payment? Never pay more than 10–15% upfront on a project of this size. Is Finishing a Basement Worth the Cost? For most homeowners, yes, with a clear-eyed view of the return. A finished basement adds functional square footage to a home and typically returns 50–75% of the investment in resale value according to NAHB data, depending on market conditions and the quality of the work. A $40,000 project in a market where finished basement space is valued may add $20,000–$30,000 to the sale price. That is not a full dollar-for-dollar return, but the daily use value of the space, the family room, the home office, the bedroom for a teenager, is where homeowners typically feel the investment most. The cases where it is less worth it: When waterproofing problems have not been resolved first When the project is over-customized for resale (very specialized home theater builds or niche layouts) When a homeowner is planning to sell within 12–18 months and the local market does not heavily value finished basement square footage In those cases, a partial finish, meaning framing, electrical, and flooring without custom rooms, often captures most of the value at a fraction of the cost. For a broader look at how basement finishing fits into whole-home renovation sequencing, the basement remodel cost guide covers full renovation scope and sizing considerations. Frequently Asked Questions How much does it cost to finish a basement? Most US homeowners spend $15,000 to $75,000, with a national average around $30,000 for a mid-size basement at standard finish levels. Projects with bathrooms, waterproofing, or premium finishes push past $75,000. What is the average cost to finish a basement per square foot? The national range is $25 to $75 per square foot, with most mid-range projects landing between $35 and $50. Open layouts with minimal plumbing additions sit at the lower end; multi-room builds with bathrooms run higher. How much does finishing a basement cost with a bathroom? Adding a full bathroom adds $8,000–$25,000 on top of the base project cost, depending on whether rough-in plumbing already exists. A half bath addition runs $5,000–$12,000. Always locate new plumbing close to existing lines to control cost. What is the most expensive part of finishing a basement? Plumbing and bathroom additions, followed by waterproofing remediation, are typically the highest-cost single line items. Electrical panel upgrades and egress window installation are the most common unexpected expenses after a project starts. How much would it cost to finish a basement yourself? DIY finishing can reduce labor costs by 30–50% on eligible tasks. Painting, flooring, trim, and cleanup are genuinely DIY-able. Electrical, plumbing, structural framing, and HVAC require licensed contractors in most jurisdictions. Attempting these as DIY work creates permit and inspection problems. How much does it cost to finish a small basement? A 500-square-foot basement runs $15,000–$37,500 depending on finish level. Smaller spaces cost more per square foot because fixed costs like electrical rough-in and permits do not scale down proportionally with the space. Does finishing a basement increase home value? Typically yes. NAHB data suggests homeowners recover 50–75% of finishing costs in resale value. Returns are highest when the space adds a functional room type, such as a bedroom or family room, and when waterproofing has been properly addressed before finishing. What does basement finishing cost not include? Standard per-square-foot quotes usually exclude waterproofing, egress windows, bathroom rough-in, structural repairs, panel upgrades, debris removal, and mold remediation. Always confirm what is and is not included in writing before accepting a quote. Final Words Here is what you now know that most people do not figure out until mid-project: the basement finishing cost number a contractor quotes on day one is almost never the number on the final invoice. The projects that come in on budget are the ones where the owner priced waterproofing before the framing started, confirmed whether the electrical panel had capacity, and built a 15% contingency into the budget before anyone put a shovel in the ground. The $30,000 average cost is real, but it assumes a dry, structurally sound basement with no plumbing additions. Add a bathroom and address a moisture problem, and you are in $55,000–$65,000 territory before premium finishes. Get the full scope on paper, ask the five contractor questions above, and price the line items separately. That is the difference between a basement project that lands where you expected it to and one that doesn’t. Cost estimates based on HomeAdvisor/Angi 2025 national averages and NAHB Cost of Construction Survey data. Verify current pricing with local contractors and suppliers before budgeting.

Rewiring a house runs $10,000 to $30,000 for most US homes, or about $5 to $17 per square foot depending on size, access, and how much old wiring needs to come out. That gap is wide because two houses with identical square footage can price out $15,000 apart once an electrician sees what’s actually behind the walls. I’ve watched homeowners go into this process anchored to a number they read online, then get blindsided when plaster walls, a tight attic, or a panel running at 100-amp service adds four figures to the estimate. The goal of this article is to make sure that doesn’t happen to you. Cost Note: Figures in this article are estimates based on national averages. Actual costs vary significantly by region, contractor, materials, and project scope. Always get at least three quotes before committing to any project above $1,000. Safety Note: House rewiring involves live electrical systems. All rewiring work requires a licensed electrician in virtually every US jurisdiction. Never attempt whole-home rewiring as a DIY project, as improper wiring is a leading cause of residential fires. Check your local permit requirements before any work begins. House Rewiring Cost by Home Size Square footage is the fastest way to build a rough budget before you call anyone. A larger home needs more wire runs, more outlet placements, and more crew hours, so cost generally scales with size. Use these ranges as your planning frame, not your final number. Home Size Low Estimate High Estimate What Drives Variation 1,000 sq ft $5,000 $17,000 Open access, simple layout vs. finished ceilings, older wiring 1,500 sq ft $7,500 $25,500 Number of circuits, panel work, plaster vs. drywall 2,000 sq ft $10,000 $34,000 Two-story access challenges, knob-and-tube removal 2,500 sq ft $12,500 $42,500+ High-demand rooms, service upgrade, asbestos or hazmat discoveries The low end of each range assumes the electrician has reasonable access, clean drywall construction, and a panel that can be upgraded without a full service replacement. The high end assumes plaster walls, tight attic or crawlspace access, aging knob-and-tube wiring, and a panel running out of headroom. Both scenarios involve the same square footage, which is exactly why size alone doesn’t tell the full story. Cost Per Square Foot: How the Math Works Electrical rewiring costs roughly $5 to $17 per square foot for an existing home. The shortcut: multiply your home’s square footage by both ends of that range to get a quick budget window. A 1,800 sq ft house runs $9,000 on the low end and $30,600 on the high end before any extras. I use per-square-foot pricing only to walk into quote conversations with a calibrated expectation. If an estimate lands well below $5 per square foot, ask what it excludes. If it lands above $17, ask why. The answer may be completely legitimate, or it may be a red flag. Pro Tip: Per-square-foot pricing reflects wire runs and outlet placements, not access difficulty. A 1,200 sq ft home with plaster walls and a finished basement ceiling can price like a 2,500 sq ft home with open framing. Never use the per-square-foot figure without asking the electrician what it assumes about access. New Construction Electrical Cost vs. Rewiring: What the Difference Actually Means New construction electrical cost per square foot typically runs $3 to $5, meaningfully lower than the $5 to $17 range for rewiring an existing home. That gap confuses homeowners who see new-build numbers cited online and wonder why their estimate is higher. The reason is straightforward: new construction wiring happens before walls are closed. The electrician runs wire through open framing, places boxes in unfinished space, and works without any finished surface in the way. There’s nothing to protect, nothing to patch, and no guesswork about where the wire can travel. Rewiring an existing home is a completely different job. The electrician has to navigate around finished rooms, push wire through closed cavities, minimize damage to ceilings and walls, and work with whatever the original builder left behind. Every foot of wire costs more to install when access is limited. That’s not markup; that’s labor. If you see new-construction pricing and wonder why your rewire quote is higher, the access gap is the reason. What Drives the Cost: Five Factors That Move the Number Most Square footage sets the baseline. These five factors are what move an estimate above or below it. 1. Wiring Type and Age Knob-and-tube wiring, common in homes built before 1950, takes more time to remove safely than modern wiring because it’s ungrounded, often runs through insulation, and requires careful tracing before disconnection. Aluminum wiring from the 1960s and 70s needs specific connection hardware at every junction point to prevent fire risk. Cloth-wrapped wiring from the same era is brittle and unpredictable once disturbed. None of these automatically means the whole house needs replacement, but all of them add labor. A home where the electrician can pull old wire in straightforward runs will price lower than one where every room requires tracing, testing, and careful extraction before new wire can go in. Pro Tip: Before requesting quotes, locate any home inspection report, seller disclosure, or past electrical invoice. Electricians who know the wiring type upfront can price more accurately, and you’ll have a better basis for comparing estimates. 2. Wall and Ceiling Access Access is the most unpredictable cost driver. An attic with clear runs to exterior walls is an electrician’s best-case scenario. A finished basement ceiling directly below a living room, where outlets need to be relocated, is the opposite. Tight wall cavities, plaster walls (which crack rather than cut cleanly), built-in shelving, and blocked ceiling paths all add time to every single circuit. I always ask homeowners to walk me through their home before I price it. If I know there’s a cathedral ceiling in the master bedroom or a brick interior wall in the kitchen before I write numbers, the estimate is more accurate from the start. Surprises mid-project cost more than surprises during the walkthrough. 3. Electrical Panel Capacity Rewiring the home’s circuits doesn’t automatically solve a panel that’s out of capacity. A 100-amp service panel, standard in homes built before the 1970s, often can’t support the load of a modern household running central air, an electric range, EV charging, and a home office simultaneously. Upgrading from 100-amp to 200-amp service adds roughly $1,500 to $4,000 to the project, depending on whether the utility company needs to move the meter, the panel location, and local permit requirements. If you’re planning an EV charger, finished basement, or home addition after the rewire, discuss panel capacity in the same conversation. Doing it twice costs more than doing it right once. For context on how panel upgrades factor into broader home improvement projects, the cost to finish a basement often includes a panel upgrade line item for the same reason. 4. Room-by-Room Demand Not every room is priced the same. Bedrooms typically need a few circuits and a handful of outlets, which is straightforward work. Kitchens require dedicated 20-amp circuits for large appliances, GFCI outlets within 6 feet of the sink, and often a separate circuit for the refrigerator, dishwasher, and microwave. Bathrooms need GFCI protection on all outlets. Laundry rooms need a dedicated 240-volt circuit for the dryer. A home office used for multiple monitors, external drives, and video production equipment puts far more demand on the wiring than the “spare bedroom” label suggests. Tell the electrician how you actually use each room, not what it’s called on the floor plan. 5. Permit and Inspection Costs Most jurisdictions require a permit for whole-home rewiring, and some require a separate electrical inspection before walls are closed. Permit fees vary by county; expect $500 to $2,000 depending on project scope and location. The electrician typically pulls the permit, but confirm this in writing before work starts. Some contracts expect the homeowner to handle permits, which changes your timeline and adds a step before work can legally begin. Skipping the permit to save money is a mistake that surfaces at resale. Buyers’ home inspections flag unpermitted electrical work, lenders sometimes won’t finance homes with open permit violations, and insurance companies have grounds to deny claims when unpermitted work is involved in a fire or damage event. A Full Cost Breakdown: What the Line Items Actually Are This is what a complete rewiring project typically consists of, priced individually. Not every project includes all of these, but knowing each line item helps you verify that a quote is complete before you sign. Line Item Low End High End What Drives Variation Wire and materials $1,500 $6,000 Home size, circuit count, wire grade Electrician labor $4,000 $18,000 Access difficulty, crew size, days on-site Panel upgrade (100A to 200A) $1,500 $4,000 Meter location, utility coordination, panel brand Outlets and switches $500 $2,500 Count, GFCI/AFCI requirements, finish grade Permits and inspections $500 $2,000 Jurisdiction, project scope, reinspection fees Drywall/plaster repair $500 $4,000 Number of access holes, surface type, paint matching The labor line is the one that surprises homeowners most. Electricians in high-cost metro areas (Boston, San Francisco, Seattle) bill $90 to $150+ per hour. Rural or mid-sized markets typically run $60 to $90. A two-person crew on a 1,500 sq ft rewire might spend four to six days on-site. That labor total, before materials or permits, can exceed the cost of the wire itself on a complex project. What Homeowners Actually Pay: Three Real-World Examples National averages only go so far. These examples, drawn from homeowner discussions about actual projects, show how the same baseline question produces very different answers depending on the house. Lower-Cost Example: 1,500 sq ft Townhome, $11,000 A 1,500 sq ft townhome rewired from knob-and-tube wiring came in at $11,000. The details that kept it on the lower end: drywall construction (not plaster), a single-story layout, accessible attic, no panel upgrade required, and a relatively simple circuit layout. That’s what the low end of the range actually looks like. Not a bare-bones quote, but a project where the access conditions went in the homeowner’s favor. Mid-Range Example: 1,200 sq ft Two-Story, $14,000 A 1,200 sq ft two-story home had remaining knob-and-tube wiring updated, the panel moved, and service brought to 200 amps. The project took four days. At $14,000, this sits comfortably in the mid-range. The job had real scope (panel relocation, service upgrade) but the electrician didn’t encounter serious access problems in every room. High-Cost Example: Older Home with Plaster, $40,000 A full knob-and-tube replacement in an older home with plaster walls, basement ceiling removal, attic insulation removal, and asbestos-related delays reached $40,000. This is what the top end looks like. It’s not a contractor overcharging; it’s what happens when difficult materials, hazmat protocols, and blocked access converge on the same project. Older homes with these characteristics routinely exceed published national averages. The practical takeaway is to use these examples for pattern recognition, not direct comparison. Your house has its own access conditions, its own wiring history, and its own panel story. Local quotes from licensed electricians who have walked your home are the only numbers that actually apply. How to Tell If a Quote is Fair A quote can be low because the job is straightforward, or because the contractor left out half the work. Before you choose, verify that each estimate covers the same scope. What to Check Why It Matters What to Ask Full vs. partial rewire Defines the project scope Which rooms and circuits are included? Permit handling Avoids compliance gaps Who pulls the permit: you or the electrician? Panel work Can add $1,500 to $4,000 if excluded Is panel upgrade or relocation included? Wall repair Drywall patching is often not included Who repairs access holes after work? Inspection support Confirms the job closes properly Do you attend the inspection or handle callbacks? Warranty Protects you after completion What’s covered and for how long? If one bid comes in 30% lower than the others, ask what it excludes before celebrating. The most common omissions are wall repair, permit fees, and panel work. A quote without those line items isn’t necessarily dishonest, but it’s not a complete price either. Extra Costs That Don’t Show Up in the Electrical Quote The electrician’s invoice ends when the wiring is done. The project isn’t over at that point. Drywall repair after access cuts typically runs $500 to $4,000 depending on how many walls were opened and whether the surfaces require texture matching or paint blending. Plaster is more expensive to repair than drywall. The material behaves differently and most drywall contractors don’t patch it to the same standard. If your home has original plaster, budget separately for a plasterer, not just a drywall finisher. Furniture moving, temporary hotel nights during heavy work, and hidden damage discovered once walls are opened (old leaks, improper splices from previous owners, pest damage in wall cavities) are all legitimate budget items that a fixed-price quote can’t anticipate. I tell homeowners to hold 10 to 15% of their electrical budget in reserve for this category. It doesn’t always get spent, but the projects where it doesn’t get spent are the lucky ones. Signs Your House May Need Rewiring Electrical problems rarely announce themselves clearly. They start as small, repeated annoyances and grow from there. If you’re consistently seeing more than one item on this list, schedule an inspection with a licensed electrician rather than waiting for the issue to resolve on its own. Breakers tripping more than once a month on the same circuit Lights flicker when large appliances run Outlets that feel warm to the touch Burning smell near switches or outlet plates Buzzing or crackling from light switches Scorch marks or discoloration around outlet covers Two-prong ungrounded outlets throughout most of the home Fuse box (not a circuit breaker panel) Home inspection report flagging aluminum wiring, knob-and-tube, or sub-standard grounding Each of these on its own might be an isolated fix. Several together, especially in an older home, usually point to a system that’s been running past its useful life. The inspection cost ($100 to $250 for most electricians) is the cheapest information you can buy before committing to a full rewire budget. Budget Tips That Actually Work The legitimate savings in a rewire project come from project management decisions, not from cutting corners on the electrical work itself. Here’s what makes a real difference: Time it with a renovation. If you’re already opening walls for a kitchen remodel, bathroom update, or home addition, rewiring those spaces simultaneously eliminates most of the access labor cost. The walls are already open. Clear the rooms before day one. Furniture, boxes, and wall items that haven’t been moved before the crew arrives slow down every circuit. Electricians bill by the hour for time spent working around obstacles. Lock in the scope before work starts. Adding a circuit, moving an outlet, or expanding to another room mid-project costs significantly more than planning it upfront. Scope creep is one of the most consistent drivers of final invoices exceeding initial estimates. Get three written estimates. Not three verbal conversations. Three written scopes with line items. The differences between them will tell you more about what you’re actually buying than any single number. Don’t skip the permit. A failed inspection after the fact, or a compliance issue discovered during resale, will cost more than the permit ever would have. This is especially relevant if you’re also working through the cost of a sunroom addition or another permitted project simultaneously. Permits are always cheaper than the alternative. Hire licensed electricians for major work. An unlicensed contractor doing whole-home rewiring creates liability you’ll carry indefinitely. Insurance claims, resale inspections, and permit compliance all touch this decision. Frequently Asked Questions These are the questions homeowners ask most often after they get a first estimate and start trying to make sense of it. How much does it cost to rewire a house completely? A complete house rewire typically runs $10,000 to $30,000, or $5 to $17 per square foot. The final number depends on home size, access conditions, panel capacity, and whether old wiring like knob-and-tube needs careful removal. What is the average cost to rewire a house? The national average lands around $12,000 to $18,000 for a 1,500 to 2,000 sq ft home with moderate access and a panel upgrade included. Homes with plaster walls, difficult access, or hazmat discoveries regularly exceed this range. How much does it cost to rewire a 3 bedroom house? A three-bedroom home typically falls between 1,200 and 2,000 sq ft, putting the rewire cost at roughly $10,000 to $34,000. Kitchen and bathroom circuit requirements, not just bedroom count, drive much of the final number. How much does it cost to rewire a whole house vs. partial rewire? A partial rewire targeting specific circuits or rooms costs less upfront but may require a second visit if more problems surface. Whole-home rewiring is generally more cost-efficient per circuit when the electrical system is broadly outdated. Does homeowners insurance cover house rewiring? Standard homeowners insurance doesn’t cover rewiring for age or obsolescence. It may respond to electrical damage from a covered event, but that depends entirely on your policy. Call your insurer before work starts to understand what documentation they require for completed licensed work. Can rewiring a house increase home value? Rewiring doesn’t produce a visible ROI like a kitchen remodel, but it reduces buyer objections at inspection. Buyers in older home markets often negotiate harder or walk away when inspection reports flag outdated electrical systems. Updated wiring gives you more control over that conversation. Do you need a permit to rewire a house? Yes, in virtually every US jurisdiction, whole-home rewiring requires a permit and inspection. The electrician typically pulls it. Keep copies of permits and inspection sign-offs permanently; they’re required documentation when you sell. How long does it take to rewire a house? Most whole-home rewires take three to seven days for a 1,500 to 2,500 sq ft home with a two-person crew. Plaster walls, blocked access, or permit delays extend that timeline. Ask for a room-by-room schedule before work begins. Can you live in a house during rewiring? Sometimes, but it’s uncomfortable. Power shutoffs, open walls, dust, and noise make full-home rewiring disruptive. Smaller, room-by-room projects are more manageable. Discuss which rooms are affected each day so you can plan meals, work, and sleeping arrangements. Can you finance a house rewire? Yes. Personal loans, home equity loans, HELOCs, and some contractor financing programs all cover rewiring costs. Compare total repayment cost, not just monthly payments. Confirm deposit and draw schedule requirements match your financing timeline before signing anything. Summing Up After ten years of helping homeowners navigate home-building budgets, I’ll give you the direct answer: yes, when the system needs it. A $10,000 to $30,000 rewire is a significant number, but the electrical system in a home built before 1970 was never designed for the load of a modern household. The homeowners who put this off long enough usually end up paying more, whether in emergency repairs, failed inspection negotiations at resale, or insurance complications after a fire traced back to old wiring. Get three written estimates from licensed electricians, understand what each one includes on panel work and permits, and ask the one concrete question that matters: what will you find once the walls are open? The answer shapes the real budget more than any national average ever will. Cost estimates based on HomeGuide and Angi national averages, 2025-2026. Verify current pricing with local licensed electricians before committing to any project.
Messy pantry shelves slow everything down. You buy food you already have, lose ingredients behind boxes, and find expired items after it is too late to use them. I know a pantry can get out of hand fast, especially when busy weeks turn into quick drop-offs and half-used bags. Learning how to organize kitchen pantry spaces gives you a cleaner setup that makes cooking, shopping, and meal planning easier. This article gives you a simple pantry reset, clear storage zones, smart layout tips, and easy upkeep habits. You’ll get a pantry that is easier to use, quicker to restock, and simpler to maintain during busy weeks. Why an Organized Kitchen Pantry Matters A pantry is easy to ignore until it starts making daily cooking harder. When shelves are crowded or mixed up, you waste time searching, buy the same items again, and forget about food before it expires. A clear pantry setup helps you see what you have, plan meals faster, and keep grocery trips more focused, the same principle behind a minimalist kitchen design where every element earns its place. It also makes cleanup easier because every item has a place to return to. Before you start buying bins or labels, it helps to understand that pantry organization is not just about looks. It is about making your kitchen easier to use every day. How to Organize Kitchen Pantry Shelves Step by Step Pantry organization works best when you follow a clear order. If you start by buying bins or moving items around without a plan, the shelves can look better for a few days but will fall apart quickly again. This step-by-step pantry reset keeps the process simple. You will clear the shelves, sort what you have, create useful zones, and set up a system that is easier to keep tidy after grocery trips. Step 1: Empty the Pantry and Clean It Take everything out of the pantry and place it on a counter, table, or clean floor area. This helps you see the full amount of food, containers, and supplies you have before anything goes back in. Keep a trash bag, a recycling bag, a donation bag, and a cleaning cloth nearby before you start. Once the shelves are empty, wipe them down, clean the corners, and sweep or vacuum the floor if needed. Let the shelves dry fully before you restock the pantry. Pro Tip: Before wiping down shelves, check the shelf depth with a tape measure. Shelves deeper than 16 inches almost always need a pull-out bin or handled basket to make the back row usable, without one, that space gets abandoned within a few weeks of reorganizing. Step 2: Check Every Item and Remove What Does Not Belong Go through each item one by one before you start sorting. Throw away expired food, stale snacks, broken packets, and anything your household will not use. You can also combine duplicate packets if they are the same food and still fresh. If you find unopened extras that are still safe and sealed, set them aside for donation. This clears space without wasting food that someone else can use. Step 3: Sort the Remaining Food Into Clear Groups Place similar items together outside the pantry before you restock the shelves. This makes it easier to see which categories need the most space. Create groups such as breakfast, snacks, baking, canned goods, rice and grains, pasta, spices, sauces, tea and coffee, and backup items. Use groups that match your cooking habits, and do not create a baking section if you only own one bag of flour. Step 4: Move Dry Goods Into Containers and Prepare Bins Before anything goes back into the pantry, transfer daily dry goods into airtight containers. This works well for rice, pasta, flour, sugar, lentils, cereal, oats, and snacks. Clear containers are especially useful because you can see what is running low without opening them. Use bins or baskets for loose packets, spice mixes, tea bags, small snack packs, and items that tend to fall over. This keeps smaller foods from getting lost at the back of the shelf. Step 5: Label the Containers and Bins Label each container and bin before placing them on the shelves. Keep the labels simple so everyone can understand where items belong. Use clear labels such as Rice, Pasta, Snacks, Baking, Tea, Spices, Cans, and Breakfast. Label after you know your categories, but before restocking, so the pantry does not get messy again while you arrange it. Step 6: Assign Shelf Zones and Place Everything Back Decide where each group will go, then place items back into those zones. Keep daily-use items at eye level, heavy staples on lower shelves, snacks within easy reach, and rarely used items on higher shelves. Try to give each shelf a clear purpose so the pantry is easier to use, much like decorating shelves elsewhere in your home, where grouping and spacing do the heavy lifting. Put older items at the front and newer items behind them so food gets used in the right order. Step 7: Add a Simple Restock System Create one small place to track items that are running low. This can be a notepad inside the pantry door, a phone grocery list, or a small “buy soon” bin. A restock system helps you avoid guessing during grocery trips and lowers the chance of buying duplicates when you already have food tucked away. This step is useful, but optional; if it feels like too much, a phone list is enough. Pantry Storage Tools Worth Using If packets fall over, use a bin. If bottles get lost in the back, try a lazy Susan, the same tools that work well inside kitchen cabinet styles built around deep or blind-corner storage. If cans block each other, a shelf riser may help. The best choice is the one that makes the shelf easier to use every week. Storage Tool Best Use Skip It When Clear bins Loose snacks, packets, baking extras, and backstock The bin is too deep to pull out easily Airtight containers Daily dry goods like flour, rice, oats, cereal, and pasta The item is rarely used or is already well stored Lazy Susan Oils, sauces, vinegars, spreads, and small bottles The shelf is too narrow for it to spin Shelf risers Cans, jars, spices, and short containers The shelf height is already tight Over-the-door rack Small packets, wraps, spices, snacks, and bottles The pantry door cannot close properly Pull-out baskets Deep shelves and lower cabinets The basket blocks taller food items The best organizers are the ones you can use without extra effort every week. If a tool makes food harder to reach, blocks the shelf, or creates more steps, it probably does not belong in your pantry. Pantry Layout Tips for Different Kitchen Sizes The best layout starts with the main problem in your space. Once you know what makes the pantry hard to use, you can choose storage that improves visibility, reach, and restocking. 1. Small Closet Pantry A small closet pantry can get crowded fast because items often sit on top of one another. Snacks, cans, baking supplies, and breakfast foods may end up stacked in layers, making it hard to see what you already have. This type of pantry works best when every shelf has a clear job. Use one shelf for daily breakfast items, another for snacks, and another for canned goods, grains, or baking supplies. Try to leave a little breathing room on each shelf instead of filling every inch. Even a small gap makes it easier to pull out a bin, check what is inside, and put groceries away without creating another pile. 2. Deep Shelves Deep pantry shelves often hide food in the back. This can lead to duplicate purchases, expired items, and half-used packets that are forgotten until the next big cleanout. This layout works best when you make the back of the shelf easier to reach. Long bins, handled baskets, and pull-out organizers can help you bring the whole group forward instead of moving items one by one. Use pull-out bins, lazy Susans, or front-to-back rows so items do not disappear. Keep the foods you use most often near the front, and store backstock or less-used items in clearly marked zones toward the back. 3. Cabinet Pantry A cabinet pantry usually has limited vertical space, so short items can waste shelf height. Small boxes, jars, packets, and cans may sit in one flat layer, leaving unused space above them. This type of pantry works better when you create levels inside the cabinet. Shelf risers can lift cans, jars, and spices so the back row is easier to see, while stackable bins can hold snacks, packets, or backup items. Try not to overload the cabinet with too many containers. A simple setup with clear zones usually works better than stacking items so high that they become hard to pull out. 4. Wire Shelf Pantry Wire shelves can be tricky because small items tip over or fall through the gaps. Packets, spice jars, small cans, and narrow containers can become messy even when you try to keep them grouped. Use solid-bottom bins, trays, or shelf liners to create a steadier surface. This gives small items a flat base and makes shelves easier to wipe, straighten, and restock. Choose bins that slide easily across the shelf and do not catch on the wire. That small detail can make everyday restocking much smoother. 5. No-Pantry Kitchen A no-pantry kitchen can feel scattered because food may be split across several cabinets, drawers, or shelves. When pantry items do not have one clear home, grocery planning and meal prep become harder. This setup works best when you create one main food zone, even if it is small. A single cabinet, rolling cart, open shelf, or over-the-door rack can hold the foods you reach for most often. Create one main food zone using a cabinet, cart, open shelf, or over-the-door rack. Even an awkward pantry can work better when each shelf or storage area has a clear job. Focus on visibility, easy reach, and simple restocking before adding extra organizers. What Not to Buy Before You Organize Before spending money, clear the pantry, sort your food, and measure the space. This helps you avoid buying tools that look nice but do not solve the real problem. Matching Containers: Decanting works best for foods you use often, such as cereal, rice, oats, flour, sugar, or pasta. It can become extra work when every single package has to be opened, poured, labeled, and refilled. Deep Bins: Avoid bins that leave too much unused space behind them or become too heavy to pull out. A bin should help you reach food faster, not turn the shelf into another place where items get buried. Tiny Labels: Small, detailed labels are easy to ignore, especially in a busy kitchen. Use simple category labels that family members can read quickly, such as snacks, baking, breakfast, pasta, canned goods, and backstock. Oversized Bulk Items: Bulk buying only helps when you have a clear place to store the extras and a plan to use the food. Without a backstock area, large packages can crowd daily shelves and make duplicates harder to track. The goal is not to avoid all pantry products. It is to buy the right ones after you understand your space, your food habits, and the items that keep causing clutter. How to Reduce Food Waste With Pantry Organization A few small habits can help you waste less food and avoid opening new packages too soon. Keep older and open items easy to see so they get used first. Keep open, older, or soon-to-expire food in one visible bin. Group open crackers, pasta, cereal, chips, and baking items together. Store older food in front and newer food behind it. Add purchase or best-by dates to decanted staples with removable labels. These quick checks work best during your regular grocery routine. Rotate food as you restock, and your pantry will stay easier to shop from each week. How to Keep Your Pantry Organized After Grocery Shopping Pantry organization can fall apart quickly after a grocery trip if new items are pushed onto any open shelf. A simple restocking routine helps you keep the system working without doing a full reset every week. Start by unboxing bulky items when the inner packaging is sealed and easy to store. Next, restock each pantry zone before adding new food wherever there is room. This keeps your pantry easy to shop from later. When you add new groceries, place newer items behind older ones. This keeps open, older, or soon-to-expire food visible at the front so it gets used first. A good maintenance routine should feel quick and realistic. Frequently Asked Questions How often should you clean out a pantry? A quick pantry reset once a week works well for most homes. Do a deeper clean every season to check dates, wipe shelves, and fix zones that no longer work. Should spices go in the pantry or near the stove? Spices are best stored in a cool, dry spot away from heat and light. A pantry, drawer, or cabinet near the prep area usually works better than right beside the stove. What foods should not be stored together in a pantry? Keep potatoes away from onions because they can spoil faster together. Also, separate strong-smelling foods from dry goods that can absorb odors, such as flour, cereal, crackers, and rice. What should go on the top pantry shelf? Use the top shelf for light items you do not need every day. Extra paper goods, party supplies, seasonal baking items, and backup snacks can work well there if they are easy to lift safely. How do you organize a pantry for kids? Place kid-friendly snacks, breakfast bars, and lunch items in a low open bin. Keep messy, breakable, or parent-only items higher so children can help themselves without pulling everything apart. The Bottom Line Here’s the honest measure: a well-organized kitchen pantry is one you can restock in under five minutes without creating new piles, and where you can confirm whether an ingredient is in stock without moving anything out of the way. If the reset you’ve done passes both tests next grocery day, it’s working. If it doesn’t, the fix is almost always one of two things: zones that don’t match how you actually cook, or bins that are too deep to use daily. Start with whichever one is breaking down first. Move one category, adjust one bin size, and see if the behavior sticks. Pantry organization that works isn’t built in a day; it’s calibrated over a few grocery cycles until the system fits the way the kitchen actually runs.
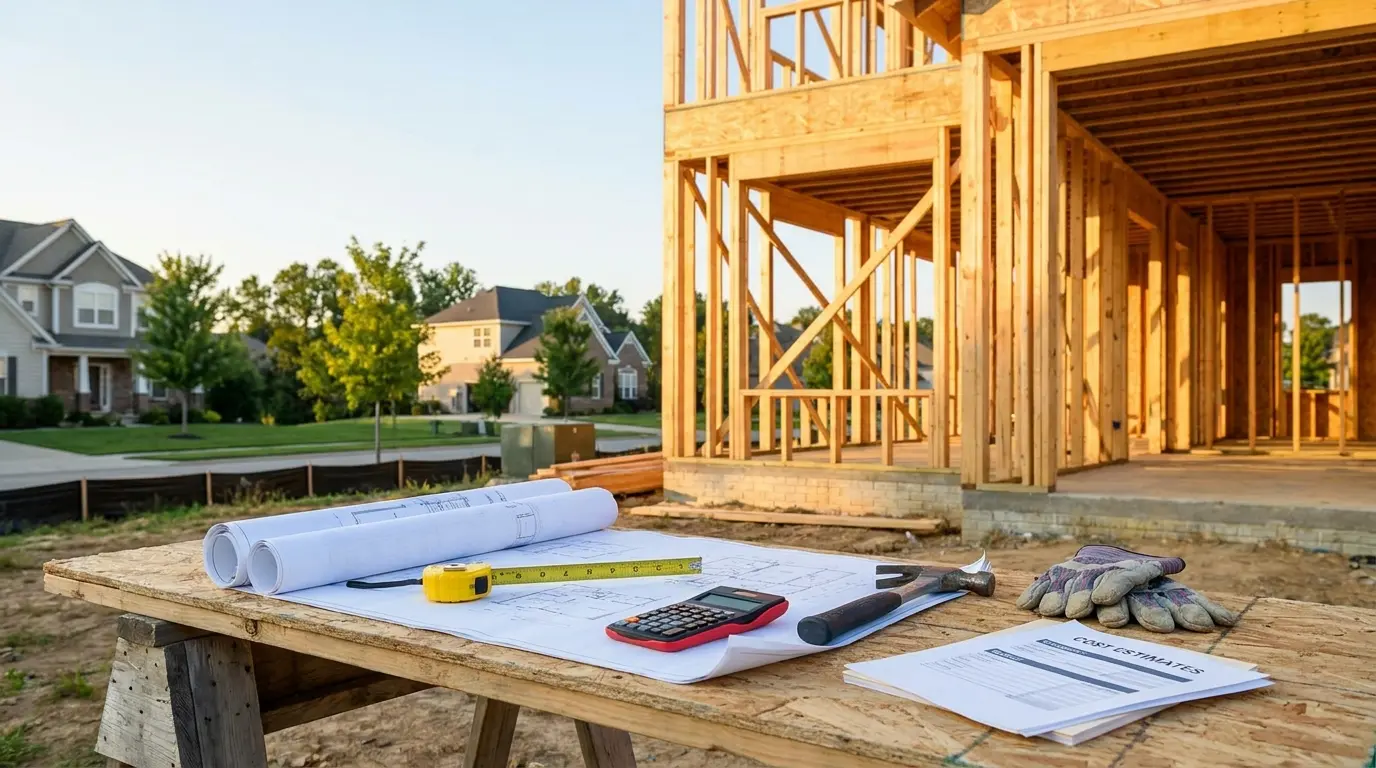
Building a new home in the U.S. costs between $150 and $300 per square foot on average, which puts a 2,000-square-foot house somewhere between $300,000 and $600,000 in construction costs alone, before land, permits, or site work enter the picture. That range sounds wide because it is. The average cost to build a house shifts meaningfully based on where you build, who you hire, and what you choose to include. Most people arrive at this number after seeing a single figure online and wondering why their local builder’s quote looks so different. The gap usually comes down to what the quote actually covers and what it quietly leaves out. This article breaks that down so you can read a builder’s bid with your eyes open. Quick Glance: Average Cost to Build a House Before you get into the line items, it helps to see the full range in one place. These figures reflect construction costs for a new build. Land, site prep, permits, and utilities are separate. Build Type Cost Per Square Foot Estimated Cost for 2,000 Sq. Ft. What Drives the Variation Basic build $150 to $200 $300,000 to $400,000 Standard floor plans, builder-grade finishes, minimal customization. Mid-range build $200 to $300 $400,000 to $600,000 Upgraded finishes, better materials, more design flexibility. High-end or custom build $300 to $500+ $600,000 to $1,000,000+ Custom layouts, premium finishes, specialized labor, high-end features. These ranges track with NAHB’s 2024 Cost of Constructing a Home survey, which puts the national average at roughly $162 per square foot excluding land and general contractor overhead. Once you add a GC’s fee, typically 15 to 25%, the effective average climbs closer to $195 per square foot. Use this table as a planning baseline, not a final bid. What Is Included in the Average Cost to Build a House? The average cost to build a house in the U.S. typically covers the work required to make the home livable: foundation, framing, roof, siding, windows, exterior doors, plumbing, electrical, HVAC, insulation, drywall, flooring, paint, cabinets, countertops, standard fixtures, and basic appliances. What varies is the quality level assigned to each of those line items. One builder’s quote may include vinyl flooring and stock cabinets. Another allows for hardwood, tile, or semi-custom cabinetry. The gap between those two quotes can be $30,000 to $80,000 on a mid-size home, without a single layout change. That is why the allowance sheet matters more than the total number. Several costs commonly sit outside the base price. These include: Land purchase and survey fees Soil testing and geotechnical reports Lot clearing, grading, and drainage work Permits, impact fees, and plan review Utility hookups, water, sewer, electric, gas Septic systems or well drilling on rural lots Driveway construction and landscaping Construction loan interest and temporary housing Change orders added after work begins Before comparing bids, ask every builder for a written scope, a finish allowance list, and a clear exclusions page. The builder with the lowest number may simply be the one who excluded the most. Average Cost Per Square Foot to Build a House The average cost per square foot to build a house helps you create a rough budget before you talk to builders or choose finishes. It is useful, but it should not be treated as a final quote, as location, design, labor, and materials can affect the price. Here is a simple way to compare common square-foot cost ranges: Cost Range Per Sq. Ft. Typical Build Type Common Characteristics $150 to $200 Basic Home Standard floor plans, builder-grade finishes, straightforward construction, and fewer custom features. $200 to $300 Mid-Range Home Larger floor plans, upgraded finishes, better-quality materials, and more design flexibility. $300 to $500+ Custom or Luxury Home Custom layouts, premium finishes, specialized labor, and high-end features. Use these ranges as a planning guide, not a fixed price. A 2,000-square-foot house at $225 per square foot may start around $450,000 for construction, but that may not include land, permits, utilities, site prep, driveway work, or landscaping. Note: Costs can vary significantly depending on where you build. The Northeast and West Coast often run higher due to labor, code requirements, and land prices. Many parts of the Midwest and South may be more affordable. Mountain areas can increase excavation costs, while coastal locations may require stronger materials to withstand storms, moisture, or wind. How to Estimate Your Total Home-Building Budget A smart budget should not stop at the builder’s base price. I would build it in layers so you can see the full project, not just the house. Start with the main construction number, then add land, site work, permits, design, utilities, outdoor basics, financing costs, and a safety cushion. Use this simple formula before speaking with builders: Total estimated cost = construction + land + site work + permits and design + utilities + outdoor work + financing costs + contingency Note: A full home-building budget should always leave room for surprises. Even with a clear estimate, site issues, permit delays, material changes, or upgrades can shift the final price. I would keep a 10% to 20% cushion so you are not forced into rushed decisions later What Affects the Average Cost to Build a House? No two home builds price out the same way. Even if two homes have the same square footage, the final quote can change because of the market, the lot, the plan, and the finish choices. These factors explain why your estimate may look different from someone else’s. 1. Location, Labor, and Local Rules Your building area sets the pricing environment before any work begins. A home in a busy metro area, coastal county, or fast-growing suburb may be priced differently than one in a smaller inland town because builders work under different market pressures. Here are the local cost factors that can change your quote: Contractor availability: When good builders and subcontractors are booked out, prices can rise because there is more demand for their time. This can affect scheduling, bid amounts, and how flexible the builder is with changes. Local approval process: Some areas require more inspections, review steps, energy standards, or impact fees. These rules can add cost even when the house plan itself stays the same. 2. Land, Site Condition, and Utility Access The lot shapes the budget before the foundation is poured. A piece of land priced below market often has a reason: access issues, unstable soil, or a need for significant prep work. The two site-related factors worth checking early: Build-ready versus raw land: A developed subdivision lot typically has road access, drainage, and nearby utilities. Raw land may need clearing, grading, soil testing, and drainage planning before construction can start. Knowing what you are buying changes the true land cost significantly. Once you have chosen your lot, it is worth reading through the different foundation types for residential homes early, since the site condition often dictates which option is structurally viable. Utility connection needs: Lots on public water and sewer have predictable hookup costs. Rural properties may need a well, septic system, propane setup, or a long run of electric line from the nearest service point, costs that can easily reach $20,000 to $50,000 before framing begins. 3. Home Design, Size, and Finish Level The house plan determines how much labor and coordination the build requires. A simple rectangular layout with a single roofline is less expensive to build than the same square footage spread across a complex shape. These two design choices move the number the most: Structural complexity: Vaulted ceilings, large open spans, oversized windows, multiple rooflines, and unusual room geometry all require more planning and more skilled trades. A hip roof, for example, costs more to frame and flash than a gable. Understanding how hip roofs are built and priced helps you evaluate whether the design premium is worth it on your specific plan. Finish allowances: Builders set dollar allowances for cabinets, flooring, countertops, lighting, and appliances. If your selections exceed those amounts, the difference is added to your final invoice. A $5,000 cabinet allowance and a $20,000 cabinet allowance produce the same floor plan on paper but a very different final bill. How to Control Costs During the Building Process A home-building budget changes as the project moves from planning to final touches. If you know where money usually goes, you can make smarter choices early and avoid spending on changes that do not add real value. Here is a simple way to see where costs appear and how you can control them: Budget Area Where Money Goes How to Control the Cost Planning Stage Design, permits, engineering, builder scope, and finish allowances. Finalize the floor plan, review the builder scope, and set clear allowances before work starts. Structure Foundation, framing, roofing, windows, doors, and exterior walls. Keep the layout simple, use standard sizes, and avoid too many rooflines or unusual shapes. Major Systems Plumbing, electrical, HVAC, insulation, and behind-the-wall work. Avoid late layout changes and keep kitchens, bathrooms, and mechanical areas planned clearly. Interior Finishes Cabinets, countertops, flooring, lighting, fixtures, trim, and appliances. Choose mid-range durable finishes and track every selection against your allowance list. This is where most new home budgets quietly break. If you are planning to paint the interior after move-in, factor that into your finish budget now rather than treating it as a later expense. Final Extras Landscaping, fencing, decks, built-ins, bonus rooms, and outdoor details. Defer non-essential exterior work if the main budget is running tight. A driveway and basic grading should be in the original scope, but driveway materials and finishes can be decided and priced separately from the house structure. The goal is not to cut every corner. It is to spend with intention. I would protect the parts that affect safety, comfort, and long-term use, then delay extras that can be added later Common Budget Mistakes to Avoid When Building a House Budget mistakes usually happen when the early estimate looks simpler than the real project. A house build has many moving parts, so you need to check the quote, track decisions, and leave room for changes before work begins. Here are the mistakes I would avoid before signing a builder contract: Online averages: Treating broad cost ranges as final numbers can lead to a weak budget. Your city, lot, builder, design, and finish choices will shape the real cost. Unclear scope: Comparing builder quotes without checking what each one includes can mislead you. A lower bid may leave out allowances, site work, or key project details. Loose allowances: Choosing finishes without clear allowance limits can push your budget up fast. Cabinets, flooring, lighting, and appliances should have set price ranges early. Late changes: Making design changes after construction starts can increase labor, delay the schedule, and add change-order fees. Finalize major choices before work begins. Lowest bid: Picking the cheapest builder without checking past work, reviews, licensing, insurance, and communication style can create higher costs later. Building a House vs Buying a House Choosing between building and buying depends on your timeline, budget, location, and how much control you want. In fast-moving markets like parts of the West Coast or Northeast, buying may feel faster but more competitive. In many Midwest, Southern, or suburban areas, buildings may give you more room to plan around your needs. Here is a simple comparison to help you decide which option fits your situation better: Factor Building a House Buying a House Timeline Usually takes longer because you need land, permits, design, and construction time. Usually faster if you find a move-in-ready home. Cost Control Less predictable because site work, materials, and changes can affect the final price. More predictable because you know the sale price before closing. Design Choice Gives you more control over layout, finishes, energy features, and future use. Limited to the existing layout unless you renovate. Buyers who go this route often find that home renovation costs after purchase can close much of the gap with new construction. Location Options Depends on available lots, zoning rules, and utility access. Often gives more options in established neighborhoods. Early Repairs Usually fewer at first because the home, systems, and materials are new. Depends on the age, condition, and inspection results of the home. Best Fit Better if you want control and have time to manage the process. Better if you need to move sooner or want price certainty. Both choices can make sense. If you want a home shaped around your lifestyle, building may be worth the wait. If you need speed, a known price, or a specific school district or neighborhood, buying may be the smarter path. Frequently Asked Questions How long does it take to build a house? Most new homes take 7 to 12 months to build after permits are approved. The timeline depends on the builder’s schedule, weather, inspection delays, material lead times, and how quickly you finalize finish selections like flooring, cabinets, and fixtures. Do I need a construction loan to build a house? Most buyers use a construction loan if they are not paying cash. The loan covers building costs in draws as work is completed. Once the home is finished, it typically converts into a standard mortgage, though lender terms vary. Is it cheaper to build a one-story or two-story house? A two-story home can cost less per square foot because it uses a smaller foundation and roof footprint. A single-story home spread over a larger slab may carry higher foundation and roofing costs, though it is often easier for long-term accessibility. What is not included in a builder’s base price? Commonly excluded items include land, lot clearing, grading, permits, impact fees, utility hookups, septic or well systems, driveway work, landscaping, window coverings, and construction loan interest. Always request the exclusions list before comparing quotes. How much does land add to the cost of building a house? Land cost varies widely, from $5,000 to $10,000 per acre in rural areas to $100,000 or more for suburban or urban lots. According to NAHB data, finished lot cost represents roughly 18% of the total price of a new home nationally, though that share is higher in supply-constrained markets. What is a realistic contingency budget for a new home build? A 10% to 15% contingency is standard practice. On a $400,000 build, that means keeping $40,000 to $60,000 uncommitted until the project is substantially complete. Soil surprises, permit delays, and mid-build material changes are the most common reasons contingency gets used. Final Thoughts The average cost to build a house is only the starting point, not the finish line. I would use it to shape your budget, compare builder quotes, and decide what matters most before you commit. You now know how square-foot pricing works, why land and site costs matter, and where extra money can slip in. The best move is to take these ranges, adjust them for your area, and ask builders clear questions about scope, allowances, and change orders. When you plan this way, you are not just chasing a number. You are building with more control. If you are getting serious about your project, start by listing your must-haves and request detailed local estimates today.

Heard the term rough in plumbing and wondered why everyone treats it like such a big milestone? It can be confusing when you see open walls, exposed pipes, and no working fixtures yet. If you’re building a home or planning a remodel, you’re probably trying to understand what happens during rough-in plumbing and why it matters. I know it can feel overwhelming when contractors use unfamiliar terms without much explanation. The good news is that this stage is easier to understand than it sounds. By the end, you’ll know what a rough-in is, what plumbers install during this phase, why inspections matter, and how this work prepares your home for sinks, toilets, showers, and other finished fixtures. Cost Note: Figures in this article are estimates based on national averages from Angi and industry guides (2025). Actual costs vary significantly by region, contractor, pipe material, and number of fixtures. Always get at least three quotes before committing to any project above $1,000. What Is Rough-In Plumbing? Rough-in plumbing is the phase where plumbers install every pipe, drain, and vent connection inside open walls, floors, and ceilings before drywall, tile, or cabinetry goes up. By the time rough-in is done, your home has the full infrastructure for water supply and waste removal, but no visible fixtures yet. No faucets, no toilets, no showerheads. Think of it as the plumbing skeleton. Every fixture location is staked out and connected to the system. The toilet may not be there, but its drain stub-out is already set at the right distance from the wall. The shower may have nothing installed yet, but its valve, P-trap, and supply lines are roughed in and waiting. That positioning is what rough-in means: the hidden work that makes the finished work possible. Line Item Low End High End What Drives the Variation Single bathroom rough-in $3,000 $20,000 Fixture count, pipe material, labor rates Whole-house rough-in (2,000 sq ft) $8,000 $30,000 Number of bathrooms, stories, slab vs crawl space Cost per fixture (rough-in only) $300 $600 Fixture type, access difficulty, regional labor Cost per square foot $4.00 $15.00 Complexity, number of stacks, layout Finish plumbing (add after rough-in) $1,500 $6,000+ Fixture quality, number of trim items Those ranges are wide because rough-in cost is almost entirely driven by how many fixtures you have, what pipe material is used, how many stories the home has, and your regional labor market. A simple one-bathroom remodel in a single-story house with accessible walls is nothing like roughing in a three-bathroom custom home on a slab with a master suite above the garage. Both are “rough-in plumbing,” and the cost reflects the difference. What Happens During a Plumbing Rough-In? The plumber works from the building plan, marking fixture locations and running the three-core systems before any surface goes up. Here is what gets installed at each rough-in task. Rough-In Task What It Means Fixture layout Marks where toilets, sinks, tubs, showers, and appliances will go Water supply lines Runs hot and cold water pipes to each fixture location Drain lines Adds pipes that carry wastewater away from sinks, toilets, tubs, and showers Vent pipes Installs pipes that allow air movement through the drain system to prevent siphoning and odors Pipe supports Secures pipes so they stay stable inside walls or floors Pressure testing Checks water lines for leaks before walls are closed Inspection Confirms the rough-in meets local code before the next stage begins Most of this work happens during framing, before insulation and drywall. That open-wall window is the only practical time to run pipes cleanly. Once the walls close, access to fix problems costs significantly more. Rough-In Plumbing vs. Finish Plumbing This is the distinction I hear most homeowners mix up in their contracts, and it matters because the two phases are usually billed separately. Rough-in covers everything hidden: the drain pipes, vent stacks, supply lines, and stub-outs that end inside walls and floors. Finish plumbing, also called trim-out, is the second visit your plumber makes after drywall, tile, and cabinets are done. That is when the visible pieces get connected: toilets, faucets, showerheads, under-sink drain assemblies, and fixture valves. In a bathroom remodel, for example, painting shower tile is one of the final steps that only happens after finishing plumbing is complete. Comparison Point Rough-In Plumbing Finish Plumbing Main job Install hidden pipe routes Connect usable fixtures Timing Before drywall and finished surfaces After walls, floors, and cabinets Includes Drains, vents, supply lines, stub-outs Toilets, faucets, sinks, valves, trim Access needed Open framing Finished rooms Inspection type Rough inspection before covering Final inspection after fixture install Also called Rough-in phase Trim-out plumbing When you see a contract that lists rough-in and finish plumbing as separate line items, that is correct. Do not assume rough-in covers installed fixtures. If a contractor’s quote only mentions rough-in, ask explicitly what finish plumbing will add to the total. New Construction Plumbing Rough-In: Main Steps New construction rough-in happens after framing is complete and before insulation or drywall goes up. That open-wall window is the only practical time to run pipes cleanly through studs, joists, and slab penetrations. Understanding the full scope of a new build also means knowing what comes before the plumber even arrives, the structural decisions made at the framing stage, including the roof framing type, can affect how drain stacks are routed to the exterior. Here is how the rough-in process unfolds on a typical multi-bathroom new build. Confirm the whole-house rough-in plan has been reviewed and approved before framing closes. This walkthrough covers drain routing, fixture rough-ins, venting, water lines, and stack locations. The primary stack rises from the slab with a 45-degree offset, then runs through the floor joists. It serves the toilet, shower, and lavatory while maintaining proper drain pitch. A three-inch line connects to the toilet. A three-by-two wye sends two-inch piping to the shower P-trap and lavatory. The lavatory wet vents both fixtures. Upper-floor bathrooms tie into shared roof venting. Each includes a toilet, lavatory, and tile shower with valve rough-in and a handheld connection stub-out. Additional stacks serve secondary bathrooms, using three-inch toilet lines and two-inch branches for lavatories and tile showers, with P-traps insulated near unconditioned spaces like garages. The main workhorse stack handles the heaviest fixture load: laundry areas, a bar sink, and multiple bathrooms feeding into the same drain system. Laundry and utility rough-ins include a washing machine box, water heater stub-outs, and a floor drain or pan drain routed to the exterior. Upper-level plumbing often uses cast iron for the main stack to reduce noise transfer through floor assemblies. Island kitchen sinks and top-floor laundry add fixture complexity. Water supply uses PEX-A expansion pipe entering at 1.25 inches before splitting into two one-inch distribution systems, one for hot and one for cold. Each step builds on the one before it. Skipping the walkthrough at Step 1 or rushing the drain pitch at Step 2 creates problems that do not show up until the tile is in and the walls are closed. What Fixtures Are Planned During Rough-In? Every fixture that needs water, drainage, or both gets its position set during rough-in. The list matters because a missed fixture location means opening walls later at full remodel cost. Common fixture locations that must be staked out during rough-in include: toilets, bathroom sinks, kitchen sinks, showers, bathtubs, laundry sinks, washing machines, dishwashers, ice maker lines, water heaters, outdoor hose bibs, and floor drains. Shower rough-in is one of the more precise placements on this list. The valve position, drain center, and curb height all have to align with whatever small bathroom shower design you have chosen, because changing any of those dimensions after tile is in means demolition. The same logic applies to kitchen sinks: the drain stub-out position needs to match the cabinet layout, which is why the kitchen layout and design should be finalized before rough-in begins. Appliance connections are the most commonly forgotten category. If you plan to add a refrigerator ice maker, a bar sink, or a wet bar, those stub-outs need to be in the wall before drywall closes. Adding them after costs multiples of what they would cost during rough-in. Where Rough-In Plumbing Budgets Go Wrong This is where most homeowners get surprised. The rough-in quote looks manageable until one of these hits. Fixture Locations Are Changed After Rough-In Starts Moving a toilet drain six inches because the vanity turned out to be wider than planned is not a small job. The drain is already set in concrete or through framing. Changes mid-rough-in cost $500 to $2,000 per fixture relocation, depending on how far along the work is. Pipe Material Upgrades PEX is the most common supply pipe in new construction and runs $0.50 to $2.00 per linear foot for materials. Copper runs two to four times that. If the original quote assumed PEX and the inspector or HOA requires copper in certain sections, that gap adds up fast on a whole-house rough-in. Slab or Underground Work When drain lines have to go under a concrete slab, excavation and concrete patching add $1,500 to $5,000 or more on top of standard rough-in costs. This comes up in slab-on-grade homes and basement bathroom additions more often than homeowners expect. Inspection Corrections Failing the rough-in inspection is not a disaster, but it does cost time and sometimes money. Common correction items are drain slope, vent sizing, and pipe support spacing. Budget a buffer of 5 to 10 percent of the rough-in total for corrections, especially in jurisdictions with stricter inspectors. Finish Plumbing Treated as Included Some homeowners sign a rough-in contract and assume the fixtures will be installed in the same visit. They are not. Finish plumbing is a separate mobilization. If your contract does not include it, expect an additional $1,500 to $6,000 depending on fixture count and quality. The same budget discipline applies to other home systems: house painting costs, for instance, are also routinely underestimated when interior and exterior work are scoped separately. What is Negotiable vs. What Isn’t Rough-in pricing has real and fake flexibility. Here is where you can push back and where you cannot. Negotiable: Pipe material choice (PEX vs. CPVC for supply lines), fixture count (cutting a planned bar sink or second laundry location), timing flexibility if your schedule is not rigid, and bundling rough-in with finish plumbing in a single contract for a lower combined rate. Not negotiable: Permit fees, inspection scheduling, required drain slope per code (a quarter-inch drop per foot of horizontal run), vent sizing requirements, and licensed plumber requirements for any work that will be inspected. Asking a contractor to skip a permit to save money on rough-in plumbing is the single most expensive shortcut in residential construction. When you sell the home or file a claim, unpermitted plumbing becomes your problem. How Long Does Rough-In Plumbing Take? A small bathroom remodel takes one to two days of rough-in. A full new construction project on a two-story home with three bathrooms, a kitchen, and a laundry room takes four to seven days, sometimes longer if inspections require return visits or if the framing crew and plumbing crew have scheduling gaps. Delays are most common when fixture selections are not finalized before rough-in starts, when framing changes force pipe reroutes, or when the inspection is scheduled but the work is not ready. All three of those delays are preventable with better planning before the plumber mobilizes. Questions to Ask Your Contractor Before Rough-In Starts These are the questions I recommend asking before you sign anything or before the first pipe goes in. The answers tell you whether you have a contractor who has done this before or one who is figuring it out on your project. Does this quote include finish plumbing, or is that a separate contract? What pipe material are you using for supply lines, and why? Are all fixture locations finalized before you start? What happens if they change? Will you pull the permit, and is that cost included in the quote? Who schedules the rough-in inspection, and what happens if it fails? Is underground or slab work in scope, and how is that priced? What is your process if framing changes force a pipe reroute? A contractor who cannot answer these specifically is a contractor whose rough-in quote will have surprises attached to it. Common Rough-In Plumbing Mistakes to Avoid Most of the expensive rough-in mistakes are not plumbing errors. They are planning errors that the plumber had to work around. Choosing fixture locations too late, after rough-in has already started Not confirming cabinet or vanity dimensions before drain stub-out placement Setting toilet drains too close to walls (standard rough-in distance is 12 inches from the finished wall to the center of the drain) Skipping vent pipe requirements or assuming the inspector will not catch them Getting the drain slope wrong (water sits in improperly sloped pipes and causes chronic clog issues) Running pipes where future fasteners will hit them without installing nail plates Skipping pressure tests before drywall closes the walls Covering walls before inspection approval The toilet distance issue is worth flagging specifically. A toilet set at 10 inches from the wall instead of 12 means the toilet physically cannot be installed correctly later. That drain has to move, and by that point, moving it involves cutting concrete or opening floors. Why the Rough-In Inspection Matters The rough-in inspection is the one point in the project where an independent set of eyes confirms the work is safe before it gets permanently hidden. The inspector checks drain pitch, vent sizing, pipe supports, water line routing, and code compliance for your jurisdiction. In 37 states, that means International Plumbing Code (IPC) requirements. Other states, including California, Oregon, and Minnesota, have their own adopted codes. Passing the inspection also protects you at resale. If unpermitted rough-in plumbing is discovered during a home sale inspection, it becomes a negotiating item or a deal-breaker. Permitted and inspected work is documentation that the plumbing was done to code at the time of construction. Pro Tip: Ask your plumber to pressure-test the water supply lines before calling for the rough-in inspection. A failed pressure test found during inspection means a second inspection visit. Finding it yourself before scheduling saves days on your timeline. Frequently Asked Questions About Rough-In Plumbing How do table finishes affect room feel? Glossy or reflective surfaces can make a room feel brighter and larger, while dark or matte finishes add warmth but may feel heavier. Consider lighting and wall color when choosing a finish to ensure your table complements the room’s overall look. Can a rug impact table clearance? Yes. Thick or high-pile rugs reduce chair clearance and make pulling out chairs harder. Measure the rug size and pile height to ensure at least 36 inches of space around the table, maintaining comfort and free movement. How do table corners affect safety? Sharp corners can cause bumps in tight spaces, especially with children. Rounded, beveled, or bullnose edges reduce impact risk while maintaining functional table dimensions in a smaller dining area. Do room doors influence table placement? Yes. Swinging doors can block chairs or limit clearance. Measure door arcs and ensure end chairs or walkways aren’t obstructed before selecting a table size, especially in compact dining areas. How does table shape affect conversation? Round tables promote eye contact and easier conversation for small groups. Rectangular tables separate diners at the ends, while oval tables balance seating and flow in narrow rooms. Choose a shape to improve interaction and comfort. Can lighting height affect table fit? Pendant or chandelier height should allow unobstructed view and movement. Low lighting can interfere with headspace above chairs, so ensure proper clearance between the table surface and light fixture. Summing Up Getting a handle on your home’s hidden infrastructure takes the stress out of your next big renovation or build. Now that you understand how rough-in plumbing lays the structural framework for your water lines, drains, and vents, you can confidently navigate contractor quotes and timelines. Recognizing the clear line between this open-wall skeleton phase and the final trim-out ensures you won’t face surprise expenses when it is time to install your actual fixtures. This foundational knowledge ultimately protects your budget, saves your sanity, and ensures your project passes inspections with flying colors. What part of your upcoming plumbing project feels the most challenging? Drop a comment below to share your experiences or ask a question.
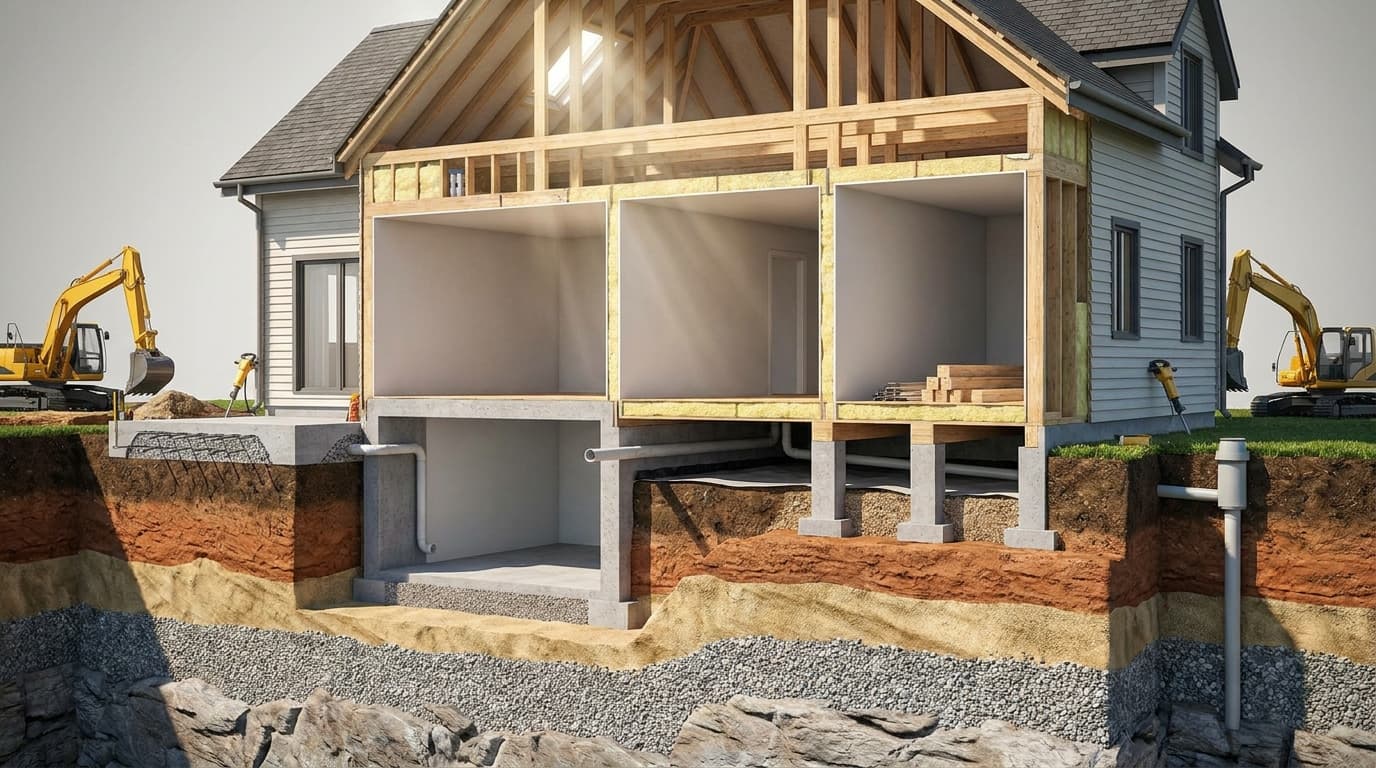
A house foundation type decision can shift your total build budget by $10,000 to $60,000 before you’ve bought a single board of lumber. If you’re planning a new build, comparing lots, or trying to decode a contractor’s bid, the foundation line item is usually the one that causes the most confusion. This guide breaks down all house foundation types, what each one costs in real numbers, where budgets go wrong, and what to ask before you sign anything. Cheapest Foundation Type Concrete slab ($4,000–$12,000) Most Expensive Foundation Type Mat/raft foundation ($25,000–$70,000) Most Common Hidden Cost Waterproofing, drainage, and soil correction Biggest Budget Risk Discovering poor soil conditions after excavation starts Cost Source HomeAdvisor national averages, 2024–2025 The table above is a quick orientation, not the full picture. What type of lot you need and what it ends up costing depend heavily on where you’re building, what the soil is doing, and how your contractor prices the work beneath the surface. That detail is what this article is built around. What a House Foundation Actually Does (And Why Type Matters) A house foundation transfers the entire weight of a structure into the ground safely and prevents it from shifting, settling unevenly, or absorbing moisture in ways that damage the frame above. Every crack in a wall, every door that sticks in a frame, every sloping floor in an older home can often be traced back to what happened at the foundation level years earlier. Choosing the wrong type for your soil conditions or climate is one of the most expensive mistakes you can make in a new build. It is also one of the hardest to fix after the fact, because the foundation is already under your house. The choice you make before the slab is poured or the piles are driven is the one you live with for decades. The Key Factors That Determine Which House Foundation Type You Need No single foundation type works everywhere. Before any cost conversation makes sense, these five factors have to be assessed for your specific site: Soil Type & Bearing Capacity: Clay expands/contracts; loose or sandy soil may need deeper support. Soil-bearing tests are essential before excavation. Frost Line Depth: Footings must extend below frost line to prevent heave; depth affects excavation and foundation type. Water Table & Drainage: High water tables add hydrostatic pressure; exterior waterproofing may cost $10,000–$30,000 extra. Building Size & Structural Load: Larger, heavier homes require deeper footings, more reinforcement, and additional concrete. Local Building Codes: Permit and inspection requirements vary; skipping them risks delays, fines, or resale liability. These factors are why a contractor cannot give you a reliable foundation cost estimate without a site visit and, ideally, a soil report. Any bid based on a phone description of your lot should be treated as a rough planning number only. If you’re still in the early stages of deciding whether to build at all, the build on your land full sequence of decisions that come before foundation selection. All House Foundation Types: What They Cost and When to Use Them The following breakdown covers each foundation type from the most commonly used to the most specialized, with honest cost ranges and the conditions that make each one the right or wrong choice for a project. 1. Concrete Slab Foundation A concrete slab is poured directly onto prepared, compacted soil in a single continuous pour, with reinforcing steel embedded inside. It is the least expensive foundation option and the fastest to complete. In the right conditions, it performs exceptionally well for decades with almost no maintenance. Typical cost range: $4,000–$12,000 for a standard residential slab. This assumes flat terrain, stable soil, and a region where frost depth is not a factor. Works Well For Watch Out For Warm-climate builds with stable, flat lots Plumbing runs through the slab; repairs require cutting concrete Homes where no basement or crawl space is needed Not suitable for lots with frost heave risk or expansive clay soil Budget-constrained builds where soil conditions allow Zero access to utilities under the floor after pour The hidden cost most homeowners miss: soil preparation. If your lot has fill dirt, tree roots, or soft spots, the contractor must excavate and recompact before pouring, which can add $1,000 to $5,000 to the base estimate. 2. Basement Foundation A basement foundation uses poured concrete or concrete block walls that extend well below the frost line, with a floor slab at the base. The depth that protects the foundation from frost also creates usable square footage. A finished basement can add meaningful living space, but even an unfinished one is useful for utilities, storage, and mechanical systems. Typical cost range: $15,000–$50,000. The wide range reflects excavation depth, wall type, waterproofing specification, and regional labor costs. On bedrock sites that require blasting, costs can go higher. Works Well For Watch Out For Cold-climate builds that require deep footings anyway High water table sites require extensive waterproofing Homes that need extra living or utility space Ongoing moisture management: sump pumps, drainage tile, wall sealants Sloped lots where partial basements are feasible The most expensive standard foundation type to build and to maintain The waterproofing line item on a basement foundation deserves its own attention. Interior drainage systems run $50 to $100 per linear foot; exterior excavation-based systems run $100 to $300 per foot. For a full-perimeter system, that means $8,000 to $30,000 on top of the base foundation cost. Many contractors quote the foundation and the basement waterproofing costs separately, so budget both before committing to this type. 3. Crawl Space Foundation A crawl space foundation uses short stem walls to raise the home 18 inches to 4 feet above grade, creating a narrow accessible area under the floor. It is the practical middle option between a slab and a full basement: more accessible than a slab for plumbing and electrical work, and less expensive to build than a basement. Typical cost range: $8,000–$20,000. Ventilation systems, moisture barriers, and insulation are often add-ons that push the actual project cost toward the higher end. Works Well For Watch Out For Sloped or uneven lots where slab grading is impractical Moisture accumulates easily without proper ventilation and vapor barriers Regions with moderate climate and accessible utility needs Pest entry is a persistent concern without encapsulation Mid-range budgets that need utility access under the floor Encapsulation adds $5,000–$15,000 but is often necessary in humid climates Crawl spaces that are not properly encapsulated and ventilated tend to become the source of mold, floor rot, and pest damage within 5 to 10 years. That maintenance liability rarely shows up in the initial quote. 4. Pier and Beam Foundation Pier and beam foundations support the home on a grid of vertical concrete piers with horizontal beams running between them. The house sits elevated above the ground, with open space underneath. This approach adapts well to uneven terrain and is common in older homes across Texas, the Southeast, and coastal regions. Typical cost range: $12,000–$35,000. Depth of piers, soil conditions, and whether you are building new or rehabilitating an existing system all drive variation. Works Well For Watch Out For Coastal areas and flood-prone zones where elevation matters Floors can shift and squeak as pier posts settle or wood ages Uneven terrain that would require major grading for a slab Requires regular inspection; settling piers need leveling every few years Easy access to plumbing and electrical under the floor Moisture and pest management are still required in the open underfloor space If you are buying an older home with a pier and beam foundation, get an inspection from a specialist who can evaluate whether the piers have settled unevenly and whether the beams show rot or insect damage. Repairs on a neglected system run $4,000 to $15,000 or more. 5. Pile Foundation Pile foundations drive long steel or concrete columns deep into the ground until they reach stable load-bearing soil or bedrock. They are used when the top layers of soil are too soft, waterlogged, or unstable to carry the structural load. This is not a residential first choice but the only viable option on sites with poor bearing capacity. Typical cost range: $20,000–$60,000, with significant upward variation based on pile depth, soil resistance, and equipment mobilization fees. On coastal or waterfront builds, costs can exceed this range substantially. Works Well For Watch Out For Soft, waterlogged, or low-bearing-capacity soil Specialized equipment required; not every contractor can quote this accurately Heavy structures requiring deep load transfer Engineering design fees add $3,000–$10,000 on top of installation Flood-zone or oceanfront builds with strict elevation requirements Very high upfront cost with no practical lower-cost substitution on problem sites 6. Raised Foundation A raised foundation lifts the home clearly above grade using piers, columns, or perimeter walls. Unlike a standard crawl space, the clearance is often substantial enough to walk under. This design is common in flood zones, on hillside lots, and in regions where moisture management requires significant airflow under the structure. Typical cost range: $10,000–$25,000. Bracing and seismic retrofits in earthquake-prone regions can add significantly to this range. 7. T-Shaped Foundation The T-shaped foundation is the standard cold-climate approach. Footings are poured first and go below the frost line, then walls are built on top of the footings, and the slab or floor system is placed last. The cross-sectional shape, wider at the base than at the top, distributes load and resists the upward pressure of freezing and thawing soil. Typical cost range: $15,000–$40,000. Deep footing requirements in northern states push costs toward the upper end of this range. 8. Frost-Protected Shallow Foundation (FPSF) An FPSF uses rigid foam insulation placed horizontally around the perimeter of a shallow footing to keep the ground warm enough to prevent frost penetration. This allows footings to be placed at shallower depths in cold climates, reducing excavation and concrete costs compared to a T-shaped system. Typical cost range: $10,000–$30,000. The savings over a deep T-shaped system come from reduced excavation, but the insulation installation must be done precisely according to engineering specifications. Shortcuts in placement defeat the frost protection entirely. 9. Mat or Raft Foundation A mat foundation is a thick, heavily reinforced concrete slab that covers the entire building footprint. Rather than concentrating load at specific points, it spreads the total weight across the maximum possible ground area. This is the correct choice when soil bearing capacity is uniformly low and isolated footings would punch through or settle unevenly. Typical cost range: $25,000–$70,000. This is the most material-intensive option. The concrete volume alone on a large residential mat can approach what a standard basement costs just for the walls. 10. Insulated Concrete Form (ICF) Foundation ICF foundations are built from interlocking foam blocks that serve as the formwork for poured concrete. After the concrete cures, the foam stays in place as permanent insulation. The result is a wall with high structural strength, excellent thermal performance, and good sound attenuation. ICF is increasingly used for high-performance homes where the energy savings over time justify the higher upfront cost. Typical cost range: $20,000–$50,000. Skilled labor is a requirement; ICF systems are less forgiving of placement errors than standard poured concrete. Modifications after the fact are difficult and expensive. 11. Concrete Block Foundation Concrete block (CMU) foundations are built by stacking and mortaring hollow concrete masonry units, typically with steel reinforcement threaded through the cores and grouted solid. They were standard practice through much of the 20th century and remain common in certain regions. They are easier to repair than poured concrete, though they are more susceptible to water infiltration through mortar joints. Cost notes: CMU foundations are priced similarly to poured concrete in most markets, though local labor and material availability affect the comparison. Waterproofing is a non-negotiable add-on for CMU walls; block that is not sealed allows moisture to wick through the mortar at a rate that can cause significant damage within a few years, and prolonged water intrusion is one of the more common causes of water stains on ceilings in older homes with block foundations. 12. Poured Concrete Foundation Poured concrete walls are formed in place using temporary steel or aluminum forms, then filled with concrete and steel reinforcement in a single continuous pour. The result is a wall with no joints, no mortar lines, and uniform strength throughout. It is the current standard for new residential basements and foundation walls in most of the country. Poured concrete outperforms CMU block on lateral soil pressure resistance, which matters on sites with heavy clay soils or steep lot slopes. The trade-off is that repairs, when needed, require cutting and patching rather than replacing individual blocks. 13. Hybrid or Mixed Foundation Hybrid foundations combine two or more foundation types on the same structure to address site-specific conditions. A home built on a sloped lot might use a full basement under one portion and a crawl space or slab under the other. Custom builds with multiple sections and complex footprints often require this approach. The cost of a hybrid system is site-specific and cannot be estimated without detailed plans and a geotechnical assessment. What matters from a budget perspective is recognizing that the transition points between foundation types require careful engineering to prevent differential settlement, which is when one section of a foundation moves at a different rate than another and causes cracks in the structure above. Foundation Cost Summary: All Types Side by Side Here is how all 13 house foundation types compare on cost. These are national average ranges. Your actual numbers will vary by region, soil conditions, and contractor. Foundation Type Cost Range (USD) Primary Hidden Cost Concrete Slab $4,000–$12,000 Soil preparation, re-compaction Basement $15,000–$50,000 Waterproofing, sump pump, drainage tile Crawl Space $8,000–$20,000 Encapsulation, vapor barrier, pest control Pier and Beam $12,000–$35,000 Pier leveling, beam inspection, and moisture management Pile $20,000–$60,000 Engineering design, equipment mobilization Raised $10,000–$25,000 Bracing, seismic retrofit in applicable zones T-Shaped $15,000–$40,000 Deep excavation, footing depth in northern climates Frost-Protected Shallow $10,000–$30,000 Insulation precision, engineering review Mat/Raft $25,000–$70,000 Concrete volume, specialized reinforcement ICF $20,000–$50,000 Skilled labor premium, precision installation Concrete Block $10,000–$30,000 Waterproofing, mortar joint sealing Poured Concrete $12,000–$35,000 Forming labor, curing time, and a skilled crew are required Hybrid/Mixed Site-specific Differential settlement engineering, transition detailing The cost figures above represent the foundation work alone. Site preparation, grading, permits, and waterproofing are frequently quoted as separate line items. Foundation type is also one of the biggest variables in overall construction cost per square foot, particularly when comparing slab builds to basement builds in the same region. Cost Note: Figures in this article are estimates based on HomeAdvisor national averages, 2024–2025. Actual costs vary significantly by region, contractor, soil conditions, and project scope. Always get at least three quotes before committing to any foundation type. See the construction cost per square foot guide for how foundation type factors into total build budgets by region. How Soil and Climate Determine Your Foundation Options The two variables that contractors can least control are also the ones that most commonly blow up a foundation budget: what is in the ground and what the weather does to it. Expansive Clay Soil: Found in TX, OK, CO, and CA; swells when wet, shrinks when dry; can crack reinforced concrete. Requires deeper footings, drainage, or pier/pile systems. Loose or Fill Soil: Common on disturbed or low-lying sites; compresses over time if not compacted. Soil-bearing tests before construction prevent costly post-pour fixes. Frost Depth: Major driver of cost differences; colder regions need deeper, protected footings (T-shaped or FPSF), increasing foundation costs significantly. High Water Tables: Hydrostatic pressure can affect slabs/walls; waterproofing becomes structural necessity. Low bids may under-specify or plan to upcharge later. Where Foundation Budgets Go Wrong The most common budget surprises in foundation work fall into four categories. They are predictable, and knowing them in advance is how you protect yourself in contract negotiations. Unexpected Soil Conditions: Loose fill, debris, underground water, or rock can appear after excavation; budget 10–15% contingency for soil-related changes. Waterproofing & Drainage: Low bids often under-specify; confirm scope in writing, including interior/exterior drainage, sump pump, and perimeter drains. Permits & Inspections: Multiple inspections may be required; fees and scheduling delays can increase project costs. Grading & Drainage: Proper lot slope is critical; exterior grading is often separate from the foundation quote and affects long-term waterproofing performance Concrete Foundations: Why They Dominate Modern Residential Builds Concrete is the material behind most of the foundation types on this list: slabs, poured walls, ICF systems, mat foundations, and most modern piers are all concrete-based. Its dominance is not incidental. Concrete handles compressive load exceptionally well, resists pests, can be formed into nearly any shape, and, when properly reinforced and cured, lasts longer than the home above it in most conditions. What concrete does not do well is handle tension without steel reinforcement. An unreinforced slab or wall will crack under the kinds of loads and ground movements that residential foundations routinely experience. Every concrete foundation quote should specify the rebar schedule, the concrete mix design, and the minimum curing time before backfilling. If a bid does not mention these details, ask. They are the difference between a foundation that performs for 80 years and one that starts showing problems in 15. Basement and Foundation: How the System Works Together A basement functions as the foundation itself, supporting the house above while resisting soil and water pressure. Key components work together: footings distribute wall loads to the soil, walls resist vertical and lateral pressures, the floor slab provides a usable surface and counters hydrostatic forces, perimeter drainage tiles divert groundwater, exterior waterproofing blocks moisture migration, and the sump pump collects and removes water. Removing any part compromises the system. Chronic basement leaks usually indicate gaps in one area, such as missing or failed drain tiles, insufficient exterior waterproofing, or an undersized sump pump, showing that each element is essential for a functional, water-managed foundation.. Foundation Warning Signs Every Homeowner Should Know If you are buying an existing home or monitoring a home you already own, these are the signs that warrant a professional foundation inspection rather than a wait-and-see approach. Warning Sign What It May Indicate Urgency Stair-step cracks in the brick or block exterior Differential settlement or frost heave High; get an inspection Horizontal cracks in basement walls Lateral soil pressure or water pressure; walls may be bowing Urgent; do not delay Doors and windows are binding in frames Foundation movement causing the structure to rack Moderate to high, depending on progression Sloping or bouncy floors Pier settlement, beam rot, or crawl space moisture damage Moderate; monitor and inspect Water in the basement after rain Failed waterproofing, drain tile blockage, or grading issue High; source must be identified Gaps between the foundation wall and the sill plate Settlement or deterioration of the top-of-foundation course High: structural implication Hairline cracks in concrete are common and often cosmetic. Width matters: cracks wider than 1/4 inch, cracks that are growing, or any horizontal crack in a basement wall are not cosmetic and require evaluation. Foundation repair costs escalate quickly when problems are deferred. A $3,000 crack repair becomes a $30,000 wall stabilization project if the underlying cause is not addressed in time. Foundation Maintenance: What Actually Matters Year to Year The most effective foundation maintenance is almost entirely about water management. These are the tasks that prevent the problems described above from developing in the first place: Clear Gutters and Downspouts: Keep gutters and extensions free of debris and direct water at least 6 feet from the foundation to prevent leaks and wall deterioration. Maintain Positive Grade: Ensure the soil slopes away from the home, ideally 6 inches over the first 10 feet, to avoid surface water pooling near the foundation. Annual Inspections: Check crawl spaces and basement walls at least once a year, using a flashlight and moisture meter for early detection of cracks or moisture intrusion. Seal Cracks Promptly: Fill visible cracks in concrete before they widen or freeze, preventing water infiltration and structural damage. Manage Plantings: Keep trees and large shrubs at least 10 feet from the foundation to prevent root intrusion and soil shrinkage that can cause settling. What to Ask Your Contractor Before Signing a Foundation Bid These five questions will tell you more about a contractor’s competence and a bid’s completeness than almost anything else: Have you reviewed a soil report for this site, and if not, will you require one before finalizing pricing? A contractor who prices a foundation without a soil report is assuming conditions that may not exist. That assumption becomes a change order after excavation starts. What does your waterproofing specification include, and is it in this bid or a separate line item? This question separates the complete bids from the incomplete ones immediately. What permit inspections are required, and are permit fees included in this estimate? You want to know who is responsible for scheduling inspections and whether delays in inspection timing can affect your contract price. What is your concrete mix design, and what is your minimum cure time before backfilling? If a contractor cannot answer this, they are not specifying the work at the level required for a quality outcome. What is your contingency process if we find unexpected soil conditions after excavation? You want this spelled out in advance: what triggers a change order, how it is priced, and what documentation you receive. Frequently Asked Questions Can climate change affect my home foundation? Extreme weather events, flooding, and shifting soil patterns caused by climate change can affect foundations. Homes in flood-prone or erosion-prone areas may need additional reinforcements, drainage, or soil stabilization to maintain long-term structural integrity. How does nearby construction impact foundation stability? Heavy construction next door can cause vibrations and soil displacement. Foundations may settle unevenly, causing cracks or shifts. Monitoring the foundation and consulting a structural engineer early helps prevent damage and manage risks. Are older foundations more prone to pest infestations? Yes. Aging foundations, especially crawl spaces, may have cracks or gaps allowing termites, rodents, or ants to enter. Regular inspections, sealing gaps, and pest control measures help protect the structural integrity. Do foundations affect energy efficiency in homes? Foundation type impacts insulation and moisture control. Basements and ICF walls can improve thermal performance and reduce energy costs, while poorly insulated slabs may increase heating and cooling requirements. Can landscaping influence foundation health? Yes. Trees with invasive roots or poorly graded gardens can shift soil and affect foundations. Maintaining proper distance from trees, positive grading, and root barriers prevents long-term damage. What is the role of foundation vents? Vents in crawl spaces control moisture and airflow. Properly placed and maintained vents prevent mold, wood rot, and structural weakening. Incorrect placement can lead to dampness and pest issues. Final Verdict Foundations are the part of a home you rarely see, but I’ve realized they set the stage for everything above. You now know the main house foundation types, what affects your choice, and common problems to watch for. I’ve also shared practical tips for maintenance, budgeting, and when to call a professional. Understanding concrete foundations, soil, climate, and water issues helps you avoid costly mistakes and keeps your home stable for years. I hope you feel more confident evaluating foundations for your home. Try applying these tips, check your own foundation for warning signs, and let me know your thoughts or experiences in the comments.
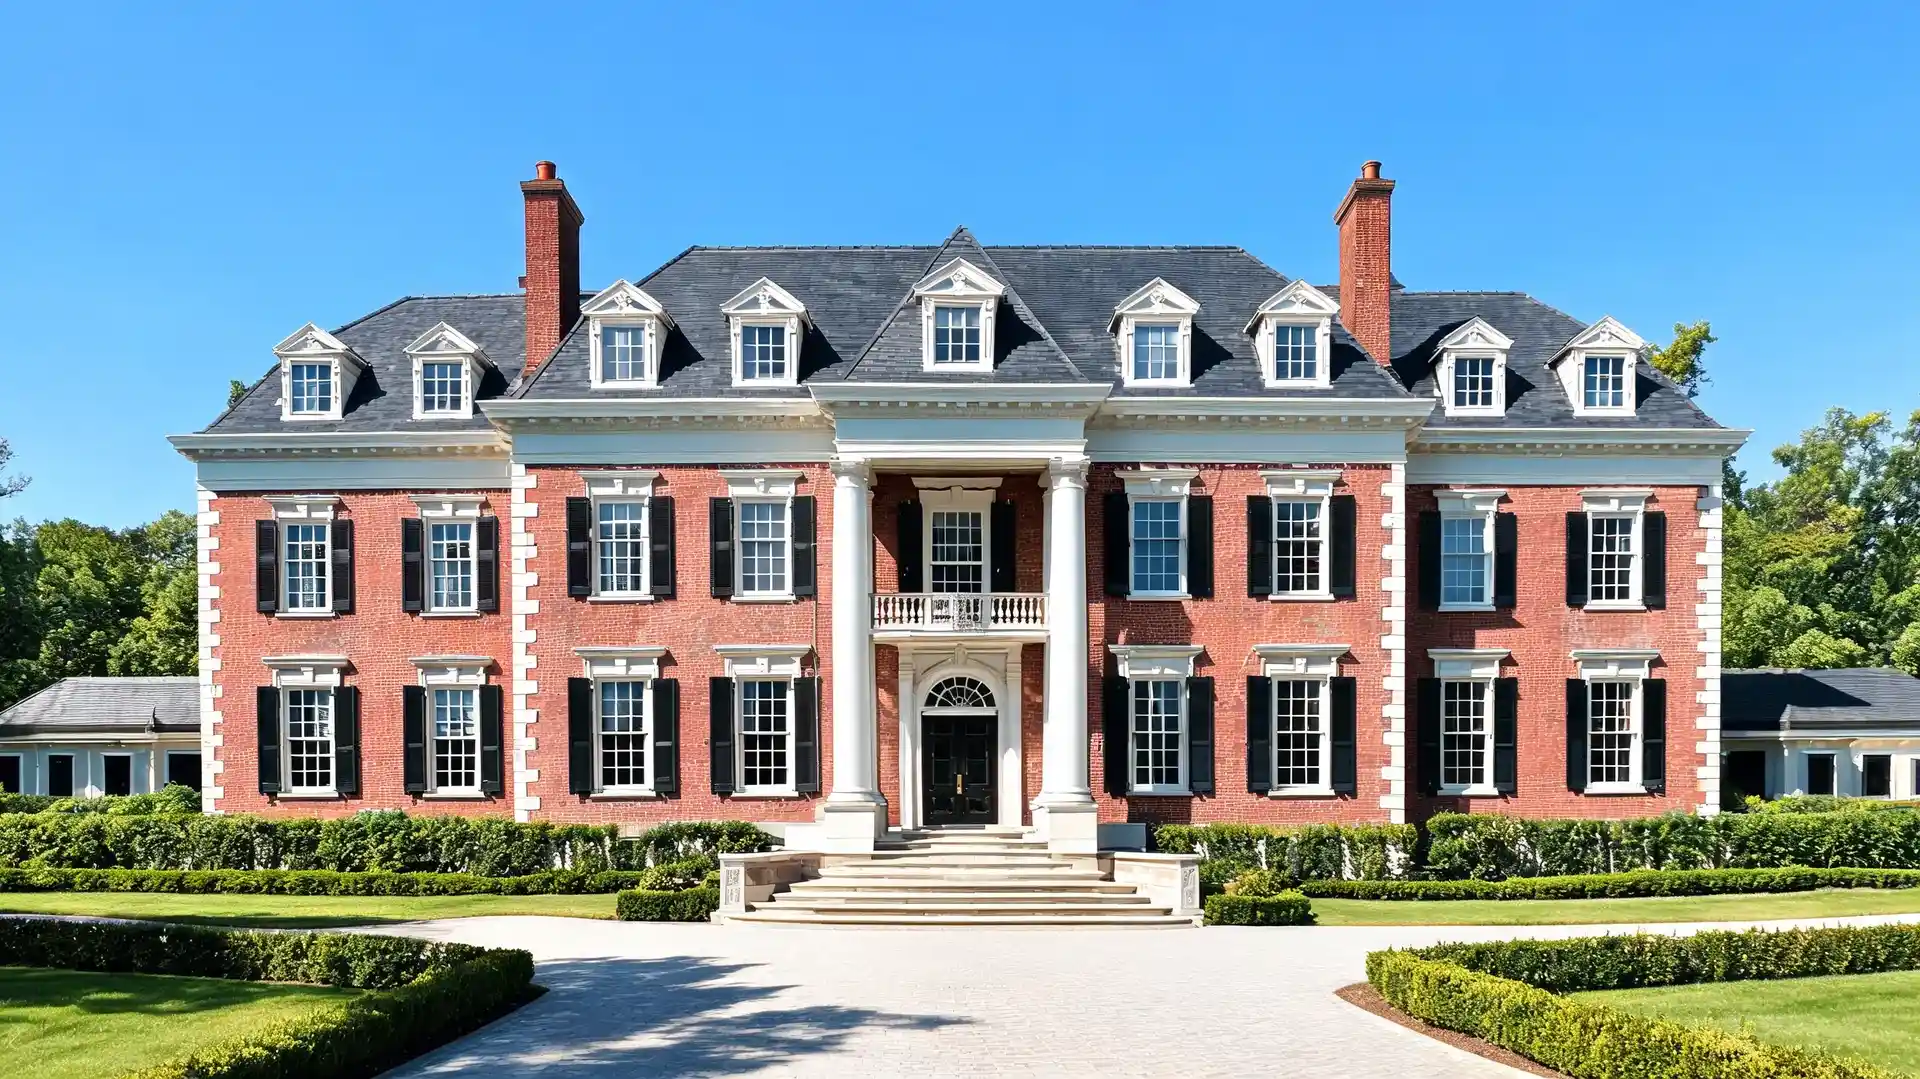
Have you ever looked at an old brick home and noticed how perfectly everything lines up? That is often the pull of Georgian architecture. This classical building style is known for symmetry, proportion, brick or stone exteriors, sash windows, and a calm, formal look. Once you know the signs, it becomes much easier to recognize them in old houses, townhouses, terraces, civic buildings, and American colonial homes. I’ll explain where the style came from, what makes it different, how it shaped interiors and streets, and what details to look for when you see a Georgian building today. What Georgian Architecture Actually Is Georgian architecture is a building style defined by one thing above everything else: every element on the facade earns its place through proportion. If a window is the wrong size, it pulls the whole front out of balance. If the door is off-center by a foot, the entire elevation reads as wrong. That precision is not accidental. It is the core logic that ran through British construction from 1714 to 1830, and it is why Georgian buildings still hold up visually today. The style draws directly from ancient Greek and Roman design, filtered through Italian Renaissance principles and applied to brick-and-mortar construction across Britain, Ireland, and eventually the American colonies. Once you understand what Georgian architecture is built around, you start seeing its fingerprints everywhere: in terraced townhouses, civic halls, colonial plantation homes, and the Georgian Revival houses going up in new developments right now. Style Name Georgian Architecture Period 1714 to 1830 (reigns of Kings George I through IV) Origins Classical Greek and Roman design via the Italian Renaissance (Palladian influence) Defining Feature Symmetry and proportion: centered doors, evenly spaced sash windows, balanced facades Primary Materials Brick (towns), stone (grand houses), stucco (later Regency period) Found In Britain, Ireland, the American colonies, and Georgian Revival homes today What It Replaced Baroque excess and heavy ornament; folk-style colonial dwellings in America The table above gives you the factual skeleton. What the table cannot show is how these principles translate into specific decisions for a real building, from the spacing of windows to the height of ceilings to the placement of chimneys. That is what the rest of this article walks through. The History Behind Georgian Architecture The Georgian style developed during a period of growth, trade, and urban planning in 18th-century Britain. As towns expanded, builders used classical ideas to create homes and public buildings that felt refined, practical, and easy to organize. Key historical influences included: Britain’s growing wealth and demand for formal homes Planned streets, terraces, squares, and crescents Palladian design, with columns, pediments, and classical proportions The spread of British building traditions to Ireland and North America Later adaptations, including Regency, Federal, and Georgian Revival styles These influences made Georgian architecture more than a house style. It became a clear design language based on proportion, restraint, and practical planning. That is why many Georgian buildings still feel formal, calm, and easy to recognize today. The Five Core Principles of Georgian Architecture Every recognizable Georgian building follows the same five design principles. These are not decorative choices. They are structural logic that determines what gets built and where. 1. Symmetry The front door sits at the center. Windows are placed in matched pairs on either side, at consistent spacing across each floor. The roofline, chimneys, and any decorative details mirror each other left to right. This is the most immediately legible feature of Georgian architecture, and the easiest to check: stand in front of the building and draw an imaginary vertical line down the center. If both sides are true mirrors, you are almost certainly looking at a Georgian design. Inside, the same logic continues. A central entrance hall runs front to back, with rooms arranged in balanced positions on either side. The layout is not just aesthetic. It makes the house easy to navigate and gives every main room equal relationship to the central axis. 2. Proportion Proportion in Georgian design means that every element, window, door, room height, facade width, relates mathematically to every other element. A window is not placed based on how it looks in isolation. It is sized and positioned based on the total height and width of the wall it sits in. A door surround is not chosen for ornament alone. Its height, its frame width, and its relationship to the windows beside it all follow deliberate rules. This is the principle most responsible for why Georgian buildings look considered even when their detail is minimal. The math is doing the work that decoration is not. 3. Classical Influence Georgian buildings borrowed specific classical vocabulary from ancient Greece and Rome: columns or pilasters flanking a doorway, a pediment (the triangular element) above an entrance, a cornice line at the roofline, a fanlight above the front door. These were not decorative flourishes chosen at random. Each had a classical precedent and a defined position in the building’s hierarchy. The key distinction from earlier Baroque styles is restraint. Classical elements were used precisely and sparingly. A pediment on a doorway, yes. Pediments on every window as well? That would have been considered excessive. Georgian design favored control over display. 4. Light and Space Tall sash windows, often running to near ceiling height in formal rooms, served two functions: they brought daylight deep into the interior, and they reinforced the proportional rhythm of the facade from outside. High ceilings in principal rooms allowed those large windows without making the room feel compressed. The combination created interiors that read as spacious and well-lit by the standards of any era, not just the 18th century. In more modest Georgian homes, the same principles applied at smaller scale. The windows were still tall relative to the room. The ceilings were still higher than strictly necessary. Light and space were not luxuries reserved for grand houses. They were built into the design logic at every level of the market. 5. Restraint The fifth principle is what separates Georgian from Victorian. Where Victorian architecture added more molding, more color, and more carved detail, Georgian design held back. A Georgian cornice is present because it marks the transition between wall and roof. It is not carved into elaborate foliage. A Georgian door surround has a fanlight because the fanlight brings light into the hall. It is also encrusted with decorative metalwork. Late Georgian and Regency buildings pushed this boundary somewhat, adding ironwork balconies and stucco facades. But even in those cases, the underlying discipline of proportion kept the design from tipping into excess. Restraint was not austerity. It was the principle that decoration should serve the structure, not compete with it. Georgian Architecture Features: What to Look For Outside Knowing the principles is one thing. Spotting the specific features on an actual building is another. Here is what to look for on the exterior of a Georgian building, and what each feature tells you about the design logic behind it. Brick, Stone, and Stucco Facades Material choice in Georgian architecture followed clear conventions based on location and budget. Brick was the standard for urban townhouses and terrace housing because it was locally available, practical for repetitive construction, and produced even, flat facades that suited the Georgian preference for controlled surfaces. Stone appeared on grander country houses and public buildings where owners wanted a heavier, more permanent look. Stucco became increasingly common in the later Georgian and Regency periods, particularly on high-status terraces in London and other cities. It gave buildings a smooth, pale surface that read from a distance as more expensive than plain brick. The material changed; the proportional logic underneath did not. The Front Entrance The front door in a Georgian building is always a design statement, not just an opening. It sits in the exact center of the facade. It is framed by one or more of the following: columns or pilasters on either side, a pediment above, sidelights (narrow windows flanking the door), and a fanlight above. The fanlight is the most immediately recognizable feature: a semicircular or rectangular window set directly above the door, usually with decorative glazing bars in a fan or geometric pattern. The purpose of the fanlight was practical as well as decorative. The entrance hall of a Georgian townhouse was often narrow and received no direct window light. The fanlight solved that problem while simultaneously making the entrance look more formal and considered. If you spot a fanlight, you are almost certainly looking at a Georgian building or a Georgian Revival one. Rooflines and Chimneys Georgian roofs are typically hipped on all four sides, sloping to a ridge rather than ending in a gable at each end. This gives the building a neat, contained profile from any angle. On terraces and townhouses, a parapet wall often hid the roof entirely from street view, making the facade read as a clean horizontal line at the top. Chimneys were placed symmetrically. In a detached house, you will typically find them in matched pairs, positioned so they do not disturb the building’s left-right balance. Even practical infrastructure was subject to the same proportional discipline applied to windows and doors. Georgian Interiors: What Happens Inside Georgian exterior logic carries into the interior. A central hall organizes the layout, with main reception rooms balanced on either side and secondary or service areas toward the back or basement, keeping principal spaces formal and uncluttered. Rooms follow strict proportions: ceiling height matches floor area, and fireplaces align on central axes. Common features include crown molding, cornices, ceiling roses, paneled walls, and formal staircases. Wealthier homes added elaborate plasterwork; modest townhouses kept details simple. The core principles, proportion and clear axes, translate to contemporary spaces, ensuring rooms feel balanced regardless of style or period-appropriate decoration. The rules that underpin minimalist home decor share more with Georgian thinking than most people expect: both approaches rely on proportion and restraint rather than surface decoration to make a room work. Georgian Townhouses and Terraces The logic of Georgian exteriors carries into the interior. A central hall from the front door organizes the plan, with main reception rooms on either side and secondary rooms or service areas toward the back or basement. This keeps principal spaces uncluttered and formally arranged. Rooms follow proportional rules: lengths and widths feel balanced, ceiling height matches floor area, and fireplaces sit on central axes. Interiors often feature crown molding, cornices, ceiling roses above chandeliers, paneled walls in dining or entrance halls, and formal staircases near the entry. Wealthier homes could include elaborate plasterwork, while modest townhouses used simpler detailing, maintaining the same proportional and orderly logic throughout. In many surviving Georgian townhouses, the original basement layout is still legible even after 200 years of adaptation. The kitchen as a separate service space rather than a social room traces directly to this Georgian convention of keeping utilitarian functions off the principal floor. Georgian Architecture in Britain, Ireland, and America Georgian principles stayed consistent as the style crossed geographic boundaries, but materials, scale, and specific details adapted to local conditions. The table below maps the key differences. Region Georgian Architecture Features Britain Townhouses, terraces, squares, country houses, and civic buildings. Planned streets with balanced facades and formal urban layouts. Brick in cities, stone in the countryside. Ireland Brick-fronted townhouses and formal squares, particularly in Dublin. Tall sash windows, simple classical details, and repeating terrace forms. Dublin’s Georgian core is one of the best-preserved examples in Europe. American colonies Brick homes, plantation houses, churches, and public buildings. Georgian principles adapted to locally available timber and different climate conditions. Later evolved into the Federal style after independence. Georgian Revival (modern) Symmetry, sash-style windows, classical entrances, and brick or stone facades applied to modern construction. Uses contemporary layouts, insulation, and materials while maintaining the proportional logic of the original style. The American Federal style deserves a specific note because it is often confused with Georgian. Federal kept the symmetry and classical proportion but applied lighter, thinner details: narrower door surrounds, more delicate fanlight patterns, and ornamental motifs referencing the new nation rather than British classical tradition. Georgian feels heavier and more formal. Federal is the same logic made more precise and less monumental. How to Spot Georgian Architecture Today You do not need architectural training to identify a Georgian building. You need to look at the front in the right sequence. Start with the door: is it centered? Move to the windows: are they arranged in even rows on both sides? Check the roofline: is it neat and symmetrical, with chimneys placed in balanced positions? If the answer to all three is yes, and the building is brick or stone with restrained classical detail, Georgian architecture is a strong candidate. The features that most reliably confirm a Georgian identification are the fanlight above the door, the multi-paned sash windows, and the absence of heavy Victorian ornament. Georgian buildings are plain in a considered way. They are not trying to impress through decoration. They are trying to impress through order. Georgian Revival buildings built in the 20th and 21st centuries follow the same checklist. The giveaway is usually in the window glazing bars (modern double-glazed units sit slightly differently) and in the roofline details, but the proportional logic is the same. If understanding how historical styles shape contemporary design decisions interests you, the interior design style quiz at Minimal and Modern is a useful starting point for placing your own preferences in a broader context. Quick identification checklist: Centered front door with fanlight above. Sash windows in even rows, taller than wide. Brick, stone, or stucco exterior. Symmetrical facade. Hipped roof or parapet roofline. Chimneys in matched pairs. High ceilings and proportional rooms inside. Frequently Asked Questions About Georgian Architecture These are the questions that come up most often from people who have spotted a building they suspect is Georgian and want to understand what they are looking at. What are the key features of Georgian architecture? The key features are a centered front door with fanlight, evenly spaced sash windows, a symmetrical facade, brick or stone exterior, hipped or parapet roof, and proportional room layouts inside. Classical details such as columns, pilasters, and pediments appear at the entrance but are used with restraint rather than excess. What is the difference between Georgian and Victorian architecture? Georgian architecture is defined by restraint and symmetry: plain surfaces, proportional windows, minimal ornament. Victorian architecture added decorative complexity: carved stonework, asymmetric bay windows, polychrome brickwork, and far more surface detail. If a building looks busy, it is more likely Victorian. If it looks ordered and plain, it is more likely Georgian. What is a Georgian fanlight? A fanlight is the window set directly above a Georgian front door, typically semicircular in shape with radiating glazing bars. It brought daylight into the entrance hall when the door was closed and gave the entrance a more formal, considered appearance. It is one of the easiest Georgian features to spot from the street. Why do Georgian houses have such high ceilings? High ceilings in Georgian principal rooms were a deliberate proportional decision, not just a status signal. Taller walls allowed larger windows, which brought more daylight into formal spaces. The ceiling height also had to relate correctly to the floor area to satisfy Georgian proportional rules. A low ceiling in a large room would have read as incorrect. What is Georgian Revival architecture? Georgian Revival applies the proportional logic and exterior features of original Georgian buildings to modern construction. Symmetrical facades, sash-style windows, centered classical entrances, and brick or stone cladding are standard features. The underlying layouts and building systems are entirely contemporary. The revival approach has been popular in the UK and US since the late 20th century. What colors were used in Georgian interiors? Georgian interiors typically used muted, mid-toned colors: cream, pale blue, sage green, warm gray, ochre, and dusty pink. These worked with plasterwork, wood paneling, and period furniture without competing with the room’s proportional clarity. Deeper tones appeared in dining rooms and libraries in wealthier homes. Did Georgian homes have basements? Most Georgian townhouses had basements, particularly in cities. These lower levels housed kitchens, coal stores, and service rooms, keeping those functions separate from the formal living floors above. In many surviving Georgian terraces, the basement is still partially visible from the street through railings or light wells. How does Georgian architecture influence modern home design? Georgian influence shows up in symmetrical facades, centered front doors, sash-style windows, and proportional room layouts. The principles of balance and restraint also underpin approaches like mid-century modern design, which similarly prioritizes form and proportion over surface decoration. Both styles reward getting the fundamentals right rather than adding detail to compensate. Final Verdict: Is Georgian Architecture Worth Understanding for Your Own Home? Georgian architecture is not a historical curiosity. It is a set of design principles that remain some of the most reliable in residential construction: proportion first, symmetry as a structural tool, classical detail used precisely rather than liberally. If a room in your home feels off without you being able to identify why, the answer is almost always in the proportions: a ceiling that is too low for the floor area, windows that are too small for the wall they sit in, furniture at the wrong scale for the space. Georgian architecture made those decisions explicit and rule-governed. Understanding it makes it easier to see where modern rooms go wrong. Start with the room that bothers you most and measure the ceiling height against the longest wall. That ratio will tell you a lot.





