

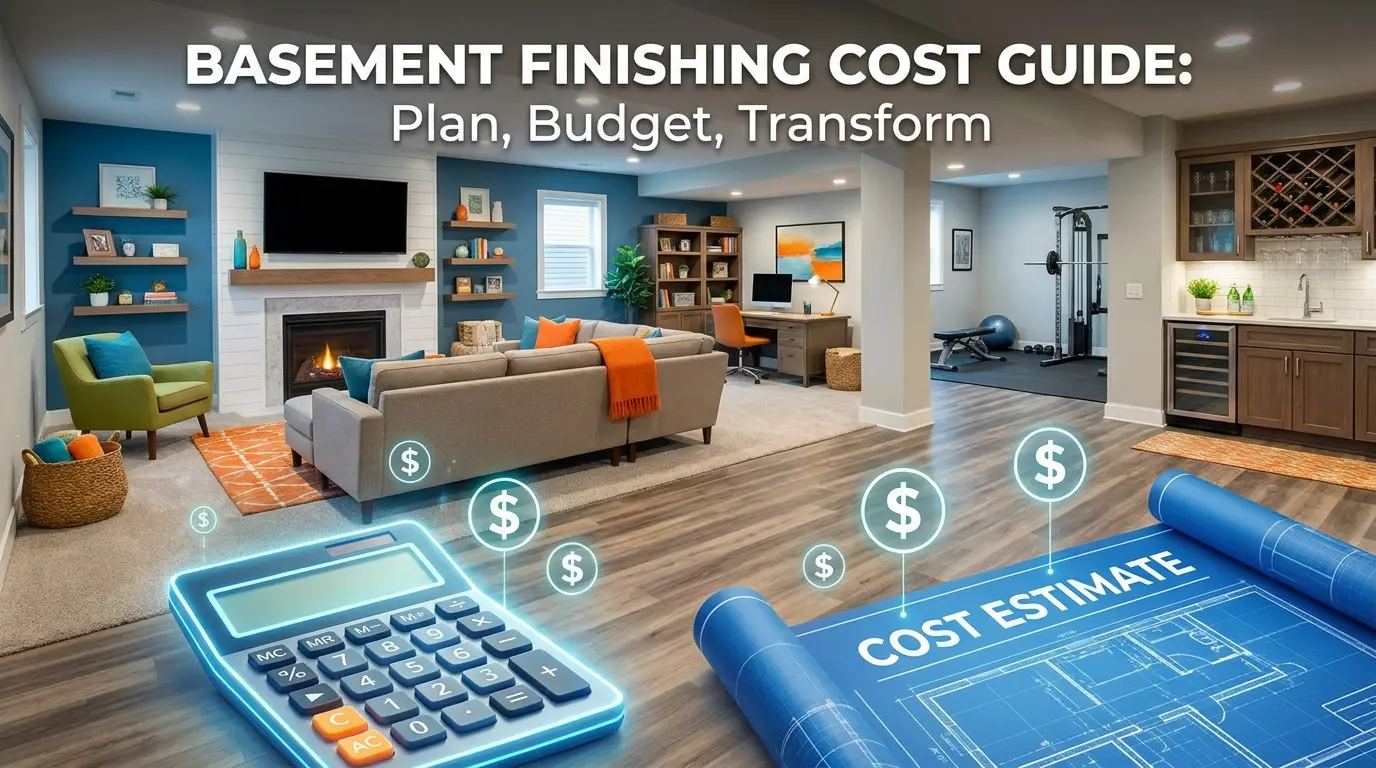
Basement finishing cost runs between $15,000 and $75,000 for most US homeowners, with a national average around $30,000 to $50 per square foot for standard work. That is the honest answer up front. Where your project lands within that range depends on four things: the size of the space, the condition it is in before anyone picks up a framing nail, the finish level you choose, and where you live. The spread is wide because the variables are real, not vague. A 600-square-foot open-plan family room with existing rough-in plumbing in suburban Ohio lands very differently than a 1,200-square-foot build-out with a bathroom, a bedroom, and a wet bar in a Seattle suburb. Both are “basement finishing projects.” Neither belongs in the same budget conversation. This guide breaks down the real cost drivers, shows you where contractor quotes hide the surprises, and tells you what to ask before you sign anything. Cost Note: Figures in this article are estimates based on national averages from HomeAdvisor/Angi (2025) and NAHB Cost of Construction Survey data. Actual costs vary significantly by region, contractor, materials, and project scope. Always get at least three quotes before committing to any project above $1,000. Basement Finishing Cost by Size Square footage sets the floor on your budget, not the ceiling. Every additional room, fixture, or upgrade builds on top of the base per-square-foot cost. The table below uses the national $30–$50–$75 per square foot range for low, mid, and high-end finishes respectively. Basement Size Low End ($30/sq ft) Mid-Range ($45/sq ft) High End ($75/sq ft) 500 sq ft $15,000 $22,500 $37,500 750 sq ft $22,500 $33,750 $56,250 1,000 sq ft $30,000 $45,000 $75,000 1,200 sq ft $36,000 $54,000 $90,000 1,500 sq ft $45,000 $67,500 $112,500 These figures cover standard framing, drywall, insulation, flooring, lighting, and electrical. They do not include bathroom additions, egress windows, waterproofing, or structural repairs. All of those sit on top as separate line items. The next section covers those specifically, because they are where most budget overruns actually happen. How to Estimate Your Basement Finishing Cost Before Calling Anyone A quick working estimate before your first contractor conversation looks like this: (Square footage × cost per square foot) + feature additions + permits + 15% contingency Walk through a real example: a 1,000-square-foot basement at $40 per square foot costs $40,000 as a base. Add a full bathroom at $12,000, permits at $1,500, and a 15% contingency buffer of $8,025. Total working estimate: $61,525. Pro Tip: Do not skip the contingency. Of every basement finishing project I have seen go over budget, the single most common reason is that the contingency line was cut before work began. Budget 15% minimum on any project in a home more than 20 years old. What Actually Drives Basement Finishing Cost: A Line-by-Line Breakdown Knowing the number on paper is different from knowing where it comes from. Here is a breakdown of the real cost drivers, ordered by how often they surprise homeowners after a project starts. 1. Framing, Drywall, and Insulation This is the skeleton of the project, the line item contractors will quote first and the one where open layouts save real money. Fewer interior walls mean fewer linear feet of framing, less drywall, and a faster installation schedule. A 1,000-square-foot open plan can cost $8,000–$14,000 in framing and drywall. Divide that space into four separate rooms and the same work climbs to $14,000–$22,000. 2. Waterproofing and Drainage This is the cost most homeowners do not price in until a contractor opens the walls and finds moisture. A full interior waterproofing system runs $3,000 to $15,000 depending on scope. Crack injection, sump pump installation, and interior drain tile each carry separate costs. Exterior waterproofing pushes well past that. The full guide to basement waterproofing costs covers each method and what drives the price. Budget for this before anything cosmetic moves, because finishing over an active moisture problem is not a solution. 3. Electrical and Lighting A finished basement needs dedicated circuits for outlets, a subpanel connection, and lighting throughout. Standard work for a 1,000-square-foot basement runs $3,500–$7,000. Recessed lighting, smart switches, or home theater wiring adds to that. If your existing panel is at capacity, which is common in homes built before 1990, a panel upgrade adds $1,500–$4,000 to the electrical scope before a single fixture goes in. 4. Flooring Below-grade spaces need moisture-tolerant flooring. Luxury vinyl plank ($2–$5 per square foot installed) handles this well and is among the most cost-effective choices for finished basements. Engineered hardwood runs $6–$12 installed. Carpet over a vapor barrier is cheaper upfront at $1.50–$4 per square foot but is the first thing you will be ripping out if moisture becomes a problem. Tile works well in bathrooms but adds labor cost to the general living area. For a 1,000-square-foot basement, flooring ranges from roughly $1,500 to $12,000 depending on material choice. 5. HVAC Extensions An unfinished basement typically sits outside the home’s climate control loop. Extending existing ductwork or installing a ductless mini-split unit for a finished space runs $1,500–$6,000 for most projects. Older HVAC systems may need assessment before the extension is added; if the main unit lacks capacity, upgrading it becomes a separate cost. Proper ventilation is also a permit requirement in most jurisdictions. It is not optional. 6. Permits and Inspections Permit fees vary significantly by municipality but typically add $500–$2,000 to a basement finishing project. Structural changes, electrical, and plumbing all require separate permits in most jurisdictions. Staged inspections are common. Expect a framing inspection, an electrical rough-in inspection, and a final inspection at minimum. Missing any of these creates rework that costs more than the permit fee ever would have. Pull the permits. Added Features: What Each Room Costs The base per-square-foot cost covers the space, not the upgrades inside it. Each of the following is a line item that sits on top of your base estimate. Basement Bathroom Addition: $8,000–$25,000 A full bathroom is the single largest add-on cost in most basement projects. The range is wide because the cost depends almost entirely on whether rough-in plumbing already exists. If it does, a basic full bath adds $8,000–$15,000. If there is no rough-in, which is typical in older basements, you are looking at breaking concrete, installing an ejector pump for below-grade waste, running supply lines, and meeting inspection requirements. Full scope on a no-rough-in bathroom runs $15,000–$25,000 before fixtures. A half bath runs $5,000–$12,000 by comparison. Keep new plumbing as close to existing lines as possible, because every foot of new pipe run across a concrete slab adds labor cost. Basement Bedroom Addition: $5,000–$12,000 Additional A below-grade bedroom has one non-negotiable requirement: an egress window. Building code in most US jurisdictions requires a minimum net clear opening of 5.7 square feet, with a minimum opening height of 24 inches and minimum width of 20 inches. Installation of a code-compliant egress window, including excavation for the window well, runs $2,500–$5,000 per window. Add to that the bedroom framing, closet, HVAC extension, and electrical, and a compliant basement bedroom adds $5,000–$12,000 to the project above what the base square footage cost covers. Wet Bar or Kitchenette: $5,000–$15,000 A wet bar requires a sink, supply lines, drain routing, cabinet installation, and electrical circuits for appliances. Keeping it near existing plumbing controls cost significantly. A basic wet bar with a prep sink and stock cabinets runs $5,000–$8,000. A full kitchenette with a small refrigerator, microwave, and dishwasher circuits pushes to $10,000–$15,000. Plan the electrical load before choosing appliances, because additional circuits for a kitchenette may require a subpanel. Home Theater, Home Office, or Gym: $3,000–$10,000 Additional Dedicated-use rooms add specific requirements on top of the base cost. A home theater needs dedicated electrical circuits, acoustic considerations, and structured wiring for audio and video. Budget $3,000–$10,000 above base depending on equipment. A home office adds network drops and electrical outlets; $1,500–$3,500 covers most configurations. A home gym needs impact-resistant flooring (rubber flooring runs $2–$8 per square foot installed) and increased HVAC capacity for the heat load. If the basement is part of a larger renovation, the guide to house additions before and after shows how homeowners typically sequence these decisions. The Complete Cost Summary: All-In Line Items Line Item Low End High End What Drives Variation Framing + drywall + insulation $8,000 $22,000 Number of interior walls, ceiling height Waterproofing + drainage $0 $15,000+ Existing moisture problems, system type Electrical + lighting $3,500 $9,000 Panel capacity, circuit count, fixture type Flooring $1,500 $12,000 Material choice, moisture prep required HVAC extension $1,500 $6,000 Existing system capacity, duct vs. mini-split Bathroom addition $8,000 $25,000 Existing rough-in, ejector pump, fixture grade Egress window (bedroom) $2,500 $5,000 Excavation depth, soil conditions Permits and inspections $500 $2,000 Municipality, scope of work Contingency (15%) Built into budget Built into budget Age of home, unknown conditions This breakdown makes it clear why two homeowners with the same square footage can end up with vastly different total costs. The line items above the base, specifically waterproofing, bathroom, and egress, are not optional depending on project scope, and they are the items most commonly missing from initial contractor quotes. Where Budgets Go Wrong Most basement finishing projects that overshoot their budget do so at the same points. These are not unusual surprises. They are predictable costs that did not make it into the original estimate. Waterproofing discoveries after walls open: This is the most common mid-project cost addition. A contractor removes old paneling or starts framing and finds active seepage, crack damage, or evidence of past flooding. Addressing it at that point is non-negotiable. You cannot frame over a moisture problem. Budget for it before work starts, or assume the contingency covers it. Panel and electrical upgrades: More circuits, more outlets, and more fixtures routinely push older electrical panels to their limit. An inspector will flag this before sign-off. A panel upgrade that was not in the original scope adds $1,500–$4,000 mid-project. Floor leveling: Uneven concrete affects every subsequent trade: flooring, door installation, and trim fitting. Self-leveling compound adds cost and time that rarely appears in a first quote. Check your slab before the project starts. Debris removal: Old insulation, carpet, paneling, and drywall from demo work needs to be hauled. Dumpster fees, disposal charges, and labor hours for cleanup can add $500–$1,500 to the early phase of the project. Mold remediation: Any visible growth or persistent musty smell requires professional assessment and clearance before walls close. Enclosing active mold is not a solution. Remediation costs vary widely based on the extent. Budget $500–$6,000 if there is any indication of growth before the project starts. What’s Negotiable vs. What Isn’t Not every line item has the same flexibility. Understanding which costs are fixed and which have real room to move helps you have a more productive conversation with any contractor. Not negotiable: Permit fees (set by municipality), electrical panel upgrades required to pass inspection, egress window specifications required by code, and waterproofing remediation for identified moisture problems. These are compliance and safety items. Cutting them creates liability and future cost. Negotiable: Finish level on flooring and fixtures, brand and grade of cabinets and hardware, lighting fixture type, layout complexity (fewer walls cost less), and project phasing. The bathroom can be framed and roughed in during the main project and finished later. Flooring can be luxury vinyl rather than hardwood. DIY-able: Painting, trim installation, basic flooring over an existing subfloor, cleanup, and storage assembly. These are the tasks where DIY labor makes a real dent without creating code compliance or safety risk. Leave electrical, plumbing, structural work, and HVAC to licensed contractors. Regional Cost Variation: Where You Live Changes the Number Labor rates for finishing work differ significantly across the country. The same 1,000-square-foot project that costs $40,000 in suburban Ohio will cost closer to $55,000–$65,000 in the San Francisco Bay Area or New York metro, and may run $32,000–$38,000 in parts of the Midwest or Southeast. The difference is almost entirely labor. Material costs are more consistent nationally, though lumber and drywall prices have shown volatility in recent years. Urban markets also tend to have longer permit timelines and more stringent inspection schedules, both of which affect contractor pricing. If you are in a high-cost metro, the mid-range per-square-foot figures in this article will run toward the upper end. What to Ask Your Contractor Before Signing The questions below are not small talk. They are the specific items that determine whether a quote is complete or whether it has hidden costs you will discover mid-project. Is waterproofing included, or is it a change order if you find moisture? Nail down the answer before work starts. What is your permit process? Do you pull all required permits, and is the fee included in this quote? Some contractors price permits separately. If my electrical panel needs an upgrade to support this scope, is that included or additional? This is the most common mid-project addition on older homes. What is your process for handling unexpected structural or foundation issues? Get the change order protocol in writing. What is the payment schedule, and what are the specific completion milestones tied to each payment? Never pay more than 10–15% upfront on a project of this size. Is Finishing a Basement Worth the Cost? For most homeowners, yes, with a clear-eyed view of the return. A finished basement adds functional square footage to a home and typically returns 50–75% of the investment in resale value according to NAHB data, depending on market conditions and the quality of the work. A $40,000 project in a market where finished basement space is valued may add $20,000–$30,000 to the sale price. That is not a full dollar-for-dollar return, but the daily use value of the space, the family room, the home office, the bedroom for a teenager, is where homeowners typically feel the investment most. The cases where it is less worth it: When waterproofing problems have not been resolved first When the project is over-customized for resale (very specialized home theater builds or niche layouts) When a homeowner is planning to sell within 12–18 months and the local market does not heavily value finished basement square footage In those cases, a partial finish, meaning framing, electrical, and flooring without custom rooms, often captures most of the value at a fraction of the cost. For a broader look at how basement finishing fits into whole-home renovation sequencing, the basement remodel cost guide covers full renovation scope and sizing considerations. Frequently Asked Questions How much does it cost to finish a basement? Most US homeowners spend $15,000 to $75,000, with a national average around $30,000 for a mid-size basement at standard finish levels. Projects with bathrooms, waterproofing, or premium finishes push past $75,000. What is the average cost to finish a basement per square foot? The national range is $25 to $75 per square foot, with most mid-range projects landing between $35 and $50. Open layouts with minimal plumbing additions sit at the lower end; multi-room builds with bathrooms run higher. How much does finishing a basement cost with a bathroom? Adding a full bathroom adds $8,000–$25,000 on top of the base project cost, depending on whether rough-in plumbing already exists. A half bath addition runs $5,000–$12,000. Always locate new plumbing close to existing lines to control cost. What is the most expensive part of finishing a basement? Plumbing and bathroom additions, followed by waterproofing remediation, are typically the highest-cost single line items. Electrical panel upgrades and egress window installation are the most common unexpected expenses after a project starts. How much would it cost to finish a basement yourself? DIY finishing can reduce labor costs by 30–50% on eligible tasks. Painting, flooring, trim, and cleanup are genuinely DIY-able. Electrical, plumbing, structural framing, and HVAC require licensed contractors in most jurisdictions. Attempting these as DIY work creates permit and inspection problems. How much does it cost to finish a small basement? A 500-square-foot basement runs $15,000–$37,500 depending on finish level. Smaller spaces cost more per square foot because fixed costs like electrical rough-in and permits do not scale down proportionally with the space. Does finishing a basement increase home value? Typically yes. NAHB data suggests homeowners recover 50–75% of finishing costs in resale value. Returns are highest when the space adds a functional room type, such as a bedroom or family room, and when waterproofing has been properly addressed before finishing. What does basement finishing cost not include? Standard per-square-foot quotes usually exclude waterproofing, egress windows, bathroom rough-in, structural repairs, panel upgrades, debris removal, and mold remediation. Always confirm what is and is not included in writing before accepting a quote. Final Words Here is what you now know that most people do not figure out until mid-project: the basement finishing cost number a contractor quotes on day one is almost never the number on the final invoice. The projects that come in on budget are the ones where the owner priced waterproofing before the framing started, confirmed whether the electrical panel had capacity, and built a 15% contingency into the budget before anyone put a shovel in the ground. The $30,000 average cost is real, but it assumes a dry, structurally sound basement with no plumbing additions. Add a bathroom and address a moisture problem, and you are in $55,000–$65,000 territory before premium finishes. Get the full scope on paper, ask the five contractor questions above, and price the line items separately. That is the difference between a basement project that lands where you expected it to and one that doesn’t. Cost estimates based on HomeAdvisor/Angi 2025 national averages and NAHB Cost of Construction Survey data. Verify current pricing with local contractors and suppliers before budgeting.

Rewiring a house runs $10,000 to $30,000 for most US homes, or about $5 to $17 per square foot depending on size, access, and how much old wiring needs to come out. That gap is wide because two houses with identical square footage can price out $15,000 apart once an electrician sees what’s actually behind the walls. I’ve watched homeowners go into this process anchored to a number they read online, then get blindsided when plaster walls, a tight attic, or a panel running at 100-amp service adds four figures to the estimate. The goal of this article is to make sure that doesn’t happen to you. Cost Note: Figures in this article are estimates based on national averages. Actual costs vary significantly by region, contractor, materials, and project scope. Always get at least three quotes before committing to any project above $1,000. Safety Note: House rewiring involves live electrical systems. All rewiring work requires a licensed electrician in virtually every US jurisdiction. Never attempt whole-home rewiring as a DIY project, as improper wiring is a leading cause of residential fires. Check your local permit requirements before any work begins. House Rewiring Cost by Home Size Square footage is the fastest way to build a rough budget before you call anyone. A larger home needs more wire runs, more outlet placements, and more crew hours, so cost generally scales with size. Use these ranges as your planning frame, not your final number. Home Size Low Estimate High Estimate What Drives Variation 1,000 sq ft $5,000 $17,000 Open access, simple layout vs. finished ceilings, older wiring 1,500 sq ft $7,500 $25,500 Number of circuits, panel work, plaster vs. drywall 2,000 sq ft $10,000 $34,000 Two-story access challenges, knob-and-tube removal 2,500 sq ft $12,500 $42,500+ High-demand rooms, service upgrade, asbestos or hazmat discoveries The low end of each range assumes the electrician has reasonable access, clean drywall construction, and a panel that can be upgraded without a full service replacement. The high end assumes plaster walls, tight attic or crawlspace access, aging knob-and-tube wiring, and a panel running out of headroom. Both scenarios involve the same square footage, which is exactly why size alone doesn’t tell the full story. Cost Per Square Foot: How the Math Works Electrical rewiring costs roughly $5 to $17 per square foot for an existing home. The shortcut: multiply your home’s square footage by both ends of that range to get a quick budget window. A 1,800 sq ft house runs $9,000 on the low end and $30,600 on the high end before any extras. I use per-square-foot pricing only to walk into quote conversations with a calibrated expectation. If an estimate lands well below $5 per square foot, ask what it excludes. If it lands above $17, ask why. The answer may be completely legitimate, or it may be a red flag. Pro Tip: Per-square-foot pricing reflects wire runs and outlet placements, not access difficulty. A 1,200 sq ft home with plaster walls and a finished basement ceiling can price like a 2,500 sq ft home with open framing. Never use the per-square-foot figure without asking the electrician what it assumes about access. New Construction Electrical Cost vs. Rewiring: What the Difference Actually Means New construction electrical cost per square foot typically runs $3 to $5, meaningfully lower than the $5 to $17 range for rewiring an existing home. That gap confuses homeowners who see new-build numbers cited online and wonder why their estimate is higher. The reason is straightforward: new construction wiring happens before walls are closed. The electrician runs wire through open framing, places boxes in unfinished space, and works without any finished surface in the way. There’s nothing to protect, nothing to patch, and no guesswork about where the wire can travel. Rewiring an existing home is a completely different job. The electrician has to navigate around finished rooms, push wire through closed cavities, minimize damage to ceilings and walls, and work with whatever the original builder left behind. Every foot of wire costs more to install when access is limited. That’s not markup; that’s labor. If you see new-construction pricing and wonder why your rewire quote is higher, the access gap is the reason. What Drives the Cost: Five Factors That Move the Number Most Square footage sets the baseline. These five factors are what move an estimate above or below it. 1. Wiring Type and Age Knob-and-tube wiring, common in homes built before 1950, takes more time to remove safely than modern wiring because it’s ungrounded, often runs through insulation, and requires careful tracing before disconnection. Aluminum wiring from the 1960s and 70s needs specific connection hardware at every junction point to prevent fire risk. Cloth-wrapped wiring from the same era is brittle and unpredictable once disturbed. None of these automatically means the whole house needs replacement, but all of them add labor. A home where the electrician can pull old wire in straightforward runs will price lower than one where every room requires tracing, testing, and careful extraction before new wire can go in. Pro Tip: Before requesting quotes, locate any home inspection report, seller disclosure, or past electrical invoice. Electricians who know the wiring type upfront can price more accurately, and you’ll have a better basis for comparing estimates. 2. Wall and Ceiling Access Access is the most unpredictable cost driver. An attic with clear runs to exterior walls is an electrician’s best-case scenario. A finished basement ceiling directly below a living room, where outlets need to be relocated, is the opposite. Tight wall cavities, plaster walls (which crack rather than cut cleanly), built-in shelving, and blocked ceiling paths all add time to every single circuit. I always ask homeowners to walk me through their home before I price it. If I know there’s a cathedral ceiling in the master bedroom or a brick interior wall in the kitchen before I write numbers, the estimate is more accurate from the start. Surprises mid-project cost more than surprises during the walkthrough. 3. Electrical Panel Capacity Rewiring the home’s circuits doesn’t automatically solve a panel that’s out of capacity. A 100-amp service panel, standard in homes built before the 1970s, often can’t support the load of a modern household running central air, an electric range, EV charging, and a home office simultaneously. Upgrading from 100-amp to 200-amp service adds roughly $1,500 to $4,000 to the project, depending on whether the utility company needs to move the meter, the panel location, and local permit requirements. If you’re planning an EV charger, finished basement, or home addition after the rewire, discuss panel capacity in the same conversation. Doing it twice costs more than doing it right once. For context on how panel upgrades factor into broader home improvement projects, the cost to finish a basement often includes a panel upgrade line item for the same reason. 4. Room-by-Room Demand Not every room is priced the same. Bedrooms typically need a few circuits and a handful of outlets, which is straightforward work. Kitchens require dedicated 20-amp circuits for large appliances, GFCI outlets within 6 feet of the sink, and often a separate circuit for the refrigerator, dishwasher, and microwave. Bathrooms need GFCI protection on all outlets. Laundry rooms need a dedicated 240-volt circuit for the dryer. A home office used for multiple monitors, external drives, and video production equipment puts far more demand on the wiring than the “spare bedroom” label suggests. Tell the electrician how you actually use each room, not what it’s called on the floor plan. 5. Permit and Inspection Costs Most jurisdictions require a permit for whole-home rewiring, and some require a separate electrical inspection before walls are closed. Permit fees vary by county; expect $500 to $2,000 depending on project scope and location. The electrician typically pulls the permit, but confirm this in writing before work starts. Some contracts expect the homeowner to handle permits, which changes your timeline and adds a step before work can legally begin. Skipping the permit to save money is a mistake that surfaces at resale. Buyers’ home inspections flag unpermitted electrical work, lenders sometimes won’t finance homes with open permit violations, and insurance companies have grounds to deny claims when unpermitted work is involved in a fire or damage event. A Full Cost Breakdown: What the Line Items Actually Are This is what a complete rewiring project typically consists of, priced individually. Not every project includes all of these, but knowing each line item helps you verify that a quote is complete before you sign. Line Item Low End High End What Drives Variation Wire and materials $1,500 $6,000 Home size, circuit count, wire grade Electrician labor $4,000 $18,000 Access difficulty, crew size, days on-site Panel upgrade (100A to 200A) $1,500 $4,000 Meter location, utility coordination, panel brand Outlets and switches $500 $2,500 Count, GFCI/AFCI requirements, finish grade Permits and inspections $500 $2,000 Jurisdiction, project scope, reinspection fees Drywall/plaster repair $500 $4,000 Number of access holes, surface type, paint matching The labor line is the one that surprises homeowners most. Electricians in high-cost metro areas (Boston, San Francisco, Seattle) bill $90 to $150+ per hour. Rural or mid-sized markets typically run $60 to $90. A two-person crew on a 1,500 sq ft rewire might spend four to six days on-site. That labor total, before materials or permits, can exceed the cost of the wire itself on a complex project. What Homeowners Actually Pay: Three Real-World Examples National averages only go so far. These examples, drawn from homeowner discussions about actual projects, show how the same baseline question produces very different answers depending on the house. Lower-Cost Example: 1,500 sq ft Townhome, $11,000 A 1,500 sq ft townhome rewired from knob-and-tube wiring came in at $11,000. The details that kept it on the lower end: drywall construction (not plaster), a single-story layout, accessible attic, no panel upgrade required, and a relatively simple circuit layout. That’s what the low end of the range actually looks like. Not a bare-bones quote, but a project where the access conditions went in the homeowner’s favor. Mid-Range Example: 1,200 sq ft Two-Story, $14,000 A 1,200 sq ft two-story home had remaining knob-and-tube wiring updated, the panel moved, and service brought to 200 amps. The project took four days. At $14,000, this sits comfortably in the mid-range. The job had real scope (panel relocation, service upgrade) but the electrician didn’t encounter serious access problems in every room. High-Cost Example: Older Home with Plaster, $40,000 A full knob-and-tube replacement in an older home with plaster walls, basement ceiling removal, attic insulation removal, and asbestos-related delays reached $40,000. This is what the top end looks like. It’s not a contractor overcharging; it’s what happens when difficult materials, hazmat protocols, and blocked access converge on the same project. Older homes with these characteristics routinely exceed published national averages. The practical takeaway is to use these examples for pattern recognition, not direct comparison. Your house has its own access conditions, its own wiring history, and its own panel story. Local quotes from licensed electricians who have walked your home are the only numbers that actually apply. How to Tell If a Quote is Fair A quote can be low because the job is straightforward, or because the contractor left out half the work. Before you choose, verify that each estimate covers the same scope. What to Check Why It Matters What to Ask Full vs. partial rewire Defines the project scope Which rooms and circuits are included? Permit handling Avoids compliance gaps Who pulls the permit: you or the electrician? Panel work Can add $1,500 to $4,000 if excluded Is panel upgrade or relocation included? Wall repair Drywall patching is often not included Who repairs access holes after work? Inspection support Confirms the job closes properly Do you attend the inspection or handle callbacks? Warranty Protects you after completion What’s covered and for how long? If one bid comes in 30% lower than the others, ask what it excludes before celebrating. The most common omissions are wall repair, permit fees, and panel work. A quote without those line items isn’t necessarily dishonest, but it’s not a complete price either. Extra Costs That Don’t Show Up in the Electrical Quote The electrician’s invoice ends when the wiring is done. The project isn’t over at that point. Drywall repair after access cuts typically runs $500 to $4,000 depending on how many walls were opened and whether the surfaces require texture matching or paint blending. Plaster is more expensive to repair than drywall. The material behaves differently and most drywall contractors don’t patch it to the same standard. If your home has original plaster, budget separately for a plasterer, not just a drywall finisher. Furniture moving, temporary hotel nights during heavy work, and hidden damage discovered once walls are opened (old leaks, improper splices from previous owners, pest damage in wall cavities) are all legitimate budget items that a fixed-price quote can’t anticipate. I tell homeowners to hold 10 to 15% of their electrical budget in reserve for this category. It doesn’t always get spent, but the projects where it doesn’t get spent are the lucky ones. Signs Your House May Need Rewiring Electrical problems rarely announce themselves clearly. They start as small, repeated annoyances and grow from there. If you’re consistently seeing more than one item on this list, schedule an inspection with a licensed electrician rather than waiting for the issue to resolve on its own. Breakers tripping more than once a month on the same circuit Lights flicker when large appliances run Outlets that feel warm to the touch Burning smell near switches or outlet plates Buzzing or crackling from light switches Scorch marks or discoloration around outlet covers Two-prong ungrounded outlets throughout most of the home Fuse box (not a circuit breaker panel) Home inspection report flagging aluminum wiring, knob-and-tube, or sub-standard grounding Each of these on its own might be an isolated fix. Several together, especially in an older home, usually point to a system that’s been running past its useful life. The inspection cost ($100 to $250 for most electricians) is the cheapest information you can buy before committing to a full rewire budget. Budget Tips That Actually Work The legitimate savings in a rewire project come from project management decisions, not from cutting corners on the electrical work itself. Here’s what makes a real difference: Time it with a renovation. If you’re already opening walls for a kitchen remodel, bathroom update, or home addition, rewiring those spaces simultaneously eliminates most of the access labor cost. The walls are already open. Clear the rooms before day one. Furniture, boxes, and wall items that haven’t been moved before the crew arrives slow down every circuit. Electricians bill by the hour for time spent working around obstacles. Lock in the scope before work starts. Adding a circuit, moving an outlet, or expanding to another room mid-project costs significantly more than planning it upfront. Scope creep is one of the most consistent drivers of final invoices exceeding initial estimates. Get three written estimates. Not three verbal conversations. Three written scopes with line items. The differences between them will tell you more about what you’re actually buying than any single number. Don’t skip the permit. A failed inspection after the fact, or a compliance issue discovered during resale, will cost more than the permit ever would have. This is especially relevant if you’re also working through the cost of a sunroom addition or another permitted project simultaneously. Permits are always cheaper than the alternative. Hire licensed electricians for major work. An unlicensed contractor doing whole-home rewiring creates liability you’ll carry indefinitely. Insurance claims, resale inspections, and permit compliance all touch this decision. Frequently Asked Questions These are the questions homeowners ask most often after they get a first estimate and start trying to make sense of it. How much does it cost to rewire a house completely? A complete house rewire typically runs $10,000 to $30,000, or $5 to $17 per square foot. The final number depends on home size, access conditions, panel capacity, and whether old wiring like knob-and-tube needs careful removal. What is the average cost to rewire a house? The national average lands around $12,000 to $18,000 for a 1,500 to 2,000 sq ft home with moderate access and a panel upgrade included. Homes with plaster walls, difficult access, or hazmat discoveries regularly exceed this range. How much does it cost to rewire a 3 bedroom house? A three-bedroom home typically falls between 1,200 and 2,000 sq ft, putting the rewire cost at roughly $10,000 to $34,000. Kitchen and bathroom circuit requirements, not just bedroom count, drive much of the final number. How much does it cost to rewire a whole house vs. partial rewire? A partial rewire targeting specific circuits or rooms costs less upfront but may require a second visit if more problems surface. Whole-home rewiring is generally more cost-efficient per circuit when the electrical system is broadly outdated. Does homeowners insurance cover house rewiring? Standard homeowners insurance doesn’t cover rewiring for age or obsolescence. It may respond to electrical damage from a covered event, but that depends entirely on your policy. Call your insurer before work starts to understand what documentation they require for completed licensed work. Can rewiring a house increase home value? Rewiring doesn’t produce a visible ROI like a kitchen remodel, but it reduces buyer objections at inspection. Buyers in older home markets often negotiate harder or walk away when inspection reports flag outdated electrical systems. Updated wiring gives you more control over that conversation. Do you need a permit to rewire a house? Yes, in virtually every US jurisdiction, whole-home rewiring requires a permit and inspection. The electrician typically pulls it. Keep copies of permits and inspection sign-offs permanently; they’re required documentation when you sell. How long does it take to rewire a house? Most whole-home rewires take three to seven days for a 1,500 to 2,500 sq ft home with a two-person crew. Plaster walls, blocked access, or permit delays extend that timeline. Ask for a room-by-room schedule before work begins. Can you live in a house during rewiring? Sometimes, but it’s uncomfortable. Power shutoffs, open walls, dust, and noise make full-home rewiring disruptive. Smaller, room-by-room projects are more manageable. Discuss which rooms are affected each day so you can plan meals, work, and sleeping arrangements. Can you finance a house rewire? Yes. Personal loans, home equity loans, HELOCs, and some contractor financing programs all cover rewiring costs. Compare total repayment cost, not just monthly payments. Confirm deposit and draw schedule requirements match your financing timeline before signing anything. Summing Up After ten years of helping homeowners navigate home-building budgets, I’ll give you the direct answer: yes, when the system needs it. A $10,000 to $30,000 rewire is a significant number, but the electrical system in a home built before 1970 was never designed for the load of a modern household. The homeowners who put this off long enough usually end up paying more, whether in emergency repairs, failed inspection negotiations at resale, or insurance complications after a fire traced back to old wiring. Get three written estimates from licensed electricians, understand what each one includes on panel work and permits, and ask the one concrete question that matters: what will you find once the walls are open? The answer shapes the real budget more than any national average ever will. Cost estimates based on HomeGuide and Angi national averages, 2025-2026. Verify current pricing with local licensed electricians before committing to any project.
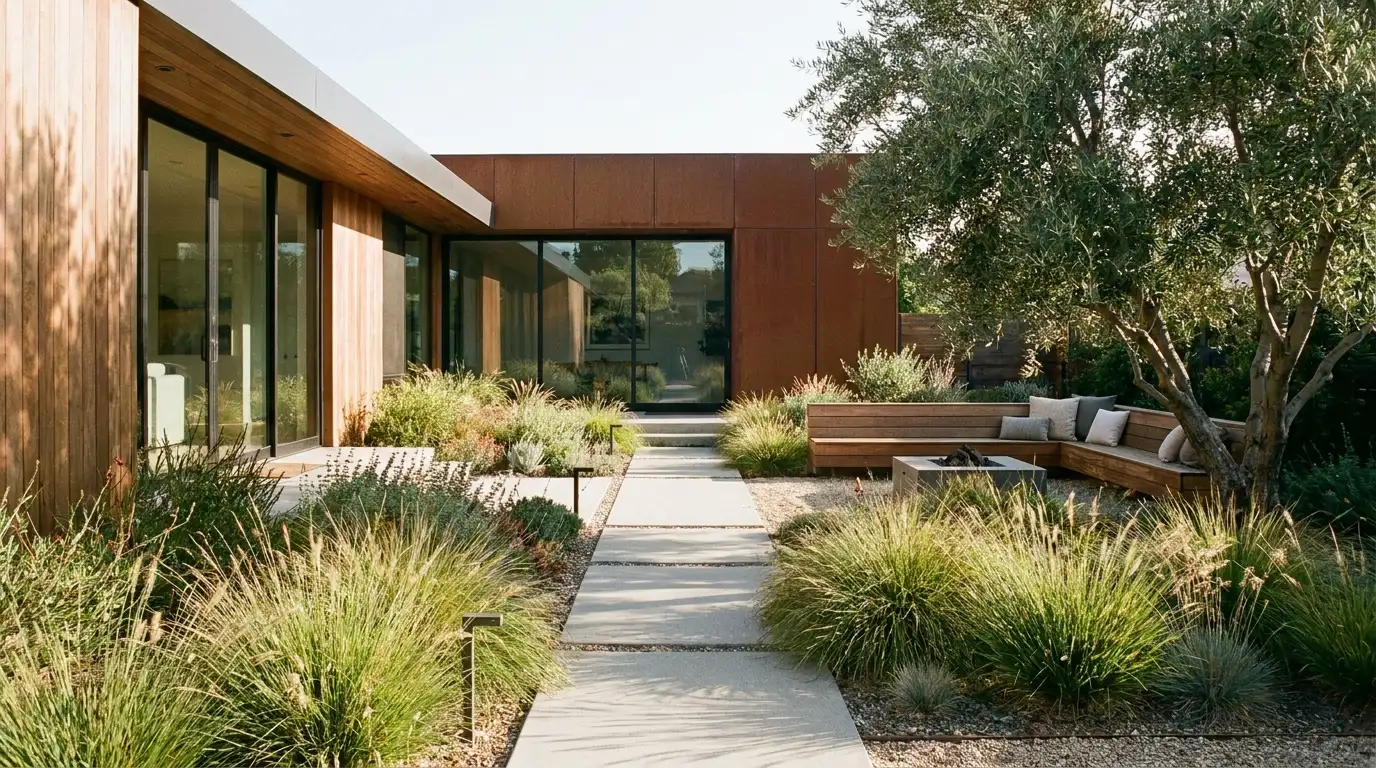
Most modern landscape designs look clean for about two seasons. Then the gravel migrates, the corten steel bleeds rust onto the concrete, and the ornamental grasses crowd out everything planted next to them. The design was chosen for how it looked in a photo, not for how it holds up in a real yard, through real weather, with real maintenance schedules. That’s the problem I run into most often. Modern landscaping done right starts with materials and function, then arrives at aesthetics. That means understanding what concrete, decomposed granite, permeable pavers, and corten steel actually do in your climate, and choosing plants that survive without constant intervention. The ideas below follow that order. Not style first, not trend first. Material first. Cost Note: Figures in this article are estimates based on national averages. Actual costs vary significantly by region, contractor, materials, and project scope. Always get at least three quotes before committing to any project above $1,000. 21 Modern Landscape Design Ideas Worth Building These are arranged by function: paths, planting, structures, water, and living zones. That order helps you identify which area of your yard needs work first, rather than picking ideas at random. 1. Floating Concrete Pathway With Groundcover Gaps Poured concrete slabs with 2-inch gaps planted with creeping thyme or mondo grass. The gaps do two things: they allow drainage, which matters much more than most people think when paving near a foundation, and they break up the visual weight so the path reads as designed rather than just laid. Keep individual slabs at 18 to 24 inches square and space them at 30-inch centers for a natural walking stride. Anything wider and the gaps look accidental. Anything narrower and you lose the softness that separates this from plain concrete. 2. Monochromatic White Garden With Textured Foliage A single-color palette works when texture carries the contrast. White blooms, silver foliage (lamb’s ear, artemisia, dusty miller), and soft feathery grasses create depth without competing colors. The risk is flatness. Avoid it by mixing plant forms deliberately: spiky agave or yucca against rounded mounding plants, with trailing groundcover at the base. This planting scheme performs consistently in south- and west-facing beds where direct sun would bleach saturated colors anyway. 3. Sunken Conversation Pit With Built-In Seating A sunken pit requires 18 to 24 inches of excavation and proper drainage below the seating surface. Skip the drainage layer and you’ll have a water feature you didn’t plan for. Poured concrete or cut stone walls work well. The built-in seating cap should be at least 16 inches wide to be comfortable, and 18 inches is better. Add a central fire feature or a low table. The sunken level naturally creates a sense of enclosure without fences or screens, which is why this works so well in exposed backyards where privacy planting would take years to establish. 4. Vertical Succulent Wall Panel Vertical planting panels only work in the long term with proper irrigation. Drip lines built into each pocket or channel are non-negotiable unless you’re in a climate with consistent rainfall. Manual watering on a vertical wall is unreliable, and plants dry out unevenly. Geo-textile pocket panels or welded wire frames with coco coir liner both work. Arrange plants in repeating geometric blocks for a modern look. Avoid random placement. It reads as messy within a single growing season as plants spread at different rates. 5. Gravel-Filled Dry Creek Bed With Native Boulders A dry creek bed is a drainage solution that doubles as a design feature. If your yard holds water after rain, run the creek from the wet zone to a lower drain point before worrying about aesthetics. Use three gravel sizes: large river rock at 4 to 6 inches for the outer edges, medium cobble at 2 to 3 inches through the middle, and pea gravel in the narrower sections. Single-size gravel looks like a filled trench. Vary the boulder sizes too. One large anchor boulder per 8 to 10 feet of run, with smaller stones between. Plant ornamental grasses and native sedges along the edges to complete the look. 6. Rectangular Reflecting Pool Reflecting pools are more maintenance than they look. Algae growth is the biggest ongoing issue, and a simple recirculating pump with UV sterilizer handles it without chemicals. Keep the pool shallow (12 inches is enough) and the surround clean. A black or dark gray interior finish creates the mirror effect; light-colored plaster bounces light back and kills the reflection. This feature works best when you frame it with simple, repeating elements: stone pavers, a single specimen tree, minimal planting. A busy mixed border competes for attention in the reflection and undermines the whole point. 7. Corten Steel Edging With Ornamental Grass Borders Corten steel develops its weathered orange-brown patina over 12 to 18 months and then stabilizes. It’s not actively rusting, just forming a sealed surface layer. In the first season, it will bleed rust stain onto adjacent concrete or pavers. Install it with a 2-inch clearance from any hardscape you don’t want stained, or accept the patina will transfer. At 3/16-inch thickness it holds a crisp edge for years without warping. Pair it with fountain grass, Karl Foerster, or blue oat grass. The warm rust tone plays well against both silver-blue and deep green foliage. 8. Geometric Hedge Alternatives Clipped boxwood is the obvious choice, but boxwood blight has made it unreliable in humid climates east of the Rockies. Japanese holly (Ilex crenata) or inkberry holly (Ilex glabra) are tougher alternatives that take the same tight shearing. For a looser geometric form, upright yew or ‘Sky Pencil’ holly creates vertical structure without constant trimming. Repeat the same plant in the same form. That repetition is what makes it read as designed rather than planted. One clipped sphere here and a cube there just looks like a nursery. 9. Decomposed Granite Courtyard With a Statement Tree Decomposed granite compacts well and drains fast, but it migrates into adjacent planted areas and needs a stabilizer added (about 3 to 4 percent by weight) to stay in place on slopes. At a 3-inch depth, it resists displacement from foot traffic. The statement tree does the visual work here: a multi-trunk olive, a Japanese maple, or a sculptural desert willow, depending on your region. One tree, centered or deliberately off-axis. Two trees and the composition loses focus. Keep furniture and accent pieces minimal. The point is that the tree reads as the main event in the yard. 10. Hidden Outdoor Kitchen Behind a Slatted Privacy Screen The screen material matters here. Ipe and teak hold up in outdoor conditions, but both are expensive. Aluminum slat panels are more practical: powder-coated, no seasonal maintenance, and they don’t shrink and warp through freeze-thaw cycles the way wood does. Space slats at 2 to 3 inches apart for partial screening that allows airflow around cooking equipment. A gas line and a small prep counter need to be accessible, so plan the screen with a clearance door or removable panel, not a sealed wall. 11. Layered Retaining Walls as a Terraced Garden Feature Any retaining wall over 4 feet in most jurisdictions requires a permit and engineering. Check before you build. Under 4 feet, dry-stacked concrete block or poured concrete with a battered face (1 inch back for every 12 inches of height) handles most residential slope conditions. The critical piece is drainage behind the wall: a perforated drain pipe in crushed stone at the base, sloped to daylight. Without it, hydrostatic pressure builds up and walls fail, usually in the third or fourth wet season. For sloped yards with significant grade changes, layering three or four smaller walls at 18 to 24 inches each is structurally safer than one tall wall and creates more planting opportunities between levels. 12. Black-Framed Pergola With Climbing Vines Steel pergola frames in a matte black powder coat hold their appearance indefinitely with minimal care. That’s a major advantage over painted wood, which needs recoating every three to five years in most climates. The vine selection changes the character over time. Wisteria is beautiful but aggressive and needs heavy annual pruning to stay manageable. Climbing hydrangea is slower to establish but lower maintenance. Jasmine works well in warmer zones. Train the vine in its first two seasons before it sets its own direction. Redirecting a mature vine that’s wrapped structural members is significantly harder. 13. Lawn-Free Front Yard With Permeable Paving Permeable pavers allow stormwater to pass through into a gravel sub-base, which matters in municipalities that charge for stormwater runoff or where impervious surface coverage is restricted. The system requires a 6-inch compacted gravel base minimum and maintenance to prevent the joints from filling with dirt and losing permeability over time. Design-wise, limit yourself to two or three materials: one paving material, one gravel or decomposed granite, and planting. More than three materials in a small front yard read as busy. Check paver installation costs per square foot before finalizing your material choice, because cost variation between paver types is significant. 14. Linear Fire Feature Built Into a Low Wall A linear gas fire feature runs on a dedicated gas line. This is not a DIY installation in most jurisdictions, and local code typically requires a licensed gas fitter for the connection. The burner trough is usually 6 to 12 inches wide and set into a concrete or block wall cap at a height of 18 to 24 inches, comfortable for both standing and seated viewing. Glass fire media (crushed tempered glass, not decorative rock) gives the cleanest look in a modern setting and holds up to outdoor conditions better than lava rock. Site the wall 6 to 8 feet from seating for comfort without singeing. For more fire feature options that don’t require a gas line, a cast concrete fire pit is a lower-cost alternative. 15. Edible Kitchen Garden in Raised Steel Planters Galvanized or Corten steel raised planters in 12 to 16-inch depth handle most annual vegetables and herbs. The steel heats the soil faster in spring, which is useful in shorter growing seasons, and the clean lines integrate better into a modern yard than timber boxes, which need replacing every eight to ten years. Arrange herbs closest to the door (within 10 feet of the kitchen entry if possible) and taller crops like tomatoes or beans at the back. A drip irrigation system through the planters reduces watering time significantly, especially in summer when daily watering would otherwise be necessary. 16. Nighttime Landscape Lighting as a Design Feature LED landscape lighting runs at 12 volts through a low-voltage transformer, typically DIY-installable unless you’re running new conduit or adding a circuit. Warm white (2700K to 3000K) reads better outdoors at night than cool white, which creates a clinical, commercial look. Prioritize three zones: step lighting for safety, uplighting for specimen trees or architectural features, and path lighting at 6 to 8-foot intervals. Avoid ground floods pointing straight up at every plant. It looks like a crime scene. Keep light sources below eye level wherever possible so the effect is ambient rather than blinding. 17. Japanese-Inspired Raked Gravel Garden The maintenance commitment here is real. Raking gravel after wind, leaf fall, or rain is a regular task, not an occasional one. Use angular granite or decomposed decomposed granite rather than river pebbles; round stones don’t hold the rake marks that make this feature visually distinctive. Install a landscape fabric barrier below the gravel to limit weed intrusion, though it won’t eliminate it entirely. This design works well in a small enclosed courtyard where wind and leaf fall are minimal. In an open backyard surrounded by trees, expect to rake weekly in autumn. 18. Smart Irrigation Zones Built Into the Design Zone irrigation matters more than controller sophistication. A basic timer with separate zones for grass (if any), shrub beds, and container plantings will outperform a smart controller running a single undifferentiated zone. Drip irrigation at 1 to 2 gallons per hour delivers water directly to root zones and cuts water use significantly compared to spray heads. Run the lateral lines under gravel or mulch to keep them invisible. If you’re redesigning the yard, install the irrigation infrastructure first. Retrofitting drip lines through established planting or under finished hardscape is more disruptive and expensive. 19. Outdoor Shower Framed by Privacy Planting Drainage is the practical concern most people skip. An outdoor shower needs a French drain or dry well within 6 feet to handle the volume. A standard shower runs at 2 gallons per minute, which adds up fast on surfaces that weren’t designed for runoff. A teak or composite platform over a gravel bed handles the drainage while keeping the surface clean underfoot. Privacy planting works best when it’s planted at 80 percent of full size. You want screening now, not in five years. Bamboo (in contained planters to prevent spreading), tall ornamental grasses, or dense arborvitae all establish fast enough to be useful in the first season. 20. Children’s Play Zone That Can Grow With the Yard The most common mistake is building a play structure that dominates the yard for eight years and then has no second use. A better approach: a level, well-drained area with a decomposed granite or engineered wood fiber surface, a simple timber frame structure, and enough open space around it that the furniture, structure, and fencing can be removed later without leaving a dead zone. Plan the zone at least 6 feet from any boundary, fence, or wall. When the play phase ends, the flat, well-drained area converts naturally to a seating zone, a raised planting area, or an extension of the main patio. 21. Pollinator Meadow Strip Along Fence Lines A meadow strip along a fence line reads as designed when it has a clean hard edge and a defined depth, typically 18 to 36 inches wide. Without that, it looks like something you meant to mow. A corten steel or black steel edging strip along the front line makes the difference. Plant in drifts of three to five plants of the same species, not individual specimens scattered randomly. Native wildflowers (coneflower, black-eyed Susan, little bluestem) establish faster and need less irrigation once rooted than exotic species. Year-one establishment requires consistent moisture; after that, most native plantings are self-sustaining in their adapted climate. How to Plan Modern Landscaping That Holds Up The design sequence matters as much as the materials. Most landscape projects that fail or need expensive rework skipped one of these steps, usually the drainage or the material compatibility check. Drainage first: Before choosing any surface material or planting bed location, map where water currently goes in a heavy rain. Every path, patio, and planting zone needs a clear outlet. Hardscaping that concentrates water toward a foundation or low point is a structural problem, not just a design problem. One anchor feature: Pick one primary element (a specimen tree, a patio, a water feature) and design everything else to support it. A yard without a clear focal point reads as a collection of individual purchases. Match materials to climate: Decomposed granite is excellent in dry western climates but migrates badly in areas with significant rainfall. Corten steel performs well in most climates but bleeds rust in wet or coastal conditions without proper clearances. Wood degrades at different rates depending on species, treatment, and humidity. Regional climate determines which materials are worth the investment. Build infrastructure before finishes: Irrigation lines, electrical conduit for lighting, and drainage pipes need to be in the ground before paving or gravel goes down. Retrofitting them later means tearing up finished surfaces. Leave room to grow: Plants at installation are a fraction of their mature size. Spacing that looks sparse in year one is correct spacing for year five. Overcrowded planting looks good briefly and then becomes a maintenance problem that undermines the design. Materials for Modern Landscaping: What to Expect Over Time This is where most landscaping guides go wrong. They list materials by appearance without telling you what they cost in maintenance two or three years out. Here’s a practical comparison of the surfaces and structural elements that define modern landscape design. Material Approx. Cost / sq ft installed Lifespan Maintenance Climate Watch Poured concrete $6–$12 30+ years Low; seal every 3-5 yrs Freeze-thaw cracking in northern climates without fiber reinforcement Permeable pavers $12–$20 25–30 years Medium; joints need clearing annually Excellent for high-rainfall areas; restricts in heavy clay soil Decomposed granite $2–$5 5–10 years before refresh Low; raking and top-up needed Migrates in heavy rain; not suited to slopes above 5% Corten steel edging $4–$8 per linear ft 20+ years None after patina sets (12–18 months) Avoid within 100 ft of saltwater; bleeds rust onto adjacent hardscape in year 1 Composite decking $8–$15 25–30 years Low; annual cleaning Thermal expansion in direct sun; gaps critical in hot climates Natural stone (bluestone, travertine) $15–$30 50+ years Seal annually; watch for efflorescence in wet climates Travertine slippery when wet; bluestone handles freeze-thaw better Cost estimates are US national averages based on HomeAdvisor data. Your actual figures will vary by region, labor rates, and project scale. Read a complete breakdown of paver installation costs before finalizing your hardscape budget. Plant Choices for Modern Landscaping by Climate The cleanest modern designs use plants that actually survive where you live. Here’s what performs reliably in each major US climate zone without constant intervention. Dry Western Climates (Southwest, California) Agave, blue fescue, ornamental bunchgrasses, desert willow, palo verde, and creosote. These tolerate long dry periods and look intentional in a modern composition. They have strong silhouettes and don’t require deadheading or seasonal replanting. Avoid plants that need supplemental summer irrigation once established. Humid Southeast and Gulf Coast Muhly grass, inkberry holly, southern magnolia, camellia, and native ferns. High humidity and summer heat eliminate many of the species that look good in western or Pacific Northwest landscaping. Boxwood blight is endemic here. Avoid it entirely. Focus on broad-leaf evergreens and grasses that handle both heat and periodic flooding. Temperate Pacific Northwest Japanese maple, hellebore, mondo grass, ferns, and bamboo (contained). This climate supports the widest range of ornamental plants, but slug pressure is significant. Avoid hostas and thin-leafed species in high-moisture zones. Corten steel performs well here without coastal salt exposure. Upper Midwest and Northeast Karl Foerster grass, catmint, switchgrass (Panicum), native coneflowers, and serviceberry. Freeze-thaw cycles are the primary material challenge in these zones. Focus on plants with good winter structure: seed heads and dried stems that hold form through snow rather than collapsing into mush by December. For more on landscaping choices by region, including what specific plants survive in northern climates, that guide covers regional conditions in detail. Modern Landscaping by Space Type Different yard types have different constraints that shape which modern landscape design approaches actually work. A sloped yard needs grading decisions before it needs design decisions. A small front yard needs fewer materials and more negative space, not more features. Use this table as a quick reference before committing to any specific idea. Space Type Primary Challenge Best Move What to Avoid Front yard Curb appeal with limited depth Clean entry path, one specimen plant, permeable paving Cluttering with too many plant types or decorative features Backyard Creating zones without it feeling divided Hardscape anchors, clear sightlines between zones, graduated screening Solid fencing that makes the space feel smaller; full lawn with no planting beds Small courtyard Avoiding visual clutter One material for the ground plane, vertical planting, single focal point Multiple paving types, too many planters, anything that breaks the sightline Sloped yard Drainage and usable flat area Layered retaining walls under 4 ft each, terraced planting, steps with drainage channels Single tall retaining wall without drainage; planting on unstabilized slopes above 30 degrees This table gives you a starting framework. Adjust every choice against your local soil, rainfall, and frost conditions before committing materials or signing any contracts. Common Modern Landscaping Mistakes That Show Up Two Years Later The mistakes that create the most damage in a modern landscape aren’t the obvious ones. They’re the decisions that look fine initially and then compound over time. Here are the four I see most often in residential landscapes. Skipping Drainage Planning Hardscaping without drainage planning is the most expensive mistake in landscaping. Improperly sloped patios channel water toward foundations. Planting beds without drainage hold moisture that rots root systems. Retaining walls without drainage fail within a few wet seasons. Fix grading and drainage before choosing any surface material or plant. It’s cheaper to solve before the landscape is installed than after. Choosing Plants by Appearance, Not Climate Modern landscaping photos are shot in ideal conditions, usually in temperate California or Pacific Northwest climates. The plants look clean and structural. Many of them don’t survive a humid summer in Georgia or a freeze in Minnesota. Research plant hardiness zones and actual mature sizes before purchasing. A 3-gallon Miscanthus grass looks perfect at installation. At three years it’s 5 feet wide and blocking the path. Overcrowding to Fill Space Immediately Newly planted beds look sparse for the first two seasons. That’s correct. Planting at 50 percent of the recommended spacing creates a full look immediately and a jungle two years later. The maintenance time and cost of managing overcrowded plants usually exceeds what was saved on additional plants at installation. Prioritizing Style Before Function A modern yard should handle water, movement, shade, and maintenance before it should look polished. A beautiful patio with no drainage, a path that floods after rain, or a planting scheme that requires weekly attention defeats the practical purpose of an outdoor space. The style follows when the function is working. If you’re adding a deck to your landscape, reviewing outdoor deck ideas alongside these landscaping principles helps ensure the built elements work together as one design. Frequently Asked Questions These are the questions that come up most when homeowners are deciding how to approach modern landscaping, before they’ve hired anyone or committed to materials. What does modern landscape design actually look like? It prioritizes clean lines, a limited material palette (usually two to three surfaces), structured planting with defined edges, and intentional negative space. It avoids ornate decoration, mixed plant styles, or busy borders. The result is a yard that reads as composed rather than accumulated. What plants are used for modern landscaping? Ornamental grasses, succulents, agave, yucca, native wildflowers, and clipped evergreen shrubs. Specific choices depend on climate. A modern Southwest yard uses agave and bunchgrasses; a modern Pacific Northwest yard uses Japanese maple, mondo grass, and ferns. Climate drives plant selection more than style does. What is the cheapest way to make a yard look modern? Add defined edging, resurface paths with decomposed granite or gravel, and reduce plant variety to two or three species planted in mass. Clean edges and reduced visual complexity have more visual impact per dollar than new structures or hardscape. Does modern landscaping require a lot of maintenance? Less than traditional landscaping when it’s designed correctly. Native plants in their climate zone, drip irrigation, gravel or decomposed granite surfaces, and defined edges all reduce ongoing maintenance. A lawn-heavy traditional yard typically requires more time and water than a well-planned modern one. What is mid-century modern landscaping called? Mid-century modern landscaping is sometimes called California modernist or ranch modern. It references the design vocabulary of the 1950s and 60s: clean concrete lines, low-maintenance planting, bold specimen plants, and the integration of indoor and outdoor living. It’s a specific subset of modern landscape design, not a separate category. How do I add privacy without making the yard feel closed in? Use slatted screens at 40 to 60 percent opacity, tall ornamental grasses, or a single row of columnar trees (Sky Pencil holly, Italian cypress) rather than a solid fence or dense hedge. Partial screening maintains spatial openness while blocking direct sightlines from adjacent properties or streets. What are the landscape design trends for 2026? Lawn removal and water-efficient planting, pollinator meadow strips, outdoor kitchen integration, and native plant landscaping are gaining consistent traction. Structurally, linear fire features, steel-framed pergolas, and permeable paving continue to define the clean-line modern look. Is modern landscaping good for small front yards? Modern design principles are better suited to small yards than traditional mixed planting. Fewer material types, more negative space, and one focal point make a small area feel larger. Restrict the plant palette to two species and let the hardscape carry the design. For specific ideas suited to smaller spaces, the modern deck skirting ideas guide includes approaches that help defined outdoor areas feel cohesive in compact yards. Final Words Done right, modern landscape design costs more upfront than patching a lawn or throwing down mulch, but it pays back in lower maintenance and longer material lifespans. The concrete pathway lasts 30 years. The Corten steel outlasts the house. The native planting needs no irrigation after year two. The investment question isn’t whether modern landscaping is expensive. It’s whether the materials and plants you’re choosing will hold up without constant attention in your specific climate. Start with drainage, pick one anchor feature, and select materials for your region before worrying about aesthetics. Get at least three contractor quotes for any work that involves hardscape or grading. That’s the honest sequence for a yard that still looks right a decade from now.
Color Name White Dove (OC-17 / PM-19) Brand Benjamin Moore LRV 83.16 — high, reads as a true white in bright rooms Undertones Soft yellow-gray, reads warmer in low light and cooler in strong north-facing light Best For Walls, trim, cabinets, ceilings, south- and east-facing rooms Avoid In North-facing rooms with cool gray or blue tones, next to bright white trim Benjamin Moore White Dove is the kind of white people search for when they want a soft, clean paint color that doesn’t feel cold or too creamy. It has a warm, calm look that works well in many homes, which is why I understand you’re looking at it more closely before choosing a sample. I’ve seen how tricky white paint can be because it shifts a lot with lighting, trim, flooring, and nearby colors. A shade that looks perfect online may feel different on the wall. You’ll see how the color behaves, where it works best, what undertones to expect, and what to check before using it in your space, so the final choice feels more confident. What Benjamin Moore White Dove Actually Looks Like in a Real Room White Dove OC-17 reads as a clean, soft white in a well-lit room. Put it in a north-facing space with cool gray furniture, and that yellow-gray undertone surfaces in a way that reads flat rather than fresh. That shift is the most important thing to understand before you order a sample. It is not a flaw in the color. It is the color telling you something specific about your room. White Dove sits in Benjamin Moore’s Off-White Collection under the code OC-17, also listed as PM-19. Its LRV of 83.16 puts it firmly in white territory, not cream. In bright rooms, it reflects light cleanly and holds its softness without reading yellow. In lower light, it shows more warmth, which is exactly what most people are looking for when they choose it for living rooms and kitchens. It has been one of Benjamin Moore’s most consistent performers precisely because that range is useful. White Dove Undertones: Yellow-Gray, Not Yellow The undertone of White Dove is a muted yellow-gray. This is different from a straightforwardly creamy white like Alabaster, which pulls clearly warm. White Dove’s gray component keeps it from reading as butter or cream in most conditions. The yellow is present but grayed out, which is why it can feel neutral one moment and slightly warm the next, depending on where you are in the room and what time of day it is. What causes problems is pairing it with colors that have a strong cool bias. Cool slate floors, blue-gray cabinetry, or stark white trim will make the yellow in White Dove visible in a way it wouldn’t be otherwise. Understanding how undertones interact with decor before committing saves you a repaint. The undertone interaction matters more than the swatch on its own. Pro Tip: Paint a large sample board (at least 12×12 inches) and move it to different walls in the room. The undertone shifts more than you’d expect between a north wall at 7 am and a south wall at noon. That undertone behavior directly affects how White Dove reads under different lighting conditions, which is the next thing worth mapping out carefully. How White Dove Looks in Different Room Directions White Dove changes noticeably with natural light. Room direction affects whether it looks bright, muted, warm, or creamy, so testing samples at different times matters before painting. Room Direction How White Dove Looks Best Tip North-Facing Rooms Looks softer and more muted, sometimes closer to greige than white. Cool gray or slate tones can make the yellow undertone more noticeable. Test carefully, especially with cool flooring or furniture. A warmer white like Alabaster SW 7008 may work better. South-Facing Rooms Looks clean, bright, and balanced. Warm natural light keeps the yellow-gray undertone from feeling too strong. Best direction for White Dove, especially in open kitchens, living rooms, trim, and cabinets. East-Facing Rooms Feels warm and inviting in morning light, then becomes calmer and more neutral later in the day. Works well in bedrooms because the color shifts gently with daylight. West-Facing Rooms Afternoon sun adds warmth and may push White Dove toward cream, especially near yellow-toned wood or stone. Test samples around 3 PM and 5 PM, not just in the morning light. White Dove works best when its undertones match the room’s light and materials. Always compare it beside flooring, furniture, and trim before deciding on the final paint choice. Choosing the Right Finish for White Dove The finish changes both how the color looks and how the surface performs. Flatter finishes read softer. Glossier finishes reflect more light, which makes the color appear marginally brighter and slightly more saturated. If you are deciding between Satin and Semi-Gloss for trim or cabinets, the difference between satin and semi-gloss comes down to sheen level and how much traffic the surface gets. Finish Best For Why It Works Matte Bedrooms, low-traffic walls Softest look, minimal sheen, hides imperfections Eggshell Living rooms, hallways, family rooms Balanced softness with enough durability for regular cleaning Satin Trim, doors, bathrooms, kitchens Washable, reflects light gently, holds up in higher-humidity spaces Semi-Gloss Cabinets, doors, trim Most durable option, easy to clean, slight brightening effect One rule worth following: never use Flat or Matte finish in bathrooms. Without the right sheen, moisture marks accumulate and the surface cannot be wiped down effectively. Satin or Semi-Gloss are the correct choices for any space with humidity. White Dove vs Alabaster: Which One Is Right for Your Room? These two colors come up together constantly. They are not the same white, and the difference is meaningful depending on your room’s light. Feature White Dove OC-17 (Benjamin Moore) Alabaster SW 7008 (Sherwin-Williams) LRV 83.16 82 Undertones Soft yellow-gray, balanced Warm, clearly creamy Look Muted warmth, reads closer to true white Cozy warmth, reads off-white Best For Trim, walls, cabinets, classic and contemporary spaces Walls, cabinets, farmhouse, and traditional spaces Potential Risk Can read flat or muted in cool north-facing light May read as overly creamy in very bright rooms Choose White Dove when you want something that reads as a true white in bright conditions but has enough warmth to avoid feeling clinical. Choose Alabaster when you want a consciously cozy, warmer result: farmhouse kitchens, traditional living rooms, spaces with rich wood tones. Both are reliable. The right choice comes down to your room’s light, not the color’s popularity. Where White Dove Works Best: Room by Room 1. Living Room In living rooms with good natural light, White Dove reads open and fresh without the sharpness of a true white like Chantilly Lace. It provides a backdrop that lets furniture and textiles do the work. Pair it with wood floors, linen curtains, and neutral sofas for a calm palette. For rooms that need more definition, add navy, charcoal, olive, or black in accents. Those darker tones stop the white from feeling flat without fighting it. 2. Kitchen Cabinets White Dove is a strong cabinet color because it reads clean without the sharpness that makes some kitchens feel cold. Satin or Semi-Gloss finishes are the right call here: easier to clean and durable enough for a busy kitchen. It pairs well with brass hardware, matte black fixtures, and brushed nickel. If you are working toward a minimalist kitchen design, White Dove cabinets keep the palette restrained without going stark. Test it beside your backsplash first. If your tile is a very cool white or blue-gray, White Dove will read noticeably warmer against it, which may or may not be what you want. 3. Bedroom In bedrooms, White Dove creates a calm backdrop that feels warm rather than sterile. Its softness works with warm lamps, natural textures, and layered bedding. If you are choosing between warm whites and deeper tones, the best bedroom colors for coziness tend to be those that hold warmth without going heavy, which is exactly where White Dove lands. Pair it with dusty pink, sage green, warm gray, or muted blue. Avoid stark white bedding or bright white trim alongside it: that contrast tends to make White Dove look yellow or slightly dingy rather than intentionally warm. 4. Bathroom White Dove reflects light well in bathrooms and keeps small spaces from feeling harsh. Use Semi-Gloss on walls for moisture resistance and a surface that can actually be wiped down. High-Gloss on trim gives a crisp finish. It pairs nicely with marble, warm wood vanities, brass mirrors, and soft gray stone. Check your tile before committing: cool white subway tile will make White Dove appear warmer by contrast. 5. Exterior Outdoors, White Dove reads clean in sunlight without the glare of a true white. It works particularly well on trim against greige, navy, deep green, charcoal, or warm beige siding. As a full exterior color, it gives a home a soft, classic look. Note that outdoor light is stronger than indoor light, so the color will read lighter than your interior samples. In harsh sun or weather, it can also show dirt and wear sooner than darker colors. Colors That Work With White Dove White Dove pairs best with colors that either support its warmth, provide gentle contrast, or add depth without making the palette feel sharp or competing. Coordinating Color Color Code LRV Best Use Classic Gray OC-23 73.67 Walls, bedrooms, hallways Balboa Mist OC-27 65.53 Living rooms, open-plan spaces, bedrooms Revere Pewter HC-172 55.05 Walls, cabinets, built-ins Hale Navy HC-154 8.36 Accent walls, doors, cabinets Kendall Charcoal HC-166 14.61 Built-ins, trim, doors Test these pairings with White Dove in both natural and artificial light before committing. Soft neutrals keep the palette calm, darker shades add structure, and earthy tones reinforce the warmth without fighting it. When You Should Not Use White Dove White Dove is not the right answer for every space. Being specific about where it fails will save you a repaint. North-facing or low-light rooms: The gray undertone takes over, and the color reads flat or slightly dirty. A warmer white like Alabaster SW 7008 holds up better here. Rooms where you want a crisp, true white: White Dove is an off-white. For sharp, minimalist spaces, Chantilly Lace OC-65 is the more appropriate choice. Rooms dominated by cool gray or blue tones: The yellow undertone will quietly conflict with cool slate floors, gray stone, or blue-gray cabinetry, making the whole palette look slightly off. Spaces where existing trim is already bright white: The contrast will make White Dove walls look yellowed rather than intentionally warm. Repainting the trim is necessary to make it work. Bathrooms painted in Flat or Matte finish: Poor ventilation plus the wrong finish means moisture damage and no way to clean the surface properly. Satin or Semi-Gloss are the correct choices for any high-humidity room. Tight budgets: Benjamin Moore is premium-priced. If you want to understand the full cost before committing, it helps to know how much painting a house costs before you factor in premium paint at the higher end of that range. How to Sample White Dove Before You Commit Testing properly is the difference between a confident decision and an expensive mistake. Peel-and-stick samples: Place on different walls at different heights. View them at 7 am, noon, and 7 pm to see the full range of the color’s behavior. Painted sample boards: A 12×12-inch board you can move around the room gives a more accurate read than a fixed swatch, particularly next to cabinetry or flooring. Test at least two spots: One in the room’s brightest area and one in the darkest corner. The gap between those readings tells you how much the color will shift. Use the actual finish: Matte and Semi-Gloss read as noticeably different colors. Test in the sheen you plan to use, not just what’s on the sample card. Step back six feet: Undertones are more visible from a distance than up close. Read the sample from across the room, not just from arm’s length. Sampling White Dove this way takes about a week but avoids the cost and frustration of repainting a room that wasn’t tested correctly. A Note on “SW White Dove” A large number of searches use the phrase “SW White Dove,” expecting to find a Sherwin-Williams product. Sherwin-Williams does not make a paint called White Dove. The color belongs entirely to Benjamin Moore (OC-17). If you are working within the Sherwin-Williams range and want something similar, the closest options are Alabaster SW 7008 for a warmer version, Extra White SW 7006 for a brighter and crisper match, or Shoji White SW 7042 for something slightly more muted. None of these are exact dupes. White Dove’s specific undertone balance is particular to its Benjamin Moore formulation. Frequently Asked Questions About Benjamin Moore White Dove These are the questions I hear most often from people who already have the chip on their wall and still aren’t sure what they’re looking at. Is Benjamin Moore White Dove warm or cool? White Dove is warm. Its yellow-gray undertone places it on the warm side of the white spectrum, though it is far more balanced than a clearly creamy white like Alabaster. In strong cool light it can read neutral, but it never reads cool. Does White Dove look yellow on walls? It can, in specific conditions: strong afternoon light, warm incandescent bulbs, or placement next to bright white trim. In balanced natural light it reads as soft white, not yellow. Sampling at different times of day in your specific room tells you whether yellow is going to be a problem for your space. What is the LRV of Benjamin Moore White Dove? White Dove has an LRV of 83.16 according to Benjamin Moore’s official specs. That places it firmly in white territory, lighter than most off-whites, which is why it reads as a true white in bright rooms rather than cream. Is White Dove good for trim? Yes. White Dove works particularly well on trim in rooms where the walls are a warm neutral or a deeper color. Its softness prevents trim from looking harsh or stark. Pair it with walls in Balboa Mist OC-27 or Classic Gray OC-23 for a tonal approach that reads calm and cohesive. What colors go with Benjamin Moore White Dove? Hale Navy HC-154, Kendall Charcoal HC-166, Classic Gray OC-23, Balboa Mist OC-27, and Revere Pewter HC-172 are all reliable pairings. Warm neutrals and deep contrast colors work best. Cool grays and blue-toned palettes tend to conflict with its yellow undertone. How does White Dove compare to Chantilly Lace? Chantilly Lace OC-65 is a crisp, near-true white with no meaningful undertone. White Dove is warmer and softer with an LRV about five points lower. Use Chantilly Lace for sharp, contemporary spaces that need brightness without warmth. Use White Dove when you want softness alongside that brightness. Can White Dove be used on kitchen cabinets? Yes, and it performs well there. Its softness keeps kitchens from feeling clinical. Use Satin or Semi-Gloss for durability and cleanability. Test beside your countertop and backsplash before committing, since very cool tile can make the cabinet color read warmer than expected. Final Thoughts White Dove is more than just a soft white; it’s a color that adapts to your space and lighting. I’ve shared how its undertones, LRV, and finishes affect walls, trim, cabinets, and exteriors. You’ve also seen how to sample it the right way, explore complementary colors, and understand when it may not be the best choice. By paying attention to lighting, pairing it thoughtfully, and testing properly, you can make sure your rooms feel balanced, warm, and inviting. I’ve found that seeing it in your own space changes everything. Try these tips yourself, and let me know in the comments how White Dove works in your home.

Choosing a design style can feel confusing when you like multiple looks at the same time—modern, cozy, rustic, or bold all pulling you in different directions. Interior design styles make that decision easier by acting as flexible starting points rather than strict rules. Each style gives you direction on color palettes, furniture choices, materials, textures, and overall mood so your space feels more cohesive and intentional. In this guide, you will find key interior design styles, what defines each one, where they work best, and how to mix them without losing balance. If you have already completed our interior design style quiz, this is the next step to understand your result in a deeper, more practical way. Interior Design Styles Explained for Beginners Interior design styles help you understand how different choices in furniture, color, materials, and layout come together to create a specific mood in a room. Instead of guessing what looks good, you can use these styles as simple guides to make your space feel more balanced and intentional. Each style offers its own direction; some focus on minimal and clean spaces, while others bring in texture, warmth, or bold character. When you understand these basics, it becomes easier to mix elements without making the room feel random or cluttered. This section breaks down interior design styles in a simple way so you can quickly identify what fits your taste, your space, and the way you actually live every day. Simple and Calm Interior Design Styles These styles share one thing: less visual noise. They use open layouts, restrained color, and furniture chosen for usefulness as much as appearance. They work for people who want a room that does not feel like it requires constant maintenance to look right. 1. Modern Interior Design Style Modern interior design refers to early- to mid-20th-century design, not anything currently trending. The defining features are clean lines, open layouts, smooth surfaces, and very little decorative clutter. Furniture sits close to the floor. Shapes are geometric. Nothing is fussy. Common materials: neutral paint, wood, glass, metal, leather. If you want to try it without committing, replace any ornate piece with something that has a straight silhouette and no added detail. That is where modern starts. 2. Contemporary Interior Design Style Contemporary design means what is happening right now in design, so it shifts. As of the mid-2020s, that means curved furniture, soft shapes, warm neutrals, and natural textures. It is less rigid than modern and more forgiving when you mix in older pieces. Common materials: stone, warm wood, glass, textured fabric. One curved chair or a textured rug in a warm oat or clay color is a practical first step. 3. Minimalist Interior Design Style Minimalist design is often misread as empty. The goal is not emptiness — it is intentionality. Every piece should earn its place, which usually means fewer but better-quality items, hidden storage, and surfaces that stay clear by design rather than by effort. The same logic applies in the kitchen: a minimalist kitchen works through handleless cabinets, integrated appliances, and zero counter clutter, not through removing everything useful. Common palette: white, beige, gray, black, natural wood, stone. The practical starting point is clearing the surfaces you look at most. Do not buy anything until you have done that first. 4. Scandinavian Interior Design Style Scandinavian design solves the problem that minimalism sometimes creates: rooms that feel cold. It keeps the simplicity but adds warmth through natural light, pale wood, soft textiles, and a livable sense of comfort. This is a style that works particularly well in small apartments and rooms with low ceilings, where the light palette and low-profile furniture keep the space from feeling compressed. Common materials: light wood, wool, linen, cotton, sheer curtains. Start with a pale wood side table, a cozy throw, and let natural light in as much as your windows allow. 5. Japandi Interior Design Style Japandi merges Japanese wabi-sabi principles with Scandinavian warmth. Low-profile furniture, handmade ceramic and clay pieces, and a palette of taupe, cream, and charcoal define the look. The result is calm without being sparse, and grounded without being heavy. Common materials: bamboo, wood, clay, linen. A low bench or a ceramic vase on a clear surface gets you there faster than redecorating an entire room. 6. Quiet Luxury Interior Design Style Quiet luxury is polish without announcement. The furniture is well-made and well-proportioned. The palette stays in cream, taupe, camel, and stone. Nothing shouts. What makes it work is material quality and restraint, fewer pieces, better finish, correct scale. If you are working through the bedroom specifically, the best bedroom colors for this style sit in the mushroom, warm gray, and pale putty range. Common materials: wool, linen, leather, wood. The shift toward quiet luxury does not require buying everything new. It often means removing what is cluttering a room that already has good bones. 7. Modern Organic Interior Design Style Modern organic is what happens when you want the clean layout of a modern room but cannot stand how cold it feels. Curved furniture softens the geometry. Natural materials, boucle, stone, linen, live-edge wood- add warmth without adding clutter. The palette stays quiet: white, beige, taupe. One curved upholstered chair or a stone-look coffee table is enough to move an otherwise modern room in this direction without a full redesign. Classic and Refined Interior Design Styles These styles bring structure, symmetry, and finish. They tend to use richer materials, more deliberate layouts, and details that make a room feel considered rather than assembled. They take more discipline to execute well, but they age better than most trend-led looks. 8. Traditional Interior Design Style Traditional design is grounded in balance and history. Symmetrical layouts, paired furniture arrangements, crown molding, framed art, and rich fabrics create a room that feels established rather than put together recently. It works best in homes that already have architectural detail to work with. Common materials: dark wood, velvet, silk, brass. A classic rug with a symmetrical furniture arrangement is the fastest way to test whether this direction works in your space. 9. Transitional Interior Design Style Transitional design strips the formality out of traditional without going fully contemporary. Classic furniture shapes stay, but the heavy details and rich colors get replaced with soft neutrals and cleaner lines. It is the style most likely to work for people who own a mix of old and new pieces and want them to coexist. Common materials: linen, wood, stone, metal. Try pairing a traditionally shaped sofa with modern pendant lighting — that combination captures transitional exactly. 10. Art Deco Interior Design Style Art Deco is deliberate and structured. It uses strong geometric shapes, shiny surfaces, and rich materials — emerald velvet, black lacquer, mirrored furniture, gold detailing, and navy. The look requires restraint to avoid tipping into excess. One brass-and-glass lamp or a geometric mirror placed intentionally is enough to bring in the reference without overwhelming a room. 11. Hollywood Regency Interior Design Style Hollywood Regency borrows from old-Hollywood glamour: high contrast, mirrored surfaces, crystal chandeliers, lacquered furniture, and plush fabrics. It is harder to execute subtly than most interior design styles, but it works well in rooms that are meant to be dramatic — a formal sitting room, a primary bedroom, a powder room. Used in those smaller doses, it lands better than trying to commit an entire home to the look. 12. Grandmillennial Interior Design Style Grandmillennial brings back the details older homes were full of, wallpaper, florals, pleated lampshades, skirted furniture, wicker, and antiques, and presents them as deliberate choices rather than leftovers. The result is classic without being stuffy. Common materials: chintz, rattan, brass, patterned fabric, blue and green tones. A pleated lampshade or a floral throw pillow is a low-commitment way to test whether this direction fits the room. Country-Inspired Interior Design Styles These styles are built around warmth and usefulness. They use natural materials, lived-in textures, and furniture that looks like it has a history. They work well in homes where the priority is comfort over precision. 13. Farmhouse Interior Design Style Farmhouse design is practical-first. Classic farmhouse leans vintage — more worn, more layered. Modern farmhouse cleans that up: shiplap, simple open shelving, matte black fixtures, warm whites, and wood accents. Both versions prioritize casual function over formal arrangement. Common materials: wood, iron, cotton, stone, aged finishes. A wood dining table with metal chairs is one of the fastest ways to establish this direction in a kitchen or dining room. 14. Rustic Interior Design Style Rustic design is less polished than farmhouse and more grounded in natural materials. Exposed wood beams, stone fireplaces, leather seating, and reclaimed wood planks define the look. It reads as a cabin or lodge rather than a country kitchen. The palette stays earthy: brown, cream, charcoal, dark wood. If you are choosing a dining table to anchor a rustic room, the wood species you pick matters more here than in most styles, oak and reclaimed pine hold the weathered character far better than maple or cherry. 15. French Country Interior Design Style French country sits between rustic and classic, distressed wood and stone alongside antique-style furniture and soft linen. The room feels comfortable rather than perfect. Cream, sage, and lavender are the colors most associated with it. Wrought iron, toile, and lightly worn finishes round out the materials palette. 16. Cottagecore Interior Design Style Cottagecore takes its cues from country cottages, old gardens, and handmade objects. It feels deliberately nostalgic — floral wallpaper, lace curtains, vintage dishes on open shelves, ceramic pitchers, and soft dusty pastels. The materials are humble: cotton, linen, ceramic, and wood. It suits rooms where warmth and personal history matter more than current trends. Coastal and Nature-Inspired Interior Design Styles These styles use brightness, natural materials, and outdoor references to make a room feel airy and connected to something beyond the four walls. They differ in how literal that connection needs to be. 17. Coastal Interior Design Style Coastal does not require anchors and rope accents to work. What makes a room feel coastal is lightness — white and beige walls, linen upholstery, woven jute or rattan, and comfortable furniture with a relaxed scale. The palette is sandy neutrals plus blue or soft green. Keep the clutter out and the natural texture in. 18. California Coastal Interior Design Style California coastal is warmer and more pulled-together than standard coastal. Light oak furniture, linen upholstery, leather accents, and indoor-outdoor flow define the look. It is beach-adjacent without leaning on beach decor. The palette stays in cream, tan, and soft white. This works well in homes with large windows or direct garden access. 19. Mediterranean Interior Design Style Mediterranean design draws on homes in southern Europe, Spain, Italy, and Greece, and looks best in rooms with high ceilings, arched doorways, or tile floors to work with. Plaster walls, terracotta, hand-painted tile, wrought iron, and cream and cobalt blue are the signature materials. Without some existing architectural texture to anchor it, Mediterranean details can feel applied rather than integrated. 20. Biophilic Interior Design Style Biophilic design goes beyond adding a few plants. It builds a deliberate connection between the interior and the natural world through daylight, natural ventilation, organic shapes, and materials like wood, stone, clay, and bamboo. The color palette follows nature: greens, browns, warm creams. Maximizing natural light is where this starts, plants and natural materials layered after. Bold and Collected Interior Design Styles These styles prioritize personal expression over visual consistency. They tend to reward people who have accumulated meaningful pieces over time and want the room to reflect that accumulation rather than override it. 21. Bohemian Interior Design Style Bohemian rooms look collected rather than purchased. Layered rugs, mixed textiles, plants, woven pieces, and art in warm and jewel tones all coexist without a strict organizing principle. The materials are natural: rattan, wood, cotton, macrame. The only real rule is that everything should feel chosen rather than just filled in. Start with one layered rug situation and let the room build outward from there. 22. Eclectic Interior Design Style Eclectic design is a thoughtful mixing of different time periods, materials, and styles, brought together by a consistent thread. That thread is usually color or scale: a repeated color or a consistent furniture height range helps a mixed room feel less random. Without that connecting element, eclectic slides into clutter. With it, the room reads as personal and curated. 23. Maximalist Interior Design Style Maximalism is full, wallpaper, gallery walls, bookshelves, patterned furniture, bold colors, but it still needs a plan. The difference between maximalism and chaos is intention. A repeated color family, a dominant pattern, or a consistent material scale keeps the room readable even when it is dense. Start with one wallpapered wall and a gallery of related art before filling the rest of the room. Urban and Structure-Led Interior Design Styles These two styles have the strongest material signatures of any on this list. They are defined less by what is decorative and more by what the room is made of. 24. Mid-Century Modern Interior Design Style Mid-century modern comes from the 1940s through the 1960s and is defined by tapered legs, clean silhouettes, warm walnut or teak wood, and an open-plan sensibility. The palette leans toward mustard, olive, cream, and leather. It holds up well alongside contemporary furniture because the lines are simple enough to be compatible with a lot of different pieces. 25. Industrial Interior Design Style Industrial design takes inspiration from warehouses and lofts and highlights structure rather than hiding it. Exposed brick, concrete ceilings, metal pipes, open ductwork, and reclaimed wood are the raw materials. The palette is black, gray, brown, and steel. This style works well in spaces that already have those structural elements. Without them, it tends to look like a costume rather than a design choice. How to Choose the Right Interior Design Style for Your Home The most common mistake people make here is starting with the aesthetic rather than the room. Before you land on a style, these are the questions that matter more than which Pinterest boards you have saved. Start with the Mood the Room Needs: Write down three words that describe how the room should feel: calm, energetic, cozy, formal, bright, grounded. Those words will eliminate half the style list immediately. A room that needs to feel calm does not benefit from maximalist layering, no matter how well-executed it is. Read What Your Room Already Has: Ceiling height, window size, trim detail, flooring type, and built-in features all push toward certain styles. A room with 9-foot ceilings and original crown molding works with traditional or transitional. A room with concrete floors and exposed ductwork is already doing some of the industrial work for you. Fighting the architecture is expensive and rarely works. Once you know the direction, choosing paint colors that reinforce the style — rather than conflict with it — is where the room either comes together or falls apart. Think Through How the Room Gets Used: Kids, pets, a partner who reads on the sofa, guests who stay for a week- these daily realities change what a style needs to deliver. A minimalist room only stays minimal if the storage is genuinely working. A cottagecore aesthetic with open shelving requires someone who enjoys maintaining it. Set a Realistic Budget Before You Commit: Some interior design styles, such as Scandinavian, bohemian, and farmhouse, work with secondhand furniture, painted pieces, and affordable textiles. Others, quiet luxury, Art Deco, and Hollywood Regency depend on material quality and statement pieces to land. The style that fits your budget is always the right starting point. Use Reference Images to Find the Pattern: Save 10 to 15 rooms that genuinely appeal to you without filtering by style label. Then look for what they have in common: the palette, the furniture scale, the texture density, the lighting. That pattern is your actual preference, and it will likely point clearly toward one or two of the styles on this list. Interior Design Styles That Are Easy to Mix Some pairings work because the styles share underlying logic, a similar color range, a compatible material palette, or a matching mood. The general approach: choose one dominant style for the large furniture and architecture, then let the second style come in through lighting, rugs, art, and accessories. Style Mix Why It Works Modern + Organic Clean lines feel warmer with wood, stone, and soft textures layered in. Traditional + Contemporary Classic furniture shapes read fresher when paired with modern lighting and art. Scandinavian + Japandi Both are minimal, warm, calm, and practical — the overlap is almost total. Coastal + Farmhouse Natural texture, relaxed furniture scale, and warm neutrals connect the two. Industrial + Rustic Raw wood, metal, stone, and aged finishes share the same material logic. Bohemian + Mid-Century Modern Tapered-leg vintage shapes pair well with layered rugs and textured textiles. The table above is a starting point, not a complete list. Any two styles that share at least two of the following — color range, material palette, furniture scale, mood — can usually coexist in the same room. Interior Design Styles People Often Confuse Several interior design styles look similar at first because they share materials or furniture shapes. The differences are in emphasis, not in the presence of the same elements. Modern vs Contemporary: Modern refers to a specific design period (mid-20th century). Contemporary means current — it changes over time. Minimalist vs Scandinavian: Minimalist strips the room back further. Scandinavian adds cozy texture and warmth that strict minimalism avoids. Bohemian vs Eclectic: Bohemian is relaxed and layered by nature. Eclectic is more deliberately curated — the mixing is intentional, not accumulative. Rustic vs Farmhouse: Rustic is rougher and closer to nature. Farmhouse is warmer and more domestic — practical without being raw. Coastal vs Nautical: Coastal is light, textured, and airy. Nautical uses literal sea motifs — anchors, rope, navy stripes. Traditional vs Transitional: Traditional is formal and symmetrical. Transitional softens that with lighter materials and cleaner lines. Best Interior Design Styles by Room Different rooms have different functional demands. A bedroom needs to support sleep; a kitchen needs to support use. The style choices that work well in one room do not always translate directly to another. Room Interior Design Styles That Work Well Living Room Transitional, contemporary, Scandinavian, coastal, modern organic, eclectic Bedroom Japandi, Scandinavian, minimalist, coastal, quiet luxury, traditional Kitchen Modern, farmhouse, Mediterranean, Scandinavian, industrial, contemporary Bathroom Minimalist, biophilic, Art Deco, coastal, modern organic The room-by-room breakdown above reflects functional fit — smaller spaces need styles that rely on open layouts and hidden storage; high-use rooms need styles that tolerate real wear. Treat it as a narrowing tool, not a restriction. Common Mistakes When Choosing an Interior Design Style Most rooms that feel off have one of these problems, not a taste problem. Copying one photo exactly: A single room image does not account for your layout, ceiling height, natural light, or budget. Use it as a reference for details, not a template for the whole room. Ignoring how the room actually functions: Storage, seating count, clearance paths, and traffic flow are not style decisions — they are room decisions that the style has to work around, not replace. Buying accessories before the anchor pieces: Cushions and art do not fix a room where the sofa is the wrong size or the wrong style direction. Get the large pieces right first. Mixing more than two strong styles: Two styles with a connecting thread work. Five competing directions do not. Narrow down before you start buying. Ignoring the light: A color or material that looks right in a showroom or in a photo taken under studio light may not behave the same way in your north-facing living room at 4 pm. Test materials in context before committing. Building entirely around trends: Trend-driven choices date quickly. Classic materials, functional furniture, and a handful of personal pieces will look more considered in five years than a room assembled entirely from last year’s most-pinned images. Frequently Asked Questions About Interior Design Styles What interior design style is easiest to achieve on a budget? Bohemian, farmhouse, eclectic, and Scandinavian work well on limited budgets. All four tolerate secondhand furniture, painted pieces, and DIY updates better than styles that depend on material quality and custom scale. Which interior design styles work best in small spaces? Scandinavian, Japandi, minimalist, and contemporary are the most practical in small rooms. All rely on open floor area, light color palettes, and furniture chosen for usefulness — which is exactly what a small space needs. Which interior design style has the best resale value? Transitional, contemporary, and modern organic tend to be the safest choices for resale. They are current without being polarizing, which means more buyers can picture their own furniture in the space. Can you mix more than two interior design styles in one room? One dominant style and one supporting style is usually the limit. A third style can appear through small accents, but any more than that and the room loses a coherent visual logic. The connective thread — shared color, material, or scale — has to be legible. What is the difference between an interior design style and a decor theme? A style guide decides about furniture, layout, materials, color, and overall mood. A theme is usually a surface layer — a motif, subject, or seasonal reference applied over an existing design foundation. Can renters use interior design styles without permanent changes? Yes. Rugs, curtains, removable wallpaper, furniture, lighting, art, cushions, and bedding can shift a room significantly without touching the walls or flooring. Most rental-appropriate style direction happens through those elements anyway. How do I know which interior design style actually fits my personality? Save 10 to 15 rooms you genuinely like, then look for patterns in color, material, furniture scale, and clutter level. The repeated elements are the style. The interior design style quiz on this site can also help you identify your direction more quickly. What is the most popular interior design style right now? Contemporary, modern organic, and quiet luxury are the most searched interior design styles in the US currently. Japandi and Scandinavian remain consistently strong. These styles share a preference for warm neutrals and natural materials over bold color or heavy pattern. Final Thoughts Choosing from different interior design styles becomes easier once you understand how each one shapes color, furniture, and overall mood. Instead of feeling overwhelmed by options, you can now see how styles like modern, Scandinavian, rustic, or eclectic guide your decisions in a practical way. I focus on how each style helps you build a space that matches how you actually live, not just how it looks in photos. You can now identify what fits your home, mix styles with balance, and avoid common design mistakes. I encourage you to revisit your favorite sections, try small changes first, and share which interior design style feels most like your own space and personality.

The first time I tried knockdown texture, I over-applied the joint compound and ended up with walls that looked like the surface of the moon. Too thick. Too random. Wrong trowel angle. I sanded it back and started over, and the second attempt looked completely different. That experience is pretty much the story of every drywall texture project: the technique matters as much as the choice. This guide covers the most popular modern drywall texture types, how each one behaves in a real room, which ones you can DIY in a weekend, and which ones you should leave to a pro. Pro Tip: Surface prep is the step that decides whether any texture looks good. Patch cracks, sand down ridges, and prime before you touch the joint compound. Skipping prep is the most common reason DIY texture jobs look amateurish. What Modern Drywall Textures Actually Do Modern drywall textures are different from the heavy finishes that dominated homes in the 1980s and 90s. Popcorn ceilings, heavy slap brush, those styles used texture as a shortcut to hide bad drywall work. The modern approach is the opposite: subtlety, intentional pattern, and compatibility with today’s interiors. The goal is a wall that adds visual interest without competing with the room’s furniture, lighting, or color palette. Beyond aesthetics, texture is practical. It hides minor imperfections in the drywall, slight unevenness, small dents, tape lines, that smooth finishes expose immediately. The right texture also affects how light behaves in the room. A light knockdown softens direct light and reduces glare; smooth walls reflect it cleanly and can feel stark in certain lighting. If you’re also considering shiplap half-wall paneling as an alternative to texture on lower portions of a room, that’s a choice worth thinking through before you commit to texturing the full wall. Before picking a texture, spend a few minutes observing how light moves through your room at different times of day. That single observation will narrow your options significantly. Types of Drywall Textures Modern drywall textures can completely change the look and feel of a room. Each style has its own visual appeal, maintenance needs, and ideal placement. Here’s a guide to the most popular textures and where they work best. 1. Knockdown Knockdown is the texture I’d recommend most often for a DIYer who wants something that looks genuinely modern. You spray drywall mud onto the wall to create random peaks, then use a knockdown knife, a wide, flexible blade, to lightly skim across the surface and flatten the high points. The result is a mottled, low-relief pattern that catches light at gentle angles and softens the look of a room without drawing attention to itself. Best for: Living rooms, bedrooms, open-plan spacesAvoid if: You want smooth, reflective walls in a minimalist space 2. Skip Trowel Skip trowel is hand-applied. You load a curved pool trowel with joint compound and drag it across the wall in arcing passes, intentionally leaving gaps where the base coat shows through. The result is an organic, slightly Mediterranean-feeling finish with soft depth and movement. Getting consistent coverage by hand is harder than it sounds. The pattern tends to look better when it’s less uniform, but “controlled randomness” is a technique, not an accident. Best for: Accent walls, bedrooms, transitional interiorsAvoid if: You’re working alone on a large wall and want to finish in a single session 3. Smooth / Imperfect Smooth Smooth walls are the most demanding texture to execute well. A Level 5 finish, the standard for smooth drywall in high-end construction, requires skim-coating the entire surface with joint compound, sanding it flat, and repeating until every seam, fastener dimple, and surface variation is invisible. The problem with smooth walls is that they show everything. Any imperfection in the underlying drywall, any bump or ridge, any roller texture from the primer, all of it shows under raking light. Best for: Contemporary interiors, art walls, rooms with controlled lightingAvoid if: Your drywall has significant flaws or you’re working under high natural light 4. Orange Peel Orange peel is a beginner-friendly option. You apply joint compound through a hopper sprayer, which creates a fine, even mist that dries into small raised dots; the pattern genuinely resembles citrus skin. It is consistent and fast. Orange peel is extremely common in new builds and rental properties because it’s forgiving, easy to touch up, and works on both walls and ceilings. Best for: Ceilings, rentals, hallways, high-traffic wallsAvoid if: You want a contemporary, upscale finish in a main living area 5. Hawk and Trowel Hawk and trowel is a hand-applied finish using traditional plasterer’s tools, a flat hawk to carry compound and a flexible steel trowel to spread it. Done well, it produces a fluid, layered finish with distinct trowel marks that add architectural interest. Done poorly, it looks uneven in all the wrong ways. This is a finish worth mastering if you’re going to do multiple rooms, but a poor return on practice time for a one-off project. Best for: Polished modern spaces, feature walls, rooms with architectural intentAvoid if: This is your first texture project 6. Spray Sand Spray sand adds fine sand particles to the joint compound before spraying, which creates a subtly gritty, tactile surface, something between orange peel and smooth. It’s also more durable than plain compound textures, which matters in rooms that see regular contact with walls. The application is similar to orange peel but requires consistent mixing to keep the sand evenly distributed in the compound. Best for: Living rooms, bedrooms, walls that need texture with gripAvoid if: You want a smooth, flat reading wall surface 7. Slap Brush The modern application consists of a looser, lighter pattern achieved by lightly flicking a stiff brush across wet compound. Done with a gentle touch, it creates a hand-crafted texture that works in casual or transitional spaces without looking dated. It’s genuinely one of the easier textures to DIY because the pattern’s variation is part of the look. Heavy coverage in one area and lighter coverage in another reads as intentional. Best for: Feature walls, casual spaces, ceilings in transitional roomsAvoid if: The room has a polished, contemporary design language 8. Brush Stipple Comb and stipple textures are made by dragging a wide-tooth comb or a stiff-bristle brush through wet compound in straight, curved, or crosshatch patterns. They’re completely customizable and work as purely decorative finishes on accent walls or ceilings in rooms where you want visible craft. The downside is that they’re harder to repair, matching a specific stipple or comb pattern after the original application is genuinely difficult. Best for: Accent walls, creative spaces, single-room featuresAvoid if: You anticipate needing to patch the wall later 9. Faux Finish Venetian plaster is layered, troweled, and burnished to create a marble-like depth and sheen. It’s genuinely beautiful, but it’s also genuinely difficult. The multi-coat process requires both patience and technique. Burnishing the final coat to bring up the sheen takes the right tool (a steel trowel) and the right timing. Too early and you smear the compound; too late and you can’t move it at all. For most homeowners, this is a professional-only finish; budget $6 to $12 per square foot for professional application. Best for: Feature walls, dining rooms, premium interiorsAvoid if: You’re DIYing and haven’t practiced on full boards first 10. SlapRoller For textured paint rollers, rollers with a raised nap pattern you apply a thickened compound or textured paint and roll it onto the wall like regular paint. The pattern is consistent and uniform, and covers large walls quickly with minimal skill. There are dozens of nap patterns available; the deeper the nap, the more pronounced the texture. Roller texture works best in large, casual rooms where speed matters and subtlety is enough. It’s not the right choice for anywhere that needs a refined or architecturally considered finish. Best for: Large walls, basement rooms, DIY-first projectsAvoid if: You want a finish that looks professionally applied 11. Texture Spray Spray knockdown is a close relative of standard knockdown. It’s one of the faster textures to apply to large surfaces like ceilings, where it’s used most. The spray equipment does the coverage work; you just need to time the knocking-down correctly, too early, and you smear; too late, and the peaks are already dry. Getting that timing window right takes one practice run, but once you’ve found it, the technique is consistent. Spray knockdown patches better than almost any other texture because the organic pattern absorbs minor variation without looking repaired. Best for: Ceilings, large living spaces, transitional roomsAvoid if: You want a heavier, more visually distinct texture with more depth Installation & Maintenance Tips Choosing the right drywall texture is only half the job. Understanding how to install and maintain each finish ensures your walls stay stylish, functional, and long-lasting. Here are key tips to make installation and upkeep easier: DIY Friendly Options: Textures like smooth, light knockdown, and soft skip trowel are ideal for beginners. They require minimal specialized tools and allow you to achieve a modern look without professional help, saving time and installation costs. Professional Application Recommended: Complex textures such as Venetian, sand swirl, hawk and trowel, and detailed skip trowel usually need skilled installers. These finishes require precise technique and experience to achieve a consistent and polished appearance. Repair Ease: Some textures are simpler to patch than others. Knockdown and orange peel allow quick touch ups, while smooth walls and intricate textures require careful joint preparation, blending, and finishing to maintain a smooth look. Maintenance Tips: Keep textured walls clean by dusting or gently washing with a damp cloth. Smooth walls are easiest to repaint, but most modern textures can be refreshed with light sanding and a new coat of paint when needed. Tools & Materials: Each texture requires specific materials. Commonly used items include joint compound, trowels, knockdown knives, brushes, or spray equipment. Choosing the right tool ensures an even application and prevents uneven or inconsistent finishes. Room Specific Advice: Consider the function of the room when selecting a texture. High traffic areas benefit from durable finishes; ceilings may need subtle textures, and feature walls can accommodate more decorative styles for visual impact. For a fresh look, I stick with trending textures like hawk and trowel and light knockdown. Heavy popcorn and slap brush feel outdated to me. Subtle patterns complement neutral colors, while deeper textures add character to feature walls and hide small flaw. Pros and Cons of Modern Drywall Textures Knowing the advantages and drawbacks of each texture makes choosing the right finish much easier. This table compares style, maintenance, and suitability, so you can quickly see which textures work best for your home. Texture Type Pros Cons Knockdown Subtle, hides imperfections, easy to repair Slightly harder to DIY Skip Trowel Adds depth, forgiving for wall flaws Requires skill for even application Smooth / Imperfect Smooth Sleek, easy to paint, low maintenance Shows imperfections easily Orange Peel Durable, hides flaws, easy touch ups Can feel dated if overused Hawk & Trowel / Sand Swirl / Venetian Unique, customizable, artistic Time intensive, professional needed Selecting the right texture balances aesthetics, durability, and ease of upkeep. This table helps you make a confident choice, whether you’re refreshing a living room, accent wall, or high traffic area. Common Mistakes to Avoid Even small errors can make a modern drywall texture look off or create maintenance headaches. Here are the mistakes I see most often and how you can avoid them. Choosing the wrong texture for the room: Some textures work better in specific areas. For example, heavy or intricate finishes can overwhelm small rooms, while smooth or light knockdown is better for high-traffic or compact spaces. Skipping surface prep: Uneven walls, cracks, or old paint can show through textures. Always patch imperfections, sand, and prime before applying any finish. If you’re new to DIY wall work in general, starting with a simpler weekend home improvement project before tackling texture will save you a lot of frustration. Ignoring maintenance needs: Certain textures trap dust or are harder to clean. Know how much upkeep each finish requires before committing. Over applying texture: Applying too much compound can create unwanted peaks, uneven patterns, or cracking. Less is often more with modern finishes. Mismatching style and décor: A rustic texture on a sleek, modern wall can feel out of place. Consider your room’s overall style and lighting before picking a texture. DIY without proper tools or technique: Some textures, like skip trowel or Venetian, require skill and specialized tools. Attempting these without experience can lead to inconsistent results. Frequently Asked Questions What is the most popular drywall texture in modern homes? Knockdown is the most widely used modern texture in US homes, followed closely by orange peel. Knockdown tends to be the preference in living areas and bedrooms; orange peel dominates ceilings and rental properties. Smooth walls (Level 5) are increasingly popular in new high-end builds. What drywall texture is easiest to DIY? Orange peel and roller texture are the most beginner-friendly options. Both are forgiving of minor inconsistencies and don’t require specialized hand skills. Orange peel needs a hopper sprayer but the technique is straightforward. Roller texture requires nothing beyond a textured nap roller. Which texture hides wall imperfections best? Skip trowel and hawk-and-trowel hide the most surface variation because their organic, layered patterns provide the most visual camouflage. Slap brush also covers well. Smooth finishes hide nothing, they actually make minor imperfections more visible, especially under natural light. Can I apply a new texture over existing smooth drywall? Yes, light knockdown, skip trowel, and orange peel all apply cleanly over smooth painted drywall. Scuff-sand the surface lightly, apply a bonding primer, and then texture. Don’t attempt this over peeling paint or loose compound; fix those first or the texture won’t bond. What drywall texture works best in a bathroom? Smooth or light knockdown is the most practical for bathrooms. They resist moisture buildup better than heavy textures and clean more easily. Venetian plaster also works in bathrooms because it’s applied in dense, sealed layers, but it’s a significant investment. Avoid skip trowel and slap brush in high-humidity rooms. How long does drywall texture take to dry before painting? Standard joint compound textures need at least 24 hours to dry before priming or painting. Thicker applications, hawk and trowel, multi-coat skip trowel, can take 48 hours. Don’t rush this. Painting over wet compound causes trapped moisture, cracking, and adhesion failure. Is drywall texture going out of style? Heavy textures like popcorn and full slap brush are dated. Subtle modern textures, light knockdown, skip trowel, and smooth are very much current. The trend in 2025 and 2026 is toward refined, low-profile finishes rather than no texture at all. Completely smooth walls remain a design choice, not a universal default. Final Verdict If you’re doing this yourself for the first time, start with knockdown. It’s forgiving, it repairs easily, and it works in almost every room in a modern home. If your priority is the cleanest contemporary look and you’re willing to hire out the work, Level 5 smooth is where to go, but only if your drywall substrate is solid enough to support it. For an accent wall where you want the texture to be part of the room’s design, skip trowel gives you the most character for a DIY project. Pick one texture, practice on a scrap board first, and get the compound consistency right before you touch the wall. That’s the difference between a finish that looks intentional and one you end up painting over.
Messy pantry shelves slow everything down. You buy food you already have, lose ingredients behind boxes, and find expired items after it is too late to use them. I know a pantry can get out of hand fast, especially when busy weeks turn into quick drop-offs and half-used bags. Learning how to organize kitchen pantry spaces gives you a cleaner setup that makes cooking, shopping, and meal planning easier. This article gives you a simple pantry reset, clear storage zones, smart layout tips, and easy upkeep habits. You’ll get a pantry that is easier to use, quicker to restock, and simpler to maintain during busy weeks. Why an Organized Kitchen Pantry Matters A pantry is easy to ignore until it starts making daily cooking harder. When shelves are crowded or mixed up, you waste time searching, buy the same items again, and forget about food before it expires. A clear pantry setup helps you see what you have, plan meals faster, and keep grocery trips more focused, the same principle behind a minimalist kitchen design where every element earns its place. It also makes cleanup easier because every item has a place to return to. Before you start buying bins or labels, it helps to understand that pantry organization is not just about looks. It is about making your kitchen easier to use every day. How to Organize Kitchen Pantry Shelves Step by Step Pantry organization works best when you follow a clear order. If you start by buying bins or moving items around without a plan, the shelves can look better for a few days but will fall apart quickly again. This step-by-step pantry reset keeps the process simple. You will clear the shelves, sort what you have, create useful zones, and set up a system that is easier to keep tidy after grocery trips. Step 1: Empty the Pantry and Clean It Take everything out of the pantry and place it on a counter, table, or clean floor area. This helps you see the full amount of food, containers, and supplies you have before anything goes back in. Keep a trash bag, a recycling bag, a donation bag, and a cleaning cloth nearby before you start. Once the shelves are empty, wipe them down, clean the corners, and sweep or vacuum the floor if needed. Let the shelves dry fully before you restock the pantry. Pro Tip: Before wiping down shelves, check the shelf depth with a tape measure. Shelves deeper than 16 inches almost always need a pull-out bin or handled basket to make the back row usable, without one, that space gets abandoned within a few weeks of reorganizing. Step 2: Check Every Item and Remove What Does Not Belong Go through each item one by one before you start sorting. Throw away expired food, stale snacks, broken packets, and anything your household will not use. You can also combine duplicate packets if they are the same food and still fresh. If you find unopened extras that are still safe and sealed, set them aside for donation. This clears space without wasting food that someone else can use. Step 3: Sort the Remaining Food Into Clear Groups Place similar items together outside the pantry before you restock the shelves. This makes it easier to see which categories need the most space. Create groups such as breakfast, snacks, baking, canned goods, rice and grains, pasta, spices, sauces, tea and coffee, and backup items. Use groups that match your cooking habits, and do not create a baking section if you only own one bag of flour. Step 4: Move Dry Goods Into Containers and Prepare Bins Before anything goes back into the pantry, transfer daily dry goods into airtight containers. This works well for rice, pasta, flour, sugar, lentils, cereal, oats, and snacks. Clear containers are especially useful because you can see what is running low without opening them. Use bins or baskets for loose packets, spice mixes, tea bags, small snack packs, and items that tend to fall over. This keeps smaller foods from getting lost at the back of the shelf. Step 5: Label the Containers and Bins Label each container and bin before placing them on the shelves. Keep the labels simple so everyone can understand where items belong. Use clear labels such as Rice, Pasta, Snacks, Baking, Tea, Spices, Cans, and Breakfast. Label after you know your categories, but before restocking, so the pantry does not get messy again while you arrange it. Step 6: Assign Shelf Zones and Place Everything Back Decide where each group will go, then place items back into those zones. Keep daily-use items at eye level, heavy staples on lower shelves, snacks within easy reach, and rarely used items on higher shelves. Try to give each shelf a clear purpose so the pantry is easier to use, much like decorating shelves elsewhere in your home, where grouping and spacing do the heavy lifting. Put older items at the front and newer items behind them so food gets used in the right order. Step 7: Add a Simple Restock System Create one small place to track items that are running low. This can be a notepad inside the pantry door, a phone grocery list, or a small “buy soon” bin. A restock system helps you avoid guessing during grocery trips and lowers the chance of buying duplicates when you already have food tucked away. This step is useful, but optional; if it feels like too much, a phone list is enough. Pantry Storage Tools Worth Using If packets fall over, use a bin. If bottles get lost in the back, try a lazy Susan, the same tools that work well inside kitchen cabinet styles built around deep or blind-corner storage. If cans block each other, a shelf riser may help. The best choice is the one that makes the shelf easier to use every week. Storage Tool Best Use Skip It When Clear bins Loose snacks, packets, baking extras, and backstock The bin is too deep to pull out easily Airtight containers Daily dry goods like flour, rice, oats, cereal, and pasta The item is rarely used or is already well stored Lazy Susan Oils, sauces, vinegars, spreads, and small bottles The shelf is too narrow for it to spin Shelf risers Cans, jars, spices, and short containers The shelf height is already tight Over-the-door rack Small packets, wraps, spices, snacks, and bottles The pantry door cannot close properly Pull-out baskets Deep shelves and lower cabinets The basket blocks taller food items The best organizers are the ones you can use without extra effort every week. If a tool makes food harder to reach, blocks the shelf, or creates more steps, it probably does not belong in your pantry. Pantry Layout Tips for Different Kitchen Sizes The best layout starts with the main problem in your space. Once you know what makes the pantry hard to use, you can choose storage that improves visibility, reach, and restocking. 1. Small Closet Pantry A small closet pantry can get crowded fast because items often sit on top of one another. Snacks, cans, baking supplies, and breakfast foods may end up stacked in layers, making it hard to see what you already have. This type of pantry works best when every shelf has a clear job. Use one shelf for daily breakfast items, another for snacks, and another for canned goods, grains, or baking supplies. Try to leave a little breathing room on each shelf instead of filling every inch. Even a small gap makes it easier to pull out a bin, check what is inside, and put groceries away without creating another pile. 2. Deep Shelves Deep pantry shelves often hide food in the back. This can lead to duplicate purchases, expired items, and half-used packets that are forgotten until the next big cleanout. This layout works best when you make the back of the shelf easier to reach. Long bins, handled baskets, and pull-out organizers can help you bring the whole group forward instead of moving items one by one. Use pull-out bins, lazy Susans, or front-to-back rows so items do not disappear. Keep the foods you use most often near the front, and store backstock or less-used items in clearly marked zones toward the back. 3. Cabinet Pantry A cabinet pantry usually has limited vertical space, so short items can waste shelf height. Small boxes, jars, packets, and cans may sit in one flat layer, leaving unused space above them. This type of pantry works better when you create levels inside the cabinet. Shelf risers can lift cans, jars, and spices so the back row is easier to see, while stackable bins can hold snacks, packets, or backup items. Try not to overload the cabinet with too many containers. A simple setup with clear zones usually works better than stacking items so high that they become hard to pull out. 4. Wire Shelf Pantry Wire shelves can be tricky because small items tip over or fall through the gaps. Packets, spice jars, small cans, and narrow containers can become messy even when you try to keep them grouped. Use solid-bottom bins, trays, or shelf liners to create a steadier surface. This gives small items a flat base and makes shelves easier to wipe, straighten, and restock. Choose bins that slide easily across the shelf and do not catch on the wire. That small detail can make everyday restocking much smoother. 5. No-Pantry Kitchen A no-pantry kitchen can feel scattered because food may be split across several cabinets, drawers, or shelves. When pantry items do not have one clear home, grocery planning and meal prep become harder. This setup works best when you create one main food zone, even if it is small. A single cabinet, rolling cart, open shelf, or over-the-door rack can hold the foods you reach for most often. Create one main food zone using a cabinet, cart, open shelf, or over-the-door rack. Even an awkward pantry can work better when each shelf or storage area has a clear job. Focus on visibility, easy reach, and simple restocking before adding extra organizers. What Not to Buy Before You Organize Before spending money, clear the pantry, sort your food, and measure the space. This helps you avoid buying tools that look nice but do not solve the real problem. Matching Containers: Decanting works best for foods you use often, such as cereal, rice, oats, flour, sugar, or pasta. It can become extra work when every single package has to be opened, poured, labeled, and refilled. Deep Bins: Avoid bins that leave too much unused space behind them or become too heavy to pull out. A bin should help you reach food faster, not turn the shelf into another place where items get buried. Tiny Labels: Small, detailed labels are easy to ignore, especially in a busy kitchen. Use simple category labels that family members can read quickly, such as snacks, baking, breakfast, pasta, canned goods, and backstock. Oversized Bulk Items: Bulk buying only helps when you have a clear place to store the extras and a plan to use the food. Without a backstock area, large packages can crowd daily shelves and make duplicates harder to track. The goal is not to avoid all pantry products. It is to buy the right ones after you understand your space, your food habits, and the items that keep causing clutter. How to Reduce Food Waste With Pantry Organization A few small habits can help you waste less food and avoid opening new packages too soon. Keep older and open items easy to see so they get used first. Keep open, older, or soon-to-expire food in one visible bin. Group open crackers, pasta, cereal, chips, and baking items together. Store older food in front and newer food behind it. Add purchase or best-by dates to decanted staples with removable labels. These quick checks work best during your regular grocery routine. Rotate food as you restock, and your pantry will stay easier to shop from each week. How to Keep Your Pantry Organized After Grocery Shopping Pantry organization can fall apart quickly after a grocery trip if new items are pushed onto any open shelf. A simple restocking routine helps you keep the system working without doing a full reset every week. Start by unboxing bulky items when the inner packaging is sealed and easy to store. Next, restock each pantry zone before adding new food wherever there is room. This keeps your pantry easy to shop from later. When you add new groceries, place newer items behind older ones. This keeps open, older, or soon-to-expire food visible at the front so it gets used first. A good maintenance routine should feel quick and realistic. Frequently Asked Questions How often should you clean out a pantry? A quick pantry reset once a week works well for most homes. Do a deeper clean every season to check dates, wipe shelves, and fix zones that no longer work. Should spices go in the pantry or near the stove? Spices are best stored in a cool, dry spot away from heat and light. A pantry, drawer, or cabinet near the prep area usually works better than right beside the stove. What foods should not be stored together in a pantry? Keep potatoes away from onions because they can spoil faster together. Also, separate strong-smelling foods from dry goods that can absorb odors, such as flour, cereal, crackers, and rice. What should go on the top pantry shelf? Use the top shelf for light items you do not need every day. Extra paper goods, party supplies, seasonal baking items, and backup snacks can work well there if they are easy to lift safely. How do you organize a pantry for kids? Place kid-friendly snacks, breakfast bars, and lunch items in a low open bin. Keep messy, breakable, or parent-only items higher so children can help themselves without pulling everything apart. The Bottom Line Here’s the honest measure: a well-organized kitchen pantry is one you can restock in under five minutes without creating new piles, and where you can confirm whether an ingredient is in stock without moving anything out of the way. If the reset you’ve done passes both tests next grocery day, it’s working. If it doesn’t, the fix is almost always one of two things: zones that don’t match how you actually cook, or bins that are too deep to use daily. Start with whichever one is breaking down first. Move one category, adjust one bin size, and see if the behavior sticks. Pantry organization that works isn’t built in a day; it’s calibrated over a few grocery cycles until the system fits the way the kitchen actually runs.