


Building a bed frame can feel expensive, but it does not have to be. If you want a sturdy bed without paying for store-bought furniture or paid plans, I get why you are looking for better options.
It can also be hard to know which plan is worth your time when every design uses different tools, wood, measurements, and support details.
Understanding how a platform bed structure works makes the base easier to plan before choosing a build type.
I’ll help you compare ideas by mattress size, storage needs, skill level, tools, wood type, and cost. By the end, you will know which free DIY bed plans make sense for your space and what to check before you start building.
The Best Free DIY Bed Frame Plans by Need
The best DIY bed plans depend on your mattress size, room layout, storage needs, budget, tools, and comfort level with woodworking.
A simple platform bed is usually the easiest place to start because it supports the mattress with slats or plywood and often removes the need for a box spring.
Storage bed plans work well in small bedrooms because drawers, cubbies, or raised frames can hold bedding, clothes, or baskets. Pallet bed frames are a smart, low-budget option, especially for a relaxed or rustic look, as long as the pallets are clean, sturdy, and well sanded.
Traditional wood bed frames are better if you want a raised bed with legs, a headboard, or a footboard. The DIY bed frame ideas below can be built from free tutorials or adapted from free cut lists to fit your space.
Basic DIY Guide: How to Build a Simple Platform Bed Frame
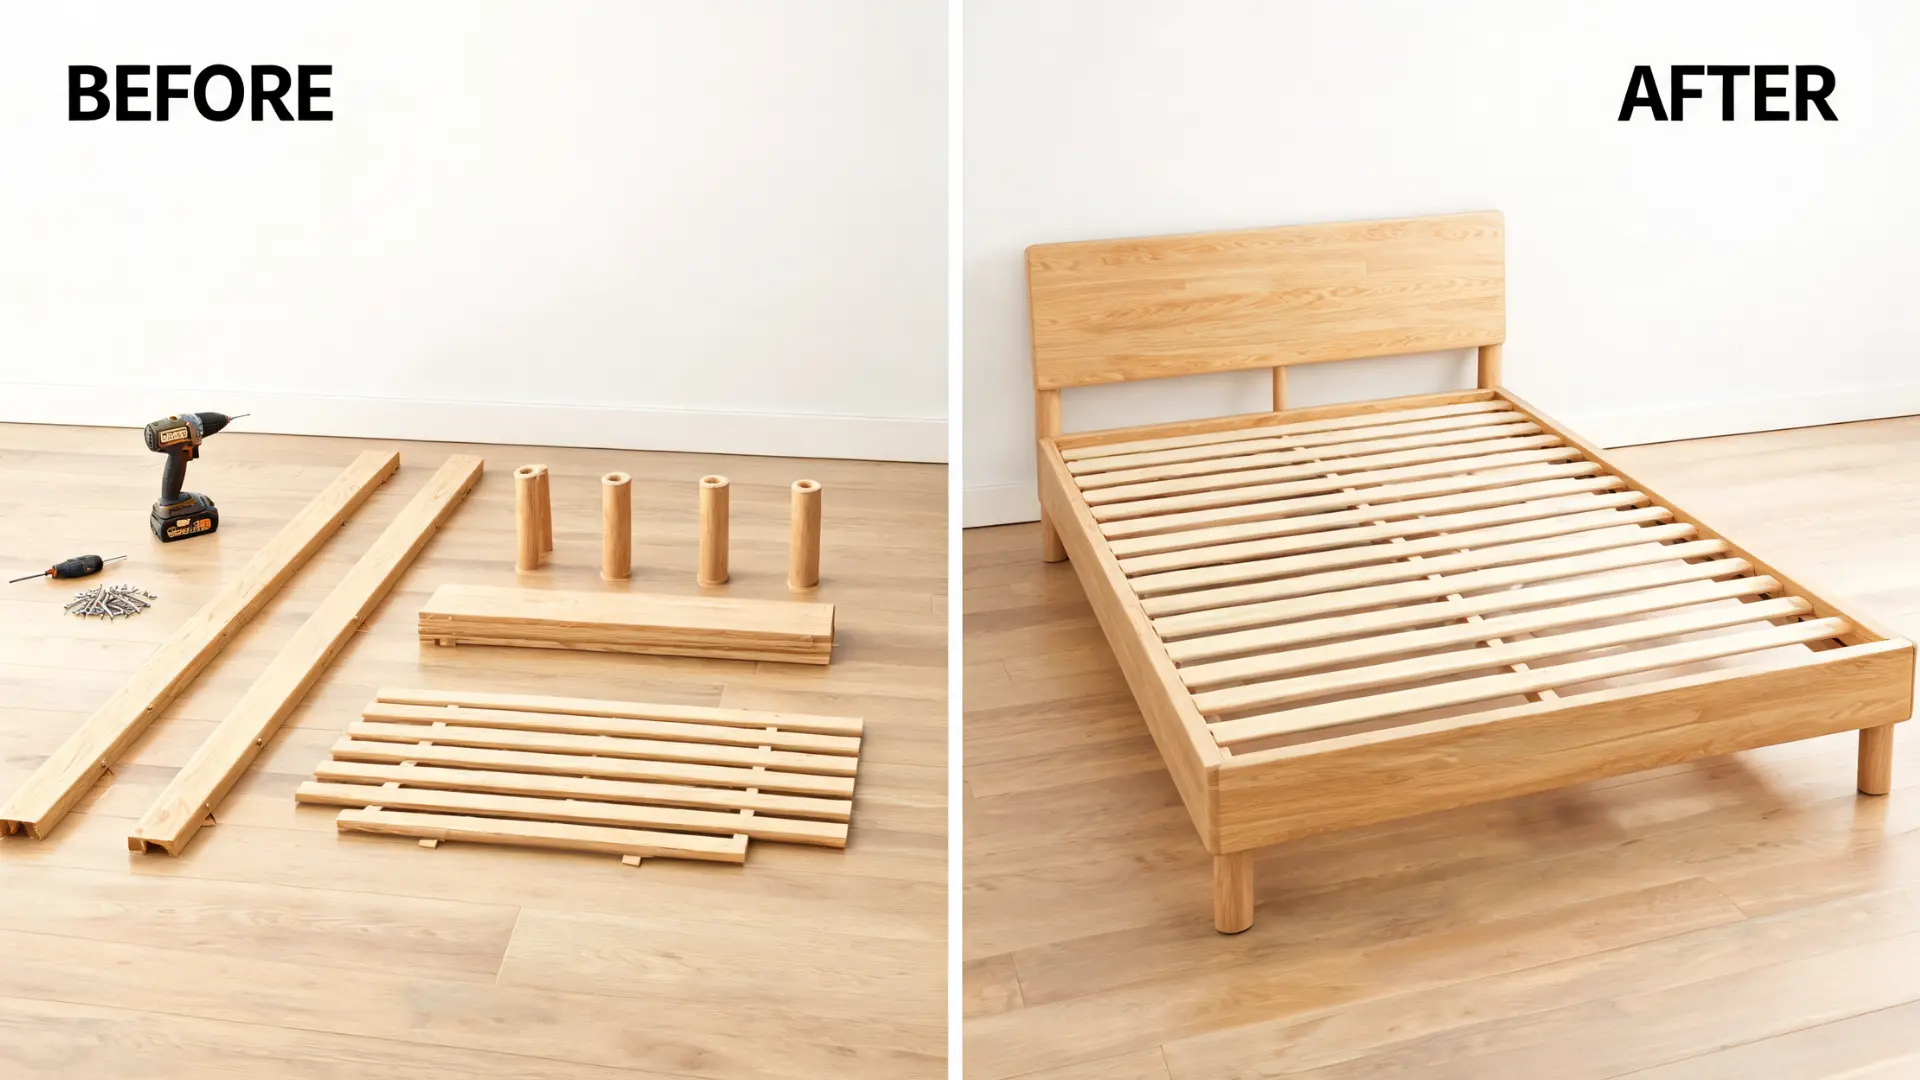
Before looking at different DIY bed frame plans, beginners should understand the basic structure of a simple platform bed. Most DIY bed frames use the same core parts: a mattress-sized outer frame, support legs, a center beam, and slats.
- Measure Mattress: Start by measuring the mattress or checking its standard size. The frame should fit the mattress comfortably, neither too tight nor too loose.
- Build Outer Frame: Create a rectangular base using two side rails and two end rails. This outer frame forms the main shape of the bed.
- Add Center Support: Install a center support beam through the middle of the frame. This is especially important for full, queen, and king beds because it helps prevent sagging.
- Attach Legs: Add legs to each corner of the frame. For wider beds, add extra middle legs under the center support beam for better weight support.
- Install Slats: Place wooden slats evenly across the frame. These slats support the mattress, so keep the gaps small and consistent.
- Sand Wood: Smooth all rough edges, corners, and surfaces before using the frame. This helps prevent splinters and keeps bedding from catching.
- Finish Frame: Seal, stain, or paint the wood based on the bedroom style. Let the finish dry fully before placing the mattress on top
Free DIY Bed Plan Ideas to Consider
The best DIY bed frame ideas match your room size, mattress, budget, and skill level. This usually results in a calm minimalist bedroom layout that creates balance around the bed structure.
A simple platform is ideal for beginners, while storage beds suit small rooms needing extra space. Pallet frames are low-cost but need cleaning and sanding.
For a more finished look, opt for wood frames with headboards, footboards, or upholstered rails. Consider comfort, support, tools, and storage needs before choosing a plan.
1. Simple Platform Bed Frame Plan
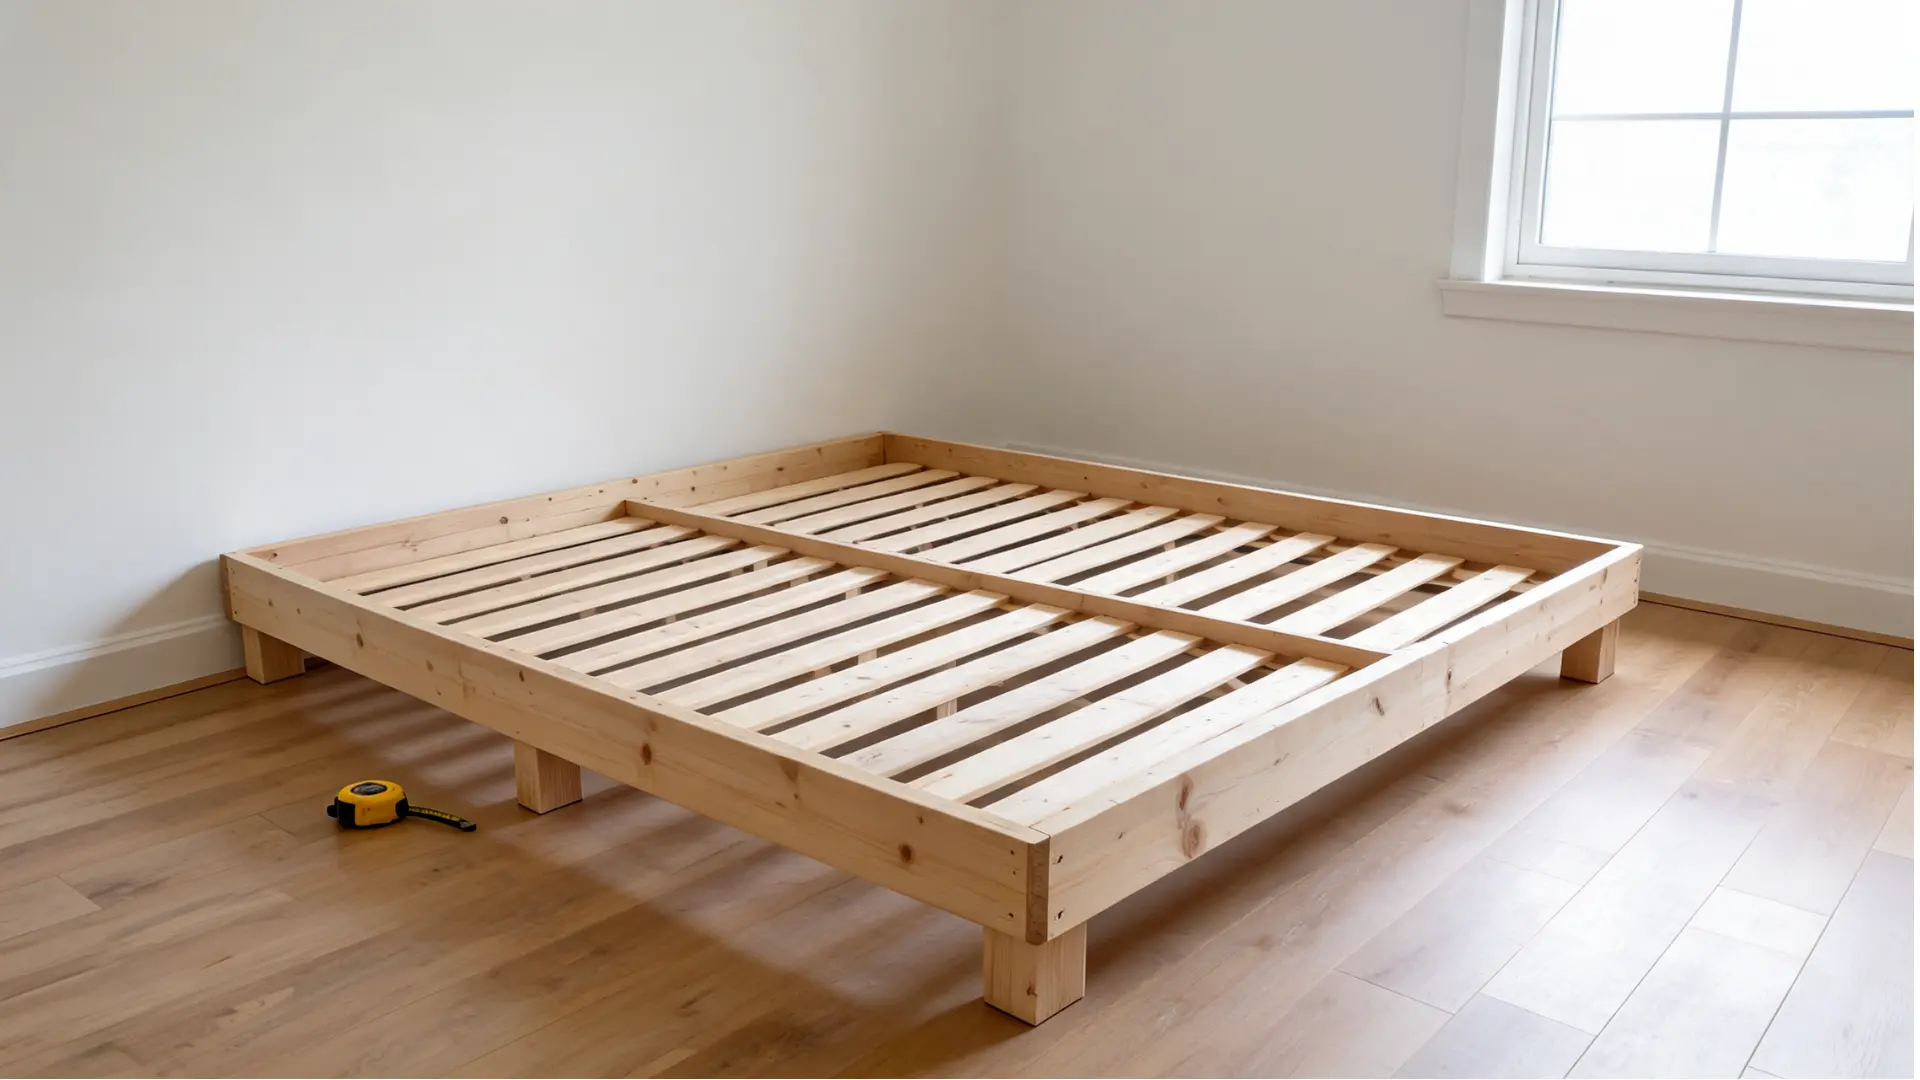
A simple platform bed frame is a basic wooden structure that supports a mattress on a rectangular base with slats and a center beam. It helps beginners practice measuring, cutting, joining boards, and building a stable, square, functional frame.
- Materials: 2×4 boards, 1×4 slats, screws, wood glue, stain or paint
- Plan Note: Keep the design plain and strong before adding a headboard or storage
- Budget: $75–$150
| What to watch for: Keep the frame square. Check all four corners with a carpenter’s square before fastening. A frame that’s even a degree off will wobble and feel unstable regardless of how solid the joints are. If you plan to add a headboard later, run two 2×6 boards along the head end instead of 2x4s so you have material to bolt into. |
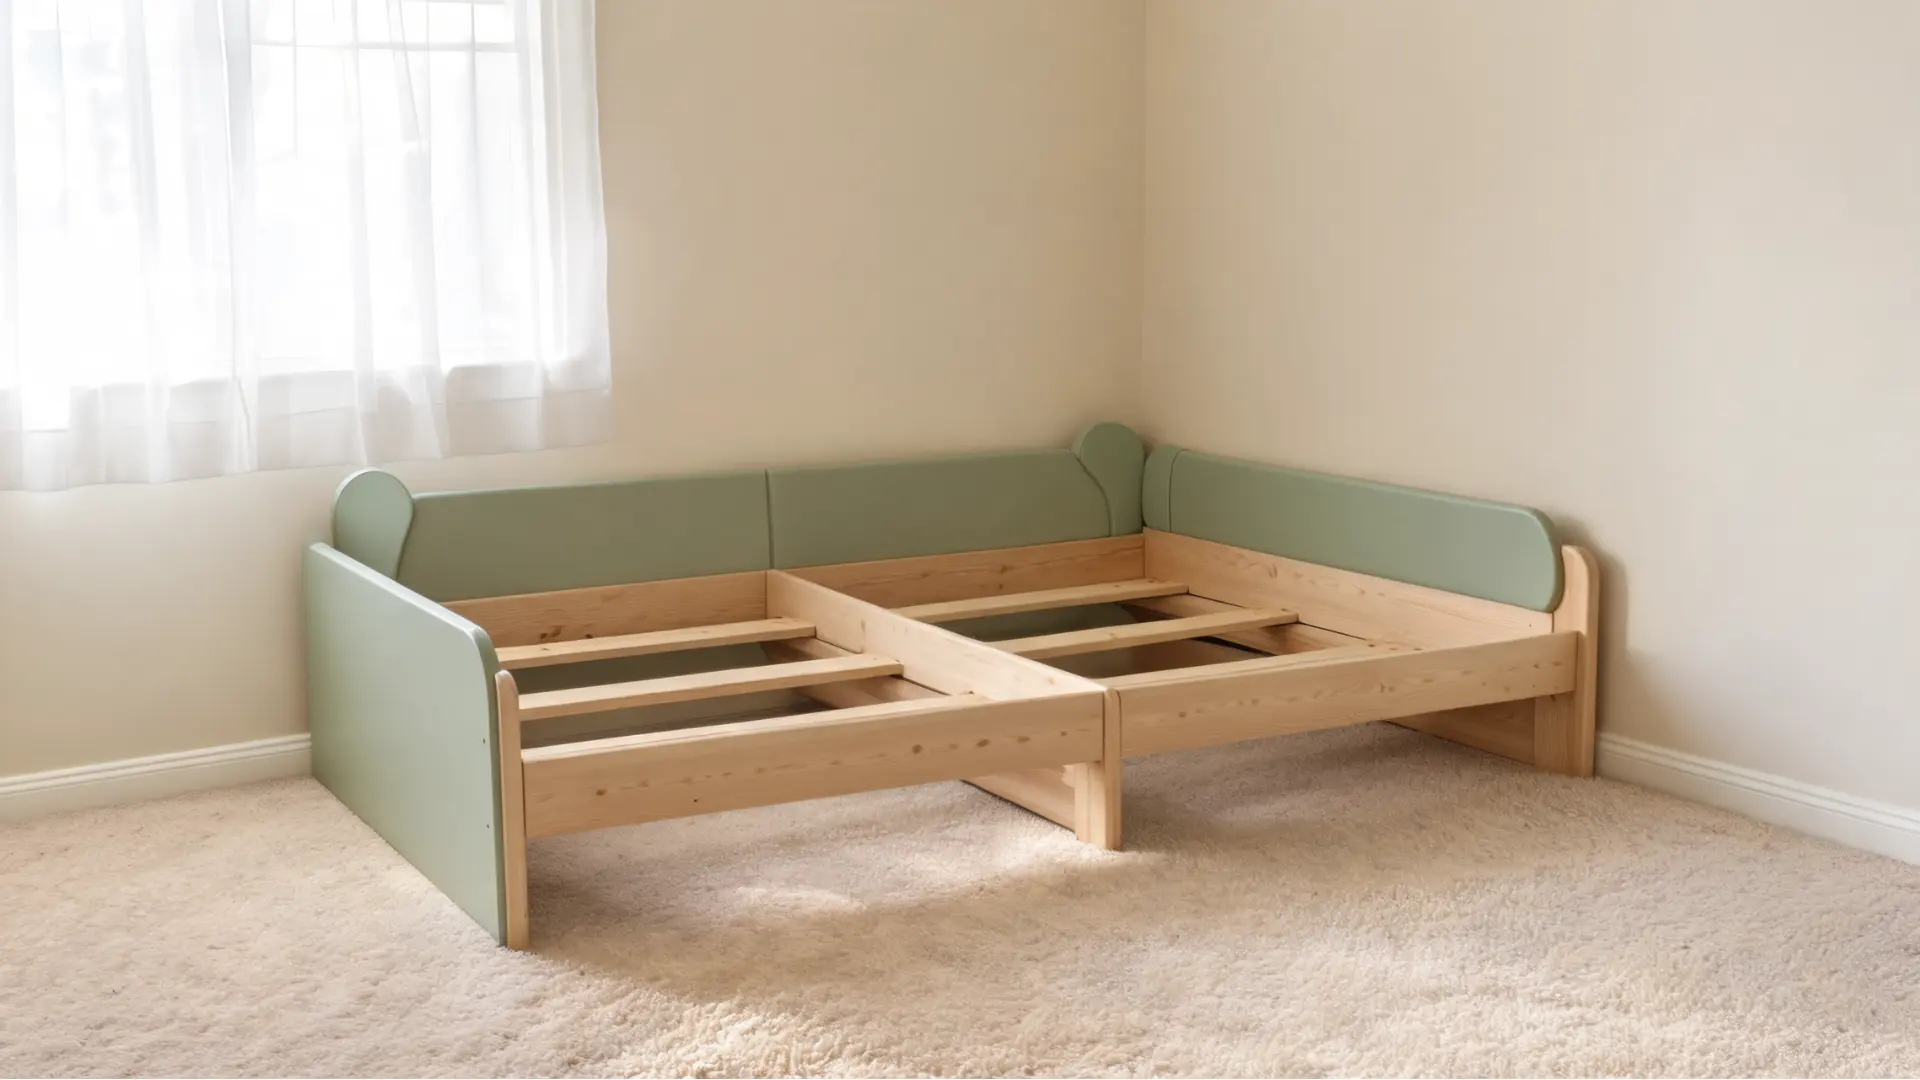
2. Low Floor Bed Frame Plan
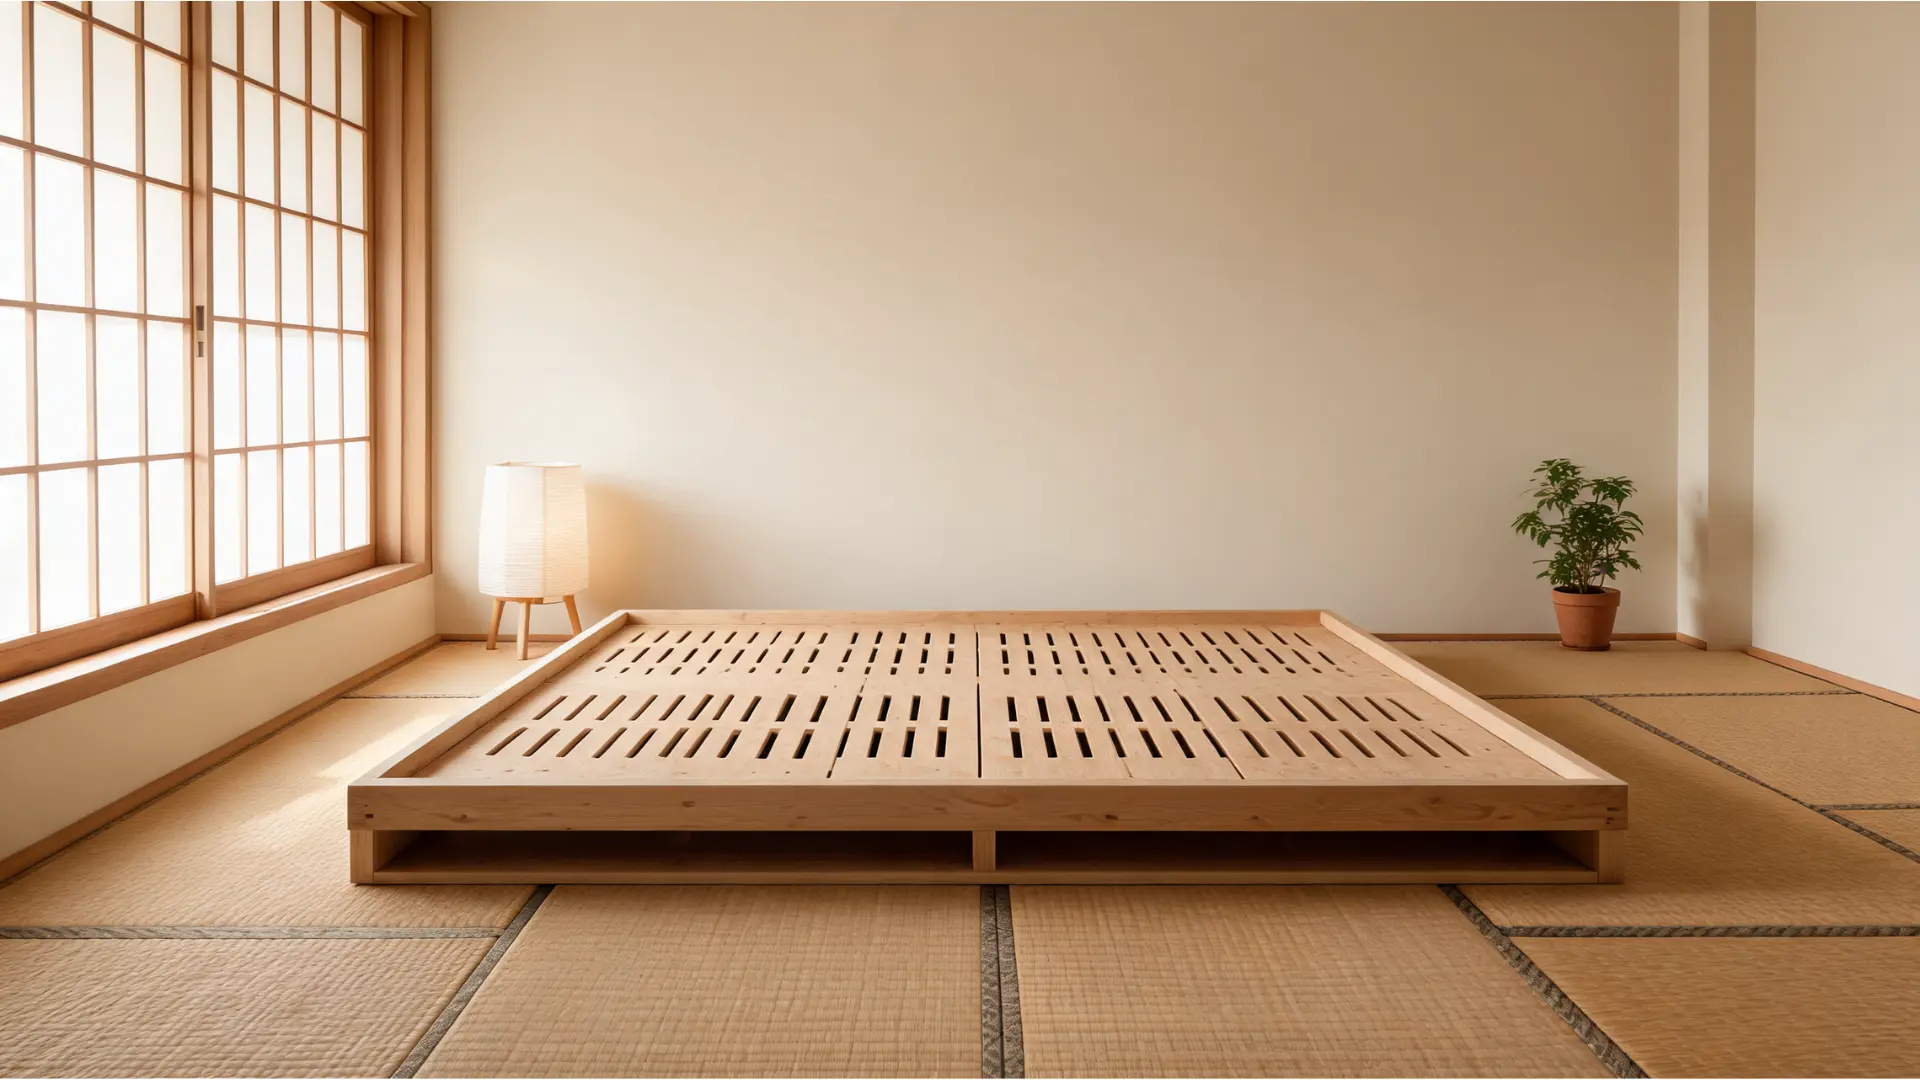
A low floor bed frame sits close to the ground and creates a minimal, open bedroom feel. It uses plywood, boards, and slats, with careful spacing to ensure airflow under the mattress and prevent moisture buildup over time.
- Materials: Plywood, 2×4 boards, slats, screws
- Plan Note: Ensure adequate airflow under the mattress
- Budget: $100–$200
3. Floating Bed Frame Plan
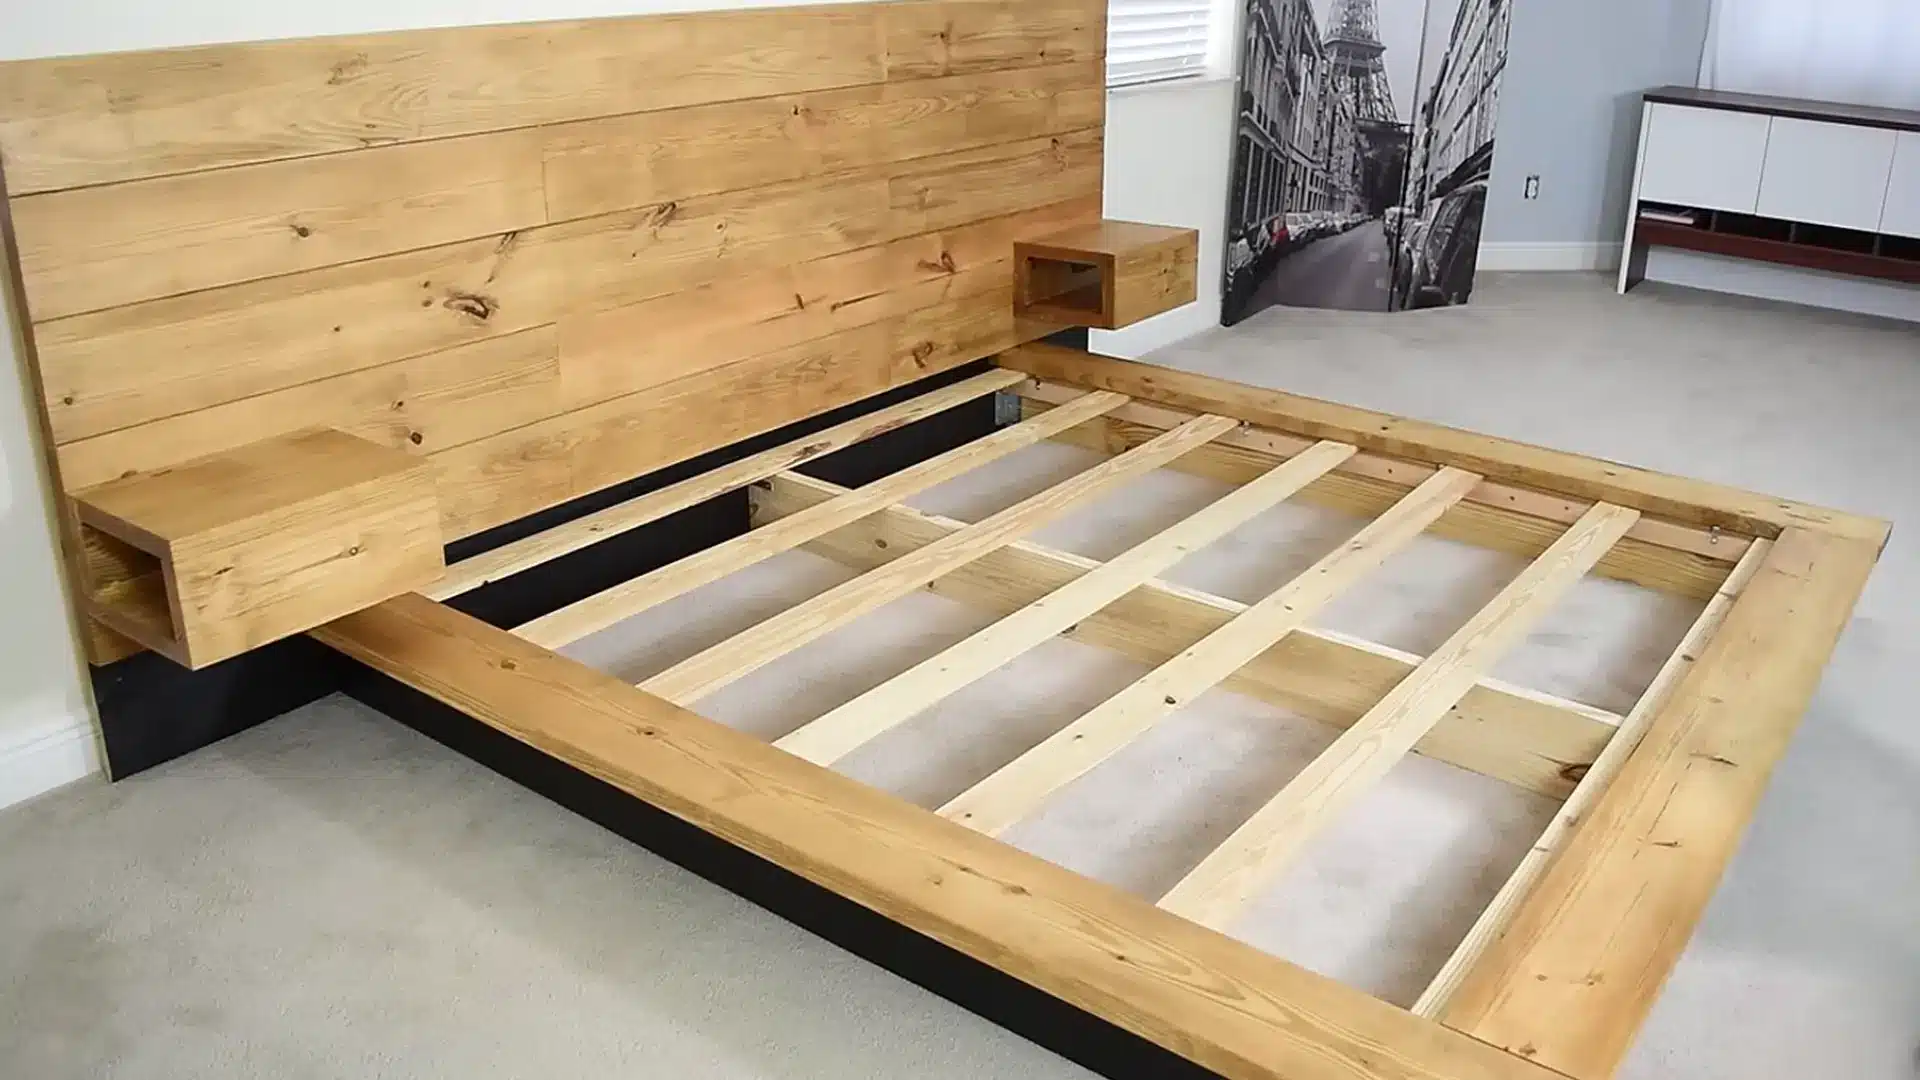
A floating bed frame uses a recessed base that is smaller than the top platform, creating a visual effect of the bed hovering above the floor. The hidden structure still requires strong support and proper weight distribution.
- Materials: 2×4 boards, plywood, screws, optional LED strip
- Plan Note: Hidden base must have strong center support
- Budget: $150–$300
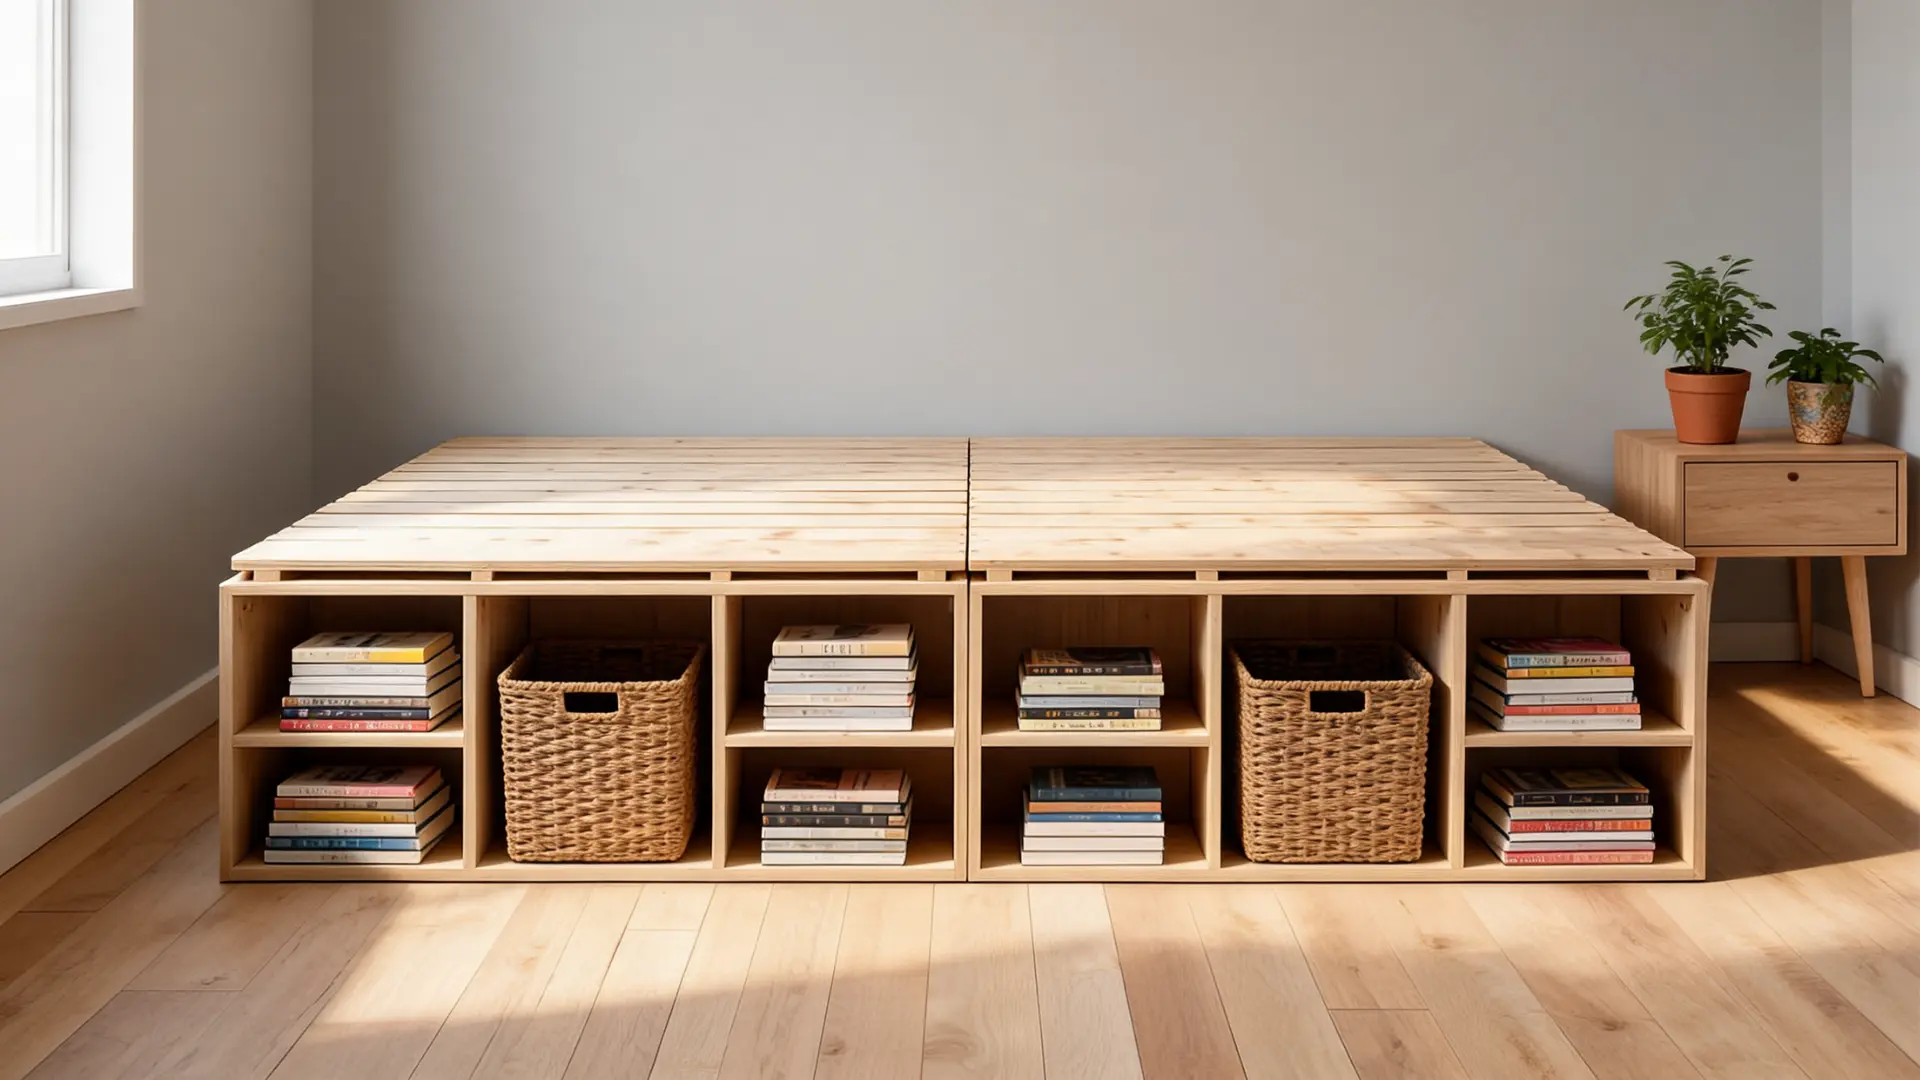
4. Storage Bed Frame Plan

A storage bed frame integrates drawers, cubbies, or shelf-style compartments beneath the mattress for practical storage. It maximizes bedroom space while maintaining a stable base that evenly supports weight across the entire structure.
- Materials: Plywood, drawer units, cube shelves, screws, brackets
- Plan Note: Ready-made storage units simplify construction
- Budget: $250–$600
5. Pallet Bed Frame Plan
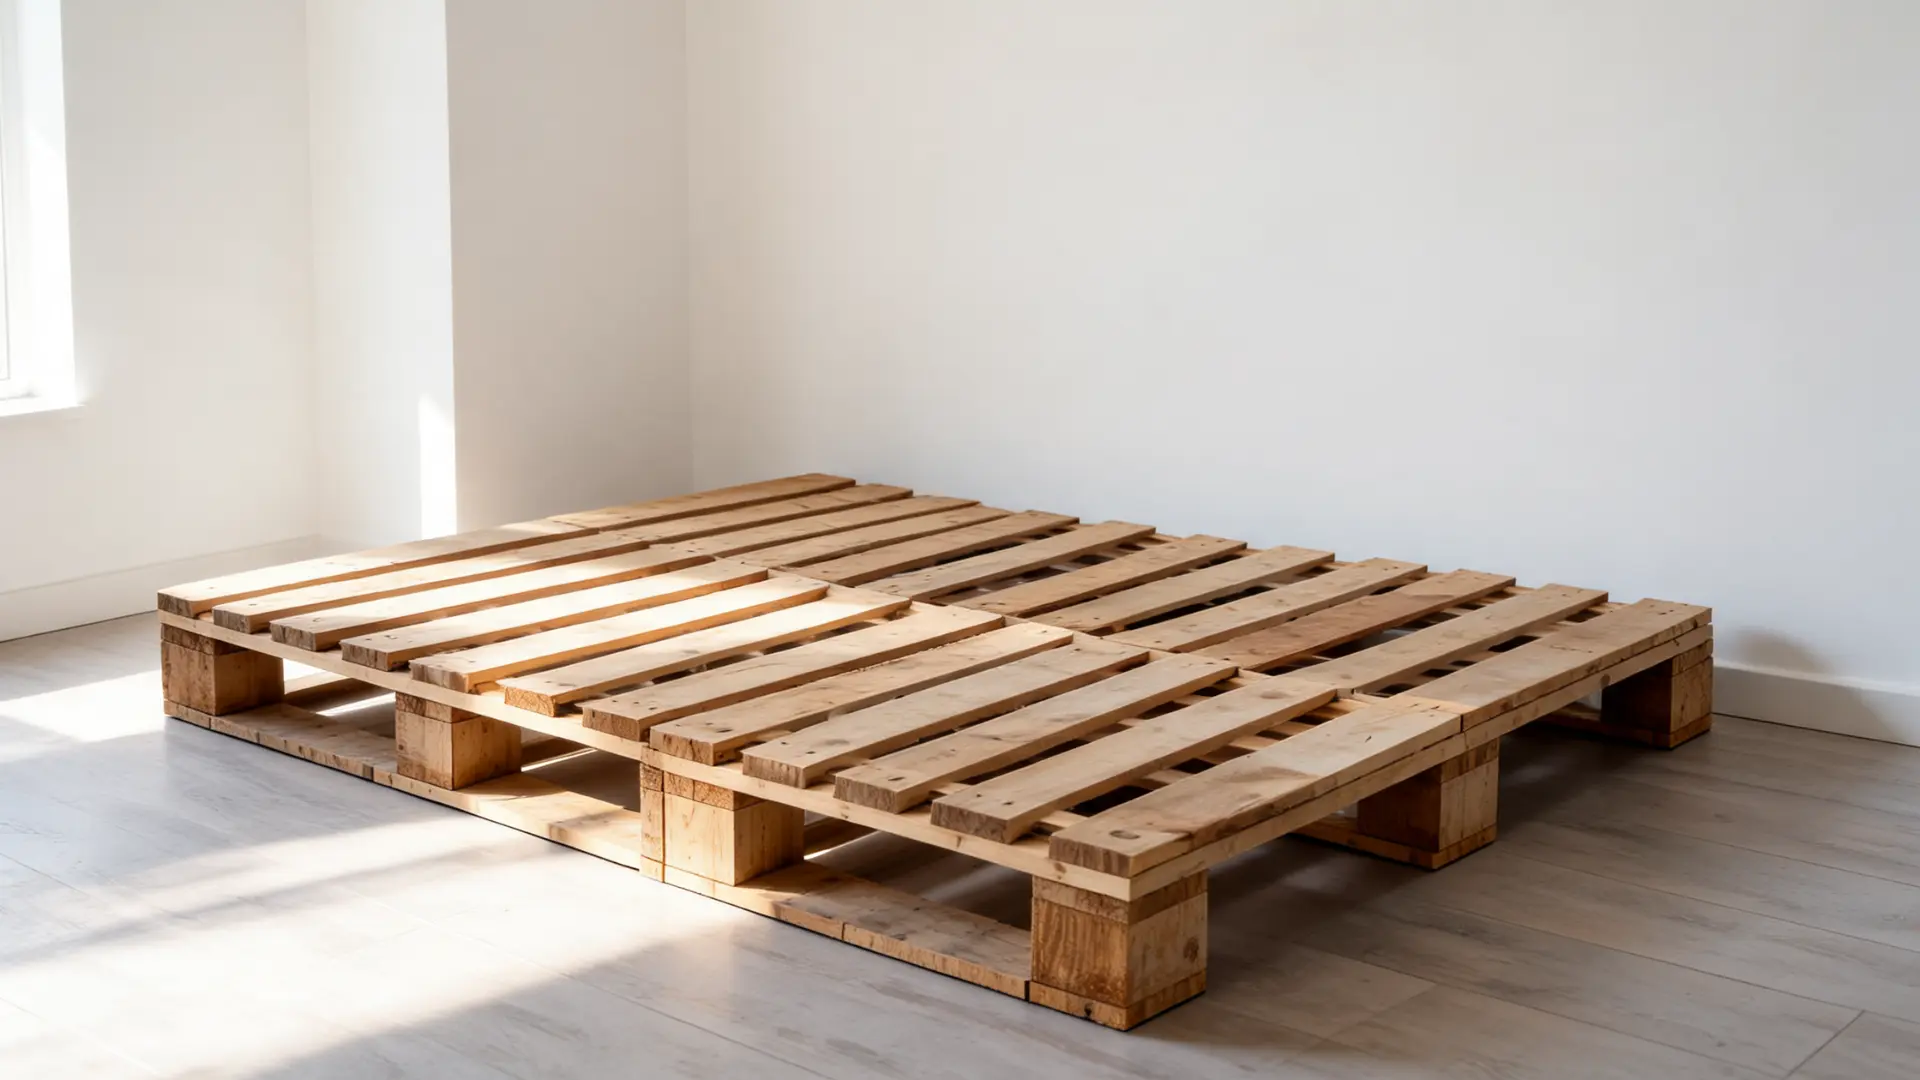
A pallet bed frame uses stacked or joined wooden pallets to create a simple base with minimal construction work. Only heat-treated pallets should be used, and all surfaces must be cleaned, sanded, and checked for safety.
- Materials: Heat-treated pallets, sandpaper, screws, wood sealer
- Plan Note: Inspect for nails, splinters, pests, and chemical marks
- Budget: $40–$120
| Safety Note: Only use heat-treated (HT-stamped) pallets. Avoid any pallet with stains, unusual odors, or missing stamps, these are signals of chemical contamination. Sand all surfaces to 120-grit minimum before contact with bedding. |
6. Bookcase Bed Frame Plan
A bookcase bed frame uses cube shelves or low bookcases arranged as a base, with a solid top layer placed above for mattress support. The structure provides built-in storage while keeping construction simple and modular.
- Materials: Cube shelves or bookcases, plywood, brackets, screws
- Plan Note: Secure shelves to prevent shifting under weight
- Budget: $180–$450
7. Upholstered Bed Frame Plan
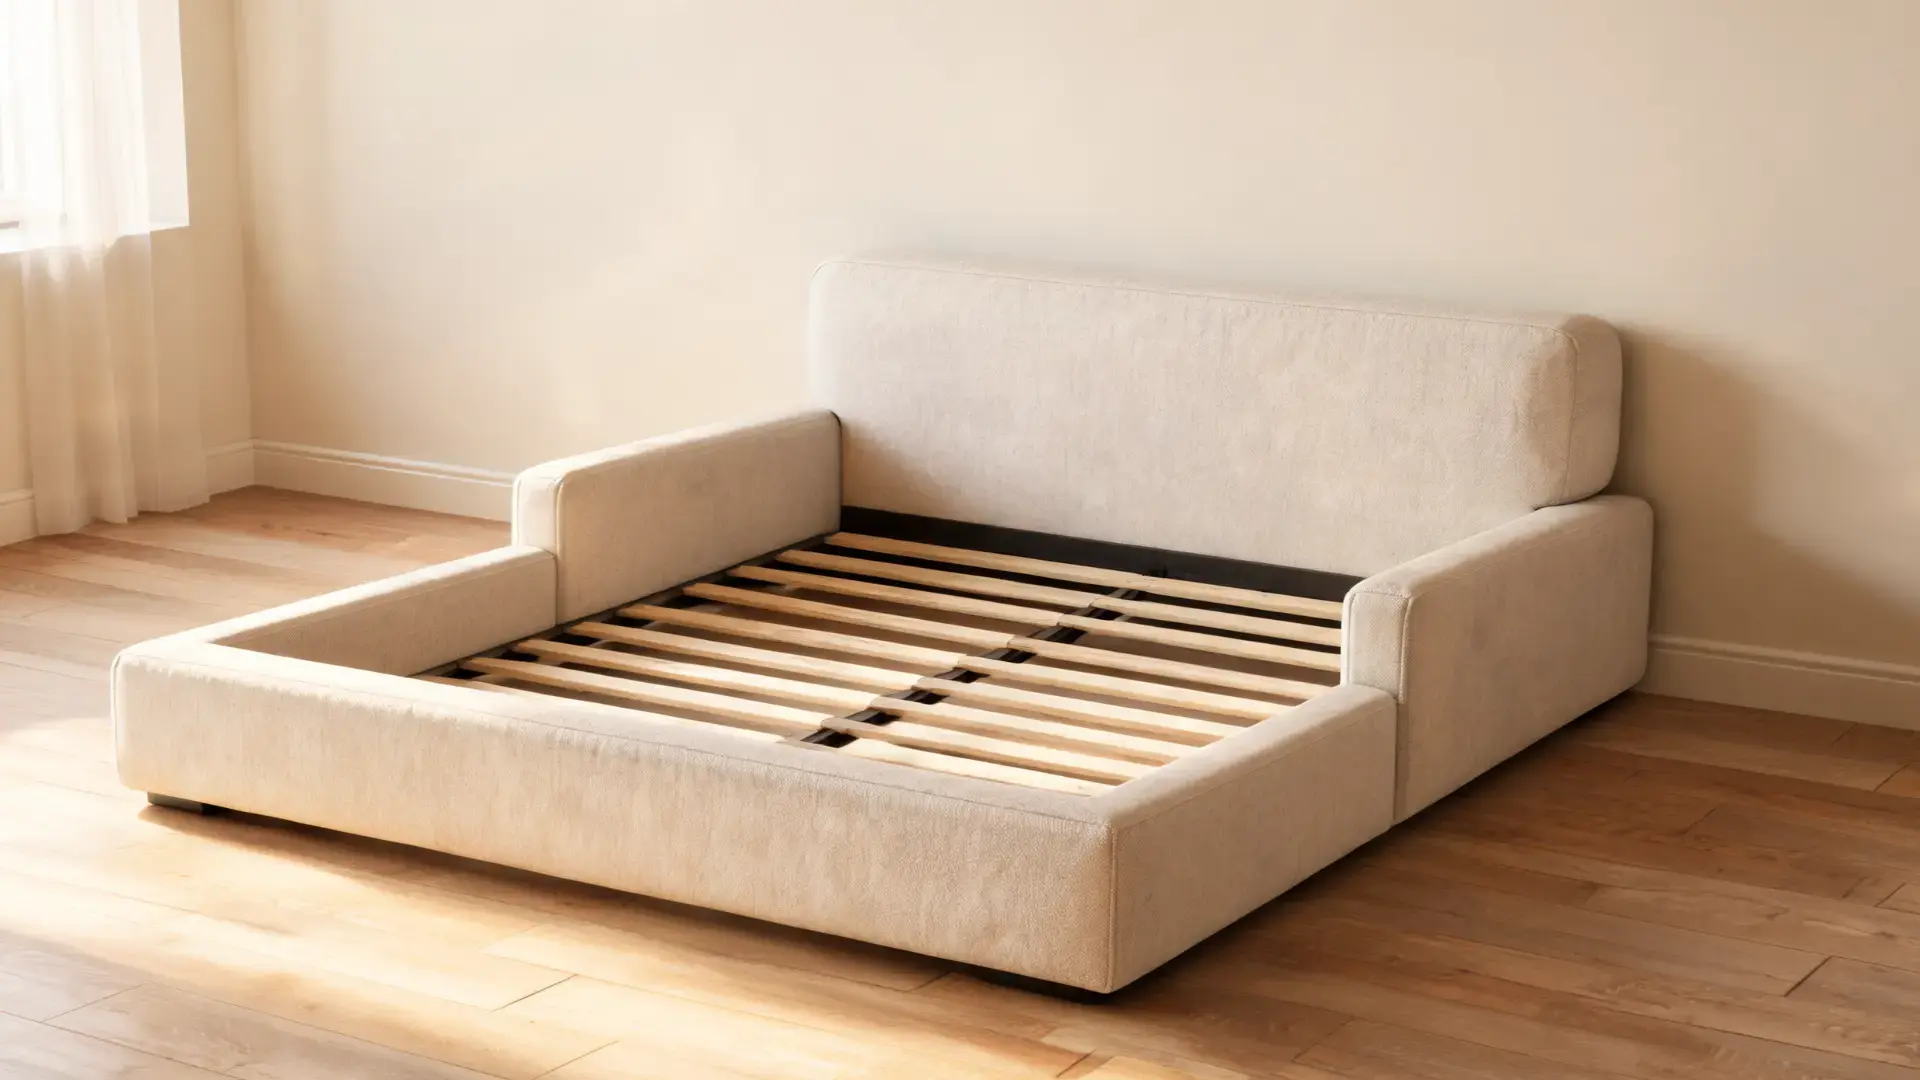
An upholstered bed frame starts with a wooden base covered in foam, batting, and fabric for a soft, finished look. The process focuses on smooth fabric stretching and stapling for a clean surface without wrinkles or gaps.
- Materials: Wood frame, foam, batting, fabric, staple gun
- Plan Note: Start with an upholstered headboard if needed
- Budget: $200–$500
8. Reclaimed Wood Bed Frame Plan
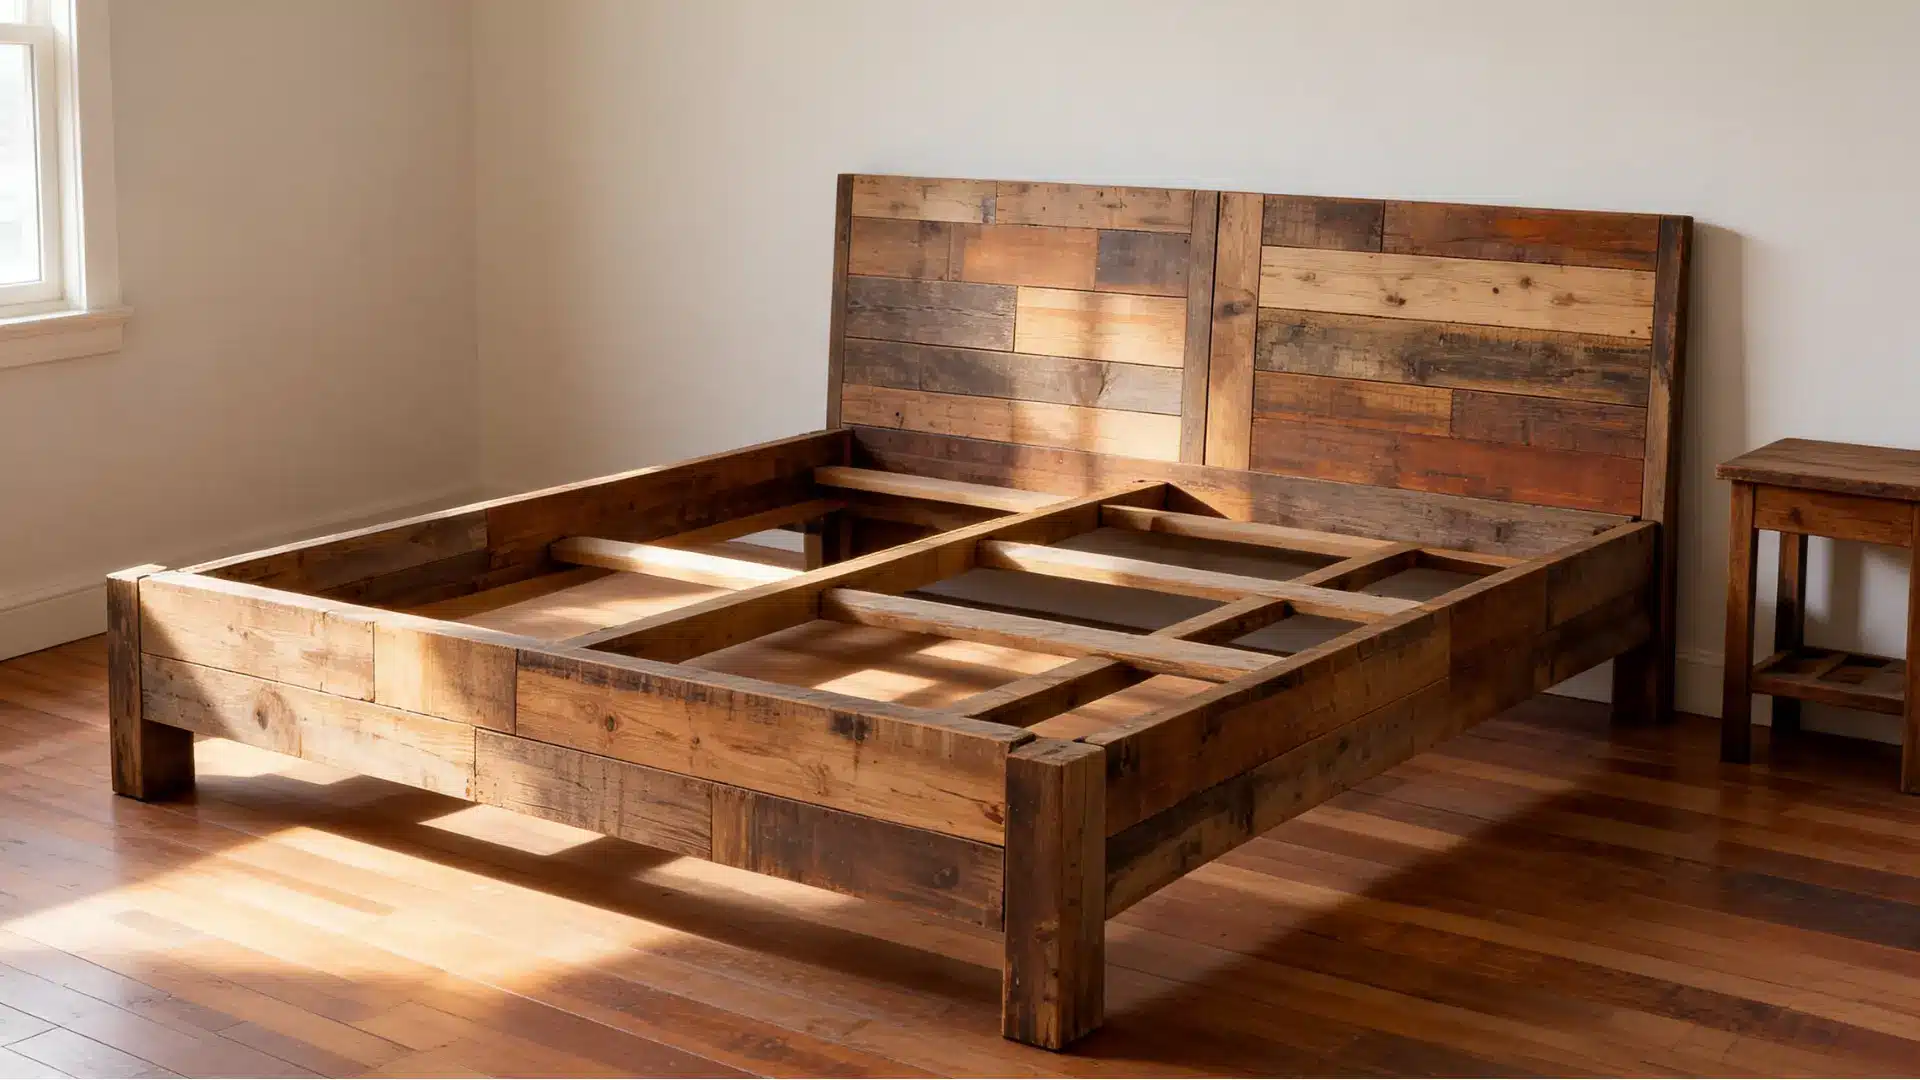
A reclaimed wood bed frame is built from salvaged boards arranged into a platform structure that highlights natural texture and variation. Each piece must be cleaned, sanded, and inspected to ensure it is structurally safe for use.
- Materials: Reclaimed boards, screws, slats, sandpaper, sealant
- Plan Note: Check wood for cracks, pests, nails, and weak spots
- Budget: $100–$300
9. Hairpin Leg Bed Frame Plan
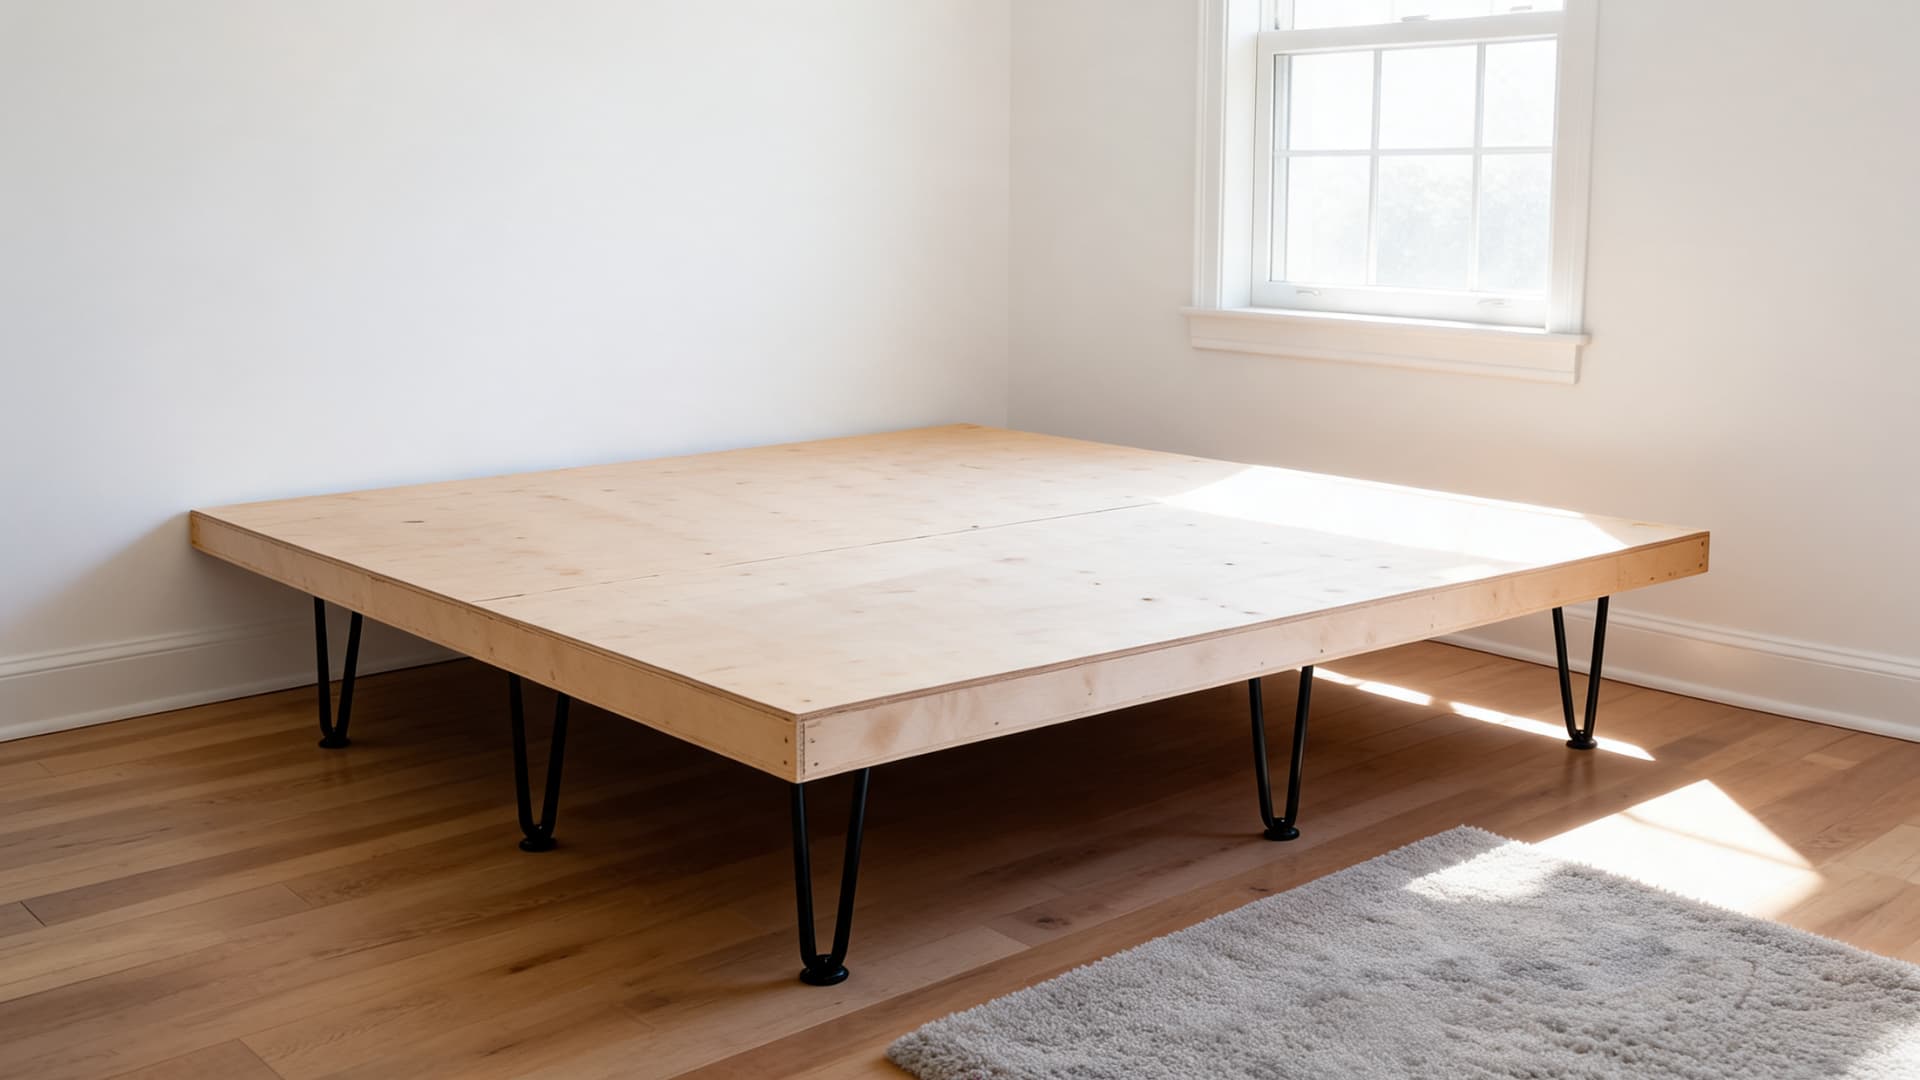
A hairpin leg bed frame combines a simple wooden platform with metal hairpin legs attached underneath for a lighter, modern appearance. The platform must be reinforced in the center to support mattress and sleeper weight safely.
- Materials: Plywood or boards, hairpin legs, screws, slats
- Plan Note: Choose legs rated for bed weight
- Budget: $150–$350
10. Canopy Bed Frame Plan
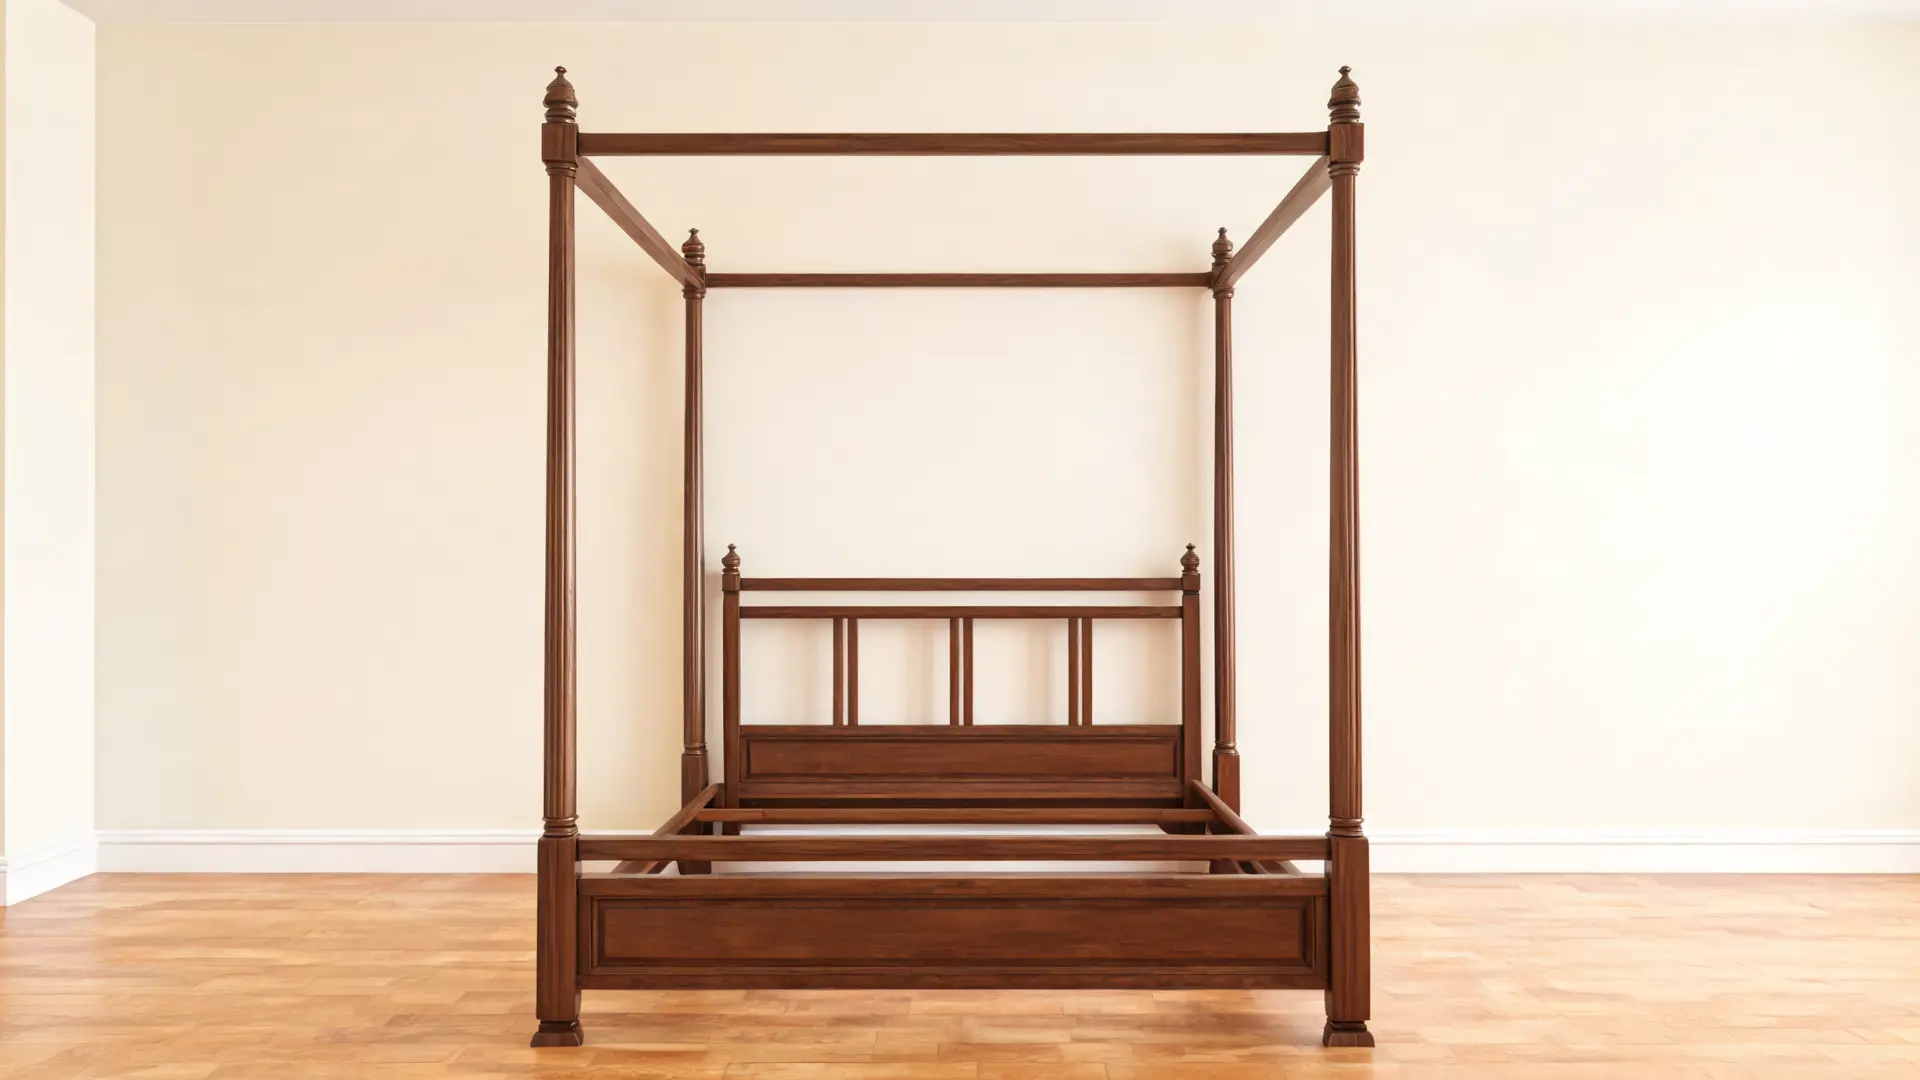
A canopy bed frame includes a raised structure with four tall posts and connecting rails above a platform base. It creates a larger visual presence in a room and requires precise alignment for stability and safety.
- Materials: 4×4 posts, 2×4 rails, slats, screws, brackets
- Plan Note: Posts must be straight, secure, and properly braced
- Budget: $300–$700
11. Twin Bed Frame Plan
A twin bed frame is a compact wooden structure designed for smaller mattresses, making it easier to build, move, and assemble. It uses a basic rectangular frame with slats and optional center support for stability.
- Materials: 2×4 boards, 1×4 slats, screws, wood glue, sandpaper, stain or paint
- Plan Note: Ensure correct twin mattress dimensions and solid slat support
- Budget: $50–$120
Tools and Materials Needed for Most DIY Bed Frames
Most DIY bed plans use the same basic tools and materials, though storage beds, upholstered beds, and larger king-size frames may need extra parts. Before buying anything, read the full plan, check the cut list, and measure your mattress.
Many builds rely on a wooden bed base frame setup to keep weight evenly supported across the structure. Having everything ready before you start makes the build go more smoothly and helps you avoid stopping halfway through the project.
| Category | Common Items | Notes |
|---|---|---|
| Lumber | 1x boards, plywood, slats | The exact lumber depends on the bed size, frame style, and whether you are adding a headboard or storage. |
| Fasteners | Wood screws, pocket screws, bolts, washers, brackets | Bolts and brackets add strength to larger frames, especially queen and king beds. |
| Tools | Drill, sander, square, clamps, tape measure | A carpenter square helps keep the frame straight, while clamps hold boards steady during assembly. |
| Finish | Stain, paint, varnish, sealer | Sand the wood before applying the finish so the surface is smooth and comfortable to the touch. |
| Support | Center beam, cross supports, slats, plywood | Wider beds need stronger support to prevent sagging, shifting, or noisy slats. |
| Optional Add-ons | Drawer slides, casters, fabric, batting, headboard hardware | These are useful for storage beds, rolling beds, upholstered frames, or separate headboards. |
A basic platform bed can be built with fewer supplies, which makes it a good first project for many DIYers. A storage bed, upholstered bed, floating frame, or king-size bed needs more planning because the weight, support system, and joinery matter more.
It is also worth buying a little extra sandpaper, screws, and finish so you are not short on small supplies during the final steps.
Common DIY Bed Frame Mistakes to Avoid
Even a simple DIY bed frame can wobble, sag, or feel uncomfortable if a few small details are missed. Check these common mistakes before cutting, assembling, or finishing your frame.
- Measure The Mattress First: Check the actual mattress size before cutting wood so the frame does not end up too tight or too loose.
- Leave Bedding Clearance: Add a little extra space for sheets, blankets, and mattress movement, making the bed easier to make.
- Add Center Support: Queen, king, and storage beds need a center beam or legs to prevent sagging.
- Space Slats Properly: Keep slats close enough to support the mattress and follow the mattress requirements.
- Check Corners For Square: Use a carpenter’s square so the frame does not wobble, twist, or sit unevenly.
- Choose Straight Boards: Avoid warped or twisted lumber because it makes the frame harder to build and less stable.
- Sand Before Finishing: Smooth rough edges so the wood does not snag bedding, scratch skin, or make paint look uneven.
- Plan The Bed Height: Think about mattress thickness, storage needs, and how easy it is to get in and out of bed.
Avoiding these mistakes will make the bed frame safer, steadier, and easier to use every day. Take your time with measuring, support, and hardware, so the finished frame holds up well.
Safety and Stability Checks Before Sleeping on the Bed
Before using your DIY bed frame, go through these quick safety checks:
Tighten all hardware: Check all bolts, screws, brackets, and joints before adding the mattress.
Test for wobbling: Gently shake the frame; if it moves, check and tighten the legs, corners, and fasteners.
Press each corner: Push down on each corner of the frame to make sure it feels steady and evenly supported.
Check the center support: Ensure the center support is secure and touches the floor if needed.
Inspect the slats: Make sure all slats are evenly spaced, firmly attached, and not cracked or loose.
Sand sharp edges: Smooth rough edges around the frame, headboard, footboard, and storage openings.
Lock the casters: If the bed has wheels, use locking casters and lock them before sleeping.
Secure the headboard: Make sure the headboard is fixed safely to the wall or attached firmly to the frame.
Listen for squeaks: After a few nights, check for squeaks, movement, or loose hardware.
Re-tighten after use: Re-tighten screws, bolts, and brackets after the bed has been used for a few nights.
Frequently Asked Questions
What is the easiest bed frame to build?
A simple platform bed is usually the easiest bed frame to build. It uses a basic rectangular frame, slats or plywood support, and optional legs. It also removes the need for a box spring in many cases.
Is it cheaper to build a bed frame or buy one?
Building a bed frame is often cheaper with simple DIY plans. In this list, the pallet bed frame is the lowest-cost option. Cost: $40–$120 (pallet bed frame)
Do I need a box spring with a DIY bed frame?
Not always. Platform beds and frames with enough slats usually support the mattress without a box spring. Traditional frames may still need one, depending on the design and mattress requirements.
How much space should be between bed slats?
The right spacing depends on the mattress, but many mattresses need slats close enough to prevent sagging. Always check the mattress brand’s support requirements before final assembly.
How do I stop a DIY bed frame from squeaking?
Tighten loose hardware, check slats, add felt or cork where wood pieces rub, and make sure the frame is square. Squeaks often come from loose slats, bolts, or shifting supports.
Conclusion
A bed frame should fit your room, your mattress, and the way you actually use the space. With the right DIY bed frame plans, you can build something simple, sturdy, and useful without buying expensive furniture.
A platform bed is usually the easiest place to start, while storage beds, pallet frames, canopy beds, loft beds, upholstered frames, and raised wood frames give you more choices.
The main things to remember are simple: measure first, choose straight wood, match the plan to your tools, add proper support, check slat spacing, and finish the frame safely.
I would start with the idea that fits your budget and comfort level. Try one plan, take your time with the details, then check more bedroom DIY projects for your next build.


