

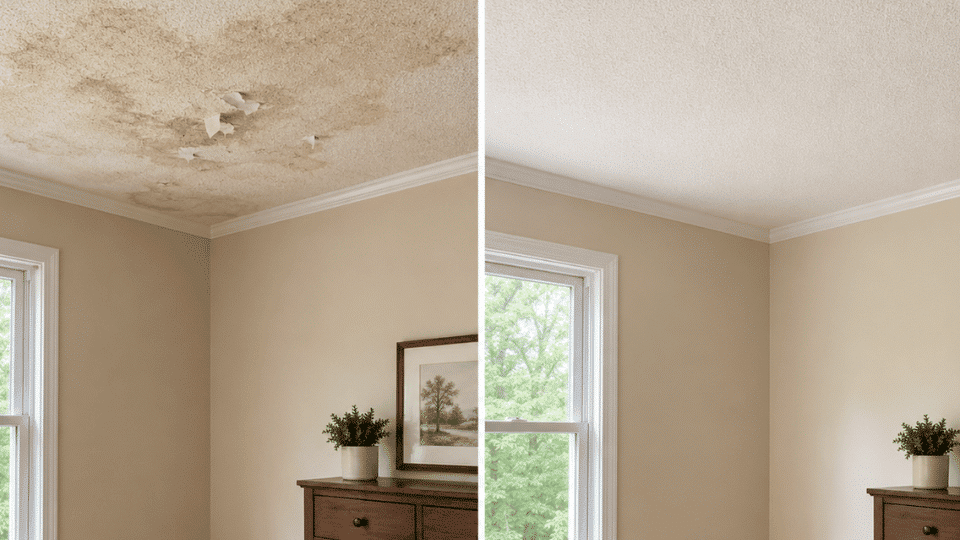


You look up one morning, and there it is, a brownish ring spreading quietly across your ceiling, looking like it has been there longer than you noticed. A water stain on ceiling surfaces is one of those home problems that feels minor until it isn’t.
I’ve been through this repair twice. The first time, I painted over it immediately, and the stain came back within two weeks, darker than before.
The second time, I followed every step correctly, dry time, stain-blocking primer, and the repair held. The difference wasn’t the paint. It was the order of operations.
What you’ll find here: how serious the stain actually is, every common cause, a step-by-step repair process with material costs, how to spot an active leak, cleaning alternatives, and how to stop it from coming back.
| Difficulty | 2 of 5, basic prep work, one tricky ceiling coat |
| Time | Half a day for the repair; 24–48 hours total, including dry time |
| Cost | $50–$150 for materials if the source is already fixed |
| Tools Needed | Step ladder, putty knife, sandpaper, brush or roller, drop cloth |
| Skill Required | Beginner, no specialist tools needed |
Is a Water Stain on the Ceiling Serious?
Yes, it can be, and it deserves more than a coat of paint. A stain indicates water reached a surface it shouldn’t have. Often, what appears on the ceiling is just the visible tip of moisture traveling through your home’s structure.
Behind that ring, there could be damp insulation, softened drywall, or early mold development.
Unaddressed leaks can lead to mold growth, drywall deterioration, peeling paint, ceiling sagging, and electrical hazards if moisture contacts wiring or fixtures. Long-term water can also cause structural damage.
The severity of a stain depends on its size, moisture feel, location, and whether it’s active or changing. A dry, stable stain from a previous leak is less urgent than a growing, damp, musty patch.
Always check the source before painting over it; this is essential advice for every homeowner.
Common Causes of a Water Stain on the Ceiling
A water stain can come from several parts of the home, so its location, timing, and shape often help narrow down the source.
- Roof Leaks: Check attic for roof stains after rain or snow; inspect shingles, flashing, pipe boots, skylights, vents, valleys, and gutters for leaks.
- Plumbing Leaks: When a stain forms below a bathroom, kitchen, or laundry area, a plumbing leak is often the cause due to dripping supply lines, drainpipes, corroded joints, or loose fittings that may take weeks to cause visible damage.
- Bathroom Leaks: Failed caulk, cracked grout, leaking shower pans, overflowing tubs, or deteriorating toilet wax rings can cause water damage to floors and ceilings.
- HVAC Leaks: Air conditioning systems produce condensate, which can overflow or leak due to clogged drains, overflowing drip pans, or poor duct insulation, especially during the cooling season.
- Condensation: Not all stains come from leaks; condensation in poorly ventilated bathrooms, kitchens, and laundry rooms causes faint patches, damp spots, or mildew-like discoloration, not brown rings.
- Skylight, Chimney, or Exterior Water Intrusion: Improper flashing on skylights and chimneys often causes ceiling water damage, hidden from view and hard to confirm without inspection.
Finding the source first keeps the repair from becoming temporary. Once the cause is fixed, cleaning, priming, and repainting can last longer.
How to Fix a Water Stain on the Ceiling
The safest repair starts with the moisture source, then moves to cleaning, sealing, and repainting once the ceiling is fully dry.
Materials Required
Having the right materials helps prevent the stain from bleeding through fresh paint and keeps the repair cleaner from start to finish.
| Material | Estimated Price | Recommended Brand/Product |
|---|---|---|
| Step ladder | $45–$130 | HBTower Step Ladder |
| Drop cloth | $8–$25 | Trimaco Canvas Drop Cloth |
| Gloves and safety glasses | $10–$25 | 3M Safety Glasses |
| Putty knife | $5–$12 | Warner Putty Knife |
| Spackle or drywall compound | $6–$18 | 3M High Strength Small Hole Repair |
| Sandpaper | $5–$15 | Fandeli Sandpaper Sheets |
| Stain-blocking primer | $12–$35 | Zinsser Cover Stain |
| Ceiling paint and roller | $25–$60 | Pro Grade Paint Roller Kit |
Step 1: Find and Fix the Moisture Source
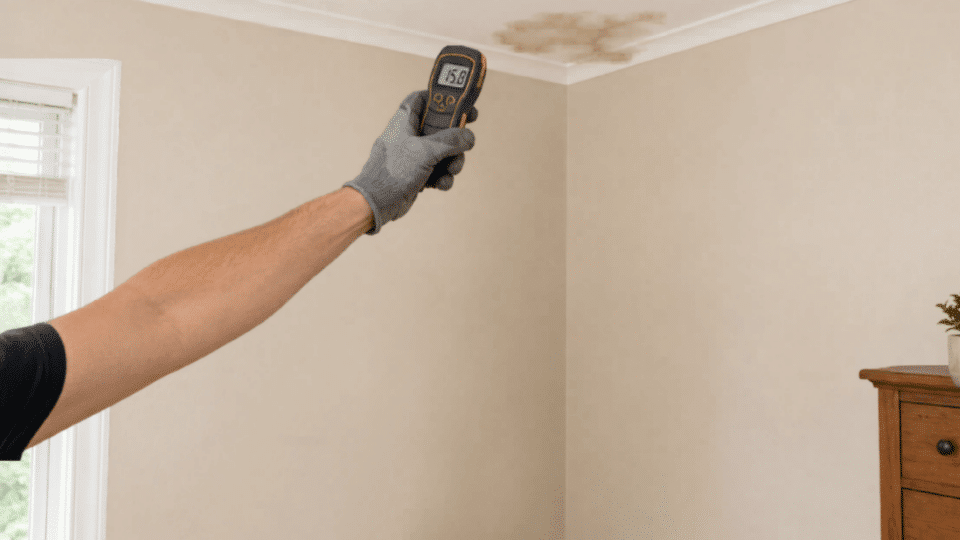
Before anything else touches the ceiling, the source needs to be identified and resolved.
- Check the area directly above the stain, attic, bathroom floor, plumbing lines, or HVAC equipment
- Look for damp insulation, dripping pipes, cracked caulk, or overflow signs
- If the source is unclear, a moisture meter can help locate active dampness
- Fix or replace whatever is causing the water entry before continuing
- Do not move to the next step until the source is confirmed as resolved
Step 2: Dry, Clean, and Prep the Area
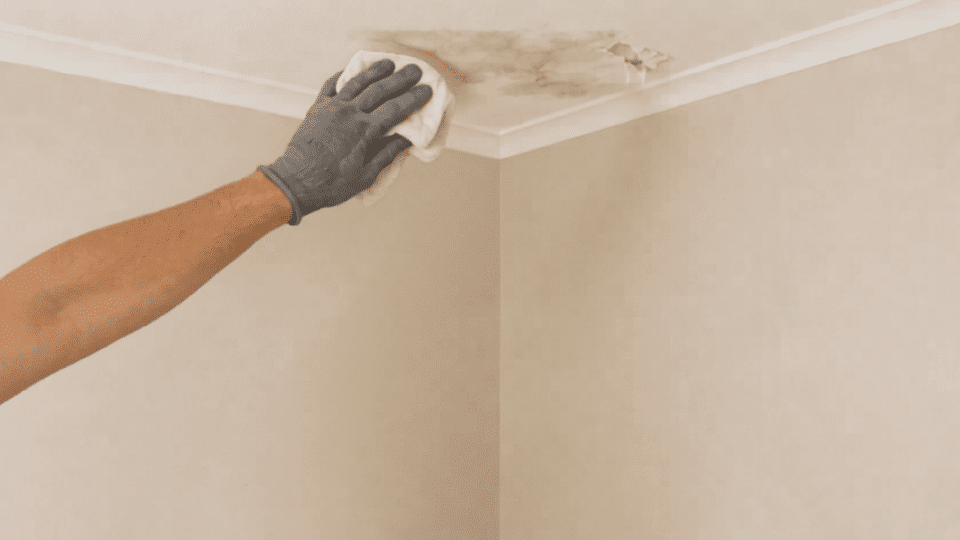
Once the leak is fixed, the ceiling needs to be fully dry; this is non-negotiable. Use fans, open ventilation, or a dehumidifier to pull moisture out. Rushing this step traps moisture under the repair, causing it to resurface.
When dry, wipe the stained area with a damp cloth and mild detergent to remove dust, residue, and surface grime, then let it dry again.
Followed by using a putty knife to gently scrape away any peeling paint, bubbling texture, or loose plaster, being careful not to damage solid drywall nearby.
Step 3: Patch Any Damage
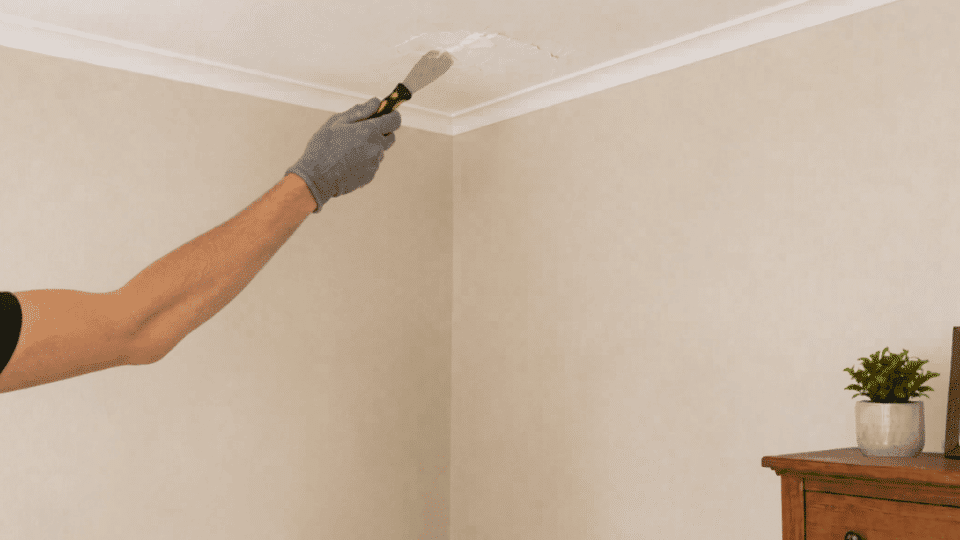
Patch ceiling damage carefully before priming, since weak or uneven areas can make the final repair look uneven.
- Fill small cracks or holes with spackle or drywall compound.
- Apply the filler evenly over the damaged area.
- Let it cure completely before sanding.
- Sand the patched area until it feels smooth and level.
- Use a drywall patch for larger soft or sagging sections.
- Avoid using the compound alone if the ceiling board has lost its integrity.
Step 4: Apply Stain-Blocking Primer
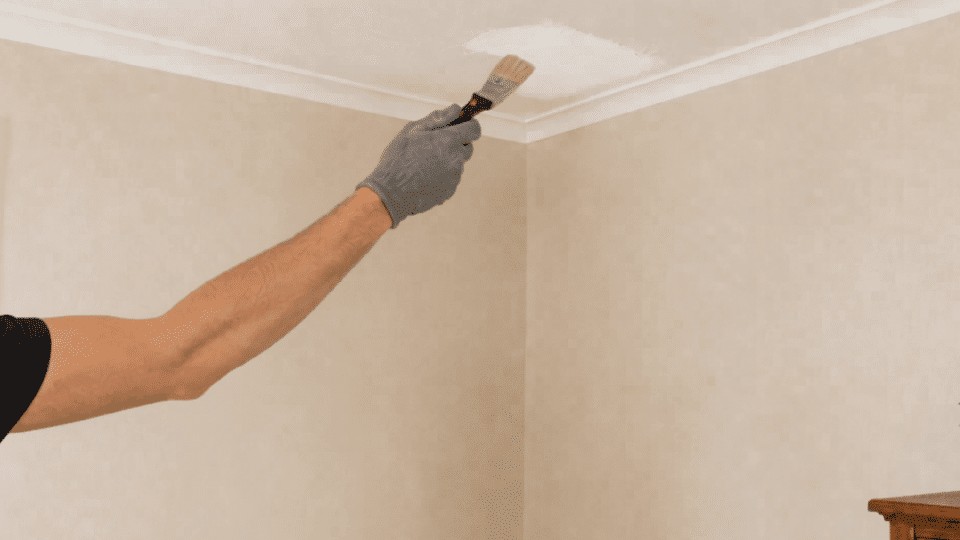
This step is where most DIY ceiling repairs go wrong. Standard primer and regular paint will not seal a water stain; the brown or yellow residue left in the drywall will bleed right back through, sometimes through multiple coats of paint.
Use an oil-based or shellac-based stain-blocking primer specifically. Apply it over the entire stained and patched area, extend slightly beyond the visible ring edge, and let it dry fully , usually 1–2 hours for oil-based products, less for shellac , before painting.
If you’re wondering whether acrylic paint alone offers water resistance, the short answer is that it doesn’t seal existing stains , primer does the sealing, paint does the finish.
Step 5: Repaint the Ceiling
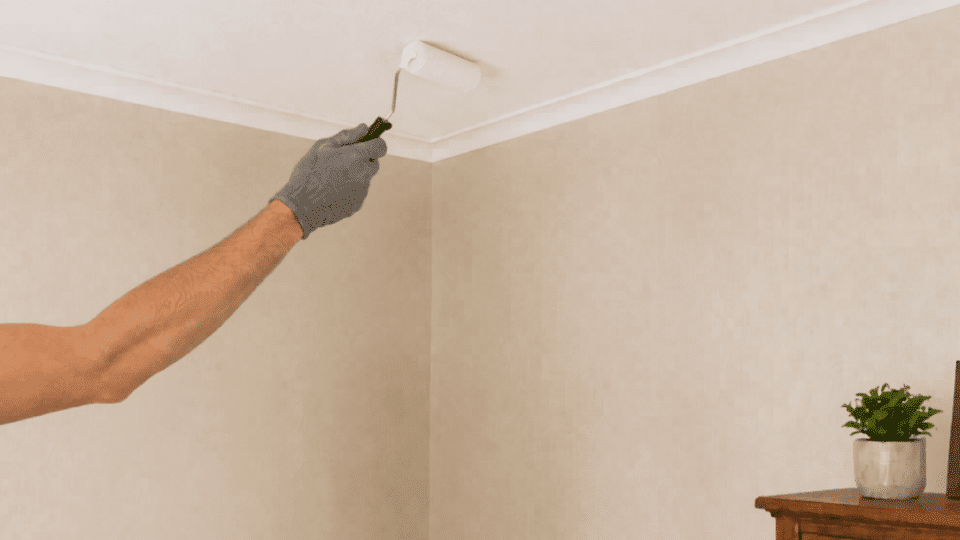
Apply flat ceiling paint only after the primer has dried fully. Feather the edges into the surrounding surface so the repaired area blends naturally.
If the existing ceiling paint has faded or the patched section is large, repaint the entire ceiling rather than spot painting. This creates a cleaner, smoother, and more even finish.
Quick Fixes for a Water Stain on the Ceiling
If the stain is small, dry, and the leak has already been fixed, you may not need a full ceiling repair right away.
A few quick fixes can improve the look of the area before you commit to patching or repainting the whole ceiling. Use this table to choose the right quick fix based on what the stain looks like.
| Situation | Quick Fix | Best For |
|---|---|---|
| Light surface stain | Wipe with mild soap and water, then let dry | Fresh, minor marks |
| Yellow or brown dry stain | Apply stain-blocking primer, then repaint | Stains that show through cleaning |
| Mild mildew-like discoloration | Use equal parts vinegar and water, then dry fully | Light mildew marks |
| Stubborn dark spot | Test 3% hydrogen peroxide, blot gently, then dry | Older or harder stains |
| Stain near a leak source | Stop and fix the leak first | Any damp or changing stain |
| Soft, sagging, or bubbling ceiling | Call a professional | Possible drywall or structural damage |
Once you know which fix fits your stain, follow the same rule every time: fix moisture first, dry the ceiling fully, then clean, prime, and paint only if needed.
Other Ways to Remove a Water Stain from the Ceiling
Painting is not always the first option. Small, dry stains on light ceilings may improve with careful cleaning methods.
- Bleach and Water Method: A diluted bleach solution (roughly one part bleach to three parts water) can lighten dry stains. Lightly mist, let dry, and repeat if needed. Ventilate the room and protect your eyes and skin.
- Vinegar and Water Method: Equal parts white vinegar and water can help with mild discoloration or mildew-like marks. Spray or dab lightly, let it sit briefly, then wipe and allow the ceiling to dry fully.
- Hydrogen Peroxide Method: Three percent hydrogen peroxide can work on stubborn spots or mildew-prone discoloration. Test a small hidden area first, then apply lightly and blot rather than scrub.
- When Cleaning Is Not Enough: Dark, old, or recurring stains almost always need primer and paint. Cleaning may reduce the visible mark, but it cannot seal discoloration that has absorbed into drywall or ceiling texture. If the stain comes back after cleaning, reach for the stain-blocking primer.
These methods work best on dry, minor stains. If discoloration persists or recurs, sealing and repainting are usually the better repair.
How to Tell If It Is an Active Leak
Before treating the stain as cosmetic damage, check whether moisture is still entering the ceiling or the leak has already stopped.
| New or Active Stain | Old or Dry Stain |
|---|---|
| Stain is visibly growing or spreading | Stain size and color are stable |
| Color is darkening | Ceiling surface feels firm and dry |
| Ceiling feels damp, soft, or spongy | No musty odor present |
| Paint is bubbling, or drywall is swelling | No dripping, bubbling, or swelling |
| Water is actively dripping | Moisture readings are normal |
| Musty or mildew smell is present | No smell detected |
| Stain appears or worsens after rain, shower use, or AC running | The original source has already been repaired |
If any signs are present in the active column, the repair cannot start yet. Call a roofer, plumber, HVAC technician, or leak detection professional if the source is unclear.
When the ceiling is sagging, water is visibly dripping, mold has appeared, or the stain sits near electrical fixtures, getting professional help quickly matters.
How to Prevent Future Ceiling Leaks and Stains
Prevention depends on controlling moisture before it reaches the ceiling, especially around roofs, bathrooms, plumbing lines, and HVAC equipment.
- Maintain the Roof: Inspect shingles, flashing, vents, skylights, chimneys, and gutters at least once a year and after major storms. Keep gutters clear, so water runs cleanly away from the roofline.
- Check Plumbing Regularly: Look under sinks, around toilets, near tubs, and below appliances for slow drips or damp cabinet floors. Replace failing caulk early and pay attention to changes in water pressure or unexplained damp smells.
- Service HVAC Systems: Clear condensate drain lines, inspect drip pans, and confirm ductwork insulation is intact. Annual HVAC maintenance is one of the most cost-effective ways to prevent moisture problems above ceilings , issues that are often invisible until a stain appears.
If you’re building or renovating a space with HVAC overhead, the planning considerations for sunroom additions cover condensation and moisture management in enclosed ceiling spaces as well. - Reduce Indoor Humidity: Run exhaust fans consistently in bathrooms, kitchens, and laundry rooms. In persistently damp areas, a dehumidifier can prevent condensation from forming on cooler ceiling surfaces.
Regular checks help stop small moisture issues early, before they turn into ceiling stains, drywall damage, or expensive leak repairs.
Frequently Asked Questions
Can you paint over a water stain on the ceiling without primer?
No. Paint alone does not seal water stains. The mineral residue and wood tannins absorbed into the drywall bleed back through regular paint, sometimes through several coats. A stain-blocking primer, either oil-based or shellac-based, must go on first.
Why does a ceiling water stain keep coming back?
A recurring stain almost always means one of three things: the leak is still active, the ceiling wasn’t fully dry before painting, or the wrong primer was used. Recheck the moisture source before repainting again.
How long does a ceiling need to dry before painting after a leak?
At minimum 24–48 hours for minor staining, and several days to a week for a ceiling that was significantly wet. Use a moisture meter to confirm dryness, touch alone isn’t reliable for drywall that absorbed water deeply.
Does the color of a ceiling water stain tell you anything?
Yes. Yellow or brown staining typically comes from water carrying minerals or rust through drywall layers. Dark marks, black spots, or fuzzy patches suggest mold or mildew, which changes both the urgency and the approach, mold needs to be treated, not just painted over.
What is the best primer for covering water stains on a ceiling?
Shellac-based primers (Zinsser BIN is the standard recommendation) or oil-based stain blockers (Zinsser Cover Stain, Kilz Original). Water-based “stain-blocking” primers work for light discoloration but often fail on heavy water stains, oil or shellac is more reliable on severe marks.
Can a ceiling water stain be a sign of mold?
Yes. If the stain has a dark border, smells musty, or shows fuzzy texture, mold may be present. Mold behind drywall requires more than a surface repair, the affected area may need to be cut out and replaced, and the source of ongoing moisture addressed first.
How much does it cost to fix a water-stained ceiling?
DIY materials run $50–$150 for a standard repair once the leak is fixed. Professional ceiling repair ranges from $200–$500 for small sections and $500–$1,500+ for larger areas requiring drywall replacement or mold remediation.
The Final Step
A water stain on ceiling surfaces is never just a paint problem. In my experience with home repairs, the stains that come back, sometimes twice, sometimes more, almost always return because the moisture source wasn’t fully confirmed or the ceiling was repainted too quickly.
Treat the stain as a moisture warning first and a cosmetic issue second. Check how serious it is, identify the source, fix it, let the ceiling dry completely, then clean, prime with a stain-blocking product, and repaint properly.
Keep up with roof, plumbing, bathroom sealing, and HVAC maintenance to reduce the chances of it happening again.
Take a close look at the stain, check whether it’s damp, whether it’s growing, and what sits above it. Drop your stain location or situation in the comments if you want a second opinion.





