


| Cost Note: Figures in this article are estimates based on national averages. Actual costs vary significantly by region, contractor, materials, and project scope. Always get at least three quotes before committing to any project above $1,000. |
The first thing I evaluate on any dock project is what the water is doing two seasons after the build. Post rot. Fastener corrosion. Floats that have shifted under weight and never quite leveled out again.
Pressure-treated pine posts driven into sandy lakebeds tend to wobble loose within three to five years if they weren’t set deep enough at the start, and most first-time builders don’t go deep enough because the soil feels firm at four feet. Go to six.
Learning how to build a dock that lasts comes down to three decisions made before you touch a single board: what type of dock fits your water conditions, what materials will still be serviceable after two Wisconsin winters or a Florida hurricane season, and whether your posts, pipes, or floats are actually sized for the load you’re putting on them.
Get those three right and the construction itself is straightforward.
| Project Type | Pipe-leg fixed dock with wood frame and decking |
| Difficulty | 3/5 — manageable for two people with basic construction experience |
| Time | 1–2 weekends for a basic 8×16-foot section |
| Cost Range | $1,500–$4,000 DIY depending on size and materials |
| Key Tools | Drill/impact driver, level, string line, tape measure, saw, sledgehammer |
| Permit Required? | Almost always — check with your local municipality before starting |
Before diving into the build sequence, a quick note on permits: waterfront construction is one of the most regulated DIY categories in the US.
The Army Corps of Engineers, your state’s environmental agency, and your local municipality may all have jurisdiction, depending on the type of water body. A dock built without the right permits can be ordered removed at your expense. Check before you buy lumber.
Fixed Dock vs. Floating Dock: Which One Holds Up in Your Conditions
The dock type that works best is determined entirely by your water — not your budget preference or what you saw on a lake house tour. Each type has a specific failure mode in the wrong conditions, and that’s what you need to weigh before committing.
| Dock Type | Best Conditions | What Fails After Two Seasons | Estimated Cost (DIY, basic section) |
| Fixed (post/pile) | Calm water, stable water levels, firm sandy or clay lakebed | Posts loosen in soft soil; ice heave lifts them in cold climates | $2,000–$5,000+ |
| Floating | Variable water levels, deeper water, soft or muddy bottoms | Under-sized anchors drag; floats rated for the wrong load list or bounce | $1,500–$4,500 |
| Pipe-leg | Shallow water (under 5 ft), seasonal use, firm bottom | Legs shift in sand over time; exposed to ice damage if left in | $800–$2,500 |
| Crib | Heavy permanent use, high-traffic boat docks, stable water | Expensive upfront; requires permits almost everywhere; not DIY-friendly | $5,000–$20,000+ |
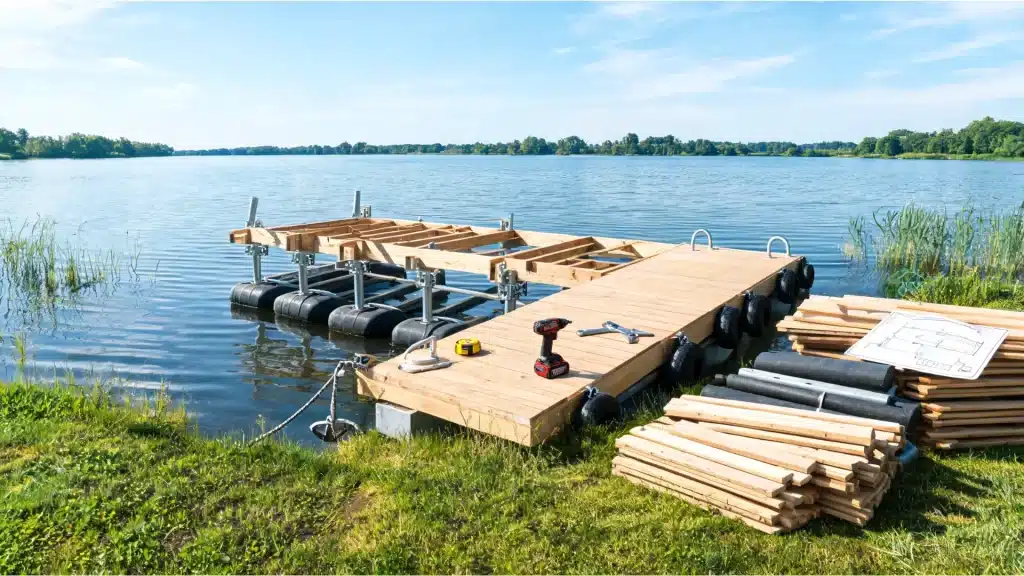
The pipe-leg dock is where most DIY beginners should start, it’s the most forgiving design for shallow-water installs, can be pulled out seasonally before ice sets in, and doesn’t require pile-driving equipment. That’s the build sequence this guide covers in detail.
If your water runs deeper than five feet at the dock end or your levels fluctuate significantly by season, a floating dock is the smarter choice despite the added complexity of anchoring.
Choosing Dock Materials That Actually Last
Materials are where people cut corners and pay for it two winters later. The wrong lumber choice isn’t always obvious; a dock built with above-ground-rated pressure-treated lumber instead of ground-contact-rated wood might look fine for a couple of seasons before the rot sets in at the waterline. The right call depends on what part of the structure you’re building.
| Material | Best Use | Rough Cost | Real-World Lifespan |
| Ground-contact PT lumber (UC4B) | Posts, joists, framing in or near water | $0.80–$1.50/linear ft | 20–30 years with maintenance |
| Composite decking | Walking surface — no splinters, no annual sealing | $3–$7/linear ft | 25–30 years, minimal upkeep |
| Aluminum frame | Saltwater or high-corrosion environments | Higher upfront, very low maintenance | 30+ years |
| Galvanized hardware | Freshwater docks — bolts, brackets, pipe clamps | Standard cost | 10–15 years before replacement |
| Stainless steel hardware | Saltwater or harsh-weather docks | 2–3× the cost of galvanized | 25+ years |
The one thing I’d tell anyone building their first dock: don’t put standard above-ground pressure-treated lumber into posts or framing that contacts the water or wet soil. You need UC4B ground-contact-rated lumber for anything below or at the waterline. The spec is printed on the tag at the lumber yard — check it before you load the truck.
| Pro Tip: Brush cut-end wood preservative on every board end immediately after cutting. Pressure treatment doesn’t penetrate the full thickness of the lumber — saw cuts expose untreated wood, and those exposed ends are where rot starts first. |
Planning the Dock Size and Location
Walk your shoreline before you finalize anything. The best-looking dock location on paper is often the worst on the ground — soft mud, submerged rocks, exposed to the prevailing wind line, or sitting directly in the path of boat traffic. What you’re looking for is a spot with consistent water depth, firm bottom conditions, protected exposure, and clear access from land.
Measure water depth at three points: at the shoreline, midway out, and where the dock will end. Do this at seasonal low water — the worst-case scenario. For a boat dock, you need at least 2.5 to 3 feet of clearance at the bow end at low water to avoid hull contact.
A fishing or swimming dock has more flexibility in depth, but anything under 5 feet at the end point means a pipe-leg fixed design will work. Deeper than that, and you’re in floating dock territory.
Keep the dock width practical. A walkway section needs to be at least 4 feet wide to move comfortably with a gear bag. A platform or boat dock end section works best at 8–10 feet wide.
For a combined walkway-plus-platform layout, plan a T or L shape at the end rather than extending the full width from shore, it’s cheaper, structurally simpler, and gives better access on both sides of a moored boat. If your outdoor layout is still taking shape, it’s worth thinking about how the dock connects back to the rest of your waterfront space, including any deck structure near the shoreline.
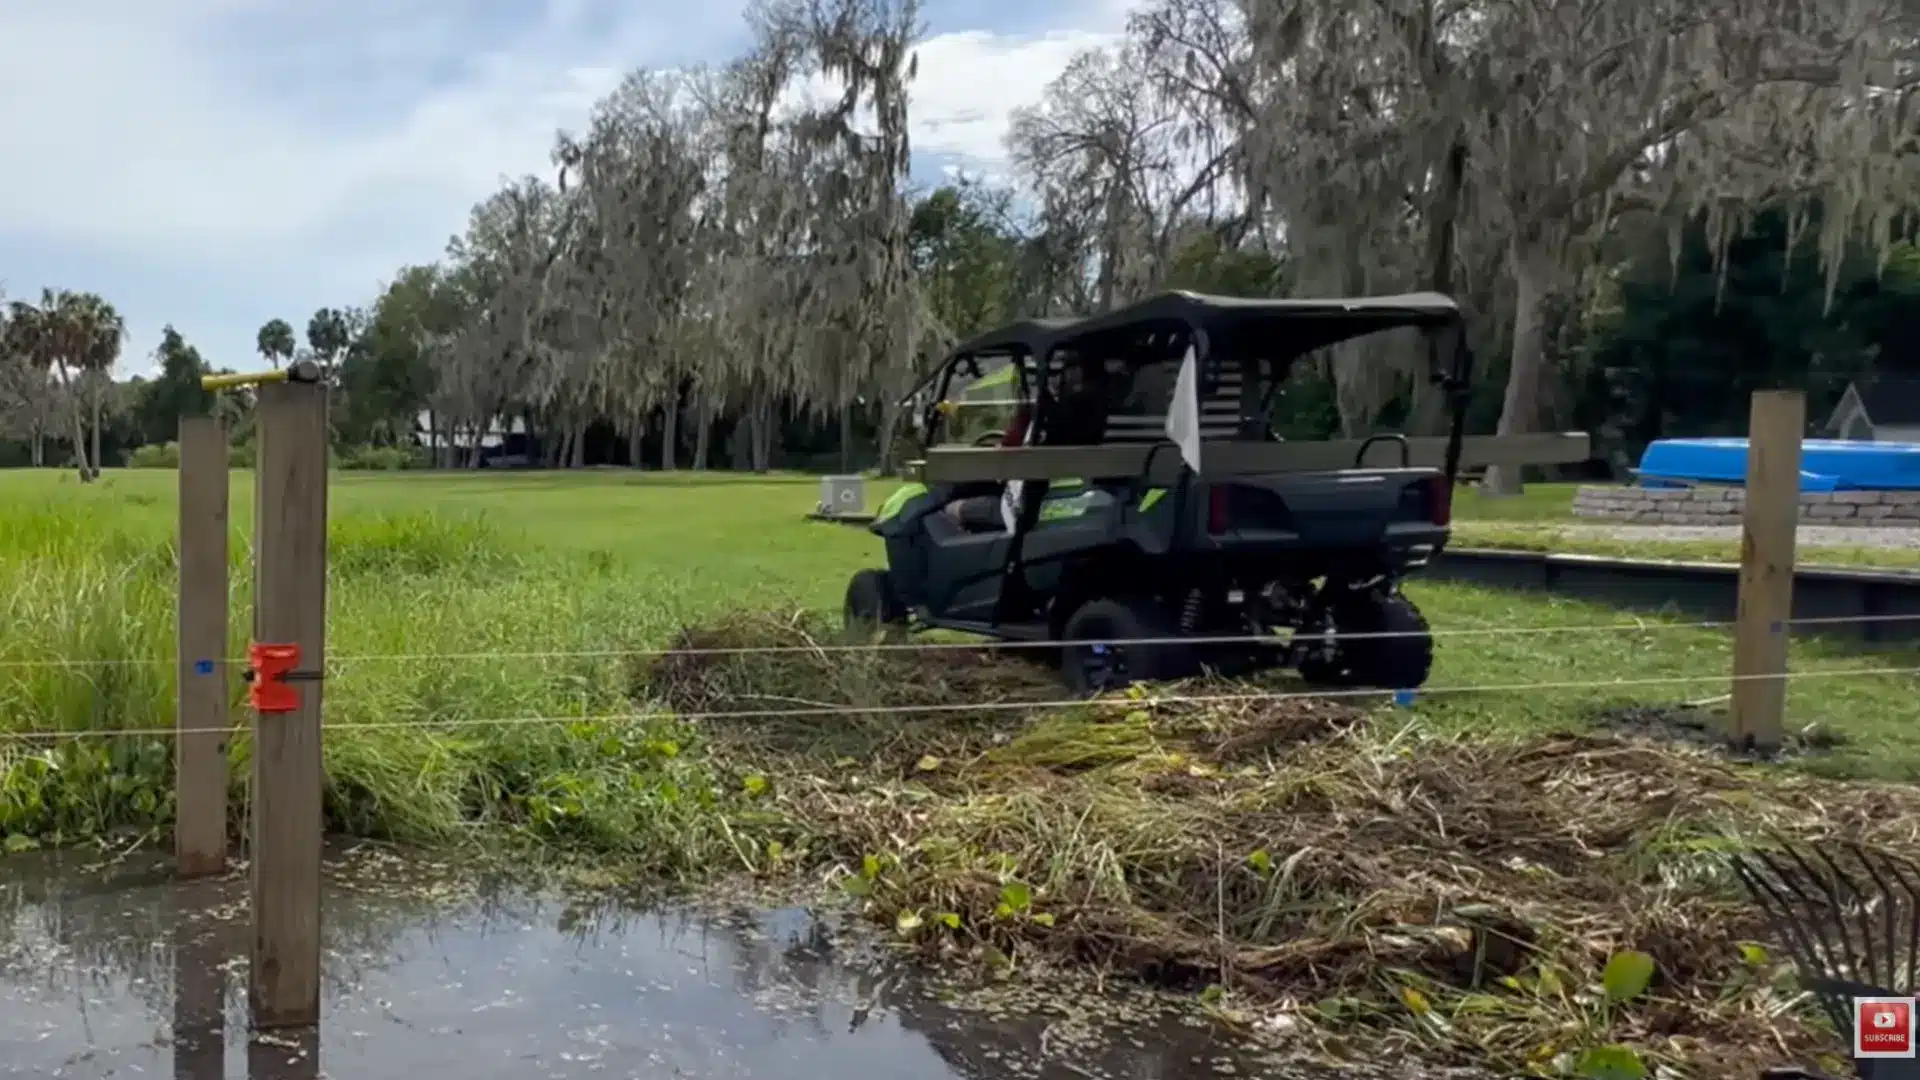
Step-by-Step Guide: Installing a Wood Dock with Pipe Legs
Before you start the installation, make sure you have all the required hardware, tools, and safety gear ready.
Having everything prepared in advance will make it easier to assemble the dock sections, install the pipe legs, level the structure, and secure the dock properly in the water.
Tools and Materials Needed
Before starting the dock build, gather the main tools, lumber, fasteners, and safety items. Having everything ready helps you work more safely and avoid stopping halfway through the frame setup.
- Saltwater splash-rated pressure-treated lumber
- Pressure-treated posts
- Crossmember boards
- Joists
- Blocking boards
- Standard deck boards
- Cut-end wood preservative
- Paintbrush for applying preservative
- Garden hose for water jetting posts
- Sledgehammer
- Sacrificial wood cap or steel plate for post tops
- String line for alignment
- Line level
- Tape measure
- Temporary construction screws
- Drill or impact driver
- 10-inch, 1/2-inch carriage bolts
- Lag bolts
- Ratchet strap
- Saw for cutting lumber
- Level
- Work gloves
- Safety glasses
- Helper for handling long posts and boards
- Optional: concrete form cylinders if setting posts in concrete
After gathering these items, start by treating the cut board ends, setting the posts, checking alignment, and using temporary screws before final bolts.
Step 1: Choose Saltwater-Rated Lumber
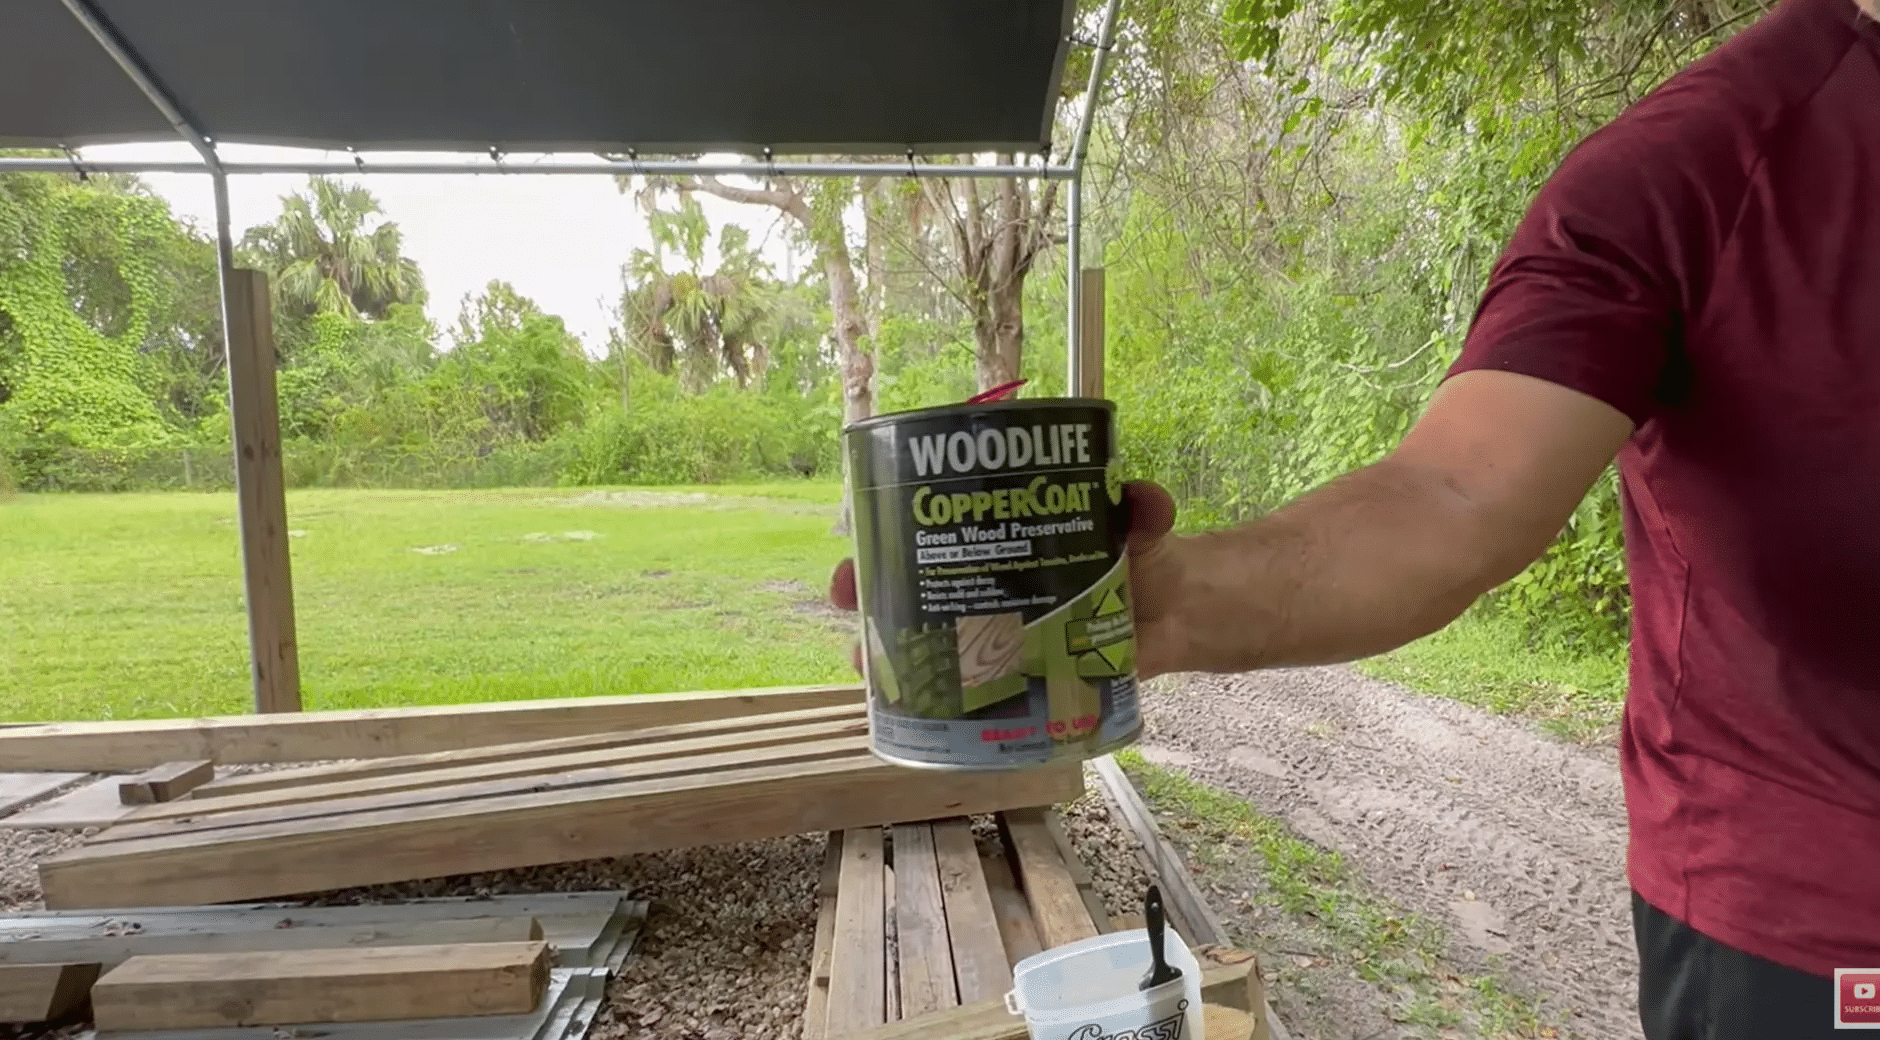
Start with lumber that can handle outdoor moisture, splash exposure, and changing weather. Standard untreated boards are not a good choice for dock framing because they can rot, weaken, or absorb moisture too quickly.
Use saltwater splash-rated lumber or properly pressure-treated boards designed for wet outdoor conditions. Keep cut-end wood preservative nearby while you work. Every time you cut a board, brush preservative onto the exposed end so water has a harder time entering the wood.
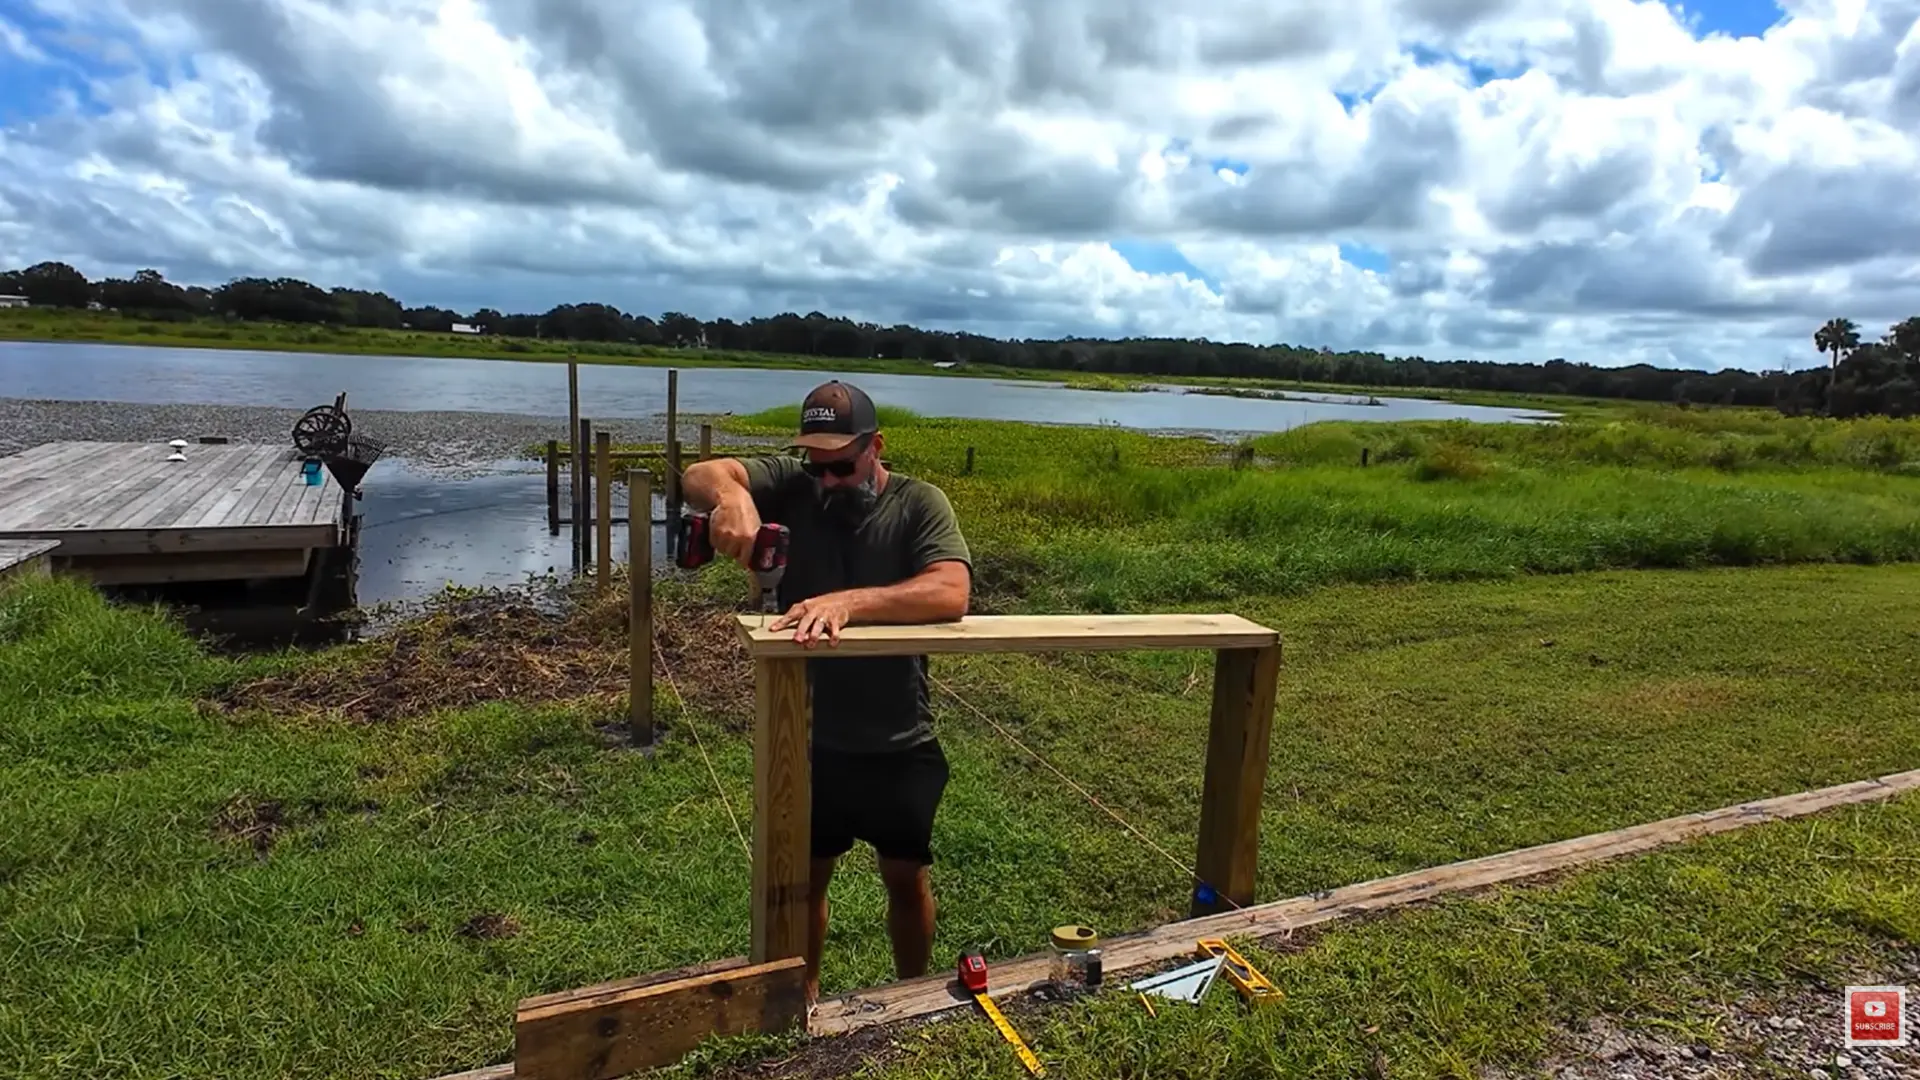
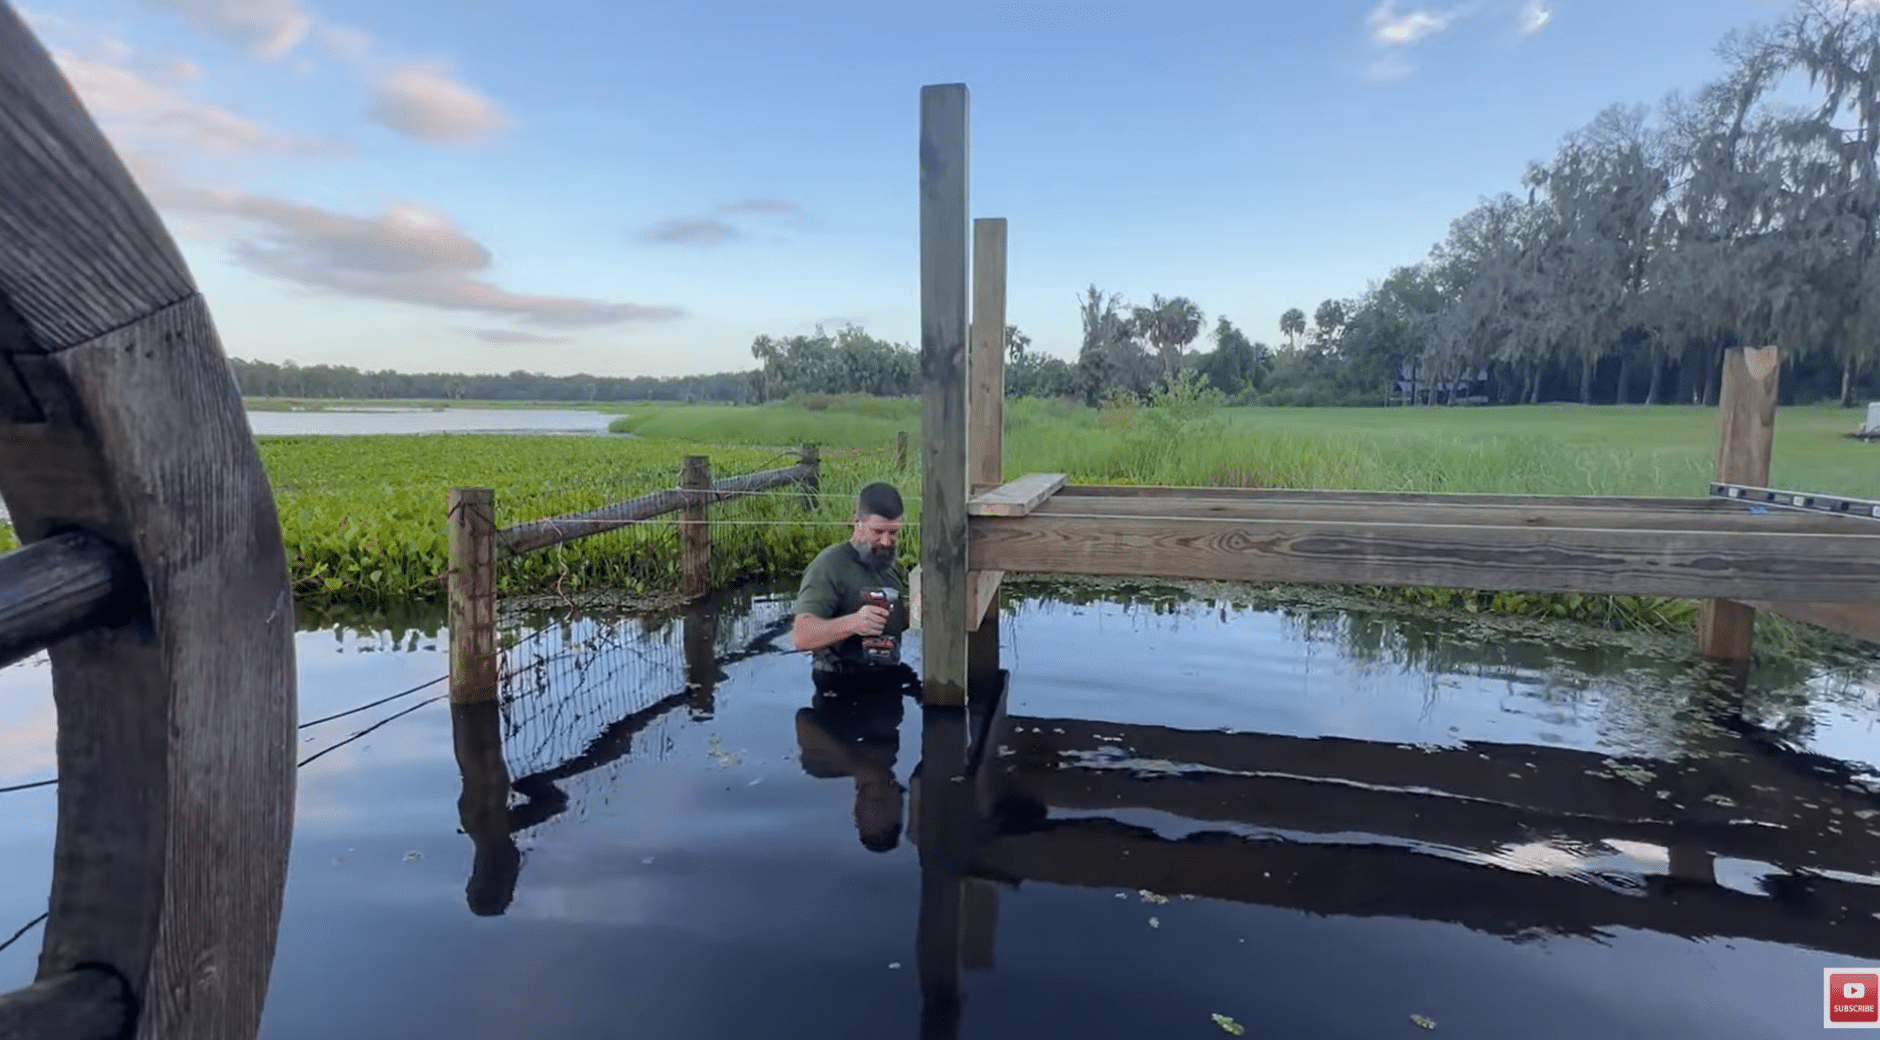
Step 2: Set the Dock Posts in Place
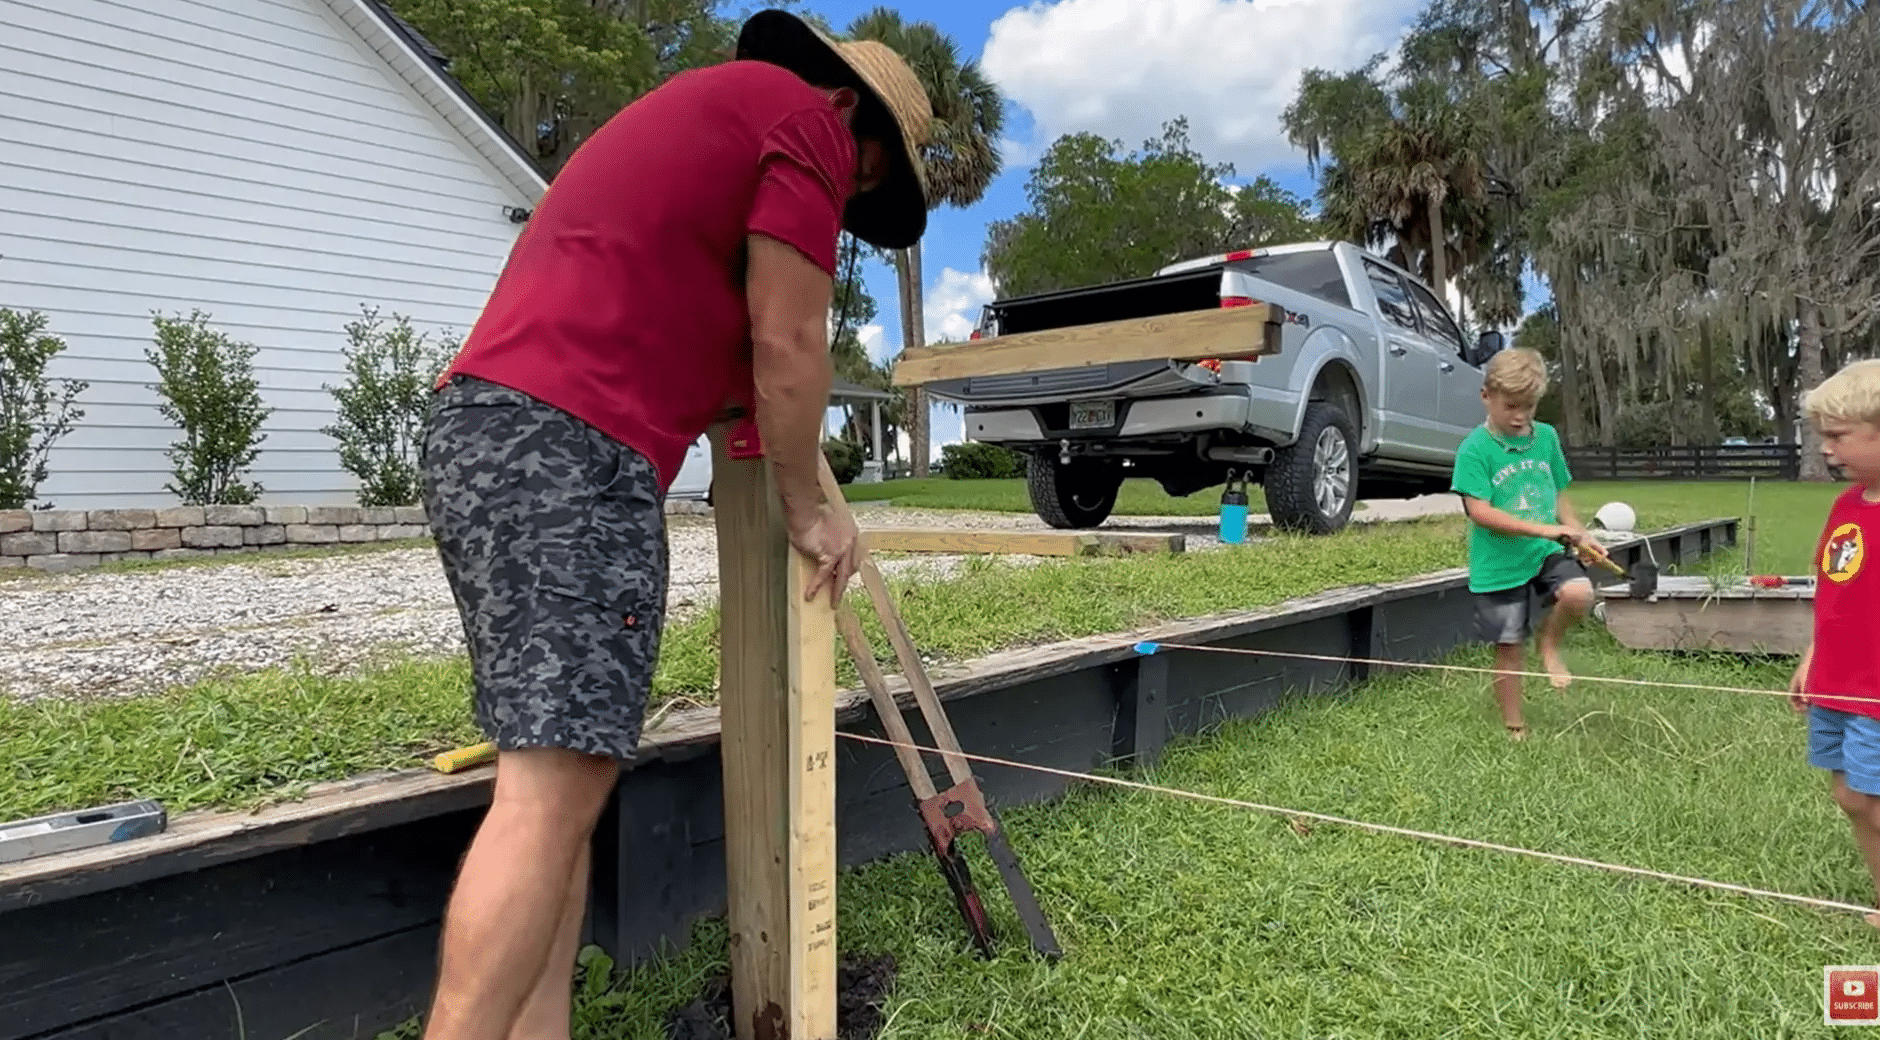
The dock posts form the foundation, so set them carefully. Use water pressure from a hose to loosen the soil around each post location. As the soil softens, twist the post back and forth while working it into the ground.
Set each post deep enough to stay secure under weight, movement, and water pressure. Avoid striking the top too hard with a sledgehammer because this can split the wood. If heavy hammering is needed, use a protective cap or steel plate to protect the post top.
Step 3: Keep the Posts Straight and Aligned
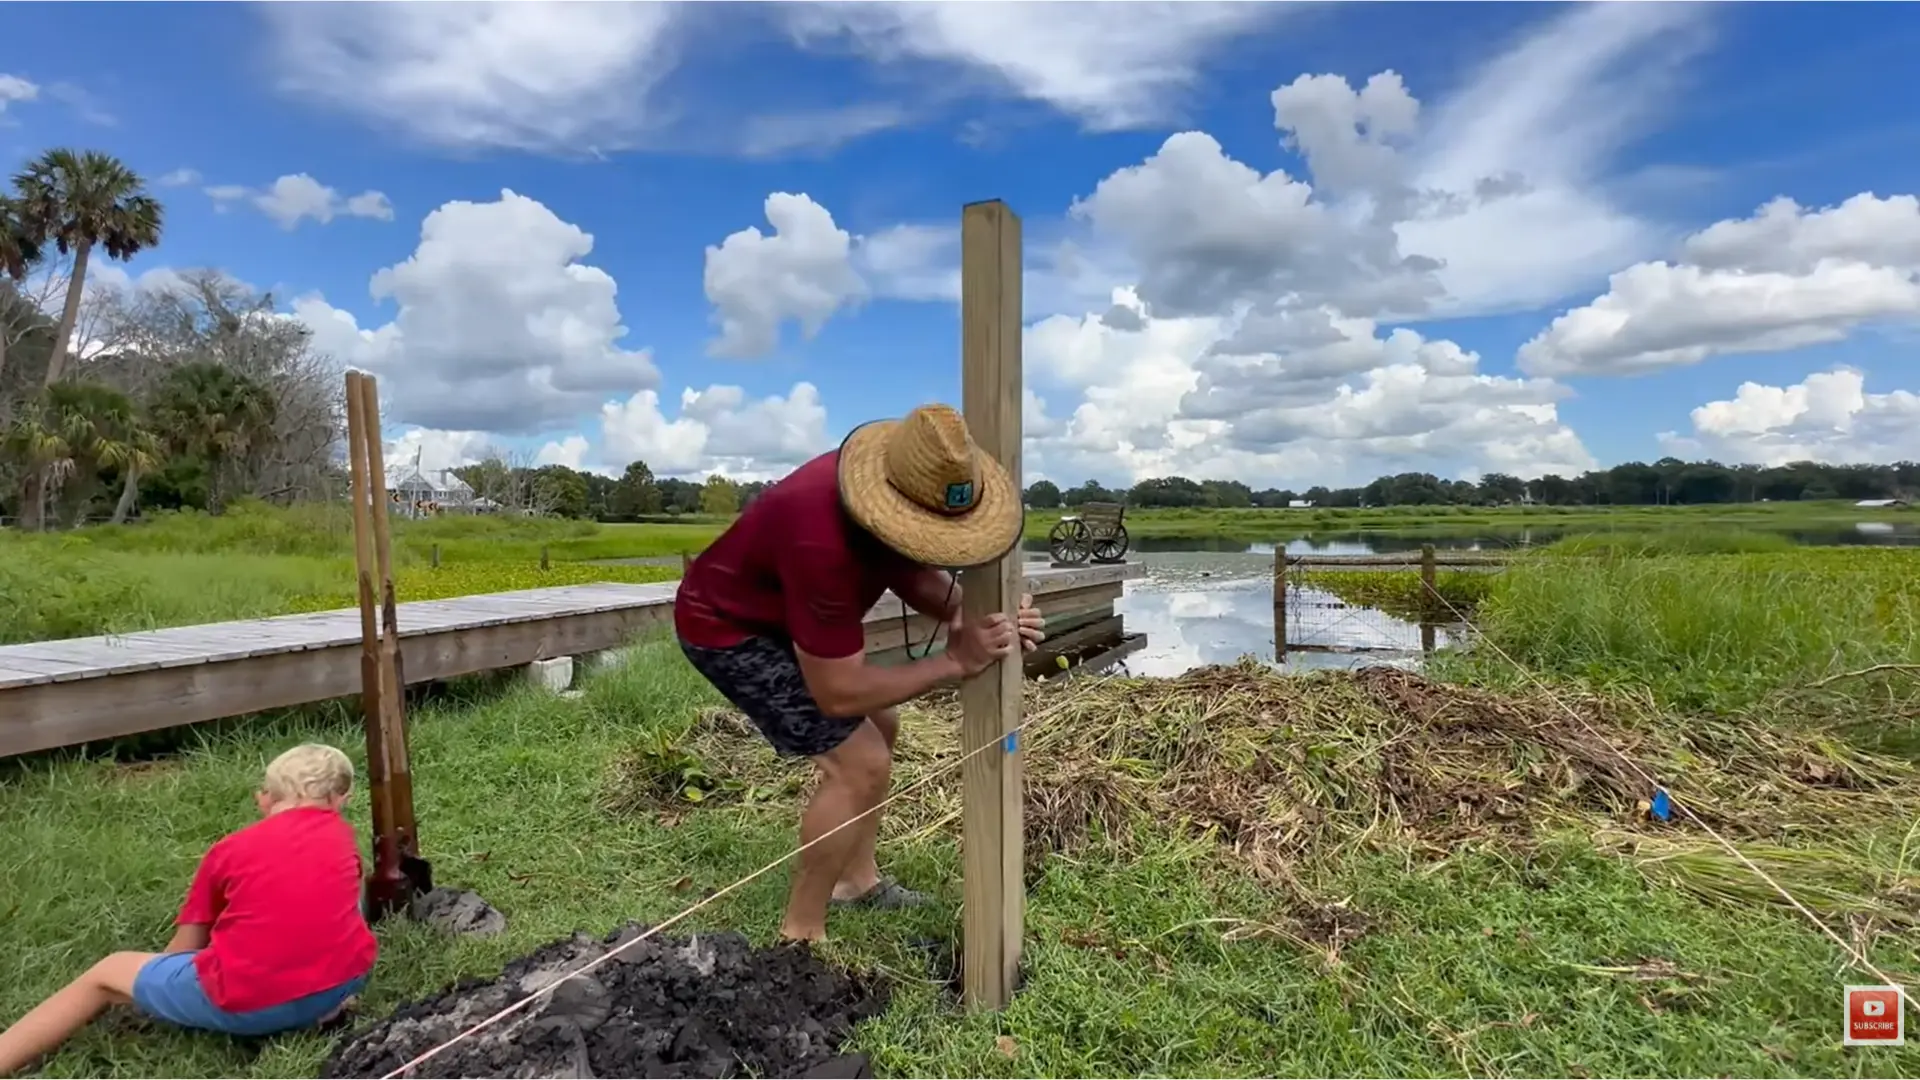
As each post goes into place, check that it stays straight and plumb. Use string lines to keep the dock running in a clean path from the shoreline to the end of the structure.
Check every post from more than one angle before moving forward. A crooked post may not seem like a big problem at first, but it can make crossmembers, joists, blocking, and deck boards harder to install later. Good alignment now saves time during framing.
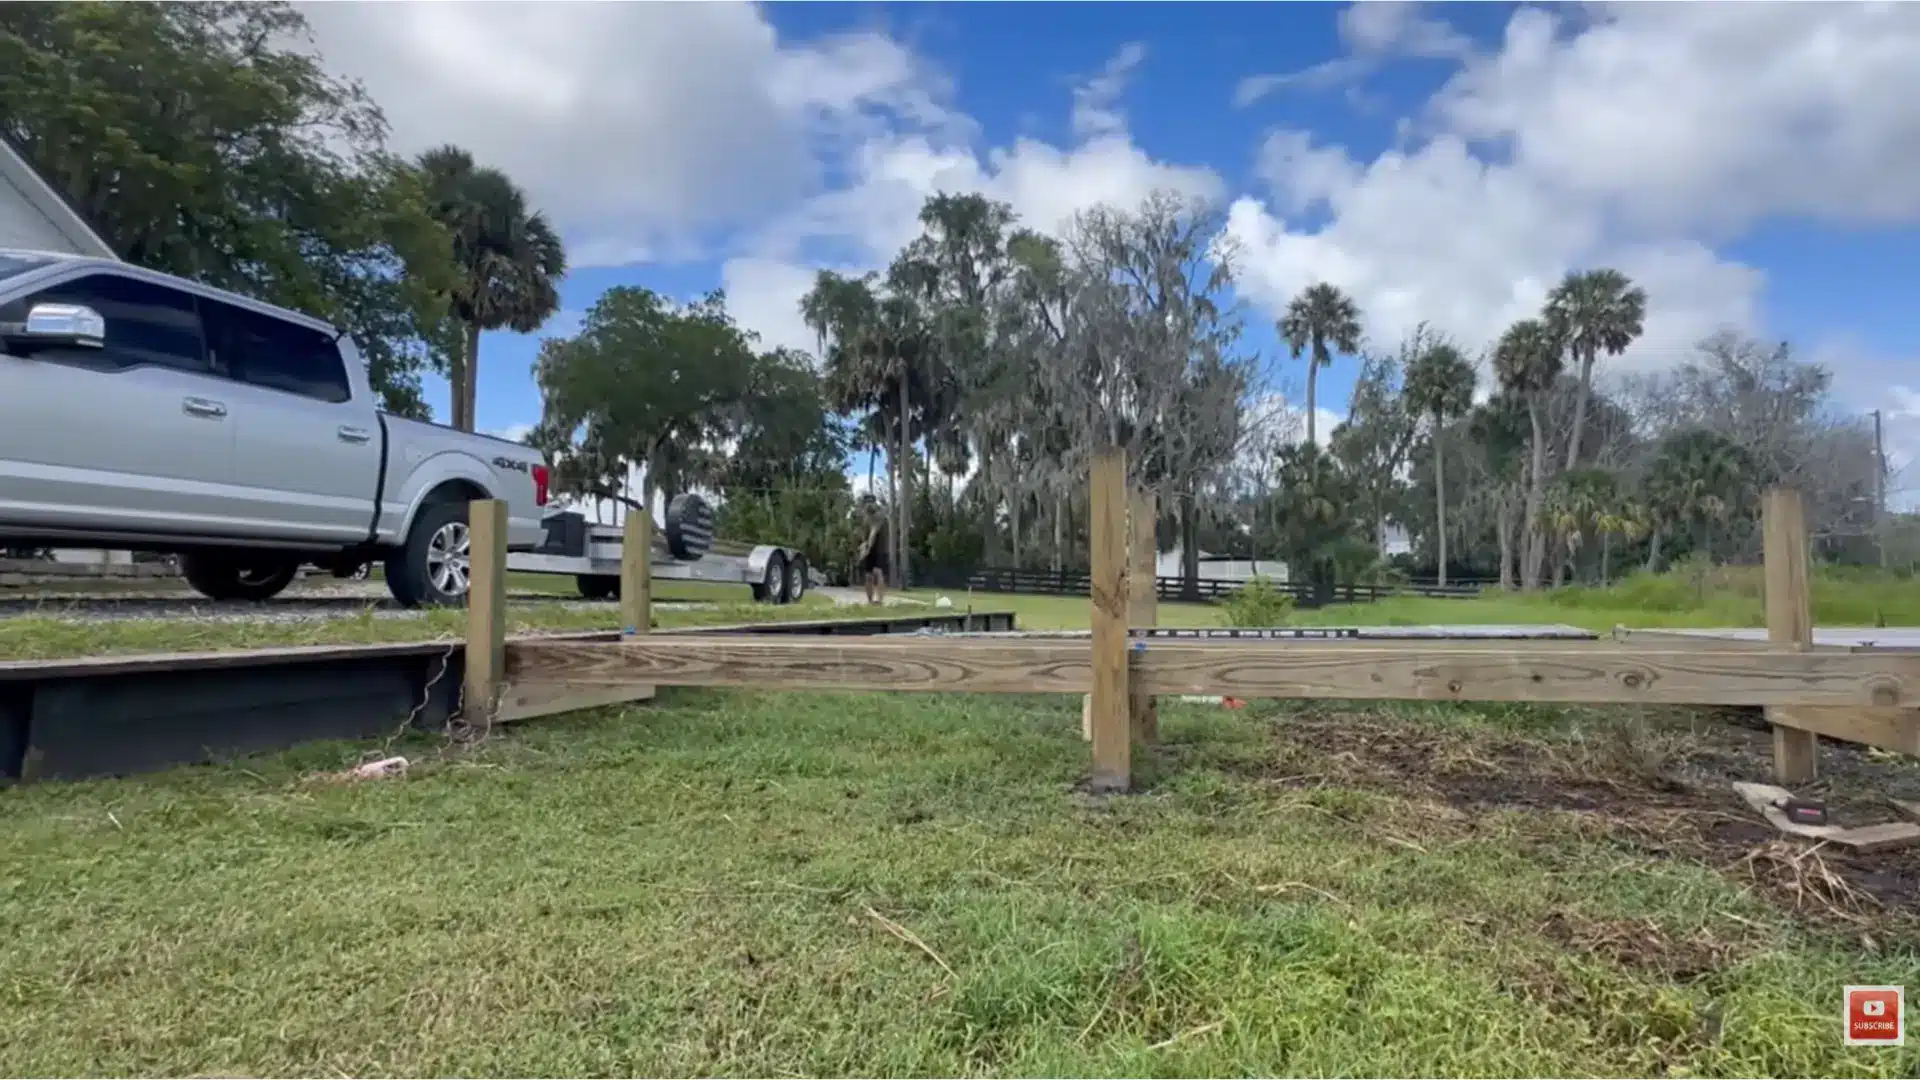
Step 4: Set the First Crossmember Height
After the posts are set, attach the first crossmember at the planned height for the dock frame. This board becomes the reference point for the rest of the structure, so place it carefully.
Use temporary screws first instead of permanent bolts. This lets you adjust the height before locking the frame into place. Once you know the crossmember is sitting at the right level, you can move forward with stronger hardware.
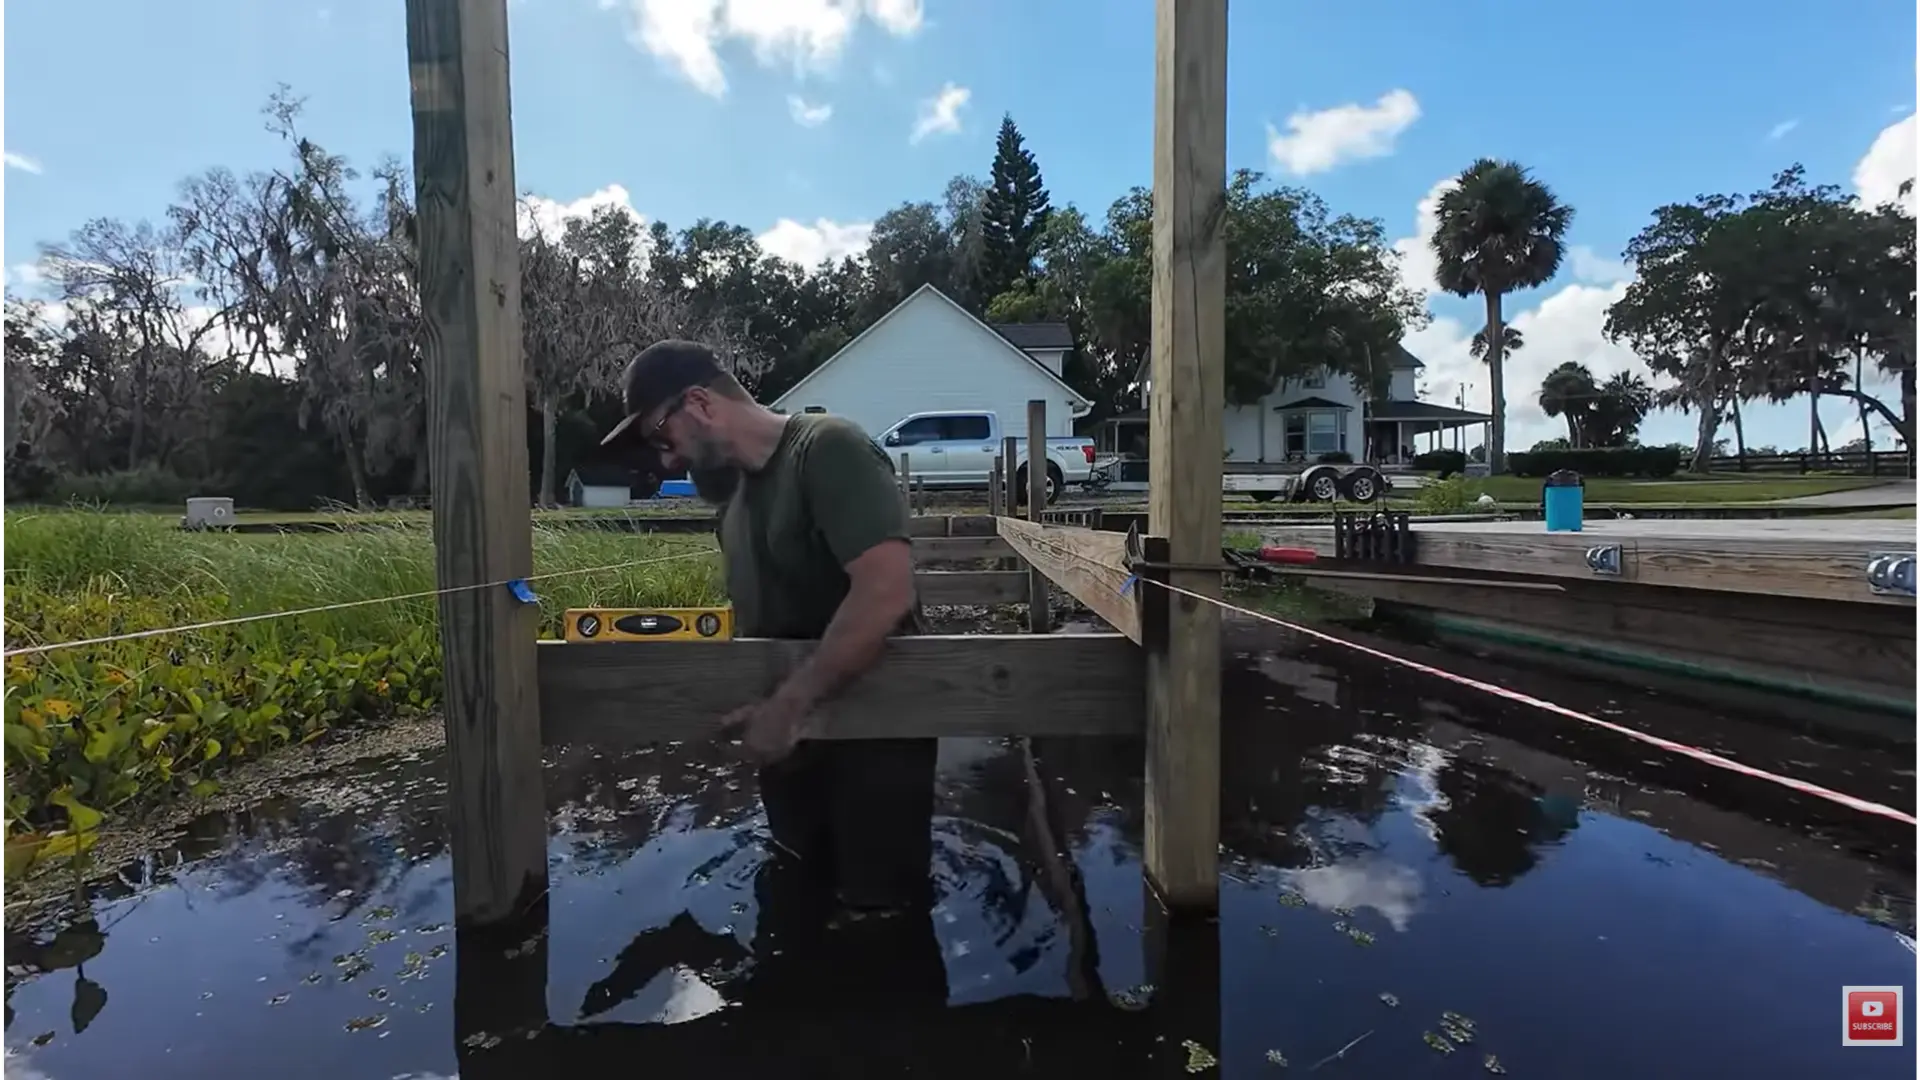
Step 5: Double-Check Level Before Final Fastening

Before adding lag bolts or carriage bolts, check the frame height in more than one way. A string level can help, but it should not be your only reference.
Compare the frame against the waterline and use a reliable level where possible. Temporary screws make it easier to correct small mistakes. Do not fully fasten the frame until it is straight, level, and properly aligned with the rest of the dock layout.
Step 6: Install Joists and Add Blocking
Once the crossmembers are level, install the joists that will support the dock boards. Place crowned boards with the crown facing upward when possible so the boards settle more naturally under load.
For longer spans, add blocking between joists. Blocking stiffens the frame, helps spread weight across the structure, and reduces movement underfoot. This step is especially useful on docks that will hold people, gear, coolers, or boat-related equipment.
Step 7: Avoid Pulling Posts Loose
Be careful when using straps or heavy force to adjust crowned, twisted, or uneven boards. Too much tension can pull a post upward or loosen it from the ground.
If any post shifts during the build, stop and reset it before continuing. The posts need to remain deep, stable, and secure before crossmembers, joists, blocking, or decking are added. A loose post can affect the safety of the whole dock.
Step 8: Use Temporary Screws Before Final Hardware
Temporary construction screws are useful while adjusting the dock frame. Use them to hold boards in place while you check alignment, height, spacing, and level.
Once the frame is straight and secure, reinforce or replace the temporary setup with permanent hardware. Use carriage bolts, lag bolts, washers, and exterior-rated fasteners that can handle moisture and movement. Do not rely on temporary screws as the final connection.
Step 9: Plan the Final Dock Section Carefully
Plan the final dock section with extra care, especially if it connects to a gangway, floating section, or deeper water. The end of a dock often handles more movement, walking weight, and possible uplift during storms or flooding.
Deeper water may require longer posts, stronger bracing, better anchoring, or extra help during installation. Before framing this section, check the height, water depth, post stability, and how the final deck boards will meet the rest of the dock.
Step 10: Prepare for Deck Boards and Final Fastening

Before installing deck boards, inspect the full frame. Check that the posts, crossmembers, joists, blocking, and long board joints are secure. Look closely at corners and any areas that may need extra bracing.
Once the frame feels firm and properly aligned, add the final bolts, lag screws, washers, and exterior-rated fasteners. After that, install the deck boards with proper spacing for drainage and expansion. Keep the surface even, secure, and safe for walking.
This creates a stronger walking surface and helps reduce movement in the finished docks.
What Fails Two Winters Later
The failure modes I see most often on fixed docks built without enough planning are predictable: post rot at the waterline (where wet soil meets air), fastener corrosion that works loose before the wood fails, and ice heave in northern climates that lifts posts out of the ground over successive freeze-thaw cycles.
If you’re in a climate that gets sustained ice cover, your fixed dock needs to come out of the water each fall — or be designed with ice-rated crib foundations, which is a different project altogether. A pipe-leg dock is the right choice specifically because the pipes and frame can be removed seasonally. The wood frame stores under cover; the pipes stay in the ground or get pulled depending on how deep the frost line runs in your area.
Floating docks have their own failure modes: under-sized anchors that drag in storms, floats rated for a lower load than what’s actually put on them, and hinge connections between sections that corrode and seize. Size anchors to 1.5× the expected wind and wave load. Check float ratings before you buy — most residential dock floats are rated between 500 and 1,500 pounds per float. Know your deck area and expected load before ordering.
Cost Breakdown: Building a Basic Dock
| Line Item | Low End | High End | What Drives Variation |
| Lumber (frame + posts) | $400 | $1,200 | Size of dock, lumber grade, regional pricing |
| Decking material | $250 | $900 | Composite vs. PT wood, deck area |
| Hardware (bolts, brackets, fasteners) | $150 | $400 | Stainless vs. galvanized, connection count |
| Pipe or post material | $100 | $350 | Pipe diameter, count, and depth |
| Floats (floating dock only) | $200 | $600 | Float capacity, number of sections |
| Anchors and chain (floating dock only) | $100 | $400 | Anchor type, water depth, chain length |
| Permit fees | $50 | $500+ | State and local jurisdiction requirements |
| Tools and consumables | $100 | $300 | What you already own |
| Total (DIY, no labor) | $1,350 | $4,150 | Size, materials, and location are the main levers |
Cost estimates based on national average lumber and hardware pricing, 2025. Verify current material costs locally before budgeting — lumber prices shift significantly by region and season.
The biggest variable most people underestimate is hardware. Stainless fasteners cost two to three times what galvanized costs, but in a saltwater or high-humidity environment, they’re not optional — they’re the difference between a dock that’s structurally sound in year ten and one that has loose connections you can’t tighten because the bolts are corroded solid.
If you’re building in a freshwater lake in a moderate climate, galvanized hardware is fine. Coastal or Great Lakes builds warrant stainless throughout. For projects near the water, the structural framing considerations are similar to what goes into a well-built outdoor pergola; material choice at the start determines the maintenance burden years later.
Dock Maintenance After the Build
Inspect the dock twice a year — once in spring before it goes back into service, once in fall before it comes out or winter sets in. The spring check should cover post movement, fastener tightness, decking surface condition, and any float or anchor shifts.
The fall check is primarily about what the summer season has done — loose boards from heavy use, weathered sealant on wood decking, and any hardware that’s showing early corrosion.
Clean algae off the deck surface before it builds up. Algae on composite or wood decking turns slippery within days of the first warm spell, and that’s a safety issue, not just an aesthetic one. A stiff brush and a diluted deck cleaner appropriate for your decking material handle most buildup without running harsh chemicals into the water.
Wooden dock surfaces may need sealing or staining every two to three years depending on sun and water exposure. Check the manufacturer’s recommendation for your specific lumber or composite product. Any coating you apply near the water should be labeled safe for aquatic environments.
Common Mistakes That Cost Money Later
- Skipping the permit. Unpermitted docks get ordered removed. The cost of removal exceeds the cost of the permit by a significant margin.
- Using above-ground rated lumber in ground-contact locations. Check the lumber tag for UC4B before buying posts or framing that will touch soil or water.
- Under-sizing posts or anchors. A post driven 3 feet into sand isn’t a post — it’s a stake. Go deeper or change your foundation approach.
- Ignoring ice. In any climate with sustained freeze, fixed docks need to come out in fall. If they don’t, ice heave will move the posts.
- Tight-spacing deck boards. No gap means no drainage, and standing water accelerates rot even in treated lumber.
- Using indoor or standard exterior hardware. Marine environments are hard on metal. Use galvanized or stainless throughout — no exceptions at the waterline.
- Building cleats into weak framing. A cleat handles serious lateral load when a boat is tied up in wind. Back it with solid blocking and use lag bolts into the main frame.
Frequently Asked Questions About Building a Dock
These are the questions that tend to come up once the permit is approved and the lumber is on site — the ones that don’t show up in the planning guides.
How long does it take to build a dock by yourself?
A basic pipe-leg dock section (8×16 feet) takes two people one to two weekends. Solo builds take longer and introduce safety issues when handling long posts and heavy frame sections near water. Two people isn’t optional for the post-setting step.
What wood is best for dock framing?
UC4B ground-contact pressure-treated lumber — typically Southern Yellow Pine — is the standard for framing. For decking, composite or UC4A treated boards are the practical choice. Cedar and tropical hardwoods work but cost significantly more per board foot.
Do I need a permit to build a dock on my own lake property?
Almost certainly yes. Waterfront construction triggers federal, state, and local jurisdiction in most US states. Contact your state environmental agency and local building department before starting. The answer varies significantly by state, water body type, and dock size.
How deep should dock posts be set?
At minimum, one-third of the post length should be below the lakebed surface. In sandy or soft soil, go deeper — 5 to 6 feet of depth is not excessive for posts supporting a permanent structure. Shallower than that and you’re relying on the soil to do work it can’t sustain under load and wave action.
What is the best dock decking for bare feet?
Composite decking with a textured surface is the best choice for comfort and safety. It doesn’t splinter, doesn’t require annual sealing, and stays cooler than dark-colored wood in direct sun. Look for products specifically rated for wet-environment use.
Can I build a dock in winter?
In theory, yes. In practice, frozen ground, icy water surfaces, and cold-weather lumber issues make winter builds impractical in most northern US climates. Spring — once water levels stabilize from snowmelt — is the best window for post-setting and installation.
How do I stop my dock from wobbling?
Wobble almost always comes from one of three sources: posts not set deep enough, inadequate cross-bracing in the frame, or hardware that’s loosened over time. Check post depth first. Add diagonal blocking between joists. Then go over every bolt with a wrench before assuming the structure itself needs rebuilding.
How much does a contractor charge to build a dock?
Professional dock construction typically runs $150–$300 per linear foot installed, not counting permit fees or specialty hardware. A 30-foot dock with a platform end runs $6,000–$12,000 or more with labor. DIY saves significantly but only if you have the right tools and can handle the physical work involved.
Final Verdict
Creating a safe and durable waterfront structure starts with good planning and smart decisions.
I’ve found that success comes from understanding your site, choosing the right dock type, following local rules, and using materials built to handle water and weather.
When you learn how to build a dock, each step matters, from measuring depth and building a strong frame to adding secure supports, decking, and safety features. These details help you avoid costly mistakes and create a dock that works well for years.
With the right approach, you can build with more confidence and get better results. Have questions or tips of your own? Share your thoughts below and check out my related dock-building guides.
Sources:
U.S. Army Corps of Engineers, “Permits for Work in Waterways.” https://www.usace.army.mil/
American Wood Protection Association, “Treated Wood for Marine Use.” 2024. https://www.awpa.com
Angi/HomeAdvisor, “Dock Building Cost Estimates.” 2024. https://www.angi.com


