

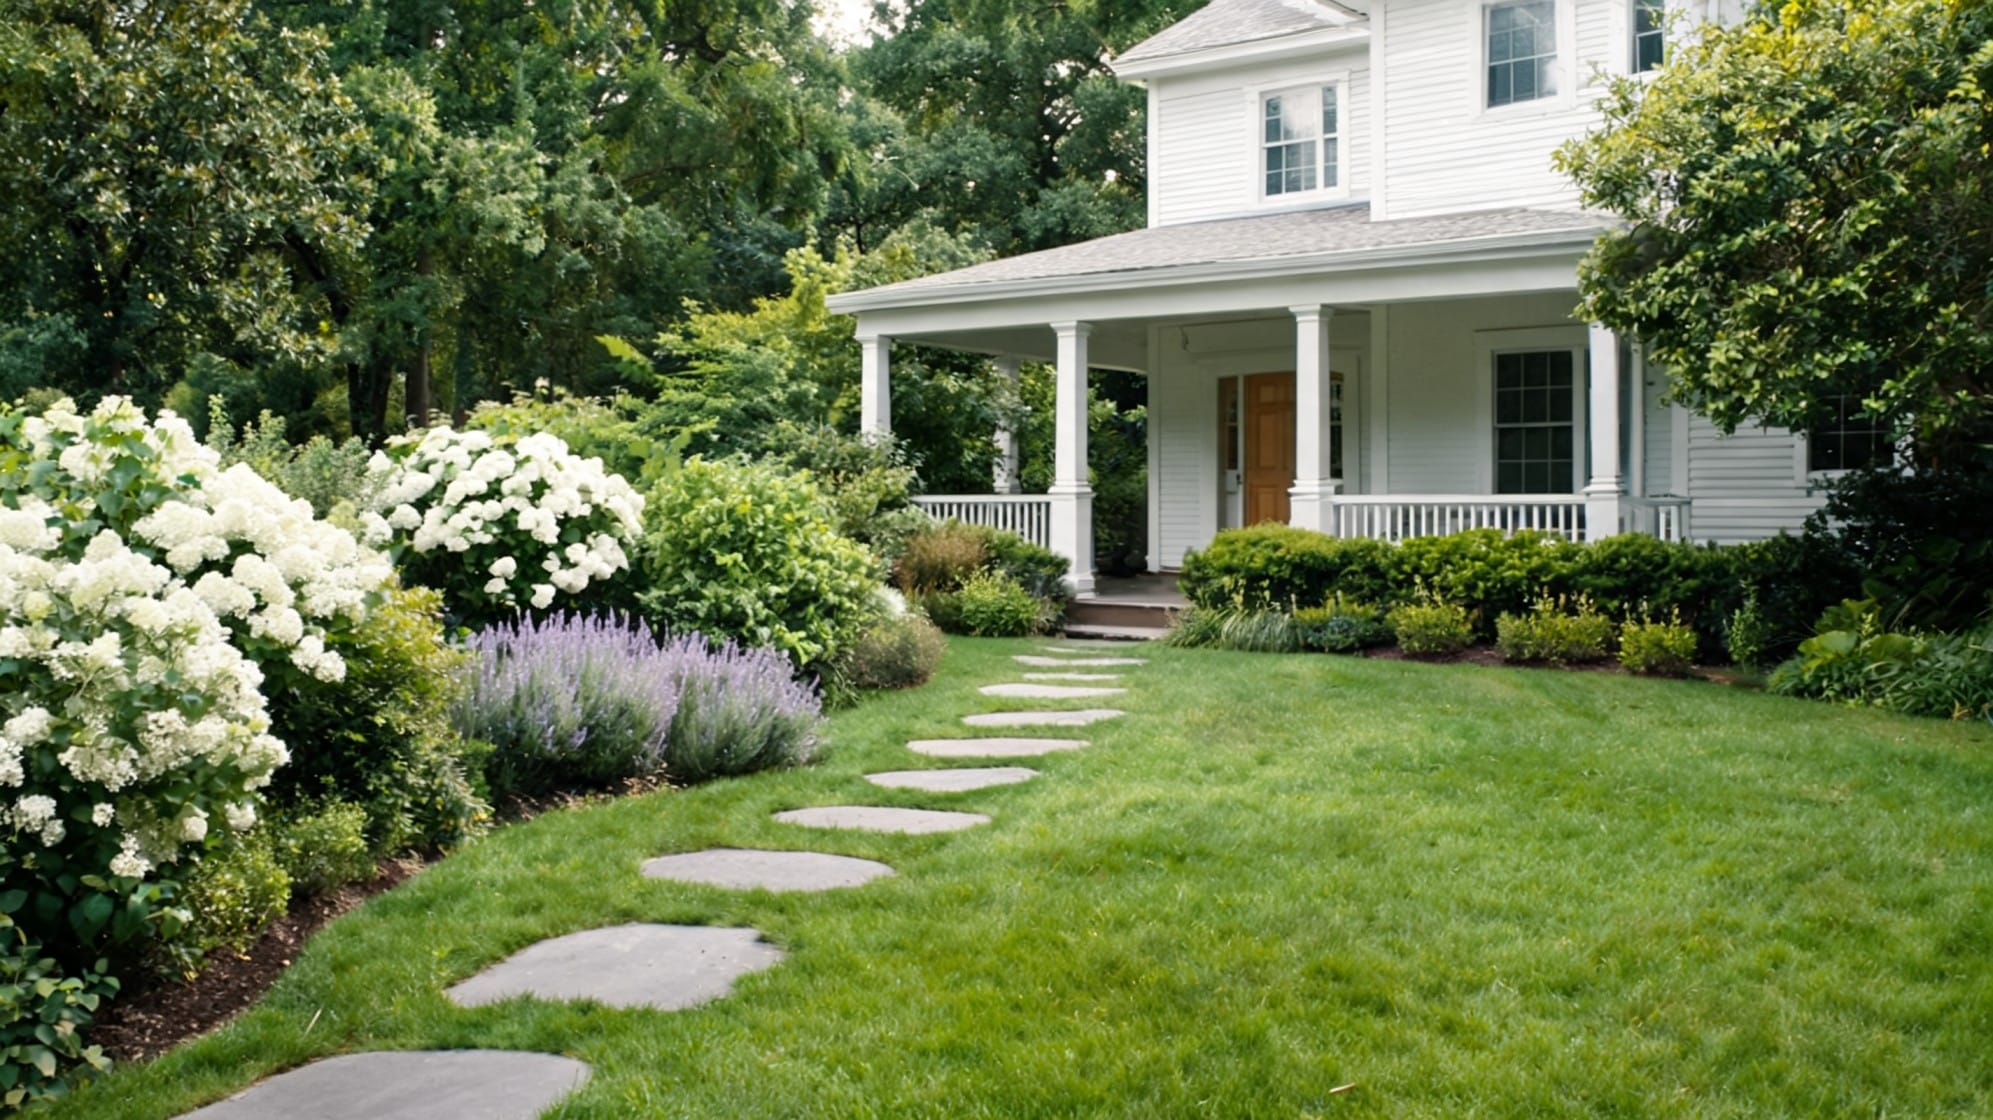
Does your front yard look fine for two days, then need work again? I get why that feels tiring. Grass grows fast, weeds show up, and some plants seem to need attention every time you walk outside. That is whylow-maintenance front yard landscaping can make a big difference, and why getting the approach right matters more than just picking pretty plants. The goal is not to make your yard plain. It is to make it easier to care for, with smart choices that still look clean from the street. I’ll walk you through simple ideas such as mulch beds, native plants, rock gardens, ground covers, drip irrigation, and lawn alternatives. You’ll also see how to choose the right materials, avoid common mistakes, and match ideas to your yard type. By the end, you’ll have practical ways to cut mowing, watering, and weeding without giving up a front yard you feel good about. Simple Front Yard Layout Formulas A low-maintenance front yard is easier to plan when you start with a simple layout. Pick one clear style, use fewer plant types, and repeat the same materials so the yard looks clean without needing constant work. Modern front yard: Use a gravel bed, a concrete or stone path, 3 evergreen shrubs, 2 ornamental grasses, 1 small tree, and drip irrigation. Cottage front yard: Use mulch beds, perennials, compact flowering shrubs, a stepping stone path, and one trellis near the entry. Drought-tolerant front yard: Use a gravel or rock base, succulents or native plants, boulders, drip irrigation, and no traditional lawn. Family-friendly front yard: Use a small lawn or lawn alternative, mulch beds along the edges, a durable path, low-growing shrubs, and no thorny plants near walkways. These formulas keep the design simple and easy to manage. You can adjust the plants and materials based on your climate, budget, and the amount of yard work you want to avoid. Basic Maintenance Plan Keep the front yard care on a simple schedule, so you do not have to think about it every weekend. Even a low-maintenance yard needs a little attention, but the work becomes much easier when you split it into monthly, seasonal, and yearly tasks. Schedule What to do Monthly Pull small weeds before they spread, check drip lines, sweep gravel or paths, and trim plants blocking walkways. Seasonally Refresh mulch where it looks thin, cut back ornamental grasses, lightly prune shrubs, and replace dead plants with better-suited options. Yearly Review plant spacing, add compost if needed, check edging, and adjust the irrigation schedule for the season. The goal is not to avoid yard care completely. It is to keep the work small, steady, and simple, so your front yard stays clean without taking over your free time. Low-Maintenance Front Yard Landscaping Ideas I’ve found that the easiest front lawn ideas usually start with one simple change: less grass and fewer fussy plants. You don’t need to redo the whole yard at once. Start with one area, make it easier to care for, then build from there. 1. Trees with Mulch Beds Grass is often the main reason a front yard feels like work. It needs mowing, watering, trimming, and clean edges. The idea here is to remove grass from small, hard-to-maintain areas and turn them into mulch beds. You can use mulch around trees, along walkways, under shrubs, or near the front wall of your home. Add shrubs, perennials, or small plants before mulching if you want color. Mulch helps the soil stay moist, protects plant roots, and makes it harder for weeds to grow. Tip: Use shredded bark, pine bark, cedar mulch, or composted mulch. Avoid: Piling mulch against stems or tree trunks. Best for: Flower beds|Shrub borders|Tree rings Pro Tip: A 3-inch mulch depth is the working minimum. Less than 2 inches, and weeds push through. More than 4 inches around shrubs, and you risk crown rot in wet seasons. 2. Native Blooms That Fit Your Climate Native plants are plants that already grow well in your area. They are accustomed to the local weather, soil, and rainfall patterns, so they usually require less care once they settle in. The idea is to choose plants that fit your yard rather than picking them only because they look good in photos. For a contained native planting without committing to in-ground beds, a DIY planter box offers the same climate-matching flexibility with easier drainage control. Native plants can also support birds, bees, and butterflies, which makes your front yard feel alive without adding much extra work. Tip: Water native plants well during the first growing season. Avoid: Mixing dry-loving plants with plants that need frequent watering. Best for: Natural|Low-water front yards 3. A Classic Evergreen Shrub Border Evergreen shrubs are a smart base for a low-maintenance front yard because they keep their shape and leaves through most or all of the year. The idea is to use them as the steady structure of the yard. Even when flowers are not blooming, the front yard still looks planned and tidy. Use them along the house, driveway, walkway, or front fence. Repeating the same shrub makes the design look cleaner and easier to care for. Choose compact shrubs near windows so you do not have to keep cutting them back. Tip: Leave enough space between shrubs so they can grow naturally. Avoid: Planting large shrubs too close to windows, doors, or walkways. Best for: Neat|Year-round front yards 4. A Multi-Season Perennial Flower Bed A perennial flower bed gives you color without replanting the whole area every year. Perennials return each growing season, making them easier to grow than annual flowers. The idea is to mix steady plants with seasonal color, so the bed does not look empty when one plant stops blooming. A simple formula works well: use 40% evergreen shrubs for shape, 40% perennials for flowers, and 20% seasonal color or ornamental grass for extra interest. This keeps the bed balanced, full, and easier to manage through the year. Tip: Repeat the same plants in small groups for a cleaner look. Avoid: Filling the whole bed with annual flowers that need replacing often. Best for: Colorful|Easy-care front yards 5. A Rock Garden for Sunny Areas A rock garden is a good choice when grass struggles or the yard gets strong sun most of the day. The idea is to use rocks, gravel, and drought-tolerant plants to create a front yard area that needs very little watering or mowing. Start with large rocks first because they give the space shape. Then fill the open areas with gravel or pea stone. Add plants in small groups, not one by one everywhere. This keeps the design clean and easy to manage. Leave some open space between rocks and plants so the yard does not look crowded. Tip: Use different rock sizes for a more natural look. Avoid: Filling every empty space with plants. Best for: Dry|Sunny front yards 6. Gravel and Pebbles Pathway Bare soil can quickly turn into a weed patch, muddy spot, or dusty area. Gravel and pebbles help cover the ground while keeping the front yard neat and easy to care for. The idea is to use them around pavers, along walkways, under seating spots, or between planting areas. The same edging logic applies when gravel meets a driveway follow identical containment rules at the boundary. For areas with weeds, place landscape fabric under the gravel where needed. Choose smaller gravel for walking areas and larger pebbles for decorative spaces where people will not walk often. Tip: Use smaller gravel near walkways for easier walking. Avoid: Using loose gravel on steep slopes. Best for: Paths|Side yards|Dry planting beds 7. A Stepping Stone for a Walkway Stepping stones give your front yard a clear path without adding much upkeep. The idea is to guide people from the driveway, sidewalk, or street to the front door in a simple and clean way. Place the stones where people naturally walk, then set them at a comfortable distance apart. Larger stones are safer because they give more room for each step. You can fill the gaps with gravel, mulch, or low ground cover to reduce bare soil and weeds. This also helps the walkway blend into the yard rather than look like a random line of stones. Tip: Use larger stones for a safer and cleaner path. Avoid: spacing stones too far apart. Best for: Entry paths|Small front yards|Lawn breaks 8. Style Sunny Spots with Succulents Succulents are useful for low-maintenance front yards because they store water in their leaves and do not need frequent watering. The idea is to use them in sunny areas where the soil drains well. They work well near gravel, boulders, stone borders, and raised beds. Before planting, check your soil. If it stays wet for too long, succulents may rot. Wet clay soil needs improvement before planting, or you can use raised beds with a better soil mix. Succulents are great for dry climates, but they are not the best choice for every yard. Tip: Pair succulents with gravel, boulders, stone borders, or raised beds. Avoid: Planting succulents in wet clay soil without fixing drainage. Best for: Dry|Sunny front yards 9. Grass Fairy Garden with Evergreen Weeds A full grass lawn can take a lot of water, mowing, and care. If you still want a soft green look, try drought-tolerant grass or a lawn alternative instead. The idea is to keep the front yard open and neat without using a traditional high-maintenance lawn. You can use clover, native grass, Kurapia, creeping thyme, sedges, artificial turf, or gravel with planting islands. Choose based on your climate, foot traffic, and how much mowing you want to avoid. Some options feel like a lawn, while others create a cleaner, planted look with very little upkeep. Choose a softer option like clover or native grass if kids or pets use the yard. Option Water use Mowing needs Best climate Clover lawn Low to moderate Low Mild to warm areas Native grass Low once settled Low Local climate zones Kurapia Low Very low Warm, dry areas Creeping thyme Low Very low Sunny, dry areas Sedges Low to moderate Very low Shade or mixed sun Artificial turf None for growth None Most areas, but it can get hot Gravel with planting islands Very low None Dry or sunny areas Avoid: Picking artificial turf for very hot spots without considering heat and drainage. Best for: Low-water|No-mow front yards 10. Cutesy Smart Watering System Hand watering can make even a simple front yard feel like a chore. Drip irrigation or smart watering helps you care for plants without dragging a hose around every few days. The idea is to send water straight to the roots, where plants need it most. Use drip lines in flower beds, around shrubs, and near foundation plants. Add a smart timer so the system waters on a set schedule. Some timers can even adjust for rain. For better results, group plants with similar water needs together so each area gets the right amount. Tip: Check drip lines once a month for clogs or leaks. Avoid: Watering all plants the same way if they have different needs. Best for: Flower beds|Shrubs|Busy homeowners 11. Ornamental Grasses for Movement and Texture Ornamental grasses are a great way to make a front yard feel full without adding much work. They bring height, soft movement, and texture, especially when planted near gravel, mulch, boulders, or perennials. Many types need little water once they settle in, and most only need trimming once or twice a year. The idea is to use them as simple accent plants rather than filling the yard with flowers that require regular care. Plant them in groups of 3, 5, or 7 so they look planned and balanced. Tip: Pair grasses with gravel, mulch, boulders, and perennials. Avoid: Planting large grasses too close to paths or windows. Best for: Modern|Natural|Low-water yards 12. Charming No-Mow Mailbox Garden The area around a mailbox or driveway often looks messy because it is hard to mow and easy to ignore. A no-mow border fixes that small problem area and makes the front yard look cleaner. The idea is to remove grass from the tight strip, then replace it with edging, mulch, gravel, or low plants. Keep the design simple. Use one small shrub, one ground cover, and one accent plant for a planted look. Keep everything low so your house numbers, mailbox, and driveway view stay clear. Tip: Use low plants so the mailbox and house numbers stay visible. Avoid: Tall, thorny, or fast-spreading plants near the driveway. Best for: Mailbox areas|Driveway edges|Narrow grass strips 13. Slopes Covered in Easy Ground Covers Ground covers are low-growing plants that spread across the soil. They are useful in places where grass is hard to mow or does not grow well. The idea is to replace difficult grass areas with plants that cover the ground, reduce weeds, and help hold soil in place. This works well on sloped front yards, narrow strips near sidewalks, under trees, between stepping stones, and around boulders. On slopes, ground covers can also help reduce soil washout after rain. Choose a type that suits your sun, shade, and water needs. Tip: Use ground covers between stepping stones for a softer look. Avoid: Fast-spreading plants that can take over nearby beds. Best for: Slopes|Sidewalk strips|Under trees 14. Dry Creek Bed for Beauty and Drainage A dry creek bed is a shallow stone channel that helps guide rainwater through the yard. It looks like a natural stream bed, but it stays dry most of the time. The idea is to place it where water already flows or where puddles form after rain. Use river rock as the main base, then add larger stones along the edges to define the shape. Make the creek bed curve rather than run in a straight line, so it looks more natural. Add drought-tolerant plants along the sides to soften the stone and improve curb appeal. Tip: Mix small river rock with larger stones for a natural look. Avoid: Placing a dry creek bed where it sends water toward the house. Best for: Drainage|Muddy spots|Sloped front yards 15. Frame the Yard with Natural Stone Edging Natural stone edging helps a front yard look neat with very little ongoing care. The idea is to create clear lines between different areas, such as lawn and mulch, gravel and plants, or a walkway and flower bed. This keeps materials from spreading and makes the yard easier to maintain. You can use stone along a front path, around a tree ring, at the edge of a planting bed, or on a small slope as a low retaining edge. Stone also lasts longer than many thin plastic borders and gives the yard a finished look. Tip: Use similar stone colors across the yard for a cleaner design. Avoid: Using loose stones where people may trip. Best for: Lawn edges|Walkways|Planting beds 16. A Small Ornamental Tree to Steal the Attraction A small ornamental tree can make a simple front yard feel planned without adding much work. The idea is to use one tree as the main focal point instead of filling the yard with too many small plants. Choose a tree that fits the space when fully grown, not just when it is young. Keep it away from the foundation, roofline, driveway, and utility lines. After planting, add a mulch ring around the trunk to protect the roots and reduce mowing around the trunk. You can also add low plants around the base for a finished look. Tip: Check the mature height and width before buying. Avoid: Planting large trees too close to the house. Best for: Entry areas |Open lawns|Front yard corners 17. Cohesive and Calm Repeated Plant Pattern A low-maintenance front yard should not feel packed or confusing. The idea is to use fewer materials and repeat the same plants so the yard looks neat and is easier to care for. Too many plant types can mean different watering, pruning, and cleanup needs. A simple formula works better: pick one path material, one mulch or rock type, and 3 to 5 main plant types. Repeat those plants in groups rather than placing one of each across the yard. Leave open space between plants so they can grow without crowding each other. Tip: Repeat colors, shapes, and materials for a cleaner look. Avoid: Adding too many one-off plants just to fill empty space. Best for: Clean|Easy-care front yards How to Choose the Right Low-Maintenance Plants The right plant makes the whole yard easier to care for. I always suggest choosing plants based on your yard first, then picking the ones you like from that smaller list. Choose plants for your climate first: Pick plants that can handle your local heat, cold, rain, and dry seasons. Match plants to sun or shade: Use sun-loving plants in open areas and shade-friendly plants under trees or near covered spaces. Check mature size before planting: Choose plants that fit the space when fully grown, so you do not have to keep trimming them back. Pick drought-tolerant plants where water is limited: Use plants that can handle dry spells if your area gets little rain or has watering limits. Use more perennials and shrubs than annuals: Perennials and shrubs come back year after year, while annuals usually need replacing each season. Group plants with similar water needs: Keep dry-loving plants together and water-loving plants together to keep watering simple. Use native plants where possible: They often require less care because they are well-suited to your local soil and weather. Avoid invasive vines and fast-spreading plants: These can take over beds, climb into unwanted areas, and create more work later. A low-maintenance plant is only low-maintenance when it fits the place you plant it. Choose for climate, light, size, and water first, and your yard will be much easier to manage. Installation: What You Can DIY and What You Shouldn’t If the project extends to the back, concrete patio and deck combinations involve the same material-selection decisions covered here. DIY-appropriate: Mulch bed installation, gravel path laying, ground cover planting, drip irrigation on existing water supply, stepping stone paths, ornamental grass planting, dry creek bed construction. Hire a licensed contractor for: Any irrigation work that requires a connection to the main water line or backflow preventer (permits required in most jurisdictions). Retaining walls over 4 feet tall (structural permit and engineering typically required). Any work that involves regrading toward the house or redirecting water toward a neighboring property. On cost: A basic mulch bed installation runs $300–$600 for a 200-square-foot area (materials plus labor). A full front-yard gravel-and-native-plant conversion typically costs between $2,500 and $7,000, depending on yard size and whether irrigation is included. Drip system installation for a standard front yard: $800–$2,000 professionally installed, or $300–$500 DIY with a weekend of work. Landscaping Materials: Quick Comparison The material you choose can make your front yard easier or harder to care for. Compare the basics first so you can pick what fits your space, budget, and level of upkeep. Material Best use Main benefit Watch out for Mulch Beds and tree rings Fewer weeds, better moisture Needs topping up Gravel Paths and dry beds No mowing, good drainage Can move without edging River rock Dry creek beds Handles runoff Can heat up in full sun Flagstone Walkways Long-lasting Higher upfront cost Pavers Paths and patios Clean look Weeds can grow in gaps Artificial turf No-mow lawn look No mowing or watering Can get hot Compost Soil improvement Helps plant health Must be worked into the soil The best choice depends on where you use it. Mulch is great around plants, gravel works well for dry paths, and stone gives the front yard a clean shape with very little upkeep. Common Mistakes to Avoid Choosing plants before checking sun and soil: Pick plants only after you know how much light the area gets and how well the soil drains. Filling the whole yard with small plants that need trimming: Too many small plants can create more pruning, watering, and cleanup work. Using too many plant types: Stick to a few repeat plants so the yard looks cleaner and is easier to manage. Skipping edging around gravel or mulch: Edging keeps materials in place and stops them from spreading into the lawn or walkway. Planting shrubs too close to the house: Give shrubs room to grow so they do not block windows, vents, doors, or paths. Using annuals as the main flower bed: Annuals need replacing often, so use them only for small seasonal color. Choosing thirsty plants for a dry yard: Pick drought-tolerant plants if your yard gets strong sun or limited water. Installing artificial turf without considering heat and drainage: Turf can get hot and may require proper drainage beneath it. Leaving bare soil exposed: Bare soil invites weeds, dust, mud, and erosion, so cover it with mulch, gravel, or plants. Forgetting walkway safety and lighting: Keep paths flat, clear, and well-lit so the front yard stays safe and easy to use. Frequently Asked Questions Do HOA rules typically restrict front-yard materials like gravel or artificial turf? Many do, and the restrictions are rarely in the welcome packet. Gravel-only front yards, artificial turf, and the removal of all lawn grass are commonly restricted in HOA communities, sometimes requiring approval from the architectural committee, even for changes to mulch depth. Pull the CC&Rs before buying any hardscape materials. Fines for non-compliant front yard changes can run $100–$500 per month in active HOAs. How do I handle a front yard that gets reflected heat from a light-colored driveway or concrete wall? Reflected heat from concrete or light stone can raise surface temperatures 15–30°F above air temperature in the adjacent planting bed, killing plants rated for your zone. In those microclimates, skip standard USDA zone guidance and choose plants rated for two warmer zones. Desert willow, agave, and most salvias tolerate this. Most ornamental grasses and standard evergreen shrubs do not grow without supplemental irrigation. Will a low-maintenance front yard actually reduce my water bill, and by how much? A full lawn-to-native-plant conversion typically reduces outdoor water use by 50–70%, according to EPA WaterSense data. In dollar terms, a homeowner irrigating a 1,500-square-foot front lawn in a warm climate can save $200–$600 annually depending on local water rates. Gravel alone, without plant replacement, saves roughly 30–40% because it eliminates irrigation but doesn’t replace the evapotranspiration benefit that plants provide. To Sum Up Low-maintenance front yard landscaping ideas work best when you make simple choices that save time each week. You do not need a full yard makeover to see a change. Start with one problem spot, like too much grass, bare soil, messy edges, or plants that need too much water. I suggest choosing plants that fit your climate, using mulch or gravel to control weeds, and adding clear paths or borders to keep the yard neat. Small changes like drip watering, ground covers, native plants, and repeated shrubs can make your front yard easier to care for. The goal is a yard that looks clean without asking for constant work. When you match the design to your space, sun, soil, and budget, your front yard becomes easier to enjoy and easier to maintain through every season.
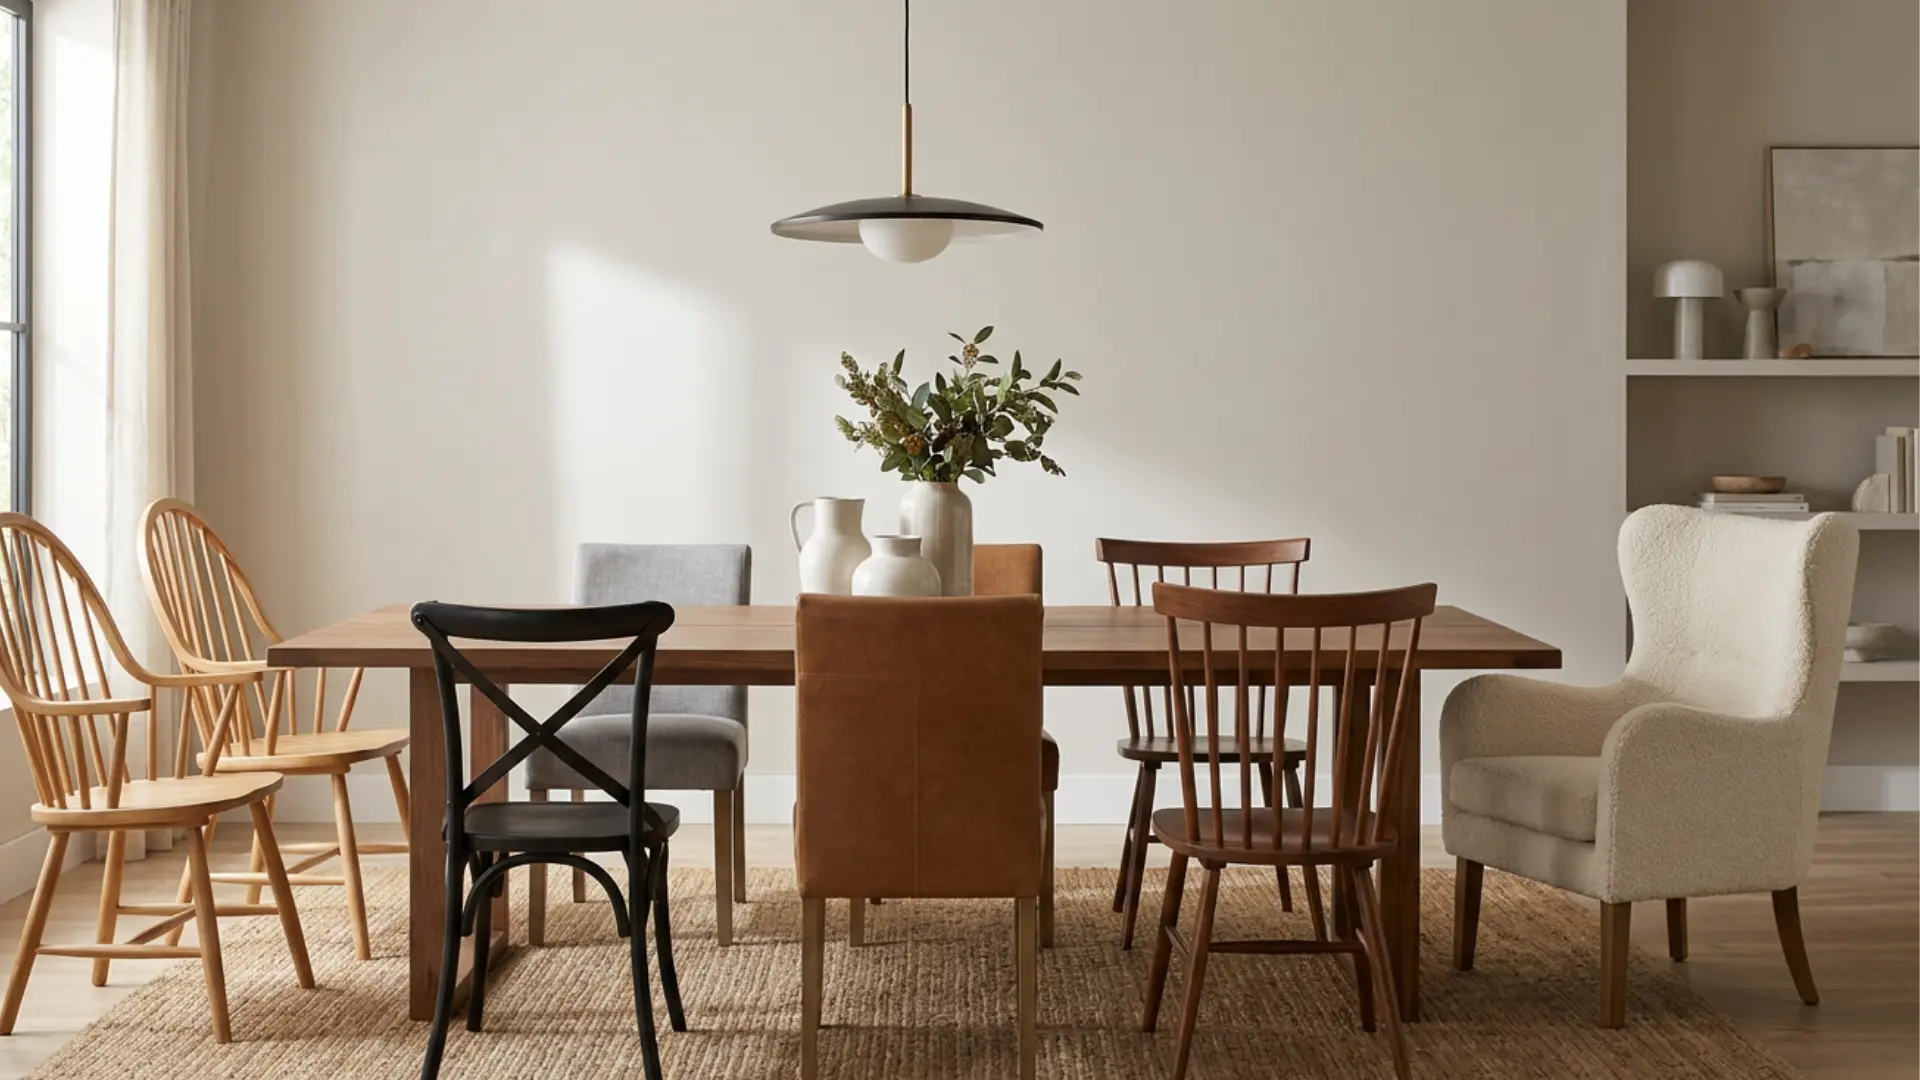
Choosing the wrong dining chair is an expensive mistake, and one that’s surprisingly easy to make. Many chairs may look great in photos, but once they’re around your table, they can feel uncomfortable, clash with your décor, or simply not fit the space the way you expected. With so many types of dining chairs available, it’s not always obvious which styles work best for different dining rooms, tables, and lifestyles. I know how confusing the options can be when everything starts to blend together. The good news is that a few key differences separate the styles, and understanding them can save you time, money, and frustration. By the end, you’ll know the most popular dining chair types, what makes each one unique, and how to choose a style that looks right, feels comfortable, and works beautifully in your dining space for years to come. Wood Comparison: Species Commonly Used in Dining Chair Frames Before looking at individual dining chair styles, it’s worth knowing what’s actually inside the frame. Retailers rarely specify species; they say “solid wood” and stop there. Here’s what that typically means, and what each species does over time. Species Janka Rating (lbf) Common Use in Dining Chairs Cost Range Durability Over Time White Oak 1,360 Windsor, ladder-back, Scandinavian styles $8–$15 per board ft Excellent: resists joint movement and humidity swing Hard Maple 1,450 Mid-century, cross-back, slat-back $7–$13 per board ft Excellent: very dense, holds screws and dowels well Beech 1,300 European and Scandinavian styles, Eames-type $6–$11 per board ft Very good: standard in quality production furniture Walnut 1,010 Mid-century, modern, upscale farmhouse $12–$22 per board ft Good: softer than maple but ages well with a proper finish Ash 1,320 Windsor, bow-back, Shaker-inspired $6–$10 per board ft Good: flexible grain resists splitting at spindles Rubberwood 960 Budget versions of most styles $3–$6 per board ft Fair: technically solid wood, but softer and more prone to joint loosening over time Pine 870 Farmhouse, rustic, country styles $2–$5 per board ft Fair: dents easily, joints loosen faster under daily use Rubberwood and pine are both technically “solid wood”, which is why that phrase on a tag tells you almost nothing useful. A chair built from oak or hard maple with a Janka rating of 1,300+ will hold its joints and resist surface wear far longer than one built from a species with a rating below 1,000. If a retailer can’t tell you the species, ask. If they don’t know, that itself is information. CAUTION: Board-foot prices reflect rough lumber averages and vary by region, supplier, and grade. Finished chair frames carry a significant markup over the cost of raw lumber. The Most Common Dining Chair Styles Explained Dining chairs come in a wide range of designs, but a few styles remain the most popular because of their versatility and appeal. Armchairs offer extra support and a formal look, while side chairs are compact and easy to fit around most tables. Parsons chairs feature clean lines and upholstery, making them a favorite for modern and transitional spaces. Windsor chairs bring timeless character with their spindle backs, while cross-back and ladder-back chairs are commonly found in farmhouse-inspired interiors. Slat back chairs provide a classic, versatile look that suits many décor styles. For added elegance and comfort, wingback, barrel, and upholstered chairs are popular choices. Each chair type varies in style, comfort, and functionality, making certain designs better suited for formal dining rooms, casual family spaces, or everyday use. Understanding Popular Dining Chair Styles Dining chairs can be grouped into several style categories, each with its own design characteristics and aesthetic appeal. This quick overview helps you compare the main styles before exploring individual chair types in detail. Dining Chair Style Category Chair Styles Included Traditional Dining Chair Types Windsor Chair, Bow Back Chair, Queen Anne Chair, King Louis Chair, Pressback Chair, Sheaf Back Chair, Splat Back Chair Farmhouse and Rustic Dining Chair Types Cross Back Chair, Ladder Back Chair, Live Edge Chair, Turnbuckle Chair, Reclaimed Wood Chair Modern and Contemporary Dining Chair Types Parsons Chair, Keyhole Back Chair, Open Back Chair, Floating Arm Chair, Wraparound Chair, Tub Chair, Barrel Chair Mid-Century and Scandinavian Dining Chair Types Wishbone Chair, Eames Chair, Spindle Back Chair, Cantilever Chair Mission and Craftsman Dining Chair Types Slat Back Chair, Lattice Back Chair, Cut-Out Back Chair Upholstered and Formal Dining Chair Types Upholstered Dining Chair, Tufted Dining Chair, Wingback Chair, Accent Dining Chair From classic traditional designs to sleek modern silhouettes, each style category offers something unique. Understanding these groups makes it easier to identify the dining chair styles that best complement your space and décor. Traditional Dining Chair Types Traditional dining chairs are rooted in classic furniture design and have remained popular for generations. These styles are known for their craftsmanship, elegant details, and timeless appeal. They work particularly well in traditional, farmhouse, and formal dining rooms, offering a balance of comfort, durability, and visual character. 1. Windsor Chair The Windsor chair is one of the most recognizable dining chair styles. It features a solid wooden seat, angled legs, and a spindle back that creates a light and airy appearance. Originating in 18th-century England, Windsor chairs are valued for their durability and timeless design. They fit naturally into traditional, farmhouse, and cottage-style interiors. Their simple construction and comfortable support make them suitable for both everyday dining and formal gatherings while adding classic charm to the dining space. Size: Typically 18–20 inches wide and 34–40 inches high. Best for: Families, farmhouse homes, and traditional dining rooms. 2. Bow Back Chair A bow-back chair is a variation of the Windsor design, distinguished by its curved wooden rail that forms a continuous bow around the backrest. Vertical spindles connect the seat to this curved frame, providing support and visual interest. The gentle curve enhances comfort while maintaining a classic appearance. Bow-back chairs are commonly used in traditional and farmhouse interiors for their handcrafted look and timeless appeal. Their elegant silhouette makes them a versatile choice for a variety of dining room styles. Size: Usually 18–20 inches wide and 35–40 inches high. Best for: Farmhouse homes, cottage-style interiors, and everyday dining. 3. Queen Anne Chair Queen Anne chairs are known for their graceful curves and refined appearance. Common features include cabriole legs, shaped backrests, and upholstered seats that add comfort and sophistication. Inspired by early 18th-century furniture design, these chairs bring grace to formal dining spaces. Their decorative details create a more upscale look than many other traditional styles. Queen Anne chairs pair particularly well with rich-wood dining tables and classic décor, making them a popular choice for homeowners seeking a timeless, polished dining room. Size: Generally 19–22 inches wide and 38–44 inches high. Best for: Formal dining rooms, traditional homes, and elegant interiors. 4. King Louis Chair The King Louis chair is a classic French-inspired design recognized for its oval-shaped backrest and elegant proportions. Upholstered seats and backs are often included to enhance comfort and luxury. Decorative carvings and refined details contribute to its formal appearance, making it a favorite for a high class dining rooms. Although rooted in historical furniture design, modern versions often feature cleaner lines for transitional interiors. The King Louis chair remains a popular option for homeowners who want a blend of comfort, elegance, and timeless European style. Size: Commonly 20–24 inches wide and 38–45 inches high. Best for: Formal dining rooms, luxury interiors, and comfort-focused seating. 5. Pressback Chair Pressback chairs stand out because of the decorative patterns embossed or carved into their wooden backrests. Popular motifs include floral designs, scrollwork, and geometric shapes that showcase detailed craftsmanship. Originally popular during the Victorian era, these chairs combine function with decorative appeal. Their sturdy wooden construction makes them durable enough for everyday use, while the intricate back designs add visual character. Pressback chairs are well-suited to traditional, vintage-inspired, and country-style dining rooms that emphasize classic furniture details. Size: Typically 18–20 inches wide and 36–42 inches high. Best for: Vintage-inspired homes, traditional dining rooms, and decorative interiors. 6. Sheaf Back Chair The sheaf-back chair takes inspiration from bundled wheat stalks, reflected in the arrangement of its decorative back spindles. This distinctive design symbolizes craftsmanship and abundance while maintaining the traditional characteristics of classic wooden seating. Often considered a variation of the Windsor chair, it features a curved back and turned legs, creating an elegant appearance. Sheaf-back chairs work particularly well in traditional and farmhouse dining rooms, where natural materials and handcrafted furniture play an important role in the overall design. Size: Usually 18–21 inches wide and 36–42 inches high. Best for: Farmhouse homes, rustic dining spaces, and traditional interiors. 7. Splat Back Chair A splat-back chair features a decorative vertical panel positioned in the center of the chair back. Known as the splat, this element can range from simple and understated to highly detailed and ornate. Spatially back designs have appeared in many furniture styles throughout history, including the Colonial, Georgian, and Victorian periods. Their versatility allows them to fit both formal and casual dining rooms. The decorative center panel adds character while providing structural support, making splat-back chairs both functional and visually appealing. Size: Commonly 18–22 inches wide and 36–44 inches high. Best for: Traditional homes, formal dining rooms, and classic furniture styles. Farmhouse and Rustic Dining Chair Types Farmhouse and rustic dining chairs focus on natural materials, simple craftsmanship, and a welcoming feel. These styles often highlight wood grain, distressed finishes, and practical designs that create warmth and character. They are ideal for casual dining spaces that prioritize comfort and timeless appeal. Pro Tip: Flip any farmhouse-style chair before buying. Look at the underside of the seat; quality chairs show clean mortise-and-tenon or dowel joints at the leg-to-seat connection. Staples or visible glue blobs alone mean the joint will loosen under daily load. 8. Cross Back Chair Cross-back chairs feature an X-shaped backrest that adds both support and visual interest. Inspired by classic French country furniture, they bring a relaxed and inviting feel to dining spaces. Their combination of rustic charm and simple elegance makes them a popular choice for farmhouse interiors. Typically crafted from wood with natural or distressed finishes, these chairs complement rustic tables and warm color palettes. Their sturdy construction, timeless silhouette, and comfortable support make them suitable for both everyday family meals and casual entertaining. Size: Typically 17–20 inches wide, 18–19 inches deep, and 34–38 inches high. Best for: Farmhouse homes, French country décor, and casual dining rooms. 9. Ladder Back Chair Ladder-back chairs are characterized by horizontal slats resembling the rungs of a ladder. This timeless design has been used for centuries because of its durability, simplicity, and practicality. The open back creates a light appearance while providing reliable support for everyday dining. Often made from solid wood, ladder-back chairs blend easily with farmhouse, country, and rustic interiors. Their straightforward design allows them to work with a variety of table styles while maintaining a comfortable and welcoming feel in the dining room. Size: Typically 17–19 inches wide, 17–18 inches deep, and 36–42 inches high. Best for: Farmhouse kitchens, rustic dining rooms, and family dining spaces. 10. Live Edge Chair Live-edge chairs preserve the natural contours of the wood, showcasing unique grain patterns, knots, and organic shapes. Each piece has a distinctive appearance that highlights craftsmanship and the beauty of natural materials. Unlike mass-produced furniture, no two live-edge chairs are exactly alike. These chairs add texture, warmth, and visual character while creating a strong connection to nature. Their handcrafted appeal makes them a striking addition to rustic, cabin-inspired, lodge-style, and nature-focused dining rooms where authenticity is a key design element. Size: Typically 18–22 inches wide, 18–20 inches deep, and 34–40 inches high. Best for: Rustic homes, cabin-style interiors, and nature-inspired spaces. 11. Turnbuckle Chair Turnbuckle chairs combine solid wood construction with metal turnbuckle accents, providing structural support and an industrial appeal. The combination of wood and metal creates a rugged yet refined appearance that stands out in modern rustic interiors. Originally inspired by industrial furniture designs, these chairs are valued for both durability and visual character. Their distinctive details add depth without overwhelming the space. Strong materials, functional construction, and a unique aesthetic make turnbuckle chairs a practical choice for high-traffic dining areas. Size: Typically 18–20 inches wide, 18–19 inches deep, and 34–38 inches high. Best for: Industrial dining rooms, farmhouse homes, and mixed-material interiors. 12. Reclaimed Wood Chair Reclaimed wood chairs are crafted from salvaged timber, giving old materials a new purpose while preserving their natural character and history. Weathered textures, visible grain patterns, nail marks, and unique imperfections make every chair slightly different. These chairs support sustainable design by reducing waste while adding authenticity and warmth to a dining room. Their rustic appearance pairs beautifully with farmhouse, industrial, and country-inspired décor. Durable construction and timeless appeal make reclaimed wood chairs both environmentally responsible and visually distinctive seating options. Size: Typically 18–20 inches wide, 18–19 inches deep, and 34–40 inches high. Best for: Rustic homes, eco-conscious households, and farmhouse dining spaces. Modern and Contemporary Dining Chair Types Modern and contemporary dining chairs emphasize clean lines, simplicity, and functionality. These designs often use sleek silhouettes, innovative shapes, and minimal ornamentation to create a stylish, uncluttered look. They work especially well in contemporary, transitional, and minimalist dining spaces. 13. Parsons Chair Parsons chairs feature a straight-backed silhouette and a fully upholstered design that prioritizes comfort and versatility. Originally created at the Parsons School of Design, they were intended to showcase simplicity and function. Their clean lines allow them to blend easily with traditional, transitional, and contemporary dining rooms. Available in a wide range of fabrics, colors, and finishes, Parsons chairs can be customized to suit different décor styles. Their understated appearance makes them one of the most versatile dining chair options available today. Size: Typically 18–21 inches wide, 18–20 inches deep, and 36–42 inches high. Best for: Formal dining rooms, small spaces, and transitional homes. 14. Keyhole Back Chair Keyhole-back chairs feature a decorative cutout in the backrest resembling a keyhole. This open design adds visual interest while improving airflow and reducing the chair’s visual weight. Their clean geometric silhouette gives them a modern appearance without sacrificing comfort or practicality. The distinctive back detail is a subtle design element that enhances contemporary dining spaces. Keyhole back chairs are often found in transitional and modern interiors where simplicity and style are equally important. Size: Typically 18–20 inches wide, 18–19 inches deep, and 34–40 inches high. Best for: Modern homes, minimalist interiors, and compact dining spaces. 15. Open Back Chair Open-back chairs feature a backrest with intentional open spaces that create a light and airy appearance. By incorporating negative space into the design, these chairs feel less bulky and help smaller dining rooms appear more spacious. Their streamlined profile works particularly well in contemporary and minimalist interiors. Open-back designs come in a variety of materials, including wood, metal, and upholstered frames, allowing them to suit different décor styles. Their balance of comfort and visual openness makes them a popular modern choice. Size: Typically 18–20 inches wide, 18–19 inches deep, and 32–38 inches high. Best for: Small dining rooms, minimalist spaces, and contemporary interiors. 16. Floating Armchair Floating armchairs feature armrests that appear visually separate from the backrest, creating a sleek and sophisticated profile. This distinctive construction adds architectural interest while maintaining comfort and functionality. The open design prevents the chair from feeling heavy, making it suitable for modern dining spaces. Many floating armchairs combine wood, metal, or upholstered elements to enhance their contemporary appeal. Their elegant proportions and unique silhouette make them a stylish option for homeowners looking to add designer-inspired seating to a dining room. Size: Typically 22–25 inches wide, 20–22 inches deep, and 34–40 inches high. Best for: Modern homes, designer-inspired interiors, and statement seating. 17. Wraparound Chair Wraparound chairs are designed with curved sides that gently extend around the sitter, creating a supportive and comfortable seating experience. Their sculptural shape makes them a standout feature in modern dining rooms while also encouraging relaxed seating during long meals. Many versions include padded seats and upholstered backs for additional comfort. The curved design helps create a sense of enclosure without feeling restrictive. Wraparound chairs combine style and functionality, making them a popular choice for contemporary homes focused on comfort. Size: Typically 22–26 inches wide, 20–24 inches deep, and 32–38 inches high. Best for: Comfort, modern dining rooms, and extended gatherings. 18. Tub Chair Tub chairs feature a rounded backrest that flows into integrated armrests, creating a cozy and supportive seating environment. Their curved shape provides excellent comfort while maintaining a stylish contemporary appearance. Originally popular in lounge seating, tub chairs have become increasingly common in dining rooms because of their inviting design. Many models feature upholstered finishes that enhance both comfort and visual appeal. Their balanced combination of softness, support, and modern styling makes them ideal for everyday dining and entertaining. Size: Typically 22–28 inches wide, 20–24 inches deep, and 30–36 inches high. Best for: Comfort, family dining rooms, and contemporary interiors. 19. Barrel Chair Barrel chairs are distinguished by their curved, barrel-shaped backrest that partially surrounds the seat. This rounded design provides excellent support while creating a luxurious and comfortable seating experience. Often upholstered in fabric or leather, barrel chairs add softness and sophistication to a dining room. Their sculptural silhouette helps break up straight lines commonly found in dining furniture, creating visual balance. Because of their generous proportions and premium feel, barrel chairs are frequently used as statement seating in upscale dining spaces. Size: Typically 24–30 inches wide, 22–26 inches deep, and 30–38 inches high. Best for: Comfort, formal dining rooms, and modern luxury interiors. Mid-Century and Scandinavian Dining Chair Types Mid-century and Scandinavian dining chairs focus on simplicity, functionality, and clean design. These styles often feature natural materials, tapered legs, and minimal ornamentation. Their timeless appearance makes them a popular choice for modern homes that prioritize comfort, practicality, and understated elegance. 20. Wishbone Chair The Wishbone chair is a Scandinavian classic known for its distinctive Y-shaped backrest and handwoven seat. Designed by Hans Wegner, it combines comfort, craftsmanship, and simplicity in a lightweight form. Its elegant curves and natural wood construction create an airy appearance that suits modern dining spaces. The chair’s organic shape provides excellent support while maintaining a minimalist aesthetic. Its timeless design has remained popular for decades, making it one of the most recognizable Scandinavian furniture styles. Size: Typically 21–22 inches wide, 20–22 inches deep, and 28–30 inches high. Best for: Scandinavian homes, minimalist interiors, and modern dining rooms. 21. Eames Chair The Eames chair is an iconic mid-century modern design recognized for its molded seat and clean, functional silhouette. Originally developed by Charles and Ray Eames, it was designed to provide stylish seating that was both comfortable and accessible. Modern versions are available in plastic, fiberglass, wood, and upholstered finishes. Its simple form allows it to blend seamlessly with many interior styles while maintaining a distinctly modern look. The chair’s durability and versatility continue to make it a popular choice for dining rooms. Size: Typically 18–21 inches wide, 20–22 inches deep, and 31–34 inches high. Best for: Modern homes, mid-century interiors, and everyday family use. 22. Spindle Back Chair Spindle-back chairs feature multiple slim vertical rods forming the backrest, creating a light and visually balanced design. Their clean lines and understated appearance make them a staple in Scandinavian and mid-century interiors. Despite their simple construction, spindle-back chairs offer reliable support and long-lasting durability. Many designs highlight natural wood finishes that enhance their timeless appeal. Their compact footprint makes them especially useful in smaller dining areas where maintaining an open and uncluttered look is important. Size: Typically 17–20 inches wide, 18–19 inches deep, and 34–38 inches high. Best for: Small spaces, Scandinavian décor, and casual dining areas. 23. Cantilever Chair Cantilever chairs stand out because they use a single curved frame instead of four traditional legs. This innovative construction creates a floating appearance while allowing slight flexibility when seated, which can enhance comfort. Often made from metal, wood, or mixed materials, cantilever chairs reflect the clean, functional principles of modern design. Their streamlined silhouette helps create an open and contemporary feel in dining spaces. The combination of visual lightness, comfort, and engineering innovation makes them a distinctive seating choice. Size: Typically 18–22 inches wide, 20–22 inches deep, and 34–38 inches high. Best for: Modern homes, minimalist spaces, and contemporary dining rooms. Mission and Craftsman Dining Chair Types Mission and Craftsman dining chairs emphasize simplicity, durability, and skilled woodworking. These styles showcase clean lines, solid wood construction, and functional design rather than excessive ornamentation. Their timeless appeal makes them a popular choice for traditional, rustic, and craftsman-inspired interiors. 24. Slat Back Chair Slat-back chairs feature vertical wooden slats across the backrest, creating a clean, structured appearance that reflects traditional craftsmanship. This classic design provides reliable support while highlighting the natural beauty of wood grain and simple construction. Their versatile style works equally well in traditional, farmhouse, and craftsman-inspired dining rooms. Slat-back chairs are valued for their durability, timeless appeal, and ability to blend with various table styles without overwhelming the space. They remain a practical choice for both casual family meals and everyday dining. Size: Typically 17–20 inches wide, 18–19 inches deep, and 36–42 inches high. Best for: Craftsman homes, traditional dining rooms, and everyday family use. 25. Lattice Back Chair Lattice-back chairs feature an open, grid-like pattern on the backrest that adds decorative interest while maintaining a light, airy appearance. The geometric design reflects skilled woodworking and traditional craftsmanship without appearing overly ornate. These chairs balance style and functionality, providing comfortable support while serving as a subtle focal point in the dining room. Their distinctive pattern works well in mission, craftsman, traditional, and transitional interiors, making them a versatile option for homeowners who appreciate detailed yet practical furniture design. Size: Typically 18–21 inches wide, 18–20 inches deep, and 36–44 inches high. Best for: Mission-style homes, craftsman interiors, and statement seating. 26. Cut-Out Back Chair Cut-out back chairs feature decorative openings carved directly into the backrest, often using geometric, floral, or symmetrical patterns. These unique details showcase craftsmanship while adding visual character without requiring excessive ornamentation. Depending on the specific design, cut-out back chairs can complement traditional, transitional, rustic, or even contemporary interiors. Their blend of functionality and artistic appeal makes them a popular choice for homeowners seeking distinctive dining furniture. The decorative openings also help create a lighter appearance compared to fully solid chair backs. Size: Typically 18–21 inches wide, 18–20 inches deep, and 34–42 inches high. Best for: Craftsman décor, transitional homes, and design-focused dining spaces. Upholstered and Formal Dining Chair Types Upholstered dining chairs raise a second lifespan question alongside the frame: the fabric or leather surface that comes into daily contact with food, spills, and cleaning products. Frame quality still matters, but the upholstery maintenance plan matters too. Faux leather at dining tables typically lasts 3–5 years before peeling begins at the seat edges and arm contact zones; genuine leather, properly maintained, can last 10–15 years; performance fabrics rated for high rub counts sit in between. Budget accordingly. 27. Upholstered Dining Chair Upholstered dining chairs feature padded seats, backs, or both, covered in fabric, leather, or faux leather for enhanced comfort. The cushioning provides excellent support during long meals, family gatherings, and special occasions. Available in countless colors, textures, and finishes, these chairs can easily complement traditional, transitional, or modern décor. Their soft appearance adds warmth and sophistication to dining spaces while creating a more comfortable seating experience. Many homeowners choose upholstered chairs to balance style, comfort, and versatility. Size: Typically 18–22 inches wide, 20–24 inches deep, and 34–42 inches high. Best for: Comfort, formal dining rooms, and extended dining sessions. 28. Tufted Dining Chair Tufted dining chairs feature decorative buttons stitched into the upholstery, creating a textured and luxurious appearance. This classic detail adds depth, visual interest, and a sense of elegance that suits formal dining spaces. Beyond aesthetics, the padded upholstery provides excellent comfort and support for longer gatherings. Tufted chairs are commonly found in traditional and luxury interiors, though simplified versions also complement transitional styles. Their combination of comfort, sophistication, and timeless appeal makes them a favorite for upscale dining rooms. Size: Typically 19–23 inches wide, 20–25 inches deep, and 38–46 inches high. Best for: Formal dining rooms, luxury interiors, and elegant entertaining spaces. 29. Wingback Chair The tall backrest and extended side wings were engineered for warmth, to block drafts from open fireplaces. At a dining table, those same wings create a narrow access profile, making it harder to slide the chair in and out without catching the table edge. Wingback chairs work best at the heads of a table, where they have lateral clearance, rather than along the sides, where they compete with adjacent chairs for space. The taller back-and-seat height combination requires an exact match to your standard dining table height; confirm clearance before ordering. Size: 22–30 inches wide, 42–50 inches high. Size: Typically 22–30 inches wide, 22–28 inches deep, and 42–50 inches high. Best for: Formal dining rooms, comfort-focused seating, and head-of-table placement. How to Choose the Right Dining Chair The best dining chair should complement your table, fit your room style, and provide the right balance of comfort and practicality. Keeping these factors in mind will help you choose chairs that look great and work well for everyday dining. Match the chair to your dining table: Choose chairs that suit the table’s size, height, shape, and overall design. Leave enough clearance between the seat and the tabletop for comfortable seating. Consider your room style: Traditional rooms suit Windsor and Queen Anne chairs, farmhouse spaces work well with Cross Back and Ladder Back designs, while modern interiors pair better with Parsons, Eames, and Cantilever chairs. Choose between armchairs and side chairs: Armchairs offer extra comfort and a more formal look, while side chairs save space and allow for greater seating flexibility. Decide between upholstered and wooden chairs: Upholstered chairs provide added comfort and softness, while wooden chairs are durable, easier to clean, and often require less maintenance. Think about comfort and daily use: Consider seat cushioning, back support, chair width, and how frequently the chairs will be used for meals or gatherings. Select the right material: Solid wood offers durability, upholstery adds comfort, metal creates a modern feel, and reclaimed wood brings rustic character and sustainability. Common Materials Used in Dining Chairs The material of a dining chair affects its appearance, comfort, durability, and maintenance requirements. Some materials offer a classic, timeless look, while others prioritize comfort, modern styling, or easy upkeep. Understanding the most common options can help you choose dining chairs that suit both your lifestyle and interior design preferences. Material Realistic Lifespan (daily use) What Fails First Maintenance Reality Solid hardwood (oak, maple, beech) 15–25+ years Finish surface; joints if poorly glued Re-glue joints every 10–15 years if needed; refinish surface Solid softwood (pine, rubberwood) 5–10 years Joint loosening; surface denting Higher joint maintenance; difficult to refinish cleanly Performance fabric upholstery 8–15 years Seam wear at seat edges Spot clean; professional clean every 2–3 years Genuine leather 10–20 years Cracking at flex points without conditioning Condition 2x per year; avoid direct sunlight Faux leather (PU) 3–5 years Peeling at edges and seat contact zones Cannot be repaired; must be replaced Tubular steel (welded) 20+ years if the welds are sound Weld failure at stress points; surface rust without coating Inspect welds annually; touch up paint or powder coat if scratched Polypropylene shell 10–15 years UV yellowing; crack at mounting points Keep out of direct sunlight; check mount hardware annually Choosing the right dining chair material ultimately comes down to your priorities. Solid wood offers lasting durability, upholstery maximizes comfort, metal delivers a modern edge, and reclaimed wood provides rustic character with sustainability benefits. By understanding the strengths of each material, you can select dining chairs that not only complement your décor but also perform well in everyday dining. Frequently Asked Questions Why do dining chairs get wobbly, and can they be fixed? Wobble almost always comes from one of two places: a dried-out glue joint that has lost its bond, or a leg that has worn unevenly on a hard floor. Dried glue joints are fixable; disassemble, clean out the old adhesive, reglue with fresh PVA or hide glue, and clamp overnight. Uneven leg wear gets a furniture leveler glued to the short leg. What can’t be fixed is a frame built with misaligned legs from the start. That wobble is structural and permanent. Is there a meaningful difference between chair weight and quality? Generally yes. A solid hardwood chair in oak or maple typically runs 6–10 lbs, and that weight reflects actual material density. A chair that feels lightweight for its size often has a hollow frame, soft wood, or more composites than listed. Exceptions include engineered chairs like Eames shells or aluminum cantilevers. For traditional wood chairs, if it feels insubstantial, it likely is. What seat depth actually affects comfort at a dining table? Seat depth, the front-to-back measurement of the seat pan, should match your upper leg length, typically 16–18 inches. Deeper than 18 inches causes shorter people to sit forward without support or slouch, while shallower than 16 inches causes the front edge to cut into the thigh during long seated periods. Though seldom listed, this measurement affects comfort more than cushion thickness. Can outdoor dining chairs be used indoors permanently? Structurally, yes, but there are real trade-offs. Outdoor chairs are built for moisture and UV exposure, so they use teak, powder-coated aluminum, or all-weather resin rather than the hardwood and upholstery you’d choose for an indoor room. They run heavier, the finishes read as utilitarian, and seat comfort is usually secondary to weather resistance. For a casual dining space, they work fine. For a formal dining room, they’ll look out of place regardless of how good the chair itself is. To Wrap it Up Finding the right dining chair is about more than choosing something that looks good. The best option balances comfort, function, and style while fitting naturally into your dining space. As you’ve seen, different types of dining chairs offer unique features, from traditional Windsor and Queen Anne designs to modern Parsons, Eames, and barrel chairs. Room size, table style, materials, and everyday use all play an important role in making the right choice. Understanding the various types of dining chairs helps you narrow down options with confidence and create a dining area that feels both practical and inviting. I hope this guide makes your decision easier. Have a favorite chair style? Share your thoughts below or explore our related dining room guides for more inspiration.
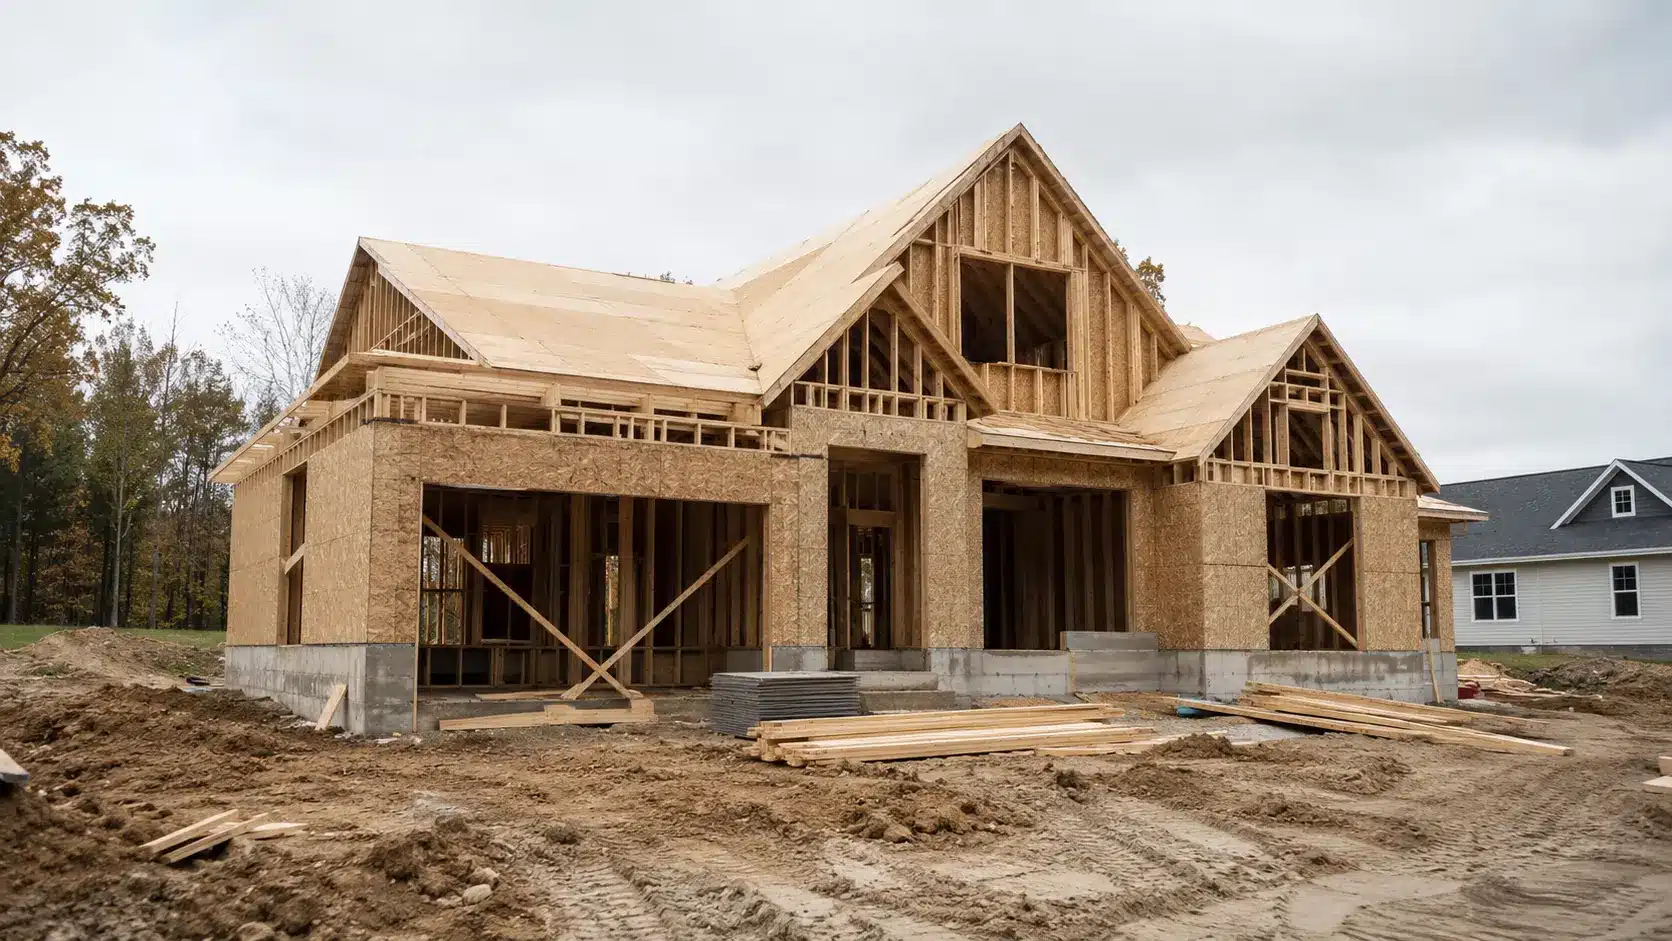
I have sat across from enough homeowners in pre-construction meetings to know that the first real question is always: “So how long is this actually going to take?” Most of them had already Googled it. They had seen “7 to 14 months” somewhere and were not sure what that meant for their specific situation, their lot, their design, their builder. That range is real, but it does not tell the full story. How long it takes to build a house depends on what you are counting, what type of home you are building, and how many avoidable delays get in the way. By the end of this, you will know the realistic timeline for each build type, what happens in each phase, why two similar homes can take very different amounts of time, and what you can actually do to keep things moving. From Planning to Keys: What the Timeline Really Covers Building a house takes longer than most people expect, and the number that trips people up is almost always the same one: “7 to 14 months.” That range is real, but it depends entirely on what you are counting, what type of home you are building, and how many avoidable delays get in the way. By the end of this, you will know the realistic timeline for each build type, what happens in each phase, and what you can actually do to keep things moving. Most homeowners assume the clock starts when construction begins. It doesn’t. Design, financing, land checks, and permits can take one to four months on their own, and that time counts. Skip it in your planning, and you will miss your target date before a single piece of lumber is ordered. According to the U.S. Census Bureau’s Survey of Construction, the average single-family home in 2024 took about 9.1 months from permit authorization to completion, with the active construction period averaging 7.6 months. That is the national average. Whether your build lands at 7 months or 14 months depends on the factors below. Stage Typical Duration Design and planning 1 to 3 months Financing and land prep 2 to 6 weeks Permitting 2 to 8 weeks Site work and foundation 2 to 6 weeks Framing 1 to 2 months Mechanical, electrical, and plumbing rough-ins 1 to 2 months Insulation and drywall 2 to 4 weeks Interior and exterior finishes 1 to 3 months Final inspection and punch list 1 to 4 weeks These phases overlap more in production builds and stack sequentially in custom builds. Local permitting speed and trade availability can significantly compress or stretch any of them. Once you know which build type you are dealing with, those phase durations start to make more sense. How Long Does It Take to Build a House by Type A production home and a custom home do not follow the same schedule, even when the square footage is identical. The difference is how many decisions are already made before work begins. Type of Home Typical Timeline Why It Takes This Long Production home 4 to 7 months Plans, materials, and processes are already set. Semi-custom home 8 to 12 months The base plan is fixed, but finish selections and modifications add time. Custom home 10 to 18+ months Design, engineering, permits, selections, and special materials all require more review. Owner-built home 12 to 16+ months The homeowner manages more decisions, trade coordination, and scheduling directly. Modular home 3 to 6 months after permits Sections are built off-site while foundation work happens simultaneously. A production home moves faster because the plans are already approved, the materials are pre-ordered in bulk, and the builder runs multiple homes on the same schedule. A custom home requires more back-and-forth on design, longer permitting review, and more specialized trades, all of which add time before and during construction. If you are weighing these options, understanding production vs custom home tradeoffs can save you months of recalibrated expectations. The Main Phases of Building a House and How Long Each Takes Each phase of construction has its own pace and its own set of things that can slow it down. Knowing what happens in each one helps set realistic expectations and makes it easier to ask the right questions when talking to a builder. Phase 1. Planning, Design, and Permits: 1 to 4 Months This phase starts with final floor plans, financing, and lot checks. The builder confirms the site is ready, then submits permits to the local building department for zoning and code review. Timelines vary by location. Some offices approve permits in two to three weeks, while others may take two to three months for complex homes or busy markets. Phase 2. Site Preparation and Foundation: 2 to 6 Weeks The lot is cleared, graded, and prepared for construction. Crews mark the home’s footprint, dig footings, set forms, and pour concrete. The foundation then needs time to cure before framing begins. The weather can affect this stage. Wet soil, poor drainage, freezing temperatures, or delayed concrete inspections can stretch this phase beyond the usual range. Phase 3. Framing: 1 to 2 Months Framing gives the home its visible shape. Crews build the floors, walls, roof structure, and sheathing. Trusses are delivered and set, and windows or exterior doors may be installed. This stage often feels fast from the outside, but weather, lumber shortages, roof work, or delayed truss delivery can slow progress. Phase 4. Plumbing, Electrical, and HVAC Rough-Ins: 1 to 2 Months This phase adds the hidden systems inside the walls. Plumbers install pipes, electricians run wiring, and HVAC crews place ducts, vents, and equipment lines. Each trade usually needs inspection before insulation, and drywall can begin. Scheduling gaps, failed inspections, or rework can hold up the next phase because the walls cannot close too early. Phase 5. Insulation and Drywall: 2 to 4 Weeks After rough-in inspections pass, insulation is installed in walls and ceilings. Drywall comes next, followed by taping, mudding, sanding, and surface prep for paint. This stage depends on drying time, so cold weather, high humidity, or poor ventilation can slow it down. Supply issues or finish quality fixes can also add extra days. Phase 6. Interior and Exterior Finishes: 1 to 3 Months This phase brings together the visible details: flooring, cabinets, countertops, tile, fixtures, paint, trim, siding, and exterior work. It often takes the longest in custom homes because many items require lead time. Cabinets, specialty tile, lighting, and non-standard fixtures can take weeks to arrive, so late selections can quickly push the schedule. Phase 7. Final Inspection and Move-In: 1 to 4 Weeks Once the finishes are complete, the builder schedules the final inspection with the local building department. If the home passes, a certificate of occupancy is issued. At the same time, the punch list is completed, covering small fixes or touch-ups. Failed inspection items, unresolved punch-list work, or inspector scheduling delays can delay move-in. With each phase laid out, the full timeline becomes easier to understand. A build does not slow down for one reason only. The next step is looking at why two homes in the same area can still finish months apart. Why Two Similar Homes Can Have Different Build Timelines Two homes can look similar on paper, but take very different amounts of time to finish. The difference usually comes from the type of build, the site, the plan details, and how many choices are already settled before work begins. Production vs custom build: A production home usually moves faster because the builder already has tested plans, set materials, and a repeatable schedule. A custom home takes longer because design, pricing, engineering, and selections need more review. Lot condition: A flat, ready-to-build lot is faster to prepare. A sloped lot, a wooded lot, poor soil, drainage issues, or a hard-to-reach utility connection can add time before the foundation begins. Plan complexity: A simple rectangular home is easier to frame and finish. A home with a basement, complex roofline, large windows, multiple roof sections, or special ceiling details needs more labor and coordination. Finish level: Standard cabinets, flooring, fixtures, and tile are easier to source. Custom cabinets, imported tile, specialty lighting, or non-standard finishes can stretch the schedule. Builder process: A builder with strong scheduling, clear selection deadlines, and reliable trade partners can keep the job moving. A builder without a clear process may leave gaps between phases. Homeowner readiness: Fast builds usually have early decisions. Slow builds often involve late selections, uncertain budgets, or changes after construction starts. The main point is simple: square footage gives only part of the answer. The smoother builds usually have a clear plan, a ready lot, standard materials, and fewer late changes. What Causes Delays in Home Construction and Why They Stack A delay does not always stay small during a home build. One late approval, missing material, or failed inspection can block the next trade from starting. That is why a one-week issue can turn into a longer schedule slip. Delay What It Can Block Possible Time Added Why It Affects the Schedule Permit backlog Groundbreaking 2 to 10 weeks Work cannot begin until the local office approves the plans. Failed inspection Next phase 1 to 3 weeks The builder must fix the issue, schedule another inspection, and wait for approval. Late windows or trusses Dry-in and framing progress 1 to 6 weeks Crews may be ready, but they cannot move forward without key materials. Weather issue Foundation, roofing, grading 1 to 4 weeks Rain, mud, snow, freezing temperatures, or heat can slow outdoor work. Late owner decisions Material ordering 1 to 6 weeks Slow choices on flooring, cabinets, lighting, tile, or counters can delay orders. Change order Drawings, pricing, materials, trades 2 to 8 weeks Changes after work starts can affect plans, permits, pricing, and trade schedules. The real issue is not only the delay itself. It is what the delay blocks next. Once one crew misses its scheduled window, the builder may need to wait for that crew to become available again. Smart Ways to Keep Your Build Timeline on Track The best way to keep a home build moving is to make key decisions before they become urgent. Most delays are not caused by weather or bad luck. They are caused by plans, permits, materials, or selections that were not ready when the builder needed them. Before work starts on site: Finalize the floor plan, confirm soil and drainage conditions, verify utility access, and secure financing before the design is complete. Ask your builder when permits will be submitted and review the full phase-by-phase schedule before signing anything. During the design phase: Choose flooring, cabinets, tile, counters, fixtures, and paint early. Ask which materials have long lead times, choose widely available products where possible, and get all selection deadlines in writing. During construction: Respond to builder questions within 24 to 48 hours so work does not pause. Avoid change orders after framing begins, visit the site regularly enough to catch issues early, and keep written records of every approval. Hire a builder with a clear process: Pick someone who can explain how they track timelines, handle permit delays, manage late materials, and show the time and cost impact of change orders upfront. For larger builds, knowing where whole-house budgets go wrong gives you a better baseline for what to protect. Add a realistic time buffer: Plan 2 to 3 extra weeks for a production home and 4 to 6 extra weeks for a custom home. Avoid scheduling movers or ending a lease based only on the best-case date. Pro Tip: Get your flooring, cabinet, and fixture selections finalized before the framing inspection. Builders typically need these ordered 8 to 12 weeks ahead of the finish phase. Missing that window is the single most common reason a build that’s on schedule suddenly isn’t. Frequently Asked Questions Can I live in the house before the final inspection? No. In most jurisdictions, you cannot move in until the home passes final inspection and receives a certificate of occupancy. Some builders allow limited walkthroughs, but full occupancy requires local approval. Moving in early can also affect your homeowner’s insurance coverage. Should I sell my current home before construction starts? Waiting is usually safer unless you have a flexible place to stay. Construction dates shift for permits, weather, inspections, and materials. Most homeowners either plan temporary housing or add extra time before committing to a final move date. How long does it take to build a house with a basement? Expect to add 2 to 4 weeks to the foundation phase. Basements require deeper excavation, additional waterproofing steps, and a separate inspection sequence. In areas with high water tables or rocky soil, that window can stretch further. How often should I check on the build during construction? A weekly site visit is enough for most homeowners. You do not need to manage the job daily, but regular visits catch questions early. Ask your builder how often visits are allowed and who should be present when you come. Do modular homes take less time to build? Yes, often significantly. Sections are manufactured off-site while foundation work runs simultaneously. Total time still depends on permits, delivery, utility hookups, and local inspections, but modular builds regularly finish in 3 to 6 months after permits are issued. What should I ask a builder before signing a contract? Ask for a phase-by-phase schedule, permit expectations, long-lead material risks, selection deadlines, and change order rules. A builder who cannot answer those questions specifically is a risk to your timeline before work even starts. How long does it take to build a tiny house? A professionally built tiny house on a permanent foundation typically takes 3 to 6 months. A trailer-mounted tiny house can be completed faster, sometimes in 8 to 16 weeks, depending on the builder’s backlog and the complexity of your layout. You can see a full cost breakdown for tiny house construction to understand how the timeline affects total spend. Ending Note Most US homeowners should plan for 7 to 14 months from planning to move-in. Production homes can close that gap considerably, often finishing in 4 to 7 months when selections are locked in early. Custom and owner-built homes regularly push past 12 months because every decision point adds time. The builds that stay closest to schedule have one thing in common: decisions made well ahead of when they are needed, not the day the builder calls asking for them. Before you sign a contract, ask your builder for a phase-by-phase schedule with specific permit and selection deadlines. That one document will tell you more about how long your build will take than any range you find online.
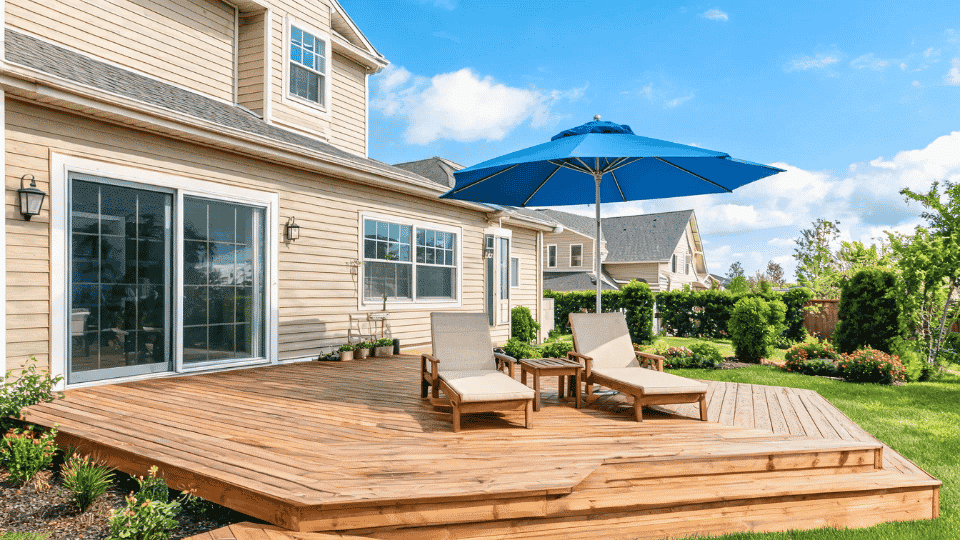
Deck quotes can be confusing because the same project name can refer to very different work. A small pressure-treated platform may cost around $4,000, while a raised composite rebuild with stairs, railings, footings, and demo can cost over $30,000. So, how much does it cost to build a deck? Start with the scope, not the headline price. The labor cost to build a deck per square foot often accounts for the largest gap, especially when the job includes old deck removal, code updates, or custom railing. Before you trust a contractor bid, compare the deck size, materials, height, permits, cleanup, and every line item. Use this step before requesting your final deck quotes. Cost Note: The mentioned figures are estimates based on current US deck pricing patterns, contractor quote ranges, and homeowner-reported examples from forums and social media. Actual costs vary by region, contractor, deck height, material, permits, and project scope. Always get at least three written quotes before signing any deck contract. How Much Does It Cost to Build a Deck by Size? Deck size sets the base price. Larger decks need more boards, more framing, more fasteners, more railing, and more labor hours. Deck Size Square Feet Basic Wood Deck Mid-Range Deck Composite or Custom Deck 10×10 100 $3,000 to $6,000 $6,000 to $9,000 $9,000 to $14,000 12×12 144 $4,500 to $8,500 $8,500 to $13,000 $13,000 to $20,000 12×16 192 $6,000 to $11,000 $11,000 to $17,000 $17,000 to $26,000 14×20 280 $9,000 to $16,000 $16,000 to $25,000 $25,000 to $35,000+ 16×20 320 $10,000 to $18,000 $18,000 to $28,000 $28,000 to $40,000+ 20×20 400 $13,000 to $24,000 $24,000 to $35,000 $35,000 to $50,000+ 500 sq ft 500 $16,000 to $30,000 $30,000 to $45,000 $45,000 to $65,000+ These numbers are not meant to replace a local quote. They are meant to help you spot a number that needs more explanation. A 300 sq ft deck can be cheap or expensive depending on what sits under it, what sits around it, and what the contractor has to remove first. However, the deck is not limited to just the wooden build; factors like furniture and outdoor features are in the mix, and they can change the cost of working on a full backyard when including the deck, skirting, patio, etc. Labor Cost to Build a Deck Per Square Foot Labor cost to build a deck usually runs $15 to $40 per square foot for standard contractor work. Simple ground-level decks can land below that range. Raised, multi-level, or composite decks can run much higher. Project Type Labor Cost Per Sq Ft Basic ground-level wood deck $10 to $20 Standard residential deck $15 to $35 Raised deck with stairs $25 to $45 Composite deck installation $25 to $50 Multi-level deck $40 to $60+ Rebuild with demo $30 to $60+ Labor is not only for board installation. You are paying for layout, post holes, concrete, framing, blocking, ledger work, stairs, railing, inspection fixes, cleanup, and contractor overhead. Even the styles picked for the parts, such as deck skirting types, finishes, and stairs, can make significant changes. That is why labor can account for a large share of the final deck cost. A 12×12 deck is 144 sq ft. If labor runs $20 to $40 per sq ft, labor alone can cost $2,880 to $5,760 before materials. Add stairs, railing, demo, or composite boards, and the labor number rises. Deck Cost by Material Material choice is one reason forum prices vary so much. A basic wood deck and a composite deck may be the same size, but the quote can differ by thousands. Deck Material Installed Cost Per Sq Ft Maintenance Best Fit Pressure-treated wood $30 to $55 High Lowest first cost Cedar $40 to $70 Medium to high Natural wood look Redwood $45 to $75 Medium to high Better natural rot resistance Composite $50 to $90 Low Lower upkeep PVC $60 to $100+ Low Wet or high-moisture areas Hardwood $70 to $120+ Medium Premium deck builds Material choice is where many online price comparisons fall apart. A pressure-treated wood deck may look cheap because the first cost is lower, while composite and PVC quotes can rise once hidden fasteners, fascia, stair trim, and upgraded railing are included. Before comparing your quote with a forum comment, check the exact material, product line, railing type, and finish details. What Drives the Final Deck Price Note: This breakdown reflects average cost distribution across deck projects and can vary; demolition may represent little to no cost on a new build where no existing structure needs to be removed. The deck boards are just the starting point. These seven factors are what separate a $6,000 quote from a $30,000 one, and what most homeowners don’t think to ask about before signing. 1. Height Ground-level decks cost less, have shorter posts, simpler framing, and faster labor. Raised decks add high cost at every level: Longer posts and stronger beams to handle increased load Cross-bracing and deeper footings required for structural stability Guardrails are commonly required on decks more than 30 inches above grade, but local code decides the final requirement. Taller, heavier, or unusual deck designs may require engineered plans or structural review. The higher the deck, the more likely it is to need guardrails, stronger framing, inspections, and added structural planning. Decks.com’s deck railing code guide is a useful starting point, but the final requirement should come from your local building department. 2. Stairs Each stair run requires stringers, treads, risers, railings, landings, and code-compliant rise-and-run dimensions. Cost drivers include: Number of runs from deck level down to grade Stair width and total drop height from deck to ground Railing type required on both sides of every run Landings are needed when connecting the deck to the patio or yard One run typically adds $1,500 to $3,500. Multiple runs can change the entire quote. 3. Railings Railing type is one of the biggest variables between two quotes for the same deck size. Cost depends on: Material choice: wood is the cheapest, cable and glass cost the most Total linear footage and required height per local code Anchoring method and fastener type used at each post Custom curves, tensioners, or premium hardware specified in the design Always ask for the railing spec before comparing quotes. 4. Footings Footings carry the full structural load of the deck. What drives cost: Soil type and bearing capacity at your specific site Local frost line depth determines how far piers must go Slope and drainage conditions requiring additional excavation or forming Code requirements tied directly to your deck’s height and size Shallow deck blocks are the cheapest. Poured concrete piers below the frost line cost more but provide long-term stability and reliably pass inspection. 5. Framing Framing is the skeleton on which everything else sits. If saving money is the goal, framing is not the place to cut corners. Cost factors for framing include: Joist, beam, and post sizing are determined by your deck’s span Many composite boards require specific joist spacing, and some layouts need tighter spacing than standard wood decking. Flashing and blocking must be installed correctly to prevent long-term water damage. Engineered beams specified for larger decks or heavier load requirements Cutting corners on framing is where decks fail structurally five to ten years later. 6. Demolition Removing an old deck adds both labor and disposal costs. Key variables: Condition of the existing structure, since rotted framing takes significantly longer Material types, such as wood, composite, concrete, and metal, are priced differently for disposal Whether hauling and dump fees are included in the quote or billed separately Yard access and protection are required to avoid damage during removal Always confirm the demo scope in writing before work starts. 7. Permits Many cities require permits for attached, elevated, or structurally significant decks, but rules vary by location. Check your city or county building department first; for example, this city deck permit page from Shoreview, Minnesota, shows the kind of local permit guidance homeowners may need to review. The process includes: Plan review and written approval are required before any construction begins Inspections at the framing stage and again at final completion Fees that vary by jurisdiction, deck size, height, and structural type Skipping permits creates liability, insurance, and resale problems. Ask upfront who pulls the permit, what inspections are required, and whether fees are included in the quote. What Homeowners Say About Real Deck Costs Homeowner threads make deck pricing feel more real than a cost calculator. In one Houzz discussion, a user asked people to share “where are you located, how big is your deck,” and what they spent, which matches how many homeowners price-check before calling contractors. Another user asked whether a simple 10×15 ground-level deck would cost “2k or 10k or more,” while a commenter said materials for a 10×10 deck were “around $1200” before labor. A bigger replacement thread shows why quotes can feel shocking. One homeowner broke down a deck quote at about “$160 a square foot” for a little over 400 sq ft. Another thread reported “$80 – $100 per sq ft” for a turnkey composite deck and porch, which proves why scope matters. These comments all point to the same lesson: forum prices help, but only when you check size, height, material, railing, demo, and labor. What to Ask Your Contractor Before Signing Before paying a deposit on any deck build, get clear answers to these five questions in writing. What exactly is included in this quote? Ask for an itemized breakdown of materials, labor, permits, demo, hauling, railings, stairs, and footings. Any item that isn’t listed isn’t included. What triggers a change order? Soft framing, poor soil, uneven ground, and rotted ledger boards are the most common reasons a fixed-price quote turns into a higher bill. Know the policy before work starts. Are you pulling the permit? If the answer is no or vague, that’s a red flag. Permitted work is inspected work. Uninspected decks have resale and liability implications. What is the framing material and spacing? Composite boards require tighter joist spacing than wood. If a contractor quotes composite boards for a wood-spaced frame, the boards will bow. What is your warranty, and who handles post-build issues? Workmanship warranties vary from 1 year to 5 years. Know who to call if a board lifts or a post shifts. What’s Negotiable and What Isn’t If you’re working toward a tighter number, some deck costs have flexibility, and some don’t. Knowing which is which before you start negotiating saves time and bad faith. Typically negotiable: Material grade (e.g., stepping down from capped composite to standard composite), railing style (wood instead of cable), deck size (reducing by 20 sq ft can save more than you’d expect), timing (off-season builds in late fall or winter often come in lower when contractors are less busy). Not negotiable: Footing depth required by code, permit filing, ledger attachment method, structural joist sizing for your span. A contractor who negotiates these items is cutting corners that show up in failed inspections or structural problems two to five years out. Why Online Deck Prices Are So Misleading A low forum price and a high contractor quote can both be real, but they may describe completely different projects. Forum posters sharing deck prices rarely include the full picture: whether they did the work themselves, whether permits were pulled, what the railing type was, whether they had to demo anything first, or what region they’re in. A 300 sq ft deck in rural Mississippi and a 300 sq ft deck in coastal Connecticut are not the same job. Houzz and Reddit comments are useful as sanity checks. One Houzz thread showed quotes ranging from around $80–$100 per square foot for turnkey composite and porch builds to roughly $160 per square foot for a composite deck on a complex property. Those are real numbers for real projects, but they’re not your numbers until you know the scope matches. Use online prices to flag outliers in your quotes. If you get three quotes and one is 40% lower than the others, ask what’s missing, not whether to take it. Frequently Asked Questions Is it cheaper to build a deck yourself or hire a contractor? DIY deck building can cost less upfront because you avoid labor charges. However, mistakes with footings, ledger attachment, framing, stairs, or permits can become expensive. A simple ground-level deck may suit DIY, but raised or attached decks are usually safer with a licensed contractor. Why is my deck quote much higher than online estimates? Online estimates often leave out stairs, railings, demolition, permits, hauling, difficult access, and upgraded materials. Your quote may also include code updates or structural repairs. Compare line items before deciding whether the price is too high. Can I lower my deck cost without cutting corners? Yes. You can reduce the size, choose pressure-treated wood, simplify the railing, avoid multiple stair runs, or build during a slower season. Do not cut costs on footings, ledger attachment, joist sizing, flashing, or permits. What should be included in a deck quote? A good deck quote should list materials, labor, deck size, railing type, stairs, footings, framing specs, permits, demolition, hauling, cleanup, payment schedule, warranty, and change-order rules. If those details are missing, ask for a revised written quote. Final Verdict So, how much does it cost to build a deck? The best answer comes from matching real quotes to the same scope, not from copying one forum number. A small wood platform can stay near the lower range, while a raised composite rebuild with stairs, railings, demo, and permits can cost far more. The labor cost per square foot to build a deck is the number I would check first because it reflects the work behind the bid. Use online prices as a rough reality check, then rely on written local quotes with the same scope. Before you sign, ask what is included, what is excluded, and how add-ons are billed. Then get at least two more quotes with the same scope to ensure the comparison is fair.
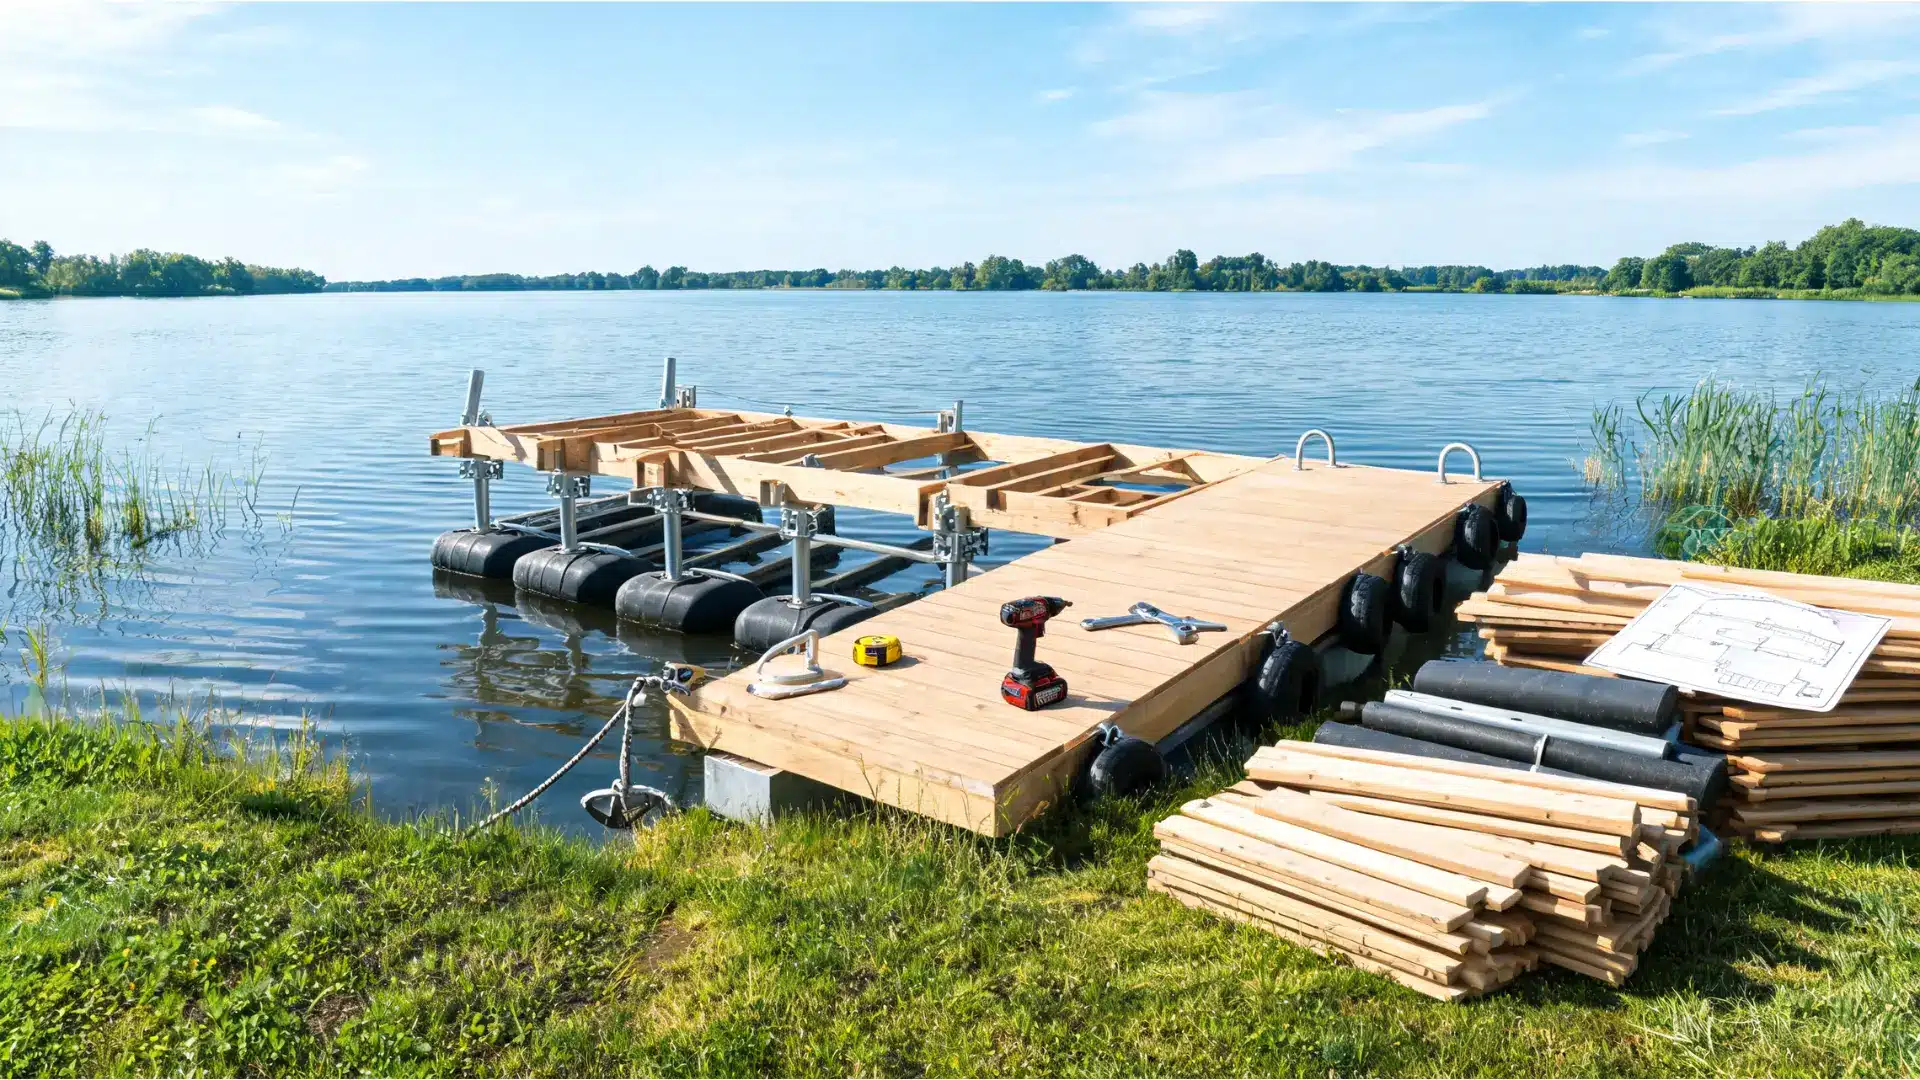
Cost Note: Figures in this article are estimates based on national averages. Actual costs vary significantly by region, contractor, materials, and project scope. Always get at least three quotes before committing to any project above $1,000. The first thing I evaluate on any dock project is what the water is doing two seasons after the build. Post rot. Fastener corrosion. Floats that have shifted under weight and never quite leveled out again. Pressure-treated pine posts driven into sandy lakebeds tend to wobble loose within three to five years if they weren’t set deep enough at the start, and most first-time builders don’t go deep enough because the soil feels firm at four feet. Go to six. Learning how to build a dock that lasts comes down to three decisions made before you touch a single board: what type of dock fits your water conditions, what materials will still be serviceable after two Wisconsin winters or a Florida hurricane season, and whether your posts, pipes, or floats are actually sized for the load you’re putting on them. Get those three right and the construction itself is straightforward. Project Type Pipe-leg fixed dock with wood frame and decking Difficulty 3/5 — manageable for two people with basic construction experience Time 1–2 weekends for a basic 8×16-foot section Cost Range $1,500–$4,000 DIY depending on size and materials Key Tools Drill/impact driver, level, string line, tape measure, saw, sledgehammer Permit Required? Almost always — check with your local municipality before starting Before diving into the build sequence, a quick note on permits: waterfront construction is one of the most regulated DIY categories in the US. The Army Corps of Engineers, your state’s environmental agency, and your local municipality may all have jurisdiction, depending on the type of water body. A dock built without the right permits can be ordered removed at your expense. Check before you buy lumber. Fixed Dock vs. Floating Dock: Which One Holds Up in Your Conditions The dock type that works best is determined entirely by your water — not your budget preference or what you saw on a lake house tour. Each type has a specific failure mode in the wrong conditions, and that’s what you need to weigh before committing. Dock Type Best Conditions What Fails After Two Seasons Estimated Cost (DIY, basic section) Fixed (post/pile) Calm water, stable water levels, firm sandy or clay lakebed Posts loosen in soft soil; ice heave lifts them in cold climates $2,000–$5,000+ Floating Variable water levels, deeper water, soft or muddy bottoms Under-sized anchors drag; floats rated for the wrong load list or bounce $1,500–$4,500 Pipe-leg Shallow water (under 5 ft), seasonal use, firm bottom Legs shift in sand over time; exposed to ice damage if left in $800–$2,500 Crib Heavy permanent use, high-traffic boat docks, stable water Expensive upfront; requires permits almost everywhere; not DIY-friendly $5,000–$20,000+ The pipe-leg dock is where most DIY beginners should start, it’s the most forgiving design for shallow-water installs, can be pulled out seasonally before ice sets in, and doesn’t require pile-driving equipment. That’s the build sequence this guide covers in detail. If your water runs deeper than five feet at the dock end or your levels fluctuate significantly by season, a floating dock is the smarter choice despite the added complexity of anchoring. Choosing Dock Materials That Actually Last Materials are where people cut corners and pay for it two winters later. The wrong lumber choice isn’t always obvious; a dock built with above-ground-rated pressure-treated lumber instead of ground-contact-rated wood might look fine for a couple of seasons before the rot sets in at the waterline. The right call depends on what part of the structure you’re building. Material Best Use Rough Cost Real-World Lifespan Ground-contact PT lumber (UC4B) Posts, joists, framing in or near water $0.80–$1.50/linear ft 20–30 years with maintenance Composite decking Walking surface — no splinters, no annual sealing $3–$7/linear ft 25–30 years, minimal upkeep Aluminum frame Saltwater or high-corrosion environments Higher upfront, very low maintenance 30+ years Galvanized hardware Freshwater docks — bolts, brackets, pipe clamps Standard cost 10–15 years before replacement Stainless steel hardware Saltwater or harsh-weather docks 2–3× the cost of galvanized 25+ years The one thing I’d tell anyone building their first dock: don’t put standard above-ground pressure-treated lumber into posts or framing that contacts the water or wet soil. You need UC4B ground-contact-rated lumber for anything below or at the waterline. The spec is printed on the tag at the lumber yard — check it before you load the truck. Pro Tip: Brush cut-end wood preservative on every board end immediately after cutting. Pressure treatment doesn’t penetrate the full thickness of the lumber — saw cuts expose untreated wood, and those exposed ends are where rot starts first. Planning the Dock Size and Location Walk your shoreline before you finalize anything. The best-looking dock location on paper is often the worst on the ground — soft mud, submerged rocks, exposed to the prevailing wind line, or sitting directly in the path of boat traffic. What you’re looking for is a spot with consistent water depth, firm bottom conditions, protected exposure, and clear access from land. Measure water depth at three points: at the shoreline, midway out, and where the dock will end. Do this at seasonal low water — the worst-case scenario. For a boat dock, you need at least 2.5 to 3 feet of clearance at the bow end at low water to avoid hull contact. A fishing or swimming dock has more flexibility in depth, but anything under 5 feet at the end point means a pipe-leg fixed design will work. Deeper than that, and you’re in floating dock territory. Keep the dock width practical. A walkway section needs to be at least 4 feet wide to move comfortably with a gear bag. A platform or boat dock end section works best at 8–10 feet wide. For a combined walkway-plus-platform layout, plan a T or L shape at the end rather than extending the full width from shore, it’s cheaper, structurally simpler, and gives better access on both sides of a moored boat. If your outdoor layout is still taking shape, it’s worth thinking about how the dock connects back to the rest of your waterfront space, including any deck structure near the shoreline. Step-by-Step Guide: Installing a Wood Dock with Pipe Legs Before you start the installation, make sure you have all the required hardware, tools, and safety gear ready. Having everything prepared in advance will make it easier to assemble the dock sections, install the pipe legs, level the structure, and secure the dock properly in the water. Tools and Materials Needed Before starting the dock build, gather the main tools, lumber, fasteners, and safety items. Having everything ready helps you work more safely and avoid stopping halfway through the frame setup. Saltwater splash-rated pressure-treated lumber Pressure-treated posts Crossmember boards Joists Blocking boards Standard deck boards Cut-end wood preservative Paintbrush for applying preservative Garden hose for water jetting posts Sledgehammer Sacrificial wood cap or steel plate for post tops String line for alignment Line level Tape measure Temporary construction screws Drill or impact driver 10-inch, 1/2-inch carriage bolts Lag bolts Ratchet strap Saw for cutting lumber Level Work gloves Safety glasses Helper for handling long posts and boards Optional: concrete form cylinders if setting posts in concrete After gathering these items, start by treating the cut board ends, setting the posts, checking alignment, and using temporary screws before final bolts. Step 1: Choose Saltwater-Rated Lumber Start with lumber that can handle outdoor moisture, splash exposure, and changing weather. Standard untreated boards are not a good choice for dock framing because they can rot, weaken, or absorb moisture too quickly. Use saltwater splash-rated lumber or properly pressure-treated boards designed for wet outdoor conditions. Keep cut-end wood preservative nearby while you work. Every time you cut a board, brush preservative onto the exposed end so water has a harder time entering the wood. Step 2: Set the Dock Posts in Place The dock posts form the foundation, so set them carefully. Use water pressure from a hose to loosen the soil around each post location. As the soil softens, twist the post back and forth while working it into the ground. Set each post deep enough to stay secure under weight, movement, and water pressure. Avoid striking the top too hard with a sledgehammer because this can split the wood. If heavy hammering is needed, use a protective cap or steel plate to protect the post top. Step 3: Keep the Posts Straight and Aligned As each post goes into place, check that it stays straight and plumb. Use string lines to keep the dock running in a clean path from the shoreline to the end of the structure. Check every post from more than one angle before moving forward. A crooked post may not seem like a big problem at first, but it can make crossmembers, joists, blocking, and deck boards harder to install later. Good alignment now saves time during framing. Step 4: Set the First Crossmember Height After the posts are set, attach the first crossmember at the planned height for the dock frame. This board becomes the reference point for the rest of the structure, so place it carefully. Use temporary screws first instead of permanent bolts. This lets you adjust the height before locking the frame into place. Once you know the crossmember is sitting at the right level, you can move forward with stronger hardware. Step 5: Double-Check Level Before Final Fastening Before adding lag bolts or carriage bolts, check the frame height in more than one way. A string level can help, but it should not be your only reference. Compare the frame against the waterline and use a reliable level where possible. Temporary screws make it easier to correct small mistakes. Do not fully fasten the frame until it is straight, level, and properly aligned with the rest of the dock layout. Step 6: Install Joists and Add Blocking Once the crossmembers are level, install the joists that will support the dock boards. Place crowned boards with the crown facing upward when possible so the boards settle more naturally under load. For longer spans, add blocking between joists. Blocking stiffens the frame, helps spread weight across the structure, and reduces movement underfoot. This step is especially useful on docks that will hold people, gear, coolers, or boat-related equipment. Step 7: Avoid Pulling Posts Loose Be careful when using straps or heavy force to adjust crowned, twisted, or uneven boards. Too much tension can pull a post upward or loosen it from the ground. If any post shifts during the build, stop and reset it before continuing. The posts need to remain deep, stable, and secure before crossmembers, joists, blocking, or decking are added. A loose post can affect the safety of the whole dock. Step 8: Use Temporary Screws Before Final Hardware Temporary construction screws are useful while adjusting the dock frame. Use them to hold boards in place while you check alignment, height, spacing, and level. Once the frame is straight and secure, reinforce or replace the temporary setup with permanent hardware. Use carriage bolts, lag bolts, washers, and exterior-rated fasteners that can handle moisture and movement. Do not rely on temporary screws as the final connection. Step 9: Plan the Final Dock Section Carefully Plan the final dock section with extra care, especially if it connects to a gangway, floating section, or deeper water. The end of a dock often handles more movement, walking weight, and possible uplift during storms or flooding. Deeper water may require longer posts, stronger bracing, better anchoring, or extra help during installation. Before framing this section, check the height, water depth, post stability, and how the final deck boards will meet the rest of the dock. Step 10: Prepare for Deck Boards and Final Fastening Before installing deck boards, inspect the full frame. Check that the posts, crossmembers, joists, blocking, and long board joints are secure. Look closely at corners and any areas that may need extra bracing. Once the frame feels firm and properly aligned, add the final bolts, lag screws, washers, and exterior-rated fasteners. After that, install the deck boards with proper spacing for drainage and expansion. Keep the surface even, secure, and safe for walking. This creates a stronger walking surface and helps reduce movement in the finished docks. What Fails Two Winters Later The failure modes I see most often on fixed docks built without enough planning are predictable: post rot at the waterline (where wet soil meets air), fastener corrosion that works loose before the wood fails, and ice heave in northern climates that lifts posts out of the ground over successive freeze-thaw cycles. If you’re in a climate that gets sustained ice cover, your fixed dock needs to come out of the water each fall — or be designed with ice-rated crib foundations, which is a different project altogether. A pipe-leg dock is the right choice specifically because the pipes and frame can be removed seasonally. The wood frame stores under cover; the pipes stay in the ground or get pulled depending on how deep the frost line runs in your area. Floating docks have their own failure modes: under-sized anchors that drag in storms, floats rated for a lower load than what’s actually put on them, and hinge connections between sections that corrode and seize. Size anchors to 1.5× the expected wind and wave load. Check float ratings before you buy — most residential dock floats are rated between 500 and 1,500 pounds per float. Know your deck area and expected load before ordering. Cost Breakdown: Building a Basic Dock Line Item Low End High End What Drives Variation Lumber (frame + posts) $400 $1,200 Size of dock, lumber grade, regional pricing Decking material $250 $900 Composite vs. PT wood, deck area Hardware (bolts, brackets, fasteners) $150 $400 Stainless vs. galvanized, connection count Pipe or post material $100 $350 Pipe diameter, count, and depth Floats (floating dock only) $200 $600 Float capacity, number of sections Anchors and chain (floating dock only) $100 $400 Anchor type, water depth, chain length Permit fees $50 $500+ State and local jurisdiction requirements Tools and consumables $100 $300 What you already own Total (DIY, no labor) $1,350 $4,150 Size, materials, and location are the main levers Cost estimates based on national average lumber and hardware pricing, 2025. Verify current material costs locally before budgeting — lumber prices shift significantly by region and season. The biggest variable most people underestimate is hardware. Stainless fasteners cost two to three times what galvanized costs, but in a saltwater or high-humidity environment, they’re not optional — they’re the difference between a dock that’s structurally sound in year ten and one that has loose connections you can’t tighten because the bolts are corroded solid. If you’re building in a freshwater lake in a moderate climate, galvanized hardware is fine. Coastal or Great Lakes builds warrant stainless throughout. For projects near the water, the structural framing considerations are similar to what goes into a well-built outdoor pergola; material choice at the start determines the maintenance burden years later. Dock Maintenance After the Build Inspect the dock twice a year — once in spring before it goes back into service, once in fall before it comes out or winter sets in. The spring check should cover post movement, fastener tightness, decking surface condition, and any float or anchor shifts. The fall check is primarily about what the summer season has done — loose boards from heavy use, weathered sealant on wood decking, and any hardware that’s showing early corrosion. Clean algae off the deck surface before it builds up. Algae on composite or wood decking turns slippery within days of the first warm spell, and that’s a safety issue, not just an aesthetic one. A stiff brush and a diluted deck cleaner appropriate for your decking material handle most buildup without running harsh chemicals into the water. Wooden dock surfaces may need sealing or staining every two to three years depending on sun and water exposure. Check the manufacturer’s recommendation for your specific lumber or composite product. Any coating you apply near the water should be labeled safe for aquatic environments. Common Mistakes That Cost Money Later Skipping the permit. Unpermitted docks get ordered removed. The cost of removal exceeds the cost of the permit by a significant margin. Using above-ground rated lumber in ground-contact locations. Check the lumber tag for UC4B before buying posts or framing that will touch soil or water. Under-sizing posts or anchors. A post driven 3 feet into sand isn’t a post — it’s a stake. Go deeper or change your foundation approach. Ignoring ice. In any climate with sustained freeze, fixed docks need to come out in fall. If they don’t, ice heave will move the posts. Tight-spacing deck boards. No gap means no drainage, and standing water accelerates rot even in treated lumber. Using indoor or standard exterior hardware. Marine environments are hard on metal. Use galvanized or stainless throughout — no exceptions at the waterline. Building cleats into weak framing. A cleat handles serious lateral load when a boat is tied up in wind. Back it with solid blocking and use lag bolts into the main frame. Frequently Asked Questions About Building a Dock These are the questions that tend to come up once the permit is approved and the lumber is on site — the ones that don’t show up in the planning guides. How long does it take to build a dock by yourself? A basic pipe-leg dock section (8×16 feet) takes two people one to two weekends. Solo builds take longer and introduce safety issues when handling long posts and heavy frame sections near water. Two people isn’t optional for the post-setting step. What wood is best for dock framing? UC4B ground-contact pressure-treated lumber — typically Southern Yellow Pine — is the standard for framing. For decking, composite or UC4A treated boards are the practical choice. Cedar and tropical hardwoods work but cost significantly more per board foot. Do I need a permit to build a dock on my own lake property? Almost certainly yes. Waterfront construction triggers federal, state, and local jurisdiction in most US states. Contact your state environmental agency and local building department before starting. The answer varies significantly by state, water body type, and dock size. How deep should dock posts be set? At minimum, one-third of the post length should be below the lakebed surface. In sandy or soft soil, go deeper — 5 to 6 feet of depth is not excessive for posts supporting a permanent structure. Shallower than that and you’re relying on the soil to do work it can’t sustain under load and wave action. What is the best dock decking for bare feet? Composite decking with a textured surface is the best choice for comfort and safety. It doesn’t splinter, doesn’t require annual sealing, and stays cooler than dark-colored wood in direct sun. Look for products specifically rated for wet-environment use. Can I build a dock in winter? In theory, yes. In practice, frozen ground, icy water surfaces, and cold-weather lumber issues make winter builds impractical in most northern US climates. Spring — once water levels stabilize from snowmelt — is the best window for post-setting and installation. How do I stop my dock from wobbling? Wobble almost always comes from one of three sources: posts not set deep enough, inadequate cross-bracing in the frame, or hardware that’s loosened over time. Check post depth first. Add diagonal blocking between joists. Then go over every bolt with a wrench before assuming the structure itself needs rebuilding. How much does a contractor charge to build a dock? Professional dock construction typically runs $150–$300 per linear foot installed, not counting permit fees or specialty hardware. A 30-foot dock with a platform end runs $6,000–$12,000 or more with labor. DIY saves significantly but only if you have the right tools and can handle the physical work involved. Final Verdict Creating a safe and durable waterfront structure starts with good planning and smart decisions. I’ve found that success comes from understanding your site, choosing the right dock type, following local rules, and using materials built to handle water and weather. When you learn how to build a dock, each step matters, from measuring depth and building a strong frame to adding secure supports, decking, and safety features. These details help you avoid costly mistakes and create a dock that works well for years. With the right approach, you can build with more confidence and get better results. Have questions or tips of your own? Share your thoughts below and check out my related dock-building guides. Sources:U.S. Army Corps of Engineers, “Permits for Work in Waterways.” https://www.usace.army.mil/American Wood Protection Association, “Treated Wood for Marine Use.” 2024. https://www.awpa.comAngi/HomeAdvisor, “Dock Building Cost Estimates.” 2024. https://www.angi.com
A good home update should solve a real problem, not create a bigger one. This list of diy home projects and home diy projects helps you choose work by Estimated Cost, skill, and space, so the next step feels clear. Some ideas take less than an hour. Others need a calm weekend and a better plan. My rule is simple: start with the thing that bothers you most, such as poor lighting, cluttered counters, loose hardware, or worn finishes. Pick one task, gather supplies, and finish it well. You get a cleaner, safer, more useful space without taking on more than your budget or schedule allows, right now, inside your own home. Cost Note: All cost ranges below reflect supply costs only, not tool rentals or contractor labor. Projects marked Advanced often benefit from a second pair of hands. Always get at least three quotes before hiring out any work above $1,000. Types of DIY Home Projects to Compare Before You Start Before you choose a project, it helps to know what kind of change your home needs. Some updates fix small daily problems, while others improve style, storage, outdoor use, or long-term function. Use this table to compare the main project types before buying supplies or setting aside a weekend. Project type Best for Typical Estimated Cost range Skill level Small repairs and maintenance Fixing daily irritations, worn spots, odors, loose hardware, and basic upkeep $0–$100 Beginner Room updates Making a room feel cleaner, more finished, or less dated $30–$500 Beginner to advanced Storage fixes and larger weekend builds Reducing clutter, adding hidden storage, or improving busy spaces $10–$1,000 Beginner to advanced Outdoor work Improving curb appeal, garden areas, patios, porches, and exterior function $20–$500 Beginner to intermediate Estimated Cost means the rough supply range, not tool rentals or pro labor. Skill Level shows how much measuring, cutting, drilling, prep, or help the task may need. Best Fit indicates whether the project works best indoors, outdoors, or in either setting. Before sanding or disturbing old paint, check the EPA’s lead-safe renovations for DIYers , especially if your home was built before 1978. Start Small: Home DIY Projects That Fix Daily Irritations Best for quick wins: these beginner-friendly updates help when a room feels messy, worn, or harder to use than it should. My pick is to start with the item you notice every morning or every night. 1. Deep Clean the Dishwasher and Disposal Clean the filter, gasket, spray arm, and disposal flap, then run a hot vinegar cycle. This small kitchen maintenance task helps with odors, cloudy dishes, and slow draining. Keep vinegar, baking soda, a cloth, and an old toothbrush nearby so the job stays simple and quick for my monthly reset. Estimated Cost: $0-$20| Skill Level: Beginner |Best Fit: Indoor 2. Patch Small Wall Holes Fill nail holes, anchor marks, and small dents with spackle. Sand lightly, then add matching paint once the patch dries. This wall repair is useful before painting, moving furniture, or hanging new art. My tip is to keep leftover paint labeled by room in my kit for fast fixes later. Estimated Cost: $5-$25| Skill Level: Beginner| Best Fit: Indoor 3. Refresh Sink or Tub Caulk Cut out old caulk, clean the seam, let it dry, then apply a fresh line. This bathroom repair helps seal gaps around sinks and tubs. If water is leaking behind the wall or beneath the fixture, pause the work and fix the leak before adding caulk to ensure a lasting seal. Estimated Cost: $10-$30| Skill Level: Beginner| Best Fit: Indoor 4. Change Cabinet Knobs or Pulls Swap dated knobs or pulls on cabinets, vanities, dressers, or built-ins. Measure hole spacing before buying new hardware. This budget update can make a kitchen or bath feel cleaner fast. Keep old screws and handles in a labeled bag, especially if the home is rented for a later swap back. Estimated Cost: $15-$75| Skill Level: Beginner| Best Fit: Indoor 5. Add Door and Entry Hooks Install hooks where bags, coats, towels, keys, hats, or leashes usually land. This entry storage fix works best when it matches real habits. Use wall anchors when studs are not available. Mount a lower row for kids so cleanup becomes easier for the whole family at home every day, too. Estimated Cost: $10-$40| Skill Level: Beginner| Best Fit: Indoor 6. Add Drawer Dividers Use dividers for utensils, makeup, tools, office supplies, or junk drawers. Measure width, length, and depth before buying. This drawer organization idea works when each section has one job. My rule is simple: if the item has no clear slot, it soon becomes clutter again inside the drawer. Estimated Cost: $15-$60| Skill Level: Beginner| Best Fit: Indoor 7. Replace a Shower Head Choose a fixed, rain, or handheld model based on how the shower gets used. Wrap threads with plumber’s tape, hand-tighten, then test for drips. This bathroom upgrade can quickly improve comfort. Avoid forcing the connection because overtightening can crack parts or cause small leaks after the first full shower test. Estimated Cost: $25-$100| Skill Level: Beginner| Best Fit: Indoor 8. Add Battery Under-Cabinet Lights Stick rechargeable strips or puck lights under kitchen cabinets, inside closets, or near pantry shelves. Place them near the front edge so light falls on the work surface. This lighting update requires no hardwiring and helps make dark corners feel safer and easier to use at night, without calling an electrician. Estimated Cost: $25-$80| Skill Level: Beginner| Best Fit: Indoor Room Style Fixes With a Clear Payoff Best for visible change, these interior room updates work well when the space functions fine but looks flat, dated, or unfinished. Use them after the small repairs are done. 9. Paint One Accent Wall Choose the wall behind a bed, sofa, desk, or dining table. Test paint in daylight and lamp light before buying a full gallon. This paint project feels manageable because only one wall changes. Tape carefully, roll two coats, and let the color dry before moving furniture back into place. Estimated Cost: $30-$100| Skill Level: Beginner| Best Fit: Indoor 10. Add Peel-and-Stick Wallpaper in a Small Spot Use a closet wall, a shelf back, a powder room wall, or a laundry corner. Clean the surface, mark a level line, and smooth bubbles as you go. This removable wallpaper idea works best in small areas where the pattern adds interest without taking over the whole room or making removal harder later on. Estimated Cost: $40-$150| Skill Level: Beginner| Best Fit: Indoor 11. Upgrade a Bathroom Mirror Swap a flat mirror for a framed one, add a frame kit, or build a simple wood frame around it. Measure width, height, faucet clearance, and light clearance first. This bathroom update can make the room feel more finished without replacing tile, flooring, or the vanity, which keeps Estimated Costs easier to control. Estimated Cost: $50-$200| Skill Level: Beginner to Intermediate| Best Fit: Indoor 12. Paint a Bathroom Vanity Remove doors, clean grease, sand lightly, prime, and use cabinet paint. Let the finish cure before heavy use. This vanity makeover is cheaper than replacement and works well with new hardware. My tip is to label hinges and doors, so reassembly stays simple when the final coat is fully dry. Estimated Cost: $75-$200| Skill Level: Intermediate| Best Fit: Indoor 13. Paint Interior Floor Tile Use this in powder rooms, laundry rooms, or low-moisture areas. Clean well, scuff the tile, prime, paint, add a stencil if desired, then seal. This floor paint project needs patience. Avoid shower floors and wet zones, as standing water can break down the finish, even after all coats have fully dried. Estimated Cost: $100-$250| Skill Level: Intermediate| Best Fit: Indoor 14. Add Wall Frame Molding Plan the layout with painter’s tape before cutting the trim. Keep spacing even, attach molding, fill nail holes, caulk seams, and paint. This trim project suits dining rooms, bedrooms, and halls. Measure twice before each cut, since small errors show up fast in repeated boxes across each wall section, and later overall. Estimated Cost: $100-$300| Skill Level: Intermediate| Best Fit: Indoor 15. Install Floating Shelves Mark studs, check weight limits, and choose shelf depth before drilling. Floating shelves work for dishes, towels, books, office items, or plants. This wall storage idea looks best when heavy items sit low and daily items stay easy to reach without crowding the shelf for a cleaner daily setup overall. Estimated Cost: $75-$250| Skill Level: Intermediate| Best Fit: Indoor 16. Create a Gallery Wall With Paper Templates Trace the frames on paper, tape the layout to the wall, then adjust the spacing before drilling holes. Keep one center line or edge consistent. This wall art layout method saves time and reduces the number of extra nail marks. Mix frame sizes, but keep colors consistent for a cohesive look from across the room at home. Estimated Cost: $75-$250| Skill Level: Intermediate| Best Fit: Indoor 17. Make a Fabric Headboard Cut plywood to size, add foam, wrap batting, then staple fabric tightly on the back. Mount it to the bed frame or wall. This bedroom project adds softness behind the bed. Use washable fabric if kids, pets, or guests will lean against it often at the end of the day. If you want to know more about different builds before committing to fabric, there are several upholstered and wood headboard styles worth comparing first. Estimated Cost: $100-$300| Skill Level: Intermediate| Best Fit: Indoor 18. Add Peel-and-Stick Backsplash Clean the wall, plan the first row, and cut carefully around outlets. Use a heat-safe product near a stove and seal edges near water. This kitchen backsplash project provides a cleaner cooking zone without grout, tile saws, or a long work schedule, and makes cleanup easier after dinner. Estimated Cost: $75-$250| Skill Level: Intermediate| Best Fit: Indoor 19. Add a Wood Slat Feature Wall Mark studs, set even spacing, cut slats, and finish with paint or stain. Limit the work to one wall behind a bed, desk, or TV. This wood wall idea has a strong look, so careful spacing matters more than adding extra pieces. Sketch placement in my room notes first, then carefully. Estimated Cost: $150-$500| Skill Level: Intermediate to Advanced| Best Fit: Indoor 20. Replace a Ceiling Fan or Light Fixture Pick the right size for the room and ceiling height, then turn off the power at the breaker. This fixture update can change both the light and the airflow in one step. If the wiring looks old, crowded, or unclear, hire a licensed electrician instead of guessing, even for a quick room change today. For electrical work, review the NFPA electrical safety checklist, then hire a licensed pro when the work goes past a simple fixture swap. A good project should match your tools, budget, time, and comfort level before it starts. Estimated Cost: $100-$400| Skill Level: Intermediate| Best Fit: Indoor 21. Add Shiplap to a Small Wall Use a powder room, mudroom, or bed wall for a contained job. Mark studs, keep rows level, fill seams, caulk edges, and paint. This wall paneling project works best when you plan outlet cuts before the first board goes up, so the cuts stay clean and the final wall sits flat. A shiplap half wall is also worth considering if a full wall feels like too much for a first attempt. Estimated Cost: $150-$500| Skill Level: Intermediate to Advanced| Best Fit: Indoor Storage and Function Fixes for Busy Spaces Best for daily order: these storage ideas suit rooms where clutter keeps coming back. My favorite ones give every item a clear place, then make that place easy to reach. 22. Install a Closet System Measure the closet before buying shelves, rods, drawers, or bins. Sort by item type, then keep daily pieces at eye level. This closet organization project works when the layout matches how you get dressed, not how the store displays looks. Check your own morning routine before you buy anything new. Estimated Cost: $100-$400| Skill Level: Intermediate| Best Fit: Indoor 23. Add Pull-Out Trash and Recycling Bins Measure cabinet width, depth, and height before buying a slide kit. A pull-out bin clears floor space and hides waste behind a door. This kitchen storage fix works best near the sink or prep area, where trash gets used most. Busy nights feel easier when the floor stays clean, are too. Estimated Cost: $75-$250| Skill Level: Intermediate| Best Fit: Indoor 24. Set Up Pantry Zones Group snacks, breakfast, baking, cans, grains, and backstock in clear zones. Use bins and labels only where they help. This pantry organization plan should match how you cook and shop, so daily items stay easy to grab. Place heavy cans low and snacks where kids can reach safely without climbing. Estimated Cost: $50-$250| Skill Level: Beginner| Best Fit: Indoor 25. Build a Laundry Folding Shelf Add a wood shelf above front-load machines or along an open wall. Anchor brackets into studs and keep baskets nearby. This laundry room storage idea gives clean clothes a landing spot, helping prevent top piles from piling up on beds or chairs. Wash days feel calmer in my house each week. Estimated Cost: $75-$250| Skill Level: Intermediate| Best Fit: Indoor 26. Add a Peg Rail in an Entry A peg rail handles bags, jackets, hats, umbrellas, and keys in one clean line. Mount it level and choose a finish that matches nearby trim. This entryway storage fix feels more planned than random hooks and still stays easy to use. It helps during school mornings, workdays, and rainy afternoons. Estimated Cost: $50-$200| Skill Level: Beginner to Intermediate| Best Fit: Indoor 27. Build a Mudroom Bench With Cubbies A mudroom bench works best in an entry where shoes, bags, coats, and sports gear already pile up. Plan the bench around those habits first, then decide how many cubbies, hooks, baskets, and shelves the space can actually hold. Before cutting wood, measure the wall, baseboards, door swing, and walking path. The bench should give people a place to sit without blocking the entry. I would use durable paint or a wipeable finish here, because this area takes more scuffs, dirt, and daily use than a decorative built-in. Estimated Cost: $250–$800| Skill Level: Advanced| Best Fit: Indoor 28. Add a Garage Tool Wall Use pegboard, French cleats, shelves, hooks, bins, and labels. Mount heavy items into studs and keep sharp tools high. This garage organization project saves time because you can see tools at a glance instead of digging through boxes. Repairs can start faster when tools stay visible in my garage today. Estimated Cost: $100-$500| Skill Level: Intermediate| Best Fit: Both 29. Build a Window Seat With Storage Use a bedroom, playroom, or reading corner. Plan seat depth, cushion height, hinged lids, drawers, and trim before building. This built-in storage project adds seating and hidden storage, so toys, blankets, or books can stay close yet be covered. The room gains storage without adding extra bins or baskets nearby, too. Estimated Cost: $250-$900| Skill Level: Advanced| Best Fit: Indoor 30. Create Toy Rotation Storage Store extra toys in labeled bins and keep a smaller set out. Rotate on a simple schedule that suits your family. This toy storage method cuts visible clutter without buying more furniture, and it helps kids notice what they already have. Kids may ask for new things less often, too. Estimated Cost: $50-$250| Skill Level: Beginner| Best Fit: Indoor 31. Add Over-Toilet Storage Use shelves or a slim cabinet for towels, paper goods, and bath supplies. Anchor tall units to the wall and keep heavy items low. This small bathroom storage idea uses vertical space when a room has no linen closet. Daily items stay within reach after a morning shower, too. Estimated Cost: $50-$250| Skill Level: Beginner to Intermediate| Best Fit: Indoor 32. Build a Breakfast Nook Bench Use a kitchen corner or dining wall. Plan seat height, depth, storage lids, cushion thickness, and table clearance. This banquette seating project adds extra seats and hidden storage, but it requires careful measuring to ensure people can sit comfortably. Good spacing prevents knee bumps at breakfast at home each morning, too. Estimated Cost: $300-$1,000| Skill Level: Advanced| Best Fit: Indoor Outdoor Refreshes and Larger Weekend Builds Best for curb appeal and outdoor use, these weekend builds work for porches, patios, gardens, garages, and yards. Check the weather, drying time, and local rules before starting. 33. Paint the Front Door Clean, sand, prime, and use exterior paint made for doors. Remove the hardware if possible, and start early so the door dries before the night air sets in. This curb-appeal task gives the entry a cleaner look and uses a modest supply list. It is my favorite low-Estimated Cost exterior fix for my home this season. Estimated Cost: $40-$150| Skill Level: Beginner| Best Fit: Outdoor 34. Make a Modern House Number Sign Use sealed wood, metal numbers, and sturdy mounting hardware. Place the sign where it is clear from the street. This front entry update helps guests, drivers, and emergency crews find the house more quickly, making it both useful and neat. No one has to search for the entrance twice. Estimated Cost: $25-$100| Skill Level: Beginner| Best Fit: Outdoor 35. Power Wash a Walkway or Patio Clean concrete, pavers, porch steps, or patio surfaces with the right pressure setting. Test a hidden spot first. This outdoor cleaning task removes dirt quickly, but excessive force can damage wood, soft stone, loose mortar, or old surfaces. Move slowly and protect nearby plants before starting outside. Estimated Cost: $0-$150| Skill Level: Beginner| Best Fit: Outdoor 36. Build a Simple Window Box Build a box with drainage holes, add a liner, and mount it with strong brackets. Fill it with plants that match the sun level. This window box project works on front windows, sheds, garages, fences, or balcony rails. It uses fewer tools than a full garden build requires outside, too. Estimated Cost: $50-$150| Skill Level: Beginner to Intermediate| Best Fit: Outdoor 37. Stain a Small Deck or Porch Clean the wood, let it dry fully, sand rough spots, then stain in mild weather. Do not start before rain or high heat. This deck-care task helps keep wood looking cleaner and lasting longer with consistent seasonal upkeep. Wait for dry weather so the finish cures well afterward each year. The same prep and grain-reading rules apply if you are staining wood furniture or railings in the same session. Estimated Cost: $100-$400| Skill Level: Intermediate| Best Fit: Outdoor 38. Build a Raised Garden Bed Use lumber, metal kits, or blocks to make a simple growing bed. Keep the width easy to reach from both sides. This garden project suits vegetables, herbs, or flowers, and it keeps soil contained in small yards. You can grow more without tearing up extra lawn at home this season. Estimated Cost: $75-$300| Skill Level: Intermediate| Best Fit: Outdoor 39. Hang Outdoor String Lights Use outdoor-rated lights, guide wire, hooks, and safe outlets. Keep cords away from walking paths and water. This patio lighting project makes outdoor seating easier to use after sunset. Hire an electrician for hardwired power or new outlets. A safe setup matters most during regular use outdoors on dry nights. Estimated Cost: $50-$250| Skill Level: Intermediate| Best Fit: Outdoor Common Mistakes to Avoid With DIY Home Projects Even simple diy home projects can go wrong when you rush, skip prep, or choose the wrong task for your space. Use these reminders before buying supplies or starting work. Starting without first checking the estimated cost, time, tools, and skill level. Skipping surface prep before painting, caulking, staining, or peel-and-stick work. Picking a project because it looks nice, not because it fixes a real problem. Buying supplies before measuring the space twice. Ignoring safety steps for wiring, lead paint, ladders, sharp tools, or heavy materials. Taking on advanced builds without a helper, a plan, or a clear stopping point. Using cheap hardware where weight, moisture, or daily use matters. Forgetting drying, curing, or setup time before using the finished space. Relying on trend-based choices that may not Best Fit your home or habits. Leaving small repairs unfinished, which makes the room feel messier. A good project should make your home easier to use, not harder to manage. Start small, finish cleanly, and save larger work for days when you have enough time. Frequently Asked Questions How do I know if a project needs a permit? Check your local building department before changing structure, plumbing, wiring, windows, decks, fences, or exterior openings. Permit rules vary by city and project type. A quick check can prevent fines, failed inspections, or problems when selling the home later. What should renters ask before starting with updates? Renters should ask what changes are allowed, what needs written approval, and what must be removed before moving out. Paint, mounted shelves, lighting swaps, adhesive products, and outdoor updates can all cause issues if the lease does not allow them. Should I photograph before starting a DIY project? Take photos of the entire space, close-ups of damage, measurements, product labels, hardware placement, and anything you remove. These photos help with reassembly, returns, touch-ups, and showing the original condition if a repair or replacement becomes more complicated. How do I stop a small DIY from turning into a bigger job? Set a clear stopping point before you begin. Decide what you are fixing and what you are leaving alone. Keep supplies in one area, clean as you go, and avoid starting another update until the first one is fully finished. Closing Thoughts The best diy home projects and home diy projects are not always the largest ones. A small finished task can change how your home works each day, especially when it clears clutter, fixes a worn spot, adds safer lighting, or makes a busy room easier to use. My advice is to pick one space, one problem, and one budget before buying supplies. Start with the idea that feels useful right now, then build a skill one project at a time. When each task has a clear Estimated Cost, skill level, and Best Fit, you can plan with less stress and finish with more confidence without turning every free hour into extra work again. Drop a comment below if you have any further questions.
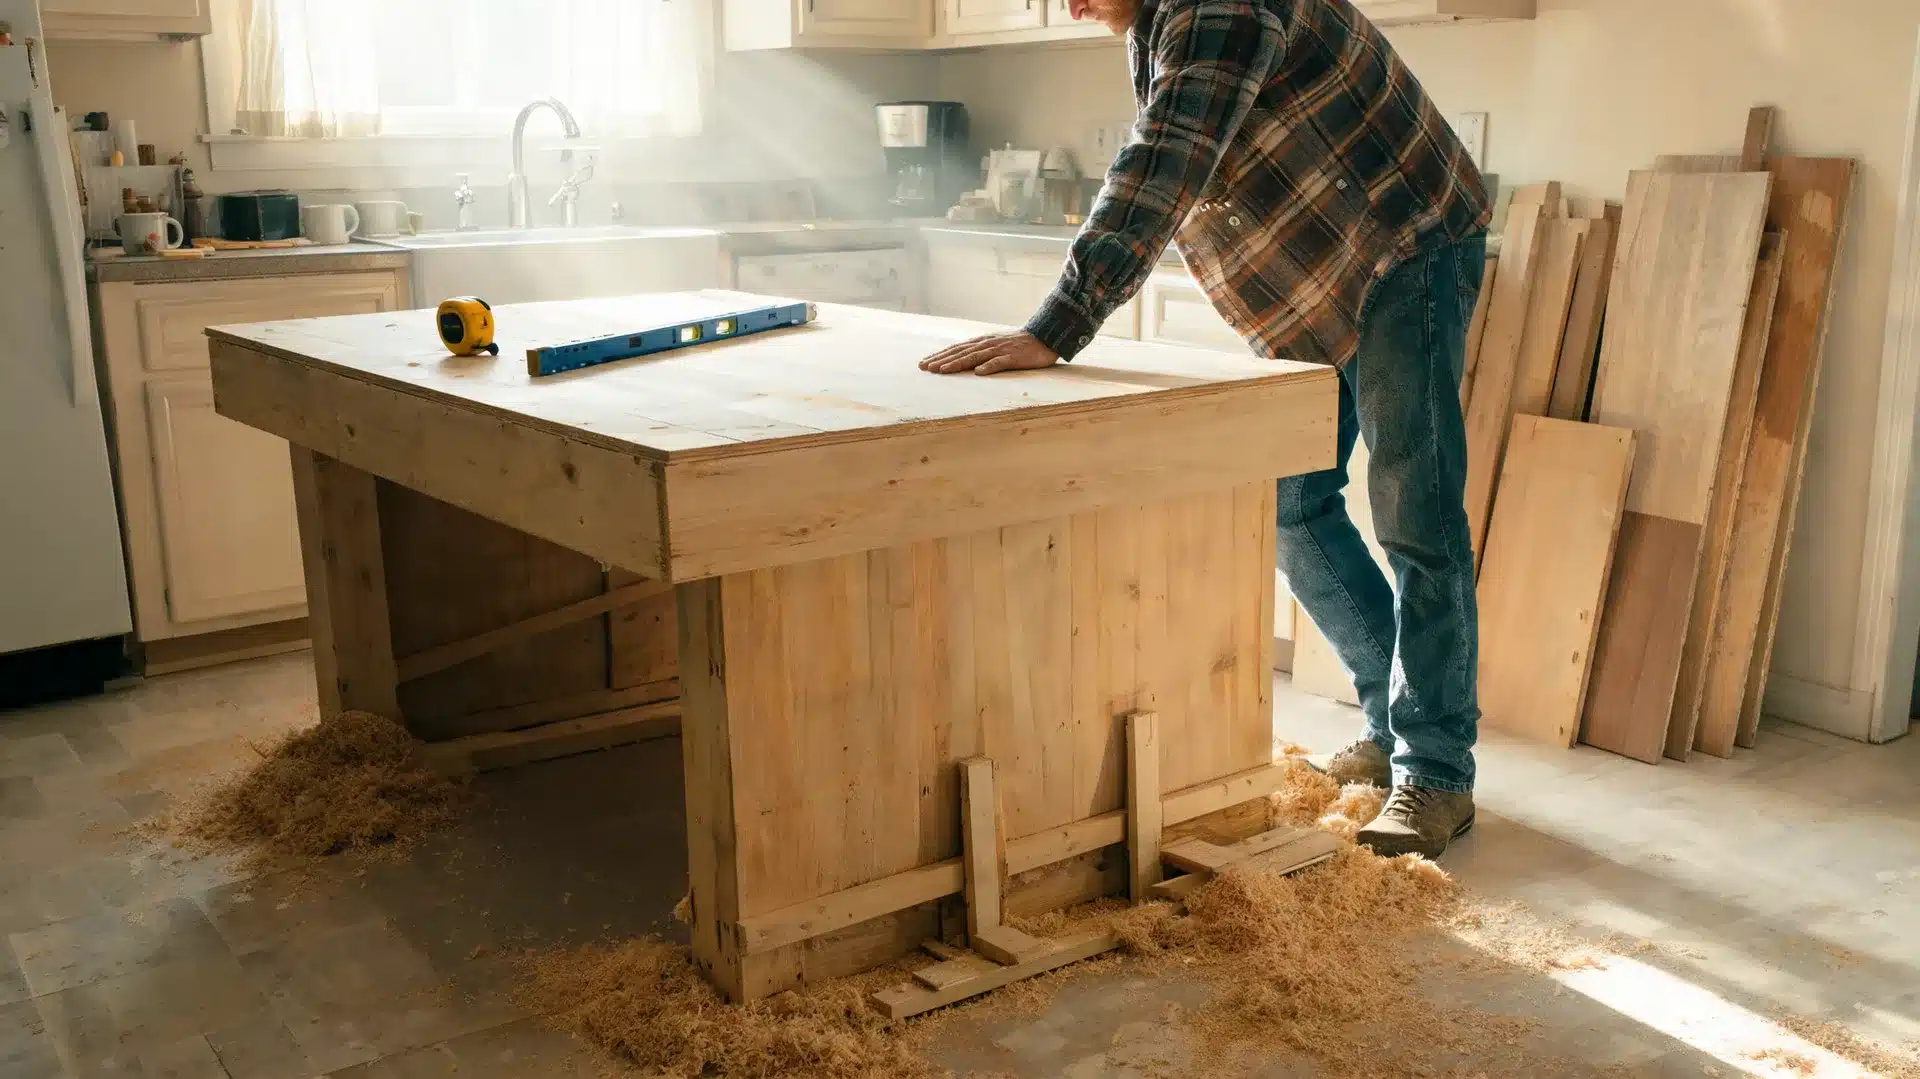
Need more counter space without paying for a full kitchen remodel? I get why a kitchen island feels like the perfect fix, but the build can seem confusing once you start looking at cabinets, lumber, countertops, and clearances. A diy kitchen island can be simple if you choose the right method before buying anything. You might use stock cabinets, a wood frame, IKEA cabinets, a movable base, or even a solid secondhand dresser. This guide helps you compare each option, choose the right size, gather materials, follow safe build steps, and avoid mistakes that make an island wobbly, crowded, or hard to use. Can You Actually Build a Kitchen Island Yourself? Yes, you can build a DIY kitchen island yourself without hiring a contractor or owning a workshop full of tools. The real question is which method fits your skill level, space, and budget — and whether you pick that method before you spend a dollar. I like this project because you can keep it simple or build it out over time. Stock cabinets, a wood frame, IKEA cabinets, or even a solid secondhand dresser all work. What changes is the build order, the tools you need, and how much a mistake costs you mid-project. A basic storage island is a weekend build. One with a sink, cooktop, wiring, or a heavy stone top is a different project entirely. This guide walks through the version that is genuinely within reach: a level base, a rigid structure, a countertop that is properly supported, and a finished result you will actually use. Difficulty 2/5 (stock cabinets or repurposed furniture) to 3/5 (wood frame) Time One weekend for most builds Cost $50 (repurposed furniture) to $4,000 (stock cabinet build with stone top) Tools Needed Drill, level, clamps, circular saw or jigsaw, measuring tape, shims Skill Required Beginner to intermediate, depending on the method Is a DIY Kitchen Island the Right Project for You? The mistake I made on my first build was not picking the wrong method. It was not known ahead of time where the method would break down. Stock cabinet islands look simple until you are shimming a crooked floor at 11 pm and questioning every decision. Here is the honest scope check before you commit. This stays in DIY territory when the island adds prep or counter space, drawers or cabinet storage, seating or a breakfast bar, a butcher block or laminate top, or casters for a movable setup. The project moves out of DIY territory once a sink, cooktop, gas line, or heavy stone countertop enters the plan. Outlets on a permanent island fall under local electrical code in most US states and need a licensed electrician for installation. If your island stays within that list, you have a project that is well within reach on a weekend. Safety Note: Outlets on a permanently installed kitchen island require a licensed electrician and a permit in most US jurisdictions. Check your local building department requirements before starting any permanent installation. Choose Your Build Method Before You Buy Anything Most people pick a build method based on a photo. The real question is which method holds up given your floor space, storage needs, skill level, and tools. Cabinets carry the load through box frames. Wood frames carry it through legs and rails. Repurposed furniture needs reinforcement before it can handle countertop weight. Getting this right upfront saves you from a wobbly island six months in. Build Method Best For Skill Level Typical Cost (USD) Stock cabinets Storage-heavy builds Beginner to Intermediate $600 – $4,000 Wood frame Open, table-style islands Intermediate $150 – $1,200 Repurposed furniture Fast, budget builds Beginner $50 – $600 IKEA cabinets Modular, customizable islands Beginner to Intermediate $300 – $1,800 Movable island Small kitchens, renters Beginner $100 – $800 Once the method is clear, the materials follow naturally. The next section covers what each build requires from the first cut to the last check before you load the drawers. How to Build a Kitchen Island: Step-by-Step by Method The method determines the build order. Here is how each build moves from start to finished island, with a check at each critical point before moving forward. Pre-Use Safety Checklist: Push firmly from each corner and check the level across the countertop in both directions. Sit on any seating overhang or apply equivalent weight before using. Open every drawer and door fully. Confirm nothing contacts the stove, refrigerator, or dishwasher door. If outlets are planned, hire a licensed electrician and pull the required permit. Method 1: Stock Cabinet Island Materials you need: Base cabinets, 2x4s for the toe-kick frame, side panels, back panels, trim, molding, countertop, cabinet screws, corner brackets, shims, glue, nails, and a butcher block or laminate top. Step 1: Confirm Dimensions. Measure your kitchen floor space, then compare it with the cabinet sizes before you order anything. Mark the island footprint with painter’s tape, open nearby doors and drawers, and make sure the planned island leaves enough clearance for walking and appliance access. Step 2: Build the Base Frame. Build a 2×4 toe-kick frame that matches the cabinet layout. Square the corners, check the level, and shim where needed. Once everything sits flat, fasten the frame securely to the floor so the island has a stable base. Step 3: Set the Cabinets. Place the base cabinets on the toe-kick frame and check that each one sits level. Clamp the cabinet boxes together before drilling. Keep the fronts flush, line up the tops, and adjust with shims before fastening anything permanently. Step 4: Fasten Cabinets Together. Drive screws through the inside cabinet frames to connect all boxes into one solid unit. Work slowly so the cabinet faces stay even. After fastening, check for gaps, rocking, or twisting before adding panels or countertop support. Step 5: Add Side and Back Panels. Cut the side and back panels to fit the exposed cabinet ends. Use glue and finish nails to secure them neatly. These panels hide unfinished cabinet backs and sides while giving the island a cleaner, built-in look from every angle. Step 6: Install Trim and Molding. Attach toe-kick trim, seam molding, and edge trim where needed. This covers gaps, panel seams, and exposed edges. Keep cuts tight and even. A clean trim job is what makes a stock cabinet island look like it was built for the room. Step 7: Install the Countertop. Set the countertop in place and check that it sits level on the cabinet frames. Fasten it from below through the cabinets, not down through the top. Make sure any overhang is supported before using the island for seating or prep. Check before moving on: Does the countertop sit level? Do all drawers open fully without catching? Does anything rock when pushed? Method 2: Wood Frame Island Materials you need: 2x4s for lighter builds, 2x6s for wider builds, plywood for shelves, pocket-hole screws, structural brackets, sandpaper, wood filler, countertop, fasteners, wood finish, and figure-eight fasteners or cleats. Step 1: Cut the Lumber. Measure your planned island size, then cut the legs, top rails, lower rails, and shelf supports to length. Label the pieces before assembly. Accurate cuts matter here because a small error can make the frame twist or sit unevenly. Step 2: Assemble and Square the Frame. Join the legs and rails with pocket-hole screws, structural brackets, or both. Check the frame for square before tightening every joint. Measure diagonally from corner to corner. If the numbers match, the frame is square and ready. Step 3: Add the Lower Shelf. Cut plywood to fit between the legs and rest on the lower rails. Secure it firmly so it does not shift or rattle. The shelf adds storage, but it also helps strengthen the frame and reduce side-to-side movement. Step 4: Sand and Finish Before the Top. Fill screw holes, dents, or open gaps with wood filler. Sand all surfaces smooth before the countertop goes on because corners become harder to reach later. Your finish choice depends on the wood species and uses — some take oil well, others need a sealer first. Let it dry fully before moving on. Step 5: Attach the Countertop. Place the countertop on the frame and center the overhang on all sides. Use figure-eight fasteners or cleats so the top can move slightly with seasonal wood changes. Do not lock solid wood too tightly in place. Check before moving on: Push each leg firmly. Any diagonal rack in the frame means you need a cross brace added before the countertop goes on. Method 3: Repurposed Furniture Island Materials you need: A solid wood dresser, table, or cabinet, interior bracing, metal corner brackets, 2×2 braces, kitchen-grade primer, paint, sealer, countertop, replacement knobs or pulls, screws, and sandpaper. Step 1: Remove Weak Components. Take out sagging drawers, thin shelves, loose backs, or decorative tops that add height but not strength. Keep only the solid parts of the furniture body. This gives you a stronger base before adding countertop weight or storage. Step 2: Check and Reinforce the Body. Push the sides, back, and top frame firmly. If anything flexes, add corner brackets or 2×2 braces inside the body. A furniture island needs extra support because it was not always built to hold a heavy countertop. Step 3: Sand, Prime, and Paint. Sand the outside so primer can grip the surface. Apply a bonding primer, then use a kitchen-grade paint that can handle cleaning and daily touch. Let each coat dry before adding the countertop or reinstalling hardware. Step 4: Fit and Fasten the Countertop. Cut the countertop to match the furniture body, including any planned overhang. Set it in place, check the balance, and fasten it from inside the cabinet or dresser frame. Avoid driving screws down through the visible top surface. Step 5: Seal and Add Hardware. Seal surfaces that may contact food-prep tools, cleaning products, or moisture. Add new pulls, knobs, or handles if the old ones feel loose or dated. Then load the drawers slowly and check that nothing sags or shifts. Check before moving on: Load the drawers with weight and check for sag. Add more internal bracing if anything moves. Method 4: IKEA Cabinet Island Materials you need: IKEA SEKTION cabinet units, cover panels, island support brackets, leveling legs, connecting hardware, cabinet connector bolts, toe-kick strips, countertop, screws, shims, and any doors, drawers, or hardware needed. Step 1: Measure Before Ordering. Measure your kitchen floor space, then compare it with the SEKTION cabinet depth, width, and height. Include countertop overhang in your plan. IKEA cabinets have set sizes, so your island footprint should be confirmed before placing the order. Step 2: Assemble the Cabinet Units. Build each cabinet unit by following the IKEA instructions closely. Keep every box square as you assemble it. Check the corners, tighten the hardware, and make sure the cabinets sit flat before connecting them into one island body. Step 3: Install Island Support Brackets. Attach the island support brackets to the cabinet units as required. These brackets help keep the island stable and secure. Check that each bracket is aligned correctly before fastening, because crooked support affects the countertop and cabinet layout. Step 4: Fasten Cabinets Together. Clamp all cabinet units flush at the front and bottom. Use cabinet connector bolts to pull the boxes together tightly. Check the cabinet faces as you work so the doors and drawers line up cleanly across the full island. Step 5: Add Cover Panels on Exposed Sides. Cut and attach cover panels to any side that will be visible. These panels hide the unfinished cabinet backs and ends. Keep the panels straight, secure them firmly, and make sure all exposed sides look finished before adding the top. Step 6: Install Leveling Legs and Toe-Kick. Snap the leveling legs into place and adjust them until the island sits evenly. Use a level across the cabinet tops in both directions. Once everything is steady, add the toe-kick strips along the base for a finished look. Step 7: Install the Countertop. Place the countertop on the assembled cabinet base and check for full support. Fasten it from below through the cabinet structure. Do not screw through the top surface. Add support where needed if the edges or overhang flex. Check before moving on: Are all cabinet fronts flush with each other? Do doors and drawers open without catching? Is the countertop fully supported with no flex at the edges? Method 5: Movable Island Materials you need: A small cabinet base or wood frame, 2×4 base frame, heavy-duty locking casters, screws, brackets, butcher block or laminate countertop, fasteners, shims, and a finish or sealer if using wood. Step 1: Keep the Footprint Small. Plan a compact island that is usually 24 to 36 inches wide. A movable island needs enough room to roll, turn, and park safely. Keep the size practical so it does not block cabinets, appliances, or walking paths. Step 2: Choose the Right Casters. Use heavy-duty locking casters rated above the estimated loaded weight of the island. Include the countertop, cabinet body, stored items, and anything placed on top. Better casters make the island safer and easier to move when needed. Step 3: Mount Casters to a Solid Base. Attach the casters to a 2×4 base frame, not thin cabinet floor panels. A strong base spreads the weight better and keeps the wheels from tearing loose. Check that every caster is tight before standing the island upright. Step 4: Pick a Lighter Countertop. Choose butcher block or laminate for a movable island because both are easier to handle than stone. A lighter top reduces tipping risk and strain on the casters. Make sure the top is fastened well before moving the island. Step 5: Test All Four Casters. Set the island upright and confirm all four casters touch the floor evenly. Lock each wheel, then push gently from every side. If the island rocks, tips, or rolls while locked, fix the base before adding storage. Check before moving on: Lock all four casters and push hard from one side. A movable island should not rock or tip under pressure. Every method follows the same core logic: a level base, a rigid structure, and a countertop that is properly supported. What changes is the starting material. The checks at each stage stay the same no matter which route you take. Getting the Size Right Before You Order Anything Sizing is where the whole project can go wrong before a single board is cut. The National Kitchen and Bath Association recommends at least 42 inches of clearance for single-cook kitchens and 48 inches for kitchens with more than one person working in them. Get this wrong and every step after it pays for the mistake: cabinet selection, frame cuts, countertop order, and seating layout. Mark the layout on the floor with painter’s tape first, then walk around it with all appliances fully open. If it feels tight with tape, it will be worse with a real island in place. Plan seating and overhang carefully, allowing 12 to 15 inches of countertop overhang per stool, with brackets underneath to prevent sagging. Check storage and door swing by adding cabinet door and drawer swing distances to your clearance measurements before finalizing the footprint. Every material order and every cut that follows depends on getting these numbers right before a single board is bought. Best Countertop Options for a DIY Kitchen Island The countertop affects cost, durability, maintenance, and style, so choose it before finalizing the island size. A light top is easier for a DIY install. A heavy one may need extra support and an extra set of hands. The edge shape is part of this decision too — different countertop edge profiles carry different visual weights and finishing requirements. Match the surface to how you actually cook and clean, not just the look you found online. 1. Butcher Block Butcher block is one of the easiest countertop choices for a DIY kitchen island because it is lighter than stone and easier to cut and install. It adds warmth and works well for prep space, casual kitchens, and cabinet-based islands. The main care needs are sealing, wiping spills quickly, and regular oiling to prevent stains, cracks, and moisture damage. 2. Laminate Laminate keeps the island lightweight and budget-friendly. It comes in many colors, patterns, stone looks, and wood looks, so it works with different kitchen styles. It is easy to clean and a good choice for rentals or small kitchens. The trade-off: it can chip, scratch, or burn if handled roughly. 3. Plywood with Sealer Plywood with sealer is a low-cost option for rustic, utility, or farmhouse-style kitchen islands. It is easy to cut, sand, stain, and customize. The key is sealing the top, bottom, and edges carefully. Without proper sealing, plywood can absorb moisture, swell, or stain quickly from daily kitchen use. 4. Stone or Quartz Remnant A stone or quartz remnant gives a DIY kitchen island a polished, high-end look with strong durability. If you want a marble look without the slab weight and cost, DIY marble countertops are a realistic middle ground worth considering. For a real stone install, the base must be level, strong, and fully supported, and you may need help with lifting and safe fastening. 5. Stainless Steel Stainless steel handles heat, moisture, and frequent cleaning well and gives the island a clean, professional look. It works especially well in modern or utility-style kitchens. The downside is that it shows scratches, dents, fingerprints, and water marks more easily than softer-looking surfaces. For most DIY builds, butcher block, laminate, or sealed plywood is the easier path. Heavy stone, quartz, or steel may need more planning, lifting help, and stronger cabinet support. Mistakes to Avoid and Final Safety Checks Most problems with a finished kitchen island started in planning or base work, not during cutting or assembly. Catching them early saves time, materials, and a lot of frustration. Building too large a block blocks the work triangle and makes drawers hard to reach. Test the footprint with tape before ordering anything. Skipping leveling and shimming creates countertop gaps, misaligned trim, and drawers that hang at the wrong angle. Forgetting overhang support is a common one: seating overhangs past 12 inches will sag and crack over time without brackets, corbels, or support legs. Picking the wrong method for your skill level matters too — wood frame builds need accurate cuts and solid joinery, and that gap shows on a finished island. Finally, ignoring local code can turn a finished project into a permit problem. Some jurisdictions require permits or outlets on permanently installed islands, so check with your local building department before starting. A finished island that passes these checks will hold up through daily use. Fix anything that moves, flexes, or catches before loading it with cookware or putting weight on the seating overhang. Frequently Asked Questions These are the questions I hear most often from people who are partway through their build and hit a decision they did not expect. Can you build a kitchen island without cabinets? Yes. A wood frame, table-style base, or repurposed furniture all work without cabinets. Open shelving and a clean countertop are fully achievable. The frame just needs to be square, level, and strong enough for the countertop weight. What is the cheapest way to build a kitchen island? Repurposing a solid wood dresser or table and adding a new countertop is usually the lowest-cost route. A wood frame island is also affordable if you already own basic tools. Avoid plumbing, wiring, and stone tops if budget is the main constraint. Can I add wheels to any kitchen island? Only if the base is solid enough to hold them. Casters must attach to a solid wood frame, not thin cabinet panels. Use locking casters rated above the total island weight, including the countertop and anything stored inside. How tall should a DIY kitchen island be? Most kitchen islands are 36 inches tall, matching standard countertop height. Bar-style seating typically calls for 42 inches. If you go taller, make sure the stools and knee clearance match that height before you finalize the build. Can I use a dresser as a kitchen island? Yes, if it is solid wood and structurally sound. Reinforce weak areas, add a durable countertop, seal the surface, and use kitchen-safe paint or finish. Avoid particleboard dressers — they will not hold up under daily kitchen use. Does a kitchen island need to be attached to the floor? Permanent islands with cabinets, outlets, or seating overhangs are usually floor-anchored for stability. Movable islands do not need floor attachment, but locking casters and a stable base are non-negotiable. What countertop is easiest to install on a DIY island? Butcher block and laminate are the easiest. Both are lighter than stone, easier to cut, and simpler to fasten from below. Butcher block needs sealing; laminate requires less maintenance and is usually more budget-friendly. How much countertop overhang is safe for seating? 12 inches is the standard minimum; 15 inches gives more knee room. Anything longer needs brackets, corbels, or support legs. Check for flex before using the island — unsupported overhangs sag and pull loose over time. Final Verdict Upgrading your home with a custom layout is entirely within your reach when you focus on a straightforward design. By selecting a method that matches your current skill level and tools, you can avoid common pitfalls like uneven frames or cramped walkways. I always emphasize that measuring your floor clearance and securing a level base are the most critical steps for long-term success. Now that you know how to build a kitchen island using stock cabinets, a wood frame, or repurposed furniture, you can confidently choose the perfect countertop and finishes for your daily needs. What style are you planning to create? Drop a comment below to share your DIY plans or ask a question before you start building.

