

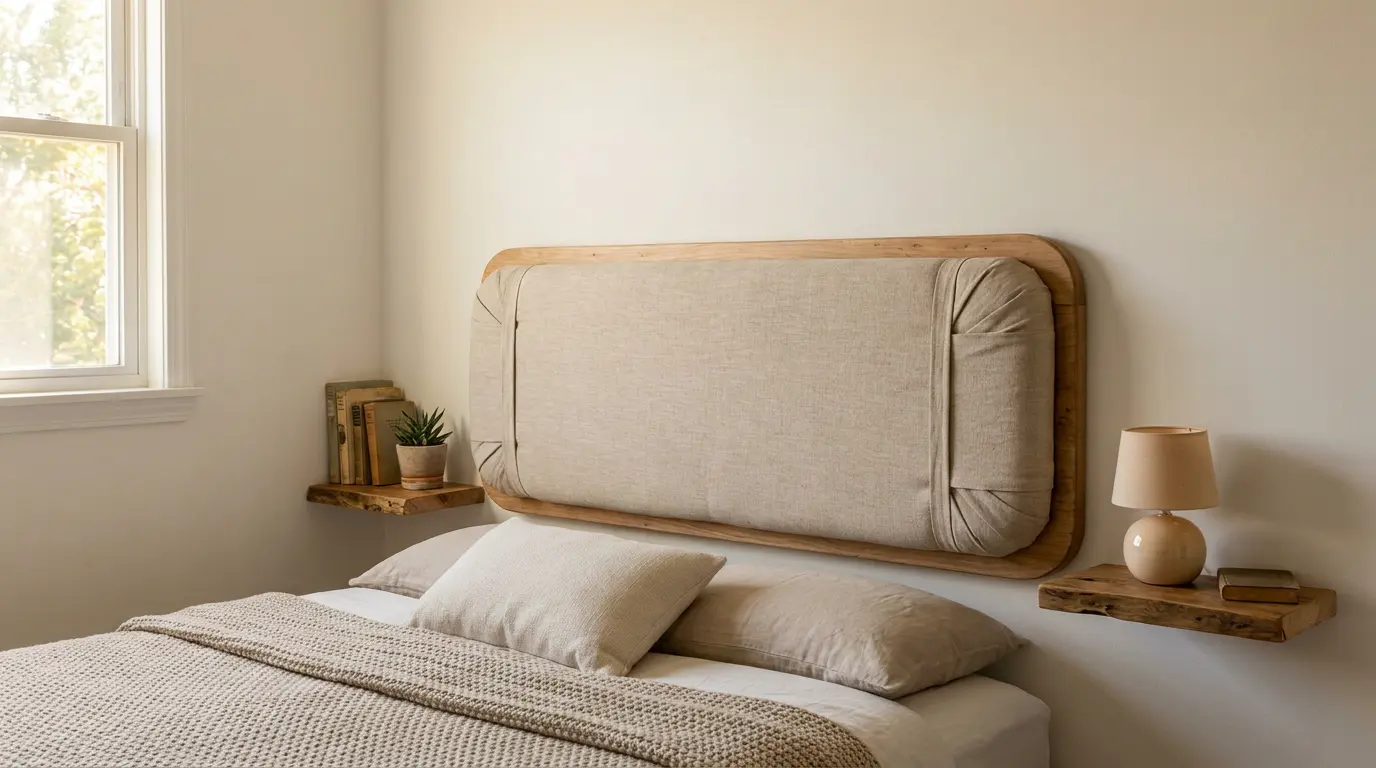


Learning how to make a headboard is a genuine weekend project: figure on 4–6 hours of build time, a material cost of $40–$90 depending on your fabric choice, and a difficulty level that sits at a solid 2 out of 5. If you can use a staple gun and a drill, you can finish this.
The step that trips people up the most isn’t cutting; it’s getting the fabric taut without wrinkles at the corners. I’ll tell you exactly how to avoid that before we get there.
| Difficulty | 2/5, Beginner-friendly with basic tools |
| Time | 4–6 hours (single headboard) |
| Cost | $40–$90, depending on fabric |
| Tools Needed | Drill, staple gun, craft knife, tape measure, hammer |
| Skill Required | Beginner |
The most common failure point is skipping the wadding layer and going straight from foam to fabric. You’ll see every bump and ridge through the fabric. Add the wadding; it takes five extra minutes, and it’s the difference between a store-quality finish and a lumpy mess.
Things to Plan Before Building a Headboard
Planning a wooden headboard project starts with understanding space, materials, and finish choices. Careful preparation helps you avoid mistakes, control spending, and make the build go more smoothly, even if you’re handling tools at home for the first time. Plan these things before building:
- Space Planning: Measure bed and wall area carefully to avoid fitting issues and ensure balanced headboard placement in the bedroom space
- Style Choice: Select headboard design style and choose wood type based on durability, look preference, and daily bedroom use needs
- Budget Planning: Decide between painted, stained, or natural finish while setting a clear budget to control material and tool expenses early
- Mounting Choice: Choose a wall-mounted or bed frame-mounted design depending on stability needs, room layout, and installation effort required
How to Make a Headboard: Step by Step
I’ve found that taking it step by step makes building a headboard feel much easier. If you follow these stages carefully, you can create a strong, custom piece that fits your bedroom perfectly.
Materials you’ll need
- 11mm OSB board (headboard + mattress slip)
- Timber batten strips (for three sides)
- Wood glue & screws
- 4× M8 T-nuts & bolts
- Headboard struts (bed-specific)
- 2-inch upholstery foam
- Spray adhesive
- Polyester wadding
- Upholstery fabric (cut generously)
- Fiber backtack strip
- Calico lining fabric
- Staple gun & staples
- Drill & drill bits
- Stanley/craft knife
- Tape measure, pencil, ruler
- Hammer
Step 1: Cut Your Board to Size
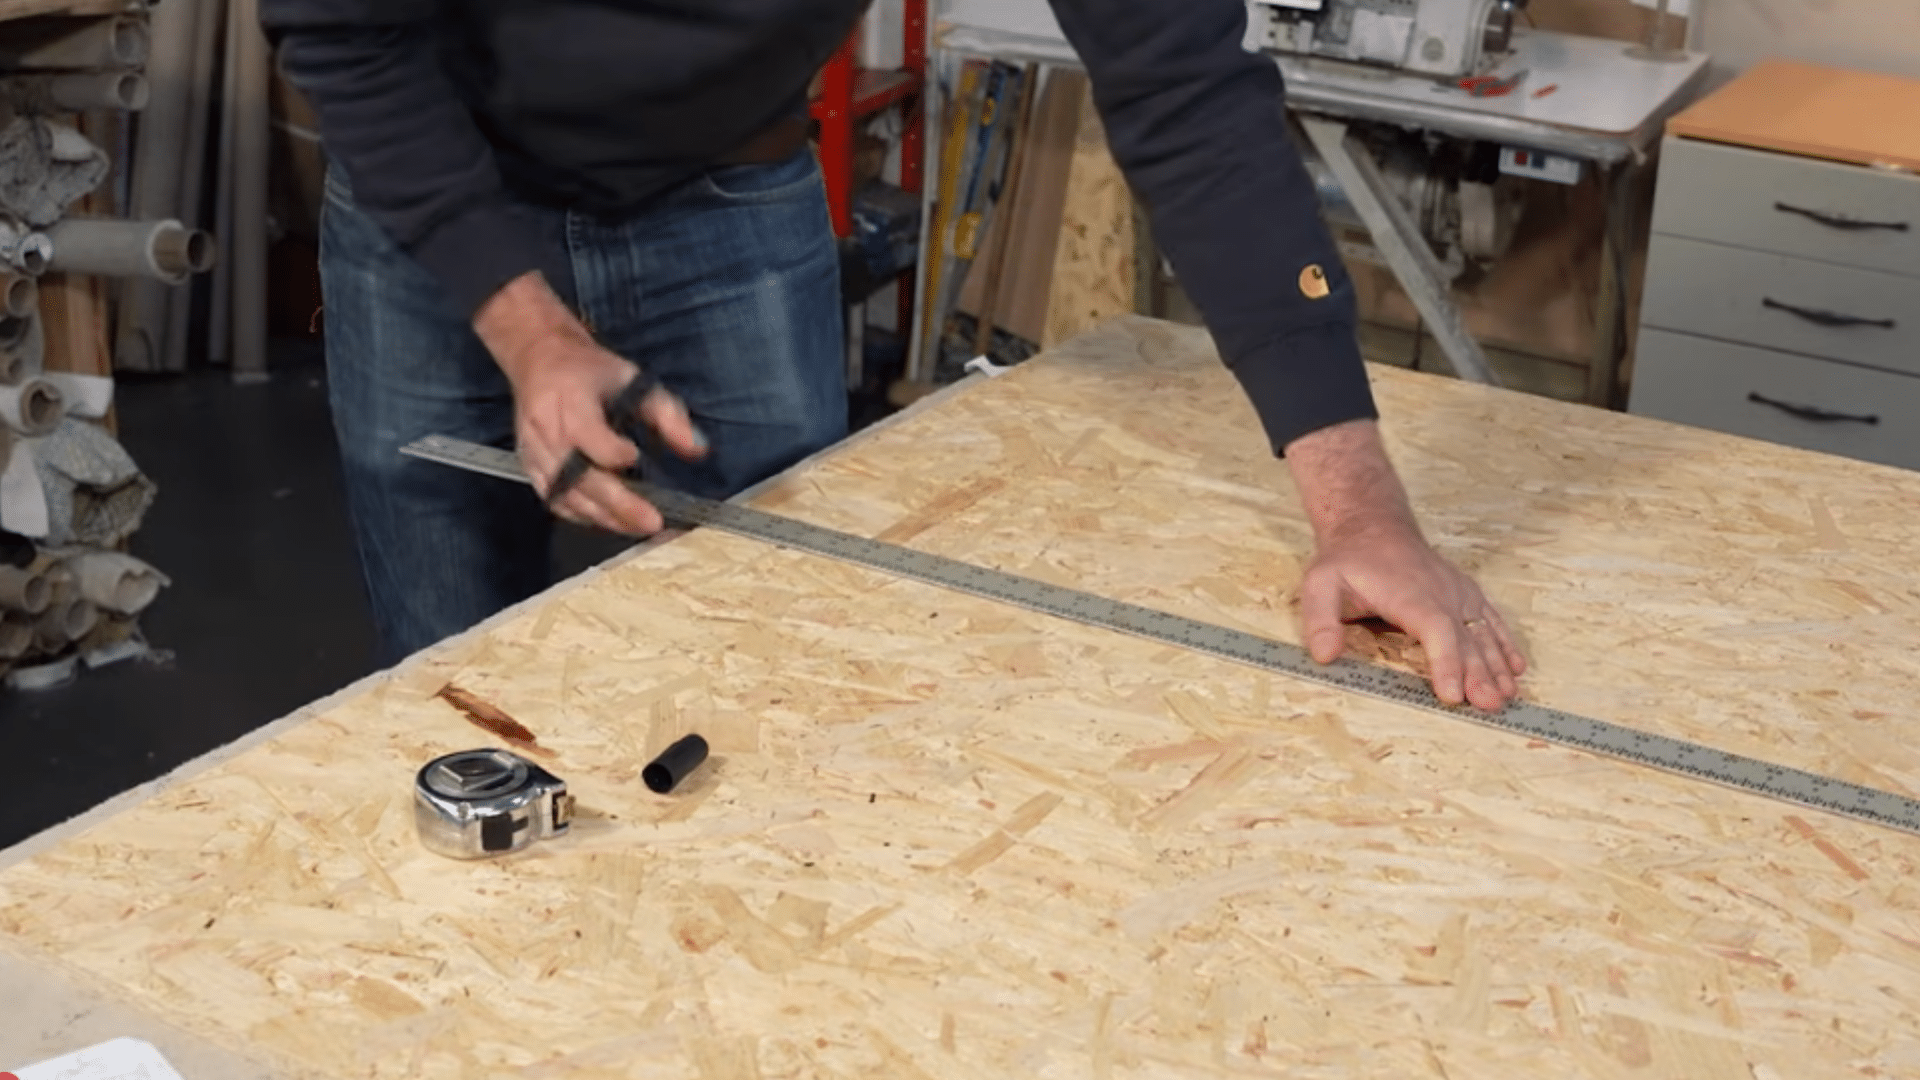
Before you dig in, grab your tape measure and get your cuts right; everything you build from here depends on these first precise dimensions.
Cut your OSB board to 3ft wide and 2ft tall for a single headboard. Cut a separate piece for the mattress slip, 25cm deep; this sits behind your mattress and tucks down.
Tip: Measure twice, cut once; even a centimeter off can affect how your headboard fits against the bed
Step 2: Attach the Batten Frame
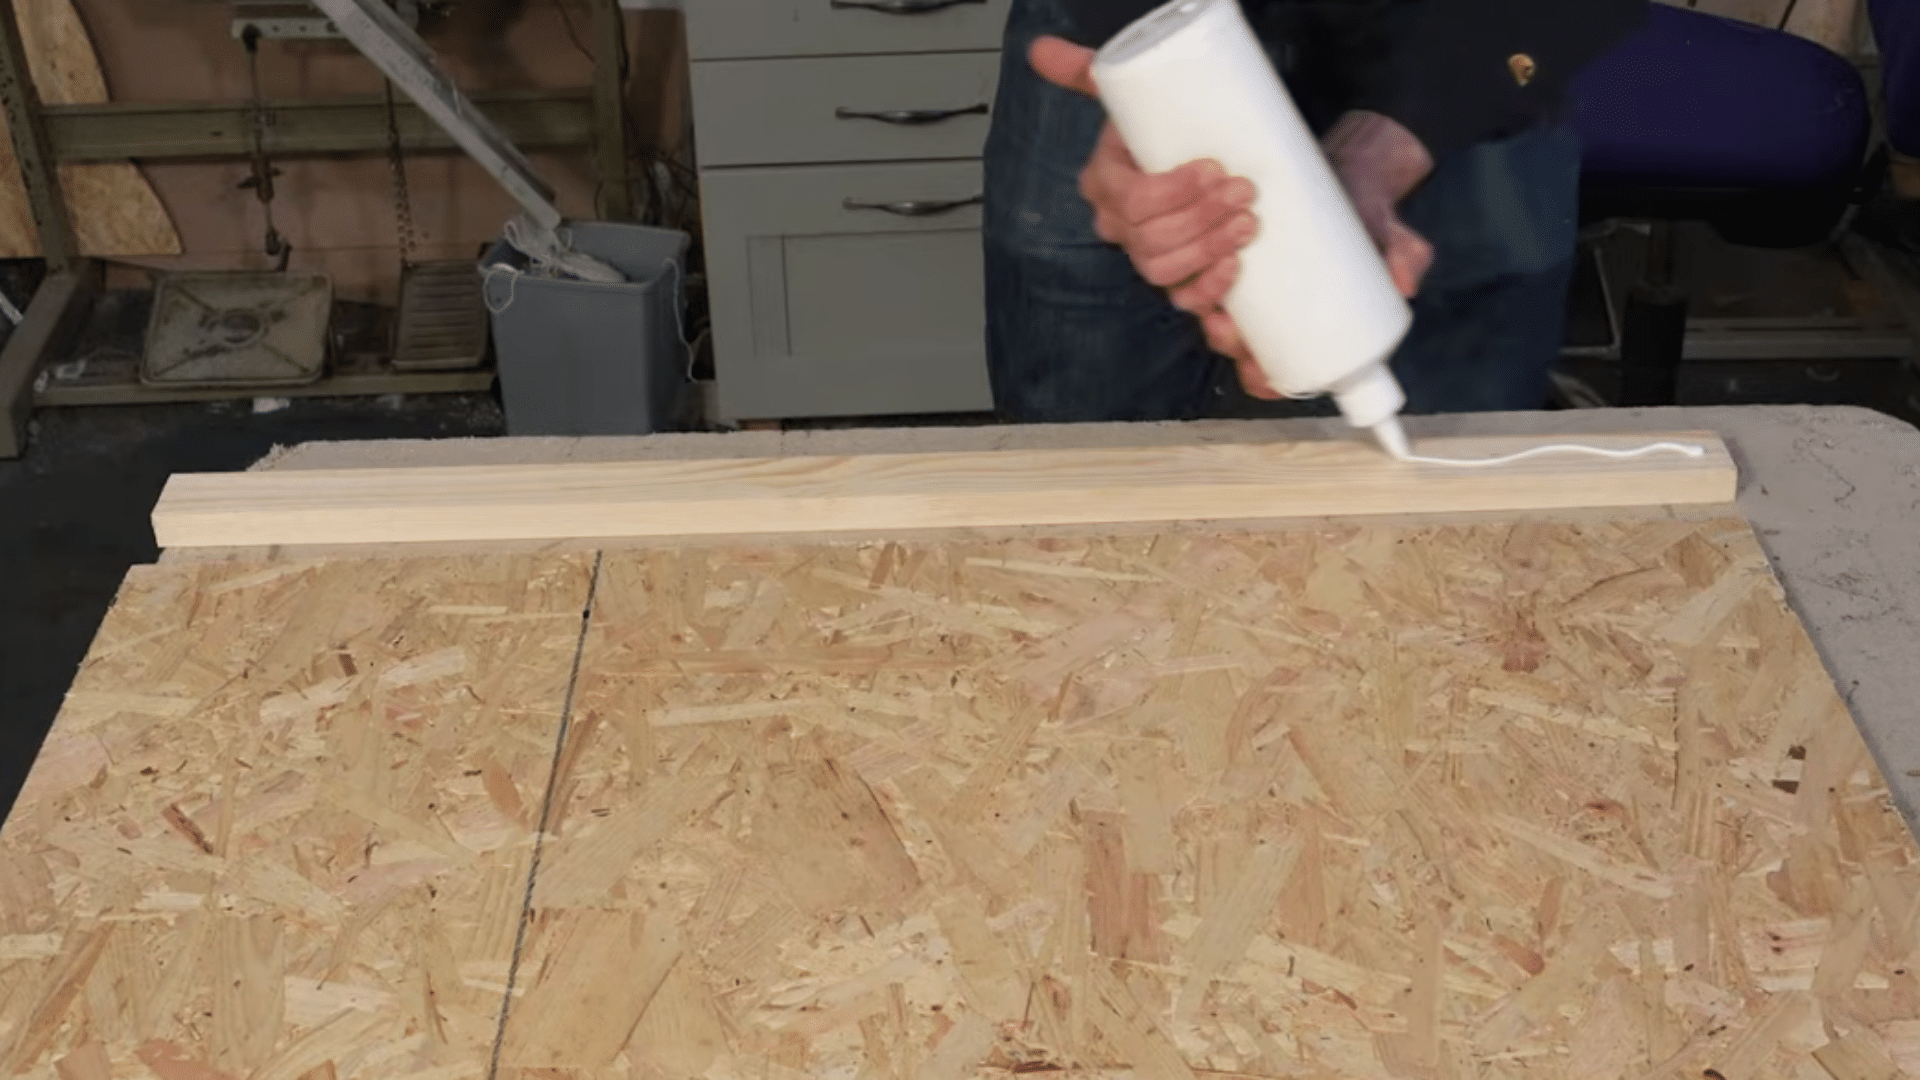
Now that your board is cut, you’re ready to build the frame that gives your headboard its structure, depth, and that all-important flush fit against your wall.
Apply wood glue to your batten strips and fix them along both sides and the top of your headboard; leave the bottom edge completely free.
Set the board on top and screw it down firmly. The battens add depth to your headboard and create the essential gap your struts need to slide comfortably into.
Tip: Don’t rush the glue; let it grip before screwing for a stronger, longer-lasting frame
Step 3: Drill Holes for The Struts
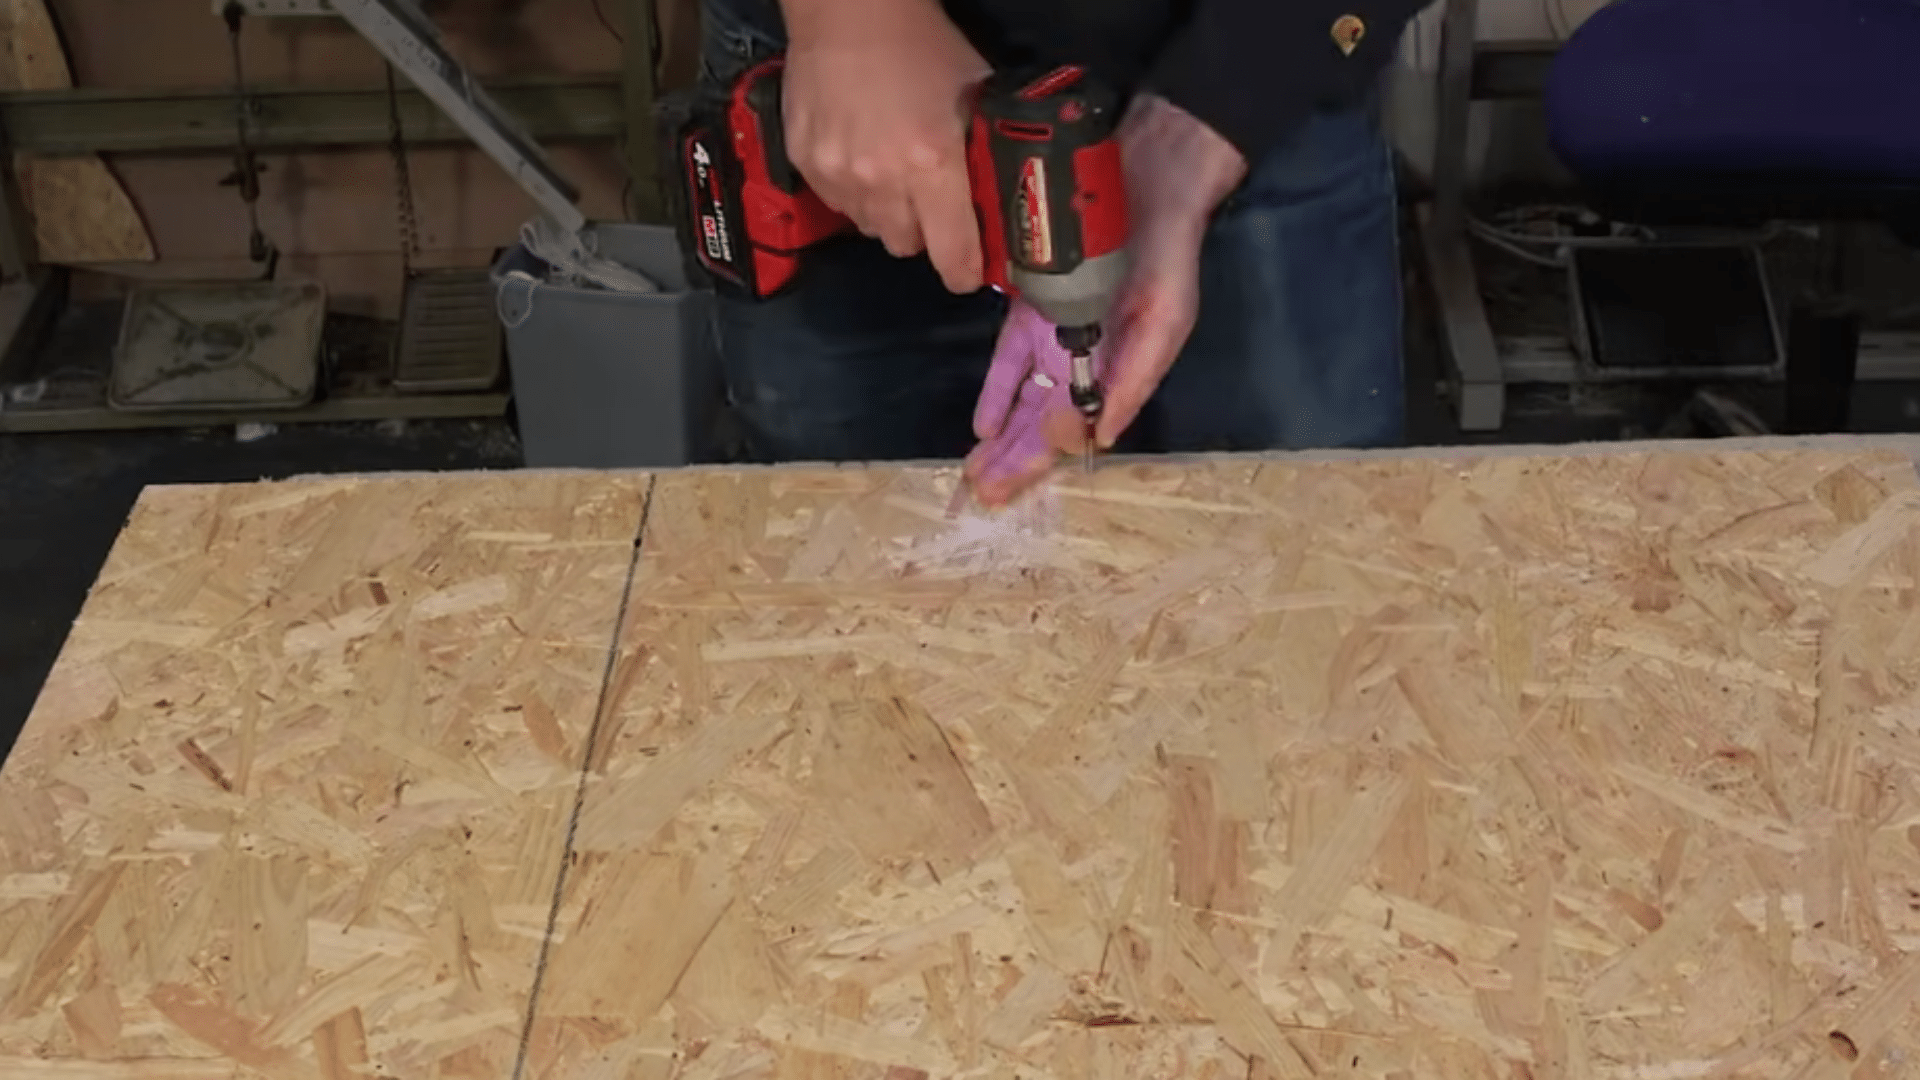
This step connects your headboard to your bed, so take your time; a few careful measurements here will save you from a wobbly finish later.
Hold your headboard strut against the board, align its groove with the bottom edge, and mark your four drill hole positions, usually 6 inches in from each side. Drill carefully on both sides, then hammer your M8 T-nuts firmly into each hole. These threaded inserts are what the bolts will screw into during mounting.
Tip: Always measure your own bed base first; strut spacing varies between different bed manufacturers
Step 4: Cut and Glue the Foam
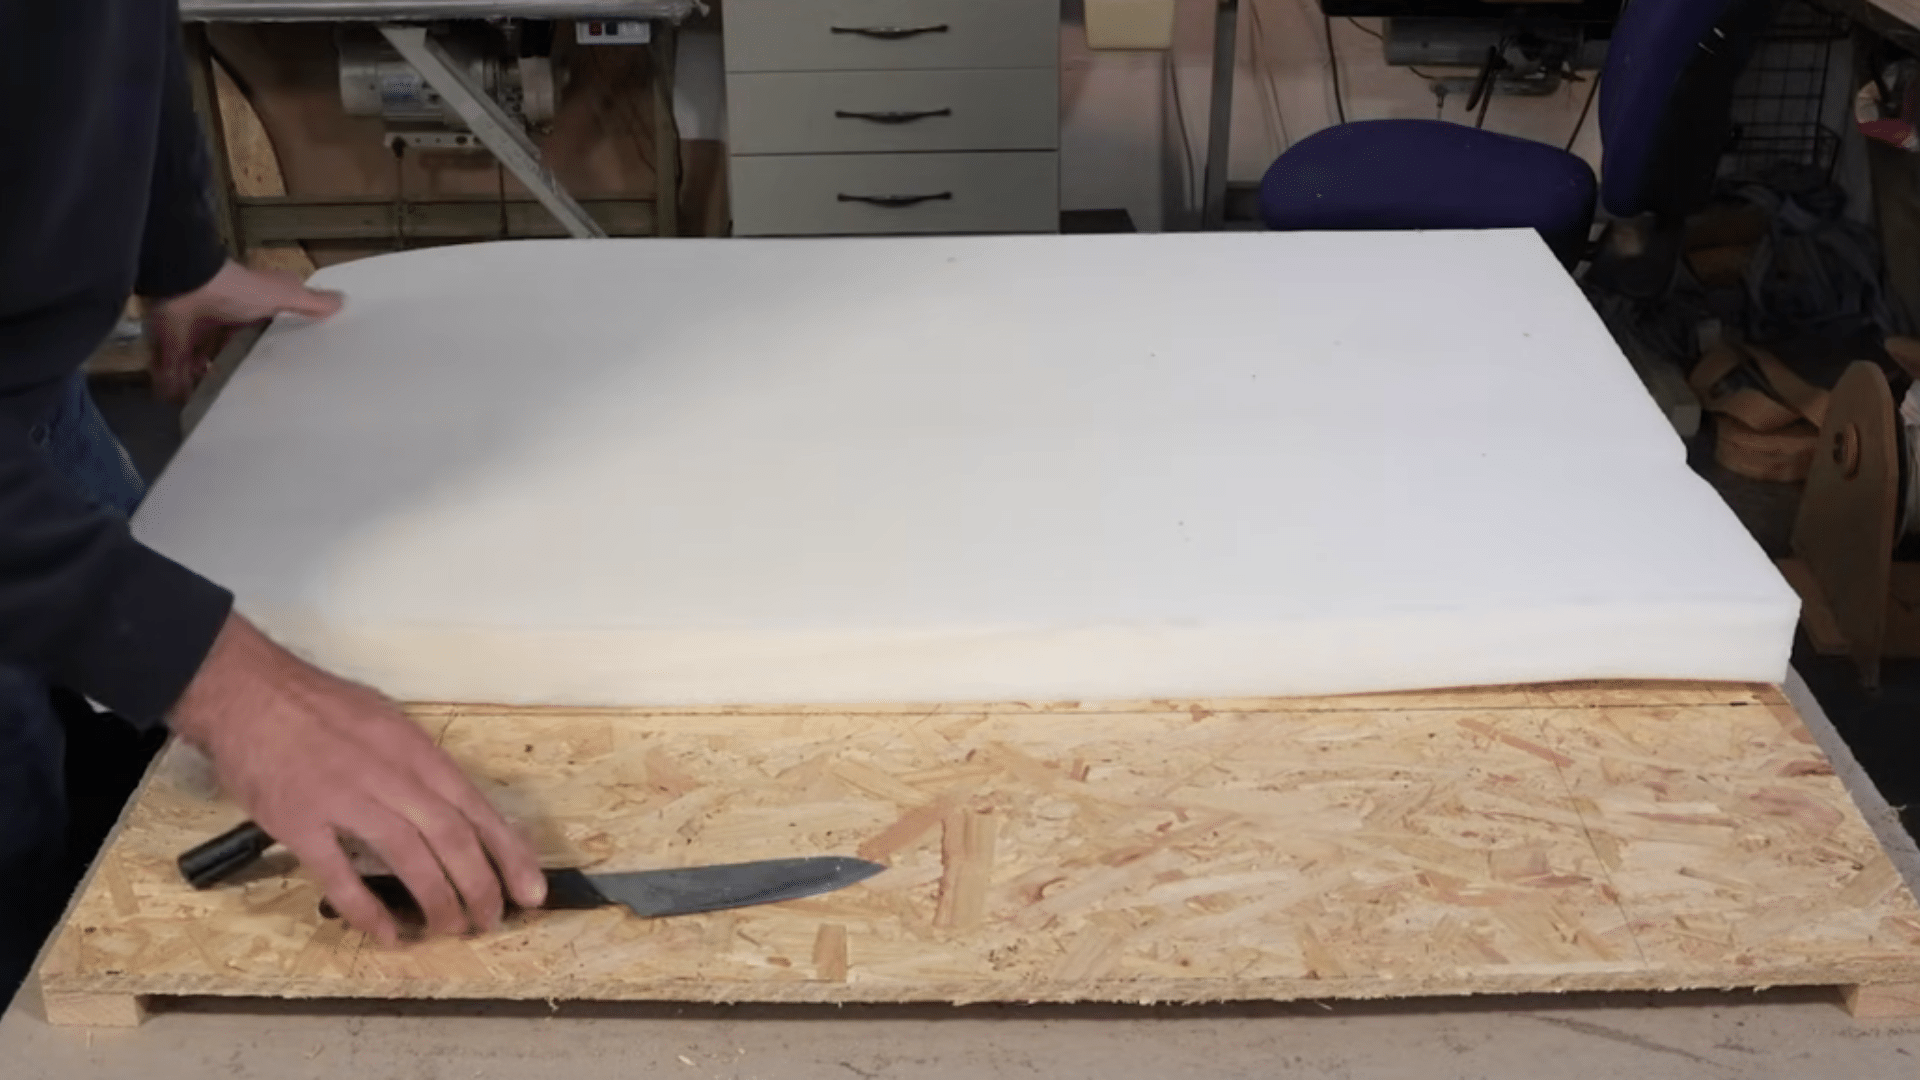
Here’s where your headboard starts to feel real. This is the layer that gives it that satisfying softness and rounded shape you’ll love against your wall.
Measure your foam to overhang the board by about 1cm on the sides and top, for a single headboard, roughly 94cm × 61cm. Cut it using an old kitchen knife in a smooth slicing motion. Spray adhesive onto both the board and the foam, press them together firmly, then staple along the side edges to secure.
Tip: Work quickly after spraying adhesive; it bonds fast, and repositioning gets difficult once contact is made
Step 5: Add the Polyester Wadding
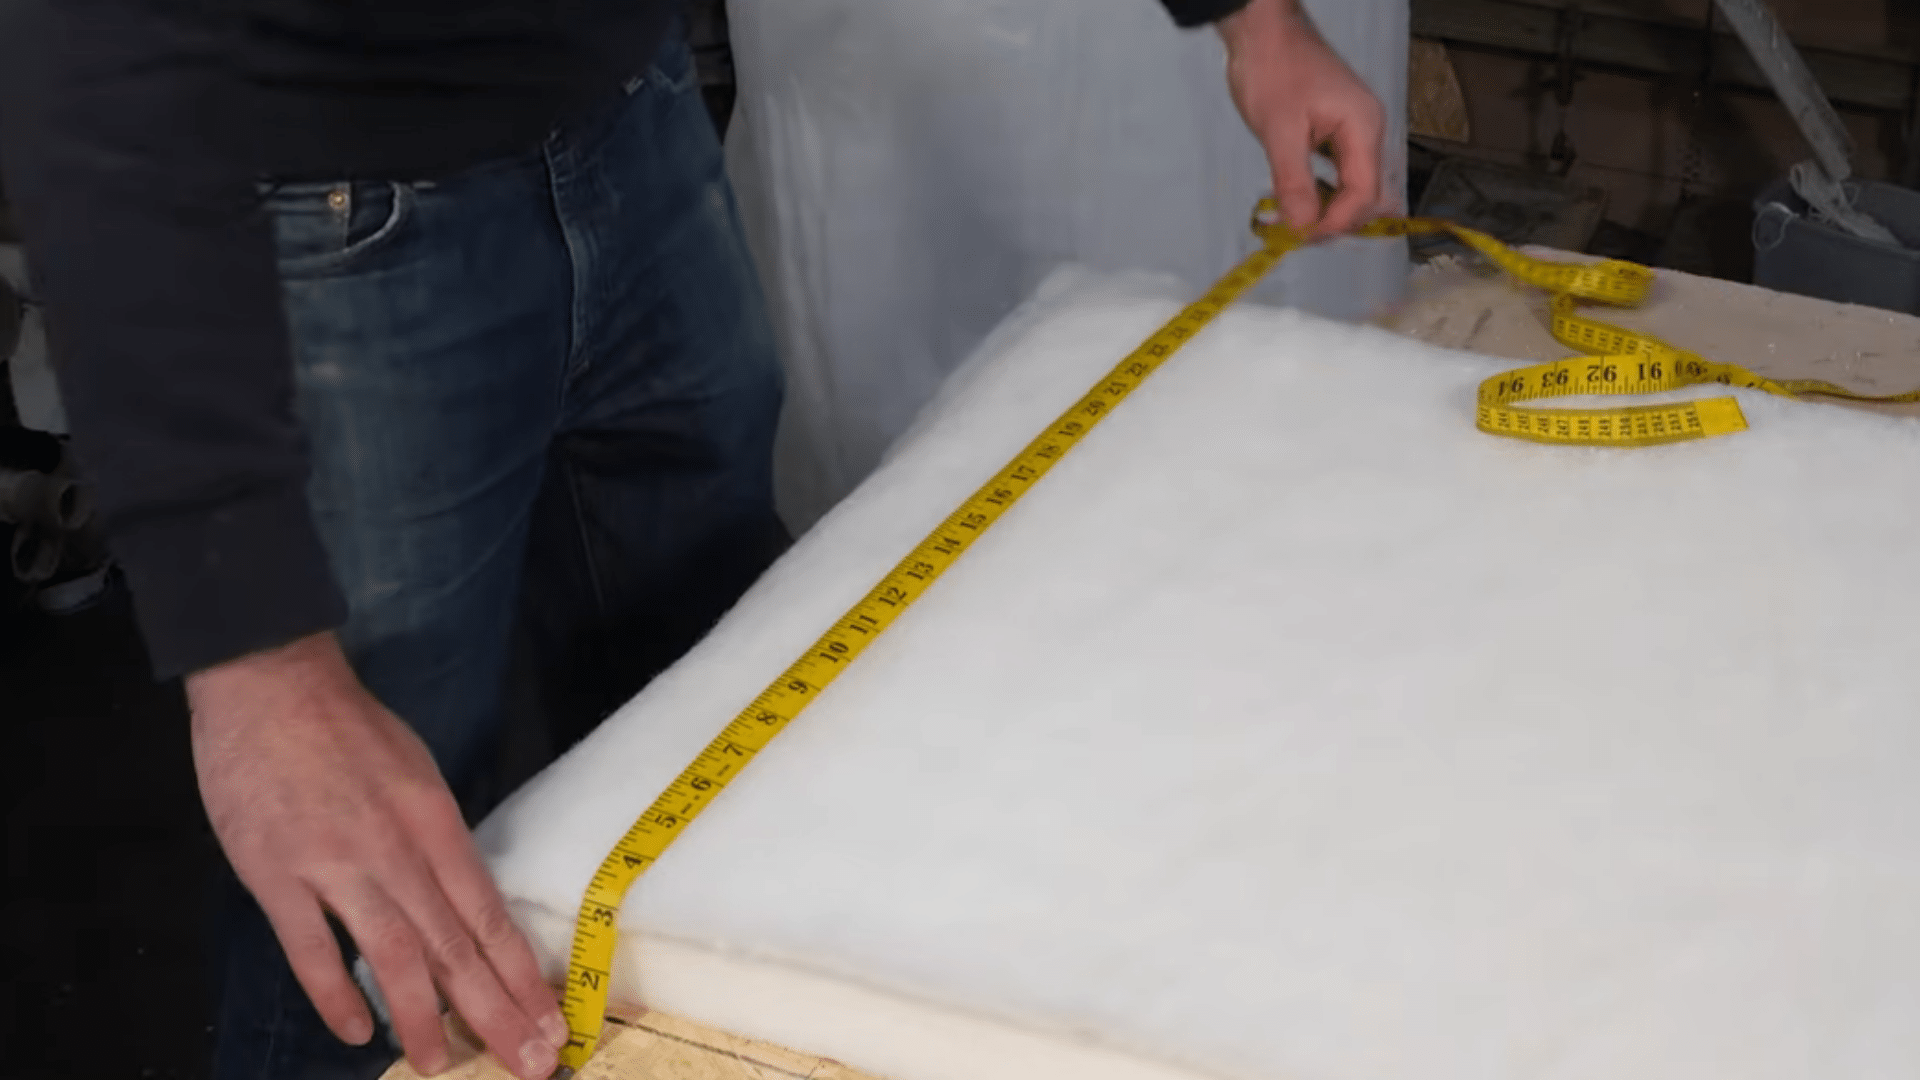
You’re making great progress. This quick but important layer is what separates a flat, stiff headboard from one that looks and feels beautifully plush and professional.
Cut a piece of polyester wadding large enough to cover the entire front of your headboard over the foam. This layer adds a soft, smooth surface that helps your fabric sit beautifully without any lumps or bumps showing through. Lay it over the foam and trim it neatly before you begin pulling your main fabric over.
Tip: Don’t skip the wadding, it’s what gives your finished headboard that plush, professional upholstered look.
Step 6: Cut and Attach the Main Fabric
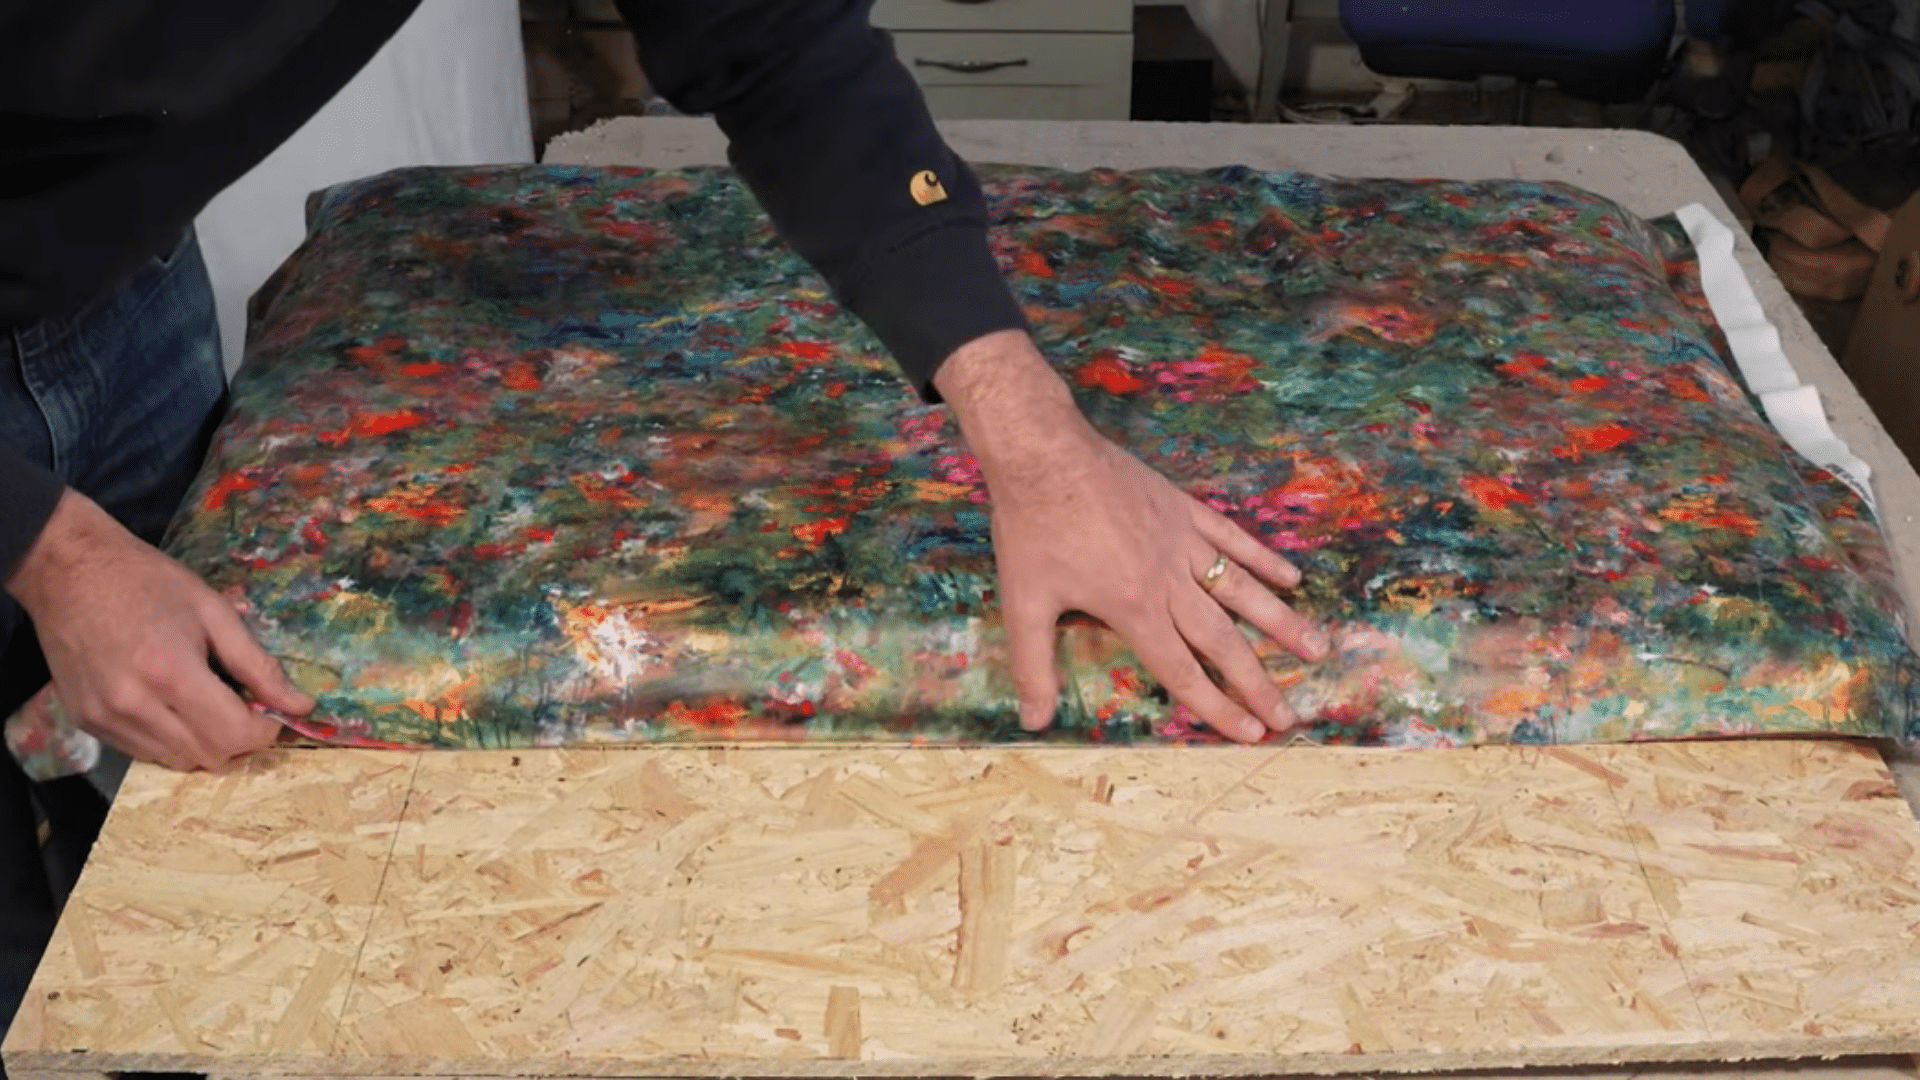
This is your big moment, the fabric you choose is what everyone will see, so take your time pulling it tight and getting it perfectly smooth.
Cut your fabric generously, around 31 by 45 inches works well for a single headboard. Draw a guideline an inch below the board’s bottom edge on the back.
Start with a temporary staple in the center of the bottom, then work outward. Repeat on the top edge, pulling the fabric taut and smooth throughout.
Tip: Always use temporary staples first so you can remove and re-tension the fabric without leaving marks
Step 7: Pleat the Corners Neatly
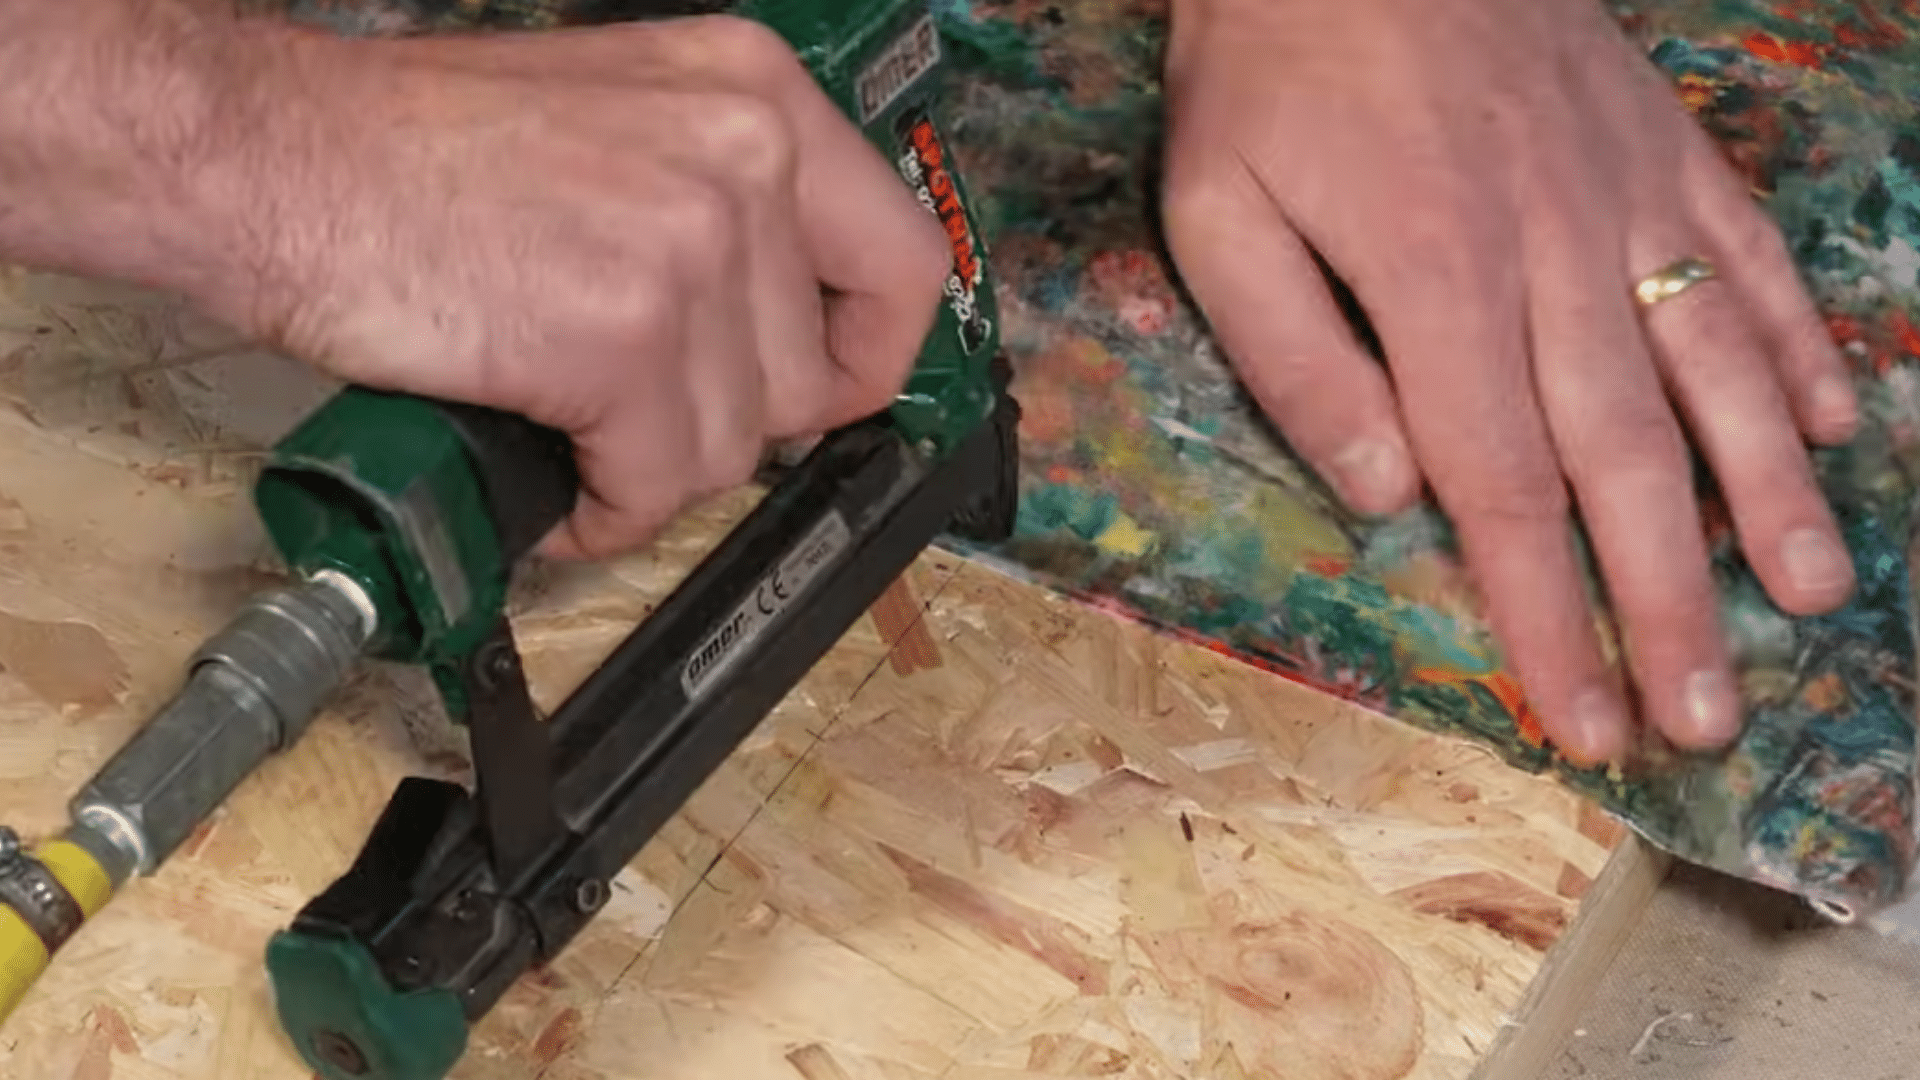
Don’t rush this step; the corners are what people notice first, and a neat pleat here is what gives your headboard that crisp, tailored finish.
Corners require extra care and tension from you. As you staple toward each corner, increase your pull on the fabric. This creates a natural, tight pleat. Fold the fabric neatly underneath to form a sharp, clean edge, then staple it firmly in place. If wrinkles appear, work the fabric slightly away from your guide line.
Tip: Take your time at corners. This one step separates a professional-looking headboard from an amateur finish
Step 8: Cover the Mattress Slip
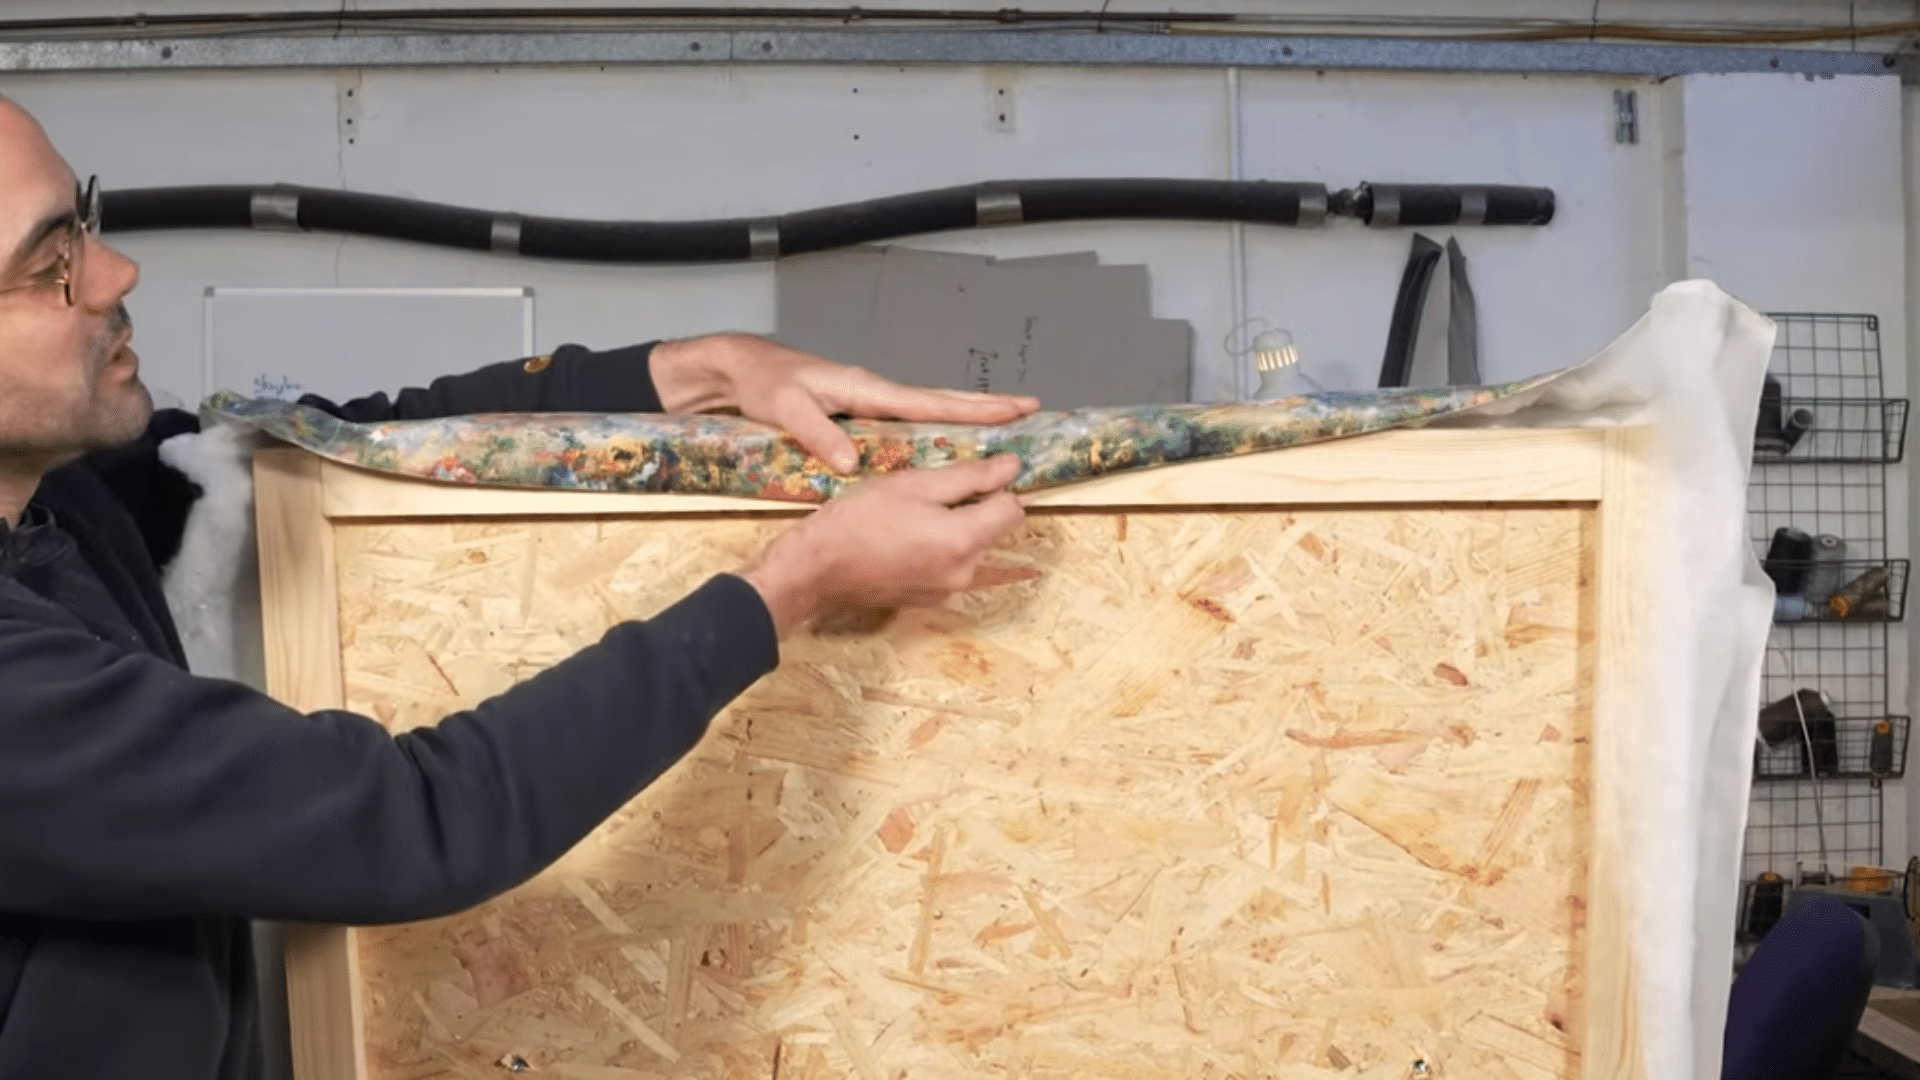
Almost there, this piece slots behind your mattress and gives your headboard a clean, finished look all the way down to where it meets your bed.
Measure fabric to run from the front of the mattress slip all the way underneath, approximately 14cm × 41cm.
Flip it face-down, tack along your guideline starting in the middle, then use a fiber backtack strip along the 25cm mark to create a clean folded edge. Pull the fabric over and staple outward from the center.
Tip: The fiber backtack strip is key; it gives you a crisp, straight edge that fabric alone can’t achieve
Step 9: Line the Back with Calico
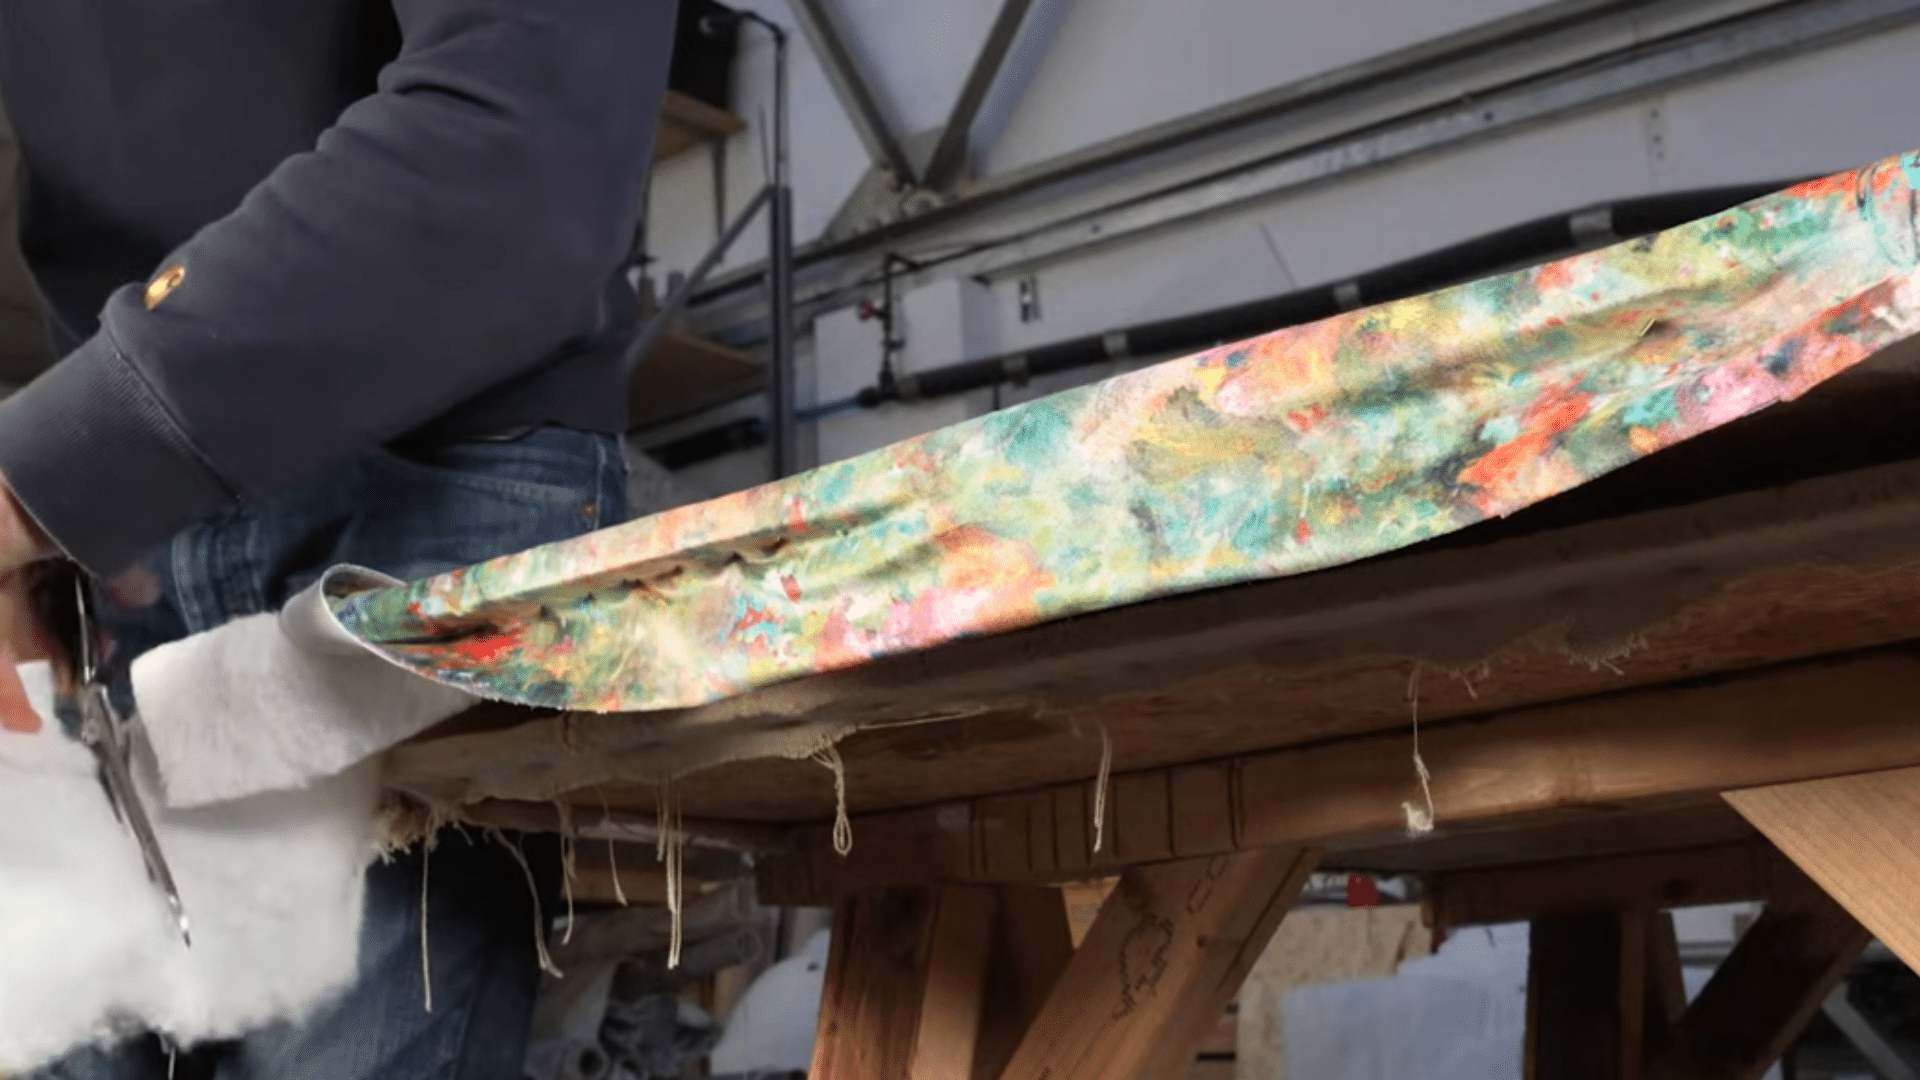
The back of your headboard deserves just as much care. A neat calico lining keeps everything tidy and gives your build a truly professional, finished quality.
Flip your headboard face down and trim away all excess fabric for a neat, flat back. Cut calico a couple of inches oversized all around. Starting in the middle of one end, staple outward on each side in turn, applying firm tension as you go. Use a craft knife to carefully cut away calico over each T-nut.
Tip: Stapling outward from the center on every side prevents the calico from pulling unevenly or buckling
Step 10: Attach to Your Bed
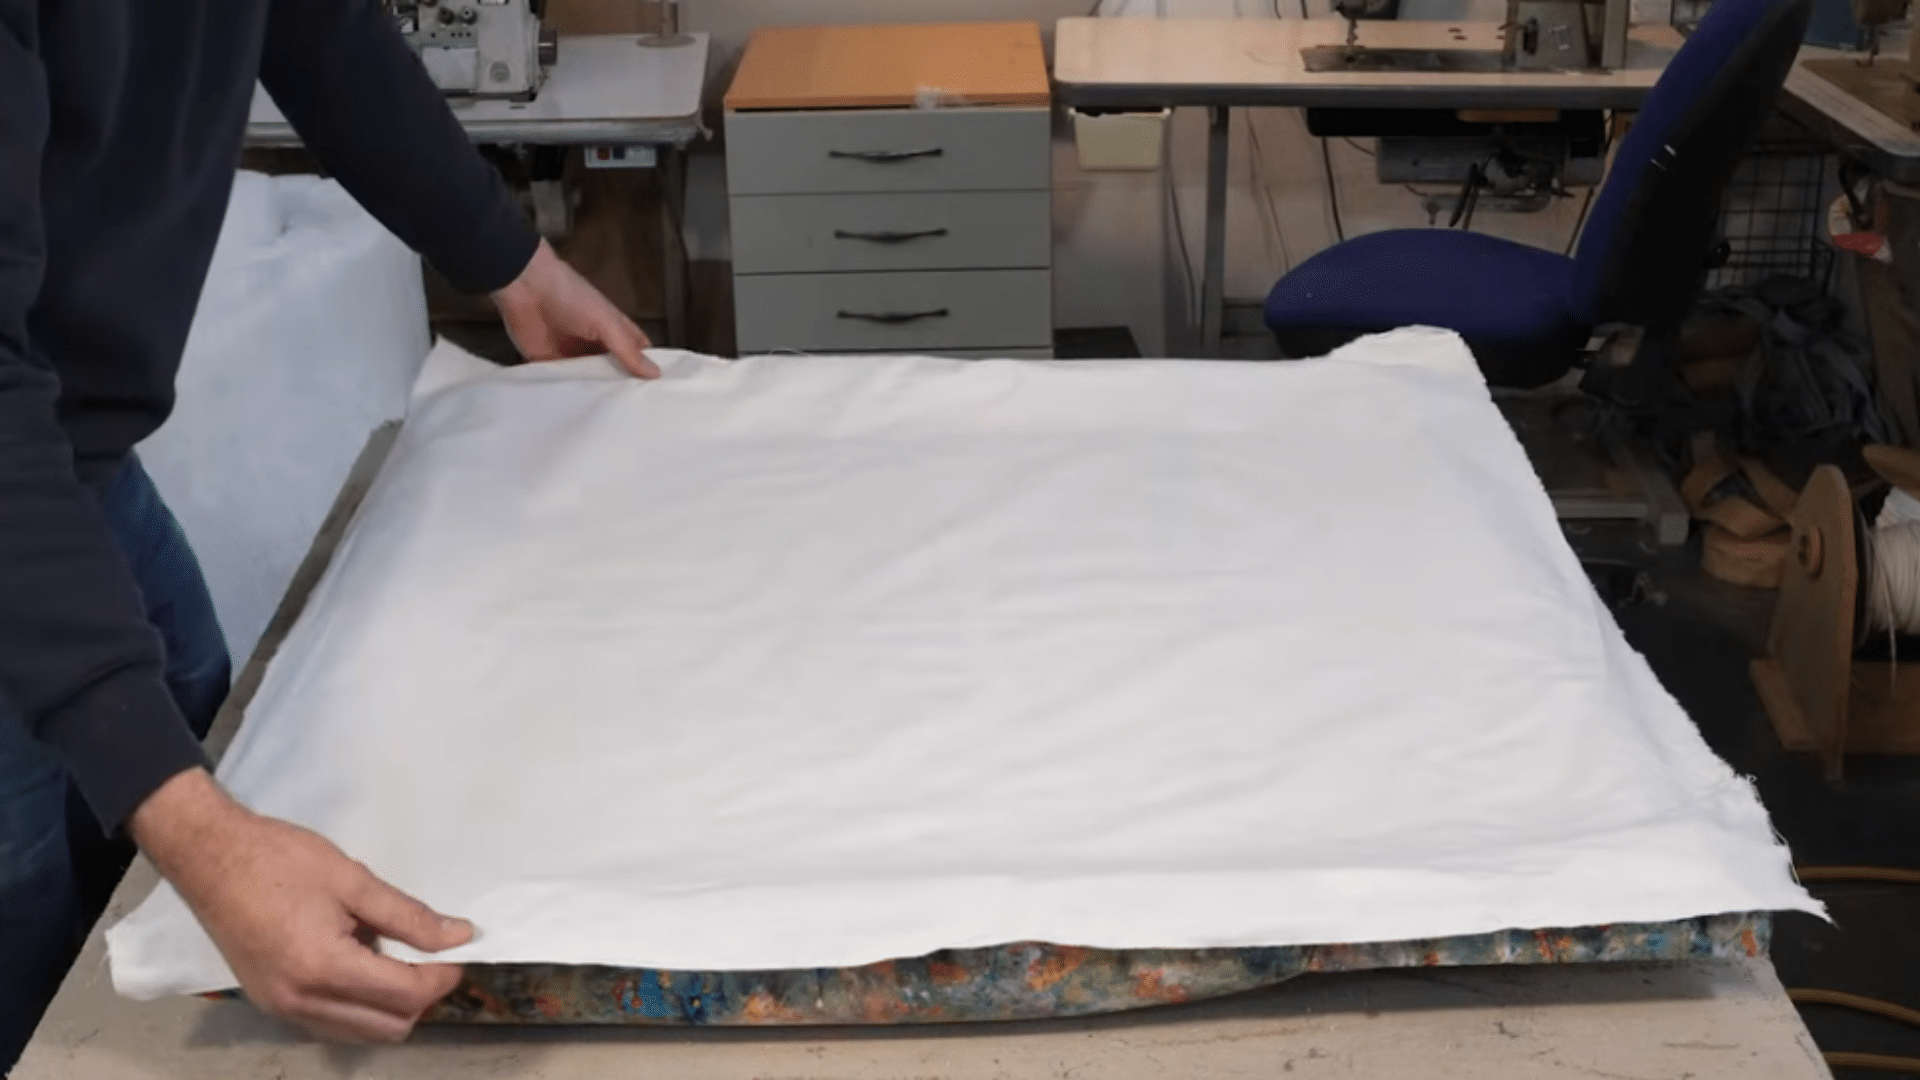
You’ve done the hard work; this final step is the most rewarding of all. It’s time to put your headboard where it belongs and enjoy the result.
Push your bolts through the headboard straps and screw them securely into the T-nuts you installed earlier. Slide the struts underneath the headboard so the board sits flush and level against the wall.
Stand back and admire your finished, fully upholstered headboard, professionally made by your own hands from start to finish. It looks fantastic!
Tip: Check that all four bolts are equally tightened; an uneven fit can cause the headboard to wobble over time
Check out the video for a more detailed overview:
How to Build Floating Shelves to Match Your Headboard
Following a clear step-by-step process makes building floating shelves easier and more reliable. Careful preparation, proper finishing, and correct installation help create strong shelves that stay secure and look clean in any bedroom space.
Step 1: Clean and sand the wood to remove dirt, rough patches, and uneven areas, creating a smooth base that ensures better lacquer adhesion and a professional, even finish.
Step 2: Spray an even first layer of pre-catalyzed lacquer to seal and protect the wood. Maintain steady hand movement to prevent thick spots or uneven buildup.
Step 3: Lightly sand the dried lacquer with 320-grit paper to remove bumps or dust particles, improving adhesion for subsequent layers and ensuring a smooth, flawless headboard surface.
Step 4: Apply two additional coats for durability, depth, and a polished finish. Allow each layer to dry fully before proceeding to maintain a long-lasting, professional result.
Step 5: Locate wall studs, measure carefully, and securely attach the headboard and shelves using strong fasteners. Use a level to ensure everything sits straight, stable, and properly aligned.
Step 6: Make any design adjustments, install extra shelves if needed, and check all screws, joints, and fittings to confirm the headboard is secure, aligned, and ready for everyday use.
Watch the video for the step-by-step procedure:
DIY Wooden Headboard Ideas to Try at Home
I always find it easier to pick a headboard style when I can see simple ideas first. These DIY options help you choose a design that fits your space, tools, and comfort level without complicating things.
1. Rustic Reclaimed Wood Headboard
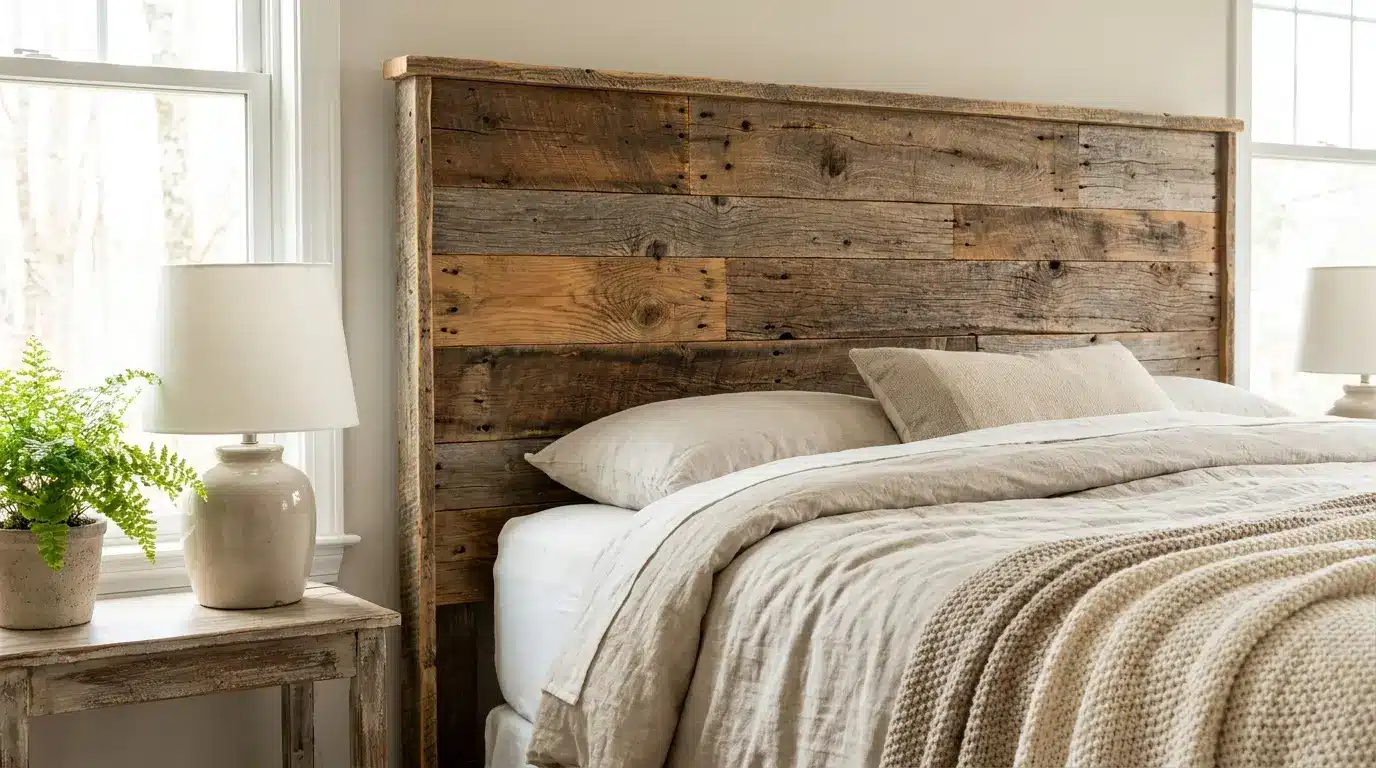
This headboard uses old wooden planks joined together to form a strong and natural bed back piece. The mix of marks, grain, and color gives it a raw look that feels warm and personal in any bedroom space.
- Smooth Sanding: Light sanding removes sharp edges from old wood so it feels safe while keeping its natural, worn surface look intact for a simple finish
- Random Layout: Place planks in mixed order to avoid uniform patterns, giving the headboard a more relaxed, handmade feel that suits basic bedroom setups
2. Modern Slatted Wood Headboard
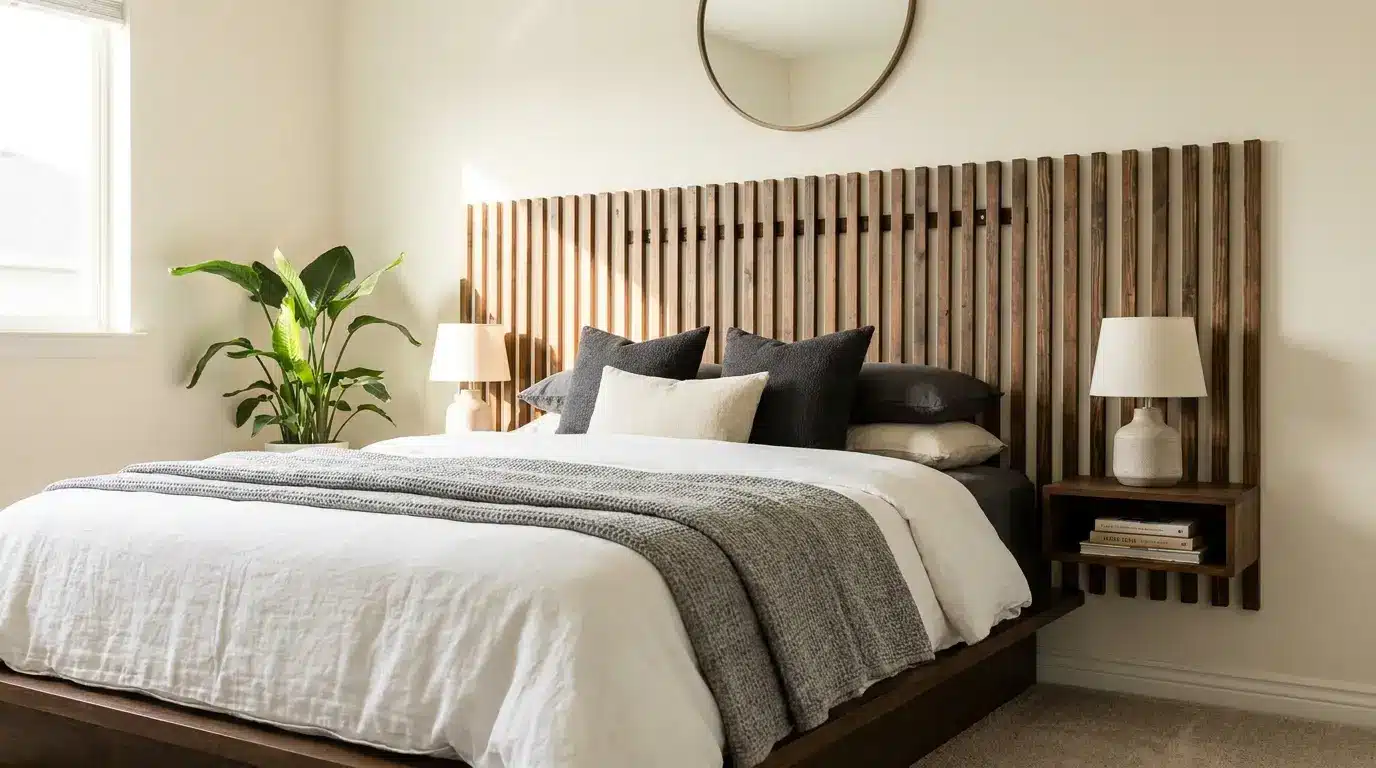
This design uses straight wooden strips with equal gaps for a clean, simple bed backdrop. It fits well in small or large rooms and can be made using basic cutting and measuring tools at home.
- Gap Spacing: Use a small spacer between each slat to keep an equal distance and avoid uneven lines during installation on the wall or bed frame
- Dark Finish: Apply dark paint or wood stain to give slats a stronger visual impact and match different room color themes easily
3. Plywood Headboard With Built-In Shelf
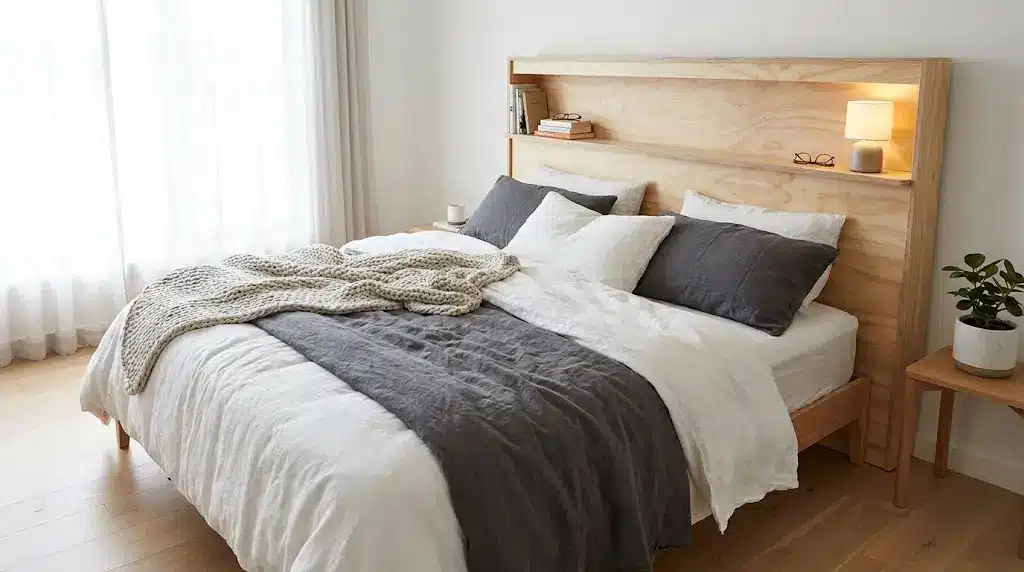
This headboard is made from a single plywood sheet with a small shelf added at the top. It is useful for keeping small items like books or glasses close to the bed without needing extra furniture.
- Top Support: Add a fixed strip along the top edge to create a stable shelf strong enough to hold light bedside items safely
- Extra Storage: Shelf space helps keep small daily items within reach while reducing clutter on side tables or floor areas around the bed
4. Upholstered Wooden Headboard
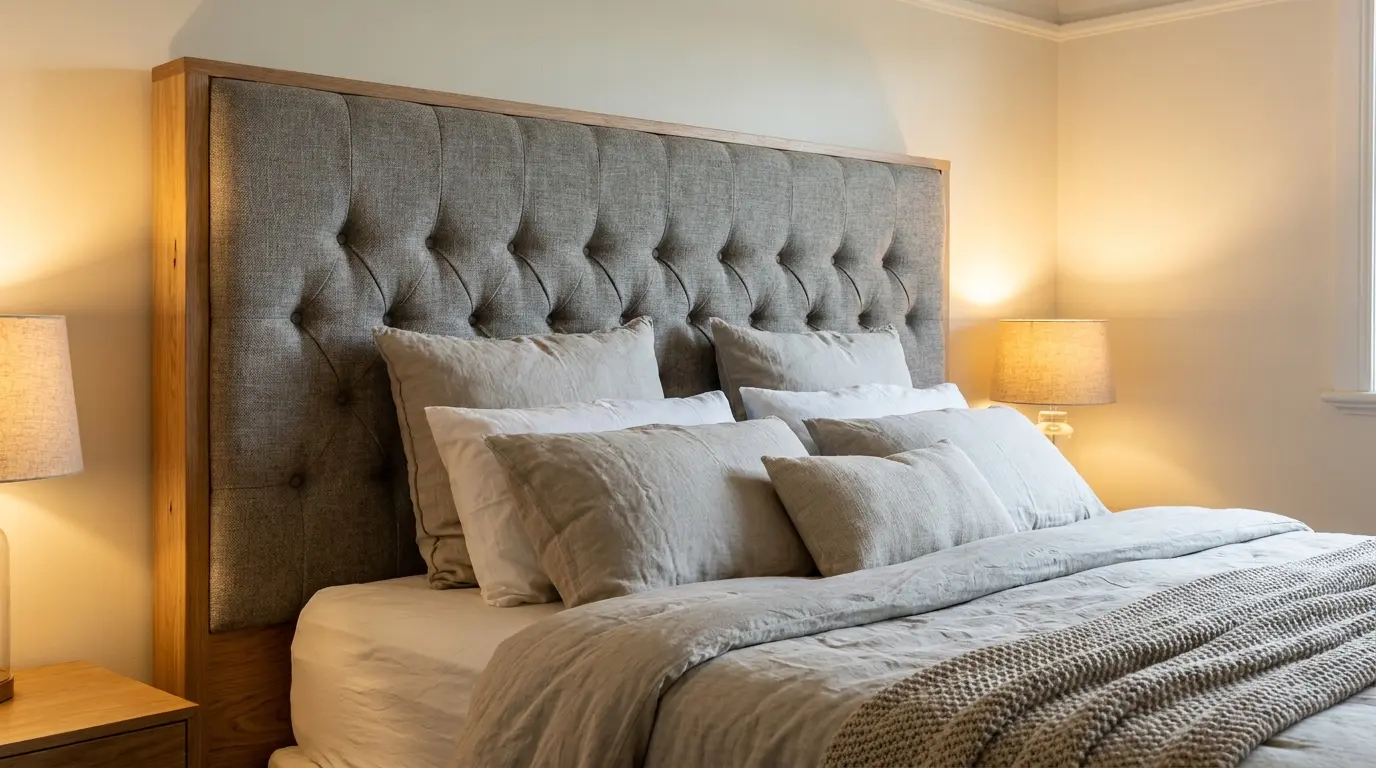
This headboard combines a wooden base with soft padding and fabric covering. It gives a comfortable surface for leaning while sitting in bed and also adds a softer look to the sleeping area.
- Soft Layer: Foam padding under fabric makes the headboard more comfortable for resting back while reading or using a mobile in bed
- Strong Frame: Wooden base keeps the structure firm, so it does not bend or move even after adding thick fabric and padding layers
5. Pallet Wood Headboard
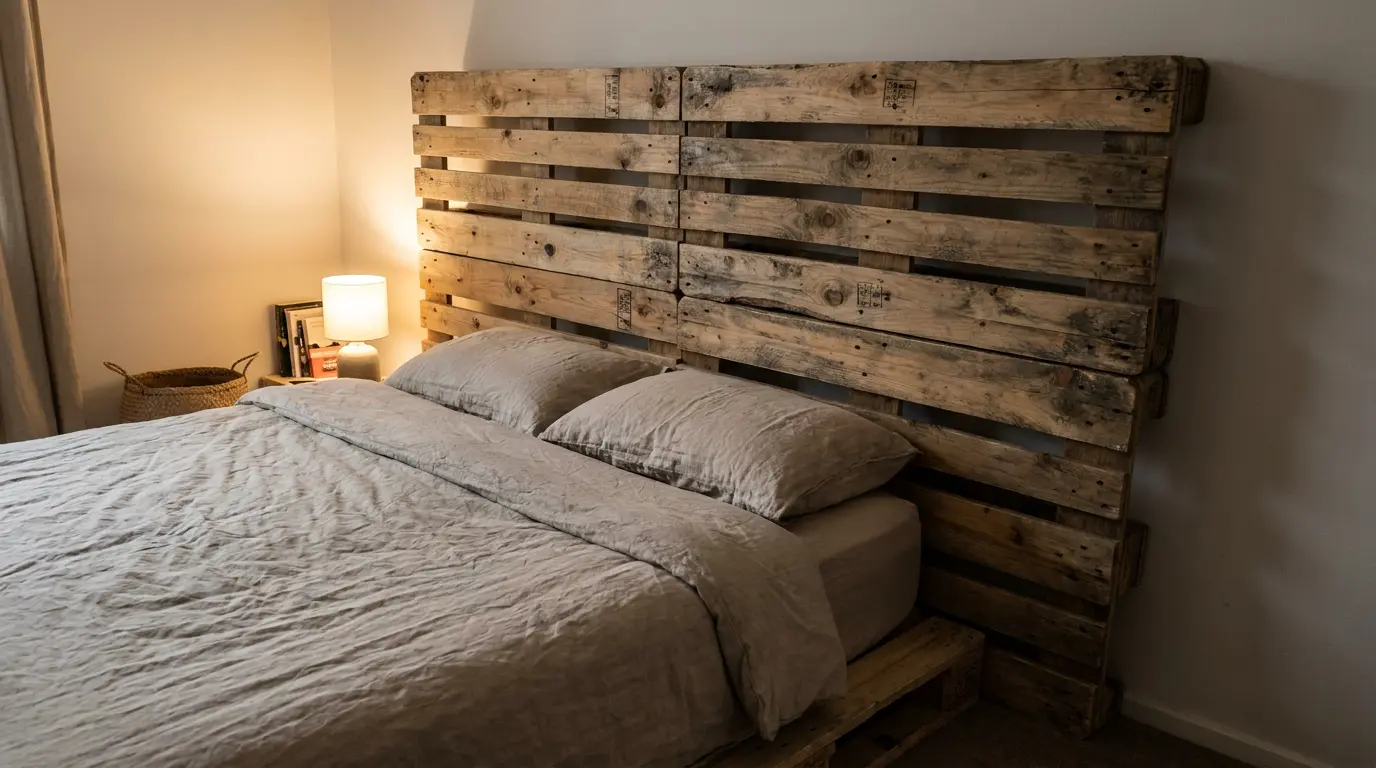
This design uses old pallets, stacked or arranged, to form a simple back panel for a bed. It is low-cost and works well for quick home projects, where style stays raw and simple without extra finishing work.
- Basic Cleaning: Remove nails and dust from pallets before fixing them to avoid damage and keep the surface safe for bedroom use
- Layer Build: Adding two pallet rows can create a deeper look and make the headboard feel more solid against the wall
6. Floating Headboard With LED Lighting
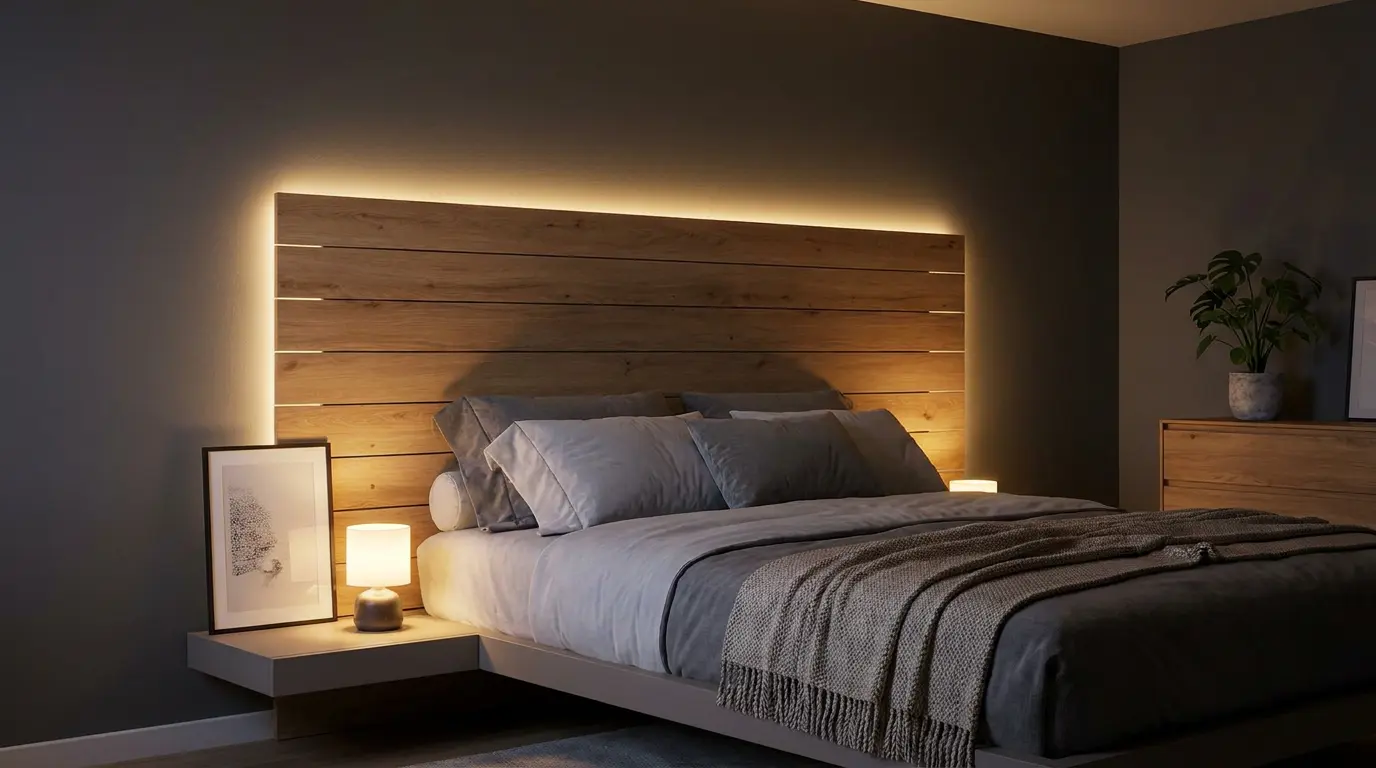
This headboard is fixed slightly above the wall and includes soft lighting behind it. It creates a gentle glow around the bed area and works well for night use without needing strong room lights.
- Hidden Wiring: Place LED strips behind the wood so wires are not visible and lighting stays clean and evenly spread behind the headboard
- Wall Fixing: Strong wall support keeps the headboard stable in a floating position while leaving space underneath for light to spread evenly
7. Headboard With Matching Floating Shelves
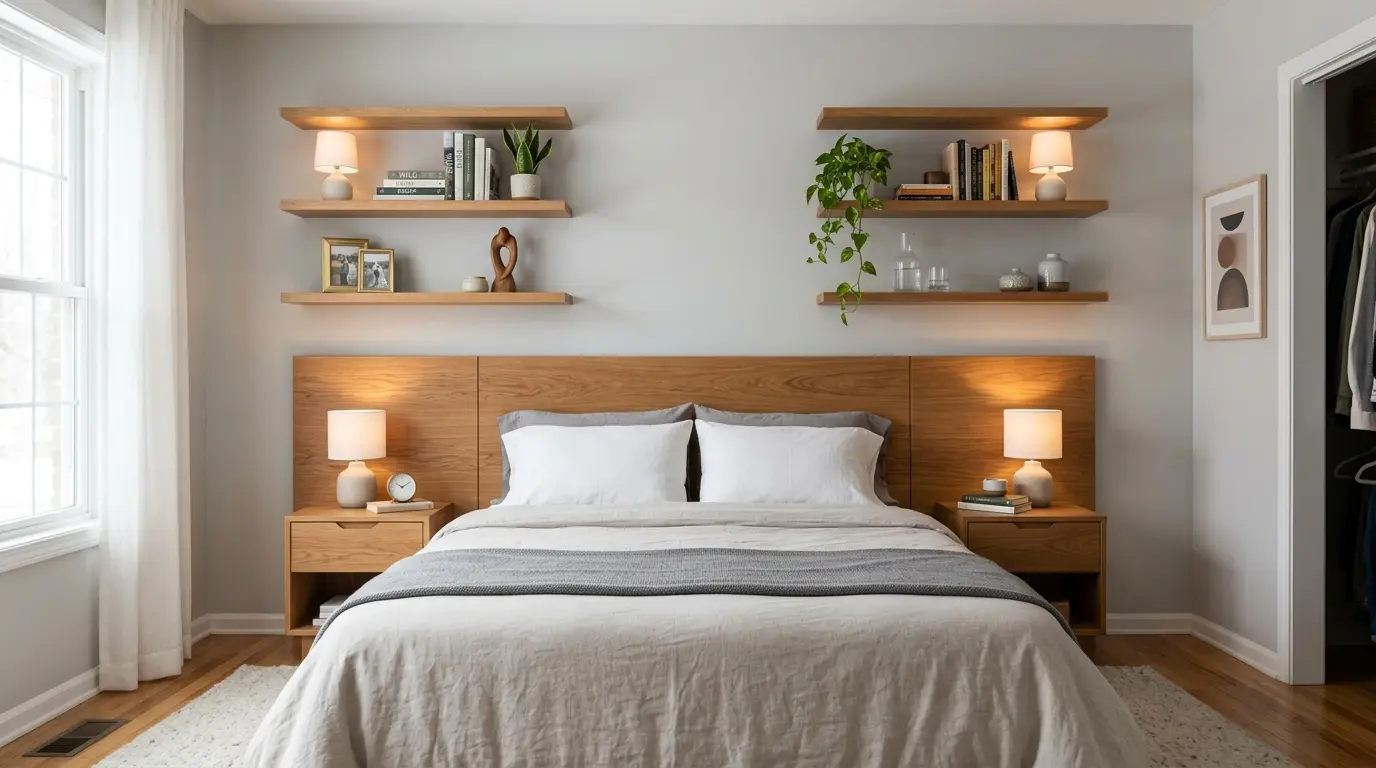
A central headboard panel with shelves fixed at matching height on each side. Keep both shelves exactly level; even a few millimeters off reads as crooked once the bed is in place.
Use the same wood and finish across all three pieces. If you’re already thinking through how to style your shelves, plan what you’ll put on them before deciding on the depth. 8 inches is usually enough for a lamp and small items.
Tips to Maintain and Clean a Wooden Headboard
Keeping a wooden headboard in good shape is not complicated. With a few simple habits like gentle cleaning, checking loose parts, avoiding scratches, and controlling moisture, you can keep it strong and looking fresh.
- Gentle Cleaning: Wipe painted or stained wood using a soft cloth and mild cleaner, avoiding harsh chemicals that damage the finish surface easily
- Scratch Care: Avoid dragging objects on the headboard surface and use soft padding to reduce marks, dents, and long-term visible wear damage
- Firm Checkups: Regularly tighten screws, joints, and wooden boards to maintain stability, prevent wobbling, and keep the structure strong over time use
- Moisture Control: Keep the headboard away from water exposure and dust buildup by wiping regularly and ensuring proper bedroom airflow in a daily routine
These small steps fit easily into daily bedroom care and help you maintain the headboard for a long time without extra effort.
Common Mistakes to Avoid During a DIY Headboard Project
DIY headboard work often looks simple, but small errors can affect strength, fit, and finish. Paying attention to basic steps like measuring, material choice, surface prep, and safe fixing helps avoid rework and keeps the final result stable and clean.
| Mistake Area | What Goes Wrong | Better Approach |
|---|---|---|
| Wrong Measurements | Uneven fit or gaps between the bed and the wall | Measure carefully and use a level tool before fixing |
| Weak Wood Choice | Frame bends or feels unstable | Use solid, straight, dry wood for strong support |
| No Sanding | Rough finish and poor coating | Sand properly before painting or staining |
| Poor Wall Fixing | The headboard becomes loose or unsafe | Use wall studs and strong anchors for support |
| Complex Design | Hard to build, more errors | Start with simple designs for easier assembly |
Avoiding these common mistakes makes the DIY process smoother and helps the headboard stay strong, safe, and visually clean for everyday bedroom use.
How to Keep Material Costs Down
The difference between a $40 headboard and a $120 one is usually fabric choice and whether you’re buying pre-cut wood. Neither spending level produces a better result, just different constraints.
- Reclaimed or scrap wood: Salvage yards, Facebook Marketplace, and the offcut bin at most lumber yards are the right places to look. Reclaimed wood for a headboard doesn’t need to be structurally graded; it just needs to be flat and dry.
- Pre-cut boards: Most hardware stores will cut sheet goods to your dimensions at low or no cost. This eliminates the need for a table saw and removes the most common source of measurement error.
- Reused furniture: Old cabinet doors, solid-core interior doors, and pew backs from estate sales all work as headboard bases. The profile is already there; you’re just finishing and mounting.
- Simple shapes: Every curve and routed edge adds time and tool requirements. A clean rectangle with good fabric costs less and photographs just as well. The DIY furniture makeover offers more budget-first approaches that still produce polished results.
Frequently Asked Questions
Can you make a headboard without power tools?
Yes. A handsaw, hammer, and staple gun are enough for the upholstered build in this guide. Ask the hardware store to make your OSB cuts, most do it at low or no cost. The only step that genuinely benefits from a power tool is drilling the T-nut holes, and a hand drill works fine for that.
What height should a DIY headboard be?
Most headboards read well between 24 and 48 inches above the top of the mattress. Low-profile beds suit the 24-inch end. Taller ceilings and statement rooms benefit from 36–48 inches. Use painter’s tape on the wall to test your chosen height before cutting.
How do I stop a wooden headboard from wobbling?
Wobble almost always comes from two bolts being tighter than the other two, or from the strut spacing not matching the bed frame exactly. Loosen all four bolts, re-seat the struts, and tighten evenly in a diagonal sequence, same logic as tightening wheel nuts.
What is the cheapest way to make a headboard?
Pallet wood mounted directly to the wall is the cheapest build at near-zero material cost. If you want an upholstered look, reclaimed plywood with a discounted fabric remnant keeps the total under $30 in most markets.
What type of wood is best for a DIY headboard?
OSB or 3/4-inch plywood for an upholstered build, both are dimensionally stable and take staples without splitting. For an exposed-wood look, pine is the most forgiving to work with; oak gives a harder, more durable surface. See the wood types for furniture for a full species comparison.
How do you attach a DIY headboard to a bed that has no headboard brackets?
Two options: mount the headboard directly to the wall using a French cleat rated for the weight, or retrofit metal headboard brackets to your bed frame. Most bed frame side rails have pre-drilled holes for standard brackets, measure the bolt spacing before ordering struts.
Can you make a headboard for a king-size bed with basic tools?
Yes, with one adjustment: a king headboard (typically 76–80 inches wide) requires two OSB sheets joined at the center. Join them with a batten strip on the back, keep the seam behind the center pillow position, and it won’t be visible once the bed is dressed.
Final Wrap
Building your own headboard is less about complicated tools and more about simple planning, patience, and choosing a design that fits your space. Once you understand the basic steps, from measuring and cutting wood to finishing and installing, the whole process feels much more doable than it first seems.
I’ve seen how even small DIY changes can make a bedroom feel more personal and comfortable, and you can experience the same shift in your own space.
When you start learning how to make a headboard, you also open up ideas for storage, shelves, and better room use without spending too much. Try one of the ideas shared here and see what works for your setup. You can also share your thoughts or check other DIY guides for simpler home projects.





