


| Difficulty | 2/5, Straightforward build with basic power tools; no joinery skills needed |
| Time | 3 to 4 hours for a set of three shelves |
| Cost | $30 to $60 for materials (three shelves from a single 12-foot pine board) |
| Tools Needed | Circular saw, or miter saw, drill, stud finder, level, measuring tape, sandpaper |
| Skill Required | Beginner, if you can drill a straight hole and use a level, you can do this |
If you want to know how to make floating shelves at home without paying $80 a shelf at the store, this is the build I come back to every time. One 12-foot pine board, a handful of oak dowels, and an afternoon is all it takes for three shelves that hold up and look clean against the wall.
I’ve built this set four times now, in a bathroom, two kitchens, and a small bedroom, and the second build went noticeably faster once I stopped making the mistakes I made the first time.
I’ll tell you what those mistakes were before we get into the steps.
Where Most People Go Wrong with DIY Floating Shelves
The most common failure point isn’t the cutting or the finishing, it’s the wall mounting. Specifically, drilling the dowel holes into the wall at a slight angle without realizing it, then wondering why the shelf won’t slide straight.
The second issue is skipping the stud finder and trying to anchor into drywall alone. Drywall won’t hold a loaded shelf. It will eventually pull away from the wall, sometimes with the shelf still on it.
The third mistake, and this one is mine, is cutting all the boards first and drilling all the holes before doing a single dry-fit. If one measurement is off, you’ve wasted wood. Do one shelf start to finish before cutting the rest.
What Size Should Floating Shelves Be?
For most rooms, a length of 24 to 36 inches works well. It’s manageable to cut, carries enough surface area to be useful, and spans at least two wall studs in standard framing.
A depth of 6 to 8 inches is the right call for decor, mugs, small plants, and folded towels. Go deeper than 8 inches, and you’re adding leverage on the wall that the dowel system isn’t built to handle long-term.
Thickness matters more than most guides admit. A board thinner than 1.5 inches will sag under real weight, even light decor, within a year. Stick to 1.5 inches or thicker, which is exactly what a 2×8 pine board gives you after milling.
If you’re stacking shelves, leave at least 10 to 12 inches of vertical clearance between them. Less than that, and you can’t actually reach the lower shelf without knocking things over.
Best Wood for DIY Floating Shelves
The wood you choose changes how the shelf looks, how it finishes, and what it costs.
For a deeper look at how each species behaves over time, wood types for furniture covers hardness, grain, and finish compatibility in detail. For shelf builds specifically, here’s how the main options break down:
| Wood Type | Best For | Finish | Cost |
| Pine | First-time builds, painted shelves | Paint or light stain | Lowest |
| Poplar | Smooth painted finish | Paint (not stain) | Low to medium |
| Oak | Stained natural wood look | Stain or oil | Medium to high |
| Plywood | Box-style or extra-long shelves | Paint with edge banding | Low |
| Reclaimed Wood | Rustic rooms; character pieces | Clear coat or wax | Varies widely |
For a first build, pine is the right call. It’s forgiving, inexpensive, and available at any hardware store. If you go with reclaimed wood, check that it’s straight and dry before you cut; warped boards are nearly impossible to hang flush against the wall.
Tools and Materials You’ll Need
| Item | What It’s For |
| 2×8 pine board (12 feet) | Main shelf body yields three 30-inch shelves |
| 1/2-inch oak dowels (36-inch rod) | Hidden wall supports |
| Circular saw, or miter saw | Cuts shelf boards and dowels to length |
| Drill with a 1/2-inch bit | Drills holes in the shelf back edge and the wall studs |
| Stud finder | Locates wall studs for safe anchoring |
| Level (24-inch minimum) | Keeps the shelf from tilting |
| Measuring tape and pencil | Marks, cuts, and wall positions |
| Speed square | Guides straight cut lines |
| Sandpaper (120 and 220 grit) | Smooths edges and preps for finish |
| Wood stain, paint, or clear coat | Final finish |
| Wood filler | Fills screw holes and small gaps |
| Small wood screws | Locking screws to secure the shelf to the dowels |
| Safety glasses | Eye protection during cutting and drilling |
One note on screws: the locking screw at the end of this build goes through the shelf into the dowel, not into the wall. You’re not using screws to bear load here; that’s the dowel’s job. The screw just stops the shelf from sliding forward off the wall over time.
Cut List for Three Floating Shelves
| Part | Dimensions | Quantity |
| Shelf boards | 2×8, cut to 30 inches | 3 |
| Oak dowels | 1/2-inch diameter, cut to 4 to 6 inches | 6 to 9 (2 to 3 per shelf) |
| Locking screws | Small wood screws | 1 per shelf |
| Finish | Paint, stain, or clear coat | As needed |
| Wood filler | Small container | As needed |
A 12-foot pine board gives you three shelves at just under 31 inches each, accounting for the saw kerf. Lay the full cut list out on paper before making your first cut; it takes two minutes and saves a ruined board.
How to Make Floating Shelves: Step by Step
This method shows you how to build floating shelves using a solid wood board and hidden dowel supports, so the shelves appear to float on the wall. It works best for light decor, mugs, small plants, candles, and bathroom items.
Step 1: Cut the Shelf Boards
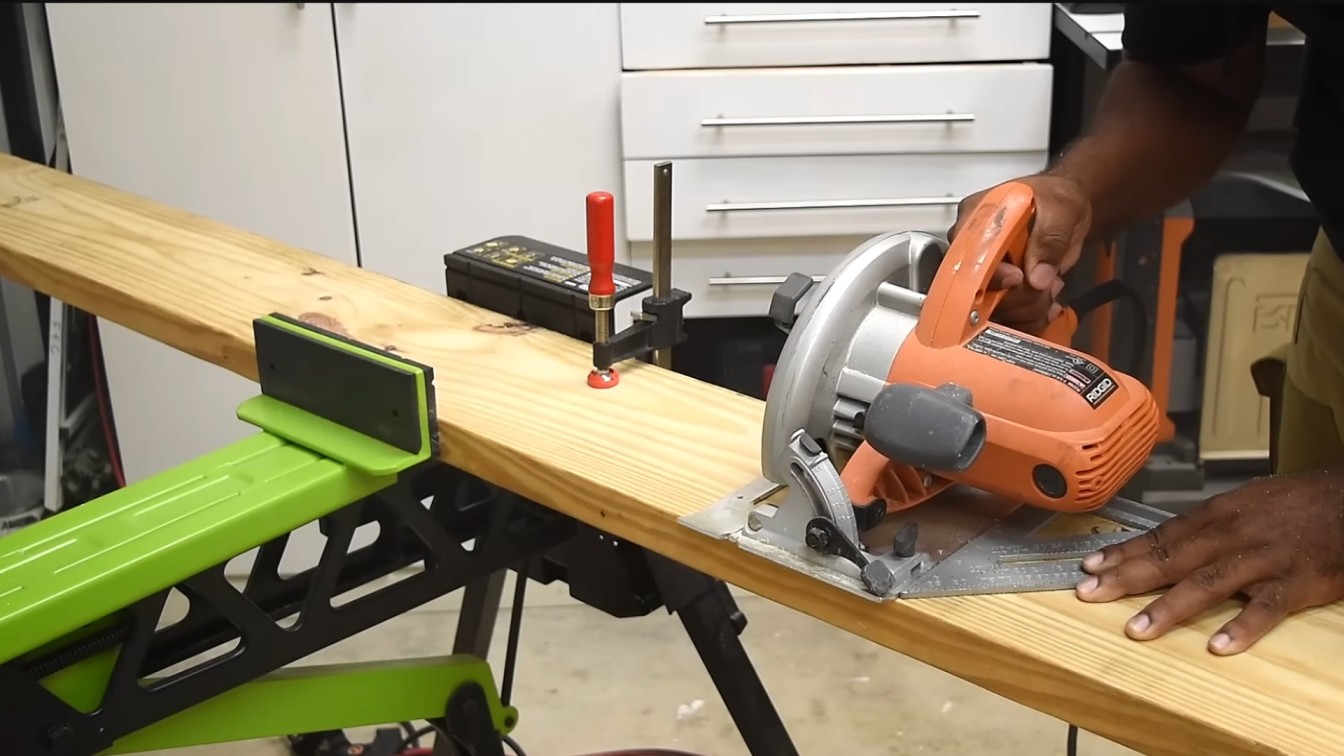
Measure and mark each cut with a pencil and speed square. Clamp the board to a stable surface before cutting; it should not move.
Make your cuts with a circular saw or miter saw, then sand the cut edges immediately with 120-grit sandpaper. Sharp edges on a shelf are an annoyance every single time you set something down.
Step 2: Cut the Dowel Supports
Cut the 1/2-inch oak dowel into 4 to 6-inch sections. Two dowels per shelf is the minimum; three is better for a 30-inch span.
The dowels need to be consistent in length; if one sits 1/2 inch shorter than the others, the shelf will tilt slightly when it’s on the wall.
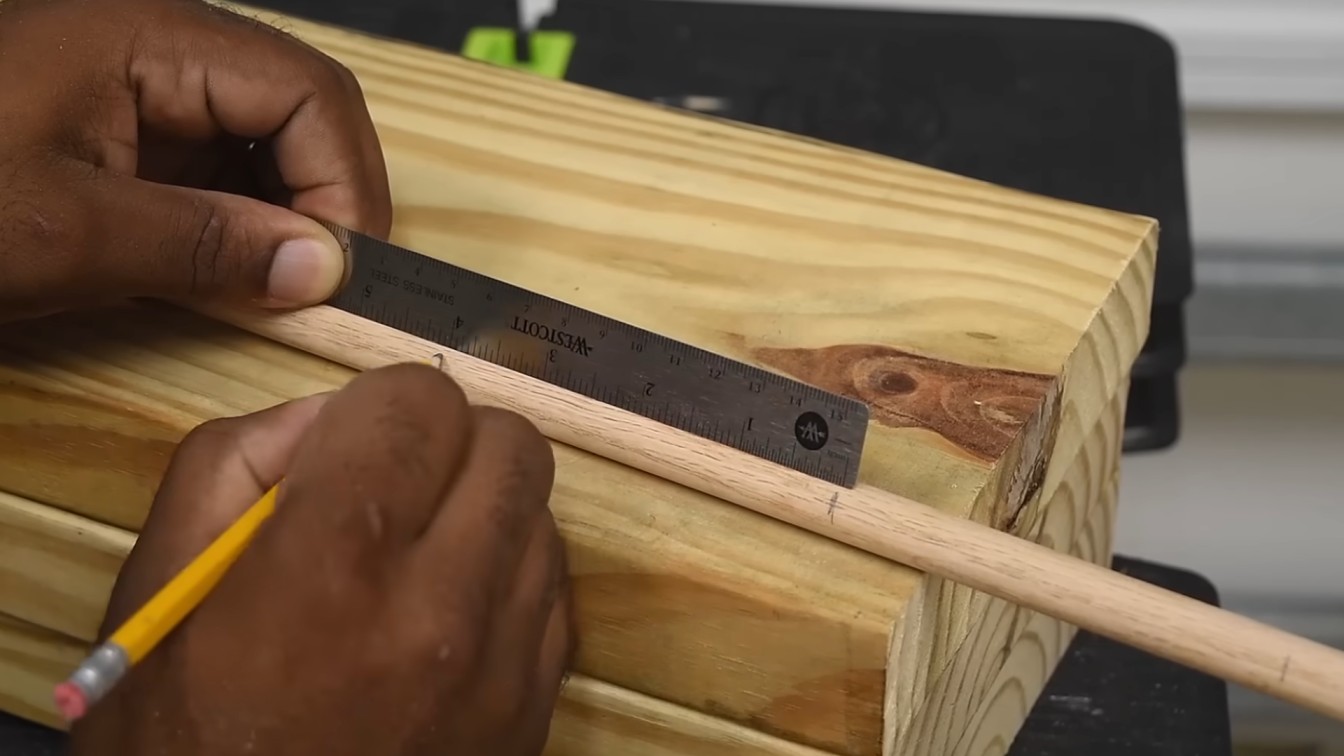
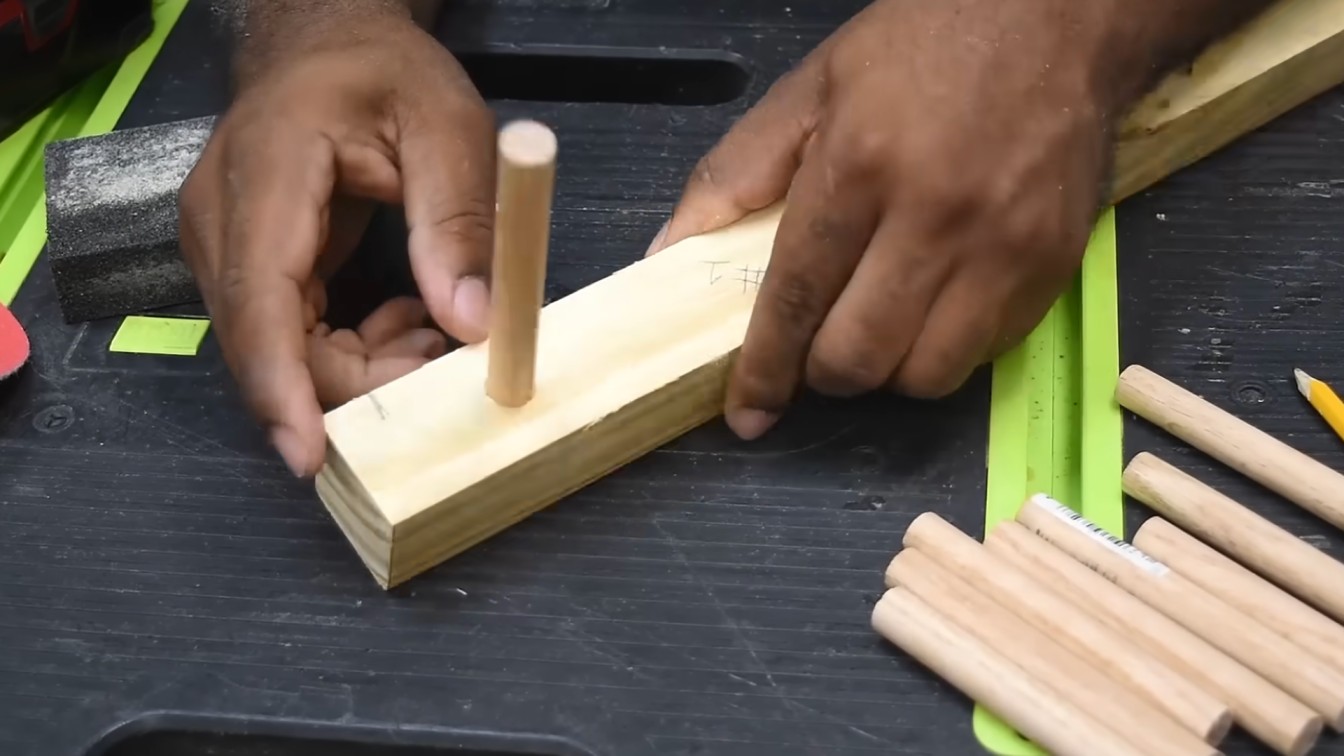
Step 3: Mark and Drill the Shelf Holes
Lay the shelf face down on a flat surface. Mark the dowel hole positions on the back edge, evenly spaced.
Try to position them to align with wall studs; that alignment determines where the shelf actually goes on the wall, so get a stud finder out before marking and work backward from where the studs are.
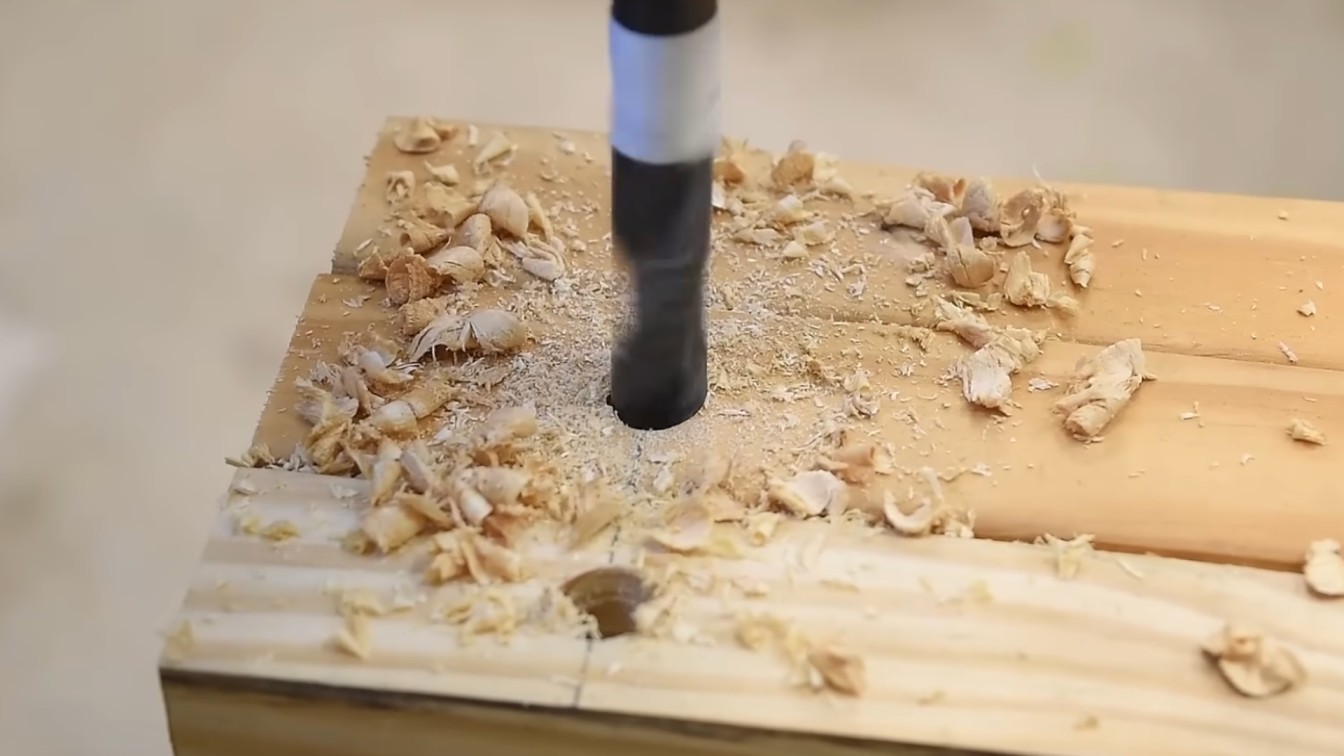
Drill straight into the back edge of the shelf using a 1/2-inch bit. Go slowly. If the drill drifts even 5 degrees off horizontal, the shelf will sit at an angle on the wall. Don’t drill all the way through; stop about 1/2 inch from the front face of the board.
| Pro Tip: Wrap a piece of masking tape around the drill bit at your target depth. When the tape hits the wood, you’re done, no guesswork, no drilling through the front. |
Step 4: Find the Wall Studs and Mark the Shelf Position
Run the stud finder along the wall at shelf height and mark every stud center with a pencil.
Standard stud spacing is 16 inches, but older homes vary; don’t assume. Use the level to draw a light horizontal line where the bottom of the shelf will sit.
This line is your reference for keeping the shelf straight, and it should be checked twice before you drill anything into the wall.
Step 5: Drill the Wall Stud Holes
Drill matching holes into the wall studs at the marked positions. The hole placement in the wall must match the hole spacing in the shelf exactly; measure both twice.
Drill at least 2 inches deep into each stud. Blow out any dust from the holes before installing the dowels.
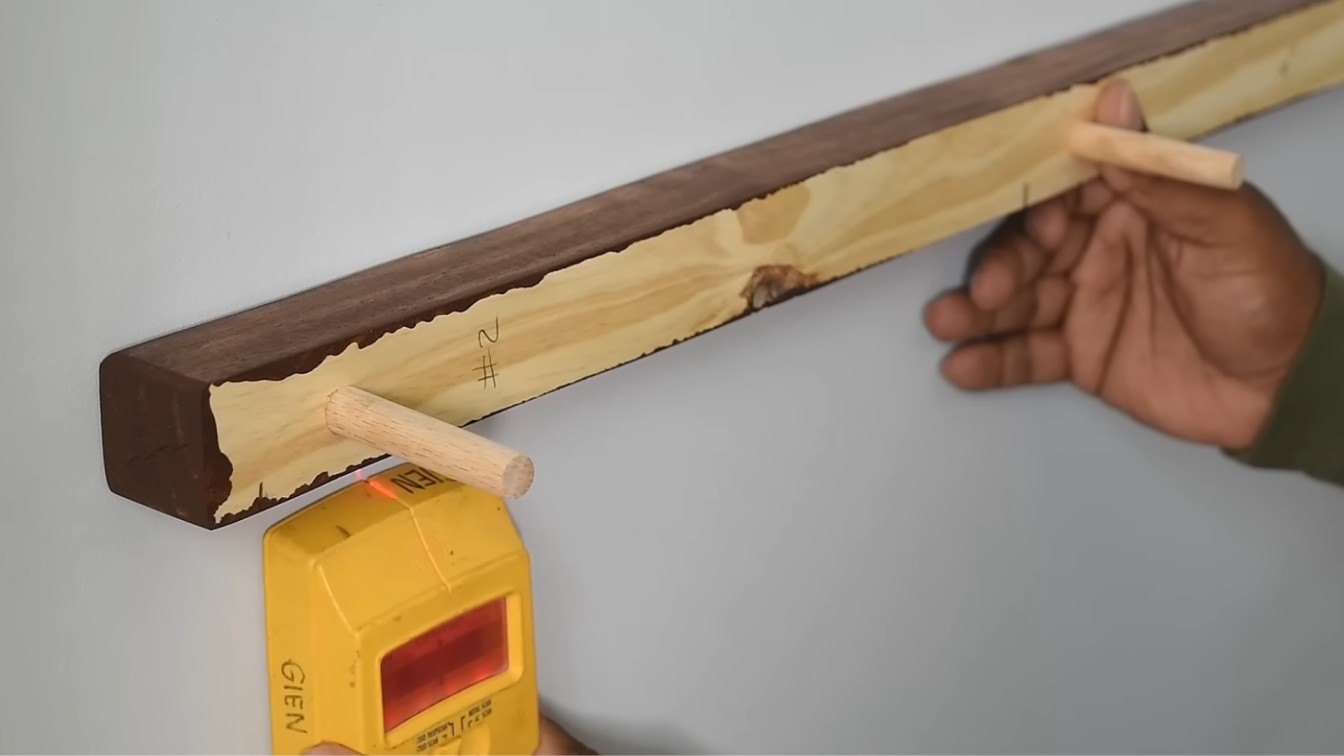
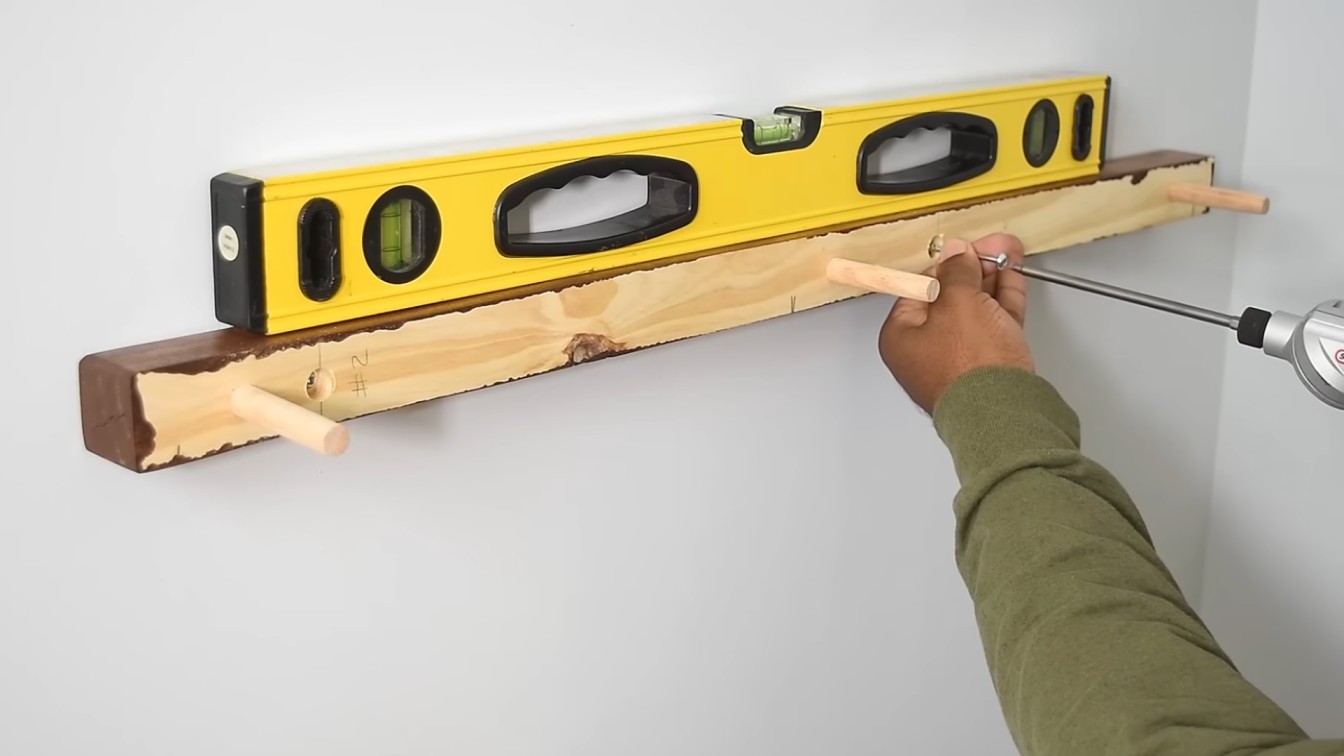
Step 6: Install the Dowels
Press the dowels firmly into the wall holes. They should feel solid, no wobble. If a dowel spins in the hole, the hole is slightly too large.
A drop of wood glue in the hole fixes this; let it set before sliding the shelf on. If the dowel is too tight to press in by hand, sand it lightly.
Step 7: Slide the Shelf Onto the Dowels
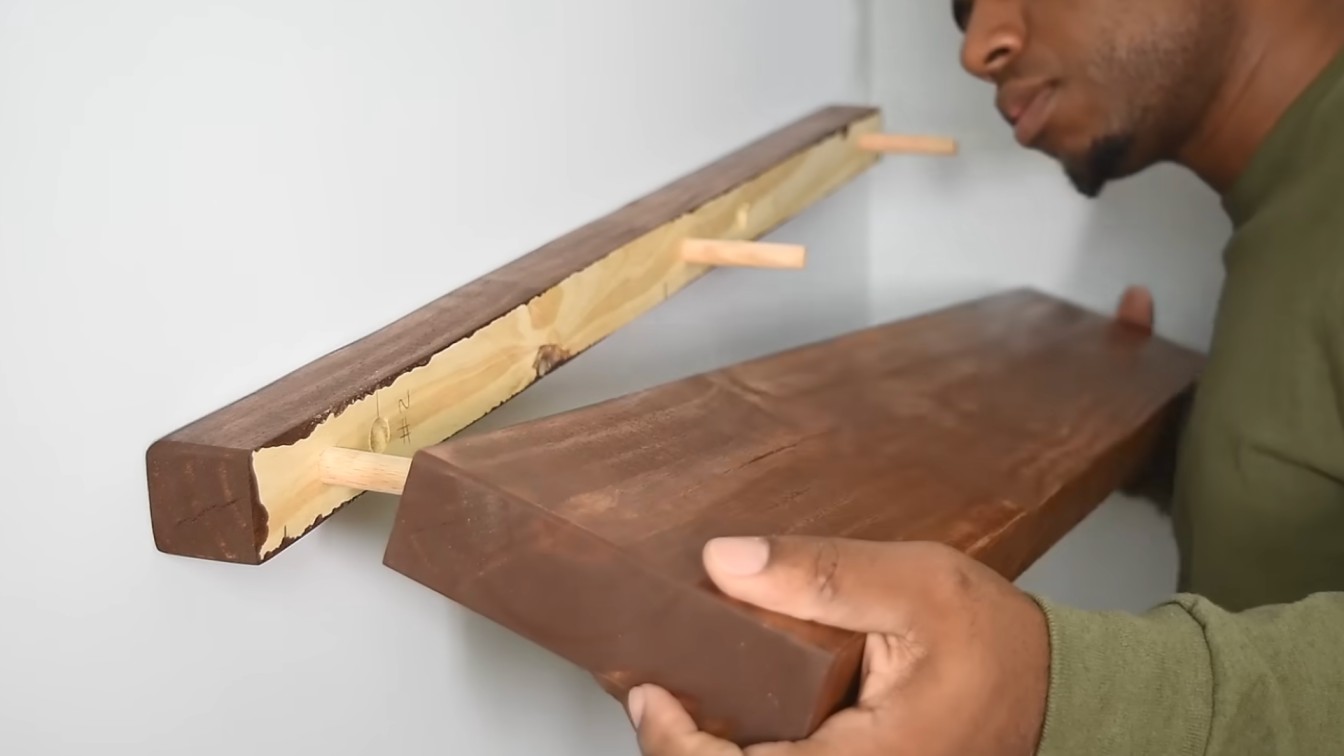
Line up the shelf holes with the dowels and slide it straight back. The back face of the shelf should sit flush against the wall.
Don’t force it; if it resists, remove it and check whether the holes are aligned. Forcing the shelf on a slightly misaligned dowel can split the wood at the back edge.
Once the shelf is on, lay the level on top. Make any small adjustments now, before the next step locks it in place.
Step 8: Add the Locking Screw
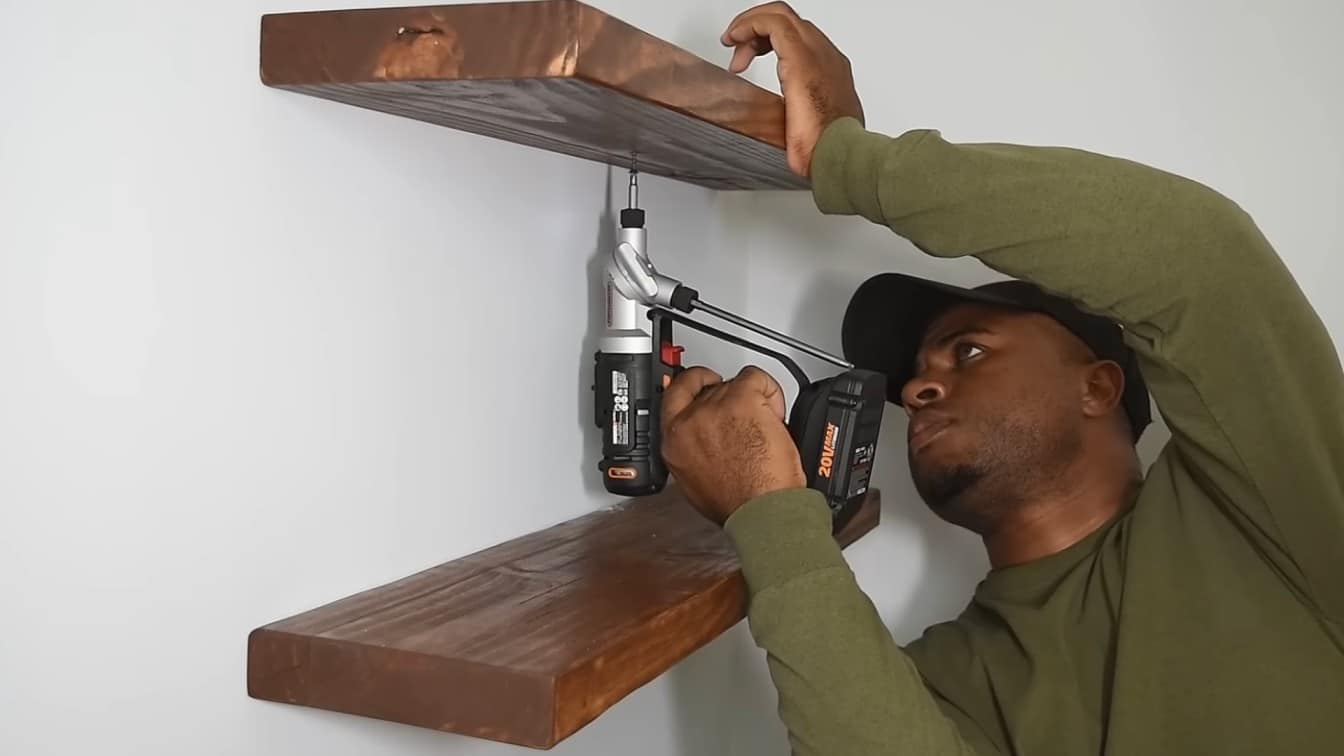
Drive a small wood screw through the underside of the shelf into one of the dowels.
This isn’t a load-bearing fix; it just prevents the shelf from sliding forward on the dowels over time, which can happen in rooms with vibration or on walls that flex slightly. Fill the screw hole with wood filler if you want the underside to look clean.
For a detailed walkthrough, the video below shows the full process from cut to install:
The Faster Way I Found the Second Time
On my first build, I finished all three shelves and then started mounting, only to find that the studs in the bathroom wall were not evenly spaced, which meant my pre-drilled shelf holes didn’t line up the way I expected. I had to redrill one shelf’s holes entirely.
The fix: find the studs first, mark their center positions on the wall, and use those positions to determine your hole spacing in the shelf, not the other way around. Thirty seconds of stud-finding before you touch a drill bit saves a ruined board.
How Much Weight Can DIY Floating Shelves Hold?
With dowels anchored into two wall studs, a pine shelf at 1.5 inches thick can safely hold light-to-moderate everyday items, think mugs, small plants, candles, framed photos, and a few books. That’s roughly 15 to 25 lbs per shelf under normal conditions.
What erodes that capacity quickly:
- Anchoring into drywall only: Drywall anchors pull out under sustained load. Studs are non-negotiable for this build.
- Shelf depth over 8 inches: Extra depth adds leverage on the wall. The further the load sits from the wall surface, the more force the dowels feel.
- Warped boards: A board that doesn’t sit flush against the wall stresses the dowels unevenly, especially at the ends.
For anything heavier, such as cast iron cookware, stacked dishes, or storage bins, the dowel method isn’t the right system. Use a hidden bracket or a wall cleat that spans multiple studs instead.
Optional Upgrades Once the Basic Shelf Is Done
| Upgrade | What It Does | Best Room |
| Hidden bracket system | Metal rods inside the shelf increase load capacity significantly | Kitchen, office |
| Wall cleat | A horizontal wood support that spans studs is better for long shelves | Living room, laundry |
| Edge trim | Adds visual thickness to thin boards or plywood | Any room |
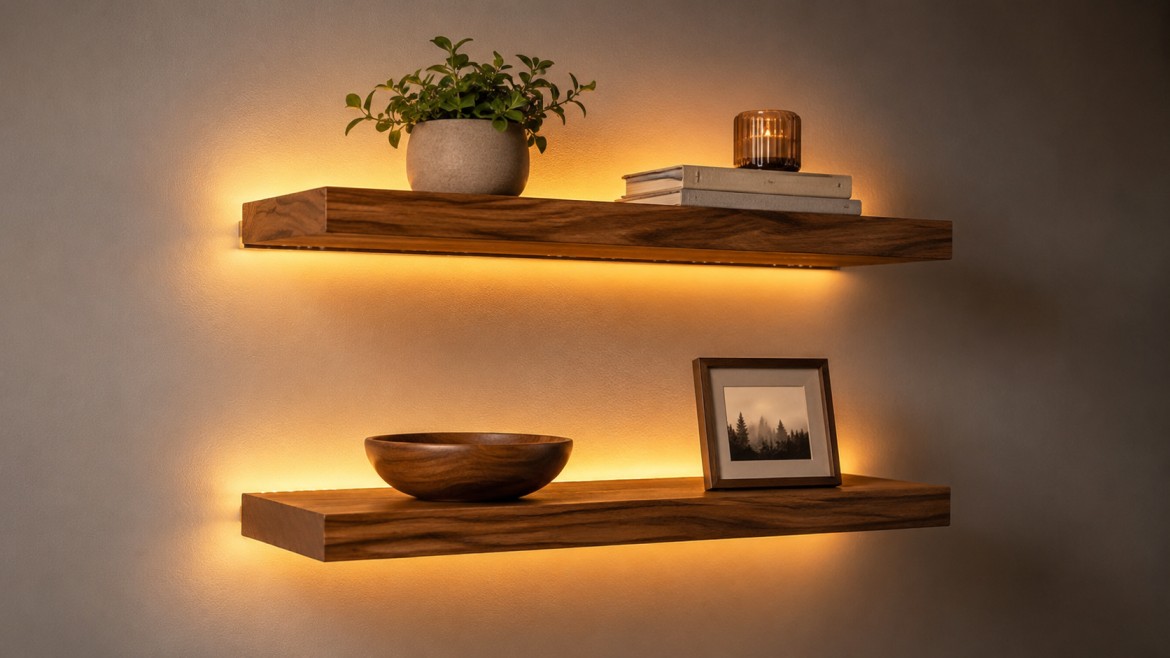
| LED strip lighting | Under-shelf lighting creates a usable task light or ambient glow | Kitchen, bathroom, desk |
| Clear coat topcoat | Seals the finish so the shelf wipes clean easily | Kitchen, bathroom |
Start with the upgrade that solves a real problem in the room. LED strip lighting is purely aesthetic, worth adding, but not urgent. A hidden bracket system matters the moment you plan to put anything genuinely heavy on the shelf.
How to Finish and Style the Shelves
Sand the shelf to 220 grit before applying any finish. Skipping that step and painting over 120-grit pine leaves a surface that looks slightly rough under good light, fine in a garage, not great in a bathroom or bedroom.
For bathrooms and kitchens, a clear coat over the stain or paint is worth the extra step. Steam and cooking grease work their way into unsealed wood faster than you’d expect. A sealed shelf takes 30 seconds to wipe down; an unsealed one starts to stain around the 6-month mark.
For styling ideas that work in a real minimalist room rather than a catalog shot, the minimalist home decor covers how to keep surfaces from looking cluttered without stripping them bare.
When it comes to floating shelves specifically, the rule is simple: leave a third of the shelf empty. One tall item, one medium item, one small one, and an open space around all three.
For bedroom shelves, the cozy minimalist bedroom ideas guide shows how to style open shelving without making the room feel busy.
Avoid filling every inch. A shelf that’s loaded edge to edge reads as storage, not design. Place heavier items toward the back and closer to the wall; it reduces the forward pull on the dowels and keeps things from tipping.
Common Mistakes That Derail This Project
- Skipping the stud finder. There is no workaround. Drywall anchors are not a substitute for studs in a floating shelf build that uses dowels.
- Drilling the shelf holes before finding the studs. Do the studs first, always. Reverse engineering a set of pre-drilled holes to match stud locations is a headache that usually ends with a board in the trash.
- Using boards thinner than 1.5 inches. They sag, they can’t fully conceal the dowel, and they feel flimsy when loaded.
- Not checking the level twice. Once before tightening, once after. The shelf can shift slightly as you secure the locking screw.
- Rushing the finish. Paint or stain that hasn’t fully dried will smear when you install the shelf or set the first item on it. Let it cure fully, typically 24 hours for paint, longer for oil-based stain.
Frequently Asked Questions
How do you make floating shelves without brackets?
The dowel method covered in this guide is the most common bracket-free approach. Oak dowels anchor into wall studs and slide into matching holes drilled in the shelf’s back edge.
The shelf sits flush against the wall with no visible hardware. A locking screw on the underside keeps it from sliding forward.
What wood is best for DIY floating shelves?
Pine is the best starting point for beginners, inexpensive, easy to cut, and forgiving of small mistakes. Oak works better for a stained natural finish.
Poplar is the right pick if you want a painted shelf with a smooth, furniture-grade surface. Avoid particleboard for anything load-bearing.
How thick should a floating shelf be?
At least 1.5 inches for a standard dowel-mounted shelf. Thinner boards sag under real weight and can’t fully conceal the dowels.
A standard 2×8 pine board gives you that thickness after milling and is the most common board for this build.
Can floating shelves hold books?
A few books, yes, if the shelf is anchored into wall studs with at least two dowels. A full row of hardcover books is pushing the limit of this build.
For a dedicated bookshelf, use a hidden bracket system or a wall cleat anchored to three studs, not two.
How far apart should floating shelf dowels be?
Space dowels evenly, ideally lining them up with wall studs. For a 30-inch shelf, two dowels at roughly 8 inches from each end work well.
For a 36-inch shelf, three dowels distributed evenly give better support across the span.
Is it cheaper to build or buy floating shelves?
Building is almost always cheaper if you already own the tools. A 12-foot pine board, a dowel rod, screws, and finish run $30 to $60 and yield three shelves.
Store-bought floating shelves of comparable quality typically cost $40 to $80 each, and usually have less solid wood in them.
How do floating shelves stay up without visible support?
The dowels anchored into wall studs are the support; they’re just hidden inside the shelf.
The shelf slides over the protruding dowels, and the wall bears the load through those anchored points. The shelf appears to float because no bracket or hardware extends below or around it.
Final Verdict
If you want to know how to make floating shelves that look clean and hold up in daily use, this dowel method is the one I’d recommend for a first build.
It costs $30 to $60 in materials, takes an afternoon, and produces shelves that you can put real objects on without worrying.
The one thing I’d do differently from my first attempt: find the studs before cutting a single board, and work all your measurements from there. That one change cut my installation time in half on every build since.
Start with one shelf, get it level and flush, then repeat for the rest. The second one always goes faster.


