
| Difficulty | 2/5 — manageable for a first-timer with patience |
| Time | 4–6 hours (including dry time between steps) |
| Cost | $30–$80 for a standard indoor piece |
| Tools Needed | Sanding block or orbital sander, 80/120/180-grit sandpaper, clean rags, bristle or foam brush, pre-stain conditioner (for softwoods), wood stain, polyurethane sealer |
| Skill Required | Beginner |
Learning how to stain wood correctly is a half-day project that goes wrong for the same reasons every time: skipping prep, using too much stain, or not wiping off the excess before it dries.
I made all three of those mistakes on my first bookshelf. The second time, I got a finish I was genuinely happy with, and the only real difference was following the right order and not rushing.
This guide covers every step from raw wood to sealed surface, including the prep work that most tutorials skip past too quickly.
It also covers what changes depending on your wood type, because pine and oak behave very differently under the same stain.
What Can Go Wrong Before You Open the Can
The most common staining failures are not application errors. They happen in the prep stage, and by the time you see them, the stain has already dried. Here is what to watch for before you start.
Stain needs bare, open wood pores to absorb evenly. Any old finish, glue residue, wax, or even fine sanding dust sitting on the surface can block absorption and leave blotchy or pale patches. Minwax notes that a stain applied over an existing sealed surface will not penetrate the wood at all; it will simply sit on top and wipe off.
| Surface Condition | What It Means for Your Prep |
| Bare, unfinished wood | Ready for sanding and dust removal |
| Old clear coat or paint | Needs full sanding or chemical stripping first |
| Glue spots | Block stain and leave pale patches, scrape and sand out |
| Deep scratches | Hold extra stain and darken more than the surrounding wood |
| Softwood (pine, poplar, maple) | Absorbs unevenly, needs pre-stain conditioner |
Run your hand over the whole surface before anything else. If you feel rough patches, old finish buildup, or sticky spots, address those first. Stain will make every surface problem more visible, not less.
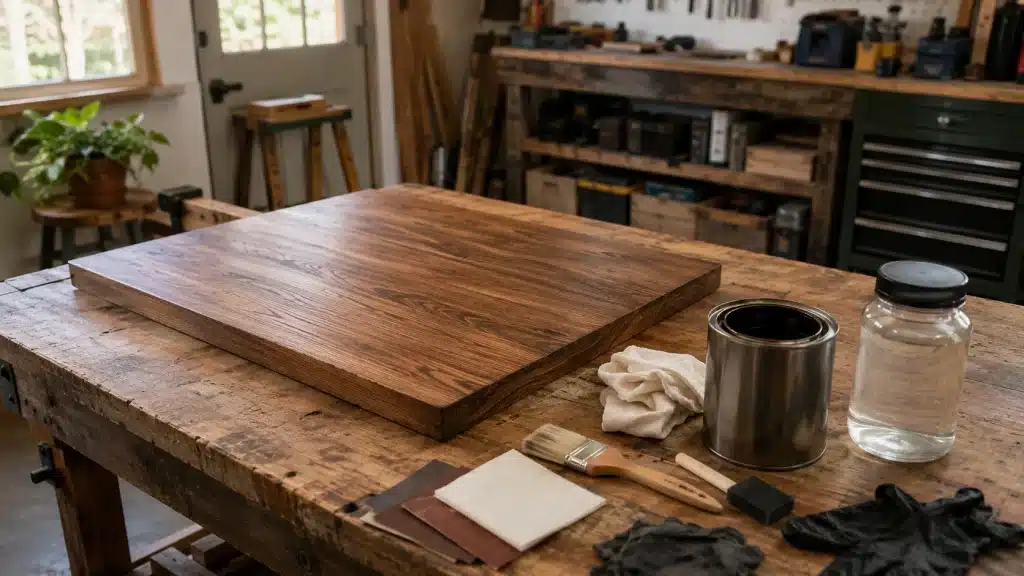
How to Stain Wood Step by Step
Follow this order exactly. Each step sets up the next one, and skipping ahead is where results fall apart.
Tools You Need to Stain Wood
You do not need a large kit. For most indoor pieces, this list covers everything. The one item people skip most often is the pre-stain conditioner, and that skip is the reason softwood staining jobs end up blotchy.
| Prep Tools | Application | Finishing |
| Sanding block or orbital sander | Wood stain | Polyurethane or polycrylic sealer |
| 80-grit sandpaper | Pre-stain conditioner | Foam brush |
| 120-grit sandpaper | Bristle or foam brush | 180-grit sandpaper (between coats) |
| 180-grit sandpaper | Clean cotton rags | Extra clean rags |
| Damp cloth | Slightly damp application cloth | Small roller (large flat pieces) |
| Safety Note: Oil-based stains can cause rags to self-ignite when balled up and left in a warm place. OSHA requires solvent-soaked rags to be stored in sealed, fire-resistant metal containers until disposal. Lay used rags flat outside to dry completely, or submerge them in water in a sealed metal bin before binning. |
With tools sorted, the actual work starts with the sandpaper, not the stain can.
Step 1: Sand the Surface

Start with 120-grit sandpaper on bare wood, or 80-grit if you are removing an old finish. Always sand with the grain, not across it. Cross-grain scratches hold more stain than the surrounding wood and show up as dark lines once the stain dries.
After the first pass, move to 180-grit for a smooth surface. Wipe the wood with a barely damp cloth to raise the grain slightly, let it dry for 15 minutes, then sand again lightly with 180-grit. This prevents the grain from lifting under the stain and creating a rough texture after it dries.
| Pro Tip: Do not go finer than 180-grit (or whatever the stain label recommends) on wood you plan to stain. Sanding too fine closes the wood pores and the stain will sit on top rather than soak in. I learned this the hard way on a maple tabletop that came out looking almost gray. |
Step 2: Remove All the Dust
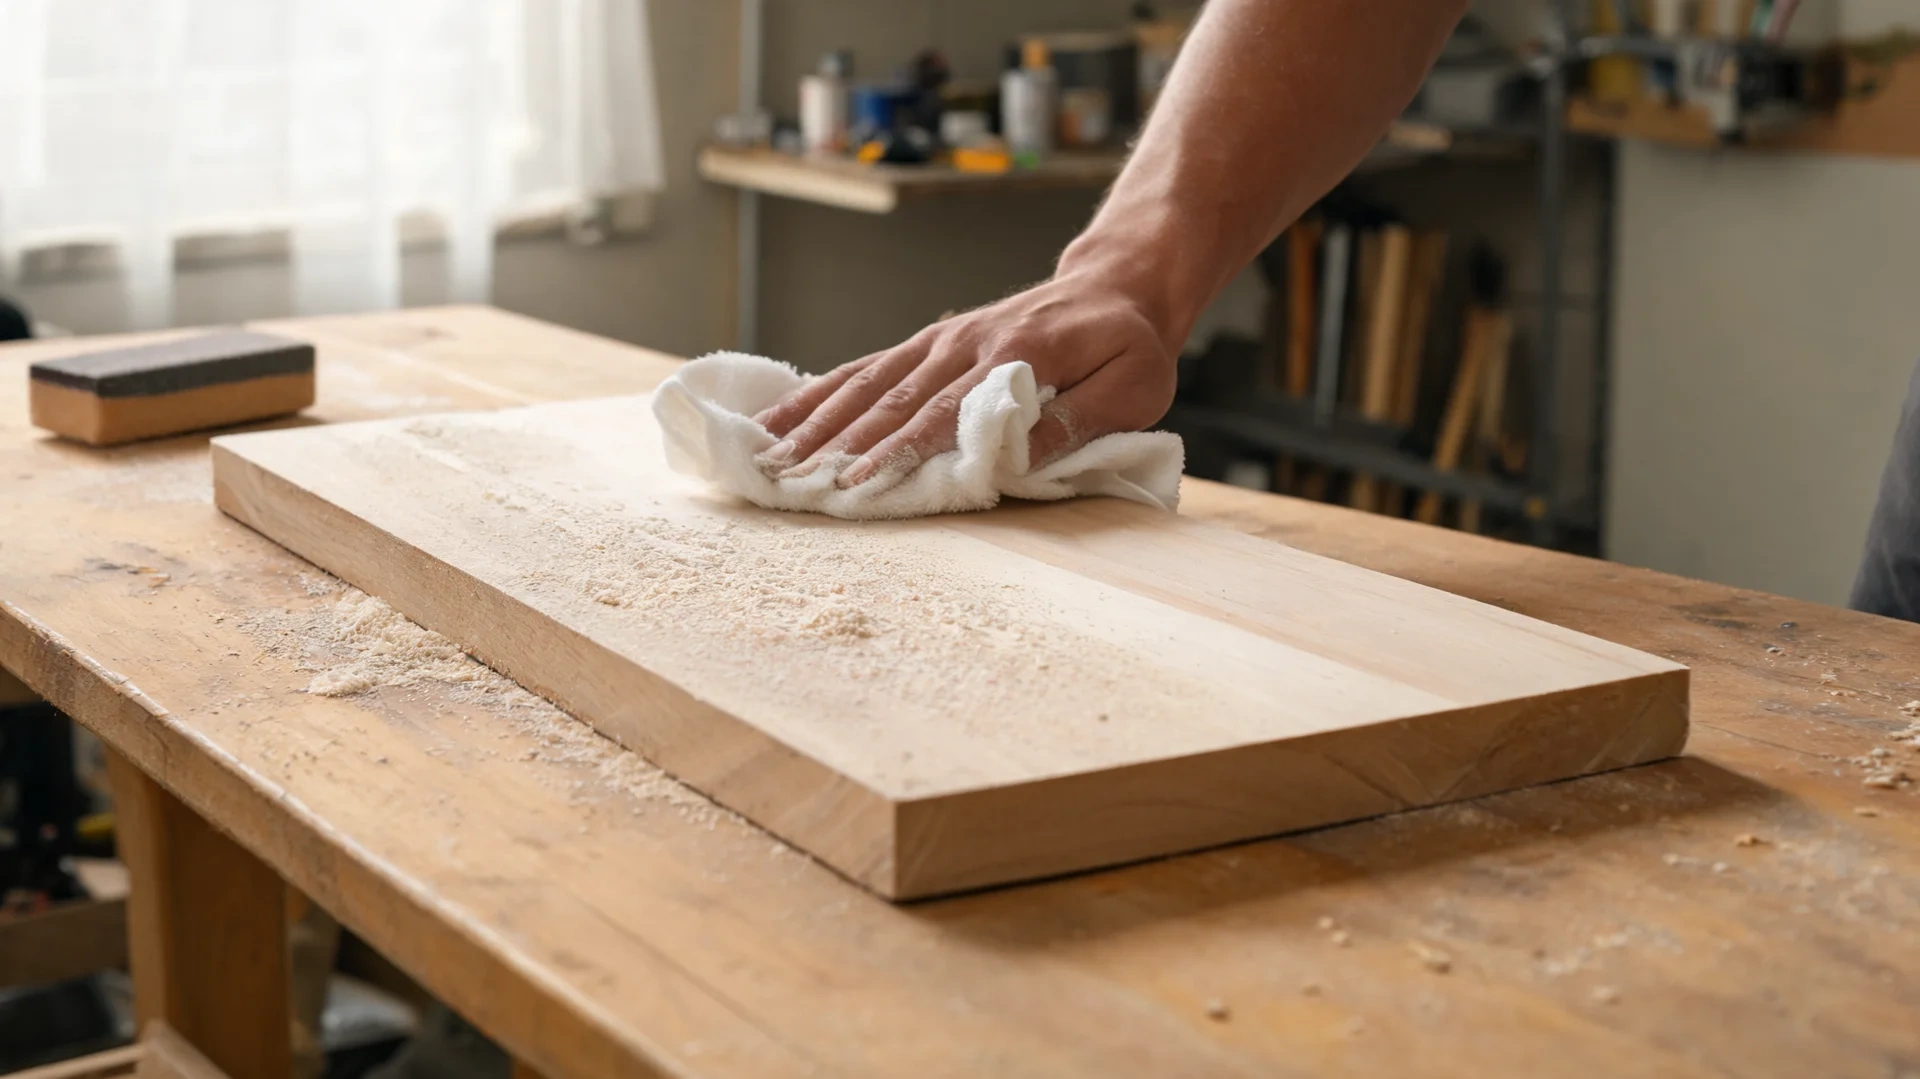
Vacuum the surface first, then wipe with a clean, dry cloth. Pay attention to corners, grooves, and edges — sanding dust collects there and is easy to miss. Any grit left behind will create rough specks in your finish and can block even stain absorption.
If the wood has any deep carvings or profiles, use a soft brush or compressed air to clear those out before wiping down the flat surfaces.
Step 3: Apply Pre-Stain Conditioner (Softwoods Only)
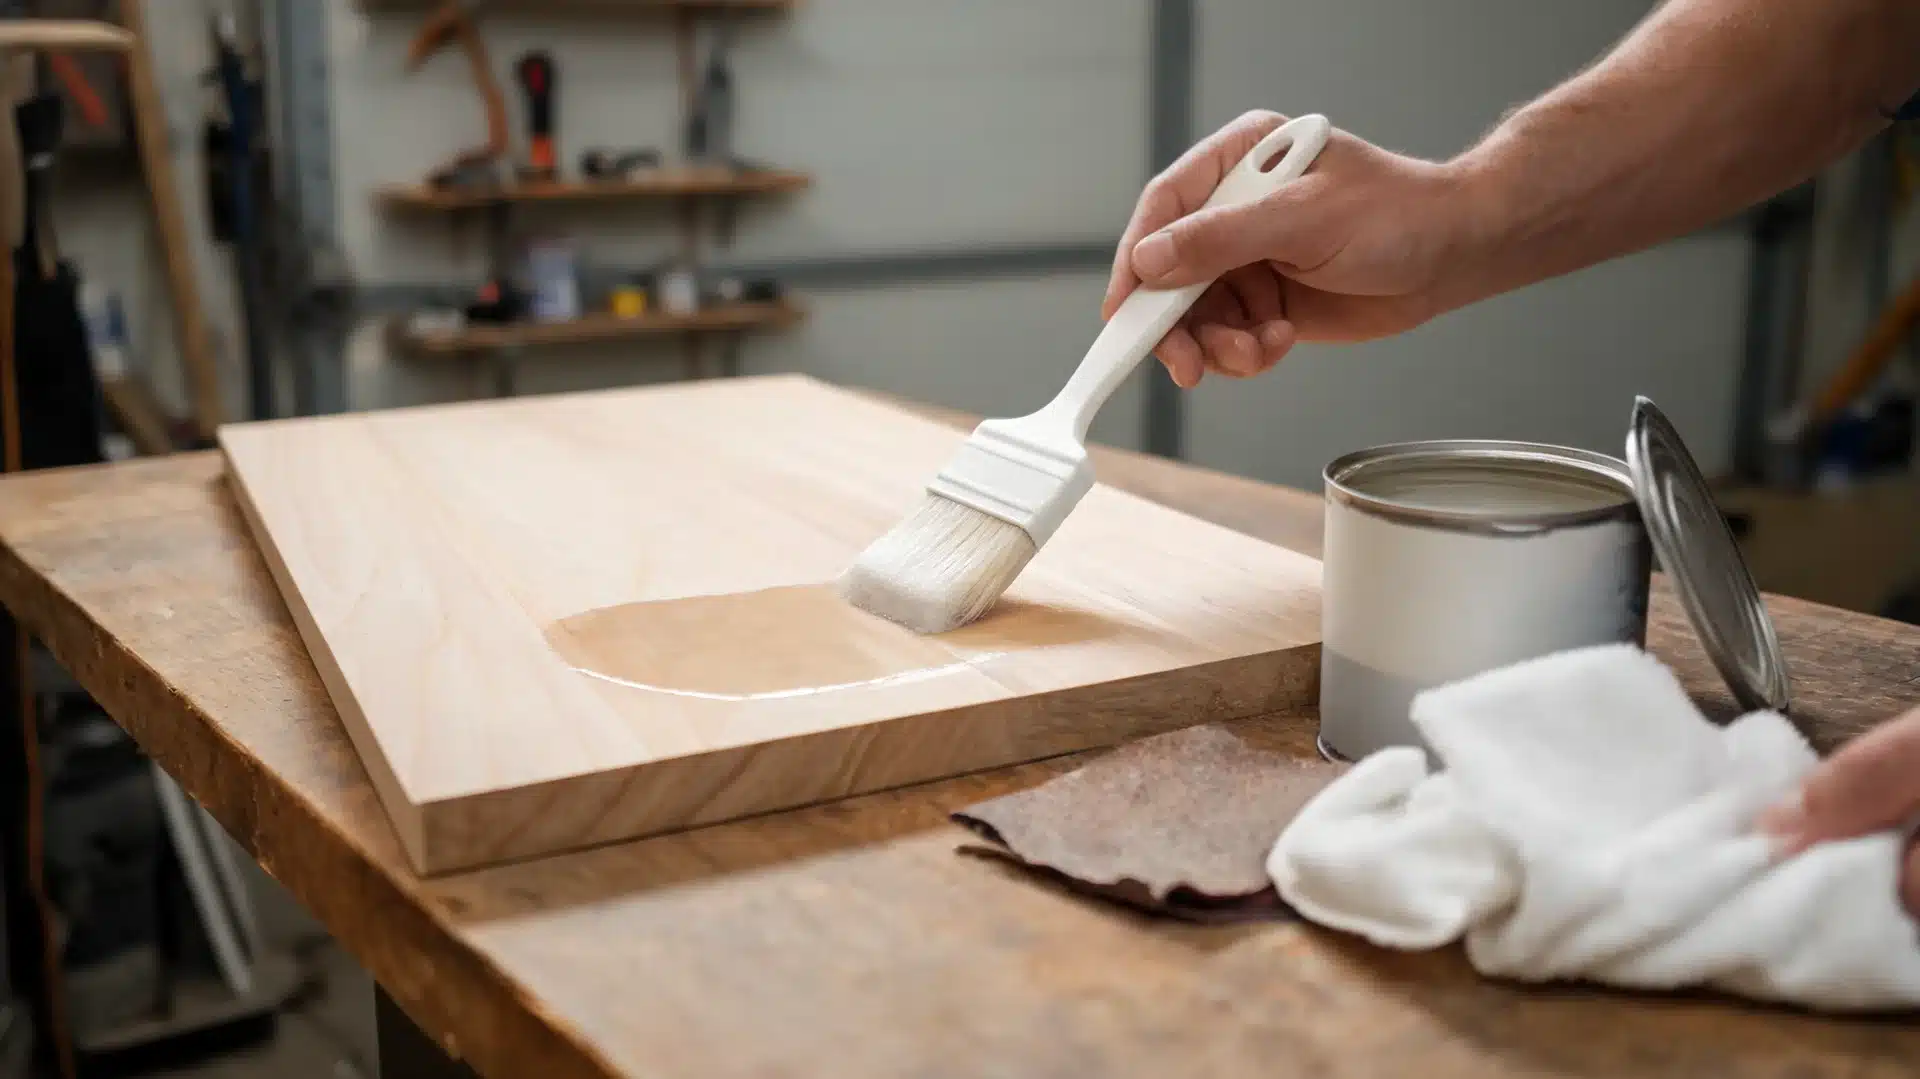
If you are working with pine, poplar, maple, or any other softwood, do not skip this step. These woods absorb stain at different rates in different spots, which produces the blotchy, uneven look that frustrates most beginners. A pre-stain conditioner slows that absorption down and gives the stain a more even base to work from.
Apply the conditioner with a brush or rag, follow the product label for how long to let it sit (usually 5 to 15 minutes), then move to staining while the surface is still slightly tacky. Do not let the conditioner dry completely before staining.
Step 4: Apply the Stain
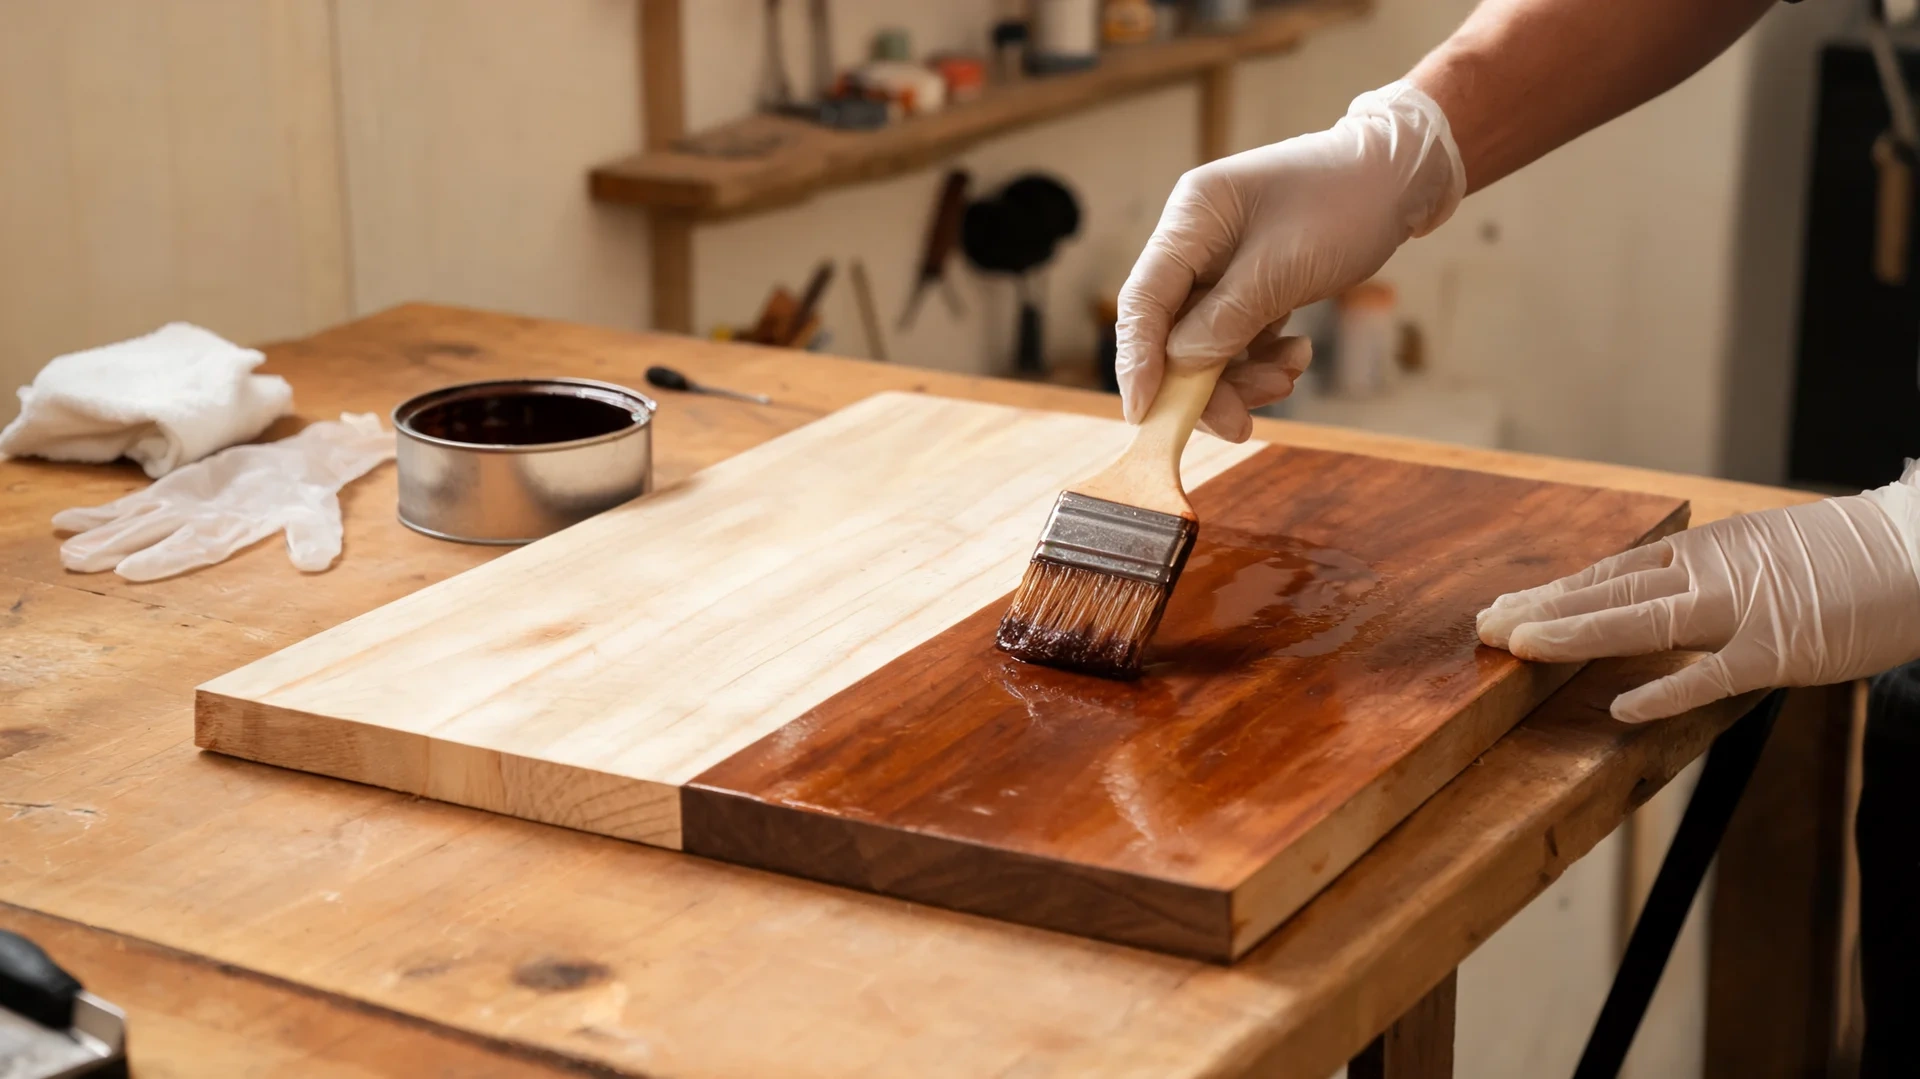
Stir the stain slowly before you start. Shaking it introduces bubbles that can leave marks in the finish. Once it is well mixed, use a slightly damp cloth or a clean brush to apply a thin, even coat. Work with the grain and keep the coat light. The goal is to build color gradually, not load it all on in one pass.
Do not let stain pool in corners or grain pockets. Those areas absorb faster and will dry darker than the rest if you let the stain sit unevenly.
Step 5: Wipe Off the Excess

After the stain sits for the time listed on the label (typically 1 to 5 minutes), wipe off all excess with a clean, dry cloth. Move with the grain. Stain that sits too long dries sticky, dark, and uneven. Wiping it off is not optional; it is part of the application process.
If the color looks lighter than you expected, that is normal. A wet stain always looks darker than the dried result. Judge the color only after a full dry cycle, usually 4 to 8 hours for water-based stain and 8 to 24 hours for oil-based.
Step 6: Seal the Surface

Once the stain is fully dry and no longer tacky, apply a clear protective topcoat. For most indoor furniture and shelves, polyurethane gives the most durable protection. Polycrylic (water-based) is a good option for lighter-colored stains where you want to avoid any yellowing over time.
Apply two thin coats with a foam brush. Let each coat dry completely before adding the next. Light sanding with 220-grit between coats gives a smoother final surface. Allow at least four hours before putting the piece into use, and 24 hours before placing anything heavy on it.
How to Prep Wood Before Staining: Quick Reference
If you remember nothing else from this guide, remember this order: sand with the grain, remove every bit of dust, condition softwoods, test on scrap first, then apply stain in thin coats and wipe off the excess before it dries. That sequence is what separates a flat, even result from a blotchy one.
| Note: Always test your stain on a scrap piece or the underside of the project before committing to the visible surface. If you plan to apply a clear coat, test that too — some finishes deepen the color noticeably. |
Mistakes That Make Wood Stain Look Uneven
Most stain problems are caused by decisions made before the brush touches the wood. Here is what goes wrong and how to avoid it.
| Mistake | What Happens | What to Do Instead |
| Skipping sanding | The stain absorbs unevenly across the surface | Sand to the grit listed on the stain label before applying |
| Sanding against the grain | Cross-grain scratches darken and show through | Always sand in the direction of the grain |
| Sanding too fine | Closed pores repel stains instead of absorbing them | Stop at the grit the label recommends, usually 180 |
| Leaving dust behind | The stain looks speckled or blocked in spots | Vacuum then wipe with a dry cloth before staining |
| Skipping conditioner on softwood | Pine and poplar come out blotchy | Always condition pine, poplar, and maple |
| Shaking the stain can | Air bubbles mark the finish | Stir slowly with a stir stick |
| Applying too much at once | Surface goes sticky and dries unevenly | Thin coats only, build color in passes |
| Not wiping off excess | Stains pool and dry darker in some areas | Wipe with the grain within the time on the label |
| Judging the color wet | A wet stain always looks darker than the dry result | Wait for a full dry before assessing the color |
| Skipping topcoat | Stained surface scratches and fades quickly | Seal any piece that will see regular handling |
| Piling oily rags | Fire risk from spontaneous combustion | Lay flat to dry or store in a sealed metal container |
These problems stack. Sanding marks darken under stain, dust blocks even absorption, and a clear coat locks whatever result you get in place permanently. If something looks wrong before sealing, fix it then — not after.
What Changes for Different Wood Types
The basic process is the same for all wood, but a few adjustments make a real difference depending on what you are working with.
1. Staining Pine, Poplar, and Maple
These woods absorb stain unevenly, which is why they are prone to blotching. Use a test board first, always apply a pre-stain conditioner, and keep coats thin.
If the result still looks patchy after conditioning, gel stain is worth trying — it sits on the surface rather than soaking in, which gives more consistent color on problem woods.
2. Staining Oak and Open-Grain Woods
Oak takes stain well overall, but the open grain lines hold more color than the surrounding wood. Wipe evenly and check corners and grain pockets specifically; let the stain sit in those spots too long, and they go noticeably darker than the flat surface.
For floating shelf builds in oak, this grain behavior is actually a positive; it adds depth without any extra work. If you want to see how oak handles a stained natural finish compared to other species, the floating shelves guide covers wood selection for shelf builds in detail.
3. Staining Furniture with Legs and Detail
Stain the detailed areas first, legs, grooves, carved edges, then move to the flat sections. If you do it the other way, the flat areas sit with stain on them longer while you work the details, and you end up with uneven drying across the piece.
4. Staining Cabinets
Remove all hardware before you start. Cabinets often have cooking grease, hand oils, and old finish built up near handles and edges. Degrease thoroughly, let the surface dry, then test inside a door panel before committing to the exterior faces.
5. Staining Previously Finished Wood
Standard penetrating stain will not work over an existing clear coat. The stain cannot reach the wood. You need to either sand back to bare wood or use a product specifically designed for going over existing finishes.
The same prep logic applies to any stair tread makeover where the old finish needs to come off the wood surface before the new color goes on. Check the label before buying — not all stains work the same way.
How to Seal Stained Wood for Daily Use
Stain only changes the wood’s color. It does not protect the surface. For daily-use pieces like shelves, tables, and cabinet doors, the sealer or topcoat provides the real protection.
- Wait until the stain is fully dry: Do not apply sealer over tacky stain, because it can smear the color and create an uneven finish under the clear coat.
- Use polyurethane for heavy-use pieces: Polyurethane is a strong choice for tables, shelves, and cabinets because it resists scratches, wear, and everyday handling better.
- Use polycrylic for lighter stains: Polycrylic works well on indoor pieces with light-colored stains because it stays clearer and avoids the amber tint of oil-based polyurethane.
- Apply thin coats: Use two thin coats instead of one thick coat. Thin coats dry more evenly and reduce brush marks, bubbles, and cloudy spots.
- Sand lightly between coats: If the product label allows it, sand lightly with 220-grit sandpaper between coats to help the next layer bond smoothly.
- Let the final coat cure: Give the final coat at least 24 hours before placing items on the surface, and longer for heavy use if the label recommends it.
Frequently Asked Questions
How do you stain wood without blotching?
Sand with the grain to the grit on the stain label, remove all dust, and apply a pre-stain conditioner before staining softwoods like pine or poplar. Thin coats and prompt wiping prevent most blotting. Testing on scrap wood first shows you how the specific wood and stain combination will behave before you commit.
What is the best way to apply wood stain?
Use a clean cotton rag or bristle brush, apply with the grain in thin, even passes, and wipe off excess within the time listed on the product label. Thin coats give more control over color depth than one heavy application, and excess stain left on the surface dries sticky and uneven.
How long do you leave the stain on before wiping?
Most stain labels recommend 1 to 5 minutes. Check yours specifically, because dwell time varies by brand and formula. The longer you leave it, the darker the result. If you want a lighter color, wipe sooner. Always wipe off excess before it dries, not after.
Can you stain wood without sanding first?
Gel stains and some specialty products allow application without sanding, but standard penetrating wood stain requires a sanded, bare surface to absorb correctly. Skipping sanding on standard stain produces uneven color and areas where the stain sits on top rather than soaking in.
Why does my stained wood feel sticky after drying?
Sticky wood stain means too much was left on the surface. Stain soaks into the wood — the excess needs to be wiped off. If it has already dried sticky, wipe the surface with the mineral spirits or solvent listed on the product label, or sand back lightly and reapply with proper wiping technique.
Can you mix two wood stain colors together?
Yes, if both stains are the same type — oil-based with oil-based, or water-based with water-based. Mix a small batch first, test on scrap wood, and write down the ratio. Never mix oil-based and water-based stains together; they will not bond correctly and the finish will fail.
How do you fix a wood stain that came out too dark?
If the stain is still wet, wipe more off immediately. If it has dried, light sanding followed by a second application of a lighter stain or a thin coat of the same stain in a lighter shade can reduce the effect. Test any fix on a hidden area before touching the main surface.
Do you need to seal wood after staining?
For decorative pieces that will not see regular use, sealing is optional. For furniture, shelves, cabinets, or any surface that will be touched, cleaned, or used daily, a clear topcoat is necessary. Stain alone provides no meaningful protection against scratches, moisture, or wear.
Final Verdict: Is Staining Wood Worth Doing Yourself?
Transforming raw timber into a beautifully finished piece is incredibly rewarding once you respect the process.
Achieving a flawless result relies entirely on patience, proper grain sanding, and never skipping the pre-stain conditioner on softwoods.
When you understand how to stain wood with a methodical approach, wiping away excess product on time, and applying thin, protective topcoats, you guarantee a durable finish that protects against daily wear and tear.
Now that you have the blueprint to avoid the most common beginner pitfalls, it is time to grab your sandpaper and get started.
What project are you tackling first? Share your upcoming woodworking plans or drop your questions in the comments below.
Sources
- Minwax — Wood Stain Product Application Guidelines
- OSHA — Hazard Communication: Flammable Liquids and Oily Rag Disposal
- Home Depot — How to Stain Wood (Video)