

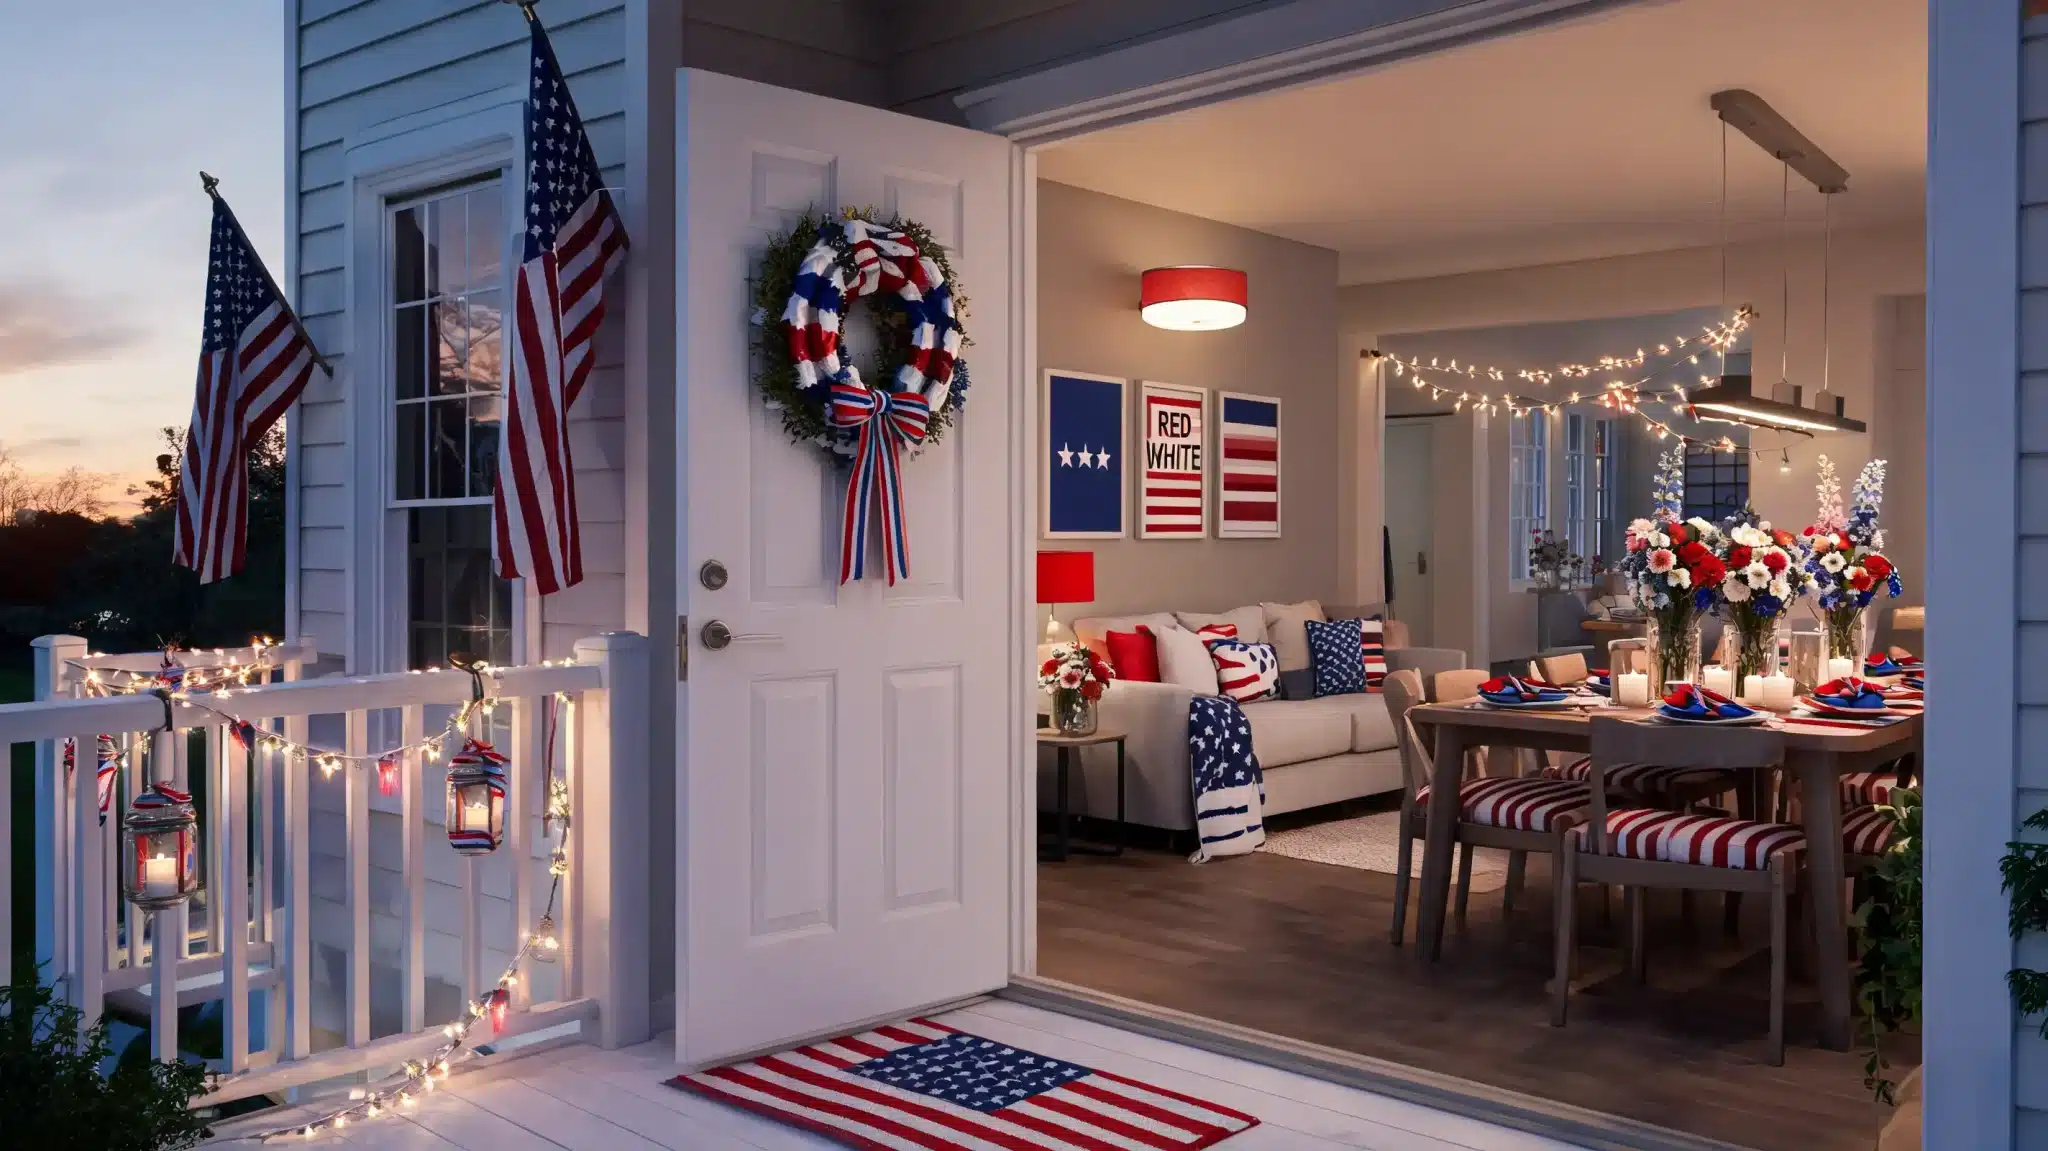
There’s a certain kind of excitement that hits a few days before a patriotic holiday, the kind that makes you want to actually do something with your space. Patriotic decorations for the home aren’t just about red, white, and blue anymore. Done right, they make your home feel like the place everyone wants to be on the day. Last Fourth of July, a few changes turned an ordinary living room into something genuinely festive, not overdone, just right. I used to overthink it entirely. Too many pieces, wrong scale, clashing shades of red. It took a few tries to figure out what actually works. This blog covers room-by-room ideas, beginner-friendly DIYs, and styling tips that bring the whole look together. The Reason Patriotic Decor Hits Different at Home It’s not just the colors. What makes patriotic home decor actually work is the feeling it creates, that unmistakable sense that something worth celebrating is happening right here, in your space. High-contrast colors like red, white, and blue naturally draw the eye and add energy to any room without clashing with existing furniture or walls. But the bigger reason? A decorated home changes the atmosphere. Guests feel it, kids get excited about it, and the day genuinely feels bigger because of it. The best part, most patriotic pieces are reusable every year. Same wreath, same lanterns, same throw pillows. One good setup pays off for seasons to come. Key Elements of Patriotic Home Decor Before buying a single thing, it helps to know what actually makes patriotic decor look intentional. Most well-decorated homes lean on the same five building blocks: Element What to Use Color Palette Red, white, navy, pick exact shades and stick to them Symbols Stars, stripes, flags, use sparingly for impact Texture Burlap, wood, and metal layers make it feel rich, not flat Florals Red geraniums, white daisies, blue hydrangeas, natural and effortless Lighting String lights, lanterns, and candles change the space after dark The mistake most people make is grabbing everything at once. Pick two or three elements, place them intentionally, and the look comes together on its own. Patriotic Decorations for the Living Room Living room styling sets the first festive impression, even with small changes like pillows, candles, and simple accents that shift the whole space, especially if you already enjoy a warm, cozy living room setup with layered neutral tones and soft textures. 1. Flag-Inspired Throw Pillows Swap out your regular cushions with flag-patterned or star-print throw pillows in red, white, and navy. They instantly shift the room’s mood without a full redecoration. Two or three accent pillows on a neutral sofa is genuinely all it takes to make the living room feel dressed up and ready for the holiday. Easy upgrade: Stick to one pattern and balance it with solid-colored pillows so the space doesn’t feel busy 2. Red, White, and Blue Throw Blanket A chunky knit or woven throw in patriotic colors folded casually over a sofa arm adds warmth and color without feeling overdone. It works beautifully in spaces designed around a comfortable, lived-in aesthetic where softness matters more than perfection. Look for cream or off-white as your white tone; it reads warmer and more intentional than a stark bright white. Easy upgrade: Drape it loosely rather than folding it flat; it looks more natural and lived-in 3. Patriotic Wall Art or Framed Prints A framed flag print, vintage-style star poster, or simple “Land of the Free” typography piece on the wall adds a focal point without taking up floor or surface space. Keep the frame white or natural wood for a clean look. One well-chosen art piece does more than three mediocre ones. Easy upgrade: Print a digital download at home and frame it yourself, costs under $10 total 4. Coffee Table Centerpiece Tray A wooden or metal tray styled with a white pillar candle, a small mason jar of red and white flowers, and a mini flag creates a cohesive centerpiece that looks curated. The tray keeps everything contained and intentional. Swap the flowers out for pinecones or star-shaped ornaments if fresh flowers aren’t practical. Easy upgrade: Always use odd numbers when grouping. Three items on a tray always look better than two or four 5. Patriotic Candles and Candle Holders Red, white, and navy pillar candles or candles in star-shaped holders add subtle patriotic color without making a big statement. Cluster them on a mantel or side table for a layered look. Unscented candles work best for gatherings, so the scent doesn’t compete with food. Easy upgrade: Use candle risers at different heights to create visual depth on a mantel display A few thoughtful pieces are enough to shift the room into a warm, festive space without overwhelming existing furniture. Patriotic Decorations for Front Porch and Entryway Entry spaces set the tone before anyone steps inside, making wreaths, lights, and planters key for a welcoming holiday feel. 6. Red, White, and Blue Ribbon Wreath A wreath made from layered ribbons in patriotic colors is one of the highest-impact, lowest-effort things you can put on your front door. It reads festive immediately and sets the tone before anyone steps inside. Add a small wooden star or a miniature flag in the center to finish the look. Easy upgrade: Use a wired ribbon so the loops hold their shape even in wind and humidity 7. Patriotic Doormat A themed doormat with stars, stripes, or patriotic text like “Home of the Brave” is practical decor that works every time someone approaches your door. Choose a durable outdoor material, such as coir or a rubber-backed fabric. It’s one of the most affordable swaps you can make with an immediate visual payoff. Easy upgrade: Layer a smaller decorative mat over a larger plain one for a designer-style entryway look 8. Bunting and Hanging Banners Classic triangle bunting in red, white, and blue fabric strung across a porch railing or above the front door has an old-fashioned charm that never gets old. It adds movement and color to an otherwise static space. Fabric bunting is reusable and holds up far better than paper versions in outdoor conditions. Easy upgrade: Hang bunting slightly loose rather than pulled tight; gentle draping looks more intentional 9. Patriotic Planters with Seasonal Flowers Placing two matching planters on either side of your front door creates a polished look that feels intentional and welcoming, similar to how well-balanced outdoor spaces use symmetry to make even simple setups look designed Red geraniums, white petunias, and blue lobelia are the classic combination: easy to find and easy to maintain, and they bloom right through summer. Easy upgrade: Use matching planters for symmetry; mismatched pots undermine an otherwise great porch setup 10. Lanterns and String Lights for Evening Curb Appeal A porch that looks good after dark is something most people never think about until it’s too late. Lanterns with red or white candles and string lights draped along the railing change your entryway after sunset. Warm white lights complement the patriotic palette better than colored bulbs. Easy upgrade: Put string lights on a timer so they automatically come on at dusk without any effort Small porch updates can change the entire arrival experience and make the home feel ready for celebration. Patriotic Table Decor for Dining and Gatherings Table setups bring people together, where runners, centerpieces, and simple details turn everyday meals into festive shared moments. 11. Patriotic Table Runner A striped or star-patterned table runner laid across the center of a dining table instantly anchors the whole table setup. It defines the decorating zone and keeps the rest of the table clean and open. Navy and white stripes or red and cream work especially well on natural wood tables. Easy upgrade: Iron the runner before laying it; wrinkles make even an expensive table runner look cheap 12. Mason Jar Flower Centerpieces Three mason jars of different heights filled with red carnations, white daisies, and blue hydrangeas clustered in the center of a table is one of the simplest and most effective patriotic centerpieces you can put together. It looks handmade in the best way. Tie twine around the jars for a rustic finishing touch. Easy upgrade: Add a few drops of blue food coloring to white flowers in water overnight. They absorb the color beautifully 13. Patriotic Napkin Rings and Rolled Napkins Rolled red napkins, tied with a piece of navy or gold twine, placed on each plate, take a basic table setting and make it look styled. It’s a small detail that guests notice. For a more lifted version, tuck a small sprig of white baby’s breath into the twine before placing it on the plate. Easy upgrade: Use cloth napkins instead of paper; they photograph better and feel more special for a holiday gathering 14. Mini Flag Place Settings A small American flag pick tucked into a folded napkin or inserted into a small bud vase at each place setting doubles as decor and a patriotic detail guests will appreciate. Kids especially love having their own flag at the table. Use 4-inch flags for a subtle look, or 6-inch flags for greater visual impact. Easy upgrade: Write each guest’s name on a small tag attached to the flag stick to use it as a place card 15. Patriotic Dessert and Snack Display A tiered stand styled with red, white, and blue desserts, strawberries, marshmallows, blueberries, or themed cookies, is both decor and food. It becomes a natural focal point on a buffet or kitchen counter. Add small flags between tiers, and sprinkle star confetti on the tray underneath for a finished look. Easy upgrade: Fill any gaps in the display with fresh greenery or white flowers so it looks full even as food gets eaten Simple table accents help create a gathered, festive atmosphere without needing elaborate styling or expensive pieces. Easy DIY Patriotic Decorations DIY pieces add a personal touch using simple materials, turning everyday items like jars and paper into festive decor. 16. Painted Mason Jar Candle Holders Paint clean glass jars in alternating sections of red, white, and blue using chalk paint and painter’s tape. Let dry, peel the tape, and place a tea light inside. The candlelight glowing through the painted glass creates a warm, beautiful effect at night that looks far more expensive than the few dollars it costs to make. Easy upgrade: Leave one section unpainted so the candlelight shines through directly; it creates a gorgeous glow effect 17. Paper Star Garland Cut or hole-punch stars from red, white, and blue cardstock and thread them onto twine in alternating colors. Hang across a window, mantel, or stair banister. This project takes under 30 minutes, costs almost nothing, and looks genuinely charming. Make two or three strands at different lengths for a layered, fuller look. Easy upgrade: Use a star punch instead of scissors for perfectly uniform stars; it cuts the project time in half 18. Rustic Wooden Flag Sign Paint stripes and a star field onto a scrap wood plank or a pine board from the hardware store. Sand the edges when dry for a weathered farmhouse look. Hang with twine on your front door or above a console table inside. It looks handcrafted and personal in a way that no store-bought piece can replicate. Easy upgrade: Lightly sand before painting so the paint grips better, and layer two thin coats instead of one thick one 19. Patriotic Centerpiece in a Galvanized Bucket Fill a galvanized metal bucket with red, white, and blue flowers, small flags, and a handful of greenery. Place it on a porch, table, or kitchen counter. The metal texture adds a rustic, industrial element that refines the overall look. It takes ten minutes to assemble and makes a genuinely impressive centerpiece. Easy upgrade: Add a small piece of floral foam inside the bucket to hold flowers upright and keep them fresh longer 20. Ribbon and Twine Bottle Vases Wrap clean glass bottles, including wine bottles, with alternating sections of red, white, and blue twine or ribbon, securing each section with craft glue. Fill with a single-stemmed flower or leave it empty as a decorative accent. Group three bottles of different heights together for a complete vignette that costs almost nothing to make. Easy upgrade: Use a hot glue gun instead of regular craft glue; it dries instantly and holds the twine far more securely Handmade accents bring character into the space and keep decorating affordable and flexible for any home. Outdoor Patriotic Decoration Ideas Outdoor styling extends the celebration beyond walls, using lights, flags, and seating areas to create a festive atmosphere. 21. Patriotic String Lights Across the Backyard String warm white lights across a pergola, between fence posts, or overhead above an outdoor dining area. They create an instantly festive atmosphere after dark and make your backyard feel like a proper venue for the celebration. Solar-powered options eliminate the need for extension cords entirely. Easy upgrade: Use S-hooks to hang lights along a fence line. They’re removable, damage-free, and make repositioning easy 22. Flag-Themed Outdoor Table Setup A red gingham or striped tablecloth, white dishes, navy napkins, and a simple jar of wildflowers create an outdoor dining setup that looks styled without being overdone. Add a small chalkboard sign with the date or a patriotic quote to further personalize it. Clip the tablecloth to the table with binder clips on windy days. Easy upgrade: Weigh down the corners of outdoor tablecloths with small decorative stones or clip-on table weights to prevent wind from ruining the setup 23. Yard Flags and Lawn Stakes Cluster three small decorative flags of different heights near your mailbox, in a garden bed, or along a front walkway. It’s one of the quickest outdoor decorating moves you can make, and it reads well from the street. Mix a large American flag with smaller star-print or striped decorative flags for variety. Easy upgrade: Push stakes into the ground at a slight angle rather than perfectly vertical; it looks more natural and holds better in the wind 24. Patriotic Fire Pit Seating Area Style your outdoor fire pit area with themed cushions on chairs or benches, a small galvanized lantern, and a metal bucket filled with sparklers for after dark. Lay a red or navy outdoor rug underneath the seating to define the space. It turns a plain backyard corner into a genuine gathering spot. Easy upgrade: Choose fade-resistant outdoor fabric for cushions; regular fabric cushions left outside lose their color quickly in summer sun 25. Patriotic Garden Lantern Path Line a garden path or porch steps with small lanterns alternating red, white, and blue candles inside. It creates a welcoming, illuminated entry to your outdoor space that looks intentional and celebratory. Battery-operated flameless candles are the safest option, especially in dry summer conditions. Easy upgrade: Vary the lantern heights by placing some on small risers or bricks. A mix of heights always looks more styled than a flat row The best part? You don’t need all. Pick three or four that feel right for your space and start there. Small changes make a bigger difference than most people expect. Where to Buy Patriotic Decorations Finding the right stores makes it easier to get quality decor without overspending. Here are some reliable options for different styles and budgets. Store Name Product Examples Best For Price Range Target Star throw pillows, patriotic wreaths Trendy seasonal decor Affordable Amazon LED string lights, mini flags, banners Variety and quick delivery Budget to Mid Etsy Handmade wreaths, wooden flag signs Personalized and handcrafted Mid to Premium Walmart Doormats, bunting banners Budget-friendly basics Low to Affordable Pottery Barn Premium throws, lanterns Elegant and long-lasting decor Premium Choosing the right store depends on your style and budget, but mixing sources often creates a more balanced and personalized look. Common Mistakes to Avoid With Patriotic Decorations Even the best decorating intentions can go sideways with a few easy-to-miss errors. Here’s what to watch out for before you start. Overcrowding the space: More pieces don’t mean more festive. Empty space is part of the design. Clashing shades of red and blue: Fire-engine red next to burgundy looks accidental. Pick one shade of each and commit to it. Ignoring proportion: A tiny wreath on a wide double door looks lost. Scale your pieces to the space. Buying cheap materials: One quality piece beats five flimsy ones every single time. Forgetting the evening look: Decorations that don’t work after dark are only doing half the job. Avoiding these five mistakes alone puts your setup ahead of most homes on the block. Tips to Store Decorations and Reuse Them Next Year Good decorations deserve a second life. A little effort after the holiday saves money, time, and frustration when the next celebration rolls around. Use clear bins: Label them by room or decoration type so nothing gets lost between seasons. Wrap ribbon and garlands around cardboard: Prevents tangling and keeps them ready to hang straight away. Store candles in cool, dark spaces: Heat warps them and ruins the shape before next use. Press and dry floral elements: Dried flowers and greenery can be reused or repurposed the following year. Photograph your setup before packing: Next year, you’ll know exactly what went where. A little effort at the end of the holiday saves a lot of frustration at the start of the next one. Store it right once, and decorating next year becomes genuinely enjoyable. Frequently Asked Questions Can patriotic decor work in a rental home? Absolutely. Focus on non-permanent options like freestanding decor, removable hooks, and tabletop accents. These allow you to decorate freely without damaging walls, making it easy to refresh or remove items whenever needed. What’s the easiest single change that makes the biggest impact? A wreath on the front door is one of the simplest yet most effective changes. It takes only minutes to hang and instantly enhances your home’s curb appeal, creating a welcoming and festive first impression. Is patriotic decor appropriate for apartments? Yes, patriotic decor works well in apartments when kept minimal and intentional. Use compact items like throw pillows, small flags, or window garlands to add personality without overwhelming a limited space or making the area feel cluttered. The Bottom Line Patriotic decorations for the home don’t have to be complicated or expensive to look genuinely good. I’ve seen simple, intentional choices change an ordinary space into something worth gathering in, and that’s really the whole point. Start with one room. Pick two or three elements that feel right for your style. Store everything properly so next year feels easier than this one. The mistakes are avoidable, the DIYs are beginner-friendly, and the impact is always bigger than expected. You don’t need a perfectly decorated home; you just need one that feels festive and yours. Try one idea from this blog and see how it changes the space. Drop your favorite tip in the comments.
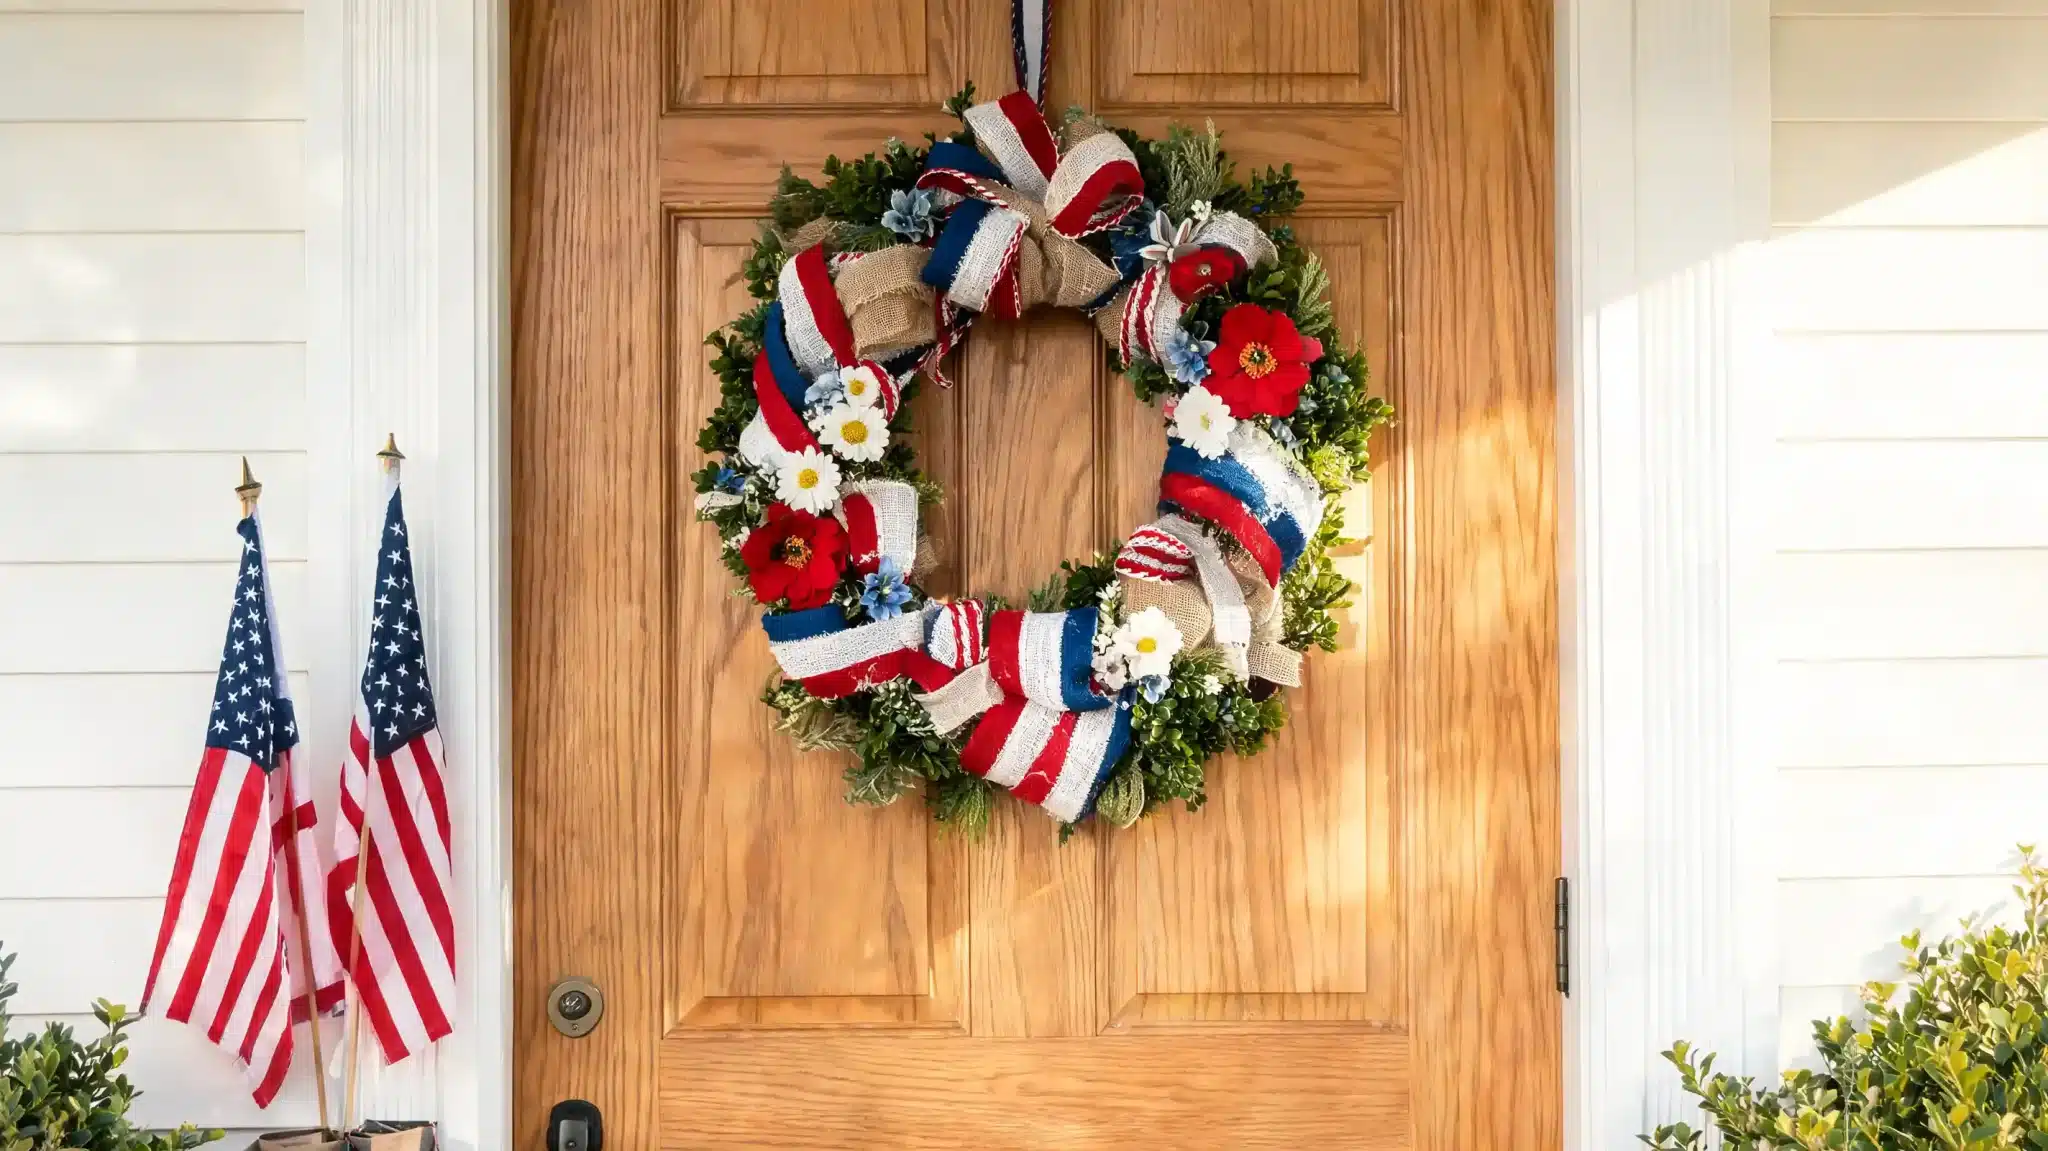
Every May, most front doors look exactly the same. But Memorial Day deserves something more than a last-minute trip to the store. What if the wreath on your door actually meant something this year? Making a Memorial Day wreath at home gives you the chance to put real thought into every color, every flower, and every detail. Red for sacrifice. White for commitment. Blue for loyalty. These aren’t just craft choices; they carry weight. I’ll cover wreath ideas you can put together at home, from simple ribbon styles to personal military tributes. Some take under an hour. Others carry a lifetime of meaning. Ready to find the one that fits your home and your heart? A gravesite placement turns it into something personal. An indoor display, above a mantle or on a memorial wall, keeps the tribute close, especially for families honoring someone they personally lost. Most of these wreaths cost $15 to $45 in materials and take under two hours to build. The military tribute and photo memory wreaths take longer, not because of the steps, but because the items inside require thought. What Makes a Memorial Day Wreath Special? A Memorial Day wreath carries real weight behind every color and material you choose. Red stands for the blood sacrificed by service members. White represents the purity of their commitment. Blue reflects the loyalty they showed until the very end. Flags signal national respect. Stars reference the country those soldiers defended. Flowers, especially red roses and white daisies, have long been placed at gravesites as a quiet, personal act of remembrance. Where you place your wreath matters, too. A front door tells your neighborhood you remember. A gravesite placement makes it deeply personal. An indoor display keeps the tribute close, especially for families honoring someone they personally lost. Every placement carries its own quiet significance Memorial Day Wreath Ideas You Can Make at Home Memorial Day always feels more meaningful when something handmade is part of the moment. These wreath ideas keep things simple, personal, and easy to put together at home. 1. Classic American Flag Wreath A flag-pattern wreath made from burlap or cotton strips is one of the most visible ways to mark the holiday. It works on front doors, fences, and exterior walls, and holds up through the weekend without looking overdone. Difficulty 2/5, beginner-friendly Time 45 to 60 minutes Cost $15 to $25 Tools Needed Hot glue gun, scissors, wire cutters Best For Front door, fence, exterior wall Materials: 18 to 22-inch wire wreath form, red/white/blue fabric strips or flag-print fabric cut to 2×10 inches, hot glue gun and sticks, 3 to 5 small American flags, wire cutters, hanging ribbon. Step 1: Cut fabric into 2-inch-wide, 10-inch-long strips. Step 2: Tie each strip around the wire frame using a simple knot, alternating red, white, and blue evenly across the form. Step 3: Keep adding strips until the frame is full. Fluff each strip as you go. Step 4: Hot-glue flag-print ribbon clusters at your chosen focal point. Step 5: Glue small star buttons diagonally across the wreath. Step 6: Loop the floral wire through the top as a hanger. Step back, adjust any loose strips, then hang. Second-time tip: Pre-sort fabric strips into red, white, and blue piles before you start tying. It sounds obvious, but stopping mid-way to hunt for the right color slows everything down. 2. Red, White, and Blue Flower Wreath This one works equally well on a front door or laid flat at a graveside. Red roses, white daisies, and blue hydrangeas come together into something that reads as both respectful and visually strong. Faux flowers are the better call here if you want them to last longer than a weekend. Difficulty 2/5, No special skills needed Time 60 to 90 minutes Cost $20 to $40 (faux flowers) Tools Needed Hot glue gun, floral wire, scissors Best For Front door, gravesite, porch Materials: 18 to 20 inch foam or wire wreath form, faux or fresh roses/daisies/hydrangeas in red/white/blue, floral wire or hot glue, green filler leaves, wide ribbon or bow, scissors. Step 1: Trim faux or fresh stems to about 2 inches using wire cutters. Step 2: Lay flower heads on the base without gluing first to plan spacing. Step 3: Glue the largest blooms, roses, or hydrangeas first. Step 4: Fill gaps with smaller daisies and accent blooms. Step 5: Wrap floral wire around any wobbly stems or add a dot of hot glue at the sides for faux flowers. Step 6: Tie a wide ribbon into a bow and attach it at the top or bottom. Add your hanging loop. 3. Patriotic Ribbon Wreath This is the one I’d recommend if you’re just starting out. Budget-friendly, quick to assemble, and the layered ribbons look far more polished than the effort required. I’ve made three of these, and the second one took under 40 minutes. Difficulty 1/5, easiest on this list Time 30 to 45 minutes Cost $12 to $20 Tools Needed Scissors, hot glue gun, U-pins Best For Front door, indoor wall, porch Materials: Wire or foam wreath form, red/white/blue ribbons in 2.5-inch width (striped, star-print, and solid patterns), scissors, hot glue gun, U-pins or floral pins, hanging ribbon. Step 1: Pre-cut 15 to 20 pieces per pattern, each 10 to 12 inches long. Step 2: Fold each piece into a loop and pull the ends through to create a knot. Step 3: Add ribbons side by side around the form, alternating colors and patterns throughout. Step 4: Hold the wreath up and fill thin spots with extra ribbon pieces. Step 5: Glue or wire a wide bow to the top as a finishing detail. Step 6: Loop a pipe cleaner through the top for hanging. This wreath is very lightweight. 4. Rustic Burlap Memorial Day Wreath For a farmhouse-style home, this fits right in. The natural burlap base paired with small flag accents gives your door a grounded, understated patriotic feel without screaming red, white, and blue from across the street. Difficulty 2/5 Time 45 to 75 minutes Cost $15 to $30 Tools Needed Hot glue gun, scissors Best For Farmhouse or cottage-style homes, porch, entryway Materials: Natural burlap ribbon (2.5 to 4 inches wide), wire wreath form, small American flags or flag picks, red and white buffalo check ribbon, hot glue gun, twine for hanging, and optional wooden star cutouts. Step 1: Push burlap through each wire ring in gathered sections. Step 2: Bring each loop toward the front for a full, textured effect. Step 3: Keep looping until no wire shows. Slight unevenness looks natural here. Step 4: Add pinecones or a wooden star slightly off-center for character. Step 5: Push flags into the burlap at the center and add glue at the base for hold. Step 6: Loop twine through the top frame, leaving ends slightly long for a casual finish. 5. Star-Shaped Grapevine Wreath A star-shaped frame instantly sets your door apart. Bold, festive, and surprisingly simple to put together. The shape alone does most of the work, so you don’t need heavy decoration to make it read as a deliberate choice. Difficulty 2/5 Time 45 to 60 minutes Cost $20 to $35 Tools Needed Floral wire, hot glue gun, scissors Best For Front door, covered porch Materials: Star-shaped grapevine or wire frame, greenery sprigs (eucalyptus, boxwood, or artificial), mini American flags, red berries or small floral picks, floral wire, hot glue gun, twine or ribbon for hanging. Step 1: Attach small greenery sprigs from the outer points inward using floral wire. Step 2: Overlap each sprig slightly to hide the frame underneath. Step 3: Add a larger greenery cluster at the center as a focal point. Step 4: Place flags at two outer points and one in the center cluster. Step 5: Hot-glue small ribbon bows at the top center and side points. Step 6: Twist floral wire around the top point into a secure hanging loop. 6. Military Tribute Wreath This one is built around a specific person or branch of service. Dog tags, patches, and service branch colors make it personal in a way that a generic patriotic wreath cannot. It works well at gravesites, memorial services, or as a permanent indoor display in honor of someone who served. Difficulty 3/5, takes more planning than craft skill Time 60 to 90 minutes Cost $25 to $50, depending on items used Tools Needed Hot glue gun, floral wire Best For Cemetery, memorial service, indoor tribute wall Materials: Dark-colored wreath base (wire, foam, or grapevine in black, navy, or olive), dog tags (real or decorative), service branch patches or pins, red/white/blue ribbon, small photo frame (optional), hot glue gun, floral wire, U.S. flag rosette or cockade. Step 1: Start with the dark-colored wreath base. Step 2: Wrap red, white, and blue ribbon around the base in sections. Step 3: Attach dog tags or branch insignia using floral wire or hot glue. Step 4: Hot-glue a flag rosette or ribbon bow at the top. Step 5: If using a photo, secure a small frame in the center with floral wire. Step 6: Attach a hanging loop at the back. Note: If you’re using a real service member’s dog tags, consider whether this wreath will be displayed outdoors in the weather. A covered porch or indoor placement protects the items from corrosion. 7. Minimal Greenery Wreath with Flag Accent Not every Memorial Day wreath needs to be covered in red, white, and blue. A clean eucalyptus or boxwood base with a single flag tucked into one side keeps things understated and dignified. This one fits modern and minimalist homes without looking like a compromise. It’s also the easiest to store and reuse year after year if you go with faux greenery. Difficulty 1/5 Time 20 to 35 minutes Cost $10 to $20 Tools Needed Floral wire, scissors Best For Modern homes, minimalist entryways, covered porches Materials: Fresh or faux eucalyptus or boxwood stems, wire wreath form or floral foam ring, one standard American flag on a stick, floral wire, scissors, and optional small white ribbon bow. Step 1: Secure stems around the wreath form with floral wire, layering in one direction. Step 2: Continue until the form is fully covered. Step 3: Tuck the flag into the lower right or left section of the wreath. Step 4: Secure the flag stem with a small piece of floral wire. Step 5: Add a white ribbon bow near the flag if desired. Step 6: Attach a wire loop at the back for hanging. 8. Mesh Deco Wreath in Patriotic Colors Deco mesh creates a full, fluffy wreath that reads well from a distance. The layered mesh gives real volume without requiring any craft skill to execute. Use UV-resistant mesh if this is going on an uncovered exterior door. Difficulty 2/5 Time 45 to 60 minutes Cost $20 to $35 Tools Needed Pipe cleaners or zip ties, scissors Best For Outdoor display, front door, fence Materials: Red, white, and blue deco mesh rolls (10-inch wide, UV-resistant for outdoors), 24-inch wire wreath form, pipe cleaners or zip ties, patriotic ribbon picks or bow, optional star picks or small ornament accents, and scissors. Step 1: Attach the end of the first mesh roll to the inner ring using a pipe cleaner. Step 2: Push the mesh forward in bunches, securing each bunch to the wire rings as you go. Step 3: Repeat with the second and third mesh colors, alternating along the wreath. Step 4: Fill any flat spots by pushing mesh loops outward. Step 5: Attach a large patriotic bow at the top and add star picks throughout. 9. Paper Flower DIY Memorial Wreath Handmade paper flowers take more time than most of these wreaths, but produce results that look far more involved than they are. This is a good project for a rainy afternoon, or for doing with kids who are old enough to handle scissors safely. Difficulty 3/5, repetitive but not difficult Time 2 to 3 hours Cost $8 to $15 Tools Needed Scissors or craft cutting tool, hot glue gun, pencil Best For Indoor display, family projects, kids’ crafts Materials: Red, white, and blue cardstock or crepe paper, scissors or craft cutting tool, hot glue gun, foam or cardboard wreath form, green paper for leaves, pencil and circle template, ribbon for hanging. Step 1: Cut circles from cardstock in three sizes: small, medium, and large. Step 2: Fringe the edges of each circle with scissors to form petals. Step 3: Layer three circles from large to small, gluing them together at the center. Step 4: Pinch the center slightly and glue to hold the flower shape. Step 5: Make 15 to 20 flowers in red, white, and blue. Step 6: Hot-glue flowers around the wreath form, spacing colors evenly. Step 7: Add green paper leaf cutouts between flowers and attach a ribbon loop at the back. 10. Photo Memory Wreath Placing a photo at the center of a wreath turns a decoration into a tribute. This works well for gravesites, mantelpieces, and walls at memorial services. The image carries the meaning; the wreath surrounding it just needs to frame it well without competing for attention. Difficulty 2/5 Time 45 to 75 minutes Cost $15 to $30 Tools Needed Hot glue gun, floral wire Best For Cemetery, memorial service, indoor tribute corner Materials: Foam or grapevine wreath base, small photo frame or locket sized for a 2×3 or 3×4 photo, printed photo of your loved one, red/white/blue flowers or ribbon, floral wire or hot glue, hanging ribbon or hook. Step 1: Decorate the wreath base with flowers or ribbon in patriotic colors using hot glue or floral wire. Step 2: Print and trim a photo to fit the small frame. Step 3: Place the photo in the frame and secure it. Step 4: Wire or glue the framed photo firmly to the center of the wreath. Step 5: Add a ribbon bow at the top. Step 6: Attach a strong hanging ribbon or hook at the back. 11. Wooden Sign Wreath with “Remember and Honor” A short message gives this wreath a specific purpose. “Remember and Honor” communicates the meaning of the day without relying on purely visual cues. Pairing a wooden sign with a simple wreath base keeps the design clean and readable from a distance. Difficulty 3/5, the sign adds a step Time 60 to 90 minutes (includes drying time) Cost $20 to $40 Tools Needed Hot glue gun, paintbrush, letter stencils Best For Front door, entryway, indoor wall Materials: Pre-made or DIY wooden sign (6 to 8 inches wide), foam/wire/grapevine wreath base, red/white/blue ribbon or flowers, wood paint and brush, letter stencils or vinyl lettering, hot glue gun, twine for hanging. Step 1: If making the sign, paint a small wooden plank in white or weathered gray and let it dry completely. Step 2: Use stencils or vinyl letters to write “Remember and Honor” across the sign. Step 3: Seal the sign with a clear coat if it will hang outdoors. Step 4: Decorate the wreath base with ribbon or small flowers. Step 5: Wire or glue the wooden sign to the center or lower section of the wreath. Step 6: Attach a twine loop at the back for hanging. Where to Display Each Wreath Placement changes what a wreath says as much as what’s in it. This table matches each style to the location that suits it best. Display Location Best Wreath Type Placement Tip Front Door Flag wreath, ribbon wreath, mesh deco wreath Center at eye level (roughly 57 to 60 inches from the ground) for maximum visibility Porch or Entryway Burlap rustic wreath, greenery with flag accent Hang beside a lantern or door frame to create a layered look without crowding the entrance Cemetery or Memorial Site Photo memory wreath, military tribute wreath, flower wreath Lay flat at the base of a headstone or prop against the marker. Avoid staking in maintained cemetery grounds unless permitted Indoor Wall Paper flower wreath, wooden sign wreath, star grapevine wreath Mount on a gallery wall or above a fireplace mantle. Keep clear of heat sources if using paper flowers or ribbon Four Things That Make Any of These Look Better Limit your palette strictly to red, white, and blue. Extra colors, even neutrals, pull attention away from the tribute. Burlap and natural wood are the only exceptions since they read as a base, not a color choice. Space materials deliberately. Overcrowded bases make everything fight for attention. Give each element enough room to stand on its own. When in doubt, pull one thing out. Match materials to conditions. UV-resistant or weatherproof mesh and faux florals belong on any outdoor display. Fresh flowers are fine for a day-of gravesite placement but won’t survive a week on a south-facing door in late May. Mirror both sides of the base. Place similar elements at equal distances on each side. It doesn’t need to be perfect, but a wreath that’s noticeably heavier on one side reads as unfinished rather than handmade. If you’re building your first wreath and want something that requires almost no tools, the DIY cabinet doors guide gives a good sense of approaches. Wrapping Up Putting thought into what hangs on your door this Memorial Day goes further than most people realize. I hope these ideas gave you something to work with, whether you want a quick ribbon wreath or a personal military tribute built around someone you loved. The key things to keep in mind: stick to red, white, and blue, space your materials evenly, and pick a placement that matches your intention. A front door says you remember. A gravesite says it personally. An indoor display keeps the tribute close. A handmade Memorial Day wreath does something a store-bought one rarely can: it shows real effort. Try one of these ideas this weekend and let me know in the comments which style you picked. Frequently Asked Questions How do I make a simple Memorial Day wreath at home? The ribbon wreath is the simplest starting point. Pre-cut 2.5-inch ribbon strips into 10 to 12-inch lengths, knot them onto a wire wreath form alternating red, white, and blue, and finish with a bow. Total time is under 45 minutes, and the materials run $12 to $20. What flowers are traditional for Memorial Day wreaths? Red poppies are the most historically significant, tied to the World War I poem “In Flanders Fields.” Red roses and white daisies are also common for graveside wreaths. Blue hydrangeas fill out the patriotic color scheme. For outdoor or door displays, faux versions hold up better through a holiday weekend than fresh-cut flowers. Can I leave a DIY wreath on a grave? Yes, but check the specific cemetery’s policies first. Many cemeteries permit wreaths to be laid flat at the base of a headstone or propped gently against the marker. Most do not allow staking into the ground or permanent attachments. Fresh flowers are generally fine for a day-of visit; faux materials last longer for a multi-day display. What size wreath form should I use for a front door? An 18 to 22 inch form works for most standard doors. If your door is wider than 36 inches or you have a large covered porch entrance, a 24-inch form gives a better proportion. For gravesites and indoor wall displays, 16 to 18 inches is usually sufficient. How do I keep a wreath from fading in the sun? Use UV-resistant deco mesh and ribbon for any wreath in direct sunlight. Most craft stores carry outdoor-rated ribbon. For faux florals, look for “weatherproof” or “outdoor” labeling. A covered porch extends the life of standard materials significantly, even without UV-resistance. Is it disrespectful to put a wreath on a grave for Memorial Day? No. Placing wreaths and flowers at gravesites on Memorial Day is a long-standing tradition. The National Cemetery Administration places small American flags at service members’ graves annually. A handmade wreath, especially a personal military tribute or photo memory wreath, is a respectful and meaningful gesture. Can I reuse a Memorial Day wreath for the Fourth of July? Most of these wreaths transition well to the Fourth of July since they use the same red, white, and blue palette. A minimal greenery wreath with a flag accent, a ribbon wreath, or a deco mesh wreath works for both holidays. The military tribute and photo memory wreaths are specific to remembrance and are better stored between Memorial Day and Veterans Day rather than used as seasonal decor.
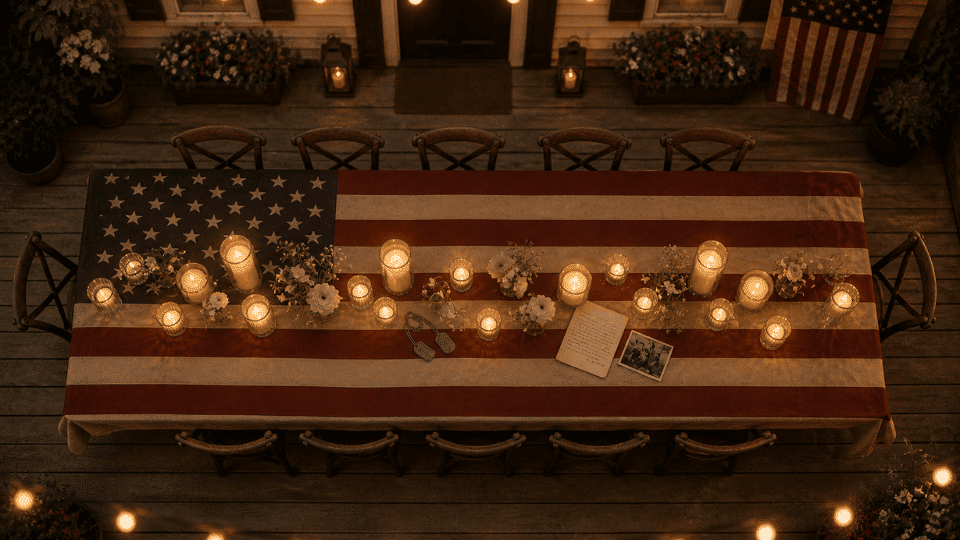
Memorial Day table decorations carry a quiet responsibility that other holidays simply don’t. This isn’t the day for seasonal color swaps; it’s the day the table itself becomes a tribute. I put together several distinct setups here, each built around a genuinely patriotic table setting rooted in real military tradition. Not just red, white, and blue for the sake of it, but details that actually mean something. You’ll find the practical elements that tie every setup together, the small touches that lift the look without cluttering it, and answers to the most common questions before you shop. If you’re hosting twenty people or five, your table can make guests feel something worth feeling. The Holiday That Changed What Decoration Means Memorial Day started as Decoration Day in 1868. Families brought flowers to the graves of Civil War soldiers. It was a physical act of remembrance, personal, intentional, and rooted in loss. As the country fought more wars, the scope of the conflict grew. By 1967, it was officially renamed Memorial Day and dedicated to every American who died in military service. The table, in that context, is where Memorial Day decor becomes something more than aesthetics — it’s a modern extension of that original impulse. It brings the act of remembering inside, into a gathering, a meal, a shared moment with people you love. What separates a meaningful setup from a forgettable one is the same thing that defined Decoration Day: every choice should be intentional. That standard runs through everything covered here. Idea 1: The Missing Man / Fallen Comrade Table This table stands apart from the main table, and that separation is intentional. The contrast between the two is where the meaning lives. 1. The Foundation Use a small, round table, never a rectangular one. The roundness is part of the symbolism: a circle has no end, representing unending concern for those who didn’t return. Cover it in a crisp white linen cloth with no pattern, no texture, no embroidery. The starkness is the point. Place it somewhere visible, near the entrance or beside the main table, so guests encounter it before they sit down. 2. The Empty Chair Pull one chair to the table, but do not push it in. It should look like someone stepped away and isn’t coming back. Drape a black sash or ribbon across the back of the chair. The black represents the emptiness left in the hearts of the families. Nothing else belongs on or around the chair. Resist the instinct to add flowers or a name card. The absence is the decoration. 3. The Centerpiece Place one single red rose in a slim, clear glass vase. Nothing else. Set it slightly off-center so it doesn’t look staged. The rose represents the lives of those who served and the loved ones still waiting for answers. Among all Memorial Day centerpieces, this is the one I keep coming back to. A symmetric, perfectly centered arrangement looks deliberate in the wrong way. The slight asymmetry makes it feel like someone placed it there in a quiet, unhurried moment. 4. The Table Items Each item on the table carries a specific meaning. A folded American flag sits to the left of the place setting. An inverted wine glass, never to be filled, stands to the right. A slice of lemon on the bread plate represents the bitterness of absence. A small pinch of salt beside it represents the tears of the families. These are not styling choices. They are part of the tradition. 5. The Framed Explanation Card Without context, guests may not understand what they’re looking at. A framed card explaining the symbolism of every item transforms curiosity into a moment of genuine reflection. Print it on aged parchment paper rather than white cardstock; the texture signals that this is not an ordinary place card. Set it where guests can read it comfortably. This card is often what people photograph and share. 6. The Personal Touch If your family has a direct connection to military service, this layer is where that lives. A branch insignia pin leaned against the vase. A small black-and-white photograph in a simple frame. A set of dog tags resting on the white cloth. One personal item shifts this from a general tribute to a specific one. Specificity is what makes people stop. Generic tributes are noticed. Personal ones are felt. Idea 2: The Branches of Service Table This is the main table. Each seat honors one of the six military branches, and every element of the setup reinforces that structure, from the base to the place card. 1. The Base Start with a deep navy tablecloth that runs the full length of the table. Lay a gold runner down the center. Navy and gold are shared colors across all six military branches; they signal formality without leaning into any single branch’s palette. The combination is clean and serious. It sets a tone before a single plate is placed. Don’t substitute lighter blues or silver. The depth of the navy matters. 2. The Place Cards Print each branch seal on aged card stock: Army, Navy, Marine Corps, Air Force, Coast Guard, Space Force. Place each card at a seat with the branch motto beneath the seal in a smaller font. Most guests won’t know all six mottos. That gap is the point. The card becomes a conversation starter before the meal begins. Use a matte finish throughout. Glossy cardstock reads as casual, and casual works against the intent of this table. 3. The Napkins Each napkin should subtly reflect that seat’s branch color: Army olive, Navy blue, Marine scarlet, Air Force silver-blue, Coast Guard orange, and Space Force midnight. These don’t need to match exact uniform shades. Approximate colors in quality linen work well. Fold them simply. A flat rectangle works better here than an elaborate fold. The napkin should complement the place card without competing with it for attention. 4. The Centerpiece A tall lantern anchors the center of the table. Flank it with six slim bud vases, each holding the flower most associated with that branch. Keep the bud vases low; they should be visible from a seated position without anyone having to crane to see the person across from them. The lantern provides height without blocking sightlines. Odd numbers of flowers per vase always look more natural than even numbers in a small vessel. 5. The Under-Plate Card Beneath each plate, slip a printed card with one remarkable historical fact about that branch, a defining battle, a first, a record. Guests discover it when they lift their plate. The reveal moment turns the setup from visual to participatory. Keep the fact to two sentences maximum. Any longer and guests skim it. Any shorter and it reads as trivia rather than tribute. The right length makes someone read it twice. Idea 3: The Letters Home Table This table is built around the most human thing soldiers did during wartime: they wrote home. Every element reflects that single act. 1. The Base Lay a white tablecloth as the foundation, then run a length of raw burlap or unbleached linen down the center as the runner. The contrast between clean white and rough texture is intentional. The white suggests to the world that the soldiers were writing to was ordered, domestic, and safe. The burlap suggests the conditions from which they were writing. That visual tension runs quietly through the entire setup without needing explanation. 2. The Place Settings At each seat, place a folded letter that has been tea-stained to give it an aged appearance. Seal it before guests arrive with a wax stamp; a simple star or eagle seal works well. Inside, guests find a paraphrased excerpt from a real wartime letter, sourced from the National Archives or Library of Congress. The act of opening the sealed letter at the table is the first moment of genuine connection. Make sure the opening is easy; no one should fumble with it. 3. The Centerpiece Use a vintage wooden crate or a worn cigar box as the vessel. Fill it with loose wildflowers, nothing arranged formally. Lean a small black-and-white photograph of soldiers in the field against the outside of the crate, without a frame. Unframed, it looks found rather than placed, as if it arrived with the crate and was never moved. That quality of accidental discovery carries more weight than a polished, deliberate display. 4. The Runner Accents Scatter a few small objects along the runner between place settings: a brass pen nib, a dried wax seal, a folded, aged envelope with a postmark stamped on the front. None of these need to be genuine antiques; aged replicas are available cheaply and convincingly. Space them unevenly along the runner. The irregularity makes the table feel assembled over time rather than styled in an afternoon. Evenness breaks the illusion entirely. 5. The Chalkboard Sign At the far end of the table, place a small chalkboard sign that reads: “They wrote home so we could gather here.” Write it by hand rather than printing it. Handwriting connects to the theme in a way that clean typography doesn’t. Keep the sign small enough to feel personal, not a large statement piece. Guests should have to lean in slightly to read it. That small lean-in creates the moment this table is built around. Idea 4: The Through the Wars History Table This table assigns each seat to a different American conflict. By the end of the meal, every guest has learned something they didn’t know when they sat down. 1. The Base Source vintage maps from estate sales, antique stores, or printed reproductions online. Cut them to runner width and lay them flat down the center of the table. WWII-era maps of Europe or the Pacific carry an immediate visual weight. Korean Peninsula maps, Vietnam topography, Gulf region charts, each one marks where Americans fought and died. The maps don’t need to be framed or laminated. Flat, slightly worn, and unprotected is better than preserved. 2. The Place Cards Print a card for each seat naming a specific American conflict: the Civil War, WWI, WWII, Korea, Vietnam, the Gulf War, Afghanistan, and Iraq. Include the years the conflict ran and a single sentence about one soldier from that war: name, rank, home state, and what they did. Not a famous general. An ordinary soldier. The ordinariness is what makes it land. Guests read the name and understand, without being told, that it could have been anyone. 3. The Centerpiece Group three to five sepia-toned photographs in simple frames at the center of the table. Mix sizes, one larger frame flanked by smaller ones, create a natural visual hierarchy without formality. Source photographs from public domain military archives. They should show soldiers in the field, not in formal portraits. Portrait photographs look like monuments. Field photographs look like people. This table is about people, not monuments. 4. The Vases Use military-issue tin cups, old canteens, or galvanized metal buckets as vases instead of glass. These vessels reinforce the field setting established by the maps and photographs across the rest of the table. Fill them with simple seasonal flowers, nothing that reads as decorative or arranged. The roughness of the containers against the softness of the flowers creates a visual tension that quietly echoes the whole premise of this setup. 5. The Era Accents Place one or two small artifacts along the runner between the vase groupings: a WWII ration tin, a Vietnam-era compass, or a Desert Storm patch. Label each with a small tag identifying the conflict and year. The labels are what change the objects from décor into anchors. Without them, guests would not be able to admire the objects. With them, guests ask questions. The questions are the point. A table that creates conversation about sacrifice has done its job. Idea 5: The Gold Star Family Tribute Table This is the most emotional of the five. It is built around the families left behind, the ones still carrying the weight long after the service ended. 1. The Base Start with a white tablecloth and a deep gold runner. Gold is the color of the Gold Star, the symbol given to families who lost a service member in active duty. The choice to use gold here is not a styling decision. It is a direct visual reference to that tradition. Keep the base clean and uncluttered. Everything placed on this foundation should have a clear reason for being there. 2. The Yellow Rose Centerpiece Yellow roses are the traditional flower of waiting and remembrance for those who didn’t return. Fill a wide, low vessel with yellow roses and white filler flowers, so guests can see each other clearly across the table. Surround the base of the vessel with small tea lights in clear holders. The candlelight at the base of the arrangement draws the eye inward and holds it there. That quality of stillness is worth deliberately designing for. 3. The Flag Display A folded American flag in a triangular display case belongs at one end of the table, not centered, not mirrored with anything else. The off-center placement signals that it was placed intentionally, not styled symmetrically into the layout. If you have a flag from a family member’s service, this is the right table for it. If not, a new flag folded and cased carries the same visual and symbolic weight without apology. 4. The Remembrance Book Place a small, cloth-covered guest book at the far end of the table with a short handwritten prompt on the open page: “Write a name you want to remember today.” Leave two or three pens beside it. By the end of the gathering, the book fills with names, some familiar to everyone at the table, some known only to the person who wrote them. That collection, accumulated quietly over the course of a meal, is the tribute. 5. The Framed Quote Choose one quote about freedom, sacrifice, or remembrance and frame it simply. Keep the frame small, 4×6 is enough. Lean it against the flag display case rather than standing it upright independently. A lean frame reads as personal. A standing frame reads as institutional. Source the quote from a soldier’s letter, a Gold Star parent’s testimony, or a poet who served. Avoid political speeches. Specificity and humanity matter here more than recognition. Five Tables One Foundation All five tables share a quiet foundation. These elements shape tone, guide emotion, and ensure every setup feels intentional, cohesive, and grounded in meaningful remembrance. Tablecloths and Runners: White linen keeps the base clean and symbolic, while burlap and raw textures add honesty and depth, and glossy or synthetic fabrics should be avoided completely. Flowers With Meaning: Red roses reflect love and sacrifice, white lilies stand for purity and honor, and yellow roses connect to Gold Star families in a quiet, meaningful way. Dinnerware: Skipping disposable plates helps maintain integrity, while enamelware or vintage pieces add authenticity, and simple designs keep the focus on meaning rather than display. Lighting: Soft candlelight creates a reflective atmosphere, lanterns add warmth without distraction, and bright or colored lighting should be avoided to preserve the tone. Food as Décor: Food as décor should stay simple yet thoughtfully arranged, using natural colors like berries and melon, so it feels inviting rather than overly styled or decorative. When every detail is considered, the tables feel connected. What remains is not decoration, but a shared moment of reflection that quietly stays with every guest. Frequently Asked Questions What colors work beyond red, white, and blue? Navy, ivory, and gold appear patriotic without loudness. Black is suitable, as seen on the Missing Man Table. Forest green suits outdoor settings. Aged brass and raw metals add authenticity. The palette should feel earned, not like a party store. How do I decorate a Memorial Day table on a budget? Tea-stained paper for place cards costs almost nothing. Mason jars work as vases. Thrift stores carry enamelware, vintage glassware, and transferware plates. Historical place cards can be made at home for under a dollar each. Budget and meaning are not in conflict. Many powerful table elements cost less than five dollars. How do I display an American flag properly at a table setting? A folded flag in a display case should sit on a table or surface, not on the floor or draped over furniture. Standing flags must be upright and secured. The flag should not touch the table when folded. These rules, outlined in the U.S. Flag Code, ensure respect and seriousness, not decoration. The Final Design Five setups, one shared foundation, and every practical detail you need to pull it off; I hope this gave you something real to work with. A Memorial Day table doesn’t need to be expensive or elaborate. It just needs to be intentional. Every choice you make is a quiet statement about what this day means to you, and the people sitting at that table will feel it even if they never say so. Pick one setup, borrow from a few, or make it entirely your own. Just make it mean something. And if you do build one this year, drop a comment below; I’d love to see it.
Memorial Day is the one day a year when decorating your home actually means something. These Memorial Day decoration ideas are built for people who want more than a box of dollar-store banners. They’re personal, DIY-friendly, and budget-conscious, without being generic. I will talk about every corner of your home: the front door, the porch, the dining table, the backyard, and more. There are quick last-minute fixes, subtle minimalist approaches, and full craft projects for families in this that might help you in times of need. You could be hosting a gathering or marking the day quietly; there’s a setup here worth trying. What Makes Meaningful Memorial Day Decorations? Memorial Day falls on the last Monday of May. It was created to honor U.S. military personnel who died while serving. That’s a different purpose than Veterans Day, which celebrates all who served. Keeping that distinction in mind shapes every decorating decision you make. Red, white, and blue are the right colors, but the why matters. Red represents valor and sacrifice. White stands for peace and purity. Blue carries justice and perseverance. When you know that, the colors stop feeling like a costume and start feeling like a statement, especially when carried through into thoughtful Memorial Day centerpiece ideas that anchor the whole table. A meaningful setup doesn’t have to be heavy or somber. It just needs one layer of intention beneath the surface. That’s what makes guests pause, ask questions, and remember why the day exists. Quick Overview of Memorial Day Decoration Ideas Before diving into the full setups, here’s a category-level snapshot of everything covered. Use this to jump straight to the section that fits your space and time. Indoor Decor: Mantle displays, living room accents, and entryway styling Outdoor Decor: Front porch setups, patio arrangements, and curb appeal ideas Table Decor: Centerpieces, place settings, and food-as-decor styling DIY Crafts: Handmade projects using everyday and budget-friendly materials Last-Minute Decor: Quick ideas that come together in under 30 minutes Each section includes complete, ready-to-build ideas broken into individual elements. Pick what fits your space, skip what doesn’t, and build from there. Front Door and Entryway Decoration Ideas Your front door is the first and last thing anyone sees. A single well-built display here does more than a dozen scattered accents inside. 1. The Poppy Welcome Wreath Difficulty 2, some fiddling with wire, but nothing frustrating Time 45–60 minutes Cost $18–$30, depending on whether you buy faux or dried poppies Tools needed Floral wire, wire cutters, hot glue gun, scissors Red poppies have been the symbol of fallen soldiers since the WWI poem “In Flanders Fields” (1915). That history is what makes this wreath worth building; guests who don’t know the connection will ask, and that’s the whole point. Faux poppies are fine here; they hold up outdoors for the full weekend without wilting. What can go wrong first: if you wire the poppies in without grouping them, the wreath looks sparse and random. Cluster them in sets of 2–3, wired at the base, and press them into the grapevine base at an angle rather than straight on. That’s the difference between a wreath that looks finished and one that looks like a project. Steps: Start with an 18–22 inch grapevine wreath form. No need to add moss or filler; the open grapevine texture is part of the look. Group, your poppy stems in clusters of 2–3. Wrap the stems together with a short piece of floral wire so each cluster behaves as one unit. Press each cluster into the wreath base at a 45-degree angle and secure with a loop of wire around the grapevine behind it. Place clusters at 10 o’clock, 12 o’clock, and 2 o’clock to build a natural crescent shape. Weave dried eucalyptus or olive branch sprigs between the poppy clusters, threading them through the grapevine rather than wiring them on top. This adds depth and keeps it from looking flat. Tie a length of raw linen or burlap ribbon into a loose bow at the bottom of the wreath. Don’t over-tighten it; a relaxed bow looks intentional; a tight one looks like a gift bow. Optional: print or handwrite a small card with the first line of “In Flanders Fields” and the year 1915, laminate it, and tuck it into the wreath near the base. Faster the second time: skip wiring individual stems to the base. Instead, use a generous dot of hot glue directly on the grapevine and press the cluster in while it’s still warm. Holds just as well, cuts the build time in half. 2. The Gold Star Door Setup Difficulty 1, assembly only, no building Time 15–20 minutes Cost $25–$40, including the star and potted rosemary Tools needed Small hook or adhesive strip, ribbon The Gold Star has symbolized a family’s loss of a service member since World War I. Displaying it on your door is one of the most historically grounded choices you can make. It’s quiet, specific, and immediately communicates what the day is actually about, without a word of explanation needed. Mount a small adhesive hook on the back of your door or use an existing knocker to hang a 10–14 inch wooden or metal star, finished in matte gold. Matte reads as intentional; glossy reads as craft store. Cut a length of navy or black ribbon, loop it through the star’s hanging point, and secure it to the hook so the star sits centered on the door. Place two small American flag holders on either side of the doorframe at head height. Slim black or dark wood holders keep the flags from looking like they’re leftovers from a parade. Mount a small printed card beside the door: “Home of the brave. In memory of the fallen.” Plain black text on white card, no additional decoration. Place one potted rosemary topiary at the base of each door side in terracotta pots. Rosemary has symbolized remembrance since ancient times; it’s a detail that rewards anyone who knows the history. Pro Tip: Add a small brass hook behind the star to hold it flush against the door on windy days. Without it, the star swings and knocks, not the atmosphere you’re going for. Front Porch Decor for Memorial Day A porch offers layered space: the railing, the floor, the ceiling, the columns. Neither requires power tools or permanent drilling, and both read clearly from the street. 3. The Military Lantern Row Difficulty 2, the silhouette cutting is the only fiddly part Time 1 hour, including drying time Cost $12–$20 for jars, cardstock, and battery votives Tools needed Scissors or craft knife, twine, battery-operated tea lights or votives At dusk, these lanterns glow with backlit silhouettes through the glass, a soldier standing, a kneeling figure, a flag. The effect is cinematic without being overdone. It’s the kind of display that makes people slow their car down. The most common failure here is using regular cardstock, which is too thick for the backlight to come through. Use tracing paper, vellum, or thin white tissue paper instead; the silhouette reads clean, and the glow is warm rather than blocked. Print or hand-cut your silhouettes on vellum or tissue paper: one soldier standing, one kneeling at a grave marker, one holding a flag. Keep them simple — detail gets lost inside a jar. Roll each silhouette loosely and lower it into a quart-size wide-mouth mason jar, image facing outward. The natural curl will press the silhouette against the glass without any adhesive. Place a battery-operated tea light or votive inside each jar, beneath the silhouette. Never use a real flame inside a sealed glass jar; the heat cracks the glass within minutes. Space the jars evenly along the porch railing. Tie each jar to the railing with a single loop of twine around the neck so it doesn’t tip or roll in the wind. Optional: drape a strand of warm white fairy lights behind the row of jars along the railing. At full dark, this creates soft back-lighting that keeps the display visible even when the individual votives dim. 4. The Military Branch Pennant Porch Difficulty 2 — sewing optional; felt and fabric glue work fine Time 2 hours if making from scratch; 30 minutes if ordering printed Cost $15–$25 DIY; $30–$45 if ordering printed pennants Tools needed Felt or cardstock, fabric glue or sewing kit, jute rope, binder clips or brass rings Standard flag bunting is everywhere on Memorial Day. A banner representing all five branches of the U.S. military is not, and the color-coding makes it genuinely educational. Most guests won’t have seen this done before. The branch colors are specific: Army (black/gold), Navy (navy/gold), Air Force (blue/silver), Marine Corps (scarlet/gold), Coast Guard (blue/white). Getting them wrong undercuts the whole point, so double-check before cutting. Cut five triangular pennant shapes from felt, approximately 9 x 12 inches each, in the correct branch colors listed above. Use fabric glue or a basic whipstitch to attach a contrasting strip of felt along the straight edge of each pennant; this is where the branch name and founding year go, in simple block letters. Fold the top straight edge of each pennant over a length of thick cotton twine or jute rope, and glue or stitch it closed to create a hanging sleeve. Leave about 8 inches of rope between pennants so they don’t crowd each other. Hang the rope between porch columns or along the ceiling line using small brass hooks or removable adhesive strips. The pennants should hang flat; if they’re curling, clip a small binder clip to the bottom point of each one as a weight. Connecting the porch to the interior is worth thinking about. If you’re styling the living room as well, the pennant colors can carry through in throw pillow accents or a mantle arrangement; the same five-branch logic works anywhere in the house. Living Room Ideas for Memorial Day The living room holds people the longest. Decoration here needs staying power, things worth looking at, asking about, and sitting with. Both work best when your living room layout already has a clear focal point; they’re additions, not reorganizations. 5. The Honor Wall This is the most personal thing anyone can do for Memorial Day. A dedicated wall, or even a single shelf, displaying framed photographs of family veterans converts the day from decoration into tribute. Black-and-white printing does most of the emotional work for you, regardless of whether the original photos were taken in color. This is not a craft project. It’s an arrangement, and it takes about 20 minutes once you have the photos printed and framed. 3–6 framed photographs of veterans, printed in black and white, in matching black or dark wood frames for visual cohesion A small handwritten or printed name card beneath each frame: name, branch, years served One red poppy stem or sprig of rosemary laid flat below each photo Optional: a folded flag in its triangular case mounted at the center of the arrangement as an anchor Optional: one framed map of a theater of war where a family member served, used as the largest piece in the arrangement 6. The Empty Chair Tribute The empty chair is a real military ceremony, one seat set aside at official dinners to represent those who didn’t come home. In a living room, it functions as a quiet installation rather than a formal ceremony, and it works precisely because it’s unexpected. It stops people mid-conversation. That’s the point. This takes about 10 minutes to set up and requires zero craft skill. One chair was placed slightly apart from the main seating arrangement, facing into the room, not toward a wall A neatly folded American flag was placed on the seat One single white rose lay across the flag A small handwritten card resting against the rose: “This seat is held for those who served and did not return.” Optional: a single candle on the side table beside the chair, lit during the day. Optional: a black-and-white photograph of a specific fallen service member placed on the armrest If you want the living room itself to feel more intentional year-round, not just on holidays, the principles behind a modern organic living room apply here: fewer pieces, more considered placement, natural materials that hold up over time rather than trendy accents that date quickly. Fireplace and Mantle Decoration Ideas The mantle is already a display surface; Memorial Day just gives you a reason to use it more deliberately. 7. The Five Candles Tribute Difficulty 1, arrangement only Time 10–15 minutes Cost $20–$35 for five pillar candles Five candles. One for each branch of the military. The simplicity is the point, and anyone who asks gets a real answer about what they’re looking at. The arrangement is calm, symmetrical, and completely specific to the day. The branch colors are: olive/green (Army), navy blue (Navy), steel blue (Air Force), scarlet red (Marines), and white (Coast Guard). Place five pillar candles in a stepped arrangement on a raw wood, slate, or galvanized metal tray: 4 inches, 6 inches, 8 inches, 6 inches, 4 inches from left to right. The pyramid silhouette reads cleanly from across the room. Tie a small handwritten or engraved tag to the base of each candle with the branch name. Lay sprigs of rosemary flat between the candles on the tray. This is not decorative filler; rosemary has meant remembrance since ancient Greece, and it earns its place here. Optional: add a sixth white candle placed slightly in front of the row, labeled “For all who served,” to extend the tribute beyond the five branches. 8. The Poppy and Dog Tag Garland Difficulty 2. The Garland building takes patience Time 45–75 minutes Cost $30–$45 including stamped dog tags Tools needed Floral wire, wire cutters, thin black cord, or ball chain This garland layers two of the most symbolically loaded Memorial Day elements, red poppies and dog tags, into one display. The metal tags add a small sound when they shift against each other, a quiet detail that most people don’t expect. It works on rustic and modern mantles equally well. Order stamped dog tags from Etsy ahead of time; most sellers can turn them in 3–5 days. The words to stamp: Honor, Remember, Valor, Sacrifice, Fallen, Serve. Start with a 4–5 foot base garland of dried or faux eucalyptus, sage, or olive branches. Lay it flat on the mantle and drape the ends over the sides naturally; don’t try to make it perfectly symmetrical. Cluster 2–3 red poppy stems together and wire them at the base, then press each cluster into the garland at even intervals. Aim for 5–6 clusters across the length. Cut lengths of thin black cord or ball chain at 3, 5, and 7 inches. Attach one stamped dog tag to the end of each. Tie or loop the cords onto the garland between poppy clusters, varying the lengths so the tags hang at different heights. Pin one small American flag upright at each end of the mantle, outside the garland, as a hard edge to the arrangement. Optional: center one framed vintage photograph or military portrait above the mantle as the anchor piece for the whole display. Dining Table Setup for Memorial Day The table on Memorial Day is where the day becomes a shared experience. Good table decor doesn’t compete with the food; it adds one layer of intention to the meal. 9. The In Flanders Fields Tablescape The poem “In Flanders Fields” by Lt. Col. John McCrae (1915) is why red poppies became the symbol of fallen soldiers after WWI. Most dinner guests don’t know that. This centerpiece is built entirely around the poppy and that story, and it gives you the natural opening to tell it. A long, low wooden tray or galvanized tin trough running the length of the table center Fresh or faux green moss is laid inside the tray to cover the base completely 15–20 red poppy stems arranged in loose clusters across the moss, at varying heights A small printed card in the center with the full text of “In Flanders Fields,” plain black text on white card, no decoration Tea light candles in clear holders placed between poppy clusters Optional: one white poppy placed at the head-of-table setting to represent peace 10. The Rosemary and Veteran Place Setting This setup turns each seat at the table into a small act of remembrance. Each place card carries the name of a veteran, family member, historical figure, or both, and a sprig of rosemary ties it together. Rosemary has symbolized remembrance since ancient times. It’s an herb choice that rewards anyone who knows the history, and a conversation starter for everyone who doesn’t. A place card at each seat, handwritten or printed, with a veteran’s name, branch, and years of service One fresh sprig of rosemary lay diagonally across each folded napkin Cream or white linen napkins, folded simply, no elaborate folds needed A single small red poppy bud or dried poppy head lay beside each water glass Optional: a short card beneath each place card explaining the veteran’s connection, family member, local figure, or historical name Backyard and Patio Decoration Ideas The backyard is where Memorial Day gatherings live. People eat here, talk here, and stay long after the food is gone. 11. The Memorial Lantern Patio This setup creates a lit gathering space that feels ceremonial at dusk without being somber. Warm string lights overhead, combined with lanterns at ground level, do the atmospheric work. The tribute corner gives it the one layer of meaning that separates this from generic outdoor party lighting. Warm white string lights strung overhead in a grid or canopy pattern across the patio space 4–6 lanterns at floor level along the patio perimeter, mismatched sizes work well Each lantern holds a white pillar candle and a single red poppy stem laid against the glass One dedicated tribute corner: a small table with a folded flag, a framed photo of a veteran, and a single lit candle A hand-lettered chalkboard sign near the tribute corner: “We remember. We gather. We honor.” Optional: small American flags on thin stakes placed in the potted plants around the patio edge 12. The Patriotic Herb and Flower Patio Bar This setup doubles as decor and function. A long outdoor table is styled with potted herbs and flowers in the right colors, all of which are actually usable for food and drinks. It looks like a styled display and works as a garnish and drink station at the same time. One of the few ideas on this list that pulls double duty the whole afternoon. Three large terracotta or white ceramic pots: one with rosemary (remembrance), one with red geraniums or petunias (valor), one with white chamomile or alyssum (peace) Pots arranged in a staggered linem, tallest center, shorter on sides A small chalkboard tag in each pot, noting the plant name and its symbolic meaning Glass drink dispensers flanking the pots, lemonade, water with red berry ice cubes; for a functional layer Cloth napkins in red, white, or natural linen, rolled and placed in a galvanized bucket nearby Lawn and Garden Patriotic Decor Your lawn and garden offer more display space than most people think to use. These two ideas work with the outdoor landscape rather than simply covering it, and both read clearly from the street. 13. The Field of Honor Difficulty 1, No tools beyond a rubber mallet Time 30–45 minutes, depending on lawn size Cost $20–$35 for 30–50 flags on wire stakes Rows of small American flags planted in precise, even lines directly evoke the white headstone rows at Arlington National Cemetery. It’s the single most visually arresting thing you can do with a front lawn and requires no building, no drilling, and no tools beyond a rubber mallet. It stops people on the sidewalk. The precision is everything; a ragged field misses the reference entirely. Mow the grass before you start. The contrast between the flags and a clean-cut lawn is the visual. Use a measuring tape and two stakes with string to set straight row lines across the lawn. 6 inches between flags within a row, 12 inches between rows. Press flags into the lawn along your guide lines using a rubber mallet. Push until the stake is fully in the ground; flags that wobble and fall undercut the whole effect. Plant one slightly larger flag at the front-center of the field as the focal anchor. Place a small printed sign at the edge of the display: “In honor of those who gave everything. [Your family name], Memorial Day [Year].” 14. The Poppy Garden Border A poppy-lined walkway turns the path to your front door into the most symbolically loaded walk of the day. Red poppies along a path feel intentional and seasonal, and because most neighbors won’t know why poppies specifically, it becomes a natural conversation starter every time someone walks up. 20–30 red poppy plants or stems placed in alternating clusters of 2–3 along both sides of a garden path or walkway edge Heights deliberately varied, taller stems at the back, shorter at the front, for a natural rather than planted look A small printed stake card at the beginning of the path: “Red poppies have honored fallen soldiers since 1920.” Optional: white alyssum or baby’s breath tucked between poppy clusters to soften and widen the border Optional: one sprig of rosemary tied with red twine, placed at the foot of the front door as the final note Quick Last-Minute Memorial Day Decorations (Under 30 Minutes) If you’re reading this on Friday night or Saturday morning, here are the four ideas from this list that work with the least lead time, no craft store run required for most of them. The Empty Chair Tribute: One chair, one folded flag, one white rose, one card. 10 minutes. Everything you need is either at home or one gas station stop away. The Five Candles Tribute: Five pillar candles in branch colors from any home goods store, arranged on a tray with rosemary sprigs. 15 minutes. The Field of Honor: Flags on wire stakes from most hardware stores, pressed into the lawn in straight rows. 30–40 minutes depending on lawn size. The Gold Star Door Setup: A star from a craft store, a length of ribbon, and two small flags in holders. 20 minutes, no tools needed. Common Mistakes to Avoid When Decorating for Memorial Day A few small missteps can accidentally flatten the meaning of the day. Here’s what to watch for before you start pulling things out of storage. Over-decorating without meaning: More isn’t always more. A room full of generic patriotic items can feel loud without saying anything real. Choose fewer, more intentional pieces. Misusing the flag: The U.S. Flag Code has specific guidelines. Flags should never touch the ground, be used as tablecloths, or be displayed worn or torn. Repetitive color use without variation: Red, white, and blue work. But flat, unvaried application reads as generic. Texture, material, and thoughtful arrangement are what create depth. Ignoring outdoor spaces: The outside of your home is part of the display. A considered porch or entryway sets the tone before anyone steps inside. Getting these things right takes no extra effort. It just takes a moment of intention before you start. Wrap Up Every home tells a story on Memorial Day. With the right Memorial Day decoration ideas, you can say something real, not just patriotic, but personal. I have covered DIY crafts, porch displays, tabletop setups, minimalist accents, and quick last-minute fixes. Each one was built to carry some meaning alongside the aesthetics. Take what fits your space and your time. Leave what doesn’t. And if one of these DIY Memorial Day decorations sparks something new, build it your way. Drop what you made in the comments; those are always the ideas worth reading. Frequently Asked Questions What decorations are appropriate for Memorial Day? Appropriate Memorial Day decorations balance remembrance with a quiet acknowledgment of the season. Red, white, and blue are standard. Poppies, flags, and stars carry specific symbolic weight. The most appropriate setups are intentional ones, not just festive. Can you decorate your house for Memorial Day? Absolutely. Decorating your home for Memorial Day is a meaningful way to mark the occasion. It doesn’t require an elaborate setup. Even a single flag displayed correctly, or a small arrangement by the front door, is enough to acknowledge what the day represents. What colors are used for Memorial Day decorations? Red, white, and blue are the primary colors. Red represents valor and sacrifice. White stands for purity and peace. Blue carries justice and perseverance. Neutral tones, cream, tan, and natural wood work well as supporting bases that keep the palette from feeling flat. How is Memorial Day different from other patriotic holidays? Memorial Day specifically honors U.S. military personnel who died in service. Veterans Day honors all who served, living or deceased. Independence Day celebrates the nation’s founding. Memorial Day carries a quieter, more reflective tone, which is worth reflecting in how you choose to decorate.
I’ve seen a lot of people run into the same issue. You buy pressure-treated wood, start planning the finish, and then realize things aren’t as straightforward as they seem. If you’re asking, Can you paint treated wood, you’re probably trying to avoid a result that looks good at first but doesn’t hold up. A big part of that comes down to picking the right paint, especially when comparing latex vs acrylic paint differences . It looks ready, but something feels off. The surface behaves differently, and what should be a simple step suddenly turns into confusion. That’s where most mistakes happen. Small details get ignored, and the results don’t turn out the way you expected. If you want a clean, long-lasting finish, understanding what’s happening beneath the surface makes all the difference. Understanding of Pressure-Treated Wood? Pressure-treated wood is basically regular lumber that’s been given superpowers. I remember helping my dad build a fence, and he explained how manufacturers force special chemicals deep into the wood using high pressure , kind of like giving it a protective shield. These chemicals prevent rot, insects, and moisture damage that would otherwise destroy regular wood in just a few years. That’s why you’ll see it used for decks, fences, raised garden beds, and outdoor furniture. The wood usually has a greenish or brownish tint from the treatment. While untreated wood rots quickly when buried in soil or exposed to rain, pressure-treated lumber can last for decades outdoors. Most modern pressure-treated lumber uses copper-based compounds , specifically micronized copper azole (MCA) or copper quaternary (CA-C), which replaced the older arsenic-based CCA formula phased out for residential use in 2003. This matters for painting because these newer copper compounds are water-based , which is exactly why a water-based primer and paint bonds to them far better than oil-based products. Can You Paint Treated Wood? Yes, you can paint treated wood, but timing and prep matter. Freshly treated wood holds moisture from the treatment process, which can stop paint from sticking properly. The most important factor is moisture content, not just time. Aim for 15% or less before painting. Some boards start at 40% or more, so the common “wait six weeks” rule isn’t always accurate. In humid areas, it may take longer, while kiln-dried wood may be ready sooner. Before painting, clean the surface to remove dirt and mildew, then sand it lightly. Apply a high-quality primer made for treated wood, followed by durable exterior paint. Done right, this gives you a finish that looks good and lasts longer. Why Should You Paint Pressure-Treated Wood? Painting pressure-treated wood provides both aesthetic and functional benefits. It enhances appearance, provides additional protection, and extends the lifespan of wood. Improved Appearance: Adds color and creates a polished, refined look. Weather Protection: Guards against moisture, UV damage, and wear from the elements. Extended Durability: Keeps wood looking fresh and durable for a longer time Proper preparation and maintenance are essential for achieving the best and longest-lasting results. Paint vs. Stain: Which Should You Choose? Choosing between paint and stain can feel confusing at first. I’ve faced this myself, and the right option really comes down to how you want your wood to look and perform over time. Feature Paint Stain Coverage Full, opaque color that hides imperfections Semi-transparent, shows natural wood grain Finish Type Sits on top of the surface Penetrates into the wood Durability Can peel or crack over time Less likely to peel Best Use Areas Fences, siding, vertical surfaces Decks, outdoor flooring, high-traffic areas Maintenance Needs recoating every 2–3 years (on decks) Lasts 3–5 years with proper application Look Clean, uniform, bold color Natural, textured appearance Now, beyond looks and durability, there are also a few practical risks you should keep in mind. Peeling or Fading: Happens when proper preparation or regular maintenance is skipped. Adhesion Problems: Paint may not stick well if the wood isn’t fully dry or properly primed. Slippery Surface: Painted decks can become slick when wet, especially on walking areas. One important thing I’ve learned from experience is this: if you’re painting a surface you walk on, always mix in an anti-slip additive. It’s cheap, easy to apply, and makes a big difference in safety. In simple terms, go with paint if you want a bold, uniform look for vertical surfaces. Choose stain if you want something lower maintenance and better suited for decks or high-use areas. This becomes even more important if you’re dealing with older finishes and thinking about painting over stained wood . Steps to Painting Pressure-Treated Wood Follow these steps to properly paint pressure-treated wood: prepare, clean, dry, prime, and use suitable paint for lasting results. Materials Needed for Painting Before starting your project, gather all your supplies so you’re not running to the store mid-job. Trust me, nothing kills momentum like realizing you forgot something important halfway through: Pressure washer or deck and wood cleaner Duct tape 3-mil plastic sheeting Drop cloth Exterior oil-based paint or stain Metal bucket Stir stick High-quality paint brush (such as a wide exterior brush) Nail (to test wood dryness) Water (for cleaning brush) Having everything ready beforehand makes the job smoother and helps you finish faster with better results, plus you’ll avoid those frustrating trips back to the hardware store. Step 1: Clean and Prep the Pressure-Treated Wood Before painting, you need a spotless surface. Always start by pressure-washing the wood to blast away dirt, mildew, and grime. You can also use a deck cleaner for stubborn spots. Let everything dry completely. This usually takes a few days. Here’s a trick: press your fingernail into the wood. If moisture appears, wait longer. Clean, dry wood helps paint stick better and last way longer without peeling. Step 2: Protect Nearby Surfaces Paint loves to splatter onto concrete, sidewalks, and nearby plants when you least expect it. learned this after accidentally staining my neighbor’s driveway. Tape plastic sheeting along walls and fence bases using strong duct tape. Lay drop cloths on the ground below your work area. Spending ten extra minutes protecting surfaces now saves you hours of scrubbing later. Step 3: Mix and Test the Paint Always mix your paint thoroughly before starting; the pigments settle at the bottom. Pour mine into a metal bucket for easier handling and keep stirring throughout the project so colors stay consistent. Test your paint on a hidden spot first, like a board edge or back corner. If it absorbs nicely without beading up, you’re ready. This quick test prevents nasty surprises and ensures your finish looks professional wherever you use it. Step 4: Apply the Paint Properly Use a high-quality brush for the best coverage. Cheap brushes leave streaks and shed bristles everywhere. Prefer wide brushes because they cover more area faster. Start at the top and work downward to catch drips as you go. Brush paint on generously, then spread it evenly into cracks, edges, and corners. Pay special attention to cut ends since they’re super absorbent and need extra coats for protection. Step 5: Let It Dry and Maintain It After finishing, check the weather forecast; you need at least 24 to 48 hours without rain. Some spots might look lighter at first, but that’s just because they dry faster. The beauty of quality exterior paint is that when it fades over time, you don’t need to strip everything. Just clean the surface with a deck cleaner, let it dry, and apply a fresh coat to bring back that gorgeous color. Want to see these techniques in action? Head over to the YouTube “Home Repair Tutor” channel for video demonstrations and extra insights. Considerations When Painting Pressure-Treated Wood When painting pressure-treated wood, it’s important to consider moisture levels, paint type, and ongoing maintenance. These factors ensure your paint adheres properly and lasts for a long time. Consideration Details Moisture and Humidity Wait until the moisture content is 15% or below. Use the water-drop test or a moisture meter. Standard treated lumber takes 2–6 months; KDAT lumber dries much faster. Paint Type and Compatibility Use exterior water-based latex paint and latex primer. Oil-based paints do not adhere properly to treated lumber and can trap moisture, causing peeling. Surface Orientation Paint lasts longer on vertical surfaces (fences, siding) than horizontal ones (deck boards). For horizontal surfaces, consider a solid stain or add an anti-slip additive. Maintenance Regular touch-ups and care help maintain the paint job and prevent wear, peeling, and fading over time. Proper preparation and careful selection of materials will ensure a lasting finish and protect your wood over time. Common Mistakes to Avoid When Painting Pressure-Treated Wood Avoiding common mistakes will save time and money, ensuring your paint job lasts. Here’s what to watch for: Painting Too Soon: Painting before wood has dried properly traps moisture, causing bubbling and peeling. Wait 6 weeks to 3 months. Using Oil-Based Paint: Oil-based paints do not bond well to pressure-treated lumber and trap residual moisture. Always use exterior latex (water-based) paint. Wrong Paint Choice: Never use interior paint outdoors. Always use exterior acrylic latex, oil-based paint, or solid stains. Ignoring Weather Conditions: Paint only when temperatures are between 50°F and 85°F, with humidity below 70%. Wait for 48 hours of dry weather. Skipping Primer: Primer is not optional on treated wood. Without it, even excellent topcoat paint will peel prematurely because the wood surface lacks adhesion. Painting in Bad Weather: Avoid painting during blazing sun, morning dew, or strong winds. Waiting for ideal weather ensures a lasting finish. Wrap Up Painting pressure-treated wood comes down to two things: patience and the right products. Wait until moisture content drops to 15% or below, confirm it with the water-drop test or a moisture meter, and never reach for oil-based paint. In over twenty years of working with wood, I’ve seen more paint jobs fail from impatience than from any other cause. The second most common culprit is skipping the primer. Get those two things right, and the rest follows naturally. Once painted, check horizontal surfaces and cut ends every spring. A quick touch-up now saves a full repaint later. Have questions or tips from your own project? Drop them in the comments below. Frequently Asked Questions Can you paint pressure-treated wood right away? No. Fresh wood holds moisture that blocks paint from sticking. Wait until moisture drops to around 15%, which can take a few weeks to a few months depending on conditions. What type of paint works best on treated wood? Use exterior water-based latex paint with a compatible primer. It bonds better with treated wood and allows moisture to escape, helping prevent peeling and long-term damage. How do you know if treated wood is ready to paint? Use a moisture meter or the water-drop test. If water absorbs into the surface, it’s ready. If it beads up, the wood still has too much moisture. Do you need to prime pressure-treated wood before painting? Yes. Primer helps paint stick and creates a stable base. Skipping it often leads to peeling and uneven coverage, especially in outdoor conditions. Is it better to paint or stain pressure-treated wood? Paint works best for vertical surfaces and gives full coverage. Stain is better for decks and high-traffic areas since it penetrates the wood and holds up longer.
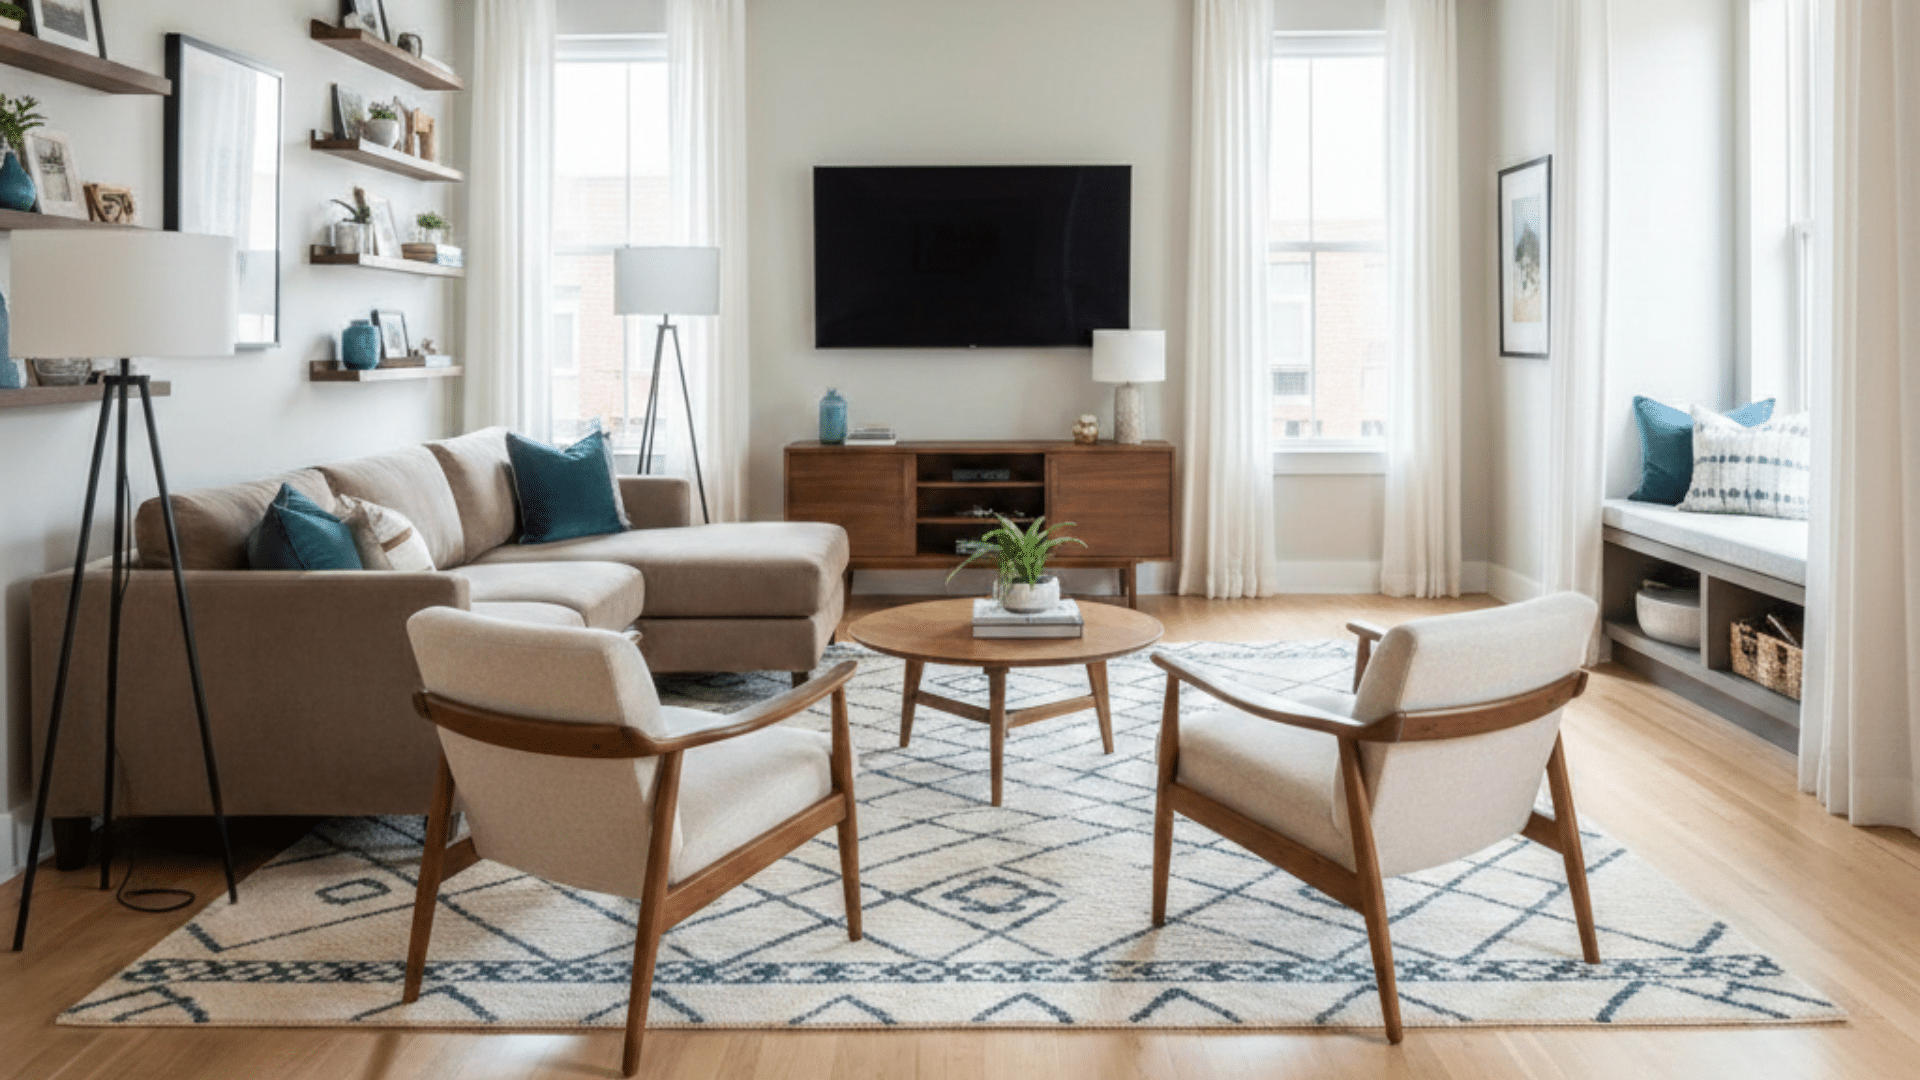
Arranging living room furniture can be a real headache. If you’re dealing with a narrow, long room, an awkward L-shape, or just furniture that doesn’t fit, most of us have been stuck in the process. You try moving things around, only to realize nothing feels quite right. But guess what? You don’t need to be an interior designer to make it work. In this, I’ll walk you through practical, real-life solutions for tricky living room layouts, from minimalist principles in Japanese design living rooms to maximizing every square inch of a family hub. And the best part? You’ll get advice from real people who faced the same challenges you’re dealing with. So if you’re struggling to find the right layout, keep reading. Measure and Understand Your Space: The First Big Step Before you start rearranging your living room, it’s crucial to measure your space and understand its layout. Begin by taking accurate measurements of the room, length, width, and height, and note doors, windows, and features such as fireplaces. This gives you a clear picture of the available space you’re working with. One thing most people miss when measuring: door swing clearances. A door that opens into the room can quietly kill your best layout option, and it’s easy to forget until you’ve moved everything and discovered the armchair blocks it. Write down every door swing direction before you plan anything. Also, consider traffic flow: Think about how people will move through the room. Ensure there’s enough space between furniture for easy passage, especially if you have a busy household. Finally, take into account how you use the room, whether it’s for lounging, TV watching, or entertaining, to guide your decisions on where to place each piece of furniture for maximum function and comfort. Living Room Furniture Placement for Small Apartments When working with limited space in small apartments, the goal is to maximize every inch without sacrificing comfort or style. Use Multi-Functional Furniture: Opt for furniture pieces that serve dual purposes, like a sofa that doubles as a bed or a coffee table with storage. Choose Slim-Profile Seating: Select seating that doesn’t overpower the room and allows for easy movement. Add Floating Shelves: Install shelves that provide storage without taking up floor space, keeping the room open and functional. These smart strategies will help you create a functional living area in your small apartment, maximizing space and comfort. How to Arrange Living Room Furniture for Maximum Comfort and Flow In a Reddit thread, users shared their struggles and solutions for arranging living room furniture. Key suggestions included optimizing space with multi-functional pieces like compact L-shaped sofas and moving the TV for better viewing angles. Others recommended adjusting furniture placement to improve traffic flow and create conversation zones. Many emphasized using furniture that suits the room’s size and layout. As someone who’s rearranged living rooms for both style and functionality, I agree that maximizing space without overcrowding is key. The thread provides practical tips for tackling common layout challenges, focusing on furniture selection, layout balance, and thoughtful placement for better flow and comfort. The pattern I see most consistently in these conversations: people keep adding chairs when what the room actually needs is fewer, larger pieces oriented toward a single focal point. Less furniture, better positioned, almost always wins. Creating the Perfect Layout: Key Furniture Rules That Actually Work Now that you’ve measured and thought about how you use the room, let’s get into some of the key rules that will upgrade your space. These are the tried-and-true strategies that work across most rooms. 1. Don’t Push Furniture Against the Walls It might seem like pushing your sofa and chairs up against the walls will make a room feel bigger, but it actually does the opposite. Furniture pushed against the walls creates distance, and the room can feel disconnected and empty. Instead, pull the furniture away from the walls (even a few inches) to create a more inviting space; a technique often used to achieve a balanced, natural modern living room. This layout encourages cozy conversation zones, helps the room feel more balanced, and adds more flow. Pro Tip: If you have a large room, float your sofa toward the center. It helps break up open space and creates natural gathering spots. 2. Create Conversation Areas Whether it’s for family time, casual conversations, or entertaining, having conversation zones is key. The best way to do this is by arranging sofas and chairs facing one another (not necessarily straight on). That way, people can talk comfortably without straining their necks. If your room is big, create multiple conversation areas by breaking up the furniture into smaller groupings. You can use area rugs to define these sections, which gives each zone its own unique feel. 3. Consider Traffic Flow Think of your room as a walkway for people to move freely. Don’t clutter the space with too much furniture in high-traffic areas. Keep clear paths between furniture, like from the sofa to the TV or from the entry to the rest of the house. If your space is tight, make sure people can move without steppingover furniture. This is especially important if you have children or pets who might be darting through the room! 4. Use the Right-Sized Rugs When arranging furniture, rugs matter more than you think. A rug that’s too small can make the room feel disjointed. Instead, choose a rug large enough for the front legs of your furniture to sit on. If the rug is too small, it will look like it was an afterthought. 5. Don’t Forget Lighting Proper lighting is essential for making the space feel cozy and functional. Combine overhead lighting, floor lamps, and table lamps at different heights to balance the room. Layering light helps with both practicality and ambiance. Consider how much natural light your room gets, and use it to your advantage when positioning furniture. If your living room gets too much sun, consider adding sheer curtains to soften the light. TV glare and window placement: If your room has large windows, position the TV perpendicular to them, not opposite. A screen facing a window fights the light all day. This is one of those details that sounds minor until you’re squinting through a reflection every evening. Solving Common Layout Problems: Real-Life Solutions Many living rooms face common layout issues that can make arranging furniture a challenge. Here are practical, real-life solutions: Narrow, Long Rooms: Narrow, elongated rooms often feel disconnected. Try positioning the sofa perpendicular to the long walls to create a more balanced look. Awkward Layouts: Rooms with odd corners or bay windows can feel hard to arrange. Use multi-functional furniture and zone the space to make the most of each section. Fireplace vs. TV Debate: Choosing between a TV and a fireplace as the focal point can be tricky. You can face seating toward the fireplace or position the TV above it, depending on your preferences. Family Room Layouts: For rooms with kids or pets, prioritize traffic flow and ensure there’s enough space for play zones. Use storage ottomans to reduce clutter. Empty Spaces in Big Rooms: Large rooms with empty areas can feel underutilized. Break the room into distinct zones using rugs or furniture arrangements that separate the space into functional areas. By applying these simple fixes, you’ll be able to tackle common layout problems and make your living room work for you. Furniture Ideas for Every Room Find out practical and stylish furniture solutions for different room types. If you have a small space, a family room, or a large living area, these ideas will help maximize functionality and style. 1. Small Living Rooms For New York apartments with narrow living rooms, consider using a compact sofa with storage underneath to save space and reduce clutter. Here’s how to do it: Multi-functional furniture: Choose storage ottomans or folding chairs that double as tables or extra seating. Slim-profile seating: Opt for sleek sofas and chairs that leave space for movement. Avoid bulky pieces: Keep furniture minimal to avoid overcrowding. Use floating shelves:Floating shelves provide extra storage without taking up floor space. Declutter with purpose: Keep surfaces clean and organized to make the room feel open and tidy. These simple ideas will keep your small living room both spacious and practical. 2. Family Rooms and Play Areas When arranging a family room, it’s important to balance comfort, functionality, and play space. Here’s how: Sofa placement: Position your sofa away from high-traffic areas to keep it functional and comfortable. Durable fabrics: Use leather or microfiber furniture to stand up to wear and tear, especially with kids or pets. Multi-purpose furniture: Add storage benches or ottomans to reduce clutter and maintain organization. Create zones: Designate areas for play and relaxation, such as a safe space for kids and a cozy corner for adults to unwind. Space for movement: Ensure there’s enough open space for active play and circulation around the furniture. By dividing the room into zones, you’ll make it more functional for both kids and adults. 3. Big Rooms with Empty Spaces In larger rooms, it’s essential to break up the space to prevent it from feeling too open or underutilized. Here are some tips: Divide the space into zones: Create distinct areas for conversation, entertainment, or reading. Use area rugs: Rugs help to visually separate spaces, giving the room a sense of purpose and warmth. Furniture arrangement: Group chairs and small tables together to create cozy conversation corners. TV placement: Position your TV or entertainment center on the opposite side to balance the room. Low-profile furniture: Use benches or side tables to complement larger pieces and prevent overwhelming the room. These steps will keep your room functional and visually appealing. Avoiding Common Mistakes: Simple Fixes for Your Layout After two decades of working with furniture and the people who live with it, these same mistakes repeat across every budget and every room size. The good news is that every one of them is free to fix. Mistake The Problem Quick Fix Too Much Furniture in One Area Trying to fill every corner or wall space makes the room feel cluttered and hard to navigate Keep some empty space around your furniture to create flow and let the room breathe Pushing Everything Against the Wall Makes the room feel distant and disconnected from the seating area Pull your furniture away from the walls to create a more inviting, intimate layout Not Using Area Rugs Properly Small rugs look out of place and make the room feel disconnected and disjointed Ensure your rug is big enough to fit under all furniture, or at least the front legs of each piece I’ve found that fixing even one of these mistakes transforms how a room feels immediately. Small adjustments in furniture placement create a more comfortable, functional space without buying anything new. When to Seek Professional Help If your living room layout still feels off after trying different arrangements, it might be time to consider professional help. Interior designers bring expertise and an eye for detail that can help solve layout problems you might have missed. They can suggest furniture placements that maximize both functionality and aesthetic appeal, particularly for tricky spaces. If you’re unsure about making significant changes or feel stuck, online consultations and floor planning services are excellent alternatives. These services provide detailed design plans, giving you a clearer picture of what will work best for your space without the guesswork. Professionals can also recommend furniture, lighting, and decor that enhance the room’s functionality, making your space work perfectly for your needs. Free tools before paid help: Try a free floor-planning tool like RoomSketcher or Planner 5D first. Enter your room dimensions and drag scaled furniture outlines around the floor plan. It won’t replace a designer’s eye, but it will show you immediately whether your planned layout has the clearances it needs, and it takes about 20 minutes. Wrap Up Rearranging your living room doesn’t have to be overwhelming. By following these simple steps and considering your space’s unique needs, you can create a layout that balances both function and style. If you’re working with a narrow room, awkward corners, or simply need more storage, there are plenty of ways to upgrade your space. Don’t be afraid to experiment with different arrangements and live with them for a few days. Remember, it’s about what works for you and your family, not perfection. So, if you’re wondering how to arrange living room furniture to maximize comfort and flow, you now have the tools to do it. Enjoy the process and share your progress in the comments. You’ve got this! Frequently Asked Questions How can I arrange furniture in a small living room without overcrowding? In a small living room, focus on multi-functional furniture, such as storage ottomans, and use slim-profile seating to save space. Avoid bulky pieces, and consider using floating shelves to add storage without taking up floor space. What should I do if my living room has an awkward layout? For awkward spaces, try using multi-functional furniture and create defined zones. You can use area rugs to divide the space and ensure there’s enough open space for easy movement. What are some quick fixes for a living room layout? A simple solution includes pulling furniture away from the walls to create a more inviting layout, ensuring proper rug sizes to anchor the space, and avoiding too much furniture in one area to keep the room feeling open.
Are you tired of walking into a kitchen that feels stuck in another decade? I know how frustrating it is to feel trapped between a dated space and the massive price tag of a full kitchen remodel. You deserve a beautiful home without draining your savings or living in a construction zone for months. This guide breaks down exactly how much cabinet refacing costs and the specific factors that push your quote up or down. You will find the truth about material quality, labor rates, and whether a DIY approach is actually worth the risk. By the end, you’ll have a realistic budget and the confidence to choose the best path for your renovation. Kitchen Cabinet Refacing Basics Cabinet refacing gives your kitchen a fresh look without removing the full cabinet setup. You keep the existing cabinet boxes and structure, but update all the visible parts. This includes replacing doors, drawer fronts, handles, and the outer surface finish, so everything looks new from the outside. Inside, the layout and storage stay the same, which helps you avoid major changes. When you compare refacing to full replacement, the difference is clear. Refacing costs less, takes less time, and creates less mess in your home. Full replacement, on the other hand, involves removing cabinets, higher costs, and longer work time. If your cabinet structure is still strong, refacing is a smart and practical way to refresh your space. One thing that often surprises homeowners: because labor makes up 50–70% of a refacing quote, two contractors using the same materials can give you estimates that differ by thousands of dollars. That’s not a red flag. It reflects regional labor rates, their overhead, and how they price access and complexity. Getting three quotes is not optional. Key Factors That Affect Cabinet Refacing Cost Cabinet refacing costs aren’t one-size-fits-all, and that’s exactly why two neighbors can get wildly different quotes for seemingly similar kitchens. Understanding what’s actually driving your number helps you budget smarter and negotiate better. 1. Kitchen Size Kitchen size is the most direct cost driver in any refacing project. Contractors price per door and drawer front, typically $75–$150 per door for materials and labor combined. A small kitchen with 10–15 doors runs $1,500–$4,000, while a large kitchen with 25–35 doors can push $6,000–$12,000. Before requesting quotes, count every door and drawer front separately; that number is what contractors actually price against, not square footage. 2. Material Choice Material selection can shift your total refacing cost by thousands. Vinyl wrap and RTF doors are the most budget-friendly at $50–$100 per door. Wood veneer sits in the mid-range at $100–$200 per door, offering a more premium appearance. Solid wood doors command $200–$400 per door at the high end. For an average kitchen, upgrading from vinyl to solid wood alone can add $3,000–$6,000 to your total project cost. 3. Door Style Door profile directly affects both fabrication time and material cost. Flat-panel doors are the most affordable, typically priced 20–30% lower than other styles. Shaker doors sit in the mid-range and remain the most popular choice, adding moderate cost without an excessive premium. Raised-panel doors require precision routing and more raw material, pushing per-door costs 35–50% higher than flat-panel equivalents. On a 20-door kitchen, that style difference alone can mean $1,500–$3,000 in additional spend. 4. Location Similar trends appear in projects like remodel costs of a basement, where location alone can significantly change pricing. In high-cost states like California, New York, and Washington, labor alone can account for $3,000–$5,000 of a mid-size kitchen project. Midwestern and Southern states typically run $1,200–$2,500 for a comparable labor scope. The same kitchen, same materials, and same door count can carry a $2,000–$3,000 price difference purely based on your zip code and local contractor market rates. For a concrete example, refacing an average kitchen in Boise, Idaho, runs around $5,000. The same project in New York City typically costs twice that. If you’re in a high-cost metro, build in a 20–30% buffer above the national average when you’re planning your budget. 5. Condition of Existing Cabinets Cabinet condition quietly adds cost that most initial quotes don’t include. Water damage repairs typically run $200–$600 per affected cabinet box. Warped frames, soft spots, or compromised hinges require structural work before any refacing begins, often adding $500–$2,000 to the total project cost depending on severity. Contractors assess box condition during the estimate visit, but requesting a written breakdown of repair costs separately from refacing costs protects you from budget surprises mid-project. Each of these factors compounds on the others; a large kitchen with premium doors, solid wood veneers, and repairs needed can cost two to three times a straightforward small-kitchen job. Know your variables before you commit. Add-Ons That Raise Your Final Quote Most refacing quotes you see online don’t include the extras, and most homeowners add at least a few. Here’s what the common upgrades actually cost, based on current contractor pricing: Add-On Typical Cost Range Worth It? Soft-close hinges and drawer slides $20–$50 per set Yes, adds years of daily use satisfaction New hardware (knobs and pulls) $100–$1,000 total Yes, fastest visual upgrade per dollar Crown molding $300–$570 installed Yes, if staying long-term Glass door inserts $150–$500 per door Situational, adds visual depth but increases cleaning Under-cabinet lighting $200–$350 per fixture High impact for resale and daily use Pull-out shelves and organizers $200–$500 per cabinet Yes, if the function is a complaint Island or peninsula panels $1,000–$4,000 Major visual upgrade; price varies widely by size If you’re working with a tight budget, prioritize soft-close hinges and new hardware first. They cost the least and deliver the most visible difference per dollar. Crown molding and glass inserts are finishing touches; add them only after your primary scope is locked in, and the budget can absorb them. Signs You Should Reface and Signs You Shouldn’t Refacing is not always the right answer. The honest version of this conversation includes knowing when to walk away from it. Refacing makes sense when: Cabinet boxes are structurally solid, with no soft spots, water damage, or warping You’re happy with the layout and don’t need to add or remove cabinets The existing door style is your only complaint, not the function You’re planning to stay in the home for at least 5–7 more years You want a kitchen update with minimal disruption (most refacing projects are completed in 2–5 days) Refacing doesn’t make sense when: Cabinet boxes are damaged, warped, or have significant water or pest damage You want to change the layout, add an island, or reconfigure storage The existing boxes are particleboard in poor condition, and veneers won’t adhere reliably Your kitchen is so dated that the counters, layout, and footprint all need to be changed anyway. In that case, full replacement at the same time saves you labor costs overall. I’ve seen homeowners spend $7,000 refacing cabinets that were genuinely on their last legs structurally. Two years later, they were replacing everything anyway. If the boxes are questionable, pay a contractor $150–$300 for a structural assessment before you commit to refacing. What Real Homeowners Are Saying Real homeowners have plenty to say about cabinet refacing on Quora. One seller shared on Quora that their home “desperately needed a kitchen facelift” and chose refacing since the layout already worked just fine, a smart, budget-friendly call. Not all feedback is glowing, on Quora a real estate investor bluntly cautioned that refacing structurally weak cabinets is “like putting lipstick on a pig,” since buyers notice the difference the moment they open a door. The consistent takeaway across all posts: refacing pays off only when the cabinet boxes are solid, and the existing layout already works for you The experience highlights something most homeowners discover too late: refacing can cost significantly more than expected, even when the layout works perfectly. Getting multiple quotes before committing is essential. I hear a version of that investor’s warning constantly from contractors I work with. The most experienced ones will actually turn down a refacing job if the boxes aren’t worth saving. That’s worth paying attention to. If a contractor is eager to start without looking closely at your box condition, that’s a flag. DIY Cabinet Refacing Cost vs Risk Refacing your cabinets yourself sounds like an easy way to save thousands, and sometimes it genuinely is. But the gap between a clean DIY finish and a costly mistake is smaller than most people expect. Breakdown DIY Refacing Professional Refacing Average Cost $1,000 – $3,500 $3,000 – $8,000 Material Cost $600 – $2,000 Included in quote Labour Cost Your time only $1,500 – $4,000 Time Required 1–2 weekends minimum 2–4 days Skill Level Needed Moderate – High Professional Warranty None 1–5 years The numbers tell part of the story, but skill level and warranty protection tell the rest. If your kitchen is small and your doors are flat, a DIY is worth a try. Anything beyond that, trust a professional. Is Cabinet Refacing Worth It? Cabinet refacing sits in a unique sweet spot; it’s not the cheapest option and not the most comprehensive, but for the right kitchen, it delivers results that genuinely rival full replacement at a fraction of the disruption, cost, and time. The real question isn’t whether refacing works, it’s whether your specific kitchen warrants it. Structurally healthy cabinets with an outdated appearance are the ideal candidate. Refacing saves 40–60% over full replacement, completes in days, and when paired with hardware and countertop upgrades, produces a transformation most homeowners struggle to distinguish from a complete remodel. The value is real, but only when the foundation underneath deserves it. Common Mistakes to Avoid When it comes to DIY cabinet refacing, it’s easy to overlook a few key details. But these common mistakes can really derail your project, leaving you with results that don’t match your expectations. Let’s take a closer look at what to avoid. Poor Door Alignment: Misaligned doors are the most visible DIY error, making even quality materials look unprofessional and rushed. Choosing Cheap Veneer: Low-grade materials peel within months, especially near heat and moisture, turning your savings into a repeat expense. Skipping Surface Prep: Refacing over dirty, greasy, or uneven cabinet boxes guarantees poor adhesion and a finish that deteriorates quickly. Ignoring Box Condition: Applying new faces over damaged or soft cabinet frames wastes money on a foundation that will fail regardless. Questions to Ask Before Hiring a Cabinet Refacing Contractor Not all refacing contractors are equally experienced, and the quality difference in a finished kitchen is visible. Before signing anything, ask every contractor these questions: Do you apply veneer on-site or do the doors go to a shop? (Shop work is generally cleaner.) What happens if you find box damage during the project? Is that quoted separately? Can I see a recently completed project in person or photos with client references? What does your warranty cover, and for how long? Can I supply my own hardware, or does it need to come from you? Will you add features like crown molding, glass inserts, or under-cabinet lighting? A contractor who hesitates on any of these, especially the box condition question, is worth removing from your shortlist. The best ones will volunteer that information before you even ask. Cabinet Refacing vs. Painting and Replacing I’ve worked with all three options, and each one fits a different situation. If you’re unsure what makes sense for your budget or goals, this simple table will help you compare them side by side and choose what works best for you. Factors Painting Refacing Replacing Average Cost $500 – $1,500 $3,000 – $8,000 $8,000 – $25,000+ Durability 3–5 years 10–15 years 15–25 years Time to Complete 1–2 days 2–4 days 2–5 weeks Structural Fix No No Yes Layout Change No No Yes Resale Value Impact Low Moderate High DIY Friendly Yes Partially Rarely Low Budget (Under $2,000) Best move Out of range Not feasible Mid Budget ($3,000–$9,000) Underspending Best value Stretching thin High Budget ($10,000+) Underutilising Possible Maximum return From what I’ve seen, painting works when you need a quick, low-cost fix, especially in rentals. If your cabinet boxes are still strong but look old, refacing gives you better long-term value. I usually suggest replacement only when there’s real damage or layout issues, since it costs much more but solves deeper problems properly. Wrap Up Cabinet refacing is one of those decisions that looks simple on the surface but carries a lot of moving parts underneath. I’ve walked you through everything that shapes the final number, from kitchen size and material choice to location, cabinet condition, and the real cost of going DIY. Now you have a clear picture of how much does cabinet refacing cost and, more importantly, what drives that cost up or down. The smartest move you can make is to assess your cabinet boxes honestly, set a realistic budget, and match your choice to your goals, not just the lowest quote. If this helped you think it through more clearly, drop your questions in the comments or read our related guides on kitchen renovation budgeting. Frequently Asked Questions How does refacing impact the resale value of a home? Refacing offers a high return on investment by modernizing the kitchen’s aesthetic for less. It typically recovers 60–80% of costs during a home sale if the layout is functional. Can I add new features like soft-close hinges during refacing? Yes, refacing is the perfect time to upgrade functional hardware. Most professionals include new soft-close hinges and modern drawer glides as part of the standard installation process for better performance. Is it possible to reface only the upper or lower cabinets? You can certainly reface specific sections to save money or create a “two-tone” look. However, matching finishes later can be difficult, so it is usually best to do both. Do I need to empty my kitchen cabinets before the pros arrive? Unlike a full remodel, you often only need to clear the items near the front. Since the cabinet boxes remain intact, most homeowners keep their dishes and pantry items inside.
The fireplace does not move. That is the actual problem. Every other element in the room adapts; the firebox is fixed, and wherever it sits determines where the TV can go. When both of those things are competing for the same wall, the answer most people land on is to stack them. Whether that works depends entirely on the room, not the idea itself. Ideal Viewing Distance 10 to 15 feet from the screen to the seating Comfortable TV Center Height 42 to 48 inches from the floor (seated eye level) Typical Above-Fireplace Height 60 to 72 inches (center of screen) Minimum Clearance Needed 12 inches between the top of the surround and the bottom of the TV Best Fireplace Type for This Setup Electric or sealed direct-vent gas Worst Fireplace Type for This Setup Open wood-burning or open-face gas Maximum Ambient Temperature (TV safe) 95 to 104 degrees Fahrenheit at the mount location Safety Note: Mounting a TV above a fireplace typically requires anchoring into masonry, brick, or a reinforced wall section. This kind of structural mounting requires locating studs or using masonry anchors correctly. Incorrect anchoring can result in the TV falling. If you are not confident working with masonry or load-bearing anchors, hire a licensed installer before proceeding. What This Setup Actually Involves Mounting a TV above a fireplace means placing the screen on the same wall as the firebox, above the mantel or surround. It changes almost every measurement the room depends on. The firebox adds visual weight at the base, throws heat upward in a column, and forces the lowest edge of the TV higher than any standard wall mount recommendation would suggest. The combination is what makes this different from hanging a TV on a blank wall. The setup has become common as living rooms get smaller and open-plan layouts push multiple functions into shared space. But common does not mean universally suitable. The fireplace is a permanent architectural element. The TV has to work around it. Why People Choose This Layout The fireplace and the television both want the most prominent wall in the room. Stacking them removes that conflict and gives the room a single visual anchor. When that still produces an unsettled layout, the decisions look very different — a problem the fireplace layout guide covers with nine real rooms and what fixed each one. Modern living rooms often have one dominant wall with limited options on either side A combined focal point lets the rest of the room orient around one axis In open-plan spaces, it defines the living zone without consuming a second wall The result reads as intentional rather than improvised When the only alternative is a TV floating on a side wall with no visual grounding, the above-fireplace placement wins on design logic. The question is whether it holds up in practice. The Trade-Off: Comfort vs. Aesthetics Combining the two elements resolves visual tension but introduces a different problem: physical tension in the neck of anyone watching for more than 20 minutes. Factor Comfort Priority Aesthetics Priority Screen position Eye-level on a dedicated wall Above the mantel, elevated by default Viewing angle Neutral, no neck strain Upward tilt required from most seats Seating setup Any height works Low-profile or reclined works best Best suited for Daily extended viewing Occasional or background viewing Room feel Functional, viewing-focused Clean, unified focal point Neither column is wrong. The right answer depends on how the room is used day to day, not just how it looks in a photo. The Two Costs You Cannot Ignore Viewing Experience: What Actually Changes When the Screen Goes Up The picture quality does not change. What changes is the angle your neck holds for the entire session. Seated eye level for most adults sits at 42 to 48 inches from the floor — the target for any good TV placement guide. A screen above a standard fireplace centers at 60 to 72 inches, depending on mantel height. That is a gap of 12 to 30 inches above where your eyes want to land. Over a two-hour film, that tilt accumulates. Distance softens it. Beyond 12 feet, the elevation angle drops enough that the strain becomes minor for most people. Choosing low-profile furniture reduces neck tension further — a sectional at 15 to 17 inches seat height makes a 20-inch height gap far more manageable than an upright chair at standard height. Large rooms with relaxed seating absorb the difference well. Close proximity makes it worse. Upright dining chairs or standard sofas within 8 feet create a steep, sustained upward angle. Small rooms have no distance to offset the elevation. If your seating is within 8 feet of the wall and you use standard-height furniture, this setup will be uncomfortable for regular viewing. Rule of thumb: Divide your room depth by the height gap. If you are 8 feet away and the screen is 20 inches above eye level, the viewing angle is roughly 12 to 14 degrees. Ergonomic research suggests anything above 15 degrees produces measurable neck strain over sessions longer than 30 minutes. Measure your room before committing. Heat Impact: What the Fireplace Does to the TV Over Time Heat moves upward. The TV sits directly in that column every time the fireplace runs. Convective heat rises from the firebox and concentrates in the zone directly above the mantel. Most consumer electronics are rated for ambient operating temperatures of 32 to 95 degrees Fahrenheit. Some extend to 104 degrees. Once the ambient temperature at the mount location exceeds that range consistently, degradation begins. It rarely produces immediate visible failure. It shortens component lifespan over one to three heating seasons. Fireplace type determines how serious the risk is: Electric fireplaces: Lowest risk. No combustion, minimal heat rise above the unit. Sealed direct-vent gas fireplaces: Acceptable risk if clearance is 12 inches or more. The sealed combustion chamber reduces heat output above the unit significantly. Open-face gas fireplaces: Higher risk. Heat and particulates move freely upward with no barrier. Open wood-burning fireplaces: Highest risk. Soot, creosote, and sustained high-output radiant heat all reach the TV. This combination causes cosmetic and functional damage over time. The threshold for real damage is not just temperature: it is the combination of no mantel buffer, frequent high-output use, and less than 12 inches of clearance between the top of the surround and the bottom of the TV. When all three conditions exist together, damage within a single heating season is likely. Height and Clearance: The Numbers That Determine Whether This Works Every room has a different mantel height. These figures give you the actual targets to measure against before mounting anything. Mantel Height TV Bottom Edge TV Center (55-inch screen) Verdict 48 inches 60 inches 60 inches Workable with low seating 54 inches 66 inches 66 inches Pull-down mount recommended 60 inches 72 inches 72 inches Problematic without a tilting mount 60+ inches 72+ inches 72+ inches Consider an alternative layout TV width matters too. A screen wider than the fireplace surround creates visual imbalance and emphasizes the height. As a rule, choose a TV no wider than the outer edge of the fireplace surround. Three Setups That Actually Work These are not aesthetic options to pick from. Each addresses a specific room condition. Read them in terms of what your room has, not what you prefer visually. Setup 1: The Low Mantel Layout This works when the mantel sits at 48 inches or below, and the room has at least 10 feet of seating distance. The TV center lands at or near 60 inches, close enough to comfortable viewing height that a fixed flat mount is sufficient. No correction required. The screen center falls within a comfortable range without tilting the hardware At least 12 inches of clearance between the surround and the TV’s bottom TV width matches the fireplace surround width for visual balance Low-profile sofa or reclined seating completes the setup This is the cleanest version of the setup. If your mantel height allows it, a fixed mount and correct TV sizing are the only decisions left. Setup 2: The Pull-Down Mount for a High Fireplace When the mantel sits at 54 to 60 inches, and there is no structural way to lower it, a pull-down mount solves the height problem mechanically. The TV parks above the surround when not in use and drops to eye level when viewing starts. The parked position looks clean and does not disrupt the visual line of the fireplace A good pull-down mount brings the screen to 42 to 48 inches center height during use A slight downward tilt in the lowered position improves the viewing angle further The mount hardware blends into the wall at rest Pull-down mounts cost $200 to $600, depending on TV weight capacity and travel distance. That is the price of making a placement that is too high, actually comfortable. If the mantel is over 54 inches and a pull-down is not in the budget, the room needs an alternative layout. Setup 3: The Built-In Wall This approach works when the homeowner treats the entire wall as a single design decision rather than two separate elements that happen to share space. The fireplace wall is designed as a unified surface. The TV is recessed or flush-mounted above the opening. Wiring runs through the wall or in a concealed channel. A matte or dark background finish reduces contrast, so the screen recedes when turned off. The TV is centered above the fireplace for visual symmetry Recessing the TV can reduce the effective height by 2 to 4 inches, depending on the wall depth All wiring is hidden, which removes the one detail that otherwise signals an improvised setup The wall reads as one unit rather than a screen sitting on top of a fireplace This is the highest-effort version of the setup and the one most likely to require a contractor for wall work and electrical routing. What People Who Have Done This Report Back A Reddit thread titled “To those who have or had the TV above the fireplace, what is your experience?” generated over 70 responses, and the split was informative. Most users regretted it. Neck strain came up in most negative responses, and at least one person reported visible burn lines on their screen from heat exposure. But a vocal minority defended it: those with gas fireplaces, deeper sofas, and rooms over 12 feet reported almost no issues after years of use. A tilting mount changed the experience entirely for some. Those who made no adjustments and had standard upright sofas close to the wall were consistently the most dissatisfied. The pattern across 70 responses is consistent: poor planning produces regret; deliberate decisions about height, clearance, and mount type produce satisfaction. The setup does not fail on its own. It fails when the room conditions are ignored. Alternatives When the Room Does Not Qualify If the mantel sits above 60 inches, the seating is within 8 feet, the fireplace is open wood-burning, or the room cannot accommodate a pull-down mount, the setup is not worth forcing. These alternatives preserve the design logic without the ergonomic or thermal costs. Side-wall placement: Moving the TV to the wall opposite the fireplace maintains viewability, brings the screen to eye level, and creates a balanced room with two intentional focal points rather than one compromised one. Built-in cabinetry beside the fireplace: A flanking built-in unit holds the TV at the correct height, hides cables, adds storage, and keeps the fireplace as the visual anchor it was designed to be. This is the option that usually photographs better than the above-fireplace version anyway. Separate zones in open-plan spaces: Seating can face the fireplace on one axis and the TV on another, creating two distinct functional areas within the same room. This works well in open-plan living rooms with 250 square feet or more of shared space — enough floor area to define both zones with furniture rather than walls. Frequently Asked Questions What is the ideal height for a TV above a fireplace? The center of the screen should sit between 42 and 48 inches from the floor, as the mantel allows. Most above-fireplace setups land at 60 to 72 inches center height, which is 12 to 30 inches higher than ergonomically comfortable for daily viewing. If the gap is more than 20 inches above seated eye level, a pull-down mount or an alternative placement will produce better results. How much clearance do you need between a TV and a fireplace? At a minimum, 12 inches between the top of the fireplace surround and the bottom edge of the TV. For open-face gas or wood-burning fireplaces, 18 to 24 inches is safer. Less than 12 inches with regular high-output use puts the TV within the sustained heat zone and shortens its lifespan. How hot is too hot for a TV above a fireplace? Most consumer televisions are rated for ambient operating temperatures of 32 to 95 degrees Fahrenheit. Some models extend to 104 degrees. The risk is not a single heat event; it is sustained exposure above 95 degrees over a heating season. Use a basic infrared thermometer at the mount location while the fireplace runs at normal output to check the actual temperature before installing the TV. What size TV should go above a fireplace? Choose a TV no wider than the outer edge of the fireplace surround. A screen wider than the surround reads as visually heavy and draws attention to the height of the setup rather than the balance of the wall. For a standard 40 to 50 inch wide surround, a 55 to 65 inch TV is usually proportional. Is mounting a TV above a fireplace bad for the TV? It depends entirely on the fireplace type and clearance. Electric fireplaces pose minimal risk. Sealed direct-vent gas fireplaces with adequate clearance are generally safe. Open-face gas and wood-burning fireplaces generate sustained heat and particulates that degrade electronics over time. The risk is real but avoidable with the right combination of fireplace type, clearance, and use frequency. Can you mount a TV above a gas fireplace? Yes, with conditions. A sealed direct-vent gas fireplace with 12 inches or more of clearance between the surround and the TV bottom is considered acceptable by most mount manufacturers and fireplace installers. An open-face gas fireplace is a different situation: heat output is less contained, and the risk to electronics increases with frequency of use. What type of mount works best above a fireplace? For mantels at 48 inches or below, a fixed flat mount is sufficient. For mantels at 54 to 60 inches, a full-motion or pull-down mount corrects the height during viewing. Pull-down mounts that bring the screen to eye level are the most effective solution for rooms where lowering the mantel is not an option. Final Thoughts Three things determine whether this setup works: height, heat, and how the room is actually used. Get all three right and the layout is space-efficient, visually clean, and worth the planning it takes. Get one wrong, and you will notice it every time you sit down to watch something. The mantel height sets the ceiling on what is possible. If it puts the TV center above 60 inches with no room for a pull-down mount, the room is not suited for this layout, regardless of how good it looks in a photo. The fireplace type sets the floor on how much heat management is required. Open wood-burning and open-face gas fireplaces raise the bar significantly. Viewing distance and seating height determine whether the elevation gap is tolerable or not. Below 8 feet with upright furniture, it is not. When all three conditions line up, mounting a TV above a fireplace is a legitimate long-term decision. When they do not, the alternatives in this article will serve the room better. Tried this setup yourself? Drop your experience in the comments.

