


Autumn is one of those seasons that can completely change the mood of a meal before anyone even sits down. A table dressed with softer colors, natural textures, candlelight, and a few seasonal details can make an ordinary dinner feel more thoughtful and inviting. The best fall tablescapes don’t fill every inch with decor; they create a clear mood and leave enough breathing room for the food and conversation to matter. From classic harvest colors to moody, minimal, and unexpected combinations, there are plenty of ways to make a fall table feel personal rather than predictable. What Makes a Good Fall Tablescape? A beautiful fall table usually starts with restraint, not more decor. Pick one mood first, then let the linens, dinnerware, centerpiece, and candlelight support it instead of competing for attention. A well-chosen fall color combination can tie those elements together and give the table a clearer direction. Think in layers rather than individual decorations: a textured base, something natural down the center, and enough open space for the meal itself. 12 Fall Tablescape Ideas for an Inviting Autumn Table Each of these fall tablescape ideas takes a different approach to color, texture, and centerpiece style, so you can find one that actually fits your space and your gathering. 1. Classic Harvest Tablescape Burnt orange, mustard, and warm brown pair naturally with pumpkins, gourds, maple leaves, and simple ceramic dinnerware. Use linen napkins and a low foliage centerpiece to keep the table traditional without overcrowding it. This style works especially well for casual family dinners and early-season gatherings because the colors feel instantly familiar and seasonal. 2. Warm Neutral Fall Table Cream, camel, taupe, and warm brown can make a fall table feel seasonal without using the usual orange-heavy palette. Layer linen napkins, matte ceramics, pale wood, dried grasses, and a few soft-toned pears or gourds to build depth through texture. This softer fall aesthetic works especially well in modern or minimalist dining spaces where the mood comes from tone and material rather than obvious seasonal decor. 3. Moody Burgundy and Plum Tablescape Burgundy, oxblood, and plum create a deeper, more formal look when paired with dark wood, antique brass, and taper candles. Keep dinnerware neutral so the darker colors remain the focal point. This palette is especially effective for evening meals because candlelight enhances the red and purple tones without making the table feel overly dramatic. 4. Rustic Woodland Tablescape Moss, branches, pinecones, wooden chargers, linen, and earthy ceramics create a table that feels as if it were collected from the landscape outside. Keep the greenery loose and low, and mix natural textures rather than adding too many themed decorations. This works best when the wood grain and organic materials remain visible, giving the table a grounded, woodland character without slipping into farmhouse styling. 5. Elegant Green and Gold Fall Table Olive or forest green with cream, brass, and clear glass creates an elegant fall table that avoids the usual orange palette. Use green napkins, brass flatware, simple foliage, and pale dinnerware for contrast. The combination works particularly well for dinner parties because the darker green adds seasonal depth while cream and glassware keep the table light and refined. 6. Vintage-Inspired Fall Tablescape Mix patterned china, mismatched glassware, embroidered linens, and aged brass instead of using a fully coordinated set. A few pieces with patina or wear make the table feel collected over time, not newly styled. Keep the centerpiece low and slightly loose so the vintage pieces stay visible. This approach also works well when your tableware comes from thrift shops, family pieces, or different collections. 7. Apple and Pear Harvest Table Use apples, pears, pomegranates, and a few branches as the main centerpiece instead of pumpkins. Arrange the fruit loosely down the center of the table rather than piling it into one large bowl. Pair it with cream ceramics, linen napkins, and simple candles. This approach is practical because the centerpiece is inexpensive, seasonal, and easy to remove or serve after the meal. 8. Candlelit Autumn Tablescape Let candlelight carry most of the visual impact by using taper candles and small votives with neutral dinnerware and minimal greenery. Vary the candle heights slightly, but keep them low enough that they do not block conversation. Unscented candles are best near food, and spacing them away from dried foliage keeps the arrangement safer while still creating a warm evening atmosphere. 9. Floral Fall Tablescape Dahlias, chrysanthemums, berries, dried grasses, and woody branches create a softer, more romantic fall table. Use several low vessels instead of one tall arrangement so guests can still see across the table. Mixing fresh flowers with dried stems adds seasonal texture and keeps the centerpiece from looking like a spring arrangement in darker colors. 10. Minimalist Fall Tablescape 10. Minimalist Fall Tablescape A minimalist fall table is less about removing everything and more about choosing each piece carefully. Start with one warm autumn tone, then pair it with neutral dinnerware, a simple linen runner, and a few sculptural branches or taper candles. Keep plenty of the tabletop visible so every element has room to stand out. The look feels clean and seasonal without relying on piles of pumpkins, leaves, or extra decor. 11. Outdoor Fall Dinner Tablescape Adapt the same autumn styling to a patio, porch, or backyard table using heavier linens, lanterns, wood, foliage, and candle holders built to handle a breeze. It brings fall entertaining outside the dining room for anyone lucky enough to have the space and weather for it, and a few extra layers, like a throw blanket on each chair, help guests stay comfortable once the sun goes down. 12. Thanksgiving-Ready Fall Tablescape Start with a simple autumn table, then add place cards, extra serving pieces, more formal glassware, and a slightly fuller centerpiece for Thanksgiving. If you want to make the setting feel more holiday-specific, a few thoughtful Thanksgiving table decor details can add warmth without overcrowding the table. Leave enough room for shared dishes, especially if you serve the meal family-style. This approach makes it easy to use the same basic table throughout fall and add a few more formal details for the holiday. 13. Copper and Terracotta Fall Tablescape Terracotta, rust, copper, cream, and warm brown create a warmer, more contemporary alternative to a classic harvest table. Use terracotta plates, rust linens, dried foliage, and copper-toned candleholders, but limit metallic finishes so the table doesn’t look too shiny. Cream napkins and clear glassware help balance the stronger earthy tones and keep the setting visually light. 14. Black and Amber Fall Tablescape Matte black dinnerware or candleholders paired with amber glassware, cream linens, and warm wood creates a dramatic but balanced fall table. Use rust foliage or caramel colored candles to connect the dark base back to the season. The contrast does the work: black provides structure, while amber glass and natural wood prevent the setting from feeling cold or overly formal. 15. Blue and Rust Autumn Tablescape Black gives a fall table strong structure, while amber keeps it from feeling too severe. Pair matte black dinnerware or candleholders with amber glassware, cream linens, and warm wood for a balanced look. Rust foliage or caramel-colored candles can soften the contrast and pull the setting back toward autumn. The combination feels dramatic without becoming cold, making it a strong choice for an evening fall table that still feels warm and inviting. 16. Linen and Dried Grass Fall Tablescape Natural linen, wheat, dried seed heads, neutral ceramics, and light wood create a soft fall look built on texture rather than strong color. Keep dried arrangements short and loose, so they don’t overwhelm the table. This style suits Scandinavian, minimalist, or relaxed modern interiors because the seasonal effect comes from tactile materials and warm neutrals, not themed decor. 17. Candle and Fruit Garland Tablescape Create a long, low centerpiece with apples, pears, figs, pomegranates, olive or eucalyptus branches, and staggered taper candles. Spread the arrangement lengthwise rather than building it up in height to keep sightlines open and leave room for serving dishes. Use fruit in different sizes and colors to create natural variation, and keep candles separated from dry foliage for a safer, more practical setup. How to Build a Fall Tablescape Step by Step Inspiration only gets you part of the way there, since translating a photo you like into an actual table setting takes a bit more structure. Here is a practical sequence for putting any of the looks above into practice. Choose One Color Story: Start with two or three main colors plus a neutral. Resist the urge to add every traditional fall shade just because it is seasonal, since that is usually what makes a table feel cluttered instead of cohesive. Establish the Base With Linens: Choose a tablecloth, runner, placemats, or leave the wood bare, depending on the style you want. This layer sets the tone before anything else goes on the table. Layer the Place Settings: Build from charger or placemat up to the dinner plate, a smaller plate or bowl, a napkin, flatware, and glassware. Working in this order keeps each setting consistent without much extra thought. Build a Low Centerpiece: Flowers, foliage, fruit, pumpkins, branches, or candles all work, as long as the arrangement stays low enough not to block sightlines across the table. Centerpiece height is one of the most common practical issues with fall tablescapes, and keeping it low solves most of them. If you want more visual interest without adding height, spread the arrangement out lengthwise along a runner rather than stacking it vertically in one spot. Add Candlelight and Finishing Details: Finish with taper candles, votives, a napkin detail, place cards, or one small seasonal accent at each setting. Stop once the table feels complete rather than filling every remaining bit of open space. How to Keep a Fall Tablescape Beautiful and Functional A table that photographs well is not always a table that works for an actual meal, and it is easy to prioritize the styling over the people actually sitting down to eat. A few practical guidelines keep both in balance: Leave room for plates and glassware: styling should not crowd out the things guests actually need. Keep centerpieces below sight lines: guests should be able to see and talk to each other across the table. Keep flammable foliage away from candles: dried grasses and greenery can catch fire more quickly than expected. Leave space for shared dishes: family-style serving needs room that a heavily styled table can eat into. Avoid overcrowding individual place settings: too many small objects at each seat makes eating awkward. Use unscented candles near food: strong fragrance can compete with the meal itself. How to Create a Fall Tablescape on a Budget A beautiful fall tablescape does not require buying an entirely new set of dinnerware. Existing white plates work as a neutral base for almost any color story, and swapping out just the napkins or a runner can shift the whole feel of the table for very little cost. Branches, leaves, and seasonal produce gathered outdoors or picked up cheaply at a grocery store make effective centerpieces on their own. Thrifted glassware and candlesticks add character that new, matched sets often lack, and changing a few small accents is usually enough without redoing the whole table. Even one new element, a runner, a set of candles, or a bowl of seasonal fruit, can carry the rest of an existing table into fall. Conclusion A successful fall tablescape comes down to a cohesive color story, a bit of seasonal texture, comfortable lighting, and enough open space for people to actually gather and eat. The prettiest table in the world falls short if it gets in the way of the meal itself. Pick one of the looks above, build it out with the step-by-step approach, and keep function in mind at every stage. The result will feel intentional and inviting, not just staged for a photo. Frequently Asked Questions What Is a Fall Tablescape? A fall tablescape is the overall styling of a dining table for autumn, combining color, linens, dinnerware, a centerpiece, and lighting into one cohesive, seasonal look. How Do You Make a Simple Fall Tablescape? Pick one seasonal color, use plain dinnerware, add a linen runner, and finish with a low centerpiece and a few candles for warmth and atmosphere. What Can I Use for a Fall Table Centerpiece? Seasonal fruit, foliage, branches, dried flowers, pumpkins, or a row of taper candles all work well as long as they stay low and simple. How Do You Decorate a Fall Table Without Pumpkins? Lean on color, linens, candlelight, and natural textures like wood and dried grasses instead, which read as autumnal without a single pumpkin anywhere in sight. How Tall Should a Dining Table Centerpiece Be? Keep it low enough that seated guests can see and talk to each other across the table, generally well below eye level once everyone sits down.

I put off making a dried orange garland for two seasons because it seemed like the kind of project that would eat an entire afternoon. It doesn’t. Once you slice the oranges, the oven does most of the work. The slices don’t need to look perfect, either. Different shades, curled edges, and slightly uneven rounds all add to the appeal. The one thing you can’t be casual about is moisture. A damp center can turn into mold later, so give the oranges plenty of time to dry before you reach for the twine. Get the slicing and drying right, and stringing the garland together is the easy part. What You’ll Need and How Many Oranges to Buy You only need a few basics to get started. The number of oranges depends mostly on how long you want the finished garland to be. 3–4 oranges: for about a 3-foot garland 5–6 oranges: for about a 5-foot garland 6–7 oranges: for about a 6-foot garland Sharp knife or mandoline: for thin, even slices Paper towels and baking sheet: for blotting and drying Parchment paper or wire rack: to prevent sticking Twine, needle, and scissors: for assembling the garland Optional: cinnamon sticks, wooden beads, star anise, or greenery for extra detail Measure the spot where you plan to hang the garland first, and leave a little extra twine for the natural dip and end loops. How to Make Dried Orange Garland Step by Step The slicing takes minutes. Drying takes hours. That is the trade-off with this project, and trying to hurry the second part usually causes most of the problems. Step 1: Slice Them Thin, Not Perfect Cut the oranges into rounds about 1/8 to 1/4 inch thick. Aim for a similar thickness, but forget about perfect circles. A few wonky edges will disappear into the finished garland. A mandoline makes quick work of this, though a sharp knife works just as well. Set aside the tiny end pieces and use the fuller rounds from the middle. Step 2: Blot Before They Hit the Oven Gently press each slice between paper towels. You are not squeezing out the juice; you are just picking up what is sitting on the surface. It takes less than a minute and leaves less moisture for the oven to remove. Step 3: Now Comes the Slow Part Lay the slices in a single layer on a parchment-lined baking sheet, leaving a little space between them. Keep the oven around 200 to 225°F and plan on roughly 3 to 5 hours, turning the slices about once an hour and removing thinner pieces as they finish. Now you may wonder whether to use an oven or dehydrator. An oven is faster at around 3 to 5 hours, while a dehydrator takes about 8 to 12+ hours but provides steadier, lower heat that can help reduce browning. Step 4: Let Them Cool Before You Decide Fresh from the oven, a slice can feel drier than it actually is. Move the oranges to a cooling rack and leave them alone until they reach room temperature. Then check the centers. They should feel dry, not tacky or spongy. Step 5: Give Them a Little More Time If you hope to reuse the garland next season, do not rush straight from the cooling rack to twine. Let the slices rest in a dry place for a few days. If one softens again or you notice moisture, it was not quite finished. Give that piece another spell in the oven or dehydrator. Step 6: Thread Without Cracking the Slices Cut more twine than you think you need. You can always trim the extra later. Make two small holes near the top of each orange, where the fruit is sturdier near the rind. Running the twine through two points helps the slices face forward instead of constantly twisting sideways. Handle them gently here. Dried oranges are fairly sturdy until they suddenly aren’t. Step 7: Space Them by Eye Slide the oranges along the twine until the strand looks balanced. You don’t need to measure every gap. Leave them plain or tuck cinnamon sticks, beads, or greenery between the slices. Finish with a loop at either end and hang the strand with a little natural slack. Give the Basic Garland a Different Look Once you know how to make the basic version, you can change the style without starting from scratch. 1. Add Cinnamon for a Holiday Feel Slip small cinnamon-stick bundles between the orange slices for a more traditional holiday look. The warm brown bark adds contrast against the bright citrus and brings in a subtle seasonal scent. Keep the bundles small so the garland stays balanced and does not sag. 2. Tuck in a Little Greenery A few pieces of pine, spruce, or eucalyptus can make a simple orange strand feel fuller and more layered. Use small sprigs rather than large branches so the greenery does not overwhelm the fruit. Fresh stems will dry gradually, which works naturally with the handmade look. 3. Break Up the Oranges With Wooden Beads Wooden beads are an easy way to create breathing room between the orange slices and give the strand a cleaner rhythm. Unfinished beads work especially well because their natural grain complements the dried fruit. Choose lightweight beads so they do not pull too heavily on the twine. 4. Don’t Stop at Oranges Lemon, grapefruit, and blood orange slices can add more variation in size and color to the garland. Mixing citrus makes the finished strand feel less uniform and a little more interesting. Keep in mind that larger grapefruit slices may need extra drying time before they are ready to thread. How to Keep Dried Orange Garland From Molding Mold usually appears because the slices were not completely dry or the finished garland picked up moisture later. The best prevention happens before you hang it: Give thicker slices extra drying time. Never thread fruit that still feels soft. Let everything cool completely. Keep the finished garland away from damp rooms. Don’t seal questionable slices in plastic. If mold appears later, discard that slice rather than trying to rescue it. How to Store Dried Orange Garland Without Breaking It Do not ball it up with the Christmas lights and hope for the best. Once dried, orange slices can handle hanging surprisingly well, but sharp bends and pressure can crack them. When the season is over: Wrap the garland loosely in tissue paper Lay it flat instead of folding it Use a cardboard box or another breathable container Keep the box somewhere dry and away from heat Avoid trapping the garland inside sealed plastic if you have any doubt about remaining moisture. A shallow box is especially useful because you can lay the whole strand down without forcing bends into the dried slices. Let It Look Handmade There’s something satisfying about decorating with something you made yourself, especially when it feels simple, natural, and a little imperfect. Dried orange garland has that kind of charm. It works just as easily in a quiet fall corner as it does across a Christmas mantel, and every strand ends up looking slightly different. Once it’s finished, all that’s left is finding the right spot for it and enjoying the warm, handmade character it brings to the room. Frequently Asked Questions How long will orange garland last? A fully dried orange garland can last for several years when stored in a cool, dry place away from moisture. What are the uses of a dried orange garland? A dried orange garland can decorate mantels, Christmas trees, windows, stair rails, shelves, doorways, and seasonal table displays. What kind of string to use for orange garland? Use sturdy twine, jute, cotton string, or strong thread that can support dried orange slices without cutting through them.
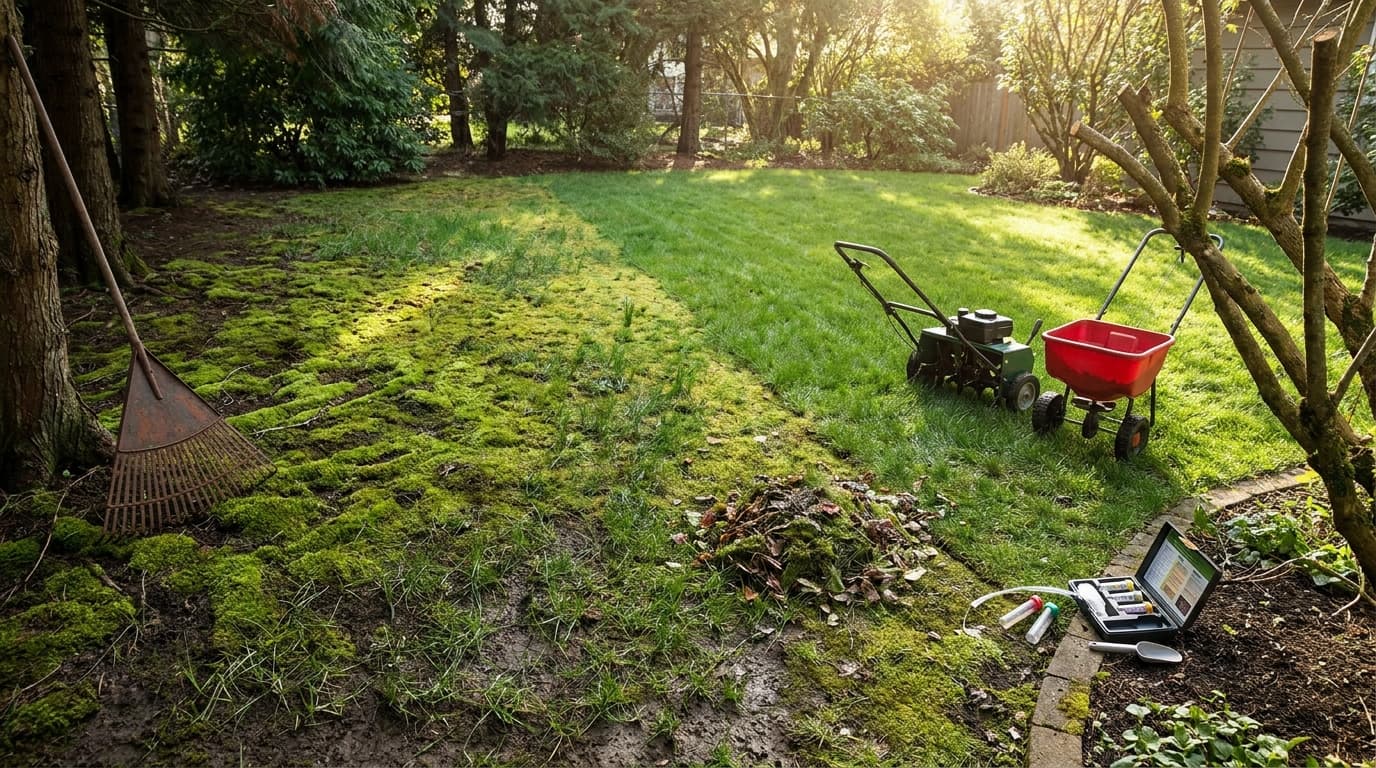
Quick answer: Moss in lawns is best controlled by removing existing growth and improving shade, drainage, soil, and grass health. Moss can quickly take over areas where grass is already struggling, leaving a lawn looking patchy, damp, and uneven. Simply removing the visible growth may improve its appearance for a while, but lasting results depend on correcting the conditions that allowed moss to spread in the first place. This blog explains how to get rid of moss in the lawn, including the main causes, step-by-step removal methods, soil and drainage improvements, reseeding tips, prevention strategies, and common mistakes that can cause moss to return. Why is Moss Growing in the Lawn? Moss growing in lawn areas almost always points to a specific weak spot in your yard’s conditions. Grass needs sunlight, good drainage, and loose soil to grow thick enough to crowd moss out. When one of these is missing, moss moves in fast because it tolerates conditions grass cannot handle. Spotting the exact cause first saves you from wasting time on the wrong fix. 1. Too Much Shade Grass slows down in low light, but moss keeps growing just fine in shade. Areas under trees, near fences, or beside buildings often show the thickest moss growth. Less sunlight means thinner grass blades and more bare soil for moss to settle into. Trimming back branches or thinning tree canopies can shift the balance back toward grass. 2. Poor Drainage and Excess Moisture Moss thrives in soil that stays wet for long stretches. Low spots, compacted clay, or areas with poor drainage retain water near the surface. Grass roots struggle in soggy soil, while moss spreads easily in these damp conditions, and standing water after rain is usually the clearest sign of a drainage issue. 3. Soil with Low pH Grass grows best in soil with a near-neutral pH, while moss tolerates acidic soil far better. A pH below 6.0 often signals conditions that favor moss over turfgrass. Testing your soil is the only reliable way to confirm this cause. Once you know the number, adjusting it is straightforward. 4. Compacted Soil Foot traffic, mowing equipment, and heavy rain can pack soil down over time. Compacted ground blocks air, water, and nutrients from reaching the grass roots properly. Under these conditions, grass thins out, leaving space for moss to take hold. High-traffic areas, such as paths and play zones, usually show compaction first. 5. Thin or Weak Grass Growth Sometimes the real issue is the grass itself, not the soil or light. Old lawns, the wrong grass type for the climate, or years of skipped feeding all weaken turf over time. Weak grass cannot compete with moss for space or nutrients. Strengthening the grass is often just as important as removing the moss on top. How to Get Rid of Moss in Lawn Step by Step Removing moss properly takes a bit more than raking it out and hoping for the best. These steps clear existing moss while setting the lawn up to recover rather than thin further. Step 1: Rake Out the Moss Use a metal-tined rake or a dethatching rake to pull moss away from the soil. Work in small sections and rake firmly, since moss often sits shallow but spreads wide. This step also removes dead grass and debris trapped underneath the moss layer. Bag up the moss and toss it, since it can regrow if left on the lawn. Step 2: Treat Stubborn Patches if Needed For thick or established moss, a moss killer can help clear the rest before raking. Iron sulfate-based products are common and turn moss black within a day or two. Apply on a dry day and water lightly afterward, following the product label for exact timing. Once the moss blackens, rake it out just like in Step 1. Step 3: Loosen and Prepare the Soil Aerate the treated area to break up compacted soil and improve airflow to the roots. A core aerator works well for larger lawns, while a hand aerator suits smaller patches. This step matters as much as removal, since bare, compacted soil invites moss right back. Add a thin layer of compost if the soil feels especially hard or poor. Step 4: Overseed the Bare Patches Spread grass seed suited to your climate and light conditions over the cleared soil. Choosing the wrong variety for your region is one of the main reasons reseeded patches stay thin. Thick, healthy grass is the real long-term barrier against moss returning. Skipping this step is why moss often comes back within a few months. How to Stop Moss from Growing Back Removing moss is only half the job. Moss returns quickly if the lawn conditions that caused it in the first place stay unchanged. 1. Improve Sunlight Exposure Grass needs a solid stretch of direct or filtered light each day to stay dense enough to outcompete moss. Trim back low tree branches and thin out crowded shrubs near shaded lawn edges, since even a small increase in light can make a noticeable difference over the course of a season. If a spot stays shaded no matter what you trim, consider a shade-tolerant grass blend instead of fighting the light problem directly. Some yards simply have permanent shade zones. Replacing those patches with no-grass ground cover options removes the conditions moss needs without the ongoing battle. 2. Improve Lawn Drainage Check for low spots that collect water after rain, and consider regrading small dips and adding topsoil. Redirecting downspouts away from the lawn helps, too, since many drainage problems stem from water running off a roof directly onto the lawn. For larger drainage issues, a French drain or dry well may be worth the investment if soggy patches keep coming back year after year. 3. Test and Adjust Soil pH A pH below 6.0 tends to favor moss over turfgrass, so testing gives you a clear number to work from instead of a guess. Home soil test kits are inexpensive and give a reading within minutes. If the test indicates acidic soil, applying garden lime gradually raises the pH over several weeks. Retest after two to three months, since lime takes time to work into the soil and a single application rarely fixes deeply acidic ground in one pass. 4. Aerate Your Lawn Regularly Compacted soil blocks water, air, and nutrients from reaching grass roots, weakening turf and inviting moss. Core aeration once or twice a year, ideally in spring or fall, loosens the soil and lets roots grow deeper and stronger. Leaving the soil plugs on the lawn after aerating is fine, since they break down and return nutrients to the soil. 5. Maintain Proper Mowing Habits Cutting grass too short weakens it and makes it easier for moss to move in. Most lawns do best when kept at around 2.5 to 3.5 inches, depending on the grass type. Mowing at this height lets grass develop deeper roots and shade out competing growth, such as moss. Keep mower blades sharp, too, since dull blades tear grass rather than cut cleanly, leaving it more vulnerable to stress and disease. Common Mistakes When Removing Moss from Lawn A few missteps during moss removal can undo all the effort put into raking, treating, and reseeding. Skipping the cause and only removing moss: Fixing shade, drainage, pH, or compaction matters as much as raking or spraying. Skip it, and moss almost always returns. Applying moss killer at the wrong time: Extreme heat or rain right after spraying weakens the treatment. Dry, mild days work best. Leaving bare soil unseeded: Raked-out patches left empty invite moss straight back. Seed them right away. Mowing too short after treatment: Low cuts stress new growth and weaken its ability to compete with moss. Keep the mowing height taller while the lawn recovers. Skipping a soil test before applying lime: Lime without a pH test can push the soil too far in the other direction. Test first. Ignoring compacted high-traffic areas: Paths, gates, and play zones get skipped during aeration, but they need it most. Avoiding these mistakes keeps the work already put into moss removal from going to waste. Moss Prevention Lawn Care Schedule Below is a breakdown of what to focus on for each season, so prevention steps occur at the right time rather than all at once. Season Key Tasks Why It Matters Spring Rake out any moss, aerate soil, overseed bare patches, and test soil pH Grass is entering active growth, giving the seed the best chance to establish Summer Mow at proper height, water deeply but less often, and avoid heavy treatments Heat stresses grass, so light maintenance keeps it steady until fall Fall Aerate again if needed, apply lime based on test results, and overseed thin spots Cool weather supports strong root growth and seed germination Winter Trim overhanging branches, check drainage before freezing weather Prepares the lawn for spring by improving light and water flow Summing Up Getting rid of moss in a lawn works best as a two-part process. Remove the moss first, then fix whatever caused it, whether that’s shade, poor drainage, low pH, or compacted soil. Regular aeration, proper mowing height, balanced feeding, and good drainage all work together to keep the grass strong enough to crowd out moss on its own. Small, consistent lawn care habits spread across the year beat one big cleanup every spring. Test your soil, watch for shaded or compacted spots, and stay ahead of the conditions that let moss take hold in the first place. Frequently Asked Questions Will Moss Come Back After Removal? Yes, if you don’t correct the underlying cause. Moss returns quickly in shaded, damp, compacted, or acidic soil. Pairing removal with soil correction and reseeding gives grass a real chance to crowd moss out. Is Baking Soda Good for Killing Moss? Baking soda can temporarily dry out small moss patches by raising the surface pH, but it is not a long-term fix. It also does not address shade, drainage, or compaction, so moss often returns. Does Moss Damage Grass Roots? Moss itself does not directly damage grass roots, but it competes for space, light, and moisture. Thick moss growth can crowd out grass over time, making the lawn thinner in already weak areas. How Often Should I Treat My Lawn for Moss? Check for moss growth once each season, with focused treatment in spring or fall when grass grows fastest. Ongoing preventive steps, such as aeration and proper mowing, matter more than repeated applications of moss killer. Can You Kill Moss Without Killing Grass? Moss can be removed without harming grass. Rake out small patches by hand or use a lawn-safe moss killer. Fixing shade, drainage, soil problems, and weak grass growth helps prevent moss from returning.
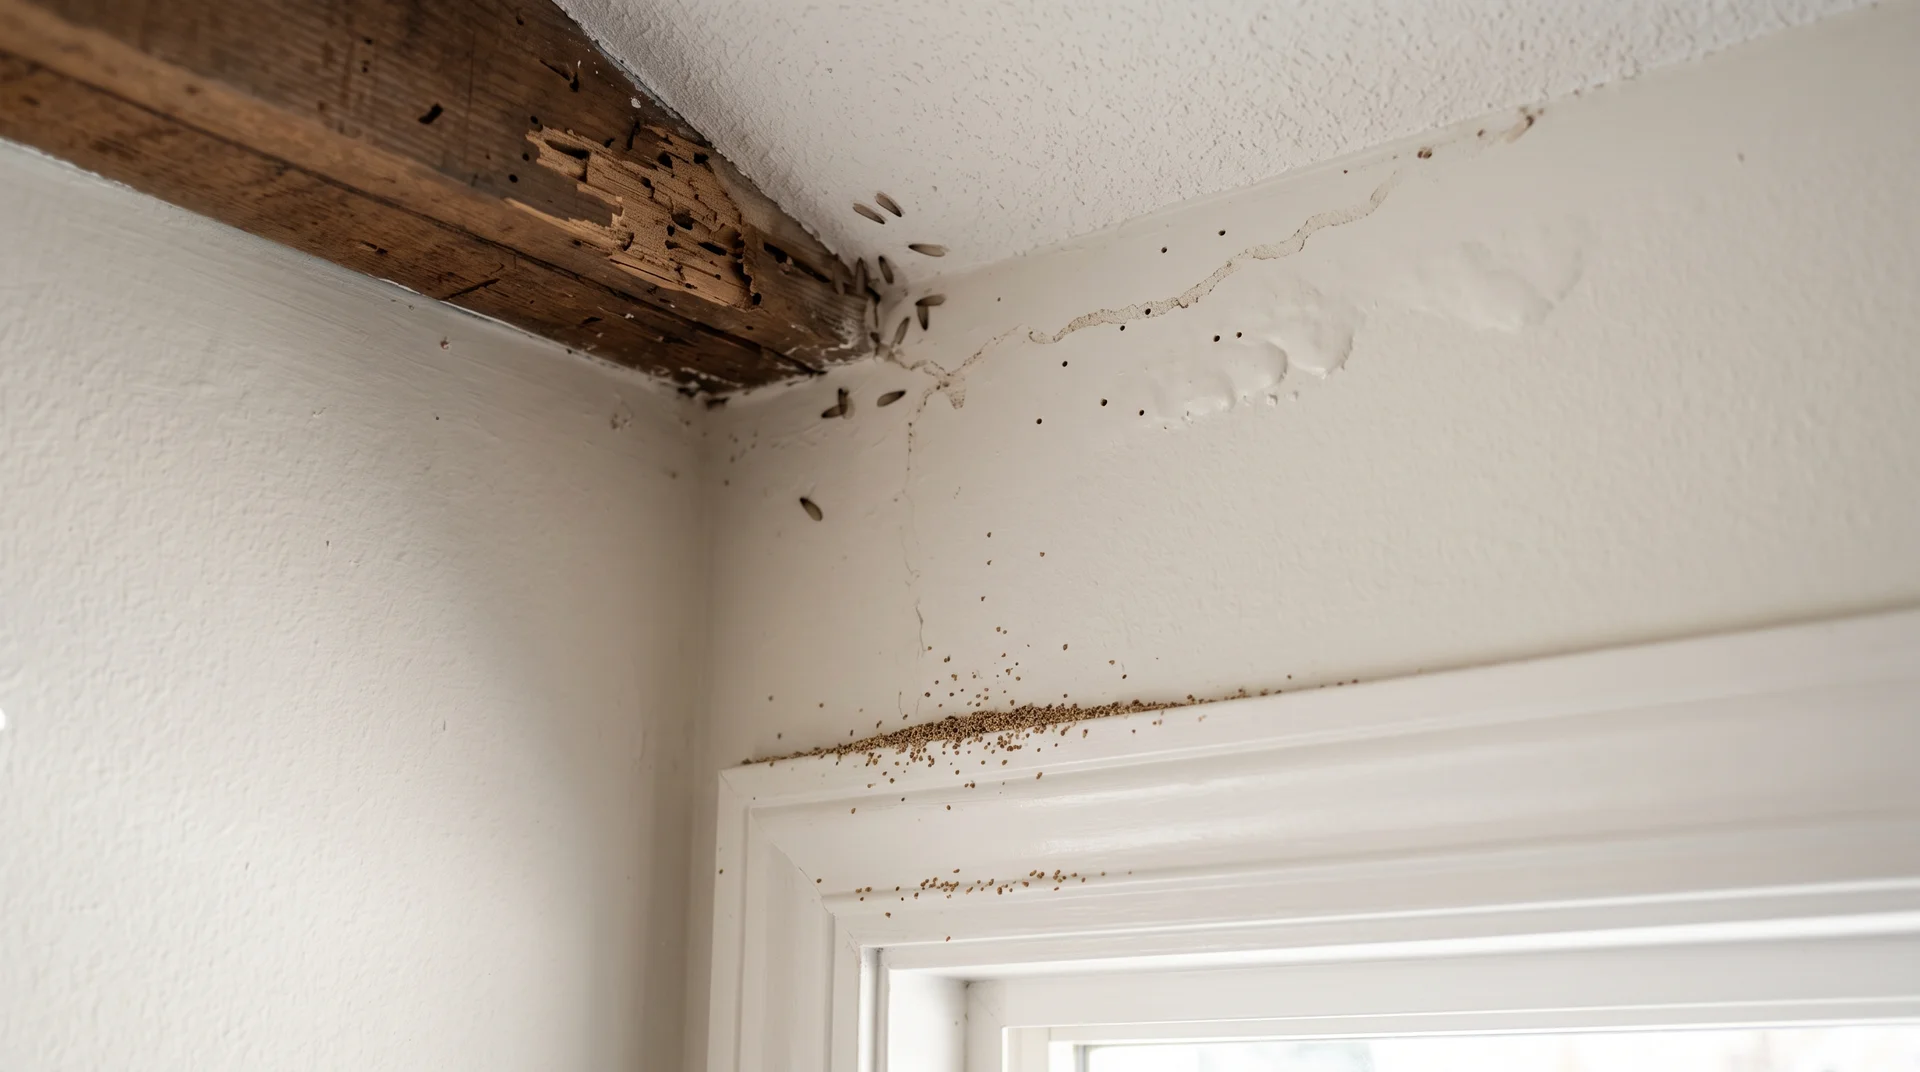
Early signs of termites in a ceiling include tiny holes, pellet-like droppings, mud tubes, irregular surface trails, discarded wings, hollow or weakened ceiling wood, and unexplained bubbling or peeling paint. A single hole or patch of damaged paint does not confirm a termite infestation. Nail marks, leaks, settling, and other insects can create similar symptoms. Several related signs in the same area are more concerning than a single isolated mark. For example, a small ceiling hole directly above a fresh pile of pellets deserves closer attention than a hole with no debris or other termite clues nearby. 8 Early Stage Signs of Termites in the Ceiling Ceiling termite activity often leaves small, easy-to-miss clues before obvious damage appears. Check for several related signs in the same area rather than relying on a single symptom. 1. Tiny Holes in Drywall or Plaster Small holes in modern drywall texture or plaster may appear when termites push waste from their galleries or emerge from infested wood. These small, round holes may occur around ceiling seams, crown molding, beams, corners, light fixtures, or attic openings. Drywood termites commonly create kick-out holes, while other insects, old repairs, or settling can cause similar marks. Look for nearby pellets, wings, trails, or other signs before concluding that termites are present. 2. Pellet-Like Droppings Below the Ceiling Small piles of hard pellets beneath a ceiling area may indicate drywood termite activity. These pellets, called frass, are pushed out through kick-out holes as termites clear their galleries. Frass is usually small, hard, and uniform in shape. It may resemble coarse sand or pepper and often collects beneath a single opening. If fresh pellets return after cleaning, the opening may still be active. Check the surrounding area for pellets, discarded wings, irregular trails, or damaged wood before assuming termites are responsible. 3. Mud Tubes or Soil-Like Material Subterranean termites build mud tubes to travel safely between the soil and wooden parts of a building. Made from soil, moisture, and termite saliva, these tubes may appear as narrow brown lines, dried mud, or raised trails. Around ceilings and attics, they may occur near wall joints, joists, plumbing openings, chimneys, masonry, or areas connected to the foundation. Ceiling-level mud tubes are less common but may indicate termites have moved upward through hidden framing or wall cavities. Leave them intact for inspection. 4. Raised or Sunken Surface Trails Termite galleries near the ceiling surface may create irregular lines or changes in texture. These signs can appear as narrow dents, raised paint lines, vein-like marks beneath drywall paper, darker tracks, or uneven areas that do not follow straight seams. Unlike normal drywall joints, termite trails are usually irregular and may curve or branch. They are more concerning when found with pinholes, frass, mud material, or damaged wood. 5. Bubbling or Peeling Paint Paint may bubble, blister, peel, or become uneven when the surface beneath it is disturbed. Termites are one possible cause, but moisture issues are more common. Check for leaks, condensation, poor ventilation, or previous water damage before assuming an infestation. Water damage often causes staining and swelling, while termite activity may create thin, uneven surfaces with nearby holes or debris. Treat damaged paint as a supporting clue, not proof on its own. 6. Hollow or Papery Wood Termites often feed inside wood while leaving the outer layer intact, so joists, beams, molding, or trim may look normal despite internal damage. Affected wood may look thin, blistered, uneven, or cracked, with small holes nearby. Avoid testing suspicious wood by pressing or striking it, as weakened surfaces may break. If an exposed beam appears damaged or unstable, stop examining it and keep people away until it is assessed. 7. Discarded Wings or Termite Swarmers Winged reproductive termites, known as swarmers, leave established colonies to start new ones. They may emerge from ceiling cavities, attic framing, or upper walls and shed their wings near windows, vents, lights, or attic openings. Termite wings are usually similar in length and appear in small piles. Swarmers have straight antennae and four equal-sized wings, unlike flying ants. Shed wings indoors can indicate termite activity. Finding shed wings indoors, especially near ceiling openings or wooden framing, can be an important sign of termite activity. 8. Faint Clicking or Rustling Sounds Termites can sometimes produce faint sounds inside wood, such as soft tapping or rustling. However, ceiling noises are more often caused by plumbing, HVAC systems, rodents, or normal house movement. Sounds alone do not confirm the presence of termites and are more meaningful when accompanied by signs such as pellets, holes, mud tubes, or wings. What to Do After Finding Possible Termite Signs Finding one suspicious sign does not mean you need to begin tearing out the ceiling. The next steps should focus on safety and professional confirmation. 1. Avoid Disturbing the Area Do not spray household insecticide into holes or ceiling cavities. Killing a few visible termites will not eliminate a hidden colony and may push the remaining insects deeper into the structure. Avoid patching holes, painting over surface damage, breaking mud tubes, removing damaged wood, opening the ceiling, or cleaning away debris before documenting the evidence. Move furniture away if loose material may fall. 2. Address Active Leaks Repair active roof or plumbing leaks, but do not cover the suspected termite opening before inspection. Fixing moisture problems can help prevent further deterioration and make it easier to determine whether termites or water damage caused the issue. Check areas around the ceiling for signs of ongoing leaks, condensation, or poor ventilation that may be affecting the structure. Avoid cosmetic repairs, such as patching holes or repainting damaged areas, until you confirm the cause. Covering the evidence too early can make it harder to identify the source of the problem. 3. Arrange a Licensed Termite Inspection A professional may inspect the ceiling and attic framing, connected walls, foundations and crawl spaces, mud tubes and frass, moisture conditions, plumbing and utility routes, and other areas with structural wood. Ask whether the evidence appears active, which type of termite is suspected, and whether any parts of the structure could not be accessed. The inspection should also explain the recommended treatment and whether a contractor or structural professional should assess damaged materials. Ways to Make Ceiling Areas Less Inviting to Termites Home remedies can help reduce conditions that favor termites. They cannot remove termites hidden inside ceiling wood or framing. If you see multiple signs of termites, schedule a professional inspection. 1. Reduce Excess Moisture: Fix roof leaks, plumbing leaks, and condensation issues. Keep attic spaces dry with proper ventilation. Dry wood is less attractive to termites. 2. Remove Wood and Cellulose Debris: Remove old lumber, cardboard, branches, and firewood near the building. Keep wood materials away from exterior walls. Clear unused wood scraps from attic spaces. 3. Vacuum Visible Swarmers and Wings: Vacuum termite swarmers and discarded wings when found indoors. Seal and dispose of vacuum contents outside. Record where swarmers appeared for inspection. 4. Keep the Area Dry and Ventilated: Use fans or dehumidifiers in damp areas. Improve airflow in attic and ceiling spaces. Reducing humidity helps protect wooden structures. 5. Avoid Unproven DIY Treatments: Vinegar, bleach, oils, and household sprays may only kill visible termites. They cannot reach hidden colonies inside wood. Avoid drilling holes or applying mixtures into ceilings. How to Prevent Future Termite Activity 1. Control Moisture- Repair roof leaks, plumbing problems, condensation, and overflowing gutters before water reaches the attic or ceiling framing. Improve attic ventilation where humidity regularly builds up. 2. Remove Wood-to-Soil Contact- Check siding, porch posts, deck supports, steps, and other wooden materials that touch the soil. Create separation between structural wood and the ground where possible. 3. Protect the Foundation and Exterior- Keep gutters clear and extend downspouts so water drains away from the foundation. Store firewood off the ground and away from exterior walls. Remove dead wood, stumps, and leftover building timber near the home. 4. Schedule Periodic Inspections- The right inspection schedule depends on local termite pressure, previous infestations, construction type, moisture conditions, and any existing termite warranty. Homes with a history of termite activity may need closer monitoring than properties with no previous evidence. What Early Termite Signs Could Be Telling You Most ceiling termite activity remains hidden well before visible evidence appears. When clues surface, such as a fresh pile of frass, a cluster of shed wings near a vent, or irregular surface trails, they typically indicate a colony that has been active for some time. Acting on early evidence keeps repair scope limited. Infestations identified before structural deterioration sets in tend to require less remediation. Waiting until visible damage appears often means managing an active infestation and the resulting structural repairs simultaneously. Frequently Asked Questions Can Termites Be in the Ceiling Without Visible Damage? Yes. Termites can remain behind drywall, insulation, or framing while feeding on hidden wood. Wings, frass, mud material, or small holes may appear before the ceiling shows obvious damage. Why Do Termite Pellets Keep Appearing After Cleaning? Drywood termites may continue pushing frass through an active kick-out hole. Pellets that repeatedly return beneath the same ceiling location are more concerning than one old, undisturbed pile. Can Ceiling Termites Spread to Other Rooms? Yes. Termites can move through connected joists, wall cavities, roof framing, and other wooden components. Visible evidence in one room may represent only part of the affected area. How Quickly Can Termites Damage Ceiling Joists? The rate varies based on colony size, termite type, moisture, wood condition, and the duration of the infestation. Visible sagging, cracking, or surface deterioration suggests you should not delay a professional assessment.

A well-planned black bedroom feels calm and grounded, not gloomy or cramped. Designers pair black walls with brass fixtures, warm wood, and soft linens. The result looks like a magazine spread and sleeps even better. If you’ve been eyeing black bedroom ideas. Black is often avoided because we worry it will make a bedroom feel smaller or absorb too much light. Used thoughtfully, however, it can create depth without sacrificing warmth or personality. These black bedroom ideas show how to use the color across walls, furniture, decor, and rooms of different sizes. Black Bedroom Wall Ideas for a Stylish Space Walls set the tone for a black bedroom. The amount of black you use, along with the room’s lighting, textures, and surrounding colors, determines whether the result feels cozy or overly dark. Some homeowners commit to four black walls. Others prefer just one accent wall or a patterned paper. Here are six ways to bring black onto your bedroom walls the right way. 1. Paint All Walls Black for a Dramatic Bedroom Painting every wall black makes the boldest statement on this list. It works best when the rest of the room balances it out. Use matte or eggshell black paint to create a sophisticated backdrop. Balance with lighter bedding, warm lighting, and textured fabrics. 2. Create a Black Accent Wall Behind the Bed A black accent wall behind the bed is the easiest way to try this trend without full commitment. A black wall creates instant contrast, especially against white, beige, or soft gray walls. It can still work in a small bedroom, since keeping the other walls lighter helps the space feel open. Use black only behind the headboard to create a focal point. Use lighter adjoining walls for stronger contrast. 3. Add Black Wall Paneling for Texture Black paneling turns a flat black wall into something with real depth. Vertical wood slats installed over black paint add texture and a natural element, softening the wall’s dark color. Molding or panel designs work the same way, adding shadow lines instead of relying on paint alone. Combine black paint with wood slats, molding, or panel designs. Use vertical details to emphasize height. Pair textured walls with simpler furniture so the room does not feel overly busy. 4. Try Black Wallpaper with Subtle Patterns Black wallpaper is a good option when a flat painted wall feels too plain. A subtle pattern adds movement without fighting the dark color. Recommend: Geometric prints Botanical patterns Textured finishes Helps prevent flatness in a dark room. Keep the pattern relatively subtle if the bedding, rugs, or furniture already contain strong prints. 5. Pair Black Walls with White Trim White trim is one of the simplest ways to keep a black bedroom from feeling heavy. White baseboards, doors, and molding draw the eye along clean lines rather than a single solid block of color. Use white or off-white baseboards and molding for contrast. Repeat the lighter trim color elsewhere through bedding or decor. Keep the contrast crisp for modern rooms or choose creamier whites for a softer look. 6. Use Black Ceiling Paint for a Cozy Effect A black ceiling pulls the whole room together. Painting the ceiling the same black as the walls creates a cocoon-like feeling that many find calming. In bedrooms with good natural light or high ceilings, this is a good addition. A low, dim room can feel closed in without enough light to balance it. Creates a cocoon-like atmosphere. Best suited for bedrooms with sufficient lighting and height. Black Bedroom Color Combination Ideas Black works best when another color controls the room’s warmth, contrast, or softness. Lighter neutrals can brighten it, while wood, green, or terracotta add warmer, more natural tones. Here are eight combinations that work well with black bedroom ideas. 7. Black and White Bedroom This is the classic pairing for a modern black bedroom. White keeps the room feeling crisp instead of heavy. Aim for roughly a 60/40 split between black and white surfaces, with white on larger areas like bedding or walls, so the room reads as sharp rather than stark. Use white bedding, rugs, or curtains against dark walls. Repeat black in smaller details to tie the palette together. Works especially well in modern, minimalist, and Scandinavian-inspired rooms. 8. Black and Beige Bedroom Pairing black with beige creates a softer, more effortless bedroom aesthetic and a cozy feel without feeling too dark. Warm beige keeps a black bedroom from feeling cold. Use beige on the largest surfaces, such as the walls or an area rug, and save black for furniture or accents so the room stays warm rather than heavy. Pair the combination with linen, wool, and woven materials. Use beige when you want contrast without a sharp black-and-white look. Add warm wood tones to make the palette feel more relaxed. 9. Black and Wood Bedroom Wood elements introduce warmth and a natural vibe, softening the boldness of black. Lighter woods like oak or ash brighten a black room more than darker walnut, so pick a wood tone based on how much natural light the space already gets. Add oak, walnut, or reclaimed wood furniture. Use visible wood grain to break up smooth black surfaces. Pair wood with black metal fixtures for a mixed-material look. 10. Black and Gold Bedroom Metallic decor pieces, like brass, gold, or silver, pop against a black wall and add a touch of luxury. Keep metallic details concentrated in a few areas so they feel intentional rather than decorative for their own sake. Use brass or gold on lighting, handles, or mirror frames. Repeat the same metal finish in two or three places. Balance reflective accents with softer fabrics and matte surfaces. 11. Black and Green Bedroom Deep green tones sit close to black on the color wheel, so the pairing feels natural rather than jarring. Olive, sage, or emerald all work well against black walls or bedding. Pair black with olive, sage, or emerald tones. Introduce green through bedding, upholstery, artwork, or plants. Add natural wood or woven materials to reinforce the organic feel. 12. Black and Gray Bedroom Layering black with different shades of gray keeps a room feeling modern without adding another color. Charcoal, soft gray, and black together read as one cohesive palette rather than clashing tones. Combine black with charcoal and soft gray. Use lighter gray on textiles to create contrast. Add texture so the monochromatic palette does not appear flat. 13. Black and Terracotta Bedroom Terracotta and other clay tones carry warmth that plain black walls lack on their own. This combination suits Mediterranean-style or earthy interiors especially well. Use terracotta through bedding, cushions, pottery, or rugs. Warm clay tones soften the intensity of black. Works well with Mediterranean and earthy interiors. 14. Black and Cream Bedroom Cream reads softer than bright white against black. It works well for anyone who wants contrast without a stark, high-fashion look. Use cream bedding, curtains, or rugs against black walls. Repeat cream across several surfaces to distribute the contrast. Works well in cozy, transitional, and traditional bedrooms. Black Bedroom Furniture Ideas Furniture is often the easiest way to bring black bedroom ideas into a room without committing to full black walls. A single black bed frame or dresser can do the work of an entire color scheme. Here are six ways to use black furniture well. 15. Add a Black Upholstered Bed An upholstered bed softens the hard edge that black furniture can have. Velvet, linen, or boucle textures add softness against the dark color. It pairs best with cream or oatmeal bedding and a woven jute or wool rug underneath. Velvet, linen, or boucle textures add softness. Creates a strong focal point. Pairs best with: cream bedding, natural rugs, and brass reading lamps. 16. Choose a Black Wooden Bed Frame A black wooden frame suits minimalist and contemporary bedrooms especially well. Its clean lines keep the piece from feeling too heavy in the room. Warm wood nightstands and a light oak floor balance the frame’s dark tone. Pair with oak or walnut side tables. Use white, beige, or muted bedding for contrast. Add a textured throw to soften the frame’s straight lines. 17. Use Black Nightstands for a Matching Look Matching black nightstands on either side of the bed create instant symmetry. Warm lamps on top keep the pair from reading as too stark. Gold or brass lamp bases and a soft table runner soften the matched black look. Creates symmetry around the bed. Add warm lamps to soften the appearance. Pairs best with: brass or gold table lamps, a light-colored table runner, and small ceramic decor pieces. 18. Add a Black Dresser or Storage Cabinet A black dresser adds real storage while keeping the room’s color story intact. Balance it with lighter decor pieces on top so it does not become the only dark element in the room. A woven basket or two, plus a light-colored vase, keeps the surface from feeling heavy. Style it with a cream, terracotta, or ceramic vase. Add rattan or woven baskets nearby. Hang a mirror above it to introduce a reflective surface. 19. Create a Black Built-In Wardrobe Wall A black built-in wardrobe wall gives the room a custom, cohesive look. Integrated interior lighting keeps it functional and stylish. Pairing the wall with a lighter ceiling and a wood- or brass-handle detail keeps the wall from closing in the room. Add warm interior wardrobe lighting. Use brass, bronze, or matte-gold handles for contrast. Keep the ceiling or surrounding walls lighter if the wardrobe occupies most of one wall. 20. Add Black Metal Furniture Accents Black metal furniture adds an edge without taking over the whole room. It works well in small doses across several pieces. Pair metal accents with warm wood or a soft textile to keep the look from feeling too industrial. Examples: Bed frames Side tables Shelving Mirrors Pair the metal with warm wood, linen, cotton, or one additional metal finish such as brass or bronze. Black Bedroom Decor Ideas Decor is what makes a black bedroom either feel flat or come to life. Texture, light, and a few well-placed accents make the biggest difference. These eight ideas cover the details worth getting right. 21. Layer Black Bedding with Different Textures Black bedding in a single flat fabric can look plain under normal light. Mixing textures adds depth without adding another color to the room. Include: Cotton sheets Quilted blankets Velvet pillows Linen throws Texture is what keeps black bedding from looking flat. A quilted blanket over smooth cotton sheets, or a velvet pillow against a linen throw, catches light differently across the bed. That variation gives the eye something to notice, even in a single color. 22. Add Warm Lighting to a Black Bedroom Layered lighting with warm bulbs prevents a black room from feeling too heavy. Lighting matters more in a black bedroom than almost any other design choice. Cover: Wall sconces Pendant lights Bedside lamps Dimmable fixtures Warm bulbs, in the 2700K to 3000K range, soften black paint and dark furniture. Cool white bulbs tend to make black surfaces look flat and a little cold. Dimmable fixtures let you adjust the mood between daytime brightness and evening warmth. 23. Use Mirrors to Reflect Light Mirrors and reflective surfaces can help bounce light around the room and offset the darkness. A large mirror does double duty in a black bedroom. Large mirrors help bounce natural and artificial light. Choose black frames for a cohesive look. 24. Add Large Artwork Against Black Walls Light-colored artwork stands out clearly against black walls and can break up a large uninterrupted dark surface. One substantial piece often creates a cleaner focal point than many small frames. Choose artwork with cream, white, muted, or metallic details. Size the piece to be proportional to the bed or dresser below it. Leave some empty wall space around the artwork. 25. Use Plants to Soften Black Interiors Wood elements and greenery introduce warmth and a natural vibe, softening the boldness of black. Plants achieve the same effect through color and life rather than texture. Use plants as small green accents against dark walls. Snake plants, pothos, and ZZ plants are well-suited to bedrooms with lower light levels. Choose simple planters so the foliage remains the main contrast. 26. Add Soft Rugs for Warmth A soft rug underfoot balances the hard visual weight of black walls or furniture. Texture matters here as much as color. Use: Cream rugs Beige textures Patterned designs 27. Style Black Curtains for a Dramatic Look Blackout curtains work best in bedrooms that need full darkness for sleep or in rooms with strong morning light. They can also make a room feel smaller on their own. Use blackout curtains when blocking morning or street light is the priority. Balance them with a lighter sheer layer or a light-colored curtain rod for contrast. Mount curtains higher to emphasize ceiling height. 28. Add Metallic Accents for Contrast Metallic finishes catch light in a way flat black paint cannot. A mix of one or two metal tones tends to look more intentional than several at once. Examples: Brass Gold Chrome Bronze Repeat the chosen metal through details such as lamp bases, handles, frames, or curtain hardware. Black Bedroom Style Ideas Black adapts to almost any design style, from stripped-down minimalism to full-on maximalism. The style you choose changes how much black you use and what you pair it with. Here are six directions to take a black bedroom. 29. Modern Black Minimalist Bedroom A minimalist black bedroom relies on simple shapes and very little clutter. The color does the visual work instead of pattern or ornament. Features: Clean lines Simple furniture Limited decoration Neutral accents 30. Luxury Black Bedroom with Velvet Details Velvet adds a soft, high-end feel that plain black paint or fabric cannot match on its own. This style leans dramatic on purpose. Use: Velvet headboard Plush bedding Statement lighting 31. Black Scandinavian Bedroom Scandinavian design usually avoids heavy color, so keep black light here. Keeping the rest of the room bright balances the one dark note. Balance black with: Light woods Neutral textiles Simple decor 32. Black Industrial Bedroom Industrial style pairs naturally with black, since both lean toward raw, unfinished materials. Metal and exposed surfaces fit right into this look. Combine it with: Black or aged metal finishes Exposed brick or concrete Dark furniture Warm wood details Adding wood or softer textiles keeps the room from feeling overly hard or utilitarian. 33. Black Bohemian Bedroom A boho black bedroom trades sleek surfaces for texture and pattern. Natural textiles and woven pieces warm up the coolness of black. Combine black with: Rattan Textiles Plants Handmade decor 34. Dark Cottage-Core Inspired Bedroom Dark Cottage-core style leans into black’s dramatic side rather than softening it. Rich fabrics and antique details give the room a sense of history. Use: Antique-style furniture Rich fabrics Ornamental details Black Bedroom Ideas for Different Space Types Not every home has the same room to work with. A black bedroom idea that works in a large main suite might not suit a small apartment or a low-light room. These ideas cover common real-world situations. 35. Small Black Bedroom Ideas A black accent wall can work in a small bedroom by anchoring the space and adding depth, as long as adjacent walls stay lighter. Full black walls can work too, but need more careful lighting. Try: Use black on one wall Add mirrors Keep furniture minimal Use layered lighting 36. Black Bedroom Ideas With Low Natural Light A room with little daylight needs extra help to keep black from feeling dim. Warm bulbs and reflective surfaces do most of the work here. Include: Warm bulbs Reflective surfaces Lighter fabrics Avoid full matte black everywhere, since matte finishes absorb more light than a satin or eggshell black would 37. Black Bedroom Ideas for Couples A shared bedroom needs a color palette and storage plan that work for two people, not one. Comfortable, neutral-leaning textures keep the space feeling calm for both partners. Include: Balanced color palettes Storage solutions Comfortable textures Neutral accents 38. Black Bedroom Ideas on a Budget You do not need a full renovation to bring black into a bedroom. Small, targeted changes get most of the visual impact for a fraction of the cost. Include: Black paint updates New bedding Decorative accents DIY furniture changes Things to Check Before Choosing Black Bedroom Walls A black bedroom can look striking, but it does not suit every space equally well. Before choosing the paint, consider your room’s size, lighting, and overall feel. How tall are your ceilings? Low ceilings can feel lower under a fully black room. If your ceilings sit under eight feet, consider stopping the black at the walls and keeping the ceiling white. Which direction do your windows face? A north-facing room gets soft, indirect light most of the day. Black can feel flat and cool in that kind of light. A south- or west-facing room gets warmer, stronger light, which balances black paint far better. How big is the room, really? Small bedrooms under 120 square feet can handle black on one or two walls without trouble. A fully black room that size often feels tighter than it is. Larger rooms have more room to absorb the color without feeling cramped. What color is your flooring? Dark hardwood or dark carpet paired with black walls can blur the line between floor and wall. Light flooring, like pale oak or a cream rug, gives the eye a clear stopping point. Does this room connect to another space? A black bedroom next to a bright, open hallway can feel like a sudden drop in energy. Adding a lighter accent near the doorway, such as a runner rug or a pale trim color, softens the transition. Final Thoughts Black is one of the boldest choices you can make in a bedroom, but it rewards a little planning. The best black bedroom ideas balance the color with light, texture, and warmth instead of using it alone. Walls, furniture, decor, and lighting all affect whether the final room feels cozy or cold. Start small if you’re unsure, with one accent wall or a few black furniture pieces, then build from there. Done well, a black bedroom can feel calm, grounded, and far more inviting than most people expect.

Sprinkler output, soil type, grass variety, rainfall, and climate all affect how long a lawn needs to be watered. A large lawn does not automatically need longer watering than a small one. What matters is how quickly your sprinkler applies water and how well your soil absorbs and holds it. Your grass type also affects how much time your sprinkler needs to run. The same weekly water goal can translate into different watering times depending on your lawn’s conditions. This blog shows you a simple test to calculate the right sprinkler time for your yard. You will also learn the best time to water and how to spot over- or under-watering before it damages your grass. How Much Water Your Lawn Needs to Stay Healthy Before you set a timer, you need to know your target number. That target is not random. Grass roots typically reach four to six inches into healthy soil. Watering to that depth trains them to grow deeper rather than stay near the surface. Deeper roots handle dry spells better. Most lawns need 1 to 1.5 inches of water each week. This total includes any rainfall. Cool-season grasses like Kentucky bluegrass and fescue tend to need water at the higher end of that range. Warm-season grasses like Bermuda, zoysia, and St. Augustine often get by on half an inch to one inch of water. Soil plays a role too. Sandy soil drains quickly, so it needs shorter, more frequent watering. Clay soil holds water longer but absorbs it slowly. It needs less frequent watering spread over a longer session to avoid runoff. Loamy soil sits in the middle and usually handles a standard deep watering schedule without much adjustment. Zoning matters here too. Grass and flower beds rarely need the same amount of water. Planning this into your garden layout early on keeps each zone on its own schedule instead of using one blanket setting. A rain gauge tracks how much of your weekly total nature already covers. That takes the uncertainty out of the rainfall side of things. Why Should You Test Your Sprinkler’s Water Output First? Every sprinkler puts out a different amount of water, so guessing your run time rarely works. Here is how to check: Place four to six empty tuna cans or other shallow containers around your lawn. Turn on your sprinkler and let it run for fifteen to twenty minutes. Measure the water depth in each can with a ruler. Add the depths together and divide by the number of cans to get the average. Once you have that average, multiply it by three for a twenty-minute test. Multiply it by four for a fifteen-minute test. That gives you your sprinkler’s output per hour. A quarter-inch average in a twenty-minute test means an hourly output near three-quarters of an inch. Every calculation in this blog starts from this one number. How Long Should You Run a Sprinkler on Your Lawn? Once you know your sprinkler’s actual output, calculating the right watering time becomes much easier. Divide your weekly watering need by your sprinkler’s hourly output. That gives you the total minutes to run the sprinkler each week. Split that total across two or three sessions instead of running it all at once. Deep, less frequent watering builds stronger roots than a quick daily splash. Here is a quick example. Let’s say a lawn needs 1 inch per week, and a sprinkler puts out 3/4 inch per hour. That works out to about eighty minutes total for the week. Split into two sessions, which are roughly forty minutes each. Split into three, it drops to about twenty-seven minutes per session. Actual output varies depending on water pressure and nozzle condition. Use these numbers as a starting point, not a strict rule. Your tuna can test results from the previous section should always take priority over the table below. Here is a rough starting point by sprinkler type, based on common output rates: Sprinkler Type Minutes Per Session Oscillating sprinkler 30 to 45 In ground spray head 15 to 25 In ground rotor head 20 to 30 Impact or pulsating sprinkler 25 to 35 If you water by hand with a hose, plan on ten minutes per section at a steady, soaking pace. Avoid a quick pass. A hose delivers water unevenly. Afterward, check the soil with a trowel to confirm it has reached a depth of a few inches. How Grass Type and Season Change Your Watering Needs Your baseline number needs small tweaks depending on your grass and the time of year. Cool-season grasses generally need close to the full 1.5 inches per week. This is especially true in the heat of summer. Warm-season grasses can often stay healthy on less. Sometimes, once established, half an inch per week is enough. Summer heat raises evaporation, so many lawns need slightly more frequent sessions during that stretch. Spring and fall usually call for less, since cooler air and natural rainfall do some of the work. Winter-dormant lawns in most regions need little to no supplemental water. Climate matters too. Dry, windy regions lose more water to evaporation and often need a third session during the hottest weeks. Humid regions can usually stick to two. Just watch for standing moisture from rain, since watering on top of it raises the risk of fungus. In areas with strict watering restrictions, some people may need to reduce or adjust this schedule. A no-grass front yard built from gravel and drought-tolerant beds needs no such routine. Always subtract rainfall from your weekly goal. Say your lawn needs 1 inch and you get 0.5 inches of rain. Your sprinkler only needs to supply the remaining half inch. A basic rain gauge makes this quick to track from week to week. What is the Right Watering Schedule for New Grass? New grass needs a more careful watering routine than an established lawn, especially during the first few weeks. Fresh seed needs the top inch of soil to stay consistently moist until it germinates. This usually means light watering once or twice a day for the first week or two. Short, frequent bursts work better here than one long soak. The seed sits close to the surface and dries out fast. New sod follows a similar pattern at first, then shifts toward deeper and less frequent watering as roots take hold. Most sod needs daily watering for the first week, then a gradual pullback over the next two to three weeks. Once you see steady new growth and roots that resist a gentle tug, ease back into the normal schedule above. How Does Watering Time Affect Your Lawn? The time of day you water affects evaporation, soil absorption, and how long grass blades remain wet. Aim for the stretch between four and nine in the morning. Cooler air and calmer winds let water soak in rather than evaporate. Grass blades also have hours to dry out before dark falls, which reduces fungal problems. Midday watering wastes water since much of it evaporates before it soaks in. Late evening or overnight watering is the riskiest choice. Wet grass sitting overnight gives fungus hours to take hold, especially in warm, humid weather. If mornings do not work for your schedule, water no later than six in the evening. This gives the grass time to dry before dark. Signs You’re Watering Too Much or Too Little Changes in grass color, blade shape, soil moisture, and the speed at which footprints disappear can help you identify watering problems before the lawn becomes severely stressed. Signs of underwatering include: Dry or brown patches across the lawn Grass blades that curl or fold Footprints or mower tracks that stick around long after you cross the lawn Signs of overwatering include: Soggy or spongy soil that squishes underfoot Mushrooms or visible fungal growth Yellowing grass even though you are watering often Try a quick soil check to back up what your eyes are telling you. After a watering session, push the tip of a screwdriver straight down into the ground. Little to no resistance for the first six inches means your timing is working. If it stops short or takes real effort, the water isn’t reaching deep enough. If you spot underwatering, add a few minutes to each session rather than adding an extra day. This keeps the deep, infrequent pattern that builds strong roots. If you spot overwatering, cut back your minutes per session before reducing how often you water. Small adjustments over a week or two usually bring a stressed lawn back on track. A spot that remains soggy even after reducing irrigation may not drain well enough for healthy turf. Turning it into a hardscaped smart yard space with pavers or gravel may be more practical than continuing to irrigate it as lawn. What Your Watering Schedule May Cost? Minutes and inches are useful, but gallons are what show up on your water bill. One inch of water applied over 1,000 square feet equals roughly 623 gallons. Multiply 623 by your lawn area in thousands of square feet, then multiply that amount by your weekly watering target in inches. Here is how the numbers add up: Lawn Size Gallons for 1 Inch Weekly 2,000 sq ft About 1,250 gallons 5,000 sq ft About 3,100 gallons 8,000 sq ft About 5,000 gallons Most water utilities bill in units of 1,000 gallons. Multiply your weekly total by your local rate to estimate the cost. Rates vary widely by city, so check a recent bill for your exact amount. Seeing the gallon figure next to your bill makes accurate timing worthwhile. Trimming a session from forty-five minutes to thirty adds up fast over a season. First, confirm that a shorter time is enough with your own tuna-can test. Ready to Build a Better Lawn Watering Routine? Most established lawns need about 1 to 1.5 inches of total water each week from irrigation and rainfall combined. Depending on sprinkler output, that often means two or three watering sessions lasting roughly twenty to forty-five minutes each. The exact number for your yard depends on your sprinkler, soil, and grass type. That is why the tuna can test matters more than any generic chart. Grab a few cans of tuna and run that test this week. Plug your number into the formula, then adjust as the seasons shift. Keep an eye on rainfall so you never water more than your lawn needs. A few minutes of measuring now pays off with a lower water bill and a healthier lawn all season long. Frequently Asked Questions Is 10 minutes of sprinkler enough? Ten minutes may be enough for high-output sprinklers, but not every system. Measure the collected water after 10 minutes, then adjust the runtime until your lawn reaches its weekly watering target. Can I water my lawn 2 days in a row? Yes, occasionally, especially during extreme heat or when establishing a lawn. For established grass, deeper watering spaced across the week is usually better than watering on two consecutive days. What temperature is too hot to water grass? There is no fixed temperature cutoff. During very hot weather, water early in the morning when evaporation is lower, and avoid irrigating during the hottest part of the day. Can you overwater new turf? Yes. New turf needs consistent moisture, but constantly soggy soil can restrict oxygen and encourage disease. Reduce watering gradually as roots establish, and the turf begins to hold firmly. Is 3 am too early to start watering a lawn? Three a.m. is earlier than ideal because grass may remain wet longer overnight. Watering closer to sunrise reduces leaf-wetness time while still limiting evaporation and daytime water loss.