


Most DIY room decor projects take one afternoon and cost under $25. The ones that fail take all weekend because you skipped the planning step, not because the idea was bad.
I’ve done both, and I can tell you that picking one mood before you make anything is the single change that turns a scattered room into one that looks intentional.
This guide covers DIY bedroom decor that a real person with basic supplies can finish and actually be happy with.
| Difficulty | 1–3 (varies by project; most are beginner-level) |
| Time | 30 minutes to half a day per project |
| Cost | $0–$60 depending on the project |
| Tools Needed | Scissors, washi tape, removable strips, basic paint supplies, optional: canvas, clay, fairy lights |
| Skill Required | Beginner. No power tools needed for most projects. |
Before touching a single wall, decide which direction your room is going. Every project in this guide works for at least one of these six looks, so pick yours first, and every piece you make connects to everything else already in the room.
Pick One Room Mood Before You Make Anything
The most common mistake I see isn’t a bad DIY project. It’s making five decent projects that don’t talk to each other.
A cozy macrame wall hanging beside a sleek LED strip and a pastel photo collage reads as unfinished, even when each piece is well made. You don’t need a rigid theme. You need one direction.
Look at what already exists in the room: wall color, bedding, the main light source, and the desk area.
Then pick the look that already feels closest to what’s there. Building on it is faster and cheaper than fighting it.
- Cozy: warm fairy lights, layered bedding, soft neutrals, natural textures
- Minimal: clean surfaces, calm colors, one piece of simple wall art
- Boho: macrame, plants, woven baskets, earth tones
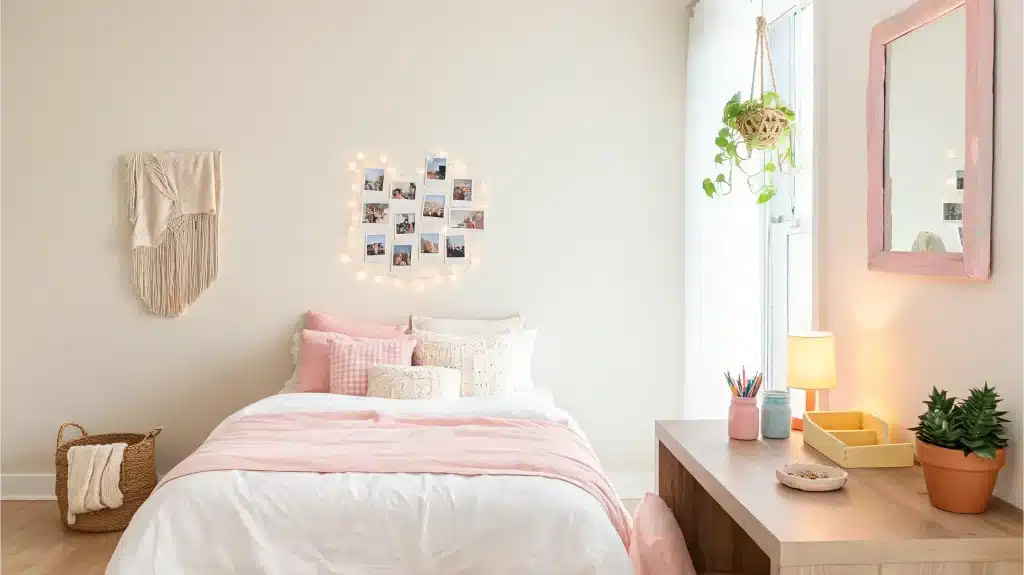
- Cute / Aesthetic: pastels, photo walls, soft shapes, Polaroids
- Modern: clean lines, LED accents, bold contrast
- Rustic: wood tones, vintage finds, linen textures
With your direction set, each project below becomes a simple yes-or-no. That’s what makes the room look planned instead of assembled by accident.
DIY Bedroom Wall Decor Ideas
Walls decide what your eyes land on first. A plain wall doesn’t just look unfinished; it makes every other piece in the room work harder to compensate.
One clear wall idea solves this faster than any amount of shelf styling or bed arranging. These are the wall decor projects worth your time.
1. Photo Collage Wall
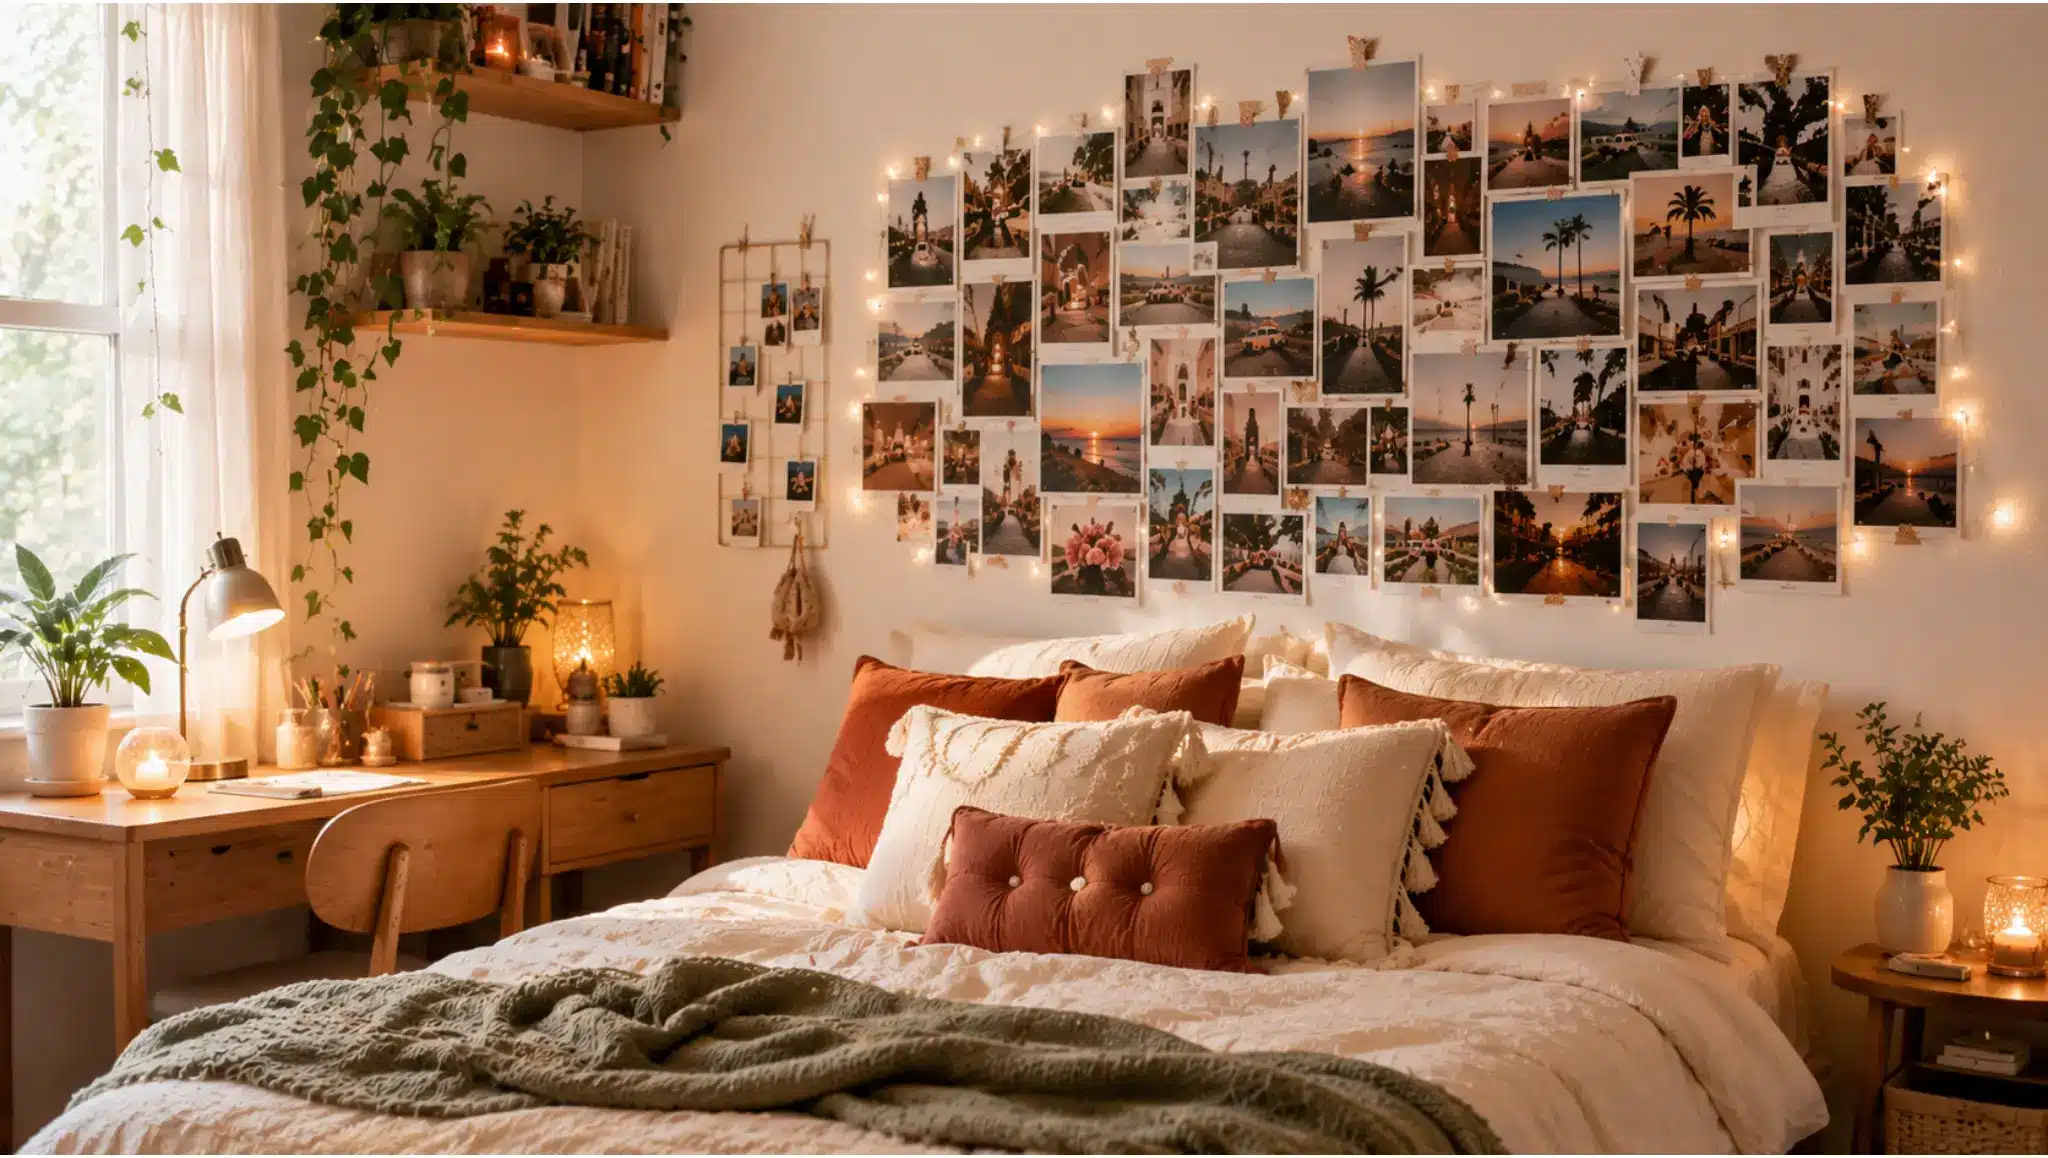
The thing people get wrong with photo collages is mixing photo tones at random. Warm, slightly faded prints next to bright phone photos next to black-and-white postcards look chaotic even when every individual image is meaningful.
Before printing anything, choose one tonal direction: warm and golden, muted and soft, or true black-and-white. Then the collage reads as a single piece instead of a bulletin board.
Place it above the bed, beside the desk, or on a single plain wall. Not across multiple walls. Use washi tape, small clips, or removable strips to avoid holes.
Cost: $5–$15.
Time: 1–2 hours.
| Pro Tip: Print photos at 4×6 inches for a clean, consistent grid. Mixing 4×6 with phone-printed wallet sizes is what makes collages look uneven. |
2. Magazine Collage Art
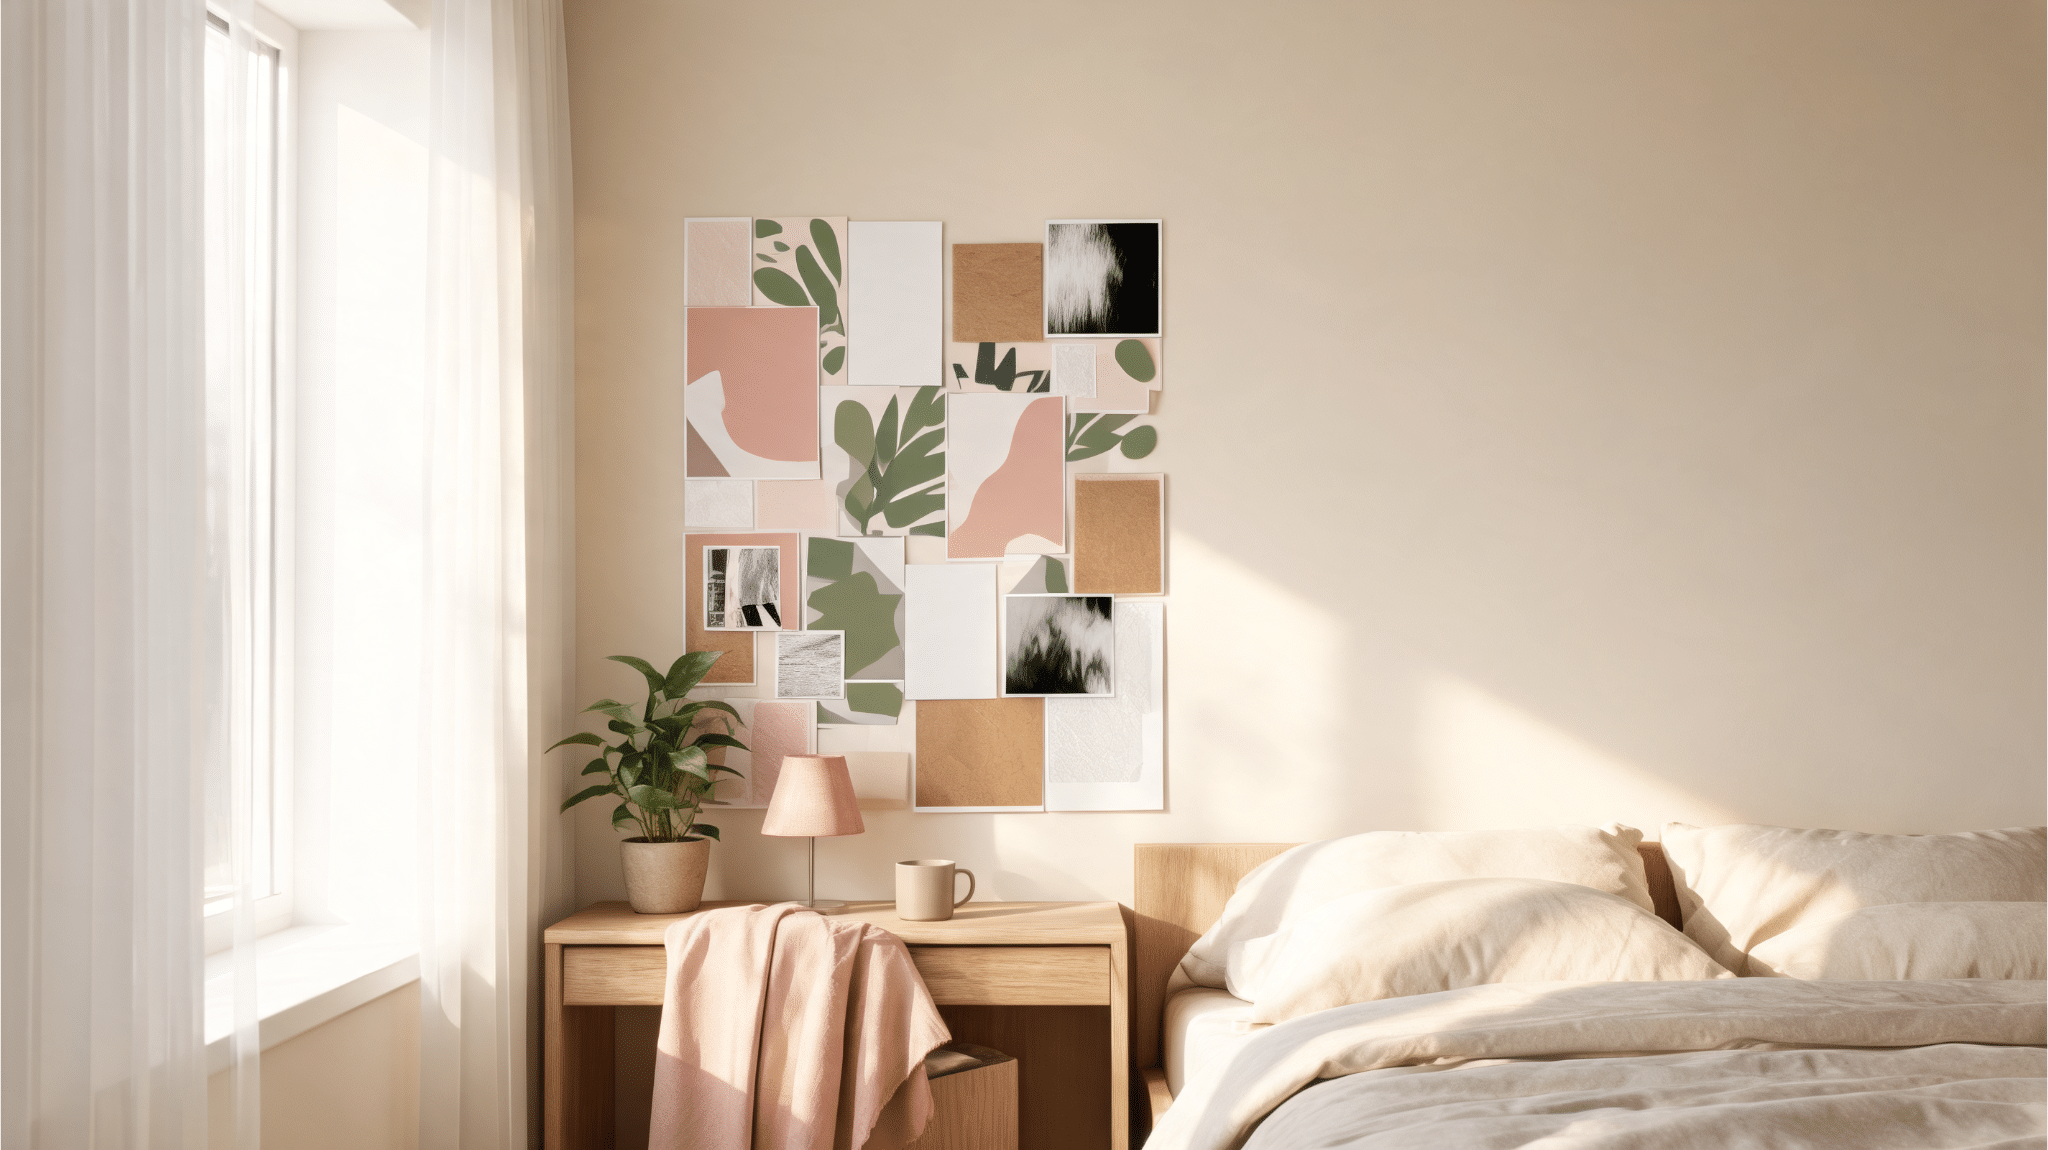
Magazine collages cost almost nothing and take about 90 minutes, which makes them one of the most honest beginner DIY bedroom decor projects.
The version that actually looks good has a restricted color palette: soft pink and cream, brown and beige, or black and white.
Pull pages only in those tones, and the piece looks art-directed. Pull every page that looks interesting, and it looks like a waiting-room table.
Keep the collage in one area: behind the bed, above the desk, or beside a mirror. Spreading it across multiple walls is the version I regret.
Cost: $0–$5.
Time: 1–2 hours.
3. DIY Canvas Art
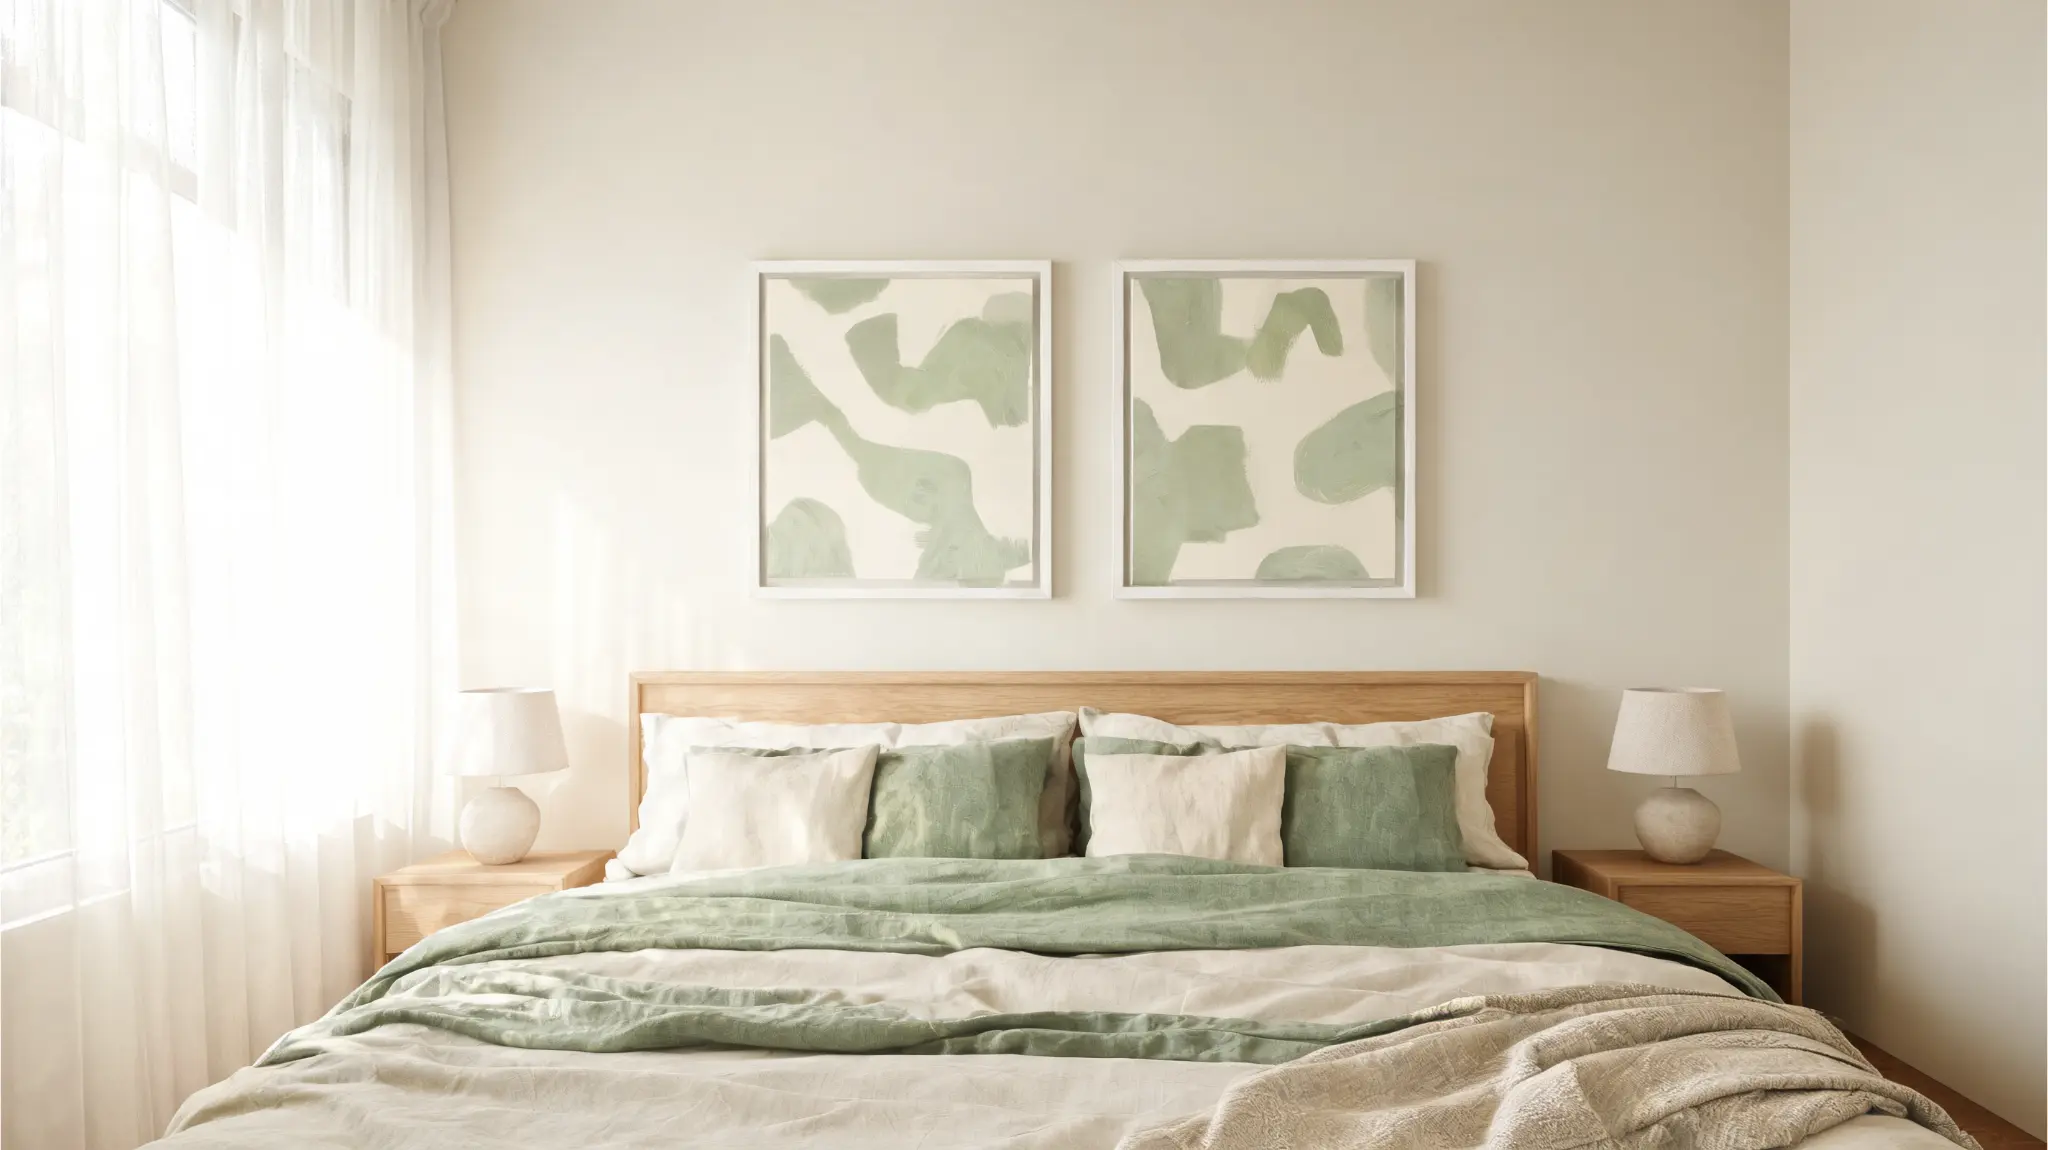
A painted canvas doesn’t need to be complicated, and the simple versions often look better than the ambitious ones.
Soft color blocks, a single brushstroke shape, or one short quote painted in a color pulled from your bedding can look genuinely finished.
Use painter’s tape for clean lines if you want a graphic look. Use a wide, loose brush and skip the tape if you want something softer.
Pick colors already in the room: bedding, curtains, or the rug. One canvas works for a small wall; two or three need matching color schemes to stay cohesive.
Cost: $10–$25.
Time: 2–3 hours including dry time.
4. Washi Tape Frames
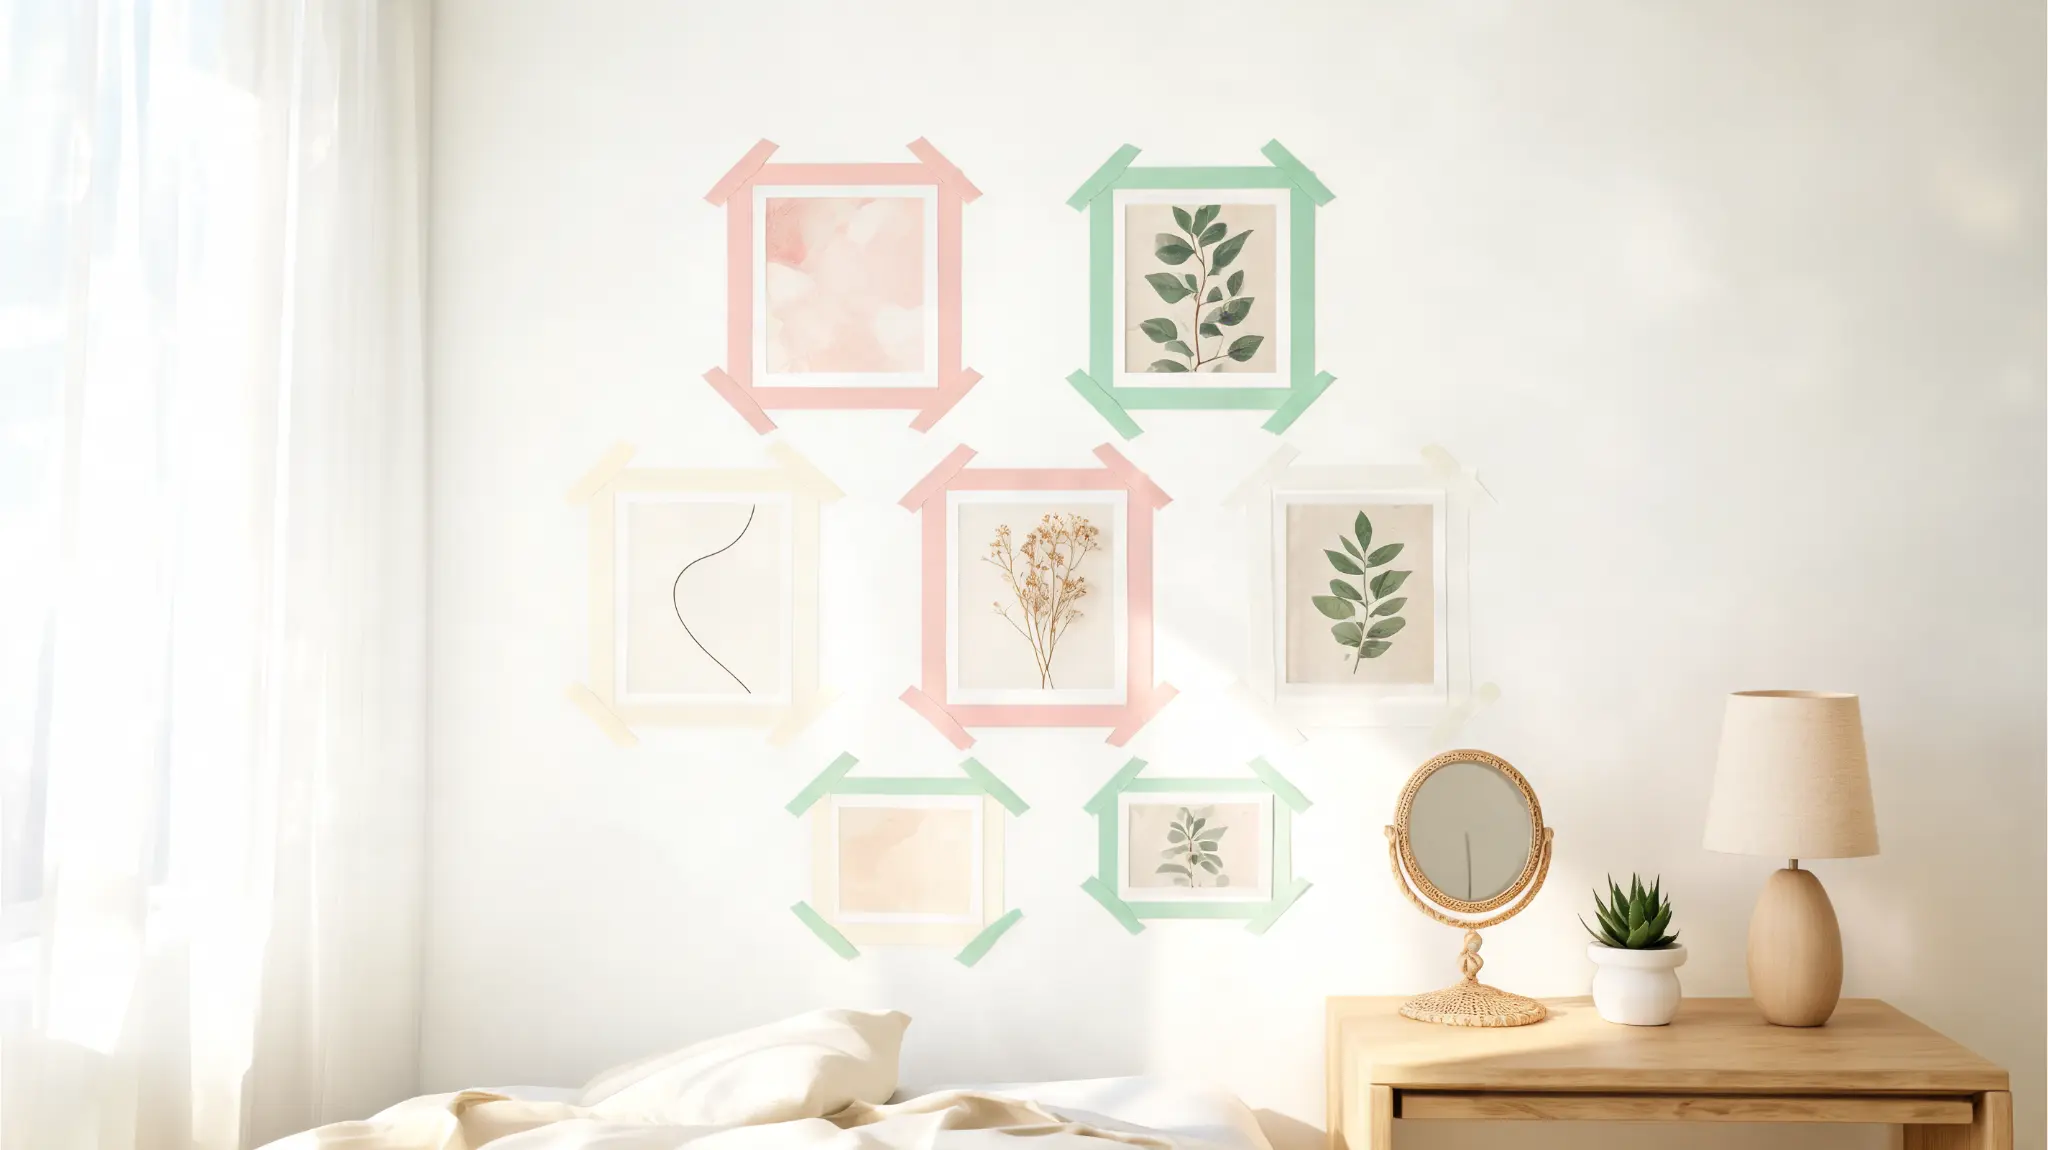
Washi tape frames are the right call for renters, dorm rooms, and anyone who’s moved the furniture three times already and knows holes are a bad bet.
Tape a thin border around a print, a postcard, or a small quote card, and you get the visual structure of a framed piece without the commitment.
The version that looks clean uses one tape color that matches the room, not a mix of patterns. Above the desk, around a mirror, or in a single column beside the bed all work well.
Cost: $5–$10.
Time: 30–45 minutes.
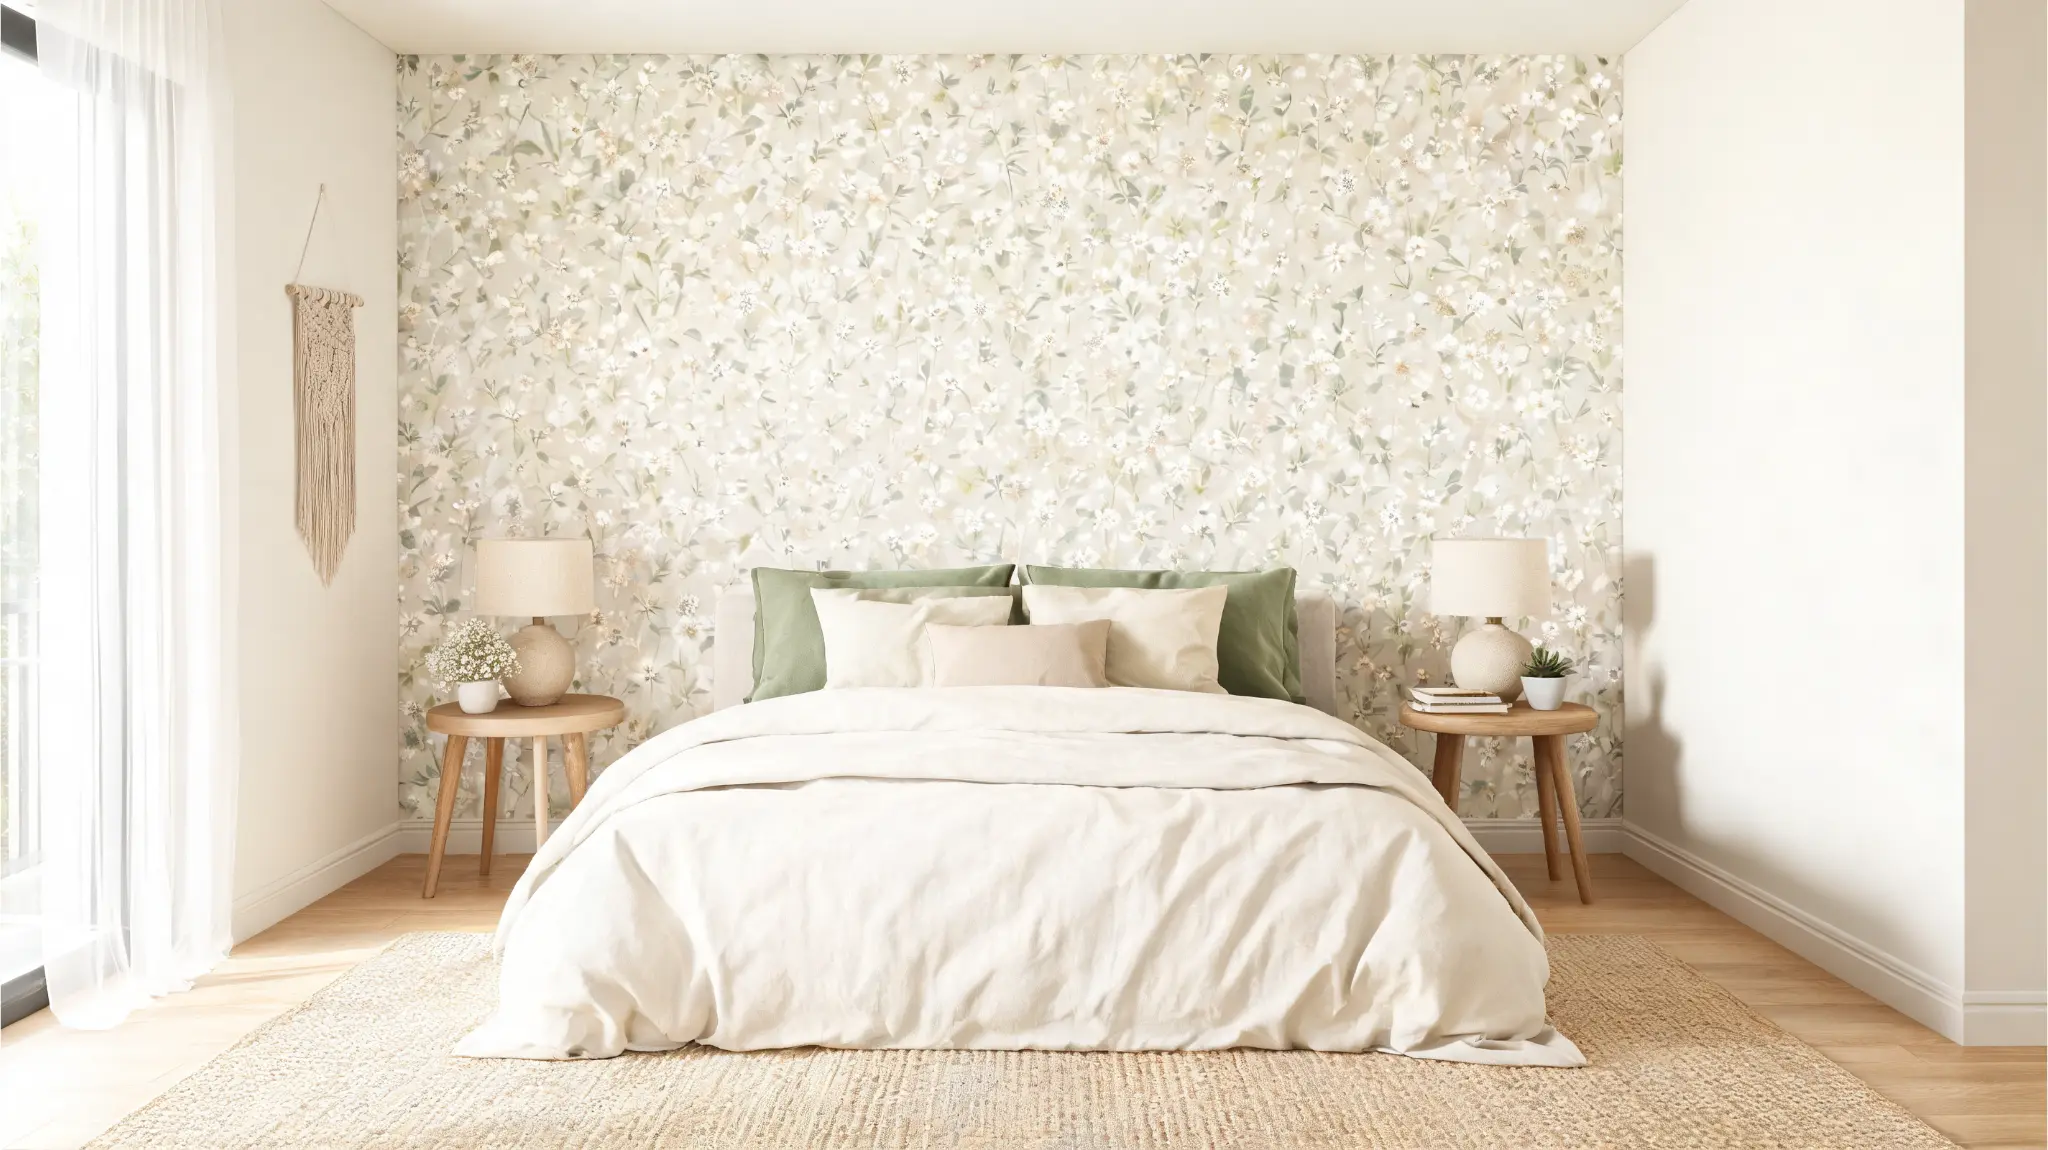
5. Peel-and-Stick Wallpaper Accent Wall
This is the biggest visual impact per hour of any project on this list, but it’s also the one most people rush and then regret.
The problem isn’t the pattern choice; it’s skipping the level check and the corner test. Use a long level to mark a straight vertical line before your first strip.
Press each panel with a flat card as you go. If you skip both steps, you’ll notice the drift by the fourth strip, and it only gets worse.
Soft florals, subtle checks, and muted stripes work better than loud patterns in most rooms.
Apply it to one wall only: behind the bed or the desk. Test a small hidden corner first in any rented room.
Cost: $25–$60.
Time: 2–4 hours.
6. Macrame Wall Hanging
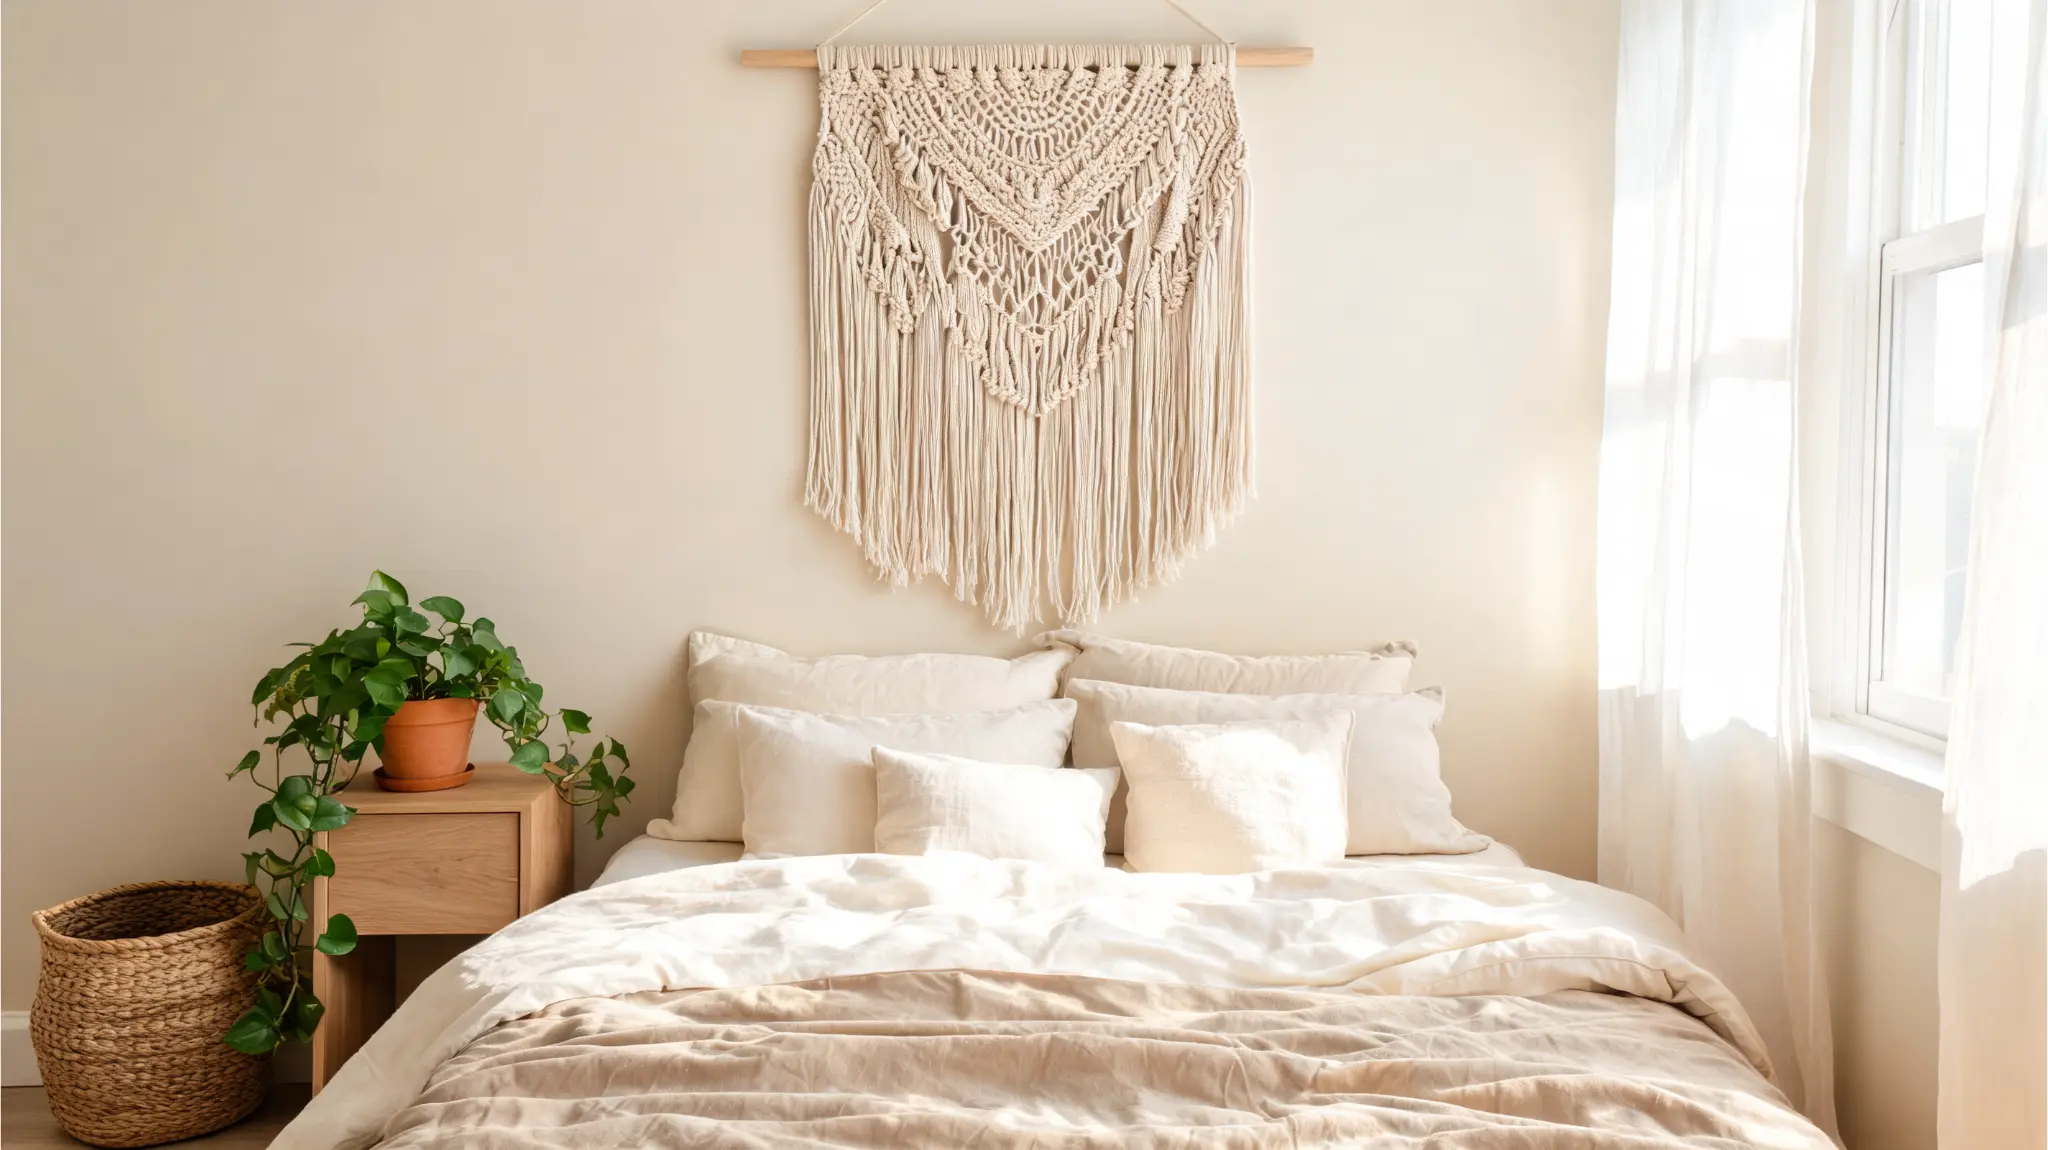
Macrame fits best in cozy, boho, and neutral-toned rooms. If your room has plants, woven baskets, or warm wood tones, it will slot right in.
If your room is minimal or modern, it creates visual friction that works against everything else you’ve done.
Hang it above the bed or beside a mirror, and leave empty space around it. The piece needs room to read as a texture detail rather than clutter. You can make one with macrame cord and a wooden dowel, or use a starter kit.
Cost: $10–$20.
Time: 2–4 hours.
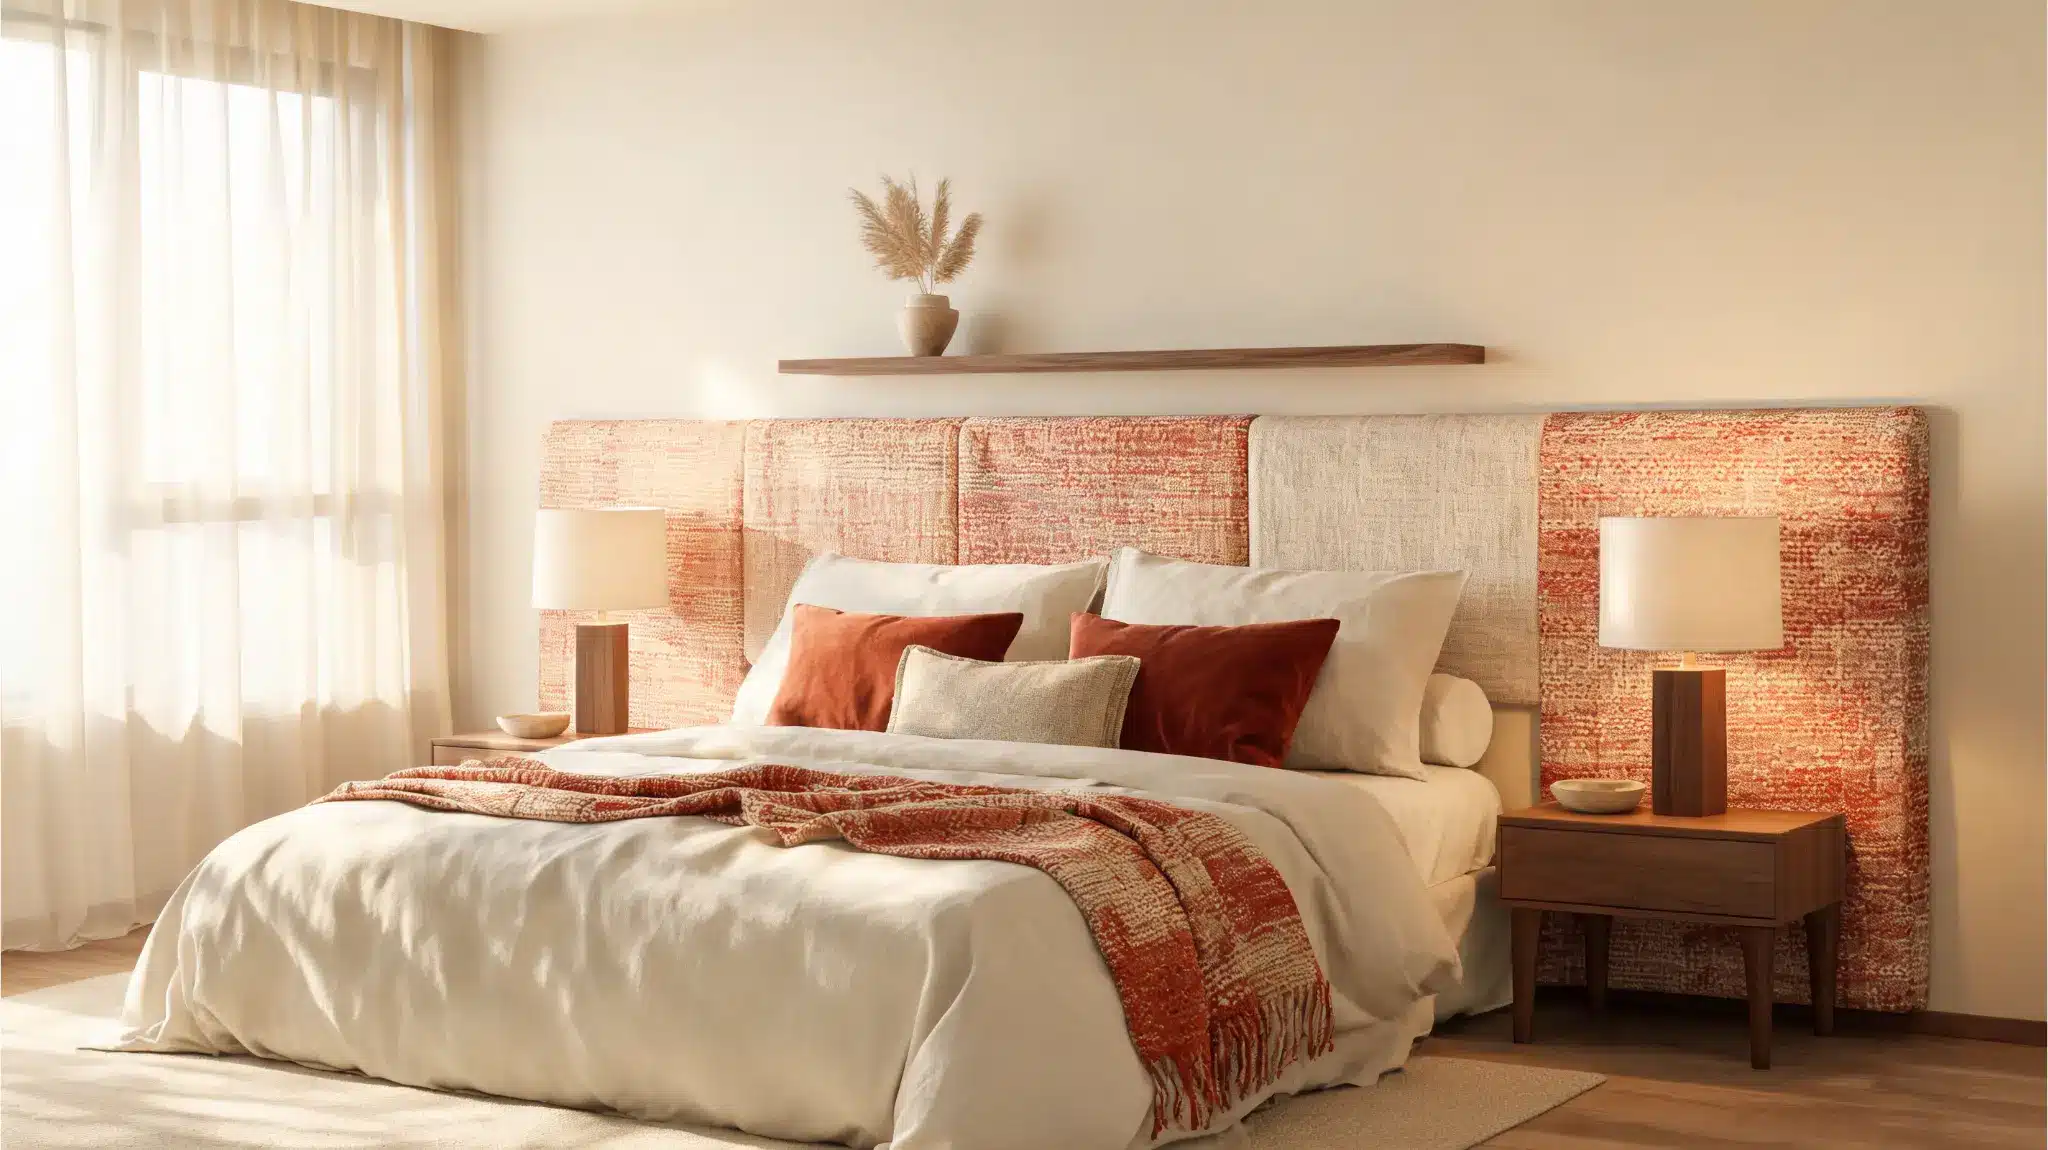
7. Fabric Wall Accent
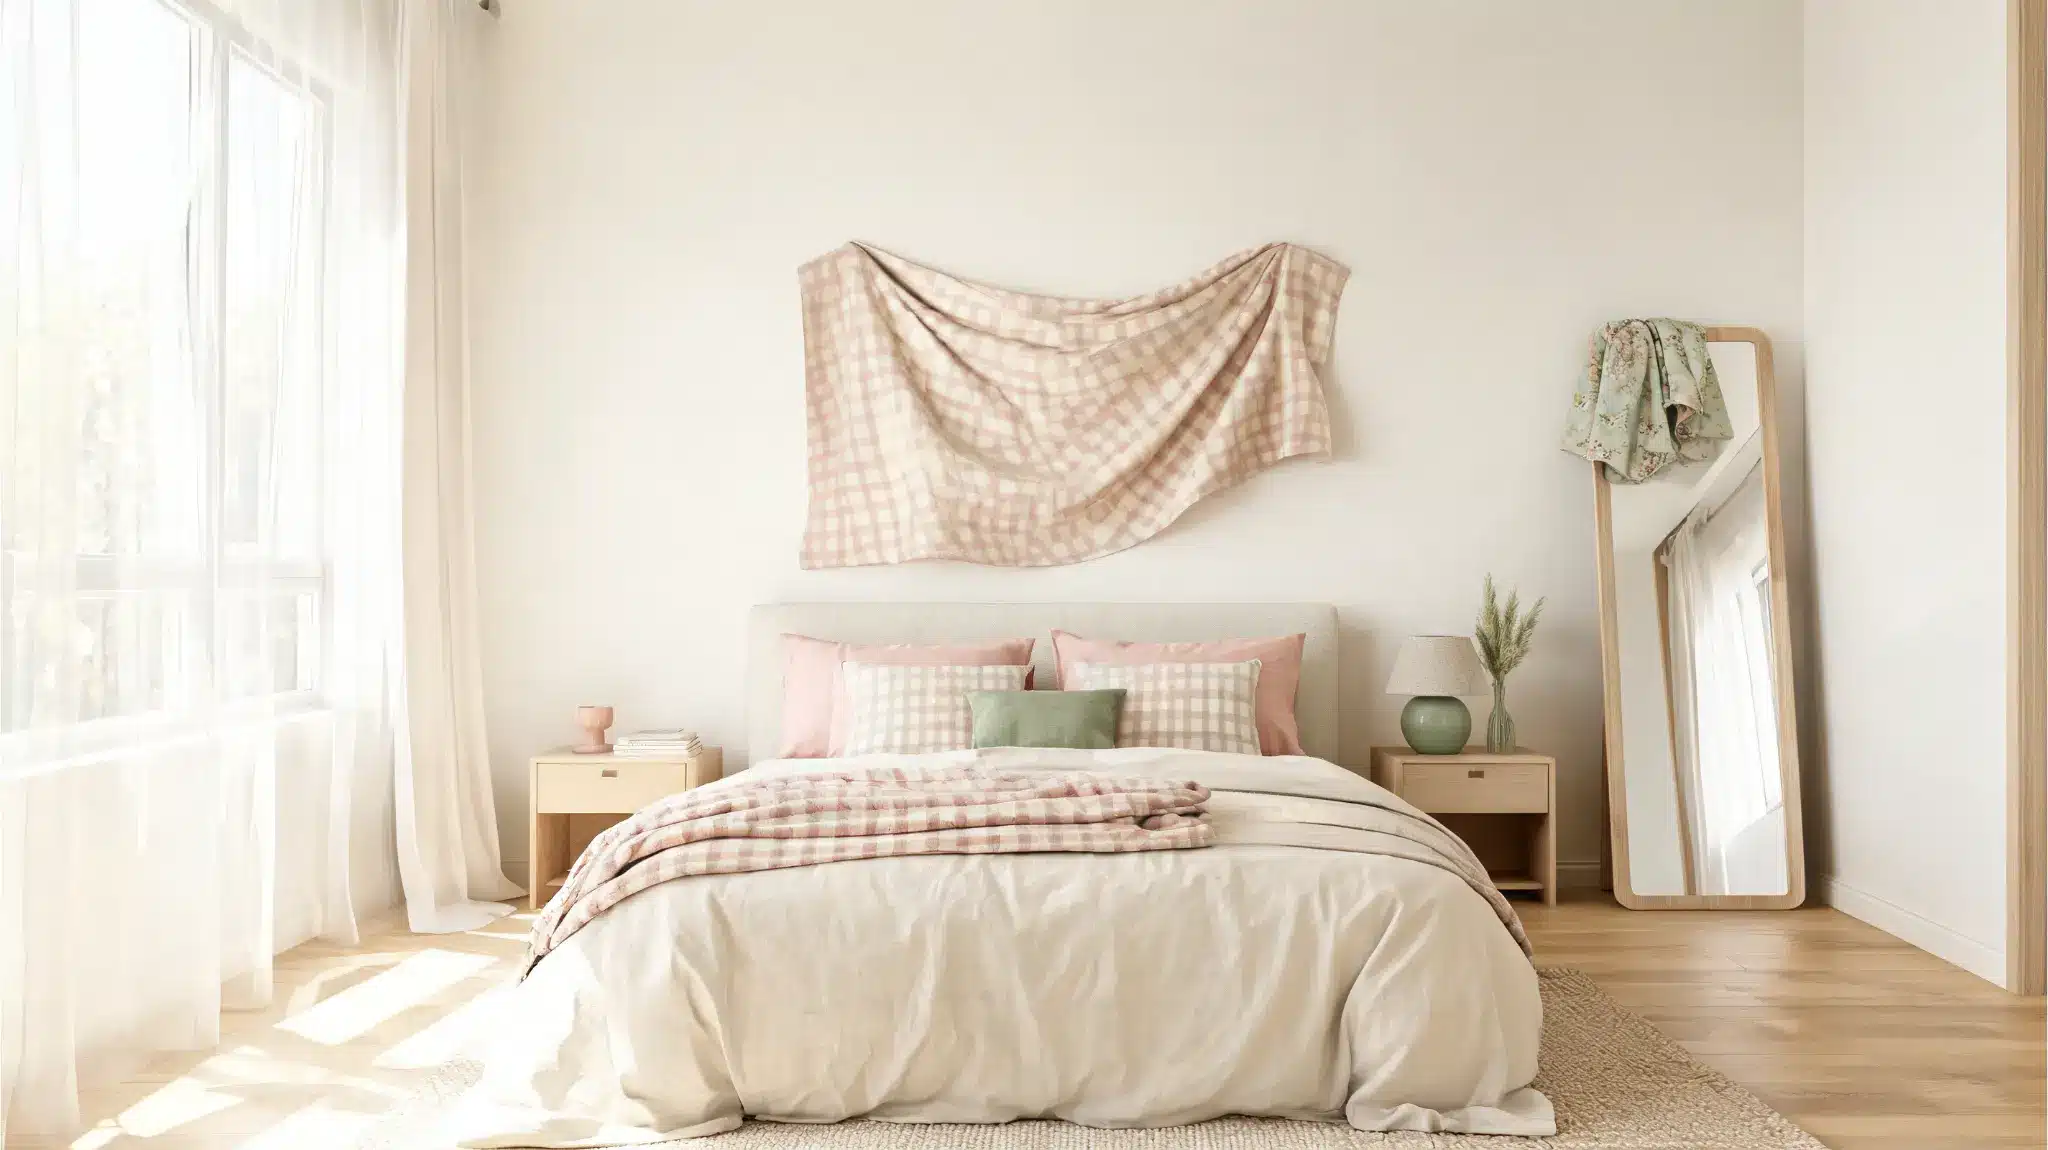
A fabric panel above the bed reads as a soft headboard from across the room and costs almost nothing if you already own a scarf or a spare piece of fabric.
Neutral linen, soft florals, or muted checks all work. Loud patterns compete with bedding and rarely win.
Keep the rest of the wall clear. One fabric piece works as a focal point; anything else turns it into clutter.
Cost: $5–$25.
Time: 20–40 minutes.
With the walls sorted, lighting is the next thing that moves a room from looking nice in photos to feeling good in real life.
DIY Lighting Decor for Bedrooms
A room can have strong wall decor and layered bedding and still feel flat if the only light source is overhead.
The overhead light is functional, not atmospheric. These lower-light additions are what change how the room actually feels at night.
| Safety Note: Never cover fairy or string lights with fabric, paper, or any flammable material. Keep all string lights away from curtains and bedding, avoid overloaded outlets, and unplug them before sleeping. |
1. Fairy Light Wall
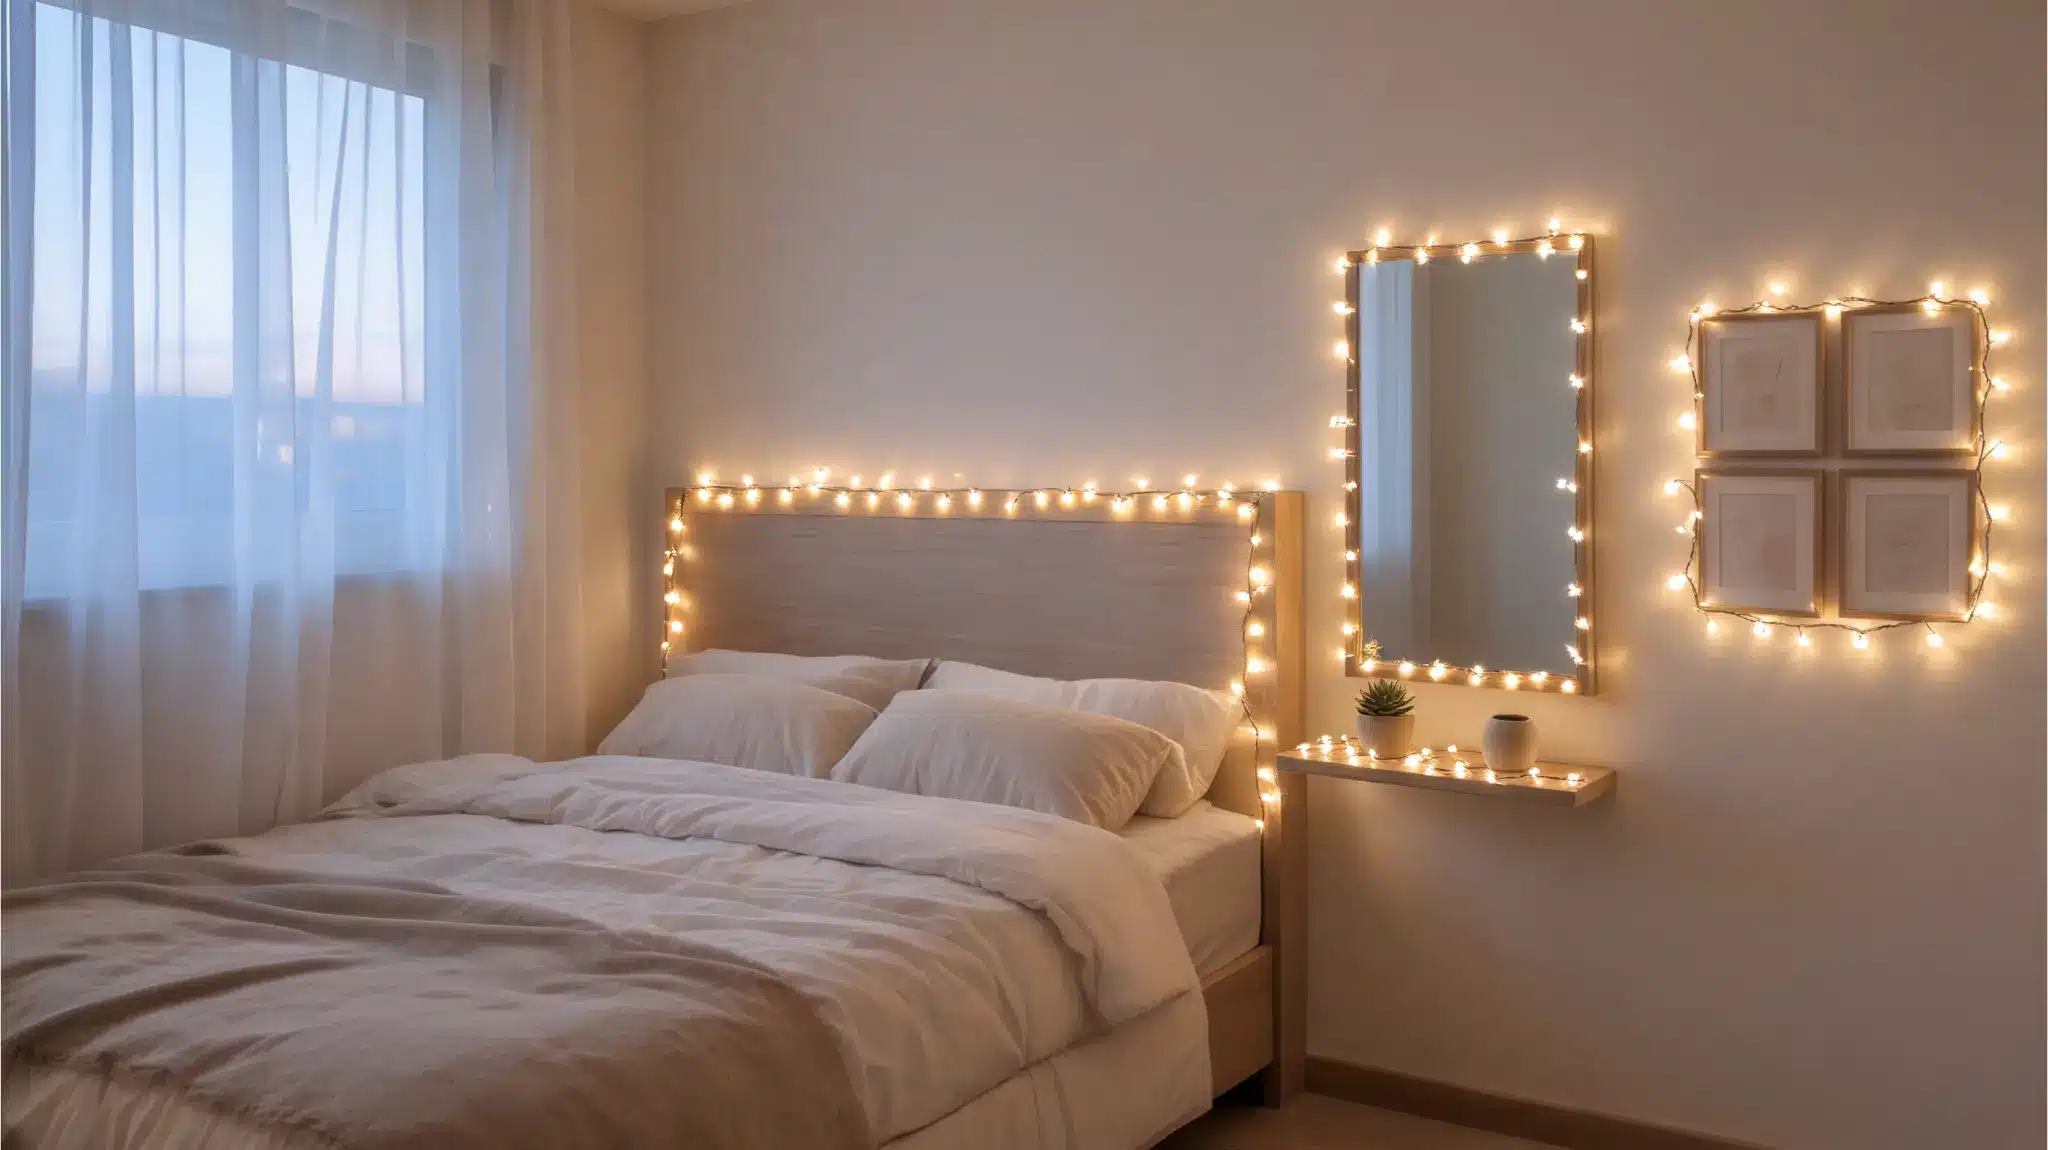
Warm white fairy lights are the most versatile thing on this list. They work around the bed, behind a desk, along a shelf, or framing a mirror.
Color-changing lights are better for a playful room; warm white works in almost every other style.
The version that looks intentional routes the wire close to wall edges or behind furniture. A wire dangling across open space reads as unfinished. Use small removable hooks or strips to keep it tight.
Cost: $10–$20.
Time: 45–60 minutes.
2. Branch Lights

Dried branches in a tall vase wrapped with battery-operated LED lights look better in a cozy or boho room than any purchased lamp at the same price point.
The shape does the work; the lights just make it visible at night. Keep the vase simple and matte so the branches stay the focus.
Place it in an empty corner, beside a mirror, or on a desk surface. Warm white for warm-toned rooms; soft white for cooler palettes.
Cost: $5–$15.
Time: 30 minutes.
3. Glass Jar Candle Holders
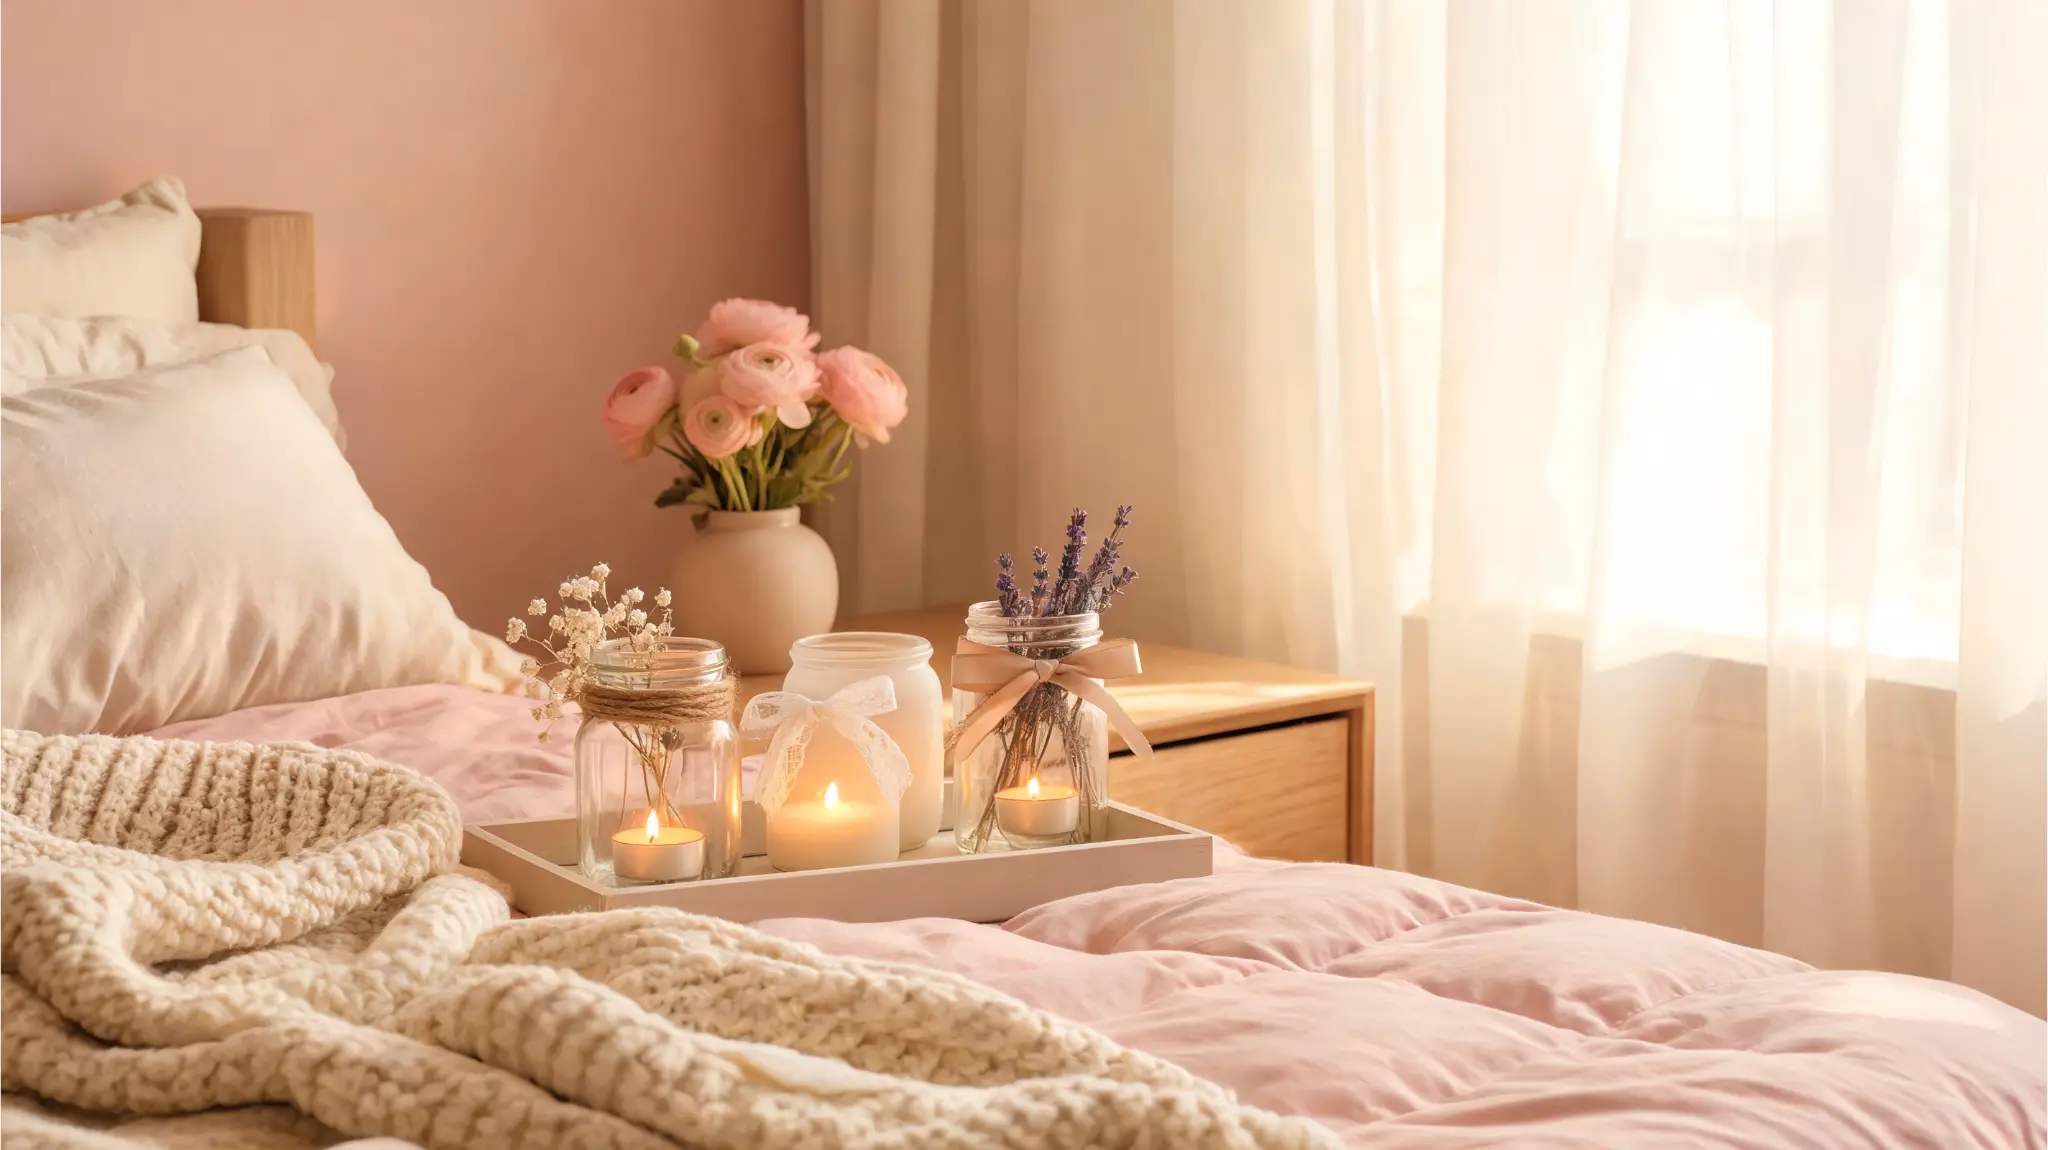
Clean pasta sauce or pickle jars wrapped in twine, ribbon, or frosted spray paint become legitimate good nightstand or desk decor.
Use battery-powered tea lights inside for the same warm glow with no fire risk. One or two jars per surface is the right number. More than that starts looking like a craft store display.
Cost: $0–$8.
Time: 30–45 minutes.
4. LED Strip Light Shapes
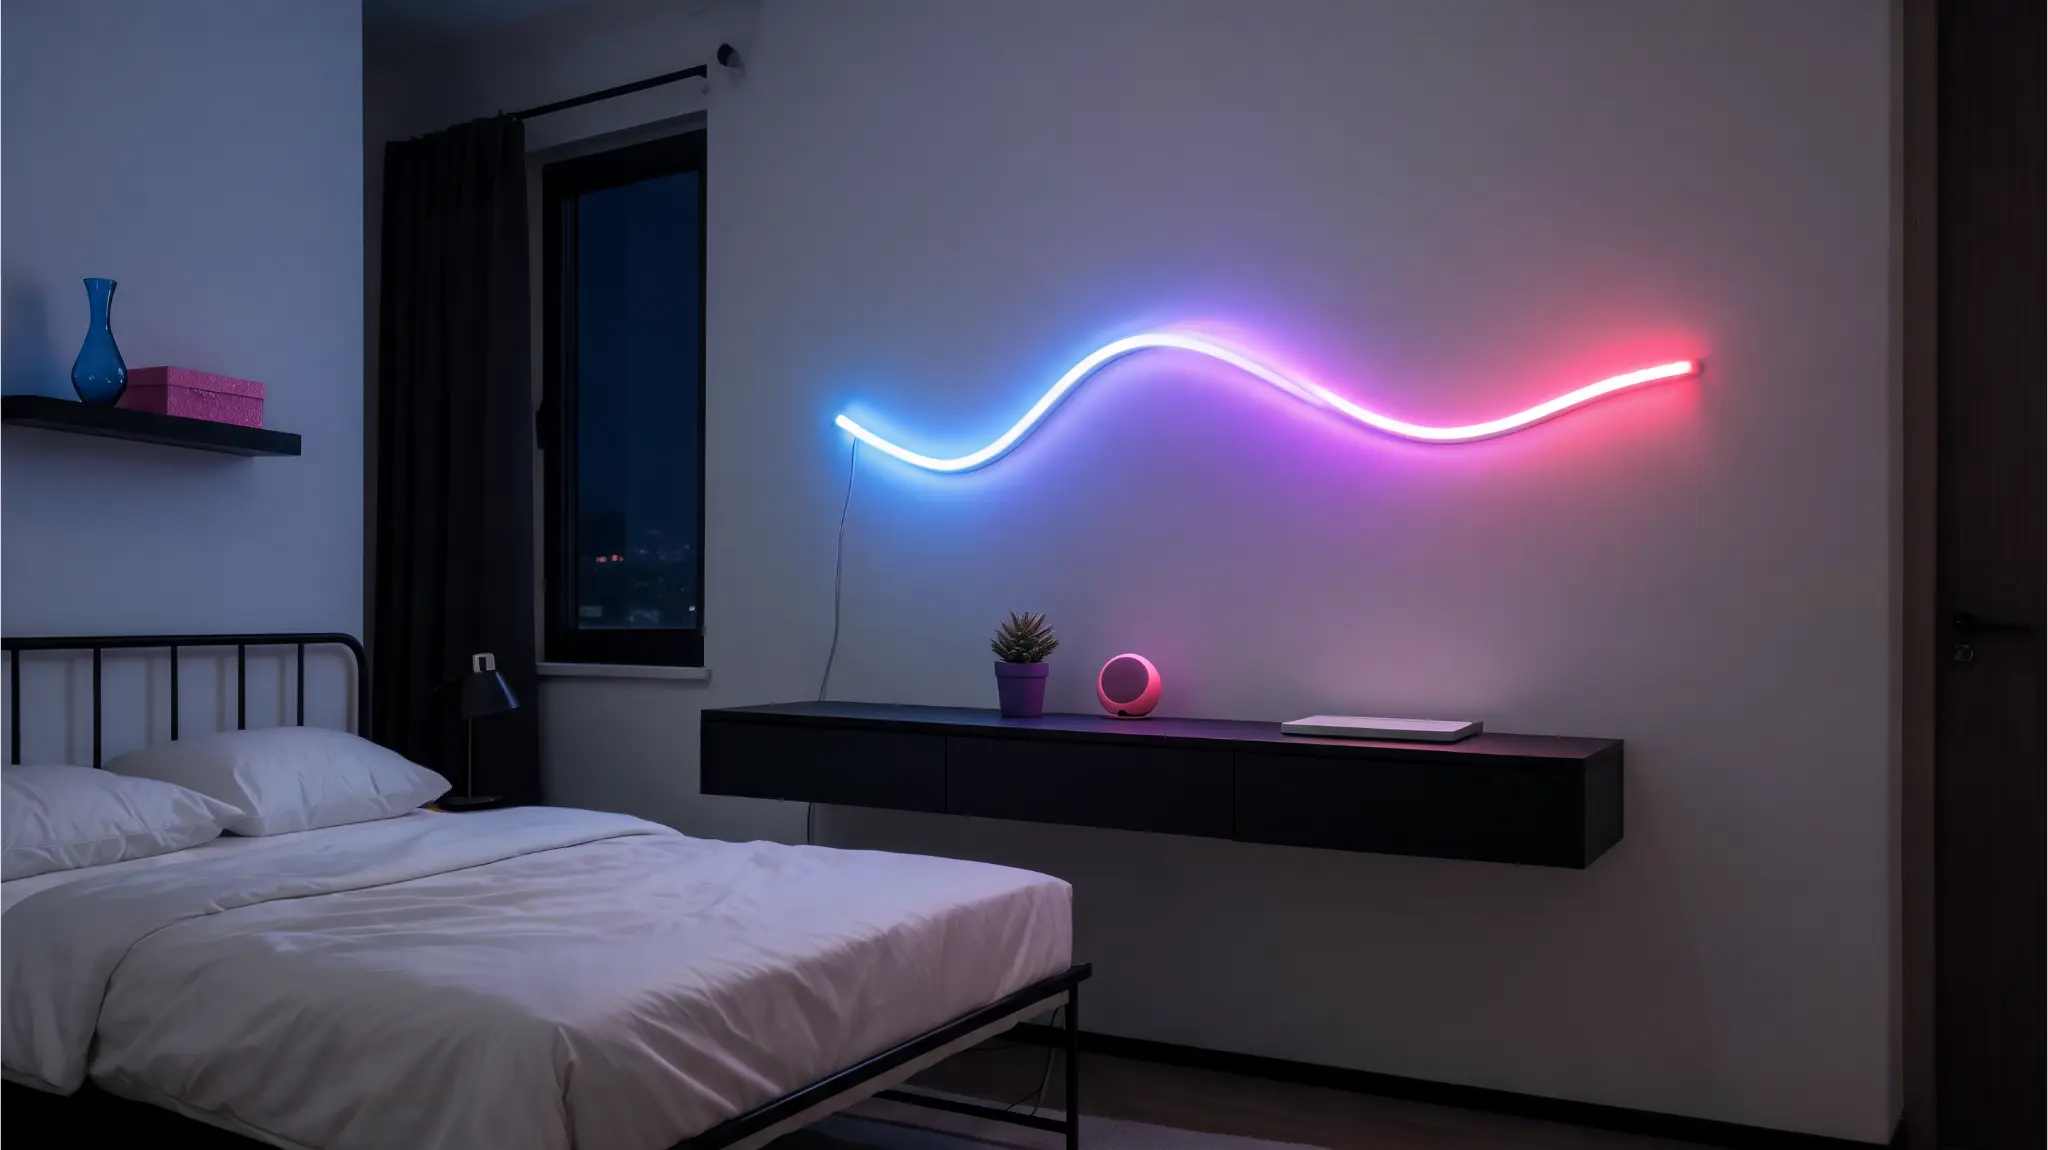
LED strips work well behind a desk, under a shelf, or around a mirror. A simple shape like a heart, star, or soft curve can work on a plain wall if the rest of the wall is clear.
The strip itself is the detail; it doesn’t need anything competing with it. Hide the wire where possible.
Cost: $10–$25.
Time: 30–60 minutes.
Lighting changes the mood of the whole room, so the bed area needs to match it.
DIY Bed Area Decor
The bed is where most people look first when they walk into a bedroom.
If the bed area looks put together, the room feels put together, even when the desk is messy and the closet door is closed.
Start above the bed, then connect it to the bedding and the surrounding lights.
1. Fabric Headboard Look
A fabric panel, padded board, or thick folded textile hung behind the bed adds the visual softness of a real headboard without the cost or the installation.
Choose a fabric that connects with your bedding: if the bedding has a pattern, keep the panel plain; if the bedding is solid, a soft texture or subtle print works.
Cost: $10–$30.
Time: under an hour.
2. Canopy Over the Bed
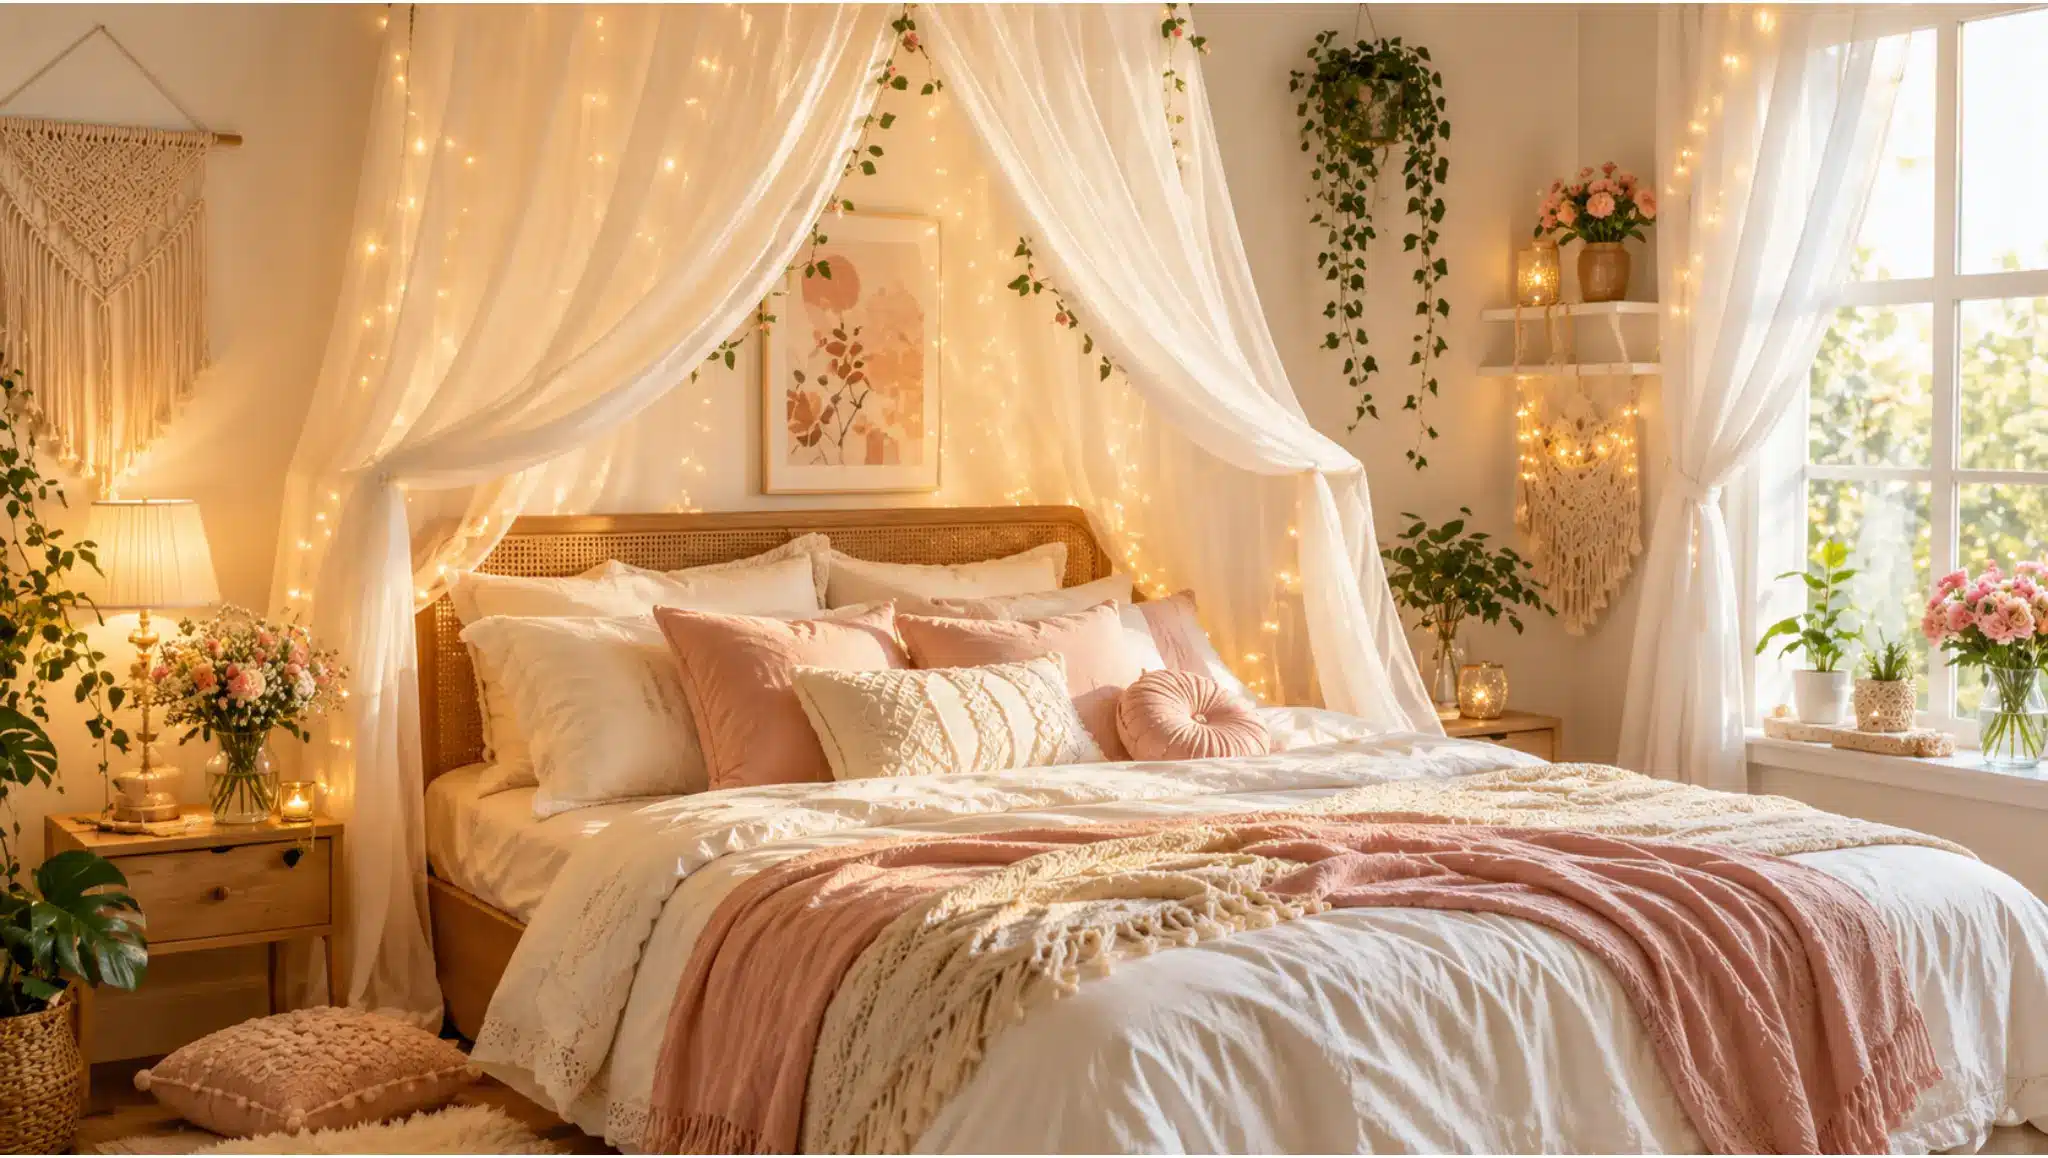
Sheer curtain panels draped above or behind the bed make the whole area feel enclosed and softer without adding weight.
White, cream, blush, and soft sage are the colors that work here. Heavy or dark fabric fights itself in this position.
Let it be the main visual detail near the bed, and don’t stack it with a wall piece, a photo collage, and a macrame hanging.
Cost: $10–$25.
Time: 30–45 minutes.
3. Throw Pillow Refresh
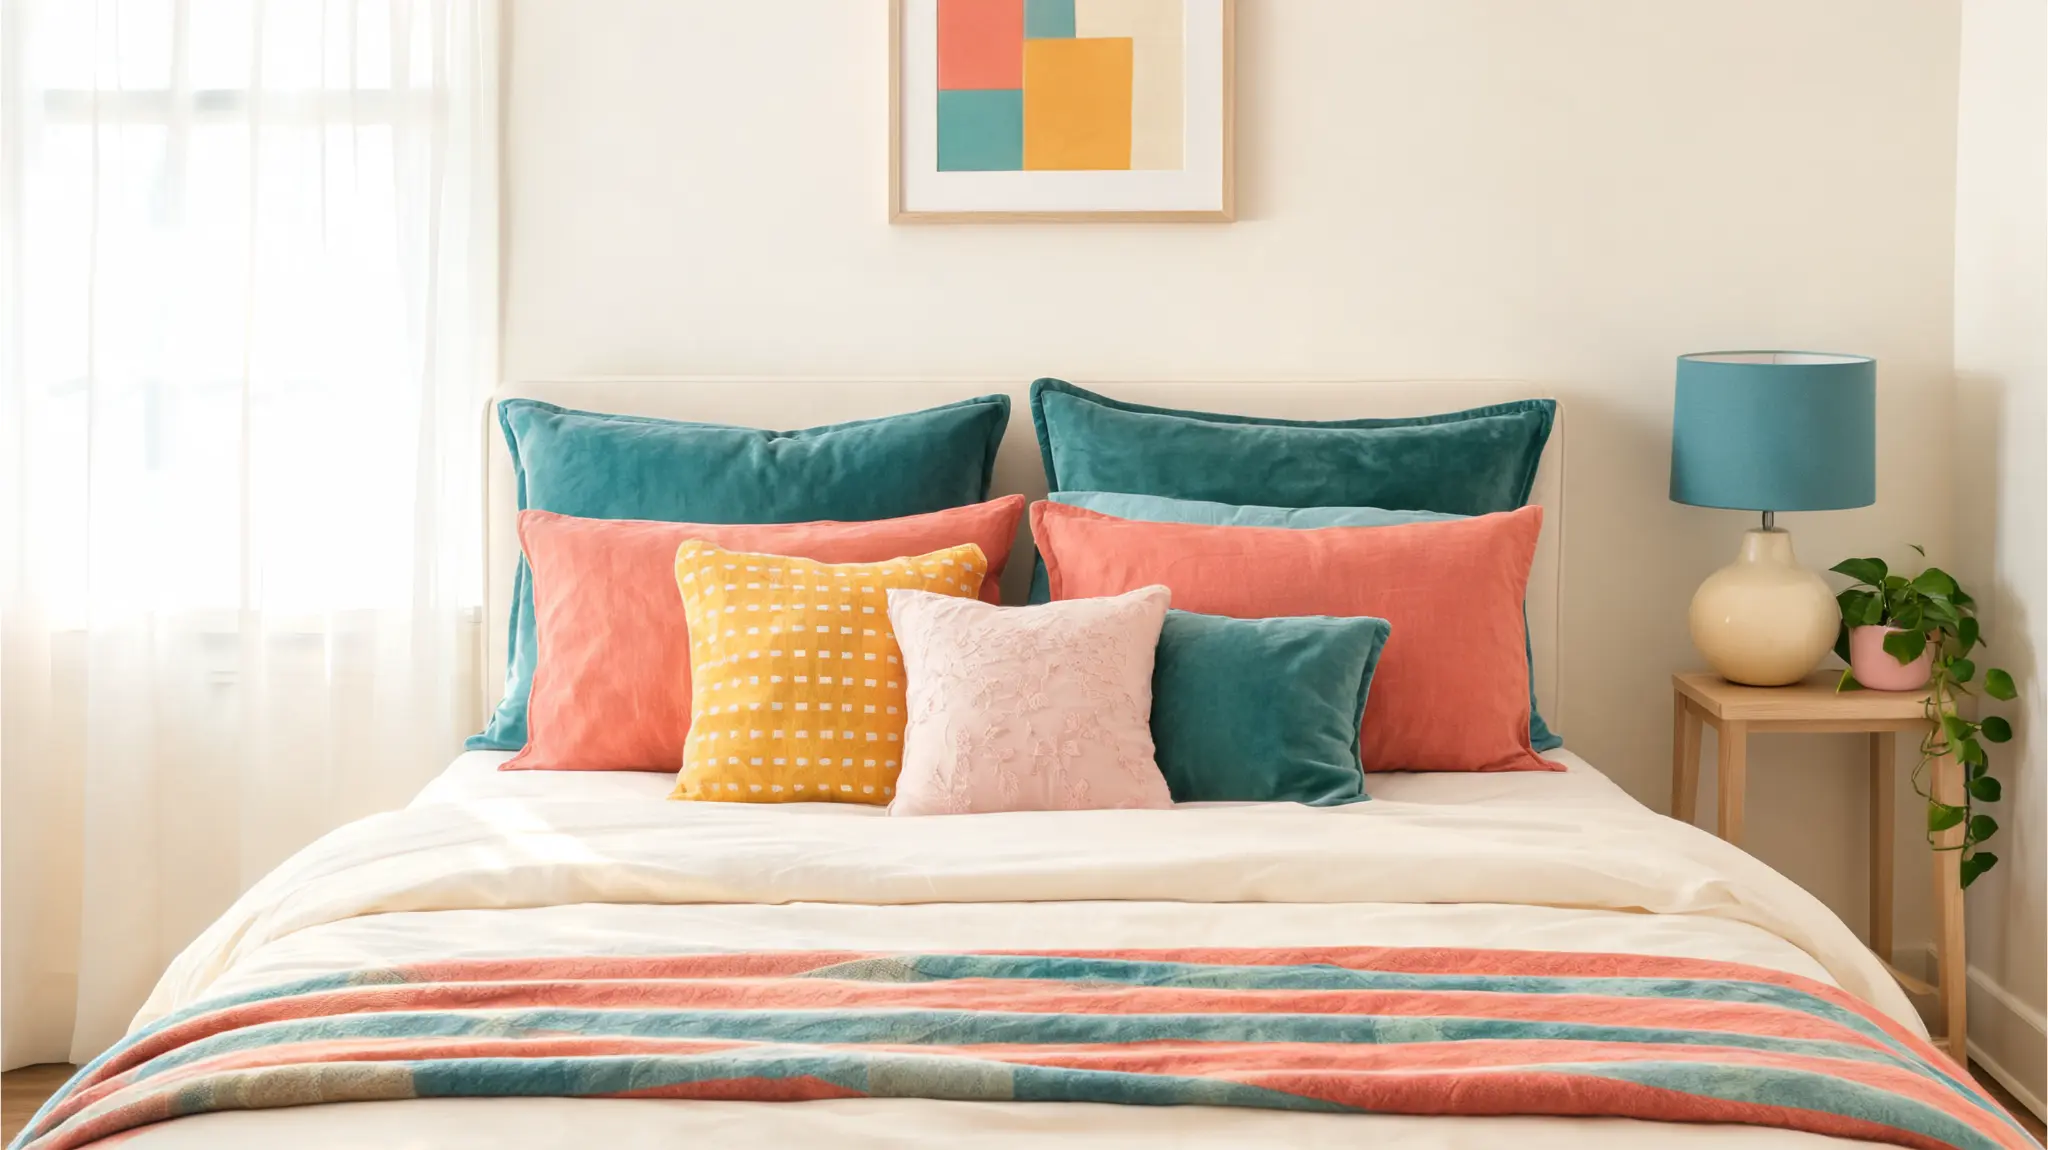
New pillow covers are the fastest single change you can make to how the bed reads.
Two or three covers in the room’s main color direction, cream, sage, blush, or warm brown for a calm room, or one brighter accent against softer bases for a playful one, shifts the whole bed area in about 15 minutes.
Three to five pillows total are enough for most beds.
Cost: $5–$20.
Time: 15 minutes.
4. Layered Bedding
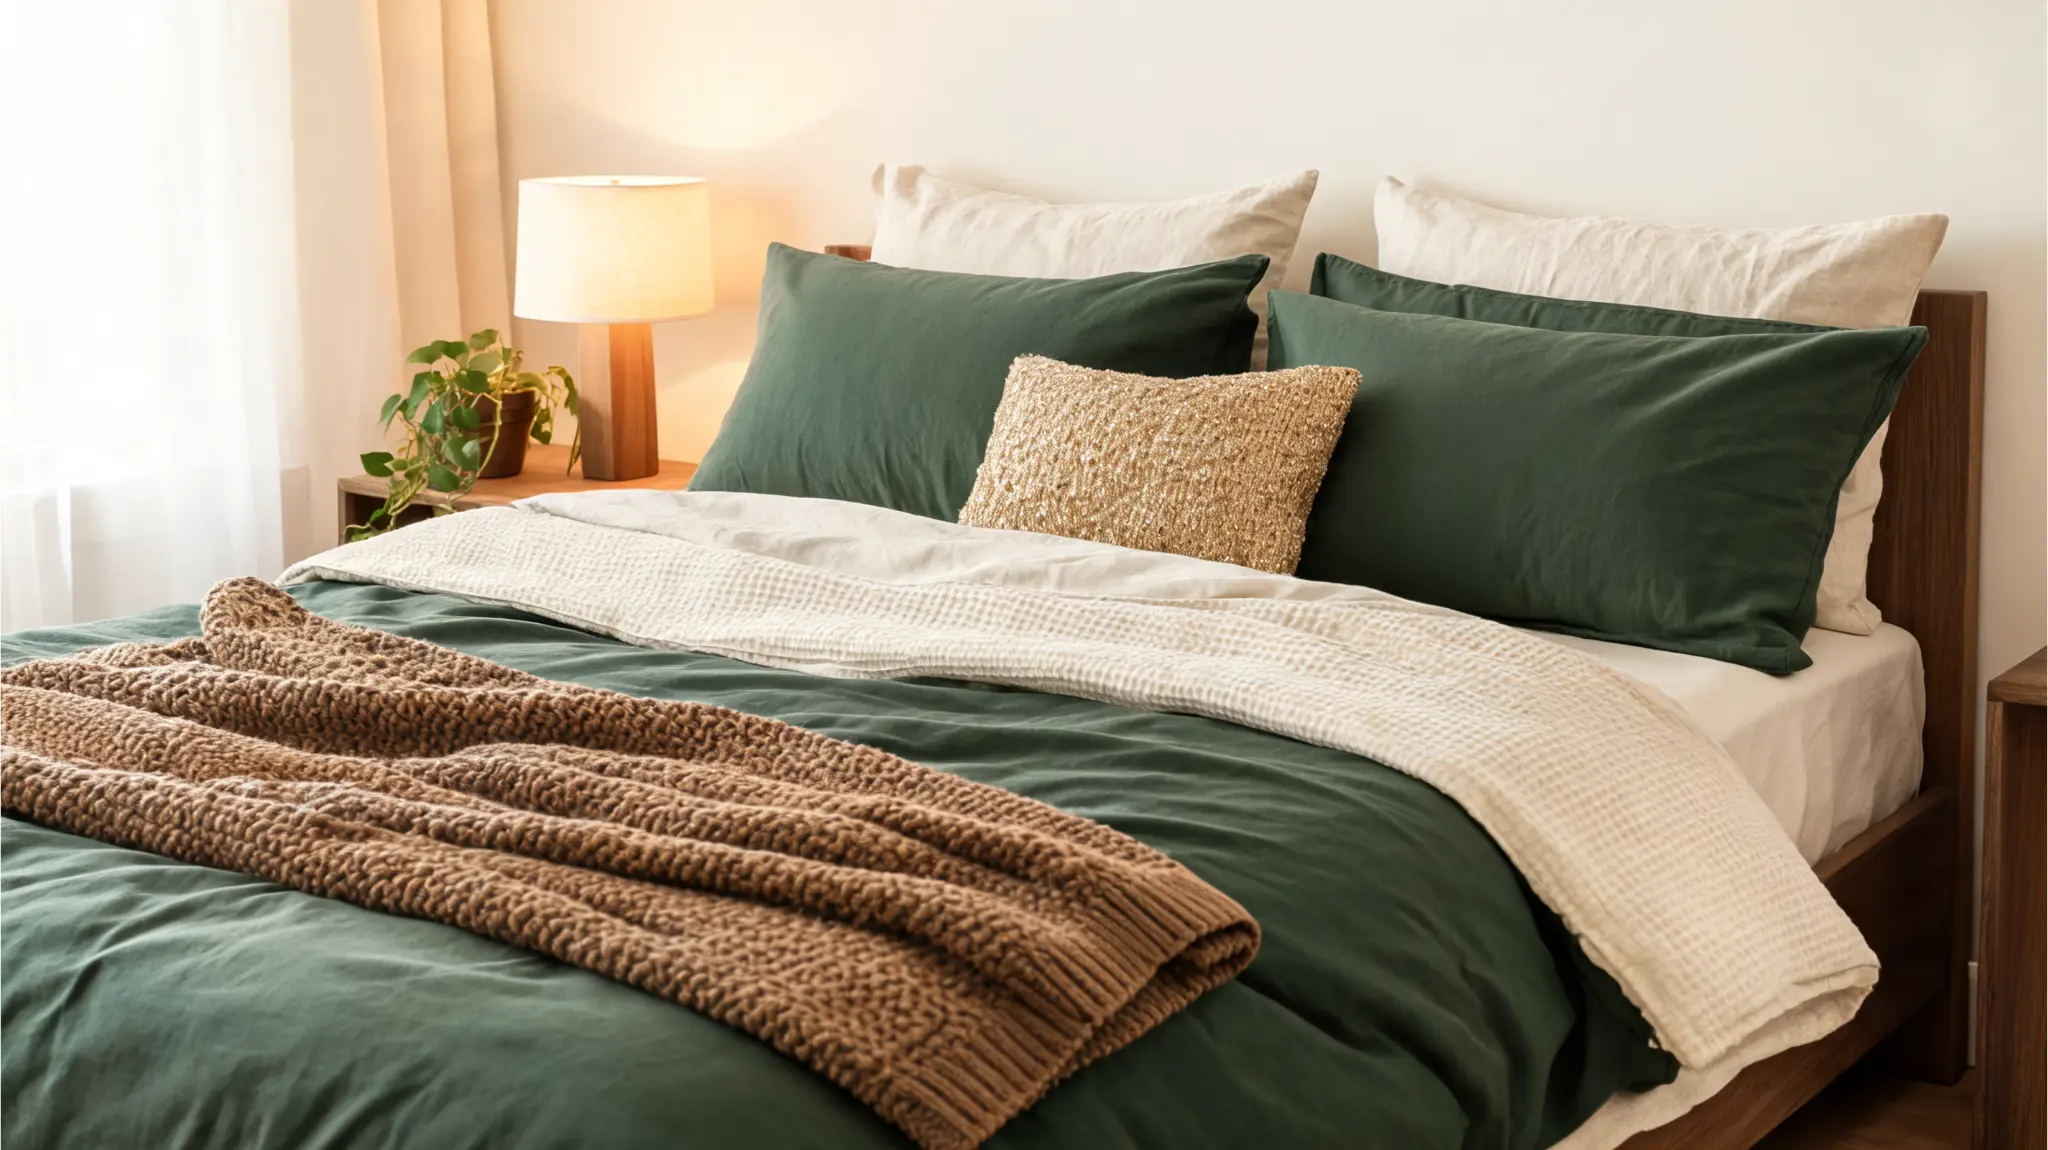
A duvet, a throw blanket, and a mix of pillows in connected colors make the bed look more deliberate than a single flat comforter ever can.
The difference in texture matters as much as the color. A smooth duvet, a knit throw, and a linen pillow read as considered.
Fold the throw at the foot of the bed instead of spreading it flat. It keeps the layers visible without making the bed look unmade.
Once the bed is sorted, the desk is usually the next surface that needs attention, and it’s where most of the daily visual clutter lives.
DIY Desk and Vanity Decor
The desk is the hardest surface to keep looking intentional because it’s actually used. Charging cables, notebooks, pens, and half-finished projects collect there daily.
The goal isn’t a perfectly styled surface. It’s a surface where the functional stuff has a place, so the decorative stuff can actually be seen.
1. Painted Organizers
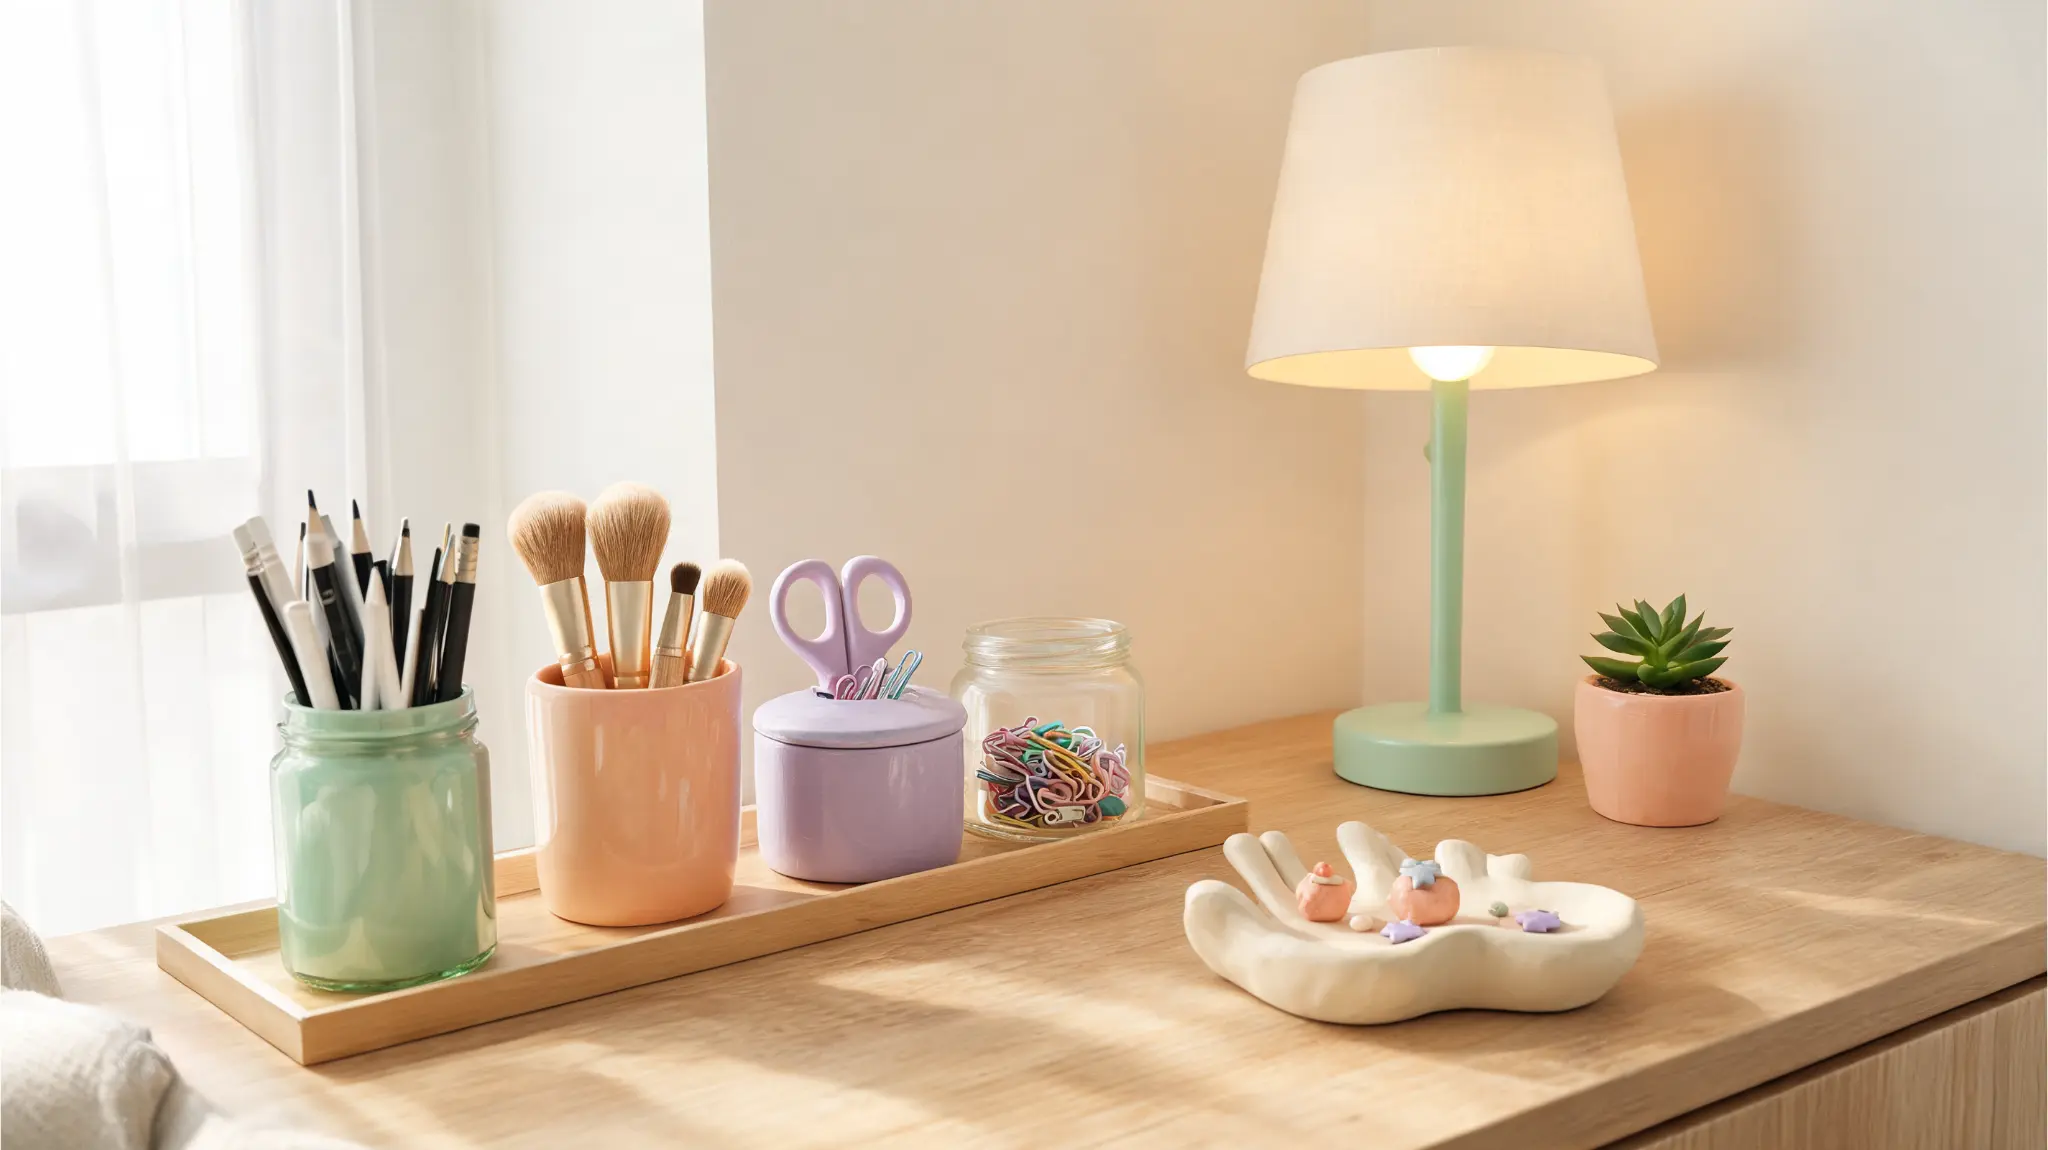
Old jars, plain cups, empty boxes: paint them in one color family and group them together on one side of the desk. White, beige, sage, or black each work depending on the room’s direction.
The trick is painting everything the same color so the group reads as a set. Individual multicolored jars look collected; a set of matching ones looks purposeful.
Cost: $2–$8 plus dry time.
Time: 30–45 minutes.
2. Clay Trinket Dishes
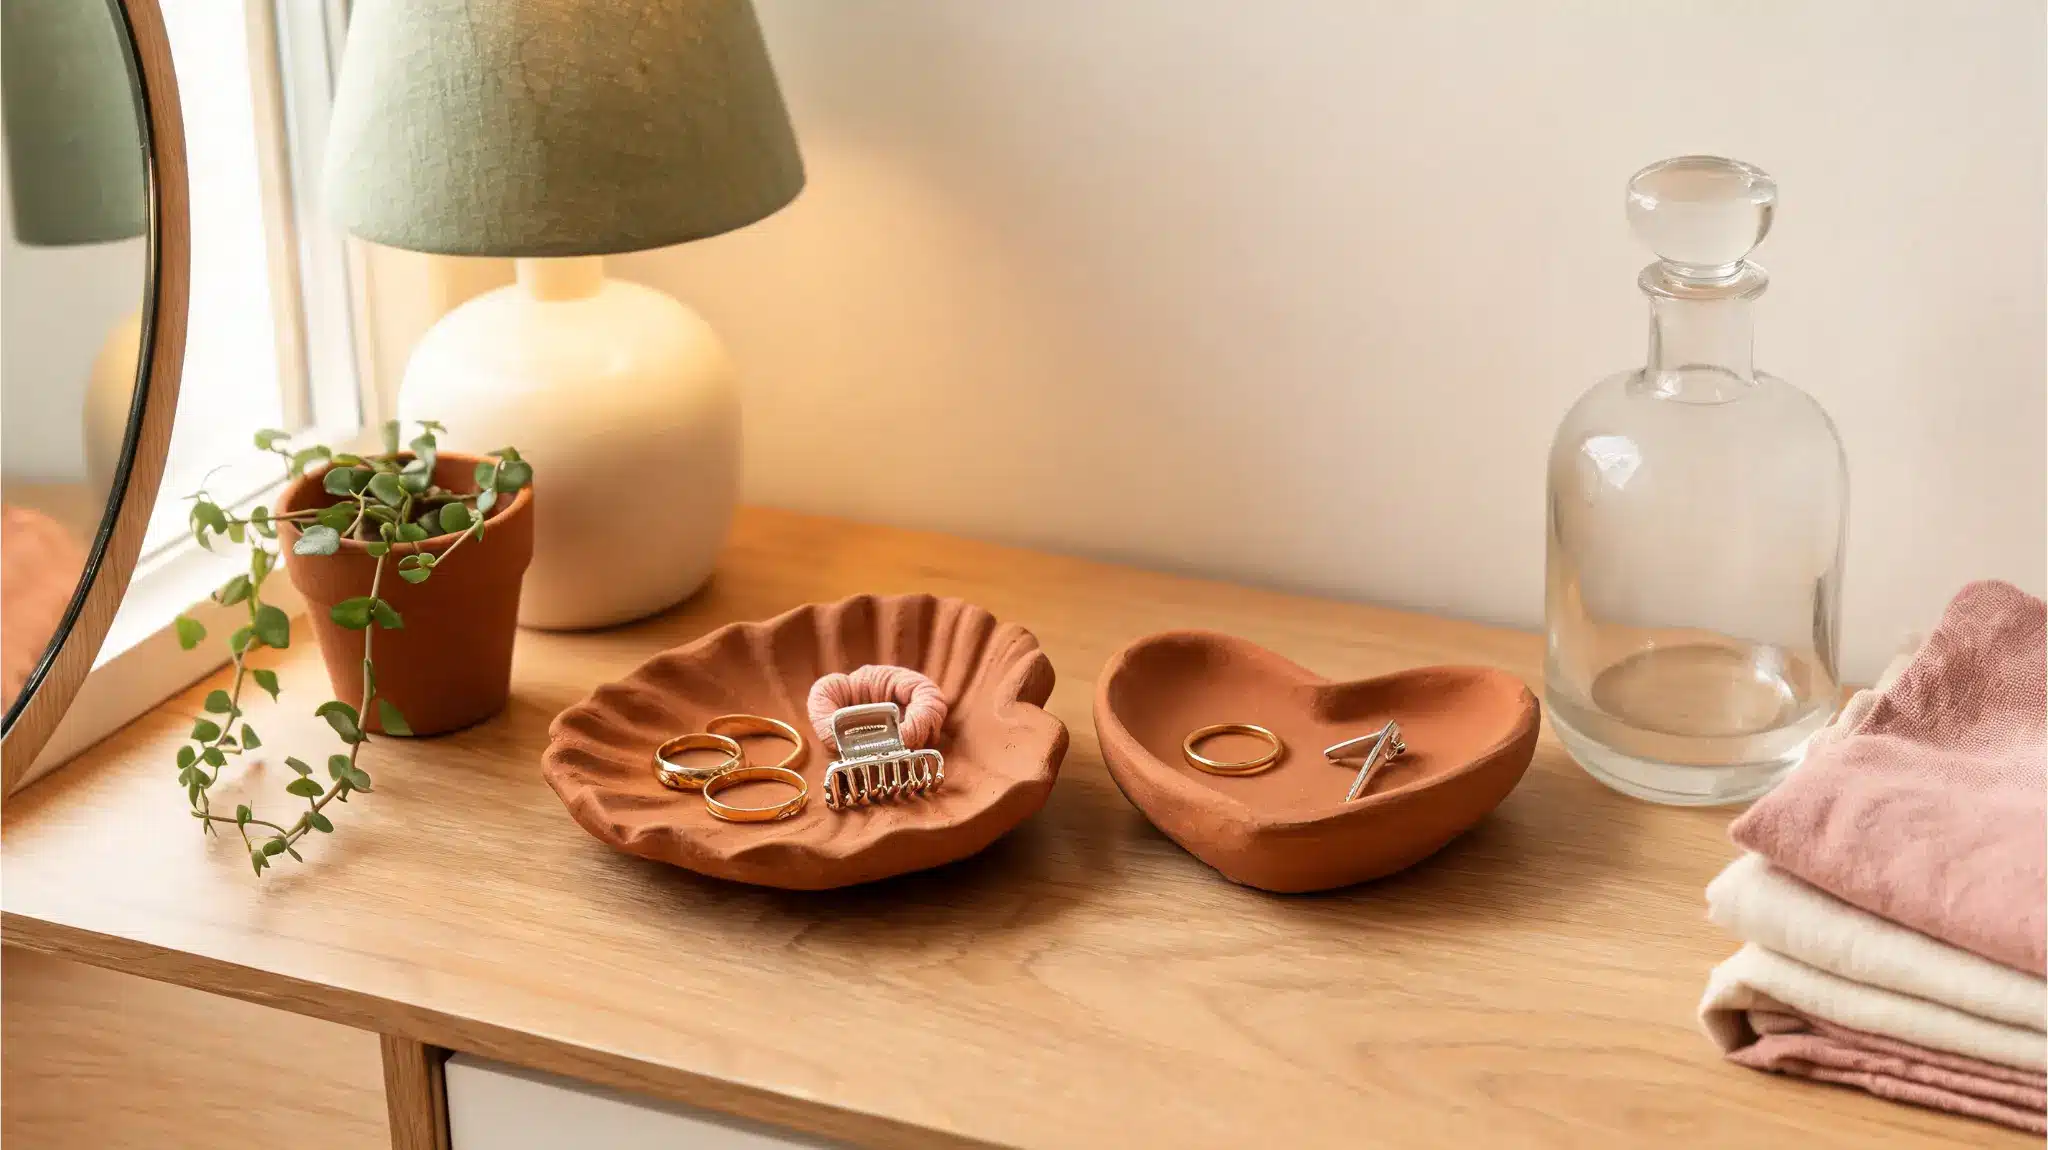
Air-dry clay shaped into a small dish gives you somewhere to put jewelry, hair clips, and small items without them migrating across the surface.
Shape it, let it dry fully (usually 24–48 hours), then paint it in a color that matches the desk or bedding.
One dish on the nightstand or vanity is the right scale. It’s a utility piece with a handmade feel, not a decor collection.
Cost: $5–$10 plus dry time.
Time: 1–2 hours active, overnight dry.
3. DIY Mirror Frame Update
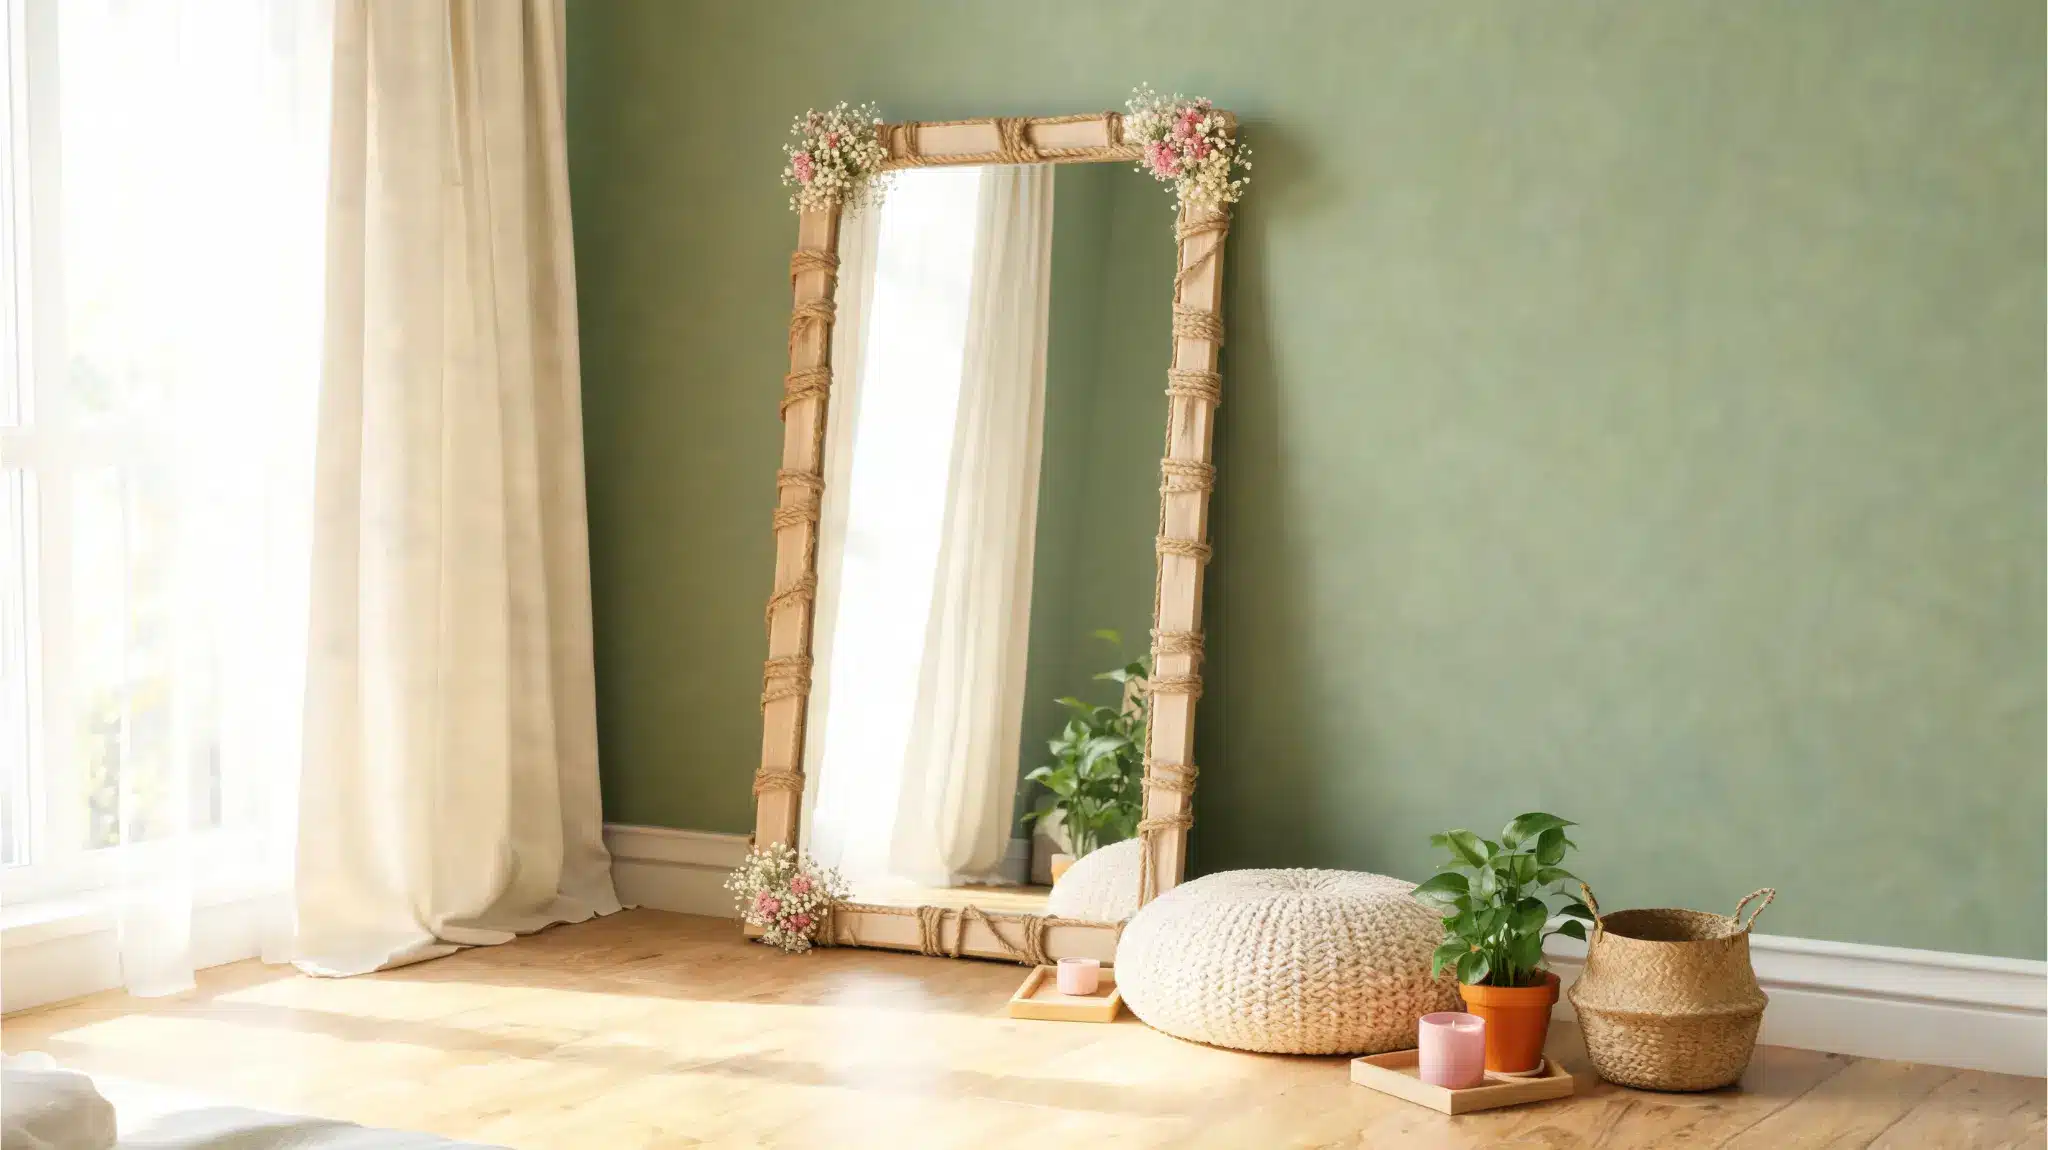
A plain mirror, whether vanity, wall-mounted, or full-length, takes a frame update well.
Rope wrapped around the edge, small craft sticks painted and glued on, dried flowers pressed into gaps, or washi tape in a geometric border all work depending on the room’s mood.
Keep the frame simple if the wall already has a photo collage or art piece. If the wall is plain, the frame can carry more detail.
A full-length mirror also does real work in a small room. Place it near the brightest natural light source, and it visually doubles the light.
Add a plant or a floor basket beside it so it reads as a composed corner rather than a stray object.
Cost: $5–$20.
Time: about 1 hour.
4. Desk Photo Board
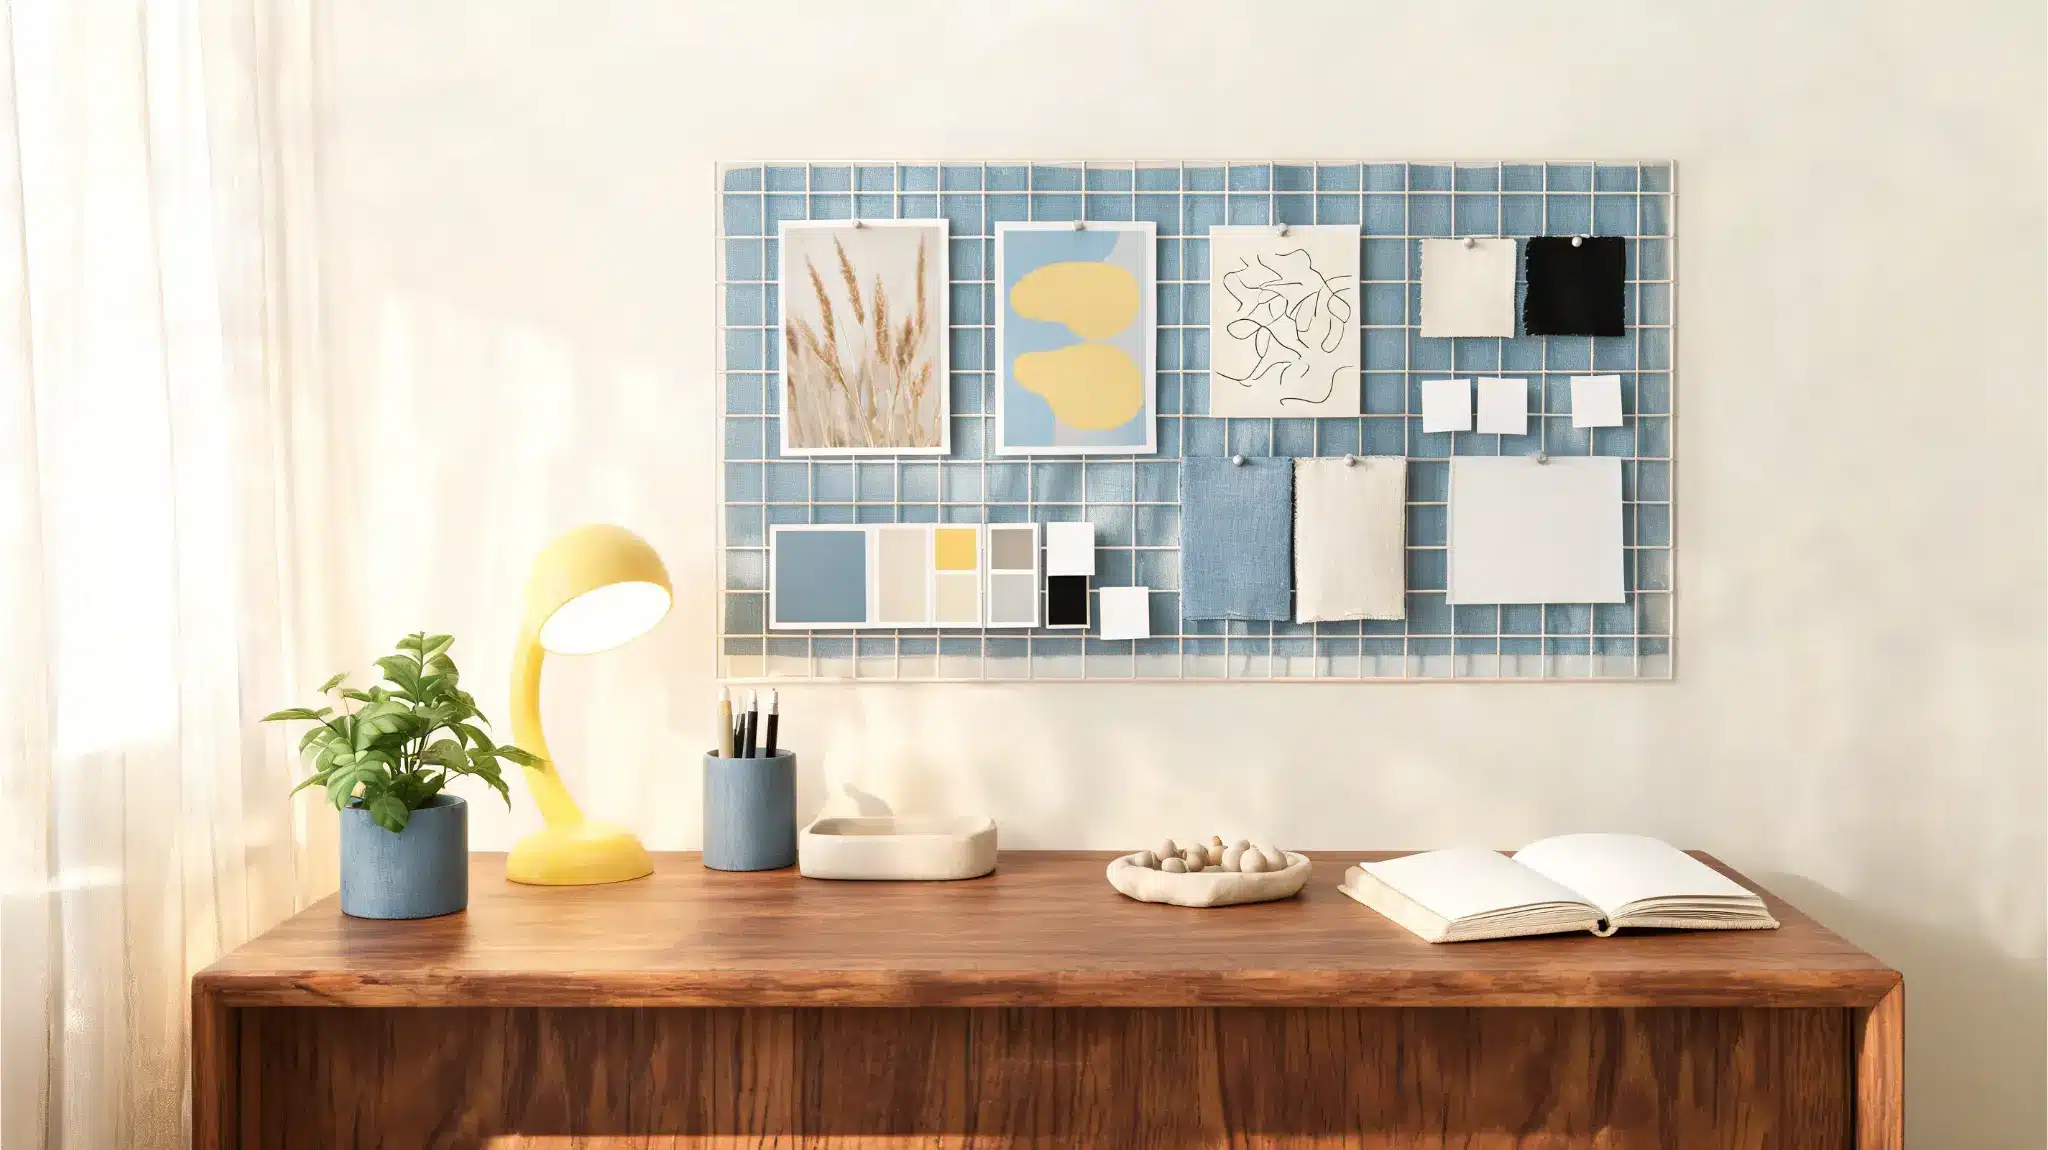
A corkboard, wire grid, or cardboard panel above the desk makes the study area feel personal without taking over the wall.
Pin photos, notes, small prints, and color swatches. Keep the colors close to whatever’s already on the walls so the desk corner feels connected to the rest of the room rather than competing with it.
Cost: $5–$15.
Time: 30–60 minutes.
All of this decor works better when the surface clutter around it is managed, so here’s a quick word on storage that doesn’t fight the room’s look.
Hide Clutter Without Ruining the Look
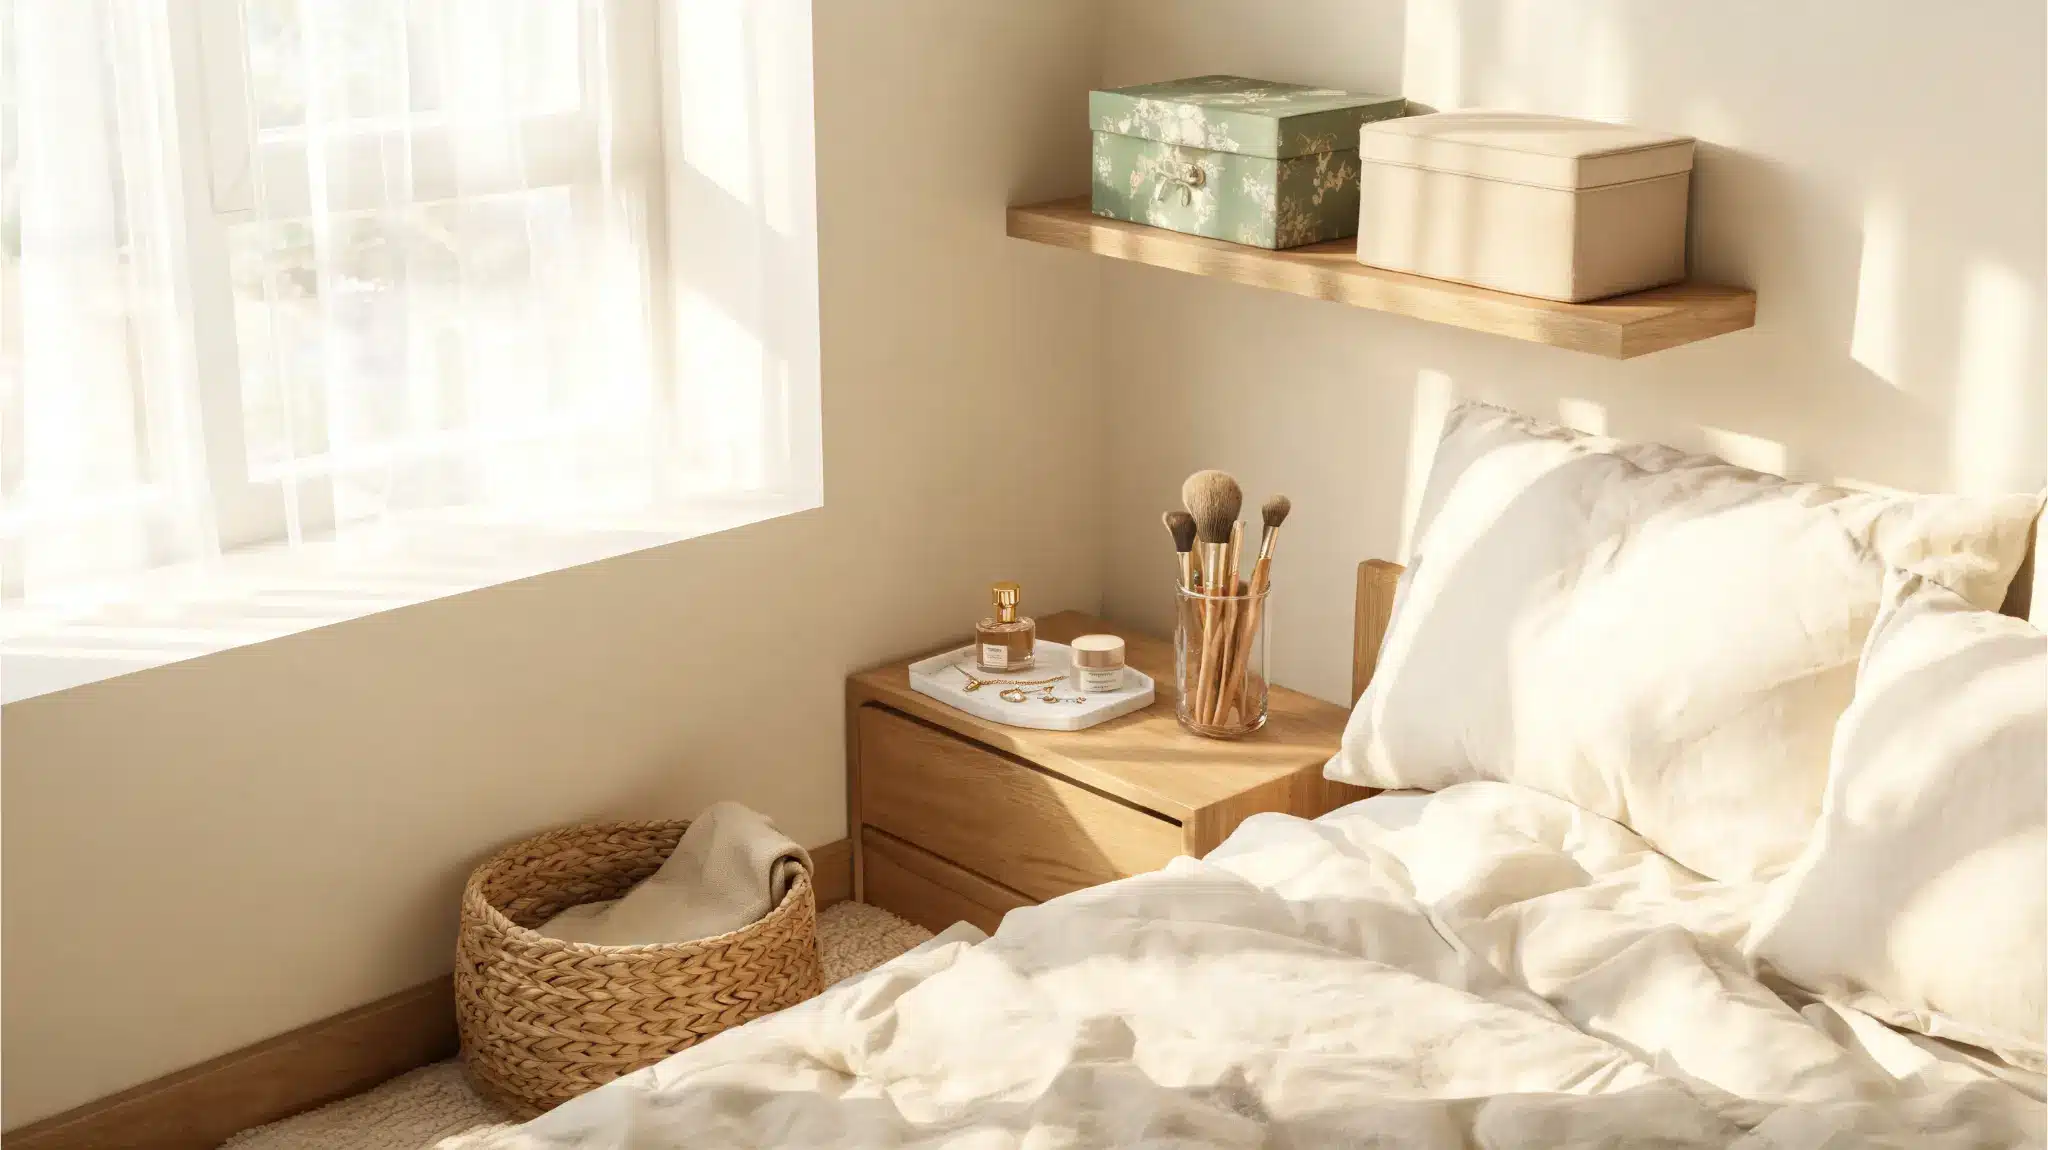
Even well-made DIY bedroom decor loses the effect when every surface is full. The room needs clear space for the handmade pieces to read as intentional. These five storage additions work without adding visual weight.
| Storage type | Use it for | Why it works |
|---|---|---|
| Small tray | Perfume, jewelry, skincare, stationery | Groups small items so they read as a display, not scatter |
| Woven basket | Blankets, bags, extra items | Hides clutter while adding warmth and texture |
| Painted box | Chargers, clips, makeup extras, desk supplies | Keeps storage hidden and color-matched to the room |
| Glass jar | Pens, brushes, flowers, clips, battery lights | Reuses a simple container without adding visual weight |
| Closed box | Shelves, closets, small rooms, under-bed spaces | Hides more than open storage and keeps the room calmer |
Most of these cost $5–$25 and take under 30 minutes to set up. In a small bedroom, trays, baskets, and closed boxes consistently outperform adding more open shelving, which tends to generate display pressure more than it solves storage problems.
DIY Bedroom Decor Mistakes That Waste Your Time
These are the patterns I’ve done wrong myself, and the ones I see repeated most often in rooms that look almost right but don’t quite land.
- No color plan before starting. Two main colors and one accent. Write them down before making the first thing. Random colors make even good individual pieces feel disconnected.
- Too many small items without negative space. Every object you add makes the room busier. Give each piece breathing room, including the handmade ones.
- Visible wires on finished walls. Loose wires around lights and desk setups undo the effect of everything around them. Tuck them behind furniture or route them along the wall edge with a removable clip strip.
- Wall pieces placed too high. Art and wall decor should connect visually with the bed, desk, or furniture it sits above, not float in the upper third of the wall where nothing else lives.
- Putting one idea on every wall. Choose one main wall feature. Photo collage on one wall, LED lights on another, macrame on a third, and a fabric panel on the fourth reads as a showroom sample space, not a bedroom.
- Copying a room photo without adjusting for your space. A large, bright loft room and a small north-facing bedroom don’t use the same solution. Scale every idea to your actual room.
If you want to go deeper into specific bedroom layout decisions, including how furniture placement affects how a room reads before any decor goes up, the cozy minimalist bedroom guide covers that framework in detail.
For the mood board side of things, the chill aesthetic room guide is a useful next read.
Frequently Asked Questions
These are the questions I get most often from people who’ve already picked their mood and are standing in the room wondering where to actually start.
What is the cheapest DIY room decor to make?
Magazine collage art ($0–$5), glass jar candle holders from reused jars ($0–$8), and painted organizers from existing containers ($2–$8) are the lowest-cost options. All three take under two hours and require no specialist tools.
How do I make my bedroom look aesthetic without buying anything?
Rearrange what you already have: remove half the items from the desk and nightstand, fold your throw blanket and drape it at the foot of the bed, and move any lamp to sit on a surface rather than on the floor. Visual edits cost nothing and often do more than new items.
What DIY room decor works for renters with no holes in walls?
Washi tape frames, removable peel-and-stick wallpaper tested on a hidden corner first, fairy lights on removable hooks, and fabric panels draped over curtain rods or tension rods are all renter-safe. Avoid real nails wherever possible; removable strips work for most prints up to standard poster size.
How do I make a small bedroom look better with DIY decor?
Use one clear wall feature instead of spreading decor across every surface. A mirror near the window doubles perceived light. Keep storage closed or grouped on trays. Pale bedding and low-level lighting both make a small room feel more spacious than anything you can hang on the wall.
What is a good DIY bedroom wall decor idea for above the bed?
A photo collage with consistent tonal colors, a single macrame wall hanging, a fabric panel, or one piece of DIY canvas art each works well above the bed. The key is picking one, not two or three, and giving it enough clear space around it to read as a focal point.
How do I decorate my bedroom on a budget with DIY projects?
Start with the projects that use what you already own: repaint existing organizer jars, rearrange current photos into a collage, swap pillow covers rather than buying new pillows. Then add one purchased item, a single string of fairy lights or a small canvas, that connects to the colors already in the room.
Can you DIY room decor for a cute aesthetic bedroom?
Yes. A pastel photo wall, soft fairy lights, clay trinket dishes in blush or cream, a canopy above the bed, and painted organizers in matching pale tones all work for a cute aesthetic bedroom. The approach is the same: pick the palette first, then make items that stay within it. For a broader view of cozy aesthetic room ideas, that guide covers the full picture.
What room colors make a small bedroom feel softer and bigger?
Soft white, cream, beige, sage, blush, and warm brown. Pick two as your main colors and one as an accent, then repeat those shades across bedding, wall pieces, and small decor. Consistency across surfaces is what makes a small room read as intentional rather than cramped.
If you want to take the wall side further with painting, texture, or a more permanent accent wall treatment, the DIY ombre wall paints guide and the DIY wall shelves guide are the natural next steps.
For larger room transformation projects that go beyond decoration, the DIY home projects overview covers what’s actually worth the effort at different skill levels.
Summing Up
If I were starting again in a room that felt unfinished, I’d do the photo collage wall and the fairy lights on the same afternoon.
Together, they cost under $30, take about two hours, and change more about how the room feels than any single higher-cost project.
After that, the bed area: new pillow covers and a folded throw blanket at the foot of the bed.
That combination of one clear wall feature, soft lighting, and a composed bed area is what turns DIY bedroom decor from scattered craft projects into a room that reads as deliberate.
Start with the wall above your bed today, pick one tonal direction for the photos, and go from there.


