



| Difficulty | 2/5, Beginner to intermediate; patience with measuring matters more than skill |
| Time | One full weekend (6–8 hours across two days) |
| Cost | $80–$250 depending on room size and material choice |
| Tools Needed | Tape measure, pencil, long level, miter saw or circular saw, nail gun or hammer, caulk gun, sanding block, paintbrush, small roller |
| Skill Required | Beginner, if you can measure twice and nail straight, you can finish this project |
DIY wainscoting is one of the few wall projects where the before and after speak for themselves.
A plain wall, maybe scuffed from furniture, maybe just flat and unfinished, becomes something that looks intentional. The room feels more built-out, more considered, without you having to change a single piece of furniture.
The mistake most people make before starting is assuming they need to hire it out. You don’t. Wainscoting with MDF boards and basic trim is a beginner project if you take it one step at a time.
I’ve done this in a hallway and a bedroom, and the second time went faster than the first, not because I got smarter, but because I knew which shortcuts were worth it and which ones came back to bite me.
Here’s what I’d tell you before you buy a single board.
What is Wainscoting Used for?
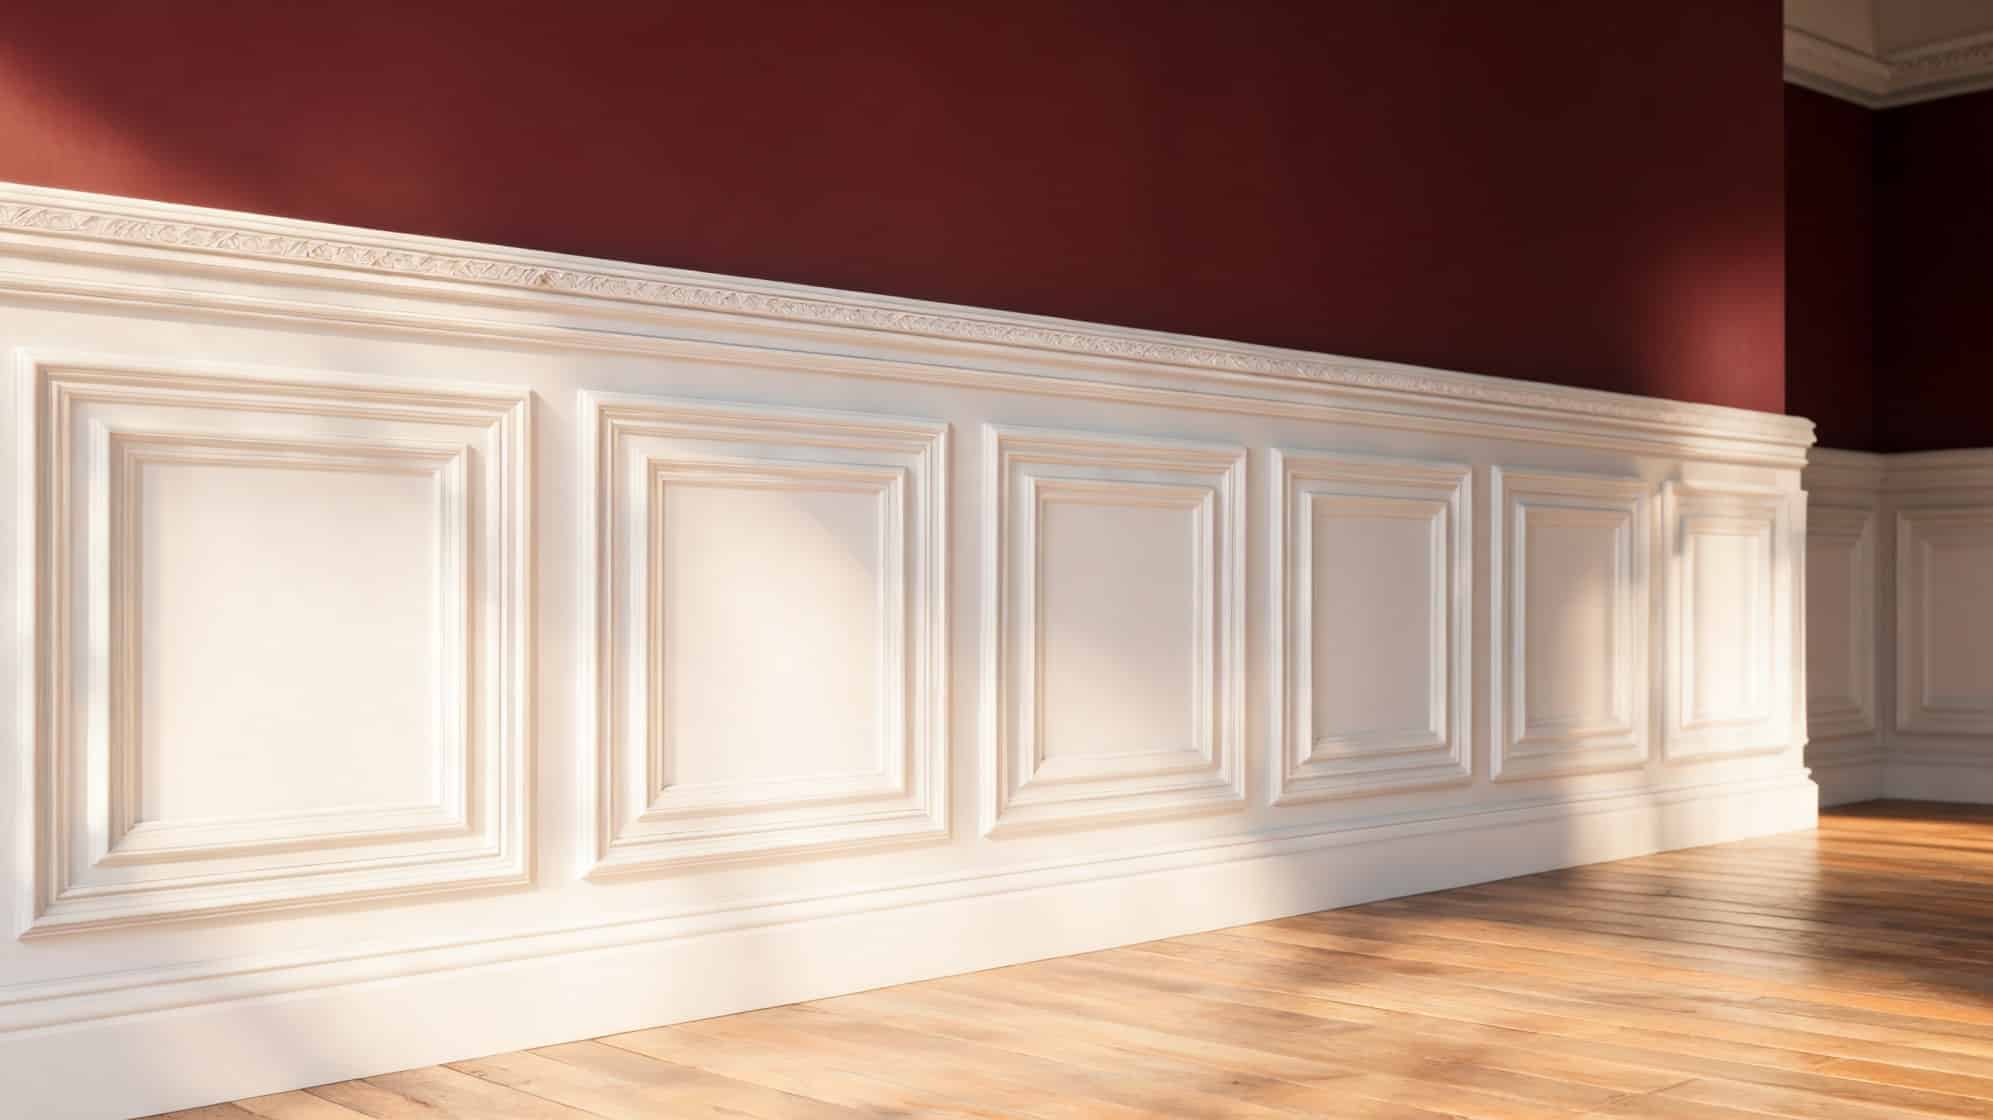
Wainscoting is decorative wall paneling typically installed along the lower part of a wall. You have probably seen it in dining rooms, hallways, bathrooms, bedrooms, and entryways. It can be made with wood, MDF, beadboard, or trim pieces. Some styles look simple and modern, while others feel more classic and detailed.
One of the main reasons people add wainscoting is style. A plain wall can feel flat or unfinished. Wainscoting adds shape, texture, and detail without changing the whole room. It adds depth to the wall and makes the space feel more planned.
Even a basic room can look more custom once the panels are added and painted. Wainscoting also helps protect your walls. The lower part of a wall often gets the most wear. Chairs, shoes, bags, pets, and kids can leave marks or scuffs.
Wainscoting adds an extra layer of protection to that area. This makes it a smart choice for busy spaces like hallways, mudrooms, dining rooms, and entryways.
Types of Wainscoting You Can DIY
There are several wainscoting styles you can try at home. Some are simple and beginner-friendly, while others need more skill and careful cutting. The best choice depends on your room, budget, and the look you want.
- Picture Frame Wainscoting: This style uses trim pieces to create box shapes on the wall and is one of the easiest DIY wainscoting options.
- Board and Batten Wainscoting: This style uses vertical boards, called battens, placed along the wall and works well in farmhouse, modern, and casual rooms.
- Beadboard Wainscoting: This style has narrow vertical grooves and is often used in bathrooms, cottages, mudrooms, and cozy spaces.
- Raised Panel Wainscoting: This style has a more formal, classic look, but it is more challenging for beginners because it requires more detailed cuts and careful fitting.
If you are new to DIY projects, picture frame wainscoting or board-and-batten is usually the best place to start. Both styles can give your room a clean, finished look without making the project too hard.
How to Do Wainscoting Step by Step
A good wainscoting DIY project depends on careful measuring, straight lines, and smooth finishing. Even if you are new to this, you can get a neat result by moving slowly and checking your work as you go.
Materials Needed
- Tape measure, pencil, long level, paper or notepad, painter’s tape
- Drop cloth or floor covering, cleaning cloth or sponge
- 1×3 MDF board for the top rail, MDF boards or trim pieces for upright boards
- Construction glue, finish nails, nail gun, or hammer
- Wall filler or spackle, wood filler, paintable caulk, caulk gun, small putty knife, damp cloth
- Sanding block or sandpaper
- Primer if needed, satin, semi-gloss, or gloss paint, paintbrush, small paint roller, touch-up brush
- Safety glasses
Step 1: Measure and Plan the Wall
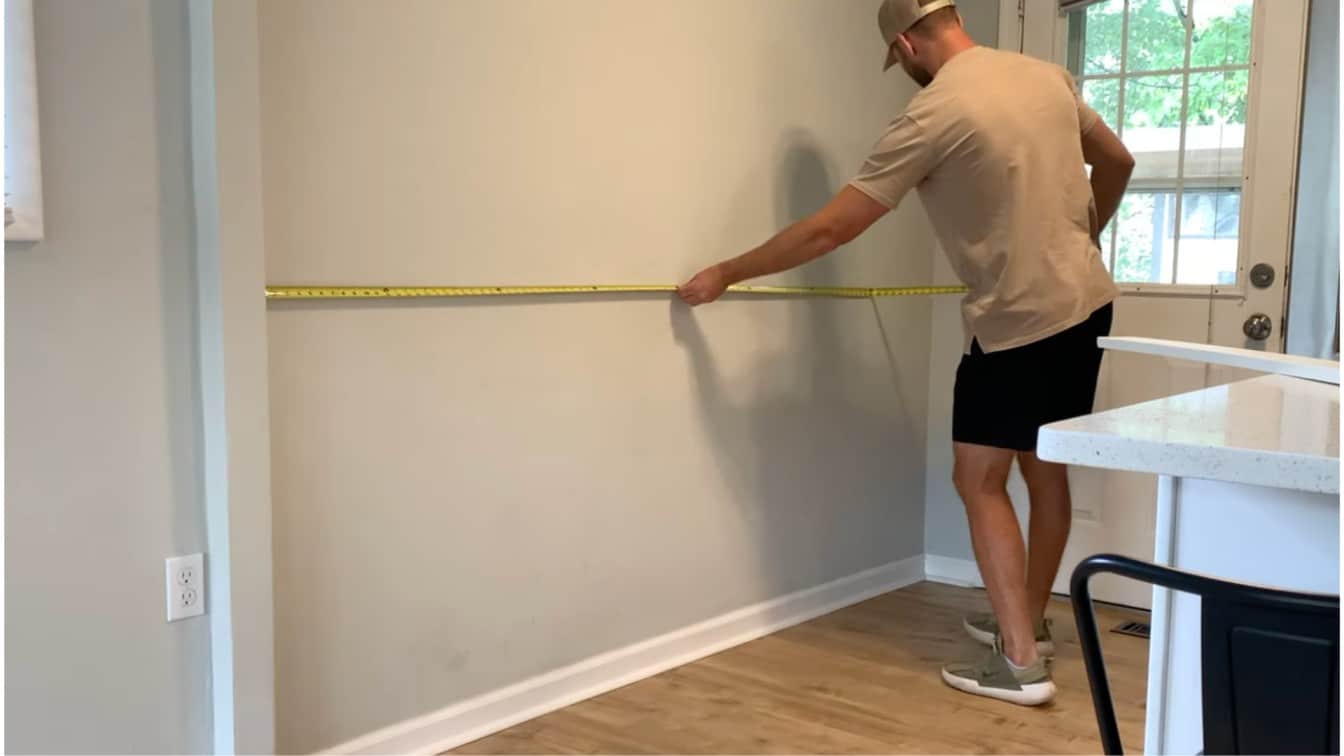
Start by measuring the wall from side to side and from the floor up to where you want the top board. In the video, the top line is about 36 inches high, which works well for many rooms. Use a long level and a pencil to draw a straight line across the wall.
Then plan where each upright board will go. Keep the gaps even so the wall looks balanced. Write the numbers down before you cut anything, and check the plan one more time.
Step 2: Paint the Wall
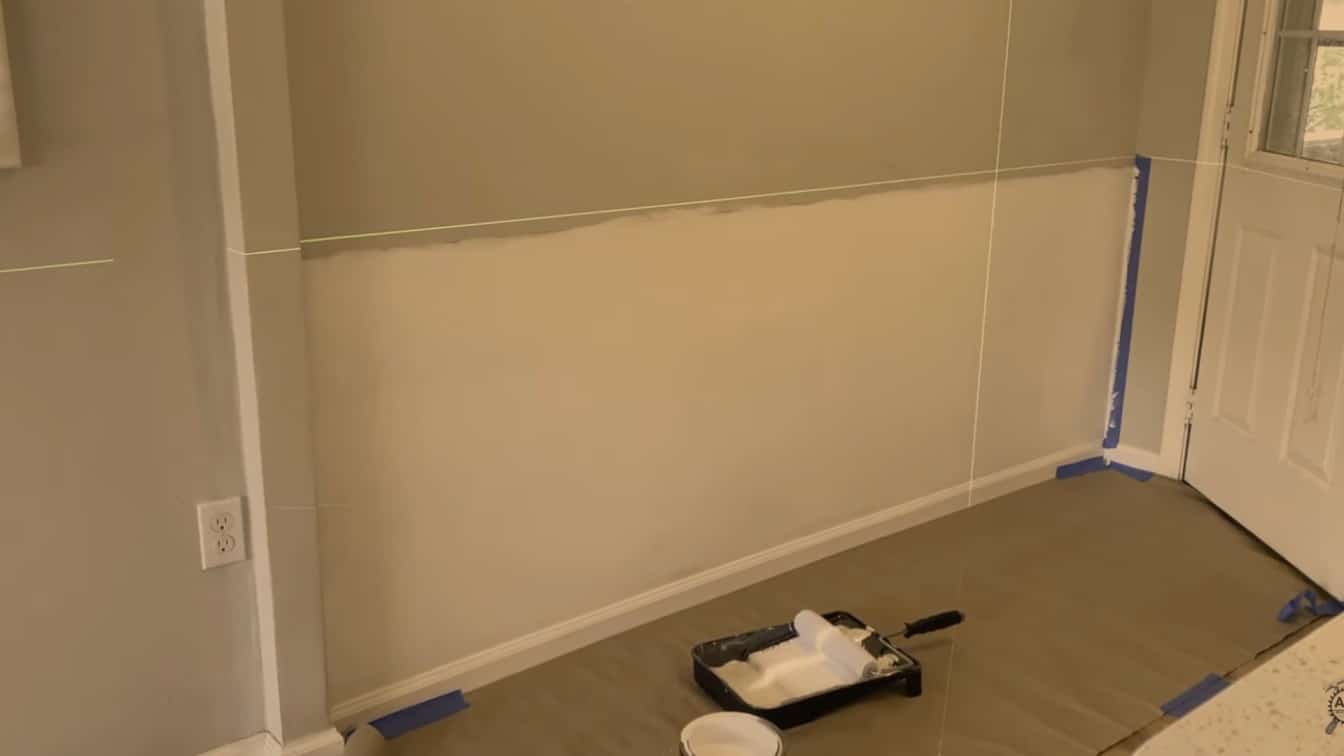
Clear the space so you can work safely. Move furniture away, take down wall decor, and remove anything that blocks the wall. Wipe the wall clean, so the glue and paint can stick well. Fill small holes if needed, then let the filler dry.
It also helps to paint the lower wall before adding the boards. This gives you a cleaner finish later, especially in the small spaces between boards where a roller may not reach easily. Let the paint dry before moving on.
Step 3: Install the Top Board
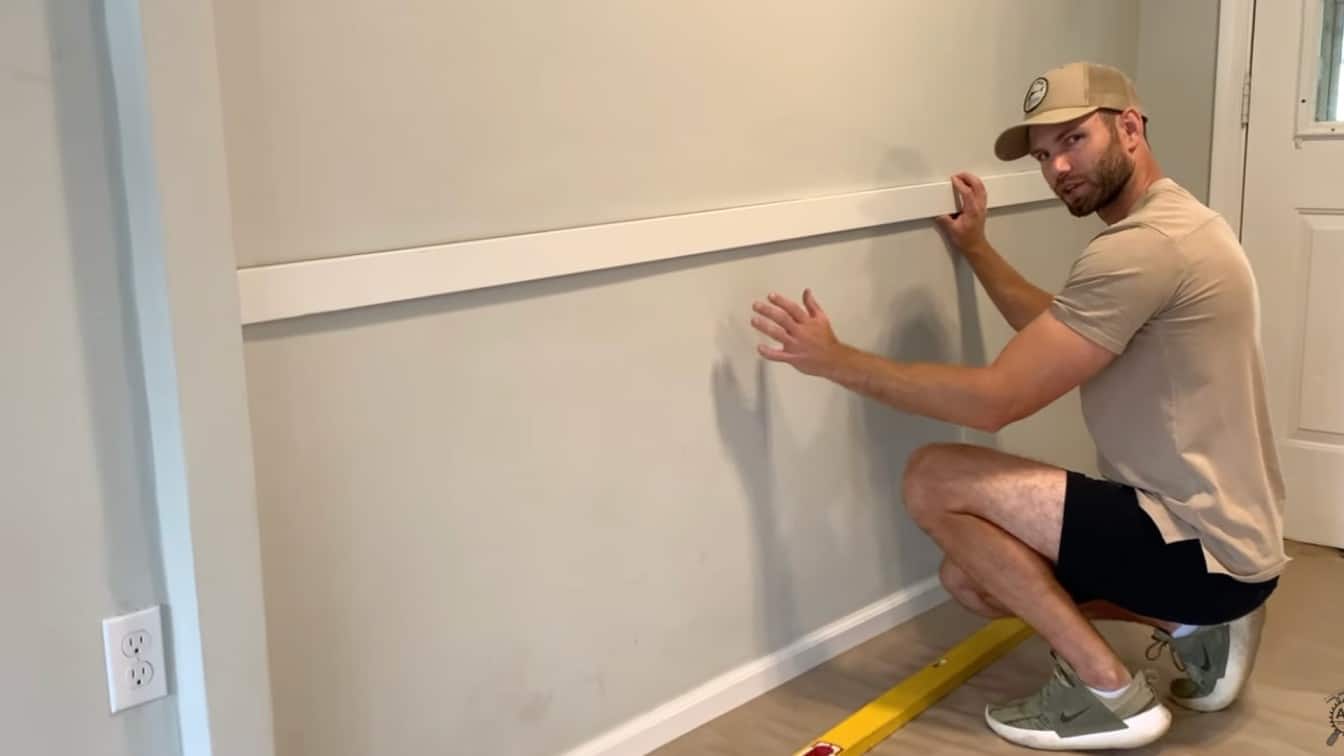
Cut the top board to match the full width of the wall. The video uses a 1×3 MDF board, but you can use a similar flat board that paints well. Add a thin line of construction glue to the back. Place it on the pencil line you marked earlier.
Check it with a level before you fasten it. Once it is straight, attach it to the wall with small finish nails or a nail gun. Wipe away extra glue right away.
Step 4: Add the Upright Boards
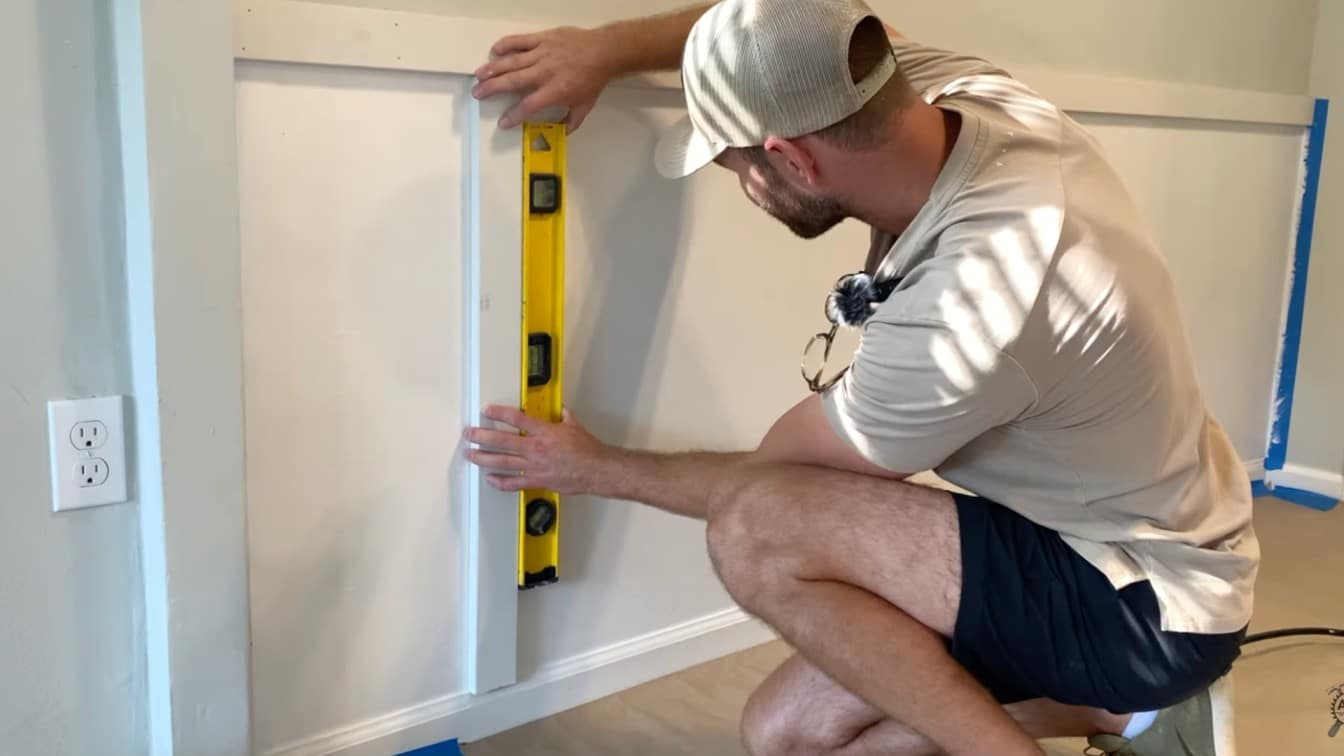
Now cut the upright boards to fit between the baseboard and the top board. Measure each piece before cutting because floors and walls are not always perfect. Put glue on the back of each board, press it onto the wall, and check that it stands upright.
Use your spacing plan to keep every gap even. Once each board looks right, nail it in place. Step back often to make sure the pattern still looks balanced from across the room.
Step 5: Fill Holes and Seal Gaps
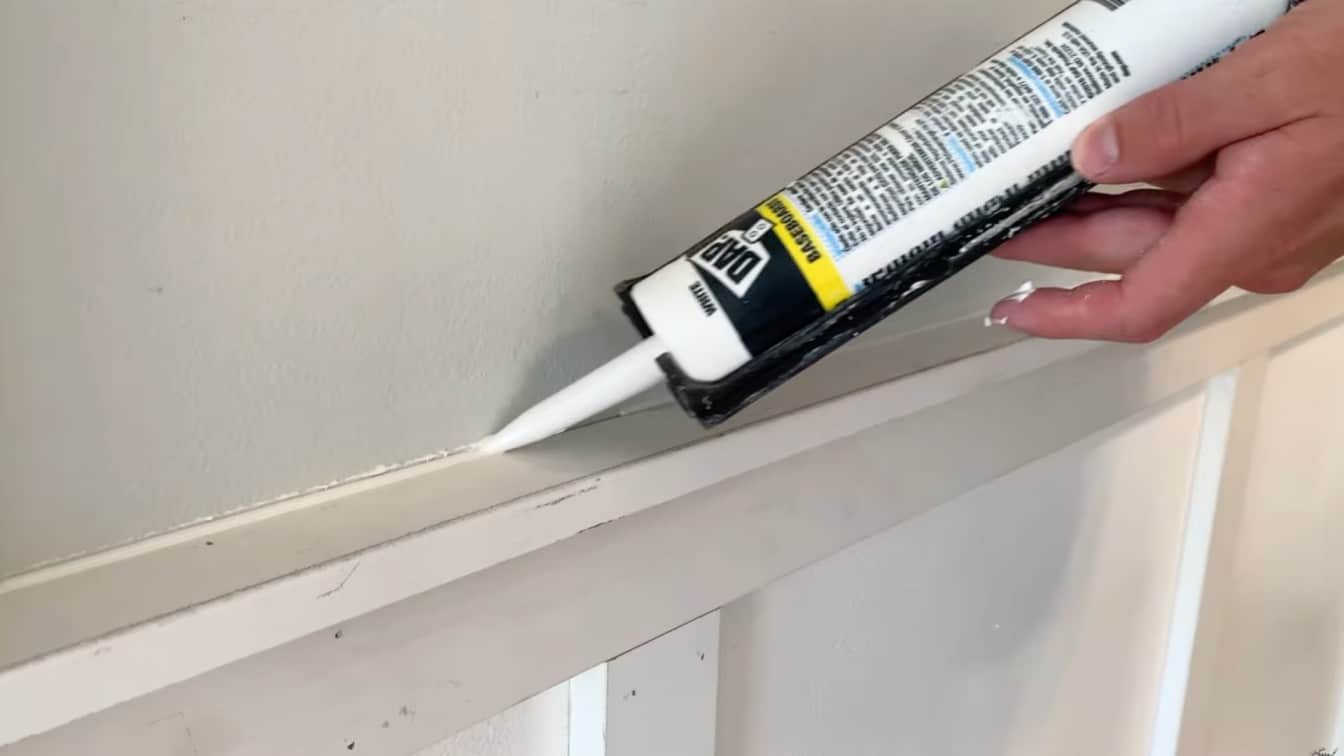
After all boards are on the wall, fill the nail holes and small cracks. Use wood filler for nail holes if you want a smooth face on the boards. Use paintable caulk where the boards meet the wall, baseboard, and top board.
Smooth the caulk with a damp finger or caulk tool. This step may seem small, but it makes the whole project look much cleaner. Let everything dry completely before sanding or painting, or the finish may smear.
Step 6: Sand and Paint the Wainscoting
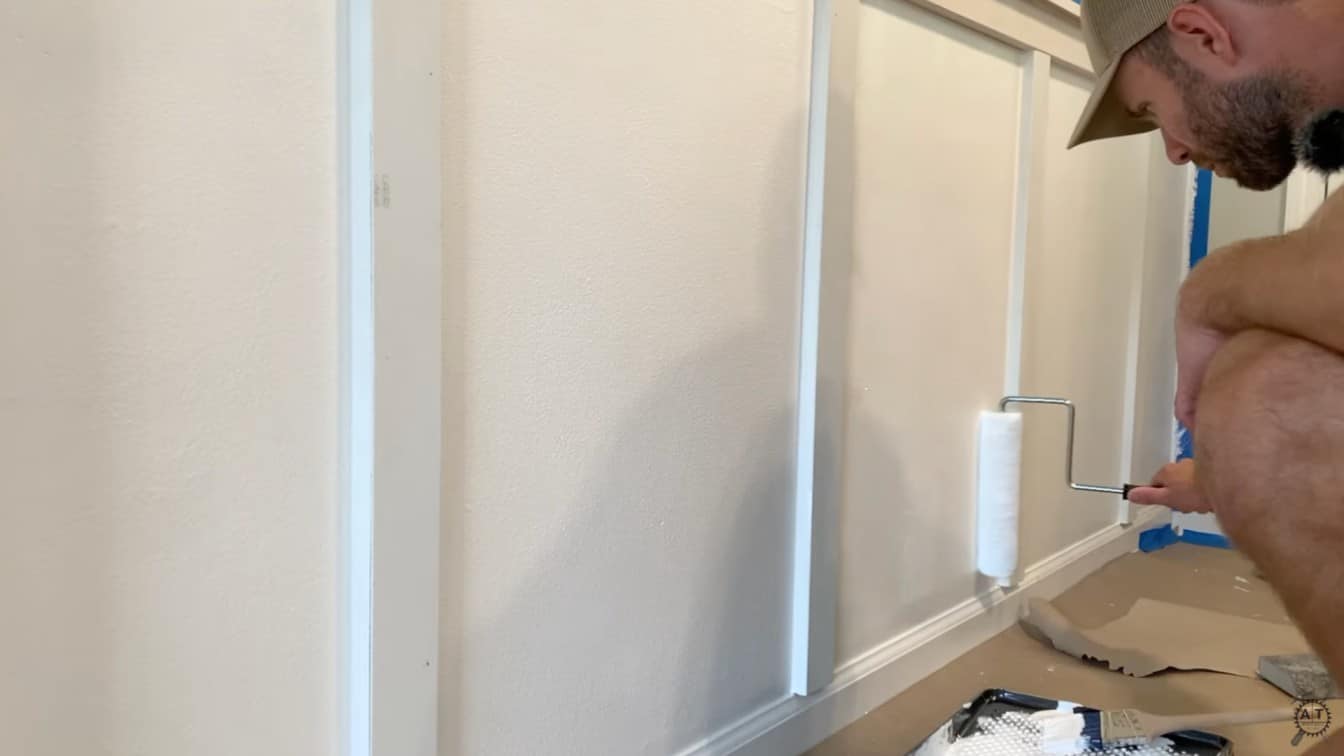
Once everything is dry, lightly sand any rough spots with 220-grit paper. Wipe away dust with a tack cloth or slightly damp rag. If you’re using raw MDF, prime it first; MDF absorbs paint aggressively and will look uneven without a primer coat. Then paint. Use a brush for edges, corners, and tight gaps. Use a small roller for board faces and the flat wall areas between verticals.
For finish choice, satin holds up well in most rooms; semi-gloss gives you a slightly harder, more wipeable surface that works particularly well on trim. The difference between satin and semi-gloss comes down to sheen level and how much traffic the wall sees.
Use a brush for edges, corners, and the tight gaps between boards. Use a small roller for the board faces and the flat wall areas between vertical boards.
Two thin coats hold better than one thick one. Semi-gloss or satin paint cleans more easily than flat and holds up better in high-traffic rooms, hallways, mudrooms, and dining rooms, especially.
Step 7: Clean Up and Touch Up
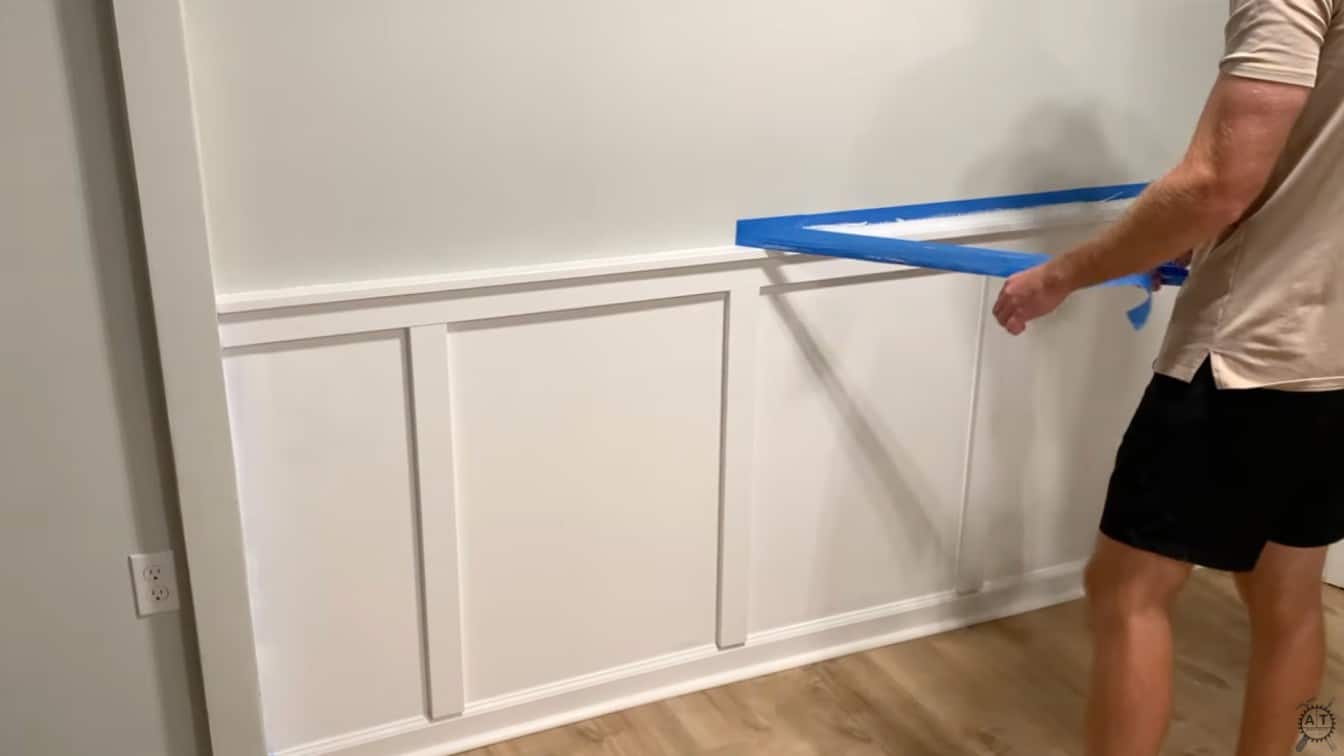
When the paint is fully dry, remove the painter’s tape if you used it. Check the wall closely for missed spots, rough lines, or small gaps that still need attention. Touch up those areas with a small brush. Clean the floor, put tools away, and move your furniture back into place.
Rehang any decor only after the paint has hardened enough to avoid leaving marks. Your finished wainscoting wall should now look neat, clean, and more custom, without making the project too hard.
For more details, refer to the video below:
Best Material for DIY Wainscoting
The material you choose can make your wainscoting project feel easier. Some materials are cheaper and easier to paint, while others are stronger or better for damp rooms. Here are the most common choices for a wainscoting DIY project.
- MDF: MDF is smooth, affordable, and easy to paint, which makes it a great choice for simple indoor wainscoting projects.
- Pine: Pine is stronger than MDF and works well for trim, but it may have knots that need filling or sanding before painting.
- PVC: PVC is a smart choice for bathrooms, laundry rooms, and other damp areas because it handles moisture better than wood or MDF.
For most beginner DIY projects, MDF is often the easiest option because it is smooth, budget-friendly, and simple to work with. But if you are adding wainscoting in a bathroom or another wet space, PVC may be the safer choice.
Wainscoting vs. Board and Batten
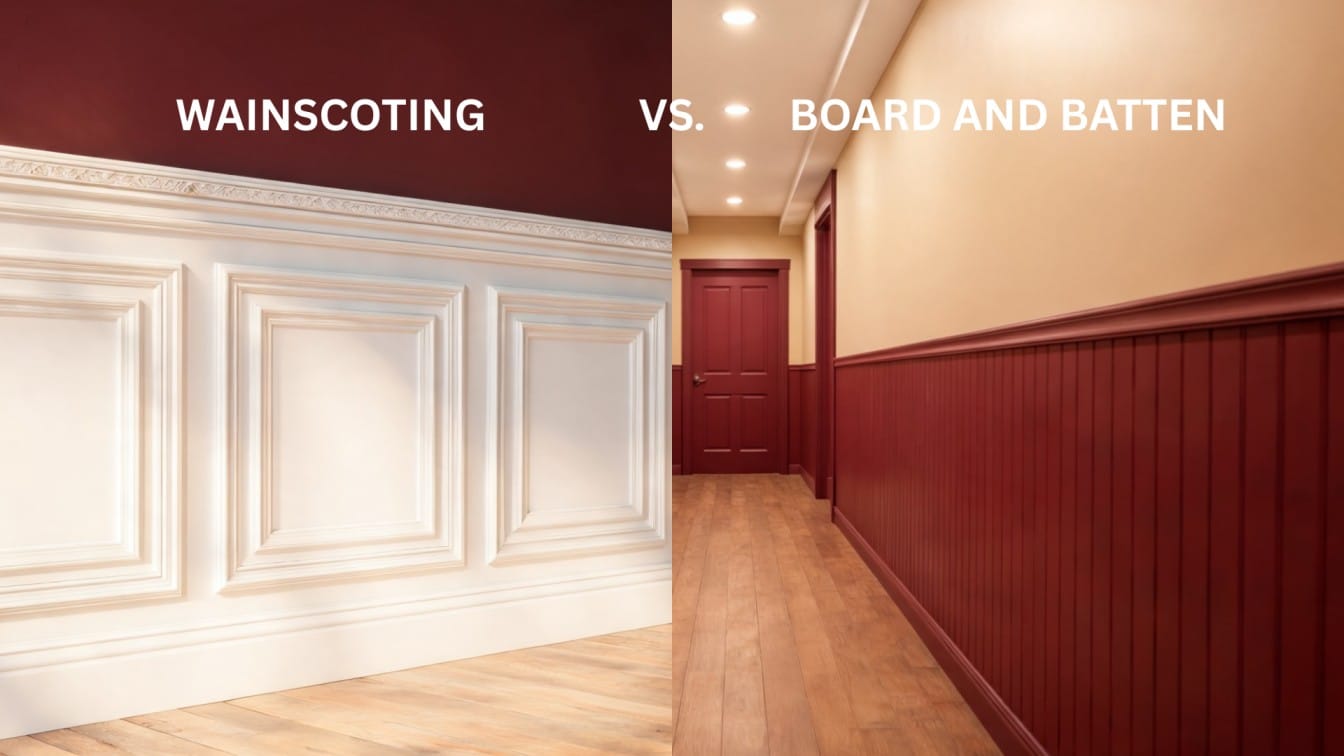
Wainscoting and board-and-batten are often confused because both add detail to the lower part of a wall. The main difference is that wainscoting is a broad term for decorative wall paneling, while board-and-batten is a specific style of wall treatment.
| Feature | Wainscoting (general) | Board and Batten |
| Look | Ranges from formal (raised panel) to simple (picture frame), depending on the style chosen | Clean vertical pattern; reads as farmhouse, transitional, or modern depending on paint color |
| Common Styles | Picture frame, beadboard, raised panel, board and batten | Flat boards with vertical battens spaced evenly; simple cap board on top |
| DIY Difficulty | Depends on style; picture frame and beadboard are beginner-friendly, but the raised panel is not | Beginner-friendly, all cuts are straight, and the layout is straightforward to plan |
| Best For | Dining rooms, hallways, bedrooms, bathrooms, and entryways | Bedrooms, mudrooms, hallways, bathrooms, and casual living spaces |
In simple terms, board-and-batten can be a type of wainscoting. So, when you add board-and-batten to the lower part of a wall, you are still doing a wainscoting-style project.
Common Wainscoting DIY Mistakes to Avoid
DIY wainscoting can look clean and polished, but small mistakes can make the final wall look uneven. A little planning before you start can save you time, money, and extra work later. Here are the most common mistakes to watch for.
- Not Planning the Layout First: Poor spacing can make the panels look uneven, so measure the wall and plan each section before cutting.
- Forgetting About Outlets: Outlets can interrupt your trim or panels, so mark them early and adjust your layout around them.
- Not Using a Level: Walls, floors, and ceilings are not always straight, so use a level often to keep boards lined up.
- Skipping Caulk: Caulk fills small gaps between the trim and the wall, giving your wainscoting a clean, finished look.
- Painting Too Soon: Let wood filler, caulk, and primer dry fully before painting so the finish stays smooth and neat.
Taking time with these details can make your wainscoting DIY project look much better. The goal is not to rush. Plan first, check your lines, and let each layer dry before moving to the next step.
Where to Add Wainscoting in Your Home
Wainscoting can work in many areas of the home. It adds style, protects walls, and helps plain spaces feel more finished. The best room depends on the look you want and how much wear the walls get.
| Room | Why It Works |
|---|---|
| Dining Room | Wainscoting gives a dining room a classic and more formal look, especially when paired with a chair rail or trim detail. |
| Hallway | It adds interest to long, plain walls and helps protect busy areas from marks, scuffs, and daily traffic. |
| Bathroom | Wainscoting can add charm and texture, but it works best when you use moisture-friendly materials like PVC or sealed wood. |
| Bedroom | It adds warmth and character behind a bed or around the room, making the space feel cozier and more finished. |
| Entryway or Mudroom | Wainscoting helps protect walls from bags, shoes, and coats, as well as everyday wear and tear, while adding a clean, organized look. |
If you’re doing this project for the first time, a single accent wall in a bedroom or a hallway run is the right place to start. You get the full experience of the process, planning, installation, and finishing, without committing the entire room before you’ve worked out your rhythm.
For bedroom placement specifically, wainscoting behind the bed works best when the rest of the room is kept intentional and uncluttered.
These cozy minimalist bedroom ideas show how that balance looks in practice. Staircases are a logical next step once you’re comfortable, though they introduce angled cuts and longer runs; the stair makeover covers those specifics in detail.
Tips for Making DIY Wainscoting Look Professional
Wainscoting can look high-end when the small details are done well. You do not need expert skills, but you do need careful measuring, clean lines, and a smooth finish. These simple tips can help your project look more polished.
- Keep Spacing Even: Measure each section before you install the boards so the panels look balanced across the wall.
- Use Quality Trim: Choose straight, smooth trim pieces, as bent or rough boards can make the finished wall look messy.
- Caulk Every Seam: Add caulk where the trim meets the wall so gaps disappear and the design looks clean.
- Sand Before Painting: Lightly sand over filled nail holes and rough spots to ensure the paint goes on smoothly.
- Use Paintable Caulk: Make sure your caulk can be painted, or the paint may not stick well over the seams.
- Choose a Durable Paint Finish: Use satin or semi-gloss paint, as it wipes clean more easily and works well on trim.
- Match the Style to the Room: Pick a wainscoting style that fits the space, whether it feels modern, classic, simple, or cozy.
- Take Your Time with Corners and Cuts: Careful cuts help the trim fit better and make the whole project look more professional.
The projects that look best are almost always the ones where the builder slowed down during filling, sanding, and caulking, not the installation itself. The boards going up are the fast part. The finishing is where the quality is made.
Once your wainscoting is painted, the color above the rail matters just as much. If you’re still deciding, these wall and trim color combinations are worth looking at before you commit.
Frequently Asked Questions
What is the golden rule for wainscoting height?
Aim for one-third of the wall height as your starting point. In a standard 8-foot room, that’s around 32 inches. Thirty-six inches is also common and works well for most rooms. Go higher only if you have tall ceilings to balance against.
Do you glue or nail wainscoting to the wall?
Both. Construction adhesive holds the boards flat while the glue cures; finish nails hold the boards in position while the glue sets. Using only nails risks board movement before adhesion; glue alone risks boards that aren’t flush. Use both for a solid result.
How much does DIY wainscoting cost?
A typical single-wall project using MDF costs $80–$150 in materials. A full room runs $200–$400, depending on wall length and the style chosen. Raised panel styles cost more because they require more material; picture frame and board-and-batten are the most budget-friendly.
Is wainscoting outdated in 2025?
No. Simple, clean styles, picture frame and board-and-batten in particular, are actively popular in modern and transitional interiors. The styles that look dated are overly ornate raised-panel versions in rooms that don’t call for a formal look. Keep it simple, and it reads current.
Does wainscoting make a room look bigger or smaller?
Lower wainscoting (under 36 inches) in a light paint color tends to make walls feel taller. Dark wainscoting installed high, above 42 inches, can make a small room feel compressed. When in doubt, go lighter and lower.
What is the best wainscoting style for beginners?
Board and batten or picture frame wainscoting. Both use straight cuts, require no special joinery, and produce clean results when the spacing is planned carefully. Avoid raised panel as a first project, the fitting complexity isn’t worth it at that stage.
Can you do wainscoting over existing painted walls?
Yes, with a caveat. The wall behind the boards needs to be clean and reasonably flat. Wipe it down thoroughly; grease, dust, and fingerprints all reduce adhesion, and fill any deep holes or texture peaks before you start.
If you’re unsure how to clean painted walls without lifting the existing paint, that’s worth reading before you prep. Heavily textured walls can cause board gaps; skim coating those areas first produces a better result.
Final Thoughts
Learning how to do wainscoting is easier when you take it one step at a time. Start by planning your layout so the spacing looks even. Then measure carefully before you cut any trim. Once your pieces are ready, install them slowly and check that everything stays level.
After the trim is in place, fill the nail holes, caulk the seams, and sand any rough spots. Then finish the project with primer and paint for a clean, smooth look.
A wainscoting DIY project does take patience, but the result is worth it. With careful work, you can turn a plain wall into a more finished space that feels custom and more expensive.





