


A porch looks simple until you start planning one. Then the questions show up fast, right? If you want to know how to build a porch without turning your entryway into a half-finished mess, you need a clear order before the first board is cut.
I’ve seen porch jobs go sideways because someone rushed the layout, guessed the beam size, or left temporary supports doing permanent work. That’s where a calm plan helps.
You’ll learn what a porch includes, which type fits your home, what tools and materials to gather, and how the main framing steps come together. By the end, you’ll know where DIY makes sense and where a pro should step in before you spend real money wisely.
Cost Note: Figures in this article are estimates based on national averages. Actual costs vary significantly by region, contractor, materials, and project scope. Always get at least three quotes before committing to any project above $1,000.
What Building a Porch Involves?
A porch that supports only foot traffic is a different structural problem than one that carries roof framing. That’s the first thing to understand before you price lumber.
The load path, where weight travels from the surface down to the ground, determines every beam size, post spacing, and footing depth in the design.
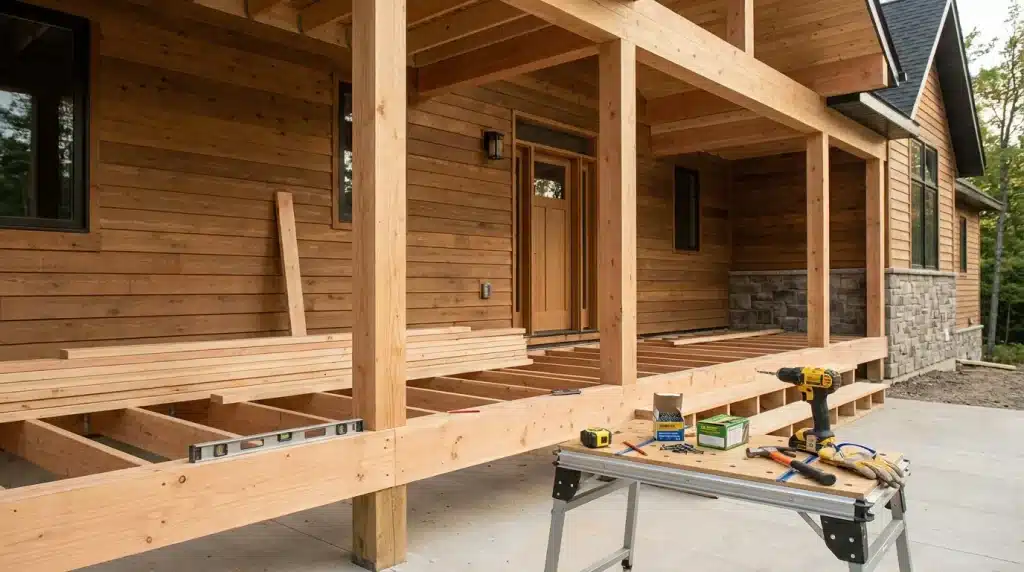
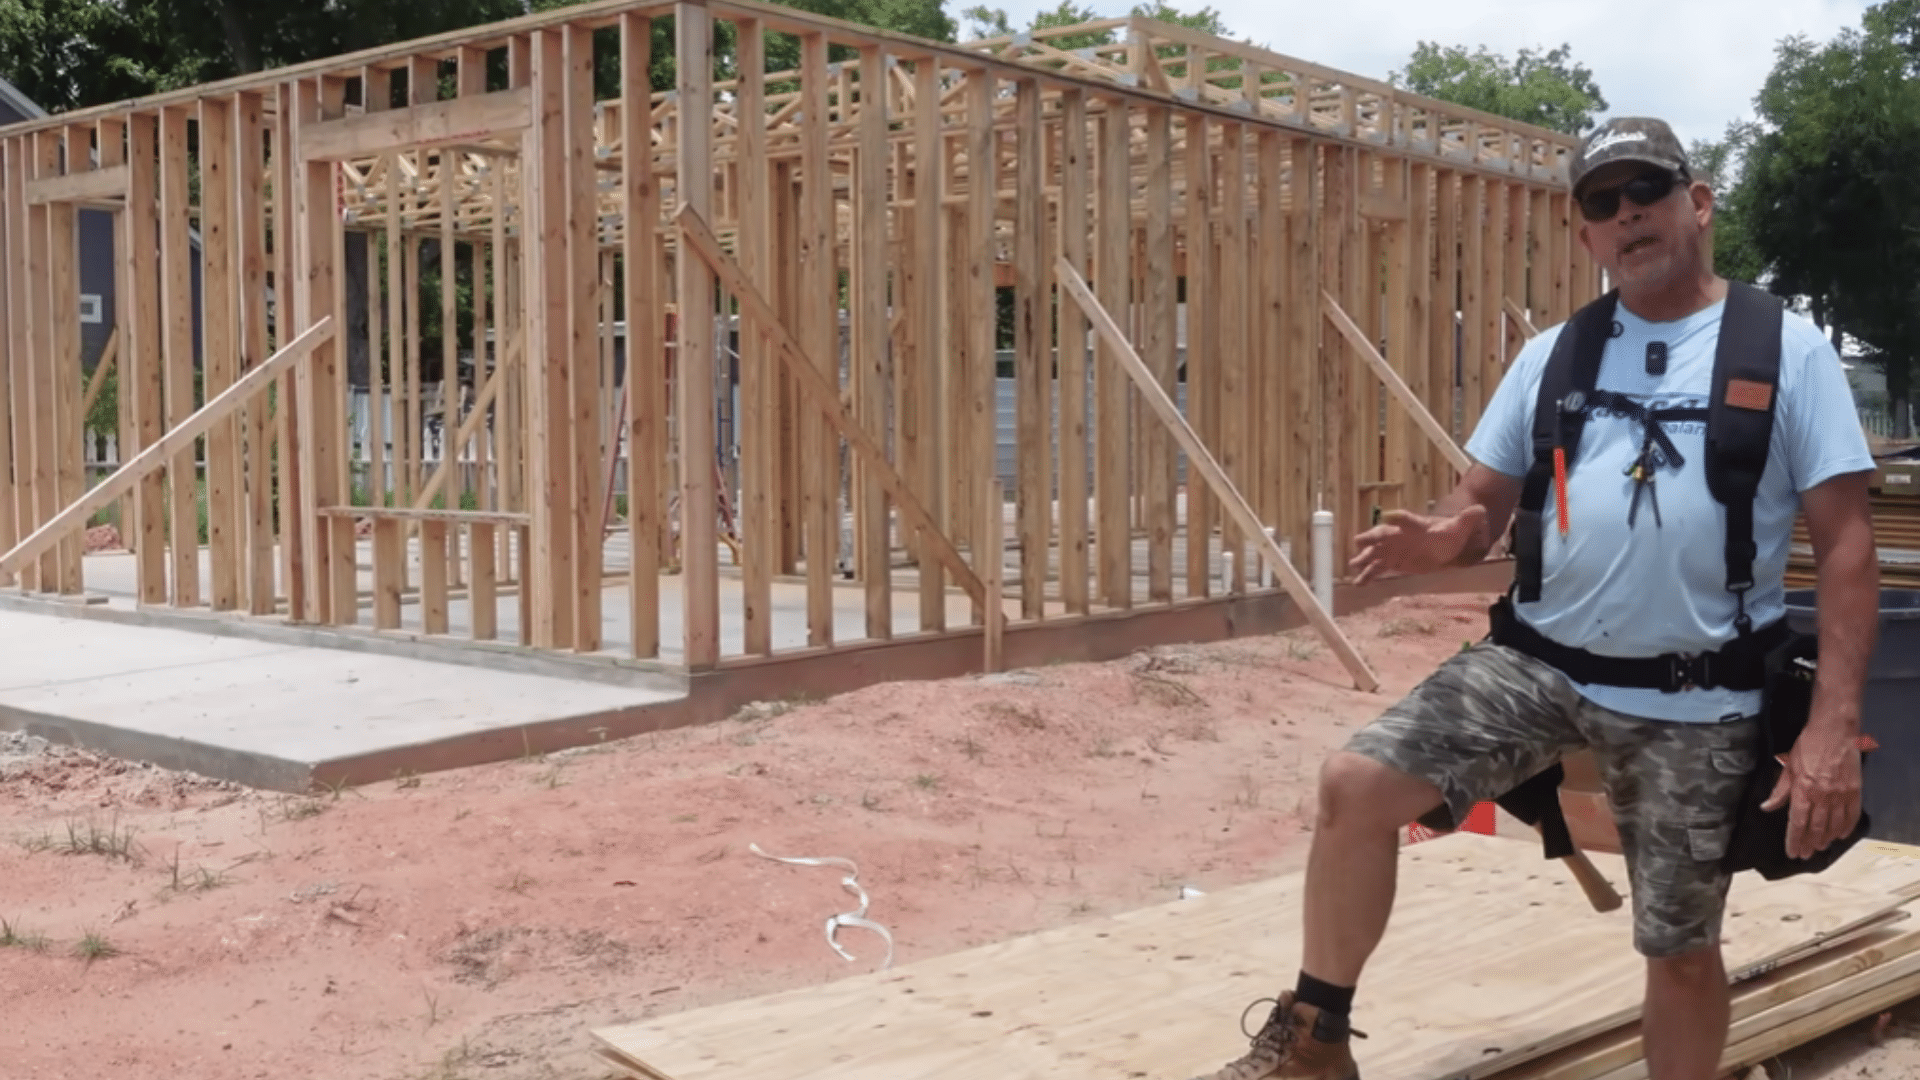
A basic porch frame includes footings or a slab, posts, beams, blocking, decking, stairs, and railings. A covered porch adds roof framing, flashing, and ceiling work. Each component has a job. Posts carry weight vertically.
Beams spread that weight horizontally across the opening. Fasteners hold the assembly together under wind, foot traffic, furniture, and weather cycles.
For a small open porch, a capable DIYer can handle most of the framing.
For anything with a roof, structural spans over eight feet, or attachment to the house’s main framing, get a builder or structural engineer involved before cutting a single board. The cost of that consultation is cheap compared to a failed inspection or a porch that racks in the first winter.
Types of Porches
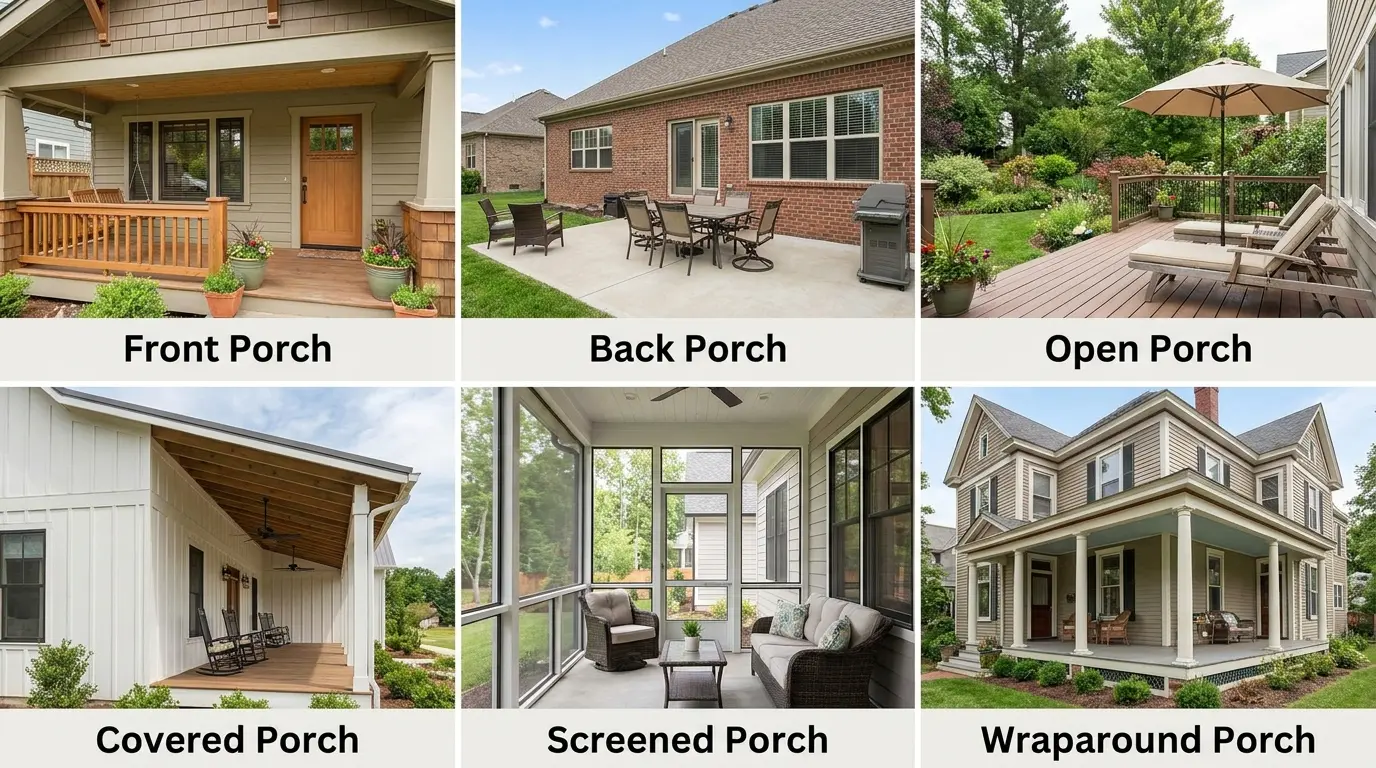
Before you pick up a saw, choose the porch style that fits your home and daily use. A front entry needs different choices than a backyard sitting space. This table provides a clear way to compare common porch types. Here’s how the main porch styles differ.
| Porch Type | Best For | What to Know Before Building |
|---|---|---|
| Front porch | Entry appeal, seating, and weather cover near the main door | It should match the home’s front layout and leave enough space for safe entry. |
| Back porch | Backyard access, outdoor meals, and quiet sitting | It often connects to patios, gardens, or yard paths, so traffic flow matters. |
| Open porch | A simple porch floor with no roof | It’s usually easier to build than a covered porch, but it still needs safe support. |
| Covered porch | Shade, rain cover, and a more finished entry | Roof weight changes the framing plan, so beam and post sizing matter more. |
| Screened porch | Sitting outside with fewer bugs | It needs extra framing for screens and may need planning for airflow and doors. |
| Wraparound porch | Larger homes and wide outdoor sitting areas | It uses more material, more support points, and more careful layout work. |
Your choice here affects everything that follows. An open porch keeps the build simpler, while a covered or wraparound porch requires more planning. Once the type is clear, you can move on to layout, framing, and safe support decisions.
Common Porch Materials: What Holds Up and What Doesn’t
The material choices you make for decking and framing will still be visible, or failing, ten years from now. Here’s how the main options compare on cost, durability, and maintenance load after two or three winters.
| Material | Cost per Sq Ft (Installed) | Lifespan | Maintenance | Climate Suitability |
| Pressure-treated pine | $8–$15 | 15–25 years | Seal every 2–3 years; watch for checking | All climates; standard choice for framing |
| Cedar | $14–$22 | 20–30 years | Oil or stain every 2–3 years to prevent grey weathering | Good in wet climates; naturally rot-resistant |
| Composite decking | $20–$38 | 25–30 years | Minimal; rinse annually, check for mold in shaded areas | All climates; watch for heat buildup in direct sun |
| Ipe (hardwood) | $30–$50 | 40–75 years | Oil annually if keeping color; greys naturally without it | Excellent in all climates; heavy and dense |
| Concrete/slab | $6–$18 | 30–50 years | Seal every 3–5 years; repair cracks before they spread | Good overall; avoid in areas with heavy freeze-thaw without proper drainage |
Pressure-treated pine is the right call for framing regardless of what decking goes on top, it’s what building codes expect, and it holds fasteners well.
For decking itself, composite costs more upfront but removes the annual sealing labor. Cedar is the middle option: real wood feel with better rot resistance than standard pine, but it still needs maintenance.
Ipe lasts a generation but requires pre-drilling every fastener and is harder to source than big-box options. If you’re building a deck alongside the porch, consistent decking material across both keeps the look cleaner and the maintenance schedule simpler.
What Fails After Two or Three Winters
Most porch problems don’t show up on day one. They show up after the first freeze-thaw cycle, the first heavy rain season, or the first summer of direct UV exposure on an unsealed surface. The failures are almost always in the same places.
- Ledger connection rot: If the ledger board that attaches the porch to the house isn’t properly flashed, water gets behind it. The house rim joist behind it rots quietly for two or three years before the porch starts to pull away. This is one of the most expensive repairs in porch construction and one of the most preventable.
- Post base failures: Posts set directly in concrete without post anchors hold moisture against the wood end grain. In climates with wet winters, the base of an embedded post can rot from the inside while looking fine from the outside. Use rated post anchors on top of footings, not posts buried in concrete.
- Undersized footings in freeze-thaw zones: A footing that doesn’t reach below the frost line will heave. One hard winter pushes a post up; the next one drops it. The deck boards crack, the railings go out of plumb, and the whole frame racks over time. Local code specifies frost depth for a reason — don’t shortcut it.
- Inferior fasteners: Standard zinc-plated screws corrode when used with pressure-treated lumber, which contains copper compounds that accelerate corrosion. Within a few years, fastener heads rust, the wood stains brown-red, and connections loosen. Use hot-dipped galvanized or stainless steel hardware rated for ACQ-treated lumber throughout.
How to Build a Porch Step by Step
To build a porch correctly, start with the plan on paper before touching lumber. Every step that follows depends on the load math and layout decisions made before the first cut. Here’s the full sequence for framing an open or covered porch.
| Difficulty | 3/5, Open porch; 4/5, Covered porch |
| Time | 2–3 days (open); 1–2 weeks (covered) |
| Cost | $4,000–$30,000+ depending on type and size |
| Tools Needed | Tape measure, chalk line, framing square, level, circular saw, drill, impact driver, post hole digger, ladders, safety gear |
| Skill Required | Intermediate, open porch; Experienced or professional, covered/wraparound |
Materials list:
- Pressure-treated lumber (posts, beams, joists, rim boards)
- Concrete mix and gravel for footings
- Post anchors (rated for ACQ lumber)
- Hot-dipped galvanized or stainless structural screws and joist hangers
- Decking boards (PT pine, cedar, or composite)
- Temporary bracing boards (2x4s)
- Railing posts, rails, and balusters
- Stair stringers and treads
- Flashing (for covered porches attaching to the house)
Step 1: Read the Porch Plan and Understand the Load
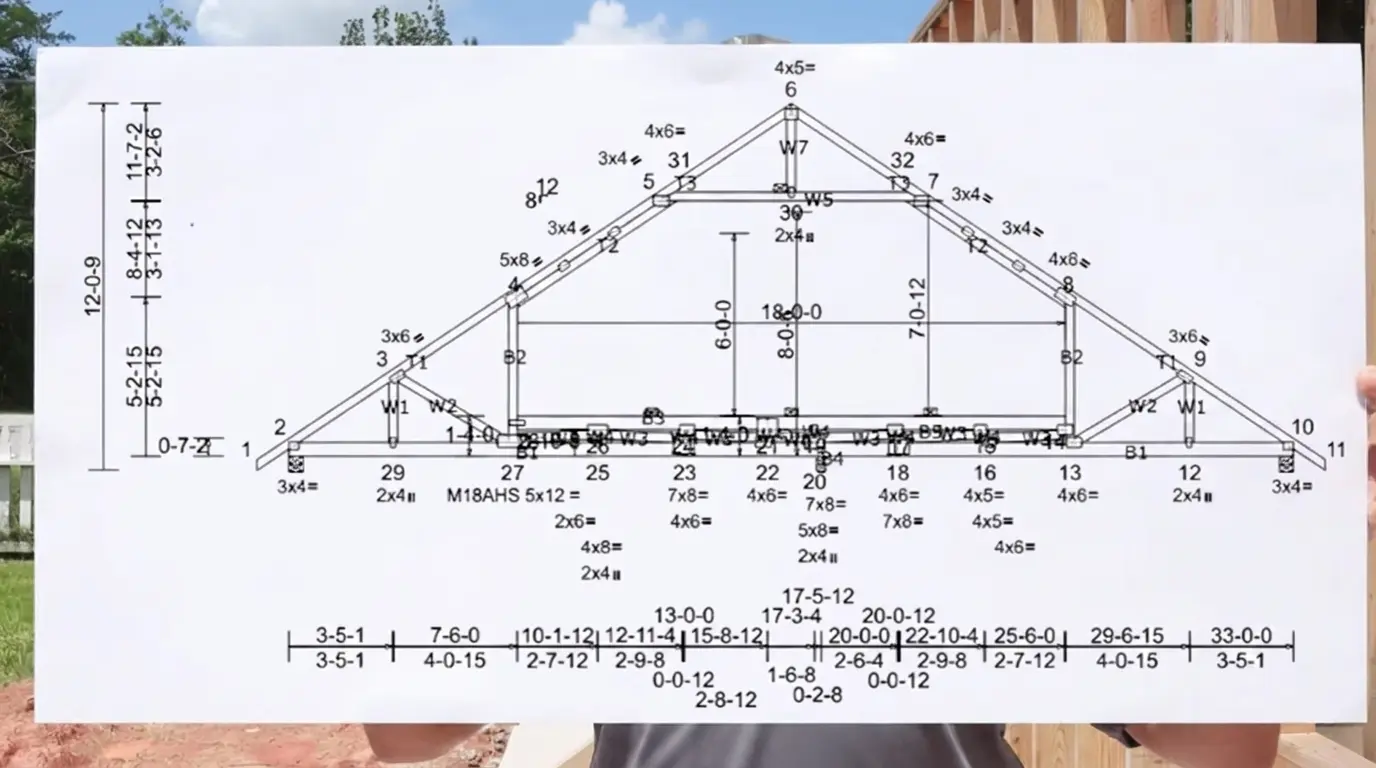
Before you touch the lumber, look at the porch plan and figure out what the frame has to carry. A porch that supports only foot traffic is different from one that also carries roof framing.
Check where the posts land, where each beam runs, and how the load is transferred to the slab or footings. This is also the time to spot special details, such as built-up beams, notches, or a roofline that must stay level with the house framing.
Caution: Don’t guess structural sizes. If the porch carries roof weight, use approved plans or ask a qualified builder or engineer before cutting anything.
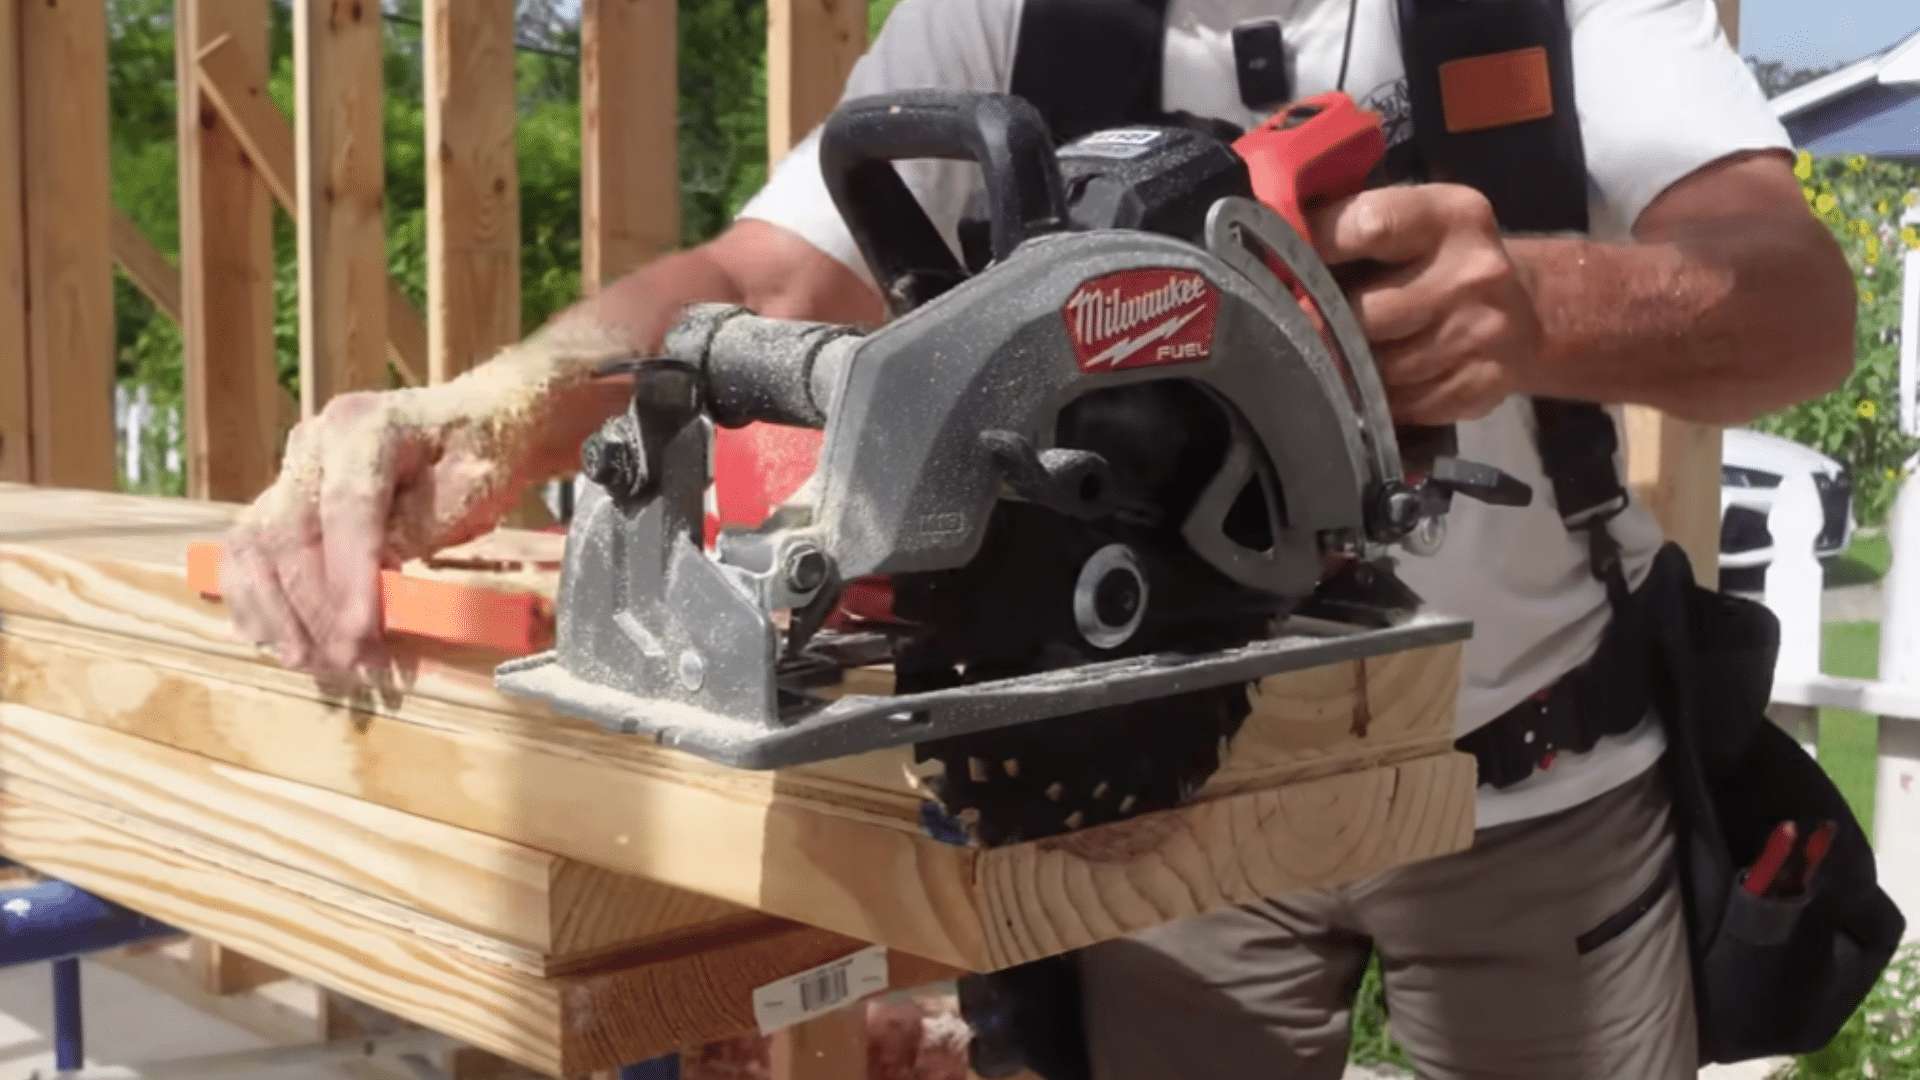
Step 2: Gather Your Tools and Materials First
Get everything on-site before you start building. You’ll need measuring tools, a chalk line, a level, a framing square, saws, a drill, an impact driver, ladders, screws, glue (if specified), plywood spacers, 2x lumber, posts, and temporary bracing boards.
This may feel like basic prep, but it saves a lot of wasted time. When the beams are half-built, you don’t want to stop because one fastener, board, or support post is missing from the pile.
Advice: Group materials by use before work starts. Keep beam lumber, post material, screws, and bracing boards separate so you can move faster.
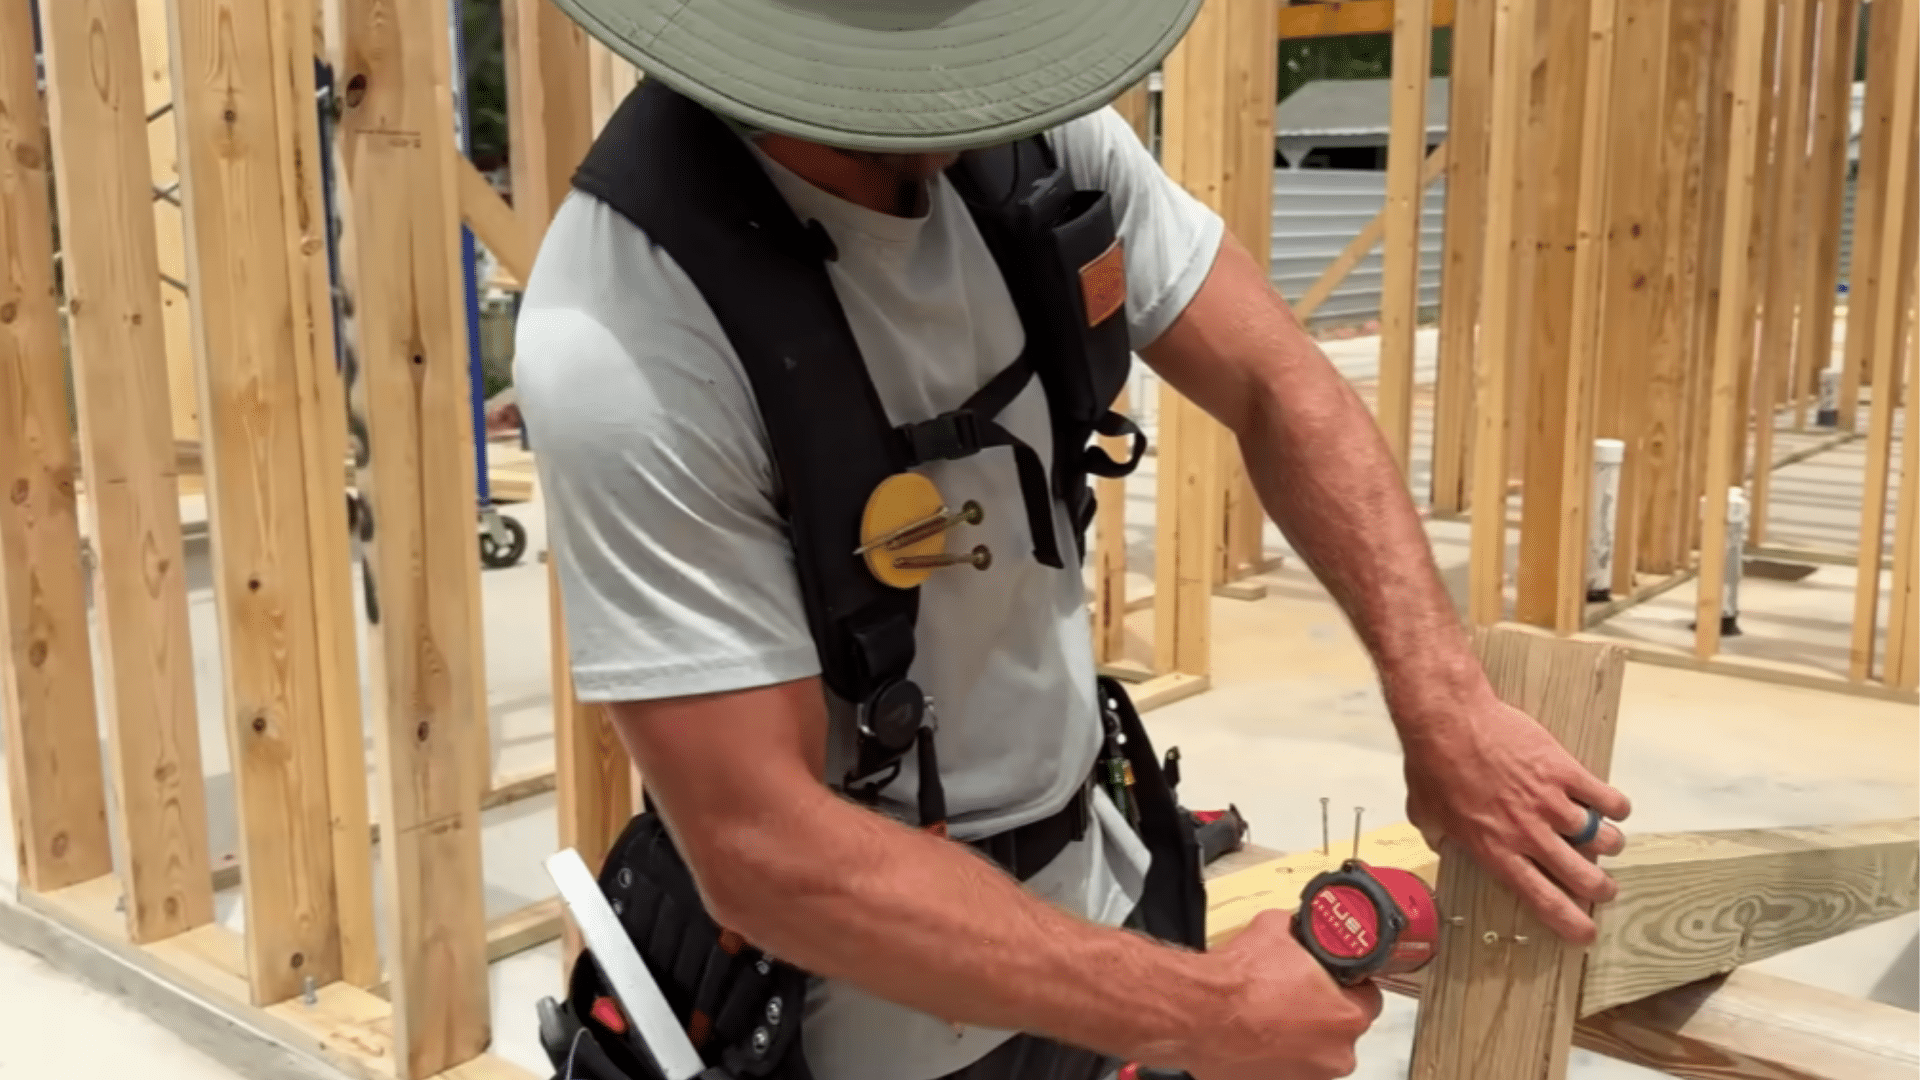
Step 3: Build the Main Porch Beams
Build the beams before you try to install them. For a built-up beam, lay one board down, add the spacer material, then place the second board on top. Keep the edges flush and fasten the layers with the correct structural screws.
If glue is called for, apply it evenly before screwing the beam together. Let the beam run a little long during assembly. Once the beam is solid, you can cut it to the final length with better control.
Note: Built-up beams should match your own plan. The board size, spacer, glue, and screws all depend on the porch span and load.
Step 4: Cut and Fit the Short Side Beams
Start with the shorter side beams because they help set the porch frame’s first fixed points. Mark where each beam sits against the house framing or beam pocket.
If a notch is needed, make it clean and only as deep as required. The top of the beam should line up with the framing height it supports. Take your time here. A short beam that sits too high, too low, or twisted can affect the front beam later.
Caution: Check every notch before cutting. Removing too much wood weakens the beam and can make the fit loose or uneven.
Step 5: Brace the Frame and Square the First Beams
Once a beam is lifted into place, don’t trust it to stay still on its own. Use temporary posts and diagonal bracing to hold it. To square the porch frame, use the 3-4-5 method.
Measure three feet along one side, four feet along the other, and five feet across the diagonal. When those marks line up, the corner is square. Fasten the brace so the beam cannot drift while you work on the other side.
Advice: Bracing may look temporary, but it protects the whole setup. A few minutes of bracing can prevent a long reset later.
Step 6: Install the Support Posts
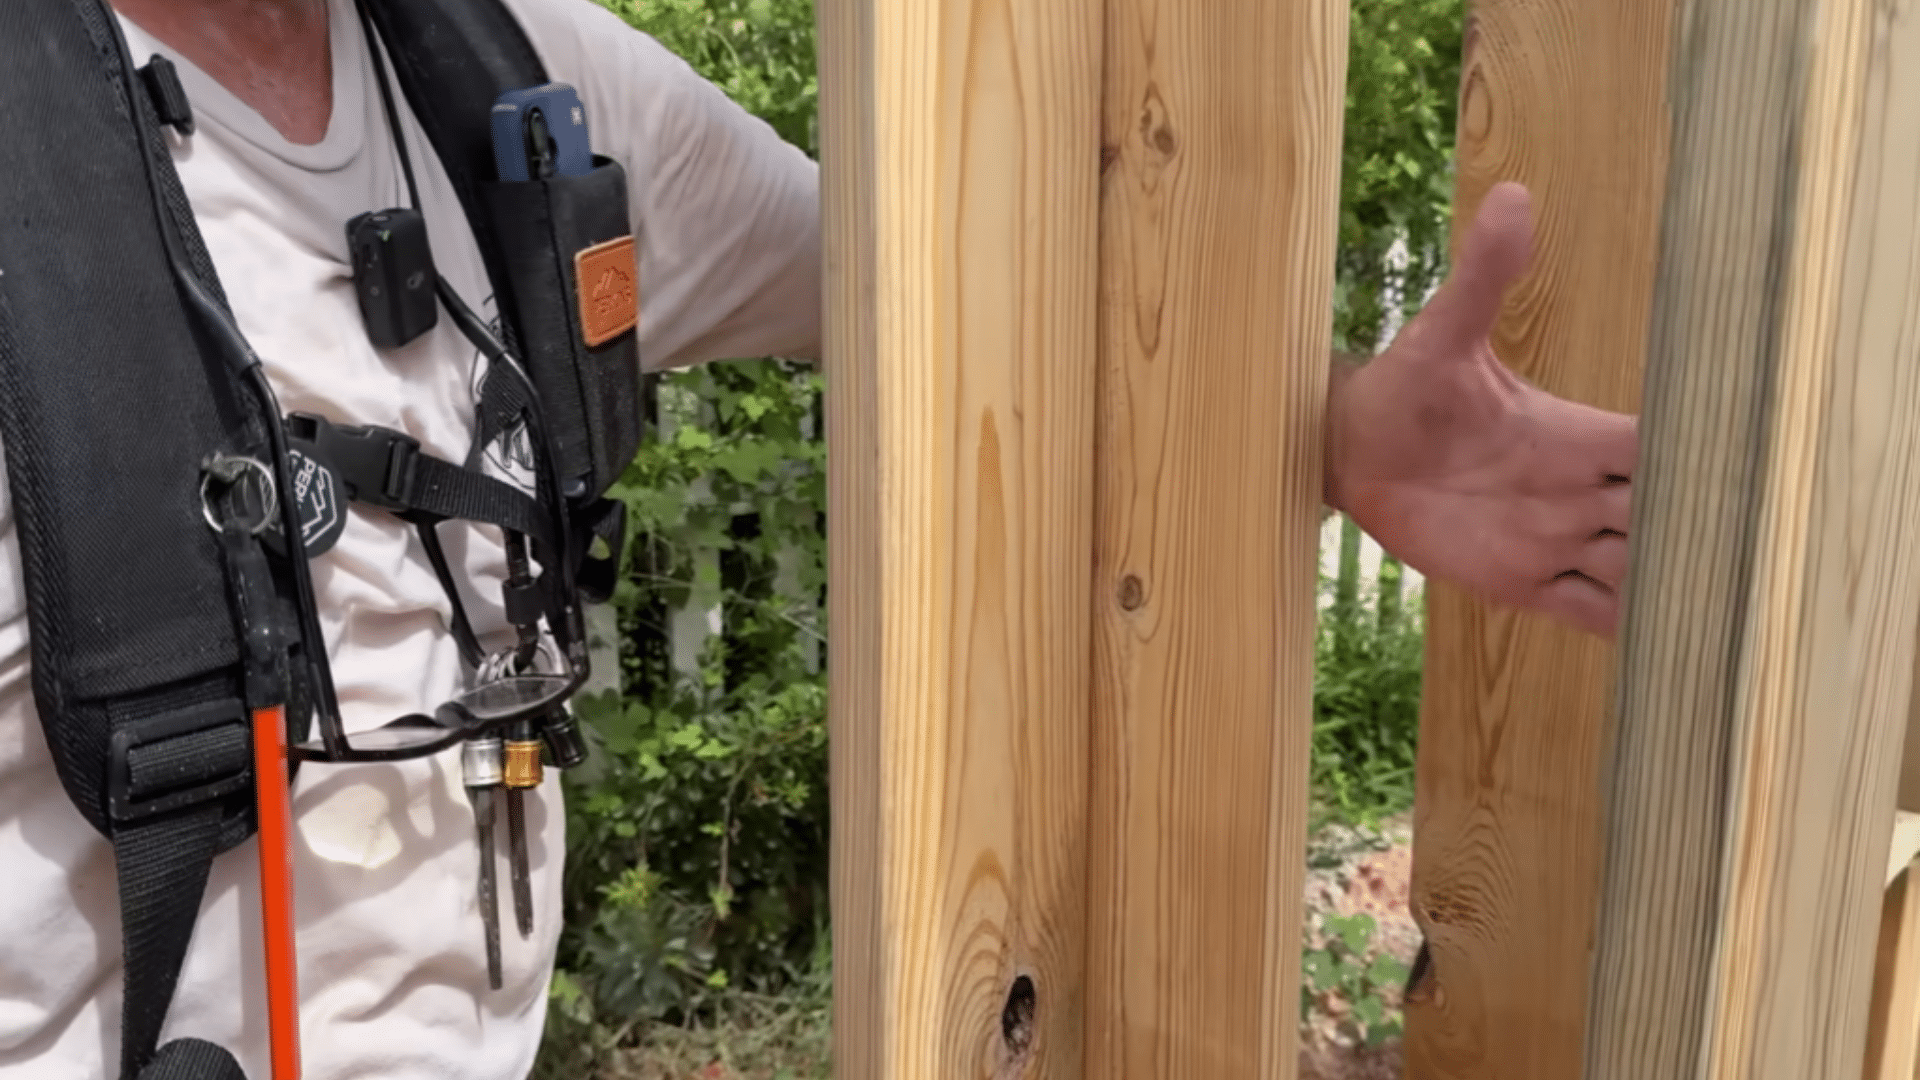
After the side beams are held in the right position, install the support posts that will actually carry the load. Set each post on its proper base or bearing point, then check it with a level.
The post should be plumb before it is fastened. If temporary 2x4s helped during layout, replace them with the correct permanent posts now. This step turns the beam from “held in place” into “properly supported.”
Caution: Never leave temporary boards as final supports. They are useful for setup, but they are not meant to carry porch loads long-term.
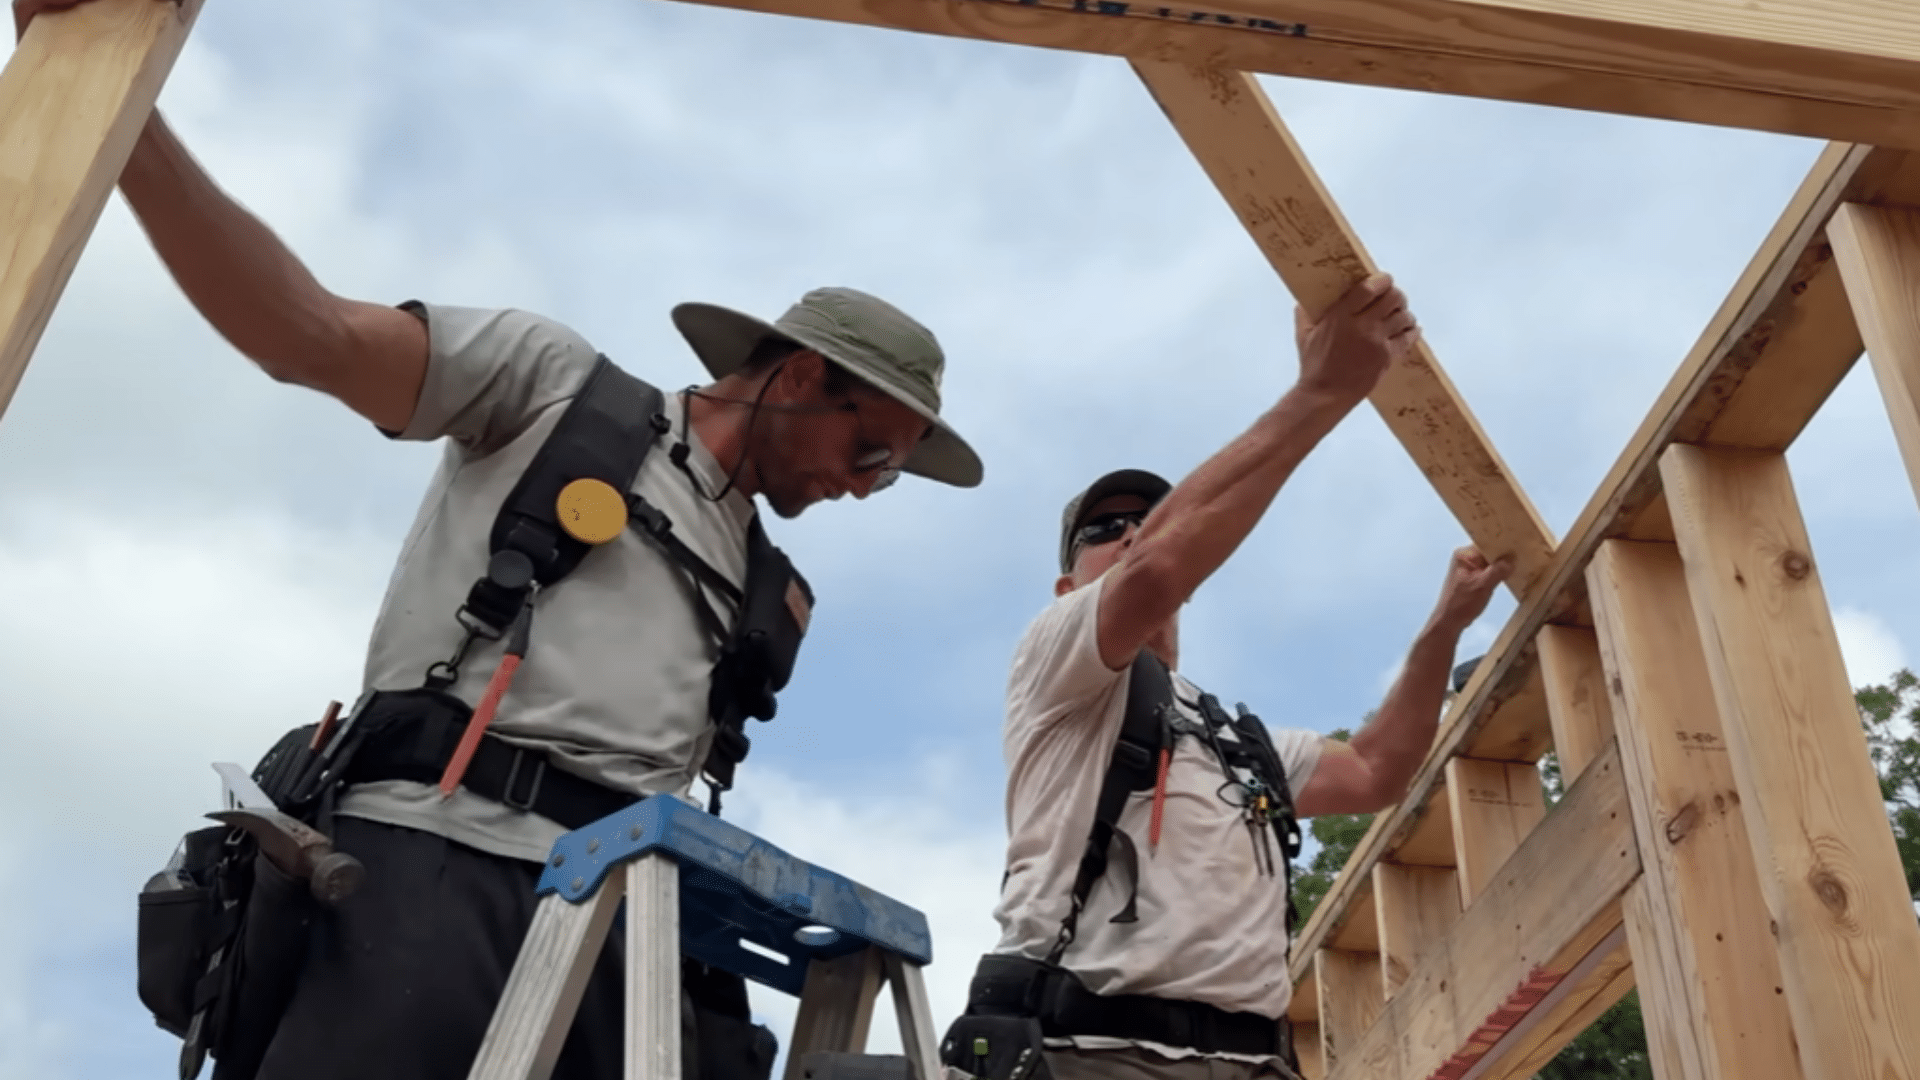
Step 7: Lift and Set the Front Beams
The front beams are often the heaviest and most awkward pieces in the porch frame. Before lifting, cut them to fit and plan how to hold each end. Temporary T-supports or blocks can make the lift safer and easier. Start screws before climbing if that helps.
Once the beam is up, align it with the side beams and house reference points. Fasten it only after you know the height and bearing points are right.
Advice: Don’t rush a heavy lift. Have enough help, clear the work area, and decide each person’s job before anyone climbs a ladder.
Step 8: Confirm the Frame Is Aligned
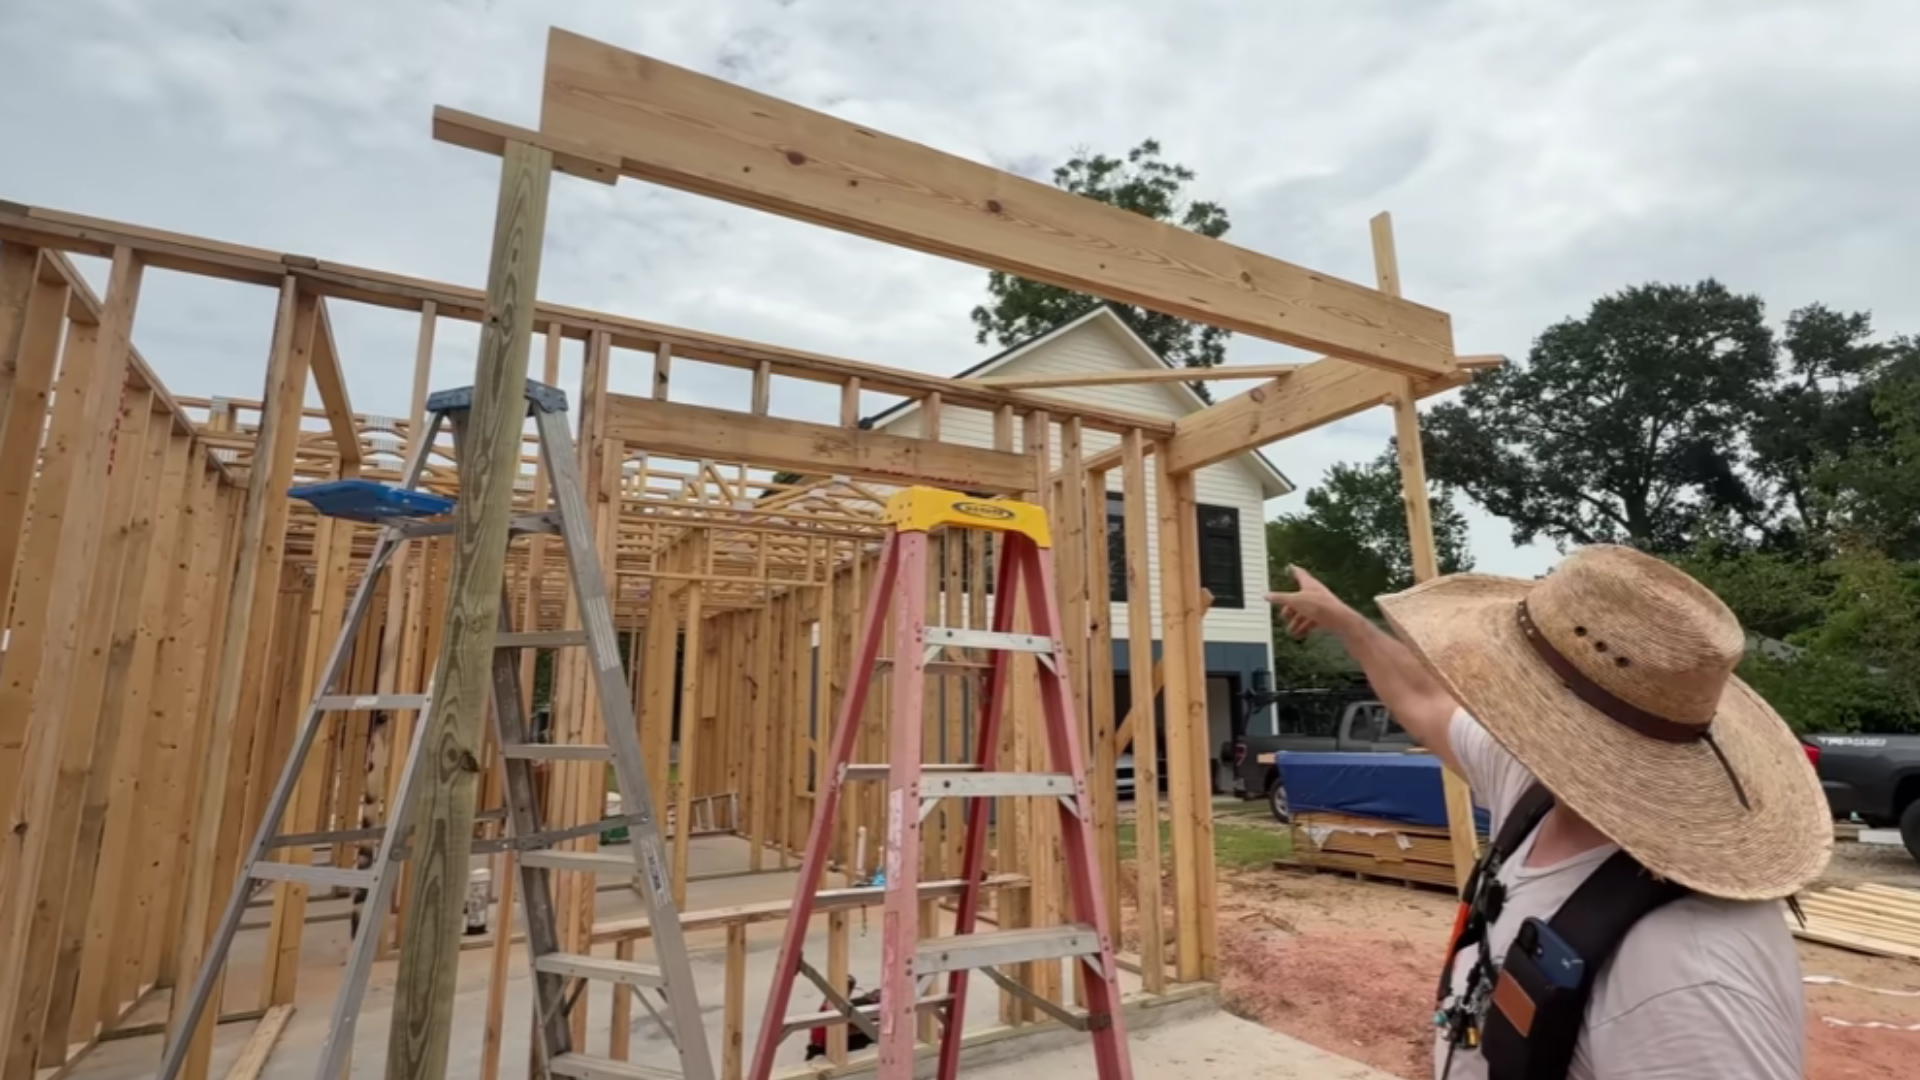
With the beams and posts in place, pause and measure the frame carefully. Check that the front beam is parallel to the house. Measure both ends from the same reference points and compare the numbers. Sight across the beam tops to see whether they line up.
Also check for side movement, loose points, or spots that still depend on temporary blocks. This is the best time to correct small errors before more framing covers them.
Note: A frame can look straight and still be off. Use measurements, not just your eye, before moving to the next stage.
Step 9: Add Ceiling Nailers or Framing Support
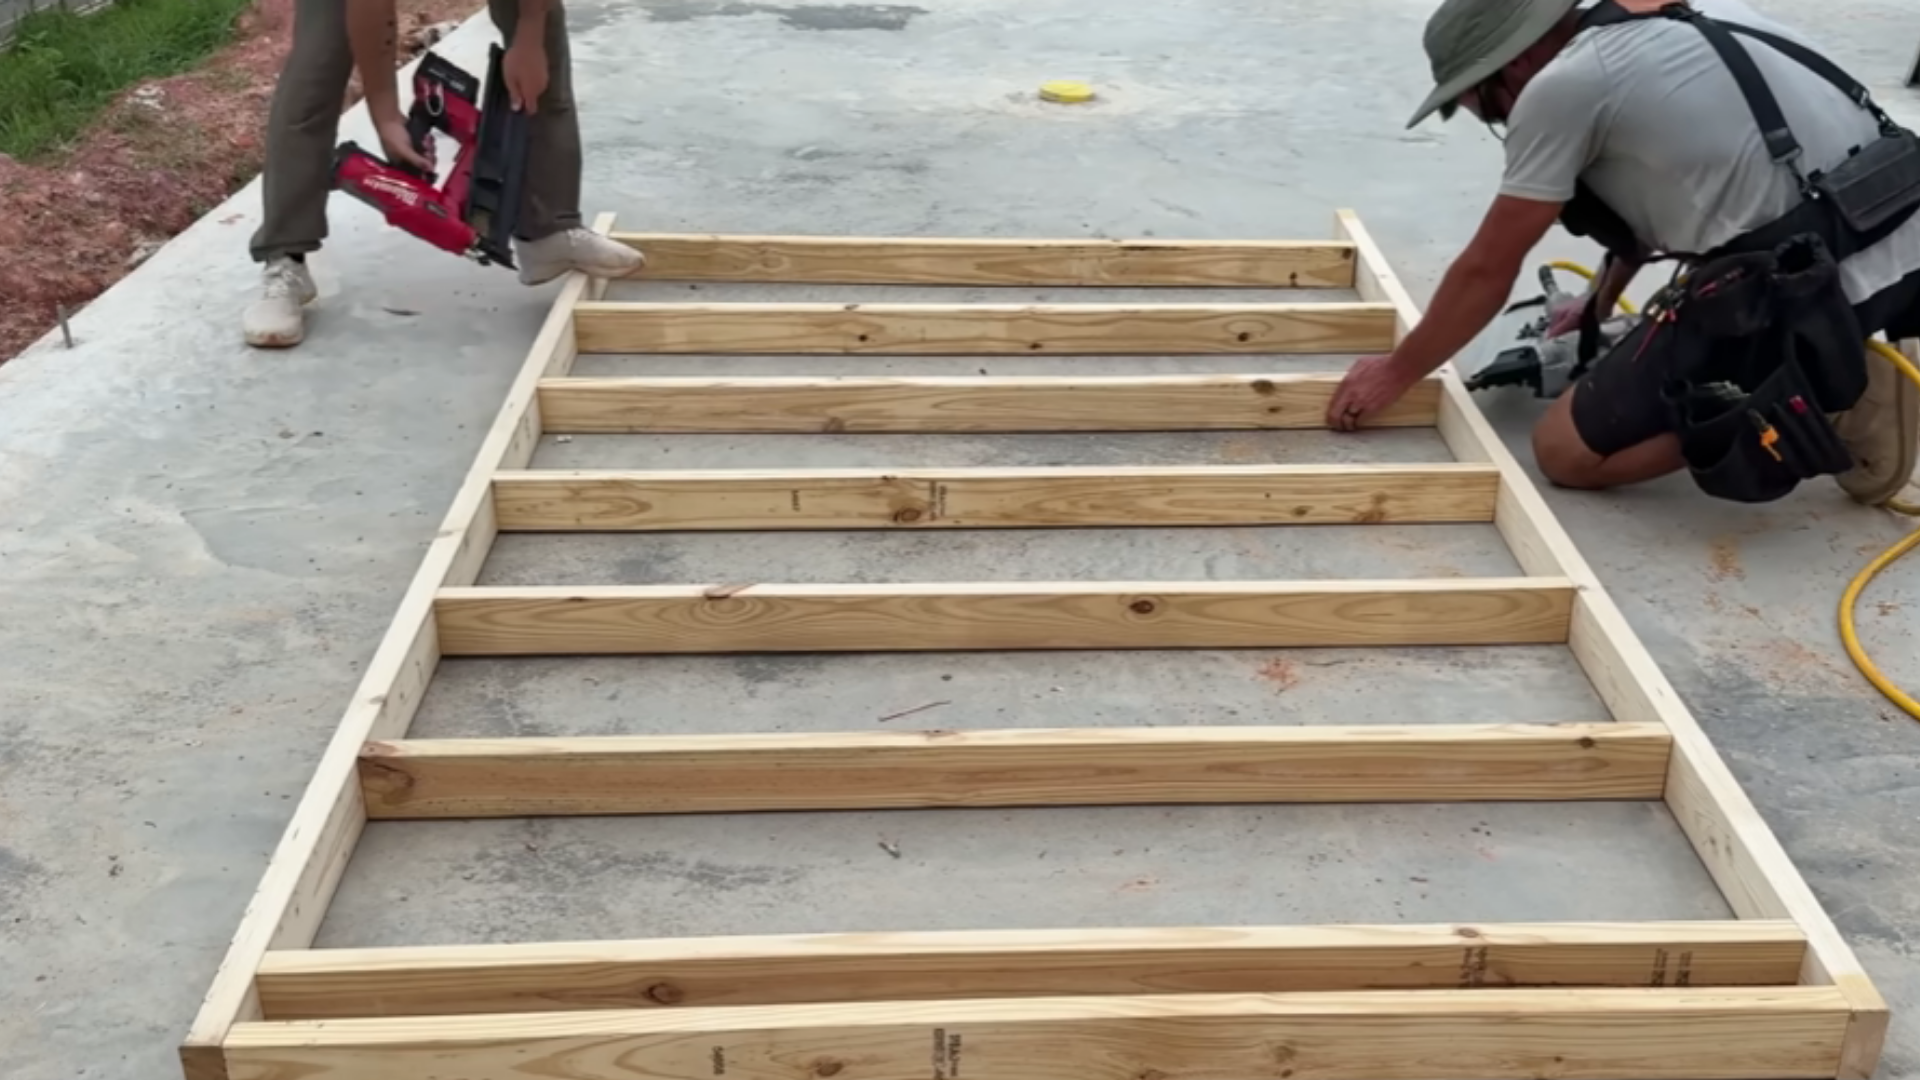
If the porch will have a finished ceiling, install nailers before closing the area. Mark the height with a laser or chalk line, then add temporary cleats to support the nailer frame while you lift it.
You can build sections on the ground first, then raise them into position. Fasten the frame to the house side and the beam side so the ceiling material has a flat, steady surface to attach to later.
Advice: Think about lights before fastening every nailer. Leave open space where a fixture box, wiring, or extra blocking may be needed.
Step 10: Fasten Everything and Remove Temporary Pieces
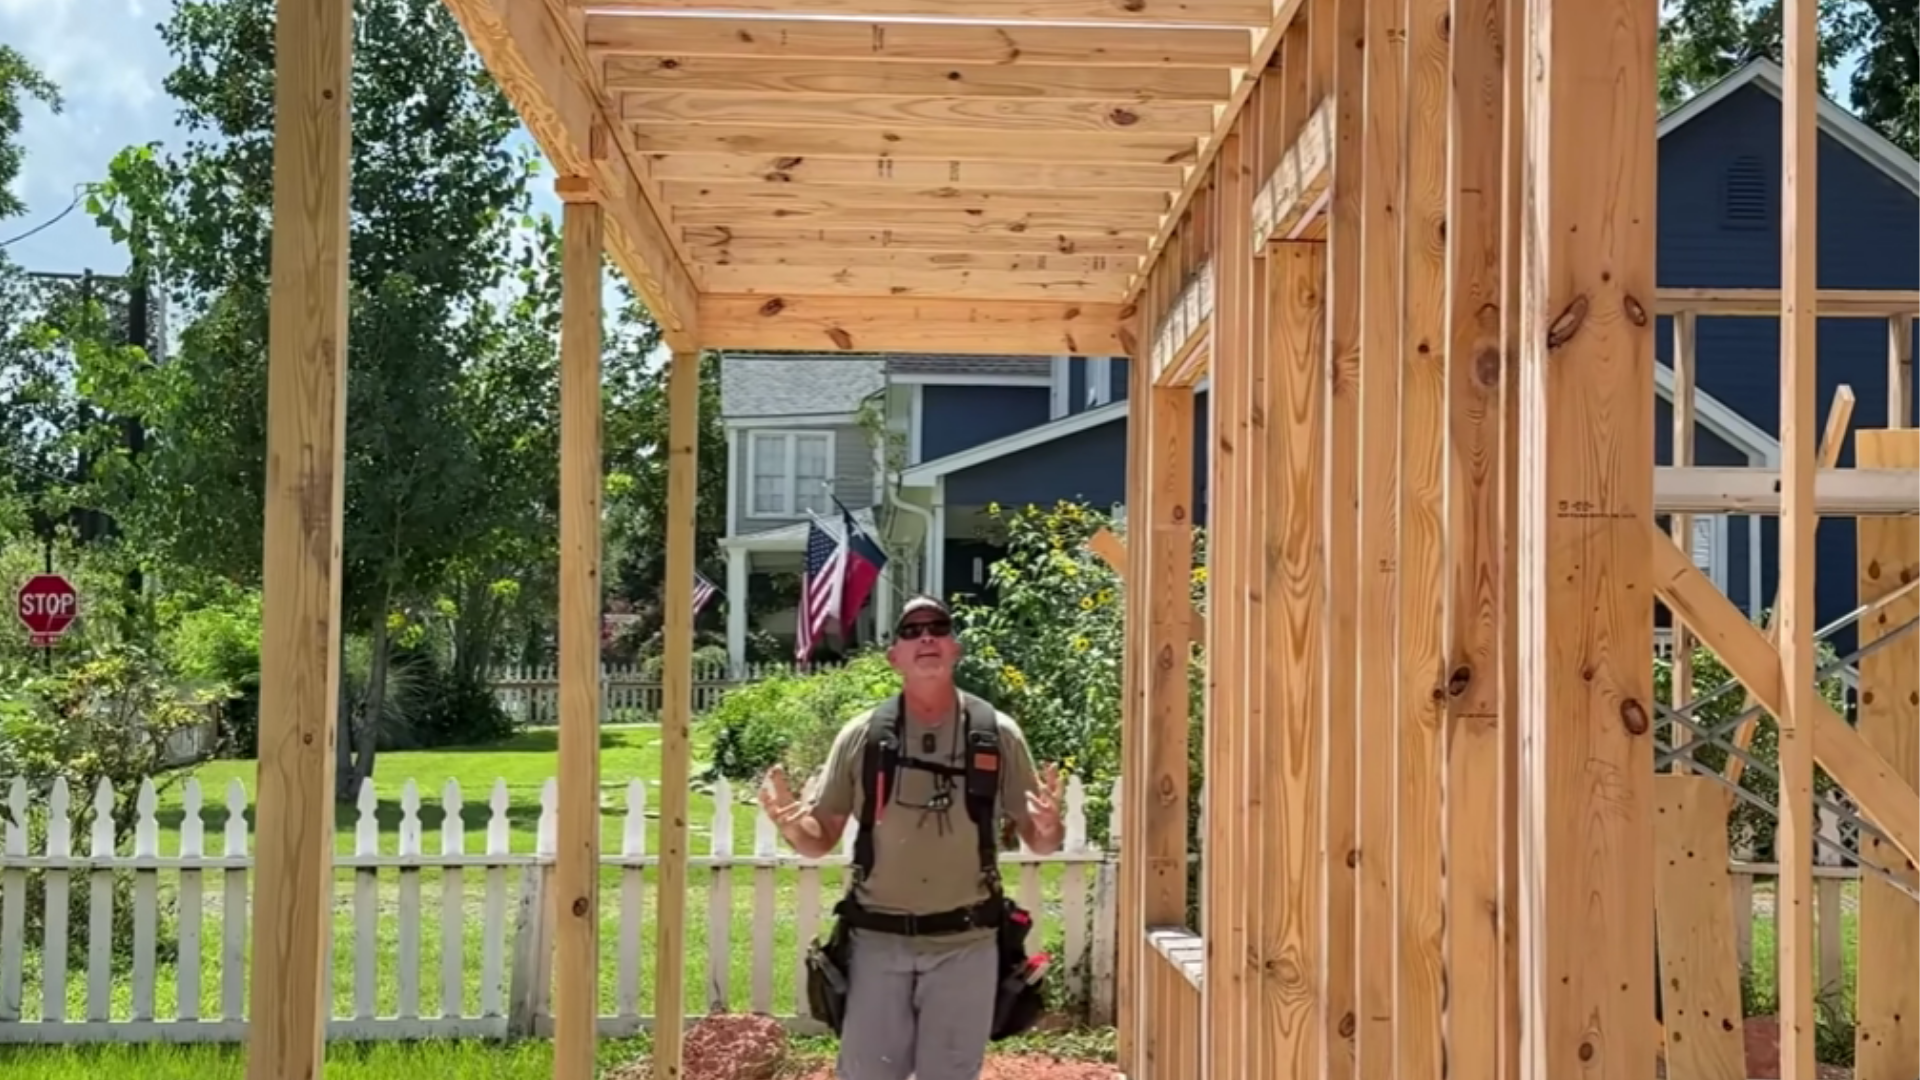
Finish the porch frame by securing every connection that the plan calls for. Drive the remaining screws or nails, then remove cleats, blocks, and temporary braces only after the permanent frame is solid. Recheck posts, beams, and nailers one last time.
Look for gaps, loose fasteners, uneven bearing, or parts that moved during lifting. When everything is tight, square, and supported, the porch frame is ready for the next phase.
Caution: Don’t hide framing mistakes under finish materials. Fix loose, crooked, or unsupported parts now while everything is still easy to reach
Watch this video for a step-by-step process:
How Much Does It Cost to Build a Porch?
Porch costs change quickly because size, material, height, and roof support all affect the bill. A simple open porch may stay fairly modest, while a covered porch needs more framing, stronger support, and often skilled labor. Use this breakdown to see where most of the budget goes.
| Cost Area | What It Includes | Estimated Cost Range |
|---|---|---|
| Permits and planning | Local permits, inspections, drawings, or basic design help | $100 to $2,000 |
| Foundation and support | Footings, concrete, gravel, post anchors, posts, and beams | $1,800 to $12,500 |
| Framing and porch floor | Joists, rim boards, blocking, hangers, screws, and porch boards | $2,500 to $14,000 |
| Stairs and railings | Stringers, treads, railing posts, rails, balusters, and handrails | $1,000 to $6,500 |
| Roof and finishing | Roof framing, roofing, flashing, gutters, paint, stain, sealer, and trim | $3,300 to $18,000+ |
| Labor | Builder, carpenter, concrete crew, electrician, or engineer | $3,000 to $20,000+ |
Note: These costs can vary by location, porch size, labor rates, material prices, permit rules, soil condition, roof design, railing style, and how much of the work you do yourself.
The foundation and framing lines are where you should spend without cutting corners. Footings that fail and beams that sag are the two most expensive repairs a porch owner faces. Spend what the structure requires, then choose finish materials at whatever price point fits the remaining budget.
The balcony vs deck cost comparison covers how these structural costs stack up across similar outdoor builds if you’re weighing your options before committing.
How Long Does It Take to Build a Porch?
A porch timeline gets easier to judge when you separate framing work from waiting time. You may build quickly on a clear day, only to lose hours to drying concrete, inspections, or weather. Plan the calendar, not just the labor involved. Here’s what usually affects the schedule.
- Small open porch: A skilled DIYer may frame and finish a basic open porch in a few days, especially when materials are ready and the ground requires little prep.
- Larger porch: A wider or deeper porch can stretch into one or more weeks because every extra span adds cutting, fastening, checking, and finish work.
- Covered porch: A roofed build takes longer because posts, beams, roof framing, flashing, and ceiling work need careful setup.
- Concrete timing: Footings or slab work can slow the project because concrete needs time to reach full working strength.
- Permit and inspection windows: Local approval can add waiting days, even when the actual work is moving well.
- Weather delays: Rain, high heat, wind, and muddy soil can slow framing and make lifting beams less safe.
- Material delivery: Having lumber and hardware on-site before the build starts can save a full day or more.
Common Porch Building Mistakes to Avoid
A lot of porch problems start before the first board is fastened. Most issues come from small shortcuts, like skipping layout checks, using the wrong hardware, or guessing structural details. Catch these early, and the whole build becomes safer and cleaner.
| Mistake | Why It Causes Problems | Better Move |
|---|---|---|
| Starting without a permit | It can lead to fines, failed inspections, or resale issues. | Check local rules before work begins. |
| Guessing beam sizes | The porch may not carry the load safely. | Follow approved plans or ask an engineer. |
| Using indoor fasteners | They can rust or fail outdoors. | Use exterior-rated structural hardware. |
| Leaving temporary posts in place | Temporary supports are not made for long-term loads. | Replace them with proper permanent posts. |
| Cutting oversized notches | Removing too much wood can weaken the beam. | Mark carefully and cut only what the plan allows. |
| Skipping bracing and alignment checks | Beams can shift, and finishes may not fit cleanly. | Brace the frame and check for square before fastening. |
| Poor flashing at the house | Water can enter the wall and cause rot. | Install flashing before closing the area. |
| Weak railings or uneven stairs | These can create fall or trip hazards. | Build stairs and rails to local code. |
Mistakes are easier to avoid when each step has a stopping point. Set the beam, then check it. Set the post, then check it. That rhythm may feel slow, but it saves time near the finish
When to Hire a Professional
An open ground-level porch with basic framing is a realistic DIY project for someone with structural framing experience. Once the project moves beyond that, a professional isn’t optional, it’s what keeps the structure sound and the permit process clean.
Hire a licensed carpenter or builder for any covered porch, any porch that attaches to the house’s main structural framing, any porch that needs deep footings, or any build on uneven or unstable soil.
The roof framing, ledger attachment, and flashing are the three areas where amateur work most often creates expensive problems later.
Hire a structural engineer when spans, roof loads, or support points aren’t clearly specified in the plan, and any time the porch ties into a load-bearing wall. Use a licensed electrician for any wiring, whether it’s a single outlet, ceiling fan, or exterior lighting circuit.
Attempting unlicensed electrical work on an outdoor structure is both a code violation and a fire risk.
Hiring a professional for a portion of the work doesn’t mean handing over the whole project. You can frame and finish independently while a pro handles the roof, flashing, and inspection sign-off.
If you’re planning adding a pergola overhead instead of a full roof, that’s a simpler structural problem that many experienced DIYers can take on without an engineer.
How to Maintain a Porch After Building It
Good porch maintenance is plain, small work done before damage spreads. You’re watching for movement, moisture, wear, and weak spots. A porch that gets checked twice a year is much easier to protect than one ignored for several full seasons. Here’s a simple care routine to follow.
- Clean the surface: Sweep off leaves, dirt, and grit so moisture does not sit against the porch boards.
- Check fasteners: Look for raised screws, rusted hardware, or loose connectors around posts, beams, stairs, and railings.
- Watch for movement: Step on different areas and feel for any bounce, wobble, or shifting that wasn’t there before.
- Look for wood damage: Soft spots, dark stains, cracks, and a peeling finish can indicate trapped water.
- Protect exposed wood: Repaint, restain, or reseal when the surface starts looking dry, faded, or worn.
- Keep water moving away: Clear gutters on covered porches and make sure water does not collect near the house.
- Trim nearby plants: Keep shrubs and vines from trapping moisture against posts, railings, or siding.
- Inspect stairs and rails: These take the most daily wear. Fix loose balusters and wobbly newel posts before they become a fall hazard. Pair the porch space with durable outdoor furniture built to last and you’ll spend less time on overall upkeep.
Frequently Asked Questions
How do I know what size beams my porch needs?
Beam sizing is determined by the span (distance between supports) and the load the beam carries. For an open porch, use a residential span table, the IRC (International Residential Code) publishes these and most local building departments have them. For a covered porch carrying roof weight, have a structural engineer or licensed builder specify the beam before you buy lumber.
Can I add a roof to an existing open porch?
Yes, but only if the existing frame can carry the added load. The posts, footings, beams, and house connection all need to be evaluated before any roof framing goes up. A roof adds dead load plus wind and snow load depending on your region. Get a builder or structural engineer to assess the existing frame first.
Should a porch floor slope away from the house?
Yes. A slope of about 1/8 inch per foot away from the house is standard for solid porch floors and slabs. Open-gap decking drains naturally, but solid surfaces need that pitch to move water away from the ledger and foundation.
What is the minimum roof pitch for a covered porch?
It depends on the roofing material. Asphalt shingles typically require a 2:12 pitch minimum; metal panels can work at 1:12 or lower with correct detailing; membrane roofing can handle near-flat. Check the roofing manufacturer’s spec sheet and local code before framing the roof.
Can I attach a porch roof to the fascia board?
No. Fascia is finish trim, it’s not rated to carry roof loads. A porch roof must connect to structural framing: either a properly installed ledger board bolted to the house rim joist, or a freestanding beam structure. Attaching to fascia is a structural defect that will eventually pull the connection apart.
Do I need a permit to build a porch?
Almost always, yes. Most US jurisdictions require a permit for any attached structure with a roof, any structure over 200 square feet, or any build that involves structural connection to the house. Check with your local building department before starting. An unpermitted porch can create problems at resale and may need to be removed or rebuilt to pass inspection.
What type of wood is best for porch framing?
Pressure-treated pine is the standard for all structural framing, posts, beams, joists, and rim boards. It’s what building codes expect, widely available, and holds structural fasteners well. For decking surfaces, cedar or composite adds rot resistance and visual appeal. Never use untreated dimensional lumber for any part of the frame in contact with the ground or exposed to weather.
Final Thoughts
Learning how to build a porch is really about slowing down before the heavy work starts. You’re not just adding boards near a door. You’re creating a place that has to stand straight, carry weight, shed water, and feel safe every time someone steps on it.
I’d treat the plan, beams, posts, and final checks with the same respect as the visible finish, because that hidden structure does the real work.
If your porch is simple, you can take this one stage at a time and build with care. If it carries a roof or ties into the house, bring in help. Ready to start? Measure your space, check your code, and plan your build today with confidence and patience.


