

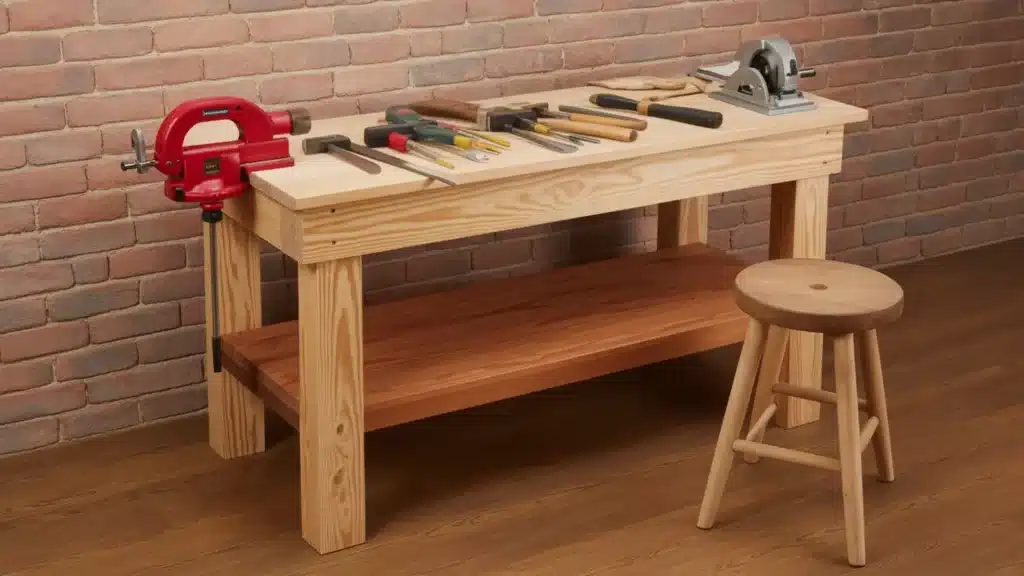

When I first set up my workshop, I was stuck using a wobbly folding table; it was a nightmare. Tools slid around; there was no solid surface to clamp anything, and storage was nonexistent.
That’s when I learned how to build a workbench, and it completely transformed my workspace. The best part? You don’t need to be an expert or spend a fortune.
I’ll walk you through step by step, covering everything from choosing the right wood, determining the ideal height and depth, to cutting, assembling, and finishing your bench. Let’s build something you’ll use for years
What Size Should a Workbench Be?
Choosing the right size is important when building a workbench. The standard height for most people is between 34 and 36 inches, which allows you to work comfortably without bending too much.
If you are taller or shorter, you can adjust the height to fit you. The ideal depth is usually 24 to 30 inches, giving you enough space to work without overreaching.
For length, common options are 4, 6, or 8 feet, depending on your available space. A 6-foot bench works well for most garages and home workshops. Always measure your space before cutting lumber.
Step by Step: How to Build a Workbench
Follow these six simple steps to build a solid workbench from scratch. Each step is beginner-friendly and requires only basic tools and standard lumber.
Materials Required
Before you start cutting wood, it’s important to gather the right tools and materials. Having everything ready will make the process smoother and help you avoid mistakes.
| Item | Purpose |
|---|---|
| Circular saw, or miter saw | Cut the 2×4 lumber and plywood to the correct size. |
| Drill/driver | Drills pilot holes and drives screws during assembly. |
| Measuring tape | Ensures accurate measurements for proper fit. |
| Carpenter’s square | Helps keep corners at a precise 90-degree angle. |
| 2×4 lumber (8–10 pieces, 8 ft) | Used to build the legs and frame of the workbench. |
| ¾-inch plywood (1 sheet, 4×8 ft) | Creates the workbench top and lower shelf. |
| 2½-inch wood screws | Secure the main frame together. |
| 1¼-inch wood screws | Attach the plywood top and shelf. |
| Wood glue | Adds extra strength to the joints. |
This basic setup keeps the cost down while still giving you a strong, durable workbench that can handle most DIY and garage projects.
Step1: Cut your lumber
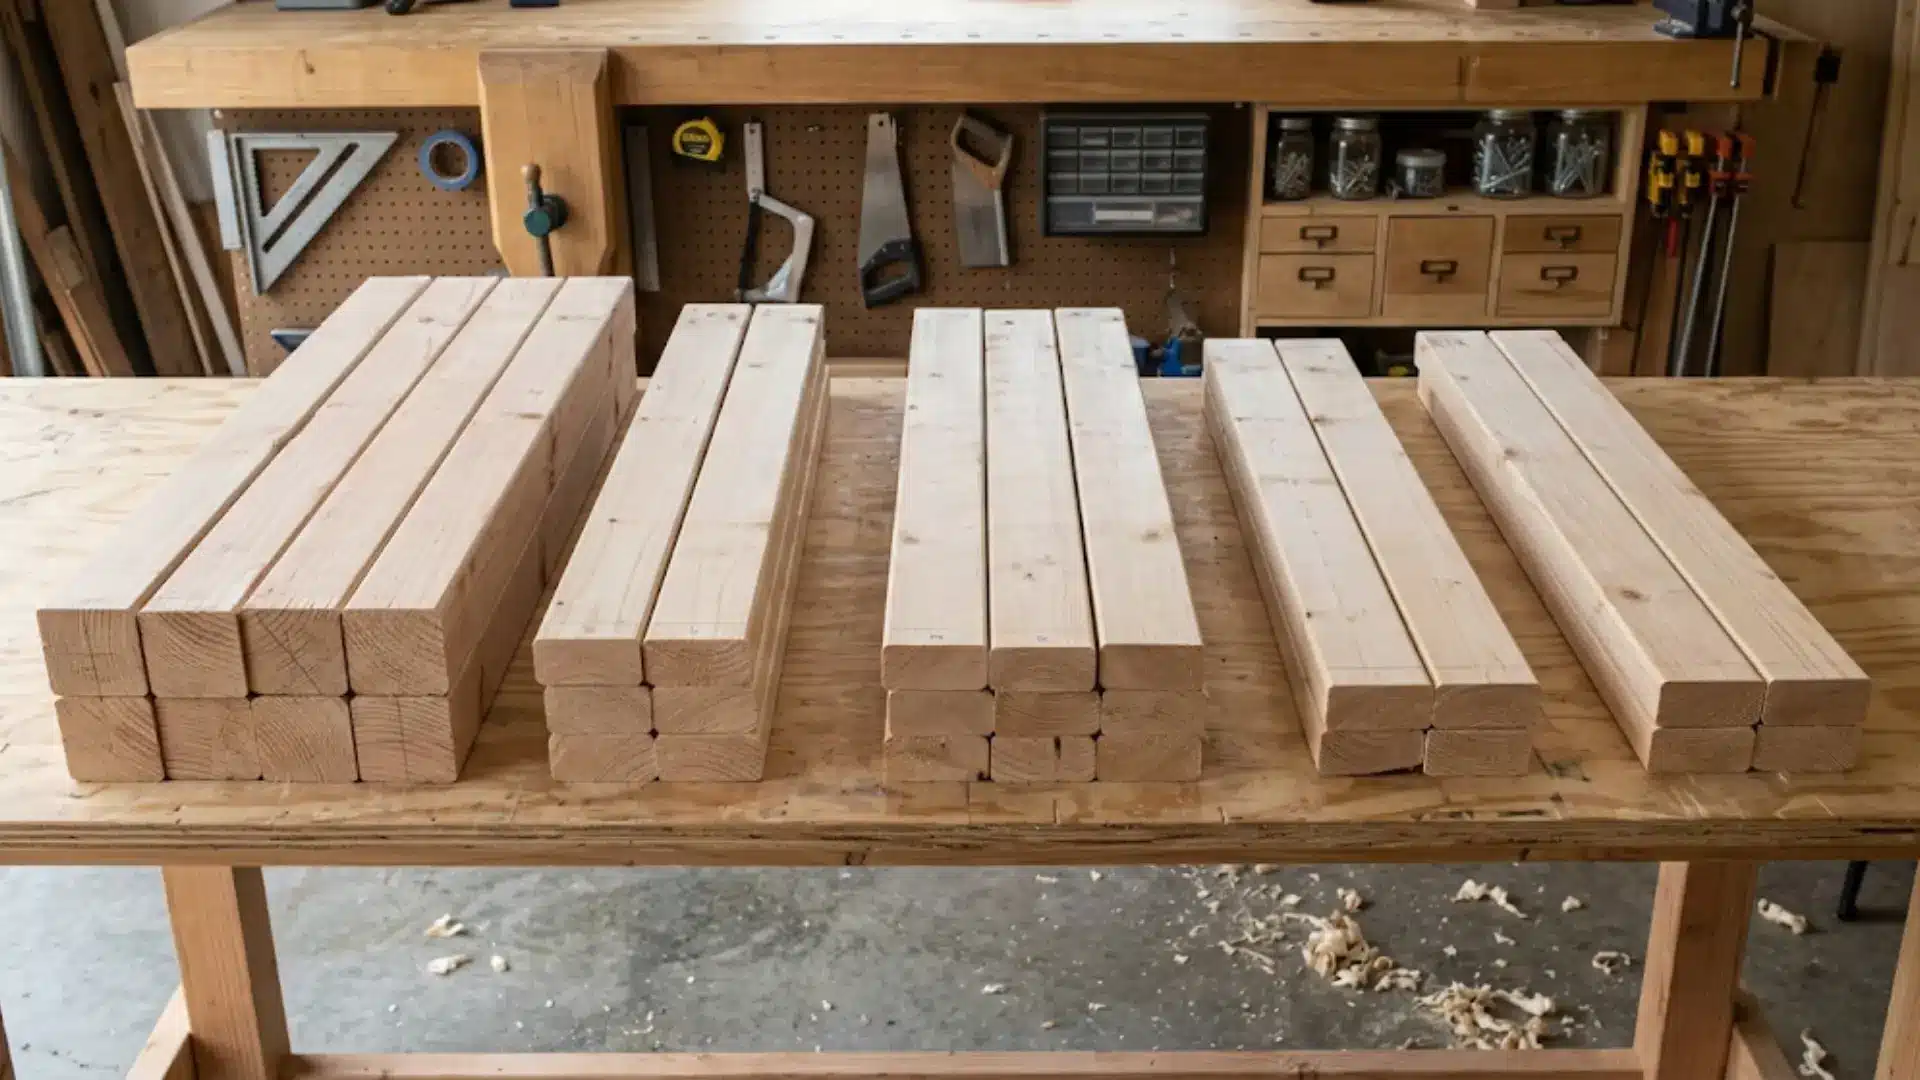
Measure twice, cut once, it’s the oldest rule in woodworking, and it’s true. Use a circular saw or chopsaw to trim your legs, top frame, lower frame, and stretchers to the correct lengths.
Mark each piece clearly before cutting so nothing gets mixed up. Accurate cuts here make every step that follows much easier and save you from costly mistakes.
Step 2: Build the base frame
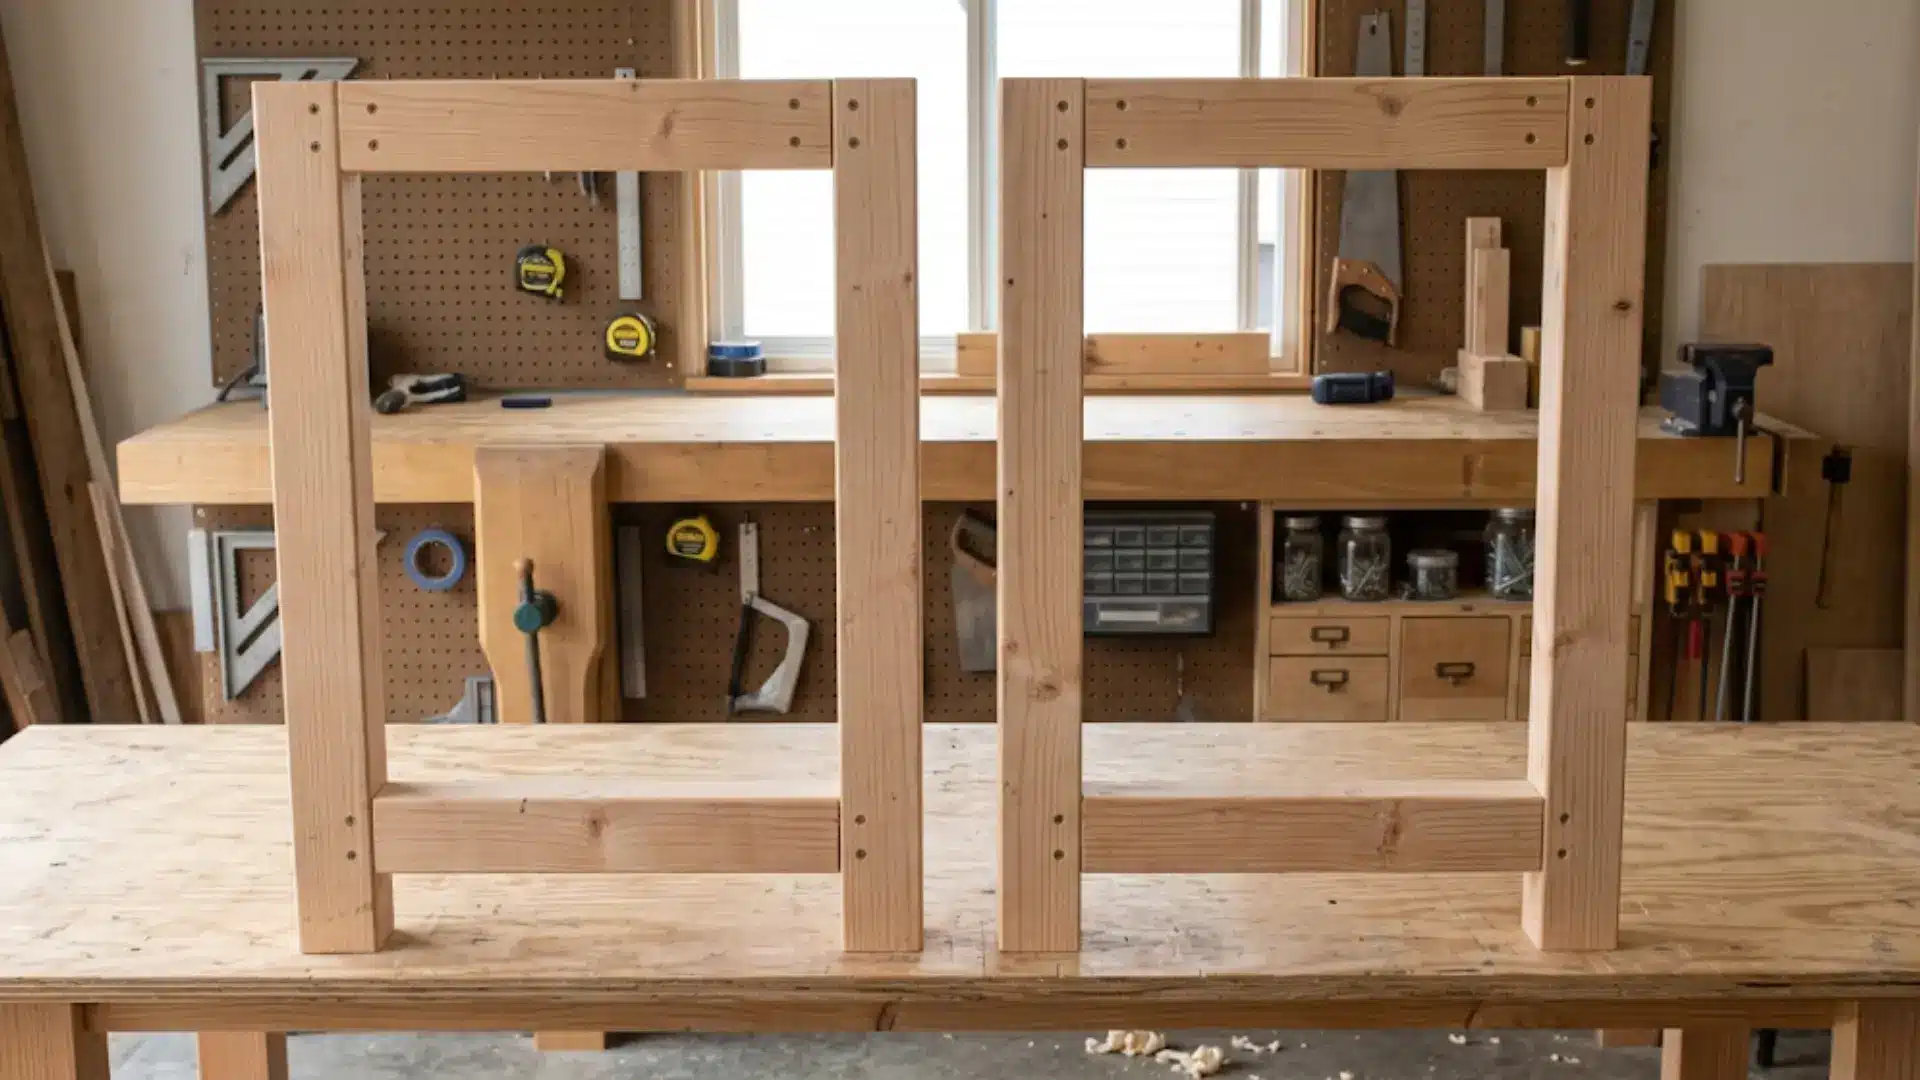
Start by assembling two rectangular end frames using 2x4s and screws. Each frame consists of two legs connected by a short top and bottom rail.
These end frames form the sides of your bench and carry most of the weight. Pre-drill your holes before driving screws to prevent the wood from splitting and to get a tighter, cleaner joint every time.
Step 3: Connect the frames
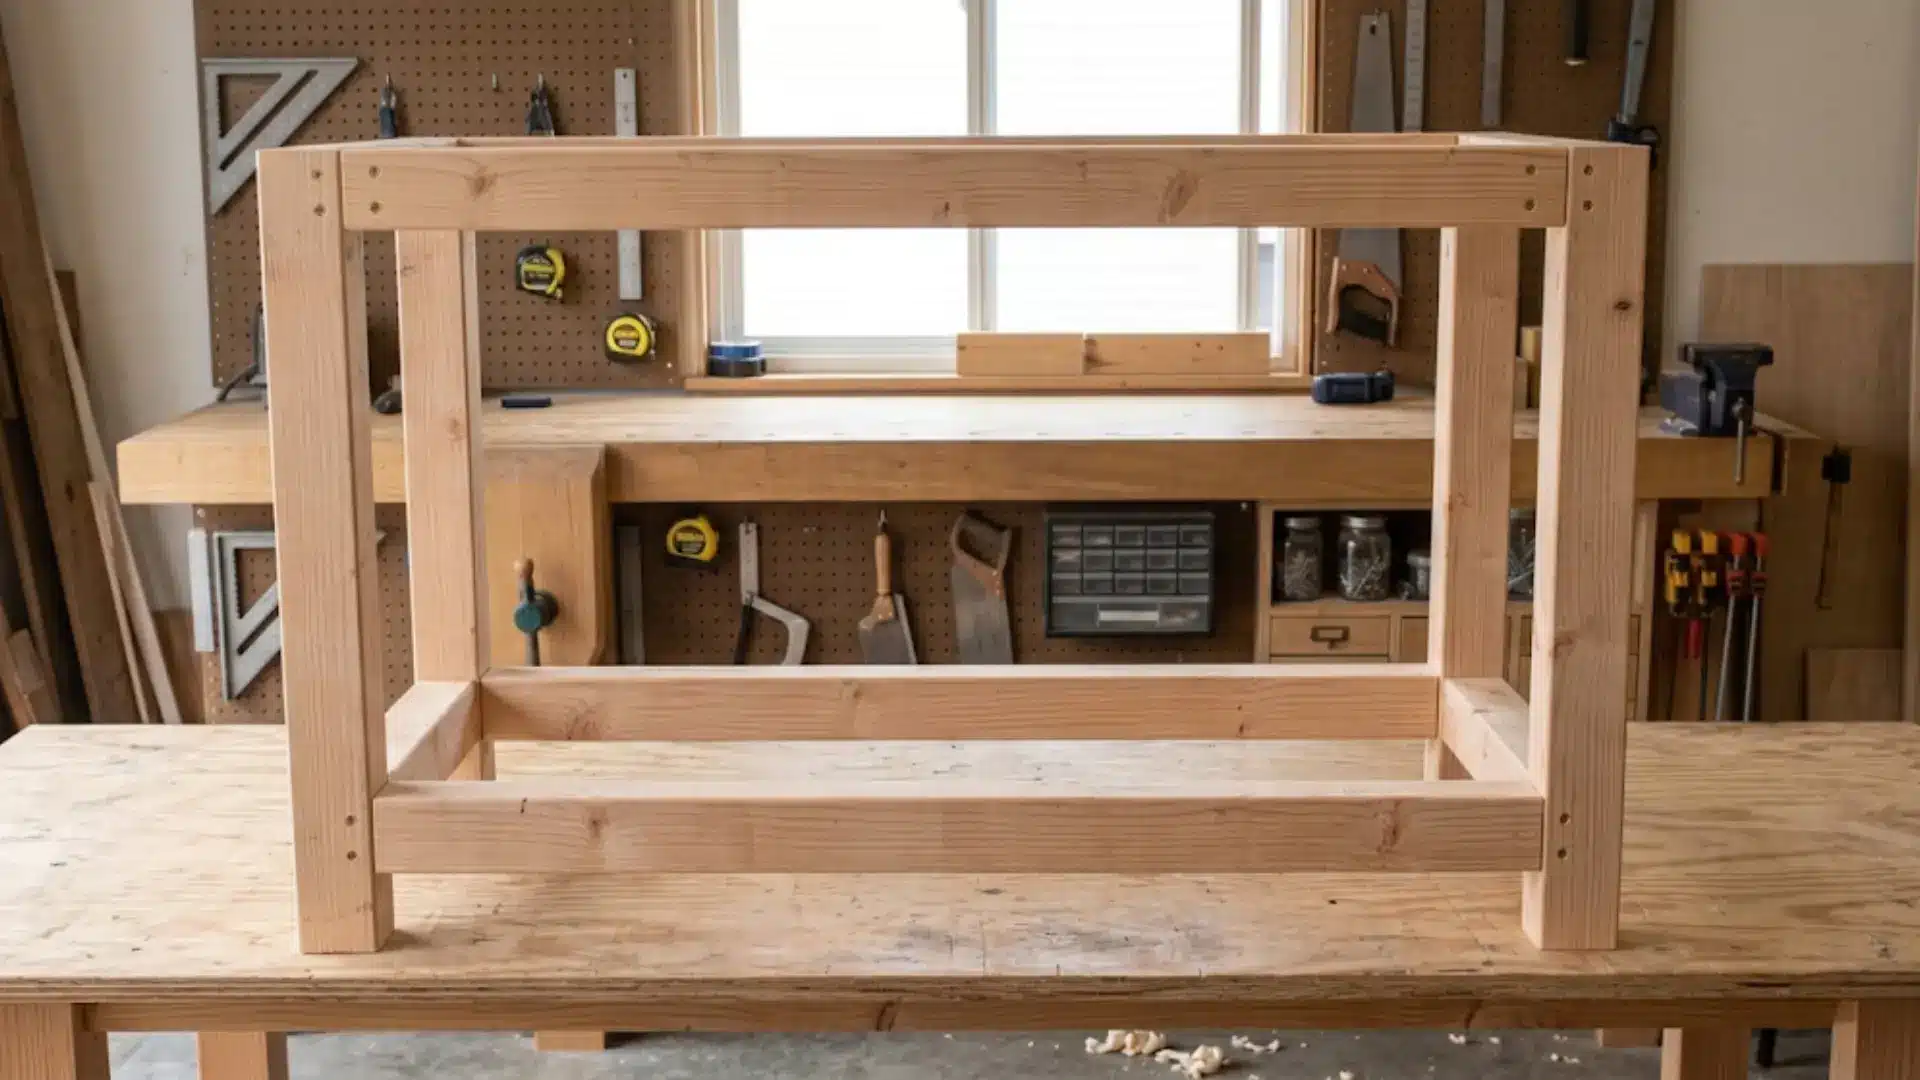
Stand both end frames upright and join them with long side stretchers running front to back. Space your stretchers evenly near the top and bottom for maximum strength.
This step gives your workbench its full length and locks the whole structure square and stable. Use a square to check your corners before fully tightening every screw.
Step 4: Add the lower shelf
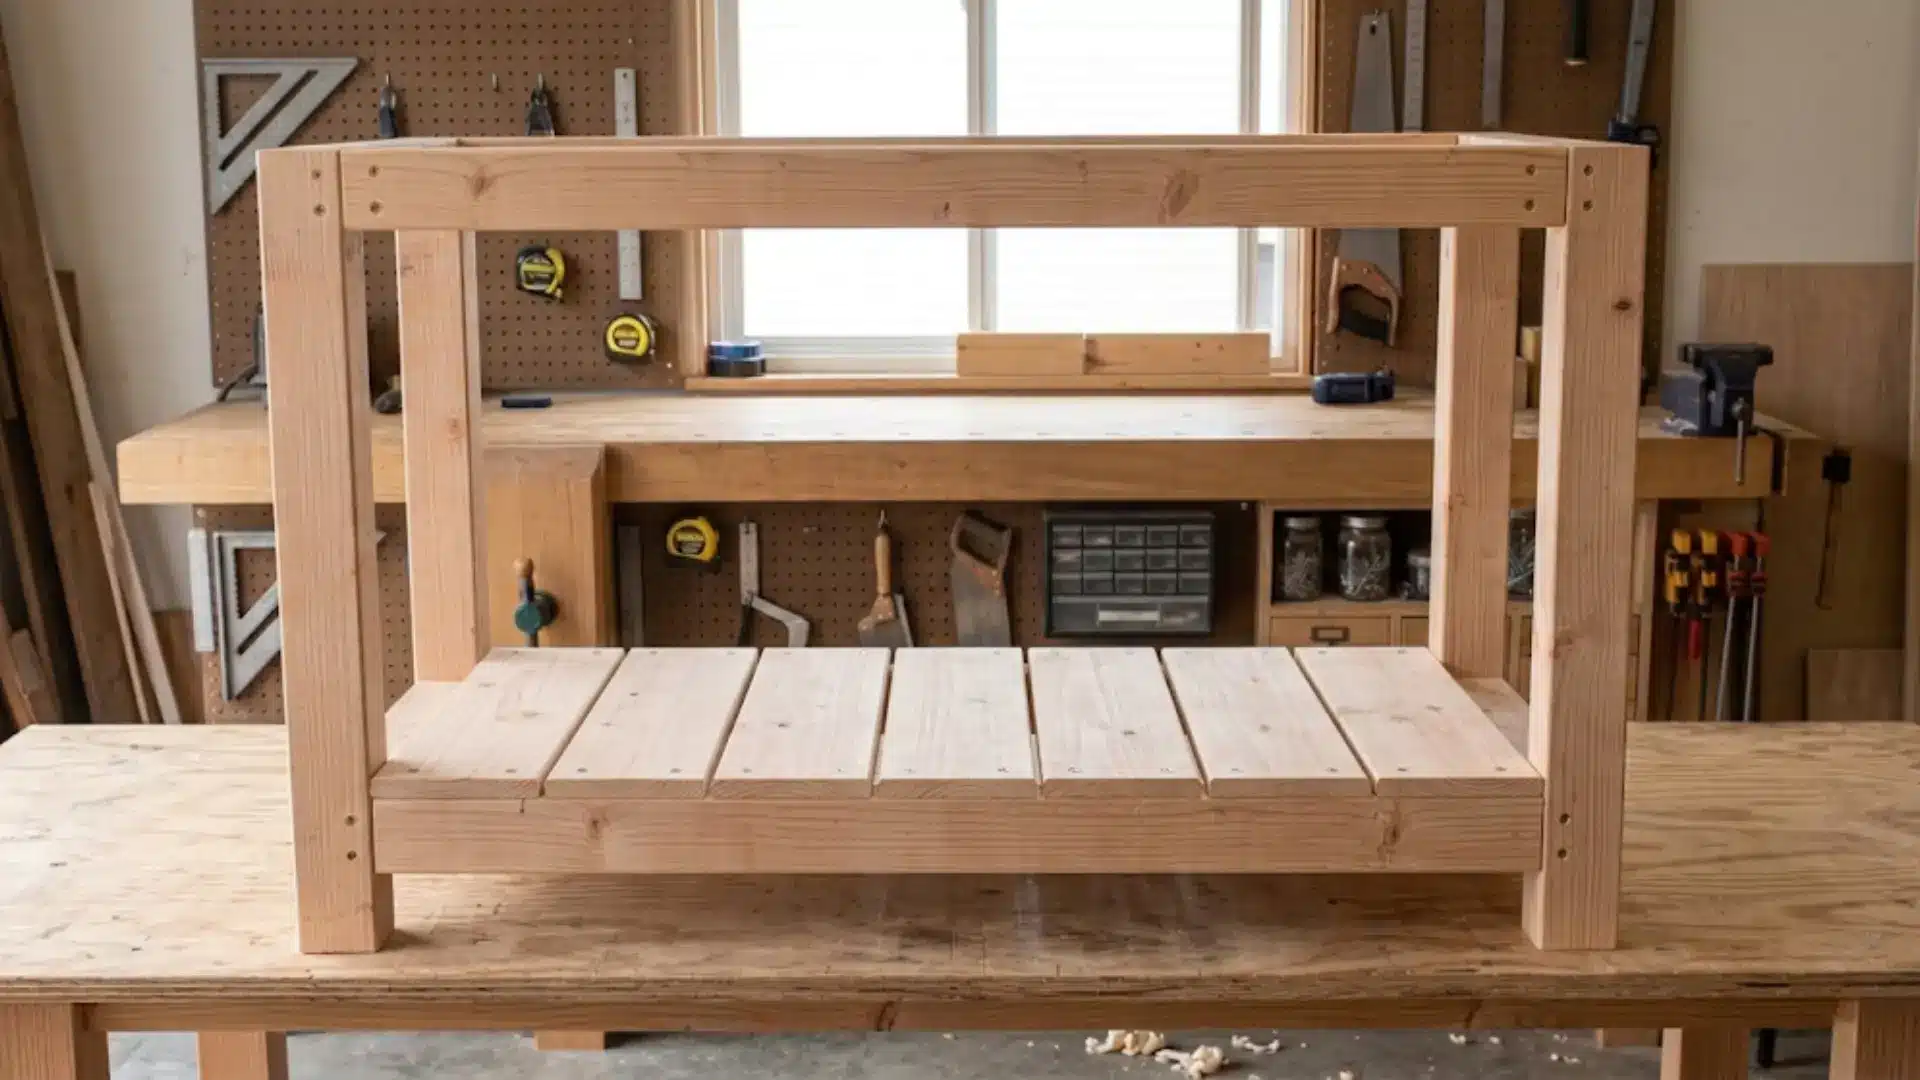
Lay a sheet of plywood or a row of 2×4 decking flat across the bottom frame and screw it down firmly. Make sure the boards sit flush and tight with no gaps.
This shelf does two important jobs; it adds rigidity to the entire structure and gives you a useful spot to store tools, bins, or supplies while you work.
Step 5: Attach the tabletop
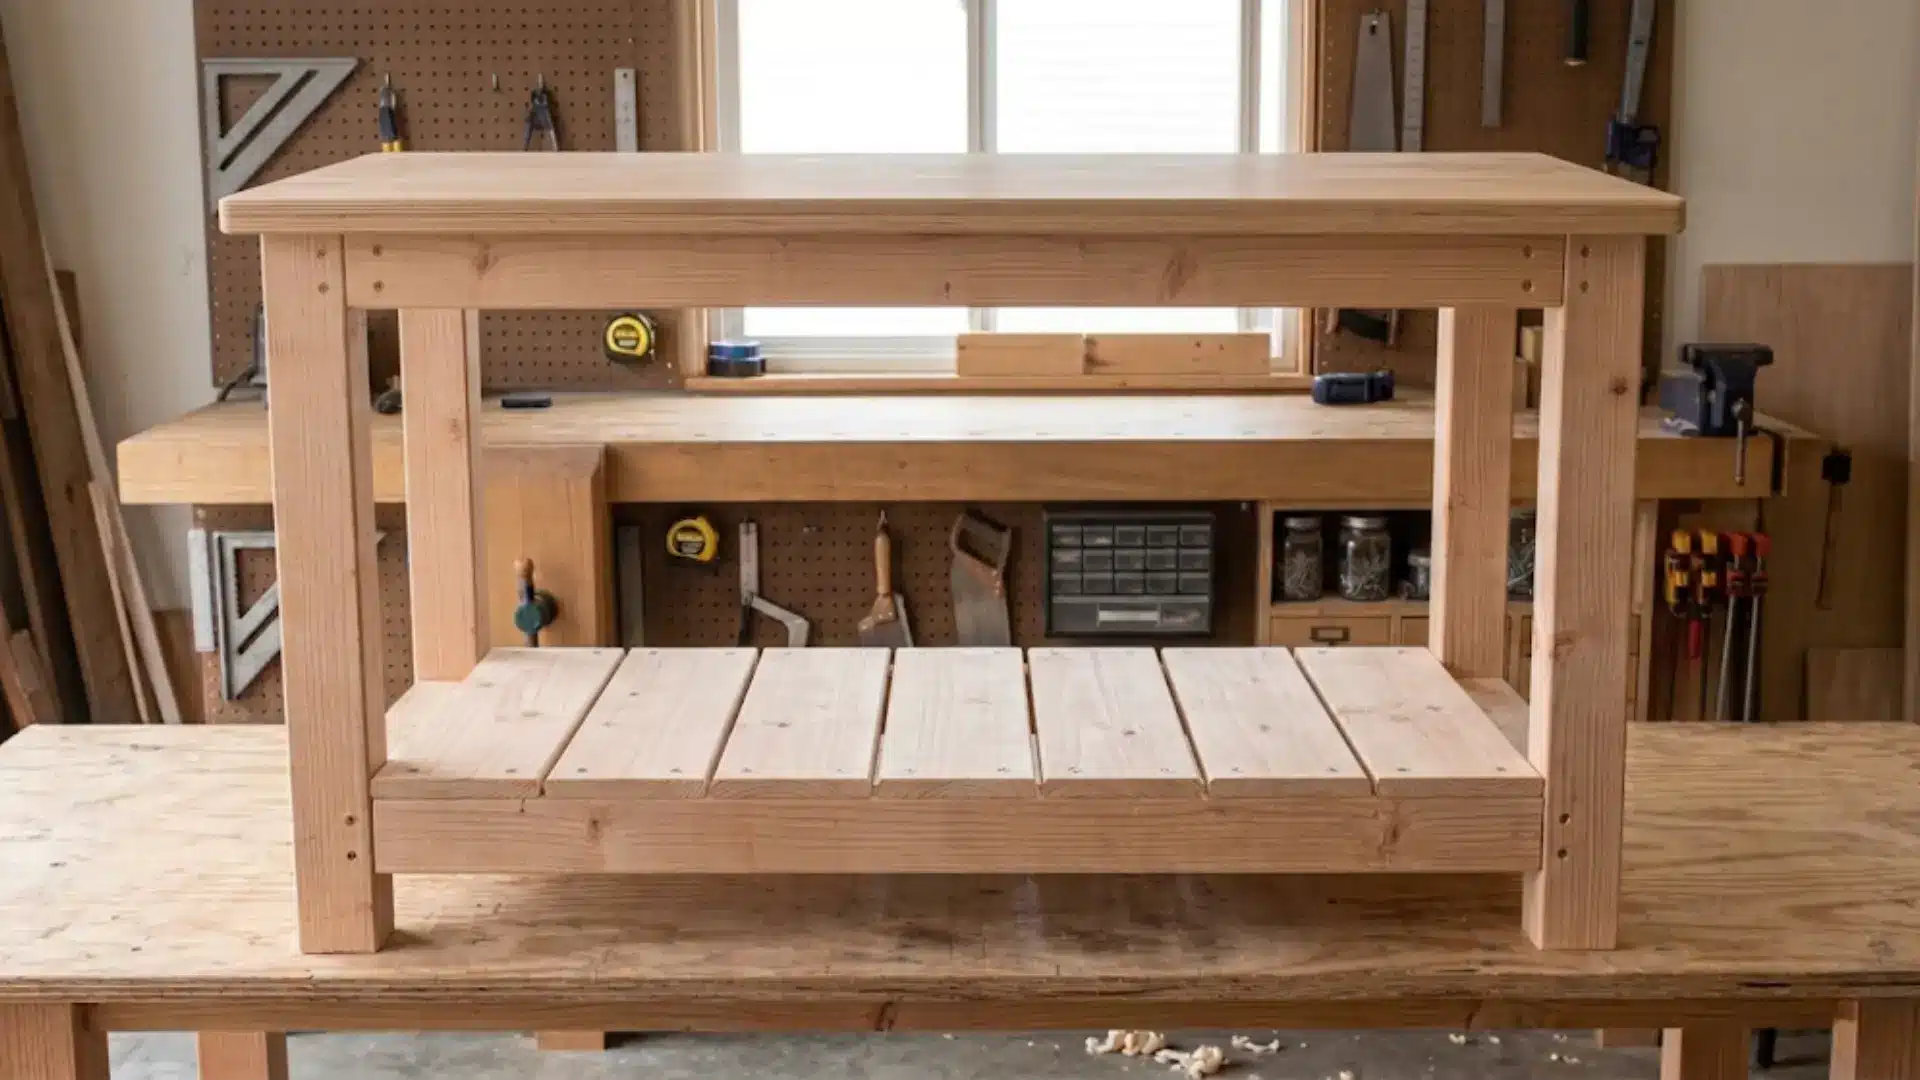
Stack two sheets of 3/4″ plywood on top of the frame. Spread an even layer of wood glue between them, then drive screws up through the frame from below to lock everything in place.
This double-layer method creates a thick, rock-solid work surface that handles heavy loads, hard impacts, and years of tough use without warping or flexing.
Step 6: Sand and finish
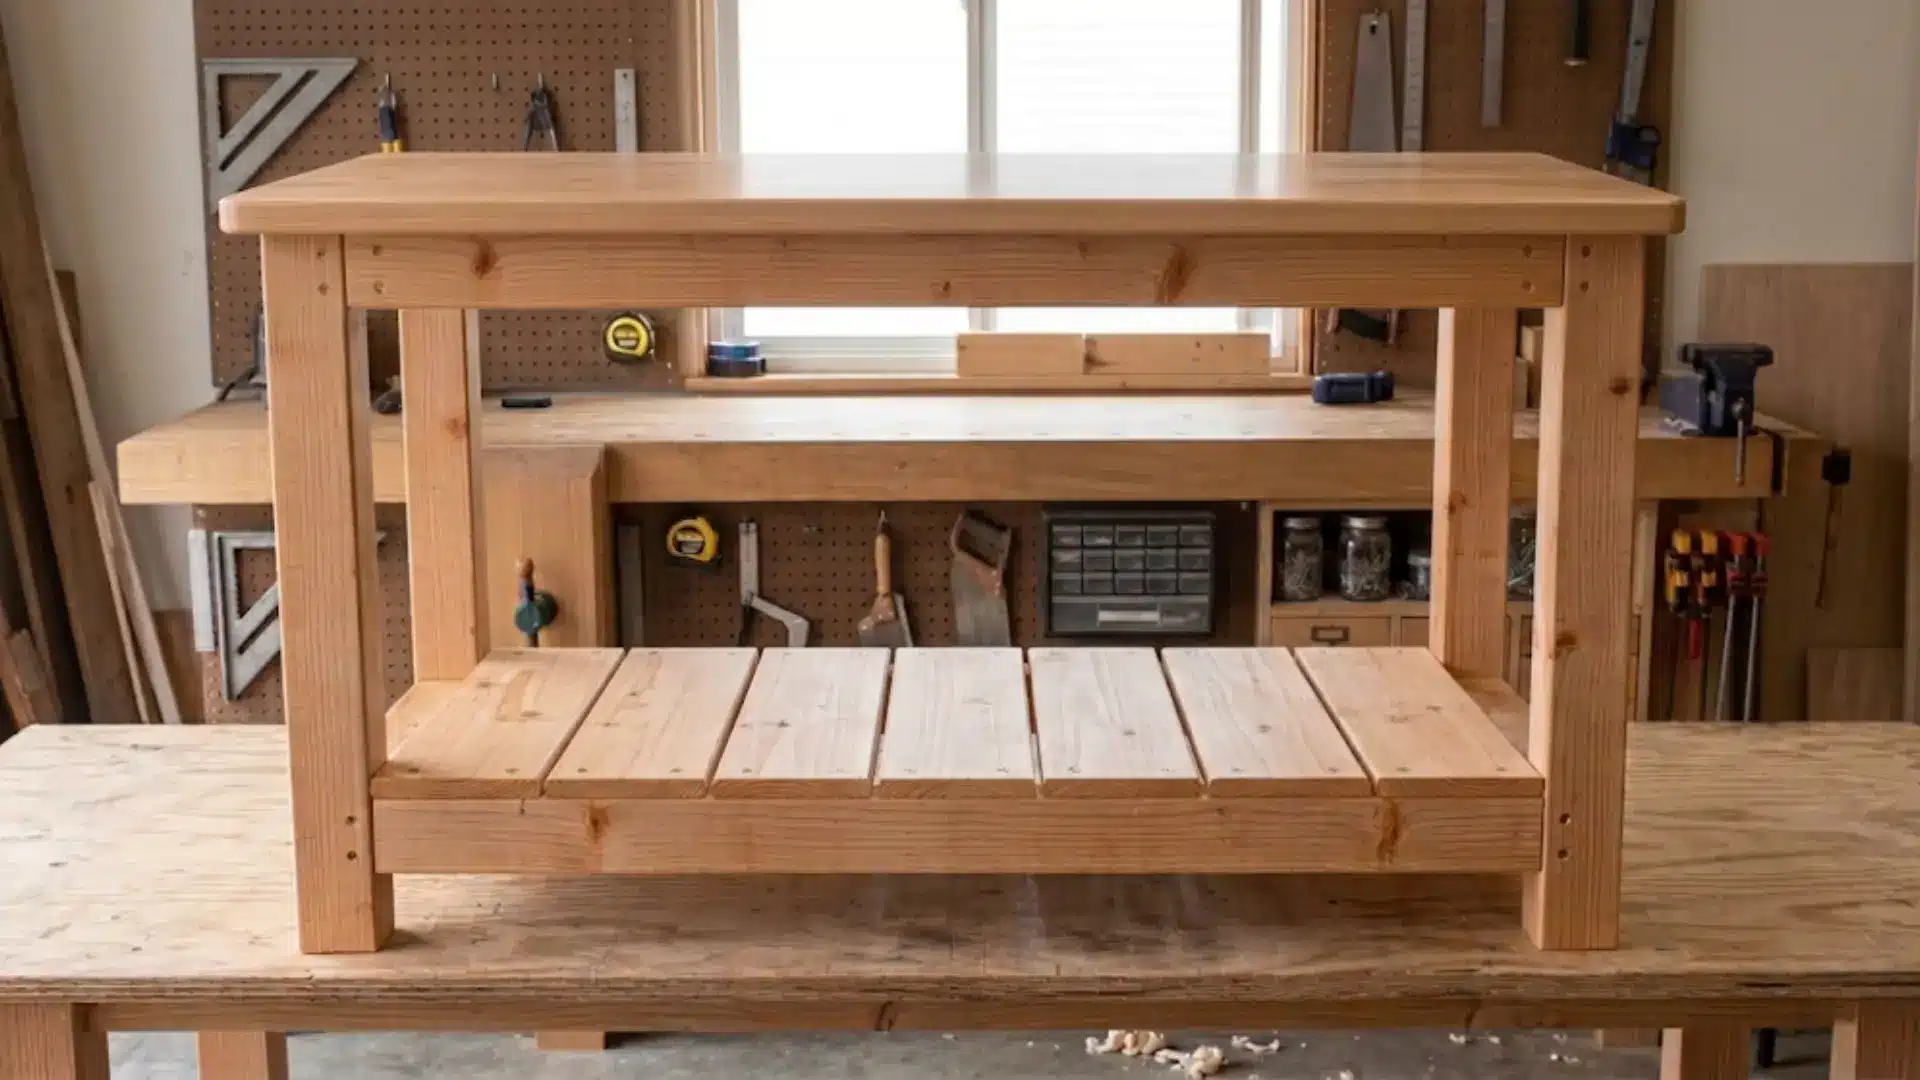
Run 80-grit sandpaper across the entire tabletop to smooth out any rough patches, splinters, or uneven edges. Wipe away the dust with a damp cloth, then let it dry completely.
For a durable finish, apply one or two coats of polyurethane and let each coat dry completely. Prefer a raw look? Leave it unfinished; it still works great right out of the box.
That’s all it takes, six steps and a few hours.
Full Cut List
Here’s every piece you’ll need to cut before assembly. Print this list and check off each piece as you go.
| Part | Dimensions | Qty |
|---|---|---|
| Legs | 2×4 @ 34″ | 4 |
| Top frame (long side) | 2×4 @ 72″ | 2 |
| Top frame (short side) | 2×4 @ 21″ | 2 |
| Bottom frame (long side) | 2×4 @ 72″ | 2 |
| Bottom frame (short side) | 2×4 @ 21″ | 2 |
| Side stretchers | 2×4 @ 72″ | 2 |
| Tabletop (double layer) | 3/4″ plywood @ 24″ x 72″ | 2 |
| Lower shelf | 3/4″ plywood @ 21″ x 72″ | 1 |
Adjust all dimensions to match your preferred bench height and length. Now that your lumber is cut and ready, let’s move on to assembly.
Pro Tips for a Stronger Workbench
If you want your bench to last for years, a few simple upgrades can make it stronger, safer, and more stable.
- Double-Layer Top: Adding a second layer of plywood makes the surface thicker and prevents sagging under heavy weight.
- Cross Bracing: Installing braces between the legs reduces side movement and keeps the bench steady.
- Wall Anchoring: Securing the bench to wall studs adds extra support and prevents tipping.
- Lag Bolts: Using lag bolts instead of basic screws improves joint strength and long-term durability.
These small changes improve strength and stability, helping your workbench handle bigger projects with confidence.
Optional Workbench Upgrades
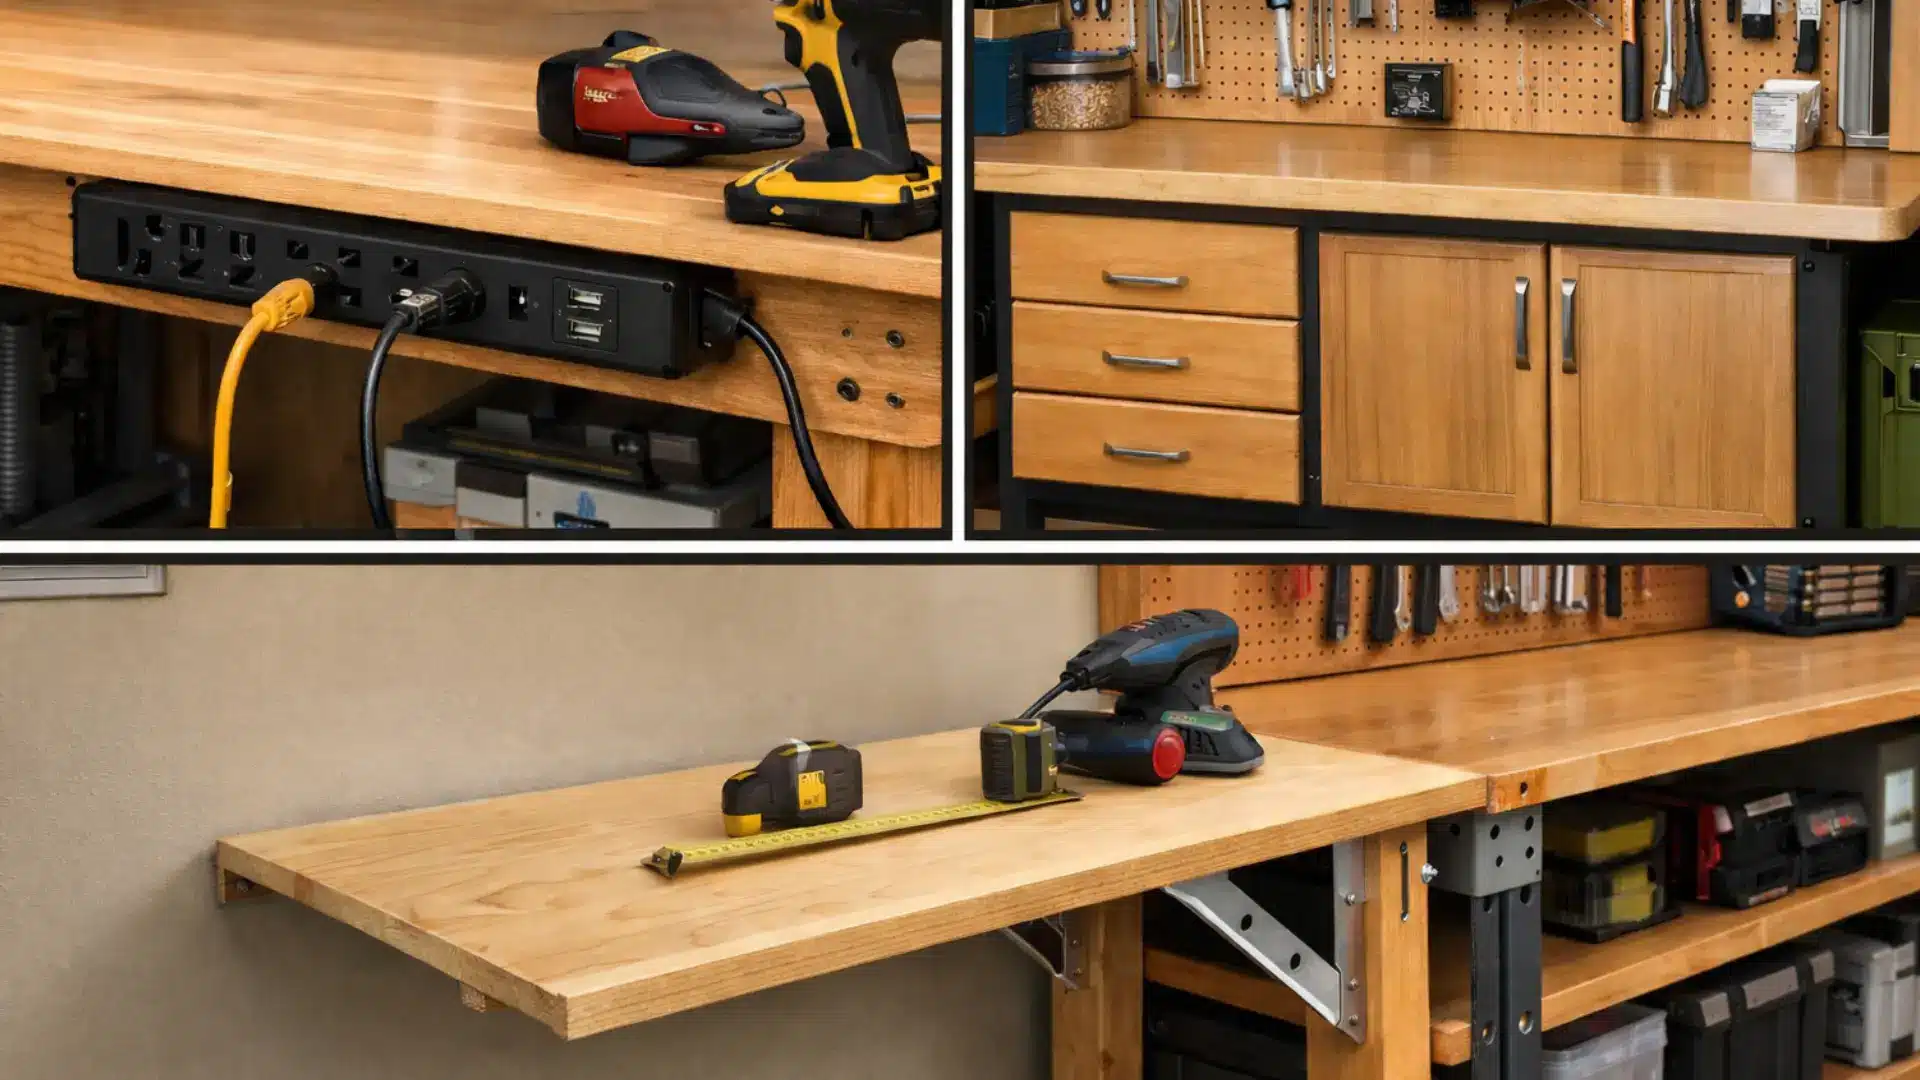
If you want to improve your setup, these simple upgrades can make your workbench more functional, organized, and easier to use every day.
| Upgrade | What It Is | Why It Helps | Best For |
|---|---|---|---|
| Mounted Power Strip | A power outlet strip is attached to the side of your workbench. | Easy access to power, fewer extension cords, cleaner workspace. | Garage workstations and frequent power tool use |
| Drawers or Cabinets | Storage units installed under the workbench. | Hides clutter, protects tools from dust, and keeps supplies organized. | Organized workshops |
| Folding Extension Wing | A side panel that folds out for extra space and folds down when not needed. | Adds more work area when required and saves space when folded. | Small or compact garages |
These upgrades are optional, but they can transform a basic bench into a more efficient workspace built for long-term use.
Beginner Mistakes to Avoid
Building a workbench can be straightforward, but beginners often make avoidable errors. Recognizing common pitfalls early ensures a safer, sturdier, and more enjoyable workshop experience.
- Skipping Squaring Checks: Failing to check corners with a carpenter’s square can leave your frame uneven and unstable.
- Using Warped Lumber: Choosing bent or twisted boards can weaken the structure and cause it to wobble over time.
- Incorrect Screw Length: Using screws that are too short or too long can reduce joint strength or damage the wood.
- Not Leveling the Legs: Ignoring proper leveling can make your workbench rock and feel unsafe during use.
Avoiding these mistakes guarantees a workbench that’s solid, level, and durable. With careful attention, your project will be efficient, reliable, and ready for years of use.
Final Thoughts
Learning how to build a workbench was one of the best things I ever did for my workshop. It gave me a solid foundation, literally, to tackle every project after it with more confidence and less frustration.
If you went with a simple 2×4 build or a beefier garage bench with storage, you now have a space that’s truly yours. The whole process taught me that you don’t need fancy tools or expensive materials to make something that works great.
All it takes is a good plan, some basic lumber, and a free afternoon. If you’re ready to get started, grab your cut list and head to the lumber yard.
Your perfect workbench is closer than you think. Drop your questions in the comments, I’d love to help!


