


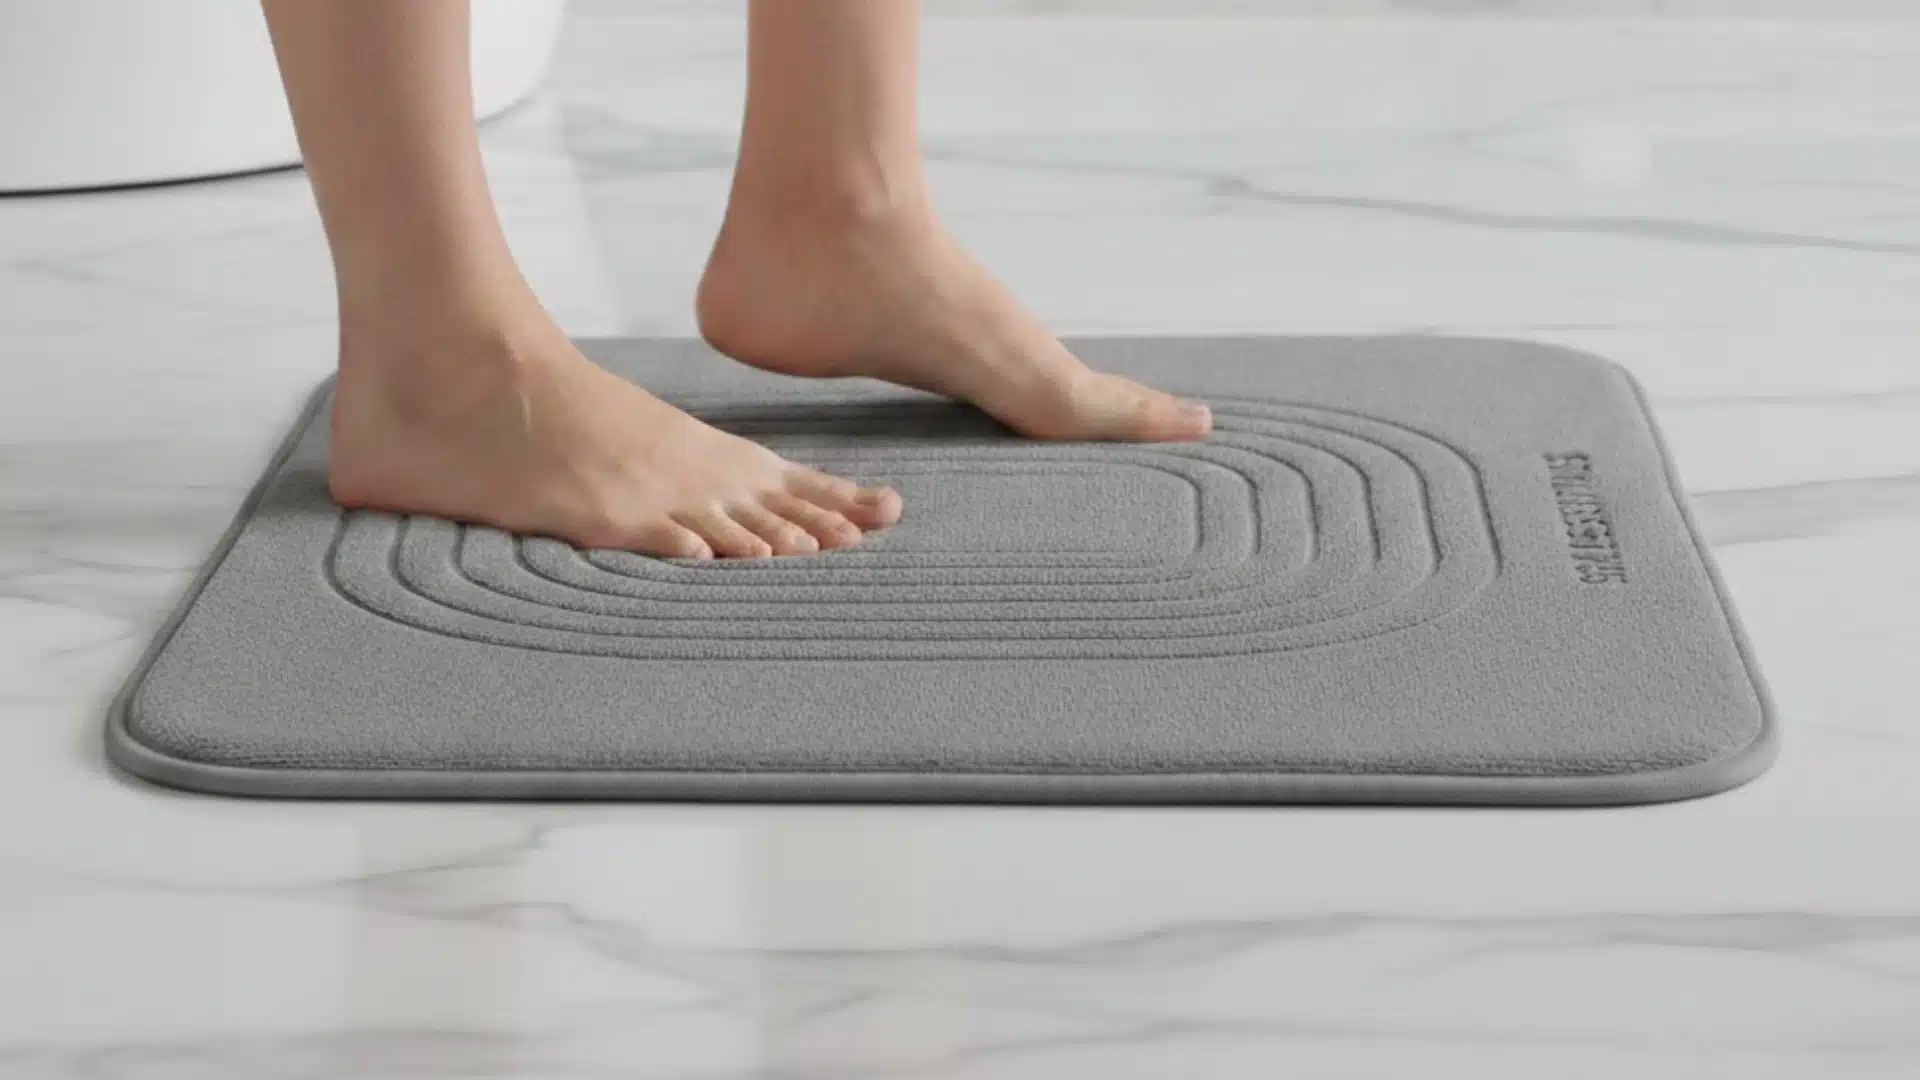
When I first searched for how to clean a stone bath mat, I thought it would be a long and tricky process. But after learning how these diatomaceous earth mats work, I realized the cleaning routine is actually quick and simple if you follow the right steps. Because the surface is porous and highly absorbent, you can’t treat it like a regular fabric bath mat. Using too much water or strong cleaners can clog the pores and reduce how well it dries. Here, I’ll walk you through the safest step-by-step cleaning method, how to remove stains, how to restore absorbency, what mistakes to avoid, and easy tips to keep your mat fresh for years. Why Stone Bath Mats Need Special Cleaning Stone bath mats need special cleaning because they are not made from cloth or rubber. Most stone mats are made from diatomaceous earth, a natural material filled with tiny holes you cannot see. These small holes absorb water quickly, which is why the mat dries your feet so quickly. Over time, soap, body oil, and hard-water minerals can get trapped in those holes, slowing the mat down. If you wash the mat in a normal bath or soak it in a lot of water, you can damage the surface and block the pores even more. That’s why gentle cleaning and proper drying help the mat stay absorbent and last much longer. Step-by-Step: How to Clean a Stone Bath Mat Properly Cleaning a stone bath mat is actually very simple when you follow these small steps in order. Step 1: Remove Loose Dirt and Hair Start with a quick dry clean. I like to shake the mat gently or wipe it with a dry cloth first. This removes hair, dust, and loose dirt sitting on the surface. If you skip this step, the dirt can turn into muddy spots once you add water. A microfiber cloth works great because it picks up small particles easily. This step only takes a few seconds but makes the rest of the cleaning much easier. Step 2: Rinse With Warm Water Next, rinse the mat with a small amount of warm running water. You only need a short rinse to wash away surface dirt. Do not soak the mat in a tub or bucket. Stone bath mats are very porous, and soaking them can damage the material or slow their water absorption later. Think of this step as a quick shower for the mat, not a long bath. Step 3: Gently Scrub the Surface If you see marks or greasy spots, gently scrub the area using a soft brush or sponge. I usually add just a tiny drop of mild dish soap for oily stains. Scrub lightly so you do not scratch the surface. The goal is to lift dirt, not grind it in. Most stains come off quickly with gentle pressure, so there’s no need to scrub hard. Step 4: Rinse Again Thoroughly After scrubbing, rinse the mat again with warm water to remove any soap left behind. Leftover soap can clog the tiny pores in the stone and make the mat less absorbent. Make sure the surface feels clean and smooth before moving to the drying step. Step 5: Let It Air Dry Completely Finally, stand the mat upright in a well-ventilated area so air can reach both sides. I prefer to place it near a wall or a rack so it can dry evenly. Avoid strong direct sunlight, since too much heat can cause cracks over time. Let it dry fully before putting it back on the bathroom floor. A completely dry mat will absorb water much faster the next time you use it. How to Deep Clean a Stone Bath Mat: For Stains or Smell If your stone bath mat has stains, smells, or stops absorbing water well, these deeper cleaning methods can help restore the surface and keep it working properly. Cleaning Method When to Use It What to Do Helpful Tip Sandpaper Refresh Use this when water starts sitting on top instead of soaking in quickly. Take fine sandpaper (120–180 grit) and rub the surface gently in one direction. Wipe away the powder after sanding. Do not press hard. Light sanding is enough to reopen the tiny pores. Always let the mat dry fully before using. Vinegar Spray Best for white spots, dull areas, or hard-water mineral buildup. Mix equal parts white vinegar and water. Spray lightly on the area, wait a few minutes, then wipe and rinse quickly. Do not soak the mat. A light spray works better and keeps the stone safe. Hydrogen Peroxide Spot Clean Good for strong stains that normal rinsing or wiping cannot remove. Pour a small amount of diluted hydrogen peroxide onto the stain, or dab it with a cloth. Rinse after a short wait. Only use this for stubborn stains. Always stand the mat upright and let it air dry completely. After using one of these methods, I always make sure the mat dries completely before putting it back, because a fully dry surface helps it absorb water faster and stay fresh longer. Shared Experience and Advice In a Facebook home DIY group, a member asked how to clean hard diatomite coasters and soft drying mats. People replied with simple home methods. One user said they scrub hard stone items with dish soap and sometimes sand the surface to remove stains. Another suggested washing soft mats with soap and water, then squeezing them slightly and leaving them in the sun to dry. Personally, I think these community tips are helpful, but need a bit of caution. In my experience, when cleaning stone bath mats, gentle rinsing, light scrubbing, and careful drying work best, but too much sun or soaking can damage the mat. Simple methods are good, as long as they’re done the right way. When to Clean Your Stone Bath Mat Knowing when to clean your stone bath mat makes it much easier to keep it fresh, absorbent, and working properly. A simple routine, along with watching for warning signs, will help it last longer. How Often Should You Clean a Stone Bath Mat? I like to follow a simple cleaning routine so the mat stays fresh and dries fast. I wipe the surface every few days to remove hair, dust, and soap marks. About once or twice a week, I rinse it with warm water to clear away buildup inside the pores. Every couple of months, I lightly sand the top to refresh the surface and help it absorb water better again. If the bathroom gets heavy use, I clean it a little more often. Signs Your Stone Bath Mat Needs Cleaning Sometimes the mat shows clear signs that it needs cleaning, even if it hasn’t been long since the last wash. When I notice water sitting on the surface instead of soaking in quickly, I know the pores are clogged. Dark spots, visible stains, or rough patches are also strong signals. A mat that feels slippery, dries more slowly than usual, or starts to smell slightly musty should be cleaned right away so it keeps working properly. What NOT to Do When Cleaning a Stone Bath Mat Avoiding a few common mistakes will help your stone bath mat stay absorbent, durable, and looking new for much longer. Never soak the mat: Stone bath mats are very porous, so soaking them in a bucket or tub can damage the material and reduce their water absorption later. Avoid strong bleach: Harsh bleach can weaken the surface and cause fading or rough spots. If you ever use it, only use a very small, highly diluted amount for tough stains. Skip harsh chemicals: Strong bathroom cleaners, acids, or heavy sprays can clog the tiny pores and reduce the mat’s drying power. Mild soap or gentle cleaners are always safer. Do not use a high-pressure hose: Powerful water pressure can chip, crack, or wear down the stone surface over time. A gentle rinse under normal running water works best. Avoid strong direct sunlight: Leaving the mat in very hot sunlight for long hours can dry it too fast and may cause small cracks. Always let it dry in a shaded, airy place instead. When I avoid these mistakes, my stone bath mat stays clean and absorbs water much faster. Small care habits really help the mat last for years. How to Keep Your Stone Bath Mat Clean Longer To keep your stone bath mat clean for a long time, I follow a few simple habits that really help. First, I stand the mat upright once a week so both sides can dry fully and no moisture stays trapped underneath. I also keep the bathroom well ventilated, since fresh air helps the mat dry faster and prevents musty smells. Another helpful step is to avoid stepping on the mat with oily or lotion-covered feet, because oils can clog the tiny pores that absorb water. If I notice a lot of soap or residue building up, I give the mat a quick rinse in warm water and let it air-dry completely. These small steps take only minutes but help the mat stay absorbent, fresh, and working properly much longer. The Bottom Line After learning how to clean a stone bath mat the proper way, I realized that keeping one fresh doesn’t require much time at all. Most of the work comes down to simple habits like quick rinsing, gentle scrubbing, and letting the mat dry fully before using it again. When you clean it correctly and refresh the surface when needed, the mat stays absorbent and keeps your bathroom looking neat. If you ever forget how to clean a stone bath mat, you can always return to these steps for a quick refresher. If this guide helped you, bookmark it for later, share it with a friend, and check out my other home care guides for more easy cleaning tips.
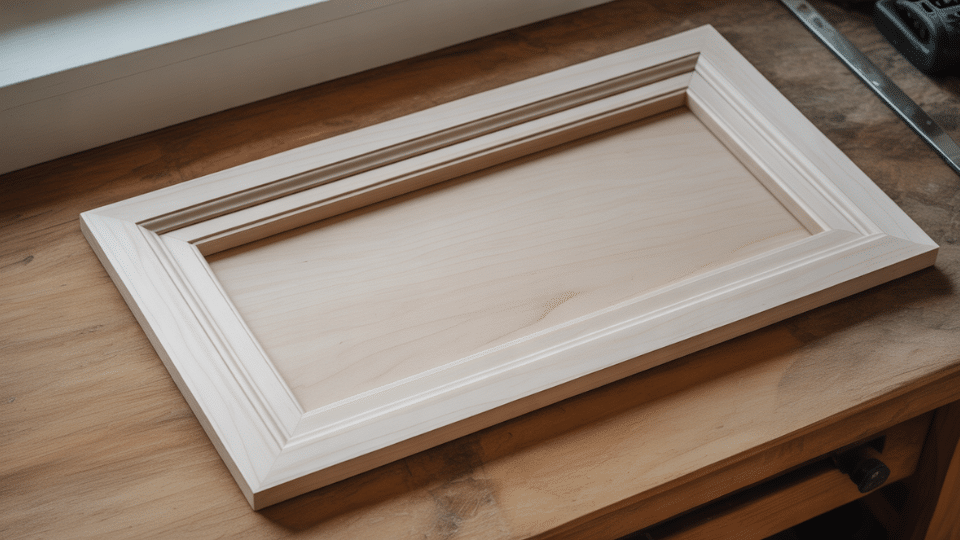
Replacing all your kitchen cabinets can cost a lot, but changing just the doors? That’s much more budget-friendly and something you can actually do yourself. In this blog, I’ll walk you through three ways to build DIY cabinet doors: a beginner pocket hole method, an intermediate table saw method, and a pro-level router table method. I’ll help you choose the right joinery for your skill level and pick the best wood for long-lasting doors. You’ll also see common mistakes that waste time and materials, and how to avoid them. By the end, you’ll feel ready to start with one small project and build your confidence from there. Why Build Your Own DIY Cabinet Doors? Building your own cabinet doors saves serious money; custom doors from retailers cost $50-150 each, while DIY cabinet doors run $15-30 in materials. Beyond the savings, homemade doors fit your non-standard openings perfectly, solving the frustration of older kitchens or unique furniture pieces. Shaker-style doors make an ideal starting point: simple flat panels with basic frames require minimal tools and forgiving techniques. Master one bathroom vanity door, then tackle your full kitchen. Each project builds your skills, turning you from a nervous beginner into someone confidently customizing any space in your home. Cost Comparison Between Beginner, Intermediate, & Pro Before choosing a method, it helps to compare the approximate cost of each door. These estimates show how materials and techniques affect price, regardless of skill level. Method Approx. Cost per Door Notes Beginner ~$35 Higher material cost due to trim and plywood backer; uses basic tools. Intermediate ~$21 Most cost-efficient; the mortise-and-tenon structure uses fewer materials. Pro ~$31 Slightly higher cost but offers the cleanest, most precise joinery and finish. Cost matters, but it shouldn’t drive your entire decision. The right method depends more on your tools, finish expectations, and the build quality you want long term. Beginner DIY Cabinet Doors with Simple Tools Here is a step-by-step guide for the builders who are new to woodwork and seek to delve into DIY projects, such as making a DIY cabinet door. Materials and Tools Required This beginner-friendly method uses basic tools and straightforward joinery, making it ideal for first-time builders updating kitchen or furniture cabinet doors. Material Notes Pine or other softwood boards For simple door frames Plywood panel Used as the door backer Small trim moulding Adds decorative detail to the front Wood glue For frame assembly and trim Pocket hole screws Frame joinery Brad nails For attaching backer and trim Wood filler Patch nail holes and gaps Sandpaper Smooths surfaces before finishing Step 1: Build the Frame Using Pocket Holes Cut your boards to size based on your desired overlay and opening. Drill pocket holes in the rail pieces, apply glue at each joint, and clamp the door frame flat. Drive screws to tighten everything together, ensuring the structure remains square. This creates a simple, sturdy frame that forms the foundation for the rest of the door. Keep the frame flat to avoid twist Pocket screws work best with 3/4 in stock Step 2: Add the Plywood Backer and Decorative Trim Cut a plywood panel slightly larger than the inside opening and glue plus brad nail it to the back of the frame. Flip the door, then install small trim around the inner edge to mimic more detailed cabinet profiles. Nail trim into the frame for strength, not just into the thin plywood. Plywood: paint-grade birch works well Nail trim into rails and stiles, not the panel Step 3: Fill, Sand, and Prep for Hinges Wipe away any glue squeeze-out before it dries, then fill nail holes and seams with wood filler. Lightly sand the entire door for a clean, paint-ready surface. Drill hinge cups or pilot holes before painting so you don’t damage the final finish when installing hardware later. Sand lightly with 120–180 grit Drill hinge cups with a 35 mm Forstner bit Making of Intermediate DIY Shaker Cabinet Doors Materials and Tools Required This method offers stronger joinery and a traditional Shaker design, ideal for DIYers ready to move beyond basic pocket screws. Material Notes Hardwood or softwood boards For stiles and rails Plywood panel Center panel for Shaker design Wood glue Joinery adhesive Painter’s tape Reduces tear-out on plywood Wood filler For tiny imperfections Sandpaper Pre-finish smoothing Step 1: Cut Rails, Stiles, and Calculate Tenon Allowances Rip your boards to a uniform width and cut the stiles to full door height. For the rails, subtract the combined stile width from your overall door width and add material for the two tenons. Tenon allowance: approximately 3/8 in per end Rail length formula: door width − stiles + tenon allowance Step 2: Cut Tenons on the Table Saw Raise your saw blade to form the tenon shoulders, using a miter gauge or sled with a stop block for repeatability. Cut both shoulders, then remove waste between them by sliding the rail sideways over the blade. Test the tenon in a stile groove and adjust blade height or fence position in small increments. Adjust in 1/32 in increments for precision Shoulders must be clean and square Step 3: Cut Mortises and Prepare the Center Panel With the same blade height, switch to the fence and cut the groove that forms the mortise. Make two passes to reach the correct width. Cut the plywood panel slightly smaller than the opening and use painter’s tape to prevent tear-out during cutting. Dry fit everything before glue-up. Groove depth: shallow enough for strength but not through Reduce panel size slightly for easy fit Step 4: Glue, Clamp, and Square the Door Apply glue to the tenons and assemble the frame around the panel. Clamp evenly, checking that glue stays inside the joints and the door remains square. Let it cure overnight for maximum strength, then drill hinge cups as needed. This creates a durable, classic Shaker door. Do not overtighten clamps Ensure diagonal measurements match Making of Advanced DIY Cabinet Doors Using a Router Table Materials and Tools Required Before starting the advanced method, gather the materials and router-specific tools you’ll need. This method relies on precision, consistent cuts, and a stable setup for clean, professional-grade joinery. Material Notes Hardwood boards Primary door frame material Solid wood panel or plywood Center panel based on desired look Wood glue For mortise-and-tenon joints only Blue tape or painter’s tape Reduces tear-out and protects surfaces Sandpaper For smoothing and pre-finish prep Optional edging/profile material For decorative router details Step 1: Rout Tenons and Mortises With Combination Bits Cut your stiles and rails using the same calculation method as the intermediate version. Install the combination router bit that cuts tenons first, then switch to the matching mortise bit. Keep one consistent reference face on each board to maintain alignment, and use light passes to avoid burning and ensure crisp, repeatable cuts. Reference face: always against the fence Light passes: prevents burning and tear-out Step 2: Shape the Center Panel and Add Profile Cut the panel with slight clearance so it sits comfortably inside the frame. Use a panel-lip or tenon bit to create the tongue that fits into the mortises. For a more dimensional look, optionally use a raised panel bit. A router table gives smooth, uniform results that eliminate the need for sanding or trimming the panel edges later. Clearance: 1/16–1/8 inch per side Raised panel bits: run at reduced RPM Step 3: Assemble With a Floating Panel and Final Sanding Apply glue only to the mortise-and-tenon joints, allowing the solid wood panel to float so it can expand and contract naturally. Clamp with light, even pressure and confirm the door is square before the glue sets. Once cured, soften the edges with a roundover bit and sand the door thoroughly in preparation for finishing. Do not glue solid wood panels in grooves Check diagonal measurements to confirm square For more details and tips, refer to the YouTube video: Which Joinery Method Should You Choose? Two joinery methods dominate DIY cabinet doors: pocket holes and mortise & tenon. Here’s how to choose. Pocket Hole Joinery Best for: First-time builders, quick bathroom updates, budget projects Build time: 20 minutes per door Strength: Solid for everyday use, may loosen after 10+ years of heavy kitchen traffic Mortise & Tenon Joinery Best for: Full kitchen remodels, heirloom-quality furniture Build time: 45+ minutes per door Strength: Lasts generations with zero loosening My Recommendation Start with pocket holes. Build 2-3 practice doors, then upgrade to mortise & tenon when you’re ready for advanced techniques. Hammer That Nail DIY cabinet doors let me control my home’s look and feel, choosing style, size, and finish instead of settling for store options. Starting with the pocket hole method, then using the table saw or router table, each door builds confidence. Don’t worry if the first isn’t perfect, that’s normal. The beauty of learning these three techniques is flexibility: quick updates when you need speed, heirloom quality when a project deserves it. Start with one door this weekend. You’ll surprise yourself with how quickly confidence builds once you see that first frame come together. Got questions about your specific project? Drop them in the comments.
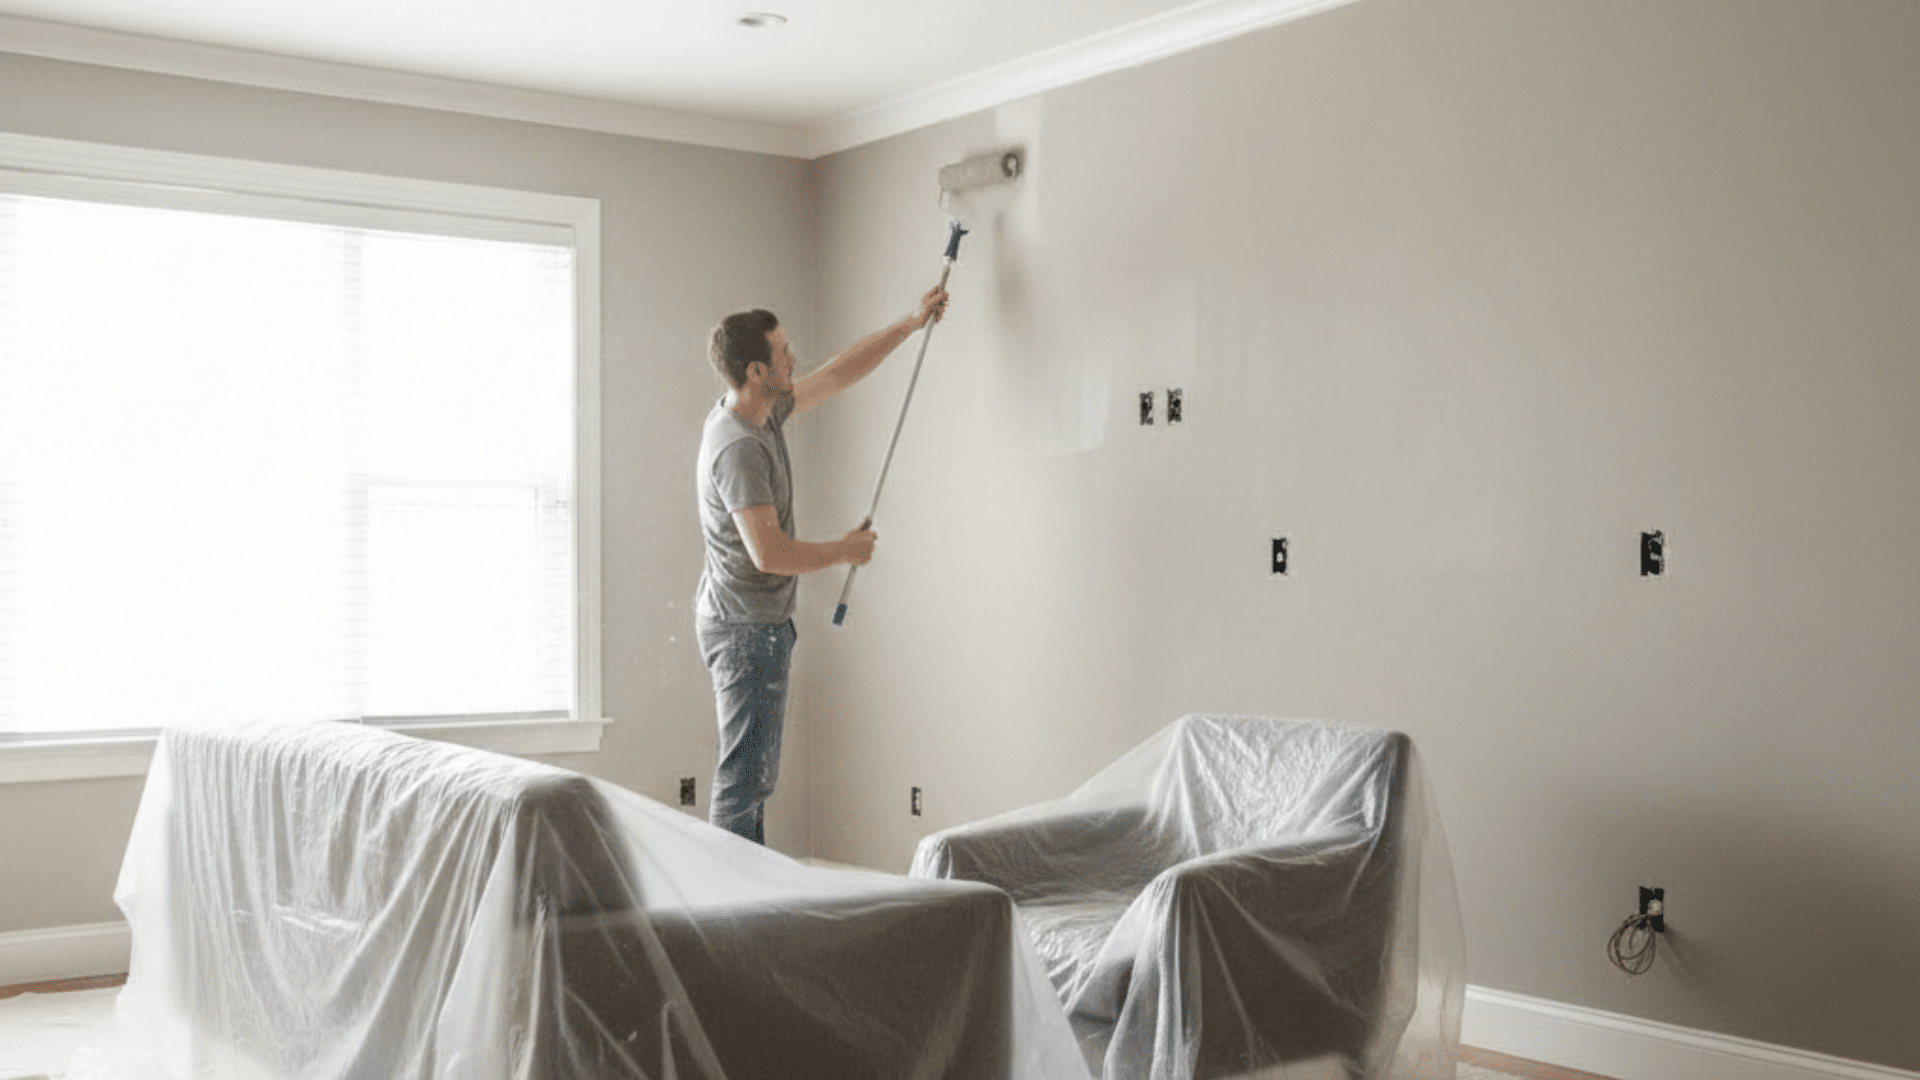
I remember walking into my living room one afternoon and noticing how dull the walls looked. Maybe you’ve had that same moment where you realize fresh color could make your space feel better. Interior residential painting can seem like a big task, but it becomes simple once you understand the steps. You might want to paint on your own, or you might feel better having a crew handle the work. Either choice can work well when you know what to expect. I’ll walk through the key parts so you can plan with confidence and avoid stress. What Does Interior Painting Cover? Interior painting includes the main surfaces inside your home, plus any extra features you choose to add. Standard Surfaces Most projects focus on the areas used and seen every day. This includes walls, ceilings, baseboards, door frames, and window trim. These parts form the base of the room and set the tone for a new color. Crews usually clean, sand lightly, and apply steady coats to create a smooth finish. These areas also show wear the quickest, so updating them brings the most noticeable change. When planning your project, list each surface clearly so your estimate reflects the full scope. Optional Add-Ons Some homes have extra features that need attention during a project. Closets, built-ins, cabinets, and stair rails fall into this group. These parts take more time because they have edges, hinges, or tight corners. They can raise project cost, but they also help the room look complete once finished. If these areas match the main surfaces, the room feels consistent. If they stay older or marked, they can stand out. Decide early which extras matter most based on use and budget. Prep and Repairs Smooth results rely on good prep. This includes patching small holes, sanding rough spots, and filling gaps with caulk. These steps help paint sit flat and last longer. Some spots need primer, especially where stains show or where dark colors change to lighter ones. Taking time to prep reduces the need for touch-ups later. Many crews include basic repairs, but larger issues may call for separate help. Clear prep notes in your estimate prevent confusion once work begins. Interior Painting Costs Interior painting prices shift based on the size of your home, the number of rooms, and the condition of each surface. Across the U.S., most professional interior painting projects fall between $2.50 and $5.50 per square foot. In some areas or for higher-end finishes, costs can range from $2 to $6 per square foot, with premium or complex jobs reaching higher. Walls usually sit at the lower end of the range. Ceilings, trim, and detailed areas cost more because they take extra time and care. Cost by Surface Different parts of the room are priced differently. Walls: about $1.50 to $3.50 per square foot Ceilings: about $1.00 to $3.00 per square foot Trim and detailed work: around $2 to $6 per linear foot If your home has high ceilings, textured walls, tight corners, or stair rails, labor time increases. That pushes pricing toward the higher end. Cost by Home Size Total cost depends on how much space needs paint. 500 sq ft: roughly $200 to $1,000 1,000 sq ft: about $2,000 to $6,000 2,000 sq ft home interior: typically $3,950 to $6,250 A single average-sized room often falls between $990 and $1,320, depending on prep work and surface condition. What Affects the Final Price Labor makes up the largest part of the total. Homes with multiple rooms, heavy prep work, repairs, or several coats will cost more. Paint quality matters too. Higher-grade paint costs more per gallon but often covers better and lasts longer. Extra areas such as closets, cabinets, and stair railings add to the total because they require detailed work. A clear list of all surfaces helps you see exactly how your estimate is built and why your final number lands where it does. DIY or Hire a Pro Choosing between doing the work yourself and bringing in a crew depends on your time, skill level, budget, and project size. Factor DIY Hire a Pro Cost Lower cost, higher effort Higher cost, less effort Time Slower pace, flexible schedule Faster results, set schedule Skill Basic skills needed Skilled crew handles details Finish Good with steady prep Consistent finish across all rooms Tools Must buy or rent gear Tools included in the service Safety Ladder work and fumes Crew manages safe setup Stress More steps to manage Less to coordinate Use this to decide which option fits your comfort level and timeline, then follow the path that supports your goals. DIY Interior Painting Process: Step-By-Step Before you start, set yourself up like a pro. When you use the right tools and a simple order, you can paint faster with cleaner lines and less tape. Tools And Materials You’ll Need Paint tray with disposable liner Quality roller cage Extendable pole (paint stick) with a secure locking handle Microfiber roller sleeve (good for smooth, even coverage) Three-inch angle brush Five-in-one tool (scraper, screwdriver, and roller cleaner) Utility knife Ladder or step stool Sanding sponge or sanding pad Drop cloths or tarps Good interior wall paint Small bucket or can for cutting-in paint Damp rag (for quick wipe-ups) Step 1: Prepare the Space and Fix Old Lines Start by clearing the hallway so you can move freely without bumping the roller. Cover floors and stairs with drop cloths, and slide furniture away from the walls. Remove all outlet and switch covers with your knife or screwdriver instead of painting around them. Next, fix old, messy edges where wall paint sits on trim or ceiling. Use trim or ceiling paint to clean that line first, so you’re not fighting three different colors later. This gives you a fresh, clean starting edge. Step 2: Sand for A Smooth, Professional Finish Lightly sand the walls with a sanding sponge or sanding pad. Builders often skip this step, which leaves walls feeling gritty and rough. You don’t need to press hard or remove paint; you’re just knocking down bumps, dust, and tiny splatters. Run your hand across the wall before and after sanding so you feel the difference. Smooth walls make your paint glide better, cover evenly, and look more finished. This one step separates a “good enough” job from a pro-looking result. Step 3: Cut in Ceilings, Corners, Trim, and Outlets Load your three-inch angle brush and start cutting at the ceiling line, but on the first coat, stay about one-quarter inch away if the old paint is flat. Then move to outside corners, using the heel of the brush to pull a clean line and gently push paint to the edge. Cut along baseboards and trim with your head low so you can see clearly. Finally, brush around outlets and switches, so your roller never hits them. This avoids splatters on plastic and hardware. Step 4: Roll Walls with An Extension Pole and Wet Edge Attach your roller to an extendable pole, so your hands stay below your heart, and you can use two hands. Load the microfiber sleeve slowly until it’s fully saturated. Roll straight up and down from almost floor to ceiling, not in a “W” pattern. Work in sections about two roller widths wide. After each section, back-roll lightly to even the texture. Always keep a wet edge by rolling into paint that’s still wet. If you stop mid-wall, you risk ridges and lap marks. Step 5: Sand Lightly, Then Do a Precision Cut and A Second Coat Once the first coat dries, sand the walls again very lightly to remove dust nibs and small bumps. For your second cut, load the brush, then wipe extra paint so it sits inside the bristles, not globbed on top. Now you can press gently right into the corner or ceiling line for a crisp edge. On coat two, always finish one wall at a time: cut that wall, then roll it immediately. This keeps the brush and roller work wet together and blends the texture perfectly. Step 6: Let the Paint Cure, Then Clean up And Reset After the second coat looks even, let the paint dry and begin curing. Avoid hanging pictures or mounting hooks for at least forty-eight hours so you don’t dent soft paint. Wait about a month before scrubbing or washing high-traffic spots, so the finish hardens fully. Clean brushes before they gum up, and use your five-in-one tool to scrape extra paint from the roller back into the can. Peel any tape carefully, reinstall cover plates, and label leftover paint for future touch-ups. For an in-depth walkthrough of the whole process, check out the complete interior painting video tutorial below: How To Hire an Interior Painter Hiring the right crew saves time, avoids stress, and gives you steady results that last. Use these points to guide your choice. Look for painters with solid reviews and a clear record of completed projects. Ask for proof of insurance before any work begins. Request a written estimate that lists surfaces, prep steps, and coat count. Confirm the paint brand and finish they plan to use. Ask who will be on the crew and how many days the job should take. Check how they handle minor repairs or extra surfaces not listed. Review warranty terms for touch-ups or early wear. Avoid bids that seem unclear or far lower than others. Compare at least two quotes side by side for accuracy. Make sure communication feels steady and easy before you commit. Preparing Your Home For Painting A little planning helps the project move smoothly and keeps daily life comfortable while work is underway. 1. What You Handle Take down wall decor, remove shelf items, and clear furniture tops so nothing gets in the way. Confirm your colors before the crew arrives, including sheen for each room. Move small items out of walking paths to prevent tripping hazards. Set aside a spot for painters to place tools and paint cans, and keep valuables in a safe location. This simple prep gives the crew room to work and prevents delays once the job starts. 2. What Painters Handle Most crews protect floors with drop cloths and cover large furniture that cannot be moved. They mask windows, doors, and fixtures as needed. Many also handle light repairs, such as filling small holes or smoothing minor rough spots. These steps help create a clean base for paint and reduce the risk of splatter or drips. Once they begin, try to give them steady access to each room so they can finish on schedule. 3. Living in the Home During Painting If you stay in the home, plan which rooms will be painted first so you always have space to sleep and relax. Open windows when possible, and use fans to keep air moving. Keep pets and kids away from wet walls and tools to avoid accidents. Choose one hallway or entry as the main path to reduce mess. Good airflow and clear routes help keep the home comfortable while the work gets done. 4. Vacant Home Advantages An empty home allows painters to move quickly, reach every wall with ease, and set up tools without shifting furniture. They can complete several rooms at once, which shortens the overall schedule. Drying time improves because nothing blocks airflow. This often results in fewer interruptions, cleaner results, and a smoother finish. If timing allows, scheduling painting before moving in is one of the simplest ways to speed up the entire process. How Long Does Painting Take The time needed for interior painting depends on your home’s size, the number of rooms, and how much prep each surface requires. A single bedroom with simple walls may take part of a day, while larger rooms with high ceilings need more time for cutting, rolling, and drying. Hallways and stairwells often add extra hours because of tight corners and detailed trim. Whole homes can take anywhere from one to several days based on crew size and surface conditions. Drying also plays a role, since some paints feel ready quickly but still need time before the next coat. Planning room order and clearing paths helps keep the schedule on track and reduces downtime between stages. Paint Care and Wall Maintenance Dry Time: Give fresh paint at least two days before hanging frames or pressing anything on the wall. Early Cleaning: Avoid washing new paint for about a month so the finish can harden fully without marks. Gentle Wash: Use a soft cloth or sponge with mild soap and water, then pat dry instead of scrubbing hard. Spot Marks: For scuffs or fingerprints, start with plain water first, then mild soap only if needed. Touch Ups: Keep a small labeled container of leftover paint for small spots, and use a clean brush or foam pad. Room Checks: Look over busy areas every few months, fix small chips early, and wipe dust from trim and baseboards. Final Thoughts Now you’ve seen how simple planning, steady prep, and the right tools can shape your results. I wanted to give you a clear path so you feel ready for the next stage, whether you paint on your own or hire a service. Interior residential painting can refresh your rooms without a large budget when each step is done with care. Keep your paint labeled, fix small marks early, and check busy areas from time to time. These habits help your walls stay clean longer. If you’re ready to try another project or want more home guidance, check out other blogs on the website and see what fits your next goal.
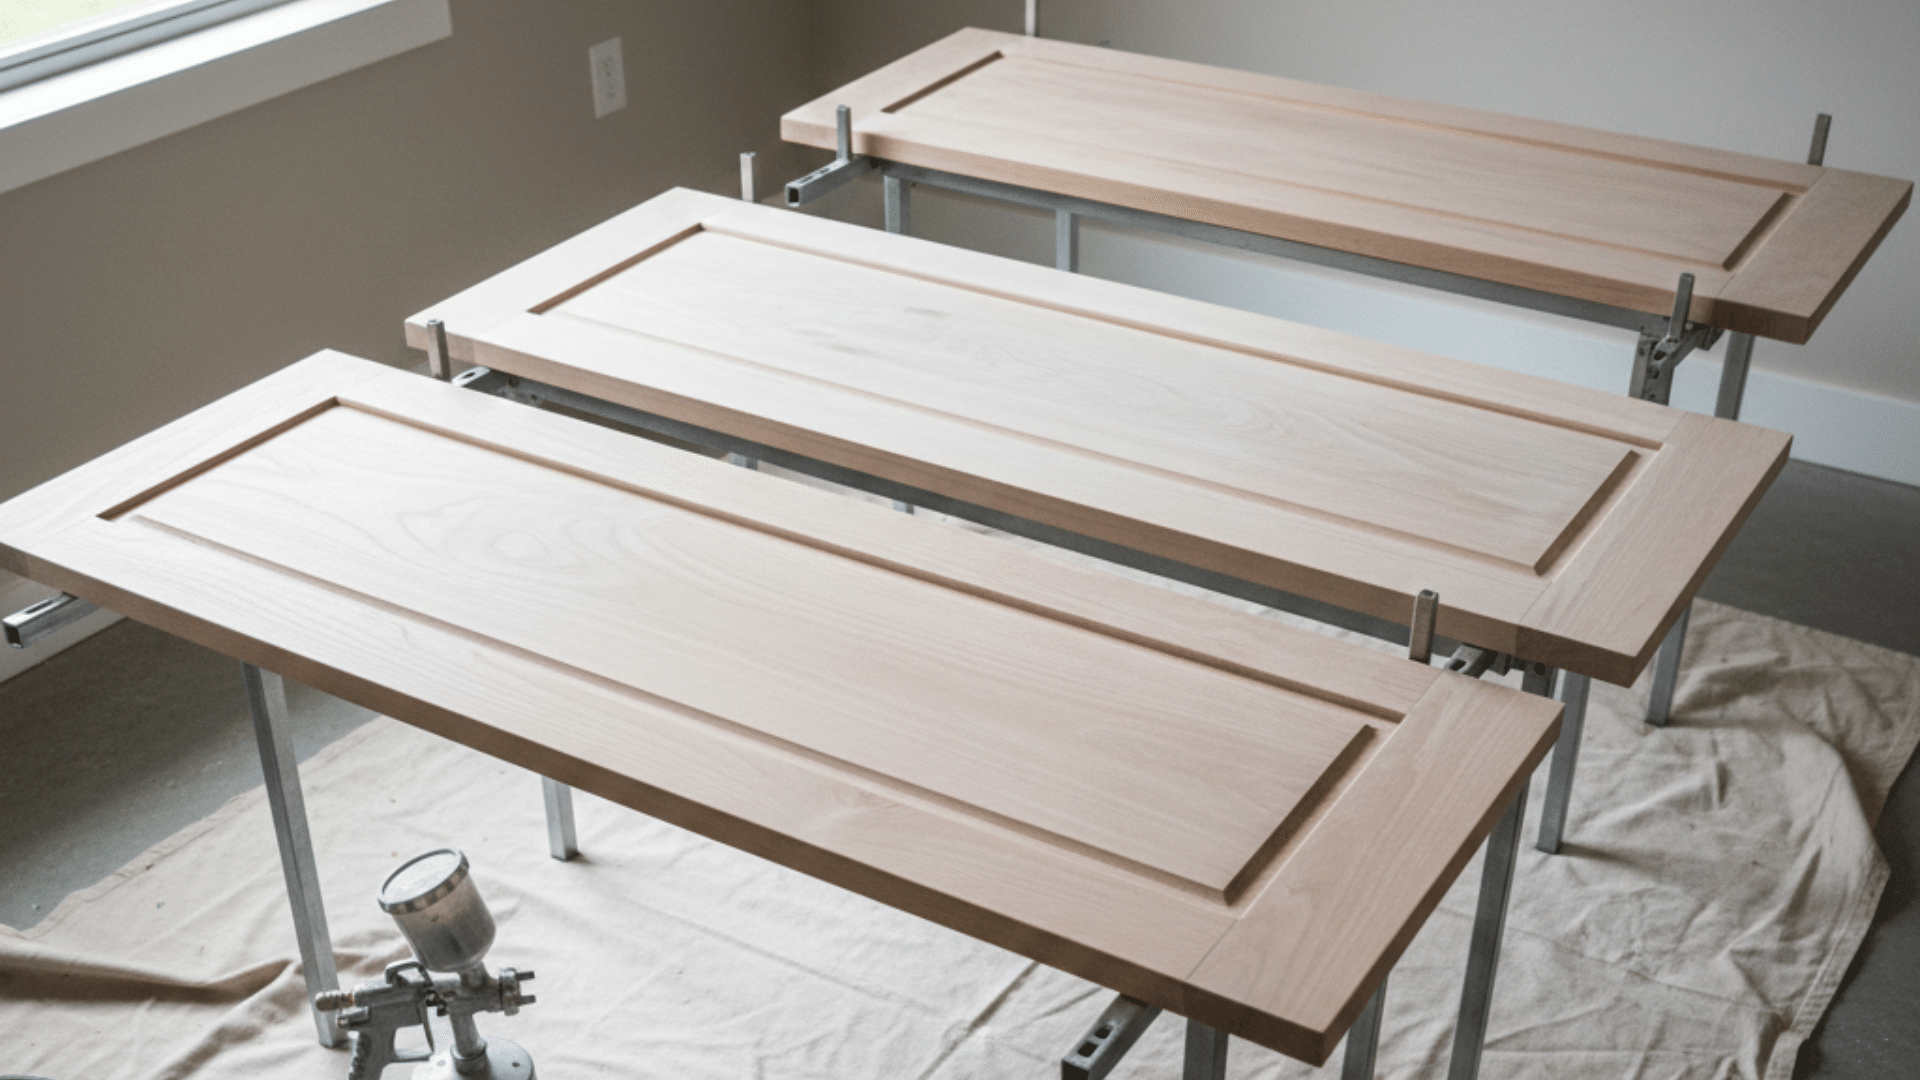
I remember the first time I saw bare wood cabinets and wondered if painting them would really hold up. You might be staring at unfinished cabinets right now, thinking the same thing. The good news is that how to paint unfinished cabinets is much more straightforward than dealing with old, greasy finishes. Raw wood gives you a clean starting point, but it also comes with its own set of concerns, like sanding, sealing, and drying time. This becomes important when comparing milk paint vs chalk paint for the final finish. Getting those parts wrong can lead to rough surfaces or easy damage later. I want to walk you through what actually works, what causes trouble, and how to avoid common slip-ups when tackling how to paint unfinished cabinets from start to finish. Can You Paint Unfinished Cabinets Successfully Yes, you can paint unfinished cabinets and get strong, long-lasting results with the right process. Unfinished cabinets are raw wood, which means there is no old finish to strip or remove first. That alone makes the job simpler than repainting existing cabinets. Paint and primer bond better to bare wood, so adhesion issues are less common when prep is done correctly. For beginners, unfinished cabinets are often a better starting point. You are not fighting grease buildup, glossy coatings, or unknown products used by the manufacturer. You start with a clean surface and build from there. As long as you sand properly, use a solid primer, and apply paint in thin coats, results can look clean and even. Mistakes are also easier to fix on raw wood, which helps reduce stress during the project. Step-By-Step Guide To Painting Unfinished Cabinets Follow a clear process that covers setup, sealing, sanding, painting, and protection so unfinished cabinets dry smooth, resist damage, and look consistent from door fronts to cabinet boxes after installation. Gather Your Materials Unfinished cabinet doors and cabinet boxes Sanding sealer Paint sprayer (critter-style or similar) Air compressor Cup hooks Drill or driver Steel wool pad Extra-fine sanding block 220-grit sandpaper Clean cloth or rag Wood filler Polycrylic clear finish Respirator or mask Step 1: Set up Cabinet Doors for Spraying Start by preparing the cabinet doors so they can be sprayed evenly on all sides. Screw cup hooks into hidden edges of each door. Place them at the top for wall cabinets and at the bottom for base cabinets so holes are never visible later. Hang the doors on a rack or temporary frame with enough spacing to avoid contact. This setup keeps doors off flat surfaces, prevents sticking, and allows paint to flow smoothly around edges, corners, and details without missed spots. Step 2: Apply Sanding Sealer Load sanding sealer into the sprayer and set air pressure just under 30 PSI. Spray an even coat across the door faces, moving slowly and keeping the sprayer steady. Focus on grooves, corners, and edges where raw wood absorbs more product. The sealer fills open pores and creates a smoother base for paint. Take time during this step since uneven sealing can show later. Let the sealer dry fully before touching or sanding the surface. Step 3: Smooth the Surface After Sealing After the sealer dries, the wood surface will feel rough. This happens because moisture causes wood fibers to rise. Lightly smooth the surface using a steel wool pad with gentle pressure. If certain areas still feel uneven, switch to an extra-fine sanding block or 220-grit sandpaper. Use only one or two light passes to avoid removing too much sealer. Once smooth, wipe everything with a clean cloth to remove dust before painting. Step 4: Apply the First Paint Coats Before spraying, test the sprayer pattern and pressure on scrap material. Apply the first paint coat using slow, even passes. Keep a steady distance and overlap slightly to avoid streaks. Let the first coat dry fully, then apply a second coat the same way. At this stage, sanding is not needed yet. These first coats build coverage and start leveling the surface. Allow proper drying time before moving on to inspection or extra prep steps. Step 5: Inspect and Re-Seal if Needed Once two paint coats are dry, inspect the surface closely under good lighting. If the surface looks uneven or needs more smoothness, apply another coat of sanding sealer. This extra layer helps paint level better and improves surface consistency. After drying, lightly smooth the surface again using a pad or fine sandpaper. Keep pressure light and focus on feel, not appearance. Clean all dust thoroughly before moving forward to prevent texture issues. Step 6: Sand Before the Final Paint Coat Before applying the last paint coat, lightly sand the surface using an extra-fine sanding block or 220-grit sandpaper. This step removes minor texture and helps the final coat lay flat. Sand just enough to smooth the surface without cutting through paint layers. Flip the doors and repeat on the back side, which is often rougher due to the panel material. Wipe everything clean so no dust remains before spraying the final coat. Step 7: Apply Protective Clear Finish Load polycrylic into the sprayer and lower the air pressure slightly since the product is thinner than paint. Spray an even coat across all painted surfaces. This layer protects the paint from scratches and wear. After the first coat dries, apply a second coat for added durability. Keep movement steady and avoid heavy buildup. This step is critical for long-term performance, especially in kitchens where cabinets face frequent contact and cleaning. Step 8: Final Dry and Inspection After all coats are applied, allow cabinets to dry fully in a clean, dust-free area. Once dry, inspect the surface by touch and under strong lighting. Check for smoothness, even coverage, and consistent finish across doors and trim. Compare results from different angles to confirm uniform appearance. After proper drying time, the cabinets are ready for installation and normal use without sticking, scratching, or surface damage. For a complete walkthrough of the whole process, check out the video tutorial below: What Unfinished Cabinets Really Are Unfinished cabinets are made from raw wood that has not been sealed, painted, or coated at the factory. The surface feels dry and slightly rough because the wood pores are open. This allows primer, sealer, and paint to soak in and bond directly to the material. Prefinished cabinets are different. They already have a factory-applied coating, which may include stain, paint, or a clear layer. That surface is smooth and sealed, so new paint does not bond as easily without extra prep. With unfinished cabinets, there is no old coating to remove or strip first. This makes them easier to work with, especially for painting projects. The results depend heavily on proper sanding, sealing, and coating steps to control absorption and surface texture. Best Primer and Paint by Cabinet Material Different cabinet materials absorb coatings in unique ways, so choosing the right primer and paint helps avoid surface issues and uneven results. Oak Cabinets Oak has an open grain and natural tannins that can rise through paint layers if not controlled. A stain-blocking primer is critical here, especially for lighter paint colors. Many DIY users report yellow or brown marks appearing days later when this step is skipped. Apply at least one solid primer coat and allow full drying before sanding lightly. Some projects benefit from a second primer coat for added protection. Taking time at this stage prevents future touch-ups and helps the paint layer stay even and stable over time. Maple And Birch Cabinets Maple and birch have tighter grain patterns, which makes them easier to coat evenly. The surface does not absorb as much product, so thin, controlled coats work best. A high-quality bonding primer helps paint grip without creating texture. Light sanding between coats keeps the surface flat and consistent. Many users recommend avoiding heavy rollers on these woods, since excess paint can leave subtle ridges. Patience with drying time improves the final look and reduces the need for extra coats later. MDF Cabinets MDF cabinets are common but can cause issues along edges and cut areas. These spots absorb moisture quickly and may swell if not sealed well. A dedicated primer designed for MDF or raw fiberboard works best. Apply extra attention to edges, corners, and routed details, sealing them before full coats. Users often report rough edges after the first coat, which can be fixed with light sanding once dry. Proper sealing early helps prevent long-term wear and surface breakdown. Choosing the Right Tool for Cabinet Painting The tool you choose affects how smooth the cabinets look and how long the work takes. Brushes give the most control and work well for edges, corners, and detailed areas. Rollers cover flat surfaces faster and help keep coats even when used correctly. Sprayers create the smoothest finish but require more setup, space, and practice. Many people combine tools, using a brush for details and a roller or sprayer for larger areas. The best option depends on skill level, workspace size, and the finish goal. Picking the right tool early helps reduce mistakes, saves time, and improves final results. Dry Time vs. Cure Time Cabinets often seem finished long before the paint is actually dry. The table below breaks down each stage clearly so timing mistakes are easier to avoid: Stage What Is Happening How It Feels Typical Time Range What To Avoid Initial Dry Surface moisture evaporates Dry to the touch 1–8 hours Touching, stacking, light pressure Recoat Ready Paint can accept another coat Slightly firm 4–24 hours Heavy sanding, hardware install Handling Dry Surface holds light contact Mostly firm 24–48 hours Hanging doors, tightening screws Early Cure Paint begins to harden below the surface Firm but flexible 3–7 days Cleaning, bumping edges Full Cure Paint reaches full strength Hard and durable 14–30 days Aggressive cleaning, impact Paint dries from the outside in. Even when cabinets feel dry, deeper layers stay soft. Waiting through full cure time prevents dents, scratches, and sticking doors that often show up days later. Should You Paint Before or After Installation Many forum users suggest painting cabinet doors before installation when space allows. This method gives better access to edges and reduces the risk of drips or missed spots. Hanging doors flat or on hooks also helps paint settle evenly. Painting after installation can make sense when cabinets are already mounted or space is limited. This option avoids extra handling and reduces the chance of dents during transport. For beginners, painting doors first and boxes in place often works best. It keeps the process manageable while limiting touch-ups later. The right choice depends on workspace, time, and comfort level, but careful handling and proper drying matter more than timing. Common Mistakes and How to Fix Them These issues come up often during cabinet painting, and most can be corrected with simple adjustments, patience, and practice. Skipping sanding between coats: Light sanding smooths the texture and helps the next coat settle evenly. Applying thick coats: Thin coats dry better and reduce runs, drag marks, and uneven buildup. Ignoring dust control: Cleaning surfaces between steps prevents grit from getting trapped in paint layers. Rushing dry time: Extra wait time helps avoid dents, scratches, and doors sticking together. Poor edge prep: Sealing and smoothing edges early prevents rough spots and early wear. Addressing these problems early saves time, reduces rework, and helps cabinets hold up better during daily kitchen use and cleaning. Conclusion Painting cabinets from raw wood takes patience, but the process is very manageable with the right order and timing. Proper setup, sealing, sanding, and drying all play a role in how the finish holds up over time. When each step is handled carefully, the results feel solid and consistent, not fragile or rushed. If there is one takeaway to remember, it is that waiting between stages matters just as much as the products used. I hope this breakdown made how to paint unfinished cabinets feel clearer and less stressful. If you want more home improvement help, take a look at other blogs on the site and keep building confidence with your next project.
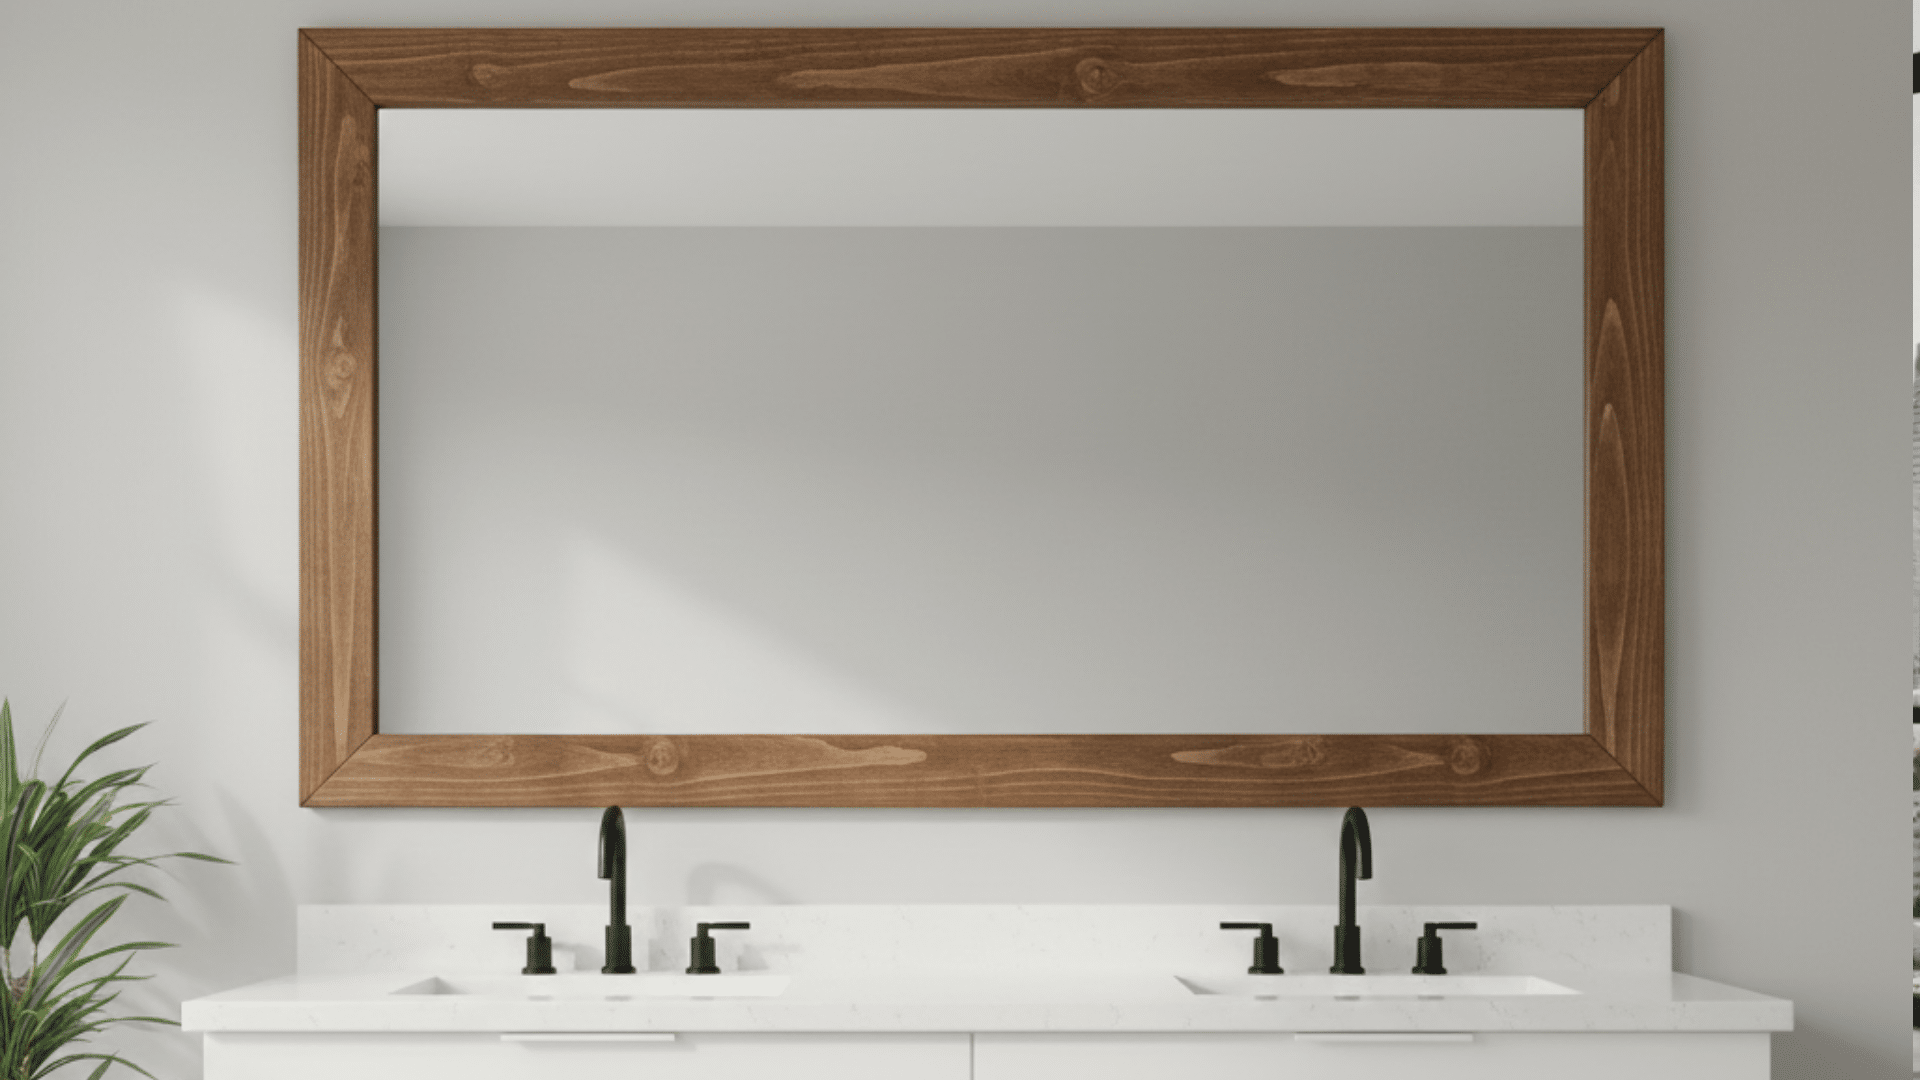
DIY mirror frame upgrades can feel like one of those projects that sounds simple, until you start pricing frames or staring at a bare mirror edge. I used to think you had to buy a custom frame or live with the plain look. The truth is, you can build something solid with basic boards, a few tools, and a little planning. The biggest headaches usually come from wrong measurements, corners that do not meet, or a finish that does not hold up in a bathroom. I am going to keep this simple and practical so you can get it done without wasting wood or time. Stick with me, and you will have a DIY mirror frame that fits right and looks finished. Quick Checklist Before You Start Before you buy wood or trim, take one minute to check three things. It saves you from bad cuts and loose frames. Mirror glued or clipped: Look at the edges. If you see metal clips, you may need to work around them. If the mirror looks flat against the wall with no clips, it is likely glued on. Bathroom moisture: If this is in a bathroom, plan to seal the frame. Steam and splashes can damage raw wood and some paints. Clearance over backsplash: Measure the gap between the mirror and backsplash or faucet. Make sure your frame will not hit tile, outlets, or light fixtures. Now you can choose the safest method. Step By Step: How To Build A DIY Mirror Frame Use this simple step-by-step plan to build a wood mirror frame with clean corners, a snug fit, and an easy finish. It works for many mirror sizes and styles. Tools & Materials Needed (2) 1×4 boards, 8 feet long (example cost was about $7 total) Measuring tape and pencil Miter saw (for 45-degree corners) Table saw (to cut a notch for the mirror to sit in) Sander or sandpaper Wood glue Brad nailer + 18 gauge brad nails (about 1 1/4 inch) Paint or stain (optional) Scrap boards for the back (to hold the mirror in place) Step 1: Measure the Mirror and Plan the Reveal First, decide how you want the frame to sit on the mirror. A flush fit means the frame lines up right at the mirror edge. An overlap fit means the frame covers a small strip of the mirror edge. Overlap hides mirror edges better and looks cleaner. Measure the mirror width and height. Your basic rule is simple: your frame opening must match your mirror size if the mirror sits inside a notch. If you plan to overlap, subtract that overlap from the opening size. Step 2: Cut Your Frame Pieces Cut your boards into four pieces: top, bottom, and two sides. If you want clean corners, cut 45-degree miters on each end. If you want a simpler build, use straight cuts and join with butt joints, but miters look more finished. Label each piece as you cut it so you do not mix up the top, bottom, and sides. For example, the top and bottom pieces were 36 inches, and the side pieces were 28 inches, but your sizes should match your mirror. Step 3: Dry Fit Everything Lay the four pieces on a flat surface and test the fit before gluing. Push the corners together and check for gaps. If you see gaps, recheck your cuts and make sure your miters match. Also, check the frame shape by measuring corner to corner both ways. If both diagonal measurements match, your frame is square. This helps your mirror sit right in the frame and keeps it from rocking later when you install it. Step 4: Assemble the Frame Once the dry fit looks good, glue the corners and assemble the frame. For a light frame, glue alone can work, but glue plus fasteners is stronger. Wood glue was added to the miter corners, then brad nails were used to lock the corners in place. Make sure the grooves or notches line up on all pieces before you nail. Wipe off excess glue so it does not harden on the wood surface and mess up your finish. Step 5: Install the Frame Prep the mirror and wall area first. Clean off dust so your frame sits flat and holds better. If your mirror will sit inside the frame notch, place the mirror into the groove once the front frame is built. Then add support boards on the back to keep the mirror from moving. In the example, backing boards were cut and attached to hold the mirror in place. If you are attaching a frame to a wall mirror, place the frame carefully, use tape to hold it in place, and support it until everything is set fully. Step 6: Finish (Paint Or Stain) Sand the whole frame, especially corners and edges, so it feels smooth. Then finish it before final attachment if your build needs backing boards added later. A thin coat of white paint was brushed onto to make a light wash look, like a pale stain. You can also use a regular stain and seal it. For bathrooms, add a clear sealer on top so steam and splashes do not damage the finish. Let it dry fully before you hang or install it near daily moisture. DIY Mirror Frame Ideas (Pick a Look) After you build the base frame, use these ideas to match your space. Each option tells you what to use, how it looks, and one tip to help it last. 1. Modern Box Frame A modern box frame uses flat boards and straight lines, so it feels clean and simple. Use 1×3 or 1×4 boards and keep the edges crisp with sanding. This style works well if you want the frame to look bold without extra detail. Paint it black for contrast, or white for a lighter look. If this is in a bathroom, add a clear topcoat so steam and splashes do not dull the paint. This style is also forgiving if your walls are not perfect. Best Materials: 1×3 or 1×4 pine, MDF, or poplar. Best Finish: Paint plus a moisture-safe clear topcoat. 2. Simple Trim and Molding Frame This is the fast upgrade many people use for builder mirrors. You attach trim that looks like doorway casing or base cap, so the mirror feels finished. It works well when you want a classic look without building a thick frame. Use a trim that is light enough to hold well, especially if you plan to attach it to the mirror surface. Paint it to match your vanity, wall trim, or cabinets so it blends in. This idea also helps hide rough mirror edges and small wall gaps. Best Materials: Base cap molding or door casing. Best Finish: Paint to match your vanity or wall color. 3. Layered Molding Frame Layered molding adds depth by stacking two trim styles. Start with a wider outer piece, then add a thinner inner piece to create a stepped look. This method gives more detail without needing fancy cuts. Keep both layers the same color so it stays neat and not busy. If you want the layers to feel tighter, fill small seams with paintable caulk before painting. This style works well in bathrooms because the extra trim detail makes a plain mirror look more finished. Best Materials: One wider trim plus a thinner inner trim. Best Finish: Same color paint on both layers. 4. Reclaimed Wood Frame Reclaimed wood gives a rough, aged look that feels warm and natural. Use straight boards only, because warped wood will not sit flat. Sand the edges so you do not get splinters, but do not sand away all the texture if you want that worn look. This style hides small wall flaws well because the wood grain and texture break up lines. In bathrooms, sealing matters most, since raw reclaimed wood can soak up moisture. Best Materials: Old fence boards or straight pallet-style planks. Best Finish: Light sand, then seal well. 5. White Painted Farmhouse Frame This uses thicker boards painted white for a strong, simple frame. It works best when you want the mirror to stand out against darker walls or wood vanities. Use 1×4 or 1×6 boards and sand the corners so they feel smooth and even. Semi-gloss paint can make cleaning easier, especially in a bathroom. If you like a softer look, you can do a thin white coat so some wood grain shows through, then seal it so it holds up. Best Materials: 1×4 or 1×6 boards. Best Finish: Semi-gloss paint with a clear topcoat. 6. Dark Stained Wood Frame A dark-stained frame adds contrast and pairs well with warm lighting and bronze or black hardware. Wood choice matters because pine can stain blotchy without prep. Use a wood conditioner if you pick pine, or use a hardwood like oak for a more even stain. After staining, add a clear coat so water does not leave marks. If you want a more even look, test stain on a scrap piece first. This style looks best with clean corners and a smooth sanded surface. Best Materials: Poplar, oak, or pine plus conditioner. Best Finish: Stain plus clear coat. 7. Picture Frame Style With Backing This style looks like a real wall frame because it uses a backing strip behind the front trim. The backing helps if the mirror edge is rough or uneven, and it gives you more support. It also helps keep the mirror snug if you are setting it into the frame. Use thin plywood as a backer, then attach trim on the front. Seal the edges well, because plywood edges can soak up moisture. This style is a good choice if your mirror is heavy or wide. Best Materials: Thin plywood backing strip plus trim. Best Finish: Paint or stain, then seal edges. 8. Shiplap Frame Border This idea frames the whole mirror zone, not just the mirror edge. Add shiplap boards around the mirror area, then finish it with simple trim on top. It works well if you want the mirror wall to feel like a feature. Use MDF shiplap panels for smoother paint, or wood planks for more texture. Keep the paint color the same as your wall trim so it does not fight for attention. Seal it well if it sits near a sink. Best Materials: Shiplap planks or MDF shiplap panels. Best Finish: Paint the same color as your trim. 9. Tile Border Frame A tile border is a smart pick near sinks because it handles water better than bare wood. Use mosaic tile for detail or thin subway tile for a clean look. Plan your tile layout so cuts land in less visible spots. Grout lines need sealing, or stains can set in over time. This option also helps match a backsplash, so the mirror feels tied into the whole wall. Keep the border width balanced, so it does not overpower the mirror. Best Materials: Mosaic tiles or thin subway tile. Best Finish: Sealed grout and clean edges. 10. Dowel Accent Frame This adds texture by attaching dowels to a simple base frame. Build the base first, then cut dowels to the same length and glue them evenly around the edge. A spacing guide helps keep gaps consistent. Paint the whole piece one color so it looks neat and unified. This style is lighter than it looks if you use smaller dowels, which can help with mounting. In bathrooms, seal it so paint does not chip from moisture and cleaning. Best Materials: Wood dowel rods plus a thin base frame. Best Finish: One color paint plus clear coat. 11. Rope Wrapped Frame A rope-wrapped frame brings a casual look and works well in guest baths. Start with a simple wood frame, then wrap rope tightly and glue as you go. Jute rope works well, but it can shed dust if left raw. A light sealer coat can help reduce shedding and make it easier to wipe clean. Keep rope joins at the bottom edge so they are less visible. This frame can get bulky, so check clearance near lights and outlets first. Best Materials: Jute rope plus strong glue. Best Finish: Light sealer coat to reduce dust. 12. Metal Look Painted Frame This gives an industrial feel without metal tools. Build a flat wood frame, then paint it in a dark tone. Add soft highlights with a dry brush so it looks like worn metal. Keep the edges sharp and smooth, because bumps show more with this finish. Seal it so cleaning does not dull the surface. This style pairs well with black faucets and simple lighting. It also works in a hallway mirror, not just bathrooms. Best Materials: Flat boards with smooth edges. Best Finish: Dark paint plus subtle dry brush highlights. 13. Oversized Frame with a Mini Shelf This idea adds a ledge at the bottom of the frame. It can hold a small item, but keep it simple so it stays easy to clean. Use a sturdy base frame and attach a shelf board along the bottom edge. Seal the shelf extra well because it will catch splashes and drips. Keep the shelf shallow so it does not block the sink or faucet. This style works well for half baths where you want more function without adding a cabinet. Best Materials: 1×4 frame plus a 1×3 ledge piece. Best Finish: Seal well to protect the shelf. Conclusion You just built the foundation for a clean mirror upgrade, and now you know what makes it work. You checked your mirror setup first, measured the right way, cut your pieces, and locked the corners so the frame stays tight. You also saw how sanding and sealing can help the finish hold up, especially in a bathroom. My biggest tip is to dry fit everything before gluing, because that step prevents most mistakes. If you try one of the style options, keep the materials simple and seal well near water. Want to take it a step further? Check out my other DIY posts for more low-cost upgrades, then tell me which DIY mirror frame style you plan to try.
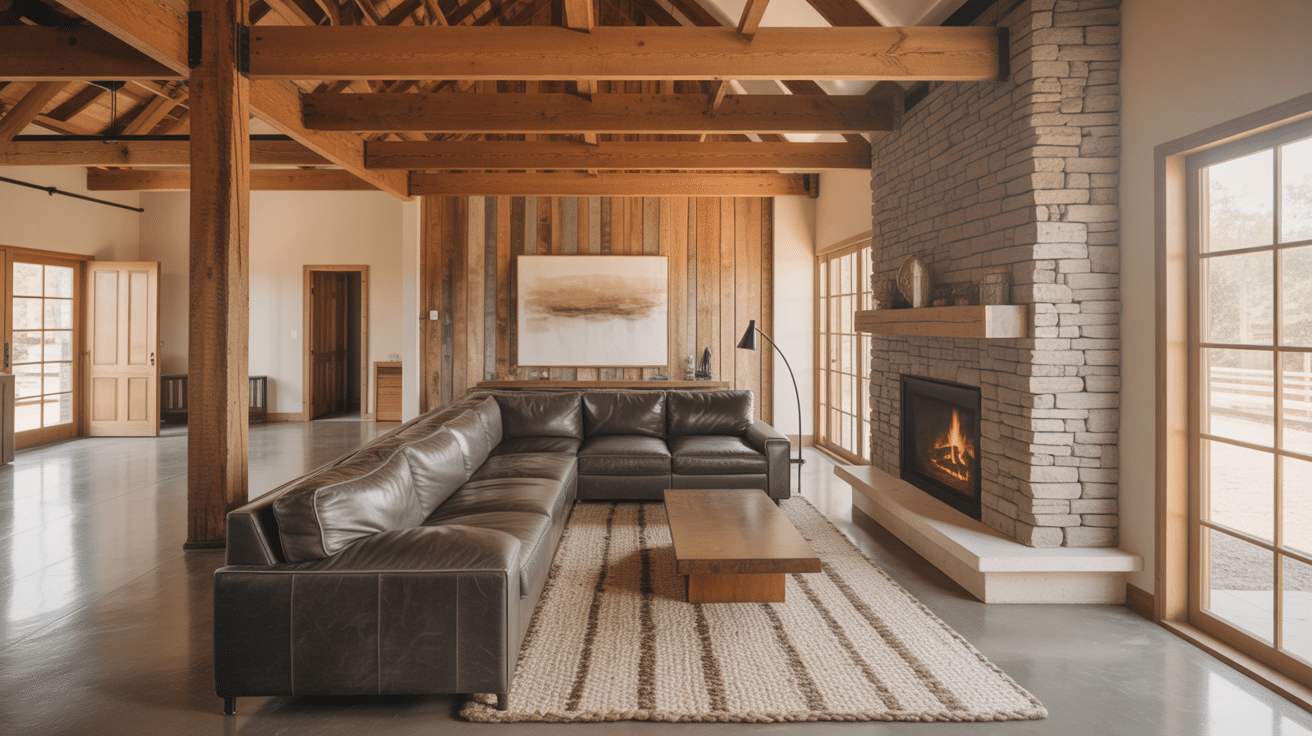
Structure Steel or metal frame, barn-derived Ceiling Height 12–20+ ft, often open to the ridge Typical Square Footage 1,200–4,000 sq ft (most builds) Interior Cost Range $30–$100+ per sq ft depending on finish level Best Layout Approaches Open-concept, loft add-ons, dual-purpose rooms Common Design Styles Rustic modern, farmhouse, industrial chic, minimalist Ever wonder what happens when an old barn gets turned into a cozy, modern home inside out? That’s an interior barndominium. It mixes country style with everyday comfort, and it’s catching on fast. People love these homes because they feel big, open, and relaxed. You get more space for your money, and it still feels warm and homey. Whether you want to move out of the city or just want something different, a barndominium might be just right. I’ll show you smart layouts, simple decorating tips, and real photos to spark ideas for your own space. What would surprise you more, granite counters in a barn kitchen or a giant walk-in shower in the old hayloft? What Makes an Interior Barndominium Different? A barndominium is a type of residential building that combines the style or structure of a barn with the comforts of a modern home. Key Features Structure: Often built from a steel or metal frame, similar to agricultural barns. Design: Can keep a rustic, barn-like exterior while offering a fully finished, livable interior. Flexibility: Frequently includes large open spaces, tall ceilings, and multi-use areas (e.g., living space + workshop or garage). Cost & Durability: Generally more affordable to construct than traditional homes and highly durable due to steel framing. Uses Full-time residence Vacation home Combined living and working space (e.g., for small business owners, hobbyists, or farmers) Those super-tall ceilings make everything feel huge and airy, like living in a fancy loft. The coolest part? All the metal beams and wooden supports stay visible instead of getting hidden away. They become part of the style! Today’s barndominiums mix that rough, rustic barn feel with sleek touches, which results in modern houses. Picture shiny concrete floors next to old weathered wood walls, or fancy kitchen appliances surrounded by exposed steel beams. It’s country charm meets city sophistication. Interior Design Styles That Fit Barndominiums Barndominiums are like blank canvases; you can make them look however you want. Here are barndominium photos that give an idea of the most popular styles that work great in these big, open spaces. 1. Rustic Modern This style nails the barndominium vibe perfectly. Think warm wood planks mixed with sleek metal fixtures and smooth concrete floors. You get earthy colors like deep browns and forest greens paired with super clean, straight lines. It’s like bringing the outdoors inside but keeping everything looking fresh and organized. The rough textures from reclaimed barn wood balance out polished surfaces, creating that perfect “fancy farm” feeling. 2. Farmhouse Style White or cream cabinetry, deep farmhouse sinks, shiplap accent walls, layouts built around gathering. This style is designed for scale; the wide-open barndominium floor plan suits it directly. The key detail most people miss: barndominium kitchens with high ceilings need layered lighting to function, not just pendant lights over the island. One ceiling fixture in a 14-foot farmhouse kitchen leaves the corners dark and the workspace underlit. 3. Industrial Chic Let those barn bones show off! Keep all the metal beams, exposed pipes, and ductwork visible as part of your decor. This no-fuss style works amazingly with those sky-high ceilings, barndominiums are famous for. Stick to simple furniture, neutral colors, and let the building’s structure be the star. It’s modern and edgy while still feeling authentic to the barn’s original purpose. 4. Country Cabin Perfect for barndominiums surrounded by trees or farmland. Load up on reclaimed wood everywhere, on walls, ceilings, and even custom furniture. Add a big stone fireplace as your main focal point and use earth tones throughout. This style makes your barndominium feel like a mountain retreat or hunting lodge, especially cozy during colder months. 5. Clean and Minimalist Whites and grays, built-in storage throughout, nothing on the floor that doesn’t have a purpose. The barndominium’s open layout makes minimalism easier to execute than in a traditional house; there are fewer transition points, no hallways to clutter, and fewer awkward corners. The challenge is acoustic: large, hard-surface rooms with minimal furniture echo badly. Rugs, upholstered seating, and ceiling baffles aren’t decorative choices in a minimalist barndominium; they’re functional ones. For a deeper look at keeping this aesthetic livable, minimalist home decor rules that hold up in real rooms cover what the design photos don’t show. Barndominium Interior Want to see what it’s really like inside a barndominium? This photo gallery gives you a closer look. You’ll find rooms that feel warm, open, and full of personality. From rustic beams to modern finishes, these spaces show how flexible barn-style homes can be. Use these ideas to help shape your own layout, whether you’re going full farmhouse or mixing in clean, modern lines. Living Rooms: Some barndominium living rooms feel soft and cozy, with wood beams, fireplaces, and comfy couches. Others are lean industrial with concrete floors, metal lights, and big open spaces. Kitchens: Kitchens in barndominiums are all about charm and space. Think open shelves, black fixtures, and wide farmhouse sinks. Bedrooms: Master suites in barndominiums can run large enough that a king bed and full furniture arrangement still leave 6 feet of clear floor on three sides, a proportion most homeowners aren’t used to planning for. Loft bedrooms are common for secondary rooms; they work well structurally and help reserve the main floor for high-use spaces. For the bedroom to feel restful rather than cavernous, cozy bedroom layouts for larger spaces address how ceiling height and furniture scale interact. Bathrooms: Bathrooms in these homes often mix spa-like comfort with rustic charm. You might see wood vanities, stone sinks, or sleek tile and glass showers. Both old and new styles feel at home here. Home Offices and Flex Rooms: These rooms are all about flexibility. A quiet nook can be an office by day and a guest space at night. Use built-ins, sliding doors, or corner desks to save space. No matter your style, there’s a barndominium layout that fits your life. These photos show just how creative and cozy barn living can be. Smart Layout Ideas for Every Need Barndominiums give you tons of space, but figuring out how to use it all can be tricky. Here are some clever layout ideas that make sense for real life. Open-Concept Living Rooms Skip walls between kitchen, dining, and living areas, let it all flow together. Use furniture and different flooring to create separate zones without blocking views. Cozy Loft Spaces Those high ceilings are perfect for adding upstairs areas. Lofts work great for kids’ rooms, offices, or guest spaces. Just make sure you have safe stairs and sturdy railings for protection. Dual-Purpose Rooms Make rooms do double duty. Turn offices into guest rooms with Murphy beds, use sliding doors to separate spaces when needed, or build desks right into walls to save floor space. Multi-Generational Layouts Great for families with older kids or grandparents. Add separate entrances for privacy and design shared spaces that can become private when needed. The best layouts work with your family’s daily routine instead of against it. Must-Have Interior Features and Finishes The finish choices in a barndominium matter more than in a conventional home because the structural bones are visible. A poor flooring choice next to a beautiful exposed beam reads as a mismatch. These are the features worth spending on and the ones where the budget can flex. Flooring: Polished concrete is the most practical choice for a metal-frame building; it handles moisture from below, suits radiant heat, and scales well in a large open space. Hardwood works, but needs a proper subfloor assembly that accounts for the metal building’s moisture behavior. Luxury vinyl plank is a reasonable mid-range option, particularly in spaces that will see heavy traffic or water exposure. Ceilings: The exposed beam is the barndominium’s signature. Painting steel beams a matte black or dark charcoal makes them read as intentional rather than industrial. Tongue-and-groove wood ceiling panels between the beams add warmth without hiding the structure. Windows and Doors: The exterior is where the interior barndominium’s character starts. Barndominium exterior features like black-frame windows and sliding barn doors carry directly into the interior aesthetic and determine how much natural light reaches the main living spaces. Floor-to-ceiling windows on the south or west elevation are worth the cost; they change how the space feels throughout the day. Lighting: Layered lighting is non-negotiable in a building with 14-plus-foot ceilings. Pendant clusters over the kitchen island, recessed cans on a dimmer in the main living area, and floor lamp placement near seating groups give the room control over how much of that vertical space gets lit at any given time. A single overhead fixture in a barndominium living room leaves the lower half of the room in shadow regardless of wattage. Note: Spray foam insulation is the standard for metal-frame buildings — not fiberglass batts. Metal conducts temperature directly; without a continuous insulation layer, condensation forms on the interior surface of the frame in cold weather. This affects every finish choice above it. Confirm your insulation spec before committing to any interior finish schedule. Interior Build Costs and Budget Tips Finish Level Cost Per Sq Ft What’s Included What’s Not Basic $30–$50 Drywall, laminate floors, builder fixtures Custom cabinetry, premium appliances, tile work Mid-Range $50–$80 Hardwood or LVP floors, granite counters, mid-grade appliances Custom millwork, heated floors, high-end tile High-End $100+ Custom cabinetry, premium tile, top-shelf everything No standard exclusions at this level The cost table above covers finish work only, not the shell, foundation, or utility rough-in. Those line items are separate and can run $40,000–$100,000 before a single piece of drywall goes up, depending on location and building size. Cost Note: Figures below are estimates based on national averages. Actual costs vary significantly by region, contractor, materials availability, and project scope. Always get at least three quotes before committing to any project above $1,000. Frequently Asked Questions What is the average cost to finish a barndominium interior? Basic interior finishes run $30–$50 per square foot. Mid-range finishes — hardwood floors, granite counters, mid-grade appliances — run $50–$80. High-end custom finishes start at $100 and go up from there. These figures cover finish work only, not the shell or structural costs. What flooring works best in a barndominium? Polished concrete is the most practical choice for metal-frame buildings because it handles moisture from below and suits radiant heat. Hardwood works with a correct subfloor assembly. Luxury vinyl plank is a reliable mid-range option for high-traffic or water-exposed areas. How do you insulate a barndominium interior? Spray foam is the standard for metal-frame buildings. Metal conducts temperature directly, and without a continuous insulation layer, condensation forms on the interior surface in cold weather. Fiberglass batts are not an adequate substitute in a metal building. Can you add a loft to a barndominium interior? Yes, and most barndominiums are well-suited for loft additions because of their ceiling height. A building with a 16-foot clear height can accommodate a loft at 8 feet with a full 8 feet of headroom on the upper level. Lofts are commonly used for secondary bedrooms, offices, or guest spaces. What are the most popular barndominium interior design styles? Rustic modern, farmhouse, and industrial chic are the three most common. Each works with the building’s exposed structure rather than concealing it. Minimalist and country cabin styles are also viable but require more deliberate acoustic and scale planning. How do you make a barndominium interior feel warmer? Layered lighting, rugs on concrete floors, upholstered seating, and wood ceiling panels between exposed beams all reduce the cold, warehouse quality that barndominium interiors can have when finished with only hard surfaces. Acoustic panels disguised as artwork also help in rooms with high ceilings and minimal soft furnishings. Is a barndominium interior cheaper to build than a traditional home? The shell is typically cheaper per square foot than stick-frame construction. The interior finish costs are comparable to a conventional home at the same finish level. The overall cost advantage comes from the combination: more square footage in the shell for less money, finished to a similar standard. Conclusion If you’re thinking about building or decorating an interior barndominium, this part’s for you. You get to mix rustic charm with the modern stuff you actually need. Whether you like a clean look or a cozy farmhouse feel, the open space and tall ceilings make it easy to plan things your way. I’ll walk you through simple ideas that help you choose the right floors, layout, and finishes for your family. Use the tips in this guide to build a space that feels like you. And hey, don’t forget to grab the free checklist. It’ll help you plan your interior without second-guessing every little step.
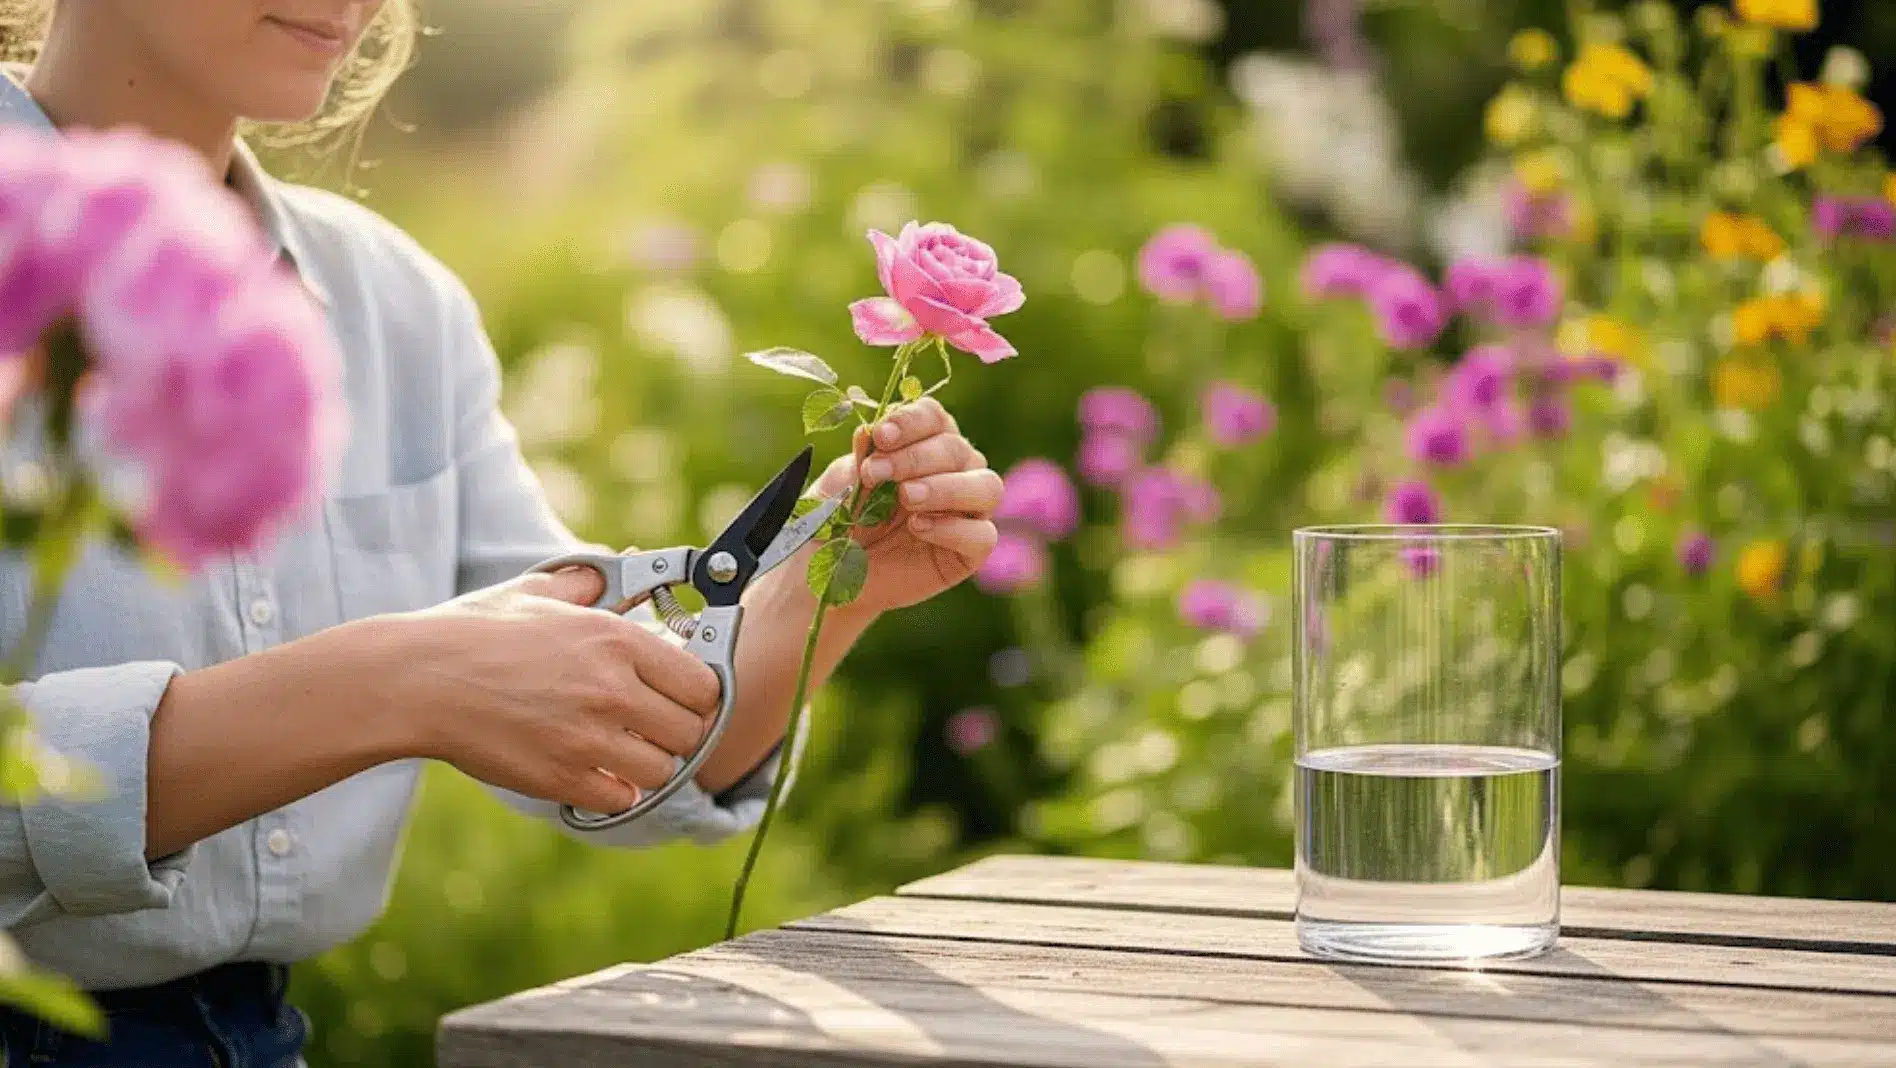
Have you ever thought why some people’s flower arrangements look fresh for weeks while yours droop after just days? I’m excited to teach you exactly how to cut flowers for a vase like a florist does. Most people make simple mistakes that kill their beautiful blooms before they even get started. You’ll find the secret timing that makes flowers last much longer than you ever imagined possible. I’ll show you which tools actually work and which ones secretly damage your precious stems. You’ll learn why the way you handle flowers right after cutting makes all the difference. Let’s turn you into a flower-cutting master who creates arrangements that make everyone stop and stare. Why Flower Cutting Technique Matters The way you cut a flower stem makes a huge difference in how long it stays beautiful. A clean, sharp cut creates an open pathway for water to flow up into the petals. When you use dull scissors or crush the stem, you block this water highway completely. Think of it like drinking through a straw that’s been pinched shut at the bottom. Your flower can’t get the water it desperately needs to stay fresh and colorful. A properly angled cut also prevents the stem from sitting flat against the vase bottom. This keeps water flowing freely and stops bacteria from building up around the cut area. Good cutting technique doubles your flowers’ lifespan. How to Cut Flowers for A Vase: Step-By-Step Guide I’ll guide you through cutting flowers with basic tools (like clean secateurs and a water bucket). You’ll find the perfect timing and methods that make your fresh blooms last longer in vases. Step 1: Pick Flowers Early Morning or Evening The best time to cut flowers is early in the morning or later in the evening when the weather is cooler. Cooler air helps the plants stay hydrated and reduces stress on the stems. Avoid cutting flowers during the middle of the day when the sun is strongest. Flowers picked in cooler conditions last longer in a vase and keep their shape, color, and freshness better than those picked in heat. Step 2: Cut at the Right Stage of Bloom Don’t pick flowers that are already fully open. Choose ones just beginning to open or those that are slightly cracked. Pollinated or mature flowers won’t last long after cutting because their life cycle is almost done. Picking flowers at the early bloom stage ensures they continue opening in the vase and stay fresh longer. The goal is to catch them before bees visit, so they hold their shape and color better. Step 3: Use Sharp, Clean Secateurs Always use clean and sharp bypass secateurs when cutting flowers. Dull blades can crush stems and block water flow, which causes early wilting. Sharp tools help you make clean cuts that allow better water absorption. Cleaning your secateurs also prevents the spread of disease between plants. A clean, angled cut keeps the stem open longer, helping the flower stay hydrated, upright, and healthy for several more days in your arrangement. Step 4: Place Stems in Cool Water Right Away As soon as you cut a flower, place it in a clean bucket filled with cool water. Even a few minutes without water can dry out the stem. Put the bucket in a shaded or cool spot so the flowers can rest. Cooling helps lower their temperature and prevent wilting. Let the stems sit for a few hours or overnight so they can soak up water and prepare for your final vase display. Follow Along: How to Cut Flowers for a Vase For more information, visit Bloom & Gray – Flower Farm How to Keep Cut Flowers Fresh Longer Your beautiful flowers don’t have to wilt after just a few days with proper care. These simple tricks help extend their life and keep them looking gorgeous in your vase: Remove wilted petals and leaves daily: Pull off any brown or droopy parts so the flower puts energy into healthy petals instead. Add flower food or a pinch of sugar to the water: This gives your blooms the nutrients they need to stay vibrant and strong. Keep your vase away from air vents and fans: Moving air dries out petals faster and makes flowers wilt much sooner than normal. Mist the petals lightly with a spray bottle: A gentle water spray keeps them hydrated from the outside, especially on hot days. Use a clean vase and wash it between flower changes: Bacteria from old water can kill new flowers before they even get a chance to bloom. These easy steps take just a few minutes each day but make your flowers last much longer. Your extra care will reward you with beautiful blooms that brighten your home for weeks. What Not to Do When Cutting Flowers Even experienced gardeners make simple errors that can quickly ruin their beautiful flower arrangements. Learning what not to do saves you time, money, and keeps your blooms looking perfect. Here’s what to avoid when cutting flowers: Cutting stems underwater or in the sink creates air bubbles inside, blocking water from reaching the flower head properly. Using hot or warm water in your vase causes heat shock to the stems, making flowers wilt faster than cold water ever could. Placing different flower types together without research can be harmful since some flowers release chemicals that kill other varieties sooner. Forgetting to condition stems before arranging by jumping straight into design work stresses the flowers and shortens their lifespan unnecessarily. Avoiding these common errors makes the difference between flowers that last days versus weeks in your home. Small changes in your routine lead to much better results and happier, healthier blooms every single time. Final Thoughts Your flower-cutting skills can help you enjoy a garden-fresh look in your home all year long. I’ve shared everything you need to know about how to cut flowers for a vase successfully. You now understand the perfect timing, proper tools, and gentle techniques that keep blooms looking amazing. Remember that even small changes in your routine can double or triple your flowers’ lifespan. Fresh flowers bring joy and color into any space when you treat them with the right care. Don’t let another beautiful bloom go to waste because of simple mistakes you can easily avoid. Your blooms will thank you by staying gorgeous longer, so comment below and share your flower-cutting experiences with everyone!
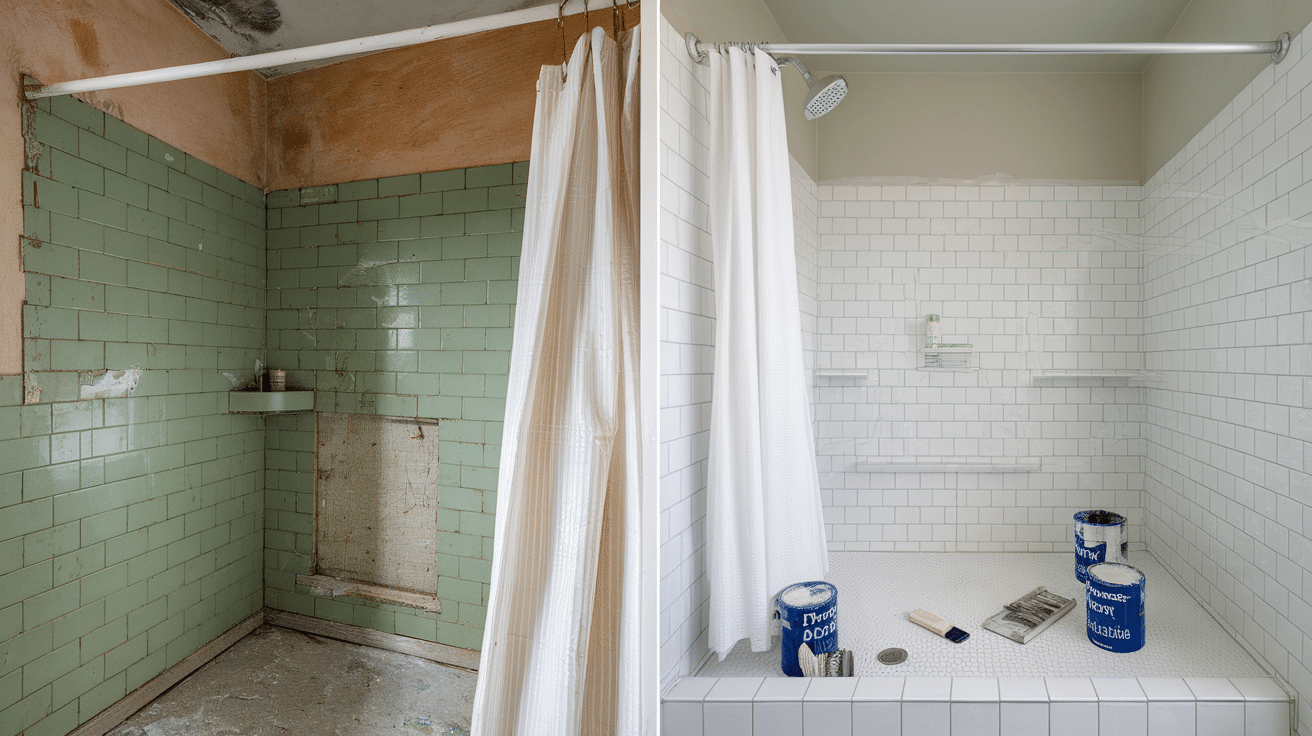
Tired of those ugly bathroom tiles? Here’s your fix. Let me guess, every time you step into your shower, those old tiles make you cringe. But is painting shower tile actually worth doing? Trust me, when you’re looking at spending thousands to rip out old tiles, a $50 paint job starts sounding pretty smart. Here’s the thing, though. I’ve seen way too many people mess this up and end up with paint peeling off after a few weeks. That’s why I’m sharing exactly what works: the right paint, the simple steps that anyone can follow. Ready to love your bathroom again without emptying your wallet? Why Painting Shower Tiles Makes Perfect Sense Replacing bathroom tiles is expensive and messy. Homeowners face thousands of dollars in costs, weeks of construction, and contractors tracking dirt throughout the house. Painting tiles offers a complete bathroom makeover for $30-50, compared to $3,000-8,000 for a full replacement. The math is simple. This project can be completed over a weekend. No jackhammers, no dust, no living without a shower for weeks. The process involves cleaning, priming, and painting. If the color becomes outdated in a few years, simply paint over it again. This flexibility doesn’t exist with ceramic tiles. When done correctly, painted tiles last 3-5 years before needing touch-ups. This durability exceeds most expectations for a DIY paint project. Tile painting isn’t just about cost savings – it’s about achieving the desired bathroom aesthetic without major construction disruption. Is Painting the Shower Tile Worth It? The decision to paint tiles depends on specific bathroom conditions and renovation goals. When It Makes Sense Tile painting works best in specific situations where the benefits outweigh the risks. Budget renovations are the perfect scenario for tile painting. When a full bathroom remodel isn’t financially feasible, paint transforms the space for under $100. Quick fixes for rentals benefit from this approach. Property owners can update outdated bathrooms without major capital investment, and tenants can improve their living space with landlord approval. Outdated or ugly tile colors get a second life through paint. Those avocado green or harvest gold tiles from decades past can become modern and stylish again. These scenarios make tile painting a smart choice that delivers real value. When You Should Avoid It Certain conditions make tile painting a recipe for failure. Poor ventilation creates problems for painted tiles. Bathrooms without proper exhaust fans trap moisture, leading to paint failure and potential mold issues. Cracked or damaged tile won’t hold paint properly. These surface imperfections need repair before painting, or the paint will fail at weak points. High-traffic showers without sealing plans face rapid wear. Daily use requires proper sealing and maintenance to prevent paint from chipping and peeling. Skip tile painting if any of these red flags apply to avoid wasted time and money. Pros and Cons Pros Cons Low costs (typically under $100) Risk of peeling over time Customizable colors Moisture issues can cause failure Fast bathroom refresh (about a weekend) Lower resale appeal compared to new tiles Quick DIY-friendly project May not add property value like ceramic tile installations What Kind of Tile Paint Works Best in Bathrooms? The paint you choose decides if your project looks great for years or starts peeling in a few months. Paint Types to Use Not all paints can handle bathroom moisture and daily use. Epoxy paint is the toughest option. It’s waterproof and creates a hard finish that won’t chip or peel easily. Think of it like a protective shell over your tiles. Latex or acrylic paint works fine for areas that don’t get wet often, like walls far from the shower. These paints are easier to work with and come in more colors. Specialty tile paints like Rust-Oleum Tub & Tile are made just for bathrooms. Companies like Valspar also make these. They’re stronger than regular paint but easier to use than epoxy. Enamel paint gives a glossy, hard finish that’s great for high-moisture areas. It takes longer to dry but creates a smooth surface that’s easy to clean and resists water damage. Pick your paint based on how wet the area gets and how much use it sees. How to Paint Shower or Ceramic Tile Here’s the exact process that transformed ugly brown tiles into a bright, modern shower. Step 1: Remove or Protect Fixtures Remove plumbing fixtures or tape around them carefully. The paint used in this project is really hard to clean up, so protecting fixtures saves significant time and hassle later in the process. Step 2: Deep Clean the Tiles Clean the tile like it has never been cleaned before. This deep cleaning step is absolutely crucial for proper paint adhesion and ensures long-lasting, professional-looking results on your shower surfaces. Step 3: Apply Bonding Primer (Two Coats) Use Insl-X Stix acrylic waterborne bonding primer; this is the secret to project success. Apply the first coat thoroughly, then add a second coat for complete, even coverage on glossy tile surfaces. Step 4: Protect Surrounding Areas Before starting the actual painting process, tape and use plastic sheeting to cover the bathtub and other finished surfaces. This careful preparation prevents accidental paint splatters and protects your investment. Step 5: Paint with Oil-Based Enamel Apply high-quality satin oil-based enamel paint in your chosen color. I recommend Behr Premium oil-based satin enamel, which cures to a hard, durable finish and effectively resists household chemicals. Follow these steps exactly, and you’ll get the same dramatic transformation shown in the video. The above video provides a thorough guide through every step of painting shower and ceramic tiles that last long. Also, with the help of this, you’ll know how to paint a ceramic tile as well. Painted Bathroom Tile Maintenance Tips Taking care of painted tiles is easy when you know what to do. How to Prevent Peeling A few simple habits keep your paint job looking good for years. Let the paint cure for 5-7 days before using the shower normally. This gives the paint time to get really hard and stick to the tiles properly. When cleaning, avoid scrubbing too hard; instead, use gentle soap and soft cloths, as rough sponges can scratch the paint off. If you live in a humid area or frequently use the shower, you may need to apply a new coat of sealer annually to prevent water from seeping under the paint. Do these things, and you won’t have paint peeling off your tiles. How Long Does Painted Tile Last? Most people get 2-5 years out of painted tiles before needing to redo them. How long yours lasts depends on a few things. If your bathroom has good air flow and you did a great job prepping the tiles, you’ll get closer to 5 years. But if it’s really steamy in there and lots of people use the shower every day, you might need to repaint sooner. Just plan on touching up or repainting every few years, and you’ll always have nice-looking tiles. Bathroom Tile Paint Ideas to Try 1. Solid Color Update Sometimes, keeping it simple works best. White paint makes dark bathrooms brighter and small spaces look bigger. It also makes everything feel cleaner and fresher. Black might sound scary, but it looks really cool and modern. Navy blue gives your bathroom that relaxing spa feeling without being too crazy or bold. 2. Two-Tone or Border Patterns Using two colors is easy, but it looks like you hired a pro. Try painting tile “rugs” by making rectangles of different colors on your floor or walls. You can also paint borders around the room, like making the bottom rows one color and everything else another color. 3. Stenciled Designs Stencils help you make fancy patterns even if you can’t draw. Moroccan patterns have cool curvy shapes that make your bathroom feel like a fancy hotel. Geometric designs use triangles, circles, or diamonds for a modern look that’s really popular right now. You can even use stencils to make fake grout lines so painted tiles look like the real thing. 4. Painted Faux Terrazzo or Stone Look Make your tiles look like expensive stone with some simple tricks. Use a sponge or splatter paint to copy the look of real stone or terrazzo floors. Earth colors like tan and brown make it look natural, while gray and white give it a modern feel. 5. Color Fade Effects Create a smooth color change that looks super trendy. Start with a dark color at the bottom and slowly make it lighter as you go up the wall. Try dark blue fading to light blue, or gray fading to white. You can even do sunset colors like orange blending into pink for something really fun. Mistakes to Avoid These three mistakes will mess up your project before you even finish. Painting floor tiles – Don’t paint tiles on the floor. People walk on them every day, which makes the paint chip off really fast. Water sits on floors longer, too, so the paint bubbles up and peels. Using the wrong paint type – Don’t use regular wall paint in your bathroom. It can’t handle all the steam and water, so it’ll start peeling in no time. Skipping cure time – Don’t use your shower right after painting. The paint needs 5-7 days to get really hard and stick properly. Avoid these three things, and your painted tiles will actually last. Conclusion Ready to Give Your Bathroom a Makeover? Painting shower tile isn’t for everyone, but if your bathroom has good airflow, solid tiles, and you’re willing to prep it right, it can work wonders. For around $50, you can skip the expensive remodel and finish this project in a weekend. Just don’t cut corners. If you skip the bonding primer or rush the prep, the paint won’t last. My advice? If your setup checks out, stop overthinking and get started. The results are worth it. Want more simple updates that won’t drain your wallet? Check out other posts for smart, budget-friendly bathroom upgrades.
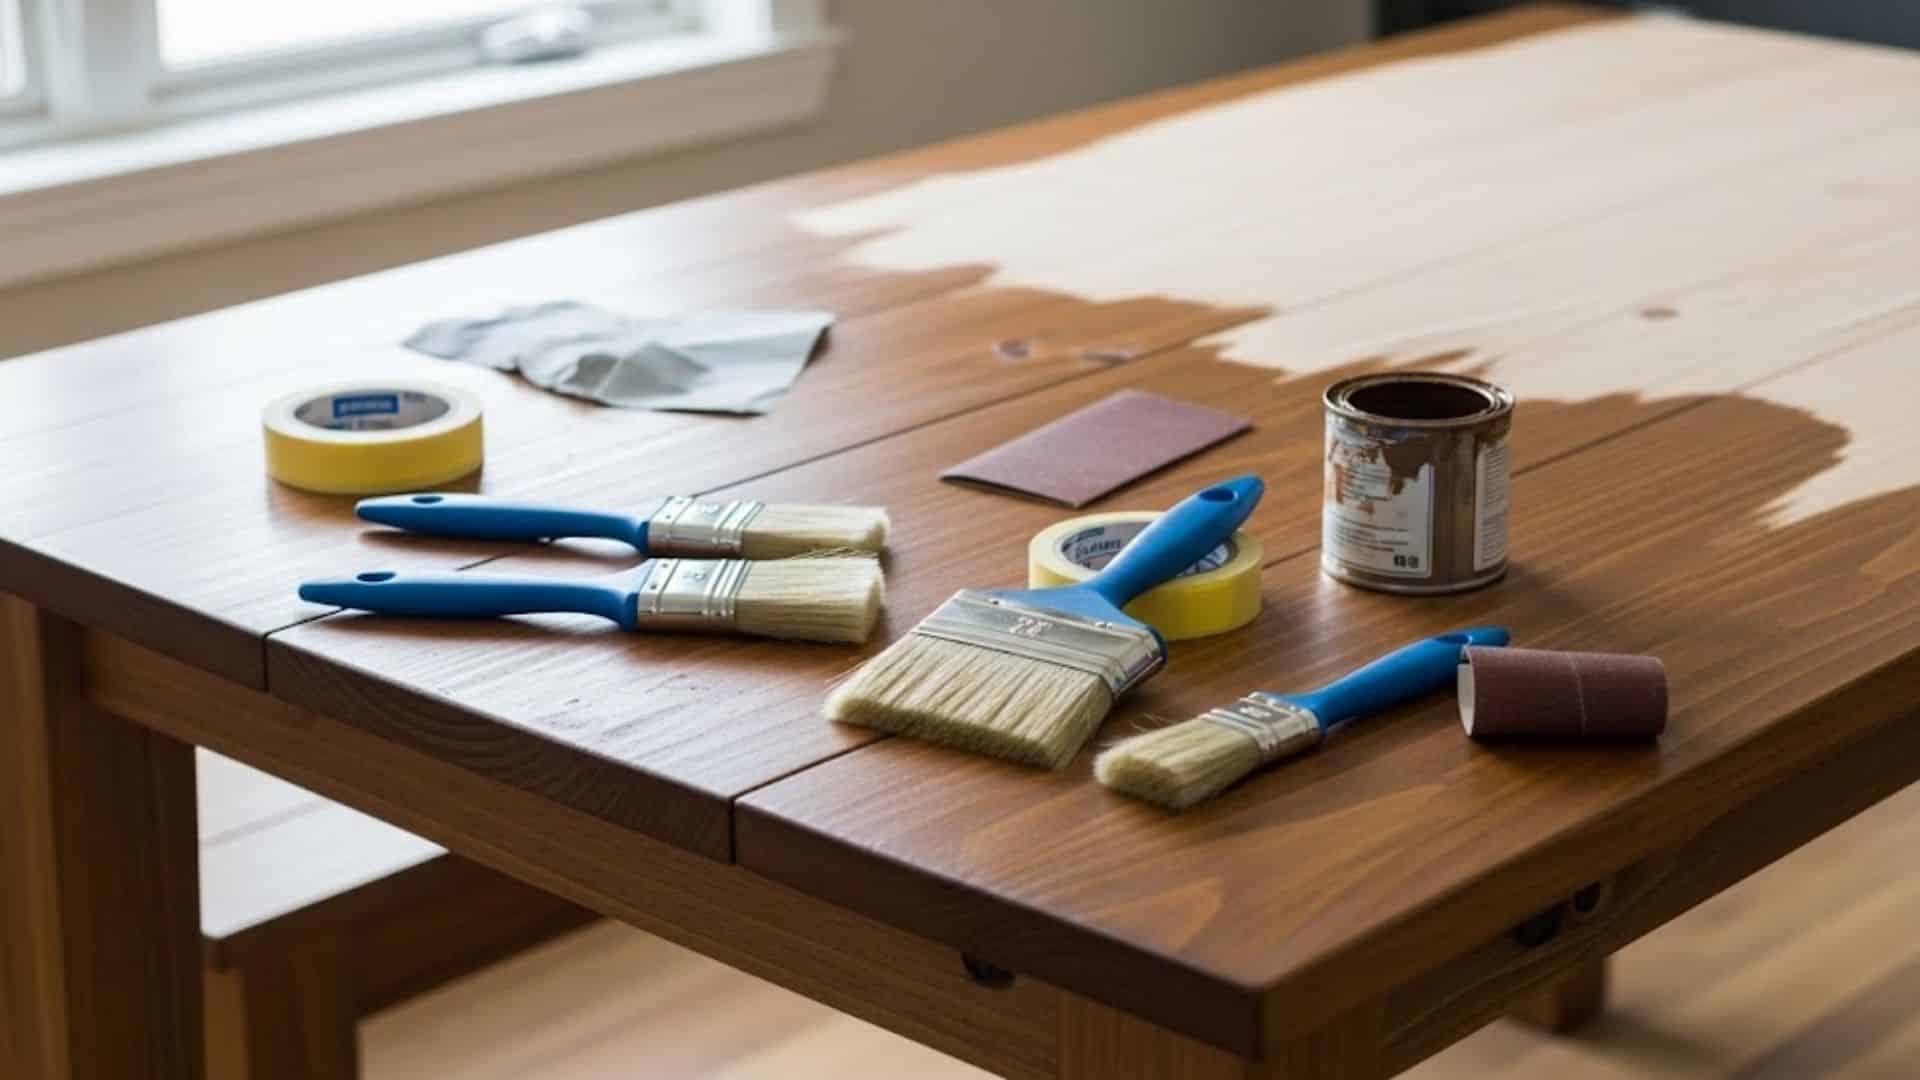
Looking at your tired old dining table and thinking if it’s time for a change? Before you start shopping for expensive new furniture, I have exciting news for you. Your current table might just need a little love and imagination to become the star of your dining room again. I believe DIY dining table makeover ideas can change any boring or worn-out piece into something stunning. You don’t need to be a skilled carpenter or spend a fortune to achieve excellent results. With some basic supplies and a free weekend, you can completely change how your dining space looks and feels. I’m here to help you find the perfect project. Your dining room changeover starts with just one simple decision to try something new! Material You’ll Need for a DIY Dining Table Makeover To complete your DIY dining table makeover, you’ll need a few essential materials and tools. Below is a table showing the estimated cost range for each material required, keeping the project budget-friendly and accessible. Material/Equipment Estimated Cost Range (USD) Gloves $3 – $15 All-purpose cleaner $5 – $15 Scraper $5 – $20 Sandpaper (220-grit) $4 – $20 Paint primer (gray) $15 – $40 Paint sprayer $25 – $80 Satin black paint $15 – $40 Stain (walnut and espresso) $10 – $30 Lint-free rags $5 – $15 Polyurethane sealant $10 – $30 Soft bristle brush $5 – $15 Total Estimated Cost $102 – $320 NOTE: Costs are estimates and may vary based on location, material availability, brand choices, and current market prices. DIY Dining Table Makeover: Step-By-Step Guide I’ll walk you through five key steps to alter your dining table completely. You’ll learn how to prepare, sand, prime, paint, and stain your table for professional-looking results. Step 1: Fix Loose Parts and Clean Thoroughly Start by fixing any loose parts, like table legs. Tighten any screws or bolts to ensure everything is secure once the structure is solid. Clean off any dirt, grime, and old stains. Use a scraper to remove larger chunks, and then wipe down surfaces with a rag and an all-purpose cleaner. Pro Tips Ensure you scrub the hard-to-reach spots with a brush. Remove any removable pieces, like table leaves, for easier cleaning. Use gloves to protect your hands from cleaning agents. Step 2: Sand the Surface Next, lightly sand the table’s surfaces with 220-grit sandpaper. Sanding removes any old finish, giving the new paint or stain a good base to stick to. Don’t rush; take your time to ensure a smooth surface. You can also sand the chairs for a more uniform look. Pro Tips Work in small sections to avoid missing any spots. Use a high-quality sandpaper for a smoother finish. Always blow off the dust before starting the next step. Step 3: Apply Primer Once everything is sanded and smooth, apply a coat of primer. A good primer helps paint bond better and prevents chipping. For the base and chairs, use a gray primer, which works well with dark colors like black. Let it dry completely before proceeding to the next step, which is painting. Pro Tips Apply primer with a sprayer for an even coat. Use a light coat to avoid any streaks. Let the primer dry for at least an hour before painting. Step 4: Paint the Base and Chairs After the primer is dry, it’s time to paint. For the base and chairs, use a durable satin black paint. A paint sprayer makes the job quicker and gives a smoother finish. Be sure to apply thin layers and allow each coat to dry before adding another. Pro Tips Use a sprayer for even coverage and fewer brush marks. Paint in light, even strokes, to avoid drips. Allow enough time for each coat to dry completely. Step 5: Stain the Tabletop For the tabletop, choose a stain that suits your style. Start with a light stain, such as walnut, and layer darker stains, like espresso, for added depth. Let each coat dry before applying the next. Finish off with a polyurethane sealant to protect the wood from wear and tear. Pro Tips Use a lint-free rag to apply the stain evenly. Wipe off excess stains immediately to avoid uneven coloring. Apply at least two coats of stain for a rich, more vibrant look. Watch How it is Done: DIY Dining Table Makeover Video Tutorial DIY Dining Table Makeover Ideas You Can Try I’ve gathered innovative makeover ideas that can convert your old dining table into something special and new. You can choose from different techniques and materials that match your style and skill level. 1. Rustic Farmhouse Look Convert your dining table into a rustic farmhouse piece by sanding it down and applying a light white or gray wash. This simple distressed finish adds a lovely, aged look. The rustic feel is ideal for creating a warm and welcoming dining space, especially in homes with vintage or country-style decor. 2. Industrial Metal and Wood Fusion For a modern, industrial appeal, consider replacing wooden legs with metal ones or simply painting the existing legs matte black. This combination of raw wood and sleek metal brings a stylish, rugged look that is ideal for creating an urban or minimalist dining area. The fusion of both materials gives it a unique appeal. 3. Chalk Paint for a Shabby Chic Look Use chalk paint in soft pastels or neutral tones to give your table a shabby chic makeover. Lightly distress the edges for a vintage, weathered effect. This technique adds character and joy to any dining space, offering a cozy, relaxed atmosphere, and it’s a budget-friendly way to update an old table. 4. Geometric Patterns on the Tabletop Create a bold, modern look by adding geometric patterns to your table. Use painter’s tape to create sharp, clean lines and paint each section in contrasting colors. This DIY project is perfect for a contemporary or artistic dining room, allowing you to experiment with vibrant shades or subtle neutrals for a unique design. 5. Marble Effect Using Contact Paper Mimic the luxurious appearance of marble by applying marble-patterned contact paper to your table. It’s an affordable, simple solution for a high-end look without the hefty price tag. This makeover gives your dining table a graceful, refined feel that works in both modern and traditional dining rooms. 6. Decoupage Tabletop with Fabric or Paper For a personalized touch, decoupage fabric or decorative paper onto your dining table. Choose fabrics or prints that match your home’s style, and use decoupage glue to apply them smoothly. This technique is ideal for adding texture and color, creating a unique dining experience while repurposing old materials. 7. Ombre Painted Tabletop Add a trendy, eye-catching touch to your table with an ombre-painted effect. Choose two or more paint colors and blend them together from light to dark for a smooth, gradient look. This fun project creates a unique, dynamic centerpiece for your dining room that reflects your personal style. 8. Reclaimed Wood Tabletop for a Vintage Feel Replace your old tabletop with reclaimed wood to add a rustic, vintage appeal. The unique, natural imperfections of the wood will give your table character and history. This sustainable choice not only improves your space but also adds warmth and texture, making it perfect for a cozy dining area. 9. Glass Top Dining Table with a Wooden Base For a sleek, contemporary look, replace your wooden tabletop with a glass one. This minimalist design accentuates the wooden base, creating an airy, cultured atmosphere in your dining space. Glass tops are ideal for modern, open-concept rooms, allowing the natural beauty of the wood to be showcased underneath. Maintenance Tips for DIY Dining Table Makeover Taking care of your newly made-over dining table will keep it looking great for years to come. These simple tips will help you protect your hard work and investment. Clean spills immediately: Wipe up any liquid spills right away to prevent staining or water damage to your new finish. Use placemats and coasters: Protect the surface from hot dishes, scratches, and ring marks by using protective mats during meals. Dust regularly with a soft cloth: Keep your table clean by dusting it weekly with a microfiber cloth to maintain its fresh appearance. Apply protective wax annually: Give your table a thin coat of furniture wax once a year to keep the finish looking smooth and protected. Following these easy habits will ensure your DIY makeover stays beautiful and functional. Your table will remain the centerpiece of your dining room for many years. Common Mistakes to Avoid Before you begin your DIY dining table makeover, it’s helpful to know some common mistakes to avoid. Here are a few things to keep in mind: Skipping the sanding step can prevent the paint from sticking properly and result in a rough finish. Choosing the wrong paint or stain can cause uneven coverage or affect the final look of your table. Not allowing enough drying time can lead to smudges, streaks, or peeling once you move to the next step. Skipping the protective coat can cause your table to become damaged from spills or everyday wear. Avoiding these mistakes will help you achieve a polished and long-lasting result. With patience and attention to detail, your table makeover will turn out beautifully! Wrapping It Up Your dining table makeover pilgrimage doesn’t have to end here with these DIY dining table makeover ideas. I hope you found the perfect project that matches your style and skill level. Remember that every expert was once a beginner, so don’t worry if your first attempt isn’t perfect. The most important thing is having fun and creating something that makes you smile every day. Your friends and family will be amazed at what you accomplished with your own hands. Take your time, be patient with yourself, and enjoy the process. Drop a comment below and tell me which makeover idea caught your eye!
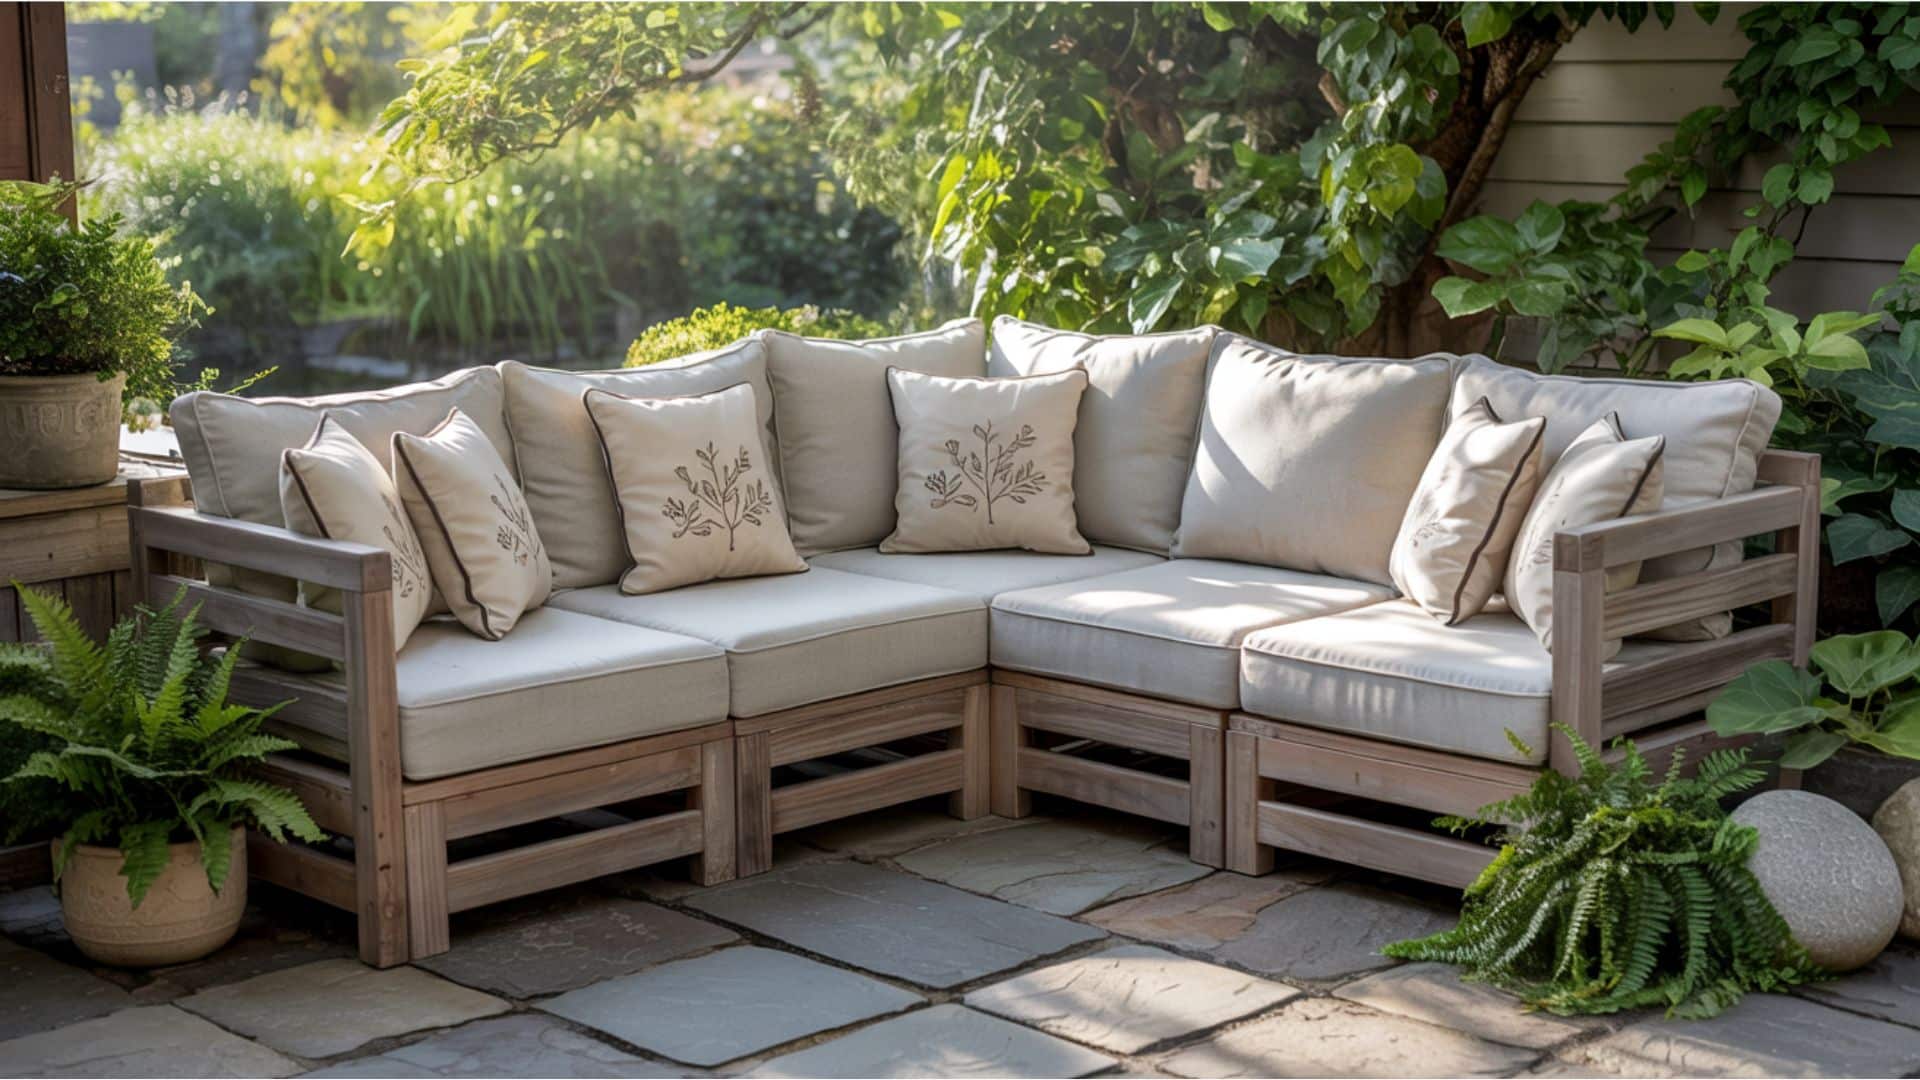
Tired of seeing those crazy high prices for outdoor sectionals at furniture stores? You’re not alone! A decent outdoor sectional can cost thousands of dollars. However, here’s the good news: you can build your own DIY outdoor sectional for significantly less money. Plus, you get to make it exactly how you want it. Want it bigger? Make it bigger. Prefer different colors? Pick whatever you love! I’m here to show you exactly how to create an amazing outdoor sectional that’ll make your neighbors jealous. You’ll save tons of money and have fun doing it. Ready to build something awesome? Let’s get your hands dirty! DIY Guide for an Outdoor Sectional Building it yourself means you also control the quality. You’ll know every joint is solid and every screw is tight. No shortcuts or cheap materials here. There’s also something amazing about relaxing on furniture you built with your own hands. Your friends will be impressed when you tell them you made it. You’ll save money and create something extraordinary at the same time. Materials and Tools You’ll Need I want to show you exactly what your DIY outdoor sectional will cost to build. The table below breaks down each material and outlines the associated costs. Material/Equipment Estimated Cost Range (USD) 4×4 Lumber (corner/support) $30 – $60 2×4 Lumber (frame/sides/back) $60 – $150 1×4 Lumber (slats) $25 – $60 Pocket hole screws (1 1/2″) $8 – $15 Wood screws (3″ & 4″) $8 – $18 Wood glue $4 – $10 Orbital sander (if needed) $25 – $50 Sandpaper (120 & 220 grit) $5 – $12 Drill with a pocket hole jig $20 – $45 (jig only) Speed square $5 – $10 Tape measure $5 – $12 Clamp $8 – $18 Silicone caulk $4 – $10 Spar urethane (for sealing) $12 – $25 Cushions (24×24″ per piece) $20 – $45 each (x4–6: $80–$270) Paint (Early American/White) $15 – $30 Exterior wood stain $10 – $25 Miter saw (if needed) $60 – $120 (buy) / $20–$40 (rent) Impact driver (if required) $30 – $70 The Total Estimated cost is $374 – $1,000. These prices provide a clear idea of the potential costs involved in your DIY project. Adjustments can be made based on the materials you select or the tools you already own. NOTE: The costs are estimates and may vary based on location, material availability, sales, and the specific products chosen. STEP 1: Plan Your Sectional Design Before you begin, plan the layout and design of your outdoor sectional. Decide on the shape, size, and placement. Use standard measurements or adjust them based on your space and style preferences. Helpful Advice Sketch your design before cutting. Measure your space carefully to ensure a good fit. Consider a modular design for flexibility. STEP 2: Cut and Assemble the Frame Begin cutting your lumber pieces to size for the frame. This includes side posts, back supports, and corner posts. Once the cuts are made, assemble them using wood glue and screws, ensuring everything is tightly secured for stability. Helpful Advice Use a speed square to ensure cuts are straight. For extra support, use wood glue along with screws. Pre-drill holes to make screwing easier and prevent splitting. STEP 3: Build the Slat Supports and Back Rest Cut the slat supports and backrest pieces to the correct size. Attach the slat supports evenly across the sectional’s base. Install the backrest pieces, making sure they’re securely attached to the frame. Helpful Advice Measure carefully to ensure even spacing of the slats. Securely attach slats with screws or nails. Use clamps to hold the pieces in place before screwing them together. STEP 4: Sand and Stain the Wood Smooth out any rough edges with a sander before applying wood stain. Use a pre-stain conditioner to ensure even coloring, then apply your desired stain (e.g., Early American). Seal the wood with spar urethane to protect it from the elements. Helpful Advice Sand the wood first with 120-grit sandpaper, then finish with 220-grit sandpaper. Apply two coats of stain for a rich, finished look. Let each coat dry before adding another for the best result. STEP 5: Assemble the Sectional and Add Cushions Once the frame and backrest are complete, assemble the sectional by attaching the pieces together. Finally, place your cushions on the frame for added comfort and adjust them to achieve the perfect fit. Helpful Advice Use screws to securely attach the final back and side pieces. Space the cushions evenly for a neat look. Make sure the cushions are weather-resistant for long-lasting use. Follow Along: DIY Outdoor Sectional Video Walkthrough Design Ideas You Can Try to Make It Unique Change your basic outdoor sectional into a stunning centerpiece with these design ideas. The table below shows different ways to customize your build for maximum style and functionality. Design Element Creative Ideas Shape L-shaped, U-shaped, Curved edges, Modular pieces Storage Built-in side tables, Hidden compartments, Lift-up seats Color Two-tone stain, Distressed finish, Painted accents Comfort Adjustable backs, Built-in cup holders, Extra-deep seats Details Rope accents, Metal hardware, Carved patterns Additions Built-in planters, Integrated lighting, and Removable ottomans Size Compact balcony, Oversized family, Expandable modules Weather Sloped drainage, Quick-dry spacing, UV-resistant finish Mix and match these design elements to create a sectional that perfectly fits your space and style. Choose the features that matter most to you and incorporate them into your build plan. Maintenance and Care Tips for Outdoor Sectional Taking care of your DIY outdoor sectional keeps it looking great for years. Regular maintenance goes a long way toward protecting your investment. Clean your sectional monthly with mild soap and water to remove dirt and prevent stains from setting in. Check all screws and joints twice a year, tightening any loose hardware to keep your sectional sturdy and safe. Cover or move your sectional during harsh weather, such as heavy storms, to prevent unnecessary damage and wear. Apply fresh stain or sealant every two years to protect the wood from sun damage and moisture. Following these simple steps will keep your sectional beautiful and functional. Your hard work deserves proper care to make it last for decades. Mistakes to Avoid when DIYing an Outdoor Sectional Even experienced builders make mistakes when creating outdoor furniture. Learning from these common errors will save you time, money, and frustration. Measure twice and cut once because rushing through planning leads to pieces that don’t fit together correctly. Choose weather-resistant wood, such as cedar or teak, instead of regular pine, which is prone to rotting quickly outdoors. Never skip the weatherproofing step, as unsealed wood will crack, warp, and deteriorate within just one season. Build a strong frame with proper support beams, or your sectional will wobble and fall apart. Avoiding these mistakes means your sectional will be sturdy and beautiful from day one. Take your time and do it right the first time. Summing It Up Your DIY outdoor sectional project offers incredible savings while giving you complete control over the design. You’ll create exactly what you want without breaking the bank. Plus, there’s nothing quite like the pride of relaxing on furniture you built yourself. Every time you sit down, you’ll remember the satisfaction of creating something beautiful with your own hands. Don’t let the project intimidate you – just take it one step at a time. You’ve got all the knowledge you need to succeed right here. Start gathering your materials and get ready for an amazing weekend project. I’d love to hear how yours turns out; comment below with your questions and success stories!
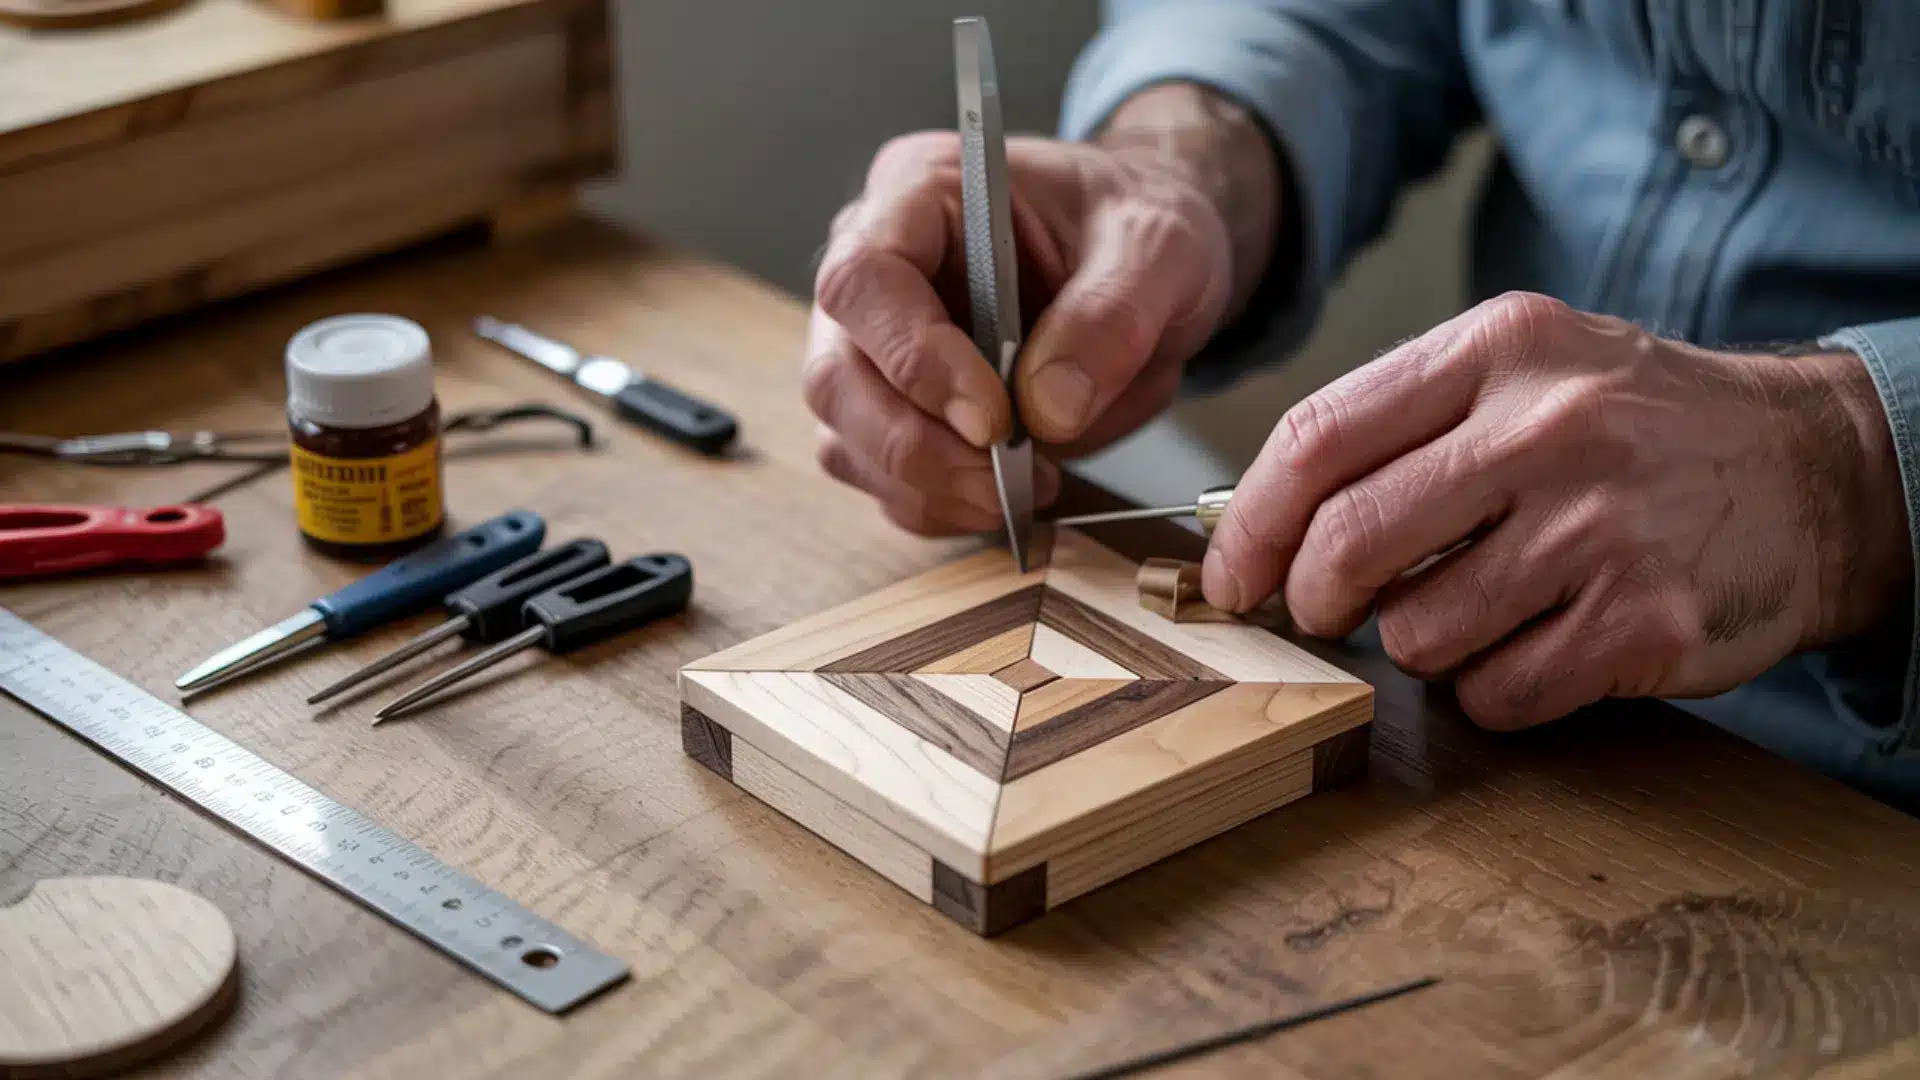
Ever looked at a wooden table or box and wondered how those sharp shapes or patterns are set into the surface so neatly? Wood inlay can seem tricky at first, but with the proper guidance, you can absolutely do it yourself. In this blog, I’ll walk you through what wood inlay is, what materials work best, and exactly how to get started. You’ll find step-by-step instructions, project ideas for all levels, and simple tips to help you avoid common problems. If you’ve worked with wood before or are just curious, this guide gives you the tools to try something new with confidence. Ready to learn how it works and what you’ll need to begin? Understanding Wood Inlay Work Wood inlay involves placing contrasting materials, such as wood, resin, or metal, into carved spaces on a solid surface to form shapes or patterns. This method has roots in ancient Rome, Egypt, and Asia, where it was applied to furniture and ceremonial items. Unlike marquetry, which uses thin pieces laid on a surface, or veneer, which covers larger areas with thin sheets, inlay adds detail directly into the base. Step-by-Step Guide to Creating Wood Inlays Follow these clear instructions to prepare, cut, install, and finish inlay work with accuracy using basic tools and steady technique. Tools Required Chisels (various sizes) Craft knife or precision blade Ruler or marking gauge Router or rotary tool Clamps Sandpaper (fine grit) Wood glue or epoxy Safety glasses and a mask Step 1: Planning and Cutting the Design Start by sketching your design directly onto the wood surface or transfer it using carbon paper. Use a ruler or template to keep lines accurate. Mark clear boundaries for the inlay and check alignment from multiple angles. Carefully cut along the marked area using a chisel or precision blade. For more detailed work, a router with a guide may help shape recesses without damaging surrounding areas. Step 2: Setting the Material in Place Dry-fit each inlay piece to check accuracy before applying glue. Ensure the fit is snug but not forced, which can damage the edges. Apply a thin, even layer of adhesive to the inside of the cavity. Press the material gently into position, making sure all parts are flush with the surrounding surface. Use clamps or weights if needed while it sets. Clean up any excess glue before it hardens. Step 3: Smoothing and Finishing Techniques Once the adhesive is fully dry, begin sanding the entire surface with fine-grit sandpaper to bring all parts to an even level. Move slowly to avoid removing too much material. After sanding, apply your choice of finish, such as oil, wax, or varnish, based on the object’s intended use. Always test finishes on a sample first to check for surface reactions or discoloration. Step 4: Fixing Fit or Surface Issues If gaps are visible after placement, use wood dust mixed with glue to fill them. Let it dry thoroughly, then resend. If the inlay is uneven or loose, check for movement in the base material or improper cuts. Adjust with careful trimming or replace the affected part. Avoid rushing corrections, as minor flaws can become more noticeable after the project is complete. Regular inspection during each stage helps avoid long-term issues. Wood Inlay Ideas for Every Skill Level This section offers practical project ideas suited for different experience levels. Each one helps you practice key skills, from simple shapes to larger builds, using various materials and tools. Simple Coasters with Basic Shapes This beginner project is perfect for getting used to the inlay process. Use small wood blanks to make coasters and insert simple shapes like lines, triangles, or diamonds. Focus on clean cuts, smooth fits, and applying glue evenly. Minimal tools are needed, and results are quick to see. It’s a great way to build control and understand how contrasting materials behave when worked into shallow surface recesses. Framed Wall Plaque or Sign Use a flat wooden board to create a plaque with a symbol, shape, or lettering made from inlay. You can trace the design or use stencils. Carve shallow recesses using a chisel or craft knife, then fit thin strips or shaped wood into place. This project teaches surface layout, edge control, and precision placement. It’s a useful way to build focus without handling complex joints or deep cuts. Small Wooden Box with Lid Detail This project introduces corners, surface variation, and alignment. Start with a basic wooden box and design a simple border or shape on the lid for the inlay. You’ll learn to work across flat and raised areas, helping with your hand skills and layout planning. It’s also a chance to practice gluing and sanding on a functional object. The box serves as a great gift or storage item when finished. Serving Tray with Border Inlay A serving tray offers a flat, medium-sized surface to test longer inlay lines or curves. Use a ruler and compass to create the pattern, then cut and place thin wood or metal into shallow grooves. This teaches longer cuts, pattern continuity, and finish control. Handles and raised edges can be added for function. The final tray looks polished, and you’ll gain comfort working with slightly larger tools or routers. Keepsake Box with Multiple Inlay Panels This box features more detail, often combining inlay on the lid, sides, or even inside. It demands layout planning and precise measurement. You’ll need to shape and fit pieces consistently across multiple faces, requiring a steady hand and repeatable cuts. This helps improve your handling of repetitive tasks, like cutting numerous identical pieces. The result is a personal project that shows improvement in control, accuracy, and surface finishing. Tabletop with Repeating Geometric Pattern A tabletop design gives space to practice complex layouts like grids, diamonds, or repeating bands. This project requires planning full patterns before cutting and ensures each inlay aligns across a large area. It’s ideal for using routers and advanced layout tools. You’ll also learn to manage surface leveling and keep edges consistent. Working across a wider surface teaches patience and helps refine techniques learned in smaller projects. Decorative Wall Panel with Mixed Materials This advanced project lets you combine wood with metal, resin, or stone to create high-contrast visuals. Choose a balanced design and lay it out across a wooden board. Different tools are needed for each material, so this project teaches tool switching and adhesive compatibility. Surface leveling becomes more complex with mixed textures. The panel works well as a display piece, allowing you to test detailed patterns and highlight precision. Materials Used in Wood Inlay Different materials are chosen based on contrast, strength, and purpose. Selection depends on the project type, tools, and surface needs. Common Types of Wood for Inlay Work Popular choices include walnut, maple, cherry, and ebony. Each offers contrast in color and texture, and most are easy to shape and sand. Walnut – deep brown, ideal for darker accents Ebony – very dark, dense, clean edges Maple – pale tone, smooth grain Cherry – warm reddish tone, easy to work with Hardwoods are favored for strength. Matching densities helps prevent cracking, especially in small and mid-size designs. Other Materials Often Used (Stone, Metal, Epoxy) Materials like metal, stone, and epoxy are used when a stronger definition or texture is desired. Thin brass or aluminum strips form precise lines. Crushed stone adds a coarse, natural surface. Epoxy allows bright colors and works well for narrow gaps. These materials each require different handling tools and bonding methods. Testing fit and adhesive compatibility is essential when mixing materials to avoid weak points or uneven finishes in the final result. Tips on Choosing the Right Combination Choose materials based on your design, tools, and experience level. Start with basic wood pairings to learn control and shaping. When combining woods, use opposing tones for contrast. For more visual impact, integrate metal or resin only after testing fit and finish. Always match material hardness to avoid shifting after sanding or use. Checking how materials react with glue and finish helps prevent problems once the piece is complete and sealed. Where to Get Supplies and Kits Several trusted online sources provide wood inlay supplies, including Inlay Product World,Bell Forest Products, and Exotic Wood Zone. When evaluating suppliers, consider factors such as product variety, wood types, return options, shipping reliability, and clear customer feedback. Reliable sellers offer detailed descriptions and clear images that help assess grain and tone. Starter kits may include essential tools and materials, while individual items can be chosen based on specific project needs. Choosing suppliers with consistent quality and clear policies helps ensure smoother results for both small and large builds. Helpful Tips to Improve Accuracy and Build Quality Improving results in wood inlay often comes down to preparation, tool handling, and choosing materials that match the surface and project type. Check your fit early using dry runs before applying adhesive; this helps avoid gaps or uneven surface levels. Work slowly with harder materials, and use sharp tools to prevent chipping or rough edges around recesses. Seal both the inlay and base wood if working in changing humidity to reduce movement and ensure long-term strength. Avoid forcing pieces into place; gently reshape them to preserve surface detail and reduce the risk of damage. Conclusion Now that you’ve got a solid overview of wood inlay, you can see it’s more about steady steps than special talent. You’ve learned how the process works, which materials to use, and how to start with small, rewarding projects. If you’re thinking about giving this a try, go back to the tools list and pick a simple plan from the ideas section. Keep it low-pressure; your first project is all about learning. Remember, the more time you give each step, the better your result will be. Want to build on this and keep learning? Check out more of my guides and posts on hands-on woodworking tips, right here on the blog.
Ever dreamed of having gorgeous marble countertops but worried about the cost? Marble countertops bring lasting grace to any kitchen or bathroom. Their unique veining and natural beauty make every surface special. But here’s the exciting part – you don’t need to break the bank! DIY marble countertops are your ticket to luxury on a budget. I’m here to show you exactly how to create stunning faux marble surfaces. You’ll save thousands while getting that high-end look you’ve always wanted. Here, I will walk you through every step needed for success. Ready to alter your space? Let’s turn your countertop dreams into reality! Why DIYing a Marble Countertop is Worth It Marble countertops are a lasting and wise choice that never goes out of style. Their unique veining and natural patterns add beauty to any space, making each countertop one-of-a-kind. If you prefer a classic white marble or something with bold, colorful veins, it complements both modern and traditional styles. Marble’s durability is another big plus. It can handle daily wear and tear in kitchens and bathrooms, making it a practical yet luxurious option. While it might seem expensive, it adds lasting value to your home. With proper maintenance, marble countertops can last for many years. Overall, marble is a versatile material that combines flawlessly with any design, creating a stunning and functional focal point in your home. Choosing the Right Marble for Your Project When choosing the right marble for your project, it’s important to consider the color, pattern, and price. Here’s a quick guide to help you determine which marble is best suited for your needs. Marble Type Description Best For Carrara Marble Classic white with soft gray veins, this is a classy and versatile choice. Kitchens, bathrooms, and floors. Calacatta Marble Bright white with bold, dramatic veins in gold or gray. Luxury kitchens, bathrooms, and features. Emperador Marble Dark brown with lighter veins, rich and warm. Bathrooms and classic interiors. Statuario Marble White with dramatic gray veining, premium appearance. High-end kitchens, bathrooms, and countertops. Crema Marfil Light beige with subtle gold and brown veins. Neutral spaces, living rooms, and bathrooms. Thassos Marble Pure white with minimal veining, clean and bright. Contemporary designs and modern bathrooms. Now that you have an idea of the different types of marble, choose the one that best fits your style and budget. Each option can alter your space and add a unique touch to your home. Step-By-Step Process: DIY Marble Countertops Create a stunning faux marble countertop with these easy, cost-effective steps. Each stage ensures a smooth, professional-looking result that lasts. Here is what you’ll need for DIY Marble Countertops Paint (Valspar Bistro White or your preferred color) Glaze Sea sponge Rag Chip brush A duck feather or a small paintbrush Polycrylic (Minwax Clear Matte) Painter’s tape Sandpaper (220 grit) Foam brush (for applying polycrylic) STEP 1: Prepare Your Countertop Surface Start by thoroughly cleaning your existing countertops to remove any dirt, dust, or grime. Remove fixtures, such as sinks and cooktops, to make the job easier. Apply painter’s tape around areas you don’t want to paint, and cover the surrounding space to prevent accidental spills. Bonus Tips: Use a mild cleaner to avoid any residue. Ensure your tape is pressed down tightly to prevent paint bleeding. Take your time cleaning for the best results. STEP 2: Apply the Base Coat Once your countertop is clean and dry, apply a crisp white base coat. This is the foundation for the faux marble look. Use a roller for an even spread, and allow it to dry completely before moving to the next step. Bonus Tips: Allow the base coat to dry completely to prevent smudges when applying the next layers. Choose a paint designed for countertops for better durability. Apply a second layer if the first coat isn’t fully opaque. STEP 3: Create the Veins For the marble effect, mix one part paint, one part glaze, and three to four parts water. Use a sea sponge to stamp the paint mixture onto your countertop in small sections. Then, quickly blot with a dry rag to create soft, combined lines that mimic the veins of marble. Bonus Tips: Practice your veining technique on scrap paper before applying it to your work. Work in smaller sections to keep the paint wet for mixing. Don’t worry if it looks messy – you can fix it! STEP 4: Add the Marble Veins Once the initial veining layer has dried, mix one part paint with one part glaze and add a few drops of water. Using a duck feather or small brush, apply random veins at a slight angle. Create a more natural look by using a chip brush to blur the lines gently. Bonus Tips: Use a feather for a soft, natural look. Experiment with darker veins for added depth and dimension. Don’t be afraid to adjust the veins if they don’t look right at first. STEP 5: Seal Your Countertop Once the paint and veins are dry, apply a protective clear finish with polycrylic. This ensures the marble look lasts and protects your countertops from spills and scratches. Use a synthetic brush for the best finish, and let the coat dry before adding additional layers. Bonus Tips: Opt for a matte finish for a realistic look. Let the polycrylic dry completely before using your countertop. Lightly sand between coats for a smoother finish. See the Process: DIY Marble Countertops Video Walkthrough Cost Analysis and ROI DIY marble countertops can cost as little as $200 to $900 for materials and basic tool rentals. On the other hand, hiring a professional to install marble countertops in an average kitchen typically costs between $1,200 and $6,000. This means DIYers can save anywhere from $1,000 to $5,000 compared to hiring a pro. While the savings are significant, the return on investment (ROI) for DIY projects typically ranges from 50% to 65%. Professional installations tend to deliver a higher ROI of approximately 70%–81%, thanks to their better durability and increased buyer appeal. So, while DIY marble countertops offer major savings, a professional installation provides greater resale value and long-term return. Consider your budget and future plans when deciding between a DIY installation and a professional installation. NOTE: The figures provided are estimates and may vary based on factors such as location, materials, and project complexity. Always get multiple quotes to ensure accuracy. Common Mistakes to Avoid When installing DIY marble countertops, it’s easy to make mistakes, but they can be avoided with a bit of care and attention. Here are some common errors to watch out for: Failing to properly clean the surface before starting can cause the paint to peel or not adhere well. Skipping the sealing step leaves your countertops vulnerable to stains and damage from spills or moisture. Applying too much paint or epoxy at once can lead to uneven coverage or drips. Using the wrong cleaning products can damage the marble’s surface over time, so always choose gentle, pH-balanced cleaners. By avoiding these mistakes, your DIY marble countertops will last longer and retain their appearance for years to come. Make sure to follow the steps carefully for the best results. Wrapping It Up DIY marble countertops offer incredible savings while delivering beautiful results. You get the luxury look without the hefty price tag. Plus, you’ll feel amazing knowing you created something gorgeous with your own hands. The key is to take your time and follow each step carefully. Your patience will pay off with stunning countertops that’ll make friends jealous. Don’t let fear hold you back from this rewarding project. Start planning your DIY marble countertops makeover today! You’ve got all the knowledge needed to succeed. Share your success story and inspire others to take the plunge. I’d love to hear about your experience – please comment below with your questions or share your excellent results!





