


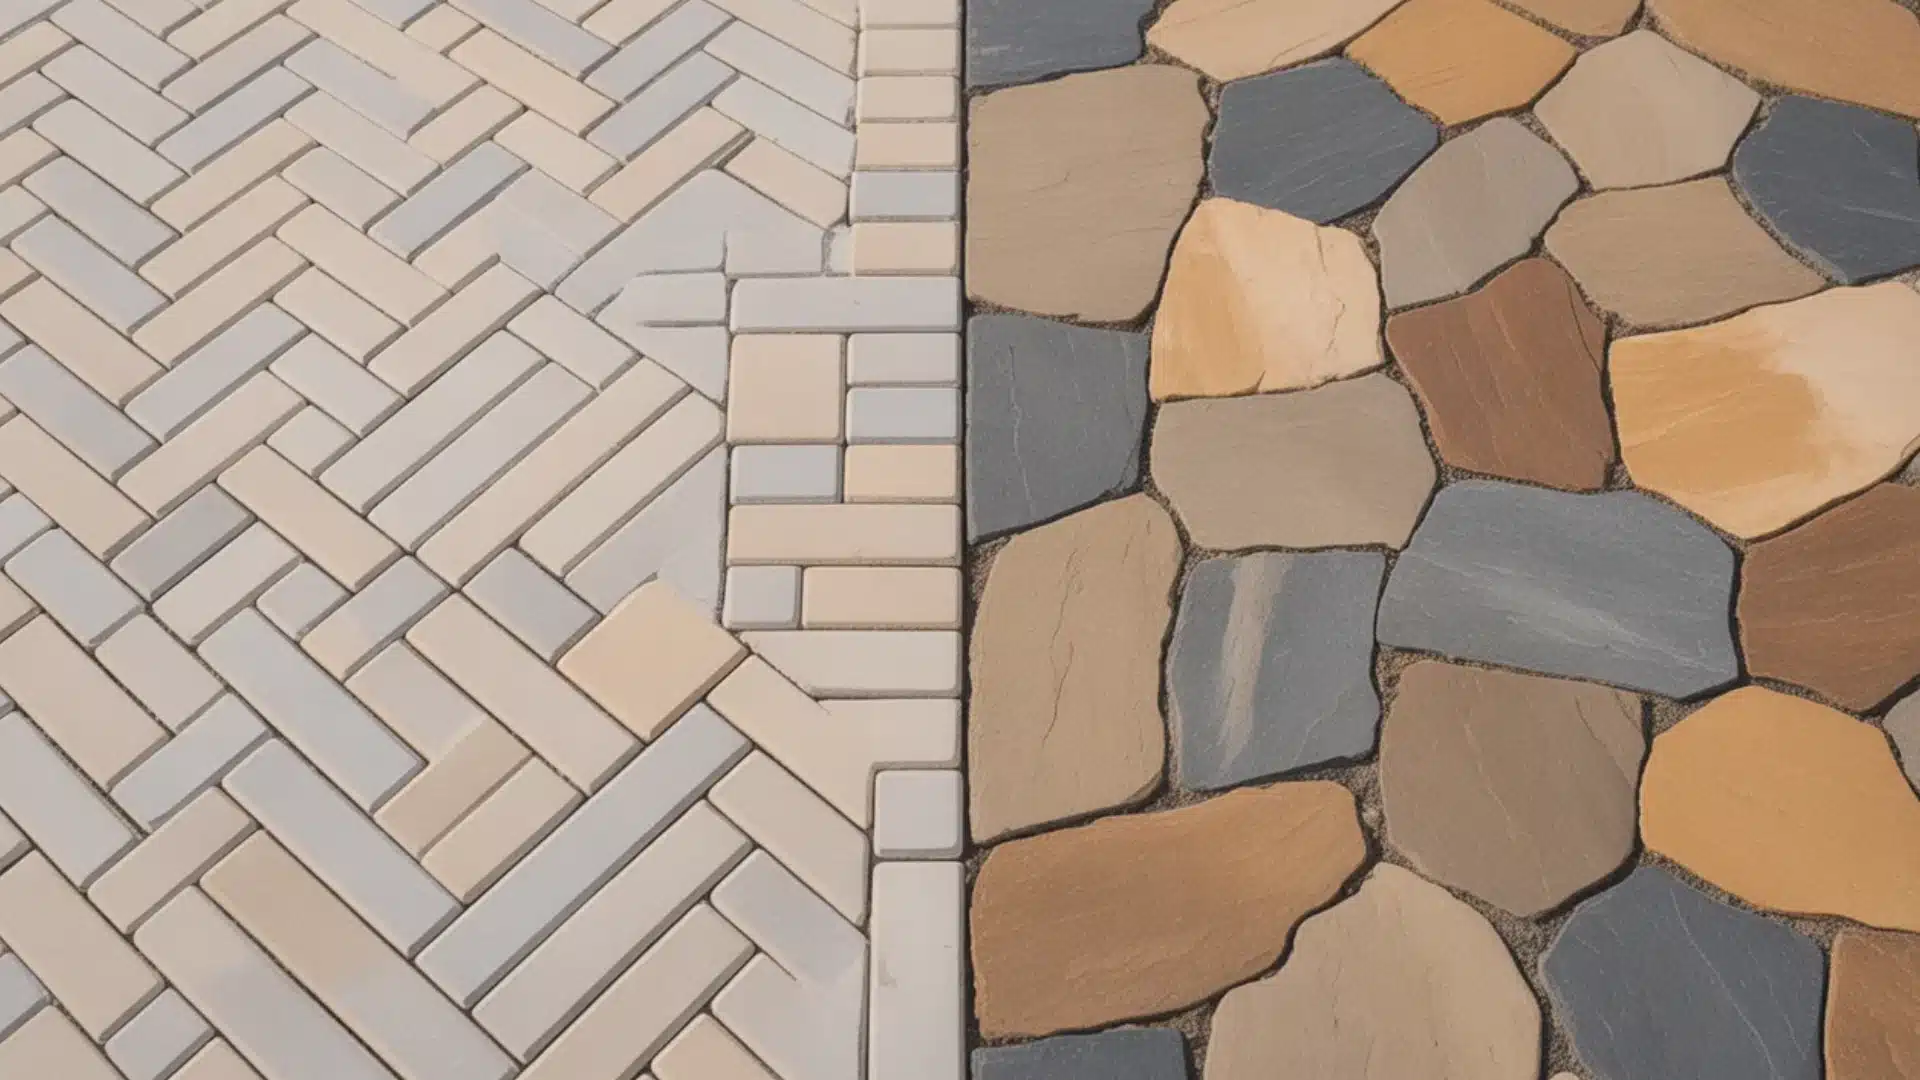
Planning an outdoor upgrade gets exciting fast, until the budget questions show up. When I started pricing out my patio, the first thing I searched was, “Is stamped concrete cheaper than pavers?” If you’re looking at driveways, walkways, or patios, you’re likely asking the same thing right now. The short answer is yes: stamped concrete usually costs less up front, but the full picture goes deeper than the initial price per square foot. I’ll walk you through installation costs, labor differences, maintenance expenses, durability, climate performance, and long-term value. By the time you finish reading, you’ll have a clear understanding of what each option truly costs and which one fits your budget, climate, and long-term plans Is Stamped Concrete Cheaper Than Pavers? When it comes to upfront cost, yes, stamped concrete is usually cheaper than pavers, especially for larger outdoor surfaces like patios and walkways. Most stamped concrete installations range from roughly $8 to $28 per square foot, depending on design complexity and coloring. Pavers, on the other hand, typically cost $20 to $40 per square foot or more because each piece must be laid, leveled, and fitted individually, which increases both material and labor costs. However, initial pricing isn’t the whole story. While stamped concrete saves you money up front, pavers often offer better long-term durability and easier, lower-cost repairs. Because individual pavers can be replaced if damaged, they may save you money over the long term. Choosing the right option depends on your budget, climate, maintenance preferences, and how long you expect the surface to last. Installation Cost Breakdown: Where Your Money Goes Understanding installation differences explains why stamped concrete and pavers have noticeable price gaps beyond the cost of materials alone. Material Costs Material costs start with the surface itself. Stamped concrete uses poured concrete, color hardeners, release agents, and stamping tools to create patterns. The materials are delivered in bulk and installed as one continuous slab. Pavers, on the other hand, require individual units, joint sand, edge restraints, and often a thicker gravel base. Because each paver is manufactured separately and transported in pallets, material costs increase. The added base layers also contribute to higher overall expenses compared to a single concrete slab. Labor Costs Labor plays a major role in the overall price difference. Stamped concrete is poured, leveled, colored, and stamped in a coordinated process that happens within a short time frame. Once the slab is finished, curing begins. Pavers require individual placement, alignment, spacing, leveling, and compacting. Each piece must be adjusted to maintain pattern consistency and structural stability. This careful placement takes significantly more time. Because installation requires precision and extended labor hours, paver projects typically cost more in workforce expenses. Base Preparation Base preparation is one of the biggest hidden cost factors. Stamped concrete requires soil compaction and a stable base before pouring a single slab on top. While proper compaction is critical, the structure remains one solid piece. Pavers require multiple base layers, including compacted gravel and a bedding sand layer to support flexibility and drainage. This layered foundation improves long-term durability and reduces cracking from ground movement. However, the additional materials and labor required for proper layering increase installation costs compared to stamped concrete. Stamped Concrete vs Pavers: Pros and Cons Before choosing between stamped concrete and pavers, it helps to compare their strengths and weaknesses side by side. This makes the trade-offs much clearer. Feature Stamped Concrete Pavers Upfront Cost Lower upfront cost Higher upfront cost Installation Speed Faster installation Longer installation time Design Options Many decorative patterns Wide variety of shapes and styles Durability Can crack over time Extremely durable and flexible Repairs Repairs are more visible Easy to replace single pieces Climate Performance May struggle in freeze-thaw cycles Handles freeze-thaw cycles well Maintenance Needs resealing every 2–3 years Occasional sand replenishment is needed Surface Safety Can be slippery when wet Better grip with joint texture Resale Value Moderate property value boost Adds stronger resale value Stamped concrete works well if you want decorative appeal at a lower cost. Pavers require more upfront investment but often offer greater durability and easier long-term maintenance. Long-Term Value: Which Saves More Money? The initial price is only one part of the story. Let’s examine the total cost over the years to determine which option truly saves you money. 1. Maintenance Costs Over Time Stamped concrete needs resealing every 2–3 years to prevent fading and damage, at a cost of about $1–$2 per square foot. Over 20 years, maintenance can reach roughly $3,000–$5,000. Pavers are simpler to maintain; you may only refill the joints with sand and clean them, with sealing optional. Long-term costs are usually $1,000–$2,000 lower than concrete. Repairs are also easier, since single pavers can be replaced cheaply, whereas repairing cracked concrete is harder and more expensive. 2. Lifespan and Long-Term Value Lifespan is where the real value difference appears. Stamped concrete generally lasts between 15 and 25 years when properly maintained. Pavers typically last 30 to 50 years, or even longer, because their modular design better handles ground movement. When you spread total costs over the full lifespan, the yearly cost difference becomes much smaller. Although pavers cost more initially, their extended durability often improves long-term value and reduces the need for full replacement. 3. Return on Investment Both options add curb appeal, but pavers typically add more property value. Pavers return 60-80% of their cost at resale, while stamped concrete returns 50-65%. Buyers see pavers as a premium feature that won’t need replacing soon. Here’s the cost per year for a 400 sq ft patio over 20 years: Stamped Concrete: Initial cost $6,000 + Maintenance $4,000 = $10,000 total ($500/year) Pavers: Initial cost $10,000 + Maintenance $1,500 = $11,500 total ($575/year) The difference is only $75 per year. Since pavers last 10-20 years longer, your cost per year drops even more over time. Durability in Different Climates Climate plays a major role in how stamped concrete and pavers perform over time, especially when weather extremes and ground movement are involved. Warm climates: Stamped concrete performs well because temperature shifts are minimal and slab stress is lower. Freeze-thaw regions: Pavers perform better since their flexible structure adjusts to soil expansion and contraction. Heavy vehicle traffic: Pavers distribute weight more evenly, reducing stress cracks under driveways. Pool areas: Pavers stay cooler under sunlight and provide better slip resistance around water. Ground movement affects solid slabs more severely than modular paver systems, especially in shifting soil conditions. Design Differences Between Stamped Concrete & Pavers Both options offer design flexibility, but they create very different visual effects and overall impressions in outdoor spaces. Stamped Concrete Design Features Stamped concrete focuses on creating a continuous decorative surface that mimics higher-end materials at a lower cost. Custom-stamped patterns replicate stone, brick, tile, or wood textures with consistent surface detailing. Seamless look creates a smooth, uninterrupted finish across patios and driveways. Mimics natural materials without individual piece installation or joint spacing. Continuous surface appearance offers clean lines and modern simplicity. Stamped concrete provides strong decorative value while keeping installation costs more affordable. Paver Design Features and Premium Appearance Pavers create a modular, textured surface that often feels more dimensional and upscale in finished outdoor spaces. Modular patterns allow creative layouts using various shapes and arrangement styles. Wide color variety offers deeper tone options and blended finishes. More dimensional texture adds shadow lines and natural variation. Premium visual perception often increases curb appeal and resale attraction. Pavers typically deliver a higher-end appearance that improves long-term property value. When to Choose Stamped Concrete or Pavers Choosing between stamped concrete and pavers really depends on your priorities. Stamped concrete makes more sense if you need a lower upfront cost, live in a warm climate, or want faster installation. It works especially well for large patios where keeping expenses under control matters. The seamless design also appeals to homeowners who prefer a smooth, continuous look. Pavers are worth the extra cost if you want maximum lifespan and stronger long-term durability. They perform better in freeze-thaw regions, handle heavy loads like driveways, and allow easier repairs by replacing single pieces. If resale value and long-term performance matter most, pavers often provide better overall value. Final Thoughts After comparing the upfront costs and long-term value, I’ve realized that when people ask, is stamped concrete cheaper than pavers, the honest answer depends on what matters most to you. Stamped concrete usually wins if you’re working with a tight budget and want a decorative surface right away. You can often save 10–15% on installation, which can amount to hundreds or even thousands of dollars on larger projects. But if you can handle the higher initial investment, pavers often make more sense long term. They last longer, make repairs easier, and reduce the risk of costly crack repairs later. Think about your climate, your budget, and how long you plan to stay in your home before deciding. Planning a project soon? Drop your question in the comments, share this guide with someone renovating, or save it to compare costs when you’re ready.
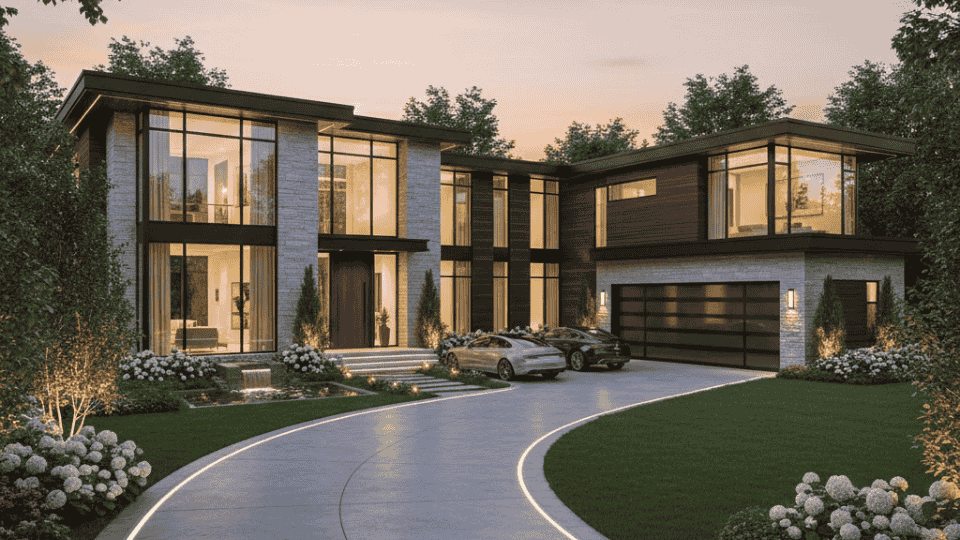
The driveway is often the first thing visitors notice about a home, yet it frequently gets overlooked in design conversations. I’ve seen how modern driveway ideas have changed ordinary entrances into stunning focal points that genuinely improve the curb’s appeal. I’ve covered sleek concrete installations, natural stone patterns, eco-conscious permeable pavers, and creative lighting solutions. I’ll walk through material comparisons, budget considerations, maintenance realities, and design tricks that work across different architectural styles. You’ll see how texture, color, and layout choices can dramatically shift your home’s first impression. A thoughtfully designed driveway does more than provide parking; it bridges the gap between street and front door with intention, setting the tone for everything beyond. What Makes a Driveway Look Modern? Modern driveways share certain defining characteristics that separate them from traditional designs. Clean lines and simple layouts create visual clarity, while minimal color palettes, think gray, charcoal, black, and white tones, provide a polished foundation. The magic often happens when mixing materials like concrete with gravel or pavers with grass, adding texture without clutter. Integrated lighting changes functionality into ambiance, and smooth connections to landscaping blur boundaries between hardscape and garden. Above all, modern driveway designs prioritize both durability and function, ensuring beauty that lasts through daily use and changing seasons. These elements combine to create driveways that feel intentional, cohesive, and refreshingly contemporary. Modern Driveway Ideas for Every Style and Budget Today’s driveway designs prove that curb appeal and smart engineering go hand in hand. Here’s what modern construction looks like at its best: 1. Large Concrete Slab Driveway The ultimate minimalist statement, a poured concrete slab offers clean, uninterrupted surfaces that complement contemporary architecture beautifully. This approach creates visual spaciousness while providing a durable, long-lasting foundation. When finished with a smooth trowel or subtle broom texture, the result feels both refined and practical for everyday use. Notable Features: Control joint patterns add subtle geometric interest to expansive concrete surfaces Light gray finishes soften the appearance while hiding minor stains effectively Seamless integration with modern home exteriors creates cohesion throughout 2. Concrete and Gravel Combo This two-material design balances affordability with visual appeal while improving drainage naturally. Concrete tire tracks provide solid driving surfaces, while gravel fills center or side sections, reducing impervious coverage. The textural contrast between smooth and loose materials adds dimension without overwhelming the space. Notable Features: Cost-effective solution uses less concrete while maintaining a professional appearance Improved water management allows rainwater to permeate through gravel sections Customizable gravel colors coordinate with home exteriors and landscaping palettes 3. Permeable Paver Driveway Environmentally conscious and visually striking, permeable pavers allow water to filter naturally into the ground below. These specially designed units feature wider joints filled with gravel or planted groundcover, managing stormwater while maintaining structural strength. The variety of available shapes, sizes, and colors enables extensive customization. Notable Features: Eco-friendly drainage reduces runoff and supports local groundwater systems naturally Design flexibility ranges from industrial-modern to warm, textured appearances Long-term durability withstands heavy vehicle traffic while remaining environmentally responsible 4. Exposed Aggregate Concrete Revealing the natural beauty of embedded stones, exposed aggregate creates slip-resistant surfaces with organic color variation. After concrete sets, the top cement layer is removed to showcase decorative aggregate beneath. This finish weathers gracefully in various climates while maintaining its textured appeal over decades. Notable Features: Customizable stone colors match home exteriors from cool grays to warm earth tones Superior traction provides safety in wet conditions without harsh textures Freeze-thaw resistance makes this ideal for northern climates with temperature fluctuations 5. Porcelain Slab Driveway Large-format porcelain slabs bring luxury interior design outdoors with dramatic impact. These oversized tiles, often 3 feet by 5 feet or larger, create sleek surfaces with minimal grout lines. Porcelain offers exceptional stain resistance and color permanence while mimicking concrete or natural stone beautifully. Notable Features: Minimal maintenance requirements eliminate sealing needs common with natural stone Consistent coloring maintains appearance without fading from sun exposure Contemporary grace improves properties with high-end modern styling 6. Floating Concrete Squares with Gravel Individual concrete pavers spaced evenly across gravel beds create sculptural rhythm and visual interest. The squares appear to float above textured surfaces while naturally guiding traffic flow. Proportions can be customized to vehicle wheelbases, and excellent drainage occurs between each unit. Notable Features: Artistic functionality changes practical needs into landscape design features Natural drainage paths prevent water pooling while maintaining structural integrity Flexible spacing accommodates different vehicle sizes and traffic patterns 7. Grass Strip Driveway Concrete or paver tracks with living grass strips growing between them offer environmentally friendly beauty. This permeable design allows rainwater to soak naturally while softening hardscape with greenery. Reinforced grass pavers in high-traffic areas prevent rutting while maintaining the natural appeal. Notable Features: Reduced heat island effect keeps surfaces cooler than solid concrete installations Natural stormwater filtration supports healthy soil and reduces municipal drainage burden Living landscape integration connects the driveway seamlessly with the surrounding gardens 8. Stamped Concrete with Geometric Pattern Contemporary geometric patterns change standard concrete into striking design statements at reasonable costs. Rather than imitating traditional materials, modern stamping creates bold rectangles, hexagons, or linear designs. Monochromatic color schemes maintain refinement while adding surface dimension and visual movement. Notable Features: Cost-effective upgrade delivers designer looks without high-end material expenses Pattern customization matches styles from mid-century to ultra-contemporary Durable surface resists fading and wears better than painted alternatives 9. LED-Lit Driveway Edges Integrated LED lighting along driveway borders creates functional illumination with architectural drama. Recessed lights or LED strips guide vehicles safely while changing the space after dark. Low-voltage systems offer energy efficiency and can be programmed for various lighting effects and timing. Notable Features: Better nighttime safety clearly defines driving boundaries in all weather conditions Energy-efficient operation minimizes electrical costs with modern LED technology Design flexibility allows color temperature choices from warm to cool white 10. Driveway with Built-In Planters Incorporating planter boxes or strips directly into driveway design softens the hardscape with strategic greenery. These integrated garden beds break up large paved areas while adding color and texture. Plants can be chosen for seasonal interest, creating year-round visual appeal at the entrance. Notable Features: Softened appeal balances hard materials with natural elements seamlessly Strategic placement frames the driveway without obstructing vehicle movement Seasonal variety allows changing plantings for evolving color and texture 11. Stepped Modern Driveway (for Slopes) Sloped properties benefit from stepped driveway designs that manage grade changes with architectural intention. Terraced sections connected by angled ramps create visual interest while improving drainage and traction. The stepping can incorporate lighting, planters, or material flow between levels. Notable Features: Improved vehicle traction on steep grades through intentional level changes Structural drama changes challenging topography into design features Better drainage control prevents water from rushing and erosion on slopes 12. Concrete Driveway with Metal Inlays Metal strips or geometric inlays add industrial classiness to concrete surfaces with exceptional contrast. Stainless steel, corten steel, or aluminum elements create visual interest while serving as expansion joints. The metal develops natural patina over time, adding character and depth to the design. Notable Features: Industrial-modern aesthetic appeals to contemporary and mid-century home styles Functional expansion joints prevent concrete cracking while adding design detail Weather-resistant materials develop beautiful patina without structural deterioration 13. Eco-Friendly Grid System Plastic or concrete grid systems filled with gravel or grass provide load-bearing surfaces with maximum permeability. These honeycomb structures distribute vehicle weight while allowing water and oxygen to reach the soil. The result combines durability with environmental responsibility in one innovative system. Notable Features: Maximum permeability achieves the highest water infiltration rates among all options Strong load capacity supports heavy vehicles without compromising environmental benefits Low maintenance requirements reduce long-term care compared to traditional surfaces 14. Driveway-to-Walkway Design Unified material palettes and thoughtful transitions blur boundaries between driveway and walkway spaces. This approach creates cohesive flow from street to front door, making the entire entry sequence feel intentional. Consistent colors, textures, and patterns throughout establish visual balance. Notable Features: Cohesive site design eliminates jarring transitions between different surface areas Material continuity simplifies maintenance and creates an urbane appearance Visual flow guides visitors naturally from the parking to the entrance 15. Wide Entry Driveway with Statement Gate Generous driveway widths paired with gates create grand, welcoming entrances with security. Modern gate designs in metal, wood, or composite materials set the tone while providing privacy. The width accommodates multiple vehicles and creates impressive first impressions for visitors. Notable Features: Better security controls property access while maintaining visual appeal Architectural focal point establishes home’s design from the street Practical width allows easy maneuvering for multiple or larger vehicles 16. Circular Modern Driveway Breaking from linear traditions, circular or curved layouts add grace and improved functionality to larger properties. The rounded design creates natural turnaround space while framing central landscaping features. This layout works particularly well with modern homes that emphasize organic shapes and flowing lines. Notable Features: Easy vehicle turnaround eliminates backing onto busy streets safely Central landscape opportunity showcases specimen trees, sculptures, or gardens Structural softness balances angular modern home designs beautifully 17. Heated Modern Driveway Radiant heating systems embedded beneath driveway surfaces automatically melt snow and ice in cold climates. This luxury feature provides year-round convenience while protecting surface materials from freeze-thaw damage. Hydronic or electric systems can be installed during construction or renovation. Notable Features: Winter convenience eliminates manual snow removal and ice scraping An extended surface life prevents freeze-thaw damage to materials Safety enhancement maintains clear, slip-free surfaces throughout the winter months How to Choose the Right Modern Driveway Design Follow these steps to find a driveway that works for your home and lifestyle: Step 1: Assess Your Home’s Architecture: Examine your home’s style first. Ultra-modern homes pair well with sleek concrete or porcelain, while softer contemporary styles benefit from mixed materials that add warmth.Step 2: Evaluate Climate and Drainage: Consider local weather patterns. Areas with heavy rainfall need permeable options, while freeze-thaw climates require durable materials that withstand temperature fluctuations.Step 3: Set Your Budget: Calculate costs for materials, installation, and long-term maintenance. Basic concrete offers affordability, while porcelain or heated systems require larger investments.Step 4: Match Maintenance to Lifestyle: Decide on upkeep commitment. Low-maintenance options like stamped concrete suit busy schedules better than natural stone. The Bottom Line Modern driveway design blends style with smart construction. Today’s modern driveway ideas range from clean concrete layouts to heated systems built for cold climates. You can choose simple slabs, permeable options for better drainage, or subtle lighting for added safety. The right design depends on your home’s architecture, local weather, budget, and how you use the space each day. A driveway should not feel like an afterthought. It shapes first impressions and supports daily routines. From eco-friendly grid systems to bold geometric patterns, there’s a solution for every need. In my experience, focus on durability, function, and a look that fits your home naturally. The right choice will serve you well for years.
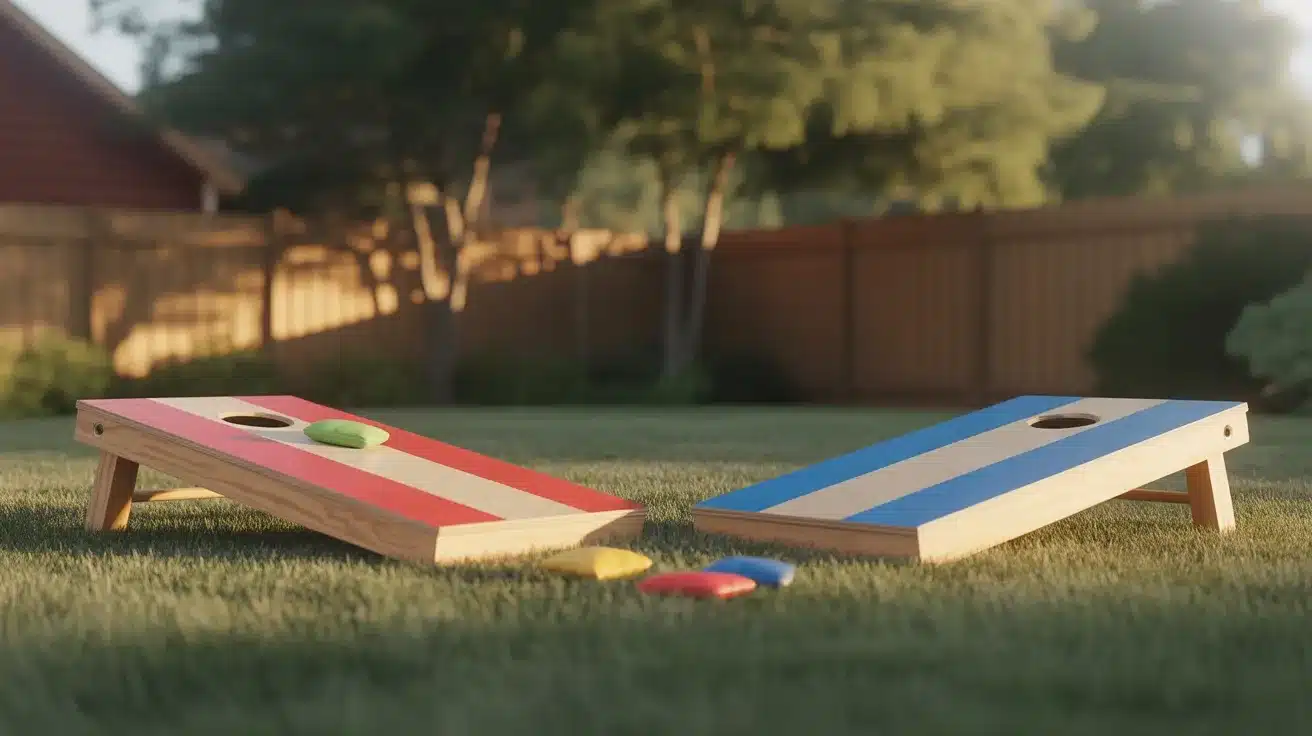
Setting up cornhole sounds simple until you realize how many people get the spacing wrong. From backyard cookouts to tailgate parties, the game gets rushed, boards dropped wherever there’s room, and suddenly the whole thing feels off. Too close, and every toss lands in the hole. Too far, and nobody’s scoring at all. Getting the distance for cornhole boards right is the single most important part of setup, and it’s easier than most people assume. Let me help you understand this by breaking it down clearly, from the official measurement to practical spacing tips, so your next game feels exactly the way it’s supposed to: balanced, competitive, and worth playing. Users are looking for the official rules regarding the setup of cornhole boards, including the standard distance between them. Understanding Cornhole Boards Cornhole is a competitive tossing game played with two raised wooden boards and fabric bags filled with corn or synthetic pellets. Each board has a 6-inch hole near the top, and a bag in the hole for 3 points, or flat on the board surface for 1. Games run to 21 using cancellation scoring, where only the net difference per round counts. Players take turns throwing from the same end, switching sides each round. The American Cornhole Association governs official specs for both board dimensions and spacing. That distance between boards determines how much skill the game actually demands; it shapes the throwing arc, the release angle, and how the bags slide once they land. Get it right, and every throw means something. Get it wrong, and even good players feel the imbalance. What is the Official Distance for Cornhole Boards? The official distance for cornhole boards depends on player age and level of play. Adult tournament rules follow strict measurements, while junior and casual games allow shorter distances for easier tossing. Adult Regulation Distance For official adult play, cornhole boards must be placed 27 feet apart, measured from the front edge of one board to the front edge of the other. In metric terms, that equals 8.23 meters. This measurement is defined in official rulebooks from the American Cornhole Association (ACA), American Cornhole Organization (ACO), and American Cornhole League (ACL). The distance creates a balanced level of difficulty and ensures consistent competitive play. Official Adult Distance: 27 feet 8.23 meters Front edge to front edge Junior & Recreational Distance Junior competitive play typically shortens the distance to 21 feet, measured front edge to front edge. For younger children, seniors, or casual backyard games, the boards may be placed 12 to 15 feet apart. Reducing the distance makes it easier to reach the board while still practicing proper throwing form. Importantly, the board size does not change for juniors or recreational players. Only the throwing distance is adjusted to match skill level and strength. Official Board Dimensions to Pair With Correct Spacing Spacing alone won’t give you a regulation setup; the boards themselves need to match official specs. Here are the dimensions that matter for a correctly built or bought board. Here’s a breakdown: Component Measurement Metrics Why It Matters Board length 4 feet 1.22 meters Shorter boards reduce the landing surface area significantly Board width 2 feet 0.61 meters Narrower boards make bag placement harder than intended Hole diameter 6 inches 15.24 cm Smaller or larger holes shift scoring rates noticeably Hole position 9 inches from the top, centered 22.86 cm Off-center holes change the target zone unfairly Back edge height 12 inches off the ground 30.48 cm Sets the playing slope that controls the bag slide distance Board size and spacing work together; using undersized boards at 27 feet makes the game harder than regulation, while oversized boards at the same distance make it easier. Match both to keep things consistent. How to Set Up the Boards Correctly Setting up the boards the right way keeps the game fair, stable, and safe. Follow these simple placement steps before starting play. Step 1: Measure the Distance Between Boards Start by placing both boards on a flat, level surface, such as grass, concrete, or indoor flooring. Measure the distance from the front edge of one board to the front edge of the other. For standard adult play, that distance is 27 feet. For casual backyard games or kids, you can shorten it to 12–15 feet. Always measure carefully so both sides agree on spacing before the game begins. Consistent distance keeps throws fair and scoring accurate throughout the match. Step 2: Position Boards at the Correct Angle Each board should sit at a slight upward angle, not flat on the ground. The back of the board must be raised so the top edge stands about 12 inches off the ground for regulation setup. Most boards have folding legs underneath to create this incline. Make sure both boards match in height and angle. If one board tilts differently, gameplay becomes uneven. Double-check stability so the board does not wobble when bags land on it. Step 3: Align the Boards Straight Across Both boards should face each other directly in a straight line. Stand behind one board and visually confirm that the hole aligns with the center of the opposite board. If needed, adjust slightly left or right until both are evenly positioned. This alignment ensures players throw toward the center and keeps the game balanced. Crooked placement can change throwing angles and affect scoring fairness. Step 4: Secure the Boards for Stability Before starting the game, test each board by pressing gently on the corners. The board should not rock, slide, or sink unevenly into the ground. On grass, press the legs firmly into the soil. On hard surfaces, consider placing non-slip pads underneath. Stability prevents movement when bags land with force. A secure setup improves accuracy and reduces frustration during play. Step 5: Create a Clear Throwing Line Mark a clear throwing line at the front edge of each board. Players must stay behind this line when tossing bags. You can use tape, chalk, or simply agree on the edge as the boundary. This keeps gameplay organized and fair. Remind players not to step past the front edge during throws, especially in competitive matches. A visible line helps everyone follow the same rules. Adjusted Distances for Different Players Not every player throws like a tournament competitor. Scaling the distance by age and skill level keeps the game competitive and worth playing for everyone involved. Here’s a breakdown: Player Type Recommended Distance What It Does Tournament / competitive adults 27 feet Full regulation play: tests skill, arc, and consistency Beginners or casual adults 21 feet More forgiving without losing the feel of real cornhole Kids aged 8–12 15 to 18 feet Keeps scoring realistically and holds their attention Young children under 8 10 to 12 feet Makes the game achievable and genuinely enjoyable From personal experience watching kids play at family gatherings, shortening the distance to match their ability changes the whole energy; they score more, stay engaged, and actually want to keep playing. Why 27 Feet Became the Standard The 27-foot distance wasn’t chosen randomly, and from my experience playing at different spacings, the difference is immediately noticeable. It sits at exactly the right point where the throwing arc requires genuine control. A good throw demands the right release height, correct arc, and enough spin to land flat so the bag slides rather than bounces toward the hole. Shorter distances make flat, skimming throws too easy. Greater distances push scoring rates so low that games stall and lose momentum entirely. Years of competitive refinement landed on 27 feet as the number that keeps games tight, scoring meaningful, and skill properly rewarded, and in my opinion, that balance is what makes cornhole worth playing seriously. Total Yard Space You’ll Actually Need Most people measure the 27 feet between boards and stop there, but that’s only part of the space the game actually requires to play comfortably and safely. Here’s a clear breakdown: Zone Space Required Metric Equivalent Purpose Between boards 27 feet 8.23 meters Official playing distance, front edge to front edge Behind each board 3 to 5 feet 0.91 to 1.52 meters Room for players to stand, step, and throw freely Each side of the lane 2 to 3 feet 0.61 to 0.91 meters Safety buffer and comfort space during play Total length needed 35 to 40 feet 10.67 to 12.19 meters Full playing area, including player zones at both ends A standard two-car driveway or an open backyard section comfortably covers this. Measure the full area before finalizing board placement; running short on space behind the boards mid-game affects every throw from that end. Common Mistakes That Throw Off Your Setup Small setup errors are more common than you’d think, and each one quietly ruins the game. Here’s what to avoid: Measuring from the wrong edge: Back edge to back edge cuts 4 feet off the playing distance. Always start at the front lip. Measuring hole-to-hole: The hole is 9 inches from the top, so this measurement falls short of the correct 27-foot spacing. Skipping the ground check: Sloped or uneven ground changes how bags behave on the board surface. Misaligning the boards: Boards angled toward each other create an uneven throwing lane. Sight down both boards before finalizing placement. Forgetting the foul line: Stepping past it during a throw affects the release point and fairness across a full game. Fix these before the first toss, and the rest of the game takes care of itself. Most of these mistakes take under a minute to avoid; the payoff is a setup that actually holds up through a full game. Final Thoughts Now you know that the official distance for cornhole boards is 27 feet, measured front edge to front edge for adult play. You’ve also seen how board dimensions, surface level, spacing behind each board, and proper alignment all shape how the game feels. When you measure carefully and set up the correct distance for cornhole boards, you create a fair playing area where skill actually matters. Take a few extra minutes with a tape measure before your next game. That small step makes a big difference in consistency and scoring. Set your boards at the proper distance today, then share your setup or questions in the comments.
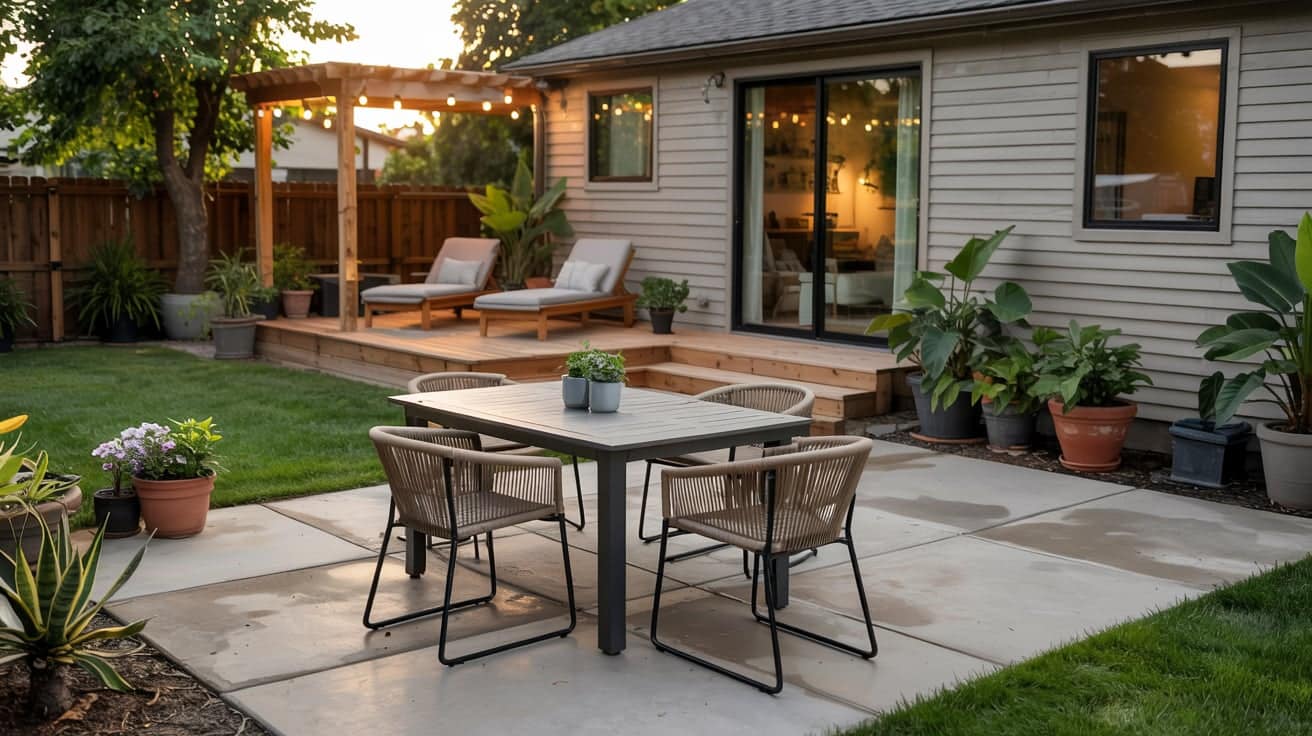
I used to go back and forth between building a patio or a deck, but I realized I didn’t have to pick just one. If you want an outdoor space that’s both functional and comfortable, perfect for everything from family dinners to lazy weekend lounging, a concrete patio and wood deck combination could be exactly what you need. I’ll share what I’ve learned about how this setup works, the design ideas that inspired me, building tips I wish I knew earlier, and the cost factors to plan for. If you’re tackling it as a DIY project or bringing in a contractor, you’ll have the info to make smart choices and avoid mistakes. Let’s start creating a space that fits your lifestyle. Combining Concrete Patios with Wood Decks for Functional Outdoor Spaces A concrete patio and wood deck combo is a backyard layout that combines both materials to create distinct outdoor zones. The concrete portion is often used for dining, grilling, or placing heavy furniture, while the wood deck provides a warmer surface for lounging or relaxing. This combination works well in various yard sizes and terrains, offering both durability and texture contrast. It allows homeowners to define spaces for different uses while using the strengths of each material for comfort, function, and long-term use. Concrete Patio and Wood Deck Combo Ideas Looking to make the most of your outdoor space? These practical and visually engaging combinations offer structure, variety, and comfort by blending durable concrete with warm, natural wood decking: 1. Side-by-Side Split Layout This layout separates your outdoor space into two clear zones: one with a concrete patio for dining or grilling and the other with a wood deck for lounging or casual seating. It’s ideal for creating a functional division without building walls or barriers. This design works exceptionally well in medium-to-large yards, helping you assign specific activities to each surface. It also gives you flexibility to decorate each area based on how you plan to use it, while keeping a clean and uncluttered look. 2. Floating Wood Deck Over Concrete Slab This idea involves installing a raised wood platform over an existing concrete patio. It’s a cost-effective solution for updating old or worn-out concrete surfaces without demolition. The wood sits slightly elevated, improving drainage and allowing airflow underneath. This approach adds warmth to the space, improves foot comfort, and offers a quick visual refresh. It’s perfect for DIY enthusiasts who want a fresh look without starting from scratch, and it works especially well in rental properties or on a limited renovation budget. 3. Multi-Level Terrace Combo A multi-level design separates your concrete patio and wood deck by elevation, making it ideal for sloped or uneven yards. One level can serve as a dining or fire pit area, while the other supports lounge chairs or planters. The step-down effect adds structure and helps create a natural flow across your yard. This approach also enhances the sense of space by visually breaking up a large area. With the proper lighting and railing, it can also improve safety and comfort. 4. Curved Concrete Patio with Square Deck Using a rounded or curved concrete shape alongside a square or rectangular deck introduces visual contrast that makes each surface stand out. The soft, flowing shape of the patio blends well with garden features or green spaces, while the geometric deck offers a stable base for furniture. This pairing works beautifully in contemporary or transitional yard designs and gives you freedom to soften the space without overcomplicating construction. The layout also encourages traffic flow around the yard more naturally. 5. Fire Pit on Concrete, Seating on Deck Place a fire pit or chiminea on the non-combustible concrete patio and arrange outdoor seating on the adjacent wood deck. This idea makes the most of each material’s strength and ensures safety around open flames. It’s perfect for entertaining and encourages gathering in one area while keeping a cozy, relaxed atmosphere on the deck. The setup also creates a natural anchor point in the backyard, drawing guests toward the fire without cluttering the entire space with heavy furniture. 6. Wraparound Deck + Inset Patio A wraparound wood deck framing a sunken or inset concrete patio provides a visually rich layout that balances structure and flow. The center patio becomes a focal point, ideal for a dining set, small garden, or hot tub, while the surrounding deck serves as a transition or seating area. This design feels enclosed but still open to the rest of the yard. It’s beneficial for maximizing space in smaller backyards while offering flexibility for future upgrades like built-in benches or planters. 7. Minimalist Concrete Pad + Floating Steps Pairing a smooth concrete pad with floating wood steps adds a modern touch with clean lines and separation between elements. This setup is ideal for homeowners seeking a sharp, understated layout that highlights architectural form. Floating steps also improve airflow and prevent moisture buildup around the foundation. If you’re creating access to a sliding door or leading to a detached space, this design offers simplicity and low maintenance while still delivering visual structure and ease of movement. 8. Pergola on Deck, Grill on Patio Install a pergola over your wood deck for shade and relaxation, while placing your grill or cooking station on the concrete patio. This layout keeps smoke and heat away from seating areas and defines different functions in the yard. It’s practical for hosting events or family meals and prevents wear on the wood from cooking-related activities. The division also helps organize your space, so guests can gather comfortably in one spot without getting in the way of meal prep or cleanup. 9. Concrete Borders Framing a Deck Frame your wood deck with a border of poured concrete to create contrast and structure. This design technique helps prevent grass overgrowth, defines the edge of the deck, and offers space for planters, lighting, or steps. The crisp perimeter also protects the deck’s foundation by improving drainage. It’s instrumental in minimalist or contemporary settings where clean edges and functional finishes matter. You can stamp or stain the concrete for added texture or visual interest while maintaining low maintenance. 10. Seamless Composite Deck into Polished Concrete Blend a composite wood deck into a polished concrete patio using aligned levels, color-coordinated tones, and matching edges. This high-end look works well in modern homes where clean surfaces and smooth transitions are key. Composite materials reduce maintenance while offering uniform appearance and durability. The polished concrete extends the sleek finish, reflecting light and expanding visual space. Together, they create an organized, low-maintenance layout that works beautifully for outdoor lounges, poolside seating, or open-concept backyard entertainment. 11. Detached Deck Nestled in Patio Install a freestanding wood deck platform within a larger concrete patio for a distinct contrast in material and elevation. This approach creates a “zone within a zone,” helpful in separating private seating or adding variation in a flat landscape. The wooden insert can host a bistro table, sectional, or lounge area, while the surrounding concrete keeps things grounded and practical. It’s a clever solution for creating spatial depth without changing your yard’s overall footprint, especially in open-plan outdoor designs. 12. Outdoor Shower on Concrete + Deck Changing Area Use concrete as a base for an outdoor shower to prevent water pooling and damage, then add a connected wood deck as a dry changing area. This pairing is ideal for beachside homes, pool zones, or backyard spas. The concrete handles constant moisture without warping, while the deck offers a warmer, barefoot-friendly surface to dry off. You can also add hooks, benches, or towel racks for convenience. It’s a space-efficient solution that mixes comfort with purpose. 13. Garden Path to Raised Deck Overlook Build a narrow concrete path leading through your garden toward a slightly styled wooden deck at the far end. This design invites movement through the landscape, creating a sense of destination. The raised deck offers a peaceful vantage point for reading or morning coffee away from high-traffic zones. It’s especially effective in long or deep yards and can be customized with lighting, flower beds, or a trellis. The separation adds visual rhythm and encourages exploration of the whole yard. Building a Deck on a Concrete Patio: A Step-by-Step Guide Building a wood deck over a concrete patio can extend the life of your outdoor space. This guide breaks down each stage to help you plan, construct, and protect your structure effectively. Step 1: Prep and Evaluation Start by inspecting the concrete slab for cracks, uneven areas, and drainage issues. Use a level to assess the slope and ensure proper water runoff away from your home. If the slab is damaged or unlevel, it may require repairs or a leveling compound before construction begins. Planning the deck height and checking for any obstacles like vents or fixtures is essential. This step ensures a stable base for your framing and long-term durability. Step 2: Building Process Begin by laying out the frame using pressure-treated wood rated for ground contact. Secure the joists with anchors or adjustable post bases to avoid direct contact with the concrete. Maintain proper joist spacing, typically 16 inches on center, for stability and uniform support. Use galvanized fasteners or deck screws to resist corrosion. Ensure all structural elements are square and level before attaching the decking boards. Proper framing is the foundation of a safe, lasting deck. Step 3: Waterproofing and Durability Tips Install flashing where the deck meets the home to divert water and prevent leaks. Use spacers or composite deck blocks to lift framing off the concrete surface, reducing the risk of moisture absorption. Consider an under-deck drainage system to protect the structure and create dry storage space below. Choose moisture-resistant decking materials like composite or hardwood to improve longevity. Proper waterproofing reduces maintenance and helps the deck withstand seasonal weather changes. Step 4: Safety & Code Compliance Check local building codes for requirements regarding railing height, stair dimensions, and deck load capacity. Permits may be needed depending on the size and height of your deck. Install guardrails and handrails where necessary and ensure steps meet regional safety standards. Leave appropriate gaps between boards for water drainage. Meeting code not only provides safety but also helps avoid fines or rework in the future. Always prioritize structural integrity and user protection. DIY vs. Hiring a Contractor Choosing between building the combo yourself or hiring a contractor depends on your experience, time, and the complexity of your yard. Deciding between a DIY build and hiring a contractor will shape your project’s cost, timeline, and results. Here’s what to consider before making the choice: Factor DIY Contractor Tools Needed Must own or rent Provided by the contractor Skill Level Basic carpentry required Professional expertise Time Slower, weekends, or longer Faster, managed timeline Complexity Best for simple builds Handles advanced or sloped layouts Drainage & Slope It may not be easy to address Expert handling of grading and runoff Permits/Code DIY responsibility Contractor-managed Cost Lower upfront Higher, includes labor and warranty Cost Breakdown and Budget Planning Understanding the full cost and creating a clear budget will help you avoid surprises and keep your project on track. Here’s how to plan your expenses: Concrete Patio Costs Concrete patios vary in price depending on the finish. Bare broom-finished surfaces are more affordable, while stamped or stained options cost more due to added labor and materials. Surface area, accessibility, and prep work also influence total cost. Keep in mind that additional features like curves, borders, or thickness adjustments may require a higher investment and more planning. Wood Deck Costs The type of wood or composite material you choose affects cost and maintenance. Pressure-treated wood is a standard entry-level option, while hardwoods or composites offer greater durability with less upkeep. The layout complexity, railing requirements, and hardware choices also influence costs. Larger decks or those with unique shapes or levels may require more framing materials and labor. Combo Project Cost Examples The total cost of a combined patio and deck setup depends on the size of each section, site conditions, and regional labor rates. For example, a flat backyard with minimal prep work may cost significantly less than one with grading needs or drainage concerns. Including stairs, lighting, or built-in features also increases pricing. Always evaluate material, design, and site conditions together. Bonus Tool: Interactive Budget Estimator An online budget estimator helps you plan by adjusting square footage, materials, and layout types. Use it to input your desired dimensions and see how material choices affect total cost. This tool can guide early decisions and help determine whether DIY or hiring a pro fits your budget. It’s designed to offer flexible projections, not fixed quotes. Furnishing and Landscaping the Combo The right furniture and landscaping can tie your patio and deck combo together, making it both functional and visually appealing. Here’s how to style the space: Layout Tips Designate each surface based on intended use. Place dining tables, grills, or kitchen stations on the concrete for stability and heat resistance. Use the wood deck for casual seating, loungers, or a fire-free lounge zone. Keep pathways clear and ensure enough space for movement between zones to make the entire layout feel connected and functional. Decor Integration Use neutral or coordinating colors to link the deck and patio areas. Add large planters along edges or transitions to soften the material shift. Outdoor rugs can help define lounge or dining zones, while matching cushions, furniture finishes, and accessories tie everything together. Natural elements like plants and stones can also create a cohesive look across surfaces. Lighting Suggestions Combine different types of lighting to ensure usability after dark. Deck post lights provide subtle illumination along railings or stairs. Wall-mounted sconces can light up your patio area, especially near doors or seating. Add solar-powered path lights to highlight walkways or garden edges. Consider string lights or lanterns for ambiance, especially above lounge or dining zones. Maintenance Tips for Longevity Proper care will keep your patio and deck combo looking great and performing well for years. Here are some maintenance tips to help extend its lifespan: Clean Surfaces Regularly: Sweep away debris, hose down dirt, and use gentle cleaners for stains on both wood and concrete. Seal Wood Annually: Apply a quality sealant to protect against moisture, UV rays, and surface cracking. Inspect for Damage: Check for loose boards, cracks, or signs of rot. Address small issues before they become major repairs. Maintain Drainage: Ensure water flows away from the deck and patio. Clear drains and avoid pooling to protect both materials. Protect During Harsh Weather: Cover furniture, remove snow promptly, and use breathable covers to shield surfaces from seasonal damage. Reapply Concrete Sealant as Needed: Concrete should be resealed every few years, depending on traffic and exposure. With regular upkeep, your patio and deck will stay safe, attractive, and ready to enjoy season after season. Conclusion Now that I’ve given you a solid understanding of how a concrete patio and wood deck combo works, you can start planning a space that suits your style and needs. If you go the DIY route or bring in a pro, the right layout, materials, and upkeep will keep your outdoor area looking great and functioning well for years. I’ve shown you layout ideas, building steps, cost tips, and even furniture suggestions, so you have all the basics covered. Just remember, every great space starts with a thoughtful plan. Want more help turning ideas into action? Check out more blogs on the website for guides, tips, and inspiration you can use!
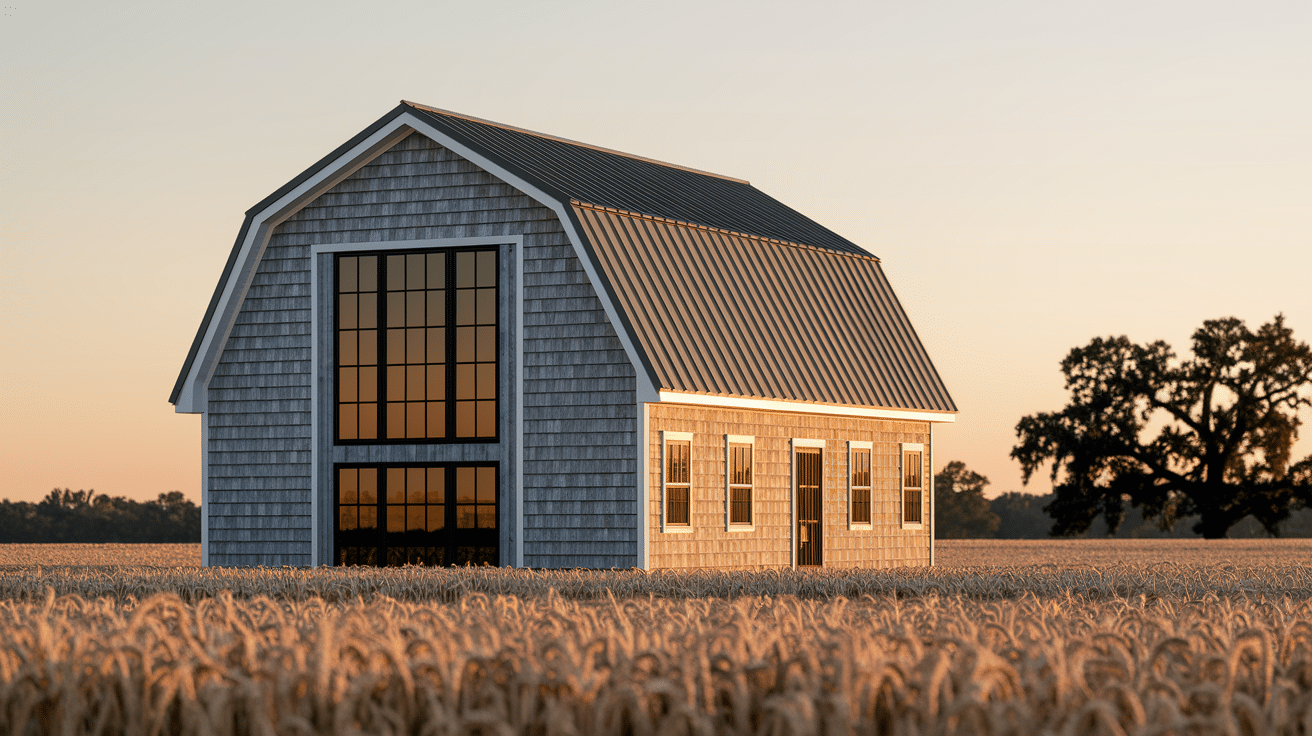
Project Type Barndominium exterior design and finishing Best Author Jack Reynolds, Outdoor & Exterior Cost Range $8,000, $60,000+ depending on siding, features, and square footage Most Durable Exterior Steel or Corten metal panels Most Common Mistake Choosing aesthetics before material performance Key Structural Decision Roof style, gambrel, gable, or shed, before any exterior finishing I’ll be honest, I used to think barndominiums were just trendy barn conversions until I saw one in person, and wow, was I wrong. These incredible homes combine the spacious, practical design of a barn with all the comfort and style you could want in a modern house. If you’re dreaming of classic red barn siding or sleek modern metal panels, there are so many ways to make your barndominium exterior absolutely pretty. From wraparound porches to dramatic black-framed windows, each design choice can completely change how your home looks and feels. Ready to find your perfect barndominium style? Let’s get into it! Cost Note: Figures in this article are estimates based on national averages. Actual costs vary significantly by region, contractor, materials, and project scope. Always get at least three quotes before committing to any project above $1,000. What Makes a Barndominium Different From a Standard Home Build A barndominium is a post-frame or steel-frame structure built with barn construction methods but finished as a living space. The name combines “barn” and “condominium,” though most have nothing to do with shared ownership; the “condominium” part just refers to the quality of interior finish. The structure is wider, simpler, and faster to frame than stick-built houses. High ceilings, open floor plans, and large spans without load-bearing interior walls are standard. The exterior is where most of the design variation happens, because the box underneath is usually the same. Why the exterior matters more on a barndominium: The silhouette of a metal-frame barn is plain. The exterior finish is almost entirely responsible for whether the building reads as a home or a storage unit. That’s not a knock on the building type; it’s a design opportunity. Your siding material, roof pitch, window size, porch design, and color choices do more work here than they would on a traditional house with built-in architectural detail. Before committing to any of the ideas below, make sure your roof structure is settled. The hip roof versus gable decision affects almost everything downstream: porch attachment points, gable window placement, and overall silhouette. Get that resolved first. Popular Barndominium Exterior Ideas Barndominiums are loved for their mix of farmhouse style and modern comfort, and the exterior sets the tone right away. Here are some popular design ideas to inspire yours: 1. Classic Red Barn Siding with White Trim Want your barndominium to look like a traditional country barn? Then this design is perfect. The bright red siding paired with crisp white trim around the windows, doors, and roofline instantly gives your home a warm, classic farmhouse feel. This combination is classic and works beautifully in both rural settings and modern neighborhoods that want a rustic touch. Red siding draws attention and makes the home look lively, while the white trim highlights structural details and keeps the overall look clean and balanced. Design Tip: Pair this look with a metal roof in white or black for extra contrast. Add a front porch with white railings to complete the true barn-inspired style. 2. Metal Siding for a Modern Farmhouse Look If you love the modern farmhouse trend, metal siding is a stylish and practical choice. It gives your barndominium a sleek, shiny, and contemporary look while also offering excellent protection against the weather. Metal panels resist rust, pests, rot, and fading, making them one of the most low-maintenance siding options available. Aside from durability, metal siding shows light beautifully and makes the home look more polished and high-end. You can choose from different finishes, such as matte, glossy, or textured, to match your preferred style. Design Tip: Go for neutral tones like charcoal gray, soft white, or matte black for a bold, modern appearance. Combine metal siding with wooden accents for a perfect balance between rustic charm and contemporary design. 3. Wraparound Porch for More Outdoor Space A wraparound porch is the most structurally significant exterior addition you can make to a barndominium. It changes the silhouette, adds usable outdoor square footage, and breaks up the plain box of a standard barn frame. The trade-off is cost and structural complexity; the porch posts, beams, roof, and decking need to be engineered alongside the main structure, not bolted on afterward. If you’re comparing your options, the deck versus porch value comparison covers which adds more to resale price and which is cheaper to build per square foot. For barndominiums specifically, an attached covered porch usually wins on value and livability over a freestanding deck. Design Tip: Use natural wood flooring or composite decking for a cozy, farmhouse feel. Add string lights, planters, and outdoor rugs to make it warm and inviting. Consider ceiling fans for comfort during warmer months. 4. Big Black-Framed Windows for Lots of Light Large black-framed windows are one of the most popular modern barndominium design trends right now. They allow tons of natural light into your home, making your interiors feel bright, open, and airy. The bold black frames create a striking contrast against lighter walls and siding, giving your home a chic farmhouse-meets-modern look. These windows also bring the outdoors inside, letting you enjoy beautiful views without stepping outside. If you want a spacious, welcoming atmosphere inside your barndominium, this feature is a must-have. Design Tip: Floor-to-ceiling windows make smaller rooms feel larger and more open. Pair black-framed windows with light wood interiors for a cozy, modern feel. Consider energy-efficient glass to keep your home cooler in the summer and warmer in the winter. 5. Sliding Barn Doors as a Bold Entry Sliding barn doors are one of the most popular features you can add to your barndominium. These doors save space, look stylish, and add a rustic farmhouse class to your home. Unlike traditional doors that swing open, barn doors slide smoothly on a track, making them practical and functional, especially in smaller spaces. They work beautifully as front entry doors, but you can also use them inside the home for bedrooms, pantries, or laundry rooms. Available in wood, glass, or metal designs, you can choose a style that matches your barndominium’s overall look. Design Tip: Go for a distressed wood finish for a rustic farmhouse look. Choose matte black or brushed metal tracks for a modern edge. Pair sliding barn doors with neutral walls to make them a bold statement piece. 6. Stone or Brick Bottom Walls for a Rustic Feel Want to give your barndominium a solid, grounded look? Adding stone or brick to the bottom half of your walls is a perfect way to create a classic farmhouse feel. It not only uplifts your home’s curb appeal but also protects the lower structure from dirt, moisture, and weather damage. Stone adds a natural, earthy charisma, while brick provides a warm, vintage character. This layered design creates visual depth and makes your barndominium look more luxurious and sturdy. Design Tip: Combine stone or brick with vertical board-and-batten siding for a textured farmhouse style. Use neutral stone shades like beige, gray, or whitewashed brick for a softer, modern feel. Add landscaping with plants and lighting to highlight the stonework at night. 7. Tall Porch Columns and Wood Beams Adding tall wooden columns and exposed wood beams to your barndominium instantly creates a warm, rustic farmhouse environment. These natural wood elements give your porch a sturdy and welcoming appearance, making the entrance feel grand and cozy at the same time. If you choose natural cedar, pine, or reclaimed wood, these beams and posts add a touch of class while upgrading the structural character of your home. Pairing them with stone bases or wraparound porches makes the design even more inviting. Design Tip: Use thicker posts for a bold, dramatic farmhouse look. Stain the wood in warm brown or deep walnut tones for extra character. Add hanging lanterns or string lights around the beams for a cozy nighttime feel. 8. Matte Black Exterior for a Striking Modern Feel An all-black or near-black barndominium exterior is the boldest choice on this list, and it has real performance implications beyond aesthetics. Dark colors absorb heat; in hot southern or western climates, a black exterior wall with western exposure will run significantly hotter than a light-colored alternative, which affects cooling costs and panel expansion rates. In cooler northern climates, the heat absorption is less of a liability. Matte finishes also show dust, pollen, and water streaking more visibly than semi-gloss. That’s worth knowing before you commit. If you’re choosing black or dark charcoal, pair it with black-framed windows and minimal trim; the look works when it’s complete. Half-measures end up looking unfinished rather than modern. For color pairing ideas on dark exteriors, exterior roof and wall color coordination follows the same contrast principles that apply here, too. Note: Black siding in climates with significant temperature swings experiences more panel expansion and contraction than lighter colors. Make sure your installer accounts for this in panel gap and fastener specifications. 9. Blue or Deep Green Paint for a Fresh Twist Want something unique and refreshing? Painting your barndominium navy blue, teal, or deep green adds a playful yet stylish feel that stands out without being too bold. These earthy tones combine beautifully with nature, making your home feel calm and inviting while still giving it personality. Lighter shades of blue create a coastal farmhouse feel, while darker greens add a rich, classy touch. These colors also pair well with white trims, wood accents, and metal roofs, giving your barndominium a fresh, updated appearance. Design Tip: Pair deep green siding with black or bronze accents for a rich, moody feel. Use navy blue walls with white trim for a crisp, timeless look. Add stone details at the base for extra texture and charm. 10. Board and Batten Siding for Classic Feel Board-and-batten siding is one of the most popular barn-inspired designs you can add to your barndominium. It features vertical wooden boards with thin strips placed between them, creating a textured look that has been loved for decades. This siding style instantly adds depth and dimension to your exterior, making your home look classic, charming, and full of character. It works beautifully in both modern and traditional farmhouse designs, especially when paired with bold trim colors. Design Tip: Paint the siding white for a traditional farmhouse look or dark gray/black for a modern twist. Combine board and batten with stone accents at the bottom for added contrast. Use wider battens if you want a bold, eye-catching design. 11. White Siding with Dark Accents for Contrast A white exterior with dark accents has become one of the hottest farmhouse trends, and for good reason. White siding creates a clean, timeless backdrop, while dark-colored doors, windows, and trims add sharp contrast that makes your home stand out beautifully. This combination works with almost any design style, from classic farmhouse to modern minimalist. Plus, it shows light, keeping your home cooler while still maintaining a classy, high-end appearance. Design Tip: Pair white siding with black-framed windows for a striking modern look. Add a wooden front door for warmth and balance. Use matte black outdoor fixtures like lanterns or house numbers for extra style points. 12. Carport or Breezeway Connected to the House A carport or breezeway is a smart and stylish addition to your barndominium. A carport provides a covered space to park your vehicles, protecting them from rain, sun, and snow. A breezeway, on the other hand, connects your garage or carport to your house with a covered walkway, so you can stay dry and comfortable even in bad weather. Besides being functional, breezeways and carports add a layer of class to your barndominium’s design. They also create extra space that can be used for storage, outdoor seating, or even small garden areas. Design Tip: Use the same roofing material as the house for a seamless look. Add stone columns or wooden posts to upgrade the design. Include recessed lighting for safety and style at night. 13. Multiple Gables or Roof Peaks for Interest Adding multiple gables or extra roof peaks instantly makes your barndominium’s exterior more eye-catching. Instead of having one simple flat roofline, extra peaks add depth, shape, and character to your home. They also create the illusion of a bigger, more spacious house from the outside. This feature works especially well for larger barndominiums, where you want to break up a long, plain roof and give it more structural personality. Design Tip: Pair multiple gables with contrasting siding colors for extra definition. Add stone or brick details under the peaks for texture and charm. Install small decorative vents or windows inside the gables to uplift the farmhouse look. 14. Dormer Windows for an Upper-Level Feel Dormer windows are small windows that extend out from the roof, and they add both function and style. These windows bring natural light into upper levels or loft spaces, making the inside brighter and more inviting. Dormers also make the exterior look taller and more classy, giving your barndominium a traditional farmhouse allure. They work especially well for homes with pitched roofs and are perfect for adding usable space to the second floor. Design Tip: Use arched or triangular dormers for a classic farmhouse style. Match the trim color of the dormers to your window frames for a cohesive look. Add flower boxes beneath dormer windows to give your home extra personality. 15. Metal Awnings Over Windows and Doors Adding metal awnings over your windows and doors serves both a practical and stylish purpose. These small overhangs provide shade in the summer, protect against rain and snow, and reduce glare inside your home. Awnings also add an industrial farmhouse feel, especially when paired with modern metal roofs and wood siding. They’re available in various colors and finishes, allowing you to match them perfectly with your overall exterior design. Design Tip: Choose matte black or dark bronze awnings for a sleek, modern farmhouse look. Combine metal awnings with wood siding for a warm, balanced style. Install accent lighting above or below the awnings for nighttime appeal. 16. Large Glass Garage Doors for Light and Style Large glass garage doors can completely change your barndominium’s look. They allow tons of natural light into your garage or workshop area, making it feel open and bright. You can also use them in living spaces, such as a game room or home gym, where you want to bring the outdoors inside. These modern glass doors create a luxurious and stylish feel, while still being durable and functional. Design Tip: Use frosted or tinted glass for added privacy without losing light. Pair glass garage doors with a matte black frame for a sleek, modern finish. Surround the garage door area with stone or wood details to make it a design feature. 17. Cedar or Wood Planks Mixed with Metal Panels Mixing natural wood planks with metal siding panels creates a perfect blend of rustic hex and modern style. Wood adds warmth and coziness, while metal gives your barndominium a sleek, durable, and contemporary edge. This combination works beautifully for exterior walls, porch ceilings, and entryways. It creates visual contrast and makes your home look custom-designed rather than plain or predictable. Design Tip: Use cedar or reclaimed wood for a rich, natural look. Pair it with matte black or gray metal siding for bold contrast. Add hidden accent lighting to highlight the wood texture at night. 18. Decorative Shutters on Windows Adding decorative shutters instantly makes your windows pop and gives your barndominium a cozy, farmhouse feel. Shutters can add a splash of color, contrast, or texture, making even simple exteriors look more magnetic and stylish. From classic wood shutters to modern composite designs, there are endless styles to choose from. Even if they’re purely decorative, shutters add depth and visual interest to your exterior. Design Tip: Choose bold colors like deep green, navy, or black to create contrast. Opt for rustic wooden shutters for a classic farmhouse feel. Match the shutter style to your window shape for a balanced, symmetrical look. 19. Landscaped Flower Beds Along the Walkway A well-designed, landscaped walkway lined with flower beds and small shrubs can completely change your barndominium’s curb appeal. Bright, colorful flowers make your home look warm, welcoming, and full of life. You can create neat, structured beds for a modern look or plant wildflowers and greenery for a natural farmhouse feel. Adding lighting along the path makes it safe and beautiful even at night. Design Tip: Use mulch or stone borders to give flower beds a polished look. Choose low-maintenance plants if you want something easy to care for. Add solar-powered pathway lights for an inviting glow after dark. 20. Covered Patio or Outdoor Kitchen for Relaxing A covered patio or outdoor kitchen extends the barndominium’s usable square footage without adding conditioned space, which makes it one of the better cost-per-use additions you can make. A well-built covered patio runs $20 to $50 per square foot depending on finish level. A full outdoor kitchen with built-in grill, refrigerator, sink, and counter adds another $5,000 to $20,000, depending on specifications and local labor costs. The roof over any covered patio attached to the barndominium should match the main roof material and pitch. Mismatched lean-to additions, a flat metal lean-to against a steep-gable roof, for example, look like additions rather than design decisions. If you want a partially open structure instead of a fully covered roof, a pergola off the back wall is a lower-cost option that still defines the outdoor space without requiring full structural engineering. Making Exterior Decisions That Hold Up Over Time The most common mistake on barndominium exteriors is choosing the photos taken at completion rather than for what the exterior actually does over ten years. Red paint fades. Wood siding in full sun exposure needs regular maintenance. Stone veneer in freeze-thaw climates without proper flashing fails quietly and expensively. The barndominium exterior ideas that hold up best share a pattern: quality base materials, proper installation with climate-specific detailing, and design choices that match the scale of the building. A large barndominium with undersized posts, undersized windows, or underpowered landscaping reads as unfinished even with fresh paint. Scale matters. The interior follows directly from the shell, ceiling height, window placement, and siding material; all shape what works inside. Getting the exterior right first makes those decisions easier, and barndominium interiors work differently from stick-built homes in ways that are worth knowing before you start finishing. Cost is the other variable most people underestimate on the exterior alone. If you’re working from a budget, what construction costs per square foot in your region give you a realistic floor to plan against before you start picking siding finishes. Frequently Asked Questions What is the most durable exterior siding for a barndominium? Steel panel siding with a factory-applied Kynar 500 coating is the most durable option; it handles UV, moisture, and impact well with minimal maintenance. Stone and brick are comparably durable at the base. Wood and fiber cement are workable but require more maintenance over time. How much does a barndominium exterior typically cost? Exterior finishing (siding, windows, doors, roofing) on a standard barndominium runs roughly $25,000 to $60,000 depending on square footage, materials, and regional labor costs. Add-ons like wraparound porches, covered patios, or stone accents add $10,000 to $40,000 on top of that range. What color is most popular for barndominium exteriors? Charcoal gray and matte black are the most requested finishes in modern barndominium builds right now. Classic barn red remains popular in rural settings. White or off-white siding with dark trim is the most common choice when resale value is a priority. Can you paint metal siding on a barndominium? Yes, but field-applied paint on metal siding performs significantly worse than factory-applied coatings. If painting metal panels, use a bonding primer rated for metal, then an exterior paint with UV protection. Expect to repaint every 7 to 12 years versus 20+ years for quality factory coatings. Does a barndominium exterior add or hurt resale value? Barndominiums appraise differently than stick-built homes, and rural properties have different resale dynamics than suburban ones. In markets where barndominiums are common, well-finished exterior design improves appraisal value. In suburban markets, the barn aesthetic can limit the buyer pool, which affects resale liquidity more than value. What roof style works best on a barndominium exterior? A gable roof is the most common and most structural for large spans. Gambrel roofs add upper-floor usable space but cost more to frame. Hip roofs are wind-resistant but limit upper-level space. Monitor-style roofs, a raised center ridge section, are ideal for maximizing clerestory light in the main living area. How do you make a barndominium look less like a barn? The fastest upgrades: large black-framed windows, a covered porch with timber framing, mixed siding materials (metal plus wood or stone), and intentional landscaping at the entry. Dormers or secondary gable peaks also add residential character that plain barn silhouettes lack. Conclusion Designing a barndominium is an exciting process, and I hope these exterior ideas sparked some inspiration for your own plans. What I enjoy most about barndominiums is the flexibility – you can lean into a classic farmhouse look, go for something sleek and modern, or mix styles to create something that feels just right for you. The key is choosing features that match your lifestyle and make you feel good every time you pull into the driveway. Start small, focus on the elements that stand out to you, and let the design grow from there. Your barndominium should reflect who you are, and now’s the perfect time to bring that vision to life. Which exterior idea are you most excited to try first?





