


Grass Type Feedings Per Year Best Months Avoid Cool-season grass 3 to 4 times Early spring and early fall Heavy feeding during summer heat Warm-season grass 2 to 4 times Late spring through summer Late-season nitrogen before dormancy Newly seeded lawn 4 to 5 times Every 6 to 8 weeks during the first season Skipping starter fertilizer A healthy lawn needs more than regular watering. Grass also depends on properly timed fertilizer to support stronger roots, steady growth, and rich green color throughout the growing season. Timing matters as much as the fertilizer itself. Feeding too early can encourage weak top growth, while applying too much during hot weather can scorch the grass. Fertilizing too late may also interfere with dormancy and increase stress. Below, you’ll learn how often to fertilize, the best months to apply it, how to understand N-P-K ratios, and which application mistakes can damage your lawn. How Often Should You Fertilize Your Lawn? Most lawns need 2 to 4 fertilizer applications per year, but the right schedule depends on your grass type, climate, and growing conditions. University of Illinois Extension suggests roughly one pound of nitrogen per 1,000 square feet per application. Split that across the growing season rather than applying it all at once. Grass Type Feedings Per Year Best Months Cool-season grass 3 to 4 Early spring and early fall Warm-season grass 2 to 4 Late spring through summer Newly seeded lawn 4 to 5 Every 6 to 8 weeks during the first season Cool-season grasses usually need more feeding in spring and fall, while warm-season grasses benefit from applications during their active summer growth. Avoid fertilizing just because the calendar says it is time. Grass absorbs nutrients most effectively during active growth, while extreme heat, drought, or dormancy can reduce the effectiveness of applications. Pro Tip: Your lawn’s fertilizer needs can also change based on soil quality, sunlight exposure, mowing habits, and rainfall. A soil test can help identify nutrient gaps and prevent unnecessary applications. Lawn Fertilizer Schedule by Region and Season Local climate and grass type determine when your lawn can actually use fertilizer. A northern cool-season lawn follows a different schedule than a southern warm-season lawn, so timing applications to coincide with active growth prevents wasted nutrients. Region Spring Fall Winter Northern Regions Light feeding as grass starts growing Heavy feeding for root strength Little to none after dormancy Southern Regions Begin feeding as warm-season grass wakes up Reduce feeding as growth slows Apply only if grass stays active Transition Zones Feed based on dominant grass type Fall feeding benefits many lawns Usually minimal feeding Seasonal fertilizing follows the way grass grows throughout the year. It feeds the roots and blades so they can actually use the nutrients, rather than wasting product on dormant grass. Key factors to adjust your schedule: Grass type: Cool-season and warm-season grasses have different growth cycles. Soil temperature: Fertilizer works best when grass is actively absorbing nutrients. Weather conditions: Avoid feeding during drought, extreme heat, or when soil is frozen. This approach is stronger than separating season and region because readers usually want to know when to fertilize based on where they live. Best Time to Fertilize Your Lawn Based on Grass Type Grass type determines when your lawn is actively growing and ready to use fertilizer. Cool-season and warm-season grasses have different peak growth periods, so their feeding schedules shouldn’t follow the same calendar. Grass type Category Best feeding months Feedings per year Kentucky bluegrass, ryegrass, tall fescue Cool-season Early spring, early fall 3 to 4 Bermuda, zoysia, St. Augustine, centipede Warm-season Late spring through summer 2 to 4 1. Cool-season grass fertilizer schedule Kentucky bluegrass, perennial ryegrass, and tall fescue all grow fastest in spring and fall. Plan your heaviest feedings for those two windows. Use a lighter touch, or skip feeding entirely, during peak summer heat. A typical schedule spreads two to four feedings between early spring and late fall. 2. Warm-season grass fertilizer schedule Bermuda grass, zoysia, St. Augustine, and centipede grass all grow most actively once summer temperatures climb. Fertilize these types through late spring and summer. Then taper off as they head into dormancy in fall. Applying nitrogen too late in the year can leave warm-season grass open to winter injury. How N-P-K Ratios Affect Your Lawn Fertilizer Schedule Every fertilizer bag lists three numbers for nitrogen, phosphorus, and potassium. Most established lawns need far more nitrogen than phosphorus. Nutrient What it does Nitrogen (N) Drives the green color and leaf growth you notice first Phosphorus (P) Supports root development, especially in young or newly seeded lawns Potassium (K) Helps grass handle drought, cold, and general wear The University of Illinois Extension recommends an N-P-K ratio of about 3-1-2 or 4-1-2 for typical home lawns. Most soils already contain enough phosphorus. What Fertilizer Should You Use on Your Lawn? The right fertilizer depends on what your grass needs and what your soil already has. It also depends on timing and the results you want to see. Understanding fertilizer labels: The three numbers on every bag indicate the percentage by weight of nitrogen, phosphorus, and potassium. An 18-6-12 fertilizer is 18 percent nitrogen. Higher numbers mean you need less product to reach one pound per 1,000 square feet. Granular vs liquid fertilizer: Granular fertilizer spreads evenly with a spreader and often uses slow-release nitrogen to feed the lawn over several weeks. Liquid fertilizer is absorbed faster and corrects deficiencies quickly, but it requires careful, even application to avoid streaking or burning. Slow-release vs. quick-release fertilizer: Slow-release nitrogen breaks down gradually, lowering the risk of burn even at higher percentages. Quick-release nitrogen delivers a fast green-up but can scorch grass if overapplied, so many fertilizers blend both types of nitrogen. Signs Your Lawn Needs Fertilizer? Watching for signs of nutrient deficiency tells you when your lawn actually needs feeding. This works better than relying only on a fixed date on the calendar. Signs of nutrient deficiency Sign What it looks like Pale green or yellow color Shows up first in the older sections of the lawn Slow growth Grass needs mowing less often than usual Thin or patchy areas Bare spots that never fill in on their own Poor recovery Struggles to bounce back after mowing or foot traffic Weak roots Shallow root systems that pull up easily Other causes of yellow grass Yellowing grass is not always a nutrient issue. Overwatering, poor drainage, and compacted soil can all starve roots of oxygen. These problems can look just like a nutrient deficiency. Diseases and pests, such as grubs feeding on roots, can also cause grass to turn yellow or brown in patches. A soil test, or a close look at the roots, can help you rule fertilizer in or out. How to Apply Lawn Fertilizer Correctly Correct application spreads nutrients evenly across the lawn. It also reduces the risk of burned grass, product runoff, and fertilizer waste during the growing season. Step 1: Prepare your lawn before fertilizing Check the forecast and skip heavy rain or drought conditions. Mow at your normal height beforehand, clear away debris, and run a soil test if needed. Step 2: Apply the correct amount of fertilizer Follow the rate printed on the bag rather than guessing, since more product does not speed up greening. Use a calibrated spreader to cover the lawn evenly without stripes. Step 3: Water after fertilizer application Granular fertilizer needs a light watering, and the best time to water is during the daytime unless rain is expected. Liquid fertilizer instructions vary by product. Either way, avoid overwatering, which can wash fertilizer into the street. Factors That Affect Fertilizing Frequency A soil test takes the guesswork out of feeding your lawn. It measures existing levels of nitrogen, phosphorus, and potassium, as well as soil pH. That tells you exactly what your grass is missing, instead of guessing with a generic bag every few weeks. Factor Why it matters Grass variety Faster-growing types need more frequent feeding Soil nutrient levels Existing nutrients reduce how much you need to add Lawn age Newly established lawns often need different rates than mature turf Sun exposure Shaded lawns grow more slowly and need less nitrogen than those in full sun Rainfall and irrigation More water moves nutrients through the soil faster Mowing habits Leaving clippings on the lawn returns some nitrogen naturally Prior applications Fertilizer already applied earlier in the season affects timing The University of Illinois Extension recommends testing every few years. Adjust fertilizer type and rate based on the results, not a fixed calendar alone. What Lawn Fertilizer Mistakes Should You Avoid Avoiding these errors protects your grass and field, making every feeding count throughout the growing season, season after season. Applying too much fertilizer: Excess nitrogen scorches grass blades (a problem known as fertilizer burn) and promotes weak growth that invites disease. Fertilizing at the wrong time: Feeding dormant grass in deep summer heat or hard winter cold wastes product and further stresses the lawn. Ignoring soil conditions: Skipping a soil test means guessing what your lawn needs, which can lead to unnecessary nutrient runoff. Using the same schedule every year: Rainfall, temperature, and lawn condition shift year to year, so watch how your lawn responds and adjust. Frequently Asked Questions How many times a year should I fertilize my lawn? Most lawns need two to four feedings a year. Cool-season grasses do best with spring and fall applications, while warm-season grasses need feeding mainly during active summer growth months. What month is best to fertilize a lawn? Cool-season lawns benefit most from feedings in early spring and again in early fall. Warm-season lawns respond best to applications from late spring through summer, once the soil has warmed. Can I fertilize my lawn too often? Yes. Over-fertilizing can burn grass, push weak growth that invites disease, and raise nutrient runoff. Stick to labeled rates and space applications several weeks apart, rather than feeding on a whim. Should I fertilize before or after mowing? Fertilize after mowing, once the grass has a day or two to recover. Mowing right after fertilizing can remove fertilized leaf tips and reduce the benefit the lawn gets. How long should I wait to water after fertilizing? Water lightly within a day of applying granular fertilizer, unless rain is expected soon. This helps nutrients settle into the soil without washing the product off the lawn entirely. Building Your Fertilizer Schedule A steady lawn fertilizer schedule feeds grass when it can actually use the nutrients. It does not rely on a fixed date every month. The right timing depends on your grass type, climate, soil, and how the lawn responds throughout the seasons. Most yards do better with a handful of well-timed feedings than frequent, scattered ones. Testing your soil and picking a fertilizer suited to your lawn will help you avoid common problems.

Some rooms just feel off. Not cluttered, not dirty, just heavy. The kind of feeling that settles in after a stressful week, a big life change, or simply too much time spent indoors without a real reset. For that kind of heaviness, people have been turning to sage for centuries. Rooted in Indigenous and spiritual traditions across cultures, the ritual uses the slow drift of sage smoke to clear stagnant energy and invite calm back into a space. It’s less about belief and more about intention, a deliberate, unhurried act that signals to your mind and your home that something is shifting. If you’ve been curious about trying it, this blog covers everything you need to know: what to gather, how to move through each room, and how to do it safely from start to finish. What Does Saging a House Mean? House saging is the practice of burning dried sage and letting the smoke drift through each room to clear stagnant energy and refresh the space. Many people use it after a stressful event, a move, or simply when a home starts to feel heavy or unsettled. It can also become part of a broader home-reset routine, alongside decluttering, opening windows, rearranging furniture, or creating a calmer atmosphere. The smoke itself isn’t magic. What matters most to practitioners is the intention behind the ritual and the sense of a fresh start it creates. What You Need to Sage Your House Gathering supplies ahead of time keeps the ritual calm and uninterrupted. A sage bundle or loose sage A fireproof bowl or abalone shell Matches or a lighter Sand or water for extinguishing the sage An open window or maybe a bathroom door An optional feather or hand fan to guide the smoke. How to Prepare Your House Before Burning Sage A little prep work before lighting the sage makes the whole process safer and more effective. Tidy clutter and remove trash. Open windows and interior doors. Turn off fans that may spread embers. Move flammable objects away from your path. Keep children and pets in a safe area. Decide on an intention for the ritual. How to Sage Your House for the First Time Safely First-timers often worry about doing it wrong, but the process is forgiving. The steps below walk through everything from lighting the bundle to finishing near the front door. Step 1: Set a Clear Intention Choose a simple purpose for the cleansing before you begin, like creating a peaceful environment or marking a fresh start after a hard week. Keeping it short and specific makes it easier to stay focused on the rest of the ritual. Safety tip: Keep your fireproof bowl and extinguishing material within reach before you begin. Step 2: Open a Window or Door Ventilation lets smoke leave the home rather than build up indoors, so open at least one window or door before lighting the sage. This single step does more to keep the air breathable than almost anything else in the process. Safety tip: Check that smoke alarms near the opened window won’t trigger from drifting smoke. Step 3: Light the Sage Bundle Safely Hold the sage bundle over your fireproof bowl, light the tip, let it burn for a few seconds, then gently blow out the flame so it smolders and produces smoke instead of fire. A steady stream of smoke, rather than an open flame or flickering light, is the sign that the sage is smoldering properly and producing smoke as intended. Safety tip: Never light the bundle near curtains, paper, or other flammable materials. Step 4: Begin at the Main Entrance Many people start at the front door since it’s considered the main point where energy enters the home, then move through the house in one continuous direction. Starting here also gives you a clear reference point to return to later. Safety tip: Keep pets and children away from the entryway while the sage is lit. Step 5: Move Slowly Through Each Room Carry the sage in its fireproof bowl and walk slowly through each room, letting a small amount of smoke drift into the space as you go. There’s no need to fill the room with smoke, just enough to pass through each area. Safety tip: Watch for falling ash and keep the bundle angled downward over the bowl as you walk. Step 6: Focus on Corners, Doors, and Windows Direct the smoke toward corners, closets, entryways, and painted vinyl windows other spots where air tends to sit still, since these areas are often the focus of the ritual. These are the same spots that tend to collect dust and stale air day to day. Safety tip: Keep a safe distance from window treatments and stored items in closets. Step 7: Repeat Your Intention As you move from room to room, repeat your chosen intention quietly or aloud. Keeping the same words in mind can help you stay focused and present throughout the process. There is no need to rush. Move at a comfortable pace and repeat the intention whenever you feel your attention drifting. Safety tip: Don’t let focus on the intention distract you from watching the burning tip. Step 8: Return to the Starting Point Finish your path near the main entrance or the open window you started with, completing the loop through the home. This closes out the ritual with the same clear structure it started with. Safety tip: Do a quick visual check of the bundle for any active embers before setting it down. Step 9: Extinguish the Sage Completely Press the burning end firmly into sand or a fireproof container and check closely for any remaining embers before setting it aside. This last step matters just as much as the ritual itself. Safety tip: Confirm the bundle is fully cold to the touch before storing it away. How Often Should You Sage Your House? There’s no fixed schedule for saging a house. Many people do it after moving into a new home, following an argument, before starting something new, after guests leave, or simply whenever the space starts to feel unsettled. The ritual is performed as needed rather than on a strict routine. Some people prefer a light, regular rhythm, like once a season or at the start of a new month, while others reach for sage only when something specific prompts them. Neither approach is more correct than the other. The right frequency really comes down to how often the home feels like it needs a reset, not a set number of times per year. Which Direction Should You Move While Saging? There’s no single required direction for staging a house, so the table below covers the most common approaches. Approach How It Works Best For Clockwise Starts at the front entrance and follows a consistent clockwise path room to room People who want a simple, repeatable routine Counterclockwise Moves in the opposite direction from clockwise, starting at the same entry point Practitioners with a personal or traditional preference Natural layout Follows the home’s floor plan in whatever order feels easiest to walk through Larger or irregularly shaped homes What matters more than the exact direction is covering every room at a steady, unhurried pace; sticking to the same path each time can make the ritual feel more familiar over time. How to Complete Your House Cleansing Ritual A few simple steps wrap up the ritual once you’ve worked through every room. Let fresh air circulate for a few minutes before closing the windows. Dispose of ash safely and store the cooled sage bundle in a dry, fire-safe place. Take a quiet moment to acknowledge the fresh start before returning to your routine. Check the room where you started one last time to make sure no embers remain. How to Choose Sage for House Cleansing When buying sage for house cleansing, look beyond price and packaging. The more important details are the type of sage, where it was grown, and whether the seller explains how it was harvested. You can find white sage from established herb suppliers such as Mountain Rose Herbs, which offers organically cultivated white sage of California origin, and Taos Herb Company, which carries California white sage sourced from private land. For smaller growers, marketplaces can also be useful, especially when sellers provide clear details about cultivation and harvesting. For example, Blossom Valley Sage grows and harvests white sage on private property in San Diego, California. Before buying, check whether the sage is cultivated or wild-harvested, where it comes from, and whether the seller provides transparent sourcing information. White sage is particularly vulnerable to overharvesting, so cultivated plants or responsibly harvested sage from private land are better options when available. Common Mistakes to Avoid When Saging a House A few small missteps account for most of the problems people run into with this ritual. Creating too much smoke is one of the most common mistakes, since a light, steady stream works better than a heavy cloud that overwhelms the space. Skipping ventilation quickly compounds the problem, so keep windows and doors open throughout. Carrying the bundle without a fireproof bowl underneath it is another oversight worth correcting before you start, as ash and embers drop without warning. Moving too quickly through each room undermines the whole process; slow, deliberate movement gives the smoke time to do its work. Keep an eye on anything flammable nearby, including curtains, loose papers, and dry decorative pieces, since sage burns longer than it appears to. When you’re done, make sure the bundle is fully extinguished rather than just set aside, since smoldering sage left unattended is a fire risk. Frequently Asked Questions What time of day should you smudge your house? You can smudge at any time, though many people prefer the morning or before a new beginning to create a fresh atmosphere. Does burning sage invite bad spirits? No, there is no evidence that burning sage invites bad spirits; many people use it as a symbolic cleansing practice based on personal or cultural beliefs. Does sage have to be gifted? No, Sage does not have to be gifted; you can purchase it yourself if you choose to use it respectfully. What is the prayer for powerful home cleansing? There is no single required prayer; you can say a simple, sincere intention asking for peace, protection, and positive energy in your home. Does dried sage ever go bad? Dried sage does not spoil quickly, but it can lose its fragrance and burn quality over time if stored in a damp or humid place. A Fresh Start for Your Home Sagging a house comes down to a few simple stages: preparing the space, lighting the bundle safely, moving smoke through each room with intention, and finishing the ritual with care. Keep the smoke light, the ventilation open, and let the process bend to your own beliefs and your household’s needs rather than a rigid set of rules. Long after the smoke has cleared, what stays behind is the quiet shift in how the home feels. That’s the real point of the ritual, not the smoke itself.

Quick Answer: Dethatch cool-season grasses in early fall and warm-season varieties in late spring or early summer. The grass must be actively growing, and the soil must be moist but not soggy. Avoid dethatching during dormancy, drought, or extreme heat. Dethatching can improve a struggling lawn, but doing it at the wrong time can leave grass thinner and more stressed than before. The best results depend on grass type, seasonal growth, soil moisture, and the actual thickness of the thatch layer. This blog explains when to dethatch a lawn and the best timing for cool- and warm-season grasses. It also covers signs that dethatching is needed, how to prepare your yard, safe removal steps, proper aftercare, and common mistakes that can slow recovery. When is the Best Time to Dethatch a Lawn? The best time to dethatch depends on your grass type. Cool-season grasses do best in early fall, with early spring as a backup. Warm-season grasses do best in late spring or early summer, once they’re actively growing. No matter the grass type, dethatch only when the lawn is actively growing. The soil should be slightly moist, not soggy. Avoid drought, extreme heat, frost, or dormancy, since the grass needs time to recover. In the transition zone, base your schedule on the dominant grass in your lawn. Mixed lawns need a lighter approach to avoid stressing either grass type. Best Time to Dethatch by Grass Type: Grass Type Best Time Backup Option Cool-season grasses Early fall Early spring Warm-season grasses Late spring to early summer Not needed Transition zone (cool-season dominant) Early fall Early spring Transition zone (warm-season dominant) Late spring to early summer Not needed Mixed lawn (both types) Light dethatching, timed to dominant grass Not needed Pro Tip: Always check soil moisture before you start. Dethatching dry, hard soil stresses the grass more than the thatch itself does. How Do You Know When Your Lawn Needs Dethatching? Don’t rely on appearance alone. Compaction, drought, pests, and disease can all look like thatch problems. The best way to check is to cut a small 2–3 inch wedge of turf. Measure the brown, spongy layer between the green grass and the soil. A layer under ½ inch is usually healthy. Anything thicker may benefit from dethatching. Signs of Excessive Thatch: Spongy feel underfoot Poor water absorption Weak fertilizer response Thinning or uneven grass Lawns with Kentucky bluegrass, creeping bentgrass, creeping red fescue, Bermudagrass, or Zoysiagrass build up thatch faster. Watch these grass types more closely. Should You Dethatch in Spring or Fall? The right time to dethatch depends on your grass type and growing cycle. Choosing between spring and fall depends on when your lawn can recover most effectively after removal. Lawn Type or Condition Better Timing Reason Cool-season grass Early fall Strong growth and better recovery conditions Cool-season grass with severe spring buildup Early spring Allows treatment before summer stress hits Warm-season grass Late spring to early summer Turf is entering active growth Dormant warm-season lawn Wait Dormant turf repairs slowly Drought-stressed lawn Wait for recovery Dethatching can worsen existing damage Overseeding cool-season grass Early fall Timing supports seed germination and recovery Treat calendar months as regional estimates rather than fixed rules. Soil temperature, active growth, recent rainfall, and how the turf is holding up matter far more than a date on a calendar. How to Prepare a Lawn for Dethatching Before dethatching, make sure your lawn and equipment are ready. Confirm that the thatch layer is excessive, identify your grass type, and ensure the lawn is actively growing. If the soil is dry, water lightly, mow the grass to about half its normal height, and remove any debris from the area. Before starting, mark sprinkler heads, irrigation lines, cables, and shallow roots to avoid damage. Choose the right tine or blade depth for your equipment and test the dethatcher on a small area first. Quick checklist: Check thatch thickness Identify grass type Confirm active growth Water the dry soil lightly Mow before dethatching Remove debris Mark hidden obstacles Set the proper machine depth Test equipment first How to Dethatch a Lawn without Damaging It Dethatching is most effective when done with the right technique. Here is a step-by-step process to dethatch your lawn safely while protecting your grass and promoting healthy growth. Step 1: Start with a Shallow Setting: Removing too much material in a single pass can tear healthy crowns and roots along with the thatch. Start conservatively, and go deeper only if needed. Step 2: Work in Straight, Overlapping Rows: Keep a steady walking speed and overlap each row slightly so you don’t miss strips of lawn or double up unevenly. Step 3: Make a Second Pass Only When Needed: If buildup is severe and spread evenly across the lawn, a second pass in a different direction can help. Avoid repeating passes over turf that’s already looking thin or weak. Step 4: Rake and Remove the Loose Thatch: Debris left on the surface can block sunlight and smother the grass trying to recover underneath. Clear it away as soon as you’re done. Step 5: Inspect the Lawn Before Continuing: Stop once you’ve pulled up the excess material. The goal is to remove buildup, not expose bare soil across the entire yard. What Should You Do After Dethatching? After dethatching, proper recovery care helps your lawn rebuild quickly. Remove leftover debris, water deeply without overwatering, and overseed thin areas if the timing is right. Apply fertilizer or soil amendments only when needed based on your grass type, season, and soil test results. Avoid heavy foot traffic while the lawn heals, monitor moisture levels, and resume mowing once the grass is actively growing. Dethatching creates better seed-to-soil contact, making it a good time to overseed bare patches. Choose a seed that matches your existing grass, climate, and growing conditions. If the yard has defined planting beds or mixed-use zones alongside the grass, thinking through your outdoor space layout at this stage can help you plan watering and foot traffic patterns that support a clean recovery without stressing the lawn again too soon. Recovery time depends on grass type, weather, soil moisture, and the degree of dethatching. Some lawns recover in a few weeks, while heavily stressed areas may take longer. What Causes Excessive Thatch? Thatch builds up when organic matter accumulates faster than soil microbes can decompose it. Common causes include excessive nitrogen fertilizer, shallow watering, compacted or unhealthy soil, heavy pesticide use, limited aeration, and fast-growing grass varieties. Grass clippings usually are not the cause of thatch when mowing is done correctly. Small clippings break down quickly and return nutrients to the soil. However, overwatering and excessive fertilization can encourage rapid growth, shallow roots, and slower decomposition, thereby accelerating thatch buildup. If the maintenance load feels like it keeps building year after year, pairing good lawn care habits with lower-maintenance yard choices around the edges can reduce the overall effort needed. When Should You Not Dethatch a Lawn? Dethatching at the wrong time can damage your turf rather than improve it. Avoid the process when grass is dormant, stressed, newly established, or when conditions are too harsh. Slightly moist soil is ideal, but wet or muddy ground can damage roots, create ruts, and make debris harder to remove. Young lawns need time to develop strong roots before dethatching, and some grasses, like St. Augustine, are more sensitive to aggressive dethatching. In these cases, lighter methods or professional guidance may be a safer choice. If the lawn has been struggling repeatedly despite proper care, it may also be worth exploring grass-free yard options that hold up better with far less upkeep. Avoid dethatching if: Grass is dormant, weak, diseased, or drought-stressed Temperatures are extreme, or frost is near Soil is muddy or waterlogged The lawn was recently seeded Thatch is less than ½ inch thick A recent herbicide treatment was applied You cannot water the lawn during recovery The grass type is sensitive to aggressive dethatching Common Dethatching Mistakes to Avoid Many dethatching mistakes start before the machine even turns on. Skipping the thatch measurement is common, along with confusing soil compaction with a real thatch problem. Timing causes trouble too. Working during dormancy, on drought-stressed grass, or on newly seeded turf can all set the lawn back. Wet, muddy soil creates its own risks, since heavy equipment can compact and tear the turf. Using the most aggressive machine setting right away is another mistake. So, it’s making too many passes over the same spot. Both often remove more than necessary, including the thin, beneficial layer that didn’t need to be touched. Forgetting to mark sprinkler heads and irrigation lines can lead to costly damage. Leaving piles of loosened thatch on the lawn also causes problems. So does applying heavy fertilizer too soon, which can undo the benefits of dethatching. Conclusion Timing decides whether dethatching helps your lawn or sets it back. Match the job to your grass type, check active growth first, and always measure the thatch layer before reaching for a machine. Cool-season lawns generally do best in early fall, while warm-season lawns respond better in late spring or early summer. Skip dormant, saturated, drought-stressed, or newly established lawns altogether. Pair good timing with proper aftercare, and your lawn should recover fully and come back thicker. When do you plan to check the thatch layer on your own lawn? Frequently Asked Questions When Should You Not Dethatch Your Lawn? Avoid dethatching during drought, extreme heat, frost, dormancy, wet soil conditions, or when grass is weak, newly seeded, or recovering from stress. What to Do Immediately After Dethatching a Lawn? Remove debris, water deeply, overseed thin areas as needed, avoid heavy traffic, and provide adequate nutrients to support a quick lawn recovery. How Many Times Should You Go over Your Lawn with a Dethatcher? Usually, one pass is enough. For heavy thatch buildup, make a second pass in a different direction without damaging healthy grass.
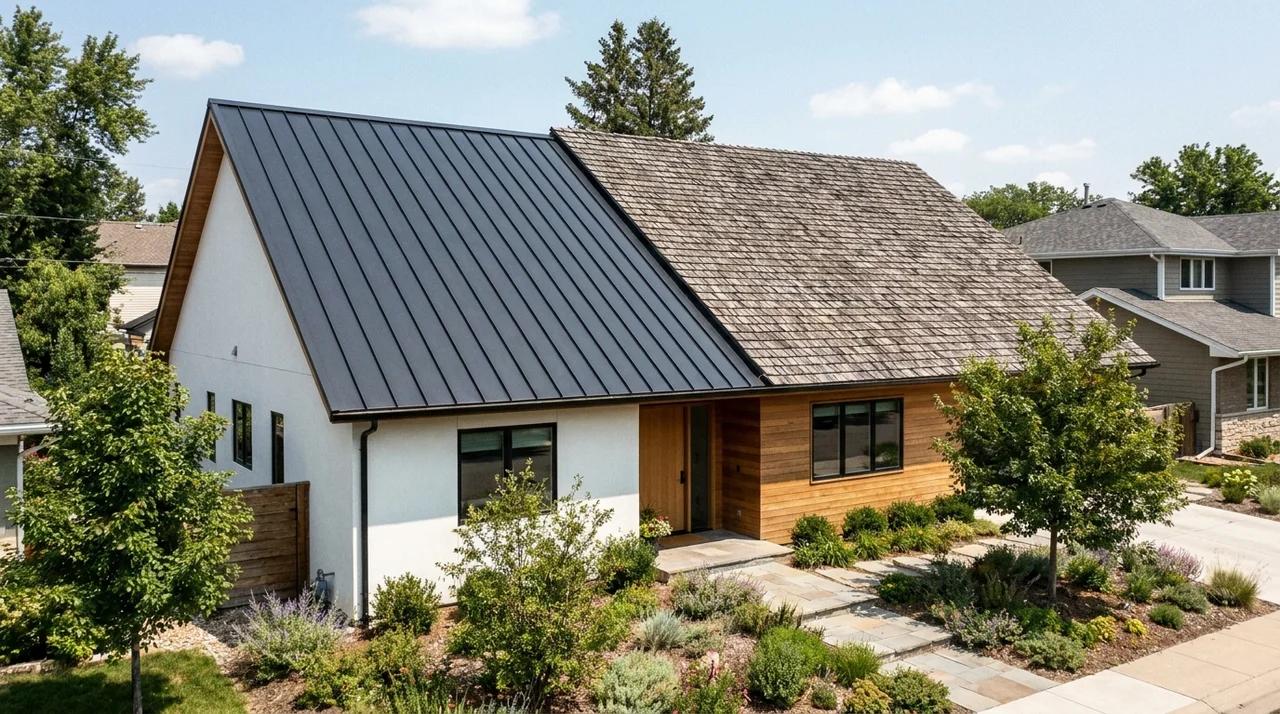
Quick Answer: Metal roofs win on lifespan (40-70 years vs. 15-30) and cost less per year despite a higher upfront price, since shingles need to be replaced 2-3 times over that span. Shingles remain smarter for tight budgets or short-term homeownership. A roof replacement is a major decision, and the material you choose can affect your costs for decades. Choosing the wrong option may lead to frequent repairs, higher energy bills, or the need for another replacement sooner than planned. When comparing a metal roof vs. shingles, price is not the only factor that matters. Both roofing options are common, but they differ in lifespan, performance, maintenance, and long-term value. This comparison examines the key areas homeowners should consider, including cost, durability, weather performance, maintenance, energy efficiency, and resale value. Knowing how each option works can make the decision easier. Metal Roof vs Shingles: How They Compare Before getting into the finer details, it helps to see how metal roofing and asphalt shingles stack up side by side. Factor Metal Roof Asphalt Shingles Average lifespan 40 to 70 years 15 to 30 years Upfront cost Higher Lower Weight Lighter per square foot Heavier Weather resistance Strong against wind, snow, and fire Moderate, varies by grade Maintenance Low, occasional inspection Moderate, more frequent repairs Energy efficiency Reflects heat, can lower cooling costs Absorbs more heat Installation Requires specialized labor Widely available, faster install Curb appeal/style options Modern to traditional looks Wide range of colors and textures Repair ease Trickier to patch, panel replacement Simple spot repairs Resale value impact Often higher due to longevity Standard, expected by most buyers What is a Metal Roof? A metal roof is a roofing system consisting of metal panels or shingles attached to the roof structure. Common materials include steel, aluminum, zinc, and copper. Each option has its own benefits in terms of its price, weight, durability, and rust resistance. Metal roofing is available in different styles. Standing seam panels have raised vertical seams that connect the panels, while metal shingles are designed to create a more traditional roof appearance. Metal roofing is a popular choice because it can last for decades, withstand harsh weather, and require less routine maintenance than some other roofing materials. However, the installation process plays a major role in performance. Proper fastening, suitable underlayment, and room for metal expansion help prevent issues and ensure the roof performs well over time. What are Asphalt Shingles? Asphalt shingles are one of the most common roofing choices for homes in the United States. They are made with a fiberglass or organic base, covered with asphalt, and finished with mineral granules that help protect the roof from sunlight and changing weather conditions. There are three main types of asphalt shingles. Three-tab shingles are the simplest and usually the most affordable. Architectural shingles are thicker, more durable, and have a layered look. Luxury shingles are designed to resemble higher-end materials like slate or wood shakes. Shingles are a popular roofing choice because they are cost-effective, easy to install, widely available, and simple to repair when damage occurs. However, not all shingles perform the same. Higher-quality architectural shingles generally last longer and handle wind better than basic three-tab options, making them a stronger choice for many homes. Metal Roof vs Shingles Cost Comparison The final roofing cost depends on more than just the material. Factors such as roof size, slope, labor rates, and material quality can affect the overall price. Cost Factor Metal Roofing Asphalt Shingles Cost per sq ft installed $7 to $14 $3.50 to $6.50 Average cost for a 2,000 sq ft roof $14,000 to $28,000 $7,000 to $13,000 Cheapest material option Steel Three-tab shingles Most expensive material option Copper or zinc Luxury/designer shingles Labor requirement Specialized installers Widely available contractors Typical repair cost Higher, panel-based Lower, spot repairs Replacement frequency over 50 years 0 to 1 time 2 to 3 times Long-term value Higher due to lifespan Lower due to more replacements Metal Roof vs Shingles: Durability and Lifespan The lifespan of a roof depends on the material, installation quality, and the conditions it faces over time. Metal and shingles can both perform well, but their durability differs. Metal Roof Lifespan A properly installed metal roof can last around 40 to 70 years. Steel and aluminum roofs often last 40 to 50 years, while copper and zinc options can last much longer. Metal roofs handle heavy rain, strong winds, snow, and fire exposure well. Many systems are built to withstand high wind speeds, making them suitable for storm-prone areas. Shingle Roof Lifespan Asphalt shingles usually last around 15 to 30 years. Basic three-tab shingles often have a shorter lifespan than architectural shingles. Heat, sunlight, ventilation, installation quality, and weather conditions all affect how long shingles last. Roof lifespan depends on more than the material. Proper installation, ventilation, and local weather conditions all play a major role in how long it performs. Which Roof Handles Weather Better? Weather performance is where the differences between metal roofing and shingles matter most. The right choice depends heavily on where you live. Weather Condition Metal Roof Asphalt Shingles Heavy Rain Sheds water quickly due to the smooth surface and interlocking panel design Relies on layered overlap, curling or granule loss increases infiltration risk High Winds Concealed fasteners can resist winds above 100 mph when properly installed Three-tab shingles are vulnerable to uplift; architectural shingles perform better, but tabs can still separate Snow and Ice Snow slides off naturally, reducing structural load Holds snow longer; poor attic ventilation can lead to ice dams along the eaves Hail Can dent depending on panel thickness and impact grade Granule loss and cracking are possible; higher-rated products hold up better Best Regional Fit Hurricane zones, Mountain West, Upper Midwest, wildfire-risk areas Temperate and moderate climates with milder seasonal weather Metal Roof vs Shingles: Which is More Energy Efficient? Your roof plays a bigger role in home comfort than you might expect, especially in the summer. 1. Metal Roofing and Heat Reflection Metal roofs reflect more solar radiation than asphalt roofs. When paired with proper ventilation and quality insulation, this reflective property can help reduce heat transfer into your living space. Many metal roofing products also carry cool-roof certifications that indicate measured reflectance values. 2. Shingles and Heat Absorption Standard asphalt shingles absorb more heat, which can raise attic temperatures on hot days. Cool-roof shingle options are available and use special granule coatings to improve reflectance, though they still generally absorb more heat than metal. 3. Other Factors That Matter Roof color, attic insulation quality, and ventilation design all influence how much heat enters your home. A dark metal roof with poor ventilation will not outperform a light-colored shingle roof with a well-designed attic system. Energy savings vary based on your climate, home design, and existing insulation, so no single number applies across the board. Which Requires More Maintenance: Metal or Shingles? Neither roof type is completely maintenance-free, but the time and cost involved differ significantly. 1. Metal Roof Maintenance Metal roofs require relatively little routine attention. The main tasks include periodic inspections of fasteners, seams, and protective coatings. Catching a loose fastener or a small coating scratch early prevents bigger issues down the line. Repairs are less frequent but should always be handled by someone familiar with metal systems. 2. Shingle Roof Maintenance Shingles needs more regular monitoring. Replace damaged or missing shingles promptly. Moss and debris buildup hold moisture against the surface and accelerate wear. Granule loss, visible as bare patches or granules collecting in gutters, signals that the shingles are aging. 3. Post-Storm and Routine Roof Checks After every major storm, walk the perimeter and look for visible damage. Check your attic space for any signs of daylight or water staining. Keeping gutters clear year-round prevents water from backing up along the roofline, a common source of preventable damage. Pros and Cons of Metal Roofs and Shingles Every roofing material comes with benefits and limitations. Comparing the strengths and weaknesses side by side makes the choice easier. Comparison Metal Roof Asphalt Shingles Pros Long lifespan, strong weather resistance, low maintenance, better heat reflection Lower upfront cost, easy repairs, wide style options, easy installation Cons Higher initial cost, specialized installation, and repairs can be more complex Shorter lifespan, more frequent maintenance, and more affected by severe weather Best For Homeowners wanting long-term durability and fewer replacements Homeowners looking for an affordable and practical roofing option Are Metal Roofs Better Than Shingles? Metal roofs outperform asphalt shingles in lifespan, weather resistance, and long-term maintenance cost. A metal roof installed today is likely the last roof that the house will need. Shingles will require at least two full replacements during that same period, which significantly narrows the cost gap over 40 to 50 years. Metal is not the better choice in every situation. Shingles cost roughly half as much to install and are easy to repair with materials available at any home improvement store. Metal repairs require matching panels and a contractor familiar with the system. If a tight installation budget or straightforward repairability is the priority, shingles deliver that. The cleaner way to frame it: metal roofs are the better long-term investment for homeowners who plan to stay in the home, live in a climate with extreme weather, or want low annual maintenance. Asphalt shingles are the better near-term choice for homeowners with upfront budget constraints, those planning to sell within a decade, or those in mild climates where the weather does not place much stress on roofing materials. Neither material fails at its job. The difference is which trade-offs fit the home, the budget, and the timeline. How to Choose Between a Metal Roof and Shingles The right roofing material comes down to four useful questions, and your answers will point fairly clearly in one direction. 1. How long do you plan to stay in the home? If you are in it for the long haul, metal pays for itself over time by eliminating one or two full replacement cycles. If you plan to sell within 10 years, shingles keep your upfront costs low while still satisfying most buyers. 2. What is your local climate like? Metal handles extreme conditions better, whether that is heavy snow loads in the upper Midwest, high winds along the Gulf Coast, or wildfire risk in the West. Shingles perform reliably in moderate climates where conditions are less demanding on the roof. 3. What can you spend now versus later? Shingles cost roughly half as much to install, which is a real advantage if your budget is tight today. Metal costs more upfront but typically requires fewer repairs and no replacement over a 50-year period, making the long-term math closer than the initial numbers suggest. 4. How important is low maintenance to you? Metal roofs ask very little of you year to year. Shingles need more consistent monitoring, particularly after storms, and individual repairs add up over time. If you want a roof you can mostly ignore between inspections, metal is the lower-effort option. Final Thought Choosing between roofing materials depends on what fits your home, budget, and long-term plans. A metal roof offers a longer lifespan, better weather performance, and lower maintenance needs, while asphalt shingles provide affordability, simple repairs, and easy installation. When choosing between a metal roof and shingles, consider your climate, home design, upfront cost, and future replacement needs. Before choosing, compare contractor quotes, check material quality, and look beyond the initial price. A roof that matches your needs can perform better and cause fewer issues over time. Share your roofing choice and experience in the comments below. Frequently Asked Questions How Much Does a Metal Roof Weigh Compared to Shingles? A metal roof weighs about 1.3 to 1.5 pounds per square foot, making it lighter than asphalt shingles and reducing stress on the roof structure. Why Do Insurance Companies Not Like Metal Roofs? Insurance companies usually support metal roofs because of their durability. However, higher replacement costs, concerns about hail damage, and installation standards may affect coverage. What is the 25% Rule for Roofing? The 25% rule means that if more than 25% of a roof section is repaired or replaced within 12 months, the entire section may require code upgrades. What Color Roof Increases Home Value? Neutral roof colors like charcoal gray, black, and weathered wood often attract buyers. These shades work well with various home styles and improve overall exterior appeal. What is the Cheapest Time of Year to Get a New Roof? Winter months, especially December through February, are often the cheapest time to replace a roof. Lower demand may help homeowners get off-season discounts of around 5% to 15%.
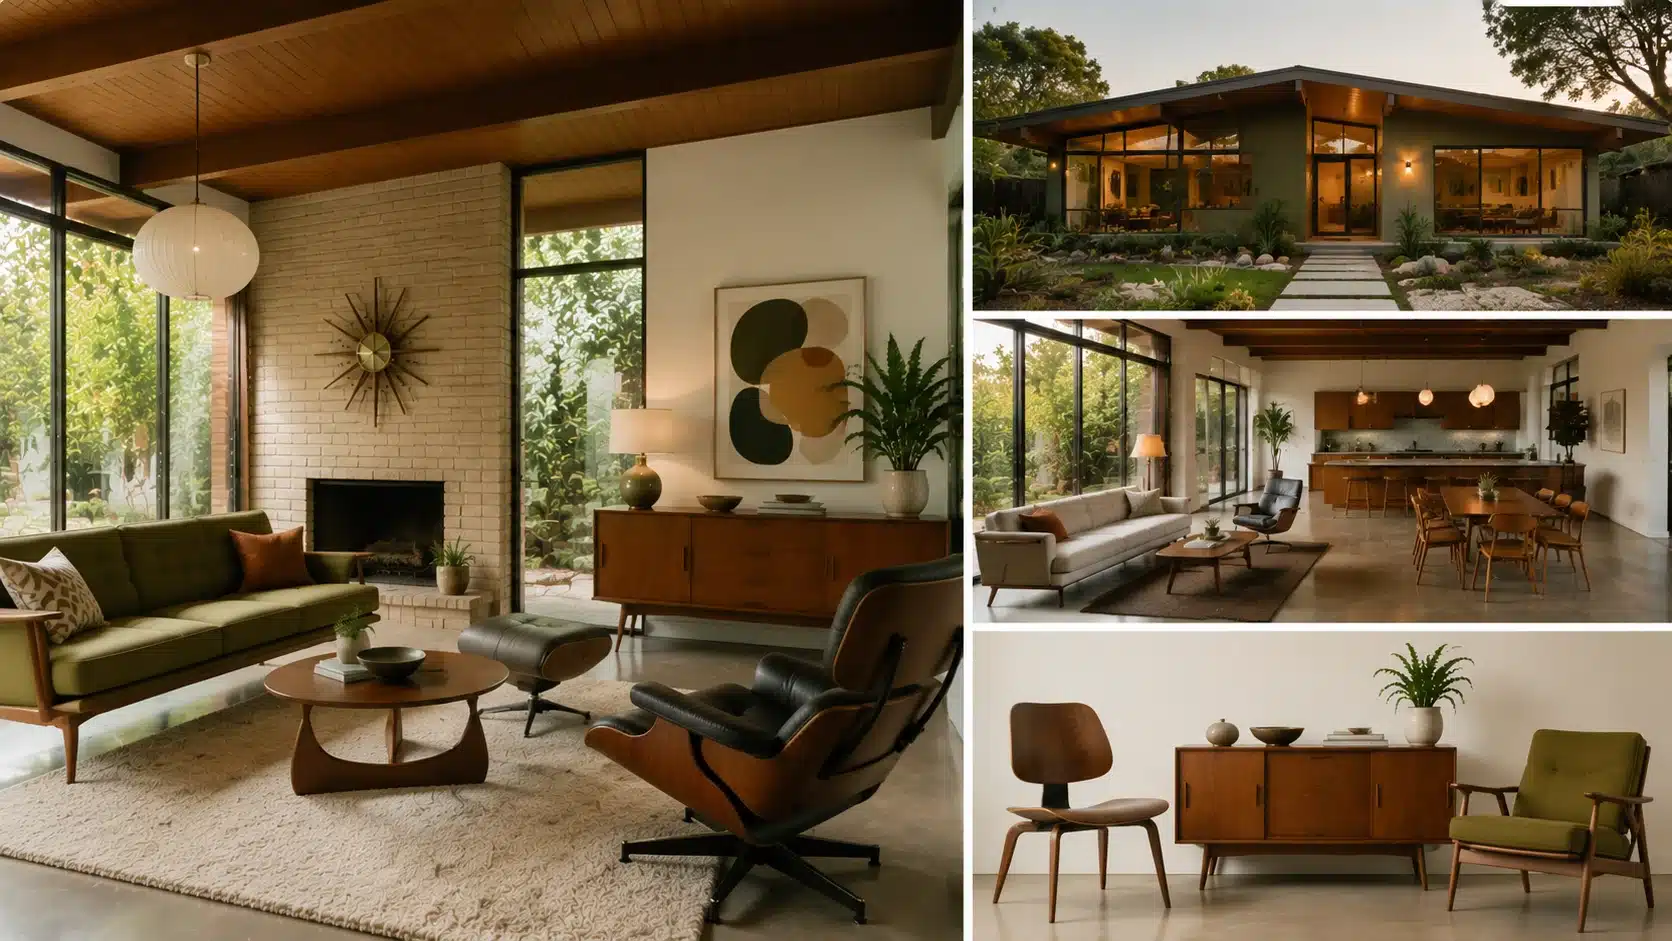
Quick Answer: Mid-century modern is a postwar design movement, roughly 1945 to 1969, built on uncluttered forms, tapered wood furniture, large windows, and open layouts. It values everyday usefulness over ornament, staying warm rather than stark. If you have walked into a room with clean lines and warm wood tones, you have likely seen mid-century modern design. The style gets mixed up with modern and contemporary decor all the time. That confusion makes it hard to know what you are actually shopping for. This blog breaks down what the style means, where it came from, and how it looks in real homes. You will find its history, its defining features, and room-by-room ideas. What Defines Mid-Century Modern Design? Mid-century modern design is defined by a balance of function, simplicity, and visual warmth. The style focuses on uncluttered spaces, practical furniture, and the thoughtful use of materials such as wood, leather, glass, and metal. Each element serves a purpose instead of adding decoration. Furniture features tapered legs, curves, and geometric shapes, while layouts focus on openness and indoor-outdoor connections. The style gained popularity after World War II as designers created practical pieces for changing lifestyles. Its timeless forms and usability keep it relevant in modern homes. The History Behind Mid-Century Modern Design Understanding its history reveals how postwar optimism, new technology, and a handful of designers built a style focused on practical, accessible living. Soldiers returned home, families expanded, and the country needed housing fast. Builders responded with smaller, simpler homes that dropped ornate details in favor of open layouts and clean construction. The Bauhaus School in Germany pushed the idea that design should serve everyday life rather than decorate it. Scandinavian minimal design added warmth through wood and handcraft. The International Style contributed glass walls and a stripped-down structure. Together, these influences gave American designers a starting point they reworked into something distinctly their own. A handful of designers defined the era and still get credit for it today, like: Charles and Ray Eames, this husband-and-wife team pioneered molded plywood and fiberglass furniture, including the Eames Lounge Chair. Eero Saarinen, known for the Tulip Table and Womb Chair, built both around a single sculptural base. Arne Jacobsen, a Danish architect and designer behind the Egg Chair and Swan Chair. Key Characteristics Of Mid-Century Modern Design The style stays easy to recognize through its balance of simplicity, warmth, and function, mixing architectural openness with carefully considered furniture and decor. Clean Lines And Simple Forms: Mid-century modern furniture and architecture rely on straight lines and simple shapes rather than heavy trim or carved details. Natural Materials And Warm Wood Tones: Teak, walnut, and oak appear throughout mid-century furniture, often left with a light finish that highlights the grain. Connection Between Indoor and Outdoor Spaces: Large windows and sliding glass doors were central to mid-century architecture, not just a decorative choice. Organic and Geometric Shapes: The style pairs sculptural, organic pieces, like curved chairs and rounded coffee tables, with more structured geometric forms. Functional Open Spaces: Open floor plans let mid-century homes feel larger than their square footage suggests. Mid-Century Modern Architecture Features Architecture from this era focused on simplicity, natural light, and a strong connection with nature. Mid-century homes used clean structures, open layouts, and materials that made spaces feel larger and more connected. Flat or low-pitched roofs replaced traditional steep designs, creating a simple geometric profile. Floor-to-ceiling windows brought in natural light and connected interiors with outdoor views. Open floor plans removed unnecessary walls between living areas, while post-and-beam construction used exposed supports to create flexible spaces without interior barriers. Indoor-outdoor living became a defining feature, with patios, courtyards, and sliding glass doors extending the home into the surrounding landscape. Famous examples include The Eames House in Los Angeles, which used prefabricated steel components to create an open design, and The Stahl House, known for its glass corners and dramatic city views. How to Create a Mid-Century Modern Home Today You can achieve this timeless look without turning your home into a museum. Combine classic pieces with modern comforts and your own personal taste. Start with One Statement Furniture Piece: Rather than replacing every item in a room, pick one anchor piece to build around. A lounge chair or a vintage credenza can set the right tone. Mix Vintage and Modern Elements: A room filled with vintage pieces can start to look like a theme rather than a home. Pair a contemporary sofa with a vintage-inspired coffee table. Choose Simple Materials: Stick to wood, glass, metal, and natural fabrics when picking new furniture or finishes. These materials echo the original style. Keep Decor Minimal: Mid-century rooms favor fewer well-made pieces over a room packed with accessories. Choose fewer items, but choose ones that serve a purpose. Mid-Century Modern Design Ideas for Different Rooms Each room can take on mid-century style in its own way. Thoughtful furniture, natural materials, and balanced color keep every space comfortable to live in. 1. Mid-Century Modern Living Room A low-profile sofa, a wooden coffee table, and a sculptural floor or table lamp form the backbone of a mid-century living room. Add one accent chair in Sherwin-Williams Cut the Mustard (SW 6384) or Benjamin Moore Hale Navy (HC-154) to break up the base. 2. Mid-Century Modern Kitchen Flat-panel cabinets in Benjamin Moore Swiss Coffee (OC-45) keep the space bright, while a kitchen island in Sherwin-Williams Renwick Olive (SW 2815) adds a period-accurate pop of color. Simple hardware, like slim brass or wood pulls, and open shelving keep the look consistent. 3. Mid-Century Modern Bedroom A platform bed with a low wooden frame anchors this look, especially against walls in Sherwin-Williams Kilim Beige (SW 6106). Add a nightstand or accent wall in Benjamin Moore Hale Navy (HC-154) for depth, then pair it with warm, layered lighting. 4. Mid-Century Modern Dining Room A mid-century dining room pairs a wooden table with sculptural pendant lighting overhead. For drama, paint an accent wall or built-in hutch in Sherwin-Williams Caviar (SW 6990), which grounds the space and lets a walnut table stand out. Pro tip: Balance a dark wall like Caviar with a lighter rug and plenty of natural light so the room does not feel closed in. 5. Mid-Century Modern Bathroom A mid-century bathroom leans on warm wood vanities, simple fixtures, and a spa-like palette. Benjamin Moore Beach Glass (1564) on the walls brings a calm, blue-green tone that pairs well with teak accents and brass hardware. Pro tip: Test Beach Glass on a poster board and move it around the room, since natural light shifts its blue and green undertones through the day. 6. Mid-Century Modern Home Office A simple wooden desk with tapered legs and an ergonomic chair with a molded shell fit the style well. Paint an accent wall in Sherwin-Williams Cavern Clay (SW 7701) behind the desk, and keep trim in Sherwin-Williams Alabaster (SW 7008) for contrast. Common Shades Used in Mid-Century Modern Interiors Color choices in this style pair earthy neutrals with bold accents, creating spaces that feel warm and balanced without ever looking overwhelming. Earthy Neutral Shades Most mid-century rooms start with a neutral base. These shades echo the natural materials used throughout the style and give bolder colors room to stand out. Shades like Benjamin Moore Walnut (CW-240), Sherwin-Williams Kilim Beige (SW 6106), and Sherwin-Williams Renwick Olive (SW 2815) work well on walls, floors, and larger furniture pieces. Bold Accent Colors Against that neutral base, mid-century interiors add pops of color through smaller pieces like chairs, pillows, and art. Shades like Sherwin-Williams Cut the Mustard (SW 6384), Sherwin-Williams Cavern Clay (SW 7701), and Sherwin-Williams Rustic Red (SW 7593) are common choices. Save bold colors for accent chairs, lamps, or artwork. This keeps the space from feeling too busy while still giving it personality. Popular Mid-Century Modern Furniture Pieces Furniture stands out as one of the clearest markers of this style, combining ergonomic shapes, solid craftsmanship, and materials built for everyday comfort. Furniture Piece Design Features Eames Lounge Chair Molded plywood shell with leather cushions Tulip Table Single pedestal base instead of four legs Wishbone Chair Curved wooden frame with a woven seat Credenzas Low, long storage pieces with clean fronts Lounge Sofas Straight lines with exposed wooden legs Exposed legs are one of the easiest ways to spot mid-century furniture. Lifting a sofa or chair off the floor made rooms feel more open, which mattered in smaller postwar homes. Low-profile designs served the same goal. A credenza that sits close to the floor takes up less visual space than a tall cabinet. Mid-Century Modern Vs Modern Vs Contemporary Design Although these styles share a clean look, their history, materials, and design approach differ enough to help individuals choose the right direction. Style Main Difference Mid-Century Modern Warm materials, vintage influence, organic shapes Modern A broader movement focused on simplicity and function without a fixed time period. Contemporary Reflects current trends, which shift as design preferences change Modern design is the umbrella term under which mid-century modern falls, tied to a specific era. Contemporary design changes with the times instead. It describes whatever is currently popular rather than a fixed set of features. Mistakes to Avoid With Mid-Century Modern Design Avoiding a few common mistakes helps keep the style authentic while creating a home that feels comfortable rather than overly staged or dated. Using Too Many Vintage Pieces: Filling a room with original mid-century furniture can make it look like a period set. Mix in newer pieces to keep the space feeling current. Choosing Poor-Quality Reproductions: Cheap reproductions often use thin veneers or weak joinery that wear out quickly. Look for solid-wood construction and quality materials. Making the Space Too Minimal: Mid-century design values simplicity, but a room stripped of all personality can feel empty rather than calm. Leave room for a few personal touches, like art or plants. Ignoring Comfort: Some mid-century pieces prioritize looks over ergonomics. Test seating before buying it, and pair statement chairs with genuinely comfortable options for everyday use. Mixing Too Many Design Styles: Combining mid-century pieces with several other unrelated styles at once can make a room feel disorganized. Choose complementary styles, like a Japandi interior design. Frequently Asked Questions What years are considered mid-century modern? The style generally spans the 1940s through the late 1960s, with its peak popularity in the 1950s and early 1960s. What makes a home mid-century modern? A mid-century modern home typically features an open floor plan, large windows, clean lines, and a strong visual connection to the outdoors through natural light and indoor-outdoor spaces. Is mid-century modern still popular? Yes. The style remains popular because of its timeless designs, functional layouts, natural materials, and ability to blend easily with modern furniture and decor. What colors are used in mid-century modern design? Common colors include warm wood tones, earthy neutrals, olive green, mustard yellow, burnt orange, and muted accent shades, creating a balanced and inviting look. What is the difference between mid-century modern and contemporary? Mid-century modern refers to a specific design movement from the mid-20th century, characterized by recognizable features. Contemporary design refers to current trends and continues to change over time. Why is Mid-Century Modern Design Still Popular? The style continues to draw homeowners because it combines a timeless look, practical layouts, durable materials, and furniture that still works in modern homes. Mid-century modern design has outlasted most decorating trends because its core ideas were never tied to a fad. Clean lines and open layouts work as well in a city apartment as they did in a 1950s suburban home. The style also lines up with a broader shift toward buying fewer, better things. A well-made walnut credenza or an original Eames chair can outlast several generations of mass-produced furniture.
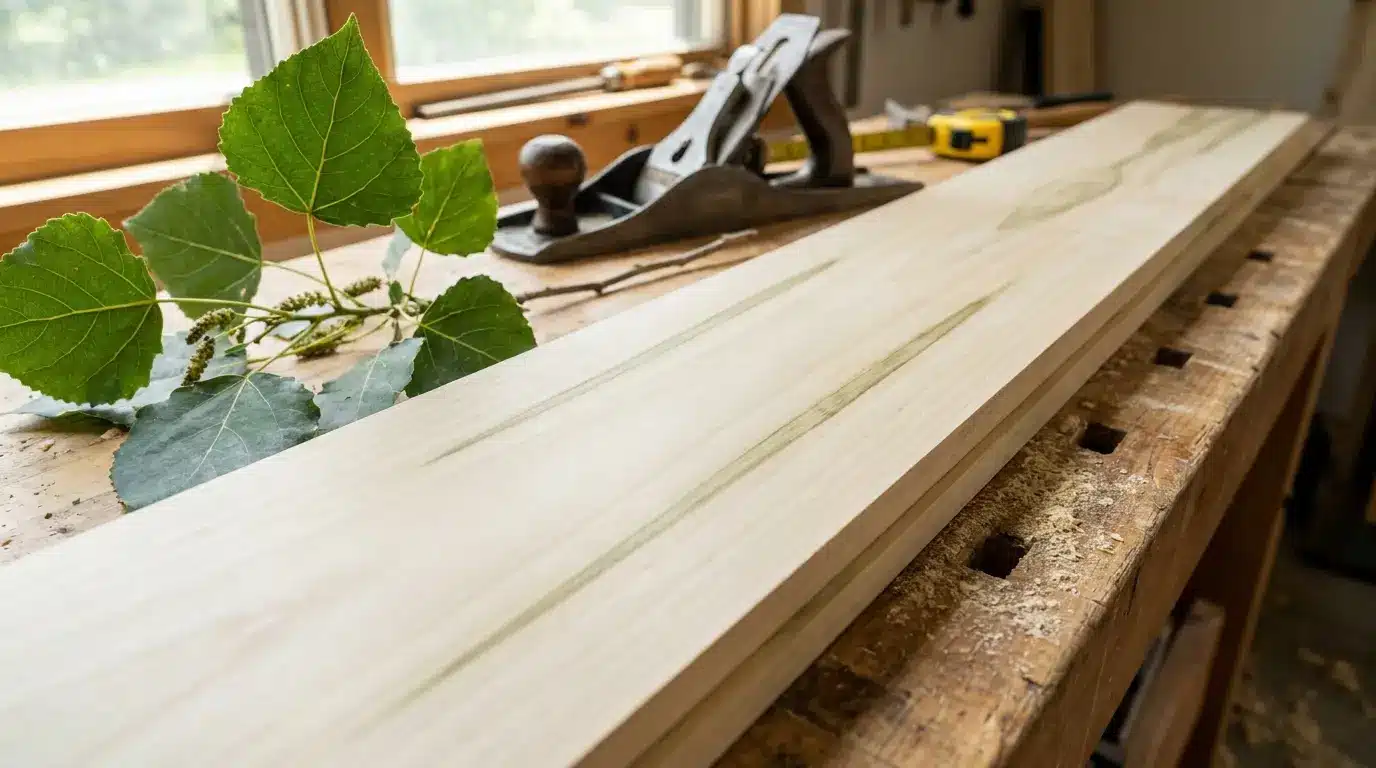
Poplar wood Value Classification Hardwood Janka hardness 540 lbf Common nicknames Tulip poplar, yellow poplar, whitewood Best for Painted furniture, frames, trim, plywood Not ideal for Flooring, cutting boards, outdoor furniture With more than 20 years of woodworking experience in carpentry and custom furniture, I have seen how different woods perform in real-world projects and which lower-cost options are actually worth using. Yes, poplar is a hardwood. It comes from a broadleaf tree rather than a conifer, which is why it’s classified as such. Still, its Janka hardness rating is much lower than woods like oak or maple, so it dents and scratches more easily. That is why poplar often causes confusion at the lumberyard. Although it is technically a hardwood, it behaves more like a softer wood in everyday use. Why Poplar Counts as a Hardwood The hardwood and softwood labels do not describe how hard a wood feels to the touch. Hardwood comes from angiosperms, flowering trees that drop their leaves each fall. Softwood comes from gymnosperms, mostly cone-bearing evergreens like pine, spruce, and cedar. Poplar flowers every spring and sheds its leaves every autumn. That single trait places it in the hardwood group, no matter how soft the milled lumber feels. Most lumber sold as poplar actually comes from the tulip tree, or Liriodendron tulipifera. American yards almost always stock this wood as poplar, even though true Populus trees, like aspen and cottonwood, also exist. Pine, fir, and cedar never enter this conversation, since they grow cones instead of flowers. Density and weight play no part in the classification at all. How to Identify Poplar Wood If you already own a board and want to confirm the species, follow these steps. Check the color: Poplar sapwood runs creamy white in most boards you encounter. Its heartwood shifts from pale yellow-brown to olive green, sometimes within the same board. Check the grain and texture: The grain remains straight and even, with a fine-to-medium texture, similar to oak or ash. Look for mineral streaks: Some boards pick up green, gray, or purple streaks as the tree grows. Woodworkers call this rainbow poplar, and it often sells at a premium. Compare the weight: Hold a poplar board next to an oak board of the same size. The poplar will feel noticeably lighter almost right away. What Poplar Wood is Used for Builders reach for poplar all the time, just not always where you can see it. 1. Furniture and Frame Parts These sit under upholstery or paint, where appearance is not important to the buyer. Among the types of wood for furniture, poplar is commonly used for hidden frames because it is lightweight, affordable, and easy to work with. Builders choose it for furniture supports since the frame stays concealed after assembly. Its low weight also helps reduce shipping costs on large orders. 2. Paint-ready Cabinets and Trim Cabinets, shelves, and trim take a smooth coat once primed properly. Millwork, molding, and door parts often use poplar, too, since most are painted rather than left natural. The straight grain helps paint sit evenly across long trim runs. Many kitchen cabinet makers use poplar for face frames before painting the whole piece. 3. Plywood Core Material Plywood cores gain lightweight strength from poplar without adding much extra bulk. This makes plywood easier to install without giving up rigidity. Manufacturers like poplar cores because they resist warping better than some softwood alternatives. This keeps plywood sheets flat during storage and shipping. 4. Pallets and Crates These rely on poplar for its low cost and light weight during transport. Poplar boards withstand repeated loading without breaking down quickly. Shipping companies also value how easily poplar takes nails and staples. Its lightweight also keeps freight costs down for large shipments. 5. Small Hobby Builds Carved signs, wooden toys, and photo frames made at home often use poplar. Its soft texture makes hand carving easier for beginners. Poplar also holds paint and varnish well on finished projects. Painters favor poplar because it holds a clean, even coat without much prep work. Carpenters like it because it rarely splits when nailed close to an edge, even on thin trim pieces. Why Poplar Feels Softer than Other Hardwoods The Janka scale ranks wood hardness by pressing a steel ball into a board until it embeds halfway. Poplar scores 540 pounds of force, compared to 1,290 for red oak, 1,450 for maple, and 1,010 for walnut. Even Douglas fir, a softwood commonly used for house framing, rates around 700 on the Janka hardness scale, making it harder than poplar. This lower Janka rating helps explain why poplar is easy to cut, shape, and work with in a workshop. A quick comparison clears up why poplar confuses so many buyers. Trait Hardwood Softwood Tree type Angiosperm, flowering Gymnosperm, cone-bearing Leaves Broad, drop each fall Needles, mostly evergreen Common examples Oak, maple, poplar Pine, cedar, fir Typical density Usually higher Usually lower Exceptions Poplar, balsa Douglas fir, yew Density sits in the usual column for a reason. Poplar and balsa are both hardwoods that score low on the Janka scale. Douglas fir and yew are softwoods that hold up better than people expect. The tree’s method of reproduction determines the label, not how the board feels in your hand. Poplar Compared to Other Common Hardwoods A side-by-side table makes these differences easier to see than raw numbers alone. Wood Janka hardness Durability Best use Poplar 540 lbf Low to moderate Painted furniture, frames, trim Black cherry 950 lbf Moderate Fine furniture, cabinets Black walnut 1,010 lbf High Furniture, veneer, gun stocks Red oak 1,290 lbf High Flooring, cabinets, trim Hard maple 1,450 lbf Very high Flooring, butcher blocks Poplar sits at the bottom of this list on hardness, but it also costs noticeably less than the others. For painted or hidden work, like frames or trim, that price gap usually favors poplar. For daily use in the open, such as a dining tabletop, oak or maple makes more sense. Is Poplar a Durable Hardwood Durability depends on how you use the wood, not just its hardwood label. Indoors, poplar lasts for years, especially once painted or sealed. It works well for modularfurniture, cabinet parts, and frames where heavy impact is limited. It dents more easily than oak or maple, so it struggles on floors or tabletops. Furniture frames, cabinet boxes, and trim rarely take hard hits, making poplar a practical choice for these applications. Regular dusting and occasional waxing help painted poplar furniture maintain its finish longer. Outdoors, poplar breaks down quickly without a sealed finish. With the right protection, it can still perform well for suitable projects. A fresh coat of paint or sealant every few years helps keep outdoor pieces protected. Poplar’s Limits Worth Knowing No single wood species works for every job, and poplar has a few clear limits worth knowing. Dents and scratches under everyday use, making it a poor fit for tabletops or floors with regular traffic. Blotches when stained, unless you apply a pre-stain wood conditioner first to even out absorption. Rots fairly quickly outdoors without a sealed finish over the top. Carries none of the natural rot resistance found in cedar or redwood. Needs a sealed finish before it faces rain, sun, or ground contact. Frequently Asked Questions Is it okay to burn poplar in a wood stove? Yes, seasoned poplar can be burned in a wood stove. It lights easily but burns faster and produces less heat than denser hardwoods. Is poplar better than pine? Poplar is usually better for indoor furniture because it is smoother and has less resin. Pine is often preferred when you want a stronger grain and a rustic look. Which variety of poplar is best? Tulip poplar is one of the best varieties for woodworking because it is lightweight, easy to shape, and widely available. The best type depends on the project. What is the lifespan of a poplar tree? Most poplar trees live for about 30 to 50 years. Some healthy varieties may survive for 100 years or longer in suitable conditions. How fast can a poplar tree grow? Poplar trees are fast-growing and may grow about 3 to 5 feet each year. Growth depends on the variety, soil, sunlight, and water supply. Is Poplar the Right Choice? Picking poplar comes down to what the finished piece needs to survive over time. Choose poplar for painted furniture, hidden frames, interior trim, and budget builds where looks matter more than raw toughness. Skip it for flooring, cutting boards, or any surface that sees daily wear without a protective coat. Its lower price beats oak, maple, or walnut whenever a project calls for paint over a natural wood look. A first apartment bookshelf, a painted nightstand, or a set of interior door trim all fit this description well. If the piece stays indoors under a coat of paint or primer, poplar rarely disappoints the person who picked it.
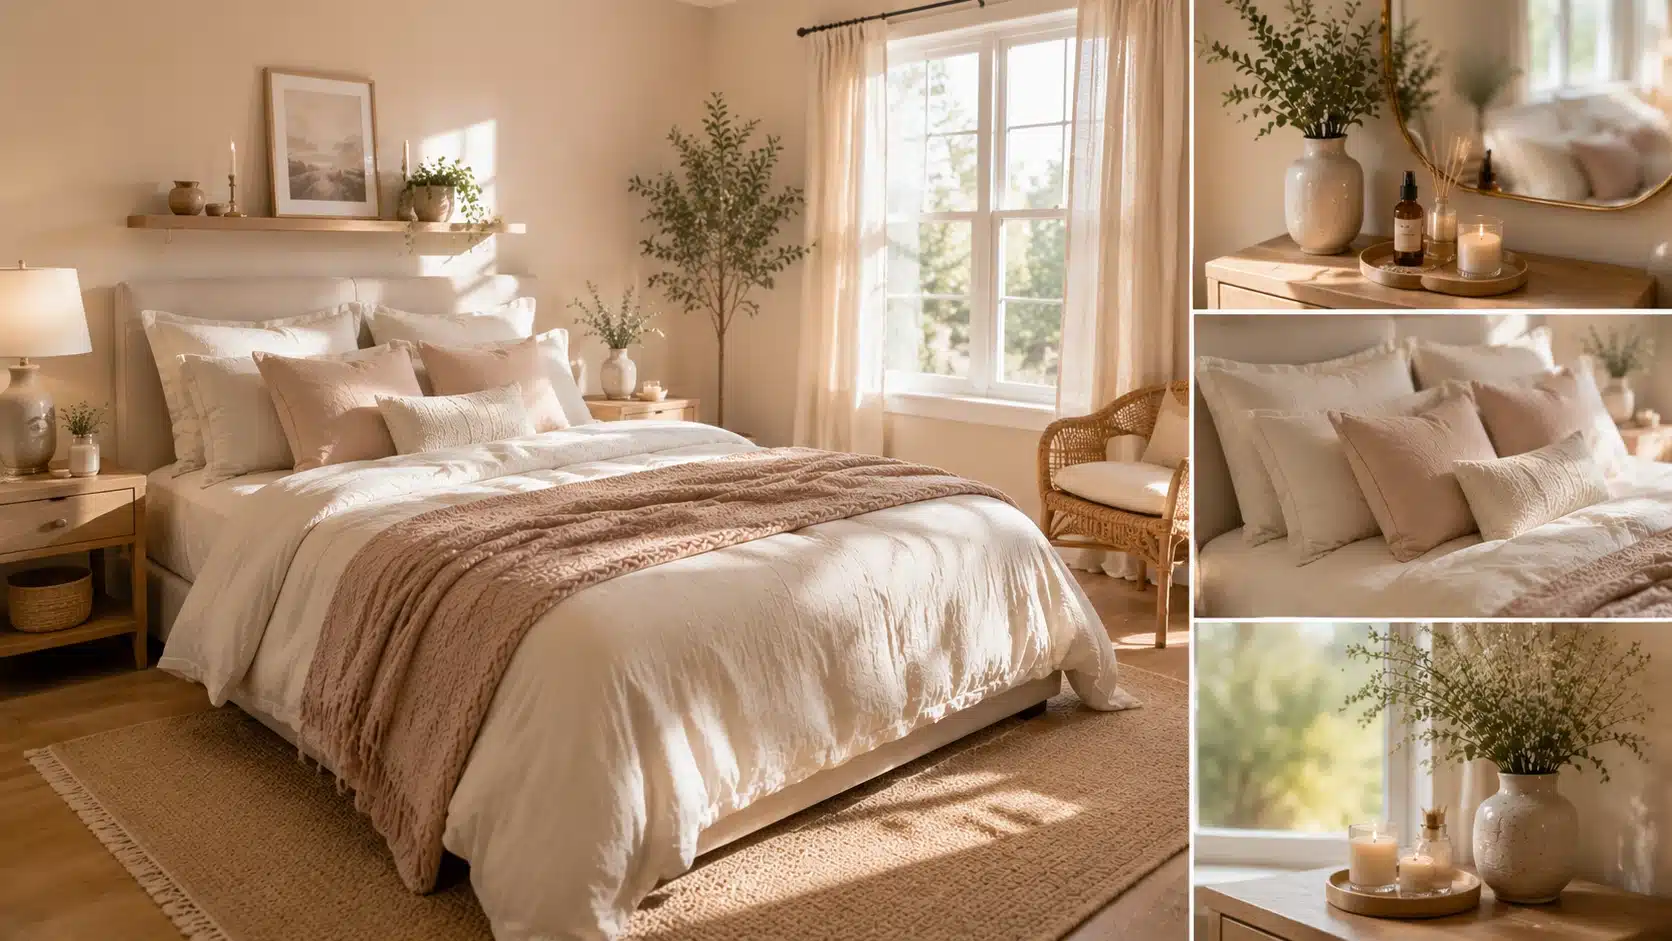
A bedroom should feel like a place where you can slow down, breathe, and reconnect with the person you share it with. Creating a romantic atmosphere doesn’t require expensive furniture or a full renovation. It comes down to a handful of simple choices: soft lighting, comfortable textures, warm colors, and small personal touches that make the room feel like yours. Whether you’re working with a spacious primary suite or a small rented apartment, these romantic, warm, and cozy bedroom ideas are for you. What Makes a Bedroom Feel Romantic, Warm, and Cozy? Before jumping into a list of ideas, it helps to understand the design principles that make a room feel this way in the first place. Most romantic bedrooms share three things: gentle lighting, soft textures, and details that feel personal rather than staged. Soft Lighting Creates a Relaxing Mood: Warm lighting between 2700K and 3000K creates a calming atmosphere. Layer bedside lamps, sconces, and candles rather than relying on harsh overhead lighting. Comfortable Textures Add Warmth: Layer soft bedding, cozy throws, rugs, and fabrics like linen, velvet, cotton, and boucle to add depth, comfort, and a welcoming feel. Personal Details Make the Room Feel Intimate: Add meaningful artwork, favorite books, or shared keepsakes to make the bedroom feel personal, lived-in, and connected to its occupants. Romantic, Warm, and Cozy Bedroom Ideas Once you understand the basics, it helps to see how those principles actually play out in a real room. Below are ideas, each with a few styling tips and a short note on why it works, so you can choose what best fits your space, style, and budget. 1. Layer Soft Neutral Bedding The bed sets the tone for the entire room, so it’s the natural place to start. Soft, neutral bedding in cream, oatmeal, or blush instantly reads as more romantic than bold patterns or stark white sheets, especially once you start layering a few pieces together. Styling Tips Stick to a tonal palette: cream, oatmeal, blush, or soft taupe Layer at least two textures, like linen under a knit throw Add four to six pillows in slightly varying shades for depth Avoid bold patterns that compete with the room’s softness Why It Works: Soft, neutral tones create a calming visual base that feels intimate rather than busy. Layering textures adds richness without adding clutter, which is the balance most romantic bedrooms are built on. 2. Add Warm Ambient Lighting Harsh overhead lighting works against a romantic mood almost every time. Swapping in warm, layered lighting from lamps, sconces, or string lights brings a soft, golden glow that makes a room feel intimate the moment you walk in. Styling Tips Choose warm white bulbs around 2700K over cool or daylight tones Add at least two light sources placed at different heights String lights along a headboard add an easy, romantic touch A dimmer switch gives you flexibility for different moods Why It Works: Warm lighting mimics candlelight and golden-hour sunlight, both of which we naturally associate with relaxation and closeness. 3. Hang Sheer Curtains Sheer curtains add movement, softness, and a slightly dreamy quality to a bedroom, especially when morning light filters through them. Styling Tips Layer sheer curtains behind heavier drapes for flexibility Choose soft white, cream, or blush sheers Hang curtains higher and wider than the window for extra drama Let the fabric pool slightly at the floor for a relaxed feel Why It Works: Sheer fabric diffuses light into a soft, glowing haze rather than harsh direct sun. That gentle movement and glow give the room a quietly romantic quality throughout the day. 4. Decorate with Candles Few things say romantic quite like candlelight. A small cluster of candles on a dresser or nightstand adds warmth and a flickering glow that no light bulb can fully replicate. Styling Tips Group candles in varying heights for visual interest Choose warm scents like vanilla, amber, or sandalwood Flameless candles work well if safety is a concern Place candles on a tray or mirror for extra glow Why It Works: Candlelight is soft, warm, and slightly unpredictable, qualities that read as far more romantic than steady artificial light. A calming scent adds another sense, deepening the overall mood. 5. Add Velvet Accents Velvet feels luxurious and romantic at the same time. A velvet cushion, bench, or headboard adds richness without redoing the whole room. Styling Tips Use velvet in small doses: cushions, a bench, or curtains Deep tones like emerald, burgundy, or navy feel especially romantic Pair velvet with softer fabrics like linen for balance Avoid overusing velvet, since it can feel heavy in large amounts Why It Works: Velvet catches and reflects light in a way that adds depth to a space. Its softness also invites touch, quietly reinforcing the cozy, intimate feeling a romantic bedroom aims for. 6. Create a Statement Headboard A bed without a headboard can feel slightly exposed, even if it’s hard to say why. A tall, upholstered headboard adds drama and an instant sense that the room was put together with intention. Styling Tips Go taller than standard for a more dramatic effect Curved or channel-tufted designs feel especially romantic Soft fabrics like velvet, boucle, or linen work beautifully Keep the wall behind it simple, so the headboard stands out Headboards: A headboard frames the bed and anchors it as the room’s clear focal point. Soft, curved shapes tend to feel more romantic than sharp, angular ones. 7. Use Soft Earthy Wall Colors Soft earthy tones like warm beige, terracotta, sage, or muted clay create a grounded, calming backdrop that feels romantic without leaning into anything too sweet or themed. They pair naturally with warm lighting and natural textures. Styling Tips Test paint samples in your room’s actual lighting before committing Consider an accent wall if a full repaint feels like too much Pair earthy tones with warm wood and soft textiles Avoid stark white trim if you want a softer overall look Why It Works: Earthy tones are rooted in nature, and we tend to associate them with warmth and safety. Unlike bright or cool colors, they create a sense of enclosure that reads as romantic rather than sterile. 8. Add Fresh Flowers Fresh flowers are one of the simplest, most classic ways to add romance to a bedroom. A single stem in a vase or a small bunch on the nightstand brings color, scent, and life into the space. Styling Tips A single stem or small bunch often feels more elegant than a large bouquet Choose soft-toned flowers like roses, peonies, or ranunculus Simple glass or ceramic vases keep the focus on the flowers Dried or faux flowers work well as a low-maintenance alternative Why It Works: Flowers introduce an organic, ever-changing element that static decor can’t replicate. They also add scent, which plays a real role in how romantic a space feels. 9. Style a Cozy Reading Corner A small seating corner, a comfortable chair, a soft throw, and maybe a side table give the bedroom a spot for quiet moments beyond the bed itself. It adds a layer of intimacy that the rest of the room doesn’t. Styling Tips Choose a genuinely comfortable chair, not just a decorative one Add a small lamp for soft, dedicated lighting Layer in a throw blanket and a cushion for extra coziness Keep the corner uncluttered so it feels inviting, not crowded Why It Works: A seating area separate from the bed adds depth to the room beyond sleeping. It also creates a natural spot for connection, whether that’s quiet reading or a shared cup of coffee. 10. Layer Rugs for Extra Warmth Layered rugs add warmth underfoot and visual depth to a room, softening hard flooring while adding texture. Layering a smaller textured rug over a larger neutral one creates a cozy, intentional look. Styling Tips Choose a large neutral base rug and a smaller accent rug on top Stick to soft, warm tones for a romantic feel Position rugs so they extend beyond the bed frame Mix textures, smooth and woven, for added depth Why It Works: Layered rugs add visual interest and warmth while grounding the furniture on top of them. Soft textures underfoot enhance the room’s overall sensory coziness. 11. Install Wall Sconces Wall sconces free up nightstand space while adding a soft glow on either side of the bed. It’s a small upgrade that instantly reads as more considered than basic table lamps. Styling Tips Plug-in sconces are an easy option if rewiring isn’t possible Choose warm metal finishes like brass or aged gold Mirror sconces on both sides of the bed for symmetry Pair with dimmable bulbs for extra flexibility Why It Works: Sconces add light at a flattering height without taking up surface space, so nightstands feel less cluttered. The soft glow also adds a sculptural element to the wall. 12. Hang Soft, Romantic Artwork Soft, muted artwork, florals, abstract shapes, or gentle landscapes add warmth and personality to bare walls without feeling overly themed. A single well-chosen piece often does more than a gallery wall of mismatched frames. Styling Tips Choose soft, muted color palettes that complement your walls Group smaller pieces in odd-numbered clusters Mix frame finishes for subtle variety Hang art at eye level when seated on the bed Why It Works: Art adds an emotional layer to a space, giving your eyes something meaningful to land on. Soft, romantic artwork reinforces the overall mood without competing with anything else in the room. 13. Add a Canopy Look A canopy, whether it’s a full frame or simple draped fabric, adds an undeniable sense of romance and drama to a bedroom. It frames the bed in a way that feels a little like a private world of its own. Styling Tips A curtain rod with draped sheer fabric works as a budget canopy Choose soft, lightweight fabrics that move easily Add fairy lights along the canopy frame for extra warmth Keep the rest of the room simple so the canopy stands out Why It Works: A canopy adds height and softness, drawing the eye upward and creating a sense of enclosure around the bed. That feeling of a room within a room is inherently intimate. 14. Use Natural Wood Furniture Natural wood furniture adds warmth and an organic, grounded feel to a bedroom, pairing beautifully with soft textiles and warm lighting. It also tends to age gracefully, gaining character rather than losing it. Styling Tips Mix wood tones intentionally rather than matching everything Look for secondhand or vintage pieces to save money Pair with brass or matte black hardware for an elevated look Keep surfaces relatively clear to let the wood grain show Why It Works: Wood introduces an organic, slightly imperfect element that contrasts nicely with smooth, manufactured surfaces. It reads as warm both visually and physically. 15. Add a Faux Fur Throw A faux fur throw draped over the bed or a chair adds an instant layer of softness and a small sense of indulgence. It’s the kind of detail that practically invites you to touch it. Styling Tips Drape loosely rather than folding it too neatly Choose cream, blush, or gray tones for a romantic feel Pair with other textures like linen or velvet for contrast Use on a chair or bench if bed space is limited Why It Works: Texture plays a big role in how luxurious a space feels, and faux fur is about as tactile as it gets. Its softness invites touch, reinforcing the room’s cozy, sensory feel. 16. Choose Blush and Cream Tones Blush and cream are about as classic as romantic color palettes get, and for good reason. These soft, warm tones feel gentle and intimate without tipping into anything overly themed. Styling Tips Use blush in smaller doses: pillows, throws, or art Pair with cream and warm white for balance Add brass or gold accents to elevate the palette Avoid using blush as the dominant wall color if you want subtlety Why It Works: Blush and cream sit close together on the color wheel, creating a soft, cohesive look without much contrast. That tonal closeness reads as gentle rather than bold or attention-grabbing. 17. Add Floating Shelves With Personal Touches Floating shelves are a great way to display small, meaningful items, such as a candle, a framed photo, or a small plant, without taking up floor space. They add personality to walls that might otherwise stay empty. Styling Tips Limit each shelf to three or four items for a curated look Mix heights and textures: a candle, a small frame, a plant Choose shelves in wood or matte black for versatility Leave some negative space rather than filling every inch Why It Works: Floating shelves add vertical interest and a personal touch without crowding the floor. Styled thoughtfully, they create small vignettes that feel intentional rather than generic. 18. Switch to Linen Bedding Linen bedding has an effortlessly relaxed, slightly rumpled look that feels romantic in a natural, lived-in way. It’s the opposite of stiff, overly formal bedding, and that’s part of the charm. Styling Tips Choose linen in soft neutral or muted tones Embrace the natural wrinkles rather than fighting them Pair with a few structured pillows for balance Wash linen regularly to keep it soft and fresh Why It Works: Linen’s natural texture and slight imperfections give a room a relaxed, lived-in feel that reads as more authentic than overly stiff bedding. 19. Add Warm Metal Accents A few gold or brass accents- picture frames, candle holders, a mirror frame- add warmth and a touch of glamour without overwhelming the space. They pair beautifully with soft, neutral palettes. Styling Tips Stick to one metal tone, gold or brass, for cohesion Use warm metal accents sparingly; a few well-placed pieces are enough Pair with soft neutrals or blush tones for balance Mirrors and candle holders are an easy starting point Why It Works: Warm metals reflect light beautifully, adding a subtle sparkle that feels elegant rather than flashy. In small doses, they elevate a room without shifting the mood away from cozy. 20. Keep the Room Clutter-Free This last idea isn’t about adding anything; it’s about editing. A clutter-free bedroom feels calmer, more intentional, and ultimately more romantic, since clutter pulls focus away from the details. Styling Tips Clear the surfaces of everyday clutter before bed each night Use baskets or drawers to hide functional items Limit decor to a few meaningful pieces per surface Do a quick reset of the room each morning Why It Works: Clutter keeps the brain subtly on edge, even if you’re not consciously aware of it. A clear, calm space lets the cozy details you’ve added actually stand out. 21. Use a Vintage or Antique Mirror An antique-style or curved mirror softens the hard lines of a bedroom while adding a gentle decorative note, even before it reflects any light. Styling Tips Look for curved or ornate frames over plain modern edges Place a mirror opposite a window to brighten the room Pair with a small tray or candle for extra glow Choose a size proportional to the wall it’s hung on Why It Works: A mirror with character adds a sense of history that a plain modern one can’t. Placed well, it also bounces light around the room, making it feel brighter and more open. 22. Add Scent with Diffusers and Sprays The smell of a bedroom shapes its mood more than most people realize. Soft floral scents or soothing woody notes, such as sandalwood, are always a safe, romantic choice. Styling Tips Use an essential oil diffuser for a subtle, consistent scent Choose calming notes like lavender, vanilla, or sandalwood A light mist of linen spray on the sheets adds a fresh touch Always keep candles attended if using them for scent Why It Works: Scent is one of the most overlooked design tools, yet it shapes how inviting a room feels the moment you walk in, layering in a sense that visuals alone can’t reach. 23. Choose Dimmable Lighting Fixed, bright lighting rarely feels romantic, no matter what else is in the room. A dimmer switch lets the space shift from bright and functional in the morning to soft and relaxed at night. Styling Tips Add dimmers to both overhead and lamp lighting where possible Pair with warm bulbs for the softest possible glow Keep at least one light source low and warm for evenings Test brightness levels at night before finalizing your setup Why It Works: The ability to adjust brightness gives you control over the room’s mood throughout the day, rather than being stuck with one fixed setting that may not fit the moment. 24. Layer in Natural Fiber Textures A jute or wool rug, a woven basket, or a natural-fiber lampshade adds an earthy softness that grounds the room. These textures pair naturally with wood furniture and warm color palettes. Styling Tips Choose a jute or wool rug for warmth underfoot Add a woven basket for blankets or extra storage Mix in a rattan or wicker accent piece for texture Keep the rest of the palette neutral, so textures stand out Why It Works: Natural fibers add visual and physical texture that manufactured finishes rarely match, giving the room an organic, grounded feel that supports the overall coziness. 25. Bring in Rattan and Woven Accents A rattan headboard, chair, or mirror frame adds a relaxed, natural quality that feels collected rather than store-bought. It’s an easy way to soften a room that leans a bit too modern or stark. Styling Tips Start with one rattan piece, like a chair or mirror Pair with soft textiles to balance the texture Avoid overusing rattan, since it can start to feel busy Mix with wood tones for a cohesive, natural look Why It Works: Woven, natural materials add texture and warmth without visual weight, keeping a romantic room feeling light rather than heavy. 26. Mix Patterns Through Throw Pillows A few well-chosen throw pillows in mixed patterns and textures add depth and personality to the bed without requiring a full bedding overhaul. Styling Tips Stick to a shared color family across all patterns Mix scales: one large print, one small print, one solid Use an odd number of pillows for a more natural look Swap seasonally to refresh the room without much cost Why It Works: Layered patterns catch the eye without overwhelming it, as long as the color palette stays consistent. It’s an easy, low-cost way to add richness to the bed. 27. Keep the Style Personal, Not Perfect The most romantic bedrooms rarely look like they came straight out of a showroom. A few personal, slightly imperfect touches, a favorite photo, a well-loved book, a plant that’s a little overgrown. Styling Tips Choose a few meaningful objects over a lot of generic decor Let one or two items show some wear or history Avoid matching every single element too perfectly Update small details seasonally to keep the room feeling lived-in Why It Works: A slightly imperfect, personal room feels warmer and more romantic than one that looks staged, since it reflects the people who actually live there rather than a catalog page. Tips to Make a Bedroom More Romantic A romantic bedroom doesn’t need to come with a large price tag. Small, budget-friendly swaps can shift the entire feel of the room, and the best updates often depend on how much space you’re actually working with. A larger bedroom has more room for layered pieces, while a smaller bedroom usually gets the most impact from one or two well-chosen changes. The table below breaks down simple, affordable options for each. Tips For Larger Bedrooms Update Budget-Friendly Option Lighting Add a floor lamp plus warm bedside lamps Bedding Layer a duvet, throw, and extra pillows Walls Framed artwork above the headboard Decor Fresh headboard and a small reading corner Furniture Rearrange pieces to create two zones Tips For Smaller Bedrooms Update Budget-Friendly Option Lighting Warm bulbs and one wall-mounted sconce Bedding Add a textured throw or extra pillows Walls Removable wallpaper or a single mirror Decor A candle and a small vase of flowers Furniture Rearrange the pieces you already own None of these updates require a big investment, and even one or two changes from the tables above can make a noticeable difference in how warm and romantic the room feels. Pro tip: Start with lighting and bedding first. They have the biggest visual impact for the least money. What to Avoid While Designing a Romantic Bedroom Even a well-decorated bedroom can lose its warmth if a few common mistakes creep in. Using only cool white lighting gives the room a harsh, clinical appearance that works against a romantic mood. Adding too many decorative items makes the space feel crowded rather than calm, which pulls attention away from the room’s overall warmth. Choosing style over comfort can leave a bedroom looking good in photos but feeling so stiff that it’s hard to relax. A romantic bedroom should prioritize rest. Ignoring bedding quality is an easy mistake to make, since the bed is the main visual and functional element in the entire room. Worn or mismatched bedding undercuts every other design choice. Frequently Asked Questions What colors make a bedroom feel romantic? Warm neutrals, muted pinks, deep reds, and earthy shades create a softer, more intimate bedroom atmosphere than cool or stark tones. How can I make my bedroom cozy without new furniture? Use lighting, layered bedding, curtains, a rug, and small decor changes to add warmth without replacing any major furniture pieces. What lighting is best for a romantic bedroom? Warm bulbs between 2700K and 3000K give off a soft glow that feels comfortable and relaxing rather than harsh or clinical. How can I make a small bedroom feel romantic? Use soft textures, warm lighting, a well-placed mirror, and simple decor choices to add coziness without crowding the room. Future Trends for a Romantic Bedroom A romantic bedroom isn’t defined by how much you spend. It comes down to a feeling, built from warm light, soft textures, and a few personal touches that make the space feel like your own. Looking ahead, expect romantic bedroom design to lean further into warm, low-glare lighting, natural materials, and softer, more textural fabrics as people continue favoring calm, restorative spaces over trend-driven looks. Start small if you need to. Swap the bulbs, add a throw, or bring in one piece of art, and let the rest follow.