

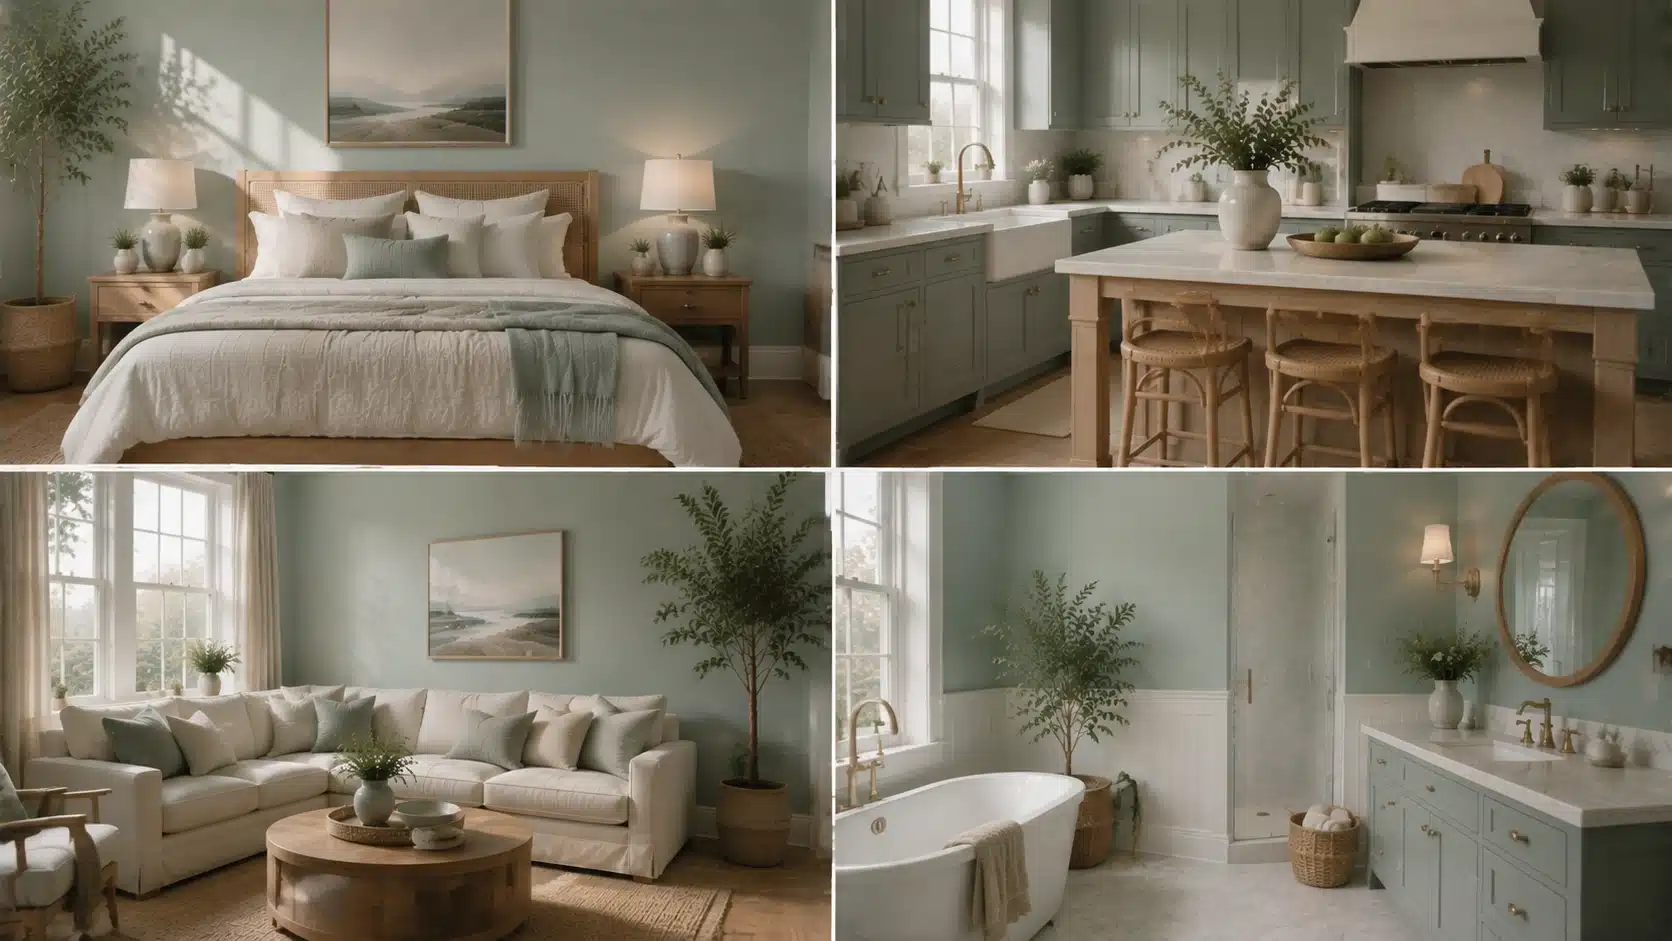
Quick summary: Benjamin Moore Beach Glass is a muted blue-green-gray shade that changes subtly with lighting and surrounding colors. Benjamin Moore Beach Glass is the kind of paint color that can look soft and coastal in one room, then slightly cooler or greener in another. That versatility is part of its appeal, but it also means choosing it requires a closer look at undertones, natural light, surrounding finishes, and coordinating colors. This article breaks down Benjamin Moore Beach Glass 1564, including its LRV and blue-green-gray undertones. How it behaves in different lighting conditions, the best rooms to use it in, how to coordinate whites and accent colors, and how it compares with similar popular shades. What Color is Benjamin Moore Beach Glass? Benjamin Moore Beach Glass 1564 is a soft blue-green paint color with a gray undertone that keeps it from ever looking too bright or too tropical. This shade sits in Benjamin Moore’s blue-green family, but it is not the bright aqua or classic beachy turquoise that its name might suggest. It reads as a muted, weathered blue-green with a gray cast, closer to the color of real sea glass than a swimming pool. Depending on lighting, some rooms will pull more blue while others lean slightly green, but the gray keeps both extremes in check. Benjamin Moore’s own product page describes it as a calming blue with a gray undertone, adding versatility to the shade. Color details Feature Details Paint brand Benjamin Moore Color name Beach Glass Color number 1564 Color family Blue-green LRV 49.7 Overall feel Calm, coastal, muted Benjamin Moore Beach Glass Undertones Undertones are the quiet influence sitting beneath the main color, and they are what make this shade a bit of a chameleon. Here is how each one shows up. Gray undertone: The gray keeps the color from ever feeling tropical or overly saturated. It softens the color and gives it a more grown-up, sophisticated quality, which is part of why it works in so many different design styles. Blue undertone: In cooler, north-facing light, the blue becomes more obvious. This is when the color leans closest to a true sea-glass blue, with an airy, almost weightless feel. Green undertone: Warm, direct sunlight tends to coax out the green side of the color. Paint experts who specialize in undertone analysis note that this warm-light shift is what gives the color its sea-glass character in south-facing rooms. Is Benjamin Moore Beach Glass Blue or Green? If you are trying to decide whether this color leans more blue or green, it can be a little hard to pin down at first. It is technically a muted blue-green, but on the wall it often reads more like a soft sea-glass blue. Its gray undertone keeps it from looking too teal or too close to seafoam. The gray undertone is what stops it from reading as a true teal or seafoam shade. How it compares to similar blues and greens: Color How it differs from Beach Glass Beach Glass Soft blue-green with gray Palladian Blue Brighter and more distinctly blue Healing Aloe Lighter and softer overall Quiet Moments Lighter, with an LRV close to 61, and leans slightly more blue Benjamin Moore Beach Glass LRV and Light Performance LRV, or light reflectance value, measures how much light a paint color bounces back into a room versus how much it absorbs. The scale runs from 0 (pure black) to 100 (white). This color has an LRV of 49.7, according to the official listing of Benjamin Moore, which places it almost exactly in the middle of the scale. North-facing rooms: Cooler, indirect light pulls the color deeper and grayer, and some of that airy, coastal quality fades. North-facing rooms never get direct sun, so the color settles into a moodier, more subdued side. South-facing rooms: Direct sun keeps the color feeling fresh and calming, and its blue-green tones read clearly without looking washed out. The strong, warm light in south-facing rooms tends to bring out the green side rather than the blue. East-facing rooms: Morning sun brings a brief window of warmth, so the color can look slightly greener early in the day before settling into a cooler, more blue-gray tone for the rest of the afternoon. West-facing rooms: Afternoon and evening sun bring the strongest warm light of the day, which can push the color toward its greener, warmer side as the sun gets lower in the sky. How Lighting Conditions Change the Look of Beach Glass Beyond room orientation, the type and intensity of light in a space play a big role in how the color performs day to day. Darker rooms: The color pulls deeper, grayer, and cooler, losing some of its lighter coastal quality when natural light is limited Lighter, sun-filled rooms: It reads fresh and clear, with the blue-green tones showing up most true to their intended shade. Warm bulbs: Warm-toned lighting emphasizes the green side of the color, giving it a slightly more sea-glass, earthy feel indoors. Cool LED bulbs: Cooler artificial light highlights the blue-gray side, making the color feel crisper and more subdued. Designer tip: Test the color on at least two walls in the room, ideally one that gets direct sun and one that does not, since the same gallon can look noticeably different depending on exposure. Where to Use Benjamin Moore Beach Glass in Your Home This color adapts well across the home, from calm living spaces to spa-style bathrooms, though its best use depends on light, function, and nearby finishes. 1. Living Rooms with Benjamin Moore Beach Glass This shade creates a relaxed, easygoing backdrop that works well with natural textures like linen, rattan, and light wood tones. It is calm enough to live with daily without feeling monotonous. In larger living rooms with plenty of natural light, it can anchor the whole space without competing with furniture or artwork. It also works well on a single accent wall for those who want the color without committing to a full room. 2. Bedrooms with Benjamin Moore Beach Glass Because it leans more toward soothing than energizing, it is a popular bedroom choice. Pairing it with soft white or warm cream bedding helps balance its cooler undertone. It tends to work best in bedrooms that get some natural light during the day, since darker bedrooms can make the color feel flatter and less restful. Layering in warm-toned nightstands or lamps also helps keep the room from feeling too cool at night. 3. Bathrooms with Benjamin Moore Beach Glass This is one of the most popular applications for the color, since its blue-green, water-inspired quality suits spa-style bathrooms especially well. It pairs naturally with white tile, marble, and brushed metal fixtures. Because bathrooms often rely more heavily on artificial lighting, it is worth testing the color under the room’s actual vanity lights before committing. This helps confirm whether it leans more blue or green once the sun goes down. 4. Kitchens with Benjamin Moore Beach Glass This shade also works as a cabinet color, particularly when the surrounding walls stay lighter and neutral. Warm hardware finishes, such as brass or bronze, help offset its cool base. It also pairs well with butcher block or light wood countertops, which help balance out the coolness of the paint. For kitchens with limited natural light, keeping the walls a shade or two lighter than the cabinets helps the space feel open. Colors That Pair Well with Benjamin Moore Beach Glass The right trim and accent colors can make this shade feel warmer, cooler, brighter, or more grounded, depending on the look you’re going for. Best White Trim Colors The right white trim can either soften the cool undertones of this shade or create a sharper contrast around doors, windows, and architectural details. Benjamin Moore White Dove: Adds warmth and prevents the overall palette from feeling too cool. Benjamin Moore Simply White: Creates a cleaner, crisper contrast against the blue-green walls. Benjamin Moore Super White: Gives the room a more modern, high-contrast finish. Benjamin Moore’s coordinating suggestions also include whites such as Snow White OC-66 and Super White OC-152, giving you additional options for creating a balanced color scheme. Overall, the best trim color depends on how much contrast you want. Softer whites create a warmer transition, while crisp whites highlight the wall color’s blue-green character. Best Accent Colors for Benjamin Moore Beach Glass Choosing the right accent colors can help this cool-toned shade feel more balanced and connected to the rest of the room. The best pairings either add warmth, create subtle contrast, or build on its soft coastal character. Navy Blue: Adds depth and a bit of drama without clashing with the cooler base tone. Warm wood tones: Balance the cool undertones and keep the space from feeling sterile. Soft beige and greige: Create a quiet, layered coastal palette that feels soft and cohesive. Natural greens: Reinforce the organic, sea-glass feel of the color and work especially well with plants and natural materials. Overall, these accent colors help bring out different sides of the shade. Navy creates contrast, wood adds warmth, and softer neutrals and greens keep the palette calm and natural. Benjamin Moore Beach Glass Compared with Similar Colors Beach Glass has good company among other Benjamin Moore blue-greens, and seeing how it stacks up can help confirm it’s the right fit before buying a sample. Paint color Difference from Beach Glass Benjamin Moore Quiet Moments Lighter and slightly softer, with a higher LRV near 61 Benjamin Moore Healing Aloe More muted and gray overall Benjamin Moore Palladian Blue Brighter and more clearly blue Benjamin Moore Mount Saint Anne Deeper and more saturated Benjamin Moore Night Mist Leans more green-gray and reads slightly lighter Benjamin Moore Iced Marble Very close in tone and often used as a match Of all these options, Beach Glass still stands out for its balance. It is neither as light as Quiet Moments nor as saturated as Mount Saint Anne, which is part of why it remains such a versatile, easy-to-live-with choice. What Not to Use with Benjamin Moore Beach Glass Choosing it without testing samples: Screen colors and in-store chips rarely match how a paint color behaves on an actual wall. A physical sample tested at home is the only reliable way to judge it. Using too many cool colors: Pairing this color with an entirely cool-toned room, including cool grays, cool whites, and chrome fixtures, can make the space feel cold rather than calm. Ignoring lighting direction: Because it sits at a mid-range LRV, the room’s light exposure has an outsized effect on how the color reads throughout the day. Pairing it with the wrong whites: Some stark, blue-based whites can make the color look flatter and more blue-gray than intended. Warmer whites tend to soften that effect. Is Benjamin Moore Beach Glass a Good Paint Color? Overall, Beach Glass earns its popularity. It suits many homes and styles, though like any mid-tone color, it rewards some planning around lighting and trim choices. Pros Cons Calm and versatile across multiple design styles Can shift noticeably depending on the room’s lighting Softer and more livable than a traditional bold blue May feel too cool in rooms with limited natural light Works well with both warm and cool accent colors Requires more careful trim selection than a true neutral Adds color to a room without overwhelming it Can look different across an open floor plan with varied light In the end, Beach Glass remains a dependable, versatile choice for homeowners seeking a calm, coastal-inspired color that adapts to nearly any room, style, or lighting condition. Testing at Different Times of Day Paint behaves differently under morning, afternoon, and evening light. Morning light tends to bring out the cooler blue-gray side of this shade, midday sun softens it toward green, and evening artificial light can deepen it slightly. Viewing a sample across all three helps avoid surprises after the whole room is painted. Real home application examples A Beach Glass bathroom vanity paired with brushed nickel hardware A single Beach Glass accent wall behind a bed with warm wood furniture Living room walls in Beach Glass paired with oak floors and linen upholstery Frequently Asked Questions Is Benjamin Moore Beach Glass Warm or Cool? It leans cool overall, thanks to its gray and blue undertones, though warm natural light can bring out softer green notes throughout the day. What is the LRV of Benjamin Moore Beach Glass? Benjamin Moore Beach Glass 1564 has an LRV of 49.7, placing it in the medium range of the light reflectance scale. Does Benjamin Moore Beach Glass Look Green? It can, particularly in warm, direct sunlight, but most homeowners describe it as a muted blue-green rather than a true green. What White Goes Best with Benjamin Moore Beach Glass? White Dove, Simply White, Snow White, and Super White are all strong options, depending on whether the goal is warmth or crisp contrast. Is Benjamin Moore Beach Glass Good for a Bathroom? Yes. Its soft, water-inspired blue-green tone pairs especially well with white tile, marble, and spa-style design details. Making Beach Glass Work in Your Home Benjamin Moore Beach Glass is the rare paint color that never quite settles, it shifts with the morning light, changes when a lamp turns on, and responds to every piece of furniture placed nearby. That quiet unpredictability is exactly what makes it worth living with. Test it on two walls, check it at different times of day, and pair it with a warm white trim before committing. Do that, and Beach Glass tends to earn its place on the wall, not just for one season, but for years.
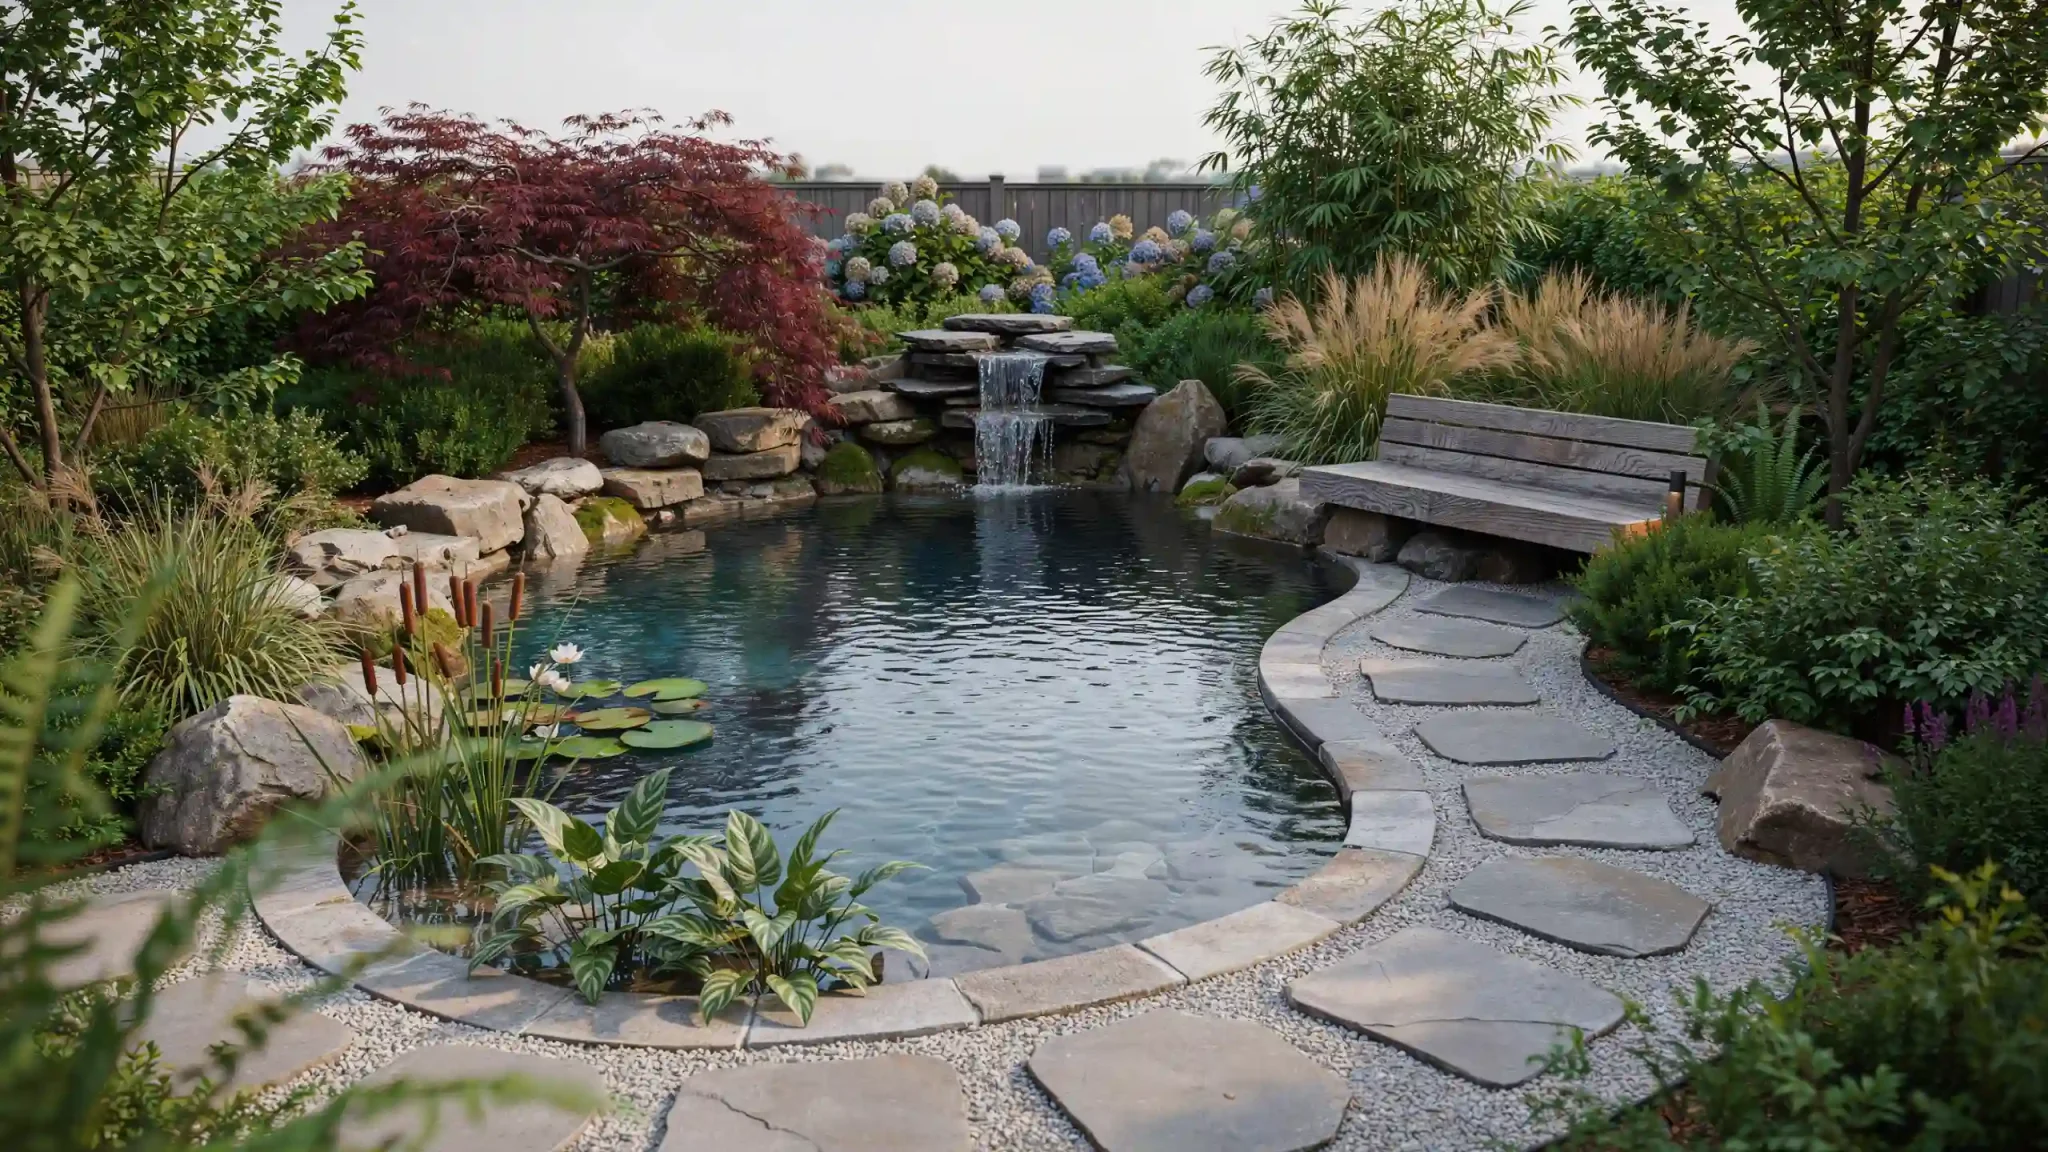
You step outside. The morning air is cool. Water ripples in the pond, and orange shapes glide just below the surface. A koi pond can turn a plain yard into something special. But there’s more to it than pretty rocks and clear water. Real koi pond ideas need to work for the fish, not just the eye. Depth matters. Filtration matters. So do shade, safe edges, and good water flow. A viewing spot ties it all together, but only if the fish stay healthy underneath. Good design isn’t about picking a style first. It’s about building a home. One that happens to look beautiful, too. What Makes a Good Koi Pond? A koi pond is more than a decorative water feature. Koi can grow over two feet long and produce a lot of waste, so the pond must be designed for their long-term health before aesthetics. Essential Feature Why It Matters Adequate water volume Supports full-grown koi Proper depth Protects fish in hot and cold weather Filtration and aeration Maintains clean, oxygen-rich water Partial shade Helps regulate water temperature Easy maintenance access Makes routine cleaning simpler Predator protection Keeps koi safe from birds and other animals A beautiful pond is only successful when it also provides a healthy environment for the fish. Prioritize function first, and the appearance will naturally follow. 17 Beautiful Koi Pond Ideas for Every Backyard Every backyard is unique, and the right koi pond design depends on the available space, landscape, and your personal style. Explore inspiring koi pond ideas tailored to different backyards to create a beautiful, functional outdoor feature. 1. Natural Rock Koi Pond This pond style features an irregular, free-flowing shape that creates a natural and organic appearance. Smooth boulders are carefully placed around the edges to enhance the landscape, while a variety of native plants add texture, color, and ecological value. A gentle waterfall provides the soothing sound of flowing water and improves circulation within the pond. The uneven, curved edges help the pond blend seamlessly into an informal garden setting, while supporting the overall garden structure with natural transitions. 2. Modern Geometric Koi Pond Straight edges and open water give this pond style a clean, elegant, and highly organized appearance. Concrete or precisely cut stone coping creates polished hardscaping that complements modern and formal landscapes. Planting is kept minimal, allowing the water’s reflective surface and the graceful movement of koi to become the main focal points. Formal rectangular ponds are also easier to maintain and clean. A bottom drain makes it easy to empty the pond completely for routine maintenance without relying on manual pumping. 3. Raised Koi Pond Raised-wall koi ponds elevate the water level above ground, making it easier to enjoy clear views of your fish without bending or leaning over the edge. They also require less excavation than fully in-ground ponds, which can simplify installation in many backyards. The raised walls can double as convenient seating, creating a comfortable place to relax and admire the pond. For this reason, many homeowners position raised ponds next to patios, decks, or outdoor living areas. 4. Small Backyard Koi Pond Space is often limited, but koi still need real depth and room to swim. A compact pond can work if it stays deep enough and keeps filtration tucked out of sight. Avoid the mistake of treating a shallow tub as a permanent home for koi. Koi outgrow small containers fast, and shallow water offers little protection from heat or predators. Pairing the pond with a practical small backyard can help preserve walking space, seating, and storage without making the yard feel crowded. 5. Japanese-Inspired Koi Pond Japanese-inspired koi ponds emphasize simplicity, harmony, and a strong connection with nature. This timeless design style uses natural stone, a graceful wooden or stone bridge, and carefully chosen plants such as a Japanese maple to create a peaceful, uncluttered setting. Every feature is thoughtfully placed to achieve balance rather than excess decoration. Gentle water movement and subtle landscaping enhance the tranquil atmosphere, making the pond an ideal focal point for meditation, relaxation, and quiet enjoyment of the garden. 6. Patio-Side Koi Pond Placing a koi pond near a deck, patio, or outdoor seating area allows you to enjoy its beauty and calming atmosphere every day. Watching the fish and listening to the gentle sounds of moving water can make the space feel more relaxing and inviting. A nearby location also makes routine observation easier, helping you quickly spot changes in water quality, fish behavior, or equipment performance. Detecting problems early can simplify maintenance and support a healthier environment for your koi. 7. Large Landscape Koi Pond A larger backyard provides the freedom to design a spacious koi pond with sweeping curves, deeper swimming areas, and eye-catching features such as a viewing platform or a decorative bridge. The extra space allows koi to thrive while creating a striking focal point in the landscape. Layered planting of trees, shrubs, ornamental grasses, and flowering plants around the pond helps it blend naturally with the surrounding garden, creating a balanced, inviting, and visually appealing outdoor environment. 8. Multi-Level Koi Pond Connected pools or streams sit at different heights across the yard. Water moves naturally between levels, supporting filtration and adding visual movement. Each level can hold a small waterfall or spillway, adding extra aeration as water drops between pools. Build the upper levels shallower and reserve the deepest pool for the bottom. That pool needs the most stable temperature and volume for koi. Keep connecting channels wide enough to prevent debris from clogging the flow. 9. Formal Courtyard Koi Pond A symmetrical pond framed by walls or neatly clipped hedges. This layout suits a structured, classic garden design inside a walled courtyard or enclosed patio. Straight edges and matching planting on both sides keep the whole space feeling balanced and intentional. Enclosed walls also block wind and reduce the number of leaves blown into the water. A small fountain or gentle waterfall adds movement and extra oxygen without breaking the tidy, formal look. 10. Koi Pond with a Viewing Window An underwater acrylic panel lets you watch koi from below the waterline. This idea works well built into a deck, patio wall, or window well. It turns the pond into a living display. The acrylic panel must handle real water pressure, so use marine-grade material. Have someone experienced with underwater panels install it. Keep the glass clean with an algae scraper. Place the window away from direct afternoon sun to limit glare. 11. Deck-Integrated Koi Pond The pond sits partly under or beside a raised outdoor deck. This blends the pond directly into your living space. Cutouts in the decking let you view koi from above. The rest of the deck stays usable for seating and entertaining. This layout works well on a sloped yard because the deck framing hides the plumbing and wiring underneath. Keep support beams clear of the pond shell, and leave an access hatch for equipment checks. 12. Koi Pond with a Wooden Bridge A bridge crosses the water, adding a classic garden touch overhead. It gives guests a reason to pause and look down at the fish. It also gives you a stable spot to feed koi or reach equipment near the pond’s center. Choose weather-treated or rot-resistant wood, since constant moisture accelerates decay in untreated lumber. Add a simple railing if the bridge crosses deeper water, especially near children or pets. 13. Minimalist Concrete Koi Pond A poured concrete basin with simple, straight lines and minimal ornamentation. Concrete surfaces are durable and low-maintenance, and they pair well with modern architecture, glass walls, and clean outdoor furniture. A well-sealed concrete shell resists cracking and algae buildup better than an unsealed pour. Ask your builder about a proper waterproof coating. This style also hides plumbing and filtration lines inside the walls, keeping the surface free of equipment. 14. Koi Pond with Aquatic Plants Water lilies, lotus, and marginal plants add shade, oxygen, and natural filtration to a koi pond. Use planting baskets, since koi often dig up and nibble unprotected roots. Add a layer of gravel on top to stop soil from clouding the water. Position taller plants near the edges and shorter ones near the center to keep the swimming area open. Well-placed plants also give young or shy koi cover from the sun and from circling predators overhead. 15. Shaded Koi Pond with a Pergola A pergola covered in vines or lattice reduces direct sunlight reaching the water’s surface. Less sun exposure can help limit algae growth and reduce temperature swings, creating more stable conditions for koi. Choose fast-growing but manageable vines, such as wisteria or grapevine. Trim them back before falling leaves become a filtration problem in autumn. A pergola also gives you a shaded spot to watch the pond during the hottest part of the day. 16. Wildlife-Conscious Koi Pond Build with overhangs, plant cover, or discreet netting to block herons and raccoons. Predator protection can look completely natural instead of obvious or bulky. Use rock ledges, dense marginal plants, or a shaded overhang along one edge. Deeper water near the center also gives koi a safe place to retreat when a predator approaches the surface. Motion-activated sprinklers near the bank offer another quiet way to discourage visits without harming local wildlife. 17. Koi Pond with a Bog Filter A planted gravel bed filters water biologically before it returns to the main pond. This lowers the need for extra chemical water treatments. Plant roots and bacteria in the gravel break down waste as water passes through. A bog filter also doubles as a landscaped feature. Plant it with irises, rushes, and other species that soften the pond’s edge. Size the bog area to about ten to fifteen percent of the total pond surface. Water Feature Options for a Healthy Koi Pond Thoughtfully designed water features enhance both the look and feel of a koi pond, turning it into a peaceful backyard focal point. Natural Stone Waterfall: A small waterfall adds a gentle sound and movement. It also boosts aeration, which koi need for healthy oxygen levels. Keep the stones securely set so they don’t shift over time. Modern Spillway: A narrow, straight-edged strip of falling water suits a formal or geometric pond. It offers the same aeration benefit with a cleaner, more structured look. Short Pond Stream: A shallow, planted stream can return filtered water to the pond. This creates a softer, more natural transition than a straight pipe or spillway. Waterfalls and fountains support water movement. But they don’t replace a properly sized filter and aeration system. Think of them as a bonus, not a substitute. Choosing the Right Pond Size and Depth The size and depth of your koi pond play a major role in fish health, water quality, and long-term maintenance. Factor What to Consider Surface area Available yard space and swimming room Depth Climate, predators, and mature koi size Water volume Number and expected size of fish Shape Effective circulation without dead zones Access Filter cleaning and routine pond care Avoid perfectly round or oval shapes. They create circular flow patterns that trap waste in the center. Irregular or kidney-shaped ponds tend to circulate water more evenly. Before construction begins, confirm local rules. Depth limits, fencing laws, permits, and electrical codes vary by area. It’s easier to check early than to redo work later. Koi Pond Cost Considerations Most mid-sized koi ponds cost between $5,000 and $16,000 to install, though smaller ponds can start closer to $2,800. Larger builds of 20 feet or more can exceed $27,000. Pond Type Typical Cost Level Main Expenses Liner pond Lower Liner, pump, filter, edging Raised pond Moderate Structure, waterproofing, filtration Concrete pond Higher Excavation, construction, drainage Large custom pond Highest Professional design, advanced filtration, landscaping Ongoing costs add up, too. Budget for electricity, water treatments, replacement filter parts, testing supplies, fish food, and annual seasonal servicing. How to Make Your Own Koi Pond Step 1: Pick a level, partly shaded spot in your yard away from trees, since leaves and strong sun can quickly harm water quality and koi health. Step 2: Dig the pond at least three feet deep in most climates, since koi need enough depth to safely escape summer heat and harsh winter ice. Step 3: Line the finished hole with a durable, thick pond liner and underlayment, which guard against leaks and sharp rocks while safely holding thousands of gallons. Step 4: Install a strong pump and biological filter system early on, since clean, well-oxygenated water keeps koi healthy and helps stop algae blooms from spreading fast. Step 5: Add a small waterfall, fountain, or aerator to boost oxygen levels, since koi always need well-oxygenated water, especially during hot summer months and crowded conditions. Step 6: Let the newly built pond cycle fully for several weeks before adding any fish, giving beneficial bacteria time to naturally control ammonia and nitrite levels. Step 7: Quarantine new koi for two full weeks in a separate holding tank, then slowly introduce them to avoid shocking the fish or spreading hidden disease. Step 8: Cover the pond with sturdy netting or add tall plants along the edges, since herons, raccoons, and neighborhood cats often see koi as easy meals. Basic Seasonal Maintenance for a Healthy Koi Pond Regular seasonal maintenance helps keep your koi pond clean, balanced, and healthy throughout the year. Spring and Summer: Test the water regularly. Inspect equipment for wear. Control debris before it builds up. Watch oxygen levels closely during hot weather, since warm water holds less oxygen and encourages algae growth. Fall and Winter: Remove fallen leaves before they sink and decay. Adjust feeding as water temperatures drop, since koi eat less in cold water. Prepare the pond for local winter conditions, including any de-icers or heaters your climate requires. Pro tip: Don’t judge water quality by looks alone. Test regularly for pH, ammonia, nitrite, nitrate, alkalinity, and temperature. Clear water can still carry hidden problems. Final Thoughts A successful koi pond design isn’t just about how it looks on day one. It balances layout with depth, water volume, filtration, and safety. Maintenance has to stay realistic too, or the pond becomes a chore instead of a joy. Plan around the koi your fish will become, not the small size they start at. Get depth and filtration right from the start, and the rest of the design has room to be as creative as you want. Ready to start planning your own koi pond? Share your yard size and style in the comments, and we’ll help you figure out the best fit. Frequently Asked Questions How Deep Should a Pond Be for Koi? A koi pond should be at least 3–4 feet deep. Deeper ponds provide stable temperatures, better protection from predators, and enough space for healthy koi growth. What Else Can You Put in a Koi Pond? You can add aquatic plants, water lilies, decorative rocks, beneficial bacteria, and compatible fish species. Avoid overcrowding to maintain good water quality and a balanced ecosystem. How Long Can Koi Survive in a Pond without a Pump? Koi may survive a few hours to several days without a pump, depending on oxygen levels, pond size, temperature, and fish population. Restore circulation quickly. What Is the Best Fish to Put With Koi in a Pond? Goldfish are among the best companions for koi because they share similar water requirements, peaceful behavior, and feeding habits, making them suitable pond mates. What Fish Will Koi Not Eat? Adult koi generally do not eat larger fish like goldfish, golden orfe, or tench. However, they may consume very small fry or fish eggs if available.

With over 12 years in interior design, I focus on practical layouts that make everyday spaces easier to use. A well-designed closet is more than just adding shelves or storage bins. Balance, movement, and placement all shape how comfortable the space feels. Proper proportions prevent shelves, drawers, and islands from making the room feel cramped. A clear layout keeps clothing, shoes, and accessories within easy reach. Choosing the right lighting and colors can make a small closet feel brighter and more open. You can solve many closet problems by improving storage placement, keeping walkways clear, and choosing finishes that work well together. Plan Your Master Closet Around Everyday Needs The best master closet ideas combine usable storage, clear walking space, suitable lighting, and an organized layout. A closet that looks great but leaves clothes crammed onto a single rod or forces you to squeeze past an island every morning misses the point. Function should come first. Once the layout works for your daily routine, you can focus on style. A functional closet adapts as your storage needs change. Shoe collections grow, seasonal wardrobes shift, and accessories often pile up faster than you expect. The best designs build in flexibility from the start, like adjustable shelves or modular bins. From full-height cabinets to a dedicated vanity, these ideas can help turn an ordinary closet into a well-organized space. 1. Install Floor-to-Ceiling Cabinets Use the full height of the room to store clothing, bags, bedding, and seasonal items without wasting space above the closet. Cabinets that reach the ceiling turn the empty space above eye level into useful storage. If you have a tall closet with low cabinets, you waste valuable space above each shelf. A pull-down rod or a small step stool makes it easy to reach the top sections without much effort. Best for: Rooms with tall ceilings and limited floor space. 2. Add a Center Island with Drawers A closet island provides extra storage for jewelry, accessories, folded clothing, and everyday essentials while also serving as a useful countertop. It also gives you a place to lay out outfits or fold laundry without leaving the room. Just make sure there’s enough space around the island to move comfortably. A built-in outlet on the island can also power a steamer or charging station right where you get dressed. Best for: Larger closets with enough clearance on all sides. 3. Set Up Separate Zones for Each Person Divide hanging rods, drawers, shelves, and shoe storage so each person has a clearly organized section. Clear zones help cut down on morning clutter and show exactly where everything belongs. This also avoids confusion about whose sweater is on which shelf. Color-coding each side with different hardware or labels makes the split even easier to maintain. Best for: Shared closets used by couples. 4. Use Double Hanging Rods Install one rod above another to create separate areas for shirts, jackets, skirts, and folded pants. This setup doubles your hanging space without taking up more room, which is great for closets with limited wall space. It works especially well if you have lots of shorter items, like blouses and folded trousers. Keep the upper rod at a height you can comfortably reach for daily items without a step stool. Best for: Wardrobes with lots of shorter hanging items. 5. Include Adjustable Shelving Movable shelves let the closet layout change as clothing collections and storage needs evolve over time. A shelf that fits sweaters now can be adjusted for taller storage bins next season. This flexibility keeps your closet useful for years, so you don’t have to redesign it every time your needs change. Adjustable shelving also makes it easier to fit unexpected items, like new boots or heels. Best for: Anyone whose storage needs shift by season. 6. Add Pull-Out Shoe Shelves Slanted or pull-out shelves keep shoes visible, easy to reach, and protected from overcrowding. This storage makes it easy to spot matching pairs at a glance, instead of digging through a pile. It also keeps shoes off the floor, helping your closet stay tidier. A slight downward tilt on each shelf lets shoes rest naturally without sliding off. Best for: Larger shoe collections. 7. Install Glass-Front Cabinet Glass doors protect special clothing and accessories while giving the master closet a clean, display-style appearance. They’re great for handbags, shoes, or seasonal pieces you want to see without opening a door. The display also makes your closet feel more like a boutique than just a storage space. Adding a small interior light behind the glass makes the display pop even more at night. Best for: Displaying handbags, shoes, or special-occasion pieces. 8. Build a Vanity Area A small vanity with drawers, a mirror, and suitable lighting creates a convenient place for makeup, skincare, and grooming. Having your routine in the closet frees up bathroom space and keeps all your supplies together. It also saves you from running between rooms in the morning. A comfortable stool or chair nearby makes the space feel more like a real routine stop rather than an afterthought. Best for: Closets with enough room for a dedicated counter. 9. Add a Storage Bench A padded bench provides comfortable seating, while the hidden storage beneath can hold shoes, bags, or seasonal items. It’s a small upgrade that makes putting on shoes much more comfortable than balancing on one foot. It also gives you a place to sit while you pick out an outfit. A hinged top on the bench makes the storage underneath easy to reach without moving the cushion aside. That means less lifting and less mess when you just need one pair of shoes. Best for: Closets with a bit of extra floor space near the entry. 10. Create a Full-Length Mirror Wall A large mirror makes dressing easier and can help a narrow or small master closet feel brighter and more open. Mirrored surfaces reflect light around the room, which is especially helpful in closets without windows. A full wall of mirrors also makes it easier to check your outfit from every angle.e. Framing the mirror to match your cabinet hardware helps it feel like part of the design, not an add-on. Best for: Small or windowless closets. 11. Use Hidden Laundry Hampers Built-in pull-out hampers keep worn clothing separated and prevent baskets from taking up valuable floor space. Putting hampers in a cabinet or drawer keeps the room tidy, even during busy weeks. It also helps you sort laundry by color or fabric without any extra work. Using two separate hamper inserts makes it simple to split lights from darks right from the start. Best for: Keeping laundry out of sight in a tidy layout. 12. Add Dedicated Jewelry Drawers Shallow-lined drawers with small compartments protect watches, necklaces, rings, and other accessories from damage. Dedicated compartments help prevent tangled chains and lost earrings. A soft lining in each compartment also protects your jewelry’s finish over time. Best for: Larger jewelry or accessory collections. 13. Install LED Closet Lighting Use recessed lights, illuminated hanging rods, or shelf lighting to improve visibility and create a polished finish. Good lighting makes it far easier to tell navy from black on a dark morning. It also helps highlight textures and colors that get lost under dim, standard overhead fixtures. Best for: Closets without natural light. 14. Use Corner Storage Efficiently Corner shelves, rotating racks, or angled hanging sections can turn difficult areas into practical storage. Corners are easy to overlook, but with the right fixtures, they can store more than you might think. A rotating rack, for example, makes it much easier to reach items in a tight corner. Best for: L-shaped or irregularly shaped closets. 15. Sliding Doors Work Best in Small Spaces DIY cabinet doors save floor space because they don’t need clearance to swing into the bedroom or closet. This makes them a smart choice for smaller layouts where every square foot of walking space counts. They also work well near tight hallways where a swinging door would be a hazard. Best for: Small closets with tight floor plans. 16. Add Storage Baskets to Open Shelves Matching baskets keep small items organized while reducing visual clutter on open shelving. Labeling each basket also makes it faster to find scarves, belts, or other small accessories. Best for: Open shelving that tends to look cluttered. 17. Reserve Upper Cabinets for Seasonal Storage Use upper cabinets for luggage, winter clothing, spare bedding, and items you don’t need every day. Keeping these out of reach but still accessible frees up prime storage space for daily essentials. A small step stool nearby makes those upper cabinets easy to access as the seasons change. Best for: Storing items you only need a few times a year. How to Create a More Functional Master Closet Lighting is where many closet designs fall short; without it, colors are harder to read, and sections of the closet become dead zones. Durable flooring and proper ventilation round out the basics, keeping the space easy to maintain and protecting clothing from moisture and odor over time. The finer details are what separate a closet that works from one that just holds things. Drawer dividers, belt racks, valet rods, scarf organizers, and pull-out trays put everything within reach without the usual rummaging. A full-length mirror keeps outfit checks in the room where they belong. Electrical outlets handle steamers, chargers, and a vacuum without running cords to the nearest hallway. Labels on bins and drawers pay off most during seasonal swaps or in shared spaces, where it is easy to lose track of what belongs where. How to Plan a Master Closet Remodel A little upfront planning saves you from having to redo work later, so start with these four steps before picking out cabinets or paint colors. 1. Measure the Available Space: Record the room’s width, depth, ceiling height, door placement, and any windows or outlets. These measurements shape every decision that follows, from cabinet size to lighting placement. 2. Review What You Need to Store: Count hanging clothing, folded items, shoes, bags, accessories, and seasonal belongings. Knowing the actual volume of what needs to fit prevents a beautiful closet from running out of space within a year. 3. Choose a Practical Layout: Select a single-wall, galley, L-shaped, U-shaped, or island layout based on the available room. The right layout depends on the closet’s shape and how much walking space you want to keep open. 4. Set a Realistic Budget: Include cabinetry, labor, lighting, flooring, hardware, and storage accessories in the total cost. Building in a little extra for unexpected changes during the project helps avoid surprises later. Mistakes That Can Ruin a Master Closet Even well-planned closets can run into a few recurring problems, most of which are easy to avoid once you know what to look for. Ignoring vertical storage space wastes the wall height above eye level, which adds up over the life of the closet, while shelves that are too deep hide items in the back and make them hard to reach. Adding an oversized island can eat up the walking space a closet needs to function, and insufficient lighting makes it hard to distinguish colors or find items quickly. Failing to measure clothing and shoes before designing storage often leads to a layout that doesn’t actually fit what’s being stored. Frequently Asked Questions What are the closet design trends for 2026? Closet designs in 2026 focus on built-in storage, warm wood finishes, LED lighting, glass-front cabinets, adjustable shelving, and dedicated spaces for shoes, bags, and accessories. What is a good size for a master closet? A comfortable master closet is typically 100 to 150 square feet, providing enough room for hanging clothes, shelving, drawers, and easy movement around the space. How do rich people organize their closets? Luxury closets are usually organized by clothing type first, then by color. Custom shelves, drawers, display cabinets, and dedicated sections for shoes, bags, and jewelry help keep everything easy to find. Is 3 feet too deep for a closet? No. A 3-foot-deep closet works well for standard hanging clothes and shelving. It offers enough depth for hangers while keeping items easy to reach. Should I organize my closet by color or type? Start by grouping clothing by type (shirts, pants, dresses, jackets), then arrange each group by color. This makes finding outfits quicker while keeping the closet neat and visually organized. Design a Closet That Fits Your Lifestyle A great master closet doesn’t have to include every idea on this list. The best setup is the one that fits your space, storage needs, and daily routine. Pick the features that match how you actually get dressed and how much room you have, then build the rest of the layout around those priorities. Whether that means a full island setup or just a smarter shelf and better lighting, small, well-planned changes add up to a closet that feels organized, comfortable, and easy to use.
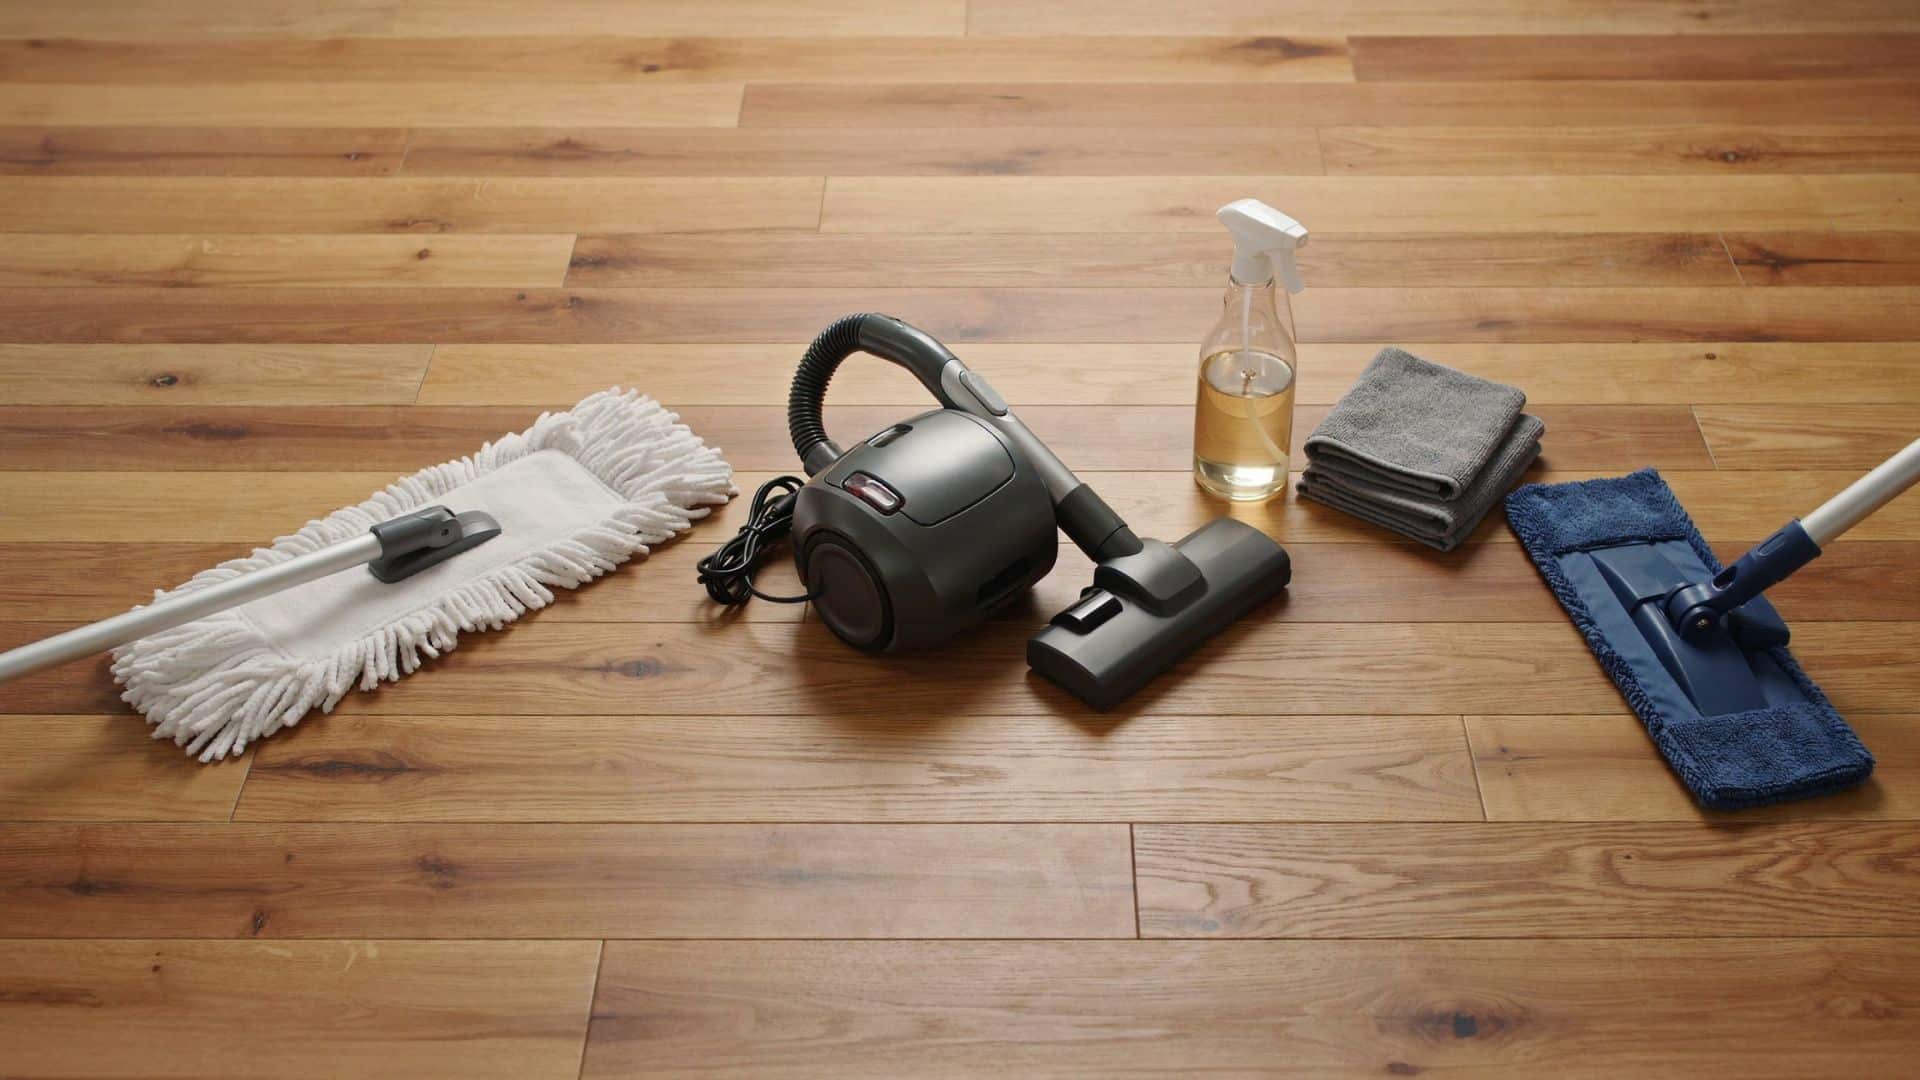
Hardwood floors add warmth and value to a home, but their finish can wear down quickly without proper care. Dust, grit, excess moisture, and the wrong cleaning products often cause scratches, dullness, and surface damage. Keeping hardwood floors clean starts with simple habits. Remove debris before mopping, use a cleaner suited to the floor’s finish, and avoid soaking the wood. The right tools and cleaning routine help protect the finish while keeping the surface looking fresh. Essential Tools and Cleaner for Hardwood Floors Before cleaning hardwood floors, gather the right tools and products to avoid scratches, residue, and moisture damage. The items below help remove dirt safely while protecting different floor finishes. Tool / Care Item How to Use It Microfiber mop Picks up dust and grime without scratching the finish, making it a safe choice for regular hardwood floor cleaning. Soft-bristle broom and microfiber cloths Remove loose dirt and handle spills, corners, and small cleaning areas quickly. Hardwood-safe vacuum Use the bare floor setting, turn off the beater bar, and choose soft attachments to prevent scratches and scuffs. pH-neutral hardwood cleaner Choose a water-based cleaner that matches your floor’s finish. Avoid harsh chemicals and residue-forming products that can dull or damage the surface. Know your floor finish. Polyurethane floors handle light damp cleaning, while oil, wax, and water-based finishes require specific products and care methods. Control moisture Use a spray bottle or a lightly damp mop instead of soaking the floor, as excess water can cause swelling or damage. Using the correct tools and controlling moisture make routine cleaning safer and more effective. Always match your cleaning method to your floor’s finish to prevent unnecessary damage. How to Clean Hardwood Floors Step by Step Before you start cleaning, it helps to follow the right order to protect your hardwood finish. The process begins with removing dirt and buildup, then moves through careful mopping, drying, and maintenance steps that keep floors looking clean without exposing them to excess moisture. 1. Remove Dirt and Stubborn Buildup First, remove dust, pet hair, and loose debris using a microfiber mop, soft broom, or hardwood-safe vacuum. For high-traffic areas, use a microfiber cloth with hardwood cleaner to lift stubborn dirt. Gently clean between floorboards with a soft attachment, avoiding excess moisture that can seep into seams. 2. Prepare the Cleaning Solution Always follow the cleaner’s instructions instead of adding extra product. Too much solution can leave behind a sticky film that attracts more dirt and makes the floor look dull. Spray a light mist over a small area rather than soaking the surface. 3. Damp Mop the Floor Use a mop that feels slightly damp, not wet. Work in small sections so moisture does not sit on the wood for too long. Rinse the mop regularly, or replace the microfiber pad when it gets dirty, to avoid spreading grime across the floor. 4. Dry the Floor Properly After cleaning each section, wipe away leftover moisture with a dry microfiber cloth or make a dry pass with your mop. Removing excess water helps protect seams and prevents issues like swelling or warping. 5. Restore Shine After Cleaning If your hardwood looks dull after cleaning, the issue may be a worn finish rather than leftover dirt. Hardwood polish can temporarily improve the appearance, but it does not repair damaged coatings. Floors with heavy wear may need professional refinishing to restore their original look. 6. Maintain Clean Floors Between Deep Cleanings Regular maintenance keeps hardwood floors cleaner and reduces the need for frequent wet cleaning. Sweep high-traffic areas often, place mats near entrances, use furniture pads to prevent scratches, and clean spills as soon as they happen to protect the finish. How to Clean Different Types of Hardwood Floors Sealed Hardwood Floors: Most modern hardwood floors are sealed with polyurethane. Use a damp mop with a pH-neutral cleaner and avoid harsh products that can damage the finish. Unfinished Hardwood Floors: Without a protective coating, hardwood is more susceptible to moisture damage. Use dry cleaning methods and avoid excess water to prevent stains or warping. Engineered Hardwood Floors: The thin layer of real wood over a composite core requires careful moisture control. Use minimal liquid and avoid soaking the surface. Older Hardwood Floors: Older finishes may react differently to cleaners. Test products in a hidden area first and use gentle cleaning methods on worn or aged floors. What Not to Use on Hardwood Floors Before cleaning hardwood floors, knowing what to avoid is just as important as knowing what to use. Certain products and cleaning methods can damage the finish, trap moisture, or create buildup that affects the floor’s appearance over time. Keep these common mistakes in mind to protect your hardwood investment. Avoid Excess Water: Standing water can seep into seams, causing swelling, warping, or cupping. Use a lightly damp mop instead of a wet one. Avoid Steam Cleaners: Steam adds heat and moisture that can penetrate between boards, damaging the wood or subfloor. Avoid Harsh Chemicals: Bleach, ammonia, and abrasive cleaners can dull or strip the hardwood finish. Avoid Wax and Oil-Based Products on Certain Finishes: These products can leave buildup on modern polyurethane floors and affect future refinishing. Always check your floor’s finish first. Common Mistakes When Cleaning Hardwood Floors One of the most common hardwood floor cleaning mistakes is mopping before removing dust and debris, as grit can scratch the finish during cleaning. Using the wrong mop can also cause problems, with abrasive materials damaging the surface and overly wet mops increasing the risk of moisture. Avoid cleaning with water too frequently, as repeated exposure to moisture can wear down the finish over time. Clean spills quickly, since liquids left sitting can seep into the wood and cause water stains or surface damage. Conclusion Keeping hardwood floors looking good comes down to gentle tools and the right cleaner for your finish. Keeping moisture to a minimum every time you clean matters just as much. None of this requires anything complicated, just a routine you actually stick to. A little consistency now saves you from a much bigger refinishing job later. It keeps the floor looking like the investment it was. Frequently Asked Questions What is the best thing to wash your hardwood floors with? Use a microfiber mop with a pH-neutral hardwood floor cleaner recommended for your finish. Avoid excess water and harsh cleaners that can damage the protective coating. Can I use Swiffer wet cloths on hardwood floors? You can use Swiffer wet cloths on some sealed hardwood floors if you use them lightly, but avoid leaving moisture behind. Always check your flooring manufacturer’s recommendations first. What do professional cleaners use on hardwood floors? Professionals typically use microfiber mops and hardwood-safe, pH-neutral cleaners designed for the floor’s specific finish. They focus on low-moisture methods to protect the wood. What is the best homemade cleaner for hardwood floors? A simple, damp microfiber mop is often the safest homemade option for many sealed hardwood floors. Avoid vinegar mixtures, as they may dull or weaken some finishes over time. Is Murphy’s Oil Soap good for wood floors? Murphy’s Oil Soap can be used on some finished wood surfaces, but it may leave residue on certain hardwood floors. Check your finish type and the manufacturer’s care instructions before using it regularly.
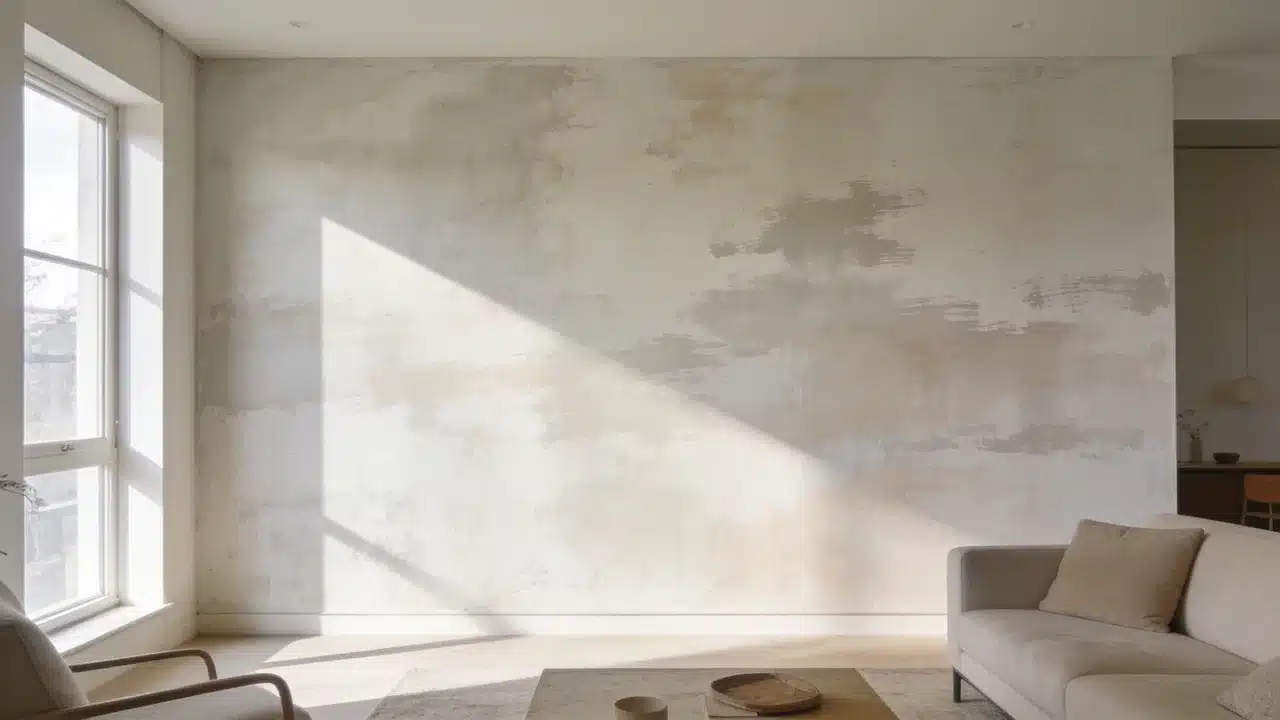
Limewashing walls starts with preparing the surface and applying thin mineral-based layers with a block brush. Random crisscross strokes create the cloudy variations that define this finish. The appeal comes from how the color changes as lighting shifts throughout the day. A wall that reads soft white at noon can look warm and shadowed by late afternoon. After a decade working with color, I have found that this changing appearance is one reason homeowners connect with limewash. The process involves preparing the wall, applying multiple coats, and caring for the finished surface. What is Limewash Paint and How Does It Work? Limewash is one of several textured wall finishes unlike regular paint, which creates an even surface with a consistent sheen, it’s applied in thin, semi-transparent layers that leave visible brushstrokes. Limewash is applied in thin, semi-transparent layers, allowing brushstrokes and color variation to remain visible. The brushwork stays visible in the final coat. That variation is the point. Color behavior matters here. The paint appears darker when wet and noticeably lighter once dry. Adding extra paint too early can reduce the soft variation that gives limewash its character. Let each layer dry fully before assessing the wall. Tools and Materials Needed to Limewash Walls Collect all materials before starting. Limewash dries differently from standard wall paint, so stopping halfway across a wall can create visible transition marks. Item Purpose Limewash paint Creates the textured finish Mineral primer Helps limewash bond with walls Block brush Creates the signature movement Drop cloth Protects floors Painter’s tape Protects edges Stir stick Keeps paint consistent Spray bottle Helps maintain a wet edge How to Prepare Walls for Limewashing Proper preparation helps limewash absorb evenly and creates a more consistent finish. Skipping any of these steps affects the final result. Clean and Repair the Wall: Remove dust, grease, and dirt with a damp cloth and mild cleaner. Fill holes with patching compound. Let everything dry before priming. Prime the Surface: New drywall requires mineral primer. Previously painted walls need primer only if the existing finish is glossy or in poor condition. Highly porous surfaces can absorb limewash quickly, resulting in uneven color if not properly prepared. Test the Color and Finish: Apply a sample patch to the actual wall. This finish reads differently at 7 am than at 7 pm. Check both before committing. How to Limewash Walls Step by Step Follow the order carefully because preparation, drying time, and application technique all affect the final appearance. Step 1: Prepare the Limewash Paint Stir thoroughly for at least two minutes before use. Follow the product’s dilution instructions if thinning is required. Pour the paint into a clean application bucket and stir again. Continue stirring during application to maintain an even consistency. Settled paint creates uneven coverage and color variation across the wall. Step 2: Apply the First Coat Using the Limewash Technique Load the block brush about a quarter of the way up the bristles. Apply using loose, unstructured crisscross strokes from the center of each section. Keep a wet edge throughout and work in small sections. Deposit most of the paint at the center and feather outward to blend the edges. Do not aim for full coverage on the first coat. Step 3: Add Additional Layers for Depth Let the first coat dry fully before adding a second coat, typically 12 to 24 hours, depending on humidity and temperature. The wall will look darker when wet and lighter when dry. Apply each additional coat using the same crisscross technique. Two coats suit most walls. A third thin coat adds consistency where needed. Step 4: Finish, Cure, and Evaluate the Wall Remove painter’s tape once the final coat dries. Stand back and assess the full wall in both morning and evening light before deciding if another coat is needed. Allow full curing before touching the surface. Mist lightly if the manufacturer recommends it. A matte sealer is optional but adds protection in high-traffic areas. Limewash Wall Care and Maintenance Limewash walls require less maintenance than many traditional painted surfaces. Keeping water exposure to unprotected areas to a minimum is what matters most. For cleaning, use a dry or barely damp cloth. Strong cleaners strip the finish. For repairs, apply a thin layer of the original product over the affected area. Feather the edges using the same crisscross approach as the original coat. Sealing is optional. A matte sealer adds protection in high-traffic areas. Without sealer, the surface may change gradually as it ages. How to Choose Limewash Colors for Different Rooms Limewash changes with lighting, so a shade can look different throughout the day. This helps reveal how the color responds to morning and evening light. Bedrooms: Soft neutrals like warm white, beige, and muted taupe work well. These shades create a calm backdrop while keeping the limewash texture visible. Living Rooms: Warm earth tones such as sand, clay, soft brown, and muted olive pair well with natural materials and add depth to larger spaces without feeling heavy. Small Rooms: Lighter shades like soft cream, pale beige, and light gray can help small rooms feel more open. Always test the color first, because limewash can appear stronger across an entire wall. Low-Light Rooms: Avoid very cool shades in rooms with limited sunlight, as they can make the space feel cold. Warmer neutrals and earthy colors usually work better under softer lighting. Can You Paint Over Limewash? You can paint over limewash after checking the surface condition and preparing it for the new coating. Run a hand over the existing wall. If material transfers, the layer must be stabilized before anything is placed on top. Remove loose or dusty limewash, or stabilize it before applying primer and new paint. Clean the wall with a damp cloth, then let it dry completely. Apply a suitable primer before the new paint. Water-based paints tend to work over primed limewash. Oil-based products need a compatible intermediate primer. Mistakes to Avoid When Limewashing Walls These common issues usually arise from problems during preparation or application. Mistake Cause Fix Finish looks streaky Too much paint applied Use thinner layers Texture looks flat Not enough stroke variation Add another coat Paint color does not stick Poor surface preparation Prime correctly first Color looks wrong Assessed before full drying Wait until completely dry Application lines visible Wet edge lost mid-wall Work faster and maintain wet edge Frequently Asked Questions What are The Disadvantages of Limewash Paint? Limewash may require more preparation than regular paint, and the final color can be difficult to judge until each coat has fully dried. Does Limewash Paint Need a Primer? Primer is recommended on new drywall, glossy surfaces, and highly porous walls to improve adhesion and create more even absorption. How Long Does Limewash Last on Interior Walls? A properly applied limewash finish can last for years indoors when protected from excessive moisture and cleaned gently. Can You Apply Limewash with a Roller? A roller can speed up coverage on large areas, but a block brush creates the natural variation and texture associated with limewash. What Surfaces Can be Limewashed? Limewash works best on porous surfaces such as plaster, brick, and mineral-based walls that allow the finish to be properly absorbed. Happy Reading The process for limewashing walls is more forgiving than most paint techniques. Variation is the point, and a perfectly even coat works against the finish. Get surface preparation right, use the crisscross stroke, and let each layer dry before assessing the color. The finish looks different at 7 am than at 7 pm. That movement is part of what makes it worth the effort. Try a small section first to test the technique. Share the result in the comments once done.
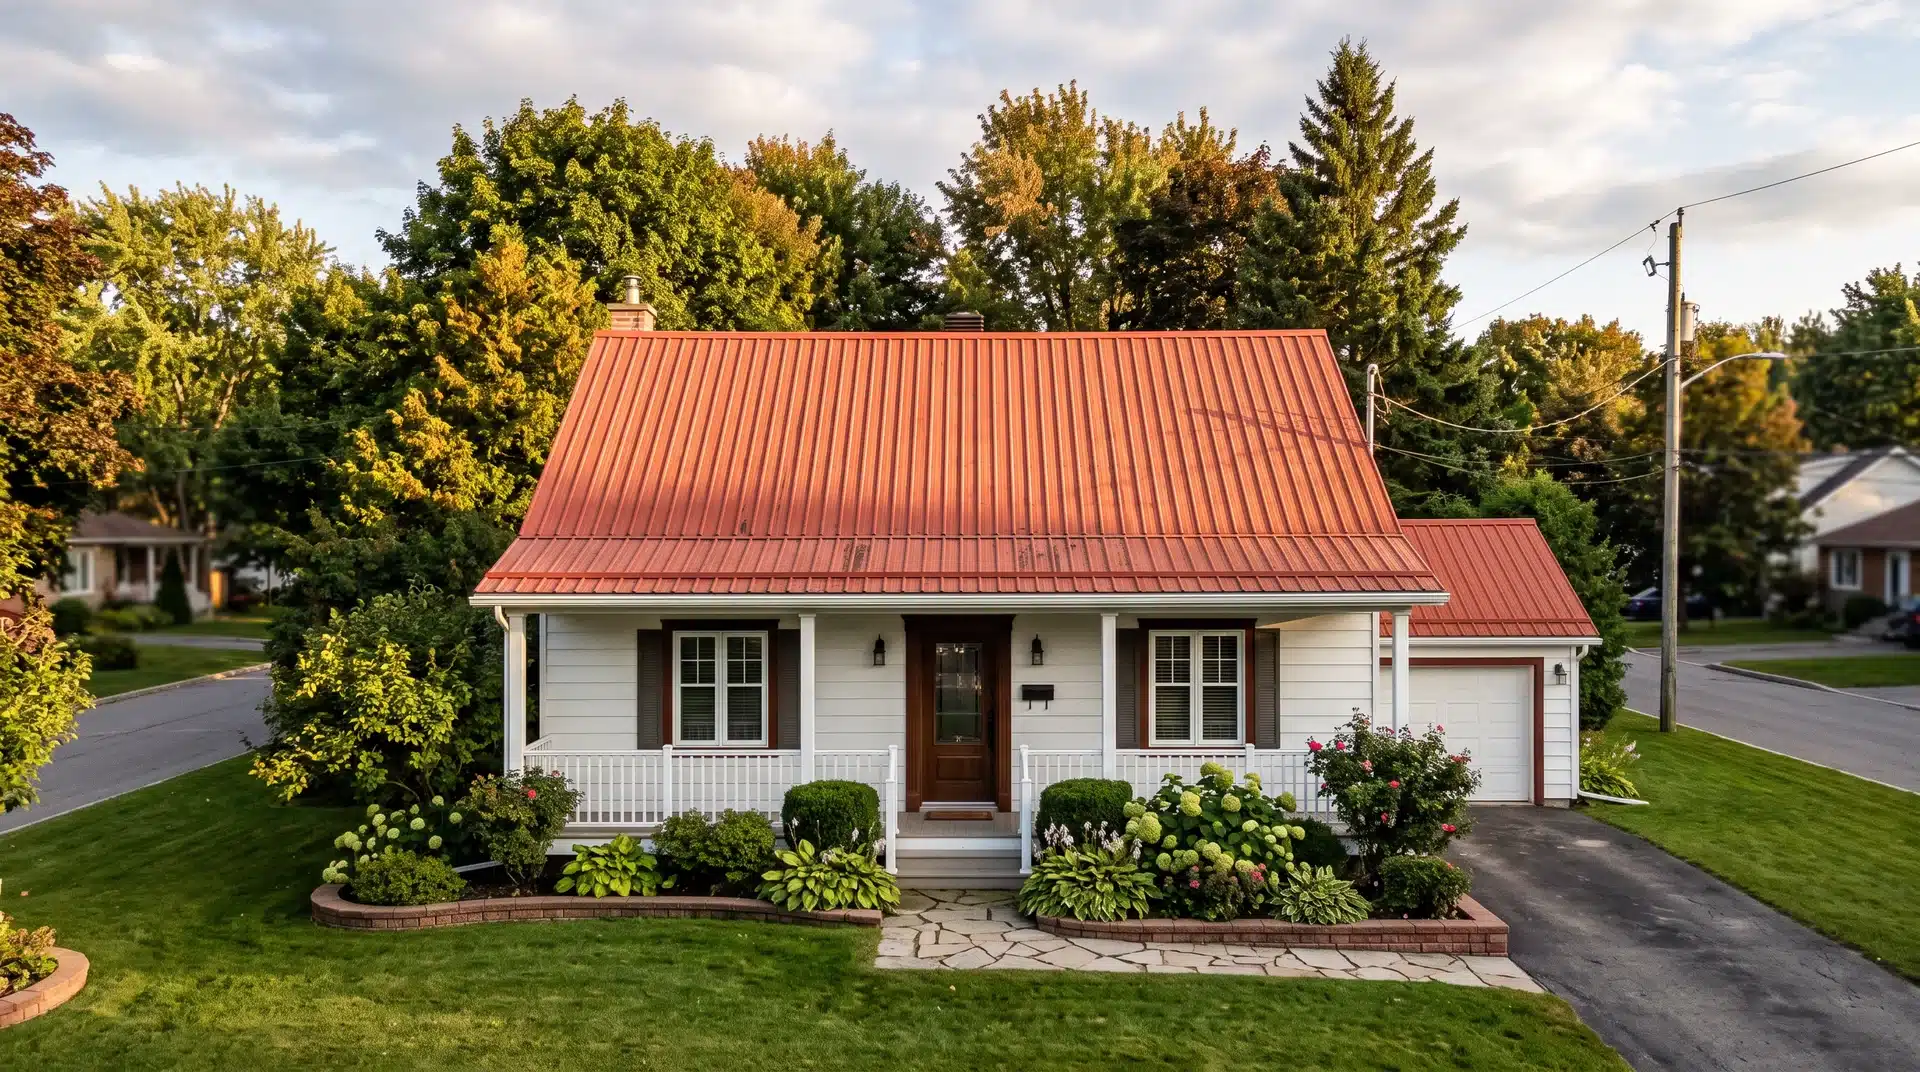
Quick Answer: Yes, painting a metal roof works well when done right. Remove rust first, apply a primer matched to your roof’s metal type, then finish with UV-resistant paint. Proper prep adds a decade or more of life for a fraction of the replacement cost. I’ve painted two metal roofs. The first looked great for eight months and then started peeling at every seam. I had skipped the primer and rushed the rust removal. The second one is still holding up years later. The difference was entirely in how I prepared the surface. So when people ask me whether you can paint a metal roof, the answer is yes, and it is one of the better calls you can make if your roof is starting to fade or showing rust. It costs 40 to 60 percent less than a full replacement and adds 10 to 15 years to the roof’s life. That’s the real advantage metal has over shingles when you’re deciding what to do with an aging roof. Do the prep right. That is exactly what this blog is for. Tools and Materials for Painting a Metal Roof I showed up on my first metal roof paint job without the right primer. I climbed back down, drove to the hardware store, and lost half a day. Tool / Material Purpose Pressure washer Remove dirt, mold, mildew, and loose paint Wire brush and sandpaper (80-grit) Remove rust and smooth rough spots Paint scraper Strip flaking old paint from the surface Safety harness, non-slip shoes, gloves, eye protection Personal protection on the roof Rust converter or rust-inhibiting solution Stop rust spreading under new paint Metal-specific primer (rust-inhibiting, aluminum, or galvanized depending on roof type) Bonds new paint to the metal surface Acrylic latex paint formulated for metal roofing (UV-resistant, water-repellent) Main protective and weatherproofing coat Paint sprayer Even fast coverage on large roof areas Roller and brush Detail work, edges, seams, and corrections Exterior caulk and sealant Seal gaps, joints, and open seams Drop cloths and masking tape Protect gutters, fascia, and trim Ladder with stabilizer Safe, stable roof access How to Paint a Metal Roof the Right Way Preparation is 70 percent of this job. The steps below are in the order they need to happen. Skip one or reorder them, and you are looking at a two-year finish instead of a fifteen-year one. Step 1: Set Up Safety Equipment and Inspect the Roof Before anything else, anchor a safety harness to a structural point on the roof. Non-slip shoes are not optional on any metal surface, wet or dry. Once you are safe, walk the entire roof and look for rust spots, loose or bent panels, holes, cracked seams, and areas where old paint is peeling. Note every problem before you clean. Paint does not fix structural damage. It traps moisture against it, which accelerates the very corrosion you are trying to stop. If your roof is new, wait at least six months before painting. Some factory coatings come with a warranty that can be voided if you paint too early. Step 2: Clean the Entire Roof Surface A pressure washer removes the bulk of the work in a fraction of the time a brush would take. Run it across the full surface to lift dirt, bird droppings, mold, mildew, and algae. Follow with a wash using a diluted trisodium phosphate solution or a dedicated roof cleaner to cut through grease and oil residue. Rinse completely. Soap residue left behind prevents primer from bonding and is one of the most common causes of paint failure that homeowners never trace back to the cleaning step. The roof needs to be completely clean before anything else happens. Step 3: Remove Rust and Strip Flaking Old Paint Work through every rust spot with a wire brush, 80-grit sandpaper, or an angle grinder fitted with a wire wheel. Remove all loose, flaking, and bubbling rust down to bare metal. A paint scraper handles old paint that is lifting along seams and edges. Do not paint over rust under any circumstances. Rust sealed under new paint does not stop. It spreads, and within months, it pushes the new paint off from underneath. I know it is tempting to rush through this one. Don’t. Every minute you spend here adds months to the finish. Step 4: Apply Rust Converter to Remaining Rust After rust removal, any area where rust has penetrated deeply needs chemical treatment before primer is applied. A rust converter reacts with iron oxide, converting it into a stable compound that stops further corrosion and provides a surface for primer to bond to. Apply with a brush and allow it to dry per the manufacturer’s instructions, which is typically around 24 hours. Do not rush this step on older roofs or roofs with visible corrosion pitting. The converter needs time to complete the chemical reaction before it can hold anything on top of it. Step 5: Repair Damage and Seal all Seams and Joints Fill small holes with a metal roofing patch or a roof repair sealant rated for exterior use. Run a bead of exterior caulk along all open seams, panel overlaps, around fasteners, and at every point where the roof meets flashing or trim. Allow all repairs and caulk to cure fully before moving to primer. Paint applied over uncured sealant wrinkles and fails. This step protects the roof’s waterproofing as much as the paint does, and skipping it leaves the roof’s most vulnerable points exposed to water entry, no matter how good the paint job looks. Step 6: Let the Roof Dry Completely Apply primer only to a dry roof. Any moisture trapped underneath creates bubbles, blistering, and adhesion failure that show up within the first season. Ideal conditions are 50 to 85°F, low humidity, and no rain forecast for at least 24 hours. Avoid painting on metal in direct midday sun: the surface heats up quickly, causing the primer to skin over before it penetrates. Wait at least 24 hours after pressure washing before you prime. In humid climates like the Southeast, I would wait 48 hours to be safe. Step 7: Apply Metal-Specific Primer This is the step I see skipped most often, and it is the single biggest reason DIY metal roof paint jobs fail early. I skipped it on my first roof and had to redo the whole thing. The first selection depends on your specific roof type. Steel roofs need a rust-inhibiting primer. Aluminum roofs have a naturally slick surface and require an aluminum-bonding primer: standard primers do not adhere to aluminum without it. Galvanized metal has a zinc coating that actively prevents standard primers from bonding. Use a galvanized metal primer specifically, or the paint will peel within months. Apply with a sprayer for full coverage, a roller for flat runs, and a brush along seams and edges. Allow the full cure time listed on the label before touching it. Step 8: Choose Your Paint and Check Weather Conditions The best paint for a metal roof is a 100% acrylic latex formula designed for metal roofing. UV-resistant and water-repellent versions protect against the two conditions that degrade metal roofs fastest. Oil-based paints are more durable but harder to apply and dry significantly slower. Color matters more than you would expect on a metal roof. Light colors reflect heat and reduce cooling costs, making them a practical choice in warmer US climates like the South and Southwest. Dark colors absorb heat and can noticeably raise attic temperatures. Do not paint outside the 50 to 85°F window, in wind, or when rain is expected within 24 hours of application. Step 9: Apply the First Coat of Metal Roof Paint Start at the peak and work downward on every pass. Working downward keeps overspray off already-painted surfaces and prevents you from stepping on wet paint. A sprayer provides the most even coverage on large roof areas. Follow with a roller to work paint into seams and around fasteners where a sprayer leaves thin spots. Apply thin, even coats. Thick coats sag, drip, and take far longer to dry without adding any extra protection. Allow the first coat to dry fully before applying the second, which typically takes four to eight hours, depending on the product and conditions. Step 10: Apply the Second Coat and Do a Final Inspection A second coat is not optional. One coat on a metal roof does not provide adequate UV or moisture protection, no matter how thick it is. Repeat the peak-down method. Once the second coat has dried for 24 to 48 hours, do a walk-through inspection of the entire roof. Look for thin spots, missed seams, runs, and any places where the primer is still showing through. Touch up with a brush before calling it done. A properly painted metal roof lasts 10 to 15 years. You will know it is time to repaint when you start seeing fading, peeling, or rust spots returning. Pros and Cons of Painting a Metal Roof Before you climb up there, here is a look at what you are getting into. Pros Cons Costs 40 to 60 percent less than a full roof replacement Prep work is time-consuming, especially rust removal Extends roof life by 10 to 15 years when done correctly The wrong primer for your roof type causes early peeling Protects against UV damage, rust, and corrosion Steep or multi-story roofs require a professional Reflective paint options reduce cooling costs in summer Paint can trap moisture if applied over unrepaired damage Refreshes curb appeal and updates exterior color Needs repainting every 8 to 15 years, depending on climate Can be a DIY project on single-story roofs Falls from roofs are among the most common home improvement injuries Stops existing rust from spreading when treated correctly New roofs with factory coatings may have warranties that painting voids Conclusion I’ve made most of the mistakes on a metal roof paint job. I skipped the primer, rushed the rust removal, and painted in the heat of the day. Every single one cost me time and money. The version that holds up for a decade is not complicated. Inspect before you paint, treat every rust spot before you prime, and give each coat the full time it needs to dry before applying the next. That is it. A painted metal roof, done with proper prep, lasts 10 to 15 years and costs a fraction of the cost of a replacement. Do it without the prep, and you are doing it twice. The prep is the job. Everything else is just paint. Frequently Asked Questions How long does paint last on a metal roof? Most painted metal roofs last 10 to 15 years with proper preparation and quality materials. Regular maintenance and early touch-ups on faded or peeling areas can extend that further. Can you paint a metal roof yourself, or do you need a professional? A single-story metal roof with a moderate pitch is manageable as a DIY project if you follow the prep steps and use the right safety equipment. Can you paint a metal roof in winter? Not in most of the US. Paint and primer need temperatures between 50 and 85°F to adhere and cure properly. Applying paint below 50°F results in poor adhesion, slow drying, and a finish that fails sooner than it should.
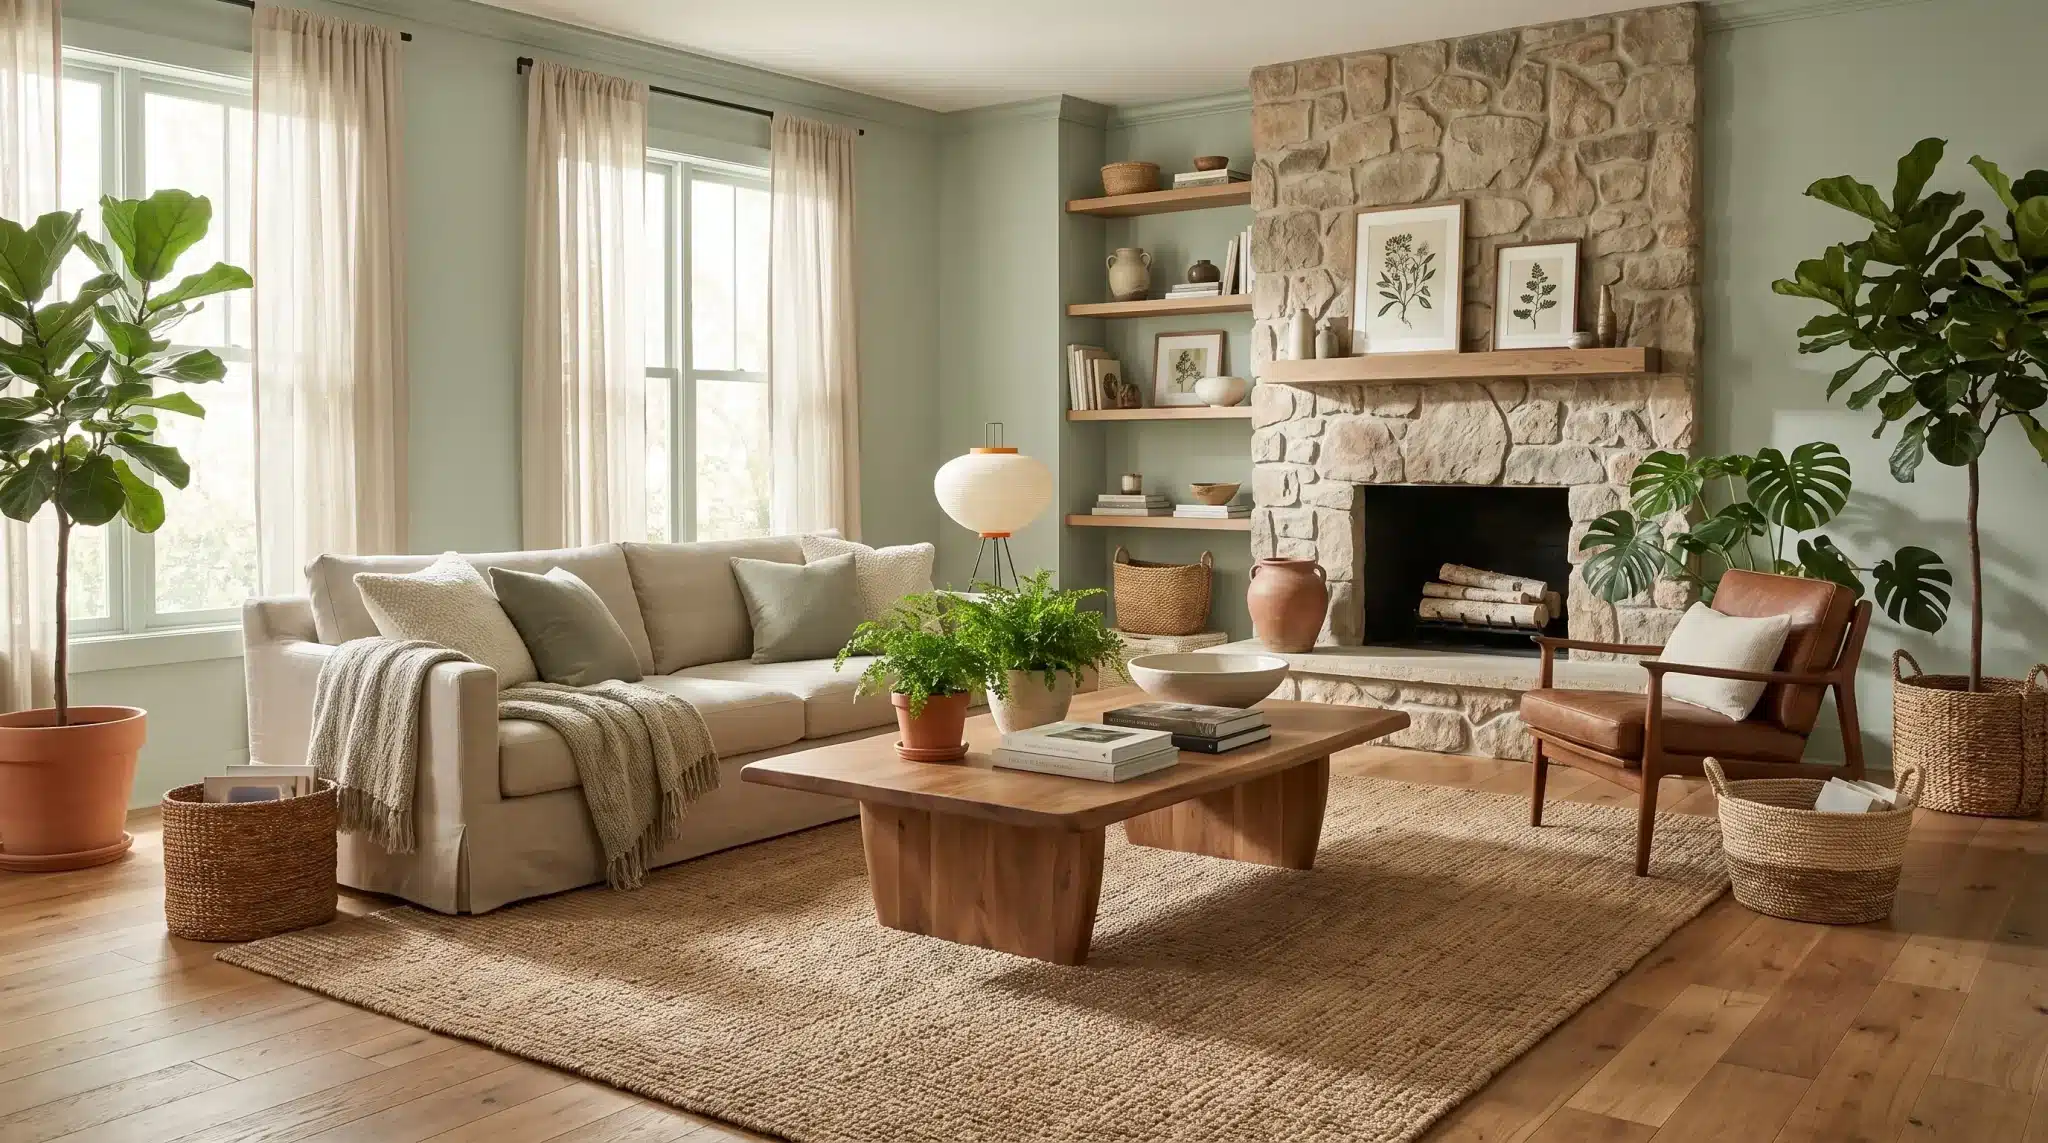
My grandma once painted her kitchen a green so bright it looked like a lime popsicle. She loved the idea of adding color, but within a month, she was ready to repaint. That memory stayed with me for years and made me hesitant about green walls. Then I came across Benjamin Moore Saybrook Sage, and it completely changed how I saw green paint. This is a soft, muted sage that feels calm, natural, and timeless. It brings a touch of the outdoors inside without making the entire room revolve around the color. Choosing the right green is about more than liking a paint chip. Undertones, lighting, flooring, and trim all influence how the shade comes to life in a space. Saybrook Sage works because it brings color in a way that still feels comfortable and easy to live with. What Makes Benjamin Moore Saybrook Sage Stand Out? Saybrook Sage HC-114 comes from Benjamin Moore’s Historical Colors collection, and it has a quiet, grounded quality that works in both older homes and newer spaces. Unlike brighter greens that demand attention, Saybrook Sage has a soft, grayed-down look that blends naturally into a room. It adds color while still letting your furniture, textures, and decor take the spotlight. Feature Details Color Name Saybrook Sage Code HC-114 Collection Historical Colors LRV Around 45 to 46 Color Family Green Undertone Soft gray-green with a touch of yellow LRV, or Light Reflectance Value, shows how much light a paint color reflects back into a room on a scale from 0 to 100. With an LRV around45 to 46, Saybrook Sage sits comfortably in the medium range. It has enough depth to feel intentional without becoming too dark or heavy. The result is a balanced sage that feels fresh in bright rooms and cozy in softer lighting. Why Does Saybrook Sage Feel So Calm and Natural? Saybrook Sage connects a room to nature without turning it into a themed space. Think of dried herbs, olive leaves, and weathered stone, all soft and worn by time. The gray running through Saybrook Sage takes the edge off the green, so it never feels artificial or sharp. That softness is what makes everyone pick it when they want personality on the walls without a bold statement. This color complements a room instead of overpowering it. Think of a living room with a linen sofa and a wooden coffee table. Saybrook Sage sits behind those pieces like a quiet backdrop. It lets the textures do the talking. In a bedroom, paired with soft cotton bedding and warm lamp light, it feels like a place to rest. In a home office, it creates a calm backdrop without feeling cold or plain. Is Saybrook Sage Too Green? You are probably wondering if Saybrook Sage will feel like a true sage green or if it will lean too far into green once it reaches your walls. One reason it works well is that it stays on the softer side. Saybrook Sage leans more toward gray than green in most spaces, and that muted quality is what keeps it feeling calm and natural rather than bright or artificial. The finishes around it will still influence the way it reads. Warm wood tones can bring out the earthy side, while crisp whites and cooler finishes can make the gray influence stand out more. In bright natural light, Saybrook Sage reveals a fresher side, with sunlight making the green feel lighter and more natural while keeping its soft, muted character. In lower light, the shade becomes deeper and quieter, with gray undertones becoming more noticeable. Warm lighting can bring out subtle olive tones, while cooler light may emphasize its gray influence. Testing a sample on your wall is the best way to see how it works with your room’s lighting, flooring, and finishes. Where Does Saybrook Sage Work Best? Saybrook Sage is one of those colors that can move comfortably from room to room. It does not need a specific style or a perfect setting to work, but certain spaces really bring out its personality. The fun part is seeing how differently it can feel depending on what surrounds it. In one room, it feels warm and earthy. In another, it feels calm and refreshing. Here are the spaces where Saybrook Sage naturally fits in. 1. Living Rooms with Warm Textures Saybrook Sage works especially well in a modern living room where natural materials and simple design elements create a balanced feel. Wood furniture, linen upholstery, woven rugs, and soft textures bring out the earthy side of the green while adding warmth and comfort without making the space feel overly styled. Used as the main wall color, Saybrook Sage creates a calming backdrop for a modern living room with layered textures, natural finishes, and pieces that add character over time. 2. Kitchens with Sage Green Cabinets A kitchen is one of the places where Saybrook Sage can make a real impact. On islands or cabinets, it adds color while still keeping the space feeling timeless and easy to live with. Pair it with white countertops, warm wood shelving, brass hardware, or a marble backsplash, and the green starts to feel balanced rather than trendy. It gives the kitchen personality without taking over the entire room, and the right approach topainting kitchen cabinets can help this soft green finish look even more polished. 3. Bedrooms with a Softer Palette Bedrooms are a natural match for Saybrook Sage because the color has a quiet, calming quality. Neutral bedding, soft lighting, and natural fabrics like cotton or wool create a space that feels comfortable and settled. It adds enough character to make the room interesting while still keeping the peaceful feeling you want in a place meant for rest. 4. Bathrooms and Smaller Spaces Saybrook Sage can be a beautiful choice for bathrooms, powder rooms, and entryways where you want a little more personality. It pairs nicely with white tile, natural stone, and brushed metal finishes. Smaller spaces are a great place to experiment with this shade because the color feels intentional without overwhelming the room. The result is fresh, inviting, and full of character. Is Saybrook Sage Good for Exteriors? Painting a house green can feel like a big risk. Saybrook Sage offers a gentler way to try it. Its muted, gray-green quality reads as sophisticated rather than loud from the street. Outdoor light changes throughout the day, so the color shifts slightly from morning to evening. That shift is part of what makes it feel connected to the surrounding landscape. With natural materials like cedar shakes, stone foundations, and brick walkways, Saybrook Sage creates a cohesive exterior by enhancing its earthy, muted tones. White trim can brighten the shade and create a classic look, while darker accents such as charcoal, black, or deep navy add contrast and depth without overpowering the soft green. What Colors Pair Well with Saybrook Sage? Saybrook Sage is flexible, but the surrounding colors determine whether it feels cozy, fresh, or dramatic. The same green can feel softer with warm whites, more natural with earthy textures, or more dramatic with broader accents. The good thing about this shade is that it already has a muted, balanced quality, so you do not need to fight against it. A few thoughtful choices can help bring out the side of Saybrook Sage that best fits your home. Warm White Trim Colors Warm whites are one of the easiest ways to make Saybrook Sage feel comfortable and inviting. Benjamin Moore White Dove creates a soft, classic contrast, while Simply White adds a little more brightness. For a cleaner, sharper look, Chantilly Lace creates a crisp edge that works well in more modern spaces. Beyond trim, these whites also work beautifully on ceilings, cabinets, and larger surfaces when you want the room to feel fresh without losing the green’s warmth. Natural Materials and Earthy Tones Saybrook Sage pairs naturally with materials that bring warmth and texture into a room. Oak, walnut, rattan, linen, leather, and stone all complement its earthy side and keep the space feeling grounded. Decor colors like warm beige, soft tan, cream, and muted brown work especially well here. These tones help the green feel connected to nature while adding layers that make the room feel comfortable rather than flat. Deeper Colors for Contrast If you want Saybrook Sage to feel a little more dramatic, deeper colors can add beautiful contrast. Shades like Hale Navy, Kendall Charcoal, and Essex Green work well on doors, built-ins, furniture, or accent walls. You can also bring in darker decor through charcoal seating, navy textiles, black metal accents, or deep wood finishes. These richer elements add depth to the room while letting the softness of Saybrook Sage remain the foundation. Saybrook Sage Compared to Other Benjamin Moore Greens Choosing between sage greens can be tricky because many shades have a similar calm, nature-inspired feel. The small differences in undertones and depth are what make each one feel different once it is on your walls. Saybrook Sage sits in a comfortable middle ground. It has enough color to add personality, but it stays muted enough for everyday spaces. Paint Color LRV Undertone Overall Feel October Mist Lighter Green with gray Fresh, gentle, slightly cooler Pale Smoke Lighter Gray with faint green Airy, subtle, almost neutral Healing Aloe Similar range Green with blue hints Fresh, coastal, cooler Saybrook Sage and October Mist are close in feel, but October Mist is lighter and softer, while Saybrook Sage feels slightly warmer and more grounded. Against lighter shades like Pale Smoke and Healing Aloe, it brings more warmth and earthy character. Mistakes to Avoid When Using Saybrook Sage Saybrook Sage is a fairly easy color to live with, but a few small choices can change how it feels in your home. Taking a little time before painting can help you avoid surprises once the color is on the wall. The biggest mistake with Saybrook Sage is skipping the natural light test. A shade that feels perfect in the morning can tell a completely different story by evening. It is also worth checking how it works with your existing floors, furniture, and trim. A white with the wrong undertone or too many competing green shades nearby can make the room feel less balanced. A sample on your own wall, viewed at different times of day, will always tell you more than a paint chip ever could. Is Saybrook Sage the Right Green for Your Home? Saybrook Sage is a great choice if you want to bring color into your home without going too bold. Its soft, muted quality works beautifully for nature-inspired spaces, homes with warm textures, and anyone looking for an alternative to traditional neutrals. It may not be the right fit if you prefer a brighter green, a cooler modern shade, or a true neutral. Like any paint color, the final look depends on your lighting, finishes, and surroundings. Before committing, test a sample on your own walls and watch how it changes throughout the day. The right color is the one that feels natural in your space. Frequently Asked Questions Is Benjamin Moore Saybrook Sage a Good Whole Home Color? Yes, its muted quality makes it easy to carry through multiple rooms without feeling repetitive. It shifts slightly with different lighting, which keeps each room feeling distinct even with one shade throughout. Does Saybrook Sage Work with Dark Wood Furniture? Yes, dark wood tones like walnut bring out the warmth in Saybrook Sage. The pairing feels grounded and traditional rather than mismatched. Is Saybrook Sage a Good Front Door Color? Yes, Saybrook Sage can work beautifully as a front door color, especially on homes with natural stone, brick, or wood details. If you want stronger contrast, deeper shades like Hale Navy can create more impact. What Flooring Looks Best with Saybrook Sage? Light to medium wood floors pair especially well, since they echo the earthy quality in the paint. Natural stone tile also works nicely in bathrooms or entryways.