

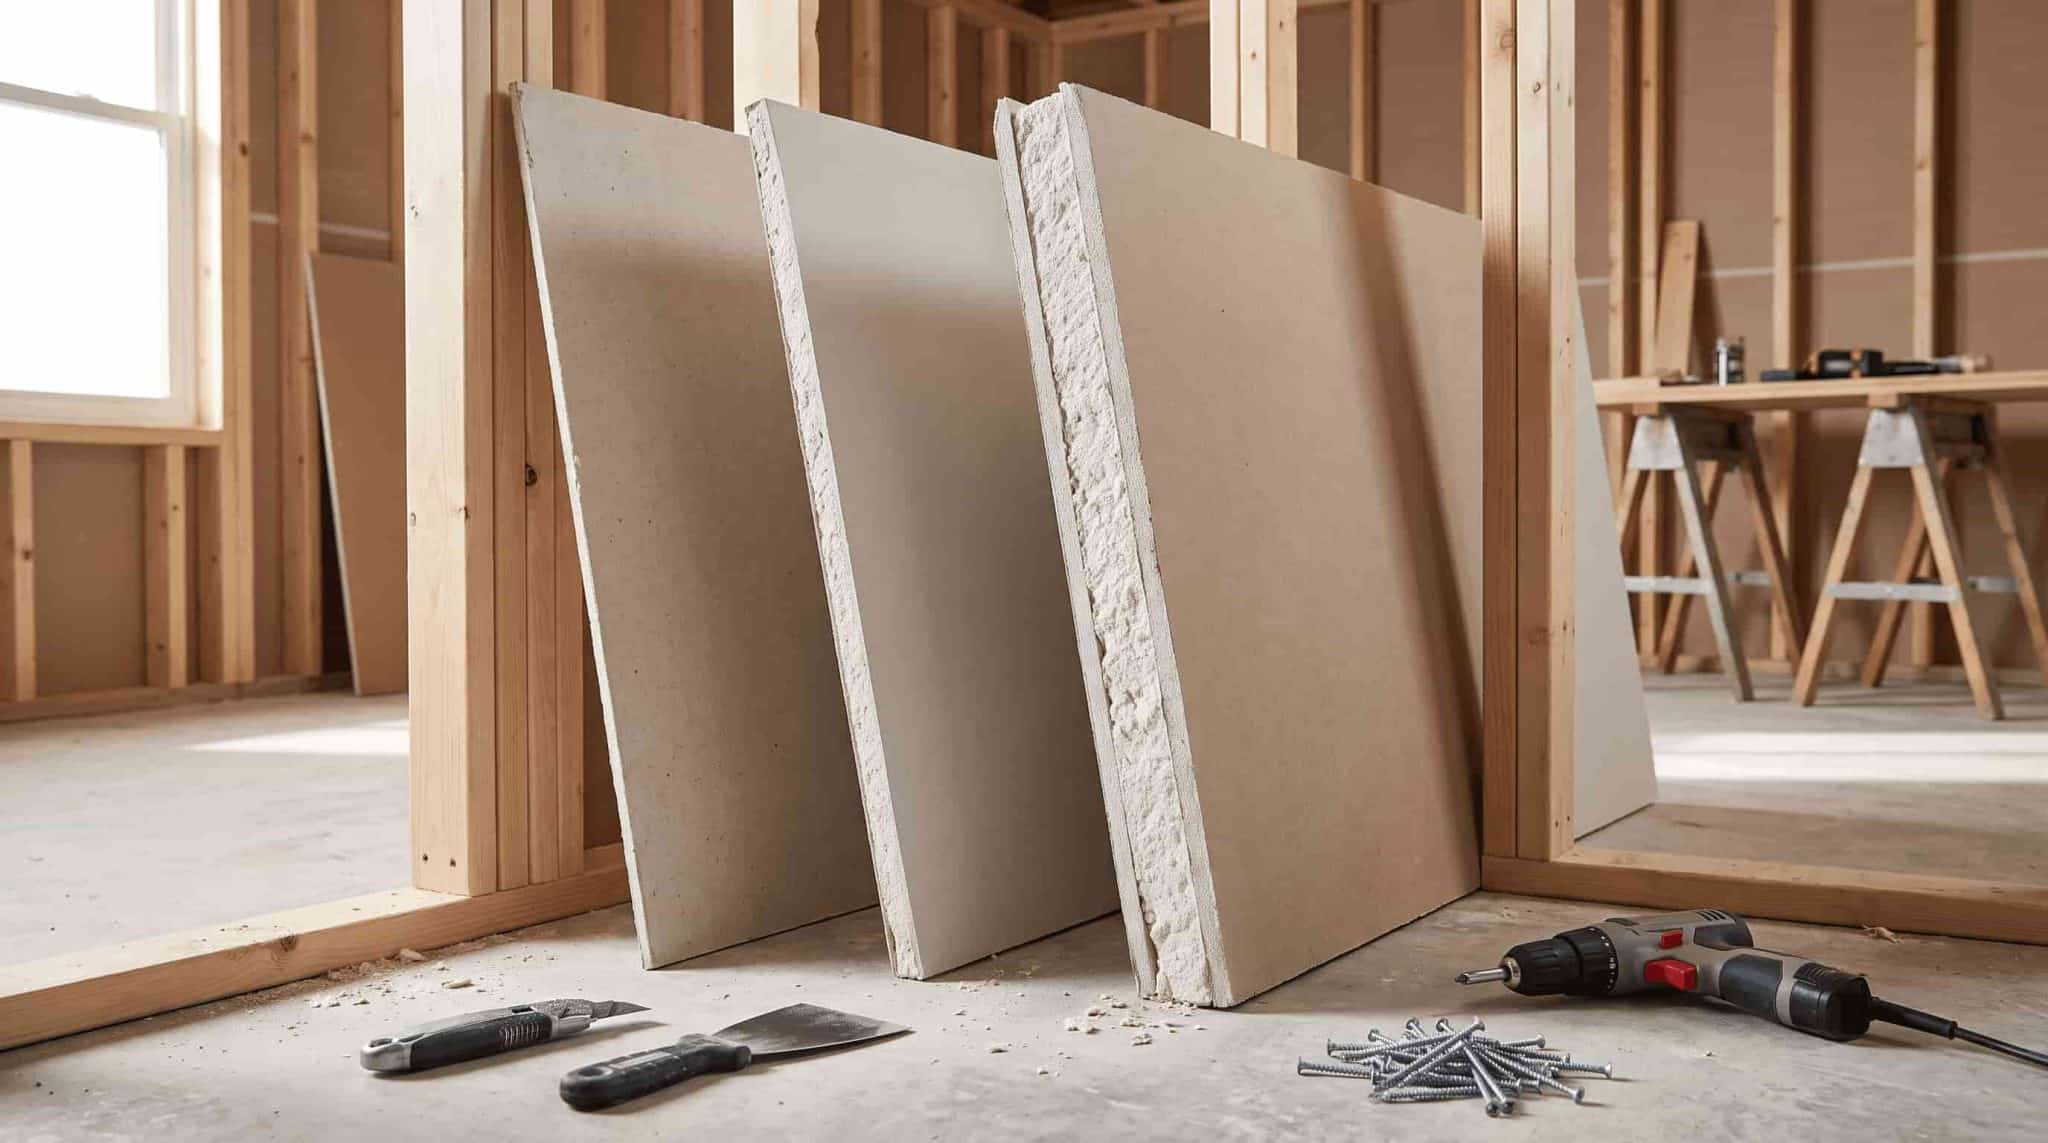
Not all drywall sheets are the same. Many people pick whatever thickness is available at the store, only to discover problems later. A ceiling starts to sag, a wall feels less sturdy than expected, or the project costs more because the wrong board was chosen. Drywall thickness is not just a measurement. It affects strength, sound control, fire resistance, installation difficulty, and where the material can be used. Most interior walls use ½-inch drywall because it offers a good balance of durability, weight, and cost. Ceilings and areas that require extra performance often use ⅝-inch drywall because the thicker panel better handles stress. This guide explains every drywall thickness option, where each one works best, and how to choose the right board for walls, ceilings, basements, garages, and sound-sensitive rooms. Standard Drywall Thickness and Sizes Drywall measurements include thickness and sheet size. Thickness affects strength, sound control, and durability, while sheet size affects installation and the number of seams. Common drywall thickness options include: ¼ inch: Used for repairs, overlays, and curved surfaces ⅜ inch: Used for older repairs and lightweight applications ½ inch: Standard choice for most interior walls ⅝ inch: Used for ceilings, fire-rated walls, and sound control Location Recommended Thickness Reason Interior walls ½ inch Standard residential choice Basement walls ½ or ⅝ inch Depends on moisture, sound, and code requirements Basement ceiling ⅝ inch Better resistance against sagging Garage walls ⅝ inch Type X Often required for fire-rated assemblies Bathroom walls ½ inch moisture-resistant drywall Better suited for humid areas Soundproof rooms ⅝ inch or specialty sound-rated drywall Adds more mass for noise control Curved walls ¼ or ⅜ inch Easier to bend and shape For most homes, ½-inch drywall provides the right balance of strength, cost, and easy installation. However, drywall type and construction quality also affect overall performance. The standard drywall width is 4 feet. Common sheet lengths include: 8 feet: Best for most residential walls 10 feet: Helps reduce seams on taller walls 12 feet: Useful for large walls and open spaces Longer sheets create fewer joints and reduce finishing work. However, they are heavier and harder to move. For most residential projects, 4-by-8-foot drywall sheets are the easiest to handle and install. Which Drywall Thickness Works Best for Your Space? Different drywall textures and thicknesses are designed for different situations. From flexible repair panels to stronger boards for ceilings and sound control, each option has its own purpose. Understanding where each thickness works best helps you avoid choosing a board that is too thin, too heavy, or unsuitable for the job. 1. ¼ Inch Drywall Quarter-inch Drywall is the thinnest standard option available. Its lightweight design makes it easier to bend, which is why it is often used when flexibility matters more than strength. Common Uses of ¼ Inch Drywall Limitations of ¼ Inch Drywall Repairing damaged wall sections Lower impact resistance compared with thicker panels Covering existing drywall surfaces Provides less sound control Creating curved walls or arches Reduced durability for everyday wall applications Adding a second layer over existing walls Not suitable for standard wall construction If you are repairing a small area or working around a curved feature, ¼-inch drywall can be useful. For full walls, ceilings, or heavily used areas, a thicker option is usually the better choice. Because it bends more easily, some installers use multiple layers of ¼-inch drywall for curved applications. This requires more labor but allows them to create shapes that would be difficult to achieve with thicker boards. 2. ⅜ Inch Drywall Three-eighths-inch Drywall was more common in older homes and renovation projects. It is still available today, but it is rarely the first choice for new construction. Common Uses of ⅜ Inch Drywall Limitations of ⅜ Inch Drywall Matching existing drywall thickness in older homes Less common in modern construction due to stronger alternatives Small repair projects Provides less strength than thicker drywall options Lightweight applications Lower durability for high-use areas Slightly curved surfaces Not typically recommended for standard wall installations If you are repairing an older home, matching the existing drywall thickness matters. Installing ⅜-inch drywall next to ½-inch drywall can create uneven surfaces that become noticeable after painting, even with careful finishing. For restoration work, matching what is already installed is often more important than choosing the thickest available option. 3. ½ Inch Drywall Half-inch drywall is the most common drywall thickness used in residential construction. Common Uses of ½ Inch Drywall Limitations of ½ Inch Drywall Bedrooms, living rooms, and hallways Provides less sound control compared with thicker drywall options Standard interior walls May not be suitable for areas requiring higher fire resistance Most residential partitions Can be more prone to sagging when used on ceilings with wider joist spacing General home construction projects Offers less impact resistance than ⅝-inch drywall Works well with standard wall framing Not the best choice for high-performance applications like home theaters or specialty sound rooms A standard 4-by-8-foot sheet of ½-inch drywall usually weighs around 50 to 55 pounds. This makes it manageable for many installations without requiring specialized lifting equipment. For most interior walls, moving to a thicker board does not provide enough benefit to justify the added weight and cost. 4. ⅝ Inch Drywall Five-eighths-inch Drywall is the thickest commonly used standard drywall option. It is selected when a project needs additional strength, sound control, or fire resistance. Common Uses of ⅝ Inch Drywall Limitations of ⅝ Inch Drywall Ceiling installations Heavier than thinner drywall options, making it harder to handle Garage walls requiring fire-rated assemblies More expensive because it uses additional material Shared walls between living spaces More difficult to cut, carry, and install Home theaters and sound-sensitive rooms May require additional labor or help during installation Areas needing better sound control or fire resistance Not always necessary for standard interior walls where ½-inch drywall is sufficient Many ceiling installations require two people to lift and position the sheets safely. Some ⅝-inch drywall products are also made as Type X drywall. These boards contain special core additives that improve fire resistance and are commonly required in certain fire-rated assemblies. For example, garages attached to living spaces often have specific fire separation requirements, so the correct drywall type matters as much as the thickness. Drywall Thickness by Room and Area The right drywall thickness depends on where you are installing it. A wall in a bedroom does not have the same requirements as a basement ceiling or a garage wall. How Thick Should Drywall Be for Ceilings? Ceilings need careful drywall selection because panels are constantly pulled downward by their own weight. Thinner drywall can sag over time, especially with wider joist spacing. Factors that affect ceiling drywall choice include: Joist spacing: Wider spacing may require thicker drywall for better support. Ceiling size: Larger areas place more stress on panels. Texture type: Heavy finishes add extra weight. Moisture exposure: Bathrooms and basements may need added protection. ⅝-inch drywall is commonly preferred for ceilings because it is stiffer and resists sagging better than thinner boards. While ½-inch drywall may work in some cases with closer joist spacing, many contractors choose ⅝-inch drywall for better long-term performance. How Thick Should Drywall Be for Basement Walls? Basement walls typically use ½-inch or ⅝-inch drywall, depending on the space requirements. The right choice depends on factors like moisture levels, sound control, fire ratings, and framing conditions. Factors that affect basement drywall selection include: Moisture exposure: Damp areas may require moisture-resistant drywall. Sound control: ⅝-inch drywall can help reduce noise transfer between floors. Fire requirements: Some basement areas may require fire-rated drywall. Wall framing: Stud spacing can affect the thickness needed. ½-inch drywall works for most finished basement walls, while ⅝-inch drywall is preferred when extra strength, sound control, or fire resistance is needed. Always check local building codes before installation. How Thick Should Drywall Be for Interior Walls? ½-inch drywall is the standard choice for most interior walls in homes. It provides a good balance of strength, cost, and ease of installation for bedrooms, living rooms, hallways, and other common areas. In some cases, ⅝-inch drywall may be a better option. It is often used for shared walls, rooms that need better sound control, or areas where extra fire resistance is required. The right thickness depends on the wall’s purpose, framing conditions, and performance needs. For most residential interior walls, ½-inch drywall is sufficient and remains the most common choice. Side by Side Comparison Basis of Comparison Interior Walls Ceilings Basement Walls Recommended Thickness ½-inch drywall ⅝-inch drywall ½-inch or ⅝-inch drywall Main Requirement Everyday strength and easy installation Sag resistance and added stiffness Strength, moisture control, and sound management Reason for Thickness Choice Balances cost, durability, and handling Thicker panels hold their shape better against gravity Thickness depends on moisture levels, sound needs, and code requirements Common Use Areas Bedrooms, living rooms, hallways, partitions Main ceilings, larger spans, areas with wider joist spacing Finished basements, living spaces below other rooms When to Choose Thicker Drywall Shared walls or rooms needing better sound control Wider joist spacing or heavier ceiling finishes Better sound control, fire resistance, or added durability Key Consideration Wall purpose and performance needs Joist spacing and ceiling load Moisture exposure, framing, and local building codes Does Thicker Drywall Reduce Noise? Thicker drywall can help reduce sound transfer, but it does not completely soundproof a room on its own. The added thickness increases the wall’s mass, making it harder for sound vibrations to pass through the surface. Sound control depends on several factors working together, including: Insulation inside the wall cavity helps absorb sound before it travels through the wall Framing design affects how vibrations move through the structure Multiple drywall layers add more mass for better noise reduction Acoustic sealants reduce sound leaks around gaps, outlets, and joints Proper installation prevents weak points that allow sound to pass through ⅝-inch drywall generally performs better than thinner boards because it provides more mass. It is commonly used in areas where noise control matters, such as: Home theaters Bedrooms near noisy spaces Shared walls between units Home offices For better results, sound-rated drywall combined with insulation and proper sealing often performs better than simply using a thicker standard panel. The entire wall assembly determines how effectively sound is reduced. Does Drywall Type Matter More Than Thickness? Drywall thickness affects strength, weight, and sound control, but it is only one part of how a drywall panel performs. The type of drywall you choose can matter just as much, especially in rooms exposed to moisture, fire risks, or higher noise levels. A ⅝-inch regular drywall panel is not automatically the best choice for every situation. A bathroom, garage, or home theater may need a specialized product instead. Here are the most common drywall types: Drywall Type Best For Main Benefit Regular Drywall Bedrooms, living rooms, hallways Affordable and versatile Moisture-resistant Drywall Bathrooms, laundry rooms, basements Handles humid conditions better Type X drywall Garages, fire-rated walls Improves fire resistance Sound-rated Drywall Home theaters, offices, shared walls Reduces sound transmission For example, using thicker regular drywall in a bathroom does not replace the need for moisture-resistant materials. Likewise, adding ⅝-inch drywall to a noisy room helps, but combining it with insulation and proper sealing creates much better results. The best choice usually comes from combining the right thickness with the right drywall type. Drywall Thickness Cost Differences Drywall thickness affects more than performance. It also changes material costs, handling difficulty, and installation time. Drywall Thickness Approximate Cost per 4×8 Sheet Handling and Installation Best Value For ¼ inch $10–$15 Lightweight and easy to handle Repairs, overlays, and specialty projects ⅜ inch $10–$18 Easy to install but less common today Matching older drywall and small repairs ½ inch $12–$20 Easier to carry, cut, and install Most interior walls and residential projects ⅝ inch $15–$25 Heavier and may require extra help during installation Ceilings, fire-rated areas, and sound-control spaces Note: Prices are approximate and may vary depending on location, supplier, drywall type, and brand. Can You Install Thicker Drywall Over Existing Walls? Installing new drywall over existing walls is possible in some situations, but it is not always the best solution. Quarter-inch Drywall is commonly used for overlays because it adds minimal thickness while creating a smoother surface. Before adding another layer, consider: Door and window trim may no longer fit correctly Electrical boxes may sit too far behind the wall surface Wall dimensions will slightly increase Moisture or damage problems may remain hidden underneath Adding thicker drywall over an existing surface may help improve appearance or add some sound control, but it does not fix damaged framing, leaks, or structural issues. For major renovations, removing old drywall and starting fresh is often the better option because it allows inspection of insulation, wiring, and wall conditions. Key Takeaways for Your Next Project Choosing the right drywall thickness depends on where it will be installed and what the space requires. For most interior walls, ½-inch drywall remains the standard option because it provides a practical balance of strength, cost, and ease of installation. Thicker ⅝-inch drywall is better suited for ceilings, fire-rated areas, and rooms where improved sound control is needed, while thinner panels work best for repairs and specialty projects. The right choice is not always the thickest board available. Considering the room type, framing, moisture exposure, building requirements, and installation needs helps prevent problems like sagging ceilings, weak surfaces, or unnecessary costs. A few careful decisions before installation can help create a stronger and longer-lasting wall system. Frequently Asked Questions What is the most common drywall thickness? ½-inch drywall is the standard choice for most residential interior walls because it offers a good balance of strength, cost, and ease of installation. Can ⅝-inch drywall be used on interior walls? Yes, ⅝-inch drywall works on interior walls where extra strength, sound control, or fire resistance is needed, but ½-inch drywall is more common for standard rooms. What thickness of drywall is used for ceilings? ⅝-inch drywall is commonly used for ceilings because its added stiffness helps reduce sagging, especially with wider joist spacing. Can you use ¼-inch drywall on walls? ¼-inch drywall is mainly used for repairs, overlays, and curved surfaces. It is not recommended as a standalone wall covering. Does drywall thickness affect fire rating? Yes. Fire-rated assemblies often use ⅝-inch Type X drywall because its reinforced core slows the spread of fire. The exact requirement depends on the building assembly and local code.
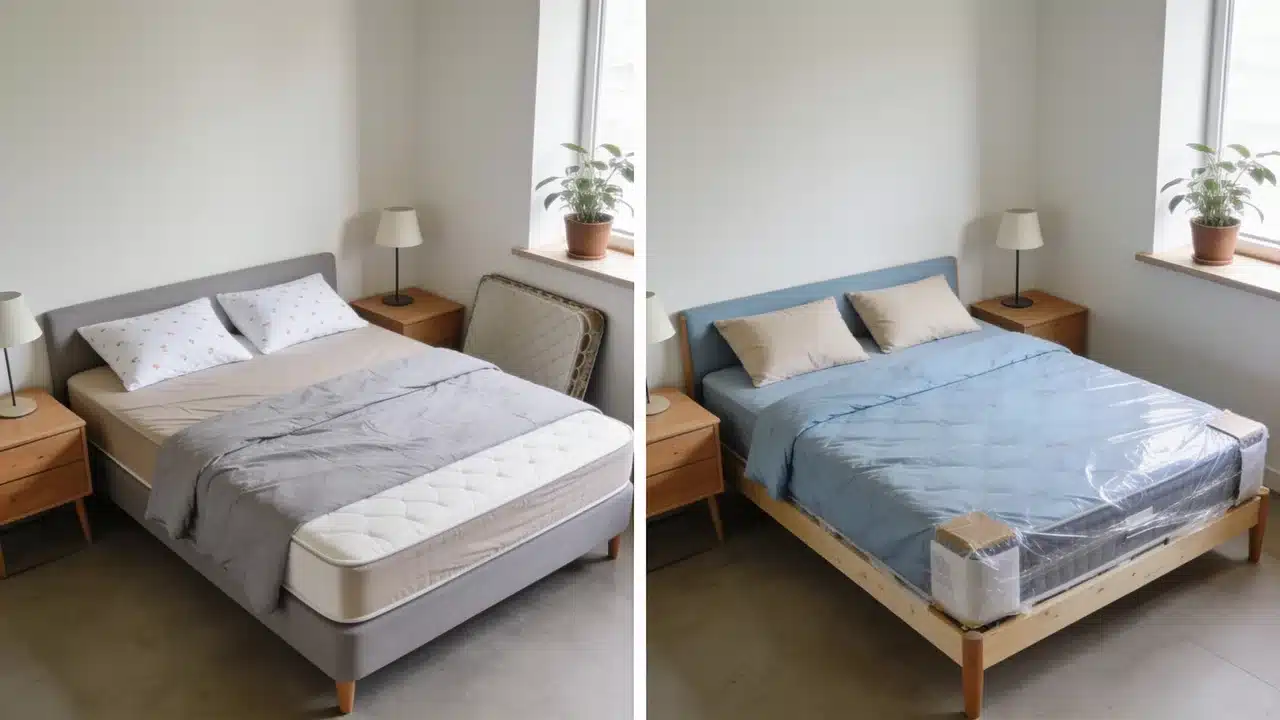
Summary: Most mattresses last between 7 and 10 years. Latex models can often last 10–15 years, while innerspring mattresses usually wear out sooner. Replace your mattress when it no longer provides proper support, comfort, or quality sleep. How long it actually lasts depends on the materials, usage, and maintenance. A mattress gets replaced only after the problem becomes impossible to ignore. A sore back that has been building for months, sleep quality that has quietly dropped, a mattress that looks fine but no longer feels that way. The challenge is that mattresses rarely fail suddenly. They degrade gradually, and because the change is slow, it’s easy to adjust to it without realizing the mattress is the cause. Those ranges in the summary are a starting point, not a fixed deadline. A mattress that is seven years old and still performing well does not need to be replaced. One that is five years old and already sagging does. This blog covers everything that determines a mattress’s lifespan and when to replace it. How Long Does a Mattress Typically Last? Different mattress types age at different rates, depending on how their materials respond to regular use. The table below shows the average lifespans of common mattress types and how long each typically provides proper support. Mattress Type Average Lifespan Durability Latex Mattress 10–15 years Long-lasting and resistant to sagging Hybrid Mattress 7–10 years Good durability from foam and coils Memory Foam Mattress 7–10 years Depends on the foam density Innerspring Mattress 5–8 years Coils and padding wear faster Pillow Top Mattress 5–7 years Comfort layers compress sooner 6 Signs You Need to Replace Your Mattress These signs indicate that a mattress can no longer support proper sleep. Checking for them helps catch the problem before it affects your health or daily routine. 1. Visible Sagging Deep dips or visible body impressions show that the mattress has lost its original support structure. Sagging of one inch or more is a clear sign that replacement is due. Look along the side of the mattress. Uneven areas you do not feel while lying down are often visible from that angle. 2. Morning Aches and Stiffness Persistent back, neck, or hip discomfort upon waking suggests that the mattress no longer adequately supports your body. Stiffness that clears up within the first hour of waking is a common sign. If you sleep better in a hotel or on another bed, your mattress is likely the cause. 3. Poor Sleep Quality Increased tossing and turning or trouble staying comfortable at night can mean the mattress is breaking down. Sleep problems that appear only in bed often point to the mattress first. If your sleep has declined without any other changes in your routine, the mattress deserves a closer look. 4. Uneven or Lumpy Surface A surface that feels uneven or shows visible spring bumps indicates that internal materials have broken down. Sleeping on an uneven surface affects spinal alignment and disrupts sleep quality. You may not notice the unevenness at first. Over time, your body registers it through increased discomfort and restless nights. 5. More Allergies or Odors An older mattress accumulates dust mites and allergens, which worsen allergy symptoms over time. A persistent musty odor usually means moisture has reached the inner layers. If your symptoms improve when sleeping elsewhere, the mattress is likely the cause. A protector alone will not fix the underlying buildup. 6. Increased Motion Disturbance Feeling a partner’s movements more strongly than before can mean the mattress is losing its ability to absorb motion. Springs or foam that no longer isolate movement signals internal wear. Small shifts in the night should not wake you. If they do, the mattress has likely broken down inside. How Often Should You Replace Your Mattress? Replacing a mattress depends more on how it feels than on a fixed schedule. The table below outlines what to check at each stage of a mattress’s age. Mattress Age What to Consider Under 5 years Usually within a normal lifespan 5–7 years Check comfort and support 7–10 years Common replacement period 10+ years Evaluate the condition carefully This comes down to how the mattress performs and feels, not a fixed number of years. That’s really the honest answer to how often you should replace your mattress. What Affects How Long a Mattress Lasts? Three things shape this: materials, usage frequency, and the conditions in which the mattress is kept. 1. Material Quality and Construction The materials inside a mattress shape how long it holds its shape. High-density foam compresses less under body weight and typically lasts longer than low-density options. Latex resists breakdown better than most foam types. Coil design and layer construction also affect how long the support holds up. 2. Usage Frequency A mattress used every night ages noticeably faster than one kept in a guest room. Daily use means more compression cycles and less recovery time between uses. Guest room mattresses often last years longer because they carry body weight far less often. 3. Body Weight and Sleeping Style Greater body weight increases the total pressure on the foam and coils, causing the materials to break down faster. Sleeping positions also affect wear patterns. Side sleepers place concentrated pressure on the hips and shoulders. Stomach sleepers tend to put more strain on the center of the mattress. 4. Mattress Foundation and Support System A mattress typically lasts longer when placed on a compatible foundation. Box springs, slatted bases with gaps of less than 3 inches, and platform beds all affect how weight is distributed. An unsupported or broken frame leads to faster sagging and uneven wear. 5. Sleep Environment The bedroom environment affects how long materials stay in good condition. High humidity causes moisture buildup inside the mattress, which accelerates foam breakdown. Poor ventilation and temperature swings put extra strain on materials. Using a breathable cover and keeping the room dry extends the mattress’s life. Can You Make a Mattress Last Longer? None of the upkeep below takes much time, and it adds up over the years. Use a waterproof mattress protector to stop spills and moisture from reaching inner layers. Rotate the mattress every three to six months if the manufacturer recommends it. This spreads compression across different areas of the foam or coils. Vacuum the surface occasionally and avoid sitting on the same edge every day. Use a compatible foundation and check that it still supports the mattress evenly. A mattress topper can delay surface wear, but it cannot repair underlying structural issues. If sagging is already noticeable, a topper only temporarily covers the problem rather than addressing the cause. What Your Mattress Warranty Covers A mattress warranty covers manufacturing defects, not loss of comfort. The table below compares warranty reality with actual replacement timing across common situations. Situation Replacement Consideration Warranty Reality Daily-use mattress Usually 7–10 years Warranty covers defects, not normal aging Couple’s mattress May wear faster Comfort loss is usually not covered Guest mattress Often lasts longer A longer warranty does not guarantee lifespan Premium latex mattress Can last 10–15 years Warranty reflects coverage, not perfect performance Older mattress (10+ years) Inspect support and comfort Replacement depends on the condition Mattress Topper vs Full Replacement A topper improves the surface feel but cannot fix underlying structural problems. Use a topper if: The mattress has a solid structure but feels too firm or too soft There is no visible sagging, body impressions, or uneven areas The mattress is under 7–8 years old with no signs of structural damage You want to protect the sleep surface and add time before a full replacement Replace the mattress if: Visible sagging or deep body impressions are present Springs feel broken, or the surface is noticeably uneven You wake with pain regularly that eases within an hour of getting up The mattress is over 10 years old Poor sleep quality persists night after night despite no other changes In my experience, a topper usually buys a few months before the underlying problem resurfaces. If the mattress has already given out, replacement is the right call. The clearest test is to press down firmly across the sleep surface. If the mattress springs back evenly, a topper may be enough. If certain areas stay compressed, the structure has already given out. Happy Reading A mattress does not announce when it’s done, it just quietly stops supporting you. So how long does a mattress last? Usually 7 to 10 years, though the actual timing depends on the type, usage, and how it feels. Sag, poor sleep, and persistent stiffness are clearer signals than the calendar. A good foundation, regular rotation, and a protector add real years. As for how often you should replace your mattress, as soon as it stops giving you good sleep. If yours already shows two or more signs above, start comparing mattresses today. Frequently Asked Questions How Long Should a $2000 Mattress Last? A $ 2,000 mattress can typically last 8–12 years when made with quality materials and properly maintained. Lifespan still depends on construction, usage, and care. Can a Mattress Last for 20 Years? Most mattresses do not maintain proper support for 20 years. High-quality latex models may last longer than average, but replacement depends on condition and comfort. How Often Should You Replace a Mattress? Most mattresses should be replaced every 7–10 years, but signs like sagging, discomfort, and poor sleep quality matter more than age alone. How to Tell if a Mattress is Worn Out? Common signs include visible sagging, uneven surfaces, increased motion transfer, waking with stiffness, and a noticeable decline in sleep comfort. Based on the confirmed snippet text from the article, here is the full modified FAQ answer with the link embedded: Do Toddler Beds Use the Same Mattress Size as a Crib? Often yes. Many toddler beds are designed to use a standard crib mattress, with the same 28 x 52-inch dimensions. Check the toddler bed’s instructions before assuming the transition will work, as some designs differ slightly.
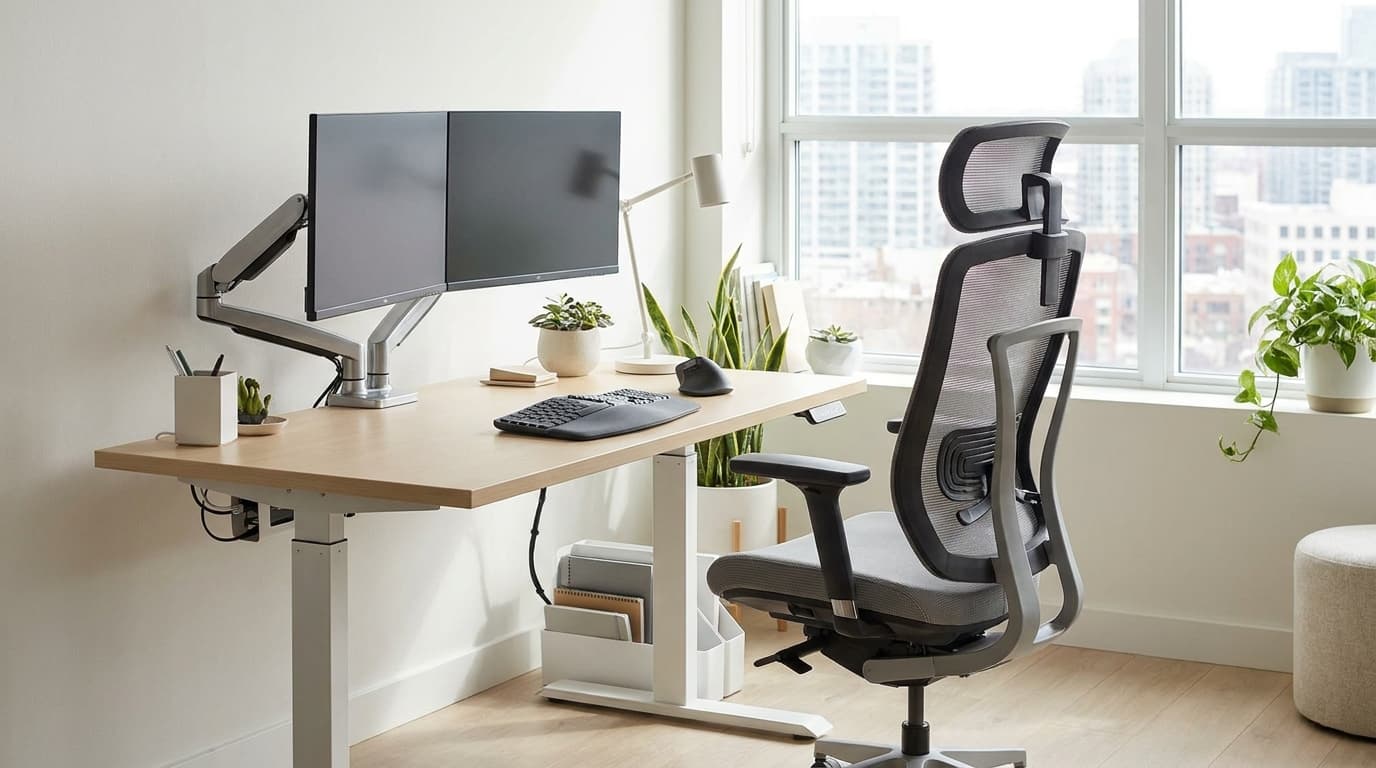
Quick Answer: Ergonomic furniture is the type of furniture that is built to match the natural shape and movement of your body. It supports good posture, reduces pain, and helps you sit or stand comfortably for long hours. This is the furniture that adjusts to fit you, not the other way around. It supports your spine, wrists, and legs in a natural position. Working from home or sitting at an office desk both carry the same risk. The right pieces can lower your chance of pain and injury. Ergonomic furniture helps create a more comfortable workspace by improving posture, reducing strain, and making long hours of sitting easier on your body. From adjustable desks to supportive chairs, small changes can make a noticeable difference in daily comfort. What is Ergonomic Furniture? Ergonomic furniture is designed around the science of human movement and body mechanics. It follows the principles of ergonomics, the study of how people interact with their environment. Each piece aims to reduce physical stress on the body during everyday tasks. A regular chair forces you to adapt to its shape, but an ergonomic chair adapts to yours. This furniture keeps your joints in neutral positions. It reduces pressure on your spine and prevents repetitive strain injuries. Long hours at a desk feel less taxing when your setup supports your body correctly. The table below breaks down common types. It shows what each one offers. Furniture Type Key Ergonomic Feature Main Benefit Ergonomic Chair Adjustable lumbar support and seat height Reduces lower back pain Standing Desk Height adjustment for sitting or standing Cuts down sedentary time Ergonomic Keyboard Split or curved design Lowers wrist and hand strain Monitor Arm Adjustable height and angle Prevents neck and eye strain Footrest Angled support for feet Improves leg circulation How Furniture Uses Ergonomic Principles to Support the Body Ergonomics is the science of designing things around how the human body moves and works. It looks at posture, comfort, and movement patterns. Furniture makers use these principles to create pieces that fit the human body. The result is less strain and more support during daily tasks. Good furniture design puts this science into practice. 1. Core Principles of Ergonomics Ergonomic furniture design rests on four core principles. Each one addresses a different source of daily strain, from posture to movement. A well-built chair, desk, or keyboard follows all four at once. 2. Proper Body Alignment Good furniture helps keep your spine, neck, shoulders, and hips aligned. It prevents your body from twisting into awkward angles. This alignment lowers the risk of long-term pain. 3. Adjustability This furniture adapts to different body types and heights. A chair might offer adjustable seat height and lumbar support. A desk might raise or lower to match your reach. 4. Comfort and Support This principle focuses on reducing pressure points. It supports areas that carry the most strain during long hours of use. Soft, shaped surfaces reduce fatigue over time. 5. Ease of Movement Good design lets you shift positions naturally. It encourages healthy movement instead of sitting still for hours. Small posture changes throughout the day protect your joints. What are the Different Types of Ergonomic Furniture Ergonomic furniture comes in several forms, each built for a specific part of your workspace. Some pieces support your seating, while others manage your desk height or screen position. Knowing the main types helps you build a setup that covers your whole body. Below are the pieces most people add first. 1. Ergonomic Office Chairs A good chair is often the first upgrade people make, and for good reason. Look for a seat height you can adjust to match your desk. Lower back support should move up or down to fit your spine. Armrests that shift in height and width keep your shoulders relaxed. Seat depth matters too, since a seat that is too long or short can cut off circulation behind your knees. Breathable fabric keeps you cool during long sessions. 2. Height Adjustable Desks A desk that allows you to switch between sitting and standing gives you more freedom throughout the day. Switching positions cuts down the hours you spend sitting still. Pairing an adjustable desk with the right minimalist home office furniture lets you position your screen and keyboard to suit your height, not a fixed standard. Switching positions cuts down the hours you spend sitting still. Different users benefit in different ways. Taller or shorter people get a desk that actually fits them. Anyone with back pain gets a break from sitting all day. 3. Ergonomic Keyboard and Monitor Setups Your hands and neck need support too, not just your back. A keyboard placed too high or too low forces your wrists into an awkward bend. Split or curved keyboards keep your wrists at a more natural angle. Your monitor should sit at eye level, so you avoid tilting your neck up or down. Getting this height and angle right reduces neck strain and wrist fatigue during long work sessions. 4. Ergonomic Home Office Furniture Remote workers face the same strain as office employees, often with less space to fix it. Compact ergonomic desks fit small rooms without giving up adjustability. A supportive chair matters just as much at home as it does in an office. Look for setups built for smaller spaces that still let you adjust height and support. A healthy home workspace protects your body just as well as a corporate one What are the Benefits of Ergonomic Furniture Choosing the right furniture pays off in ways beyond simple comfort. It changes how your body feels at the end of a workday. It can also affect how well you focus and how much you get done. 1. Improves Posture and Body Alignment Standard furniture often lets you slouch without realizing it. Ergonomic pieces guide your body into a straighter, more balanced position. Over weeks of use, this can train you to sit and stand with better alignment. Small daily corrections add up to a real change in posture. 2. Reduces Neck, Back, and Shoulder Strain Poor desk setups are a common cause of daily aches. A screen placed too low or a chair with no support forces your muscles to compensate. Proper height and support take that pressure off your neck, back, and shoulders. Many people notice less soreness within the first few weeks. 3. Increases Comfort During Long Work Hours Long shifts at a desk feel very different with the right setup. Adjustable features let you fine-tune your chair and desk to your own body. That personal fit makes hours at your desk feel less draining. Comfort during the day can also mean less stiffness once you stand up. 4. Supports Productivity and Focus Discomfort pulls your attention away from your work. Shifting in your seat or rubbing a sore neck breaks your concentration. A comfortable setup removes that distraction. Staying focused gets easier when your body isn’t fighting your furniture. 5. Encourages Healthier Movement Sit-stand desks and adjustable chairs make it easier to change position throughout the day. Small shifts, like standing for a call or adjusting your seat, keep your body from staying still too long. This kind of movement supports circulation and joint health. Over time, it can lower the risk of stiffness tied to long, fixed sitting. Ergonomic Furniture vs Regular Furniture At first, ergonomic and regular furniture can look similar. The real difference shows up in how each one treats your body. Regular furniture follows one fixed shape for everyone. Ergonomic furniture adjusts around the person using it. That gap becomes clear once you compare the two side by side. Feature Ergonomic Furniture Regular Furniture Adjustability Multiple adjustments Limited options Body Support Designed around human posture General comfort Customization Fits individual users Fixed dimensions Long-Term Use Better suited for extended use May cause discomfort over time How to Choose Ergonomic Furniture Picking the right piece takes a bit more effort than grabbing what is on sale. A few practical steps can help you avoid a poor fit and wasted money. Test the piece before you buy: Sit in the chair or try the desk height in a showroom if one is nearby. Many online retailers also offer trial periods, so check the return policy first. A short test run tells you more than any spec sheet. Check for recognized certifications and real reviews: Standards like BIFMA testing help verify durability and safety for office furniture sold in the United States. Reviews from real buyers often reveal how a piece holds up after months of daily use. Set a realistic budget before you shop: Decide which features matter most to you, such as adjustable height or lumbar support. This helps you avoid paying extra for features you will not use. Think about your room layout and space: Measure your area before ordering large items like a standing desk. Furniture for small spaces often includes compact desk alternatives worth considering first. A well-made ergonomic desk still needs to fit your room and its outlets. Frequently Asked Questions What is the Main Purpose of Ergonomic Furniture? Ergonomic furniture supports your body’s natural posture. It reduces strain on your spine, neck, and joints during long hours of use. Is Ergonomic Furniture Good for Back Pain? Yes, it can help. Adjustable lumbar support and proper seat height ease pressure on your lower back. Do Ergonomic Chairs Really Make a Difference? Yes, they do. A chair with adjustable height, armrests, and lumbar support can reduce daily aches within weeks. What Should I Look for in an Ergonomic Desk? Look for height adjustability first. A desk that shifts between sitting and standing supports better posture and movement. Is Ergonomic Furniture Expensive? Prices vary widely. Many budget options offer solid adjustability without the cost of premium brands. Final Thoughts Ergonomic furniture supports your body instead of working against it. From chairs to desks to monitor arms, each piece helps reduce strain. The right setup can ease back pain, improve posture, and keep you comfortable through long work hours. Choosing ergonomic furniture depends on your habits and body. Test adjustability, match pieces to your daily routine, and prioritize quality materials over price alone. A thoughtful setup today can protect your health for years of desk work ahead.
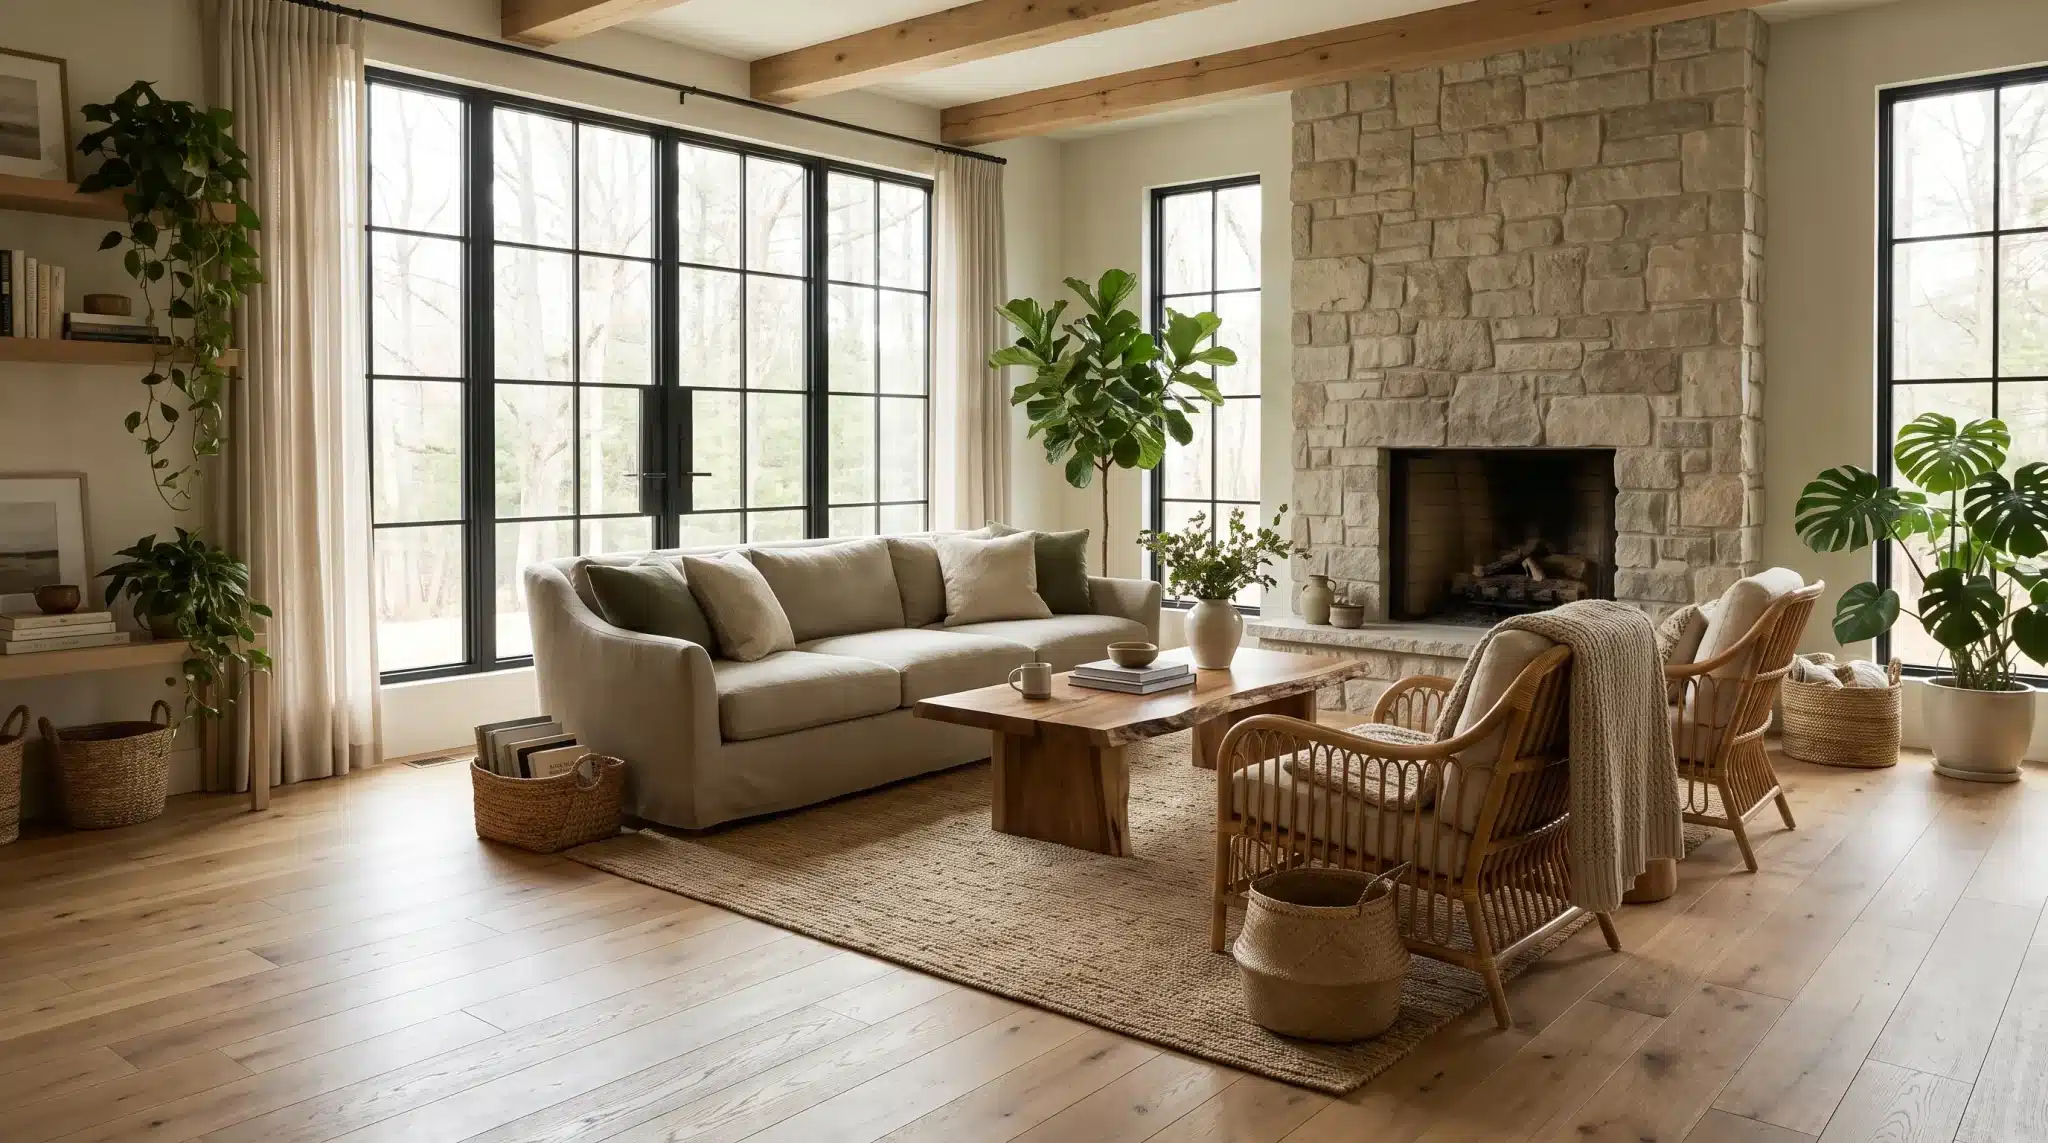
While building my home, I knew I did not want it to feel like a space made only of concrete, glass, and polished surfaces. I wanted it to have a sense of life, warmth, and connection, something that changed with the light, the seasons, and everyday moments. I imagined rooms filled with natural sunlight, the softness of wood and stone, the movement of plants, the calmness of water, and colors that echoed the outdoors. That feeling is what drew me toward biophilic interior design. By bringing together natural elements, organic textures, earthy tones, and sensory details, I made my home more than a place to live. It became a space that felt grounded, personal, and connected to the world outside. 11 Ways to Bring Biophilic Design Into Your Home Biophilic design does not mean turning your home into a greenhouse or copying a picture-perfect space. It is about adding small touches that create a stronger connection with nature. From natural textures and calming colors to plants, light, and organic shapes, these ideas can help you create rooms that feel warmer, more personal, and full of life. 1. Create a Living Green Corner with Indoor Plants Plants are the fastest way to connect a room to nature. Group a few small plants on a shelf. Hang trailing vines near a window, or place one large tree in an empty corner. Choose plants based on the light in the room, not the ones you saw online. A plant that dies within a month teaches you nothing except frustration. Plants also change over time, unlike most furniture. A fern grows new leaves. A vine climbs a wall. I think of plant corners as cozy reading nooks from an old film. Imperfect, a little wild, and completely alive. 2. Use Natural Light as a Design Element Daylight is free, and it does more work than most lighting fixtures. Sheer curtains let light in without losing privacy. Mirrors placed across from windows bounce light deeper into a room. Light colored walls and floors help a small space feel brighter without adding a single lamp. Morning light in a breakfast nook feels different from the golden light of a late-afternoon living room. Once you notice how light shifts throughout the day, you start designing around it rather than against it. 3. Bring in Natural Materials and Organic Textures Wood, stone, bamboo, rattan, linen, and clay all carry small imperfections that machines cannot fake. A wood grain that runs slightly off gives a room texture. So does a hand-thrown ceramic bowl with a rough edge. These materials also age well, which matters more than most trend pieces. Modern earthy homes lean into this fully. Rustic home interiors use it in smaller doses, such as a linen throw or a rattan chair. Either way, texture gives your hand something to notice, not just your eyes. 4. Choose Organic Shapes for Furniture and Decor Nature rarely produces a straight line. A rounded sofa, a curved mirror, or an arched doorway softens a room in a way that hard angles cannot. Sculptural decor pieces do the same job on a smaller scale. Think of a carved wood bowl or an organically shaped vase. Curved furniture has become more common in modern architecture lately. It is not only a style choice. Rooms with soft shapes tend to feel calmer to move through. 5. Build a Nature-Inspired Color Palette Forest green, sage, sand, terracotta, and soft blue all pull from the outdoors. None of them turns a room into a theme park. The trick is balance. One earthy accent wall paired with neutral furniture reads as intentional. Four different greens in one small room read as chaotic. A botanical bedroom might feature sage-colored walls with warm wood furniture. A calm home office might lean on sand and soft blue instead. Pick two or three tones and let them repeat quietly through the room. 6. Introduce Water Elements for Calm and Movement Water brings sound and motion into a space, qualities that plants and materials cannot provide on their own. A small tabletop fountain or a reflective glass surface can add this quality. Artwork featuring water works too, without any renovation. Spa interiors and nature resorts use this constantly. The sound gives your mind something steady to settle on. You do not need an indoor pond to get the benefit. A single fountain on a console table can shift how a whole room feels. 7. Blur the Boundary Between Indoors and Outdoors Large windows, glass doors, and a clear view of a garden or balcony all pull the outside in. If your apartment does not have much of a view, do not worry. A small balcony garden or window box can do surprising work. Outdoor-style seating placed near a big window also helps a room feel less boxed in. Resort-style homes have leaned into this for years. Smaller homes are catching up with clever glass and layout choices. 8. Design for All Five Senses Biophilic design isn’t just something you see. Natural scents like cedar or citrus shape how a room feels. So do soft fabrics, a breeze through an open window, and fresh air. A bedroom with linen sheets, quiet sounds, and fresh air from a cracked window feels restful. A room that only looks good in photos doesn’t feel good. Think about what a room smells like and sounds like, not just what it looks like in a listing photo. 9. Create a Biophilic Home Office Home offices benefit the most from small nature-focused changes. A desk near a window, a plant within reach, and wood furniture instead of laminate all help. Even a view of a tree from your desk chair can make a long workday feel shorter. Creative studios shown in films often mix nature with function. Plants on the desk, natural light, a comfortable chair. It is a small setup, but it works because it removes the sterile feeling most offices default to. 10. Mix Vintage Pieces with Natural Elements A vintage wooden cabinet or a handmade ceramic vase adds a layer of new furniture that cannot be replicated. So does a woven textile passed down from a relative. These pieces carry history, and history makes a room feel personal instead of staged. Pairing an old wooden dresser with a new linen chair does not clash. It tells a story. Rooms built entirely from new furniture can feel like a catalog page. Rooms with a few collected pieces feel like someone actually lives there. 11. Add Botanical Artwork and Nature-Inspired Decor Botanical artwork brings the feeling of the outdoors into rooms where adding real plants is not always practical. A framed leaf print, pressed-flower artwork, landscape painting, or nature-inspired sculpture can create a visual connection to the outside world. Choosing pieces that feel organic rather than overly decorative helps create a balanced look. A handmade ceramic vase, a wooden sculpture, or artwork with earthy tones can add personality without making the room feel themed. Why You Need Biophilic Interior Design A home built around natural light, texture, and greenery tends to feel more relaxing to live in. Several studies in environmental psychology link time spent near natural elements to better focus and lower stress levels. 1. Better Sleep: A bedroom with natural materials, calm colors, and soft light tends to make winding down easier. Harsh overhead lighting, synthetic fabrics, and sterile surfaces pull your body in the wrong direction at the end of the day. Swapping those out for linen bedding, a warmer bulb, or a small plant on the nightstand is a small change that adds up over weeks of better rest. 2. Lower Stress Levels: There is a reason you feel calmer after a walk outside than after sitting in a windowless room. Natural elements, whether real or evoked through texture, color, and material, carry that same quality indoors. A room that includes wood grain, soft green, and a plant in the corner gives your nervous system something gentler to settle on. Over time, that quieter baseline changes how a home feels to return to. 3. Sharper Focus During the Day: Working or studying near a window with a view, even a partial one, tends to reduce mental fatigue. The same effect occurs in plants. A desk positioned near natural light, with a single plant nearby, reduces some of the sensory flatness that comes with enclosed indoor environments. The brain responds to natural variation in light, color, and living things in ways that artificial settings do not replicate. 4. A Stronger Sense of Personal Connection: Homes built with natural materials and collected pieces tend to feel more personal than those filled entirely with new, polished furniture. Wood weathers and changes over time. A handmade clay pot carries marks no machine can reproduce. Living with those things builds a relationship between you and your space that purely aesthetic design does not create. That sense of connection is quieter than most design benefits, but it tends to last longer. Biophilic Design Ideas for Every Room Biophilic design works best when it feels natural to your everyday routine. Instead of adding random nature-inspired elements, think about how each room is used and choose details that bring warmth, texture, light, and a stronger connection to the outdoors. Room Biophilic Design Ideas Living Room Add plants near seating areas, choose wood or rattan furniture, and layer natural fabrics like linen or wool to create a warm, inviting atmosphere. Bedroom Use calming colors, soft natural fabrics, and gentle lighting. Choose simple materials and avoid harsh overhead lights to create a peaceful resting space. Kitchen Place herbs on a windowsill, keep wooden cutting boards visible, and use stone surfaces or natural finishes to add texture to this functional area. Bathroom Add humidity-loving plants, natural stone accents, and soft towels to create a relaxing space that feels more like a spa retreat. Home Office Position your desk near a window, add a nearby plant, and choose natural materials like wood to make the workspace feel calmer and more inspiring. Small changes can make each area of your home feel more connected to nature without requiring a complete redesign. Biophilic design can work in any space, with simple choices that reflect your personal style and bring a more natural feel into everyday living. 5 Biophilic Interior Design Mistakes to Avoid Adding nature-inspired elements can transform a home, but balance matters. Biophilic design works best when it feels natural and personal, not forced. Avoid these common mistakes when creating a nature-connected space: Buying plants without considering your home conditionsA room full of plants looks beautiful in photos, but choosing greenery without considering sunlight, humidity, and the time you have for care can cause plants to struggle or die. Turning your home into a greenhousePlants are an important part of biophilic design, but too much greenery can overwhelm a room. Leave space for furniture, movement, and other natural elements like wood, stone, and textiles. Choosing fake natural materials over authentic texturesPlastic finishes that imitate wood, stone, or plants often feel disconnected up close. Real materials bring warmth, texture, and natural variation that artificial alternatives cannot replace. Ignoring your room’s natural lightEvery room interacts differently with sunlight. A north-facing room may need different plants and colors than a bright south-facing space, so design around the light you actually have. Copying inspiration photos without adapting themA room from Pinterest or a magazine may have different lighting, dimensions, and architecture than your home. Use ideas as inspiration, but adjust them to suit your own space and lifestyle. Final Thoughts Biophilic interior design was never about building a perfect nature-themed room. It is about noticing small things. Morning light on a wood floor, the smell of a plant after watering, a soft throw under your hands. Those moments add up to more than any single design choice. Your home will keep changing, and that is fine. Future homes will likely continue to blend nature, smart technology, and personal touches in new ways. For now, start with one corner, one plant, or one better-placed lamp, and let the rest follow. Frequently Asked Questions How Many Plants Should a Biophilic Room Have? There is no fixed number. Start with one or two plants that match your light and schedule. Add more once you know you can keep them alive. Can Renters Create a Biophilic Interior Without Renovations? Yes. Plants, textiles, mirrors, and furniture choices need no permanent changes. They still shift how a rented space feels. What Furniture Styles Work Best With Biophilic Design? Wood, rattan, and other natural materials pair well with biophilic design. Curved or organically shaped furniture also fits the style naturally. Does Biophilic Design Work with Minimalist Interiors? Yes. A few well-chosen natural materials can bring a minimalist room to life. One or two plants help without adding clutter.
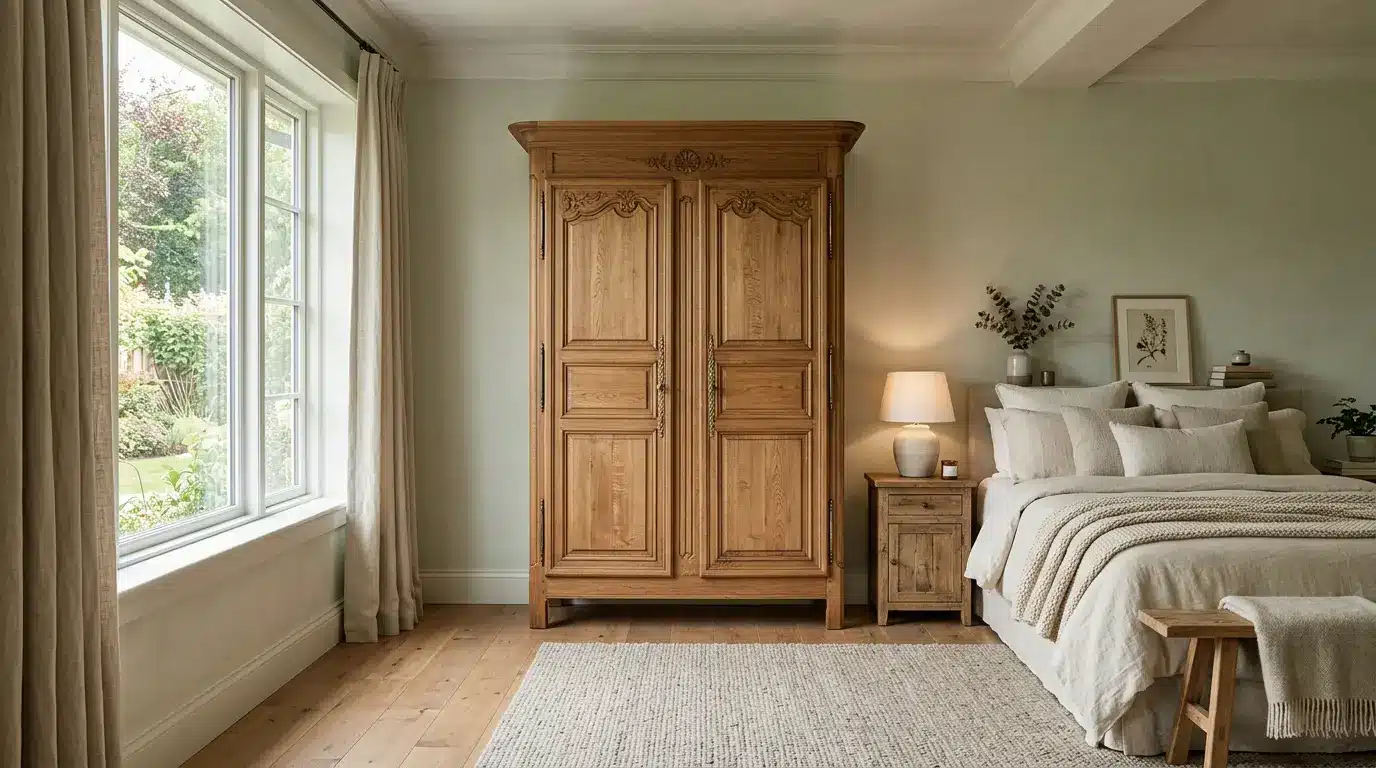
Quick Answer: An armoire is a freestanding storage cabinet used for clothes, linens, electronics, office supplies, or everyday items. It works as a flexible alternative to built-in storage and can be placed in bedrooms, living rooms, offices, or entryways. An armoire is a tall, freestanding storage cabinet built with doors and, traditionally, a good deal of carved wood detail. Unlike built-in closets, an armoire gives homeowners storage they can move, replace, or repurpose as their needs change, which is exactly why the piece has stuck around for centuries while so many other furniture trends have come and gone. Most versions include a full-height design with a mix of shelves, drawers, hanging rods, or compartments inside. The word itself comes from French furniture tradition, tracing back to the Old French armarie, which originally meant a cabinet for storing weapons. Designer Tip: An armoire should do more than solve a storage problem. Its size, finish, and placement need to balance the proportions of the room it sits in, or it ends up feeling like an afterthought rather than a piece of furniture. History and Origins of Armoires Armoires were not originally designed as bedroom furniture. The name comes from the Old French armarie, which traces back to the Latin armarium, meaning a cabinet used for storing weapons, tools, or other valuable items. Early armoires were large, simple storage pieces built mainly for function. Over time, especially during the Gothic and Renaissance periods, artisans began adding carved details, decorative panels, and more refined designs as woodworking techniques improved. By the 17th century, armoires had become symbols of craftsmanship and status in French homes, with makers like André Charles Boulle creating pieces featuring detailed marquetry and intricate carving. This shift from practical storage to decorative furniture is why antique armoires remain valued today. What are the Different Types of Armoires? Armoires come in a variety of designs, and their purpose often depends on their internal construction. Some are designed primarily for clothing, while others work better for linens, electronics, or decorative storage. The right type depends on what you need to store, the size of your room, and your home’s overall style. 1. Wardrobe Armoires Wardrobe armoires are primarily designed for clothing storage and often serve as an alternative to a traditional closet. They usually include a hanging rod for shirts, jackets, and dresses, along with shelves or drawers for folded clothes and accessories. They are especially useful in bedrooms with limited closet space because they provide storage while adding a furniture-like design element. 2. Linen Armoires Linen armoires focus on shelf storage rather than hanging space, making them ideal for towels, bedding, blankets, and table linens. Their enclosed design keeps fabrics protected from dust while giving rooms without built-in linen closets an attractive storage option. They are commonly placed in bedrooms, hallways, or guest areas. 3. Entertainment Armoires Entertainment armoires were originally designed to hide bulky televisions and media equipment behind closed doors. They typically included deep compartments, cable openings, and shelves for electronics. Although less common today, many are still reused for books, games, collectibles, or general living room storage, keeping clutter hidden. 4. Jewelry Armoires Jewelry armoires are compact storage pieces designed to organize smaller accessories. They often include shallow drawers, velvet lined compartments, ring holders, and hooks for necklaces or bracelets. Their slim design makes them a practical choice for bedrooms or dressing areas where regular jewelry boxes may not provide enough space. 5. Antique Armoires Antique armoires are known for their quality construction and timeless appearance. Many are made from solid wood and feature carved details, traditional hardware, and natural aging that gives each piece its own character. They are often used as statement furniture in traditional, vintage, or farmhouse-style interiors. 6. Modern Armoires Modern armoires emphasize simplicity with clean lines, flat-panel doors, and minimal detailing. They are designed to blend into contemporary interiors rather than act as heavily decorative pieces. Many modern versions include adjustable shelves and practical storage layouts, making them suitable for bedrooms, living rooms, and multipurpose spaces. What is an Armoire Used for? An armoire’s role tends to shift depending on which room it lands in, which is part of what makes it such an adaptable piece of furniture. 1. Clothing Storage This is the classic use. Hanging rods hold shirts, dresses, and jackets, while shelves or drawers hold folded sweaters and jeans. A homeowner renovating an older house may choose an armoire specifically because adding a built-in closet would mean cutting into original walls or architectural details worth preserving. 2. Linen Storage The shelving inside many armoires suits bedding, towels, and blankets just as well as clothing, especially in homes with limited linen closet space. 3. Entertainment Storage Older TV armoires were built specifically to hide bulky televisions and media equipment behind closed doors. This use has faded with the rise of flat-screen TVs, though the furniture itself hasn’t gone anywhere. 4. Home Office Storage A closed-door cabinet suits files, office supplies, and books, keeping a home office looking tidy when it’s not in use. 5. Entryway Storage Shoes, bags, and seasonal items all fit comfortably in an armoire placed near a front door, a fairly modern use for a very old piece of furniture. Armoire vs Wardrobe vs Closet The difference between an armoire, wardrobe, and closet often comes down to design, storage style, and use. An armoire is a freestanding piece of furniture with roots in French design, often featuring a mix of hanging space, shelves, and drawers. Wardrobes are also standalone storage units, but they usually focus more on practical clothing storage, especially for hanging garments. Closets, on the other hand, are built into the home and provide permanent storage space. Feature Armoire Wardrobe Closet Type Freestanding furniture Freestanding furniture Built-in storage Design Often decorative or furniture-focused Usually simple and functional Integrated into the room Storage Hanging space, shelves, and drawers Mostly hanging clothing storage Larger storage capacity with shelves and hanging areas Placement Bedrooms or living areas Mostly bedrooms Built into bedrooms or hallways An armoire adds storage with a decorative furniture feel, while a wardrobe focuses mainly on clothing organization. A closet provides the most permanent storage but cannot be moved or easily changed. An armoire can work as a wardrobe, but not every wardrobe has the detailed design or furniture-like character associated with an armoire. Choosing between them depends on your space and needs. Armoires work well in rooms lacking built-in storage or where flexibility matters, while closets suit larger storage needs and permanent organization. How to Choose an Armoire for Your Space Choosing the right armoire is about more than just appearance. Consider your available space, storage needs, interior style, and material quality to find a piece that feels practical and fits naturally into your home. Measure Available Space: Before anything else, measure the height and width of where the armoire will sit, along with door clearance and enough walking space around it once it’s in place. Choose the Right Storage Layout: Decide what you actually need inside. Hanging rods suit clothing, adjustable shelves handle folded items and linens, drawers fit smaller accessories, and open shelving suits books or display pieces. Match Your Interior Style: The style of your armoire should complement the overall look of your room rather than stand out as a separate piece. Traditional interiors pair well with dark walnut armoires featuring carved details and rich wood finishes. Modern spaces usually suit armoires with clean lines, flat panels, and simple finishes that keep the design minimal. Consider Material Quality: Solid wood tends to last longer and holds up better over time, though it comes at a higher price point. Understanding which wood types hold up best for furniture helps narrow the choice, walnut, oak, and mahogany consistently outperform softwoods for pieces that see daily use. Engineered wood offers a more affordable option without sacrificing too much durability for everyday use. Either way, check the hardware quality, since hinges and handles are often the first parts of an armoire to wear out. Where Should You Place an Armoire? 1. Bedroom: Use an armoire as a visual anchor beside the bed or against an empty wall where built-in storage isn’t available. 2. Living Room:A good spot for a piece that doubles as both storage and a design focal point, especially in rooms without built-in shelving. 3. Dining Room:Fits naturally against a long wall, giving the room a furnished, finished look beyond just a table and chairs. 4. Entryway: Positioned near the front door, an armoire can anchor the whole entry the way a console table might, while still hiding everyday clutter behind closed doors. Are Armoires Still Popular Today? Built-in closets have taken over much of the storage role of armoires, which, once filled, naturally reduces how often people reach for one out of necessity. That said, armoires haven’t disappeared. The rise of adaptable, movable furniture has given it something of a second life, particularly in small homes and apartments where built-in storage is limited. Modern armoires today are less about pure necessity and more about combining storage with genuine design intent. People buying one now are often choosing it as much for how it looks as for what it holds. How to Style an Armoire in Your Home An armoire suits a room best when it’s treated as a statement piece rather than something to hide in a corner. Pair it with surrounding furniture that complements its finish, add nearby lighting to highlight its details, and resist the urge to overcrowd the room around it. Updated hardware, like new pulls or hinges, can also refresh an older piece without a full refinish. A few pairings that tend to work well: A vintage armoire in an otherwise modern bedroom, used as a contrast piece A white or painted armoire in a farmhouse interior, keeping the overall palette light A dark walnut armoire in a traditional space, leaning into the furniture’s original character Pros and Cons of Using an Armoire An armoire can add both function and character to a home, but it is not the right storage solution for every space. Its biggest advantage is the flexibility it provides: storage without permanent installation while adding a furniture-like element to the room. However, armoires also take up valuable floor space and may not offer the same capacity as built-in closets. Pros Cons Adds architectural character Takes up floor space Movable storage solution Can be heavy to move Functions effectively without built-ins Holds less than a walk-in closet Serves multiple purposes Requires careful placement planning Understanding both the benefits and limitations helps homeowners decide whether an armoire fits their storage needs, room size, and interior style. Conclusion An armoire is the kind of furniture piece that quietly proves it deserves a spot in the room. It does not need to shout for attention or follow every passing design trend, it simply shows up, holds your things, and somehow makes the space feel more finished. Whether it ends up holding clothes, books, keepsakes, or the mysterious collection of items that need a proper place someday, a well-chosen armoire can become part of your home’s personality. The best pieces are not always the biggest or the most expensive. They are the ones that fit your space, match your style, and make everyday life just a little easier, more than most furniture can claim. Frequently Asked Questions What is the difference between an armoire and a wardrobe? An armoire is usually more decorative and may include shelves, drawers, and hanging space, while a wardrobe is typically designed mainly for hanging clothes. Why is it called an armoire? The word “armoire” comes from the Old French armarie, which originally referred to a cabinet used for storing weapons, tools, or valuable items. What is the English word for armoire? In English, an armoire is generally called a large wardrobe or storage cabinet, though the original French term is commonly used in furniture.

A mailbox is the first thing anyone sees before they even reach your door. Brick just does that job better than wood or metal. No yearly repaint, no warping after a bad winter, and it looks like it’s always belonged there. Starting from scratch is one path. Tearing out a post that’s been leaning for two years is another. Either way, brick gives you more to work with than a trip to the hardware store usually does. Coming up, you’ll find useful style options, from simple columns to designs with built-in planters, lighting, and secure package storage. You’ll also learn what to consider before building, typical costs, and simple ways to keep it looking its best over time. How Do You Plan a Brick Mailbox Installation? A brick mailbox installation starts with the right location and foundation, then moves to the insert and finishing details. 1. Choose a Safe Location: Check road clearance, utility lines, driveway visibility, postal placement rules, and any local codes before you pick a spot. 2. Build a Stable Foundation: A properly sized concrete footing supports the weight of the masonry and holds up against local soil and weather conditions. 3. Install the Mailbox Insert: Set the insert at a practical height and protect it from mortar, moisture, and poor drainage during construction. 4. Add the Brick and Finishing Details: Lay the brick courses evenly first, then add the cap, address plaque, lighting, planter, or landscaping around it. Brick Mailbox Ideas to Match Any Home Style Pick a brick color and design that fit your home’s architecture, driveway, and landscape so the mailbox looks like part of the property, not an afterthought. Popular add-ons right now include planters, lighting, newspaper slots, address plaques, stone accents, and different cap styles. 1. Traditional Red Brick Mailbox Classic red brick shaped into a simple rectangular column pairs naturally with a black metal mailbox insert, creating a timeless look that feels clean and understated. This style works well with Colonial, ranch, and traditional homes, especially when the exterior already includes brick walkways, masonry details, or classic wood trim. For a refreshed finish without replacing the material, painting brick can be an option worth considering. Best for: Colonial, ranch, and traditional home exteriors. 2. Modern White Brick Mailbox Painted or naturally light brick, paired with a dark mailbox insert, creates a sharp contrast against greenery and pavement. Keeping the shape plain, with straight edges and no extra trim, helps the design match a clean, modern exterior without competing for attention. Best for: Modern and minimalist homes with clean lines. 3. Brick Mailbox with an Arched Top A rounded arch on top softens the column’s boxy shape and adds a traditional architectural detail that echoes older masonry work. The curve also draws the eye upward, making a short column feel a bit taller and more substantial from the street. Best for: Homes with arched doorways, windows, or entryways. 4. Flat-Top Brick Mailbox A level concrete or stone cap keeps the look simple while directing rain away from the brick underneath, helping prevent staining and slowing mortar wear. It’s an easy match for almost any brick color since the design stays so plain and adaptable. Best for: Homeowners who want a low-fuss, budget-friendly build. 5. Brick Mailbox with a Stone Cap A natural stone or concrete cap set above the brick column adds contrast and gives the structure a finished, polished edge that catches the eye from the driveway. It also helps shield the brick below from rain, snow, and sun damage over time. Best for: Homes with stone accents on the porch or entryway. 6. Brick and Natural Stone Mailbox Brick paired with stacked stone or stone veneer creates texture and depth and works best when it matches materials already used on your house, driveway, or front walkway. The combination feels more custom than brick alone, without adding much extra cost. Best for: Properties with existing stone or veneer features. 7. Two-Tone Brick Mailbox Two complementary brick colors create a border, band, or patterned section that adds visual interest without requiring extra materials such as stone or metal accents. Keep the pattern simple, maybe one band near the top, so the design doesn’t feel busy or cluttered. Best for: Homeowners who want a custom look without added materials. 8. Brick Mailbox with a Soldier-Course Detail A row of bricks set vertically, rather than the usual horizontal pattern, placed around the mailbox opening or near the top of the column adds a subtle decorative band. It’s a small architectural touch that reads as intentional rather than plain. Best for: Traditional homes that want a subtle upgrade, not a bold one. 9. Herringbone Accent Brick Mailbox A small herringbone brick panel set into the front face adds texture and movement to an otherwise flat surface. Keep the pattern limited to one section, like a front panel or base border, so it stays clear, balanced, and doesn’t overwhelm the design. Best for: Homes with patterned brick or paver walkways already in place. 10. Brick Mailbox with a Built-In Planter A planter built into the side or back of the mailbox holds seasonal flowers, small ornamental grasses, or trailing vines that soften the brick’s hard edges. Swapping plants by season keeps the mailbox looking fresh without any structural changes. Low-maintenance front-yard plants work especially well here because they hold their shape without constant trimming. Best for: Gardeners who want color at the mailbox year-round. 11. Brick Mailbox with a Flower Bed A curved or rectangular garden bed wrapping around the base works well with low, compact plants that won’t grow tall enough to block the mailbox door or house numbers. This works especially well on properties with room to spare near the driveway entrance. Best for: Larger front yards with room for a landscaped bed. 12. Brick Mailbox with a Solar Light A small solar lantern mounted on top of the column or a ground spotlight aimed at it makes the mailbox easier to spot after dark, which helps with deliveries and safety. Solar options skip the wiring, so installation stays simple and inexpensive. Best for: Dark driveways, rural roads, or homes without nearby streetlights. 13. Brick Mailbox with an Address Plaque A metal, stone, or ceramic number plaque mounted on the front or side of the building improves visibility for delivery drivers, guests, and emergency responders. Use large, high-contrast numbers that are clearly visible from the road, especially on long or curved driveways. Best for: Homes on busy roads where quick visibility matters. 14. Brick Mailbox with a Newspaper Slot A separate opening built below the main mailbox keeps newspapers and small deliveries off wet ground, mud, or standing water after storms. This keeps paper goods dry and protected without needing a second, freestanding container near the driveway. Best for: Homeowners who still get daily newspaper delivery. 15. Brick Mailbox with a Package Compartment A larger locking compartment built into the lower section of the column securely holds small parcels, while the mailbox above remains reserved for regular mail and letters. This setup reduces porch theft without needing a separate delivery box. Best for: Frequent online shoppers who want package security. 16. Double Brick Mailbox for Two Homes One wide brick structure fitted with two separate mailbox inserts works well for shared driveways or homes set close together on a single lot. Matching address plaques on each side keep the two units easy to identify for mail carriers and visitors. Best for: Shared driveways or side-by-side properties. 17. Tall Brick Column Mailbox A taller, narrower column creates a stronger visual feature at the driveway entrance without taking up much ground space, which suits smaller yards or tight side lots. The added height also makes the mailbox easier to spot from a distance. Best for: Narrow lots that still want a bold entrance feature. 18. Wide Brick Mailbox with Side Columns Short brick wings or side columns framing the central mailbox add width and presence, which suit a wide driveway, circular entrance, or large front yard with room to spare. This layout often works well paired with matching gate posts or fence columns. Best for: Large properties with wide driveways or grand entrances. 19. Rustic Reclaimed-Brick Mailbox Reclaimed or weathered brick, with its uneven color and worn texture, complements farmhouse, cottage, and older home exteriors that already lean into a lived-in, timeworn look. It also pairs naturally with wood trim, exposed beams, or a gravel driveway, the same details that carry through in an English cottage-style home. Best for: Farmhouse, cottage, and older homes with character. 20. Brick Mailbox with a Small Roof A miniature pitched or sloped roof placed on top reflects your home’s existing rooflines and helps shed rain, snow, and debris off the structure more effectively than a flat cap. This detail works especially well on homes with visible gables or dormers. Best for: Homes with steep or distinctive roof lines. 21. Brick Mailbox with Matching Landscaping Coordinating the brick with nearby edging, pavers, mulch, and plants connects the mailbox to the rest of the front yard, rather than leaving it looking like a separate, disconnected structure dropped at the curb. For people already thinking through modern landscape design, extending those same material choices to the mailbox base ties the whole entrance together visually from the street. Best for: Homeowners who want the mailbox to feel fully built-in, not bolted on. 22. Brick Mailbox with Decorative Iron Accents A small wrought-iron scroll, hook, or trim piece attached to the column adds detail and contrast without changing its overall shape or requiring major construction. This works particularly well on properties that already feature iron railings, gates, or light fixtures. Best for: Homes with existing iron railings, fencing, or light fixtures. 23. Brick Mailbox with a Curved Wall Extension A short curved brick wall extending from one side of the column ties the mailbox into a larger entrance feature, garden wall, or fence line already present on the property. This creates a grander, more cohesive look at the driveway entrance. Best for: Properties with an existing brick wall, entry gate, or fenced yard. How Much Should You Budget for a Brick Mailbox? Cost swings based on size, materials, and whether you hire a mason or build it yourself. Here’s a general breakdown to help with planning. Cost Factor Typical Range Concrete footing and foundation $150 to $400 Basic brick column (materials and labor) $500 to $1,200 Stone or concrete cap $100 to $300 Built-in planter $50 to $200 Solar light or spotlight $20 to $80 Locking package compartment $150 to $400 Full professional installation $800 to $2,500 DIY build (materials only) $200 to $600 Prices vary by region and by the level of detail in the design, so get a local quote before locking in a budget. A basic column costs far less than a wide double mailbox with a planter, lighting, and a built-in stone cap. How Can You Personalize a Brick Mailbox? A brick mailbox doesn’t have to look like every other one on the street. A few personal touches make it feel like it belongs specifically to your house, not just any house. Match your brick to your home’s exterior: Pulling the same brick color or style from your house makes the mailbox look built-in rather than added on. Add a monogram or family name plaque: A small engraved or painted detail turns a functional structure into something more personal. Pick a cap that echoes your roofline: A peaked, flat, or curved cap can quietly mirror the shape of your own roof. Choose plants that match your garden style: Whatever grows near your front door or porch can carry over to the base of your mailbox. Add a house number in your own style: Hand-painted tile, cut metal numbers, or a carved stone plaque all read differently depending on what fits your taste. Frequently Asked Questions Is it Legal to have a Brick Mailbox? Brick mailboxes are generally legal, but they must follow USPS placement guidelines and any local road, safety, or HOA rules. What are the Best Plants to Put Around a Brick Mailbox? Low-growing plants like lavender, ornamental grasses, creeping thyme, and compact shrubs add color without blocking access, all reliable choices from a low-maintenance front yard plant palette that stays manageable year-round. What Flowers Go Best with Brick? White petunias, yellow marigolds, purple salvia, pink geraniums, and red begonias complement the warm tones of brick. What are the Latest Trends in Mailbox Design? Current trends include mixed brick and stone, built-in planters, solar lighting, large address plaques, clean lines, and secure package compartments. How Long Does it Take to Build a Brick Mailbox? A professional can usually build a brick mailbox in one to three days, although the foundation may need extra time to cure. Final Thoughts A good mailbox design fits your home, fits your yard, and stays easy to use every day. Small touches like an address plaque, planter, stone cap, or solar light add character without much extra work. Pick the style that fits your space, then build it to last. Once it’s in place, keep up with the small maintenance tasks, and it’ll hold that fresh, finished look for years.
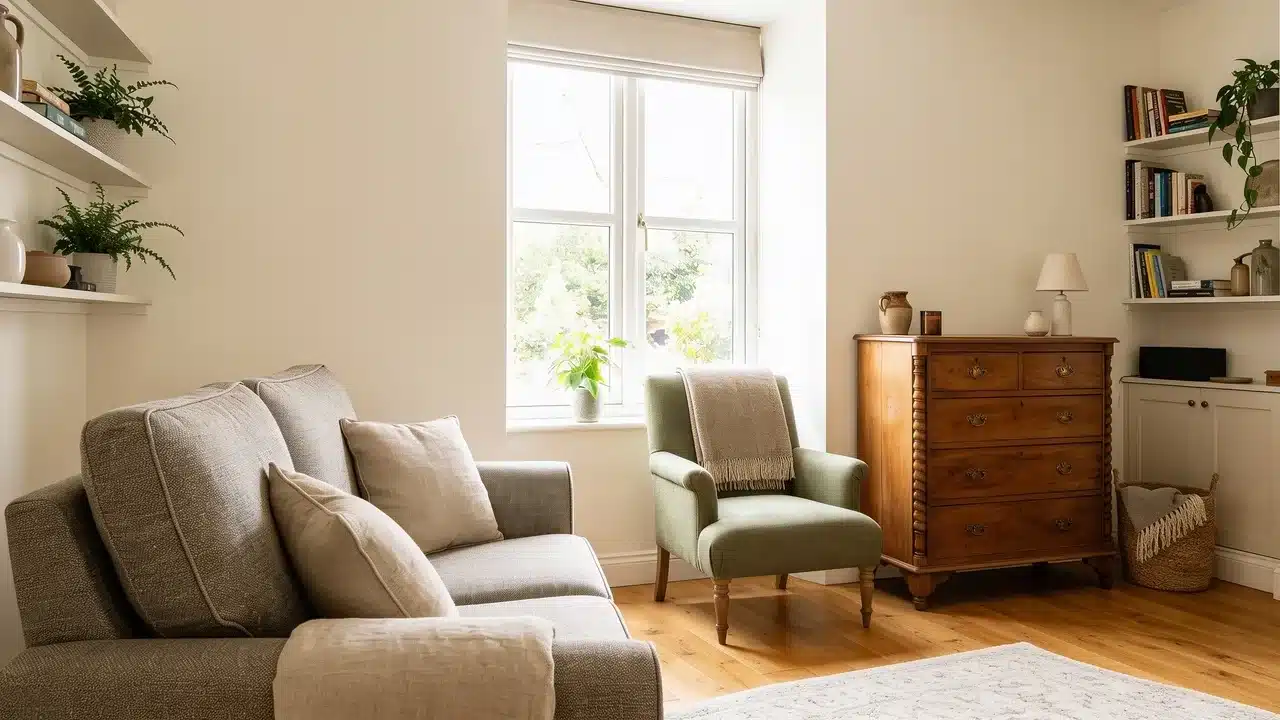
Downsizing comes down to one question, repeated for every room, does this piece earn its spot in the next home? Furniture to keep when downsizing is not always the newest or the largest item you own. It’s the piece that fits the new layout, gets used often, and still means something to you. Cutting back on furniture doesn’t have to mean cutting back on comfort or the pieces that carry real memories. Weigh each item against space, function, build quality, and its personal value, and the smaller home starts to feel like a fit rather than a squeeze. Furniture Worth Keeping When Downsizing Once the evaluation is done, certain furniture categories consistently earn their place in a downsized home. 1. Furniture You Use Every Day A sofa, armchair, dining table, bed frame, dresser, wardrobe, coffee table, or nightstand you reach for every day has already proven its value. Pieces you use daily or near-daily should be your first priority when deciding what to buy. These are the items that shape how comfortable and functional your new home feels from the first day you move in 2. High-Quality Solid Wood Furniture Dressers, cabinets, dining tables, and sideboards are examples of durable furniture that can outlast cheaper counterparts by decades. Oak, walnut, and cherry hold their structure through moves, refinishing, and daily wear. Replacing a well-made solid piece of the same quality usually costs more than keeping and restoring the one you already have. 3. Furniture With Multiple Uses A storage ottoman that works as seating, a footrest, and extra storage all in one uses less floor space. A chest that doubles as a coffee table, a writing desk that fits into more than one room, or a cabinet with flexible storage all follow the same logic. Furniture that adapts to changing needs earns its place after nearly every move. 4. Meaningful Heirloom Furniture Heirloom furniture carries meaning that outlasts its style. A family dining table, antique dresser, or handmade chest deserves space when still in regular use. Condition and fit in the new layout matter as much as the story behind it. Pieces tied to real memories and daily purpose earn their place. 5. Furniture with Built-In Storage Storage matters more once you’ve downsized, since every piece has to pull its own weight. Choosing the right storage solutions for small spaces can help keep a smaller home organized without adding unnecessary furniture. A storage bench by the door, a blanket chest at the foot of the bed, or a dresser and cabinet with deep drawers all keep the home organized without adding a separate storage unit somewhere else 6. Convertible Furniture A piece that serves multiple functions helps a smaller home stay comfortable without an extra room. A sofa bed, or sleeper sofa, combines seating and a guest bed in one piece. A daybed works as everyday seating, and a Murphy bed with a built-in sofa removes the need for a dedicated guest room. 7. Furniture That Fits Your New Home’s Scale Scale gets overlooked more than most. A piece that worked in a larger room can overwhelm a smaller one, even when well made. Apartment-scale sofas, nesting tables, narrow bookcases, and chairs with tapered legs work well in compact rooms. More small space furniture ideas can help create a functional layout without overcrowding the home. Large sectionals, oversized dining sets, and king-size bed frames are the most common mistakes. Which Furniture Should You Let Go While Downsizing? Before moving furniture into a smaller home, review each piece based on fit, function, quality, and personal value. Learning how to declutter before moving can make the downsizing process easier and more intentional. Let Furniture Go If: It creates crowding or makes rooms harder to move through It needs storage space but rarely gets used It no longer suits your current lifestyle or home setup It cannot be repaired, adjusted, or used in any other way You are keeping it only because of guilt or obligation Things to Consider Before Choosing Furniture Before deciding which pieces move with you, a few practical steps make the selection process much more reliable. 1. Measure Your New Space First Room dimensions, doorway widths, and hallway clearances decide whether a piece can even get inside. Measure every room before you commit to keeping anything. Sketch a simple floor plan to scale and place furniture outlines in it before moving day, so you know what fits before the truck is loaded. Check available storage and how much flexibility the layout allows for rearranging later 2. Choose Furniture That Fits Your Life Downsizing is a chance to choose furniture that better suits the way you live today. If you have recently been building a home or adjusting to a new layout, it is also a good time to rethink how much furniture you really need. Consider your daily routines, how often you entertain, and whether your hobbies or priorities have changed. Ask yourself: Do I use this furniture regularly? Does it support my current lifestyle? Would I regret leaving it behind? If the honest answer points toward “no,” that piece becomes a harder case to move. 3. Evaluate Furniture Quality Before Downsizing After years spent looking closely at wood, joinery, and finish work, I’ve learned that build quality is the clearest predictor of whether a piece is worth keeping. Solid wood construction, tight joints, and quality hardware hold up to another move and years of daily use. 4. Separate Sentimental Value from Emotional Attachment Family heirlooms, handmade pieces, and antiques often carry real meaning tied to who made them or what they witnessed. That reason to keep something is valid, as long as the piece still works in your new space and gets used. Keep the pieces that add value to your next home, not the ones you’re holding onto purely out of guilt. Downsizing Furniture Checklist Question Keep or Let Go Does it fit the new home’s layout? Do you use it regularly? Is it built to last through repairs? Does it solve a practical storage or space problem? Does it hold real personal meaning? Should You Replace Some Furniture After Downsizing? Furniture to keep when downsizing should support how you live now, not how you lived in a bigger house. Solid construction, everyday use, and genuine personal meaning are the three things worth considering before anything goes on the truck. Measure everything first, be honest about what you actually use, and keep what still earns its place. A smaller home doesn’t have to feel like a smaller life if every single piece in it is pulling its weight. Walk through each room slowly, imagine the new layout with each piece in place, and let go of anything that no longer fits. Happy Reading The furniture you keep when downsizing should support the way you live now. Choosing pieces with strong construction, practical daily use, and genuine personal meaning helps create a smaller home that still feels complete. From solid wood pieces to flexible storage solutions, each item should have a clear purpose before it takes up floor space. Focus on quality over quantity and keep what truly works for your home. Which piece of furniture are you planning to bring to your new space? Share in the comments below. Frequently Asked Questions How Do You Sell Furniture You Cannot Take with You? Online marketplaces, estate sales, and consignment shops are the most common options. Local buy-and-sell groups also move pieces quickly. Should You Buy New Furniture After Downsizing? Only if existing pieces do not fit the new space. Buying before measuring your new rooms often leads to poor-fitting choices. Is it Worth Reupholstering Furniture Before a Move? Yes, if the frame is solid and the reupholstery cost stays below the price of a comparable replacement piece. Should You Downsize Furniture Before or After Moving? Before. Deciding what stays while you can still measure both homes prevents moving pieces that will not fit the new space. What Should You Do with Antique Furniture That Does Not Fit? Consult an appraiser before selling. Some antiques hold more value than expected and may be worth storing or passing to family.