



Memorial Day table decorations carry a quiet responsibility that other holidays simply don’t. This isn’t the day for seasonal color swaps; it’s the day the table itself becomes a tribute. I put together several distinct setups here, each built around a genuinely patriotic table setting rooted in real military tradition. Not just red, white, and blue for the sake of it, but details that actually mean something. You’ll find the practical elements that tie every setup together, the small touches that lift the look without cluttering it, and answers to the most common questions before you shop. If you’re hosting twenty people or five, your table can make guests feel something worth feeling. The Holiday That Changed What Decoration Means Memorial Day started as Decoration Day in 1868. Families brought flowers to the graves of Civil War soldiers. It was a physical act of remembrance, personal, intentional, and rooted in loss. As the country fought more wars, the scope of the conflict grew. By 1967, it was officially renamed Memorial Day and dedicated to every American who died in military service. The table, in that context, is where Memorial Day decor becomes something more than aesthetics — it’s a modern extension of that original impulse. It brings the act of remembering inside, into a gathering, a meal, a shared moment with people you love. What separates a meaningful setup from a forgettable one is the same thing that defined Decoration Day: every choice should be intentional. That standard runs through everything covered here. Idea 1: The Missing Man / Fallen Comrade Table This table stands apart from the main table, and that separation is intentional. The contrast between the two is where the meaning lives. 1. The Foundation Use a small, round table, never a rectangular one. The roundness is part of the symbolism: a circle has no end, representing unending concern for those who didn’t return. Cover it in a crisp white linen cloth with no pattern, no texture, no embroidery. The starkness is the point. Place it somewhere visible, near the entrance or beside the main table, so guests encounter it before they sit down. 2. The Empty Chair Pull one chair to the table, but do not push it in. It should look like someone stepped away and isn’t coming back. Drape a black sash or ribbon across the back of the chair. The black represents the emptiness left in the hearts of the families. Nothing else belongs on or around the chair. Resist the instinct to add flowers or a name card. The absence is the decoration. 3. The Centerpiece Place one single red rose in a slim, clear glass vase. Nothing else. Set it slightly off-center so it doesn’t look staged. The rose represents the lives of those who served and the loved ones still waiting for answers. Among all Memorial Day centerpieces, this is the one I keep coming back to. A symmetric, perfectly centered arrangement looks deliberate in the wrong way. The slight asymmetry makes it feel like someone placed it there in a quiet, unhurried moment. 4. The Table Items Each item on the table carries a specific meaning. A folded American flag sits to the left of the place setting. An inverted wine glass, never to be filled, stands to the right. A slice of lemon on the bread plate represents the bitterness of absence. A small pinch of salt beside it represents the tears of the families. These are not styling choices. They are part of the tradition. 5. The Framed Explanation Card Without context, guests may not understand what they’re looking at. A framed card explaining the symbolism of every item transforms curiosity into a moment of genuine reflection. Print it on aged parchment paper rather than white cardstock; the texture signals that this is not an ordinary place card. Set it where guests can read it comfortably. This card is often what people photograph and share. 6. The Personal Touch If your family has a direct connection to military service, this layer is where that lives. A branch insignia pin leaned against the vase. A small black-and-white photograph in a simple frame. A set of dog tags resting on the white cloth. One personal item shifts this from a general tribute to a specific one. Specificity is what makes people stop. Generic tributes are noticed. Personal ones are felt. Idea 2: The Branches of Service Table This is the main table. Each seat honors one of the six military branches, and every element of the setup reinforces that structure, from the base to the place card. 1. The Base Start with a deep navy tablecloth that runs the full length of the table. Lay a gold runner down the center. Navy and gold are shared colors across all six military branches; they signal formality without leaning into any single branch’s palette. The combination is clean and serious. It sets a tone before a single plate is placed. Don’t substitute lighter blues or silver. The depth of the navy matters. 2. The Place Cards Print each branch seal on aged card stock: Army, Navy, Marine Corps, Air Force, Coast Guard, Space Force. Place each card at a seat with the branch motto beneath the seal in a smaller font. Most guests won’t know all six mottos. That gap is the point. The card becomes a conversation starter before the meal begins. Use a matte finish throughout. Glossy cardstock reads as casual, and casual works against the intent of this table. 3. The Napkins Each napkin should subtly reflect that seat’s branch color: Army olive, Navy blue, Marine scarlet, Air Force silver-blue, Coast Guard orange, and Space Force midnight. These don’t need to match exact uniform shades. Approximate colors in quality linen work well. Fold them simply. A flat rectangle works better here than an elaborate fold. The napkin should complement the place card without competing with it for attention. 4. The Centerpiece A tall lantern anchors the center of the table. Flank it with six slim bud vases, each holding the flower most associated with that branch. Keep the bud vases low; they should be visible from a seated position without anyone having to crane to see the person across from them. The lantern provides height without blocking sightlines. Odd numbers of flowers per vase always look more natural than even numbers in a small vessel. 5. The Under-Plate Card Beneath each plate, slip a printed card with one remarkable historical fact about that branch, a defining battle, a first, a record. Guests discover it when they lift their plate. The reveal moment turns the setup from visual to participatory. Keep the fact to two sentences maximum. Any longer and guests skim it. Any shorter and it reads as trivia rather than tribute. The right length makes someone read it twice. Idea 3: The Letters Home Table This table is built around the most human thing soldiers did during wartime: they wrote home. Every element reflects that single act. 1. The Base Lay a white tablecloth as the foundation, then run a length of raw burlap or unbleached linen down the center as the runner. The contrast between clean white and rough texture is intentional. The white suggests to the world that the soldiers were writing to was ordered, domestic, and safe. The burlap suggests the conditions from which they were writing. That visual tension runs quietly through the entire setup without needing explanation. 2. The Place Settings At each seat, place a folded letter that has been tea-stained to give it an aged appearance. Seal it before guests arrive with a wax stamp; a simple star or eagle seal works well. Inside, guests find a paraphrased excerpt from a real wartime letter, sourced from the National Archives or Library of Congress. The act of opening the sealed letter at the table is the first moment of genuine connection. Make sure the opening is easy; no one should fumble with it. 3. The Centerpiece Use a vintage wooden crate or a worn cigar box as the vessel. Fill it with loose wildflowers, nothing arranged formally. Lean a small black-and-white photograph of soldiers in the field against the outside of the crate, without a frame. Unframed, it looks found rather than placed, as if it arrived with the crate and was never moved. That quality of accidental discovery carries more weight than a polished, deliberate display. 4. The Runner Accents Scatter a few small objects along the runner between place settings: a brass pen nib, a dried wax seal, a folded, aged envelope with a postmark stamped on the front. None of these need to be genuine antiques; aged replicas are available cheaply and convincingly. Space them unevenly along the runner. The irregularity makes the table feel assembled over time rather than styled in an afternoon. Evenness breaks the illusion entirely. 5. The Chalkboard Sign At the far end of the table, place a small chalkboard sign that reads: “They wrote home so we could gather here.” Write it by hand rather than printing it. Handwriting connects to the theme in a way that clean typography doesn’t. Keep the sign small enough to feel personal, not a large statement piece. Guests should have to lean in slightly to read it. That small lean-in creates the moment this table is built around. Idea 4: The Through the Wars History Table This table assigns each seat to a different American conflict. By the end of the meal, every guest has learned something they didn’t know when they sat down. 1. The Base Source vintage maps from estate sales, antique stores, or printed reproductions online. Cut them to runner width and lay them flat down the center of the table. WWII-era maps of Europe or the Pacific carry an immediate visual weight. Korean Peninsula maps, Vietnam topography, Gulf region charts, each one marks where Americans fought and died. The maps don’t need to be framed or laminated. Flat, slightly worn, and unprotected is better than preserved. 2. The Place Cards Print a card for each seat naming a specific American conflict: the Civil War, WWI, WWII, Korea, Vietnam, the Gulf War, Afghanistan, and Iraq. Include the years the conflict ran and a single sentence about one soldier from that war: name, rank, home state, and what they did. Not a famous general. An ordinary soldier. The ordinariness is what makes it land. Guests read the name and understand, without being told, that it could have been anyone. 3. The Centerpiece Group three to five sepia-toned photographs in simple frames at the center of the table. Mix sizes, one larger frame flanked by smaller ones, create a natural visual hierarchy without formality. Source photographs from public domain military archives. They should show soldiers in the field, not in formal portraits. Portrait photographs look like monuments. Field photographs look like people. This table is about people, not monuments. 4. The Vases Use military-issue tin cups, old canteens, or galvanized metal buckets as vases instead of glass. These vessels reinforce the field setting established by the maps and photographs across the rest of the table. Fill them with simple seasonal flowers, nothing that reads as decorative or arranged. The roughness of the containers against the softness of the flowers creates a visual tension that quietly echoes the whole premise of this setup. 5. The Era Accents Place one or two small artifacts along the runner between the vase groupings: a WWII ration tin, a Vietnam-era compass, or a Desert Storm patch. Label each with a small tag identifying the conflict and year. The labels are what change the objects from décor into anchors. Without them, guests would not be able to admire the objects. With them, guests ask questions. The questions are the point. A table that creates conversation about sacrifice has done its job. Idea 5: The Gold Star Family Tribute Table This is the most emotional of the five. It is built around the families left behind, the ones still carrying the weight long after the service ended. 1. The Base Start with a white tablecloth and a deep gold runner. Gold is the color of the Gold Star, the symbol given to families who lost a service member in active duty. The choice to use gold here is not a styling decision. It is a direct visual reference to that tradition. Keep the base clean and uncluttered. Everything placed on this foundation should have a clear reason for being there. 2. The Yellow Rose Centerpiece Yellow roses are the traditional flower of waiting and remembrance for those who didn’t return. Fill a wide, low vessel with yellow roses and white filler flowers, so guests can see each other clearly across the table. Surround the base of the vessel with small tea lights in clear holders. The candlelight at the base of the arrangement draws the eye inward and holds it there. That quality of stillness is worth deliberately designing for. 3. The Flag Display A folded American flag in a triangular display case belongs at one end of the table, not centered, not mirrored with anything else. The off-center placement signals that it was placed intentionally, not styled symmetrically into the layout. If you have a flag from a family member’s service, this is the right table for it. If not, a new flag folded and cased carries the same visual and symbolic weight without apology. 4. The Remembrance Book Place a small, cloth-covered guest book at the far end of the table with a short handwritten prompt on the open page: “Write a name you want to remember today.” Leave two or three pens beside it. By the end of the gathering, the book fills with names, some familiar to everyone at the table, some known only to the person who wrote them. That collection, accumulated quietly over the course of a meal, is the tribute. 5. The Framed Quote Choose one quote about freedom, sacrifice, or remembrance and frame it simply. Keep the frame small, 4×6 is enough. Lean it against the flag display case rather than standing it upright independently. A lean frame reads as personal. A standing frame reads as institutional. Source the quote from a soldier’s letter, a Gold Star parent’s testimony, or a poet who served. Avoid political speeches. Specificity and humanity matter here more than recognition. Five Tables One Foundation All five tables share a quiet foundation. These elements shape tone, guide emotion, and ensure every setup feels intentional, cohesive, and grounded in meaningful remembrance. Tablecloths and Runners: White linen keeps the base clean and symbolic, while burlap and raw textures add honesty and depth, and glossy or synthetic fabrics should be avoided completely. Flowers With Meaning: Red roses reflect love and sacrifice, white lilies stand for purity and honor, and yellow roses connect to Gold Star families in a quiet, meaningful way. Dinnerware: Skipping disposable plates helps maintain integrity, while enamelware or vintage pieces add authenticity, and simple designs keep the focus on meaning rather than display. Lighting: Soft candlelight creates a reflective atmosphere, lanterns add warmth without distraction, and bright or colored lighting should be avoided to preserve the tone. Food as Décor: Food as décor should stay simple yet thoughtfully arranged, using natural colors like berries and melon, so it feels inviting rather than overly styled or decorative. When every detail is considered, the tables feel connected. What remains is not decoration, but a shared moment of reflection that quietly stays with every guest. Frequently Asked Questions What colors work beyond red, white, and blue? Navy, ivory, and gold appear patriotic without loudness. Black is suitable, as seen on the Missing Man Table. Forest green suits outdoor settings. Aged brass and raw metals add authenticity. The palette should feel earned, not like a party store. How do I decorate a Memorial Day table on a budget? Tea-stained paper for place cards costs almost nothing. Mason jars work as vases. Thrift stores carry enamelware, vintage glassware, and transferware plates. Historical place cards can be made at home for under a dollar each. Budget and meaning are not in conflict. Many powerful table elements cost less than five dollars. How do I display an American flag properly at a table setting? A folded flag in a display case should sit on a table or surface, not on the floor or draped over furniture. Standing flags must be upright and secured. The flag should not touch the table when folded. These rules, outlined in the U.S. Flag Code, ensure respect and seriousness, not decoration. The Final Design Five setups, one shared foundation, and every practical detail you need to pull it off; I hope this gave you something real to work with. A Memorial Day table doesn’t need to be expensive or elaborate. It just needs to be intentional. Every choice you make is a quiet statement about what this day means to you, and the people sitting at that table will feel it even if they never say so. Pick one setup, borrow from a few, or make it entirely your own. Just make it mean something. And if you do build one this year, drop a comment below; I’d love to see it.

Memorial Day is the one day a year when decorating your home actually means something. These Memorial Day decoration ideas are built for people who want more than a box of dollar-store banners. They’re personal, DIY-friendly, and budget-conscious, without being generic. I will talk about every corner of your home: the front door, the porch, the dining table, the backyard, and more. There are quick last-minute fixes, subtle minimalist approaches, and full craft projects for families in this that might help you in times of need. You could be hosting a gathering or marking the day quietly; there’s a setup here worth trying. What Makes Meaningful Memorial Day Decorations? Memorial Day falls on the last Monday of May. It was created to honor U.S. military personnel who died while serving. That’s a different purpose than Veterans Day, which celebrates all who served. Keeping that distinction in mind shapes every decorating decision you make. Red, white, and blue are the right colors, but the why matters. Red represents valor and sacrifice. White stands for peace and purity. Blue carries justice and perseverance. When you know that, the colors stop feeling like a costume and start feeling like a statement, especially when carried through into thoughtful Memorial Day centerpiece ideas that anchor the whole table. A meaningful setup doesn’t have to be heavy or somber. It just needs one layer of intention beneath the surface. That’s what makes guests pause, ask questions, and remember why the day exists. Quick Overview of Memorial Day Decoration Ideas Before diving into the full setups, here’s a category-level snapshot of everything covered. Use this to jump straight to the section that fits your space and time. Indoor Decor: Mantle displays, living room accents, and entryway styling Outdoor Decor: Front porch setups, patio arrangements, and curb appeal ideas Table Decor: Centerpieces, place settings, and food-as-decor styling DIY Crafts: Handmade projects using everyday and budget-friendly materials Last-Minute Decor: Quick ideas that come together in under 30 minutes Each section includes complete, ready-to-build ideas broken into individual elements. Pick what fits your space, skip what doesn’t, and build from there. Front Door and Entryway Decoration Ideas Your front door is the first and last thing anyone sees. A single well-built display here does more than a dozen scattered accents inside. 1. The Poppy Welcome Wreath Difficulty 2, some fiddling with wire, but nothing frustrating Time 45–60 minutes Cost $18–$30, depending on whether you buy faux or dried poppies Tools needed Floral wire, wire cutters, hot glue gun, scissors Red poppies have been the symbol of fallen soldiers since the WWI poem “In Flanders Fields” (1915). That history is what makes this wreath worth building; guests who don’t know the connection will ask, and that’s the whole point. Faux poppies are fine here; they hold up outdoors for the full weekend without wilting. What can go wrong first: if you wire the poppies in without grouping them, the wreath looks sparse and random. Cluster them in sets of 2–3, wired at the base, and press them into the grapevine base at an angle rather than straight on. That’s the difference between a wreath that looks finished and one that looks like a project. Steps: Start with an 18–22 inch grapevine wreath form. No need to add moss or filler; the open grapevine texture is part of the look. Group, your poppy stems in clusters of 2–3. Wrap the stems together with a short piece of floral wire so each cluster behaves as one unit. Press each cluster into the wreath base at a 45-degree angle and secure with a loop of wire around the grapevine behind it. Place clusters at 10 o’clock, 12 o’clock, and 2 o’clock to build a natural crescent shape. Weave dried eucalyptus or olive branch sprigs between the poppy clusters, threading them through the grapevine rather than wiring them on top. This adds depth and keeps it from looking flat. Tie a length of raw linen or burlap ribbon into a loose bow at the bottom of the wreath. Don’t over-tighten it; a relaxed bow looks intentional; a tight one looks like a gift bow. Optional: print or handwrite a small card with the first line of “In Flanders Fields” and the year 1915, laminate it, and tuck it into the wreath near the base. Faster the second time: skip wiring individual stems to the base. Instead, use a generous dot of hot glue directly on the grapevine and press the cluster in while it’s still warm. Holds just as well, cuts the build time in half. 2. The Gold Star Door Setup Difficulty 1, assembly only, no building Time 15–20 minutes Cost $25–$40, including the star and potted rosemary Tools needed Small hook or adhesive strip, ribbon The Gold Star has symbolized a family’s loss of a service member since World War I. Displaying it on your door is one of the most historically grounded choices you can make. It’s quiet, specific, and immediately communicates what the day is actually about, without a word of explanation needed. Mount a small adhesive hook on the back of your door or use an existing knocker to hang a 10–14 inch wooden or metal star, finished in matte gold. Matte reads as intentional; glossy reads as craft store. Cut a length of navy or black ribbon, loop it through the star’s hanging point, and secure it to the hook so the star sits centered on the door. Place two small American flag holders on either side of the doorframe at head height. Slim black or dark wood holders keep the flags from looking like they’re leftovers from a parade. Mount a small printed card beside the door: “Home of the brave. In memory of the fallen.” Plain black text on white card, no additional decoration. Place one potted rosemary topiary at the base of each door side in terracotta pots. Rosemary has symbolized remembrance since ancient times; it’s a detail that rewards anyone who knows the history. Pro Tip: Add a small brass hook behind the star to hold it flush against the door on windy days. Without it, the star swings and knocks, not the atmosphere you’re going for. Front Porch Decor for Memorial Day A porch offers layered space: the railing, the floor, the ceiling, the columns. Neither requires power tools or permanent drilling, and both read clearly from the street. 3. The Military Lantern Row Difficulty 2, the silhouette cutting is the only fiddly part Time 1 hour, including drying time Cost $12–$20 for jars, cardstock, and battery votives Tools needed Scissors or craft knife, twine, battery-operated tea lights or votives At dusk, these lanterns glow with backlit silhouettes through the glass, a soldier standing, a kneeling figure, a flag. The effect is cinematic without being overdone. It’s the kind of display that makes people slow their car down. The most common failure here is using regular cardstock, which is too thick for the backlight to come through. Use tracing paper, vellum, or thin white tissue paper instead; the silhouette reads clean, and the glow is warm rather than blocked. Print or hand-cut your silhouettes on vellum or tissue paper: one soldier standing, one kneeling at a grave marker, one holding a flag. Keep them simple — detail gets lost inside a jar. Roll each silhouette loosely and lower it into a quart-size wide-mouth mason jar, image facing outward. The natural curl will press the silhouette against the glass without any adhesive. Place a battery-operated tea light or votive inside each jar, beneath the silhouette. Never use a real flame inside a sealed glass jar; the heat cracks the glass within minutes. Space the jars evenly along the porch railing. Tie each jar to the railing with a single loop of twine around the neck so it doesn’t tip or roll in the wind. Optional: drape a strand of warm white fairy lights behind the row of jars along the railing. At full dark, this creates soft back-lighting that keeps the display visible even when the individual votives dim. 4. The Military Branch Pennant Porch Difficulty 2 — sewing optional; felt and fabric glue work fine Time 2 hours if making from scratch; 30 minutes if ordering printed Cost $15–$25 DIY; $30–$45 if ordering printed pennants Tools needed Felt or cardstock, fabric glue or sewing kit, jute rope, binder clips or brass rings Standard flag bunting is everywhere on Memorial Day. A banner representing all five branches of the U.S. military is not, and the color-coding makes it genuinely educational. Most guests won’t have seen this done before. The branch colors are specific: Army (black/gold), Navy (navy/gold), Air Force (blue/silver), Marine Corps (scarlet/gold), Coast Guard (blue/white). Getting them wrong undercuts the whole point, so double-check before cutting. Cut five triangular pennant shapes from felt, approximately 9 x 12 inches each, in the correct branch colors listed above. Use fabric glue or a basic whipstitch to attach a contrasting strip of felt along the straight edge of each pennant; this is where the branch name and founding year go, in simple block letters. Fold the top straight edge of each pennant over a length of thick cotton twine or jute rope, and glue or stitch it closed to create a hanging sleeve. Leave about 8 inches of rope between pennants so they don’t crowd each other. Hang the rope between porch columns or along the ceiling line using small brass hooks or removable adhesive strips. The pennants should hang flat; if they’re curling, clip a small binder clip to the bottom point of each one as a weight. Connecting the porch to the interior is worth thinking about. If you’re styling the living room as well, the pennant colors can carry through in throw pillow accents or a mantle arrangement; the same five-branch logic works anywhere in the house. Living Room Ideas for Memorial Day The living room holds people the longest. Decoration here needs staying power, things worth looking at, asking about, and sitting with. Both work best when your living room layout already has a clear focal point; they’re additions, not reorganizations. 5. The Honor Wall This is the most personal thing anyone can do for Memorial Day. A dedicated wall, or even a single shelf, displaying framed photographs of family veterans converts the day from decoration into tribute. Black-and-white printing does most of the emotional work for you, regardless of whether the original photos were taken in color. This is not a craft project. It’s an arrangement, and it takes about 20 minutes once you have the photos printed and framed. 3–6 framed photographs of veterans, printed in black and white, in matching black or dark wood frames for visual cohesion A small handwritten or printed name card beneath each frame: name, branch, years served One red poppy stem or sprig of rosemary laid flat below each photo Optional: a folded flag in its triangular case mounted at the center of the arrangement as an anchor Optional: one framed map of a theater of war where a family member served, used as the largest piece in the arrangement 6. The Empty Chair Tribute The empty chair is a real military ceremony, one seat set aside at official dinners to represent those who didn’t come home. In a living room, it functions as a quiet installation rather than a formal ceremony, and it works precisely because it’s unexpected. It stops people mid-conversation. That’s the point. This takes about 10 minutes to set up and requires zero craft skill. One chair was placed slightly apart from the main seating arrangement, facing into the room, not toward a wall A neatly folded American flag was placed on the seat One single white rose lay across the flag A small handwritten card resting against the rose: “This seat is held for those who served and did not return.” Optional: a single candle on the side table beside the chair, lit during the day. Optional: a black-and-white photograph of a specific fallen service member placed on the armrest If you want the living room itself to feel more intentional year-round, not just on holidays, the principles behind a modern organic living room apply here: fewer pieces, more considered placement, natural materials that hold up over time rather than trendy accents that date quickly. Fireplace and Mantle Decoration Ideas The mantle is already a display surface; Memorial Day just gives you a reason to use it more deliberately. 7. The Five Candles Tribute Difficulty 1, arrangement only Time 10–15 minutes Cost $20–$35 for five pillar candles Five candles. One for each branch of the military. The simplicity is the point, and anyone who asks gets a real answer about what they’re looking at. The arrangement is calm, symmetrical, and completely specific to the day. The branch colors are: olive/green (Army), navy blue (Navy), steel blue (Air Force), scarlet red (Marines), and white (Coast Guard). Place five pillar candles in a stepped arrangement on a raw wood, slate, or galvanized metal tray: 4 inches, 6 inches, 8 inches, 6 inches, 4 inches from left to right. The pyramid silhouette reads cleanly from across the room. Tie a small handwritten or engraved tag to the base of each candle with the branch name. Lay sprigs of rosemary flat between the candles on the tray. This is not decorative filler; rosemary has meant remembrance since ancient Greece, and it earns its place here. Optional: add a sixth white candle placed slightly in front of the row, labeled “For all who served,” to extend the tribute beyond the five branches. 8. The Poppy and Dog Tag Garland Difficulty 2. The Garland building takes patience Time 45–75 minutes Cost $30–$45 including stamped dog tags Tools needed Floral wire, wire cutters, thin black cord, or ball chain This garland layers two of the most symbolically loaded Memorial Day elements, red poppies and dog tags, into one display. The metal tags add a small sound when they shift against each other, a quiet detail that most people don’t expect. It works on rustic and modern mantles equally well. Order stamped dog tags from Etsy ahead of time; most sellers can turn them in 3–5 days. The words to stamp: Honor, Remember, Valor, Sacrifice, Fallen, Serve. Start with a 4–5 foot base garland of dried or faux eucalyptus, sage, or olive branches. Lay it flat on the mantle and drape the ends over the sides naturally; don’t try to make it perfectly symmetrical. Cluster 2–3 red poppy stems together and wire them at the base, then press each cluster into the garland at even intervals. Aim for 5–6 clusters across the length. Cut lengths of thin black cord or ball chain at 3, 5, and 7 inches. Attach one stamped dog tag to the end of each. Tie or loop the cords onto the garland between poppy clusters, varying the lengths so the tags hang at different heights. Pin one small American flag upright at each end of the mantle, outside the garland, as a hard edge to the arrangement. Optional: center one framed vintage photograph or military portrait above the mantle as the anchor piece for the whole display. Dining Table Setup for Memorial Day The table on Memorial Day is where the day becomes a shared experience. Good table decor doesn’t compete with the food; it adds one layer of intention to the meal. 9. The In Flanders Fields Tablescape The poem “In Flanders Fields” by Lt. Col. John McCrae (1915) is why red poppies became the symbol of fallen soldiers after WWI. Most dinner guests don’t know that. This centerpiece is built entirely around the poppy and that story, and it gives you the natural opening to tell it. A long, low wooden tray or galvanized tin trough running the length of the table center Fresh or faux green moss is laid inside the tray to cover the base completely 15–20 red poppy stems arranged in loose clusters across the moss, at varying heights A small printed card in the center with the full text of “In Flanders Fields,” plain black text on white card, no decoration Tea light candles in clear holders placed between poppy clusters Optional: one white poppy placed at the head-of-table setting to represent peace 10. The Rosemary and Veteran Place Setting This setup turns each seat at the table into a small act of remembrance. Each place card carries the name of a veteran, family member, historical figure, or both, and a sprig of rosemary ties it together. Rosemary has symbolized remembrance since ancient times. It’s an herb choice that rewards anyone who knows the history, and a conversation starter for everyone who doesn’t. A place card at each seat, handwritten or printed, with a veteran’s name, branch, and years of service One fresh sprig of rosemary lay diagonally across each folded napkin Cream or white linen napkins, folded simply, no elaborate folds needed A single small red poppy bud or dried poppy head lay beside each water glass Optional: a short card beneath each place card explaining the veteran’s connection, family member, local figure, or historical name Backyard and Patio Decoration Ideas The backyard is where Memorial Day gatherings live. People eat here, talk here, and stay long after the food is gone. 11. The Memorial Lantern Patio This setup creates a lit gathering space that feels ceremonial at dusk without being somber. Warm string lights overhead, combined with lanterns at ground level, do the atmospheric work. The tribute corner gives it the one layer of meaning that separates this from generic outdoor party lighting. Warm white string lights strung overhead in a grid or canopy pattern across the patio space 4–6 lanterns at floor level along the patio perimeter, mismatched sizes work well Each lantern holds a white pillar candle and a single red poppy stem laid against the glass One dedicated tribute corner: a small table with a folded flag, a framed photo of a veteran, and a single lit candle A hand-lettered chalkboard sign near the tribute corner: “We remember. We gather. We honor.” Optional: small American flags on thin stakes placed in the potted plants around the patio edge 12. The Patriotic Herb and Flower Patio Bar This setup doubles as decor and function. A long outdoor table is styled with potted herbs and flowers in the right colors, all of which are actually usable for food and drinks. It looks like a styled display and works as a garnish and drink station at the same time. One of the few ideas on this list that pulls double duty the whole afternoon. Three large terracotta or white ceramic pots: one with rosemary (remembrance), one with red geraniums or petunias (valor), one with white chamomile or alyssum (peace) Pots arranged in a staggered linem, tallest center, shorter on sides A small chalkboard tag in each pot, noting the plant name and its symbolic meaning Glass drink dispensers flanking the pots, lemonade, water with red berry ice cubes; for a functional layer Cloth napkins in red, white, or natural linen, rolled and placed in a galvanized bucket nearby Lawn and Garden Patriotic Decor Your lawn and garden offer more display space than most people think to use. These two ideas work with the outdoor landscape rather than simply covering it, and both read clearly from the street. 13. The Field of Honor Difficulty 1, No tools beyond a rubber mallet Time 30–45 minutes, depending on lawn size Cost $20–$35 for 30–50 flags on wire stakes Rows of small American flags planted in precise, even lines directly evoke the white headstone rows at Arlington National Cemetery. It’s the single most visually arresting thing you can do with a front lawn and requires no building, no drilling, and no tools beyond a rubber mallet. It stops people on the sidewalk. The precision is everything; a ragged field misses the reference entirely. Mow the grass before you start. The contrast between the flags and a clean-cut lawn is the visual. Use a measuring tape and two stakes with string to set straight row lines across the lawn. 6 inches between flags within a row, 12 inches between rows. Press flags into the lawn along your guide lines using a rubber mallet. Push until the stake is fully in the ground; flags that wobble and fall undercut the whole effect. Plant one slightly larger flag at the front-center of the field as the focal anchor. Place a small printed sign at the edge of the display: “In honor of those who gave everything. [Your family name], Memorial Day [Year].” 14. The Poppy Garden Border A poppy-lined walkway turns the path to your front door into the most symbolically loaded walk of the day. Red poppies along a path feel intentional and seasonal, and because most neighbors won’t know why poppies specifically, it becomes a natural conversation starter every time someone walks up. 20–30 red poppy plants or stems placed in alternating clusters of 2–3 along both sides of a garden path or walkway edge Heights deliberately varied, taller stems at the back, shorter at the front, for a natural rather than planted look A small printed stake card at the beginning of the path: “Red poppies have honored fallen soldiers since 1920.” Optional: white alyssum or baby’s breath tucked between poppy clusters to soften and widen the border Optional: one sprig of rosemary tied with red twine, placed at the foot of the front door as the final note Quick Last-Minute Memorial Day Decorations (Under 30 Minutes) If you’re reading this on Friday night or Saturday morning, here are the four ideas from this list that work with the least lead time, no craft store run required for most of them. The Empty Chair Tribute: One chair, one folded flag, one white rose, one card. 10 minutes. Everything you need is either at home or one gas station stop away. The Five Candles Tribute: Five pillar candles in branch colors from any home goods store, arranged on a tray with rosemary sprigs. 15 minutes. The Field of Honor: Flags on wire stakes from most hardware stores, pressed into the lawn in straight rows. 30–40 minutes depending on lawn size. The Gold Star Door Setup: A star from a craft store, a length of ribbon, and two small flags in holders. 20 minutes, no tools needed. Common Mistakes to Avoid When Decorating for Memorial Day A few small missteps can accidentally flatten the meaning of the day. Here’s what to watch for before you start pulling things out of storage. Over-decorating without meaning: More isn’t always more. A room full of generic patriotic items can feel loud without saying anything real. Choose fewer, more intentional pieces. Misusing the flag: The U.S. Flag Code has specific guidelines. Flags should never touch the ground, be used as tablecloths, or be displayed worn or torn. Repetitive color use without variation: Red, white, and blue work. But flat, unvaried application reads as generic. Texture, material, and thoughtful arrangement are what create depth. Ignoring outdoor spaces: The outside of your home is part of the display. A considered porch or entryway sets the tone before anyone steps inside. Getting these things right takes no extra effort. It just takes a moment of intention before you start. Wrap Up Every home tells a story on Memorial Day. With the right Memorial Day decoration ideas, you can say something real, not just patriotic, but personal. I have covered DIY crafts, porch displays, tabletop setups, minimalist accents, and quick last-minute fixes. Each one was built to carry some meaning alongside the aesthetics. Take what fits your space and your time. Leave what doesn’t. And if one of these DIY Memorial Day decorations sparks something new, build it your way. Drop what you made in the comments; those are always the ideas worth reading. Frequently Asked Questions What decorations are appropriate for Memorial Day? Appropriate Memorial Day decorations balance remembrance with a quiet acknowledgment of the season. Red, white, and blue are standard. Poppies, flags, and stars carry specific symbolic weight. The most appropriate setups are intentional ones, not just festive. Can you decorate your house for Memorial Day? Absolutely. Decorating your home for Memorial Day is a meaningful way to mark the occasion. It doesn’t require an elaborate setup. Even a single flag displayed correctly, or a small arrangement by the front door, is enough to acknowledge what the day represents. What colors are used for Memorial Day decorations? Red, white, and blue are the primary colors. Red represents valor and sacrifice. White stands for purity and peace. Blue carries justice and perseverance. Neutral tones, cream, tan, and natural wood work well as supporting bases that keep the palette from feeling flat. How is Memorial Day different from other patriotic holidays? Memorial Day specifically honors U.S. military personnel who died in service. Veterans Day honors all who served, living or deceased. Independence Day celebrates the nation’s founding. Memorial Day carries a quieter, more reflective tone, which is worth reflecting in how you choose to decorate.
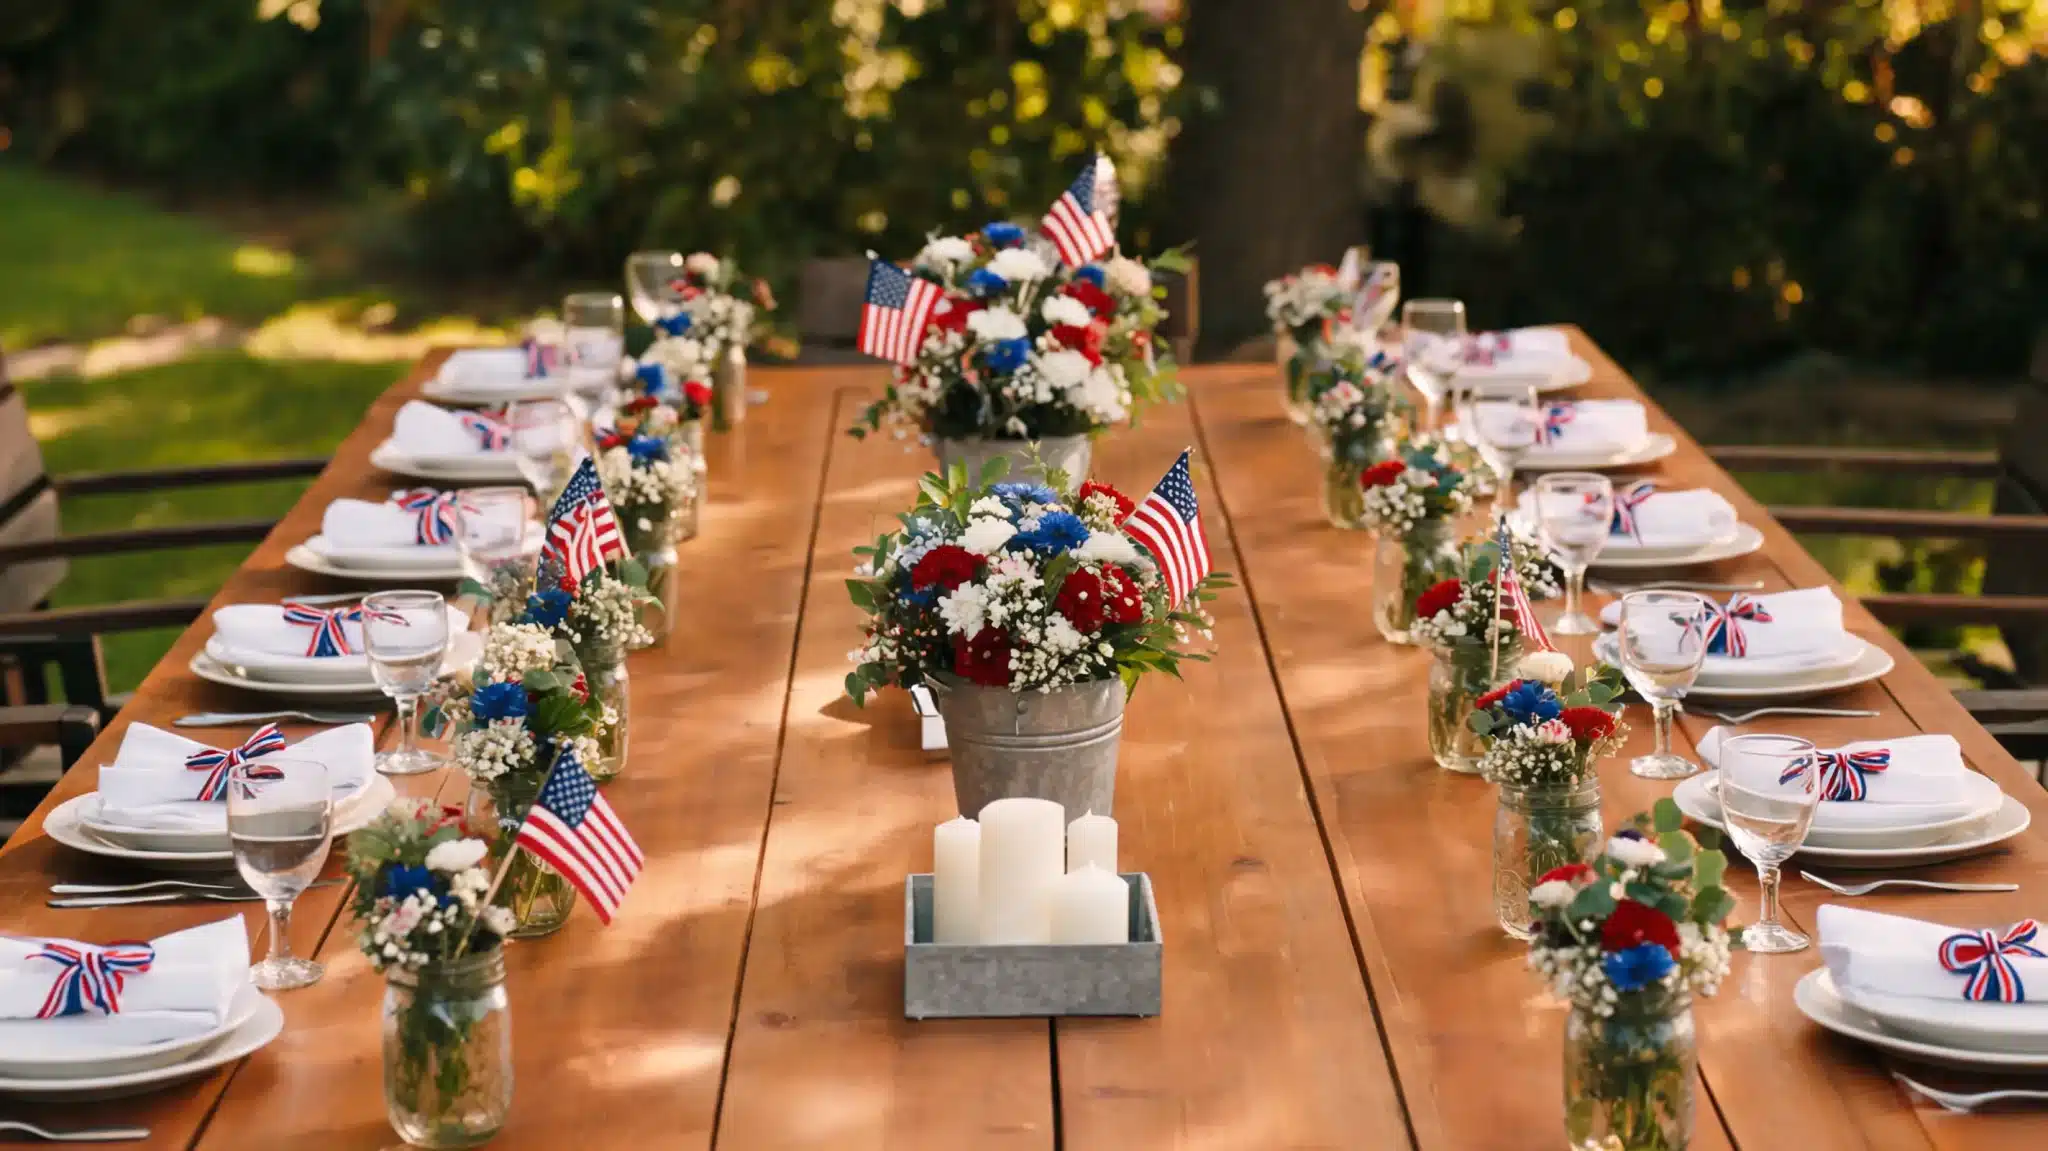
A good Memorial Day centerpiece idea doesn’t take a florist’s budget or three hours of prep. Most of the ones I’ve put together cost under $15 and were done before the first guests arrived. What they did take was knowing which details actually show and which ones don’t matter once food hits the table. Memorial Day carries weight. It’s about honoring and remembering, and a well-set table quietly reflects that without turning your backyard into a parade float. The centerpiece is the first thing people see when they sit down, get it right, and everything else reads as intentional, even if the rest of the setup was thrown together. I’ll cover DIY designs you can build from hardware store supplies, flower combinations that hold up in summer heat, indoor and outdoor versions, and the small details that keep the whole table from looking scattered. If you’re also decorating your front door, these Memorial Day wreath ideas pair perfectly with any of the centerpiece setups here. Difficulty 2/5, Most designs require no special skills Time 15–30 minutes per centerpiece Cost Range $5–$20 for DIY versions; $0 extra if reusing supplies Tools Needed Hot glue gun, scissors, paintbrush (for painted mason jar versions) Skill Required Beginner, no floral arrangement experience needed The most common mistake people make with patriotic centerpieces is overcomplicating them. The project card above tells you what you actually need before you start buying things you won’t use. What Actually Makes a Patriotic Centerpiece Work Before assembling anything, it helps to know which decisions actually affect how the finished piece reads from across the table. There are four of them, and color is the one most people get wrong first. Element What to Do What Goes Wrong Color Palette Pick one red, one blue, and use white as a balance Mixing burgundy, navy, and cobalt together reads muddy Height and Scale Match the centerpiece height to the table size Tall arrangements on small tables block sightlines and conversations Texture Mix Combine florals, metal, wood, and fabric One material only falls visually flat, no matter how good the flowers are Lighting Add a candle or small lantern for evening use Skipping lighting entirely kills the table once the sun goes down Color does the heavy lifting. Texture adds depth. Lighting finishes the job after dark. Get those four right, and everything else falls into place without much effort. Memorial Day Centerpiece Ideas for the Dining Table The indoor dining table is where these designs need to hold up under close inspection, as people sit around it for hours. 1. Classic Mason Jar Flower Arrangement Three mason jars, of different heights, filled with red carnations, white daisies, and blue hydrangeas, are one of the most reliable indoor Memorial Day centerpiece ideas you can put together. It looks handcrafted, costs almost nothing, and works on any table size because you control how spread out the cluster sits. Varying jar heights does most of the design work for you. The eye moves naturally from the tallest to the shortest and back, no styling tricks required. Where to buy: Jars at IKEA or Walmart; flowers at any grocery store or farmers market Best for: Casual dining tables and kitchen counters where a relaxed, homemade look fits 2. Galvanized Metal Bucket Display A galvanized metal bucket filled with mixed red, white, and blue flowers adds a rustic focal point with almost zero assembly time. The metal contrasts with soft florals in a way plastic containers can’t replicate; it gives the whole arrangement an intentional, layered look without requiring any arrangement skill. Use floral foam inside to hold stems upright and extend flower life through a full afternoon and evening of use. Where to buy: Amazon, Home Depot, IKEA, or Walmart for galvanized buckets Best for: Farmhouse, rustic, or outdoor-inspired dining rooms 3. Lantern and Floral Combo Centerpiece A glass or metal lantern in the center of the table, surrounded by small clusters of red and white flowers with blue ribbon accents, is the one centerpiece that genuinely changes character after dark. Daytime it’s a styled floral arrangement. Evening, it becomes something else entirely. Battery-operated candles inside the lantern are the safer call for indoor setups; same warm glow, zero fire risk during a long dinner. Where to buy: Lanterns at HomeGoods, TJ Maxx, Amazon, or Target Best for: Evening gatherings and dinner parties where the table needs to carry the ambiance 4. Tiered Tray Patriotic Display A two or three-tiered tray styled with small flag picks, white pillar candles, star ornaments, and mini florals is the right call for smaller dining tables that need height without width. It fills vertical space without overwhelming a four-person table the way a wide flat arrangement would. Swap out the florals for small desserts or themed treats if the table is doubling as a food display; the tray structure holds up either way. Where to buy: Tiered trays at Amazon, HomeGoods, Hobby Lobby, or TJ Maxx Best for: Smaller dining tables where a flat arrangement would disappear visually 5. Patriotic Candle Tray Arrangement A wooden or metal tray with three white pillar candles at varying heights, surrounded by red and blue florals and scattered star confetti, creates a clean, structured Memorial Day centerpiece that reads as deliberately styled rather than assembled in ten minutes, even if it was. Keep the candles unscented. Scented candles compete with food during dinner, and the last thing anyone wants at a Memorial Day cookout is a vanilla-and-carnation situation. Where to buy: Trays at IKEA or Target; candles at HomeGoods, Bath and Body Works, or Amazon Best for: Formal dining tables where a polished, structured centerpiece fits the setting 6. Patriotic Centerpiece DIY Wreath A red, white, and blue wreath laid flat in the center of the table, with candles or small florals placed in the middle, is one of those ideas that seems obvious once you see it, but most people never think to try. The same wreath hanging on your wall or as part of your door ideas for home décor can pull double duty across the whole space before guests arrive. Where to buy: Pre-made wreaths at Hobby Lobby, Amazon, or Etsy Best for: Large dining tables that need wide coverage without a tall arrangement blocking sight lines Any one of these works on its own. Combine two, say the table runner from the decor section below, with one of these centerpieces, and the dining table becomes the strongest visual in the whole setup. Outdoor Memorial Day Centerpiece Ideas Outdoor tables have three problems indoor ones don’t: wind, direct sunlight that wilts fresh flowers fast, and the fact that they’re sitting in open space that swallows small centerpieces whole. 7. Flag and Greenery Bucket Centerpiece A metal or clay pot with a small American flag, fresh greenery, and a handful of red and white flowers is the quickest outdoor centerpiece on this list. It’s lightweight, easy to move if you’re rearranging seating at the last minute, and handles mild wind without tipping. Anchor the flag stem deep into floral foam inside the pot, not just pushed into soil. Shallow placement means the flag falls at the worst possible moment, usually mid-dinner. Where to buy: Pots at Home Depot or Walmart; flags at Dollar Tree or Amazon Best for: Picnic tables, patio dining tables, and backyard BBQ setups 8. Patriotic Lantern Cluster Centerpiece Three lanterns at varying heights, each holding a red, white, or blue candle, are grouped in the center of an outdoor table. The varying heights create visual interest, and the lanterns handle the main outdoor problem with candles: wind. Surround the base of each with white pebbles or fresh greenery to anchor the display and give it a finished look. Where to buy: Lanterns at Amazon, Target, Home Depot, or IKEA Best for: Evening outdoor dinners where ambiance and wind-resistance both matter 9. Wooden Crate Floral Display A small wooden crate or wine box filled with red, white, and blue flowers and a few small flags is sturdy enough for outdoor use and adds a warmth that metal or plastic containers don’t. Wood texture alongside soft florals is one of those combinations that reads expensive regardless of the actual budget. Line the inside with a plastic bag before adding floral foam; water will destroy an unprotected wood box after a few hours. Where to buy: Wooden crates at Hobby Lobby, Michaels, Amazon, or craft stores Best for: Rustic or farmhouse-themed outdoor setups and backyard BBQs 10. Patriotic Mason Jar Lantern Cluster Three mason jars filled with layered sand, pebbles, or water beads in red, white, and blue, with a tea light sitting on top of each. Make a portable outdoor centerpiece that works on uneven picnic tables because the sand base stabilizes everything. Cluster them on a wooden board or tray, and they look intentional rather than just placed. Where to buy: Mason jars at Walmart or IKEA; sand and pebbles at Dollar Tree or craft stores Best for: Picnic tables and backyard setups where portability and lightweight matter 11. Balloon Bouquet Table Centerpiece Red, white, and blue balloons tied to a weight in the center of an outdoor table. Mix latex with star-shaped foil balloons for variety. The only setup note that actually matters: keep the strings short. Long strings mean balloons drift into faces throughout the meal, and the table stops feeling festive around the third time someone bats one aside. Where to buy: Party City, Dollar Tree, Amazon, or Walmart for balloons and weights Best for: Casual backyard parties, kids’ tables, and daytime outdoor celebrations Outdoors, the right centerpiece is always the one that holds its ground. Keep it simple, keep it sturdy, and the open space works for the setup instead of against it. Table Decor That Makes the Centerpiece Actually Land A centerpiece sitting on a bare table looks like an afterthought. These additions are what make the whole setup look like it was planned together. 12. Patriotic Table Runner with Star Print A navy or red striped table runner defines the decorating zone, frames the centerpiece, and ties the table together with one piece. Pair with white dishes and cloth napkins, and the whole setup photographs cleanly without any other styling work. Where to buy: Amazon, Etsy, HomeGoods, Pottery Barn, or Target Best for: Both indoor and outdoor tables as the foundational layer 13. Patriotic Place Settings with Flag Picks A small flag tucked into each folded napkin at every place setting is a detail that costs almost nothing and makes the table feel genuinely thoughtful. Write each guest’s name on a small tag tied to the flag stem, and it doubles as a place card; two problems solved with one Dollar Tree purchase. Where to buy: Flag picks at Dollar Tree, Amazon, or Party City, usually in bulk packs Best for: Any setup where individual place settings are part of the overall look 14. Red Gingham Tablecloth Base Layer A red gingham tablecloth communicates the holiday immediately without requiring any other color work. Layer a white or natural linen runner across the center, and the centerpiece sits against a two-toned base that makes everything above it pop. Works equally well indoors and outdoors and wipes clean after a BBQ, which matters more than people remember when they’re setting up. Where to buy: Amazon, Walmart, Target, or IKEA for outdoor-friendly tablecloth options Best for: Casual BBQ setups, picnic-style gatherings, and backyard outdoor dining 15. Patriotic Dessert and Snack Display Table A tiered stand loaded with red, white, and blue treats, strawberries, marshmallows, blueberries, and themed cookies, works as both a centerpiece and a food station. Add small flags between the tiers and a scatter of star confetti on the tray. Replenish as things get eaten so the display stays full throughout the event rather than looking ransacked by the second hour. Where to buy: Tiered stands at Amazon or HomeGoods; themed picks at Party City or Walmart Best for: Buffet setups, dessert tables, and kitchen counters during larger gatherings 16. Patriotic Napkin Fold with Ribbon Tie Rolled cloth napkins tied with red, white, or navy twine on each plate refine a basic table setting into something that looks like someone actually styled it. Tuck a small sprig of baby’s breath or a star pick into the twine. It costs almost nothing and takes under five minutes for a full table, the highest ROI detail on this list. Where to buy: Cloth napkins at IKEA or Amazon; twine at Hobby Lobby, Michaels, or Dollar Tree Best for: Any Memorial Day table where small details make the biggest cumulative difference Small details add up fast. Get these five right, and the whole table looks planned weeks in advance, even if it was assembled the morning of. DIY Memorial Day Centerpiece Ideas You Can Build at Home Store-bought works fine. But the DIY versions on this list cost less, look more personal, and, most importantly, can be stored and reused next year without any degradation. 17. Painted Mason Jar Flower Vases What can go wrong first: Paint applied to a damp or greasy jar peels at the rim within an hour. Clean and dry the jars completely; this takes three minutes and prevents the most common failure point. Materials needed: 3 clean glass mason jars in different sizes, red and blue chalk paint, painter’s tape, paintbrush, and fresh flowers in patriotic colors. Clean and dry the jars completely before starting. Tape off any sections you want to keep unpainted. Paint each jar a different color: one red, one blue, and leave one white or natural glass. Let dry fully for at least one hour before removing tape. Fill each jar with fresh flowers in complementary colors. Cluster all three jars on a tray or wooden board. Faster the second time: Skip taping entirely. Paint each jar a solid color all the way to the rim. The imperfect edges read as handmade, not sloppy, and you save ten minutes. 18. Rustic Wooden Box Centerpiece What can go wrong first: Skipping the plastic bag liner inside the crate. Water from floral foam soaks through unprotected wood in under an hour, and the crate warps or stains the table. This step takes 30 seconds and protects both. Materials needed: Small wooden crate or wine box, chalk paint or spray paint, floral foam, mixed red, white, and blue flowers, small American flag picks, greenery or eucalyptus. Lightly sand the box if needed for a smooth paint surface. Paint the outside in alternating stripe sections, or leave the wood natural. Line the inside with a plastic bag to protect from water. Cut the floral foam to fit snugly inside and soak it in water. Insert greenery first as a base layer across the foam. Add flowers in color clusters: red, white, and blue grouped separately. Tuck flag picks in at varying heights to finish. 19. Star Candle Holder Tray Display What can go wrong first: Candles that tip during the meal. Use candle holders — not just candles balanced on the tray — and fill gaps with decorative stones heavy enough to act as a buffer if someone reaches across the table. Materials needed: Wooden or metal serving tray, 3 white pillar candles at varying heights, star-shaped candle holders or glass votive holders, red and blue decorative stones or sand, small flag picks and star scatter. Place the tray flat on the table as the base. Arrange the three candles at varying heights using holders. Fill gaps between candles with red and blue decorative stones. Scatter star confetti or small star ornaments across the tray surface. Add flag picks at each corner of the tray as framing elements. Light candles only when guests are seated. Never leave them unattended. 20. Tin Can Patriotic Vase Cluster What can go wrong first: Painting cans that still have label residue. The label glue repels paint, and you get patchy coverage. Soak the cans in warm water for ten minutes before starting; the labels and glue come off cleanly. Materials needed: 5 clean tin cans in different sizes, red and blue chalk or spray paint, twine or ribbon, a hot glue gun, and fresh or faux flowers. Soak and remove labels, then clean all cans thoroughly. Paint each can, alternating red, white, and blue. Let dry completely, then wrap the rim with twine secured by hot glue. Arrange the five cans in a cluster on a wooden board, tallest in the back. Fill each can with a single color of flower for a color-blocked look. Place the whole cluster directly on the table runner as the centerpiece. Fastest DIY on the list: Paint the cans the night before. The next morning, add flowers and it’s done in under ten minutes, the quickest patriotic centerpiece setup if you’re working with morning-of prep time. 21. Burlap and Ribbon Floral Arrangement What can go wrong first: Burlap wrapped too tightly frays within a couple of hours, especially near the hot glue attachment points. Wrap loosely and use enough glue at the top and bottom edges, not just a single line down the back, to keep it from unraveling mid-event. Materials needed: Glass vase or mason jar, burlap ribbon in natural tone, red or blue satin ribbon, floral foam, mixed patriotic flowers, hot glue gun. Wrap the outside of the vase with burlap ribbon and secure with hot glue at the top, bottom, and back seam. Layer a thinner red or blue ribbon over the burlap and tie a bow at the front. Soak floral foam in water and place snugly inside the vase. Insert greenery first as a base, filling evenly around the foam. Add flowers in a dome shape, working from the center outward. Alternate red, white, and blue blooms so no two colors sit directly next to each other. None of these requires special skills or more than thirty minutes. The results consistently look like they took longer, which is the whole point of doing it yourself. Budget Breakdown: What Each DIY Centerpiece Actually Costs DIY Centerpiece Estimated Cost Time to Make Painted Mason Jar Flower Vases $8–$12 20 mins Rustic Wooden Box Centerpiece $15–$20 30 mins Star Candle Holder Tray Display $12–$18 15 mins Tin Can Patriotic Vase Cluster $5–$10 25 mins (plus overnight dry time) Burlap and Ribbon Floral Arrangement $10–$15 20 mins Fresh flowers are the most expensive line item across all five. Swap them for faux florals, and every budget drops by roughly half, and the centerpiece lasts for years instead of two days. Mistakes That Make a Centerpiece Fall Flat Even well-planned setups fail because of a few overlooked details. These are the ones I’ve watched sink an otherwise solid table, and they’re all fixable before guests arrive. Going too tall: Blocks eye contact across the table. Keep arrangements low or use a narrow base if you need height; tall and wide is the combination to avoid. Overcrowding the arrangement: Empty space inside the design makes individual flowers visible. More isn’t better once you’re past a certain density. Wrong scale for the table: A single small mason jar on an 8-foot dining table looks lost. Match the centerpiece footprint to the surface size, or use multiple smaller pieces spread along the table length. Clashing shades: Pick one red and one blue. Mixing burgundy, true red, navy, and cobalt blue in the same arrangement reads as unintentional. No tray or base: Loose items placed directly on a tablecloth look scattered rather than styled. A tray underneath ties everything together and contains any water drips from fresh flowers. How to Store and Reuse Your Memorial Day Centerpiece The smartest move is buying once and reusing every year. Ten minutes of care at the end of the holiday means next Memorial Day practically sets itself up. Disassemble carefully: Separate each element rather than packing everything compressed into one box. Use clear labeled bins: One bin per centerpiece. No digging, no guessing next year. Switch to faux florals: Properly stored faux flowers look just as good twelve months later. Fresh flowers don’t survive the week, let alone a year. Wrap ribbon and burlap separately: Roll ribbon around cardboard; store burlap flat in a zip bag to prevent fraying. Wrap candles in tissue paper: Prevents chipping and dust buildup through storage months. These habits take ten minutes after the holiday ends and save real frustration when Memorial Day comes back around next year. Final Verdict After making most of these more than once, the honest answer is that the painted mason jar cluster and the tin can vase design are the two I’d build again without hesitating. They cost the least, take the least time, and consistently look better than what you’d find pre-made at a party store for twice the price. If you have a larger table or are setting up outdoors, the wooden crate display is the most durable and visually flexible option on the list. Pick one Memorial Day centerpiece idea from this guide, build it this weekend, and store it properly at the end of the day; you’ll spend nothing on it next year. Frequently Asked Questions What flowers are best for a Memorial Day centerpiece? Red carnations, white daisies, blue hydrangeas, and red tulips are the most reliable options. Carnations and daisies hold up longer in summer heat than roses or peonies, which matters for outdoor setups where the arrangement might sit in direct sunlight for several hours. How do you make a simple patriotic centerpiece for a table? The tin can cluster is the simplest: paint the cans the night before, add flowers in the morning, and the centerpiece is done in under ten minutes. Three cans, three colors, one wooden board underneath to tie them together. Can I use fake flowers for a Memorial Day centerpiece? Yes, and for outdoor setups it’s often the better call. Faux flowers don’t wilt in heat, don’t need water, and can be stored and reused the following year. The wooden box and mason jar versions on this list work just as well with quality faux florals as with fresh ones. What are the best centerpiece ideas for a Memorial Day BBQ? The galvanized bucket display, wooden crate arrangement, and flag-and-greenery pot all work well for BBQ setups; they’re durable, visually appropriate for outdoor casual dining, and don’t require anything fragile. Keep the height low enough that it doesn’t interfere with serving dishes moving across the table. How many centerpieces does a long table need? Two to three evenly spaced arrangements work better than one large centerpiece for tables longer than 6 feet. A single piece only serves the middle third of the table. Smaller repeated arrangements at 18-24 inch intervals down the length cover the full table without blocking the view or conversation. How do I keep outdoor flowers from wilting at a Memorial Day party? Floral foam soaked in water and kept shaded when not in use is the main solution. Cut stems at a 45-degree angle before placing them in foam; this increases water uptake significantly. Avoid direct midday sun if you can position the table differently, and mist the arrangement with a spray bottle every couple of hours. What’s a good Memorial Day centerpiece that doubles as a host gift? A DIY mason jar arrangement or a styled tin can cluster travels well and costs under $15 to put together. Wrap the base with twine and add a small tag. It works as a centerpiece for the host’s table after the party, which is more useful than most brought gifts.

Turn your garage into your own personal hideaway. Got a garage that’s crammed with junk? I get it, mine was the same way until I finally decided to fix it. Turning it into a man cave doesn’t have to cost much or take forever. You can start small with budget-friendly weekend projects. No need for fancy tools or hiring anyone. Just pick one idea, try it, and build on it over time. I’ll share simple garage man cave ideas that work in any garage, no matter the size. These are easy changes that make a big impact without draining your wallet. Choosing the right minimalist color palette ideas can also help make your space feel clean and put together without extra effort. Want to see how I turned my messy garage into my favorite spot in the house? Let’s get started. Why a Garage Makes the Perfect Man Cave? I think a garage is one of the best places to build a man cave, and it’s easy to see why. First, it gives you your own space away from the main house, so you can relax without distractions. You don’t have to worry about making big changes either, because garages are simple to set up and customize. You can add seating, lights, or decor without doing major work. It also works well for both big and small setups, so even a single-car garage can look great. Another big plus is the cost. Turning your garage into a man cave is much cheaper than building a new room. With a few simple ideas, you can create a comfortable space that feels just right for you. One thing most people don’t realize: you don’t need to do it all at once. I started with just a used couch and a $40 floor lamp, and that was enough to make it feel like a real room. The rest came later. What You Need Before You Start? Before you start hauling furniture into your garage, spend 20 minutes on three things: clear the floor, check your outlets, and figure out the worst temperature problem. In most garages, that’s either summer heat or winter cold; both are fixable, but they dictate what you need to buy first. I skipped this step and spent my first winter shivering in my “man cave” because I hadn’t insulated the door. Don’t make that mistake. A basic insulation kit for a single garage door runs around $50 at most hardware stores and makes an enormous difference. Also, check: do you have a dedicated circuit for the space? Overloading a shared circuit with a TV, mini fridge, and space heater is a fire hazard. If you’re adding multiple appliances, talk to an electrician before you start. A simple circuit upgrade typically costs $150–$300 and is well worth it. Simple Garage Man Cave Ideas When I turned my garage into a man cave, I realized it didn’t have to be complicated. These simple ideas made it easy to build a space I actually love spending time in. 1. Multi-Sport Shrine Display memorabilia from various sports, such as football helmets, baseball bats, and basketball hoops. Set up multiple seating areas so friends can watch different games. Add scoreboards or chalkboards to keep track of stats. Perfect for guys who love all sports, not just one team. 2. High-Tech Gaming Zone Install multiple monitors, gaming chairs, and surround sound speakers. Add LED strip lights that change colors with your games. Include charging stations for controllers and headsets. Make sure you have strong internet and plenty of power outlets. This creates the ultimate space for serious gaming sessions with friends. One tip from experience: mount your router or a mesh node inside the garage rather than relying on the main house signal through a concrete or brick wall. The difference in connection speed is dramatic. 3. Movie Night Magic Install a projector and a large screen with stadium seating using recliners. Add blackout curtains and carpet to control sound. Include a popcorn machine and candy counter for the full movie experience. Dim lighting and surround sound make every movie feel like a blockbuster premiere in your own private theater. 4. English Pub Vibe Install dark wood paneling, brass fixtures, and a proper bar with beer taps. Add leather chairs, a dartboard, and vintage beer signs. Include a small kitchen area for pub food. The warm lighting and cozy atmosphere make it feel like your neighborhood bar where everybody knows your name. 5. Cigar Lounge Luxury Create a sophisticated space with leather furniture, a humidor, and proper ventilation. Add rich colors like deep reds and browns with wooden accents. Include a small bar cart and jazz music setup. This stylish design offers a classy place to relax and enjoy good conversation with close friends. If you want a more refined look, adding a few luxury home decor ideas can instantly upgrade the overall feel without overdoing it. Ventilation is non-negotiable here. A dedicated inline exhaust fan, not just leaving the door cracked, keeps smoke from soaking into everything you own. Budget about $80–$120 for a decent one. 6. The Working Man’s Paradise Combine tool storage with comfortable seating areas. Use rolling cabinets that double as tables and add a workbench that folds down when not needed. Include good lighting for both work and relaxation. This smart design lets you fix things and hang out without losing space for either activity. 7. Maker Space Social Hub Set up different zones for woodworking, electronics, and socializing. Use pegboards and shelving to organize tools while keeping the space looking neat. Add comfortable seating and a mini fridge in the social area. Perfect for guys who love building things and showing off their projects to friends. These man-cave ideas will transform your boring garage into an awesome space you actually want to spend time in. Pick the style that fits your personality and start building your dream hangout spot today! Budget-Friendly Garage Man Cave Ideas You don’t need a huge budget to make an awesome man cave. Use what you already have, shop second-hand, and try simple DIY projects. A few small upgrades can totally change the feel of your garage without costing much. Start small, add more over time, and make it a space you’ll actually enjoy using. Here are a few small man cave ideas. Quick-Reference Budget Breakdown Upgrade DIY Cost Range Difficulty Peel-and-stick floor tiles $30–$80 Easy Pallet bar (free pallets + stain) $20–$50 Moderate Wall paint + painter’s tape pattern $25–$60 Easy Used TV + wall mount $40–$120 Easy LED strip lights $15–$35 Easy Bench with storage (DIY build) $40–$90 Moderate Garage door insulation kit $40–$65 Easy 8. Repurpose Existing Furniture Skip buying new furniture and work with what’s already lying around. Cover an old couch with a slipcover in your team’s colors, repaint or sand old tables, and add cushions to worn chairs. Turn old dressers into TV stands or storage units. Even crates and coffee tables can be transformed with a little creativity and paint. 9. DIY Bar or Snack Area You can build a great bar or snack station on the cheap. Use free pallets to make a rustic bar, adding hooks for towels and openers. Build snack shelves from scrap wood, add candy jars, and create a coffee station. If you have plumbing, add a small sink or cooler for drinks. I built mine from two pallets and a piece of plywood I had left over from a fence project. Sanded it down, stained it walnut, and added a strip of LED lights underneath the counter. Total cost: $18. It gets more compliments than anything else in the space. 10. Low-Cost Entertainment Setup Entertainment doesn’t have to be expensive. Grab a used TV from a garage sale or online marketplace and mount it on the wall. Instead of a costly sound system, get a budget soundbar or Bluetooth speaker. Position them around the room for better sound, and you’ll still get a great experience for less money. 11. Wall and Floor Upgrades A quick floor upgrade is easy with peel-and-stick tiles, foam mats, or affordable rugs. For the walls, paint is the cheapest way to make a big change. Add patterns with painter’s tape, peel-and-stick wallpaper, or wood planks for a feature wall. These small changes can completely refresh your garage. Personal Touches Without Overspending Making your garage man cave your own doesn’t have to cost a lot; small, personal touches can turn it into a space that feels like you. 12. Poster Power Wall Fill a wall with your favorite movie posters, band art, or vintage ads. Grab cheap frames from a dollar store, or skip frames for a casual style. Mix sizes and themes for more personality. Lay them out on the floor first to find the perfect arrangement before hanging them up. 13. Sports Memory Lane Show off your old jerseys, signed baseballs, or ticket stubs from big games. Use shadow boxes for special items like programs or photos with players. Hang your letterman jacket or team photos. These things cost nothing since you already own them, and they tell your story. A friend of mine framed the stub from the 2016 World Series game he attended with his dad. It’s the first thing every person notices when they walk in, and it always starts a conversation. That’s what good man cave decor does. 14. Family Photo Gallery Frame pictures from fishing trips, camping weekends, or family gatherings. Pick matching frames from thrift stores for a neat look. You can even make a timeline of memories on one wall. Mix in photos of friends and good times to keep the space warm and personal. 15. Thrift Store Treasure Hunt Thrift stores are great for finding unique decor at low prices. You can pick up old signs, artwork, or small furniture pieces. I enjoy finding items that match the space’s the, like vintage or sports decor. These pieces add character and make your man cave feel different from others. It’s a fun way to decorate while staying within your budget. 16. DIY Art Projects Make your own art with stencils and paint on canvas or wood. Create quotes, team logos, or designs that mean something to you. Use old license plates, bottle caps, or beer labels for unique collages. These projects are inexpensive and let you add your own style to the room. 17. Green Space Addition Adding plants can make your garage feel fresh and alive. You don’t need many, just a few easy-care plants like snake plants or pothos. They don’t need much sunlight or attention. I like using simple containers like jars or cans for a rustic look. Plants enhance the feel of the space with minimal effort. It’s a small change, but it makes the environment more relaxing. 18. Collection Display If you collect things, use them as decor. You can display coins, tools, or model cars on shelves. Grouping similar items together makes them stand out more. I like using simple shelves or boxes to keep things organized. It saves space and shows off your hobbies at the same time. This idea turns your personal interests into part of the design without needing extra spending. 19. Music Corner Setup A music corner can become a great focal point. You can hang instruments, display records, or add posters of your favorite artists. Even if you don’t play anymore, it still looks great. I like adding a small speaker or shelf for music items. It creates a relaxed vibe and shows your taste. This setup is simple but adds a lot of personality to your man cave. 20. Comfort Zone Touches Add throw pillows in your team colors or fun prints to make seating cozy. Use old blankets or quilts as wall hangings or couch covers. Little things like coasters, cup holders, or a basket for remotes make the space more comfortable without spending much. These ideas make your garage man cave feel truly yours. The best decorations remind you of good times and show off what matters most to you. Layout and Organization Tips Making your garage man cave feel comfortable and organized comes down to using your space wisely. A few smart choices can make it easier to move around, keep things tidy, and still fit everything you want. 21. Zoning With Rugs One easy way I like to organize a garage man cave is by using rugs to create different zones. You can place a soft rug under your seating area to make it feel cozy and relaxing. A tougher mat works well under a workbench or gaming setup. This simple trick helps separate spaces without adding walls. It makes your garage feel more organized and gives each area a clear purpose. 22. Furniture Placement for Zones Arrange furniture to create natural sections. Put the couch and TV on one side for relaxing, and set a table or workbench in another corner for projects. Facing furniture away from each other helps separate activities without building walls, keeping the space open but still organized. 23. Wall-Mounted Shelves Install shelves on the walls to keep things off the floor. Store books, games, or decor up high so they’re easy to see and grab. Wall shelves free up valuable space for seating and activities while also showing off your favorite items in a neat, organized way. 24. Folding Tables A folding table is one of the most useful things you can add to a small man cave. You can use it for snacks, games, or projects, then fold it away when you’re done. I find this especially helpful when space is limited. It gives you flexibility without making the garage feel crowded. You get the benefit of a table only when you need it, which keeps the area open and easy to manage. 25. Benches With Storage Benches with built-in storage are a smart way to save space and reduce clutter. You can sit on top while storing tools, gear, or extra items inside. I like placing them along the wall so they don’t take up too much room. This keeps everything organized without needing extra cabinets. It’s a simple solution that adds both seating and storage, making your garage man cave more practical and comfortable. Lighting: The Upgrade Most People Skip Good lighting can completely change the feel of your garage space, yet it’s one of the most overlooked upgrades. Element Recommendation Benefit Overhead Lighting Replace a single fluorescent with a warm LED shop light Better overall visibility and atmosphere Task Lighting Add clip-on lamps near the workbench Focused lighting for detailed work Accent Lighting Use LED strips behind the TV and along the bar Creates a stylish, relaxed vibe Dimmer Switch Install an affordable dimmer (~$15) Adjust brightness for work or relaxation Color Temperature 3000K (warm), 4000K (neutral), avoid 5000K+ Sets the right mood for different activities With just a small investment (under $90), lighting can turn your garage from a dull space into something comfortable and inviting. Common Mistakes to Avoid Don’t let simple mistakes ruin your perfect man cave setup. Here are the biggest problems to watch out for when building your dream space. Don’t Cram Everything In: Leave room to walk around and breathe. Too much stuff makes your space feel messy and stressful, rather than relaxing. Fresh Air Isn’t Optional: Install fans or open doors to keep air moving. Stuffy garages are uncomfortable and can damage your electronics over time. Gadget Fever Goes Too Far: Focus money on basics like seating and lighting first. That expensive beer tap can wait until you have extra cash to spend. Forgetting About Temperature Control: Plan for fans, heaters, or insulation. Don’t build a man cave you can’t use when it’s hot or cold outside. Skipping a dedicated power circuit: Running a TV, mini fridge, space heater, and gaming console on a shared 15-amp circuit is a genuine fire risk. If you’re adding more than two appliances, consult an electrician first. Ignoring the floor: Bare concrete is cold, hard on your back, and uninviting. Even a $30 foam mat under your seating area changes how the whole space feels. Avoid these simple mistakes, and you’ll have a man cave that’s comfortable and fun to hang out in for years to come. Final Thoughts Making a man cave doesn’t have to drain your wallet or stress you out. I’ve found that starting small and adding things over time works way better than trying to do it all at once. For me, a comfy couch, good lighting, and a few simple garage man cave ideas can be just as enjoyable as high-priced gadgets. The best setups mix what you actually use with things that show your personality. Whether you’re into sports, gaming, or just relaxing with friends, your garage should feel like it’s truly yours. I’d rather have a simple setup I love than something fancy that doesn’t fit my style. Start with the basics, then add upgrades when you can. Over time, your garage will become your favorite place to unwind. Frequently Asked Questions How much does it cost to turn a garage into a man cave? A simple setup can cost $200–$500 using second-hand items and DIY touches. Mid-range setups range from $1,000–$3,000, while full upgrades with insulation and extras can reach $5,000–$15,000 over time. Do I need a permit to convert my garage into a man cave? Most upgrades like furniture, lighting, or flooring don’t need permits. Electrical, plumbing, or structural changes usually do. Checking with your local authority first helps avoid future issues or penalties. How do I insulate a garage for a man cave? Start with the garage door using a $40–$65 insulation kit. Add wall insulation and drywall for better temperature control. Ceiling insulation also helps. Budget heating and cooling options can improve comfort year-round. What is the best flooring for a garage man cave? Vinyl tiles are affordable and easy to install. Foam mats add comfort for lounging areas. Epoxy gives a polished finish but needs more work. Combining options can balance cost, comfort, and durability. Can I build a man cave in a one-car garage? Yes, a one-car garage offers enough space if used smartly. Divide areas with furniture and rugs, and use wall-mounted storage or foldable pieces to maximize functionality without crowding the floor.
Home projects have a way of revealing problems you did not plan for, and mold on window sills is one of the most common. In my home, it appeared after a wet winter on a north-facing window that had gone unchecked for months. It looked minor at first, but left alone, it spread quickly and became far harder to shift. As someone who handles most home maintenance personally, the key was finding methods that work without expensive products or specialist help. Today, I’ll cover the causes, the health risks, the most effective cleaning methods, and prevention steps that hold up, all practical enough to take on yourself. What Is Mold on Window Sills? Black mold on window sills is a fungal growth that develops when moisture accumulates on or around window surfaces and is left undisturbed long enough for spores to take hold. It typically appears as black, green, grey, or white patches and carries a distinct musty odor that worsens in enclosed spaces. Window sills are a prime target because they sit directly where warm indoor air meets cold glass surfaces, creating the condensation that mold needs to survive. Mold does not just sit on the surface. On porous materials like wood and drywall, it sends hyphae (root-like structures) deeper into the material, which is why surface wiping alone rarely solves the problem long-term. Not all black mold is the toxic Stachybotrys chartarum; most window sill mold is allergenic rather than toxigenic, but any indoor mold warrants prompt removal regardless of species. Why Does Mold Keep Growing on Window Sills? Window sills are highly prone to moisture buildup, which allows mold to return repeatedly. The main cause is condensation, where warm indoor air meets cold glass, forming water droplets on the sill. This is more common in winter, especially in areas with high humidity, like kitchens and bathrooms. Poor ventilation traps damp air near windows, while older or poorly insulated windows increase condensation. Hidden leaks, such as cracked caulking or loose seals, can also let moisture in unnoticed, prolonging the problem. Beyond condensation, a few lesser-known factors contribute: Window plants: increase local humidity through watering and transpiration Dust buildup: provides food for mold growth Curtains or blinds: trap cold, damp air near the glass HVAC airflow: blowing warm air toward windows increases condensation cycles Fixing the moisture source, not just cleaning, is the key to stopping mold from coming back. How to Clean Mold from Window Sills The right cleaning method depends on how severe the growth is and what surface you are working with. These four solutions cover everything from light early-stage patches to heavy, established mold. Method 1: White Vinegar Solution White vinegar is the gentlest starting point for light or early-stage mold. The natural acidity cuts through surface growth without damaging painted or wooden window sills, and it is safe to use in any room without heavy ventilation requirements. Ingredients: Undiluted white vinegar, spray bottle, stiff-bristled brush, rubber gloves, microfiber cloth Step 1: Pour undiluted white vinegar into a spray bottle. Diluting it reduces the acidity needed to kill mold Step 2: Spray directly and generously onto the mold patch, ensuring full coverage Step 3: Leave it to sit for a minimum of 10 minutes without wiping Step 4: Scrub firmly with a stiff-bristle brush using small circular motions Step 5: Wipe away residue with a damp cloth and dry the surface completely Method 2: Hydrogen Peroxide Spray Hydrogen peroxide works well on painted wood and porous surfaces where bleach risks stripping the finish or causing discoloration. It effectively handles moderate mold growth, leaves minimal residue after rinsing, and produces far fewer fumes than stronger solutions. Ingredients: 3% hydrogen peroxide, water, spray bottle, scrub brush, rubber gloves, microfiber cloth Step 1: Mix equal parts 3% hydrogen peroxide and water in a spray bottle Step 2: Apply the mold patch to the affected area, covering the entire area Step 3: Leave the solution to sit for 10–15 minutes Step 4: Scrub with a brush, paying close attention to grooves or textured areas Step 5: Wipe clean with a damp cloth and dry the sill fully before closing the window Method 3: Baking Soda Paste Baking soda paste is best suited for stubborn staining that has set into the surface. It is fully non-toxic and safe in households with children or pets, and it draws out residual moisture from the sill while it works. Ingredients: Baking soda, water, mixing bowl, stiff brush or old toothbrush, damp cloth Step 1: Mix baking soda with a small amount of water in a bowl to form a thick, spreadable paste Step 2: Apply the paste over the stained area, pressing it in slightly for better contact Step 3: Leave it to sit for 5–10 minutes Step 4: Scrub with a brush or toothbrush, working the paste into the surface Step 5: Rinse away completely with a damp cloth and dry the area well Method 4: Bleach Solution Bleach is the strongest option here and should be used only on non-porous surfaces, such as tile, sealed stone, or plastic frames. Reserve it for heavy, established mold growth where gentler methods have not worked. Always use full protective gear with windows fully open. Important: Bleach kills surface mold effectively but cannot penetrate porous materials. On wood or drywall, it removes the color while leaving the root structures intact, so mold regrows quickly. Never mix bleach with ammonia, vinegar, or any other cleaner. The combination produces toxic gases. Ingredients: Household bleach, water, mixing container, rubber gloves, safety goggles, N95 mask, cloth Step 1: Mix one part bleach with ten parts water in a container Step 2: Apply using a cloth, never spray directly, as fumes concentrate quickly in enclosed spaces Step 3: Leave the solution on the surface for 10 minutes Step 4: Scrub the area firmly, then rinse with clean water Step 5: Dry the surface completely and keep the window open for at least an hour after finishing After every clean: Dry the sill thoroughly with a fresh cloth. Leftover moisture restarts the growth cycle fast. Where possible, leave the window open for at least an hour so the surface airs out fully. Which Method Is Right for You? Mold Severity Surface Type Best Method Light / early-stage Wood, painted, any White Vinegar Moderate Painted wood, porous Hydrogen Peroxide Stubborn staining Any (non-bleach-sensitive) Baking Soda Paste Heavy / established Tile, sealed stone, plastic/vinyl only Bleach Solution Do not mix methods. Never combine vinegar with bleach or hydrogen peroxide; combining vinegar with hydrogen peroxide creates a corrosive peracetic acid, and combining vinegar with bleach releases toxic chlorine gas. Use one method per session. Long-Term Habits to Keep Mold Away for Good Keeping mold away permanently means addressing the conditions that allow it to return: moisture, airflow, and surface protection. These are the habits worth building into a regular routine: Use a dehumidifier to keep indoor humidity between 30–50%, below this range, mold spores struggle to settle on any surface Reseal window frame caulking annually, even small cracks quietly let water in long before any visible damage appears Upgrade to double glazing or apply insulating film to reduce the temperature difference that causes condensation on the glass Apply mold-resistant primer and semi-gloss paint after any deep clean. This creates a surface that actively repels moisture rather than absorbing it Pull heavy curtains back during the day to stop fabric trapping moisture directly against the glass overnight From my experience, these actions slot into a routine without demanding much attention. No single habit does everything, but stacking two or three of them together, particularly humidity control and window sealing, removes the core conditions mold depends on to grow back. Black Mold vs. White Mold: What’s the Difference? Not all window sill mold behaves the same way. The type present affects the severity of the health risk, the cleaning method required, and whether professional help is needed. Here are the differences: Factor White Mold Black Mold Appearance Powdery, flat, white or grey patches Dense dark patches, black, dark green, or brown Growth stage Early stage, surface-level Established, penetrates deeper into the material Health impact Mild irritation in sensitive individuals Stronger respiratory symptoms with prolonged exposure Cleaning method Basic solutions, vinegar or baking soda Stronger solutions are required, such as hydrogen peroxide or bleach Professional help Rarely needed for small patches Recommended for large, recurring, or persistent patches How to Tell if It Might Be Toxic Black Mold (Stachybotrys chartarum)? Toxic black mold has a distinctly slimy or wet texture, a strong earthy smell even when dry, and typically requires continuous moisture exposure (72+ hours) and cellulose-rich materials like drywall or untreated wood to establish. If the growth is on a vinyl or glass surface, it is almost certainly not Stachybotrys — that species needs porous organic material to take hold. If you’re unsure, contact a professional for identification before disturbing the colony. If the patch is large, keeps returning after cleaning, or is visibly dark and dense, professional remediation is the safer option over attempting removal without proper equipment. Health Risks Worth Taking Seriously Mold on windows is not simply unpleasant to look at. Exposure to household mold over time can cause a range of health issues, and the severity depends on the mold type, the length of exposure, and individual sensitivity. What prolonged exposure can lead to: Respiratory irritation: persistent coughing, wheezing, and shortness of breath in enclosed rooms Allergic reactions: sneezing, itchy eyes, and a constantly runny nose that does not respond to typical remedies Asthma flare-ups: mold spores are a well-documented asthma trigger, particularly in children and elderly residents Headaches and fatigue: often linked to consistently poor indoor air quality Skin irritation: direct contact with active mold patches can cause redness or itching on sensitive skin The symptoms above are easy to dismiss as seasonal allergies or general fatigue, which is why mold exposure often goes unaddressed. If symptoms consistently worsen at home but clear up elsewhere, the air quality in your space is worth investigating. When to Seek Professional Help Most window sill mold responds well to household cleaning methods. However, certain situations call for professional assessment. If the affected area is larger than ten square feet , the mold has likely spread into the wall structure where surface cleaning cannot reach. Recurring mold that returns within weeks of cleaning, even after addressing moisture sources, points to a hidden leak or structural dampness requiring proper diagnosis. Any growth identified as black mold or Stachybotrys should be handled by a certified specialist, as disturbing large colonies without containment spreads spores rapidly. If household members are experiencing persistent respiratory symptoms that ease up away from home, professional remediation is worth prioritizing over repeated DIY attempts. When hiring a mold remediation company, look for professionals who use containment barriers and HEPA filtration during removal. Conduct post-remediation air testing to confirm clearance, and identify and seal the moisture source, not just remove the visible mold. A quote that skips the moisture diagnosis is one worth questioning. Frequently Asked Questions Is it safe to stay in a room with window sill mold? Short exposure is usually tolerable for healthy adults, but long-term presence can affect air quality. Children, the elderly, and individuals with breathing issues should avoid prolonged exposure. Can you just paint over the window sill mold? Painting over mold traps it beneath the surface, allowing it to continue growing. It usually reappears quickly. Always clean and treat the surface fully before applying any primer or paint. How often should window sills be cleaned? Clean window sills every two to four weeks. During colder or humid periods, check more often and remove moisture early to prevent buildup and visible mold development. Does vinegar or bleach work better for mold? Vinegar works well on wood and preserves finishes, but needs time. Bleach suits non-porous surfaces but doesn’t penetrate deeply. For wood, peroxide or baking soda paste is more effective. How do you stop mold from coming back after cleaning? Fix the moisture source first, such as sealing gaps or improving insulation. Keep humidity low, remove condensation regularly, and use mold-resistant coatings to reduce future growth. Can mold on window sills spread to walls? Mold spores can travel and settle on nearby surfaces. On materials like drywall, growth can extend inside walls, making recurring issues a sign that deeper inspection is needed. Final Thoughts Dealing with mold on window sills does not have to be a recurring problem. With the right cleaning method matched to the severity of the growth and a consistent approach to moisture control, it becomes manageable rather than dreaded. I think the homes that stay clear treat this as an ongoing maintenance routine, not a one-time crisis clean. Address the moisture source, apply the appropriate solution, protect the surface afterward, and check in regularly. That combination handles the problem at every stage, before it starts, while it is present, and long after it has gone. Hope your black mold says adios to you forever. Drop a comment below and let me know which method worked best for you.
If you want to add a touch of rustic style to your home, a shiplap half wall is a great choice. If you’re updating your bathroom, kitchen, or living room, installing a shiplap half wall can bring warmth and character to any space. It’s also a clever way to add visual interest while choosing the right colors to maximize a small space. I’ll guide you through the step-by-step process of installing a shiplap half wall. You’ll get all the helpful tips you need to make sure your DIY project goes smoothly. From gathering materials to the final touches, I’ll cover everything. By the end, you’ll feel ready to take on this project with confidence. Shiplap Half-Wall Basics You Should Know A shiplap half wall is a stylish design feature that covers the lower portion of a wall with shiplap boards, leaving the upper part exposed. It’s a popular choice for adding texture and character to rooms like kitchens, bathrooms, or entryways. This design is a staple in rustic cabin-inspired bathroom designs while maintaining a clean, modern feel. Shiplap half walls can also serve as functional dividers in larger spaces, offering both aesthetic appeal and structure. They are easy to install, making them a great DIY project for those looking to refresh a room’s style quickly. Step-by-Step Guide to Installing a Shiplap Half Wall Now that you know what a shiplap half wall is, let’s dig into the installation process. I’ll walk you through each step so you don’t feel stuck at any point. You can follow along and build your shiplap wall with more confidence and fewer mistakes Gather Your Materials Getting everything ready before you start saves time and keeps your work smooth from beginning to end. Shiplap boards (usually 6-inch wide) Nails or screws Level Saw or miter saw Measuring tape Pencil Caulk Trim for edges Safety goggles and ear protection Having tools within reach helps you stay focused and avoid stopping halfway through the installation process. Taking a few minutes to check your materials also reduces mistakes and makes the whole setup easier and safer. Step 1: Measure and Mark the Wall Start by measuring the height of your half wall. Typically, this is between 36 and 42 inches from the floor, but adjust based on your room’s design. Use a pencil to mark the height all around the room, then use a level to ensure the lines are even. Next, mark the studs along the wall using your stud finder to help you attach the shiplap securely. Step 2: Cut the Shiplap to Size Cut the shiplap boards to the required lengths using a saw. If you’re cutting across the grain, a miter saw will give you the cleanest cuts. Double-check your measurements before cutting to ensure each board fits perfectly. For corners or tricky areas, like around light switches or outlets, use a jigsaw to make the necessary cuts. Always measure twice and cut once! Step 3: Install the First Board Once you have your first board ready, position it at the bottom of your marked line and check for level. It’s crucial to make sure the first board is level since this will affect the alignment of all the following boards. Nail or screw it into place, securing it along the studs. Use a pneumatic nail gun or a hammer and nails to fasten it firmly to the wall. Step 4: Continue Installing the Boards Start installing the next shiplap board, ensuring it fits snugly against the previous one. As you go, keep checking each board with a level to ensure the shiplap stays straight. You can either nail the boards into place through the tongue or use nails to fasten them from the side, depending on the type of shiplap you’re using. Keep the boards aligned with your marked line. Step 5: Finish with Trim and Caulk Once all the shiplap boards are in place, it’s time to finish the edges. Add trim or baseboards around the half wall to cover any rough edges. Use caulk to fill any visible gaps between the boards and along the trim. This will give your shiplap half-wall a clean, polished look. Finally, paint or stain the shiplap if desired, to match your home’s décor and give it that perfect finishing touch. How to Prep Your Wall Before Installing Shiplap From my experience, prep is where most people go wrong. If you take a few minutes to check your wall properly, you’ll avoid problems later and get a cleaner final result. Uneven or damaged drywall: Shiplap doesn’t hide major bumps or holes — it follows the contour of the wall beneath it. Patch and sand any significant imperfections first. Existing baseboards: You’ll need to decide whether to remove them or work around them. Removing baseboards gives a cleaner result; working around them requires precise cuts at the bottom row. Outlets and switches: Turn off the circuit before working near them. You may also need to add outlet extenders once the shiplap adds thickness to the wall. Standard outlet extenders (about $2 each at any hardware store) handle this easily. Moisture or mold: If you’re installing in a bathroom or kitchen, inspect for any moisture damage behind the drywall first. Installing shiplap over a wet wall traps the problem Types of Shiplap: Which One Should You Use? I’ve tried different types over time, and you’ll notice each one works better in certain spaces. This will help you pick the right option based on your needs and budget. Type Best For Avg. Cost (per sq ft) Notes Real pine shiplap Authentic farmhouse look $1.50–$3.00 May need priming; can warp in humid rooms MDF shiplap boards Painted finishes, dry rooms $0.80–$1.50 Budget-friendly; not suitable for bathrooms Primed pine boards (DIY shiplap) Custom sizing, tight budgets $1.00–$2.00 Rip 1×6 or 1×8 boards yourself for the gap effect PVC/composite shiplap Bathrooms, laundry rooms $2.00–$4.00 Moisture-resistant; more expensive I used primed pine boards for my living room project; they’re easy to paint and hold up well. For my friend’s bathroom remodel, I recommended PVC shiplap instead, and it was the right call. Moisture warped a couple of her pine test pieces within a few weeks Benefits of Installing a Shiplap Half Wall I like this upgrade because it adds both style and function without much effort. You’ll see how it improves your space while staying easy to maintain and use daily. Adds Rustic Charm and Character: Shiplap brings a rustic, timeless charm to any room, adding texture and depth while complementing a range of interior styles, from modern to farmhouse. Affordable and Easy Update: Shiplap is a cost-effective, DIY-friendly option that requires minimal tools, offers great value, and transforms your space quickly without breaking your budget. Acts as a Functional Divider: A shiplap half wall provides privacy while maintaining an open feel, helping to define spaces in open-concept areas without closing them off entirely. Customizable Finishes: Shiplap is highly customizable, allowing you to paint or stain it to match your decor, offering endless style options to suit your home. Low Maintenance and Durability: Shiplap is easy to maintain, durable, and resistant to wear, making it an ideal choice for high-traffic areas like kitchens and bathrooms. In conclusion, a shiplap half wall offers a stylish, affordable, and low-maintenance upgrade, making it a great addition to any room in your home. Common Mistakes to Avoid I’ve seen small mistakes ruin the final look, even after good effort. If you watch out for these, you’ll save time, avoid rework, and get a much better finish. Improper Measuring: Not measuring properly can lead to uneven boards or gaps between them, ruining the final look. Excessive Adhesive: Overloading with too much adhesive can cause boards to shift or leave unsightly marks on the wall. Skipping Preparation Steps: Skipping steps like marking studs or leveling the first board can lead to crooked walls and difficulty with installation. Not acclimating to the wood: Wood expands and contracts with temperature and humidity. Let your boards sit in the room where they’ll be installed for 24–48 hours before cutting and nailing. Skipping this step, especially in humid climates, can cause boards to buckle or gap after installation. Forgetting outlet extenders: Shiplap adds 3/4 inch or more of thickness to your wall. If existing outlets are flush with the original wall, they’ll now be recessed. Outlet box extenders are cheap and easy to install; forgetting them is a code issue and a safety hazard. Using the wrong caulk: Use paintable, flexible latex caulk — not silicone. Silicone can’t be painted and doesn’t grip painted surfaces well. To avoid these mistakes, take your time, double-check measurements, and follow each step carefully. Proper preparation ensures a smooth and successful installation. Final Thoughts Now that you have a full guide to installing a shiplap half wall, you should be ready to take on your own project. With the right materials and a little patience, you can transform your space in no time. Remember, it’s all about measuring twice and cutting once, so take your time and enjoy the process! Whether you’re adding shiplap to your living room or creating a stylish accent in your kitchen, this project will give your home a charming, timeless look. If you have any questions or need help along the way, feel free to reach out. I’m here to help! Ready to get started? Grab your tools and make your shiplap dream wall a reality today! Frequently Asked Questions Do I need to remove baseboards before installing shiplap? Not necessarily, but removing them gives the cleanest result. If you leave them in place, you’ll need to scribe or notch your bottom board to fit around them. Most DIYers find it easier to pop the baseboards off, install the shiplap, then reinstall the baseboards at the bottom. Can shiplap go directly over drywall? Yes. You don’t need to remove drywall; shiplap installs directly over it, nailed into the studs behind. Just make sure your drywall is in good condition with no major moisture damage. What’s the right gap between shiplap boards? Typically 1/16 to 1/8 inch. A nickel is a common spacer; it’s just the right thickness to create that signature shadow gap. Some people prefer a tighter fit (using a penny) for a more modern look. Should I paint shiplap before or after installing it? Both approaches work. Painting before installation makes it easier to get clean coverage on the edges and the back. But if you’re painting after, you have better control over consistency across the whole wall. I personally paint after installation, one coat of primer, two coats of finish paint, and caulk the gaps last.
Quartz countertops have a way of making a kitchen look effortlessly clean, until one wrong product leaves a dull, streaky mess that will not budge. Knowing how to clean quartz countertops the right way is what separates a surface that stays beautiful for years from one that quietly deteriorates. The good news is that quartz is actually very easy to maintain when you know what to do. Here, I will show you exactly how to clean quartz countertops step by step. You will learn the safest cleaning method, the best cleaners to use, and what products you should avoid. I will also explain how to remove stains, grease, and sticky spills without harming the surface. By the end, you will know how to keep your quartz countertops clean, shiny, and looking great for years. Why Quartz Countertops Need Special Cleaning? Quartz countertops are not the same as natural stone, like granite or marble . They are made from crushed quartz minerals, mixed with resins and pigments. This mix creates a strong, smooth, non-porous surface. Because of this structure, quartz does not readily absorb liquids, which helps prevent stains and bacterial buildup. However, the resin that holds the material together can react to harsh cleaners or strong chemicals. That is why gentle cleaning methods work best for quartz surfaces. Engineered quartz contains about 90% natural quartz and 10% polymer resins and pigments. The resin layer keeps it non-porous but also makes it sensitive to certain products. While quartz is durable and stain-resistant, it can still lose shine or become damaged if you use rough scrubbers or strong cleaning products. Using mild cleaners helps keep the surface clean and protected. One more thing worth knowing: unlike granite or marble, quartz never needs to be sealed. The non-porous resin surface makes sealants unnecessary, and applying one can actually leave uneven residue as it wears off in high-traffic areas. What You Will Need to Clean Quartz Countertops You do not need anything fancy to keep quartz countertops looking their best. Most of these items are already sitting in your kitchen or bathroom: Dry cloth, paper towel, or soft brush Small bowl or sink with warm water Mild dish soap Soft cloth or non-abrasive sponge Microfiber cloth or soft towel These are simple, everyday items that get the job done without risking any damage to your surface. Once you have everything ready, the actual cleaning process is quick and straightforward: How to Clean Quartz Countertops: Step-By-Step Cleaning Quartz Does Not Require Complicated Products or Tools. a Simple Routine Can Keep the Surface Fresh and Safe. Follow These Steps to Clean Your Countertops the Right Way without Damaging the Finish: Step 1: Clear the Countertop Surface Start by Removing Crumbs, Dust, and Loose Debris from The Countertop. You Can Use a Dry Cloth, Paper Towel, or A Soft Brush to Sweep Everything Away. This Step Helps Prevent Scratching While You Clean. Small Particles Can Act Like Grit when Rubbed Across the Surface. Clearing the Counter First Makes the Rest of The Cleaning Process Safer and More Effective. Step 2: Use Warm Water and Mild Dish Soap Fill a Small Bowl or Sink with Warm Water and Add a Few Drops of Mild Dish Soap. Dip a Soft Cloth or Sponge Into the Mixture and Gently Wipe the Countertop. Dish Soap Works Well Because It Removes Grease, Food Spills, and Everyday Dirt. Avoid Strong Cleaners, as they can, over time, affect the Resin Used in Quartz Surfaces. Step 3: Wipe with A Soft Cloth or Sponge Use a Soft Cloth or Non-Abrasive Sponge to Wipe the Surface Evenly. Move in Gentle Circular Motions so The Soap Can Lift Dirt and Residue. Avoid Using Rough Scrubbers or Scouring Pads Because They May Dull the Finish. Soft Materials Clean the Surface Effectively While Keeping the Countertop Smooth and Shiny. Step 4: Dry with A Microfiber Cloth Finish by Drying the Countertop with A Microfiber Cloth or Soft Towel. Drying Helps Prevent Water Spots and Streaks. Microfiber Cloths Work Well Because They Absorb Moisture and Leave the Surface Smooth. Taking a Minute to Dry the Counter Also Helps Keep the Shine and Gives Your Kitchen a Clean, Polished Look. How to Remove Tough Stains from Quartz Countertops While everyday soap and water work for most situations, some stains need a more targeted approach. The table below outlines the safest and most effective methods for common tough stains. Stain Type What to Do When to Use This Method Dried-On Food or Gum Use a plastic scraper or a credit card edge at a low angle. Clean residue with warm soapy water. Avoid metal tools. Use this method when residue has hardened and cannot be wiped away easily. Coffee, Wine, or Tea Spray a mix of equal parts rubbing alcohol and water. Let it sit 1–2 minutes, then wipe with a soft cloth. Best for pigmented stains that leave behind visible discoloration. Grease or Cooking Oil Apply dish soap directly, wait 30 seconds, and wipe clean. Use a stone-safe cleaner for heavy buildup. Ideal for oily spots that feel slick or leave a dull film on the surface. Permanent Marker or Ink Dab rubbing alcohol with a soft cloth. Rinse afterward. Repeat if needed, but avoid harsh solvents. Use this approach for ink marks or dye-based stains that don’t come off with basic cleaning. By following these methods, you can remove tough stains effectively while preserving the finish and durability of your quartz countertops. Tips to Keep Quartz Countertops Looking New Quartz Countertops Can Stay Smooth and Bright for Many Years with Simple Daily Habits. Small Preventive Steps Help Protect the Surface and Reduce the Need for Heavy Cleaning. Wipe Spills Quickly: Clean Spills as Soon as They Happen to Prevent Stains or Sticky Residue. Quick Wiping Also Stops Liquids from Drying on The Surface and Leaving Marks. Use Cutting Boards when Preparing Food: Always Place a Cutting Board on The Countertop While Chopping or Slicing. This Helps Prevent Scratches and keeps the Quartz Surface Smooth and damage-free. Use Trivets for Hot Pots and Pans: Place Hot Cookware on Trivets or Heat Pads Instead of Directly on The Countertop. High Heat Can Affect the Resin and Cause Surface Damage. Avoid Dragging Heavy or Rough Objects: Sliding Heavy Appliances, Pots, or Containers Across the Surface May Create Scratches. Lifting Items Instead of Dragging Them Helps Protect the Countertop Finish. Clean the Surface Regularly: Regular Cleaning with Warm Water and Mild Dish Soap Helps Remove Grease, Crumbs, and Daily Dirt. Consistent Cleaning Keeps Quartz Countertops Fresh and Well-Maintained. Use coasters under glasses: condensation from cold drinks can leave mineral rings over time that are difficult to remove. Limit direct sun exposure where possible: prolonged UV rays can gradually dull or fade the quartz surface over time. Following These Simple Habits Helps Protect Your Quartz Countertops from Damage. A Little Daily Care Can Keep the Surface Looking Clean, Smooth, and Well-Maintained for Years. How to Disinfect Quartz Countertops Safely Quartz countertops are easy to keep clean, but disinfecting them the right way matters just as much as regular cleaning. The good news is that you do not need harsh chemicals to get the job done effectively: Use a diluted rubbing alcohol solution or quartz-safe disinfectant wipes for safe and effective germ removal. Lightly spray or wipe the surface, then use a soft cloth to spread the disinfectant evenly across the countertop. Let it sit for a short moment before wiping clean; this gives the disinfectant time to work properly. Avoid bleach, ammonia, and other strong chemicals, as they can break down the quartz resin and dull the finish over time. In my experience, disinfecting after food prep makes the biggest difference in keeping countertops hygienic long term. A simple routine like this takes less than a minute and keeps your surface looking as good as the day it was installed. Lysol disinfectant sprays and wipes that do not contain harsh chemicals are generally safe for quartz. Always check the label and rinse the surface with clean water after use. Products containing bleach, ammonia, or high concentrations of alkaline ingredients should always be avoided. Cleaning Products You Should Never Use on Quartz Quartz countertops are strong, but some cleaners can still damage the surface. Knowing what to avoid helps protect the finish and keeps your countertops looking smooth and clean. Product to Avoid Why to Avoid Common Examples Safe Alternative Abrasive Scrubbers Scratches the surface and dulls the finish Steel wool, scouring pads Soft cloth or non-abrasive sponge Oven Cleaners Too harsh, leaves permanent marks Easy-Off, heavy-duty degreasers Mild dish soap and warm water Vinegar and Acidic Cleaners Breaks down resin and reduces shine Vinegar, lemon-based sprays pH-neutral stone cleaner High-Alkaline Cleaners Causes fading and uneven surface areas Heavy-duty bathroom cleaners Mild soap and water Bleach and Ammonia-Based Cleaners Strips resin finish and dulls the surface Windex, concentrated bleach Diluted rubbing alcohol Paint Removers and Solvents Etches and permanently discolors quartz Nail polish remover, acetone Rinse immediately with clean water Wax and Polish Products Builds up residue and dulls appearance Furniture polish, countertop wax Dry microfiber cloth only Avoiding These Products Helps Your Quartz Countertops Last Longer. Using Mild Soap, Warm Water, and Soft Cloths Is Usually the Safest Way to Clean Them. Common Quartz Countertop Cleaning Mistakes to Avoid Taking care of quartz countertops is simple, but small cleaning mistakes can slowly affect their look and durability. Being aware of these habits helps you maintain a smooth and polished surface for years. Using harsh chemicals: Strong cleaners like bleach or ammonia can slowly break down the resin that binds quartz, leading to dull spots and long-term surface damage. Scrubbing with rough materials: Abrasive pads or steel wool can leave tiny scratches on the surface, making the countertop lose its smooth finish and natural shine over time. Letting spills sit too long: Liquids like coffee, wine, or oil can seep in and leave stains or sticky residue if not cleaned up quickly and properly. Placing hot items directly: Putting hot pots or pans on quartz can damage the surface finish and may even cause discoloration due to sudden heat exposure. Ignoring regular cleaning: Skipping daily wipe-downs allows dirt and grime to build up, making the countertop harder to clean and maintain later. Using too much cleaner: Overuse of cleaning products can create a cloudy film on the surface, detracting from the clean, polished look of quartz countertops. By avoiding these common mistakes and sticking to gentle cleaning habits, you can keep your quartz countertops looking fresh, clean, and well-maintained for a long time. Cleaning Quartz Countertops in the Bathroom The same rules apply in bathrooms, but a few specific situations come up more often there. Toothpaste, makeup, and hair products can all leave residue that builds up if not wiped regularly. For toothpaste and soap scum, warm soapy water and a soft cloth work well. For makeup stains or foundation smudges, a small amount of rubbing alcohol on a soft cloth lifts the pigment effectively without harming the surface. Nail polish remover (acetone) should never be used on or near quartz, as it can permanently etch the resin. If nail polish lands on the countertop, remove as much as possible with a plastic scraper, then treat the residue with a quartz-safe cleaner. Bathroom counters also tend to stay damp longer than kitchen counters. Wiping the surface dry after use prevents water spots from hard minerals building up over time, which become increasingly difficult to remove the longer they sit. Frequently Asked Questions Can you use vinegar on quartz countertops? No, it is best to avoid vinegar on quartz countertops. Vinegar is acidic and can slowly damage the resin that holds the surface together, causing dullness over time. Is baking soda safe for quartz? Yes, baking soda can be used occasionally for tough stains. However, it should be applied gently as a paste and not scrubbed aggressively to avoid scratching the surface. How often should you clean quartz countertops? You should wipe quartz countertops daily with mild soap and water to remove dust, spills, and grease. Regular cleaning helps maintain shine and prevents buildup. Can quartz countertops stain permanently? Quartz is stain-resistant but not completely stain-proof. If spills like coffee, wine, or oil are left too long, they may leave marks. Cleaning quickly helps prevent permanent stains. Can a scratched quartz countertop be repaired? Minor scratches can sometimes be buffed out by a professional. Deeper scratches are harder to fix and usually require expert repair, as DIY methods can worsen the surface. Final Shine Keeping quartz countertops clean does not have to feel complicated. I always tell people that a simple routine works best. Warm water, mild soap, and a soft cloth can handle most messes you see every day. When spills happen, wiping them quickly can prevent stains and keep the surface looking fresh. It also helps to avoid harsh chemicals, rough scrubbers, and strong cleaners that can dull the finish over time. A few simple habits can protect your countertops and make cleaning much easier. Once you understand how to clean quartz countertops, maintaining them becomes simple. If this guide helped you, consider sharing it with someone who wants an easier way to care for their kitchen surfaces.
Last summer, I wanted a pool in my backyard, but I didn’t want to spend thousands of dollars. That’s when I came acrossthe diy stock tank pool idea. It’s affordable, simple, and perfect for small spaces. I was surprised at how easy it was to build with the right tools and clear steps. Here, I’ll walk you through everything you need to know. I’ll cover the full materials list, step-by-step setup, pump installation, water maintenance, common mistakes to avoid, helpful installation tips, and a realistic cost breakdown. If you’ve been thinking about adding a small backyard plunge pool without hiring contractors, this will help you build it yourself with confidence. Overview of Stock Tank Pool A DIY stock tank pool is basically a big metal tank that you turn into a small backyard pool. It’s super popular in the USA because it’s cheap, easy to set up, and perfect for small spaces. Unlike traditional above-ground pools, you don’t need a lot of tools, time, or a big budget, and it looks really cute in your yard. Most people use round tanks that are 6, 8, or 10 feet wide, which is big enough for a few friends or kids to splash around. These pools are great for renters, families with small yards, or anyone who wants a quick, fun way to cool off in the summer without spending thousands of dollars on a full-size pool. How to Build a DIY Stock Tank Pool: Step-by-Step Guide Before you start building your DIY stock tank pool, it’s a good idea to gather all the materials you’ll need. I’ve found that having everything ready makes the process easier and faster, and you won’t have to stop mid-project to run to the store. Tools and Materials Needed Pool Pump Pool Plunger Valve Assembly Replacement Part Kit 2¾-Inch Hole Saw Chlorine Dispenser Chlorine Tablets Clear Balance Tablets Pool Test Strips Rechargeable Pool Vacuum Replacement Pool Filters Pool Filter Cartridge Cleaning Tool Total Estimated Cost: $400–$650, depending on what materials you already have and whether you use mulch or stone for landscaping. Step 1: Level the Ground Place the tank on a level surface. Use 4 bags of leveling sand under an 8-foot tank; smaller tanks require less. Leveling ensures the tank is stable and prevents stress on the metal and pump. Take time to level properly, as an uneven base can lead to leaks, tilting, or other problems during use. Step 2: Finish Landscaping Around the Tank Add landscaping around the tank for a clean, safe setup. Mulch works as a temporary solution, while stone is better for drainage and staying clean. Stone also helps prevent dirt and debris from entering the pool. Landscaping creates a neat area around the tank and protects the surrounding ground from water splashes. Step 3: Build the Inlet Nozzle and Outlet Strainer The outlet strainer pulls water into the pump, and the inlet nozzle pushes filtered water back into the tank. The outlet strainer is not included with the pump and must be assembled using parts from the Intex replacement kit. Proper assembly ensures efficient water circulation and prevents damage to the pump or tank. Step 4: Drill the Holes Use a 2¾-inch hole saw to drill two holes, approximately 1 foot from either side of the tank seam and centered vertically. Avoid drilling too low, or the plunger valves won’t fit. After drilling, file the edges smooth to prevent scratches on the fittings. The side placement of the inlet and outlet doesn’t affect performance. Step 5: Install the Fittings Install the inlet nozzle and outlet strainer, placing the rubber gasket on the inside of the tank. Tighten both fittings securely. Silicone or caulk is not required. Checking for leaks after installation ensures the pool is watertight and ready for pump connection. Step 6: Connect the Pump Attach hoses to the plunger valves. Place the black cap only on the outlet strainer, leaving the inlet nozzle open. The black cap controls airflow during startup. Proper connection of hoses and valves ensures the pump circulates water efficiently and prevents air from getting trapped. Step 7: Fill the Pool and Prime the Pump Fill the tank until water is above the inlet and outlet openings. Unlock the plunger valves and open all pump valves. Turn on the pump and bleed trapped air from the hoses and filter. Once water flows smoothly, tighten all connections and fill the tank completely. This primes the pump and prepares the pool for chemical treatment. Step 8: Balance Pool Chemicals Add a 3-inch chlorine tablet and set the dispenser to four tabs to shock the pool. Run the pump for 24 hours. Reduce to one tab after the first day and run the pump 2–4 hours daily. Test water daily with test strips, adjust pH or alkalinity as needed, and replace chlorine tablets when they are depleted to maintain clean, safe water. For a detailed breakdown, refer to the YouTube video below. How to Keep Your DIY Stock Tank Pool Clean Maintaining a stock tank pool is simple when a few key steps are followed. First, run the pump daily to keep the water moving and prevent algae from forming. Use a floating chlorine dispenser to slowly release chlorine, keeping the water safe for swimming. Test the water at least once a week with pool test strips to check pH and alkalinity, and adjust using a pH or alkalinity balancer if needed. Keep the tank edges dry and inspect fittings regularly to prevent rust or leaks. Remove leaves and debris from the water as they appear. During winter or long periods of non-use, it’s best to drain the tank, clean it, and cover it to protect the metal and prevent water buildup. Following these steps ensures the pool stays clean, safe, and ready for use all season. Common Problems and How to Avoid Them Even though a stock tank pool is simple to set up, a few common problems can pop up if not addressed early. Being aware of these issues can save time, money, and frustration. Leaks: Allow the sealant or fittings to fully set, then check connections daily before filling the pool. Rust at the Bottom: Place the tank on stone or leveling sand instead of bare ground, and keep the edges dry to prevent corrosion. Unlevel Base: Make sure the ground is completely level to avoid stress on the tank and pump. Green Water Issues: Run the pump regularly, use chlorine, and test pH/alkalinity to keep water clear. By following these simple tips, the pool will stay safe, clean, and enjoyable throughout the season. Final Thoughts Building my own diy stock tank pool was one of the most satisfying backyard projects I’ve done. It didn’t require special skills, just patience and careful setup. Once everything was installed and the pump was running smoothly, it felt amazing to relax in a pool I built myself. The key is taking your time with leveling, sealing, and choosing the right pump. When you do it right, maintenance becomes simple and stress-free. If you’ve been waiting for the perfect time to upgrade your backyard, this might be it. Start gathering your materials, plan your space, and begin your DIY stock tank pool project this week. And let me know how it turned out in the comments below.
After years of sewing, I can tell you that few things are as rewarding as hanging curtains you made yourself. I still remember my first pair, slightly uneven hems and all, but they were mine, and I was hooked. Over the years, I’ve sewn curtains for nearly every room in my home, experimenting with fabrics, styles, and techniques along the way. What started as a simple cost-saving idea turned into one of my favorite sewing projects. In this blog, I’m sharing everything I’ve learned on how to sew curtains, so you can skip the guesswork and go straight to the good part: creating beautiful, custom curtains that fit your space perfectly. Why Sewing Your Own Curtains Is Easier Than You Think? Many people assume sewing curtains requires advanced sewing skills. In reality, it’s one of the easiest projects you can start with. You don’t need complicated techniques or special training. If you can sew a straight line, you already have the main skill needed to make basic curtain panels. Curtains are also forgiving projects. Small mistakes are rarely noticeable once the panels are hanging on the rod. Another reason this project works well for beginners is the time commitment. Most simple curtain panels can be completed in just a few hours. Once you understand the basic process, you can sew curtains for any room using the same steps. With the right fabric and measurements, you can create panels that fit your windows exactly the way you want. Step-by-Step: How to Sew Basic Curtain Panels Sewing your own curtain panels is easier than it looks, and the results are always worth it. Follow these simple to know how to sew curtains, steps to get started: Tools and Fabric Essentials for Sewing Curtains Before you start sewing, it helps to see your tools and fabric options side by side. I like keeping this simple, so you can plan your budget and shop smart in the following: Item Type Why It Matters Estimated Cost Sewing machine or needle Tool Needed to stitch hems and headers $0–$200+ Polyester thread + 12/14 needle Tool Strong enough for medium to thick fabric $5–$12 Measuring tape + fabric scissors Tool Ensures accurate cuts and clean edges $10–$40 Cotton fabric Fabric Easy to sew and great for simple panels $8–$15/yard Blackout fabric Fabric Blocks light and adds privacy $10–$20/yard Drapery-weight fabric Fabric Heavier fabric for fuller, structured curtains $15–$40/yard These are the main items you’ll need to get started without overcomplicating things. Prices are estimates and may vary by brand, quality, and where you shop. Step 1: Measure Your Window and Prepare the Fabric Start by measuring from the curtain rod to where you want the curtain to end, then add 16 inches for the top fold and bottom hem. For width, measure your window and double it for a fuller look. Before you cut, trim off the selvages; those tightly woven edges can make your curtain hang unevenly. A little prep here saves a lot of trouble later. Step 2: Sew the Side Hems Fold the fabric 1 inch toward the wrong side, then press it flat. Then fold it one more inch and press again. Sew close to the inner fold, about 1/8 inch from the edge. If your fabric is thick, set your stitch length to around 3.0 for smoother sewing. Repeat the same steps on the other side. Pressing as you go keeps everything neat and straight. Step 3: Create the Bottom Hem Measure 3 inches up from the bottom edge and fold the fabric up. Press it flat, then fold up another 3 inches and press again. A deep hem like this adds weight to the curtain, helping it hang straight and look polished. Stitch along the folded edge just like the sides. If the fabric feels too bulky under the presser foot, level it before you stitch. Step 4: Sew the Top Header for Grommets Measure 5 inches down from the top edge and mark it with chalk. Fold the fabric toward the wrong side and press. Then fold down another 5 inches and press again. Stitch close to the folded edge to hold the header in place. This double fold creates a firm, sturdy top, giving your grommets something solid to grip onto without pulling or tearing over time. Step 5: Install the Grommets and Hang the Curtains Mark your grommet spots 2½ inches from the top and sides, spacing each one about 9 inches apart. Use the grommet template to trace each circle, then carefully cut out the holes. Push the bottom piece through from the right side of the fabric, then snap the top piece firmly into place. Once all grommets are set, slide the curtain onto the rod, and you’re done. For the more clear and more brief step, check out the video tutorial by Craftsy. Video Tutorials for Different Curtain Styles Learning curtain styles is so much easier when you can see every step in action that’s exactly what this section is for: a curated playlist of the best tutorials, organized by style and skill level, so you always know where to start. 1. Rod Pocket Curtains Rod pocket curtains are the perfect starting point for anyone new to sewing. You simply sew a folded channel at the top, slide the rod through, and you’re done, no grommets, no hooks, no extra tools needed. Difficulty level is beginner-friendly, and most panels take about 1 to 2 hours to complete. Watch this easy step-by-step tutorial to follow along at your own pace. 2. Back Tab Curtains Back tab curtains have a sleek, polished look because the rod stays completely hidden behind the fabric. The tabs are sewn onto the back of the panel, giving the front a smooth, uninterrupted finish perfect for a modern or minimalist space. It takes a little more precision than a rod pocket, but nothing difficult. 3. Tab Top Curtains Tab top curtains are casual, relaxed, and full of personality. The fabric loops sit right on top of the rod, making them easy to hang and simple to sew. They work beautifully in bedrooms, reading nooks, or any space where you want a laid-back, cozy feel. If you’re past the beginner stage and want something fun to make. 4. Pinch Pleat Curtains Pinch pleat curtains are the most formal and tailored style on this list, ideal for dining rooms, living rooms, or anywhere you want an elegant, structured look. They require more measuring and attention to detail, and pleater tape makes the whole process much easier by doing the spacing work for you. If you’re ready to level up, this tutorial is for you. Common Curtain Sewing Mistakes Every sewist makes mistakes, and what matters most is knowing exactly how to fix them and move forward with confidence: Uneven hems: Always press and pin your hem before sewing, and use a hem gauge for consistent folding every time. Crooked seams: Slow down at the machine, use your seam guide, and never skip the pinning step. Curtain too short: Always add extra length when cutting. You can hem up, but you can never hem down. Not enough fullness: Double your fabric width at minimum, triple it if you want a rich, gathered look. Fabric fraying: Finish all raw edges with a serger, zigzag stitch, or a simple fold-and-press before sewing. Take your time with each step, trust the process, and remember every mistake is just a lesson that makes your next pair of curtains even better. Final Thoughts If you’ve made it this far, you already have everything you need to get started. I have covered it all, from measuring your window and preparing your fabric to sewing clean hems, installing grommets, and choosing the right curtain style for your space. You’ve seen the most common mistakes and learned exactly how to fix them before they slow you down. After years of sewing curtains myself, I can tell you that the first pair you hang will feel like a genuine accomplishment, and it only gets easier from there. Pick your fabric, thread your machine, and trust the process. Your windows are waiting, and your best curtains are the ones you make yourself. Also, comment below on how your very first sewing experience went.
When I first set up my workshop, I was stuck using a wobbly folding table; it was a nightmare. Tools slid around; there was no solid surface to clamp anything, and storage was nonexistent. That’s when I learned how to build a workbench, and it completely transformed my workspace. The best part? You don’t need to be an expert or spend a fortune. I’ll walk you through step by step, covering everything from choosing the right wood, determining the ideal height and depth, to cutting, assembling, and finishing your bench. Let’s build something you’ll use for years What Size Should a Workbench Be? Choosing the right size is important when building a workbench. The standard height for most people is between 34 and 36 inches, which allows you to work comfortably without bending too much. If you are taller or shorter, you can adjust the height to fit you. The ideal depth is usually 24 to 30 inches, giving you enough space to work without overreaching. For length, common options are 4, 6, or 8 feet, depending on your available space. A 6-foot bench works well for most garages and home workshops. Always measure your space before cutting lumber. Step by Step: How to Build a Workbench Follow these six simple steps to build a solid workbench from scratch. Each step is beginner-friendly and requires only basic tools and standard lumber. Materials Required Before you start cutting wood, it’s important to gather the right tools and materials. Having everything ready will make the process smoother and help you avoid mistakes. Item Purpose Circular saw, or miter saw Cut the 2×4 lumber and plywood to the correct size. Drill/driver Drills pilot holes and drives screws during assembly. Measuring tape Ensures accurate measurements for proper fit. Carpenter’s square Helps keep corners at a precise 90-degree angle. 2×4 lumber (8–10 pieces, 8 ft) Used to build the legs and frame of the workbench. ¾-inch plywood (1 sheet, 4×8 ft) Creates the workbench top and lower shelf. 2½-inch wood screws Secure the main frame together. 1¼-inch wood screws Attach the plywood top and shelf. Wood glue Adds extra strength to the joints. This basic setup keeps the cost down while still giving you a strong, durable workbench that can handle most DIY and garage projects. Step1: Cut your lumber Measure twice, cut once, it’s the oldest rule in woodworking, and it’s true. Use a circular saw or chopsaw to trim your legs, top frame, lower frame, and stretchers to the correct lengths. Mark each piece clearly before cutting so nothing gets mixed up. Accurate cuts here make every step that follows much easier and save you from costly mistakes. Step 2: Build the base frame Start by assembling two rectangular end frames using 2x4s and screws. Each frame consists of two legs connected by a short top and bottom rail. These end frames form the sides of your bench and carry most of the weight. Pre-drill your holes before driving screws to prevent the wood from splitting and to get a tighter, cleaner joint every time. Step 3: Connect the frames Stand both end frames upright and join them with long side stretchers running front to back. Space your stretchers evenly near the top and bottom for maximum strength. This step gives your workbench its full length and locks the whole structure square and stable. Use a square to check your corners before fully tightening every screw. Step 4: Add the lower shelf Lay a sheet of plywood or a row of 2×4 decking flat across the bottom frame and screw it down firmly. Make sure the boards sit flush and tight with no gaps. This shelf does two important jobs; it adds rigidity to the entire structure and gives you a useful spot to store tools, bins, or supplies while you work. Step 5: Attach the tabletop Stack two sheets of 3/4″ plywood on top of the frame. Spread an even layer of wood glue between them, then drive screws up through the frame from below to lock everything in place. This double-layer method creates a thick, rock-solid work surface that handles heavy loads, hard impacts, and years of tough use without warping or flexing. Step 6: Sand and finish Run 80-grit sandpaper across the entire tabletop to smooth out any rough patches, splinters, or uneven edges. Wipe away the dust with a damp cloth, then let it dry completely. For a durable finish, apply one or two coats of polyurethane and let each coat dry completely. Prefer a raw look? Leave it unfinished; it still works great right out of the box. That’s all it takes, six steps and a few hours. Full Cut List Here’s every piece you’ll need to cut before assembly. Print this list and check off each piece as you go. Part Dimensions Qty Legs 2×4 @ 34″ 4 Top frame (long side) 2×4 @ 72″ 2 Top frame (short side) 2×4 @ 21″ 2 Bottom frame (long side) 2×4 @ 72″ 2 Bottom frame (short side) 2×4 @ 21″ 2 Side stretchers 2×4 @ 72″ 2 Tabletop (double layer) 3/4″ plywood @ 24″ x 72″ 2 Lower shelf 3/4″ plywood @ 21″ x 72″ 1 Adjust all dimensions to match your preferred bench height and length. Now that your lumber is cut and ready, let’s move on to assembly. Pro Tips for a Stronger Workbench If you want your bench to last for years, a few simple upgrades can make it stronger, safer, and more stable. Double-Layer Top: Adding a second layer of plywood makes the surface thicker and prevents sagging under heavy weight. Cross Bracing: Installing braces between the legs reduces side movement and keeps the bench steady. Wall Anchoring: Securing the bench to wall studs adds extra support and prevents tipping. Lag Bolts: Using lag bolts instead of basic screws improves joint strength and long-term durability. These small changes improve strength and stability, helping your workbench handle bigger projects with confidence. Optional Workbench Upgrades If you want to improve your setup, these simple upgrades can make your workbench more functional, organized, and easier to use every day. Upgrade What It Is Why It Helps Best For Mounted Power Strip A power outlet strip is attached to the side of your workbench. Easy access to power, fewer extension cords, cleaner workspace. Garage workstations and frequent power tool use Drawers or Cabinets Storage units installed under the workbench. Hides clutter, protects tools from dust, and keeps supplies organized. Organized workshops Folding Extension Wing A side panel that folds out for extra space and folds down when not needed. Adds more work area when required and saves space when folded. Small or compact garages These upgrades are optional, but they can transform a basic bench into a more efficient workspace built for long-term use. Beginner Mistakes to Avoid Building a workbench can be straightforward, but beginners often make avoidable errors. Recognizing common pitfalls early ensures a safer, sturdier, and more enjoyable workshop experience. Skipping Squaring Checks: Failing to check corners with a carpenter’s square can leave your frame uneven and unstable. Using Warped Lumber: Choosing bent or twisted boards can weaken the structure and cause it to wobble over time. Incorrect Screw Length: Using screws that are too short or too long can reduce joint strength or damage the wood. Not Leveling the Legs: Ignoring proper leveling can make your workbench rock and feel unsafe during use. Avoiding these mistakes guarantees a workbench that’s solid, level, and durable. With careful attention, your project will be efficient, reliable, and ready for years of use. Final Thoughts Learning how to build a workbench was one of the best things I ever did for my workshop. It gave me a solid foundation, literally, to tackle every project after it with more confidence and less frustration. If you went with a simple 2×4 build or a beefier garage bench with storage, you now have a space that’s truly yours. The whole process taught me that you don’t need fancy tools or expensive materials to make something that works great. All it takes is a good plan, some basic lumber, and a free afternoon. If you’re ready to get started, grab your cut list and head to the lumber yard. Your perfect workbench is closer than you think. Drop your questions in the comments, I’d love to help!
Keeping kids busy without spending a fortune is one of those things that always feels harder than it should, trust me on that. That is where DIY toys you can make at home come in handy. Most of what you need is already sitting in your recycling bin, junk drawer, or craft supply stash. These projects are screen-free, hands-on, and genuinely fun to put together. My go-to approach is grouping ideas by toy type, which is exactly how this list is laid out. The materials are simple, the steps are clear, and the results are worth every bit of effort you put in. Understanding DIY Toys DIY toys are homemade playthings built from everyday household materials rather than store-bought kits. Think cardboard boxes, empty plastic bottles, fabric scraps, paper rolls, and rubber bands, the kind of stuff that piles up in my house and usually ends up in the trash. The appeal, in my experience, is real: these toys cost almost nothing, keep kids away from screens, and build useful skills along the way. The best part, to my mind, is watching a child play with something made from a cereal box with the same excitement as a brand-new purchase. Safety matters here, especially for younger children. Always choose age-appropriate materials, skip small loose parts for toddlers, and use non-toxic supplies when possible. A little planning on your end goes a long way. DIY Toys From Cardboard and Recycled Materials Cardboard boxes, toilet paper rolls, plastic bottles, and coffee cans are some of the most versatile materials in any home. With a little tape and imagination, everyday packaging becomes something a child will actually want to play with. Here are eleven ideas to get started. 1. Cardboard Playhouse Turn a simple cardboard box into a cozy playhouse where your child can imagine, decorate, and create their own little world indoors. Materials: Large cardboard box, box cutter, strong packing tape, washable paint, thick markers, and extra cardboard strips for reinforcement. How to make it: Choose a sturdy box large enough for your child to sit inside comfortably, then tape the bottom flaps shut Mark a doorway on the front panel measuring 40 cm tall and 25 cm wide using a ruler and marker Cut carefully along the marked lines, leaving one side attached so the door can swing open Draw two square windows 15 cm × 15 cm on the side panels and cut them out to let light in Cut cardboard strips 5 cm wide and tape them firmly into each interior corner for added structural strength Let children paint the walls or add stickers, then allow at least 30 minutes drying time before play Important Safety Notes: Place the playhouse on a rug or foam mat for stability, tape sharp edges for safety, and encourage kids to decorate with curtains. 2. Cardboard Car or Truck Your child will love climbing into their own cardboard car and heading off on make-believe road trips around the living room. Materials: Large cardboard box (at least 60 cm × 40 cm × 40 cm), box cutter, strong tape, paper plate (25 cm diameter), dark permanent marker. How to make it: Remove top flaps completely to create an open seating space roughly 40 cm × 40 cm Cut a low doorway opening 30 cm tall × 25 cm wide along one side panel Trace and cut four matching cardboard circles, each 15 cm in diameter, for wheels Tape wheels securely onto both sides of the box at equal height, about 8 cm from the bottom edge Attach a 25 cm paper plate inside the front panel as a steering wheel, centered at the child’s arm height Draw headlights (10 cm circles), door lines, and window details using a dark permanent marker Important Safety Notes: Tape all cut edges before use, place on a flat non-slip surface, and check wheel attachments regularly during play. 3. Mini Cardboard Dollhouse This compact dollhouse gives your child a detailed space to arrange tiny rooms and act out their own small-scale stories. Materials: Thick cardboard base (50 cm × 40 cm), fabric scraps, non-toxic glue, scissors, ruler. How to make it: Cut away one large 50 cm × 40 cm side panel completely to create open front access to the rooms Measure and glue a vertical cardboard strip 40 cm tall by 4 cm wide down the center of the base Add a horizontal strip 50 cm long by 4 cm wide across the middle to divide the space into four rooms Secure all dividers firmly with extra glue along every join so the interior walls stay fully upright Cover each roughly 20 cm × 20 cm wall section with glued decorative scrapbook paper for a finished look Cut small furniture pieces, such as 5 cm tall chairs and 6 cm wide tables, from spare cardboard scraps Important Safety Notes: Use non-toxic glue only, allow full drying time before handling, and check all dividers are firmly secured before play begins. 4. Cardboard Marble Run Watch your child’s eyes light up as marbles zigzag down a track they helped design, learning cause and effect along the way. Materials: Large cardboard sheet (60 cm × 90 cm), paper towel rolls (each 28 cm long), hot glue, marbles (1.5 cm diameter). How to make it: Cut paper towel rolls lengthwise to create open channel pieces, each measuring 28 cm long for the track Arrange channels diagonally at a 30-degree angle across the board to form a zigzag path downward Glue each channel firmly onto the 60 cm × 90 cm cardboard backing with at least 3 cm of glue contact per side Leave 4–5 cm drop gaps between each channel section so the marble can fall through cleanly Test a 1.5 cm marble from the top, adjusting slope angles in 5-degree increments until movement is smooth Add extra glue under any loose sections and allow a full 20 minutes drying time before use Important Safety Notes: Keep marbles away from children under 3, supervise play at all times, and check all glued sections regularly for signs of loosening. 5. Cardboard Parking Garage Give your child’s toy car collection a proper home with a multi-level garage complete with ramps, floors, and numbered parking spots. Materials: Three flat cardboard boxes (each 50 cm × 35 cm × 8 cm), extra cardboard, tape, and marker. How to make it: Stack three flat 50 cm × 35 cm × 8 cm boxes evenly on top of each other to form the garage levels Cut ramp openings 15 cm wide by 12 cm tall on alternating sides to connect the upper and lower floors Insert angled cardboard ramps 30 cm long by 15 cm wide into each opening between levels Tape every ramp securely at both the top and bottom edges to prevent any shifting during active play Draw parking lines with each space 10 cm wide by 18 cm long, and add clear numbers on every floor Test by rolling toy cars up to 8 cm wide through the full structure before allowing children to play Important Safety Notes: Reinforce all ramp joints with extra tape, ensure the structure sits on a flat surface, and check stability before each play session. 6. Cardboard Rocket Ship Take your child on a trip to outer space without leaving the living room, using nothing more than a tall box and some paint. Materials: Tall cardboard box (at least 40 cm × 40 cm × 100 cm), extra cardboard, tape, and paint. How to make it: Stand the tall box upright to form a rocket body standing approximately 100 cm tall on a flat surface Roll a 50 cm × 50 cm cardboard sheet tightly into a cone shape and secure the seam firmly with tape Attach the cone to the top of the box using 10 cm strips of strong tape applied all the way around Cut four triangular fins 25 cm tall by 20 cm wide at the base, and attach them evenly around the bottom Reinforce every seam with 5 cm wide tape strips applied both inside and outside for maximum strength Paint the full rocket in chosen colors and allow at least 60 minutes of complete drying time before play Important Safety Notes: Ensure the cone is firmly attached before play, place it on a stable, flat surface, and thoroughly tape all sharp cut edges. 7. Cardboard Puppet Theater Set up a stage where your child can perform puppet shows for the whole family using a single large cardboard box. Materials: Large cardboard box (60 cm × 40 cm × 80 cm), fabric strips (each 40 cm long × 15 cm wide), tape, paint. How to make it: Stand the box upright at 80 cm tall with the open side facing outward toward the seated audience Cut a wide stage window 40 cm wide by 25 cm tall near the top of the front panel Tape 40 cm fabric strips inside along the top edge of the window opening to serve as stage curtains Cut a performer access doorway 35 cm tall by 25 cm wide at the back of the box for entry Decorate the entire front surface with paint, keeping the 40 cm × 25 cm stage window area completely clear Allow at least 45 minutes of full drying time before setting up for the first puppet performance Important Safety Notes: Tape all cut edges, ensure the box sits flat and stable on the floor, and check curtain attachments are secure before each show. 8. Plastic Bottle Sensory Shaker This calming sensory toy keeps young children engaged as they tilt and shake it to watch glitter swirl slowly inside. Materials: Clear plastic bottle (500 ml), clean water, glitter or small beads (3–5 mm), strong, waterproof glue, a tightly sealing cap, and a funnel. How to make it: Fill the 500 ml clear plastic bottle to the 250 ml mark with clean room-temperature water Add 2 tablespoons of glitter or small 3–5 mm beads carefully into the bottle using a funnel Leave a 3–4 cm air gap at the top of the bottle to allow movement and swirling inside Apply a 1 cm ring of waterproof glue inside the cap threads carefully before sealing it shut Twist the cap firmly until completely closed, and wipe away any glue that squeezes out around the rim Shake gently and check closely for any leaks for at least 10 minutes before handing it to a child Important Safety Notes: Glue the cap permanently shut, never leave a toddler unsupervised with the bottle, and inspect the seal regularly for signs of loosening. 9. Coffee Can Coin Bank Teach your child the value of saving with a personalized coin bank made from a recycled coffee can that you decorate together. Materials: Coffee can with lid (10 cm diameter × 14 cm tall), craft knife, decorative paper (cut to 44 cm × 14 cm to wrap the can), tape. How to make it: Clean and dry the 10 cm diameter by 14 cm tall coffee can thoroughly inside and out before starting Cut a coin slot 3 cm long by 0.5 cm wide, centered precisely in the middle of the plastic lid Smooth all rough edges around the slot by folding tape neatly over the entire cut opening Wrap the outer surface of the can with a 44 cm × 14 cm sheet of decorative paper for personalizing Secure the decorative paper tightly using clear tape along both the top and bottom edges of the can Snap the lid firmly closed and test the slot with a standard 2.5 cm diameter coin drop Important Safety Notes: Tape all cut edges on the lid slot, ensure the lid snaps fully closed every time, and keep away from children under 3 due to the choking risk from coins. 10. Egg Carton Caterpillar This cheerful caterpillar is made from an egg carton and a handful of craft supplies your child can paint and personalize freely. Materials: Standard 12-egg carton, non-toxic paint, googly eyes (1.5 cm diameter), pipe cleaners (30 cm long), and non-toxic glue. How to make it: Cut a single row of six connected cups from the egg carton, forming a strip roughly 30 cm long Paint each of the six cups a different bright color, then allow at least 30 minutes of full drying time Glue two 1.5 cm googly eyes firmly and flat onto the front cup of the caterpillar strip Poke two small holes 1 cm apart above the eyes using a pencil tip pressed through gently Insert a 30 cm pipe cleaner through both holes and bend each side into an antenna shape, 8 cm tall Draw small 1 cm patterns or dots along each cup segment using a marker for extra decoratio Important Safety Notes: Use non-toxic paint and glue only, allow full drying before handling, and check that googly eyes are firmly attached before giving to young children. 11. Toilet Paper Roll Binoculars Your child can take these homemade binoculars on indoor or outdoor adventures and decorate them however they choose. Materials: Two toilet paper rolls (each 11 cm long × 4 cm diameter), tape, non-toxic paint, yarn (60 cm length). How to make it: Align two 11 cm long toilet paper rolls evenly side by side, with both ends perfectly flush Tape the rolls tightly together along the full 11 cm touching seam using several overlapping strips Paint the outer surfaces of both rolls in chosen colors and allow at least 30 minutes of drying time Punch one small hole 1 cm from the outer edge on each roll for the carrying strap Thread a 60 cm length of yarn through both holes and tie a strong double knot at each end Adjust the yarn loop so the finished binoculars hang comfortably at the child’s chest height Important Safety Notes: Ensure yarn knots are tight and secure, check that paint is fully dry before wear, and use child-safe paint throughout. DIY Sensory and Toddler Toys Toddlers learn through touch, sound, and movement. The toys in this section support fine motor development, sensory processing, and early problem-solving without requiring much in the way of materials or prep time. 12. Hair Gel Sensory Bag This mess-free sensory bag lets your child press and move objects without getting their hands dirty, making it great for quiet, focused play. Materials: Large freezer bag (27 cm × 28 cm), clear hair gel (200 ml), small plastic items (2–5 cm), strong packing tape. How to make it: Open the 27 cm × 28 cm freezer bag and squeeze 200 ml of clear hair gel evenly inside Add 8–10 small plastic items, each 2–5 cm in size, spread evenly throughout the gel layer Press out all excess air from the bag before sealing the zipper completely and firmly shut Tape the full 27 cm zipper edge with a double layer of packing tape to prevent any opening Lay the sealed bag flat on a sturdy table and smooth it to an even 1 cm thickness throughout Tape all four outer edges with 3 cm wide tape strips before handing to a toddler for play Important Safety Notes: Tape all edges thoroughly to prevent gel leaks, supervise toddlers at all times, and check the seal is fully intact before each use. 13. Fabric Scrap Texture Board This simple texture board turns leftover fabric scraps into a rich sensory activity that keeps toddlers engaged through touch and feel. Materials: Thick cardboard base (40 cm × 40 cm), fabric scraps in varied textures, and non-toxic glue. How to make it: Cut a sturdy 40 cm × 40 cm cardboard square from thick cardboard to serve as the base board Select 9–12 fabric scraps with clearly different textures, such as rough, smooth, fluffy, and bumpy Cut every selected fabric piece into equal 10 cm × 10 cm squares to create a neat, uniform grid Spread non-toxic glue evenly across each 10 cm × 10 cm section of the cardboard surface carefully Press each fabric square firmly into its glued section, smoothing out any bubbles or lifted edges Allow the completed board a full 60 minutes of drying time before handing it to a child Important Safety Notes: Use only non-toxic glue, ensure all fabric edges are firmly glued down, and check for loose pieces before each use. 14. Rice Sensory Bin A sensory bin for rice gives your toddler a whole world of scooping, pouring, and digging, with hidden toys to find beneath the surface. Materials: Shallow plastic bin (50 cm × 35 cm × 10 cm deep), 1–2 kg uncooked rice, cups, spoons, small toys (at least 5 cm in size). How to make it: Pour 1–2 kg of uncooked rice evenly into the 50 cm × 35 cm bin to a depth of about 6 cm Bury 5–8 small toys, each at least 5 cm in size, lightly beneath the rice surface for discovering Add 2–3 scoops, cups, and small funnels to encourage scooping, filling, and pouring play Place the bin on a 60 cm × 60 cm mat beneath it to catch any rice that spills over the edges Show your toddler how to scoop and pour rice using the provided cups and funnels to get started Supervise closely throughout every sensory play session to ensure safe and engaged exploration Important Safety Notes: Keep rice bins out of reach of children under 18 months, supervise at all times, and store rice in a sealed container between uses. 15. Water Bead Bottle This sealed bottle filled with water beads makes a visually engaging toy that develops focus and visual tracking without any mess. Materials: Clear plastic bottle (750 ml), water beads (expand to 1–1.5 cm each), clean water, and waterproof glue. How to make it: Soak water beads in clean water for 4–6 hours until they have fully expanded to 1–1.5 cm each Fill the clear 750 ml bottle to the 500 ml mark with fresh, clean water before adding beads Add 20–25 fully expanded beads carefully through the bottle opening using a funnel for control Leave a 5 cm air space at the top of the bottle to allow the beads to move and float freely Apply a 1 cm ring of waterproof glue inside the cap, and seal the bottle tightly and completely Shake gently and inspect the cap seal closely for at least 10 minutes before toddler handling Important Safety Notes: Glue the cap permanently shut, never give to children under three due to bead choking risk, and inspect the seal regularly. 16. Rainbow Capillary Action Paper Towel Experiment This colorful experiment lets your child watch science happen in real time as colors travel up paper towels completely on their own. Materials: Paper towel sheet (full size, approximately 28 cm × 28 cm), washable markers, two clear cups (250 ml each), water. How to make it: Draw thick, 4 cm wide rainbow color stripes across both short ends of the full-size paper towel Fill two 250 ml cups to the 150 ml mark each with clean water before setting them in position Place the two filled cups 20 cm apart from each other on a flat and stable surface Fold the paper towel lengthwise to a 7 cm width and dip one colored end into each cup Ensure only the bottom 3 cm of each colored end is actually touching the water surface Watch the colors travel upward and meet in the center naturally over the next 20–40 minutes Important Safety Notes: Use only washable markers, place cups on a stable surface to avoid spills, and supervise young children around water at all times. 17. Crinkle Paper Toy Babies and toddlers are drawn to the satisfying crinkling sound this toy makes every time they squeeze or grab it during play. Materials: Two cotton fabric squares (20 cm × 20 cm each), one cellophane sheet (18 cm × 18 cm), ribbon pieces (each 10 cm long), needle, thread. How to make it: Cut two 20 cm × 20 cm cotton fabric squares of completely equal size for the outer layers Place an 18 cm × 18 cm cellophane sheet centered precisely between the two fabric layers Insert 4 ribbon loops, each 10 cm folded down to 5 cm, evenly along the edges before sewing Sew around all four edges with a 1 cm seam allowance, leaving a 5 cm opening on one side Turn the fabric carefully right side out through the 5 cm opening, pulling gently to avoid tearing Sew the 5 cm opening fully closed using small 3 mm hand stitches for a neat and secure finish Important Safety Notes: Check all stitching is secure before giving to a baby, ensure ribbon loops cannot be pulled off, and inspect the toy regularly for wear and loose seams. 18. Simple Treasure Basket A treasure basket gives babies a safe, open-ended way to handle different textures, weights, and shapes entirely at their own pace. Materials: Low wide basket (30 cm diameter × 10 cm tall), wooden spoons, fabric pieces, safe household objects (each at least 6 cm). How to make it: Choose a wide, shallow basket no taller than 10 cm with no sharp edges, splinters, or rough spots Gather 8–12 safe household objects, each at least 6 cm in size, with varied textures and weights Place all items loosely inside the 30 cm diameter basket with at least 3 cm spacing between them Remove any object smaller than 6 cm immediately, as it could pose a serious choking hazard Sit baby nearby within arm’s reach and allow completely free, open-ended exploration of the basket Rotate 3–4 objects every week to maintain the baby’s interest and introduce new textures regularly Important Safety Notes: Check every item for choking hazards before placing it in the basket, supervise babies at all times, and inspect all objects regularly for damage or sharp edges. 19. Paper Towel Roll Ball Drop A cardboard box and a few paper towel rolls become a drop-and-chase toy your toddler will return to again and again. Materials: Tall cardboard box (30 cm × 30 cm × 60 cm), paper towel rolls (each 28 cm long), tape, soft foam ball (6 cm diameter). How to make it: Stand the 60 cm tall cardboard box upright and secure it firmly against a wall before starting Cut an entry hole 8 cm × 8 cm near the top front panel, positioned 50 cm up from the floor Tape paper towel rolls diagonally inside at 35-degree angles to form a smooth zigzag path down Leave a 5 cm drop gap between the bottom of one roll and the top of the next roll below Cut an exit hole 8 cm × 8 cm near the bottom front panel, positioned 10 cm up from the floor Test the full path using a 6 cm foam ball, adjusting the roll angles until movement is completely smooth Important Safety Notes: Secure the box firmly against a wall to prevent tipping, tape all cut edges, and use only a soft foam ball during play. 20. Bottle Cap Matching Game This matching game uses recycled bottle caps to help your child practice letter recognition and memory skills at the same time. Materials: 20 matching bottle caps (3–4 cm diameter each), permanent marker. How to make it: Collect 10 pairs of matching bottle caps, with each cap measuring 3–4 cm in diameter Write identical letters inside each matching pair of caps clearly using a permanent marker Shuffle all 20 caps thoroughly and lay them face down in a grid on a flat surface Arrange the caps in a 4 × 5 grid pattern with 2 cm of even spacing between each cap Flip two caps per turn and look for a matching letter pair before turning the unmatched caps back over Keep all matched pairs set aside and continue playing until all 10 pairs have been found Important Safety Notes: Check all caps for sharp edges before play, keep small caps away from children under three, and store in a sealed container between sessions. 21. Shape Sorting Box This color-coded shape sorter helps your child match shapes and solve a simple, hands-on problem independently. Materials: Sturdy cardboard box (25 cm × 25 cm × 15 cm), extra cardboard, and non-toxic paint. How to make it: Cut five shapes into the 25 cm × 25 cm box lid: a 6 cm circle, a 6 cm square, a 7 cm base triangle, an 8 cm × 4 cm rectangle, and a 7 cm wide star Trace each matching shape onto spare cardboard and cut every piece out carefully along the outline Paint each shape and its corresponding hole the exact same color using non-toxic paint throughout Allow all painted pieces and the box lid at least 45 minutes of full drying time before use Demonstrate posting each shape through its correct 6–8 cm opening slowly and clearly for the child Reset all pieces and repeat the activity as your child builds confidence, matching each shape correctly Important Safety Notes: Use non-toxic paint, ensure cut shapes have no sharp edges, and check that pieces are too large to be swallowed before giving to young children. 22. DIY Puzzle From Cereal Box Turning an empty cereal box into a puzzle is one of the quickest ways to make a personalized activity your child will want to repeat. Materials: Empty cereal box (front panel approximately 20 cm × 30 cm), scissors, and marker. How to make it: Cut the 20 cm × 30 cm front panel cleanly and completely from the empty cereal box Draw 6–8 irregular puzzle-piece lines across the panel surface using a marker for cutting guides Cut carefully along each drawn line, separating all pieces into sections roughly 6–8 cm wide each Mix all the cut pieces thoroughly before handing them to your child to begin solving the puzzle Store all finished pieces neatly inside the original cereal box after every completed play session Gradually increase the puzzle to 12–15 pieces as your child’s cutting and fitting skills develop Important Safety Notes: Check all cut edges are smooth before play, supervise young children to prevent pieces from being put in their mouths, and store pieces safely to avoid loss. When you offer hands-on sensory play, you naturally build focus, coordination, and confidence. Try one simple setup this week, and you will notice how deeply your toddler engages. DIY STEM and Educational Toys Hands-on learning sticks better than any worksheet. The projects in this section introduce kids to force, balance, time, and motion through play that they actually want to do. No expensive kits needed. 23. Marshmallow Catapult This popsicle-stick catapult turns basic physics into a game your child will want to set up targets for and play over and over. Materials: 10 craft sticks (15 cm long each), rubber bands, plastic spoon (15 cm long), mini marshmallows (1.5 cm diameter). How to make it: Stack 8 craft sticks and secure both ends of the bundle tightly with rubber bands at each end Stand 2 craft sticks upright at one end of the stack and hold them together with a rubber band Slide the 8-stick bundle between the two upright sticks so it sits firmly 3 cm from the top Attach a 15 cm plastic spoon to the top of the upright sticks securely using 2 rubber bands Load a 1.5 cm mini marshmallow into the spoon bowl and press the spoon down 4–5 cm to prime Release the spoon quickly to launch the marshmallow forward a distance of up to 2–3 metres Important Safety Notes: Supervise all launching activity, aim only at soft targets, and keep rubber bands away from young children to prevent snapping injuries. 24. Paper Plate Clock This hands-on clock helps your child read time in a way that sticks far better than any worksheet or screen-based activity. Materials: Paper plate (23 cm diameter), cardboard, brass brad, marker. How to make it: Write numbers 1–12 evenly spaced around the plate edge, with each number standing 2 cm tall for easy reading Cut a long 10 cm minute hand and a shorter 7 cm hour hand from a piece of spare cardboard Color each hand a different shade so children can clearly distinguish between the minute and hour hands Punch a small 3 mm hole through the exact center point of the paper plate before assembly Insert a brass brad through both cardboard hands and the center hole, then secure it flat from behind Practice setting and reading real daily schedule times together each day to reinforce learning naturally Important Safety Notes: Press the brass brad flat on the back to avoid scratching, use child-safe markers, and supervise younger children during the making process. 25. DIY Balance Scale This simple scale helps your child compare weights using everyday household objects, making balance and measurement tangible and easy to grasp. Materials: Two paper cups (9 cm tall each), string (4 × 20 cm lengths), ruler (30 cm), pencil. How to make it: Punch two holes 1 cm from the top rim on opposite sides of each 9 cm paper cup Thread a 20 cm string through each pair of holes to form a sturdy handle loop Attach both cup handles to opposite ends of the 30 cm ruler, each sitting 2 cm from the end Balance the ruler carefully across a pencil positioned at the 15 cm center mark to create the pivot Place small objects like coins, buttons, or pebbles into each cup to compare their relative weights Observe which side dips lower as different objects are added to or removed from each cup Important Safety Notes: Use only lightweight objects, ensure all string knots are secure before use, and supervise children to prevent small objects from being put in their mouths. 26. DIY Magnetic Fishing Game This magnetic fishing game builds counting, color recognition, and patience all at once using nothing more than cardboard and a magnet. Materials: Thick cardboard, paper clips (3 cm each), string (50 cm), small magnet (2 cm), chopstick (25 cm long). How to make it: Cut 10 fish shapes from thick cardboard, each measuring approximately 8 cm long by 5 cm wide Decorate each fish with a number from 1–10 or a distinct bright color using markers for variety Tape a 3 cm paper clip firmly and flat onto the mouth area of every individual fish shape Tie a 50 cm length of string onto the 25 cm chopstick, knotted securely 3 cm from one end Attach a 2 cm magnet firmly to the free dangling end of the string using strong tape Lower the magnet to within 2 cm of each fish and watch the paper clip snap it upward Important Safety Notes: Keep small magnets away from children under five, check paper clip attachments before each game, and supervise play at all times. 27. Balloon Rocket This balloon rocket shoots across a taut string, giving your child a hands-on introduction to thrust and motion through exciting play. Materials: String (3–5 metres long), plastic straw (20 cm), balloon (30 cm when inflated), tape. How to make it: Thread the full 3–5 metre string through the 20 cm plastic straw completely before tying anything Stretch the string tightly between two fixed anchor points set 3–5 metres apart from each other Inflate the balloon to roughly 25–30 cm in length and pinch the open end firmly closed without tying Tape the inflated balloon firmly onto the straw using two separate 5 cm tape strips for security Hold the pinched balloon end completely closed and steady until you are fully ready to launch Release the end and watch the escaping air shoot the balloon across the entire 3–5 metre string Important Safety Notes: Tie string anchor points securely to fixed objects, keep the 3–5 metre launch path clear of faces, and supervise balloon inflation to prevent overinflating. 28. Spoon Catapult This craft stick catapult gives your child more launch power to test different objects and compare how far each one travels. Materials: 12 popsicle sticks (15 cm each), rubber bands, plastic spoon (18 cm). How to make it: Stack 10 popsicle sticks (15 cm each) in a flat bundle and secure both ends tightly with rubber bands Stand 2 sticks upright to form the fulcrum and bind them with a rubber band 3 cm from the top Slide the 10-stick bundle firmly between the two upright sticks, positioning it 4 cm from the top Lay one flat 15 cm stick horizontally across the center of the upright fulcrum to create the arm Attach the 18 cm plastic spoon securely to the longer end of the arm using a rubber band Press the spoon down 5 cm and release quickly to launch small objects up to 3 metres forward Important Safety Notes: Supervise all launching; aim only toward clear, open areas at least 3 metres wide; and keep rubber bands away from young children. 29. Paper Airplane Challenge This activity turns basic paper folding into a full experiment your child can run, measure, and repeat with different designs each time. Materials: 4 sheets of A4 paper (21 cm × 29.7 cm each), a tape measure (at least 5 metres), and small stickers for labeling. How to make it: Fold four clearly different airplane designs from four separate 21 cm × 29.7 cm A4 paper sheets Label each finished plane with a small numbered sticker from 1 through 4 for straightforward tracking Mark a consistent starting line on the floor using tape, positioned at least 2 metres from any wall Throw each plane forward from the same line using a steady and consistent force every single time Measure the exact distance each plane travels from the line using a tape measure of at least 5 metres Record all four distances carefully and compare which airplane design flew the furthest overal Important Safety Notes: Choose an open indoor or outdoor space at least 5 metres long, keep bystanders clear of the flight path, and fold back the sharp nose tips for younger children. 30. Paper Spinner This simple spinner shows your child how colors appear to merge together when they spin fast enough, a satisfying visual result every time. Materials: Stiff cardstock (10 cm × 10 cm), markers, toothpick (6.5 cm long). How to make it: Cut a neat 8 cm diameter hexagon shape from a sheet of stiff 10 cm × 10 cm cardstock Divide the surface into six equal 60-degree sections by drawing lines with a ruler and pencil Color alternating sections in two strongly contrasting colors, each section roughly 3 cm wide Push the 6.5 cm toothpick carefully and straight through the exact center point of the hexagon Leave 1.5 cm of the toothpick protruding below and 3 cm above the cardstock surface for balance Spin it quickly between your fingers and watch the two contrasting colors appear to blend together Important Safety Notes: Supervise toothpick use at all times, trim the sharp tip for children under five, and ensure the toothpick is centered before each spin. 31. Paper Chain Building Game This pattern-based building game challenges your child to follow sequences and think ahead as the chain grows longer with each loop. Materials: Colored paper strips (each 20 cm long × 2.5 cm wide), non-toxic glue. How to make it: Cut colored paper into uniform strips, each measuring exactly 20 cm long by 2.5 cm wide Write a simple repeating color sequence pattern onto a small 5 cm × 5 cm guide card for reference Form the first 20 cm strip into a loop by gluing the two ends together with a 1 cm overlap Thread the next 20 cm strip through the first completed loop before gluing its ends firmly together Continue adding one loop at a time, following the pattern card carefully with each new strip added Measure the finished chain once complete, aiming to reach at least 50 cm in total length Important Safety Notes: Use only non-toxic glue, keep it away from mouths, and ensure all strips are cut with smooth 90-degree edges before handling. 32. DIY Drum From Tin Cans This homemade drum gives your child a real instrument to tap and experiment with, producing different sounds depending on the can size and tension. Materials: Tin can (10 cm diameter × 12 cm tall), balloon (25 cm when inflated), thick rubber band (10 cm diameter), chopsticks (25 cm long each). How to make it: Clean the 10 cm × 12 cm tin can thoroughly and check the entire rim carefully for any sharp edges Cut the balloon neck off cleanly and stretch the remaining rubber piece over the full 10 cm opening Secure the stretched balloon tightly in place using a 10 cm diameter rubber band around the rim Press the surface gently to confirm it feels taut with only about 3–4 mm of flexible give remaining Wrap 2 cm of foam or fabric padding around each end of the two 25 cm chopsticks for softer tapping Tap the drum surface steadily with both padded chopsticks to produce clear and satisfying rhythmic sounds Important Safety Notes: Check the can rim carefully for sharp edges and tape any rough spots, ensure the rubber band holds the balloon firmly, and supervise chopstick use with younger children. These hands-on builds make learning feel active instead of forced or dull. Pick one project, test it together, and you will see how quickly curiosity grows through doing. DIY Pretend Play and Creative Toys Pretend play is how children make sense of the world around them. These projects give kids the props they need to act out stories, try on roles, and create their own games without any expensive accessories. 33. DIY Play Kitchen Food These cardboard food pieces give your child a full set of props for playing restaurant, chef, or grocery store right at home. Materials: Thick cardboard sheet (50 cm × 70 cm), non-toxic paint, dark marker. How to make it: Draw fruit shapes (8 cm wide), vegetables (10 cm tall), and bread slices (10 cm × 8 cm) onto the cardboard sheet Cut each food shape out carefully along its drawn outline using a pair of scissors with smooth edges Paint every piece in realistic food colors using non-toxic paint and allow a full 45 minutes to dry Add fine detail lines like seeds, crusts, and stripes using a dark marker with a 1–2 mm tip Check each piece thoroughly for any sharp or torn cardboard edges before handing them to a child Store all finished food pieces neatly inside a small basket or lidded box between each play session Important Safety Notes: Use only non-toxic paint, allow full drying before play, and check regularly for damaged or torn pieces that may have sharp cardboard edges. 34. Cardboard Cash Register This play cash register sets your child up to run their own pretend shop and practice number recognition through everyday play. Materials: Medium box (25 cm × 20 cm × 15 cm), small box (15 cm × 10 cm × 5 cm), marker, cardboard scraps. How to make it: Close and tape the 25 cm × 20 cm × 15 cm medium box on all sides to form a solid, stable base Attach the smaller 15 cm × 10 cm × 5 cm box on top of the base and secure it firmly with tape Draw a grid of number buttons, each 2 cm × 2 cm, arranged in a 3 × 4 layout across the front panel Cut a 15 cm × 3 cm rectangular slot near the bottom front edge of the box for the cash drawer Slide a shallow 15 cm × 10 cm cardboard tray into the slot opening to serve as the working drawer Add paper money cut to 10 cm × 5 cm and round cardboard coins 3 cm in diameter to complete the setup Important Safety Notes: Tape all box seams firmly, check for sharp cut edges on the 15 cm drawer slot, and keep small coin pieces out of reach of children under 3. 35. Doctor Kit From Household Items This homemade doctor kit gives your child everything needed to set up a pretend clinic and care for toys through role-play. Materials: Cardboard, pipe cleaners (30 cm long), craft stick (15 cm), gauze roll (5 cm wide). How to make it: Cut a round 8 cm diameter cardboard circle to serve as the stethoscope chest piece base Fold a 30 cm pipe cleaner in half and attach it to the chest piece to form the earpiece shape Paint one end of a 15 cm craft stick red to represent a simple pretend thermometer clearly Roll a 30 cm length of 5 cm wide gauze into a neat and soft bandage wrap for pretend injuries Rule five to six lines across 10 cm × 8 cm paper sheets to create a simple pretend prescription pad Place all finished tools together inside a small 20 cm × 15 cm bag or container for easy carrying Important Safety Notes: Fold all pipe cleaner ends flat to avoid scratching; use non-toxic paint on the craft stick; and keep small pieces away from children under 3. 36. DIY Sock Puppet A sock puppet comes together in minutes and gives children a character with a name and voice they will return to long after the first day. Materials: Clean adult sock (25–28 cm long), two googly eyes (2 cm diameter each), yarn (10 × 15 cm strands), and non-toxic glue. How to make it: Slide a clean 25–28 cm adult sock over one hand to check the fit and confirm the mouth position Lightly mark the eye positions with a pencil, placing them 5 cm back from the toe end of the sock Glue two 2 cm googly eyes firmly at the marked positions, sitting just above the knuckle line Cut a 3 cm × 1.5 cm felt tongue piece and attach it securely inside the folded mouth area Glue 10 strands of 15 cm yarn evenly along the top edge of the sock to create the puppet’s hair Allow at least 60 minutes of full drying time before handing the finished puppet to a child for play Important Safety Notes: Use strong, non-toxic glue; check that the googly eyes are firmly set before giving to young children; and ensure the yarn is securely attached, with no loose strands longer than 15 cm. 37. Superhero Masks These cardboard masks let your child step into their favorite character and head off on adventures around the house in full costume. Materials: Thick cardboard (25 cm × 15 cm), non-toxic paint, elastic string (35 cm long). How to make it: Draw a symmetrical mask shape 22 cm wide by 10 cm tall onto the 25 cm × 15 cm cardboard sheet Cut two oval eye holes, each 4 cm wide by 2.5 cm tall, spaced 7 cm apart at the center point Decorate the entire front surface of the mask using non-toxic paint in the child’s chosen colors Allow at least 45 minutes of complete drying time before moving on to any further assembly steps Punch 3 mm holes 1 cm from each outer edge of the finished 22 cm wide mask shape Thread a 35 cm elastic band through both holes and tie firm double knots at each end to secure Important Safety Notes: Ensure eye holes are large enough for clear vision, check that the 35 cm elastic is not too tight around the head, and use non-toxic paint throughout. 38. DIY Tool Belt This fabric tool belt lets your child strap on their cardboard tools and get to work fixing everything in sight with a real sense of purpose. Materials: Fabric strip (70 cm long × 8 cm wide), cardboard, non-toxic paint. How to make it: Cut a 70 cm × 8 cm fabric strip that fits comfortably around the child’s waist with room to tie Attach three small fabric pockets, each 10 cm × 8 cm, evenly spaced along the front of the strip Draw a hammer (20 cm), a wrench (18 cm), and a screwdriver (16 cm) onto thick cardboard sheets Cut each tool shape out carefully, following the drawn outlines as closely and neatly as possible Paint every tool in grey and brown tones using non-toxic paint, then allow 45 minutes to dry fully Tie the belt securely around the child’s waist with a 5 cm overlap at each end for a comfortable fit Important Safety Notes: Check that the belt tie is not too tight around the waist, use non-toxic paint on all cardboard tools, and ensure all pockets are sewn firmly before loading with tools. 39. Homemade Doll Bed This shoebox doll bed gives your child’s favorite toy a proper place to rest, complete with a hand-sewn pillow and a fabric blanket. Materials: Shoebox (30 cm × 15 cm × 10 cm), fabric pieces, cotton stuffing, cardboard (15 cm × 10 cm for headboard). How to make it: Line the interior of the 30 cm × 15 cm × 10 cm shoebox with a fabric sheet cut to fit and glued flat Cut a 15 cm × 10 cm cardboard piece to serve as a simple rectangular headboard for the bed Glue the headboard upright and firmly against the inside of one 15 cm end wall of the shoebox Sew a small pillow from two 10 cm × 8 cm fabric squares stitched together along three sides Fill the pillow lightly with cotton stuffing and stitch the remaining open 8 cm edge fully closed Place the finished pillow and a 20 cm × 15 cm fabric blanket neatly inside the completed bed Important Safety Notes: Use non-toxic glue for lining, ensure the headboard is firmly attached before play, and check all pillow stitching is secure before giving to a child. 40. Paper Fortune Teller This classic folded paper toy gives your child a fun way to play prediction games with friends or family using one square sheet. Materials: Square paper sheet (20 cm × 20 cm), marker. How to make it: Fold all four corners of the 20 cm × 20 cm square sheet inward to meet precisely at the center point Flip the paper over and fold the four new corners inward to the center point once more Fold the resulting 10 cm × 10 cm square in half to create a neat 5 cm × 10 cm rectangle shape Insert both thumbs and both forefingers into the four 5 cm × 5 cm inner pockets to operate it Write numbers 1–8 on the outer triangles and a different color on each of the inner visible triangles Add a short 2–3 word fortune beneath each of the eight inner flaps using a child-safe marker Important Safety Notes: Use child-safe markers only, ensure folds are crisp so the fortune teller holds its shape during use, and replace with a fresh 20 cm × 20 cm sheet when worn. 41. Origami Jumping Frog This origami frog takes one sheet of paper and a few precise folds to produce a toy that actually jumps when pressed from behind. Materials: One rectangular paper sheet (A4, 21 cm × 29.7 cm). How to make it: Fold the 21 cm × 29.7 cm sheet in half lengthwise to create a long 10.5 cm × 29.7 cm strip Fold the top two corners diagonally inward so they meet neatly at the center to form a triangle point Collapse the triangle folds inward to produce a compact 10.5 cm × 10.5 cm layered square shape Fold the bottom rectangular section of approximately 10.5 cm × 9 cm upward to begin forming the body Fold the resulting 5 cm bottom edge firmly back down to create the rear spring for jumping Press the 5 cm rear fold down quickly and release to make the frog leap 10–15 cm forward Important Safety Notes: Use paper with no sharp, torn edges, supervise younger children during folding steps, and replace the frog when it becomes too worn to jump cleanly. 42. Paper Pop It This paper pop-up gives your child a low-cost, reusable fidget activity they can carry anywhere and reset easily with a fresh sheet. Materials: Cardstock sheet (20 cm × 20 cm), marker. How to make it: Draw a 6 × 6 grid of circles, each 2.5 cm in diameter, across the full 20 cm × 20 cm cardstock sheet Leave 0.5 cm of even spacing between each circle as you draw the full grid across the surface Place a small 3 mm dot inside the very center of every individual circle across the entire grid Hand the sheet to the child and invite them to begin crossing out circles one at a time in any order Continue marking off circles until all 36 across the complete 6 × 6 grid have been crossed out Draw or print a fresh 20 cm × 20 cm sheet to reset the activity and start a new round of play Important Safety Notes: Use only non-toxic markers, replace worn sheets to keep cardstock edges smooth, and ensure all corners are trimmed to avoid sharp points before handing the cardstock to a child. 43. Paper Puppet This paper bag puppet sparks immediate creative play and gives your child a full cast of characters to build and perform with the same afternoon. Materials: Standard paper bag (18 cm × 10 cm × 6 cm), yarn (10 × 20 cm strands), non-toxic glue, marker. How to make it: Place the 18 cm × 10 cm paper bag flat with the sealed bottom flap positioned facing upward Draw eyes 2 cm wide, a nose 1 cm tall, and a mouth 4 cm wide onto the 10 cm × 6 cm top flap Glue 10 strands of 20 cm yarn evenly along the top sealed edge of the bag to create the hair Cut two 5 cm × 4 cm paper ear shapes and glue one firmly to each side of the bag Slide one hand inside the bag with your fingers reaching up into the 6 cm top sealed flap Move your fingers upward to open and close the 4 cm mouth flap naturally during your performance Important Safety Notes: Use non-toxic glue and markers, ensure all yarn strands are firmly attached with no loose ends longer than 20 cm, and check the bag opening is wide enough for your child’s hand. When you give children simple props, they create full worlds on their own. Choose one idea here, set it up, and watch stories unfold in ways you never expected. Quick Tips for Making DIY Toys A few simple habits make the building process smoother, safer, and more enjoyable for everyone involved. Keep these in mind before starting any project. Use age-safe, non-toxic materials and avoid small, loose parts for children under three Sand sharp cardboard edges and supervise all cutting, gluing, and hot glue gun steps Start with the simplest project in a category before moving to more complex builds Let kids help design and decorate, it increases how long they actually play with the toy Store finished toys in labeled bins and rotate them weekly to keep interest high Starting with one idea and seeing it through is better than planning ten projects at once and finishing none. Final Thoughts The best thing about these DIY toys you can make at home is that most of what you need is already within reach. A cardboard box, a pair of scissors, some tape, and a little time are enough to make something a child will actually use. From my experience watching kids play, a homemade toy often gets more attention than a store-bought one, partly because they helped make it, and partly because it feels like theirs in a way that bought toys rarely do. Start with one idea this week, something that fits what you already have at home. The process of building together is as valuable as the toy itself. Bookmark this list, come back to it when you need a new project, and keep the craft supplies within reach for when the mood strikes. Drop a comment below and share your ideas too!
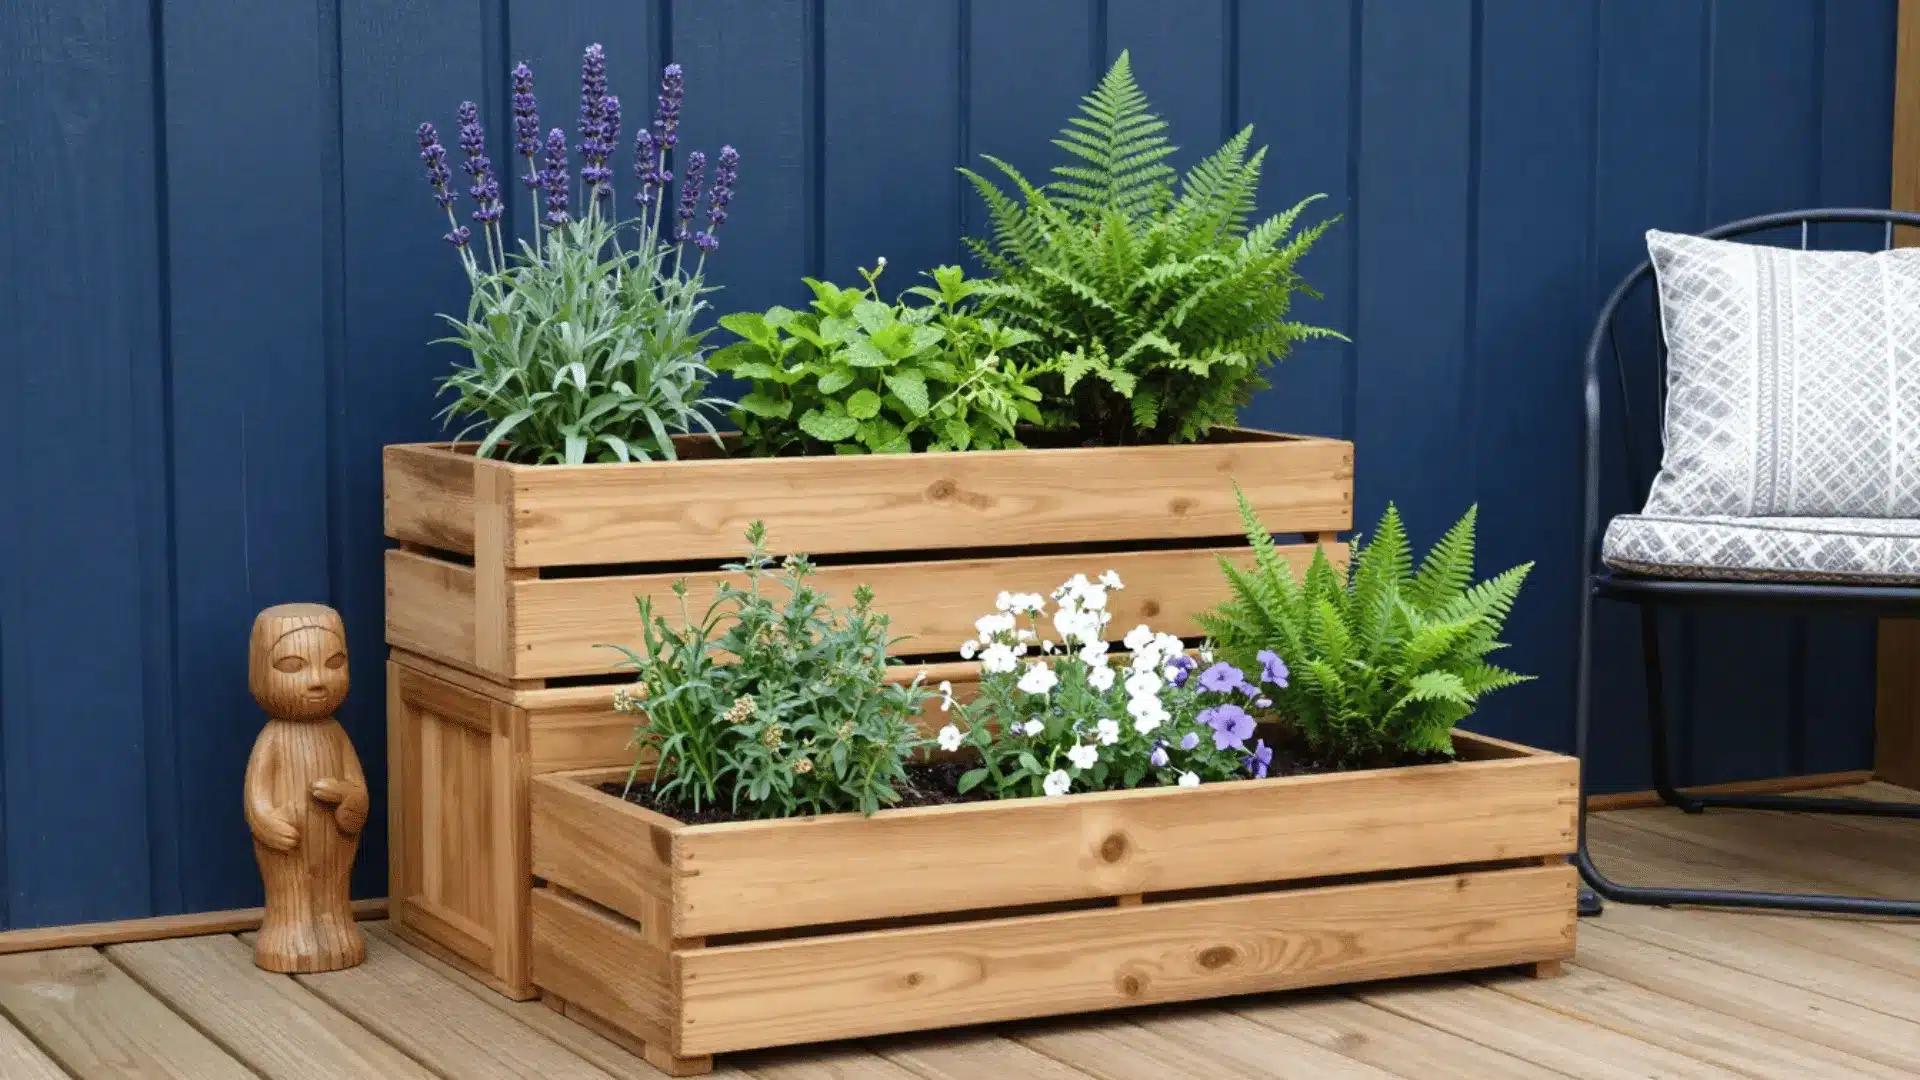
The first time I decided to build a planter box, I stood in the lumber aisle longer than I’d like to admit. If you’re here to learn how to build a DIY planter box, you probably want something simple, affordable, and sturdy enough to last. I get that. Store prices can feel ridiculous, and the quality doesn’t always match the cost. In this guide, I’ll walk you through the exact steps I use, the tools you actually need, and the small details that make a big difference in durability. You’ll also learn how to avoid common beginner mistakes that shorten a planter’s life. By the end, you’ll feel confident starting your own build. Building Your Own Planter Box Makes Sense Before you pick up a saw or buy your lumber, it helps to understand what really goes into building a DIY planter box that lasts. I’ve learned that a successful build starts with smart material choices, proper drainage planning, and using the right fasteners for outdoor conditions. You also want to think about size, depth, and placement so your plants have enough room to grow strong. Small details like sealing the wood and lift the base make a huge difference over time. When you approach the project with a clear plan, you avoid costly mistakes and end up with something sturdy, practical, and built to handle the seasons ahead. Step-by-Step: How to Build a DIY Planter Box Follow these five simple steps, and you’ll go from raw wood to a finished planter box that looks custom-built and lasts for years. No experience needed, just the right steps in the right order. Tools & Materials Checklist Table saw (or circular saw) Miter saw Drill Countersink bit Outdoor decking screws Clamps Merbau decking boards Treated pine lumber Heavy-duty plastic container LED strip light (cuttable) Aluminum LED channel Black exterior paint Rubber feet/stoppers Potting mix Step 1: Build the Legs and Prep the Frame Start by cutting your pressure-treated pine into legs all the same length. Use a stop block to keep every cut consistent. A circular saw works perfectly fine here. Once cut, paint the legs black for a clean, modern look. Drive a screw into one end so you can coat all four sides easily and let them dry without touching anything. Simple prep, big payoff. Step 2: Prepare and Cut the Decking Boards Use hardwood decking boards for the sides or pressure-treated wood if you’re on a budget. Before ripping, measure carefully so both pieces come out the same width. After cutting, run a router along the edges to smooth them out. This small step makes every board look neat and uniform. Then cut all sideboards to your final length, and you’re ready to start building. Step 3: Assemble the Side Panels and Box Set up a simple jig to keep everything square as you work. Use small plastic shims to create even gaps between boards. Always pre-drill and countersink before driving screws. This keeps the surface clean and stops the wood from cracking. Build two side panels first, then connect them all together like a puzzle. Go slow. A patient build always looks better than a rushed one. Step 4: Add the Plastic Insert and Bottom Support Skip the plastic lining and use a heavy-duty plastic container inside the box instead. Drill drainage holes in the bottom so water flows out and doesn’t sit against the wood. Then build a simple support floor inside, with a center drainage gap. This one step protects your wood from rot and makes your planter last years longer than most store-bought options ever will. Step 5: Install the Top Cap and Built-In Lighting Cut the top capping boards to size and use a spacer block to evenly position them. Rub nails with candle wax before driving into hardwood; it makes the job much smoother. Mount an aluminum LED channel under the cap, insert a cuttable LED strip, and snap on the diffuser. Tuck cords neatly inside, add rubber feet, fill with soil, plant, and water. For full measurements, cuts, and detailed instructions, watch the complete video for a clear visual walkthrough of every step DIYForKnuckleheads. Common Experience in Building First DIY Planter Box In this Reddit thread, user TessaMercury asked whether milk paint or chalk paint would work best for distressed built-in bookshelves in a 1936 bungalow. Several users pushed back on the distressed idea. Kittyroux said built-ins should match walls and trim, not look aged. EatsTheCheeseRind and others felt that shabby-chic styles are outdated. mortalwombat- suggested a clean, classic finish instead. Durability was a major concern. computer1490 regretted using chalk paint on cabinets due to poor wear and difficult touch-ups. csguydn recommended enamel paint with polyurethane for bookshelves. A few users, like NomDrop and [deleted], defended milk paint when used properly. Overall, most advised choosing a durable, classic finish over a distressed look. How to Make Your Planter Box Last for Years Building the box is only half the job; how you protect it afterwards is what separates a planter that lasts one season from one that lasts a decade: Seal wood: Apply an exterior-grade sealant or waterproof stain to all surfaces before adding soil. This blocks moisture and slows wood breakdown. Lift base: Raise the planter off the ground using rubber feet or risers. Airflow underneath prevents trapped moisture and rot. Add drainage: Drill proper drainage holes so excess water can escape instead of soaking into the wood. Use liner: Insert a heavy-duty plastic container or landscaping fabric to keep wet soil from touching the wood directly. Apply stain: Reapply exterior stain every couple of years to maintain protection and extend lifespan. Install rubber feet: Keep legs dry by preventing direct contact with wet surfaces. Winter storage: Empty soil, dry thoroughly, and store in a covered space during freezing months. Check screws yearly: Tighten loose screws and replace any that show rust to maintain structural strength. Take care of your build, and it will take care of your garden. These steps alone can easily add five or more years to your planter’s life. Budget Breakdown: What It Really Costs Here’s a realistic look at what you’ll spend building a DIY planter box using basic, budget-friendly materials. Item Estimated Cost Lumber (pressure-treated pine or decking boards) $20–$30 Outdoor screws $5–$8 Exterior sealant or stain $8–$15 Optional upgrades (LED lights, rubber feet, liner) $10–$25 Total Estimated Cost $35–$60, depending on upgrades Even with upgrades, you’ll likely spend far less than store-bought planters while getting better quality and custom sizing. Common DIY Planter Box Mistakes to Avoid Even simple builds can go wrong fast. Here are the five mistakes most beginners make and exactly how to dodge them: Skipping Drainage: No drainage holes means water sits at the bottom, rotting your wood and drowning your plants from the inside out. Using the Wrong Screws: Regular screws rust outdoors. Always use exterior-grade or stainless steel screws, or your box will fall apart within a season. Choosing Weak Wood: Soft, untreated wood warps and rots quickly. Stick with cedar, redwood, or pressure-treated pine for a build that actually lasts. Making It Too Shallow: A planter under 10 inches deep starves plant roots of the space they need to go deeper, and your plants will grow stronger and healthier. Not Sealing the Inside: Bare wood soaks up moisture like a sponge; line or seal the inside to protect the wood and double your planter’s lifespan. Avoid these five, and your planter will look great, hold strong, and outlast anything you’d find on a store shelf. Final Thoughts Building your own planter box gives you more than just a place to grow plants. You now understand why DIY makes financial sense, how to choose durable materials, and the step-by-step process to assemble a strong, long-lasting box. I have covered drainage, wood protection, proper screws, and the simple upgrades that prevent rot and extend lifespan. I’ve also shared the common mistakes that trip up beginners, so you can avoid them from day one. The best part is realizing you can build something solid with basic tools and patience. Start small, take your time, and trust the process. When you finish yours, share how it turned out. I’d love to hear about your build.





