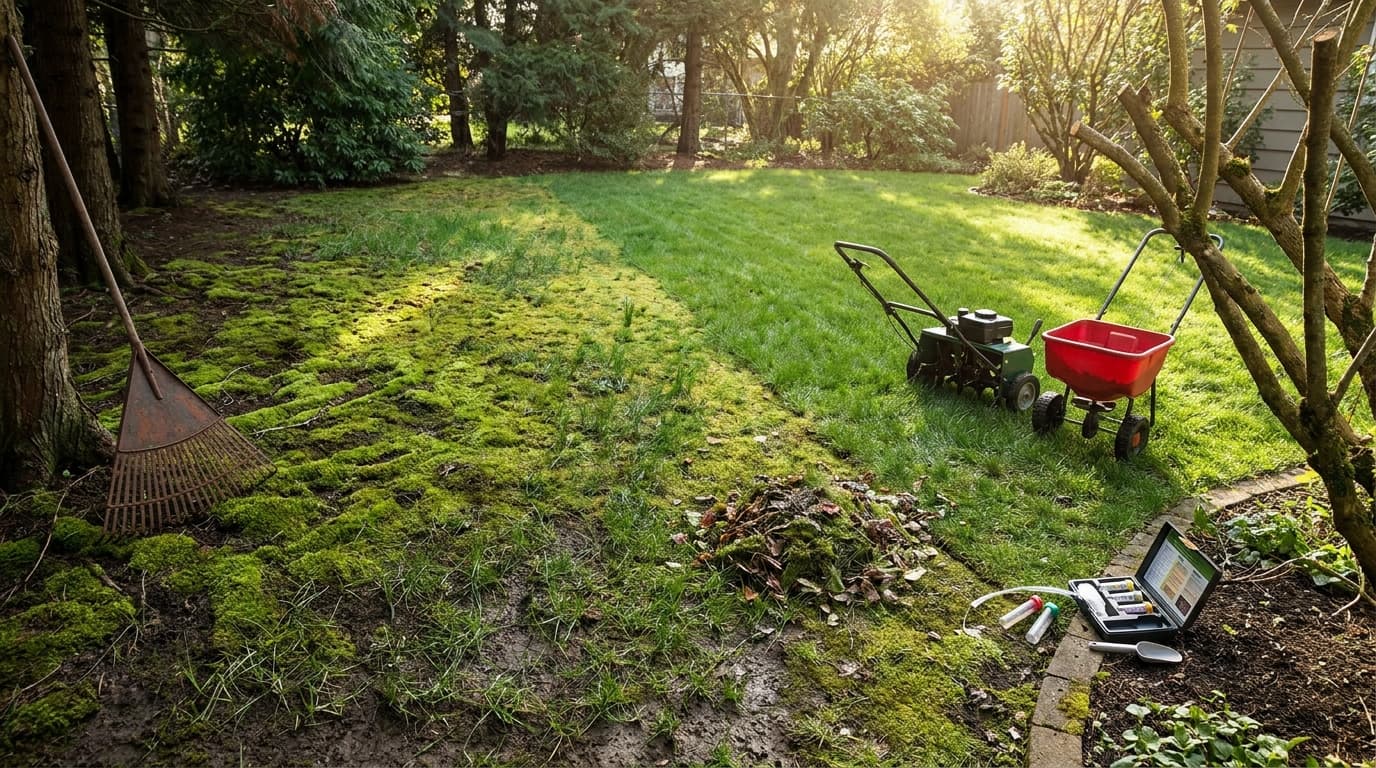
Quick answer: Moss in lawns is best controlled by removing existing growth and improving shade, drainage, soil, and grass health. Moss can quickly take over areas where grass is already struggling, leaving a lawn looking patchy, damp, and uneven. Simply removing the visible growth may improve its appearance for a while, but lasting results depend on correcting the conditions that allowed moss to spread in the first place. This blog explains how to get rid of moss in the lawn, including the main causes, step-by-step removal methods, soil and drainage improvements, reseeding tips, prevention strategies, and common mistakes that can cause moss to return. Why is Moss Growing in the Lawn? Moss growing in lawn areas almost always points to a specific weak spot in your yard’s conditions. Grass needs sunlight, good drainage, and loose soil to grow thick enough to crowd moss out. When one of these is missing, moss moves in fast because it tolerates conditions grass cannot handle. Spotting the exact cause first saves you from wasting time on the wrong fix. 1. Too Much Shade Grass slows down in low light, but moss keeps growing just fine in shade. Areas under trees, near fences, or beside buildings often show the thickest moss growth. Less sunlight means thinner grass blades and more bare soil for moss to settle into. Trimming back branches or thinning tree canopies can shift the balance back toward grass. 2. Poor Drainage and Excess Moisture Moss thrives in soil that stays wet for long stretches. Low spots, compacted clay, or areas with poor drainage retain water near the surface. Grass roots struggle in soggy soil, while moss spreads easily in these damp conditions, and standing water after rain is usually the clearest sign of a drainage issue. 3. Soil with Low pH Grass grows best in soil with a near-neutral pH, while moss tolerates acidic soil far better. A pH below 6.0 often signals conditions that favor moss over turfgrass. Testing your soil is the only reliable way to confirm this cause. Once you know the number, adjusting it is straightforward. 4. Compacted Soil Foot traffic, mowing equipment, and heavy rain can pack soil down over time. Compacted ground blocks air, water, and nutrients from reaching the grass roots properly. Under these conditions, grass thins out, leaving space for moss to take hold. High-traffic areas, such as paths and play zones, usually show compaction first. 5. Thin or Weak Grass Growth Sometimes the real issue is the grass itself, not the soil or light. Old lawns, the wrong grass type for the climate, or years of skipped feeding all weaken turf over time. Weak grass cannot compete with moss for space or nutrients. Strengthening the grass is often just as important as removing the moss on top. How to Get Rid of Moss in Lawn Step by Step Removing moss properly takes a bit more than raking it out and hoping for the best. These steps clear existing moss while setting the lawn up to recover rather than thin further. Step 1: Rake Out the Moss Use a metal-tined rake or a dethatching rake to pull moss away from the soil. Work in small sections and rake firmly, since moss often sits shallow but spreads wide. This step also removes dead grass and debris trapped underneath the moss layer. Bag up the moss and toss it, since it can regrow if left on the lawn. Step 2: Treat Stubborn Patches if Needed For thick or established moss, a moss killer can help clear the rest before raking. Iron sulfate-based products are common and turn moss black within a day or two. Apply on a dry day and water lightly afterward, following the product label for exact timing. Once the moss blackens, rake it out just like in Step 1. Step 3: Loosen and Prepare the Soil Aerate the treated area to break up compacted soil and improve airflow to the roots. A core aerator works well for larger lawns, while a hand aerator suits smaller patches. This step matters as much as removal, since bare, compacted soil invites moss right back. Add a thin layer of compost if the soil feels especially hard or poor. Step 4: Overseed the Bare Patches Spread grass seed suited to your climate and light conditions over the cleared soil. Choosing the wrong variety for your region is one of the main reasons reseeded patches stay thin. Thick, healthy grass is the real long-term barrier against moss returning. Skipping this step is why moss often comes back within a few months. How to Stop Moss from Growing Back Removing moss is only half the job. Moss returns quickly if the lawn conditions that caused it in the first place stay unchanged. 1. Improve Sunlight Exposure Grass needs a solid stretch of direct or filtered light each day to stay dense enough to outcompete moss. Trim back low tree branches and thin out crowded shrubs near shaded lawn edges, since even a small increase in light can make a noticeable difference over the course of a season. If a spot stays shaded no matter what you trim, consider a shade-tolerant grass blend instead of fighting the light problem directly. Some yards simply have permanent shade zones. Replacing those patches with no-grass ground cover options removes the conditions moss needs without the ongoing battle. 2. Improve Lawn Drainage Check for low spots that collect water after rain, and consider regrading small dips and adding topsoil. Redirecting downspouts away from the lawn helps, too, since many drainage problems stem from water running off a roof directly onto the lawn. For larger drainage issues, a French drain or dry well may be worth the investment if soggy patches keep coming back year after year. 3. Test and Adjust Soil pH A pH below 6.0 tends to favor moss over turfgrass, so testing gives you a clear number to work from instead of a guess. Home soil test kits are inexpensive and give a reading within minutes. If the test indicates acidic soil, applying garden lime gradually raises the pH over several weeks. Retest after two to three months, since lime takes time to work into the soil and a single application rarely fixes deeply acidic ground in one pass. 4. Aerate Your Lawn Regularly Compacted soil blocks water, air, and nutrients from reaching grass roots, weakening turf and inviting moss. Core aeration once or twice a year, ideally in spring or fall, loosens the soil and lets roots grow deeper and stronger. Leaving the soil plugs on the lawn after aerating is fine, since they break down and return nutrients to the soil. 5. Maintain Proper Mowing Habits Cutting grass too short weakens it and makes it easier for moss to move in. Most lawns do best when kept at around 2.5 to 3.5 inches, depending on the grass type. Mowing at this height lets grass develop deeper roots and shade out competing growth, such as moss. Keep mower blades sharp, too, since dull blades tear grass rather than cut cleanly, leaving it more vulnerable to stress and disease. Common Mistakes When Removing Moss from Lawn A few missteps during moss removal can undo all the effort put into raking, treating, and reseeding. Skipping the cause and only removing moss: Fixing shade, drainage, pH, or compaction matters as much as raking or spraying. Skip it, and moss almost always returns. Applying moss killer at the wrong time: Extreme heat or rain right after spraying weakens the treatment. Dry, mild days work best. Leaving bare soil unseeded: Raked-out patches left empty invite moss straight back. Seed them right away. Mowing too short after treatment: Low cuts stress new growth and weaken its ability to compete with moss. Keep the mowing height taller while the lawn recovers. Skipping a soil test before applying lime: Lime without a pH test can push the soil too far in the other direction. Test first. Ignoring compacted high-traffic areas: Paths, gates, and play zones get skipped during aeration, but they need it most. Avoiding these mistakes keeps the work already put into moss removal from going to waste. Moss Prevention Lawn Care Schedule Below is a breakdown of what to focus on for each season, so prevention steps occur at the right time rather than all at once. Season Key Tasks Why It Matters Spring Rake out any moss, aerate soil, overseed bare patches, and test soil pH Grass is entering active growth, giving the seed the best chance to establish Summer Mow at proper height, water deeply but less often, and avoid heavy treatments Heat stresses grass, so light maintenance keeps it steady until fall Fall Aerate again if needed, apply lime based on test results, and overseed thin spots Cool weather supports strong root growth and seed germination Winter Trim overhanging branches, check drainage before freezing weather Prepares the lawn for spring by improving light and water flow Summing Up Getting rid of moss in a lawn works best as a two-part process. Remove the moss first, then fix whatever caused it, whether that’s shade, poor drainage, low pH, or compacted soil. Regular aeration, proper mowing height, balanced feeding, and good drainage all work together to keep the grass strong enough to crowd out moss on its own. Small, consistent lawn care habits spread across the year beat one big cleanup every spring. Test your soil, watch for shaded or compacted spots, and stay ahead of the conditions that let moss take hold in the first place. Frequently Asked Questions Will Moss Come Back After Removal? Yes, if you don’t correct the underlying cause. Moss returns quickly in shaded, damp, compacted, or acidic soil. Pairing removal with soil correction and reseeding gives grass a real chance to crowd moss out. Is Baking Soda Good for Killing Moss? Baking soda can temporarily dry out small moss patches by raising the surface pH, but it is not a long-term fix. It also does not address shade, drainage, or compaction, so moss often returns. Does Moss Damage Grass Roots? Moss itself does not directly damage grass roots, but it competes for space, light, and moisture. Thick moss growth can crowd out grass over time, making the lawn thinner in already weak areas. How Often Should I Treat My Lawn for Moss? Check for moss growth once each season, with focused treatment in spring or fall when grass grows fastest. Ongoing preventive steps, such as aeration and proper mowing, matter more than repeated applications of moss killer. Can You Kill Moss Without Killing Grass? Moss can be removed without harming grass. Rake out small patches by hand or use a lawn-safe moss killer. Fixing shade, drainage, soil problems, and weak grass growth helps prevent moss from returning.
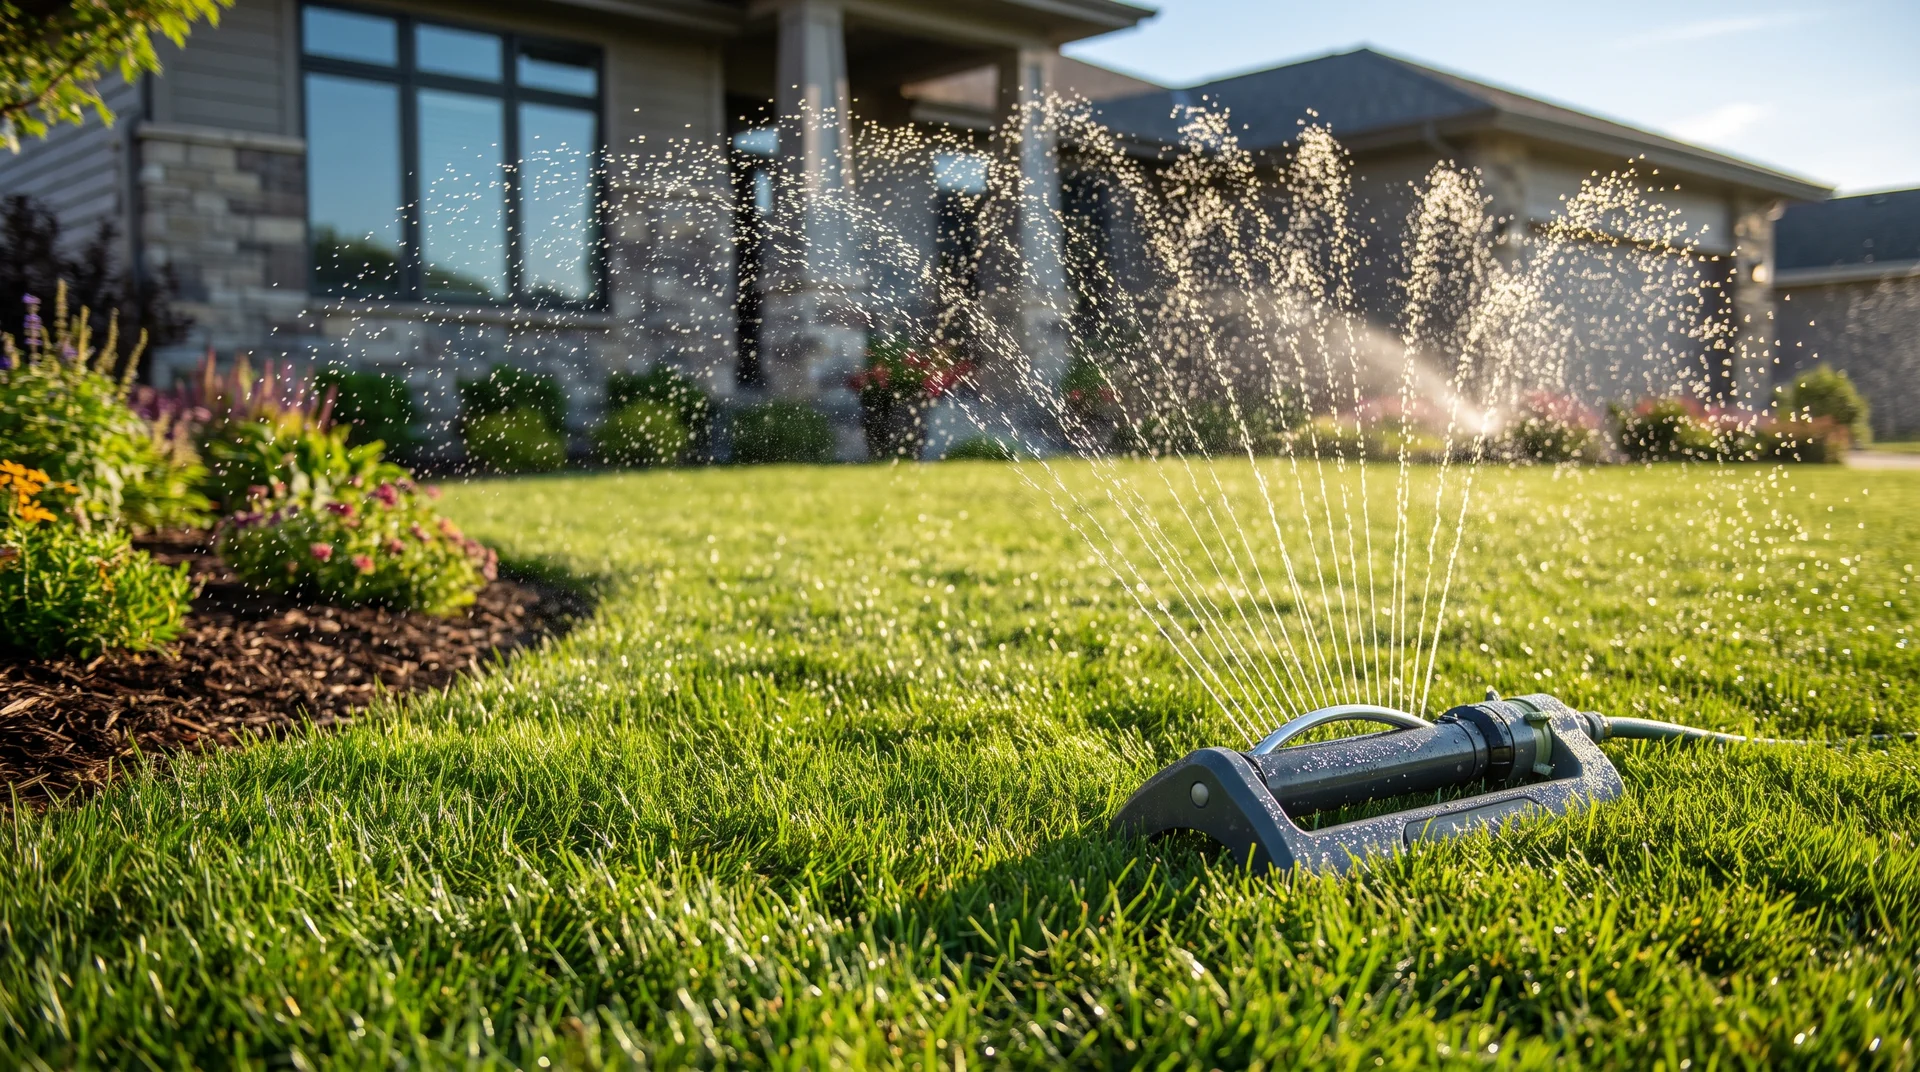
Sprinkler output, soil type, grass variety, rainfall, and climate all affect how long a lawn needs to be watered. A large lawn does not automatically need longer watering than a small one. What matters is how quickly your sprinkler applies water and how well your soil absorbs and holds it. Your grass type also affects how much time your sprinkler needs to run. The same weekly water goal can translate into different watering times depending on your lawn’s conditions. This blog shows you a simple test to calculate the right sprinkler time for your yard. You will also learn the best time to water and how to spot over- or under-watering before it damages your grass. How Much Water Your Lawn Needs to Stay Healthy Before you set a timer, you need to know your target number. That target is not random. Grass roots typically reach four to six inches into healthy soil. Watering to that depth trains them to grow deeper rather than stay near the surface. Deeper roots handle dry spells better. Most lawns need 1 to 1.5 inches of water each week. This total includes any rainfall. Cool-season grasses like Kentucky bluegrass and fescue tend to need water at the higher end of that range. Warm-season grasses like Bermuda, zoysia, and St. Augustine often get by on half an inch to one inch of water. Soil plays a role too. Sandy soil drains quickly, so it needs shorter, more frequent watering. Clay soil holds water longer but absorbs it slowly. It needs less frequent watering spread over a longer session to avoid runoff. Loamy soil sits in the middle and usually handles a standard deep watering schedule without much adjustment. Zoning matters here too. Grass and flower beds rarely need the same amount of water. Planning this into your garden layout early on keeps each zone on its own schedule instead of using one blanket setting. A rain gauge tracks how much of your weekly total nature already covers. That takes the uncertainty out of the rainfall side of things. Why Should You Test Your Sprinkler’s Water Output First? Every sprinkler puts out a different amount of water, so guessing your run time rarely works. Here is how to check: Place four to six empty tuna cans or other shallow containers around your lawn. Turn on your sprinkler and let it run for fifteen to twenty minutes. Measure the water depth in each can with a ruler. Add the depths together and divide by the number of cans to get the average. Once you have that average, multiply it by three for a twenty-minute test. Multiply it by four for a fifteen-minute test. That gives you your sprinkler’s output per hour. A quarter-inch average in a twenty-minute test means an hourly output near three-quarters of an inch. Every calculation in this blog starts from this one number. How Long Should You Run a Sprinkler on Your Lawn? Once you know your sprinkler’s actual output, calculating the right watering time becomes much easier. Divide your weekly watering need by your sprinkler’s hourly output. That gives you the total minutes to run the sprinkler each week. Split that total across two or three sessions instead of running it all at once. Deep, less frequent watering builds stronger roots than a quick daily splash. Here is a quick example. Let’s say a lawn needs 1 inch per week, and a sprinkler puts out 3/4 inch per hour. That works out to about eighty minutes total for the week. Split into two sessions, which are roughly forty minutes each. Split into three, it drops to about twenty-seven minutes per session. Actual output varies depending on water pressure and nozzle condition. Use these numbers as a starting point, not a strict rule. Your tuna can test results from the previous section should always take priority over the table below. Here is a rough starting point by sprinkler type, based on common output rates: Sprinkler Type Minutes Per Session Oscillating sprinkler 30 to 45 In ground spray head 15 to 25 In ground rotor head 20 to 30 Impact or pulsating sprinkler 25 to 35 If you water by hand with a hose, plan on ten minutes per section at a steady, soaking pace. Avoid a quick pass. A hose delivers water unevenly. Afterward, check the soil with a trowel to confirm it has reached a depth of a few inches. How Grass Type and Season Change Your Watering Needs Your baseline number needs small tweaks depending on your grass and the time of year. Cool-season grasses generally need close to the full 1.5 inches per week. This is especially true in the heat of summer. Warm-season grasses can often stay healthy on less. Sometimes, once established, half an inch per week is enough. Summer heat raises evaporation, so many lawns need slightly more frequent sessions during that stretch. Spring and fall usually call for less, since cooler air and natural rainfall do some of the work. Winter-dormant lawns in most regions need little to no supplemental water. Climate matters too. Dry, windy regions lose more water to evaporation and often need a third session during the hottest weeks. Humid regions can usually stick to two. Just watch for standing moisture from rain, since watering on top of it raises the risk of fungus. In areas with strict watering restrictions, some people may need to reduce or adjust this schedule. A no-grass front yard built from gravel and drought-tolerant beds needs no such routine. Always subtract rainfall from your weekly goal. Say your lawn needs 1 inch and you get 0.5 inches of rain. Your sprinkler only needs to supply the remaining half inch. A basic rain gauge makes this quick to track from week to week. What is the Right Watering Schedule for New Grass? New grass needs a more careful watering routine than an established lawn, especially during the first few weeks. Fresh seed needs the top inch of soil to stay consistently moist until it germinates. This usually means light watering once or twice a day for the first week or two. Short, frequent bursts work better here than one long soak. The seed sits close to the surface and dries out fast. New sod follows a similar pattern at first, then shifts toward deeper and less frequent watering as roots take hold. Most sod needs daily watering for the first week, then a gradual pullback over the next two to three weeks. Once you see steady new growth and roots that resist a gentle tug, ease back into the normal schedule above. How Does Watering Time Affect Your Lawn? The time of day you water affects evaporation, soil absorption, and how long grass blades remain wet. Aim for the stretch between four and nine in the morning. Cooler air and calmer winds let water soak in rather than evaporate. Grass blades also have hours to dry out before dark falls, which reduces fungal problems. Midday watering wastes water since much of it evaporates before it soaks in. Late evening or overnight watering is the riskiest choice. Wet grass sitting overnight gives fungus hours to take hold, especially in warm, humid weather. If mornings do not work for your schedule, water no later than six in the evening. This gives the grass time to dry before dark. Signs You’re Watering Too Much or Too Little Changes in grass color, blade shape, soil moisture, and the speed at which footprints disappear can help you identify watering problems before the lawn becomes severely stressed. Signs of underwatering include: Dry or brown patches across the lawn Grass blades that curl or fold Footprints or mower tracks that stick around long after you cross the lawn Signs of overwatering include: Soggy or spongy soil that squishes underfoot Mushrooms or visible fungal growth Yellowing grass even though you are watering often Try a quick soil check to back up what your eyes are telling you. After a watering session, push the tip of a screwdriver straight down into the ground. Little to no resistance for the first six inches means your timing is working. If it stops short or takes real effort, the water isn’t reaching deep enough. If you spot underwatering, add a few minutes to each session rather than adding an extra day. This keeps the deep, infrequent pattern that builds strong roots. If you spot overwatering, cut back your minutes per session before reducing how often you water. Small adjustments over a week or two usually bring a stressed lawn back on track. A spot that remains soggy even after reducing irrigation may not drain well enough for healthy turf. Turning it into a hardscaped smart yard space with pavers or gravel may be more practical than continuing to irrigate it as lawn. What Your Watering Schedule May Cost? Minutes and inches are useful, but gallons are what show up on your water bill. One inch of water applied over 1,000 square feet equals roughly 623 gallons. Multiply 623 by your lawn area in thousands of square feet, then multiply that amount by your weekly watering target in inches. Here is how the numbers add up: Lawn Size Gallons for 1 Inch Weekly 2,000 sq ft About 1,250 gallons 5,000 sq ft About 3,100 gallons 8,000 sq ft About 5,000 gallons Most water utilities bill in units of 1,000 gallons. Multiply your weekly total by your local rate to estimate the cost. Rates vary widely by city, so check a recent bill for your exact amount. Seeing the gallon figure next to your bill makes accurate timing worthwhile. Trimming a session from forty-five minutes to thirty adds up fast over a season. First, confirm that a shorter time is enough with your own tuna-can test. Ready to Build a Better Lawn Watering Routine? Most established lawns need about 1 to 1.5 inches of total water each week from irrigation and rainfall combined. Depending on sprinkler output, that often means two or three watering sessions lasting roughly twenty to forty-five minutes each. The exact number for your yard depends on your sprinkler, soil, and grass type. That is why the tuna can test matters more than any generic chart. Grab a few cans of tuna and run that test this week. Plug your number into the formula, then adjust as the seasons shift. Keep an eye on rainfall so you never water more than your lawn needs. A few minutes of measuring now pays off with a lower water bill and a healthier lawn all season long. Frequently Asked Questions Is 10 minutes of sprinkler enough? Ten minutes may be enough for high-output sprinklers, but not every system. Measure the collected water after 10 minutes, then adjust the runtime until your lawn reaches its weekly watering target. Can I water my lawn 2 days in a row? Yes, occasionally, especially during extreme heat or when establishing a lawn. For established grass, deeper watering spaced across the week is usually better than watering on two consecutive days. What temperature is too hot to water grass? There is no fixed temperature cutoff. During very hot weather, water early in the morning when evaporation is lower, and avoid irrigating during the hottest part of the day. Can you overwater new turf? Yes. New turf needs consistent moisture, but constantly soggy soil can restrict oxygen and encourage disease. Reduce watering gradually as roots establish, and the turf begins to hold firmly. Is 3 am too early to start watering a lawn? Three a.m. is earlier than ideal because grass may remain wet longer overnight. Watering closer to sunrise reduces leaf-wetness time while still limiting evaporation and daytime water loss.
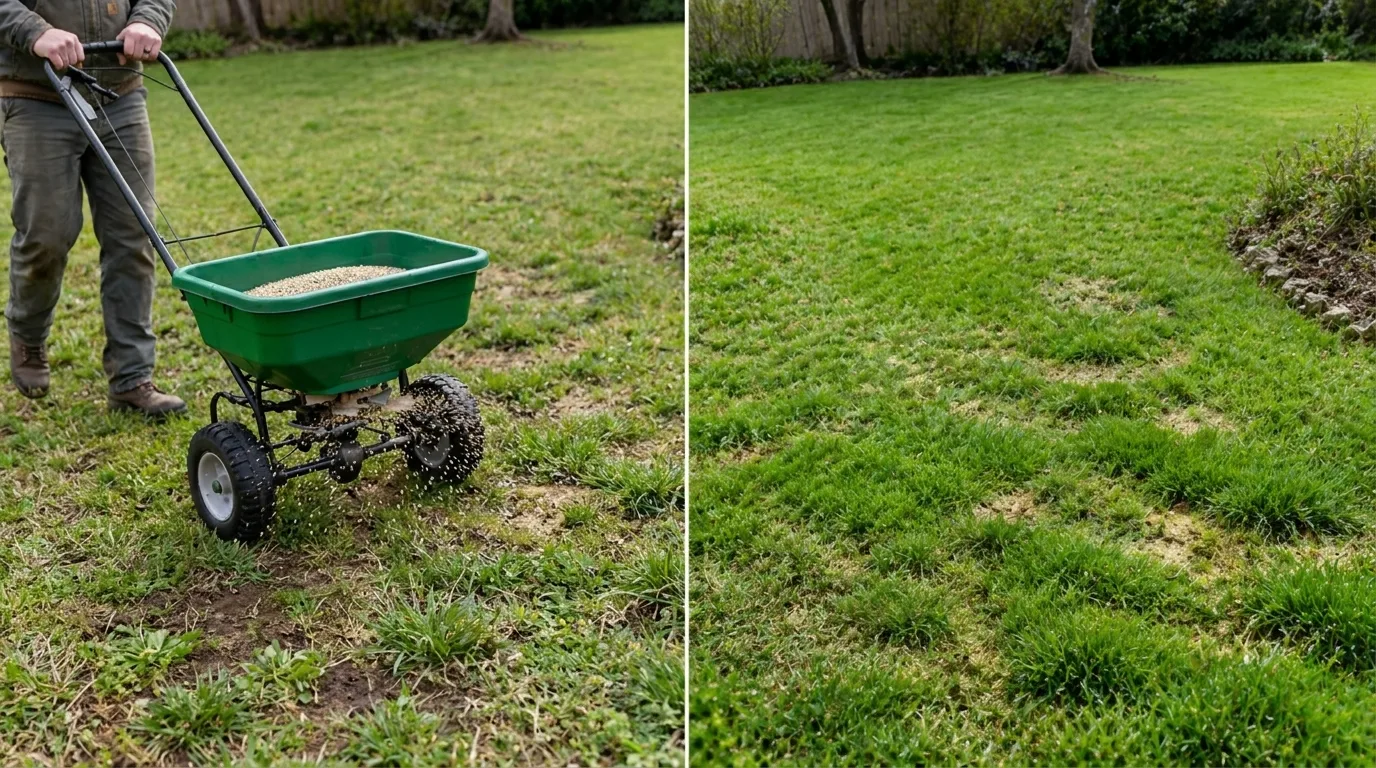
Grass Type Feedings Per Year Best Months Avoid Cool-season grass 3 to 4 times Early spring and early fall Heavy feeding during summer heat Warm-season grass 2 to 4 times Late spring through summer Late-season nitrogen before dormancy Newly seeded lawn 4 to 5 times Every 6 to 8 weeks during the first season Skipping starter fertilizer A healthy lawn needs more than regular watering. Grass also depends on properly timed fertilizer to support stronger roots, steady growth, and rich green color throughout the growing season. Timing matters as much as the fertilizer itself. Feeding too early can encourage weak top growth, while applying too much during hot weather can scorch the grass. Fertilizing too late may also interfere with dormancy and increase stress. Below, you’ll learn how often to fertilize, the best months to apply it, how to understand N-P-K ratios, and which application mistakes can damage your lawn. How Often Should You Fertilize Your Lawn? Most lawns need 2 to 4 fertilizer applications per year, but the right schedule depends on your grass type, climate, and growing conditions. University of Illinois Extension suggests roughly one pound of nitrogen per 1,000 square feet per application. Split that across the growing season rather than applying it all at once. Grass Type Feedings Per Year Best Months Cool-season grass 3 to 4 Early spring and early fall Warm-season grass 2 to 4 Late spring through summer Newly seeded lawn 4 to 5 Every 6 to 8 weeks during the first season Cool-season grasses usually need more feeding in spring and fall, while warm-season grasses benefit from applications during their active summer growth. Avoid fertilizing just because the calendar says it is time. Grass absorbs nutrients most effectively during active growth, while extreme heat, drought, or dormancy can reduce the effectiveness of applications. Pro Tip: Your lawn’s fertilizer needs can also change based on soil quality, sunlight exposure, mowing habits, and rainfall. A soil test can help identify nutrient gaps and prevent unnecessary applications. Lawn Fertilizer Schedule by Region and Season Local climate and grass type determine when your lawn can actually use fertilizer. A northern cool-season lawn follows a different schedule than a southern warm-season lawn, so timing applications to coincide with active growth prevents wasted nutrients. Region Spring Fall Winter Northern Regions Light feeding as grass starts growing Heavy feeding for root strength Little to none after dormancy Southern Regions Begin feeding as warm-season grass wakes up Reduce feeding as growth slows Apply only if grass stays active Transition Zones Feed based on dominant grass type Fall feeding benefits many lawns Usually minimal feeding Seasonal fertilizing follows the way grass grows throughout the year. It feeds the roots and blades so they can actually use the nutrients, rather than wasting product on dormant grass. Key factors to adjust your schedule: Grass type: Cool-season and warm-season grasses have different growth cycles. Soil temperature: Fertilizer works best when grass is actively absorbing nutrients. Weather conditions: Avoid feeding during drought, extreme heat, or when soil is frozen. This approach is stronger than separating season and region because readers usually want to know when to fertilize based on where they live. Best Time to Fertilize Your Lawn Based on Grass Type Grass type determines when your lawn is actively growing and ready to use fertilizer. Cool-season and warm-season grasses have different peak growth periods, so their feeding schedules shouldn’t follow the same calendar. Grass type Category Best feeding months Feedings per year Kentucky bluegrass, ryegrass, tall fescue Cool-season Early spring, early fall 3 to 4 Bermuda, zoysia, St. Augustine, centipede Warm-season Late spring through summer 2 to 4 1. Cool-season grass fertilizer schedule Kentucky bluegrass, perennial ryegrass, and tall fescue all grow fastest in spring and fall. Plan your heaviest feedings for those two windows. Use a lighter touch, or skip feeding entirely, during peak summer heat. A typical schedule spreads two to four feedings between early spring and late fall. 2. Warm-season grass fertilizer schedule Bermuda grass, zoysia, St. Augustine, and centipede grass all grow most actively once summer temperatures climb. Fertilize these types through late spring and summer. Then taper off as they head into dormancy in fall. Applying nitrogen too late in the year can leave warm-season grass open to winter injury. How N-P-K Ratios Affect Your Lawn Fertilizer Schedule Every fertilizer bag lists three numbers for nitrogen, phosphorus, and potassium. Most established lawns need far more nitrogen than phosphorus. Nutrient What it does Nitrogen (N) Drives the green color and leaf growth you notice first Phosphorus (P) Supports root development, especially in young or newly seeded lawns Potassium (K) Helps grass handle drought, cold, and general wear The University of Illinois Extension recommends an N-P-K ratio of about 3-1-2 or 4-1-2 for typical home lawns. Most soils already contain enough phosphorus. What Fertilizer Should You Use on Your Lawn? The right fertilizer depends on what your grass needs and what your soil already has. It also depends on timing and the results you want to see. Understanding fertilizer labels: The three numbers on every bag indicate the percentage by weight of nitrogen, phosphorus, and potassium. An 18-6-12 fertilizer is 18 percent nitrogen. Higher numbers mean you need less product to reach one pound per 1,000 square feet. Granular vs liquid fertilizer: Granular fertilizer spreads evenly with a spreader and often uses slow-release nitrogen to feed the lawn over several weeks. Liquid fertilizer is absorbed faster and corrects deficiencies quickly, but it requires careful, even application to avoid streaking or burning. Slow-release vs. quick-release fertilizer: Slow-release nitrogen breaks down gradually, lowering the risk of burn even at higher percentages. Quick-release nitrogen delivers a fast green-up but can scorch grass if overapplied, so many fertilizers blend both types of nitrogen. Signs Your Lawn Needs Fertilizer? Watching for signs of nutrient deficiency tells you when your lawn actually needs feeding. This works better than relying only on a fixed date on the calendar. Signs of nutrient deficiency Sign What it looks like Pale green or yellow color Shows up first in the older sections of the lawn Slow growth Grass needs mowing less often than usual Thin or patchy areas Bare spots that never fill in on their own Poor recovery Struggles to bounce back after mowing or foot traffic Weak roots Shallow root systems that pull up easily Other causes of yellow grass Yellowing grass is not always a nutrient issue. Overwatering, poor drainage, and compacted soil can all starve roots of oxygen. These problems can look just like a nutrient deficiency. Diseases and pests, such as grubs feeding on roots, can also cause grass to turn yellow or brown in patches. A soil test, or a close look at the roots, can help you rule fertilizer in or out. How to Apply Lawn Fertilizer Correctly Correct application spreads nutrients evenly across the lawn. It also reduces the risk of burned grass, product runoff, and fertilizer waste during the growing season. Step 1: Prepare your lawn before fertilizing Check the forecast and skip heavy rain or drought conditions. Mow at your normal height beforehand, clear away debris, and run a soil test if needed. Step 2: Apply the correct amount of fertilizer Follow the rate printed on the bag rather than guessing, since more product does not speed up greening. Use a calibrated spreader to cover the lawn evenly without stripes. Step 3: Water after fertilizer application Granular fertilizer needs a light watering, and the best time to water is during the daytime unless rain is expected. Liquid fertilizer instructions vary by product. Either way, avoid overwatering, which can wash fertilizer into the street. Factors That Affect Fertilizing Frequency A soil test takes the guesswork out of feeding your lawn. It measures existing levels of nitrogen, phosphorus, and potassium, as well as soil pH. That tells you exactly what your grass is missing, instead of guessing with a generic bag every few weeks. Factor Why it matters Grass variety Faster-growing types need more frequent feeding Soil nutrient levels Existing nutrients reduce how much you need to add Lawn age Newly established lawns often need different rates than mature turf Sun exposure Shaded lawns grow more slowly and need less nitrogen than those in full sun Rainfall and irrigation More water moves nutrients through the soil faster Mowing habits Leaving clippings on the lawn returns some nitrogen naturally Prior applications Fertilizer already applied earlier in the season affects timing The University of Illinois Extension recommends testing every few years. Adjust fertilizer type and rate based on the results, not a fixed calendar alone. What Lawn Fertilizer Mistakes Should You Avoid Avoiding these errors protects your grass and field, making every feeding count throughout the growing season, season after season. Applying too much fertilizer: Excess nitrogen scorches grass blades (a problem known as fertilizer burn) and promotes weak growth that invites disease. Fertilizing at the wrong time: Feeding dormant grass in deep summer heat or hard winter cold wastes product and further stresses the lawn. Ignoring soil conditions: Skipping a soil test means guessing what your lawn needs, which can lead to unnecessary nutrient runoff. Using the same schedule every year: Rainfall, temperature, and lawn condition shift year to year, so watch how your lawn responds and adjust. Frequently Asked Questions How many times a year should I fertilize my lawn? Most lawns need two to four feedings a year. Cool-season grasses do best with spring and fall applications, while warm-season grasses need feeding mainly during active summer growth months. What month is best to fertilize a lawn? Cool-season lawns benefit most from feedings in early spring and again in early fall. Warm-season lawns respond best to applications from late spring through summer, once the soil has warmed. Can I fertilize my lawn too often? Yes. Over-fertilizing can burn grass, push weak growth that invites disease, and raise nutrient runoff. Stick to labeled rates and space applications several weeks apart, rather than feeding on a whim. Should I fertilize before or after mowing? Fertilize after mowing, once the grass has a day or two to recover. Mowing right after fertilizing can remove fertilized leaf tips and reduce the benefit the lawn gets. How long should I wait to water after fertilizing? Water lightly within a day of applying granular fertilizer, unless rain is expected soon. This helps nutrients settle into the soil without washing the product off the lawn entirely. Building Your Fertilizer Schedule A steady lawn fertilizer schedule feeds grass when it can actually use the nutrients. It does not rely on a fixed date every month. The right timing depends on your grass type, climate, soil, and how the lawn responds throughout the seasons. Most yards do better with a handful of well-timed feedings than frequent, scattered ones. Testing your soil and picking a fertilizer suited to your lawn will help you avoid common problems.
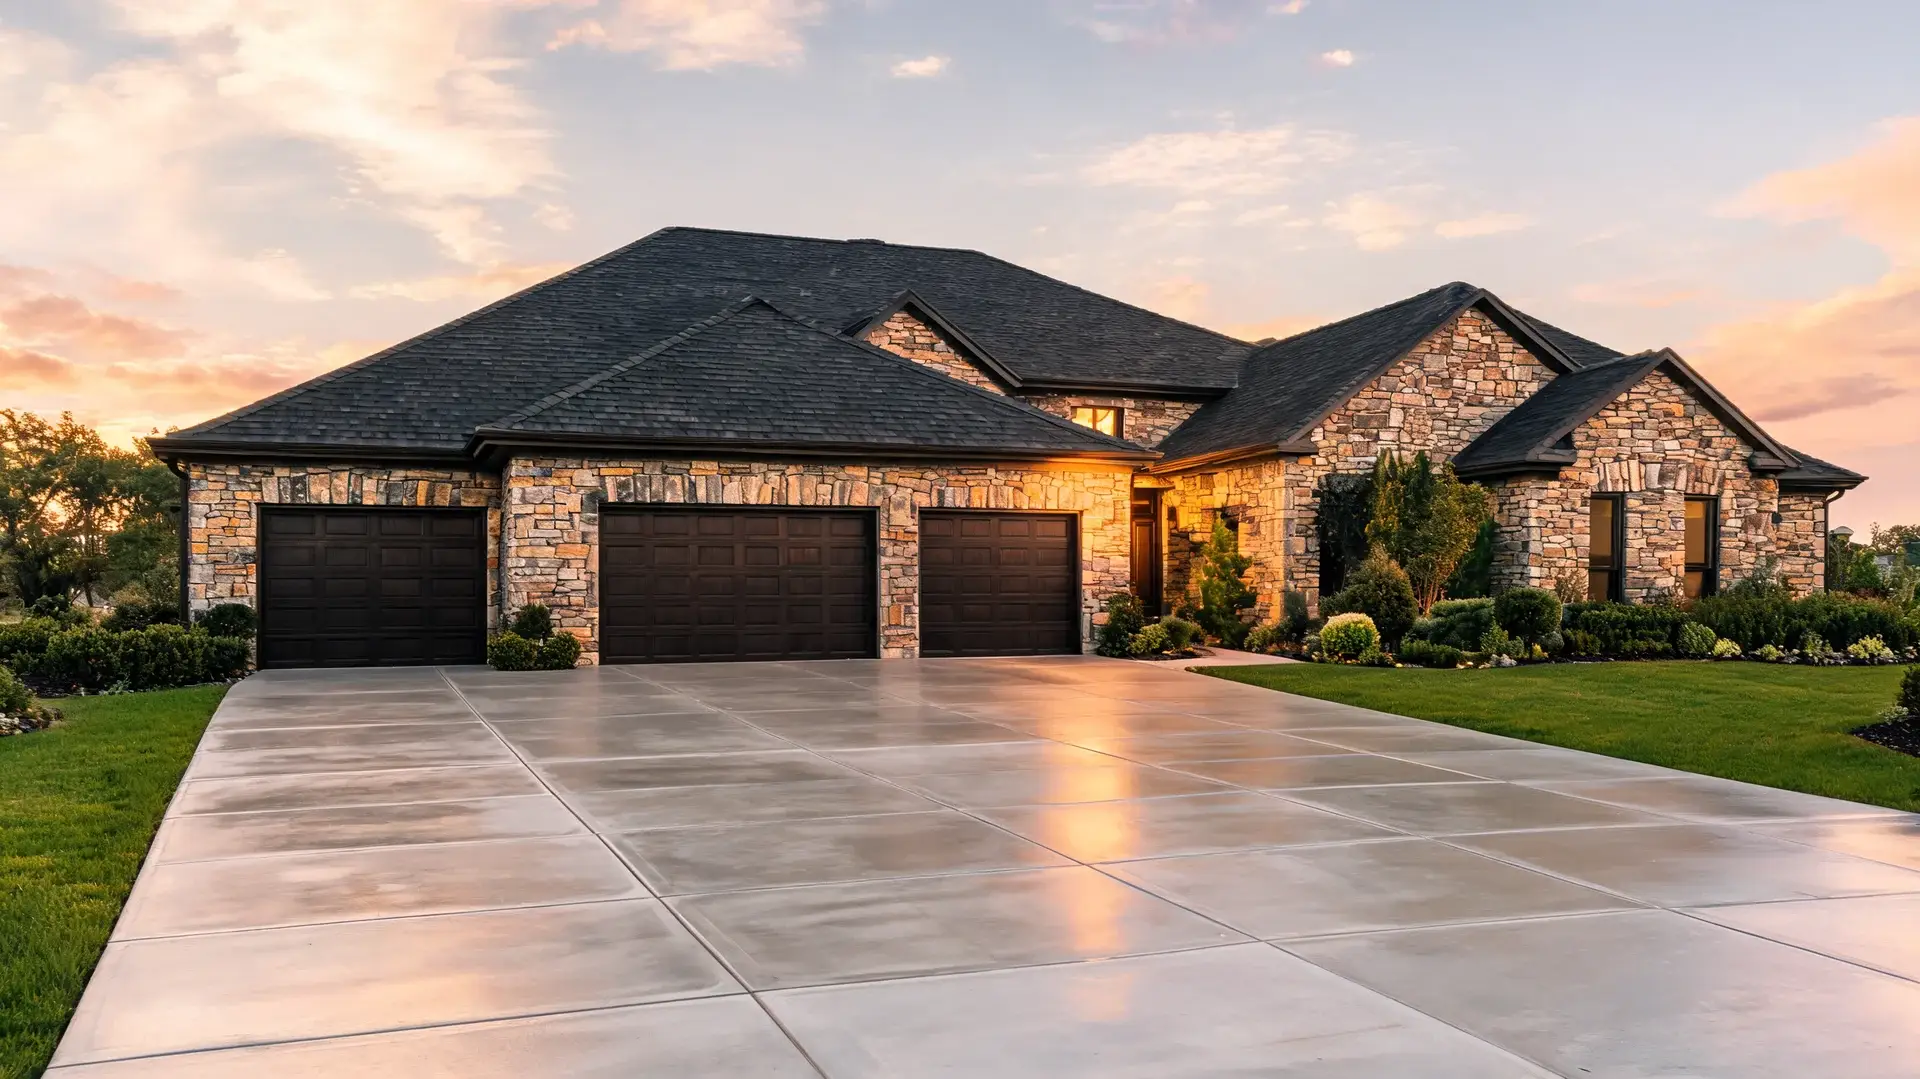
The outside of a home tells a story before anyone even knocks. Having spent years paying close attention to how front yards, driveways, and entries shape the first impression of a house. I can say that astamped concrete driveway is one of the most impactful upgrades a homeowner can make to the outside of their property. It brings the look of stone, brick, or slate without the cost and labor of laying each piece by hand. But the pattern is only part of the decision. The base, the sealer, the drainage, and the installer behind it all matter just as much, and that is exactly what this covers. Cost Note: Figures in this article are estimates based on national averages. Actual costs vary significantly by region, contractor, materials, and project scope. Always get at least three quotes before committing to any project above $1,000. Is a Stamped Concrete Driveway Worth It? A patterned concrete driveway sits between plain concrete and individual pavers. It gives you more design choices than a flat gray slab, but it does not repair as easily as separate blocks. That is the tradeoff you should understand first. It can be a good fit if you want a front driveway that looks more finished than asphalt, gravel, or plain concrete. It can also help your driveway match stone, brick, siding, trim, or walkway details around the house. Still, the finish is not only about the pattern. The base must be stable. Water must drain away. Control joints need smart placement. The sealer should suit the slope and local weather. If those parts are rushed, the driveway can crack, fade, stain, or feel slick. Advantages of a Stamped Concrete Driveway The biggest benefits come from its design range, front-yard value, and lower cost compared with some higher-end materials. 1. More Design Choices Plain concrete is useful, but it can look basic. Using concrete stamps adds pattern, texture, and color so the driveway feels more connected to the rest of the home. You can choose slate, cobblestone, brick, flagstone, ashlar stone, wood plank, or a softer stone texture. The color can stay quiet with gray, tan, beige, or brown, or it can use darker accents when the home exterior supports them. 2. Lower Cost Than Pavers Real pavers, brick, and stone use separate pieces. Each piece needs placement, leveling, and joint work. A stamped concrete surface is poured as one slab, then patterned while it is fresh. That reduces labor compared with setting individual pieces like pavers, though the final price still depends on the driveway size, base work, color, border details, and local labor rates. 3. Better Curb Appeal I have seen too many homes where the interior is beautifully finished but the driveway looks like an afterthought, cracked gray concrete that undercuts the whole first impression. A stamped finish ties the garage, walkway, porch, and landscape edges together in a way plain surfaces simply cannot. I always recommend keeping the color close to the home’s existing materials so the driveway supports the exterior rather than competing with it. 4. Good for Large Driveways Large driveways need patterns with the right scale. Ashlar stone, slate, large flagstone, cobblestone, and seamless stone textures all work well because they do not feel too small from the street. A border can frame a wide surface and create a cleaner edge where the driveway meets grass, mulch, or a walkway. Disadvantages of a Stamped Concrete Driveway The drawbacks are mostly tied to cracks, repairs, sealing, traction, and the skill needed during installation. Visible Cracks: Concrete can crack due to soil movement, loads, poor prep, weather, or aging. Control joints guide crack locations but can’t prevent all. On stamped surfaces, cracks are more visible as they cross the pattern, whereas on plain concrete they are less noticeable. Hard-to-Match Repairs: A patch is hard to hide because the surface is already changed by sun, tires, weather, and sealer wear. Even careful repairs may appear slightly different, especially on front driveways visible from the street daily. Regular Sealing: Sealer guards the driveway against tires, oil, dirt, sun, rain, and snow, preventing fading and staining. If it appears dull or water no longer beads, reseal. Most stamped driveways need resealing every two to three years depending on sun, traffic, and sealer type. Slippery Finish Risk: A glossy sealer looks attractive but can reduce grip when wet, which is concerning on sloped driveways, in rainy climates, and during icy winters. A low-sheen sealer with a grip additive is safer and still looks finished. Not DIY-Friendly: Stamping relies on precise timing: the concrete must be firm enough for the pattern but soft enough for the impression. A full driveway requires a coordinated crew, sufficient mats, release material, and finishing skill. A small backyard test slab is a safer initial attempt than a visible front driveway. Stamped Concrete Driveway vs. Other Driveway Materials Before choosing a surface, look beyond the first price. Consider how each option handles daily use, repairs, weather, upkeep, and appearance from the street. Driveway Material What It Does Well Where It Falls Short How It Compares With Stamped Concrete Plain concrete Simple, clean, and usually lower in cost Basic look with fewer design choices Stamped concrete looks more finished, but costs more and needs sealing Asphalt Works well for long driveways and tighter budgets Limited color and pattern choices Stamped concrete gives more curb appeal, but asphalt is often cheaper upfront Pavers Easier to repair in small sections Higher labor cost and possible weed growth between joints Stamped concrete gives a similar patterned look in one slab, but repairs are harder to match Brick Classic look with real individual pieces Can shift, settle, or cost more to install Stamped concrete can copy a brick look with fewer pieces, but brick may be easier to repair Gravel Low upfront cost and useful for rural homes Can spread, rut, and need regular leveling Stamped concrete looks cleaner and is easier to clear, but gravel costs less Natural stone Strong real-material look Higher material and labor cost Stamped concrete can give a stone-like look for less, but real stone may age better Choose stamped concrete when you want a planned, finished surface without the cost of real stone, brick, or full paver work. Choose plain concrete or asphalt when price is the priority. Choose pavers or natural stone when easy individual repairs or real material matter more, though paver installation per square foot can shift that decision quickly. Best Pattern by Driveway Type Use this table if you are stuck between two patterns. It ties the choice to your driveway shape, home style, and practical needs. Driveway Type Best Pattern Choice Why It Works Wide front driveway Ashlar stone or large flagstone Larger shapes look more balanced from the street Curved driveway Cobblestone or seamless slate These patterns work well with bends and soft edges Modern home Seamless stone or slate The surface looks clean without too many lines Brick home Brick border or cobblestone The pattern connects with the home’s brick tones Sloped driveway Light texture with low-sheen sealer Grip matters more when water runs across the surface Long driveway Simple pattern with border only Keeps cost and pattern repeat under control Once you narrow the pattern by driveway type, check it against your home color, slope, and budget. A good pattern should look natural from the street and still hold up to daily use. Best Stamped Concrete Driveway Design Ideas The best design fits the house, not just the driveway. Start with the home color, roof, garage door, trim, walkway, and yard. Then choose a pattern and concrete stamp type that supports those details. Stamp mat size matters too. Larger mats suit wide driveways because small repeating patterns can feel busy at scale. Flexible mats help near garage doors, curves, steps, and corners. Seamless texture skins are useful when you want a softer stone-like surface without strong pattern lines across the whole area. 1. Cobblestone Pattern A cobblestone pattern works well for traditional homes, brick homes, cottage-style homes, and curved driveways. It gives the surface an older stone path character without the cost or labor of real cobbles. Gray, brown, charcoal, and soft tan shades tend to look better than bright colors, which can feel out of place against classic architecture. Best for: Traditional homes | Brick homes | Colonial-style exteriors Installer note: Use this pattern where the driveway has enough width so the repeated shapes do not feel crowded. 2. Slate Pattern A slate pattern suits modern homes, stone-front homes, and driveways where you want texture without heavy lines. Good colors include soft gray, charcoal, beige, greige, and tan. A low-sheen sealer keeps the surface closer to a natural stone finish, which I prefer over a high-gloss coat on this pattern, the shine tends to look artificial against the natural texture of the slate impression. Best for: Modern homes | Stone-front homes | Clean front entries Installer note: Ask for a test area or past project photo in the same sealer finish before approving the final look. 3. Brick Pattern A brick pattern suits homes with brick exteriors, warm trim, red-toned roof details, or a traditional front yard. It can cover the full driveway or work only as a border around a simpler center field. Muted red, clay, brown, and charcoal tones read more naturally than bright red, which tends to compete with the house rather than complement it. Best for: Brick homes | Classic exteriors | Driveway borders Installer note: Keep the color softer than the house brick so the driveway does not compete with the exterior. 4. Ashlar Stone Pattern Ashlar stone gives the driveway the look of cut, fitted stone pieces arranged in a structured pattern. It works especially well on large driveways because the shapes are scaled to feel balanced across a wide surface. Mixed gray, tan, and brown tones add depth without making the slab look flat or uniform. Best for: Large driveways | Stone exteriors | Wide garage fronts Installer note: Choose larger stamp mats for wide areas so the scale looks right from the street. 5. Seamless Stone Texture A seamless stone texture suits modern homes and wide driveways where you want depth without a repeating grid. Because there are no defined edges between pattern pieces, it is also more forgiving of minor layout imperfections during installation than a strict brick or cobblestone grid. Best for: Modern homes | Wide concrete areas | Softer stone looks Installer note: This is a safer choice when you want texture without strong lines across the whole driveway. 6. Borders and Bands Borders and bands add a sense of structure to long or wide driveways without stamping the entire surface with a complex pattern. They can frame the edge, define the apron near the garage, or connect the driveway to the walkway. A darker border against a lighter center field tends to look clean and intentional, but adding too many color zones makes the layout feel busy. Best for: Long driveways | Simple center fields | Garage aprons Installer note: Keep the border detail clear and the center field calmer so the driveway does not look overdone. How to Pick the Right Color Palette I always start with the house when choosing driveway color. The roof, siding, brick, stone, trim, garage door, and walkway should all be taken into account. A driveway covers a large part of the front yard, so the color needs to support the home rather than pull attention away from it. A shade that works beautifully on a small sample can look overwhelming across 400 square feet of slab, always ask for a larger sample or a photo of a finished project in the same color before committing. Home Exterior Good Driveway Colors Best Pattern Match What to Avoid White or cream siding Light gray, warm beige, soft tan Slate, ashlar stone, seamless stone Very dark full-driveway colors that feel too harsh Red brick Charcoal, brown, clay, muted red Brick, cobblestone, ashlar stone Bright red that clashes with the brick Gray siding Charcoal, medium gray, greige, cool tan Slate, seamless stone, large flagstone Flat gray with no contrast Stone front Tan, gray, brown, beige mix Ashlar stone, flagstone, slate Colors that do not appear in the stone Dark exterior Light gray, warm tan, sand, soft brown Seamless stone, slate, border bands Glossy dark finishes on large areas Farmhouse exterior Soft gray, taupe, beige, weathered brown Brick border, slate, cobblestone Heavy black or bright red tones Stamped Concrete Driveway Cost Breakdown A stamped driveway costs more than plain concrete because it requires color, stamping tools, release material, sealing, and skilled labor; any existing driveway removal or resurfacing adds to that figure. Use $8 to $28 per square foot as a planning range. Simple designs sit closer to the lower end, while borders, multiple colors, curves, old driveway removal, and drainage fixes push the total higher. Cost Item Typical Cost Range What It Covers How It Affects Price Old driveway removal $2 to $6 per sq. ft. Breaking and hauling away concrete, asphalt, or pavers Costs more if the old surface is thick, reinforced, or hard to access Base preparation $1.50 to $5 per sq. ft. Grading, compacting, gravel base, and drainage setup Poor base prep can lead to cracks, sinking, and water issues Concrete pour $4 to $10 per sq. ft. Concrete mix, slab thickness, labor, and placement Larger or thicker driveways cost more Color $1 to $4 per sq. ft. Integral color, color hardener, or accent color Multiple colors raise labor and material costs Stamp work $3 to $10 per sq. ft. Pattern mats, border stamps, texture skins, and release material Detailed patterns, borders, and tight areas add labor Control joints $0.50 to $2 per linear ft. Cuts that help guide cracking Needed for a cleaner long-term result Sealer $0.75 to $3 per sq. ft. Clear, matte, low-sheen, or grip-added sealer Better sealer costs more but extends surface life Extra details $5 to $20+ per sq. ft. in detailed areas Borders, bands, apron details, curves, or custom features Raises cost because layout and stamping take more time For a 400 sq. ft. driveway, a basic stamped finish may start around $3,200 to $6,000. A mid-range design with color and a border may land around $6,000 to $9,500. A more detailed design with removal, drainage work, multiple colors, or custom features can go above $10,000. To keep costs manageable, stick to one pattern in the main area, choose one primary color, and reserve detail work for the border or apron only. Maintenance Tips A simple care routine keeps the color, texture, and sealed finish looking good for years. Nothing here is heavy work, it is more about being consistent than being thorough. Sweep often: Remove leaves, dirt, and small debris before they sit long enough to stain the sealed surface. Rinse when needed: A garden hose clears mud, dust, and light buildup before it settles into the texture. Clean oil quickly: Treat oil spots as soon as you notice them. Old stains are much harder to lift from worn sealer. Use mild cleaners: Choose a concrete-safe cleaner. Strong chemicals can break down or dull the sealed finish over time. Avoid metal scraping: Plastic shovels and soft cleaning tools protect the surface from scratches that damage the sealer layer. Use sand in winter: Sand helps with grip on icy days without being as harsh on the surface as deicing salt, which can deteriorate the sealer and affect color over time. Watch for sealer wear: A dull surface or water that soaks in rather than beading is a sign the sealer is breaking down. Plan for resealing: Most stamped driveways need resealing every two to three years, though sun exposure, traffic volume, and sealer quality all affect the timeline. What to Ask a Contractor Before You Hire Stamped work depends on timing, crew size, tools, and finishing skill. A contractor who has done it many times will answer these questions without hesitation. One who has not will show it in vague or evasive answers. Have you installed stamped driveways before, and can I see recent photos? What pattern and stamp size fits my driveway dimensions? How will you prepare the base, and what depth will you compact to? Where will the control joints go, and how will you place them around the pattern? How will water drain away from the finished surface? What sealer will you use, and is a grip additive included? How soon after the pour can vehicles use the driveway? If the answers feel uncertain or rushed, keep looking. The quality of the conversation before the job starts is usually a fair preview of the quality of the work itself. Frequently Asked Questions Does a stamped concrete driveway add resale value to a home? A well-maintained stamped concrete driveway can improve a home’s curb appeal, which does factor into buyer perception and resale value. It is not a guaranteed dollar-for-dollar return, but a driveway that looks finished and well-kept tends to make a stronger first impression than a plain or worn surface, and first impressions matter in real estate. How does stamped concrete hold up in freeze-thaw climates? Freeze-thaw cycles challenge concrete as water seeps into cracks, freezes, expands, and widens them. Sealed driveways resist this better but require resealing and sand, not salt, in winter. In harsh climates, plain concrete or pavers often age better. Is stamped concrete slippery when wet? It can be, especially with a high-gloss sealer. A low-sheen sealer with a grip additive substantially reduces this risk. On sloped driveways, this is a non-negotiable specification, not a cosmetic preference. What is the difference between integral color and color hardener in stamped concrete? Integral color is mixed into the concrete batch before pouring, ensuring the color runs through the entire slab. If the surface chips or cracks, the color remains visible underneath. Color hardener is broadcast onto fresh concrete and pressed in, creating richer tones and a tougher surface, but it only penetrates the top layer. Many installers use both for depth and vibrancy. How long does a stamped concrete driveway last? A stamped concrete driveway can last 25 years or more with proper installation and regular sealing. The surface underneath is still concrete, so longevity depends heavily on the quality of the base, the thickness of the slab, drainage, and how consistently it is maintained. The pattern and color may show wear before the slab itself becomes structurally compromised. Final Thoughts The outside of a home deserves as much thought as the inside, and the driveway is where that exterior story begins. A stamped concrete driveway, done right, with the correct base, proper drainage, a safe sealer, and well-placed control joints, can hold its appearance for decades. The pattern choices offered through concrete stamps mean there is rarely a style mismatch with the house. What matters most is hiring someone who understands both the design side and the structural side. If this helped you think it through, drop a comment below, and if you are weighing other surface options, have a look at how pavers and plain concrete stack up for your specific situation.
Struggling to make your yard feel organized instead of random? You look at the space and nothing seems to flow or function properly. Most outdoor spaces feel this way when structure is missing before planting starts. Strong garden layout ideas can fix that by turning confusion into a clear plan, especially when you start to plan-a-garden with structure in mind from the beginning. I look at many yards where seating, paths, and beds compete instead of working together. You might be dealing with narrow paths, awkward corners, or areas that never get used. This guide shows how to choose layouts that match your space, use, and conditions. By the end, you will know what fits, what fails, and what to plan first What Makes a Garden Layout Work Well A garden layout works when every part of the space earns its place. Most yards I’ve worked on don’t fail because of bad plant choices. They fail because the structure was never sorted before anything went into the ground. Seating placed too close to a fence. Paths just narrow enough to feel frustrating with a watering can. Beds positioned where water sits after rain. Scale matters as much as shape. Features need to suit the actual yard, not the one in the photo. Oversized beds overwhelm a small garden. A pergola on a 10×10 patio blocks everything it was meant to shelter. Getting the proportions right before spending a cent on materials is the single most useful thing a homeowner can do. Good garden layout ideas also account for the practical load: drainage patterns, maintenance access, storage routes, the line a hose takes from the tap. These aren’t glamorous details, but they’re the ones that determine whether a garden gets used or quietly ignored after the first season. What to Check Before Choosing a Garden Layout Idea The best time to test a layout is before anything is dug, poured, or planted. Here is what I check on every outdoor job before recommending a single design direction: Actual daily use: Decide first whether the space is for quiet mornings with coffee, family meals, growing food, or a play area. A layout that suits all four usually serves none of them well. Sun timing: Check light at the time you’ll actually use the garden. A south-facing seat looks appealing on a plan but becomes unusable in July afternoon heat. Sight lines and privacy: Walk the yard and look at what neighbors, roads, or windows can see before placing seating. A screen added afterward costs more and rarely looks right. Movement width: Mark paths with string and walk them carrying a tray or tool bag. Anything under 36 inches wide creates daily friction. Material durability: Every surface choice should be evaluated by what it looks like after two winters, not just the day it goes in. Gravel, stone, timber, and pavers all behave differently under freeze, thaw, rain, and heavy foot traffic. Plant growth in year two: Sketch the planting at mature size. Shrubs that seem well-spaced at planting can close a path or shade a seating area within 18 months. Garden Layout Ideas That Work in Real Yards What follows are garden layout ideas drawn from real outdoor spaces, not showroom shoots. For each one, I’ve included the practical details that matter most: what fails, what holds up, and what to decide before spending anything. Layout Type Best For Main Material Typical Cost Range Holds Up To Curved Walkway Flat, featureless yards Stone, gravel, brick $8–$25 per linear ft Heavy foot traffic Courtyard Small enclosed spaces Pale paving, pots $3,000–$12,000+ Year-round use Raised Bed Poor soil, slopes Timber, galvanized steel $300–$1,500 per bed Daily harvesting Cottage Border Fence and wall edges Edging, mulch $200–$1,500 Seasonal growth Outdoor Room Larger yards, entertaining Mixed surfaces $2,000–$15,000+ Guest use Vertical Garden Balconies, side yards Wall fixings, planters $500–$3,000 Wind load Island Bed Open lawns, front yards Edging, mulch $300–$2,000 Mowing clearance Sunken Seating Privacy-first spaces Stone, concrete $5,000–$20,000+ Level changes, drainage Water Feature Seating-focused yards Stone, pump, edging $500–$8,000+ Freeze-thaw cycles Rock Garden Dry slopes, poor soil Mixed stone sizes, gravel $500–$3,500 Drought conditions Shade Garden North-facing, under trees Foliage plants, mulch $400–$2,500 Low-light conditions Herb Spiral Near kitchens, patios Stone, brick $200–$1,000 Daily picking Wildlife Garden Suburban yards Native plants, water bowl $500–$3,000 Seasonal cycles Pergola Seating Patios, dining areas Timber, concrete footings $3,000–$12,000+ Wind and snow loads Container Modular Renters, patios, rooftops Pots, quality compost $300–$2,000 Seasonal mobility Linear Grid Path Narrow, rectangular yards Gravel, pavers $500–$3,000 Heavy maintenance use Zen Gravel Low-maintenance courtyards Raked gravel, stone $800–$4,000 Minimal upkeep Use the table above to match your yard’s conditions to a starting layout type before reading the full description. Cost ranges are estimates based on national averages and vary significantly by region, material grade, and labor rates. Verify current pricing with local suppliers before committing to a budget. Cost Note: Several layouts in this guide, including sunken seating, courtyard paving, pergola builds, and water features, commonly exceed $1,000 in total project cost. Figures shown are national estimates. Always get at least three contractor quotes before committing to any structural outdoor work. 1. Curved Walkway Garden A curved walkway garden is the right call when a yard is too flat and predictable to hold attention. The curve needs a reason, though. It should lead past a planted border, toward a seating area, or around a strong focal point. A path that wanders for the sake of it just frustrates people carrying anything heavier than a phone. Stone, brick, gravel, and stepping stones all work. What matters more than material is width. Under 36 inches, and the path starts to feel like a suggestion rather than a route. On slopes, check where water crosses the path before choosing a loose material like gravel, which can track and shift after rain. Turn radius: A curve tight enough to look interesting on paper becomes awkward in practice when you’re carrying a wheelbarrow or plant tray. Keep bends gradual. Material contrast: Gravel beside lawn, brick beside timber, or stone beside planted beds helps the path read clearly without any extra decoration. What fails in year two: Loose gravel migrates into planted beds on even a slight slope. Install a proper edging restraint from the start, not as an afterthought. 2. Courtyard Garden A courtyard garden is built around a central open space, and the enclosed nature of the layout makes it feel sheltered before a single plant goes in. This works well for small urban yards, privacy-first builds, and homes where outdoor living is expected year-round rather than just in summer. The middle holds a paved sitting area, a small tree, or a simple water feature. Around that center, use pots, wall planting, or built-in beds. The common failure mode in courtyard gardens isn’t the planting. It’s heat. An enclosed paved space in full sun traps heat faster than any other layout type. Pale paving and partial overhead shade from a tree or structure makes the difference between a space that gets used every evening and one that empties by 2pm. Wall base clearance: Leave a 2-inch gap between soil and any fence or wall surface. Wet soil held against timber or masonry accelerates rot and damp penetration. Movable accents: Fixed pots in a tight courtyard box you in when guest numbers change or a seasonal plant needs replacing. Choose movable containers for the outer ring. What fails in year two: Pointing between paving units loosens under freeze-thaw cycles. Repoint any gaps in autumn before water gets under the slabs and lifts them. 3. Raised Bed Garden A raised bed garden makes the most sense when the underlying soil is poor, compacted, or prone to waterlogging, or when the yard has an awkward slope. The beds themselves create order without rigidity. Rows, squares, L-shapes, or block arrangements all work. The paths between them are where most planning decisions actually matter, because paths that are too narrow (under 24 inches for a side path, 36 inches for a main route) create daily frustration by the time the plants fill in. Bed height by use: Set beds at 12 inches for ornamentals and 18 to 24 inches for anything you’ll harvest daily. Taller beds are significantly easier on the back. Corner protection: Exposed timber corners take direct hits from wheelbarrows. Galvanized steel corner brackets or a heavier timber grade at corners extends bed life by years. Wet zone separation: Keep thirsty crops in one section of the bed layout rather than spread across all of them. It makes targeted watering faster and keeps path surfaces drier. What fails in year two: Untreated softwood frames can start to show rot at the base after two wet winters. Use pressure-treated lumber rated for ground contact, or cedar and hardwood where budget allows. 4. Cottage Border Garden A cottage border garden works along fences, walls, or the outer edges of a yard. The key variable is depth. A thin line of planting rarely reads as a design choice. It looks like a failed attempt at coverage. A border needs to be at least 36 inches deep to layer properly: tall plants at the back, mid-height in the middle, and low ones softening the front edge. Done with that depth, it can carry significant visual weight without looking overdone. Service access: Leave 12 to 18 inches between the back of the border and the fence. You’ll need this when the fence needs staining, panel replacement, or post repair. Repeat shapes: A border can look wild and informal inside, but repeating one or two leaf shapes or bloom colors throughout keeps it from reading as neglected. Front edge definition: A clean front line using edging or a mowing strip is what separates a cottage border from a messy bed. The interior planting can be as relaxed as you like. What fails in year two: Taller perennials at the back start to flop without staking or support structures. Install grow-through supports in spring before they’re needed, not after they’ve already fallen. 5. Outdoor Room Garden An outdoor room garden divides one larger yard into separate zones with clear purposes. This layout idea is most effective in yards over 1,000 square feet, where a single open space starts to feel undefined. One area for dining on a firm paved surface, another for a reading chair on gravel or decking, a third for planting. The divisions can be hedges, planters, low walls, or a change in level. The risk is over-dividing. Every zone needs a reason to exist and enough space to function comfortably. Surface by activity: Dining needs a firm, level base. A quiet corner can sit on compacted gravel or low-budget decking. Mixing surface types between zones helps define each one without extra structures. Sight line management: Full-height screens create rooms but kill the feeling of space. Mixing low hedging with occasional taller elements gives privacy where it’s needed without boxing everything in. Material limit: No more than three paving or edging materials across the full yard. More than that and the garden starts to feel chopped up rather than intentionally zoned. 6. Vertical Garden A vertical garden uses height when floor space is too limited to plant outward. This works well on balconies, patios, side yards, and fenced gardens where the ground is already spoken for. Wall planters, shelves, trellises, and tall planters are all valid approaches. Beyond small spaces, it also adds visual height to larger gardens that feel flat and undifferentiated at ground level. Fixing strength: A wet planter filled with growing medium is significantly heavier than it looks dry. Fence panels rated for privacy screening are not necessarily rated for that load. Use wall fixings anchored into solid masonry or timber uprights. Shadow direction: Tall wall planting blocks light to anything below it. Check the sun’s path before positioning vertical features where they’ll shade kitchen herbs or lower beds. Drip planning: Wall-mounted planters need a watering strategy built in. Runoff stains light-colored paving and causes watermarks on rendered walls that are difficult to remove later. What fails in year two: Plants establish unevenly in pocket-style wall systems. Lower pockets tend to dry out faster than upper ones. Install drip irrigation from the start rather than relying on hand watering. 7. Island Bed Garden An island bed garden places a freestanding planted area in open lawn or hardstand. It’s the layout idea that makes the biggest visual improvement to the most ordinary yard for the least structural cost. Even one well-sized island bed changes how a flat space reads from the house. The shape can be round, oval, or kidney-shaped. A small specimen tree, shrubs, grasses, and perennials can sit together inside it. The critical difference from a border bed is that an island bed needs to look good from every angle. For yards where region and climate shape the planting choices, the climate-matched landscaping approach is worth reading alongside this layout. Size before digging: Mark the bed outline with a garden hose and live with it for a day before removing any turf. Island beds almost always look smaller outdoors than they do on a drawn plan. Mowing clearance: Leave 12 to 18 inches of clear grass around the outer edge so a mower can pass without scalping curves or hitting edging material. Outer plant selection: The perimeter of an island bed takes more wear than the center. Hose drag, foot scuffing, and pet traffic are all concentrated on that outer ring. Use robust, low-growing plants there. 8. Sunken Seating Garden A sunken seating garden creates a lowered sitting area within the outdoor space. This layout works in yards where ground-level privacy is nearly impossible to achieve without tall screens. By dropping the seating area 18 to 24 inches below the surrounding grade, you get a sheltered feel without blocking the views from inside the house. Low walls, built-in benches, stone steps, and planting around the rim complete the enclosure. This is a higher-investment garden layout idea, and drainage is the detail that decides whether it succeeds in the long term. Drainage first: A sunken area needs a proper drainage channel and outlet designed before any paving goes in. Water sitting at the base of a lowered patio is a structural and usability problem that cannot be fixed cheaply after the fact. Edge visibility: Step lighting, coping in a contrasting tone, or non-slip edge strips make level changes readable after dark. This is a safety detail, not a decorative one. Material climate match: Built-in timber seating at a lower level stays wetter than equivalent ground-level furniture. Hardwood, powder-coated steel, or polished concrete are better choices than softwood for sunken built-ins in most US climates. 9. Water Feature Garden A water feature garden places moving or still water at the center of the layout design. A pond, fountain, stream, birdbath, or simple water bowl all qualify. The value isn’t primarily visual. Sound changes how people use the space. A fountain audible from the seating area masks traffic noise and slows the pace of the garden in a way that no amount of planting does. The placement rule is simple: if you can’t hear it from the main seating area, it’s in the wrong location. Splash zones: Moving water wets surrounding paving. Textured or non-slip stone within 3 feet of any fountain or spillway is a practical safety requirement, not an upgrade. Power routing: If the feature needs a pump, the cable route has to be decided before any paving, edging, or planting is committed to. Retrofitting conduit through a finished garden is expensive and disruptive. Stable edging: Water draws people toward it, especially children. Any surrounding edge needs to feel firm and predictable underfoot. Loose gravel or uneven stepping stones around a pond edge are accidents waiting to happen. What fails in year two: Submersible pumps in small ponds clog with algae and leaf debris faster than most owners expect. A pump filter that can be cleaned without draining the feature is worth specifying from the start. 10. Rock Garden Layout A rock garden layout works where nothing else wants to. Dry slopes, compacted poor soil, sun-baked corners, and awkward edges are all natural fits. Rather than fighting the conditions, a well-built rock garden works with them. The structure is stone, and the planting fills the pockets between. This is one of the lower-maintenance garden layout ideas once established, but it requires careful installation to stay stable. Mixed stone sizes: Large anchor stones give the layout visual weight and structural stability. Smaller gravel fills gaps, locks the structure, and reduces soil erosion on slopes. Angle stones naturally: Stones buried one-third of their depth into the soil look settled. Stones sitting entirely on top look placed. The difference in result is significant. Drought-tolerant planting: Succulents, sedums, thyme, alpine plants, and ornamental grasses suit rock gardens and reduce the maintenance burden. Moisture-hungry plants in a rock garden setting tend to struggle and create gaps. 11. Shade Garden Layout A shade garden layout is the design answer for north-facing walls, spaces under established trees, and narrow side yards that get limited direct light. The approach here is to stop competing with the conditions and to instead build a planting palette that suits them. Foliage texture and structure carry the design through the year rather than seasonal flower color. Map light first: Most shaded areas still receive morning sun or filtered afternoon light through canopy gaps. Knowing exactly which areas get which quality of light changes the plant placement decisions significantly. Soil airflow: Dense shade retains moisture in the soil. Planting too closely in these conditions promotes fungal issues. Space plants further apart than the label suggests and mulch with a coarser material that doesn’t compact. Leaf texture contrast: Broad-leaved hostas, fine-textured ferns, and structured shrubs like viburnum work together to create interest without relying on bloom color, which is unreliable in low-light conditions. 12. Herb Spiral Garden An herb spiral uses a rising circular bed to grow a variety of herbs within a compact footprint. For a yard near a kitchen door where space is limited but daily access matters, this is one of the most practical small-scale garden layout ideas available. The spiral shape naturally creates varying moisture and sun exposure within a single structure. Drier, warmer conditions at the top and cooler, wetter conditions at the base allow for a wider plant range than a flat bed of the same area. Sun-loving herbs at the top: Rosemary, thyme, and oregano want the drier, warmer upper zones. Placing them there isn’t a design choice, it’s a growing condition match. Moisture herbs lower: Basil, parsley, and mint perform better in the cooler, slightly wetter sections at the base of the spiral. Build a solid base: Loosely stacked stone spirals shift within a single growing season. Compacted stone or mortared brick gives the structure the stability it needs to hold planting weight over several years. 13. Wildlife-Friendly Garden Layout A wildlife-focused garden layout supports birds, bees, and beneficial insects without abandoning usability for the household that lives there. The distinction between a wildlife garden and an overgrown yard is structure. Clear paths, defined zones, and deliberate planting choices give the garden enough order to feel intentional while still offering the habitat variety that matters for local ecology. Layered planting zones: Ground cover, shrubs at mid-height, and at least one taller element together create shelter, nesting, and feeding options for a wider range of species than any single plant layer provides alone. Quiet corners: An undisturbed corner with a log pile or dense ground cover is one of the highest-value additions in a wildlife garden. These areas require no maintenance and provide more ecological benefit than most planted features. Avoid over-clean edges: Leaving seed heads on spent plants through winter and not cutting back all growth in autumn supports seasonal feeding cycles for birds and overwintering insects. 14. Pergola Seating Garden A pergola’s framed overhead structure defines a focused outdoor dining or lounging area. The overhead element is what makes this layout idea work: it gives scale and shade to a seating zone without closing it in the way a full room or canopy would. This garden layout suits patios and transitional zones between the house and the rest of the yard, and it allows climbing plants to increase shade coverage as they establish over the first two growing seasons. Beam orientation: Position pergola beams to cut afternoon glare at the time the space will be used most. A dining area used at 6pm in summer needs shade from the west, not the south. Post footing depth: Posts set in concrete to the local frost depth hold in wind and shifting soil. Surface-mounted posts, even on well-anchored brackets, are a compromise on any structure over 10 feet square. Climbing plant guidance: Vines and climbers need attached wire or trellis from day one. Left unguided in the first season, they establish patterns that are difficult to redirect later without damage to the plant or the structure. What fails in year two: Untreated fir or pine joists exposed to rain and sun begin to check (surface crack) within two seasons. Specify pressure-treated timber or naturally durable hardwood for all horizontal members. 15. Container-Based Modular Garden A container-based modular garden replaces fixed beds with movable pots and planters arranged to create a defined outdoor space. This is the practical layout choice for renters, patio gardeners, rooftop spaces, and anyone who can’t or doesn’t want to make permanent changes to the ground. The structure comes from deliberately grouping containers, not scattering them. Height layering: Tall planters at the back or outer edge with lower pots stepping toward the front creates a sense of depth that a flat array of matching pots never achieves. Material consistency: Matching pot material or finish tone across different sizes prevents the collection from looking like a clearance sale. Terracotta, galvanized, or matte powder-coated containers each read as a coherent group. Path clearance: Containers fully planted and watered are much heavier than they appear when placed. Leave clear 24-inch routes between groupings before they’re in position, not after. 16. Linear Grid Path Garden A linear grid path garden structures a yard around straight, consistent walking routes that divide the planting into clean sections. This garden layout idea suits narrow rectangular yards and spaces where an edible or cutting garden needs a clear working structure. The paths define order while the planted sections between them carry the visual interest. The layout also scales easily: adding one more section or extending a path doesn’t require redesigning the whole yard. Consistent path width: All main paths should be the same width, typically 36 inches minimum. Uneven spacing creates a maze-like feel that frustrates movement, especially with a barrow or large container. Wet zone placement: High-water-use planting areas should sit away from the main path routes. Wet paving is a slip hazard and speeds up surface deterioration on most materials. Surface material limit: One material for paths and one for edging keeps a grid layout from feeling fragmented. The strength of a grid design is its clarity, and too many surface changes undermine that. 17. Zen Gravel Garden Layout A Zen gravel garden uses negative space, controlled texture, and a very limited plant selection to create calm in a yard that needs low maintenance above all else. The gravel is the surface, the stone is the structure, and the planting is restrained to two or three deliberate choices. This layout works best in enclosed courtyards, dedicated meditation corners, and front yards where upkeep is limited. Regular raking: Simple raked line patterns keep gravel areas reading as intentional. Without raking, a gravel garden drifts toward looking like an unfinished patio within one season. Limited plant count: Two or three structural plants, placed with space around them, carry more visual impact in this layout than a dozen smaller choices. The space between plants is part of the design. Anchor stones: One or two larger stones with real visual weight hold the entire layout together. Scattered small stones without a focal anchor produce a scattered, unresolved result. How to Match Garden Layout Ideas to Your Style Style should follow structure. The layouts that fail fastest are the ones chosen for aesthetic first and practical reality second. A cottage look requires depth and softness, which means curved paths and layered borders suit it better than strict symmetry. A modern aesthetic needs clean edges and controlled plant palettes, which makes raised beds, courtyard layouts, and sunken seating the right starting points. For hosting, outdoor room layouts give guests clear places to land rather than standing in the center of an undefined space. For calm, water features and Zen gravel layouts slow the pace of a yard in ways that no amount of furniture or planting does. For food growing, the raised bed and linear grid layouts keep production organized enough to actually maintain through a full season. The unifying principle in every case: decide on the layout’s structure before selecting any materials, plants, or finishes. Everything is easier to choose once the shape of the space is resolved. Finishing Details That Support the Layout Finishing details should make the garden’s structure clearer, not compete with it. These are the only additions worth making after the main layout is set: Clean edging: Define beds and paths so the garden’s shape stays readable as plants fill in. This is the one detail that separates a maintained garden from a neglected one at a glance. Low path lighting: Ground-level or step lights near level changes, path turns, and seating make the garden safer and warmer to use after dark without adding visual noise during the day. One firm seating spot: A single useful place to sit, properly positioned for shade, view, and access, is worth more than three decorative seating areas that rarely get used. Consistent container material: Repeating one pot finish or material across loose planters connects them to the broader design rather than making them look accumulated over time. Functional screens only: Privacy screens belong where there’s an actual view or exposure problem to solve. Installed anywhere else, they reduce light and add maintenance without improving the space. Garden Layout Mistakes to Avoid Most garden layout problems are avoidable. Every mistake in the table below is more expensive to fix after the work is done than it would have been to plan around at the start. Mistake What It Does to the Space Better Decision Too many focal points The eye jumps between features and the garden feels busy rather than resolved. Choose one main feature and let every other element support it. Paths under 36 inches wide Feels fine before planting. Becomes frustrating daily once growth fills in from both sides. Set main paths at 36 inches minimum before any plant goes in. Seating placed by aesthetic, not light A chair that sits in full afternoon sun becomes the seat nobody uses by midsummer. Check shade, privacy, view, and access at the time the seat will actually be used. Drainage ignored at planning stage Water finds its own route and usually picks the paving, the path, or the sunken seating area. Map drainage patterns before fixing any surface material or level change. Layout copied from a different-sized yard Features scaled for a larger space make a small yard feel crowded and hard to move through. Match the design to the actual yard’s dimensions, exposure, and daily use pattern. These aren’t theoretical mistakes. Every one of them shows up in real gardens, often within the first two seasons of use. The layouts in this guide are built around avoiding them from the start. Frequently Asked Questions These are the questions that come up most on outdoor jobs once the planning conversation starts moving. How do I plan a garden layout from scratch? Start with how the space gets used, not how it looks. Mark the sun at your typical use time, check drainage by observing the yard after rain, and measure any paths you plan to walk. Sketch zones before committing to any materials. Structure first, planting second. What is the best garden layout for small yards? Raised beds, vertical gardens, and container modular layouts all work well in tight spaces. Each one keeps plants off the main movement route and makes better use of vertical space than ground-level spreading. Choose based on whether the priority is growing food, privacy, or seasonal color. How wide should garden paths be? Main routes need 36 inches minimum to walk comfortably and carry equipment. Side access paths can go down to 24 inches. Anything narrower creates daily friction once plants fill in from the borders on either side. What garden layout is easiest to maintain? A simple raised bed or border layout with clear paths, grouped watering zones, and repeated plant choices requires the least ongoing effort. The fewer materials, the fewer surfaces to maintain. Gravel and edged beds outperform lawn in most low-maintenance comparisons. What is the best material for garden paths? Depends on the climate and use. Gravel drains well but migrates without edging. Compacted crushed stone packs firm and handles freeze-thaw reasonably well. Paving stone or concrete pavers hold up longest to foot traffic but require correct base preparation to avoid heaving in cold climates. How do I divide a garden into sections? Use changes in surface material, low hedging, planted borders, low walls, or a simple path to create section boundaries. Keep the number of dividers proportional to yard size. Three clear zones in a small garden is usually the maximum before it starts feeling cluttered. What plants work best in a shaded garden layout? Hostas, ferns, astilbe, hellebores, and viburnum all perform well in low light. Mixing leaf textures across these creates structure without relying on flowers. Avoid placing light-hungry plants like lavender, rosemary, or most ornamental grasses in consistently shaded positions. Summing Up A well-planned outdoor space works best when structure leads every decision rather than decoration. You get better results when paths, seating, and planting zones are decided before anything is built. I often see gardens improve immediately once layout clarity replaces scattered choices. The right garden layout ideas help you match space, use, and maintenance so the yard stays functional year after year. I want you to think in zones, proportions, and access before choosing materials or plants. That approach keeps your space practical and easier to use in real conditions. Try applying these principles to your yard and see what changes feel most useful. You can adjust as you go, but start with structure first.
Your yard can look healthy and still feel hard to use. You might have trimmed grass, neat plants, and fresh mulch, yet nowhere comfortable to sit, walk, cook, or gather. That feels annoying, doesn’t it? This is where what is hardscaping becomes a helpful question, not just a design term. It shows how built-in outdoor features can make your space work better day-to-day. Maybe you want less upkeep, safer movement, better drainage, or a cozy spot for evenings outside. Before you choose a patio, wall, path, or deck, it helps to know what each feature actually does. So let’s keep this simple and practical, like we’re planning your yard together with a clear next step in mind today What Is Hardscaping Definition Hardscaping is the built, non-living part of your outdoor space, like patios, paths, walls, decks, driveways, and fences. It gives your yard structure, so you can walk, sit, cook, park, or relax without relying only on grass and plants. Think of it as the part that makes your yard usable, not just nice to look at. You might have a healthy lawn and pretty plants, but where do you sit after work or walk when it rains? Hardscaping helps give each area a clear purpose and makes the space feel easier to enjoy. When it is planned well, your yard feels more comfortable, organized, and ready for everyday life without feeling crowded Hardscape vs Landscape: What’s the Difference? Landscape and hardscape can sound like the same thing at first, but they are not. I like to think of the landscape as the whole outdoor space, while hardscape is the built part inside it. Here is a simple way to keep the difference clear. Term Meaning Examples Main Job Hardscape Built, non-living outdoor features Patio, wall, path, deck, fence Gives the yard shape and usable areas Softscape Living outdoor features Grass, shrubs, trees, flowers Adds life, shade, color, and seasonal change Landscape The complete outdoor space Hardscape plus softscape Brings the whole yard together Once you understand this split, planning feels less messy. You can first decide where your yard needs structure, then add plants and lawn areas where they make the space feel softer Key Benefits of Hardscaping in Outdoor Spaces Hardscaping works best when it fixes something you notice in real life. Maybe the yard feels empty, muddy, hard to maintain, or awkward to move through. These benefits show how the right built features can make your outdoor area easier to use. Here are some for you: 1. Turns Empty Areas Into Useful Spots Some yards have plenty of open space, but no real place where you want to spend time. A hardscape feature can turn that unused corner, bare patch, or awkward side area into somewhere you actually enjoy. Here are two ways this benefit shows up in daily life. Outdoor Rooms: A paved or raised surface can hold furniture, planters, and lighting without sinking into grass or shifting after rain. Daily Comfort: You get a steady spot for morning coffee, weekend meals, quiet reading, or casual talks without having to set up every time. 2. Cuts Down Repeated Yard Work Let’s be honest, not every part of a yard needs to be grass. Some corners are annoying to mow, some narrow strips dry out fast, and some planted areas need more care than you want to give. This helps most when you replace the right areas, not the whole yard. Less Mowing: Replacing hard-to-cut corners or narrow grass strips with stone, pavers, or gravel can make routine care much easier. Cleaner Edges: Built borders around beds or paths to keep soil, mulch, and grass from spreading into places you want to be neat. 3. Handles Problem Water More Carefully Water can turn a nice yard into a headache if it keeps landing in the wrong place. You may see puddles, soft soil, washed-out mulch, or muddy routes after rain. The goal is to guide water, not just cover the issue. Slope Support: Walls and terraced areas can hold soil in place where rain would otherwise pull it downhill over time. Surface Planning: Gravel beds, permeable pavers, and proper grading can reduce standing water in walkways, patios, and low yard areas. 4. Makes the Home Look More Complete Hardscaping can make a home feel more finished from the outside. You do not need to add too much. Sometimes, a clean path, neat border, or better entry surface changes the whole first impression. This is about visual order, not decoration alone. Stronger Entry: A clean walkway, front steps, or driveway border can make the home feel more cared for before visitors enter. Lasting Shape: Stone, brick, concrete, and wood features keep their form through seasons when plants may thin, fade, or rest 5. Makes Outdoor Movement Safer If you have ever walked across wet grass in the dark, you already know why this matters. A yard should feel easy to move through, even after rain or in the evening. This is helpful for guests, kids, older adults, and everyday routines. Here’s how you can take advantage of it: Stable Footing: Walkways, steps, and paved entries reduce the risk of slipping on mud, loose soil, or uneven grass. Visible Routes: Edged paths and low lighting can guide people at night without making them guess where to step next. 6. Gives the Yard a Clear Layout A yard without structure can feel like one open area with no clear purpose. Hardscaping helps you divide the space into useful zones, so each part feels intentional rather than random. This is where the yard starts to feel more organized. Defined Zones: A patio edge, wall, border, or deck line can separate cooking, seating, planting, and open areas without needing extra decoration. Visual Order: Built lines and edges help the eye understand where one outdoor area ends, and another begins, making the yard feel cleaner. When Does Your Yard Actually Need Hardscaping? Your yard may need hardscaping when the space keeps showing the same problems, even after regular upkeep. I would look at where the yard feels awkward, wasted, or harder to use than it should. These signs can help you decide before choosing a feature: Muddy routes after rain No steady place for seating Sloped or washing soil Too much unused lawn Weak privacy Awkward side yards A front entry that feels unfinished Common Types of Hardscaping Not every hardscape feature does the same job. Some help with movement, some create comfort, and some solve yard problems. Let’s go through the main types so you can see where each one fits. Ready. 1. Patios: The Ground-Level Gathering Spot A patio is a flat surface built at ground level. It usually works well near the house, pool, or garden because it provides a stable surface for chairs, tables, planters, or a grill. I’ve always liked patios because they make outdoor space feel useful right away, especially when you can step outside with coffee, food, or friends without changing levels. Use these two details to decide to konw if a patio fits your space: Best Placement: Patios work well near kitchen doors, shaded corners, pool edges, or garden views where people naturally pause. Smart Detail: Leave enough room around chairs and tables so people can move without stepping into planting beds. 2. Walkways and Garden Paths: The Yard’s Route Map Walkways and garden paths help you move through the yard without having to guess where to step. They can feel formal near the front door or more relaxed through a garden area. The right path should feel nature to follow. Don’t you also think so. Use these two details in mind for that: Best Placement: Paths belong where people already walk, such as between gates, doors, patios, sheds, gardens, and driveways. Smart Detail: Match the width to traffic, since a main entry path needs more room than a quiet garden route. 3. Driveways: The Daily Arrival Zone A driveway does more than hold cars. It shapes how you arrive home, how guests park, and how the front of the property feels from the street. I’ve seen even a simple driveway upgrade make a home feel cleaner and more welcoming from the curb, so this is one area I would not treat as an afterthought. Think about real use before choosing the finish Best Placement: Driveways should connect the street, garage, parking area, and walkway without requiring sharp turns or awkward backing up. Smart Detail: Plan for drainage, tire weight, and snow or heat exposure before choosing concrete, pavers, gravel, or asphalt. For a side-by-side look at stamped concrete vs pavers, that comparison breaks down cost and durability across both options. 4. Retaining Walls: The Slope Support System A retaining wall helps hold soil where the ground changes height. It can make a sloped yard feel more controlled and give raised areas a cleaner edge. This type should be planned with care. Best Placement: Retaining walls fit sloped yards, raised beds, terraced gardens, and areas where soil pushes into usable space. Smart Detail: Taller walls need drainage behind them because trapped water can add pressure and weaken the structure. 5. Decks: The Raised Outdoor Platform A deck is a raised outdoor surface, often connected to the back of the house. It works well when the yard is uneven or when the door sits above ground level. Decks are helpful when ground-level seating feels awkward. Best Placement: Decks suit homes with raised doors, uneven yards, views, or spaces where a ground patio feels awkward. Smart Detail: Railings, stairs, shade, and board spacing should be planned early because they affect safety and comfort. 6. Fences and Privacy Walls: The Boundary Builder Fences and privacy walls help you feel more settled in your yard. They can mark property lines, block a view, protect pets, or make a seating area feel more private. One of my favorite things about privacy walls is how they can make even a small outdoor area feel more peaceful and tucked away. I’ve seen them work really well in spaces that face nearby windows or busy side yards. The purpose should decide the style Best Placement: Boundaries work around yards, patios, pools, side areas, trash zones, or spaces facing nearby windows. Smart Detail: Height, material, and spacing should match privacy needs, local rules, airflow, pets, and the home’s look. For ideas on materials and layout, fence styles and materials cover a range of practical options worth comparing before you commit. 7. Pergolas and Shade Structures: The Overhead Frame A pergola adds height over an outdoor area without fully closing it in. It can make a patio, deck, path, or dining area feel more like a real space. It helps define the area above you. Best Placement: Pergolas fit sunny sitting areas, outdoor dining spots, garden paths, and patios that need height overhead. Smart Detail: Check the sun’s direction before building, since beam placement determines how much shade the structure provides. If you are weighing the build versus hire decision, building a pergola covers the structural steps and material choices in detail. 8. Outdoor Kitchens: The Built-In Cooking Station An outdoor kitchen makes sense when cooking outside is part of your routine. It can be simple with a built-in grill or larger with counters, storage, a sink, or a fridge. This feature works best for frequent outdoor meals. For sure you should give it a chance like this: Best Placement: Outdoor kitchens should be close enough to the indoor kitchen for easy prep but far enough away from smoke-sensitive doors. Smart Detail: Plan utility lines, counter space, lighting, and weather cover before choosing appliances or surface finishes. 9. Fire Pits and Outdoor Fireplaces: The Warm Gathering Point A fire feature gives people a reason to stay outside longer. A fire pit feels open and casual, while an outdoor fireplace can feel more fixed and private. Safety should guide the layout. Best Placement: Fire features need open space, steady seating distance, safe flooring, and clear separation from plants or structures. Smart Detail: Local fire rules, wind direction, fuel type, and seating layout should be checked before installation begins If budget is a constraint, fire pit on a budget covers which materials hold up without overspending. Common Hardscaping Materials The material you choose affects how your hardscape feels, handles weather, and holds up over time. I would look past color first and consider use, care, and durability, too. Here’s a simple table to help you compare the main options before choosing one. Material Best Used For Why It Works Keep in Mind Concrete Patios, driveways, slabs Strong, clean, and practical Can crack without good prep Pavers Paths, patios, pool areas Easy to style and repair Need a solid base Natural Stone Steps, walls, premium patios Durable with natural texture Costs more than many options Brick Paths, borders, small patios Classic look and warm color Can shift in damp spots Gravel Side yards, paths, drainage areas Budget-friendly and drains well May scatter over time Wood Decks, pergolas, screens Warm and natural-looking Needs regular protection Composite Decks and privacy screens Lower upkeep than wood Higher upfront cost Metal Gates, railings, edging Strong and space-saving May rust without coating Choose the material that fits the job first. The best-looking option will not help much if it cannot handle your weather, traffic, or upkeep needs How to Choose the Right Hardscaping Feature Choosing the right hardscaping feature starts with the problem you want to fix. I would look at what feels missing or hard to use before thinking about style or materials. Use these quick matches to narrow your choice. Need Seating: Choose a patio or deck for chairs, tables, meals, or quiet outdoor time. Need Dry Access: Choose a walkway if rain leaves you stepping through mud or wet grass. Need Slope Control: Choose a retaining wall if soil shifts or beds keep washing out. Need Privacy: Choose a fence or screen if the space feels too open. Need Outdoor Cooking: Choose an outdoor kitchen if you grill often and need prep space. Need Shade: Choose a pergola or cover if sunny areas stay too hot to use. Need a better driveway: Resurfacing or full replacement, depending on the current condition and driveway surface options that hold up to vehicle loads. How to Balance Hardscape and Landscape A good outdoor space needs both built features and living details. Hardscape gives the yard form. Plants, grass, and trees bring softness, shade, movement, and seasonal change. Too much hard surface can feel harsh. Too many planted areas can become hard to manage. The right balance depends on how you use the yard. A family space may need an open lawn, safe paths, and a shaded sitting area. A low-care space may rely on pavers, gravel, and hardy plants. A garden-focused yard may need softer edges and fewer large surfaces. I personally think of hardscape as the frame and softscape as the life inside it. Both need space to do their job. If you are planning a larger outdoor project and need a sense of what the full scope costs, backyard remodel costs break down the line items that drive variation between a modest refresh and a full hardscape build. Hardscaping Planning Tips Before You Start Before you buy materials or call a contractor, spend some time watching how your yard works now. This small step can save you from wrong sizing, poor placement, and features that look nice but feel awkward later. Use these checks before the project starts. Set Priorities: Choose one main goal first, such as seating, access, privacy, slope control, easier care, or a better entrance. Study Traffic: Watch how people move from doors, gates, driveways, sheds, and garden areas before placing hard surfaces. Check Water: Look for rain to see where water pools, runs fast, or sits near the house. Measure Furniture: Leave space for chairs, tables, grills, doors, steps, and a walkway before fixing the final size. Review Rules: Check permits, property lines, HOA limits, utility lines, and fire rules before installing permanent features. Phase Work: Start with the most needed feature, then add other parts later so the yard grows in a planned way. Common Hardscaping Mistakes to Avoid Hardscaping mistakes can be hard to fix because many features are heavy, fixed, or tied to water movement. A small planning mistake can affect comfort, safety, and cost later. Here is a simple table to help you avoid the most common problems. Mistake What Can Go Wrong Better Move Covering too much yard The space may feel hot, flat, or uncomfortable Keep room for shade, plants, and open areas Ignoring drainage Water may pool, stain surfaces, or move toward the house Plan slope, drains, gravel, or permeable areas first Choosing only by looks The feature may not fit daily use Match the design to how you walk, sit, park, or cook Using the wrong material Surfaces may crack, shift, fade, or need more care than expected Choose based on climate, traffic, weight, and upkeep Skipping base prep Pavers, paths, or patios may sink or become uneven Build a proper base before the visible surface goes down Forgetting scale A feature may feel too large, small, narrow, or crowded Measure people, furniture, doors, and movement space first The safest projects respect how the yard behaves before changing it. Soil, water, sun, and daily movement should guide the design before style choices take over Frequently Asked Questions What is hardscaping in simple terms? Hardscaping is the built, non-living part of your outdoor space: patios, paths, decks, walls, fences, driveways, fire pits, and outdoor kitchens. These features give the yard shape and make it easier to walk, sit, cook, park, and relax without relying only on grass. Why is hardscaping important for a yard? Grass and plants look good but do not give you stable places to sit, walk, or gather. Hardscaping fixes muddy routes, unused corners, drainage problems, and awkward layouts with built surfaces that work in all seasons, not just when the ground is dry. What is the difference between hardscape and landscape? Hardscape is the built portion, including patios, walls, walkways, decks, and fences. Softscape is the living portion, grass, trees, shrubs, and flowers. Together, they make up the full landscape. Both are needed; neither works as well without the other. What are the most common hardscaping features? Patios, walkways, driveways, retaining walls, decks, fences, pergolas, outdoor kitchens, and fire pits. Each serves a different function; some help with movement, some create seating, and some solve drainage or slope problems. How do I know if my yard needs hardscaping? Look for recurring problems: muddy paths, no steady seating area, eroding soil on slopes, poor privacy, or spaces that never get used. If the same issues keep coming back after regular upkeep, a built feature is usually the right fix. What materials are best for hardscaping? It depends on the job. Concrete works for slabs and driveways. Pavers suit patios and paths. Natural stone handles steps and premium surfaces. Gravel aids drainage. Wood and composite work for decks. Choose by climate and function first; then by appearance. How do you balance hardscape and softscape? Use hardscape to frame movement, seating, and tasks. Use grass, trees, and plants to soften edges, add shade, and bring seasonal change. Too much hard surface feels harsh in summer; too many planted areas become a maintenance problem. Let the function drive the ratio. Final Tip Now that you understand what is hardscaping, you can look at your yard with a clearer eye. I would not start by asking which feature looks best. I would ask what would make the space easier for you to use this week and next year. Maybe you need a steady route to the door, a calm sitting area, less wet soil, or a private corner. Start with one need, then choose the feature that fits it. A good outdoor space should feel natural to use, not forced. When hard surfaces and living elements work together, your yard feels planned, useful, and personal. Ready to shape a better outdoor area? Choose one clear goal and build from there with care today.
A bare deck can look inviting yet go unused when the sun is harsh, rain blows in, or the seating area feels too exposed. Covered deck ideas on a budget are not about grabbing the cheapest cover first. They are about solving the right outdoor problem without wasting money. I like starting with the worst hour of the day because that usually shows what the deck really needs. My goal here is to help you compare shade, rain cover, privacy, airflow, and design details before you make a purchase. These covered deck ideas can make a simple deck feel useful again. Cost Note: Figures in this article are estimates based on national averages. Actual costs vary significantly by region, contractor, materials, and project scope. Always get at least three quotes before committing to any project above $1,000. Start With the Cover Your Deck Actually Needs Before choosing a cover, think about what makes your deck uncomfortable. Shade, rain, wind, privacy, and heat all need different fixes. A fabric sail can cool a sunny corner, but it will not work like a sloped roof during steady rain. A freestanding cover may be better for an older deck because it avoids adding stress to weak framing. An attached cover can look cleaner, but it needs stronger mounting and careful water control. If your deck only needs shade, keep the solution light. If you need rain protection, plan for slope, drainage, and support from the start. Deck Situation Best Budget Direction Why It Works Harsh afternoon sun Shade sail, umbrella, or pergola These options cool the main sitting area without the cost of a full-framed roof. Light rain near the door Small lean-to cover or panel roof A limited roof protects the entry without covering parts of the deck that stay open. Exposed neighbors Curtains, lattice, or screen panels Side coverage adds privacy while also helping with low-angle sun and wind. Older deck frame Freestanding cover beside the deck This avoids adding unnecessary weight to framing that may already need repair. Dining area only Partial roof or fabric canopy The budget goes toward the zone that gets used most often, not the full deck. Rental or temporary setup Umbrella, removable canopy, or sail These choices add comfort without making permanent changes to the property. What to Check Before Adding a Budget Deck Cover Even a simple cover changes how the structure handles water, wind, and weight. Getting these checks wrong can turn a budget cover into an expensive repair. Understanding deck build cost ranges before you start helps avoid the situation where a cheap cover ends up costing more to repair than it saved. Check the frame first: Look at joists, beams, posts, and boards before adding anything that catches wind or adds overhead weight. Inspect the ledger area: Any cover attached near the house needs a sound ledger, clean siding details, and proper water management. Think about wind uplift: Fabric sails, umbrellas, and canopies can pull hard on weak anchors during gusts. Plan for runoff: Rain-ready covers need slope, panel overlap, and a clear path to move water away from the house. Check local rules early: Permanent roofs, attached covers, and larger structures may need permits, HOA approval, or setback clearance. Match weight to support: A heavy gazebo or panel system should not sit on an older deck without checking support below. A budget cover should reduce problems, not hide them. If the deck frame is weak, repair it first or place the cover beside the deck on its own footings. Covered Deck Ideas on a Budget The right cover should match how the deck is used, not just how it looks. These ideas focus on comfort, cost control, and practical outdoor use. 1. Cantilever Umbrella Deck Corner A cantilever umbrella creates a shaded corner without posts, drilling, or permanent framing. The offset design keeps the pole away from the furniture, so the seating area feels more open. Choose a sturdy base, weather-rated fabric, and a canopy that can tilt as the sun moves during the day. Budget: Low, especially if you already have outdoor seating and only need focused shade. Situation: Best for sunny decks with light to moderate wind and strong afternoon glare. Deck size: Works well on small decks, balconies, and compact seating corners. 2. Sail-Shaded Dining Nook A shade sail gives a dining area a clean, modern cover without a full roof. The fabric stretches between strong anchor points, creating a lighter look than heavy framing. Keep the sail tight, angled, and properly secured so it does not sag or collect water after summer rain. Budget: Low to mid, depending on sail quality, posts, and stainless hardware. Situation: Best for sunny decks that need overhead shade but still need airflow. Deck size: Works well on small to medium decks with one clear dining zone. 3. Freestanding Canvas Canopy Deck A freestanding canvas canopy gives seasonal coverage without attaching anything to the house. It can create a soft outdoor room over furniture and can be removed when the weather changes. Choose outdoor-rated fabric, a stable frame, and secure tie-downs so the canopy feels planned rather than temporary. Budget: Low to mid, depending on frame material and fabric quality. Situation: Best for sunny or mildly exposed decks where a removable cover makes sense. Deck size: Works well on medium decks with enough room for a separate frame. 4. Manual Wall Awning Setup A manual wall awning adds shade when you need it and folds back when you want open sky. It is simpler than a motorized option and can look neat when the mounting is done correctly. The brackets must fasten into solid framing, not just siding, trim, or thin fascia boards. Budget: Mid, usually cheaper than motorized awnings or built-in roof structures. Situation: Best for sunny attached decks with a strong wall for mounting. Deck size: Works well on small to medium decks connected directly to the house. 5. Simple Slatted Wood Pergola A slatted wood pergola gives the deck structure, filtered shade, and a more finished outdoor feel without completely blocking the sky. Use straight lumber, clean spacing, and simple hardware so the finished frame looks intentional. If you want to take it further, it is possible to build a simple pergola from scratch with basic tools and a weekend, which keeps costs well below a contractor-built structure. Budget: Mid, with pressure-treated lumber keeping the cost lower than premium wood. Situation: Best for sunny decks where shade matters more than rain protection. Deck size: Works well on medium decks or larger decks with one main seating zone. 6. Vine-Covered Garden Pergola A vine-covered pergola adds natural shade and a softer garden feel. It takes time to fill in, but the result can feel more relaxed than fabric or metal. Choose plants suited to your climate, and keep growth away from gutters, siding, roof edges, and any place where moisture can collect. Budget: Low to mid after the pergola is built, since plants are usually affordable. Situation: Best for sunny decks where long-term natural shade is the goal. Deck size: Works well on medium decks and garden-facing backyard decks. 7. Reed Mat Pergola Cover Reed, bamboo, or willow mats can be laid over pergola rafters to create warm, filtered shade. The texture gives a relaxed, casual look without the cost of solid roofing. Secure the material neatly along the edges so it does not curl, sag, or flap when the weather changes. Budget: Low to mid, depending on mat quality and pergola size. Situation: Best for sunny, dry, or mild climates where heavy rain is not the main concern. Deck size: Works well on small to medium pergola-covered decks. 8. Outdoor Curtain Cabana Deck Outdoor curtains can turn a basic cover into a softer, more private sitting area. They work especially well when the top is already covered, but the sides feel exposed. Use weather-resistant fabric, strong rods or cable, and enough clearance so the fabric does not drag across wet boards. Budget: Low, especially when added to an existing roof, pergola, or frame. Situation: Best for decks with side sun, close neighbors, or light wind exposure. Deck size: Works well on decks ranging from small to large, with a defined covered section. 9. Lattice-Screened Covered Corner A lattice-screened corner adds privacy, filtered light, and a sense of enclosure without closing the whole deck. It can support climbing plants, frame a bench, or soften a seating nook near a property line. For raised decks, adding clean skirting options below the screen makes the area feel fully finished rather than cut off mid-structure. Budget: Low to mid, depending on panel material and post requirements. Situation: Best for decks with low-angle sun, nearby homes, or exposed seating corners. Deck size: Works well on small decks, townhome decks, and raised decks. 10. Polycarbonate Panel Roof Polycarbonate panels create a rain-friendly cover while still letting daylight reach the deck. They work well over a pergola, doorway, or dining area when you want shelter without a dark roof. Install the panels with proper slope, overlap, closure strips, and fasteners made for outdoor expansion and contraction. Budget: Mid, usually less than a fully finished roof but more than fabric shade. Situation: Best for rainy decks that still need natural light. Deck size: Works well on small to medium covered zones and partial roof areas. 11. Corrugated Metal Shade Roof Corrugated metal gives the deck a stronger shade and a more durable overhead surface. It can suit rustic, cabin, farmhouse, or industrial outdoor styles. Because it blocks more light than clear panels do, plan the area below for airflow, furniture placement, and lighting so the space does not feel heavy. Budget: Mid, depending on panel quality, framing, and fastening details. Situation: Best for sunny or rainy decks where full overhead shade is preferred. Deck size: Works well on medium decks or partial sections of larger decks. 12. Lean-To Doorway Cover A lean-to doorway cover protects the transition between the house and deck. It can keep the threshold drier, reduce the risk of slippery boards near the door, and make everyday use easier. Keep the shape simple and make sure any house connection is flashed correctly so water does not get behind the siding. Budget: Mid, since framing and water control matter more than size. Situation: Best for rainy decks or doors that get direct weather exposure. Deck size: Works well on narrow decks, small decks, and entry-focused layouts. 13. Freestanding Post-and-Beam Cover A freestanding post-and-beam cover gives a built-in feel without relying on the house wall. It works well when siding, brick, windows, or rooflines make attachment difficult. The frame still needs proper footings, bracing, and clean proportions so it looks permanent rather than temporary. Budget: Mid to high, depending on post size, roof material, and footing work. Situation: Best for decks where attaching the house would create water or structural concerns. Deck size: Works well on medium to large decks with room for independent posts. 14. Grill Station Mini Roof A grill station mini roof protects the cooking area without covering the entire deck. It can make weeknight grilling easier during light rain or strong sun. Keep all fabric, trim, and low framing safely away from heat. Use materials and clearances that allow smoke, steam, and grease to move safely. Budget: Low to mid, depending on whether the roof is framed or canopy-based. Situation: Best for decks where cooking is the main outdoor activity. Deck size: Works well on small to medium decks with a dedicated grill corner. 15. Pop-Up Canopy Lounge Zone A pop-up canopy can help test where shade is needed before you commit to a permanent cover. It also works for parties, summer weekends, or rental spaces. Choose one with a strong frame, secure weights, and outdoor fabric. Treat it as a temporary cover, not a structure for daily wind exposure. Budget: Low, especially for short-term shade or seasonal use. Situation: Best for temporary setups, calm weather, and flexible outdoor seating. Deck size: Works well on medium decks with enough open floor space. 16. Fabric Gazebo Seating Area A fabric gazebo creates a soft outdoor room without the need for custom framing. It can hold a sofa set, a small dining table, or a reading area while giving the deck a more complete shape. Look for vented tops, sturdy posts, and fabric that can handle sun exposure without fading quickly. Budget: Mid, usually less than a wood pavilion or a fully built roof. Situation: Best for sunny decks with moderate weather and enough space for a frame. Deck size: Works well on medium to large decks with a clear seating layout. 17. Hardtop Gazebo Beside Deck A hardtop gazebo placed beside the deck can create a covered room without loading the deck framing. This works well when the deck is older or too small for a roof. The gazebo can sit on a patio pad, a gravel base, or a proper foundation while still feeling connected to the deck. Budget: Mid to high, depending on kit size and foundation needs. Situation: Best for rainy, sunny, or mixed-weather yards needing stronger coverage. Deck size: Works well beside small decks or next to large open deck layouts. 18. Covered Alcove Seating Bay A covered alcove gives one small seating area a cozy, sheltered feel. Instead of covering the entire deck, it focuses the budget on the spot where you actually sit. Add a bench, two chairs, or a compact table, then frame the space with lighting or planters. Budget: Low to mid, because only one focused area needs coverage. Situation: Best for decks where one corner gets used more than the rest. Deck size: Works well on small decks, side decks, and narrow backyard decks. 19. Privacy Screen With Overhead Slats A privacy screen with overhead slats handles both exposure and overhead sun. The side panel blocks views from nearby homes or streets, while the slats create filtered light above. Keep the screen height balanced so the deck feels private without feeling boxed in or too closed. Budget: Mid, depending on post depth, slat material, and screen height. Situation: Best for decks with neighbors nearby, side glare, or street-facing exposure. Deck size: Works well on small to medium decks, especially narrow layouts. 20. Outdoor Roller Shade Cover Outdoor roller shades help when an existing cover does not stop glare from the side. They can mount under a roof, awning, pergola, or framed structure. Solar shades keep some visibility, while privacy shades block more of the view. Use exterior-rated hardware so the rollers hold up outdoors. Budget: Low to mid, depending on shade size and fabric quality. Situation: Best for west-facing decks, covered porches, and glare-heavy seating areas. Deck size: Works well on any deck with an existing top cover or frame. 21. Shade Cloth Wood Frame A shade cloth roof on a simple wood frame gives light coverage in a practical, affordable way. It is easier to remove than solid roofing and can cool the surface underneath. Pull the cloth tight, finish the edges cleanly, and use rust-resistant hardware so the cover does not look temporary. Budget: Low, especially when the frame is simple and the fabric is standard size. Situation: Best for hot, dry decks where rain protection is not the main goal. Deck size: Works well on small to medium decks with a simple rectangular layout. 22. Tree-Framed Deck Cover Existing trees can reduce how much artificial cover the deck needs. Instead of covering the whole area, use a smaller shade sail, pergola, or canopy to fill the gaps the branches leave. Avoid damaging trees with permanent hardware, and keep branches trimmed so leaves do not overload fabric or panel roofs below. Patio and deck combinations in yards with mature trees often benefit most from this mixed approach. Budget: Low to mid, because natural shade reduces the size of the added cover. Situation: Best for decks with mature trees nearby and uneven sun patterns. Deck size: Works well on medium to large decks with partial natural shade. 23. Half-Covered Deck Layout A half-covered layout keeps part of the deck protected while leaving part open. This can feel more balanced than covering every board, especially when you want both shade and sun. Use the covered side for dining or seating, then leave the open side for plants, lounging, or flexible furniture. Budget: Mid, since covering less area reduces material and labor needs. Situation: Best for decks that need mixed shade, sun, and open-air space. Deck size: Works well on medium to large decks with more than one activity zone. 24. Rafter-Only Rustic Cover A rafter-only cover gives the deck structure, rhythm, and partial shade without solid roofing. It can support lights, hanging plants, or seasonal fabric while keeping the sky visible. This is a shade feature, not a rain solution. Keep the rafter spacing even so the final result feels built with purpose. Budget: Mid, depending on lumber size, post support, and finish quality. Situation: Best for sunny decks where style and filtered shade matter most. Deck size: Works well on medium decks and rustic backyard layouts. 25. Pergola With Built-In Bench Cover A pergola with a built-in bench works well when the deck needs both shade and seating, but loose furniture can make the layout feel crowded. The bench can sit along one side of the deck, with the pergola frame built above it to create a small covered nook. This keeps the footprint tight and gives the space a planned, custom feel. Budget: Mid, because the same framing can support both the bench area and the overhead shade. Situation: Best for sunny decks where seating, shade, and structure need to fit within a single compact zone. Deck size: Works well on small to medium decks, especially narrow layouts where movable furniture wastes space. How to Make a Budget Deck Cover Look More Expensive A simple deck cover looks better when the finish details feel planned. These upgrades help affordable materials blend with the house and outdoor furniture. Use one finish color: Paint or stain posts, beams, brackets, and visible framing in one tone so the cover feels designed. Match fabric to trim: Choose sails, curtains, or awnings that connect with the house trim, door color, or furniture fabric. Keep hardware consistent: Use black, bronze, or stainless hardware throughout so screws, straps, and brackets do not look mismatched. Hide rough fabric edges: Use hems, battens, or clean seams so shade cloth and canvas do not look unfinished. Add warm outdoor lighting: Use string lights, sconces, or solar fixtures to make the covered zone feel useful after sunset. Ground the seating area: Add an outdoor rug under the covered zone so the furniture feels connected to the structure. Soften posts with planters: Place planters near posts or screens so budget framing does not feel bare or abrupt. Limit mixed materials: Avoid combining too many woods, metals, fabrics, and colors, as clutter makes a cheap cover look even cheaper. The cover does not need to look expensive. It needs to look clean, balanced, and connected to the rest of the outdoor space. Attached vs. Freestanding Deck Covers Both cover types can work, but the safer choice depends on support, water control, and how much you want to change the house. Factor Attached Cover Freestanding Cover Best fit Works when the house wall can support safe mounting. Works when the cover can stand beside or over the deck. Cost risk May need flashing, permits, and siding work. May need posts, footings, and bracing. Water control Needs careful sealing where it meets the house. Keeps runoff away from the wall connection. Better choice Choose it for a clean built-in look. Choose it for fewer house-related risks. If both options solve the same problem, choose the one with simpler support, cleaner drainage, and fewer long-term repair risks. Small Finishing Details That Help the Whole Deck Feel Planned A covered area looks better when the rest of the deck supports it. These small choices can help the cover feel connected rather than added later. Repeat one material nearby: Match the cover frame to railings, furniture legs, or planter boxes to make the deck feel more cohesive. Keep the furniture scale right: Oversized furniture can make a budget cover feel cramped, especially on smaller decks. Thinking through furniture that fits the deck before buying saves money and floor space. Use plants to soften edges: Tall planters can make posts, privacy screens, and simple frames feel less harsh. Add one practical surface: A small side table, storage bench, or serving cart makes the covered area more useful. Choose simple accents: A few small style upgrades can do more than crowded decor or mismatched accessories. When the covered zone connects with the furniture, plants, and lighting, even a budget-friendly cover can feel like part of the original deck. Frequently Asked Questions Can a covered deck make the inside of my house darker? Yes, a solid cover near windows or patio doors can reduce indoor light. Clear panels, lighter fabrics, slatted pergolas, or partial covers help control glare while keeping rooms brighter. Check how sun moves past the house before choosing a fully solid cover near any window. How do I make a budget deck cover look permanent? Use outdoor-rated materials, consistent finishes, clean hardware, and a cover shape that follows the deck layout. Sagging fabric, rough edges, and random anchor points are what make cheap covers look temporary, not the price of the materials. Should a deck cover match the house or contrast with it? Both work when the choice feels considered. Matching trim gives a softer, built-in look. A contrasting frame can read as modern when it connects with railings or planters nearby. The problem is adding a new color with no visual connection to anything else on the property. Can I add a cover if my deck boards need repair? Repair weak, soft, loose, or rotting boards first. A cover reduces future exposure but should not hide existing damage. Check the surface and framing before deciding which cover the deck can safely support. What cover works best for a windy backyard? A properly braced pergola, strong freestanding frame, or professionally mounted awning performs better in windy yards than loose fabric. Shade sails need strong anchors and correct tension. Lightweight pop-up canopies should not be treated as permanent structures in gusty conditions. What is the cheapest way to cover a deck? A shade sail, shade cloth on a simple wood frame, or a pop-up canopy are the lowest-cost starting points. Each requires proper anchoring to hold up over time. For shade only, these options work well. For rain cover, budget more for slope, framing, and drainage. Do I need a permit to add a cover to my deck? It depends on your location and what you are building. Fabric and removable covers usually do not require permits. Permanent roofs, attached structures, and anything that changes the home’s footprint often do. Check with your local building department before starting any framed cover project. Final Takeaway The best covered deck ideas on a budget start with the problem you need to solve. A sail can fix glare, curtains can add privacy, and panels can help with rain. The right choice depends on your deck structure, weather, and the area you use most. I would rather create one strong covered zone than stretch money across a weak full-deck build. My advice is to begin with the biggest comfort issue, then upgrade in layers. If these covered deck ideas helped, share the deck problem you are trying to solve in the comments.
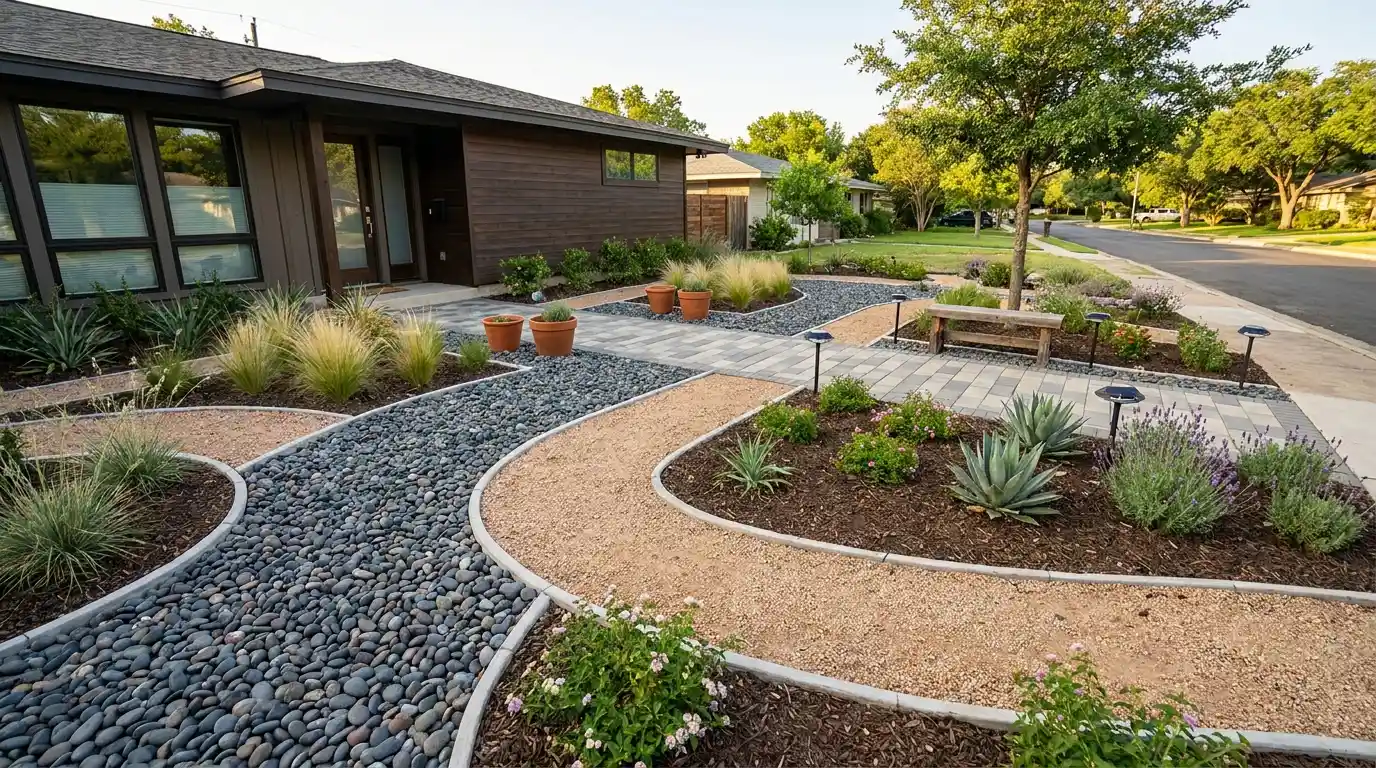
Gravel holds, mulch shifts, decorative concrete stays flat for decades if it’s sealed properly, and cracks if it isn’t. That’s what I’ve seen after years of evaluating front yard materials through freeze-thaw cycles, hard rains, and summers that bake surfaces to 140 degrees. Cheap no grass front yard ideas aren’t hard to find. What’s harder to find is honest information about which ones still look good two winters from now and which ones require you to start over. This article covers materials, costs, failure modes, and the decisions that matter before you spend anything. If you’re replacing a lawn you’re tired of maintaining, here’s what I’d actually tell a homeowner standing in their driveway trying to figure out where to start. Material Comparison: No Grass Front Yard Options Before choosing a material, understand its real-world performance, not just what it costs per bag at the hardware store. These figures reflect installed costs for a standard 500–800 square foot front yard in the US. Regional labor rates can shift costs by 20–40% in either direction. Material Installed Cost (per sq ft) Lifespan Maintenance Climate Suitability Pea gravel $1.50–$3.50 Indefinite with top-ups Low: re-rake 1–2x per year All climates; avoid on slopes Decomposed granite $1.00–$3.00 3–5 years before refresh Low: compacts well, minimal drift Excellent in dry climates; muddies in wet Organic bark mulch $0.50–$2.00 1–2 years per layer Medium: annual refresh required All climates; avoid in standing water zones Concrete pavers $8.00–$20.00 25–50 years Low: occasional re-sanding of joints All climates; needs proper base in freeze zones Stamped concrete $8.00–$18.00 25+ years if sealed Low: reseal every 2–3 years Good in mild climates; cracks in heavy freeze-thaw Artificial turf $5.00–$20.00 8–15 years Low: rinse and rake periodically Heat-prone without cooling fill; not for very wet climates Succulents + rock bed $3.00–$8.00 Plants 10+ years with right species Low: water twice monthly in summer Zones 8–11; frost kills most varieties Creeping thyme or ground cover $2.00–$5.00 Perennial, self-spreads Very low: trim once or twice yearly Zones 4–9; handles foot traffic and drought well Pea gravel and mulch have the lowest sticker price but aren’t always the cheapest over five years once annual refresh costs are factored in. That’s the math most homeowners miss when pricing out a no-grass yard. Cheap No Grass Front Yard Ideas That Hold Up These aren’t decoration ideas. They’re real installations I’ve seen survive multiple weather cycles. Cheap to install is not the same as cheap to own, and I’ll flag the difference where it exists. Pea Gravel with Weed Barrier Pea gravel installed over commercial-grade landscape fabric is the lowest-cost no-grass setup that actually stays put. Budget $1.50–$3.50 per square foot installed, plus edging. Skip the fabric, and you’ll be pulling weeds out of the gravel within one season. Use steel or aluminum edging along all borders, not plastic, which buckles in summer heat and heaves in freeze-thaw zones. On flat ground, this is a solid DIY project. Spread the gravel 2–3 inches deep and rake it level. The failure I see most often: people put down too little gravel, the fabric shows through, and the yard looks unfinished within a year. Minimum depth is 2 inches; 3 inches is better on a front-facing surface. Pro Tip: Use ¾-inch crushed gravel near the path you walk most often. Pea gravel is round and rolls underfoot. Crushed angular gravel locks in place and handles foot traffic far better over time. Rock Garden with Drought-Tolerant Plants A layered rock garden with drought-tolerant plants costs $3.00–$8.00 per square foot depending on stone sourcing. The bigger expense is plant selection: native and drought-adapted species cost more up front but stop needing supplemental water within two growing seasons, while cheap nursery plants often need irrigation for years. Grade the ground before setting the stone. The biggest failure mode with rock gardens isn’t aesthetics. It’s water pooling near the foundation because nobody graded the bed away from the house. A 2% slope (roughly ¼ inch per foot) directed away from the house solves this. Any contractor can handle regrading; a homeowner with basic tools can too if the slope change is minor. Paver Pathway Yard Concrete pavers are the highest upfront cost in this list, but the lowest long-term cost per year. Installed at $8–$20 per square foot, a properly laid paver surface with a compacted gravel base and sand joint fill will outlast the house. A 4-inch compacted gravel base under pavers prevents settling in freeze-thaw zones. Skip the base and individual pavers tip and crack within three winters. Fill joints with polymeric sand, not regular sand. Regular sand washes out, letting weeds take root between pavers within a season. Polymeric sand sets firmly when wet and effectively locks out weed seeds. Mulch Beds with Defined Edging Mulch is the cheapest per square foot but requires the most ongoing investment of any material here. Budget $0.50–$2.00 per square foot installed, then expect to refresh 1–2 inches every 12–18 months. Organic bark mulch breaks down and feeds the soil, which is genuinely useful around plants, but it disappears faster than homeowners expect. The thing that makes or breaks a mulch yard is edging. Sharp metal edging separating mulch from the driveway and walkway is not optional if you want the yard to look clean for more than one season. Without it, mulch drifts, the edge blurs, and the whole design reads as neglected within a few months. For a low-maintenance front yard landscaping setup, mulch works best when paired with a defined plant structure, not spread across open ground. Desert-Inspired Xeriscaping Xeriscaping is drought-tolerant landscaping that minimizes or eliminates the need for supplemental irrigation. It’s the most climate-appropriate option for homeowners in USDA zones 8–11 and most of the Southwest. The EPA WaterSense program estimates that replacing a 1,000-square-foot lawn with xeriscaping can reduce outdoor water use by 50–70%, which translates to $200–$600 annually in warm climates where lawn irrigation runs spring through fall. The setup: compacted decomposed granite as the base surface, boulders and decorative rock for structure, and species like agave, salvia, ornamental grasses, or native shrubs for planting pockets. Installed cost ranges from $3.00 to $8.00 per square foot, depending on plant density. Avoid using the same xeriscape design in a Zone 5 or 6 yard. Most desert-adapted species won’t survive the first winter, and the gravel base will hold water without the drainage that warmer, sandier soils provide. For a broader look at how climate affects material choices across regions, the garden landscaping guide by region covers what actually works zone by zone. Succulent Front Yard Succulents work in the right climate and fail badly in the wrong one. In Zone 9 or warmer, a succulent bed over fast-draining sandy amended soil is genuinely low effort after establishment: water twice monthly in summer, less in winter, and the plants largely take care of themselves. Mix shapes deliberately: flat rosette types (Echeveria, Sempervivum), upright varieties (Aloe, Agave), and trailing ground cover types (Sedum, Delosperma) create the visual variation that keeps the front yard from looking flat. In Zone 7 or colder, limit succulents to containers you can move inside for winter. Ground-planted succulents at those latitudes freeze out, and replacing them each spring costs more than the design is worth. Artificial Turf Zones Artificial turf costs $5–$20 per square foot installed, depending on pile height, backing type, and infill material. The range is wide because quality varies enormously. Budget turf bought off Amazon at $2 per square foot looks fine on day one and starts looking matted, faded, and plastic-like by year three. Mid-grade turf from a reputable installer, with a UV-stabilized backing and silica sand or crumb rubber infill, realistically lasts 10–15 years. Heat is the issue nobody mentions when they’re browsing turf samples. Black-backed turf in direct sun can reach 150–180°F on a summer afternoon. For a front yard facing south or west in a warm climate, specify light-colored infill or heat-reflective backing. Using turf only in select zones along a walkway or near an entry keeps costs manageable while still reducing the lawn area that needs mowing. Pair it with gravel or pavers for the rest of the yard rather than going all-turf, which maximizes surface heat. Flower Bed-Focused Layout Structured flower beds replacing a full lawn are mid-range in both cost and maintenance. The budget is roughly $2–$5 per square foot for mulch and edging, plus plant costs that vary widely by species. Annual flowers need replanting every season, which adds cost and time. Perennial beds come back on their own once established and require only a spring cleanup and occasional division. Group plants by water needs, not just by color. Putting drought-adapted lavender next to thirsty impatiens means one of them is always wrong. Defined stone or metal edging between bed sections is what keeps a multi-species layout looking intentional rather than overgrown. Without it, root systems compete, and the defined planting zones blur within a growing season. Japanese-Inspired Minimal Yard The appeal of a Japanese-inspired minimal front yard is restraint: a small number of materials, placed deliberately, with clear negative space between them. Done well, this holds up for years with almost no intervention. Done poorly, it looks like a gravel lot with a few rocks thrown in. The elements that make this work: Decomposed granite or fine gravel raked to a consistent surface 2–3 large feature stones (not a dozen small ones) One structural plant such as a Japanese maple, ornamental pine, or compact boxwood as the focal point Maintain the raked surface monthly to keep the pattern defined. The design fails when homeowners add too many elements, trying to make it look “fuller.” It’s supposed to be spare. For a modern landscape design approach where fewer materials do more work, this is one of the strongest examples in a front-yard context. Gravel and Planter Combination A gravel base with large planters is the most flexible setup for renters, people who move frequently, or anyone not ready to commit to a permanent design. The gravel base costs $1.50–$3.50 per square foot installed; containers range from $30 for basic terracotta to several hundred dollars for powder-coated steel or large glazed ceramic. Every container needs drainage holes. A planter sitting on gravel without drainage will waterlog plant roots and rot them within one season. Use containers at least 12 inches deep for shrubs or ornamental grasses, and at least 8 inches for annuals and succulents. Large ceramic planters filled with saturated soil can weigh 80–100 pounds and damage a gravel surface if you need to move them. Lightweight fiberglass containers in large sizes are worth the price difference if repositioning matters. Creeping Thyme Ground Cover Creeping thyme is the most overlooked grass replacement in this list. At $2–$5 per square foot installed for plugs spaced 6–12 inches apart, it fills in within one growing season, handles moderate foot traffic, suppresses weeds once established, and requires no mowing. A once-yearly trim keeps it from going woody. It’s a perennial across Zones 4–9, which means it covers most of the US, including climates that would kill succulents over winter. It takes one full growing season to cover the ground, so your front yard will look like sparse plugs for the first summer. Use temporary mulch around the plugs to suppress weeds during establishment. After that first year, it spreads on its own, and maintenance drops to close to zero. It’s the most honest answer to “cheap no grass front yard” in a temperate climate, with a lower annual cost than gravel once refresh cycles are factored in. Mixed Texture Landscape Design A mixed-texture approach combines gravel in the open areas, mulch around plantings, pavers for pathways, and rock accents at borders. It’s how most well-executed no-grass yards are actually built because no single material does everything well. Gravel provides drainage and low-maintenance, low-cost options. Mulch feeds the soil around plants. Pavers provide durable walking surfaces. Rock adds visual weight where structure is needed. Every material needs a clear zone. Gravel paths, mulch beds, and paver areas need defined edging between them, or the boundaries blur within one rainy season, and the yard looks like it wasn’t planned. Sketch the layout before ordering anything, because the edging requirements between zones are what drive installation cost up when homeowners skip this step. Vertical Garden Front Yard Wall-mounted or fence-mounted planters take the planting off the ground entirely, which works well for yards with very small footprints, poor soil, or privacy fencing that needs softening. Installed systems run $20–$50 per linear foot for modular wall planters; a basic DIY trellis with hanging pots costs significantly less. The maintenance reality of vertical plantings: watering frequency increases because containers dry out faster than in-ground plantings, and root zones are smaller. A drip irrigation line running along the mounting rail, with emitters at each planter, is the only way to manage a vertical setup at scale without constant hand-watering. That adds $200–$600 to the project cost but makes the system actually sustainable. Without irrigation, most vertical gardens look good for a few weeks and then suffer from inconsistent watering. What Fails Two Winters Later Most no-grass front yards that look bad after a few years have one of four problems. None of them are design failures. They’re installation shortcuts that show up on a delay. Gravel without edging Round gravel migrates onto the driveway, lawn, and sidewalk within one season without steel or aluminum restraint edging. Reinstalling edging after gravel is spread costs significantly more than doing it right the first time. The edging needs to be set 2–3 inches into the ground and pinned with landscape stakes every 18–24 inches. Mulch without fabric Skip the weed barrier under mulch, and you’ll be pulling weeds through it every few weeks. Use commercial-grade non-woven landscape fabric, not the thin woven kind sold in home improvement stores. The woven type lets fine soil wash through over time and eventually provides a seed bed for weeds right on top of the barrier. Paver base on inadequate gravel Concrete pavers set on a 1-inch sand base over native soil will start heaving and tipping within two to three winters in freeze-thaw climates. The correct base is 4–6 inches of compacted gravel, then 1 inch of bedding sand, then pavers. Shortcuts here are expensive to correct after the fact: fixing it requires pulling up all the pavers and rebuilding the base. Wrong plants for the climate A front yard designed around succulent species planted in Zone 6 will lose most of its plants in the first hard freeze. Verify hardiness zone compatibility before buying plants, not after. The USDA Plant Hardiness Zone Map is the reference for this, and it’s free online. A front yard that loses its primary plant material in year one is not a cheap option, regardless of what the plants cost at the nursery. Cost Breakdown and Installation Guide Cost Note: Figures in this article are estimates based on national averages. Actual costs vary significantly by region, contractor, materials, and project scope. Always get at least three quotes before committing to any project above $1,000. A 600 square foot front yard conversion typically falls into one of three cost tiers. Understanding which tier fits your yard and budget before you start prevents the most common planning mistake: choosing a design that looks right but costs twice what you expected. Line Item Low End High End What Drives the Variation Sod/grass removal $0 (DIY) $600–$1,200 Sod depth, root systems, disposal cost Grading/leveling $200 $800–$2,000 Slope correction, drainage rerouting Landscape fabric $50–$100 $200–$400 Coverage area and fabric grade Edging (steel/aluminum) $100 $400–$800 Linear footage and material type Primary surface material (gravel, mulch, pavers) $300–$900 $4,800–$12,000 Material choice; pea gravel is cheapest, pavers most expensive Plants $50–$300 $800–$3,000+ Species, maturity size, quantity Labor (if contracted) $0 (full DIY) $800–$3,500 Project scope and regional labor rates The DIY ceiling on this work is real but limited. Spreading gravel, laying landscape fabric, setting stepping stones, and planting are all well within a capable homeowner’s range with no specialized skills or equipment needed. The two situations that require a licensed contractor: any irrigation work connected to the main water line (backflow prevention requirements vary by jurisdiction), and retaining walls or regrading projects that affect drainage toward a neighboring property. For design principles that connect the front yard to the rest of the property’s outdoor system, the deck skirting and foundation guide cover how exterior transitions affect the overall look at ground level. HOA and Permit Considerations Before converting a front yard from grass, check two things: your HOA covenants and your local municipality’s front-yard ordinances. Both can restrict material type, plant height, coverage percentage of hardscape versus landscaping, and whether gravel or artificial turf is permitted in the front yard at all. HOA restrictions vary widely. Some prohibit decomposed granite because it can drift onto sidewalks; others require a minimum percentage of “live vegetation” in front yard landscaping. Most municipalities don’t require permits for surface material changes unless they involve grading, retaining walls over a set height (often 18–24 inches), or connections to irrigation infrastructure. Call your local building department before starting any grading or drainage-redirect work; the call takes five minutes and can save a costly correction order. Frequently Asked Questions These are the questions I hear most often once someone has decided to replace the lawn but isn’t sure which direction to go. What is the cheapest way to replace a front yard lawn? Pea gravel over landscape fabric is the lowest installed cost at $1.50–$3.50 per square foot, followed by bark mulch at $0.50–$2.00. Both require steel edging to hold properly. Creeping thyme ground cover is cheaper long-term than gravel once annual refresh costs are factored in, but it requires one full growing season to establish. How do I keep weeds out of a no-grass front yard? Commercial-grade non-woven landscape fabric under any loose surface material (gravel, mulch, decomposed granite) is the primary weed barrier. Top it with a minimum of 2–3 inches of material. Treat any gaps in edging or at plant bases with a pre-emergent herbicide in early spring. Avoid woven landscape fabric: it breaks down faster and provides a seed bed once soil filters through it. Does a no-grass front yard add or reduce home value? Professionally installed hardscape and drought-tolerant landscaping generally hold or improve curb appeal and resale value, particularly in drought-prone markets. Poorly maintained gravel, faded artificial turf, or patchy mixed installations can reduce curb appeal. The NAR landscape impact report estimates that quality front yard landscaping adds 5–11% to perceived home value. What looks good as a grass alternative that isn’t gravel or concrete? Creeping thyme fills like a lawn, handles light foot traffic, and requires no mowing. It’s suitable for Zones 4–9. Low-growing buffalo grass or native ground covers work in warm, dry climates. Clover lawns are legal in most areas and require minimal care. Each of these is a living surface that performs similarly to turf but at far lower maintenance cost once established. How long does it take to install a no-grass front yard? A single-material gravel or mulch install on a 600 square foot yard takes one to two weekends for a capable DIYer, once grass removal is complete. Paver installations take longer: two to three weekends for the same area including base preparation. Hiring a landscape contractor typically reduces that to one to two days of crew time. Do I need to remove the grass before installing gravel or mulch? Yes. Laying gravel or mulch directly over living grass will result in the grass growing through the material within one to two seasons. Either sod-cut and remove the turf (rent a sod cutter for $60–$100 per day), apply a non-selective herbicide and wait two weeks before installing, or use sheet mulching (cardboard over the grass, covered with 4–6 inches of wood chips) for a slower, no-herbicide method. Is artificial turf a good, cheap option for a front yard? Budget artificial turf ($2–$4 per sq ft materials only) is not a good long-term value. It fades within 3–5 years and sheds microplastics. Mid-grade turf from a reputable installer ($8–$12 per sq ft installed) lasts 10–15 years with proper maintenance and is a reasonable trade-off against lawn upkeep costs. Avoid any turf without UV stabilization: it’s the single biggest quality differentiator. Summing Up The most durable cheap no grass front yard ideas are the ones that treat material performance as the first decision, not appearance. Pea gravel and landscape fabric hold for years if the edging is right. Pavers last a generation if the base is built correctly. Creeping thyme outperforms every other option on long-term cost in a temperate climate once it’s established. The failure modes, migrating gravel, weed-infested mulch, heaving pavers, almost always trace back to a skipped installation step, not the material itself. Before you order anything, check your climate zone, verify what your HOA permits, and decide whether the surface change requires any regrading. If the yard needs regrading toward the street or away from the foundation, get that done first. It’s the one step that’s nearly impossible to fix after the surface material is in place.
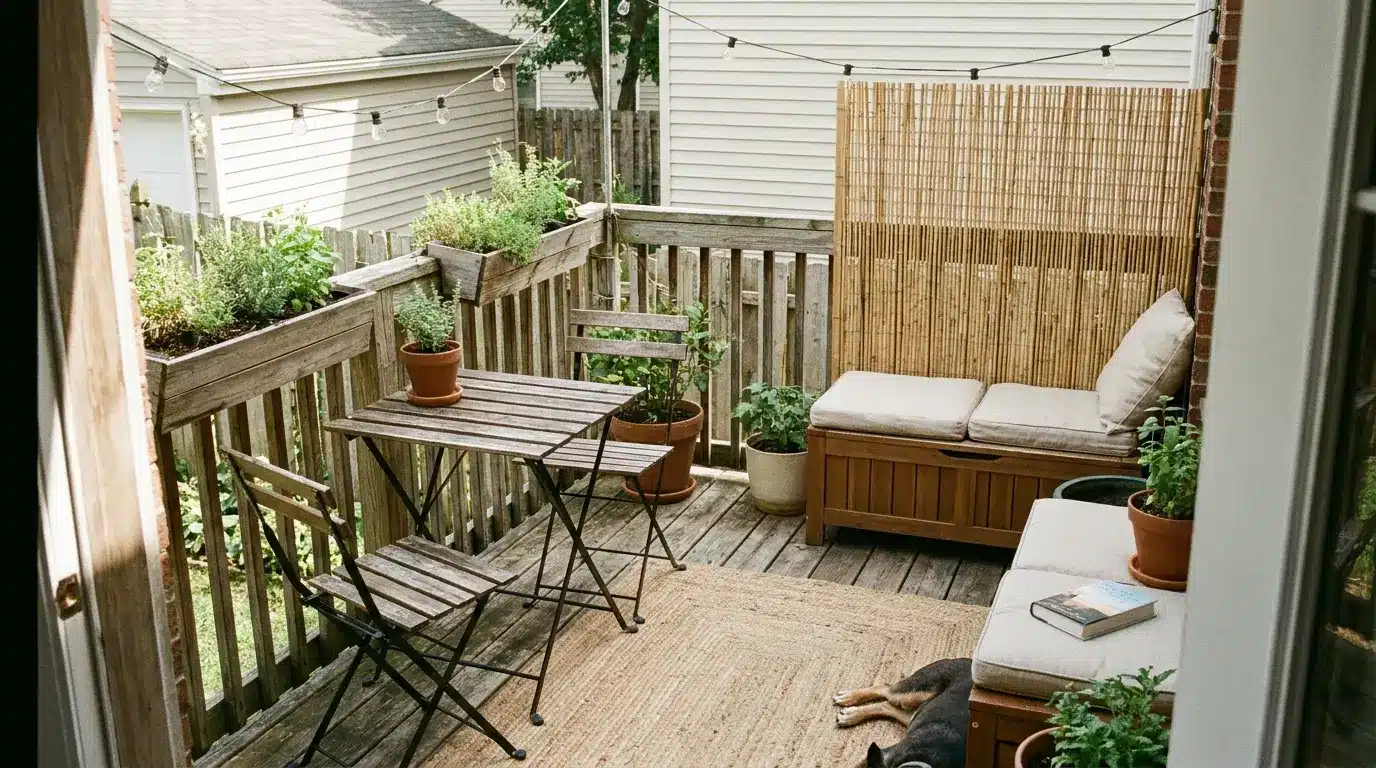
A small deck can feel tricky when every chair, pot, and table seems to take up too much room. If you are searching for small deck ideas on a budget, the real goal is simple: make the space useful, comfortable, and good-looking without buying more than needed. I like starting with one clear purpose, then choosing pieces that earn their spot. A tiny deck can hold a coffee corner, a compact seat, a bit of privacy, soft lighting, or a few plants when everything has a reason to be there. The ideas ahead focus on low-cost setups that look planned, save space, and still feel easy to live with. The best part is how small changes can shift the whole deck. Why Small Decks Are Actually an Advantage Small decks can be easier to work with than large outdoor spaces because every update feels more focused. You do not need dozens of furniture pieces, large rugs, or expensive decor to make the area feel complete. A smaller footprint also means lower material costs, faster cleaning, and less upkeep throughout the year. Even simple DIY projects, like adding railing planters, staining the floor, or building a small bench, take less time and use fewer supplies. The size also creates a warm, close setting for morning coffee, reading, or quiet evenings outside. Instead of trying to fill a large empty area, you can shape a single useful corner that feels personal and comfortable. With smart choices, a small deck can look finished without feeling crowded or costly. Planning Your Small Deck on a Budget Before spending on furniture or décor, plan the deck as if it were a small room. A clear plan helps avoid wrong sizes, wasted money, and cluttered corners. Planning Step What to Do Why It Matters Measure the deck first Measure the full space and mark doors, stairs, railings, and walking paths. It helps you choose furniture that fits without blocking movement. Set a clear budget Split the budget into furniture, décor, lighting, plants, and small repairs. It keeps spending focused on seating, shade, and safety first. Choose one style Pick a simple look like boho, modern, rustic, or minimalist before shopping. It stops colors, furniture, and décor from feeling mixed or random. Plan the layout for free Use graph paper, a notes app, or a free room planner to test placement. It helps you avoid buying pieces that crowd the deck. Note: Keep the first version of the deck simple. Buy only the essentials first, then add décor slowly after using the space for a few days. This helps you understand what the deck actually needs. A little planning makes every purchase more useful. Once the size, budget, style, and layout are clear, the deck becomes easier to decorate well. Small Deck Ideas on a Budget That Feel Easy to Try A small deck can feel useful and inviting without a full renovation. These small deck ideas on a budget focus on floors, seating, lighting, privacy, and plants. 1. Interlocking Deck Tiles Interlocking deck tiles are one of the easiest ways to refresh an old deck floor without tools or permanent changes. They snap together over flat wood, concrete, or balcony surfaces, so renters can use them safely. Choose wood-look tiles for warmth or composite tiles for easier cleaning. Measure first, then buy a few extra pieces for corners, edges, and future replacements. Budget: $2-$4 per tile. Costs remain flexible because you buy tiles only for the exact deck area. Best for: Perfect for renters because the tiles lift easily without damaging the surface. Time required: A small deck can usually be covered within a relaxed afternoon. 2. Outdoor Area Rug An outdoor area rug gives a small deck structure without changing the floor itself. It covers stains, faded boards, or plain concrete while making the seating area feel like a real room. Choose polypropylene because it dries fast and handles outdoor moisture better. Pick a size that sits under the front legs of chairs so the layout feels connected and neat. Budget: Most good outdoor rugs cost $25 to $60 for small deck spaces. Best for: Hiding worn floors and instantly creating a finished deck look. Time required: Takes about 5 minutes to unroll, place, and adjust properly. 3. Stenciled Porch Paint Stenciled porch paint turns a plain deck floor into a patterned feature without paying for tile. Clean the surface first, then use porch paint and a reusable stencil to build the design slowly. Geometric and Moroccan patterns work well because small mistakes blend into the repeat. Add a clear outdoor top coat so the design holds up under shoes, rain, and sun. Budget: Paint and stencil supplies usually cost around $15 to $25 total. Best for: Old wood or concrete floors needing color, pattern, and personality. Time required: Set aside one weekend for painting, drying, and sealing. 4. Free Pallet Wood Planks Pallet wood planks can give a small deck a rustic floor for very little money, but the wood must be chosen carefully. Use only clean, heat-treated pallets, then sand every board until smooth. Seal the planks before placing them outside. This takes more effort than a rug or tiles, but it adds texture, warmth, and a handmade feel. Budget: Pallets are often free, with $10 needed for basic outdoor sealant. Best for: Rustic, farmhouse, and handmade deck styles with natural texture. Time required: Expect one weekend for sanding, sealing, drying, and placing planks. 5. Peel and Stick Outdoor Tiles Peel-and-stick outdoor tiles are useful when a small concrete deck or patio needs a cleaner finish fast. They come in stone, wood, and simple patterned looks, so the floor feels updated without grout or heavy tools. The surface must be dry, smooth, and clean before application. Press each tile firmly and keep extra pieces for later repairs. Start from one corner so every tile line stays straight. Budget: A small deck area usually costs $25- $35 in tile. Best for: Smooth concrete decks needing a fast, modern, tool-free floor refresh. Time required: Takes 1 to 2 hours on a clean, dry surface. 6. Bistro Set A bistro set gives a small deck an instant purpose without taking over the floor. Two chairs and one compact table are enough for coffee, snacks, reading, or a casual meal outside. Nothing more is needed to make the space feel used and complete. Choose armless chairs and a round table if the layout feels tight, because they are easier to move around and do not catch on each other. For a full comparison of how different outdoor furniture materials hold up season to season, that breakdown covers the key trade-offs before you buy. Budget: A compact outdoor bistro set usually costs around $50 to $80. Best for: Morning coffee, casual meals, and decks with very limited space. Time required: Assembly usually takes 15 to 30 minutes with basic tools. 7. DIY Pallet Sofa A DIY pallet sofa adds lounge seating without the cost of a full outdoor couch. Use clean, heat-treated pallets, sand all edges, and seal or paint the wood thoroughly before adding cushions. Keep the sofa low and place it against a railing or wall so the center stays open and passable. A single long cushion looks neater than several loose pieces on a small deck. If you want a larger or more configurable build, a DIY outdoor sectional uses the same pallet logic at a bigger scale. Budget: Expect $20 to $30 if pallets are free and cushions are reused. Best for: Casual, boho, and rustic decks needing low-cost lounge seating. Time required: Plan 3 to 4 hours for sanding, painting, and setup. 8. Foldable Chairs and Table Foldable chairs and a table are perfect for a deck that changes use through the day. Bring them out for meals, guests, or reading, then fold them flat when the deck needs more room. Lightweight metal, plastic, or bamboo sets are easy to move. It gives control without removing everyday open space outside. Budget: A full folding set usually costs around $40 to $70 online. Best for: Flexible decks that sometimes need seating and later need open space. Time required: Takes under 10 minutes to set up or fold away. 9. Storage Ottoman A storage ottoman helps a small deck stay tidy while adding another useful seat. Use it for cushions, candles, small tools, throws, or garden supplies that usually create clutter. Choose a weather-resistant piece with a tight lid, so stored items stay dry between uses. It is one compact piece that solves several small problems well. Budget: Weather-resistant outdoor storage ottomans usually cost $35 to $65. Best for: Small decks that need seating, storage, and a footrest all in one. Time required: Ready to use immediately, with no real setup needed. 10. Thrifted Furniture with Fresh Spray Paint Thrifted furniture can look fresh and planned with one simple paint color. Search for small outdoor chairs, metal tables, stools, or benches that feel sturdy and fit the deck measurements. Clean each piece well, sand rough spots, then use outdoor spray paint. Keeping every item in the same color family makes mixed finds look like a matching set. Budget: Thrifted pieces and spray paint can cost $10 to $30 total. Best for: Low-cost makeovers where mismatched furniture needs a clean, cohesive look. Time required: 2 to 3 hours, including cleaning and drying. 11. Built-In Bench Along the Railing A built-in bench along the railing saves floor space by using the deck edge for seating. It works well on narrow decks where loose chairs block movement. Keep the bench simple, sturdy, and sealed for outdoor weather. Add one cushion or a few pillows for comfort. If possible, include storage below for small items that need to be hidden. It turns empty edge space into seating that feels truly planned. Budget: Basic lumber and brackets usually cost around $35 to $50. Best for: Narrow decks needing permanent seating without blocking floor space. Time required: A beginner build usually takes 4 to 5 focused hours. 12. Solar String Light Canopy A solar string light canopy makes a small deck feel warm after sunset without wiring or higher electricity bills. Hang the lights from cup hooks, a fence, a pergola, or nearby posts. Warm white bulbs usually feel softer than bright white bulbs. Keep the lines slightly loose, not sagging, and secure them well so wind does not pull them down. It creates an evening mood without adding any floor clutter. Budget: Solar string light sets usually cost $12 to $20 online. Best for: Evening seating areas needing soft light without electrical work. Time required: Installation usually takes 45 to 60 minutes with hooks. 13. Solar Stake Lanterns Along Steps Solar stake lanterns are a simple way to light steps, edges, and nearby planters without cords. They charge during the day and turn on by themselves at night. Place them where people walk first, then add extra lanterns for looks. Warm tones feel cozy, while cooler tones can suit a cleaner modern deck style with simple furniture. Budget: Each solar stake lantern usually costs around $5 to $15. Best for: Deck steps, edges, and paths that need safer night visibility. Time required: Takes under 10 minutes to place and adjust each light. 14. Mason Jar Candle Lanterns Mason jar candle lanterns add a soft glow with supplies that cost very little. Pour sand into the bottom of each jar, place a tea light inside, and set them along railings or tables. Battery candles are safer near curtains, plants, and wood. Tie wire around the rim if the jars need to hang from hooks. Budget: Jars, sand, and candles can cost less than $5 total. Best for: Rustic, farmhouse, and boho decks needing a warm glow. Time required: A full set usually takes about 15 minutes to assemble. 15. LED Fairy Lights in Glass Globes LED fairy lights inside glass globes create gentle accent lighting without taking much space. Battery strands are easy to move, and the glass spreads the light softly around the deck. Hang globes at different heights or place them on shelves for depth. Budget: Each glass globe setup usually costs around $8 to $15. Best for: Modern, boho, and mixed-style decks needing soft accent lighting. Time required: Hanging a small display usually takes 20 to 30 minutes. Layering a few small lights creates a better mood than one bright fixture. Keep lights safe, outdoor-rated, and positioned to support real use. 16. Bamboo Reed Privacy Screen A bamboo reed privacy screen can cover exposed railings quickly without building a full wall. Attach it with zip ties or outdoor wire along the railing posts, then trim the edges neatly for a finished look. The natural texture adds warmth while blocking direct views from neighbors or nearby paths. For other approaches to outdoor privacy, DIY fence and screen ideas cover permanent and semi-permanent options at different skill levels. Budget: Each bamboo privacy panel usually costs around $20 to $40. Best for: Fast privacy when railings or open sides feel too exposed. Time required: Installation usually takes under 1 hour with simple zip ties. 17. Tall Potted Plants as a Living Wall Tall potted plants create privacy while making the deck feel greener and softer. Use ornamental grass, compact bamboo, or leafy plants in sturdy containers along the most open side. Place plants in a staggered row for fuller coverage and leave enough space for watering and walking. This gives privacy, color, and movement without adding a fixed screen at all. Budget: A small row of tall plants usually costs $30 to $60. Best for: Decks needing privacy, softness, greenery, and movable screening. Time required: Positioning and arranging plants usually takes 30 to 45 minutes. 18. Hanging Outdoor Curtains Hanging outdoor curtains brings privacy, shade, and softness to a small deck in one move. Hang them from a rod, curtain wire, pergola beam, or posts set in heavy planters. Choose outdoor fabric or drop cloths that can handle sun and moisture. Tie them back during the day so the deck still feels open. Budget: Curtains and hanging supplies usually cost around $20 to $35. Best for: Soft, adjustable privacy that also adds shade and movement. Time required: Setup usually takes 30 to 45 minutes, including rod placement. 19. DIY Lattice Panel with Climbing Plants A DIY lattice panel gives privacy without making the deck feel boxed in. Place it on the side with the clearest view from neighbors, then paint it to match the railing or trim. Add climbing plants at the base if there is enough sun. Over time, the mix of wood and greenery feels natural and soft. Budget: A basic lattice panel usually costs around $25 to $40. Best for: Garden-style decks needing privacy without blocking all natural light. Time required: Installation takes 2 to 3 hours, while plants fill slowly. 20. Vertical Crate Wall Shelving Vertical crate wall shelving adds display space without using the deck floor. Mount wooden crates on a wall or fence, then use them for small plants, lanterns, candles, or garden items. Sand and paint the crates in one color so they feel connected. Grouping three crates usually looks balanced on a small deck wall without feeling crowded. This keeps decor vertical, organized, and easy to change every season with ease. Budget: Old crates are often free, with $15 needed for paint. Best for: Rustic or industrial decks needing vertical storage and display space. Time required: Mounting and painting usually take about 1 to 2 hours. 21. Dollar Store Painted Planters Dollar store planters can look much more expensive with a simple paint plan. Choose two or three colors that match the rug, pillows, or furniture. Paint the pots, seal them, then group them in odd numbers for a more natural display. Use different heights by placing smaller pots on stands, crates, or upside-down pots. Budget: A full small planter set usually costs around $5 to $10. Best for: Adding cheap color, plant groupings, and easy seasonal changes. Time required: Painting and drying usually take about 1 hour total. 22. Macrame Wall Hanging A macrame wall hanging adds texture to a bare deck wall without taking up floor space. It works especially well on covered decks where rain will not hit it directly. Choose one larger piece instead of several small ones so the wall feels calm. Natural cotton, cream tones, and simple knots pair well with plants and wood. Budget: A simple macrame piece costs $15 to $25, or free DIY. Best for: Boho, coastal, and relaxed decks needing soft wall texture. Time required: Hanging takes 10 minutes, while DIY versions take longer. 23. Repurposed Ladder Plant Stand A repurposed ladder plant stand turns vertical space into a useful display. Lean a wooden ladder safely against a wall, then place small pots across the steps or hang them with hooks. Sand and seal the ladder before outdoor use. It is practical, decorative, and easy to move when plans change later. Budget: Use a free old ladder, or thrift one for under $20. Best for: Small decks that need plant height without sacrificing much floor space. Time required: Sanding, sealing, and positioning usually takes about 30 minutes. 24. Outdoor Throw Pillow Covers Outdoor throw pillows can change plain seating without replacing the furniture. Choose weather-resistant covers and washable inserts so they can handle regular use. Mix one solid color with one simple pattern to keep the deck from looking busy. Store pillows inside during heavy rain or use a storage ottoman to keep them clean and extend their lifespan. Budget: A full set of covers usually costs around $15 to $30. Best for: Refreshing plain seating with color, pattern, and added comfort. Time required: Swapping pillow covers takes about 5 minutes once purchased. 25. Railing Herb Garden A railing herb garden adds fresh greenery to a small deck without using floor space. Clip-on planters can hold basil, mint, rosemary, parsley, or small flowers if the railing gets enough light. Keep the herbs close to the door if they are used for cooking. Water regularly, but avoid filling each planter too tightly. Budget: Planters, soil, and herbs usually cost around $15 to $25. Best for: Small decks used for cooking, hosting, or fresh greenery. Time required: Setup usually takes 30 to 45 minutes from start to finish. 26. Vertical Shoe Organizer Herb Wall A vertical shoe organizer can become a budget herb wall when floor space is limited. Hang it on a sunny wall or railing, then fill each pocket with soil and a small plant. Choose lightweight herbs so the organizer does not sag. Water slowly to prevent overflow, and place a tray below if needed. Budget: A basic hanging shoe organizer usually costs around $8 to $12. Best for: Empty deck walls that need plants without shelves or stands. Time required: Hanging and filling the organizer takes under 10 minutes. 27. Propagated Plants in Repurposed Glass Jars Propagated plants in glass jars are nearly free and easy to display on a small deck. Take cuttings from plants like pothos, spider plant, or tradescantia, then root them in water. Line the jars on a shelf, crate, or railing where they get gentle light. Once roots grow, move some into soil or keep them in water. Budget: This idea can be completely free using cuttings and saved jars. Best for: Minimalist, boho, and zero-waste decks needing gentle greenery. Time required: Roots usually appear after 2 to 3 weeks in water. Start with the area that bothers you most, then add one affordable update at a time. Small changes can make the deck feel planned, comfortable, and personal. Common Mistakes to Avoid When Decorating a Small Deck Small deck decorating works best when every choice has a purpose. Avoiding these mistakes helps the space feel open, durable, and worth the money Mistake Why It Hurts the Deck Better Choice Too much furniture Blocks movement and makes the deck feel cramped. Use one main seating setup with foldable extras. No weatherproofing Materials fade, swell, rust, or wear out faster. Pick outdoor-rated fabric, paint, lights, and sealant. Poor-quality outdoor buys Cheap pieces may cost more when replaced often. Save on decor, but choose sturdy seating and shade. Skipping a rug The floor feels bare, worn, or visually disconnected. Add one outdoor rug to define the main zone. Ignoring vertical space The floor gets crowded with plants and storage. Use rail planters, hooks, shelves, and hanging baskets. Small mistakes can make a budget deck feel messy or short-lived. Choose fewer, stronger pieces and use walls, railings, and corners wisely. Small Deck Maintenance Tips and Hacks A small deck stays nicer for longer when maintenance feels easy. These simple habits prevent damage, reduce clutter, and save money on bigger repairs later. Clean the deck weekly: Sweep leaves, dust, and dirt before they trap moisture. Wash the surface with mild soap, warm water, and a soft brush when it starts looking dull or slippery. Check boards, screws, and railings: Look for raised screws, loose nails, soft boards, or shaky railings every few weeks. Quick fixes help prevent trips, damage, and bigger repair costs. Move planters and empty saucers: Shift heavy pots now and then so they do not leave stains or water rings. Empty plant saucers after watering to avoid standing water. Protect cushions, rugs, and fabrics: Store pillows during heavy rain and lift outdoor rugs sometimes to clean underneath. This helps prevent mildew, trapped dirt, and damp smells. Seal and protect wood surfaces: If water stops beading on a wood deck, it may need resealing. A fresh coat helps protect the surface from sun, rain, and daily wear. Trim plants around the deck: Cut back branches, vines, or bushes touching the deck. Better airflow helps reduce moisture, bugs, stains, and plant debris. Do seasonal safety checks: Before summer and winter, inspect stairs, railings, lighting, furniture, rugs, and deck boards. Repair weak spots before the season starts. Deck maintenance does not have to take much time. A few small checks each week can keep the space safer, cleaner, and easier to enjoy. Frequently Asked Questions How can I make a small deck pet-friendly on a budget? Choose washable cushions, non-toxic plants, and a low storage box for leashes or toys. Avoid sharp metal decor, loose cords, and small stones that can be chewed or swallowed. Add shade and a water bowl so pets can rest comfortably outside. Can I decorate a shared deck without disturbing neighbors? Keep shared deck updates quiet, removable, and easy to clean. Use compact furniture, contained plants, and battery lights instead of permanent fixtures. Avoid blocking walkways or shared railings. A neat, contained setup shows consideration while still making your corner feel personal. How often should I change small deck decor? Change small decor only when the season or daily use demands it. Swap pillow covers, plants, or table accents first. Keep larger pieces steady so the deck does not become wasteful, expensive, or visually messy chasing new trends. What if my small deck has no railing? Use furniture placement to create soft visual edges when there is no railing. Keep seating away from drop-offs, use low planters as boundaries, and leave clear walking space. For raised decks, check local safety codes before decorating or adding any furniture near edges. Can a small deck work for kids without feeling cluttered? Give children one small activity zone instead of spreading toys across the deck. Use a lidded bin, washable mat, and soft seating that adults can reuse. Rotate outdoor toys weekly so the space stays open and easy to reset between uses. How do I make a small deck look bigger without spending much? Keep furniture low and against the edges. Use one outdoor rug sized just under the main seating arrangement. Choose light, consistent colors for furniture and decor. Vertical plants and wall-mounted storage keep the floor open. Mirrors rated for outdoor use also reflect light and add perceived depth. Is it worth building a deck versus using a patio? It depends on the ground level, access, and how you plan to use the space. For a direct comparison of structure, cost, and use cases, the balcony vs deck breakdown covers which outdoor structure suits different home types. Final Thoughts Small decks can become some of the most useful outdoor spaces when every choice has a purpose. I like starting with the basics: measure the space, set a clear budget, choose one style, and keep furniture practical. Then you can layer in flooring updates, storage, lighting, privacy, plants, and simple decor without crowding the area. These small deck ideas on a budget help you spend less while making the space easier to use every day. You get more comfort, better flow, and a cleaner look without a full rebuild. Try one idea first, see how your deck feels, and share your favorite update in the comments, or read more outdoor decor blogs next.