


Painted stairs can completely change how a staircase feels inside a home, and they do it without the cost of a full replacement. A fresh coat of paint covers scratches, uneven wood tones, and the kind of wear that stain would only draw attention to. It also opens up a color range that stained wood simply cannot reach, from soft warm whites to deep charcoal and everything in between. Painted stairs are not a shortcut. They demand proper surface prep, the right primer, and a paint product built for foot traffic. Skip any of those steps and the finish will chip, scuff, or peel within months instead of lasting years. This blog covers how to paint stairs correctly, which colors work best for different home styles, and how to keep the finish looking good long after the project is done. Are Painted Stairs a Good Idea? Paint hides dents, old stains, and uneven wood grain better than any other finish. It also opens up a full range of colors, from crisp white to deep charcoal. Stained wood cannot match that range. Softer woods like pine and poplar take paint especially well. These woods are common in older staircases. Paint covers the flaws that stains would only highlight. Here is a quick side-by-side to help you decide: Factor Painted Stairs Stained Stairs Color options Unlimited, any shade Limited to wood tones Hides imperfections Yes, very well No, highlights flaws Durability on treads Chips and scuffs faster Wears more evenly Best for Softer woods, budget updates Hardwoods with good grain Maintenance Touch-ups every 1-3 years Occasional resealing Upfront cost Higher, needs primer and coats Lower, fewer materials 15 Painted Stairs Ideas for Every Home Style This finish works with nearly every design style. Farmhouse, modern, minimalist- it fits them all. The right color and pattern depend on your home’s palette and ceiling height. It also depends on how much contrast you want between treads and risers. Below are six popular directions homeowners take, each suited to a different look and budget. 1. Classic White Painted Stairs White remains the most requested option for good reason. It reflects light and makes a narrow stairwell feel larger. White also pairs with almost any wall color. A soft white with a bit of warmth tends to feel more inviting than a stark, cool white. The tradeoff is that the scuffs show more easily. A durable, washable sheen matters here more than in most other rooms. 2. Black Painted Stairs for a Modern Look Black creates drama and works well in contemporary or industrial-style homes. It also hides scuffs and dirt better than white. That makes it a practical pick for busy households. Pairing black treads with white risers, or the reverse, adds contrast. It does this without overwhelming a small space. 3. Two-Tone Painted Staircases This look pairs one color on the risers and another on the treads. Some homeowners paint the stringer and leave the treads as natural wood. This approach adds color without committing to one bold shade. It also works well when you want to tie the staircase to a nearby room’s color scheme. 4. Painted Stair Risers with Pattern or Design Patterned risers turn a staircase into a focal point. Homeowners use stencils, wallpaper, or hand-painted designs on each riser. The pattern often varies from step to step. This works well in hallways or basements where the stairs are the main visual feature. Keep the treads in a solid, durable color. That way, the pattern will not compete with foot traffic wear. 5. Neutral Painted Stairs Gray, greige, and soft taupe offer a middle ground. They sit between stark white and bold color. Neutrals hide everyday wear better than white. They still keep the space feeling calm and put together. This is a popular pick for homeowners who plan to change decor over time. 6. Bold and Colorful Painted Stairs Some of us want our staircase to make a statement. Navy, emerald, and even a bright yellow bring real personality to the space. This approach works best when surrounding walls stay neutral and best to paint the stairs. That way, the staircase becomes the clear focal point. It won’t compete with busy wallpaper or artwork nearby. 7. Ombre Painted Stairs An ombre staircase shifts gradually from a dark shade at the bottom to a lighter tint near the top. Some homeowners mix white into the same base color for each step. Others go the opposite way, moving from light to dark as the stairs rise. This effect works well in entryways and adds real visual movement without using more than one color family. Keep the transition subtle, since jumps that are too dramatic between steps can look uneven instead of intentional. 8. Painted Faux Runner Stairs A faux runner mimics a fabric stair runner using paint alone. Painters tape off a center strip on each tread and riser, then fill it with a contrasting color. The outer edges stay in a solid neutral to frame the look. This approach offers the charm of a traditional runner without the need to clean or replace fabric. A satin or semi-gloss finish on the runner section keeps it easy to wipe down. 9. Striped Painted Risers Striped risers bring a graphic, structured look to a staircase. Horizontal stripes tend to make a narrow staircase feel wider. Vertical or diagonal stripes draw the eye upward instead. Homeowners often use two contrasting shades, such as gray and white or navy and cream, for a clean finish. Careful taping matters most here, since crisp lines make the difference between a polished look and a messy one. 10. Chalkboard Painted Stairs Chalkboard paint turns stair risers into a spot for notes, doodles, or seasonal messages. It works well in family homes because kids can draw without leaving permanent marks. The dark, matte finish also gives the staircase a simple, modern edge on its own. This style suits basements, playrooms, and other casual spaces more than formal entryways. Wipe risers clean with a soft cloth before adding a fresh chalk design. 11. Geometric Stencil Painted Stairs Geometric stencils bring a modern, graphic pattern to plain risers. Triangles, hexagons, and diamond shapes are common choices for this look. A single accent color against a neutral base keeps the pattern from feeling too busy. This style works especially well in contemporary or minimalist homes with clean, simple decor elsewhere. Stencils also let you repeat a pattern from a rug or backsplash for a more pulled-together space. 12. Painted Stairs That Match the Walls Painting a staircase the same color as the surrounding hallway creates a calm, continuous look. This approach works well in smaller homes because it eliminates visual breaks between the stairs and the walls. It also makes a narrow hallway feel larger and more open. This style suits homeowners who want their staircase to blend in rather than stand out. A slightly higher sheen on the stairs than on the walls still gives the treads enough durability for daily wear. 13. Dark Treads with Light Risers This is a practical twist on the standard two-tone staircase. Painting the treads dark while keeping the risers pale puts the contrast where it works hardest. Black, charcoal, deep brown, and navy hide everyday scuffs better on a walking surface than lighter shades do. The pale risers keep the staircase from feeling too heavy overall. This split shows up often in real staircase projects because it suits traditional and modern homes alike. Use floor-rated paint on the treads, and add an anti-slip additive for better grip. 14. Alternating Color Painted Risers Unlike an ombre staircase, which shifts gradually, this treatment repeats two fixed colors riser by riser. Muted green and cream, or dusty blue and soft gray, can alternate from the bottom step to the top. The look adds color without stencil work or complicated patterns. Keeping the treads in one neutral shade stops the staircase from feeling too busy. Benjamin Moore features this exact alternating-riser technique in its own painted stair gallery, which makes it a tested look rather than a purely decorative idea. 15. One-Color Statement Stairs Paint the treads, risers, stringers, and often the balusters in one solid color, while the surrounding walls stay a contrasting shade. Deep green, charcoal, navy, or terracotta can turn the whole staircase into one architectural feature. Unlike stairs painted to match the walls, this treatment intentionally sets the staircase apart. It also cuts maintenance, since there are no pattern lines or color transitions to touch up. How to Paint Stairs for a Long-Lasting Finish Step 1: Prepare the Surface: Remove dirt and grease with a mild cleaner. Sand any existing finish so the new paint has something to grip. Repair cracks, dents, or damaged wood before you pick up a brush. Step 2: Prime the Stairs: Primer seals the wood and provides a surface for paint to bond to. This one step reduces peeling and chipping more than almost anything else you can do. Step 3: Apply Stair Paint: Use quality brushes and rollers suited to the paint you choose. Apply thin coats rather than one thick layer. Follow the drying times on the label between coats. Step 4: Allow Proper Curing Time: Paint can feel dry to the touch within hours, but full curing takes longer. Keep heavy foot traffic off the stairs for at least 24 to 48 hours, longer if the label recommends it. Choosing the Right Paint for Stairs Picking paint for a staircase means two decisions, not one. First comes color, then comes the product itself. The right shade depends on light levels, nearby wall colors, and how much wear the stairs get. 1. Best Paint Colors for Stairs Below is a quick reference of colors that consistently perform well, based on guidance from major paint brands. Color Name Brand Best For Pure White Sherwin-Williams Bright, airy stairwells Alabaster Sherwin-Williams Soft warmth without stark white White Dove Benjamin Moore Warm white for treads and risers Hale Navy Benjamin Moore Bold, dramatic staircases Agreeable Gray Sherwin-Williams Neutral, hides everyday wear Revere Pewter Benjamin Moore Warm greige for busy households 2. Use Floor and Porch Paint Stair treads need floor or porch paint, not standard wall paint. These products are built for horizontal surfaces that take constant foot traffic. They resist scuffing, cracking, and peeling far better than a regular interior paint. Risers and balusters can use a durable semi-gloss wall paint instead, since they see less direct wear. For exterior stairs, choose a paint rated for outdoor use and temperature swings. 3. Choose the Right Paint Finish Sheen matters as much as paint type. Semi-gloss and high-gloss finishes hold up best on treads because they resist scuffs and wipe clean easily. A flat or matte finish hides small imperfections well, but scratches and dents show through quickly. For a balance of durability and a softer look, try satin on risers. Save semi-gloss or gloss for the treads. Problems with Painted Stairs and How to Avoid Them Most issues with a painted staircase trace back to prep, product choice, or timing. Here are the four problems homeowners run into most, along with simple fixes. 1. Paint Peeling or Chipping: Peeling almost always comes down to skipped primer or rushed prep. Grease, dust, or old wax left on the wood keeps new paint from bonding. Sand the surface, clean it well, and prime before you paint. Let each coat cure fully before the stairs see regular foot traffic again. 2. Visible Scratches and Scuff Marks: Scuffs show up fastest on flat or matte finishes and on very dark or very light colors. A semi-gloss or gloss sheen resists marks better and wipes clean more easily. Adding a runner or rug on the treads also reduces visible wear over time. 3. Slippery Painted Stair Surfaces: Glossy paint can feel slick underfoot, especially in socks or smooth-soled shoes. Adding a non-slip additive or choosing stair-tread paint adds grip without significantly changing the look. Runners, grip strips, or textured paint on treads also help on stairs used by kids or older family members. 4. Uneven Paint Coverage: Thin or blotchy coverage has a few common causes. The paint may have gone on too thick, too thin, or too soon after the last coat. Apply thin, even coats and let each one dry completely before adding the next. Two coats over a properly primed surface almost always give full, even coverage. Painted Stairs vs Stained Wood Stairs Painted stairs give you more design freedom and hide flaws better. Stained stairs cost less upfront and wear more evenly over time. Consideration Painted Stairs Stained Wood Stairs Color flexibility Any color or pattern Limited to wood tones Wood grain visibility Covered Highlighted Best wood types Softer woods, pine, older stairs Hardwoods with strong grain Repair visibility Touch-ups can show Touch-ups blend in more easily Upfront cost Higher, primer plus paint Lower, fewer coats needed Long-term upkeep More frequent touch-ups Occasional resealing Useful Tips for Creating Durable Painted Stairs A few habits separate a paint job that lasts years from one that needs redoing within months. Sand between coats: Light sanding removes dust nibs and helps each layer bond to the last. Work in thin coats: Thick paint traps moisture underneath and can crack or bubble as it dries. Match the primer to the surface: Bare wood, old paint, and glossy finishes each need a different bonding primer. Paint every other step first: This keeps a path open on the staircase while each coat cures. Round sharp tread edges slightly: Thin, sharp edges chip faster under regular foot traffic. Give paint real cure time: Dry to the touch is not the same as fully cured. Keep heavy traffic off treads for at least 24 to 48 hours. Choose floor-grade paint for treads: Standard wall paint was never built for constant impact. Touch up small chips early: A quick fix now prevents water and dirt from working their way under the paint later. Final Thoughts A painted staircase is one of the most affordable ways to change the feel of a home. The right paint type, sheen, and primer make the difference between a finish that lasts years and one that needs constant touch-ups. A classic white, a bold navy, or a two-tone design all follow the same rules. Prep well, prime first, and use paint made for foot traffic. With a bit of patience, a fresh coat can keep a staircase looking good for years before it needs attention again. Frequently Asked Questions Can You Paint Wooden Stairs Without Sanding? Light sanding is usually recommended because it helps the paint bond properly and reduces the risk of peeling. Are Painted Stairs Slippery? They can be if you use glossy paint. Satin finishes and slip-resistant additives can improve traction. What is the Most Durable Paint for Stairs? Floor and porch paints, or high-quality enamel paints designed for heavy traffic, usually last longer. Should Stair Treads or Risers Be Painted? You can paint both, but many homeowners paint risers and stain or seal treads because treads take more wear. How Many Coats of Paint Do Stairs Need? Most stair projects need primer plus two coats of paint, depending on the surface and paint coverage.
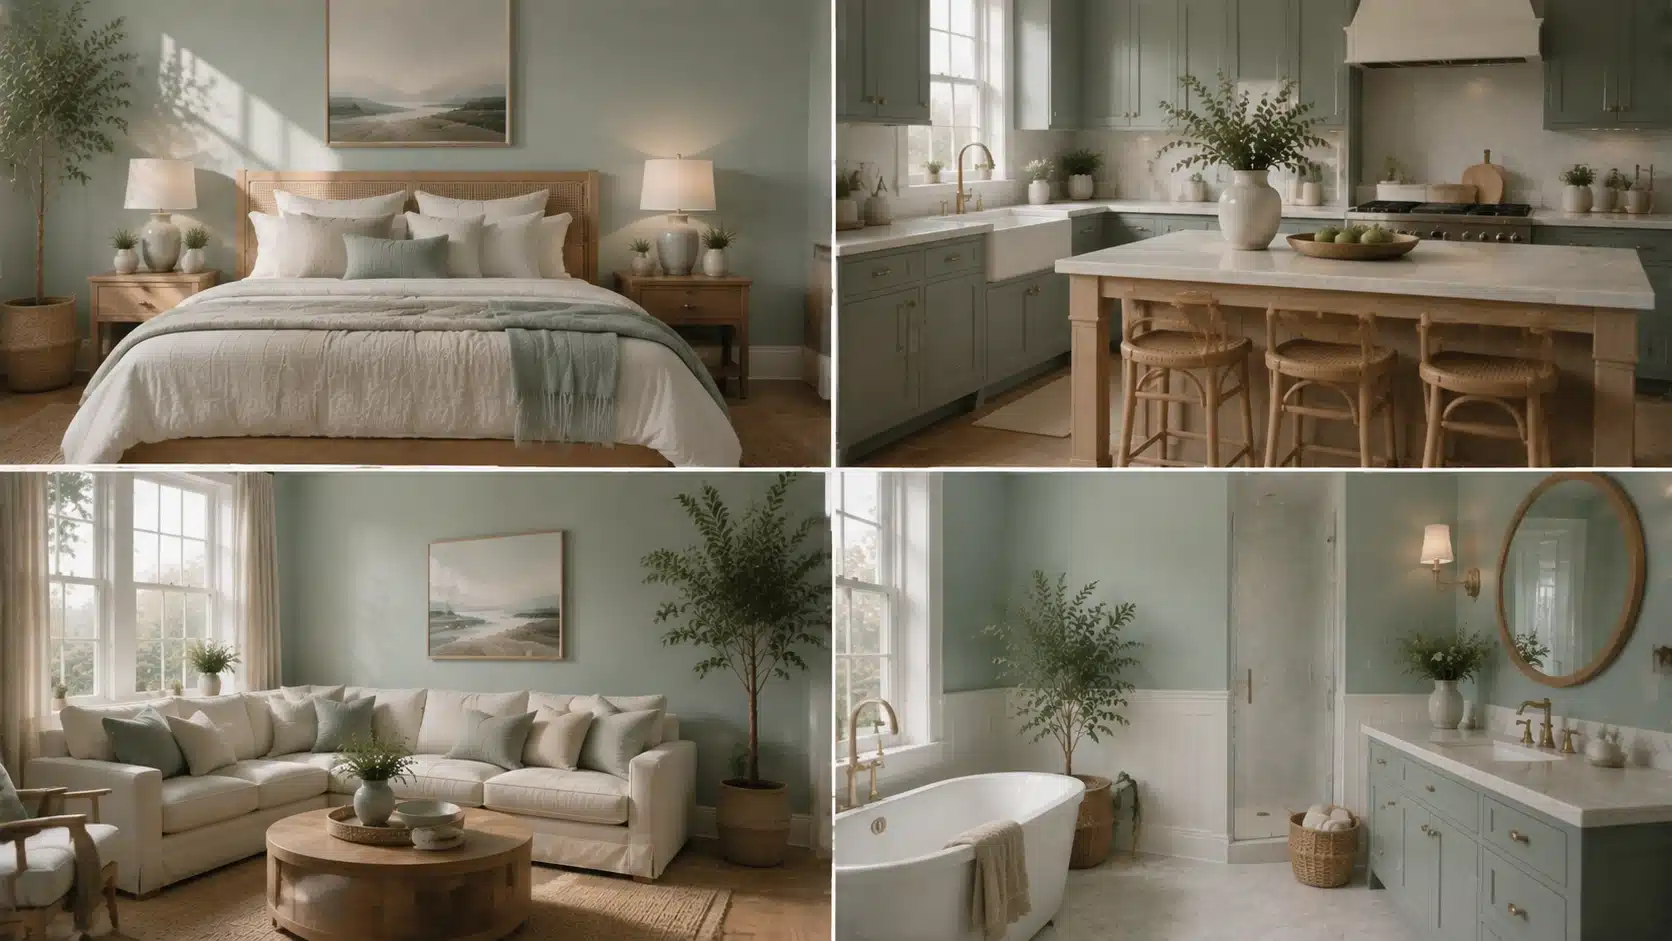
Quick summary: Benjamin Moore Beach Glass is a muted blue-green-gray shade that changes subtly with lighting and surrounding colors. Benjamin Moore Beach Glass is the kind of paint color that can look soft and coastal in one room, then slightly cooler or greener in another. That versatility is part of its appeal, but it also means choosing it requires a closer look at undertones, natural light, surrounding finishes, and coordinating colors. This article breaks down Benjamin Moore Beach Glass 1564, including its LRV and blue-green-gray undertones. How it behaves in different lighting conditions, the best rooms to use it in, how to coordinate whites and accent colors, and how it compares with similar popular shades. What Color is Benjamin Moore Beach Glass? Benjamin Moore Beach Glass 1564 is a soft blue-green paint color with a gray undertone that keeps it from ever looking too bright or too tropical. This shade sits in Benjamin Moore’s blue-green family, but it is not the bright aqua or classic beachy turquoise that its name might suggest. It reads as a muted, weathered blue-green with a gray cast, closer to the color of real sea glass than a swimming pool. Depending on lighting, some rooms will pull more blue while others lean slightly green, but the gray keeps both extremes in check. Benjamin Moore’s own product page describes it as a calming blue with a gray undertone, adding versatility to the shade. Color details Feature Details Paint brand Benjamin Moore Color name Beach Glass Color number 1564 Color family Blue-green LRV 49.7 Overall feel Calm, coastal, muted Benjamin Moore Beach Glass Undertones Undertones are the quiet influence sitting beneath the main color, and they are what make this shade a bit of a chameleon. Here is how each one shows up. Gray undertone: The gray keeps the color from ever feeling tropical or overly saturated. It softens the color and gives it a more grown-up, sophisticated quality, which is part of why it works in so many different design styles. Blue undertone: In cooler, north-facing light, the blue becomes more obvious. This is when the color leans closest to a true sea-glass blue, with an airy, almost weightless feel. Green undertone: Warm, direct sunlight tends to coax out the green side of the color. Paint experts who specialize in undertone analysis note that this warm-light shift is what gives the color its sea-glass character in south-facing rooms. Is Benjamin Moore Beach Glass Blue or Green? If you are trying to decide whether this color leans more blue or green, it can be a little hard to pin down at first. It is technically a muted blue-green, but on the wall it often reads more like a soft sea-glass blue. Its gray undertone keeps it from looking too teal or too close to seafoam. The gray undertone is what stops it from reading as a true teal or seafoam shade. How it compares to similar blues and greens: Color How it differs from Beach Glass Beach Glass Soft blue-green with gray Palladian Blue Brighter and more distinctly blue Healing Aloe Lighter and softer overall Quiet Moments Lighter, with an LRV close to 61, and leans slightly more blue Benjamin Moore Beach Glass LRV and Light Performance LRV, or light reflectance value, measures how much light a paint color bounces back into a room versus how much it absorbs. The scale runs from 0 (pure black) to 100 (white). This color has an LRV of 49.7, according to the official listing of Benjamin Moore, which places it almost exactly in the middle of the scale. North-facing rooms: Cooler, indirect light pulls the color deeper and grayer, and some of that airy, coastal quality fades. North-facing rooms never get direct sun, so the color settles into a moodier, more subdued side. South-facing rooms: Direct sun keeps the color feeling fresh and calming, and its blue-green tones read clearly without looking washed out. The strong, warm light in south-facing rooms tends to bring out the green side rather than the blue. East-facing rooms: Morning sun brings a brief window of warmth, so the color can look slightly greener early in the day before settling into a cooler, more blue-gray tone for the rest of the afternoon. West-facing rooms: Afternoon and evening sun bring the strongest warm light of the day, which can push the color toward its greener, warmer side as the sun gets lower in the sky. How Lighting Conditions Change the Look of Beach Glass Beyond room orientation, the type and intensity of light in a space play a big role in how the color performs day to day. Darker rooms: The color pulls deeper, grayer, and cooler, losing some of its lighter coastal quality when natural light is limited Lighter, sun-filled rooms: It reads fresh and clear, with the blue-green tones showing up most true to their intended shade. Warm bulbs: Warm-toned lighting emphasizes the green side of the color, giving it a slightly more sea-glass, earthy feel indoors. Cool LED bulbs: Cooler artificial light highlights the blue-gray side, making the color feel crisper and more subdued. Designer tip: Test the color on at least two walls in the room, ideally one that gets direct sun and one that does not, since the same gallon can look noticeably different depending on exposure. Where to Use Benjamin Moore Beach Glass in Your Home This color adapts well across the home, from calm living spaces to spa-style bathrooms, though its best use depends on light, function, and nearby finishes. 1. Living Rooms with Benjamin Moore Beach Glass This shade creates a relaxed, easygoing backdrop that works well with natural textures like linen, rattan, and light wood tones. It is calm enough to live with daily without feeling monotonous. In larger living rooms with plenty of natural light, it can anchor the whole space without competing with furniture or artwork. It also works well on a single accent wall for those who want the color without committing to a full room. 2. Bedrooms with Benjamin Moore Beach Glass Because it leans more toward soothing than energizing, it is a popular bedroom choice. Pairing it with soft white or warm cream bedding helps balance its cooler undertone. It tends to work best in bedrooms that get some natural light during the day, since darker bedrooms can make the color feel flatter and less restful. Layering in warm-toned nightstands or lamps also helps keep the room from feeling too cool at night. 3. Bathrooms with Benjamin Moore Beach Glass This is one of the most popular applications for the color, since its blue-green, water-inspired quality suits spa-style bathrooms especially well. It pairs naturally with white tile, marble, and brushed metal fixtures. Because bathrooms often rely more heavily on artificial lighting, it is worth testing the color under the room’s actual vanity lights before committing. This helps confirm whether it leans more blue or green once the sun goes down. 4. Kitchens with Benjamin Moore Beach Glass This shade also works as a cabinet color, particularly when the surrounding walls stay lighter and neutral. Warm hardware finishes, such as brass or bronze, help offset its cool base. It also pairs well with butcher block or light wood countertops, which help balance out the coolness of the paint. For kitchens with limited natural light, keeping the walls a shade or two lighter than the cabinets helps the space feel open. Colors That Pair Well with Benjamin Moore Beach Glass The right trim and accent colors can make this shade feel warmer, cooler, brighter, or more grounded, depending on the look you’re going for. Best White Trim Colors The right white trim can either soften the cool undertones of this shade or create a sharper contrast around doors, windows, and architectural details. Benjamin Moore White Dove: Adds warmth and prevents the overall palette from feeling too cool. Benjamin Moore Simply White: Creates a cleaner, crisper contrast against the blue-green walls. Benjamin Moore Super White: Gives the room a more modern, high-contrast finish. Benjamin Moore’s coordinating suggestions also include whites such as Snow White OC-66 and Super White OC-152, giving you additional options for creating a balanced color scheme. Overall, the best trim color depends on how much contrast you want. Softer whites create a warmer transition, while crisp whites highlight the wall color’s blue-green character. Best Accent Colors for Benjamin Moore Beach Glass Choosing the right accent colors can help this cool-toned shade feel more balanced and connected to the rest of the room. The best pairings either add warmth, create subtle contrast, or build on its soft coastal character. Navy Blue: Adds depth and a bit of drama without clashing with the cooler base tone. Warm wood tones: Balance the cool undertones and keep the space from feeling sterile. Soft beige and greige: Create a quiet, layered coastal palette that feels soft and cohesive. Natural greens: Reinforce the organic, sea-glass feel of the color and work especially well with plants and natural materials. Overall, these accent colors help bring out different sides of the shade. Navy creates contrast, wood adds warmth, and softer neutrals and greens keep the palette calm and natural. Benjamin Moore Beach Glass Compared with Similar Colors Beach Glass has good company among other Benjamin Moore blue-greens, and seeing how it stacks up can help confirm it’s the right fit before buying a sample. Paint color Difference from Beach Glass Benjamin Moore Quiet Moments Lighter and slightly softer, with a higher LRV near 61 Benjamin Moore Healing Aloe More muted and gray overall Benjamin Moore Palladian Blue Brighter and more clearly blue Benjamin Moore Mount Saint Anne Deeper and more saturated Benjamin Moore Night Mist Leans more green-gray and reads slightly lighter Benjamin Moore Iced Marble Very close in tone and often used as a match Of all these options, Beach Glass still stands out for its balance. It is neither as light as Quiet Moments nor as saturated as Mount Saint Anne, which is part of why it remains such a versatile, easy-to-live-with choice. What Not to Use with Benjamin Moore Beach Glass Choosing it without testing samples: Screen colors and in-store chips rarely match how a paint color behaves on an actual wall. A physical sample tested at home is the only reliable way to judge it. Using too many cool colors: Pairing this color with an entirely cool-toned room, including cool grays, cool whites, and chrome fixtures, can make the space feel cold rather than calm. Ignoring lighting direction: Because it sits at a mid-range LRV, the room’s light exposure has an outsized effect on how the color reads throughout the day. Pairing it with the wrong whites: Some stark, blue-based whites can make the color look flatter and more blue-gray than intended. Warmer whites tend to soften that effect. Is Benjamin Moore Beach Glass a Good Paint Color? Overall, Beach Glass earns its popularity. It suits many homes and styles, though like any mid-tone color, it rewards some planning around lighting and trim choices. Pros Cons Calm and versatile across multiple design styles Can shift noticeably depending on the room’s lighting Softer and more livable than a traditional bold blue May feel too cool in rooms with limited natural light Works well with both warm and cool accent colors Requires more careful trim selection than a true neutral Adds color to a room without overwhelming it Can look different across an open floor plan with varied light In the end, Beach Glass remains a dependable, versatile choice for homeowners seeking a calm, coastal-inspired color that adapts to nearly any room, style, or lighting condition. Testing at Different Times of Day Paint behaves differently under morning, afternoon, and evening light. Morning light tends to bring out the cooler blue-gray side of this shade, midday sun softens it toward green, and evening artificial light can deepen it slightly. Viewing a sample across all three helps avoid surprises after the whole room is painted. Real home application examples A Beach Glass bathroom vanity paired with brushed nickel hardware A single Beach Glass accent wall behind a bed with warm wood furniture Living room walls in Beach Glass paired with oak floors and linen upholstery Frequently Asked Questions Is Benjamin Moore Beach Glass Warm or Cool? It leans cool overall, thanks to its gray and blue undertones, though warm natural light can bring out softer green notes throughout the day. What is the LRV of Benjamin Moore Beach Glass? Benjamin Moore Beach Glass 1564 has an LRV of 49.7, placing it in the medium range of the light reflectance scale. Does Benjamin Moore Beach Glass Look Green? It can, particularly in warm, direct sunlight, but most homeowners describe it as a muted blue-green rather than a true green. What White Goes Best with Benjamin Moore Beach Glass? White Dove, Simply White, Snow White, and Super White are all strong options, depending on whether the goal is warmth or crisp contrast. Is Benjamin Moore Beach Glass Good for a Bathroom? Yes. Its soft, water-inspired blue-green tone pairs especially well with white tile, marble, and spa-style design details. Making Beach Glass Work in Your Home Benjamin Moore Beach Glass is the rare paint color that never quite settles, it shifts with the morning light, changes when a lamp turns on, and responds to every piece of furniture placed nearby. That quiet unpredictability is exactly what makes it worth living with. Test it on two walls, check it at different times of day, and pair it with a warm white trim before committing. Do that, and Beach Glass tends to earn its place on the wall, not just for one season, but for years.
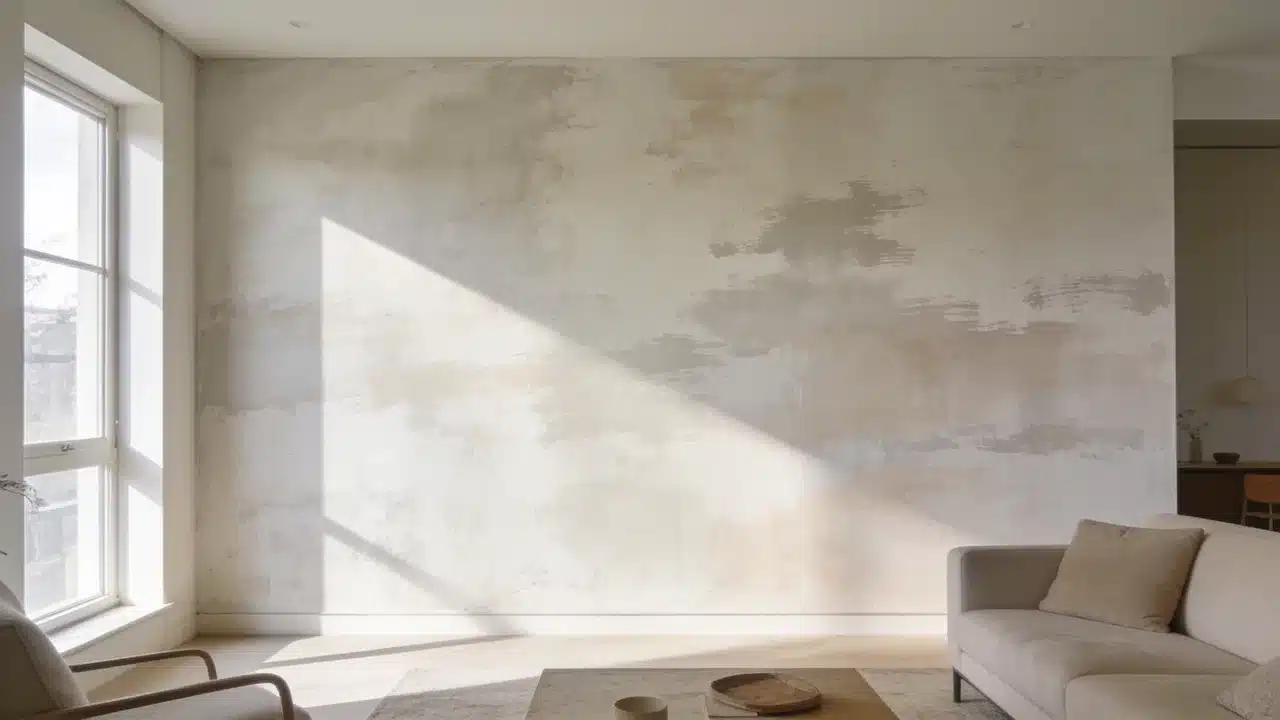
Limewashing walls starts with preparing the surface and applying thin mineral-based layers with a block brush. Random crisscross strokes create the cloudy variations that define this finish. The appeal comes from how the color changes as lighting shifts throughout the day. A wall that reads soft white at noon can look warm and shadowed by late afternoon. After a decade working with color, I have found that this changing appearance is one reason homeowners connect with limewash. The process involves preparing the wall, applying multiple coats, and caring for the finished surface. What is Limewash Paint and How Does It Work? Limewash is one of several textured wall finishes unlike regular paint, which creates an even surface with a consistent sheen, it’s applied in thin, semi-transparent layers that leave visible brushstrokes. Limewash is applied in thin, semi-transparent layers, allowing brushstrokes and color variation to remain visible. The brushwork stays visible in the final coat. That variation is the point. Color behavior matters here. The paint appears darker when wet and noticeably lighter once dry. Adding extra paint too early can reduce the soft variation that gives limewash its character. Let each layer dry fully before assessing the wall. Tools and Materials Needed to Limewash Walls Collect all materials before starting. Limewash dries differently from standard wall paint, so stopping halfway across a wall can create visible transition marks. Item Purpose Limewash paint Creates the textured finish Mineral primer Helps limewash bond with walls Block brush Creates the signature movement Drop cloth Protects floors Painter’s tape Protects edges Stir stick Keeps paint consistent Spray bottle Helps maintain a wet edge How to Prepare Walls for Limewashing Proper preparation helps limewash absorb evenly and creates a more consistent finish. Skipping any of these steps affects the final result. Clean and Repair the Wall: Remove dust, grease, and dirt with a damp cloth and mild cleaner. Fill holes with patching compound. Let everything dry before priming. Prime the Surface: New drywall requires mineral primer. Previously painted walls need primer only if the existing finish is glossy or in poor condition. Highly porous surfaces can absorb limewash quickly, resulting in uneven color if not properly prepared. Test the Color and Finish: Apply a sample patch to the actual wall. This finish reads differently at 7 am than at 7 pm. Check both before committing. How to Limewash Walls Step by Step Follow the order carefully because preparation, drying time, and application technique all affect the final appearance. Step 1: Prepare the Limewash Paint Stir thoroughly for at least two minutes before use. Follow the product’s dilution instructions if thinning is required. Pour the paint into a clean application bucket and stir again. Continue stirring during application to maintain an even consistency. Settled paint creates uneven coverage and color variation across the wall. Step 2: Apply the First Coat Using the Limewash Technique Load the block brush about a quarter of the way up the bristles. Apply using loose, unstructured crisscross strokes from the center of each section. Keep a wet edge throughout and work in small sections. Deposit most of the paint at the center and feather outward to blend the edges. Do not aim for full coverage on the first coat. Step 3: Add Additional Layers for Depth Let the first coat dry fully before adding a second coat, typically 12 to 24 hours, depending on humidity and temperature. The wall will look darker when wet and lighter when dry. Apply each additional coat using the same crisscross technique. Two coats suit most walls. A third thin coat adds consistency where needed. Step 4: Finish, Cure, and Evaluate the Wall Remove painter’s tape once the final coat dries. Stand back and assess the full wall in both morning and evening light before deciding if another coat is needed. Allow full curing before touching the surface. Mist lightly if the manufacturer recommends it. A matte sealer is optional but adds protection in high-traffic areas. Limewash Wall Care and Maintenance Limewash walls require less maintenance than many traditional painted surfaces. Keeping water exposure to unprotected areas to a minimum is what matters most. For cleaning, use a dry or barely damp cloth. Strong cleaners strip the finish. For repairs, apply a thin layer of the original product over the affected area. Feather the edges using the same crisscross approach as the original coat. Sealing is optional. A matte sealer adds protection in high-traffic areas. Without sealer, the surface may change gradually as it ages. How to Choose Limewash Colors for Different Rooms Limewash changes with lighting, so a shade can look different throughout the day. This helps reveal how the color responds to morning and evening light. Bedrooms: Soft neutrals like warm white, beige, and muted taupe work well. These shades create a calm backdrop while keeping the limewash texture visible. Living Rooms: Warm earth tones such as sand, clay, soft brown, and muted olive pair well with natural materials and add depth to larger spaces without feeling heavy. Small Rooms: Lighter shades like soft cream, pale beige, and light gray can help small rooms feel more open. Always test the color first, because limewash can appear stronger across an entire wall. Low-Light Rooms: Avoid very cool shades in rooms with limited sunlight, as they can make the space feel cold. Warmer neutrals and earthy colors usually work better under softer lighting. Can You Paint Over Limewash? You can paint over limewash after checking the surface condition and preparing it for the new coating. Run a hand over the existing wall. If material transfers, the layer must be stabilized before anything is placed on top. Remove loose or dusty limewash, or stabilize it before applying primer and new paint. Clean the wall with a damp cloth, then let it dry completely. Apply a suitable primer before the new paint. Water-based paints tend to work over primed limewash. Oil-based products need a compatible intermediate primer. Mistakes to Avoid When Limewashing Walls These common issues usually arise from problems during preparation or application. Mistake Cause Fix Finish looks streaky Too much paint applied Use thinner layers Texture looks flat Not enough stroke variation Add another coat Paint color does not stick Poor surface preparation Prime correctly first Color looks wrong Assessed before full drying Wait until completely dry Application lines visible Wet edge lost mid-wall Work faster and maintain wet edge Frequently Asked Questions What are The Disadvantages of Limewash Paint? Limewash may require more preparation than regular paint, and the final color can be difficult to judge until each coat has fully dried. Does Limewash Paint Need a Primer? Primer is recommended on new drywall, glossy surfaces, and highly porous walls to improve adhesion and create more even absorption. How Long Does Limewash Last on Interior Walls? A properly applied limewash finish can last for years indoors when protected from excessive moisture and cleaned gently. Can You Apply Limewash with a Roller? A roller can speed up coverage on large areas, but a block brush creates the natural variation and texture associated with limewash. What Surfaces Can be Limewashed? Limewash works best on porous surfaces such as plaster, brick, and mineral-based walls that allow the finish to be properly absorbed. Happy Reading The process for limewashing walls is more forgiving than most paint techniques. Variation is the point, and a perfectly even coat works against the finish. Get surface preparation right, use the crisscross stroke, and let each layer dry before assessing the color. The finish looks different at 7 am than at 7 pm. That movement is part of what makes it worth the effort. Try a small section first to test the technique. Share the result in the comments once done.
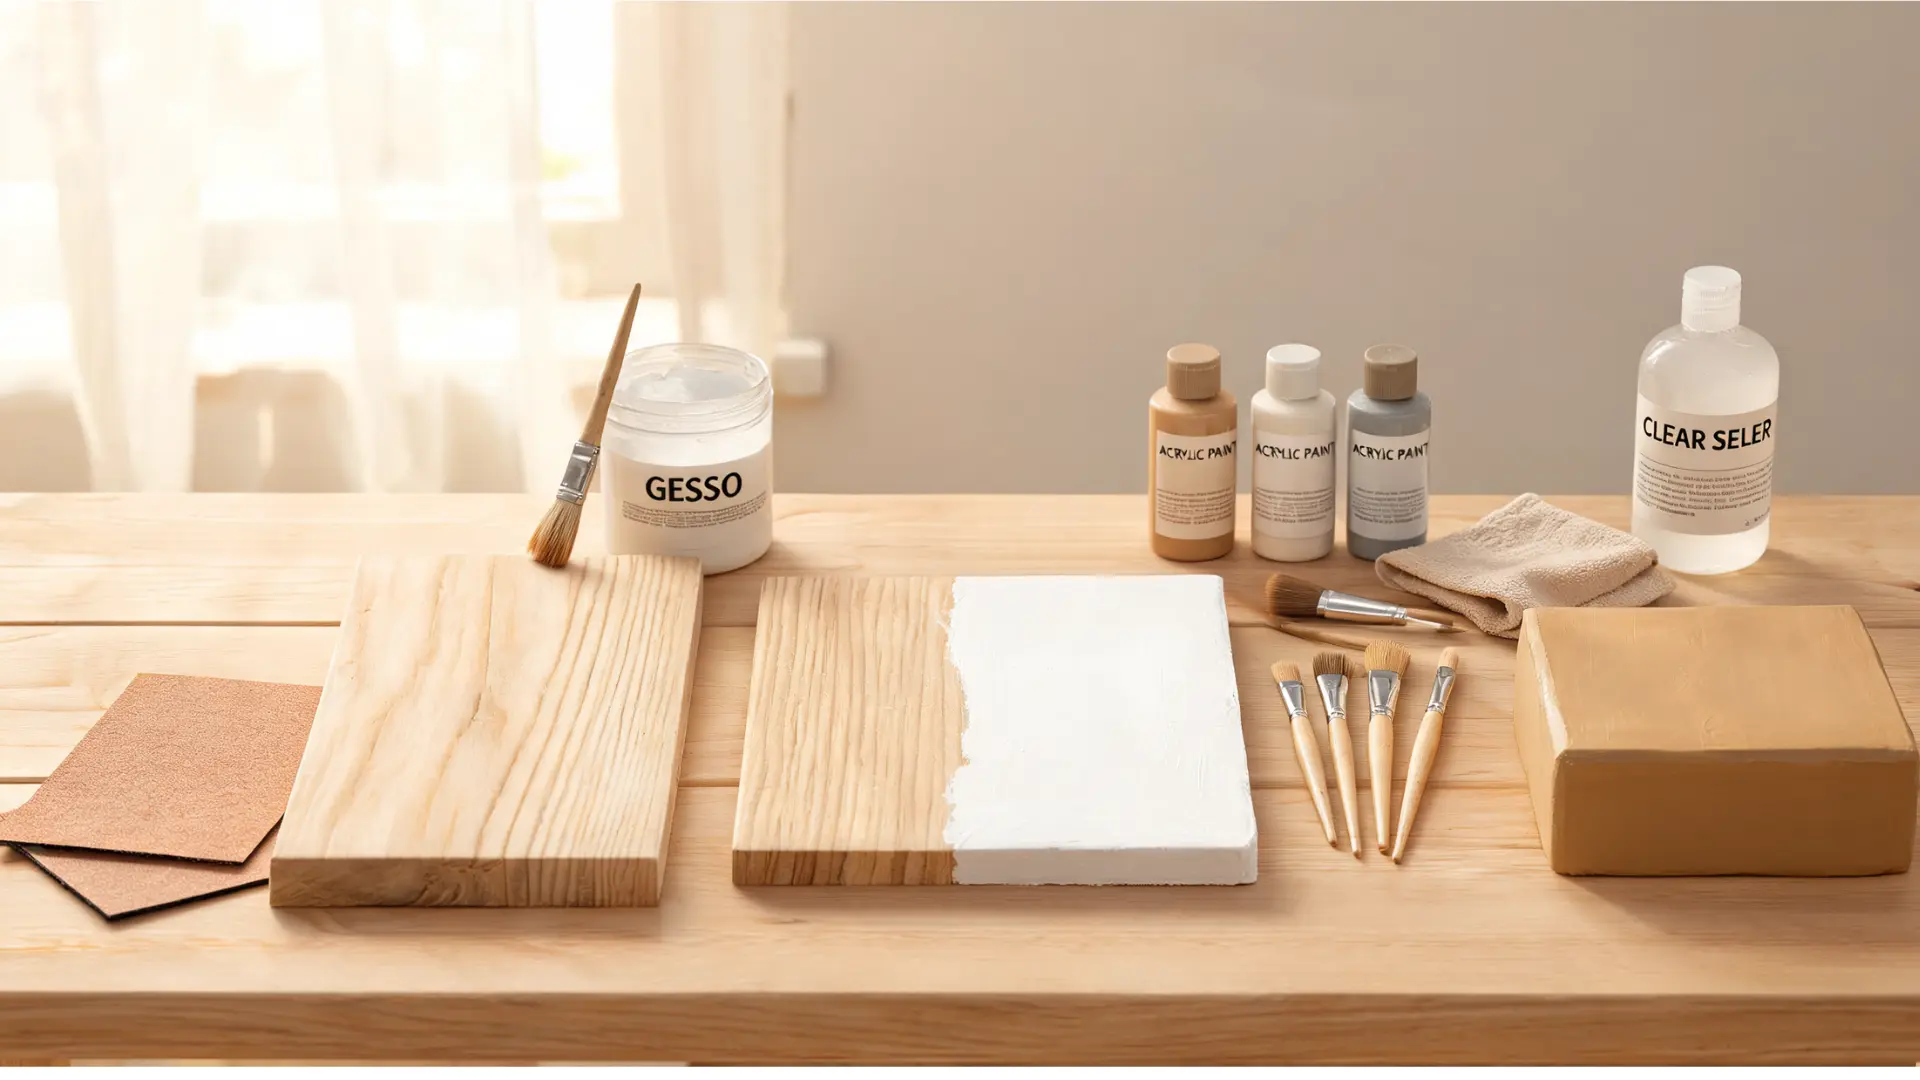
Have you ever stared at a beautiful piece of raw wood, envisioning a vibrant, custom masterpiece, only to hesitate because you weren’t sure the color would stick? Wondering if you can use acrylic paint on wood is incredibly common, especially when you want to avoid ruinous peeling or muddy, uneven surfaces. Wood is uniquely porous, meaning it absorbs moisture and shifts over time, which can easily ruin a paint job if handled incorrectly. Fortunately, achieving a flawless, long-lasting finish is entirely doable. This comprehensive guide breaks down exactly how to prepare different wood surfaces, choose the right primers, and apply flawless coats so your creative projects stand the test of time Can You Use Acrylic Paint on Wood? Acrylic paint works on wood. The finish holds, or it doesn’t, and that outcome is decided almost entirely before you open the paint. Get the prep right, and acrylic paint on wood lasts for years. Skip it, and you’ll be peeling dried paint off the surface by spring. Acrylic paint is a solid choice for indoor crafts, signs, art panels, wood slices, boxes, trays, and lightly used furniture pieces. It dries quickly, has a lower odor than oil-based alternatives, and cleans up with water before it sets. For lettering, layered colors, and detailed decorative work, it’s hard to beat. That said, the project’s location and how often it gets handled determine exactly how much prep work the surface needs before painting. Acrylic Paint Works Well When Acrylic Paint Needs Extra Help When The wood is clean, dry, and sanded The wood is raw, glossy, oily, or dusty The project stays indoors The project will sit outside The piece is decorative or lightly used The piece is touched, cleaned, or used often You apply primer or gesso first The wood is dark, stained, or very porous You seal the finished paint The surface needs scratch or water resistance The core problem is porosity. Raw wood absorbs moisture unevenly, which means paint applied directly to an unprepared surface soaks in at different rates across the face. You end up with a dull, patchy result that won’t stay put. On high-use pieces or anything going outdoors, unsealed acrylic paint scratches, fades, and peels without heavier protection underneath and on top. Sand the wood, wipe away the dust, use primer or gesso where the surface calls for it, apply thin coats, and seal when you’re done. That sequence is what separates a finish that lasts from one that doesn’t. How Acrylic Paint Behaves on Different Wood Surfaces Wood type determines your prep steps before anything else. MDF takes paint differently than raw found wood, and the gap between them matters. Here’s how the most common surfaces stack up for acrylic painting projects: Wood Surface Paint Adhesion Main Problem Minimum Prep Best Sealer MDF Good on face, poor on edges Edges absorb moisture and swell Light sand + edge primer Polycrylic or water-based polyurethane Plywood Moderate, grain shows through Surface grain and edge gaps Sand + full primer coat Satin or polycrylic Basswood Good, fine, even surface Soft, dents, and scratches easily Gentle sand + gesso Matte or satin clear sealer Birchwood Very good, smooth and stable Still needs light sand for adhesion Sand + gesso for art, primer for functional pieces Satin, gloss, or polycrylic Raw or Found Wood Poor without prep Oils, sap, moisture, and uneven grain Clean, dry fully, sealer before primer Exterior sealer for outdoor, matte for indoor The table gives you the minimum. Understanding why each surface behaves the way it does is what keeps you from learning these lessons on a finished piece. 1. MDF MDF is smooth, has no visible grain, and takes acrylic paint well once you handle the edges first. The flat face bonds readily after a light sand and a coat of primer or gesso. The edges are the problem every time. MDF is compressed wood fiber. Cut edges act like a sponge the moment moisture hits them. Leave them unsealed, and they’ll swell, the primer won’t bond properly, and the paint peels at the border. Seal the edges before anything else. A brush-on primer does this job better than a spray because you can work it into the edge fibers. Once the edges are sealed, the rest of the surface is straightforward to prep and paint. 2. Plywood Plywood needs more prep than MDF because the surface is less uniform. Grain lines, small gaps between layers at the edges, and patches where wood density changes are all standard. Paint over those variations without sanding and priming first and they show through the finished coat. Sand the face with 120-grit, follow with 220-grit before priming, and seal the exposed edge layers. Those edges absorb paint unevenly and can bubble if moisture gets in after the fact. A good primer fills surface irregularities and gives the acrylic a consistent base to bond to. 3. Basswood Basswood is the standard for craft pieces, ornaments, and carving projects. It’s light, fine-grained, and takes detail work well. Acrylic paint sits well on it without extensive prep. The trade-off is softness. Basswood dents from normal handling, and if you sand it aggressively, you can roughen the surface in a way that shows under paint. One pass with 180-grit is usually enough, followed by gesso to brighten the base for color and fill any minor surface variation. Go gentle here. 4. Birchwood Birchwood panels are the best starting surface for acrylic painting. Smooth, stable, and harder than most softwoods, they resist denting and hold their shape well. The surface takes paint evenly once you give it a light scuff with fine-grit sandpaper. For art panels and decorative work, gesso is the right primer. For functional pieces like shelves or trays that will see handling, use a standard bonding primer before painting. Either way, a protective topcoat is necessary if the piece faces moisture exposure or regular use. If you are considering different wood species for furniture projects, birch consistently performs well across a range of finishes and paint types. 5. Raw or Found Wood Raw and found wood creates more variables than any other surface. Oils, sap, old residue, and uneven moisture content all interfere with paint adhesion. On found wood especially, you don’t know what’s in the grain or on the surface. The reliable sequence: clean it thoroughly, let it dry completely (at least 24 to 48 hours in a dry space), apply a penetrating wood sealer before primer, then prime before painting. That sealer step is what most people skip. It’s also the step that prevents stains from bleeding through light-colored paint six months later. Primer vs. Gesso: Which One to Use Before Painting Wood These two products are not interchangeable, and confusing them causes real problems on the finished surface. Gesso is a primer. It strengthens paint adhesion and provides a ground for painting. But gesso is not a sealer. A sealer protects the underlying wood and prevents Support-Induced Discoloration (SID): the yellowing or amber shift that occurs when wood impurities migrate up through acrylic paint layers, particularly in light colors. If you skip sealing raw wood and go straight to gesso, whites and light yellows can shift noticeably over time. Product What It Does When to Use It When to Skip It Wood sealer Blocks stains, prevents SID, reduces warping Raw wood, found wood, porous surfaces Pre-sealed panels, primed MDF Gesso Provides a paint-ready ground, adds tooth Art panels, decorative work, basswood, birch Functional furniture pieces that need a harder primer Bonding primer Mechanical adhesion of paint to the surface Furniture, plywood, varnished or stained wood Fine art panels where gesso gives better results For most woodcraft and DIY projects, the right sequence is: clean the surface, apply wood sealer if raw or porous, sand lightly once dry, apply gesso or primer, sand again with 220-grit, then paint. That extra sanding between coats is where a lot of people stop. It’s also what separates a smooth result from one that shows brush marks and grain texture through the color. How to Apply Acrylic Paint on Wood Step by Step Thin coats are the whole game. One thick coat of acrylic paint on wood traps air underneath, takes longer to dry, leaves brush marks, and is more likely to crack or peel as the wood moves with humidity. Two to three thin coats, each properly dried and lightly sanded between, will give you better adhesion, better color, and a cleaner finish than any single heavy application. Apply a thin first coat with a brush, roller, or sponge. Work with the grain on raw or natural wood surfaces. Spread paint evenly. If you’re loading too much onto the brush, it pools at the edges of your strokes. Less is more on every pass. Let the first coat dry until it no longer feels tacky — usually 20 to 30 minutes at room temperature, longer in humid conditions. Sand lightly with 220-grit sandpaper to knock down raised grain or brush texture and give the next coat something to grip. Wipe away all sanding dust with a clean, dry cloth. Paint over dust creates visible bumps in the final surface. Apply a second thin coat. Coverage and color depth improve significantly at this stage. Add a third coat if the base coat or wood grain still shows through. Most light colors over darker wood need three coats minimum. Let the final paint coat dry completely before sealing — at least one hour, or per the product’s stated drying time. Pro Tip: Between coats, don’t rinse your brush and come back wet. Water dilutes the next coat and can raise the wood grain. Squeeze out excess moisture and keep brushes slightly damp rather than wet. Choosing the Right Sealer for Acrylic Paint on Wood The sealer determines how long your work actually lasts. Acrylic paint on wood without a topcoat handles light indoor use, but it scratches, fades faster, and picks up water damage. The sealer you choose should match the project’s actual conditions, not just the finish appearance you want. Sealer Type Best For Durability Finish Options Clear acrylic varnish Indoor crafts, signs, decorative panels Moderate Matte, satin, gloss Polycrylic Furniture, trays, shelves, high-touch pieces Good, water-resistant Matte, satin, semi-gloss Water-based polyurethane Furniture and surfaces that take real wear Very good Satin, semi-gloss, gloss Exterior-grade sealer Outdoor wood, garden signs, birdhouses, planters Best for weather exposure Satin or gloss Apply the sealer the same way you applied paint: thin coats, fully dried between applications. Two coats are standard for most indoor pieces. For anything that sees water, cleaning products, or outdoor weather, three coats are worth the extra time. Always allow the sealed piece to cure for at least 24 to 48 hours before heavy use. Most water-based sealers feel dry to the touch within an hour but continue hardening for days afterward. Best Acrylic Paint for Wood Projects Not all acrylic paint is built for the same job. Using craft acrylic on a dresser you clean weekly, or basic artist acrylic on an outdoor sign, is setting the finish up to fail early. The paint type needs to match the stress the surface will actually see. If you are still deciding between acrylic and latex for a larger project, the comparison of latex versus acrylic paint for different surfaces covers the trade-offs in detail. Paint Type Best Projects Why It Works Where It Falls Short Craft acrylic Ornaments, signs, boxes, DIY coasters Affordable, easy to apply Not durable enough for furniture or outdoor use Artist acrylic Art panels, detailed work, mandala boards Richer pigment, better blending Expensive for large surfaces, not formulated for wear Acrylic furniture paint Dressers, chairs, shelves, cabinets Built for surfaces that get cleaned and handled Overkill for simple decorative crafts Exterior acrylic Garden signs, birdhouses, painted planters Formulated to handle UV and moisture Unnecessary cost for indoor work For outdoor wood, exterior acrylic is worth the step up from craft paint, even when the piece is small. Regular craft acrylic will fade and peel in a single season without serious sealing. Exterior acrylic combined with an outdoor-rated topcoat will last several years on a properly prepped surface. Acrylic Paint on Wood: Indoor vs. Outdoor Projects The location of the finished piece changes with every decision in the process. Indoor and outdoor wood painting are not two versions of the same job. They have different prep requirements, different paint choices, and different sealer standards. Indoor Projects Indoor wood that stays away from humidity and direct sunlight is the easiest application for acrylic paint. Wood signs, plaques, wall art, craft boxes, decorative trays, and shelf accents all fit here. For simple indoor crafts, sand and gesso are usually enough prep before painting. For furniture or pieces that get handled regularly, a tray you carry, a shelf you load, use bonding primer instead of gesso, apply paint in thin coats, and finish with polycrylic or water-based polyurethane. Those two steps, primer and sealer, are what keep paint on a chair arm or shelf edge for years instead of months. This approach also applies when painting over previously stained wood, where the surface needs deglossing and a stain-blocking primer before any acrylic goes on. Outdoor Projects Outdoor wood is exposed to sunlight, humidity, rain, and temperature swings. Any of those forces will degrade unsealed acrylic paint over the course of a season. Start with wood that is completely dry. Sand the surface, apply an exterior primer, and use exterior acrylic paint rather than craft acrylic. After the paint dries fully, apply an outdoor-rated clear sealer over the entire piece, including the back and edges. Moisture enters wood from every exposed surface. A piece sealed on the face but raw on the back will still absorb enough moisture to cause paint failure at the edges within a year. Common Mistakes That Cause Acrylic Paint to Peel Off Wood Most paint failures on wood come from the same handful of skipped steps. Here’s what causes peeling and how to avoid it before you pick up a brush. Skipping sanding: Smooth or glossy wood gives paint little grip. Light sanding with 180-grit sandpaper helps the paint stick properly to the surface. Painting over dust: Dust blocks paint from bonding to the wood. Wipe the surface after every sanding step before applying any coat. Using too much water to thin paint: Too much water weakens acrylic and causes patchy, uneven coverage. Use only a few drops if thinning is needed at all. Skipping primer on raw wood: Raw wood absorbs paint unevenly. Primer seals the surface and helps color look smoother and brighter across the face. Applying thick coats: Thick paint cracks, bubbles, or dries with an uneven texture. Two to three thin coats always outperform one heavy coat. Not sealing the finished paint: Unsealed acrylic scratches, fades, and picks up water damage. A clear sealer is not optional on anything that will see regular use. Frequently Asked Questions Does acrylic paint peel off wood? Yes, when the surface wasn’t properly prepped. Peeling is almost always caused by skipping sanding, painting over a glossy or dusty surface, or not sealing the finished piece. Correct prep makes peeling far less likely even on pieces that see regular handling. Can you use acrylic paint on varnished wood? Yes, but not directly over a shiny surface. Acrylic won’t grip a slick finish. Scuff the varnish lightly with fine sandpaper, wipe away dust, and apply a bonding primer before painting. That mechanical scuff is what gives the acrylic something to hold onto. How do you seal acrylic paint on wood? Apply a clear sealer — polycrylic, water-based polyurethane, or acrylic varnish — in two thin coats after the paint is fully dry. For furniture or outdoor pieces, three coats give better durability. Let each sealer coat dry completely before adding the next. Can you use acrylic paint on outdoor wood? Yes, but use exterior-grade acrylic paint rather than standard craft paint, and finish with an outdoor-rated sealer. Regular acrylic fades and peels in one season when exposed to UV and moisture without the right protection underneath and on top. What is the difference between gesso and primer for wood painting? Gesso is a primer that prepares the surface for paint, but it is not a sealer. On raw or porous wood, use a wood sealer first to prevent stain bleed-through and warping, then apply gesso or bonding primer on top before painting. Skipping the sealer step is the most common source of color shift in light paints. Can you paint over stained wood with acrylic? Yes. Lightly scuff the surface, wipe away dust, and apply a stain-blocking primer before using acrylic paint. If the stain is dark or oily, a shellac-based primer gives better coverage than a standard bonding primer. You can find a complete breakdown of how to paint over stained wood with the right primer sequence for each situation. Is acrylic paint good for wood furniture? Yes, if you use the right acrylic type. Craft acrylic will not hold up on furniture that gets cleaned or touched regularly. Acrylic furniture paint is formulated for surfaces that see handling, and a polycrylic or water-based polyurethane topcoat is necessary to protect the finish long-term. What happens if you don’t sand wood before painting with acrylics? Paint adheres poorly, color looks patchy, and the finish chips or peels earlier than expected. Sanding opens the grain, removes oils and debris, and gives the primer and paint a surface to mechanically grip. It takes ten minutes and it’s not optional for a lasting result. Final Verdict Mastering how to use acrylic paint on wood comes down to respecting the porous nature of the material. By taking the time to sand the surface, seal raw grain, and apply multiple thin coats rather than rushing through a single thick layer, you ensure a brilliant finish. Matching your topcoat sealer to how your project will actually be handled ensures your creativity remains vibrant and protected for years to come. I would love to hear about what you are creating. Are you planning an indoor art panel or a decorative outdoor sign? Drop your thoughts, questions, or project experiences in the comments below. Sources Golden Artist Colors, “Support Induced Discoloration (SID) in Acrylic Painting.” goldenpaints.com Ampersand Art Supply, “Priming Wood Panels with Acrylic Gesso.” ampersandart.com Benjamin Moore, “Acrylic Paint Technology Overview.” benjaminmoore.com
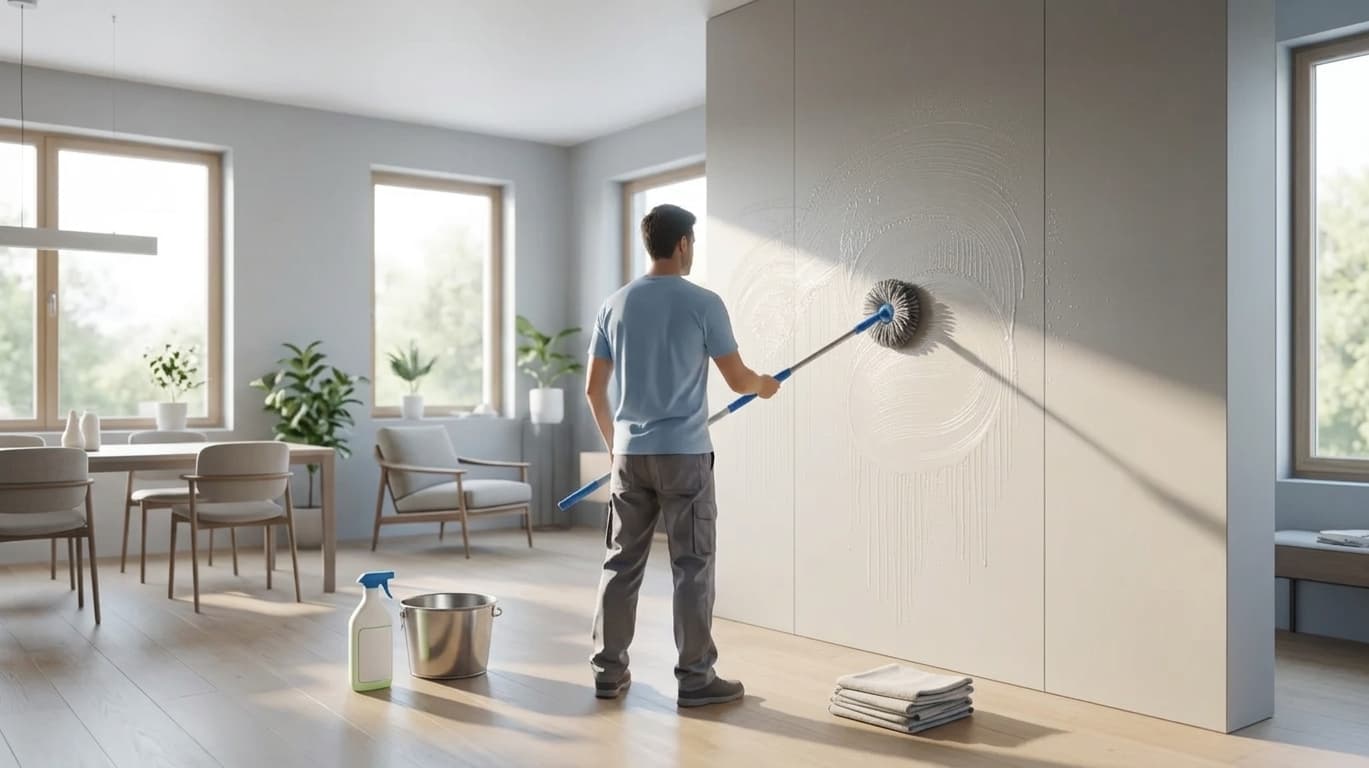
Walls don’t usually look dirty in one go. A faint smudge near a switch, a bit of kitchen grease, or a light scuff in the hallway builds up slowly until it starts standing out more than expected. I’ve noticed this in my own space too, where I didn’t realize how much those small marks were changing the feel of a room until light hit the wall the wrong way. Understanding how to clean painted walls properly matters when I don’t want to risk patchy paint or dull spots after wiping. The focus here stays on simple methods, safe steps, and habits I use to keep walls clean without damaging the finish. Understanding Your Wall Before Cleaning Understanding the wall before cleaning makes a big difference in results. Painted drywall vs textured walls respond differently, with textured surfaces holding more dust and needing a gentler approach. Old paint vs fresh paint also changes how much moisture or pressure the surface can handle, since older paint may wear faster while fresh paint is still settling. Even location matters, as high-traffic vs low-contact areas tend to collect more marks and need more frequent care. Freshly painted walls also need patience because new paint needs full curing time before any washing. Light dusting can be done early, but full cleaning should only happen once the paint has fully set to avoid streaks or surface damage. How to Clean Painted Walls: Step by Step Cleaning painted walls works best when done in a simple order that protects the paint while still removing everyday dirt, stains, and marks without leaving streaks or uneven spots. Step 1 – Dust the walls: Remove spider webs and surface dust using a dry cloth or vacuum brush so dirt doesn’t turn into streaks later. Step 2 – Prepare cleaning mix: Mix a small amount of dish soap with warm water in a spray bottle. Step 3 – Apply correctly: Spray at an angle instead of directly on the wall to avoid over-wetting and streaking. Step 4 – Clean in sections: Use a damp microfiber mop or cloth and clean in small areas with smooth up-and-down motions. Step 5 – Rinse often: Keep rinsing the mop or cloth in clean water to prevent spreading dirt. Step 6 – Spot clean stains: Use a gentle foaming cleaner for tough marks like crayon or scuffs, then wipe softly. A careful step-by-step approach like this keeps painted walls looking even and fresh while preventing common cleaning mistakes that damage the finish over time. Stain-Specific Cleaning Methods for Painted Walls Different wall stains need different cleaning approaches, and using the wrong method can damage paint. These simple steps help handle common marks safely and effectively. 1. Grease Stains (Kitchen Walls) Grease stains are common in kitchen areas where cooking oil and steam slowly settle on painted surfaces. These marks can look dark and sticky, but they can usually be removed with a gentle cleaning approach without harming the paint finish. Materials required: Mild dish soap, warm water, soft sponge, microfiber cloth, clean towel How to clean: Mix dish soap with warm water in a bowl Dip a soft sponge and wring out excess liquid Gently wipe the greasy area in light strokes Repeat if needed without scrubbing hard Wipe with a clean damp cloth to remove residue Drying tip: Pat dry with a soft towel to avoid water marks and keep the surface even. 2. Crayon or Marker Stains Crayon and marker stains often appear in homes with kids and can seem stubborn, especially on light-colored walls. These marks sit on the surface of paint and need a gentle lifting method instead of harsh scrubbing to avoid damaging the finish or creating dull patches. Materials required: Baking soda, water, soft cloth, small bowl, microfiber towel How to clean: Mix baking soda with a small amount of water to form a paste Apply the paste gently over the stained area Dab softly using a cloth instead of rubbing Repeat lightly if the mark remains Wipe clean with a damp cloth Drying tip: Let the area air dry completely before checking if a second round is needed. 3. Scuff Marks From Shoes or Furniture Scuff marks are usually caused by shoes, chairs, or furniture rubbing against walls. These marks are often surface-level and can be removed without any liquid cleaner, making them one of the easiest wall stains to fix when handled properly. Materials required: Dry microfiber cloth, sponge eraser How to clean: Start with a clean dry microfiber cloth Rub the scuff gently with light pressure Use a sponge eraser for tougher marks if needed Avoid adding water or liquid cleaners Repeat lightly until the mark fades Drying tip: No drying needed; just ensure the wall stays dry and untouched after cleaning. 4. Food or drink spills Food and drink spills can leave noticeable marks on painted walls if not cleaned quickly. These stains can soak into the surface slightly, so fast action helps prevent discoloration and makes removal much easier without affecting the paint layer. Materials required: Mild dish soap, warm water, soft cloth, microfiber towel How to clean: Dip a soft cloth into warm soapy water Blot the spill gently instead of rubbing Lift the stain slowly using repeated dabbing Wipe the area with a clean damp cloth Repeat if any residue remains Drying tip: Dry immediately using a soft towel to avoid sticky patches or water spots. 5. Smoke or dull wall marks Smoke stains or dull patches usually develop over time due to cooking fumes or indoor smoke exposure. These marks create a faded or yellowish look on walls and need gentle cleaning to restore surface clarity without damaging paint sheen. Materials required: Mild diluted degreaser, sponge, clean water cloth, soft towel How to clean: Dilute a gentle degreaser with water Apply lightly using a soft sponge Wipe the area gently without scrubbing Remove residue using a clean damp cloth Repeat only if necessary for stubborn marks Drying tip: Wipe dry immediately with a soft towel to prevent streaking or uneven finish. Knowing the right method for each stain keeps painted walls clean, consistent, and damage-free, helping maintain a smooth finish without unnecessary effort or repainting. What Cleaning Methods Should Be Avoided Some cleaning habits seem harmless but can slowly damage painted walls. Avoiding a few common mistakes helps keep the paint finish smooth and consistent after every clean. Too much water on walls: Can seep into paint layers, causing streaks, swelling, or long-term surface damage. Harsh scrubbing tools: May scratch the paint or remove it, leaving uneven and visible marks. Bleach or ammonia cleaners: Can fade color, weaken the finish, and cause dull patches on most painted surfaces. Magic erasers with pressure: Can polish the surface, creating shiny spots especially on matte paint. Colored cloths that bleed dye: May transfer color onto light walls and leave permanent stains. Avoiding these mistakes helps maintain paint quality, prevents uneven patches, and keeps walls looking clean, smooth, and well-maintained after every cleaning session. Common Problems and Fixes While Cleaning the Walls Walls can sometimes show issues even after cleaning, and most of them come from small mistakes in technique or tools. Knowing these helps fix the problem quickly and avoid repeat damage. Problem Cause Fix Streaky walls Too much soap or residue Wipe again with clean water Dirty smears Reusing unclean cloth Rinse or change cloth often Uneven drying marks Air drying unevenly Dry with soft towel immediately Shiny patches Over-scrubbing paint Use light pressure only Paint dull spots Harsh cleaning products Switch to mild soap solution Color fading patches Strong chemicals used Avoid bleach or ammonia cleaners Understanding these common issues helps correct cleaning mistakes early and keeps painted walls looking smooth, balanced, and consistently fresh after every wash. Maintenance Routine For Cleaned Walls of Your Home Keeping painted walls clean doesn’t need constant effort, but a simple routine helps maintain a fresh look and prevents buildup of dust, stains, and marks over time. Regular cleaning depends on how much each space is used and exposed to dirt or grease. Kitchen: Every 1–2 months since cooking oil, steam, and splashes build up quickly on walls. Hallways: Every 3–4 months because high foot traffic leads to frequent scuffs and fingerprints. Bedrooms: 2–3 times a year as these areas stay relatively low on dirt and only need light dusting and occasional spot cleaning. Following this schedule helps prevent heavy staining, reduces deep cleaning efforts, and keeps paint looking even and well-maintained throughout the year. Signs the Wall Needs Repainting Instead of Cleaning Not every wall problem can be fixed with cleaning. Sometimes the paint itself reaches a point where washing no longer improves the look and repainting becomes the only practical option. Permanent stains: Marks that stay visible even after repeated cleaning attempts usually mean the stain has set into the paint layer. Paint peeling: Flaking or peeling areas show surface damage that cleaning cannot repair. Shine patches after cleaning: Uneven glossy spots often appear after over-scrubbing and cannot be blended back. Color fading: Walls that look dull or uneven in tone have lost their original finish over time. When these signs appear, cleaning can only do so much, and repainting helps restore an even, fresh surface that looks clean and consistent again. Pro Tips for Cleaning Painted Walls A few simple habits can make wall cleaning easier and help protect paint from damage over time. These quick tips improve results without extra effort. Clean from bottom up for heavy stains: This helps control drips and prevents dirty streaks running down the wall. Change water frequently: Fresh water stops dirt from being spread back onto already cleaned areas. Use natural daylight when possible: Better lighting helps spot missed marks and uneven cleaning. Avoid cleaning on humid days: Slow drying in humidity can increase streaking and water marks. Keep edges and corners for last: These areas collect more dust and need separate attention after main cleaning Following these small but effective tips keeps painted walls cleaner for longer, reduces mistakes, and helps maintain a smooth, even finish after every cleaning. Frequently Asked Questions Can sunlight exposure affect how clean walls look after washing? Yes, direct sunlight can highlight streaks, water marks, or uneven patches after cleaning. It is better to inspect walls under natural but indirect light to ensure an even finish and spot any missed areas more clearly. Is it safe to clean walls near electrical switches and outlets? Yes, but extra care is needed. Always avoid excess moisture and never spray directly. Use a lightly damp cloth instead and ensure the area stays dry to prevent any risk of damage or electrical issues. How to clean high walls without using a ladder? A long-handled sponge mop or extendable microfiber duster works well for high walls. These tools allow controlled cleaning from the floor, reducing the need for climbing and improving safety during the process. Do painted walls attract more dust after cleaning? Walls do not attract more dust after cleaning, but residue from soap or improper drying can make dust stick faster. Proper rinsing and thorough drying help maintain a cleaner surface for longer periods. Can room ventilation affect wall cleaning results? Yes, good ventilation helps walls dry evenly and prevents moisture buildup. Poor airflow can lead to streaks or damp spots, so keeping windows open during and after cleaning improves overall results. Final Thoughts Walls stay in better shape when cleaning is done with the right steps instead of rushing or using harsh methods. I’ve noticed in my own space how small changes like using mild solutions, soft tools, and proper drying can prevent paint damage and keep the finish even. You’ve seen how everyday marks, stains, and buildup don’t need aggressive scrubbing when handled the right way. In my experience, most wall issues come from simple mistakes rather than tough stains. That’s why I shared what I follow in my own routine for how to clean painted walls safely. Try these tips in your space and notice the difference. Share your thoughts in the comments and check out other cleaning guides for more help!
Color Name Inkwell SW 6992 Brand Sherwin-Williams LRV 4 – very dark Undertones Cool blue-black; faint green visible in strong south-facing light Best For Cabinets, accent walls, front doors, bathrooms with good artificial light, home offices Avoid In Small rooms with no natural light; spaces with no warm contrast elements (wood, brass, cream) Inkwell Sherwin-Williams SW 6992 is a deep blue-black with an LRV of 4, and the single most important thing to understand before buying it is that “blue-black” is not marketing language. In the right light, those blue notes are real, and they change how the color reads across a room. It is not the same as Tricorn Black. It is not Iron Ore. It has its own register, and getting familiar with that register before you paint is what separates a confident result from a second-guess. Below, I’ll take you through the undertones, light behavior, finish recommendations, room-by-room uses, coordinating colors, and the comparisons people ask about most often. I’ll tell you where this color performs brilliantly and where it will disappoint you. Inkwell SW 6992 Undertones: What You Are Actually Seeing Sherwin-Williams describes Inkwell as having “a hint of blue,” and that is accurate as far as it goes. But the forum discussions and real-world reviews tell the rest of the story: some people get a room that reads navy in afternoon light, while others insist theirs looks purely black. Both are reporting correctly. The undertone is there and what changes is how much light you have to activate it. The RGB breakdown (43/48/53) shows something useful: the blue channel is slightly higher than the red, which is exactly why the blue notes can surface under certain lighting conditions. There is also a faint green influence that most people never consciously register, but which can become visible on bright south-facing days or next to warm yellows. North-facing rooms: Expect the blue undertone to be most visible. The color reads deeper, cooler, and distinctly blue-black rather than neutral black. South-facing rooms: Incoming warmth softens the color slightly. It will feel less intense than a north-facing reading, and the green note has the best chance of showing here. East-facing rooms: Morning light brings out a clear, calm blue quality that settles by midday. West-facing rooms: Late afternoon light adds a warmer, slightly charcoal shift to the color. This is often the most flattering reading of Inkwell. The practical takeaway: if you are working in a north-facing room and want this to read as near-black rather than blue-black, add warm light sources (brass-toned pendants, warm-white bulbs) to counteract the cool ambient. If you want to play up the blue depth, let the natural light do the work. How Light Behaves with Inkwell Sherwin-Williams Throughout the Day LRV 4 means this color absorbs a large amount of light rather than reflecting it back. That affects how the room feels at different times of day more dramatically than it would with a mid-tone paint. In morning light, Inkwell tends to read at its most blue and dimensional – the color has a rich, layered quality. By noon, it settles into a deeper, more neutral blue-black. In the evening under warm artificial lighting, it reads almost as a very dark charcoal with a warm edge. That shift is what makes Inkwell livable across long days. A pure black paint does not do that. Inkwell moves, which is part of why so many people find it sophisticated rather than oppressive. One practical note: test a large sample on the actual wall and look at it at 7am, noon, and 8pm before committing. The evening version and the afternoon version can feel like different colors in a well-lit room. Where to Use Inkwell SW 6992 Because Inkwell’s cool undertones stop it from feeling purely flat or neutral, it works across more surfaces than most near-black paints. Here is where it performs best, and what finish to use in each case. Inkwell on Kitchen Cabinets Inkwell on kitchen cabinets works best in satin or semi-gloss. Both finishes make the surface wipe-clean and give the color a slight sheen that plays off brass and gold hardware. Matte Inkwell on cabinets attracts fingerprints and tends to look chalky at close range rather than dramatic. Use it on lower cabinets or the island first if you want a confident starting point before committing all four walls of cabinetry. Pair with white quartz or marble countertops for a high-contrast look that keeps the kitchen feeling open. Inkwell in the Home Office A home office with Inkwell on all four walls is one of the best uses of this color. The deep blue-black creates an immersive, focused atmosphere that a matte finish enhances the velvety quality of flat Inkwell in an enclosed space is difficult to replicate with satin. Pair it with warm wood furniture and a brass desk lamp, and the result feels like a proper workspace rather than a converted spare room. The cool-toned walls benefit from warm light sources; without them, a fully-enclosed Inkwell office can feel cold. Inkwell in the Bathroom In a bathroom, use satin or eggshell, not matte. Bathrooms generate moisture, and a matte finish will absorb it over time, dulling the surface and making it harder to clean. Satin Inkwell in a bathroom catches tile-and-fixture light in a way that amplifies the spa atmosphere. White fixtures like sink, tub, toilet, pop sharply against it. Add gold or brass hardware and a statement mirror, and the bathroom reads as designed rather than just decorated. Inkwell in the Living Room Inkwell on a single accent wall in a living room – behind a fireplace or a TV console, adds depth without dominating the room. It also works exceptionally well on built-in shelves or bookcases, where the dark background makes artwork and objects stand out the way a gallery wall would. Pair with light sofas, textured rugs, and warm metals to balance the depth. Going all-four-walls in a large living room with good natural light is achievable; in a smaller, darker living room, start with one wall and see how it feels before committing. Inkwell on the Front Door On a front door, Inkwell reads as classic and commanding from the curb. The blue-black is distinct enough from standard black doors to be interesting, but not so different that it looks trendy. Warm white or cream trim sets it off cleanly. Brick, stone, or wood siding all work well with it. Use a semi-gloss finish on exterior doors for durability and for the visual impact of a slight sheen in sunlight. Inkwell on the Exterior Inkwell exterior is a strong choice for craftsman, modern farmhouse, and contemporary-style homes. On siding, it creates a high-contrast, architectural look that bright white trim sharpens considerably. If the home has natural stone accents or warm wood detailing, Inkwell provides a backdrop that highlights both. One practical note for exterior use: dark paint colors absorb heat, which can expand and contract siding materials more than lighter colors. Sherwin-Williams does offer Inkwell in an exterior formula – confirm the sheen level with your SW rep based on your siding material. That covers the main application options. The finish and surface choices above reflect what actually holds up in daily use – how a color performs at month six matters as much as how it looks on day one. Sherwin-Williams Inkwell Coordinating Colors Because Inkwell carries cool blue undertones, it pairs best with warm, slightly creamy neutrals rather than stark bright whites. A cold white next to Inkwell can make the room feel harsh. A warm white – something with an ivory or yellow base – pulls the warmth out of the color and makes the whole palette feel intentional. Coordinating Color Undertone Why It Works with Inkwell Best Use Alabaster SW 7008 Warm creamy white Softens Inkwell’s cool depth; the warmth in Alabaster counterbalances the blue undertone directly Trim, ceilings, upper cabinets Pure White SW 7005 Soft neutral white Creates a clean contrast without competing with Inkwell’s depth; works well where Alabaster might read too yellow Cabinet contrast, trim, doors Accessible Beige SW 7036 Warm greige Adds warmth in adjacent rooms without reading as a completely different palette Adjacent walls, hallways Antique White SW 6119 Warm off-white A slightly softer contrast than Pure White; particularly good in traditional or transitional homes Trim, ceilings, built-ins Urbane Bronze SW 7048 Deep warm charcoal Creates an earthy, layered palette when used in adjacent spaces or on exterior accents alongside Inkwell Accent walls, doors, exteriors The right coordinating palette does not just look good in a photo- it makes the Inkwell spaces feel cohesive as you move through the home. If you are using Inkwell in multiple rooms, Alabaster on trim throughout creates the thread that ties everything together. Inkwell SW 6992 vs. Similar Dark Sherwin-Williams Colors Even small undertone differences between near-black paints become significant once they are on a wall. These three comparisons come up most often from people who are choosing between Inkwell and something else. Inkwell vs. Iron Ore SW 7069 Iron Ore has brown-black undertones that make it feel warmer and more grounded than Inkwell. In bright rooms, Iron Ore reads as industrial and earthy – which works well in spaces with warm wood tones, exposed brick, or rust-toned accents. Inkwell reads as sleeker and more polished in the same conditions. If your furniture and materials run warm (walnut, amber, terra cotta), Iron Ore will blend more naturally into that palette. If you want Inkwell but your room reads warm, add enough brass or cream to balance the cool. Inkwell vs. Urbane Bronze SW 7048 Urbane Bronze is a deep brownish-gray with organic, earthy qualities. It is significantly warmer than Inkwell and blends easily into spaces with natural materials – linen, stone, reclaimed wood. Inkwell is darker, cooler, and makes a bolder contrast statement against light elements. If your room already has a lot of warm wood and natural texture, Urbane Bronze fits in; Inkwell stands out against it. That distinction matters depending on whether you want the color to anchor the room or pull focus. Inkwell vs. Tricorn Black SW 6258 Tricorn Black is a true neutral black with no perceptible undertone. It reads flat and clean across most lighting conditions – which can work beautifully on trim, doors, and exterior accents where you want something definitive. On walls, though, that flatness can feel harsh in bright light. Inkwell’s blue undertones give it a complexity that Tricorn Black does not have – it moves differently as the day changes, which is why many people find it easier to live with as a wall color over time. Choose Tricorn Black when you want clean and decisive; choose Inkwell when you want deep and dimensional. Pro Tip: If you are deciding between Inkwell and Tricorn Black for cabinets, get a Samplize peel-and-stick sample of each and put them side by side on your cabinet door for three days. Look at them under morning light, noon sun, and evening lamp light. The difference in undertone becomes very clear by day two. Design Styles That Work with Inkwell Sherwin-Williams Inkwell’s cool blue-black sits between pure black and navy, which makes it more flexible across design styles than a purely neutral dark paint. Moody Modern: Deep blue-black walls, matte black fixtures, and clean architectural lines. Inkwell adds drama without cold emptiness, especially alongside warm metals and sparse decor. Organic Modern: Natural wood, linen, and warm neutrals soften Inkwell’s intensity. The color reads grounded and rich – perfect for calm spaces that still have a point of view. Traditional: Brass hardware, rich wood furniture, and classic white trim bring out a library-like quality in Inkwell. It feels distinguished rather than trendy in formal rooms. Transitional: Inkwell bridges classic and contemporary without effort. It plays with ornate details and clean lines equally well. Coastal Modern: Paired with crisp whites, natural textures, and warm wood, Inkwell’s blue undertones echo depth and water without reading as a coastal cliche. The common thread across all these styles: Inkwell works when there is something warm nearby to pull against. Brass, cream, wood, or warm-white lighting – some contrast element is always in the mix. Without it, the cool undertone can read as cold rather than sophisticated. When NOT to Use Inkwell SW 6992 Most paint guides skip this section. Here is where Inkwell will give you trouble. In rooms with no natural light and no warm artificial lighting, Inkwell will feel oppressive rather than dramatic. A basement office or interior bathroom lit only with cool fluorescent bulbs is a bad match for this color. The blue undertone amplifies the cool quality of the light, and the LRV of 4 means the room will absorb most of what light there is. In very small rooms where the goal is to make the space feel larger, Inkwell works against you. It is a color for rooms where you want to feel enclosed, immersed, or focused – not for spaces where you are trying to push the walls out visually. If your furniture, flooring, and fixtures all run cool (grey stone floor, chrome hardware, blue-grey sofa), Inkwell will amplify that coolness rather than balance it. The color needs warmth somewhere to come alive. Without it, the room feels cold and flat rather than sophisticated and layered. Finally, if you are uncertain about dark colors and looking for a lower-commitment starting point, consider Sherwin-Williams Greenblack – it shares the dark, complex character of Inkwell but reads differently in certain lighting conditions and may feel like a more gradual move toward a very dark palette. Inkwell SW 6992 Paint Specs and Where to Buy Inkwell is available at any Sherwin-Williams retail location and through sherwin-williams.com in both interior and exterior formulas. Available finishes include flat/matte, eggshell, satin, semi-gloss, and gloss. For walls: matte or eggshell. For cabinets and doors: satin or semi-gloss. For exterior siding: consult the exterior formula availability with your local store. To test the color before committing, a Samplize peel-and-stick sample is the most practical option. It shows the actual paint color in your specific lighting without the mess of a traditional roller sample – and because Inkwell is very dark, seeing it in your room is far more reliable than judging a chip in-store. Color specs for reference: RGB 43/48/53, HEX #2B3035, LRV 4. Frequently Asked Questions These are the questions I hear most from people who have already got the chip on their wall and are trying to make a final call. What color is Inkwell Sherwin-Williams? Inkwell SW 6992 is a deep blue-black paint color with an LRV of 4. It reads as near-black in most conditions, with cool blue undertones that become more noticeable in north-facing rooms or under cool light. In warm or west-facing light, it reads as a very dark charcoal-black with minimal blue visibility. What are the undertones in Inkwell SW 6992? The primary undertone is cool blue. There is also a faint green influence that can surface in strong south-facing natural light. Both are subtle – Inkwell reads as near-black to most eyes – but they are present and will become visible depending on your room’s light exposure. Is Inkwell a good color for kitchen cabinets? Yes, particularly in satin or semi-gloss. The cool blue-black reads as dramatic and intentional on cabinet fronts, and the finish makes it wipe-clean. It pairs well with brass or gold hardware and white or light stone countertops. Avoid matte on cabinets – it shows fingerprints and can look chalky rather than dramatic at close range. How does Inkwell compare to Tricorn Black? Tricorn Black is a true neutral black with no visible undertones. Inkwell has cool blue undertones that give it a layered, dimensional quality Tricorn lacks. In bright light, Tricorn Black can feel flat and harsh; Inkwell maintains a moody, shifting quality across the day. For walls: Inkwell. For trim or accent applications where you want clean and definitive: Tricorn Black is the stronger choice. Can Inkwell be used on exteriors? Yes. Sherwin-Williams offers Inkwell in an exterior formula. It works well on craftsman, modern farmhouse, and contemporary homes. Pair it with bright white trim for maximum contrast. Because dark colors absorb heat, verify the finish and formula with your Sherwin-Williams store based on your specific siding material before purchasing. What white paint coordinates best with Inkwell? Alabaster SW 7008 is the most reliable pairing. Its warm, creamy undertone counterbalances Inkwell’s cool blue depth and prevents the combination from reading as cold or stark. Pure White SW 7005 works where you want a slightly cleaner contrast. Avoid bright cool whites – they amplify the blue undertone in Inkwell rather than softening it. Is Inkwell Sherwin-Williams good for front doors? It is one of the better near-black options for a front door because its blue undertone makes it more interesting than a straight black. It reads as classic and composed from the curb rather than stark. Semi-gloss finish is the right call for exterior door applications. Brass or gold hardware and warm white trim complete the look. Is Inkwell too dark for a small room? In a small room with good natural light and warm contrast elements, Inkwell can work by creating an immersive, cocooning atmosphere. In a small room with no natural light and no warm tones, it will feel oppressive. The honest answer is: test it before committing. A large sample on the wall is the only reliable way to know whether your specific room can carry it. Final Verdict: Is Inkwell Sherwin-Williams SW 6992 Right for Your Room? Here is what I would tell you at the paint counter: Inkwell Sherwin-Williams is not a safe color and should not be treated like one. LRV 4 is genuinely dark, and the blue undertone will show up in ways that a chip in-store never fully communicates. That said, it is one of the more livable near-blacks available because it shifts across the day instead of sitting flat. If you have a room with some natural light, warm contrast elements already in place (wood, brass, cream), and a finish plan that matches the surface – cabinets in satin, walls in matte – this color will deliver on its promise. If your room is dark and cold to begin with, consider Iron Ore as a gentler first step. If you are ready to commit: order a Samplize sample of Inkwell and test it on the north and south walls of your room before picking up a gallon.
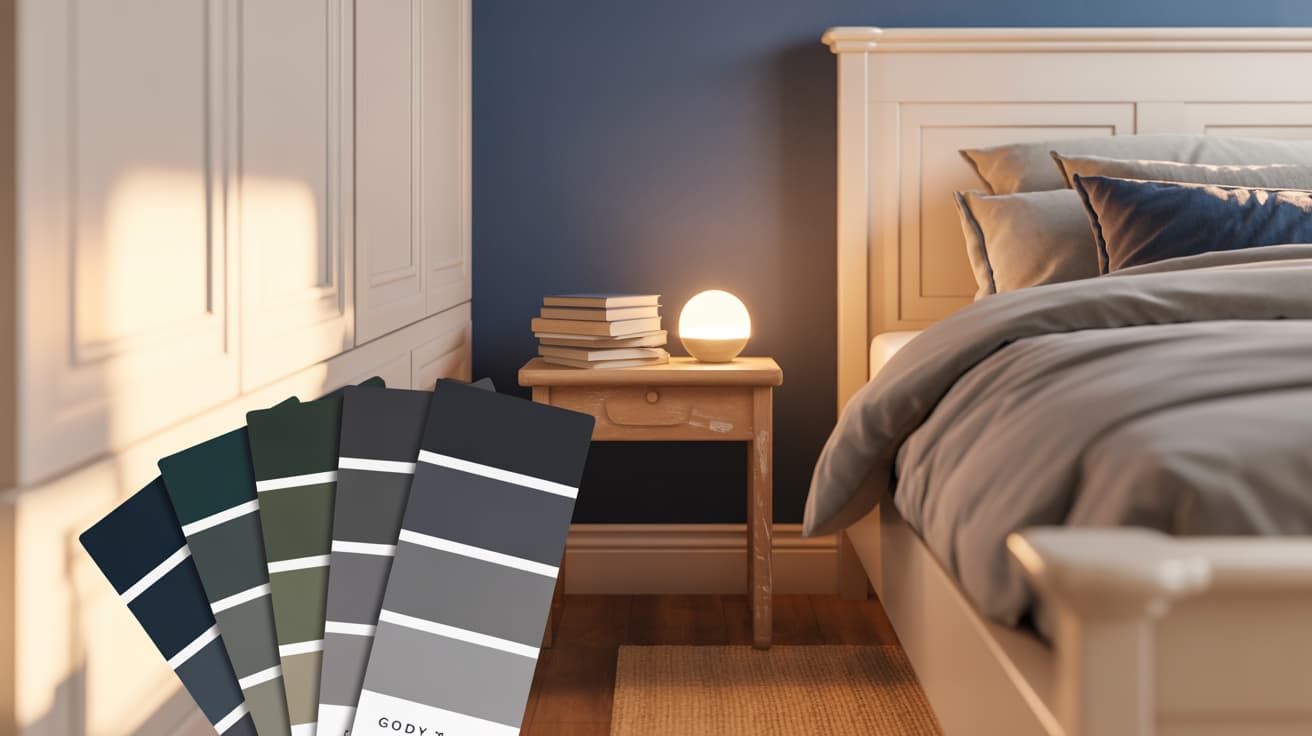
The right boys room paint ideas can turn a plain, forgettable space into somewhere your child genuinely wants to be. I’ve watched it happen with a single color change: a navy wall goes up, the white furniture suddenly pops, and a room that felt like a holding area becomes the place your kid wants to spend every afternoon. Paint is the cheapest lever in any room, and in a boy’s bedroom, it’s the one that moves the needle most. This guide covers 13 specific color directions, an age-by-age breakdown, the technical factors that determine how a color actually looks once it’s on the wall, and the painting techniques worth knowing before you open the first can. What Makes Paint Colors for a Boy’s Room Actually Work? Not every color that reads well on a chip translates to a wall. A few real factors decide whether a color succeeds in practice. Start with the room’s orientation and light exposure. A north-facing room will pull any color cooler and darker than the chip suggests. A south-facing room does the opposite, so a shade that looks muted in the store can feel intense once the afternoon sun hits it. Second, the color needs to work with everything already fixed in the space: the flooring, the trim color, the furniture finishes. Third, pick something with staying power. Navy, gray, and forest green carry a boy from age six to sixteen without feeling either babyish or jarringly adult. Finally, check how it looks under the room’s artificial lighting, not just in daylight. Choosing the right paint color comes down to how it performs across those real-world conditions, not how it looks on a Saturday afternoon in a showroom. 13 Boys Room Paint Ideas to Fit Any Style and Personality Here’s a close look at each color direction, what it actually delivers in a real room, and how to use it without it becoming a mistake you’re repainting in two years. 1. Bold Navy Blue for a Classic Look Navy blue is the most consistently successful choice on this list. It adds depth and visual weight without tipping into oppressive, and it reads as finished rather than childish from the moment the second coat dries. Pair it with white trim and gray furniture and the contrast does the work for you. Yellow accents, brass hardware, or warm wood tones all read well against it. Navy scales well with the child too: what works in a six-year-old’s room still looks intentional when he’s fifteen. 2. Soft Gray for a Calm, Neutral Backdrop Gray walls are the most forgiving choice on this list. They sit behind colorful bedding, posters, and accessories without competing, and they don’t force a decision on every future purchase. Medium grays with slight warm undertones perform best in kids’ rooms because they avoid the clinical quality of a cool blue-gray. The practical advantage: when his interests shift from dinosaurs to basketball to music, the walls stay current. You change the accessories, not the room. 3. Sky Blue for a Bright and Airy Feel Sky blue does one thing exceptionally well: it opens a small room up. If you’re working with a box bedroom under 150 square feet, this is the color that makes the walls feel like they’ve stepped back a foot. It pairs well with white, soft yellow, and warm beige, and it complements small bedroom layout strategies that already rely on keeping the visual field light and uncluttered. In rooms with limited windows, it compensates by keeping the atmosphere bright rather than dim. 4. Sage or Mint Green for a Refreshing, Natural Touch Green is one of the few colors that genuinely supports sleep and focus. Sage in particular sits in a useful middle ground: not so muted it reads like beige, not so saturated it demands attention. It pairs naturally with raw wood furniture, earthy textiles, and white trim. If you want a room that works for both rest and homework without adjusting the mood between activities, a warm sage is one of the most practical color choices here. 5. Earthy Terracotta for a Warm, Cozy Feel Terracotta reads warm, grounded, and slightly unexpected in a boy’s room, which is exactly why it works. It pairs with cream, tan, and olive well, and natural rattan or wooden furniture pulls the palette together without much effort. The caveat is light: terracotta needs a room with decent natural light. In a dim, north-facing room it can veer toward muddy. Get it under the room’s actual light conditions before committing to a full tin. 6. Dark Charcoal for a Sleek, Mature Room Charcoal is the right call for older boys, roughly ten and up, who want a room that doesn’t look like it belongs in a children’s furniture catalog. The key to making it work is contrast: light-colored furniture, white or off-white trim, and at least one source of warm artificial light to prevent the room from feeling cold after dark. Metallic accents, a desk lamp with a warm bulb, and light bedding all bring it back. Done right, it feels like a personal retreat rather than a bedroom. 7. Bright Orange for Energy and Imagination Use orange as a feature wall rather than all four walls. It stimulates energy and creativity, which is genuinely useful in a space designed for play and imagination, but a full-room orange application is difficult to live with after the first week. One wall in a warm burnt orange against three white or light gray walls gives you the impact without the fatigue. It suits younger boys well and pairs cleanly with gray, white, and natural wood. 8. Bold Red Accent Wall for a Sports Room A red accent wall works best behind the bed or the main desk wall, anchoring the room’s focal point and adding intensity without overwhelming the space. Dark wood furniture, black accents, and neutral surrounding walls keep it from feeling like a fast food restaurant. Red suits sports-themed rooms particularly well, where the energy of the color reinforces the theme rather than fighting it. 9. Cool Mint Green for a Focused Study Space Mint is lighter and cooler than sage, and it handles a different function. Where sage feels warm and grounding, mint reads as clean and alert, which makes it well-suited for rooms where homework gets done. It pairs with white, light wood, and soft gray without feeling clinical, and it keeps the room feeling open without needing an accent wall or additional color. For boys who need a calm environment to concentrate, it’s the most practical cooler-toned green on this list. 10. Dark Forest Green for an Adventure-Inspired Room Forest green is the darker, richer sibling of sage. It has real depth, and in a room with good natural light it feels immersive rather than heavy. Warm wood tones, leather accents, and vintage-style maps or outdoor photography all work with it. The surprise of forest green is how cozy it reads at night: unlike charcoal, it doesn’t go cold when the lights are low. For boys who love the outdoors, camping, hiking, or nature in any form, it connects the room to those interests without a single themed accessory required. 11. Light Taupe for a Subtle, Modern Look Taupe sits between beige and gray, which means it works with warm and cool furniture finishes without pulling in either direction. It’s an understated choice, not dramatic or immediately striking, but it ages better than most options on this list. For parents who want a room that doesn’t require repainting every three years as tastes shift, taupe is a reasonable long-term investment. It keeps the room feeling grown-up and cohesive regardless of what goes on the walls or shelves. 12. Vibrant Yellow for a Cheerful, Light-Filled Room Yellow is the most effective option for rooms with little to no natural light. It compensates with a warmth that other colors don’t deliver, keeping the space from feeling dim and closed-in regardless of the time of day. Use it as an accent wall balanced with white and neutral tones rather than all four walls. It suits younger boys particularly well and works with almost any furniture color scheme. The caution is saturation: a muted, warm yellow ages significantly better than a neon version. 13. Soft Lavender for a Unique, Creative Space Lavender breaks the convention of boys room colors, and that’s the point. For boys with artistic or creative personalities who want something personal and a little unexpected, soft lavender delivers a dreamy, calming atmosphere that encourages both rest and imagination. Pair it with silver, white, or soft wood. The rule is keeping it soft: a muted lavender reads sophisticated; a saturated purple reads juvenile. Silver and white accents prevent it from tipping too sweet. Best Paint Colors for a Boy’s Room by Age The right boys room paint ideas change as your child does. A color that energizes a five-year-old can feel out of place in the same room when he’s twelve. This breakdown matches color direction to developmental stage and interest set. Age Group Colors That Work Why Best Match Toddlers (1–3) Soft yellow, pastel blue, light green Gentle stimulation without overstimulation Sensory-driven, playful learners Preschoolers (3–5) Orange, sky blue, primary-toned accents Bold colors spark imagination and play Kids into toys, cartoons, creative storytelling Early school age (6–8) Navy blue, forest green, red accent Defined colors match growing confidence Sports lovers, outdoor adventurers Preteens (9–12) Charcoal gray, teal, olive green Deeper tones reflect developing individuality Gaming, art, science, nature exploration Teenagers (13+) Dark charcoal, slate blue, deep forest green Moody, sophisticated shades suit a personal space Music, sport, travel, minimalist aesthetics The pattern that holds across all of these age stages: keep the wall color flexible and bring strong personality in through bedding, posters, and accessories. Those are easy to swap. The walls aren’t. Six Factors That Change How Paint Looks Once It’s on the Wall Paint chips are misleading. The same color reads completely differently depending on the room it goes into. These six variables are why. Room orientation: North-facing rooms cool colors down and deepen them. South-facing rooms intensify warm undertones, sometimes dramatically. Artificial lighting: Warm incandescent or Edison bulbs pull yellow out of any color. Cool LEDs push greens and grays toward blue. Test a paint sample under the room’s actual light source, not daylight alone. Wall texture: Textured surfaces deepen color through micro-shadows. What reads as medium gray on a smooth wall reads noticeably darker on a textured one. Room size: Dark colors shrink a space. Light colors open it. This is physics, not preference, and it doesn’t change regardless of how much you like the darker shade. Finish: Matte softens and lightens a color. Semi-gloss intensifies it and adds reflectivity. The difference between satin and semi-gloss finishes can make the same base color look like two different shades on the same wall. Adjacent colors: Flooring, furniture, and trim all shift how the wall color reads. Never evaluate a paint sample in isolation from the room’s other fixed elements. Painting Techniques and Finishes Worth Knowing Choosing the right technique and finish is as consequential as the color itself. Here’s a quick reference before you make any decisions. Technique / Finish What It Does Best Application Matte Finish Non-reflective, hides wall imperfections Calm, pared-back look; less durable under scrubbing Eggshell / Satin Slight sheen, significantly more durable Best default for a boy’s room; holds up to the reality of daily use Glossy Finish Easy-wipe, highly durable surface Trim and doors rather than full walls Two-Tone Painting Divides wall into upper and lower color zones Adds structured visual depth; works well with navy or charcoal on the lower half Color Blocking Geometric shapes or panels of contrasting color High-energy, contemporary rooms; best with two or three colors maximum For a boy’s room specifically, eggshell or satin is the practical default. The walls will get scuffed, leaned on, and occasionally crayon-adjacent. A finish that can be wiped down without losing its surface is worth the small additional cost per gallon. Four Mistakes That Lead to Paint Regret Most color regrets in a child’s room come down to the same four decisions. Here’s where people go wrong and how to avoid it. Choosing full saturation: Highly saturated colors are stimulating in a paint chip and exhausting on four walls. Go for a muted version of the color you want, the kind that still reads as the color but doesn’t demand attention from every corner of the room. Not accounting for the next five years: A color that works perfectly at age five can feel jarring by ten. Navy, sage, warm gray, and forest green age well. Bright primary schemes usually don’t. Skipping the sample step: Test two shades on the actual wall, at least a foot square each, in morning light and at night. Paint looks nothing like the chip. That step eliminates most regrets before they happen. Following a trend for the base color: Trend colors date quickly and are hard to accessorize around as they shift in and out of favor. Keep the wall timeless. Bring trends in through bedding, rugs, and posters, things you can change without labor. Where to Buy Paint for a Boy’s Room These three sources cover the main scenarios, from in-person color consultation to safer formulas for children’s spaces. Where to Buy What You Get Best For Sherwin-Williams Color consultation, sample pots, in-store mixing Testing shades with personal advice before committing Benjamin Moore Premium color range, online room visualizer Browsing palettes and previewing shades in a virtual room ECOS Paints Low-VOC, low-odor, child-safe formulas Parents prioritizing air quality in a child’s sleeping space Regardless of where you buy: always get a sample pot and test the color on the actual wall before purchasing the full quantity. A two-dollar sample can save you from a decision you spend the next three years regretting. Frequently Asked Questions About Boys Room Paint Ideas What are the best paint colors for a boy’s bedroom? Navy blue, forest green, and warm gray are the most reliably successful choices across age groups because they age well, pair with most furniture finishes, and don’t force frequent repaints. For younger boys, sky blue and soft yellow also work particularly well. The “best” color depends on the room’s light conditions and your child’s personality more than any universal rule. What color should I paint a boy’s bedroom walls? Start with the room’s orientation. North-facing rooms suit warmer shades: taupe, warm gray, sage, and terracotta hold their warmth better than cool blues, which can turn cold and flat. South-facing rooms can take almost any color without correction. From there, match the shade to his age and interests using the age table above. What is the most popular color for boys’ rooms? Navy blue consistently performs as the most popular boys room choice, followed by gray and various shades of green. Navy’s appeal is its range: it works for a five-year-old and still looks deliberate for a teenager, which is why it keeps dominating boys room paint choices over time. What paint finish should I use in a boy’s room? Satin or eggshell is the practical default. Both stand up to cleaning and daily contact without losing their surface. Matte looks cleaner in photos but scuffs under real use. Save semi-gloss for trim and doors where the extra durability is worth the higher reflectivity. How do I choose a paint color my son will still like in a few years? Separate the base color from the theme. Navy, forest green, and warm gray hold up across age stages because they’re neutral enough to work with changing accessories. Bring the theme elements, the sports gear, the gaming posters, the collection of whatever he’s into, in through items you can swap. If the walls are timeless, the room stays current. Is dark paint safe to use in a boy’s bedroom? Yes, dark paint colors are completely appropriate in a boy’s room when paired with the right lighting. Charcoal, deep navy, and forest green all work well in spaces with adequate artificial lighting and at least one source of warm light. Always test the shade on the actual wall under the room’s lighting conditions before buying the full quantity. What color should I paint a small boy’s bedroom? Sky blue, soft gray, and light sage all make small rooms read as larger. Light-reflecting colors with a matte or eggshell finish keep the visual field open. If your heart is set on a darker shade, limit it to one accent wall rather than all four. Pairing it with the right layout for a small boys’ bedroom will do more for the room’s sense of space than any single paint decision. What paint color works best for a boys’ bedroom with no natural light? Warm yellows, terracotta, and warm off-whites compensate most effectively for low light conditions. They generate a sense of brightness under artificial light that cooler colors don’t. Sky blue can also work if the artificial lighting is warm-toned. Test samples under the room’s actual bulbs, not daylight, before deciding. Final Verdict: Which Boys Room Paint Ideas Are Worth Your Time? If you’re looking for the safest choice with the longest useful life, navy blue or forest green will serve you from age six through the teenage years without a repaint. If the room is small or dark, sky blue or warm yellow solves that problem more directly than anything else on this list. If your child is older, ten and above, and wants a space that feels like his own, charcoal with white trim and warm lighting delivers that. Order one or two sample pots, put them on the actual wall under the actual lighting, and make the call from there. Every color on this list looks different once it’s at scale. The sample step is the one decision that removes the guesswork.
If you’re trying to figure out what color paint goes with brown granite, the short answer is: it depends entirely on your slab’s undertones. Brown granite is never a single flat shade. It carries layers of rust, gold, amber, or gray running through the surface, and those details dictate which cabinet colors will look intentional versus accidental. I’ve watched clients bring home swatches they were certain about, only to see them fall flat the moment they held them next to the stone. That disconnect is more common than you’d expect. Once you understand what’s driving it, the whole decision gets a lot easier. Pro Tip: Always check your slab in your own kitchen lighting before committing to a cabinet color. A swatch that looks perfect in the showroom can read completely differently under warm incandescent overhead lights versus a bright north-facing window. A light brown granite with warm honey undertones needs a very different cabinet color than a darker slab carrying cooler gray veining. Getting that read right is the difference between a kitchen that holds together and one that always feels slightly off. Key Factors That Affect Cabinet Color Selection with Brown Granite Cabinet color doesn’t exist in isolation. These are the variables that will change how any color reads once it’s actually on your cabinets: Lighting Natural and artificial light alter how cabinet colors appear throughout the day. A warm cream that looks grounded at 7am can shift to almost yellow by afternoon in a south-facing kitchen. Test swatches at multiple times of day before deciding. Room Size Lighter colors reflect more light, which makes smaller kitchens feel less closed-in. Darker shades add depth and a more intimate feel, but they require adequate natural light to avoid making the space feel heavy, especially when paired with brown granite. Existing Finishes Flooring, walls, and hardware all interact with cabinet color. If your flooring has warm reddish tones and your granite carries gold undertones, stacking another warm cabinet color can push the whole kitchen into over-saturated territory. One element in the room needs to cool things down. Granite Finish Type One factor most guides skip: the finish on your granite slab. Older honed or leathered surfaces absorb light differently than polished granite, which flattens warm tones. If your slab has a matte finish, I recommend going slightly richer or warmer with your cabinet color to compensate for that light absorption. Best Cabinet Colors for Kitchens with Brown Granite These color families cover the full range from subtle and timeless to bold and dramatic. Each one is matched to specific granite undertone types so you can narrow down quickly. Soft Whites and Off-Whites Soft whites bring timeless elegance to kitchens with brown granite. They keep the space bright and balanced, letting the countertops read as the focal point. The key is choosing a white with the right undertone: too warm and it competes with golden granite; too cool and it reads stark against earthy stone. 1. Alabaster (SW 7008) Alabaster adds a quiet, creamy softness that balances gold and honey tones in the stone without pushing them into yellow territory. It works especially well in traditional kitchens where the goal is warmth rather than brightness, and it keeps the overall look cohesive without competing with the granite’s natural character. One practical note: in north-facing kitchens with limited natural light, Alabaster can read almost bone-white. If that’s your situation, test it alongside SW Creamy (SW 7012), which carries a stronger yellow base and holds its warmth better under cooler light conditions. 2. White Dove (BM OC-17) White Dove brings gentle warmth that feels made for cozy, traditional kitchens. It doesn’t try to be stark white; instead it settles into a soft, inviting tone that complements the natural variation in brown granite without drawing attention away from the countertops. Note: If you’re torn between Alabaster and White Dove, hold both swatches next to your granite at 7pm under your kitchen’s overhead light. That’s the hardest lighting moment for warm neutrals, and it’s the one that tells you the truth. Warm Neutrals Warm neutrals create a seamless, cohesive flow in kitchens with brown granite. These grounded shades add depth and sophistication without competing with the stone’s earthy character. They’re also the most forgiving option if your kitchen has mixed lighting conditions. 3. Accessible Beige (SW 7036) Accessible Beige acts as a natural bridge between brown granite and the rest of the kitchen. Its warm, slightly peachy tone harmonizes with granite that carries tan or sandy undertones. In open-concept kitchens where cabinetry needs to flow seamlessly with countertops and walls, this is one of the most reliable choices available. 4. Revere Pewter (BM HC-172) Revere Pewter sits in the sweet spot between gray and beige: sophisticated without going cold. It complements both warm and cool brown granite, which makes it one of the most versatile neutral options in this category. If your kitchen has mixed finishes or varied lighting, this greige tone adapts without reading muddy. It works across traditional and transitional styles without feeling dated. Soft Greens and Earthy Tones Soft greens and earthy tones bring a natural, organic quality to kitchens with brown granite. They add quiet color that echoes the stone’s geological warmth without overpowering it. These work best when the rest of the kitchen stays neutral, letting the cabinets carry the personality while the granite anchors the space. 5. Clary Sage (SW 6182) Clary Sage introduces a calming, nature-inspired quality that pairs well with brown granite carrying gray or greenish undertones. It adds color without overwhelming the space, which makes it a strong choice for farmhouse and cottage kitchens where the goal is warmth over drama. 6. Aganthus Green (BM HC-128) Aganthus Green bridges the gap between modern and organic. It pairs well with neutral brown granite, bringing a fresh, soft touch that feels contemporary without being trendy. This is the kind of shade that photographs well, ages gracefully, and makes the granite feel as if it was always meant to be there. Contrasting Dark Colors Dark cabinet colors create bold, dramatic kitchens that make brown granite’s natural patterns and lighter flecks stand out with striking contrast. They require adequate natural light and careful hardware selection to keep the space from feeling closed-in. 7. Tricorn Black (SW 6258) Black cabinets make a bold, contemporary statement that lets lighter flecks and patterns in brown granite pop with striking contrast. They work best paired with lighter brown granite to avoid creating a space that feels too heavy. Add plenty of natural light and warm metal hardware to keep the look from going cold. 8. Black Bean (BM 2107-10) Black Bean brings rich, warm depth without the starkness of true black. It complements medium to light brown granite while maintaining a traditional or transitional feel that doesn’t date. If you want dark cabinets but aren’t ready to commit to full black, this is the natural stepping stone. Pair with cream or warm white walls to keep the space feeling balanced and open. 9. Iron Ore (SW 7069) Iron Ore works particularly well with brown granite that carries cool gray undertones, creating a sophisticated, layered look with modern appeal. It’s a smarter alternative to black: slightly softer, more nuanced, and easier to balance in a full kitchen. Brushed-nickel or matte-black hardware both look strong here. Keep the backsplash light to give the space room to breathe. Matching Cabinet Colors Based on Your Specific Granite Variation Brown granite isn’t one-size-fits-all. The right cabinet color depends on your slab’s specific undertone profile. Use this as your starting reference, then test samples in your actual lighting before committing. Granite Variation Best Cabinet Colors Why It Works Warm Brown (gold/honey undertones) Alabaster, Accessible Beige, Muted Olive Warm neutrals echo golden undertones without amplifying them; olive adds earthy depth Cool Brown (gray undertones) Revere Pewter, Iron Ore, Rosemary Sage Cool-leaning tones create cohesive layered contrast without fighting the stone Dark Brown White Dove, Swiss Coffee, Tricorn Black Off-whites brighten heavy stone and create breathing room; black makes patterns pop Medium Brown Light Taupe, Dusty Eucalyptus Warm darks and soft neutrals balance mid-tone granite without flattening it The table above covers the four most common brown granite profiles. If your slab has strong veining in multiple directions, evaluate which undertone dominates under natural light at midday, as that reading is the one that most impacts how your cabinet color will read day-to-day. Colors That Don’t Work with Brown Granite Most guides tell you what works. Knowing what to avoid is just as useful when you’re standing in a paint store with thirty chips in your hand. Cool True Grays Colors like Repose Gray (SW 7015) with no warm base will read as icy next to brown granite’s inherent warmth. They can work in kitchens with warm overhead lighting, but in daylight-heavy spaces they fight the stone rather than complement it. Stark Bright Whites Pure White or Bright White creates contrast that’s too severe. It makes brown granite look dated rather than elegant. Always reach for an off-white with a warm undertone instead. If you’re building a full cabinet color scheme, reviewing how warm versus cool whites behave in a kitchen will help you nail the right side of that divide before you buy a sample. Saturated Blues and Greens Jewel-toned blues (cobalt, royal blue) and saturated greens (Kelly green) draw out the warm tones in brown granite and make the stone appear orange. Stick to muted, gray-leaning versions of these hues if you want color in the kitchen. Yellow-Dominant Creams If your granite already has strong gold or amber flecks, a yellow-leaning cream will push those tones into overwhelming territory. The whole kitchen ends up reading as yellowed rather than warm. Test the undertone of any cream against your granite before committing. Hardware and Finishing Touches Cabinet color is the biggest decision, but hardware, backsplash, and flooring complete the picture. Getting these wrong can undermine a cabinet color that would otherwise work well. Hardware Pairings by Cabinet Color Brass and gold hardware add warmth to white or neutral cabinets paired with brown granite. Bronze works well with darker cabinets, while brushed nickel complements cool-toned granite and cabinet combinations. Alabaster or White Dove cabinets: unlacquered brass or antique bronze Sage Green or Greige cabinets: brushed brass or satin nickel Black or Charcoal cabinets: matte black for a monochromatic look, or warm brass for contrast Backsplash With brown granite, avoid busy or patterned backsplash tiles unless you’re deliberately going maximalist. The granite already provides visual complexity. A simple cream, pale gray, or soft white subway tile is almost always the right call. It keeps the focus on the countertop and cabinets as the designed elements in the room. Flooring Choose wood or tile flooring that echoes the granite’s undertones without matching them exactly. A direct match creates a flat, layered sameness. A complementary tone creates depth. If your granite has warm gold tones, a medium-warm oak floor works. If the granite reads cooler, a lighter maple or gray-toned tile gives the room contrast without fighting the stone. Practical Tips for Painting Cabinets The right paint color only performs as well as the prep work behind it. These steps ensure your cabinet color looks intentional and holds up to daily kitchen use. Preparation: Remove hardware and doors, clean all surfaces with a degreaser, sand with 120-grit sandpaper, fill any imperfections with wood filler, wipe down with a tack cloth, and apply a cabinet-specific primer before painting. Paint selection: Use cabinet-specific paint in a satin or semi-gloss finish. Alkyd formulas offer maximum durability; acrylic latex is easier to clean up. Always test samples in your kitchen lighting first, not in a store or a different room. Maintenance: Clean regularly with mild soap and water using a soft microfiber cloth. Wipe spills immediately to prevent staining. Touch up chips promptly and consider applying furniture wax annually to protect the finish. Common Mistakes to Avoid These are the errors that send people back to the paint store a second time: Choosing stark white cabinets: Pure whites clash with brown granite’s warm undertones and make the kitchen feel sterile instead of cohesive. Ignoring the granite’s undertones: Brown granite comes in warm, cool, and neutral variations. Picking a cabinet color without reading those undertones first leads to results that look right in the store and wrong in your kitchen. Skipping paint samples: Colors shift under natural light, artificial light, and evening light. Always test samples at multiple times of day before buying a full gallon. Focusing only on cabinets: Walls, flooring, and hardware all interact with cabinet color. A cabinet color that works perfectly in isolation can look disconnected in the room once everything else is factored in. Frequently Asked Questions These are the questions I hear most often from people who’ve already narrowed their options down to two or three colors and are still not sure. What is the best cabinet color for warm brown granite with gold undertones? Alabaster (SW 7008) and Accessible Beige (SW 7036) both work well. They echo the golden undertones in the stone without amplifying them into yellow territory. If you want a bit more contrast, a soft muted olive like SW Oakmoss gives the space depth without clashing. What cabinet color goes with dark brown granite countertops? Off-whites like White Dove (BM OC-17) or Swiss Coffee (Behr) are the most reliable options. They brighten the space and prevent the stone from dominating the room. Black cabinets are also a strong choice if you want a high-contrast, dramatic look that lets the granite’s patterns pop. Can I use gray cabinets with brown granite? Yes, but only if you choose a greige tone rather than a cool true gray. Revere Pewter (BM HC-172) is the most versatile option: it sits between gray and beige, which means it complements both warm and cool brown granite without the icy undertone clash that a pure gray creates. Do green cabinets work with brown granite? Soft, muted greens work well. Clary Sage (SW 6182) and Aganthus Green (BM HC-128) both pair naturally with brown granite because they carry gray undertones that keep the palette grounded. Avoid saturated greens like Kelly or forest green, which can make the granite appear orange. Can I use two-tone cabinets with brown granite countertops? Yes. Pairing lighter upper cabinets with darker lower cabinets works well with brown granite. It adds visual depth without overwhelming the space. A common pairing is off-white uppers with a warm greige or charcoal lower, which lets the granite read as the connecting element between both tones. Should cabinet color change if I have brown granite on both the island and perimeter counters? With granite on multiple surfaces, keep cabinets in one cohesive neutral family. Using a dramatically different color on the island versus the perimeter will draw the eye to the color contrast rather than the stone, which defeats the purpose of feature granite. A tonal shift is fine; a full color switch is usually too much. What color not to use with brown granite countertops? Avoid stark whites (Pure White, Bright White), true cool grays with no warm base, saturated jewel tones in blue or green, and yellow-dominant creams if your granite already carries strong amber flecks. Each of these either clashes with the stone’s warmth or amplifies an undertone until the kitchen reads as one-note. Final Verdict If I’m standing at the paint counter with a client who has brown granite at home, the first thing I ask is: does it read warm or cool in morning light? That single answer eliminates half the color families immediately. For warm brown granite with gold or honey undertones, Alabaster or Accessible Beige are the most dependable starting points. For granite with gray veining, Revere Pewter or Iron Ore will hold the room together better than any pure neutral. When it comes to what color paint goes with brown granite, the right answer is always in the stone, not on the chip. Order two or three samples, tape them next to your granite, and look at them at 7am and 7pm before you decide.
The benjamin moore vs sherwin williams comparison matters before you buy, not after, because the wrong choice means an extra coat, a flat finish in afternoon light, or a wall that scuffs in six months. Both brands have earned their reputation. The question is which one earns it on your walls, for your project. Benjamin Moore has built its reputation on color quality and finishes that hold up under close inspection. The brand sells through independent dealers, where in-store guidance tends to be specific and useful. Its higher solids content contributes to strong hide and smooth results, and lines like Aura and Regal Select reflect that. Sherwin-Williams operates differently. With over 4,500 dedicated stores across North America, it is one of the most accessible paint brands available. Contractors default to it for large-scale work, exterior projects, and high-traffic surfaces because it performs consistently across varied conditions. Where it clearly leads is washability: scuff a wall, wipe it down, and the paint holds without fading or streaking. For households with kids or pets, that is a practical advantage worth paying for. Knowing these differences before you buy saves time, money, and a second trip to the store. Side-by-Side: Key Differences That Actually Matter Six factors tend to separate an average paint job from a great one. Here is how both brands stack up so you know exactly what you are paying for. 1. Coverage: Fewer Coats, Less Work Benjamin Moore leads on coverage. Its higher solids content gives the paint better hide on the first pass, and most color changes land in one to two coats, even over dark or saturated walls. Sherwin-Williams is competitive in its premium Emerald line, but mid-range options often need an extra coat, particularly over deep tones like navy or forest green. Pro Tip: If you are painting over a dramatically different color, both brands benefit from a tinted primer. Benjamin Moore’s Fresh Start primer pairs well with Aura and Regal Select and reduces the coat count considerably. Sherwin-Williams has its Extreme Block primer for similar situations. Skipping primer to save money often costs more in paint. 2. Durability and Washability Sherwin-Williams carries a clear edge in scrubbing resistance, which matters most in kitchens, bathrooms, and busy hallways. Both brands handle everyday wear without complaint. Benjamin Moore, by contrast, holds its color tone more consistently over the years. Walls look closer to day-one condition without repainting. For high-traffic spaces, that durability gap is worth factoring into the decision before you choose a line. 3. Application and Ease of Use Benjamin Moore flows more smoothly from brush or roller, with less drag and fewer visible roller marks. That makes it more forgiving for those without professional experience. Sherwin-Williams can run thicker or thinner depending on the product line, requiring more technique for even paint application, particularly across wide, flat surfaces where inconsistency tends to show up clearly under direct light. 4. Finish Quality Benjamin Moore produces a richer, more layered look that reads differently under natural and artificial light, especially in matte and eggshell sheens. Sherwin-Williams gives a more uniform finish across large flat walls, making it a stronger pick for open-plan spaces where visual consistency matters more than tonal depth. Both deliver clean results, but the finish character differs. 5. Price and Real Value Benjamin Moore costs slightly more upfront, but that gap reflects fewer coats in most situations. Sherwin-Williams runs frequent promotions, sometimes 30 to 40% off, which can bring premium lines to a comparable price point. The real value depends on coat count: a cheaper gallon requiring three coats typically costs more in time and product than a pricier one that covers in two. 6. Color Selection Benjamin Moore stands out for its neutral palette. Whites, greiges, and warm tones shift noticeably under different lighting, making color selection more precise. Sherwin-Williams makes color matching fast and accessible, which is a practical advantage when replicating an existing shade or referencing another brand’s palette. Both brands offer thousands of colors, so volume alone will not be the deciding factor here. One underrated advantage Benjamin Moore holds is their ColorReaders tool, which scans surfaces in your home and recommends paint colors that harmonize with your existing materials. For anyone who has struggled to pick a wall color that works with fixed elements like wood floors or granite countertops, it is genuinely useful. No single factor determines the better brand. It always depends on your specific surface, your color choice, and how much time you realistically have. The sections ahead break that down further. What Contractors Prefer: and Why The professional split comes down to practicality rather than brand loyalty, and most experienced contractors will tell you that directly. Sherwin-Williams tends to be the default for exterior and commercial work. It holds up well against weather, traffic, and time, and the dense store network makes sourcing large orders straightforward. For interior residential projects, though, a significant portion of those same contractors quietly switch to Benjamin Moore. The reason comes up consistently: finish quality and client satisfaction. When a homeowner is standing in a freshly painted living room under afternoon light, the depth and smoothness of the finish is what they notice, and Benjamin Moore delivers that more reliably. The working rule of thumb from the trade is simple: reach for Sherwin-Williams where durability and weather resistance take priority, and reach for Benjamin Moore where the final appearance is what the client is actually paying for. Product Lines: A Quick Reference Both brands organize their products into clear tiers, each built for a different project type and budget. Knowing which line does what saves time and prevents an expensive misstep at the store. Benjamin Moore Benjamin Moore keeps its lineup focused on three core interior options. Each one targets a different budget and performance level, so the right choice depends on how much coverage and finish quality matter to you. Line Available Finishes Best For Typical Coat Count Aura Matte, Eggshell, Satin, Semi-Gloss Premium interiors, rich color payoff 1 to 2 coats Regal Select Flat, Matte, Eggshell, Low Luster, Semi-Gloss, High Gloss Everyday interior walls 2 coats Ben Flat, Eggshell, Semi-Gloss Budget-conscious interior projects 2 coats Aura is the clear top-tier pick for interiors where the finish is the priority. Regal Select hits the sweet spot between performance and price, while Ben works well for straightforward repaints without a significant quality trade-off. Sherwin-Williams Sherwin-Williams covers more ground across interior, exterior, and everything in between. These three lines represent the most commonly recommended options across different project types, budgets, and durability requirements. Line Available Finishes Best For Durability Level Emerald Matte, Satin, Semi-Gloss, Gloss High-end interiors and exteriors Excellent Duration Satin, Low Luster, Gloss Exterior longevity in varied climates Outstanding SuperPaint Flat, Satin, Semi-Gloss, Gloss Value option, general use Good Emerald is the strongest all-around option and frequently goes on sale, making it a compelling value at the premium tier. Duration is the workhorse for exterior projects and holds up exceptionally well in climates with freeze-thaw cycles or high humidity. SuperPaint covers most standard interior needs without stretching the budget. What Homeowners and Painters Actually Say Online forums and Reddit discussions surface a few consistent patterns in the benjamin moore vs sherwin williams debate. Benjamin Moore earns consistent praise for coverage and ease of application, with many users noting fewer coats and less hassle overall. The finish is often described as polished without being flashy. Sherwin-Williams receives strong reviews for durability, particularly for exterior projects in humid climates and areas with intense sun exposure. Some long-term Sherwin-Williams users have noted a decline in mid-range coverage, likely related to adjustments around VOC regulations. These are the questions I hear most often from people who have already taped the trim and are trying to make the final call. Frequently Asked Questions Is Benjamin Moore better than Sherwin-Williams? Not across the board. For interior work and finish quality, Benjamin Moore is often the preferred choice. For durability and exterior applications, Sherwin-Williams holds a clear practical edge. The answer depends on the project. Which paint lasts longer on exterior walls? Sherwin-Williams generally holds up better in exterior conditions and under heavy scrubbing. Its Duration line is specifically built for climates with extreme temperature swings. Both perform comparably on interior walls under normal residential use. Why do contractors prefer Sherwin-Williams? Availability, consistent pricing, and long-term durability make it the practical default for professionals handling high-volume work across multiple project types. The store network means they can source paint quickly without waiting on special orders. Does Benjamin Moore Aura cover in one coat? Often, yes, particularly over similar base colors. The higher solids content in Aura gives it better hide on the first pass. Other Benjamin Moore lines like Regal Select typically require two coats for full, even coverage. Which is better for interior walls? Benjamin Moore delivers a cleaner, more polished finish with less effort. Its smoother application makes it more forgiving for those painting without professional experience, and the color depth is more noticeable in rooms with natural light. Is Sherwin-Williams Emerald worth the price? For high-traffic spaces and exterior surfaces, yes. It offers comparable durability to premium Benjamin Moore lines and frequently goes on sale at 30 to 40% off. At sale price, Emerald is difficult to beat for demanding applications. Which paint brand is better for kitchen cabinets? Sherwin-Williams Emerald Urethane is a common professional choice for cabinets given its hardness and scrubbability. Benjamin Moore’s Advance line is the comparable pick and is well regarded for a smooth, factory-like finish. Both outperform standard interior wall paint on cabinets. Which One Should You Choose? Neither brand is a wrong choice, but each fits a different type of project. For interior work where the finish is the main event, Benjamin Moore is consistently the stronger pick. The coverage, application feel, and final result tend to justify the slightly higher upfront cost, and the difference is most visible in rooms with natural light, where a well-applied coat of Aura or Regal Select simply reads better on the wall. For exterior surfaces and high-traffic spaces where paint takes real punishment, Sherwin-Williams is the more practical choice. Its durability, washability, and wide store availability make it a reliable option for demanding conditions. Timing a purchase around a Sherwin-Williams promotion can bring Emerald down to a genuinely competitive price, and for exterior work especially, that combination of durability and value is difficult to match at a similar tier. If you are still undecided, here is the shortcut: if the room has significant natural light and color accuracy is your first priority, use Benjamin Moore Aura. If you are painting a high-traffic space, an exterior surface, or you are working with a tight budget and can catch a Sherwin-Williams sale, go Emerald. For specific color decisions within each brand, the Sherwin-Williams Natural Choice review and the Debonair by Sherwin-Williams guide show how individual colors perform in real rooms. The same principle applies to navy paint comparisons where brand choice intersects with undertone behavior. Benjamin Moore vs. Sherwin-Williams: Which Paint Brand Is Right? Here is what I would tell you at the paint counter: if you are painting an interior room with good natural light and you want the color to look exactly right at 7am and 7pm, go with Benjamin Moore Aura. If you are tackling a high-traffic hallway, a kitchen, or exterior siding that will face real weather, Sherwin-Williams Emerald is the more durable and often better-value choice when bought on sale. The benjamin moore vs sherwin williams decision is not about which brand is better overall. It is about matching the right paint to what your specific wall actually needs. Start with your room type and your light conditions, then choose the line that fits. Order a sample, test it on the wall before you commit to a gallon, and let it dry fully before you judge the color.





