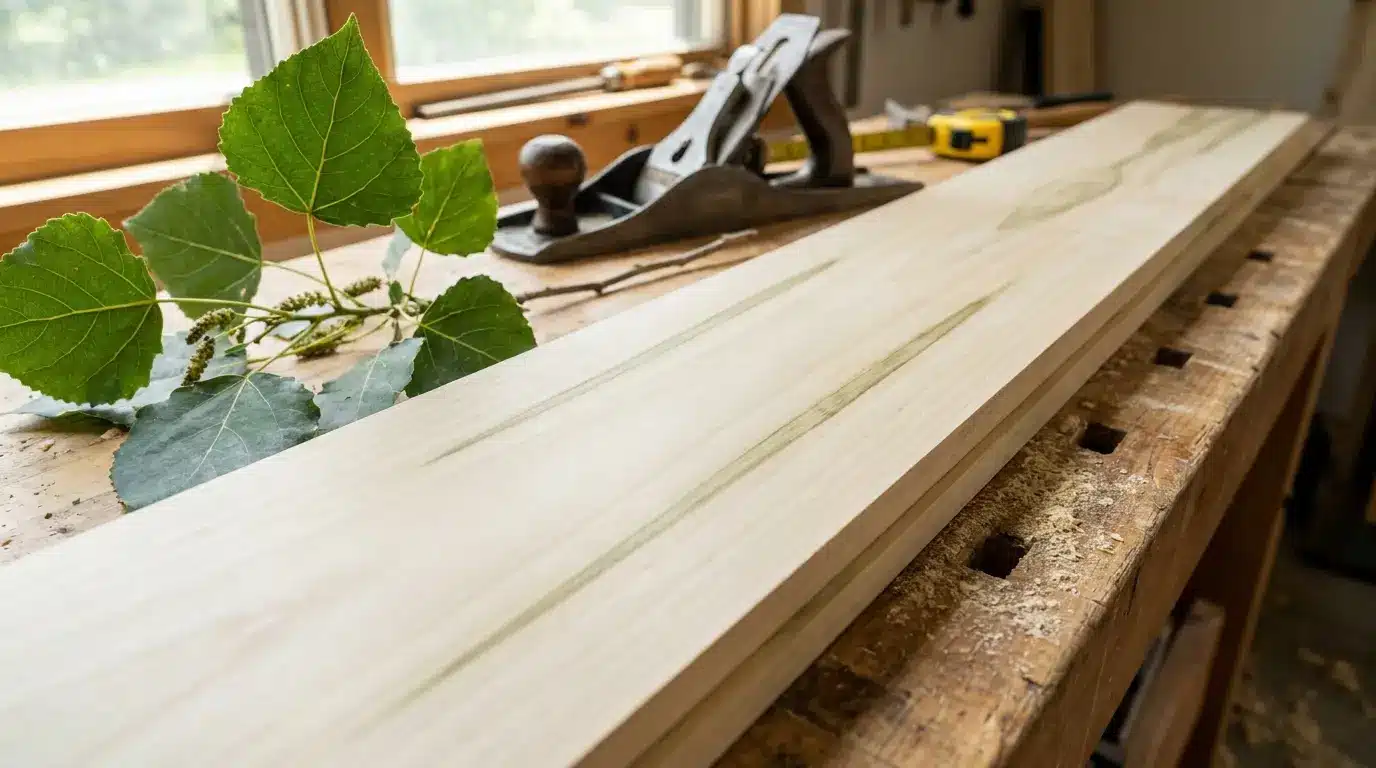
Poplar wood Value Classification Hardwood Janka hardness 540 lbf Common nicknames Tulip poplar, yellow poplar, whitewood Best for Painted furniture, frames, trim, plywood Not ideal for Flooring, cutting boards, outdoor furniture With more than 20 years of woodworking experience in carpentry and custom furniture, I have seen how different woods perform in real-world projects and which lower-cost options are actually worth using. Yes, poplar is a hardwood. It comes from a broadleaf tree rather than a conifer, which is why it’s classified as such. Still, its Janka hardness rating is much lower than woods like oak or maple, so it dents and scratches more easily. That is why poplar often causes confusion at the lumberyard. Although it is technically a hardwood, it behaves more like a softer wood in everyday use. Why Poplar Counts as a Hardwood The hardwood and softwood labels do not describe how hard a wood feels to the touch. Hardwood comes from angiosperms, flowering trees that drop their leaves each fall. Softwood comes from gymnosperms, mostly cone-bearing evergreens like pine, spruce, and cedar. Poplar flowers every spring and sheds its leaves every autumn. That single trait places it in the hardwood group, no matter how soft the milled lumber feels. Most lumber sold as poplar actually comes from the tulip tree, or Liriodendron tulipifera. American yards almost always stock this wood as poplar, even though true Populus trees, like aspen and cottonwood, also exist. Pine, fir, and cedar never enter this conversation, since they grow cones instead of flowers. Density and weight play no part in the classification at all. How to Identify Poplar Wood If you already own a board and want to confirm the species, follow these steps. Check the color: Poplar sapwood runs creamy white in most boards you encounter. Its heartwood shifts from pale yellow-brown to olive green, sometimes within the same board. Check the grain and texture: The grain remains straight and even, with a fine-to-medium texture, similar to oak or ash. Look for mineral streaks: Some boards pick up green, gray, or purple streaks as the tree grows. Woodworkers call this rainbow poplar, and it often sells at a premium. Compare the weight: Hold a poplar board next to an oak board of the same size. The poplar will feel noticeably lighter almost right away. What Poplar Wood is Used for Builders reach for poplar all the time, just not always where you can see it. 1. Furniture and Frame Parts These sit under upholstery or paint, where appearance is not important to the buyer. Among the types of wood for furniture, poplar is commonly used for hidden frames because it is lightweight, affordable, and easy to work with. Builders choose it for furniture supports since the frame stays concealed after assembly. Its low weight also helps reduce shipping costs on large orders. 2. Paint-ready Cabinets and Trim Cabinets, shelves, and trim take a smooth coat once primed properly. Millwork, molding, and door parts often use poplar, too, since most are painted rather than left natural. The straight grain helps paint sit evenly across long trim runs. Many kitchen cabinet makers use poplar for face frames before painting the whole piece. 3. Plywood Core Material Plywood cores gain lightweight strength from poplar without adding much extra bulk. This makes plywood easier to install without giving up rigidity. Manufacturers like poplar cores because they resist warping better than some softwood alternatives. This keeps plywood sheets flat during storage and shipping. 4. Pallets and Crates These rely on poplar for its low cost and light weight during transport. Poplar boards withstand repeated loading without breaking down quickly. Shipping companies also value how easily poplar takes nails and staples. Its lightweight also keeps freight costs down for large shipments. 5. Small Hobby Builds Carved signs, wooden toys, and photo frames made at home often use poplar. Its soft texture makes hand carving easier for beginners. Poplar also holds paint and varnish well on finished projects. Painters favor poplar because it holds a clean, even coat without much prep work. Carpenters like it because it rarely splits when nailed close to an edge, even on thin trim pieces. Why Poplar Feels Softer than Other Hardwoods The Janka scale ranks wood hardness by pressing a steel ball into a board until it embeds halfway. Poplar scores 540 pounds of force, compared to 1,290 for red oak, 1,450 for maple, and 1,010 for walnut. Even Douglas fir, a softwood commonly used for house framing, rates around 700 on the Janka hardness scale, making it harder than poplar. This lower Janka rating helps explain why poplar is easy to cut, shape, and work with in a workshop. A quick comparison clears up why poplar confuses so many buyers. Trait Hardwood Softwood Tree type Angiosperm, flowering Gymnosperm, cone-bearing Leaves Broad, drop each fall Needles, mostly evergreen Common examples Oak, maple, poplar Pine, cedar, fir Typical density Usually higher Usually lower Exceptions Poplar, balsa Douglas fir, yew Density sits in the usual column for a reason. Poplar and balsa are both hardwoods that score low on the Janka scale. Douglas fir and yew are softwoods that hold up better than people expect. The tree’s method of reproduction determines the label, not how the board feels in your hand. Poplar Compared to Other Common Hardwoods A side-by-side table makes these differences easier to see than raw numbers alone. Wood Janka hardness Durability Best use Poplar 540 lbf Low to moderate Painted furniture, frames, trim Black cherry 950 lbf Moderate Fine furniture, cabinets Black walnut 1,010 lbf High Furniture, veneer, gun stocks Red oak 1,290 lbf High Flooring, cabinets, trim Hard maple 1,450 lbf Very high Flooring, butcher blocks Poplar sits at the bottom of this list on hardness, but it also costs noticeably less than the others. For painted or hidden work, like frames or trim, that price gap usually favors poplar. For daily use in the open, such as a dining tabletop, oak or maple makes more sense. Is Poplar a Durable Hardwood Durability depends on how you use the wood, not just its hardwood label. Indoors, poplar lasts for years, especially once painted or sealed. It works well for modularfurniture, cabinet parts, and frames where heavy impact is limited. It dents more easily than oak or maple, so it struggles on floors or tabletops. Furniture frames, cabinet boxes, and trim rarely take hard hits, making poplar a practical choice for these applications. Regular dusting and occasional waxing help painted poplar furniture maintain its finish longer. Outdoors, poplar breaks down quickly without a sealed finish. With the right protection, it can still perform well for suitable projects. A fresh coat of paint or sealant every few years helps keep outdoor pieces protected. Poplar’s Limits Worth Knowing No single wood species works for every job, and poplar has a few clear limits worth knowing. Dents and scratches under everyday use, making it a poor fit for tabletops or floors with regular traffic. Blotches when stained, unless you apply a pre-stain wood conditioner first to even out absorption. Rots fairly quickly outdoors without a sealed finish over the top. Carries none of the natural rot resistance found in cedar or redwood. Needs a sealed finish before it faces rain, sun, or ground contact. Frequently Asked Questions Is it okay to burn poplar in a wood stove? Yes, seasoned poplar can be burned in a wood stove. It lights easily but burns faster and produces less heat than denser hardwoods. Is poplar better than pine? Poplar is usually better for indoor furniture because it is smoother and has less resin. Pine is often preferred when you want a stronger grain and a rustic look. Which variety of poplar is best? Tulip poplar is one of the best varieties for woodworking because it is lightweight, easy to shape, and widely available. The best type depends on the project. What is the lifespan of a poplar tree? Most poplar trees live for about 30 to 50 years. Some healthy varieties may survive for 100 years or longer in suitable conditions. How fast can a poplar tree grow? Poplar trees are fast-growing and may grow about 3 to 5 feet each year. Growth depends on the variety, soil, sunlight, and water supply. Is Poplar the Right Choice? Picking poplar comes down to what the finished piece needs to survive over time. Choose poplar for painted furniture, hidden frames, interior trim, and budget builds where looks matter more than raw toughness. Skip it for flooring, cutting boards, or any surface that sees daily wear without a protective coat. Its lower price beats oak, maple, or walnut whenever a project calls for paint over a natural wood look. A first apartment bookshelf, a painted nightstand, or a set of interior door trim all fit this description well. If the piece stays indoors under a coat of paint or primer, poplar rarely disappoints the person who picked it.
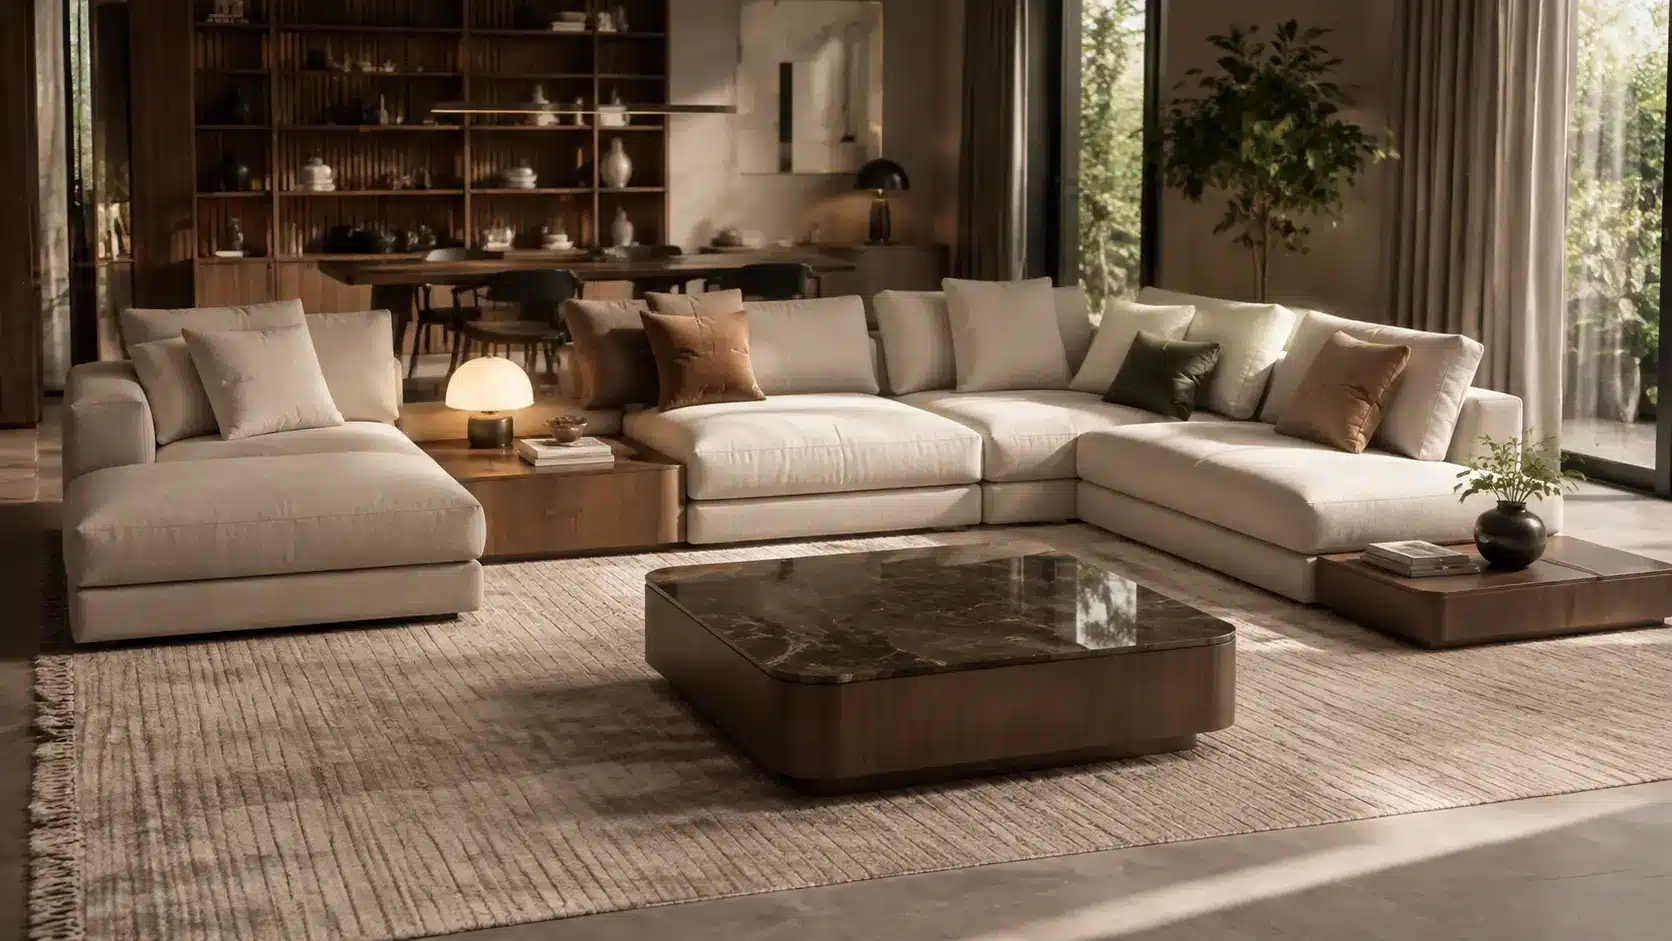
Most furniture is built for a fixed room in a fixed life. Buy a sofa, put it against the wall, leave it there for a decade. That approach works until the room changes, the family grows, or the apartment gets smaller, and the sofa suddenly does not fit through the door. Modular furniture was designed around that problem. Instead of one rigid piece, you get a system of components that can be rearranged, expanded, or scaled down as your space and needs shift over time. This blog covers what modular furniture actually is, the main types available, how it differs from sectional furniture, what it typically costs, and what to check before buying a system for your home. What is Modular Furniture? Modular furniture is built from separate, standardized units called modules that can be combined, rearranged, or expanded to fit different spaces and needs. Instead of buying one fixed piece, you assemble a system from individual components. A modular sofa might include armless seats, corner pieces, and ottomans that can be arranged in dozens of layout combinations. The same logic applies to shelving, storage, beds, and office furniture, where each module functions independently yet connects seamlessly with others. A modular shelving unit, for example, might start as a single small cube and later grow into a full wall of connected storage without replacing the original piece. Why Modular Furniture is Popular Now Modular furniture has moved well beyond a niche design trend to become a genuine market force, backed by real numbers. The U.S. modular furniture market reached $24.3 billion in 2025 and is projected to continue growing steadily through 2035, driven largely by shrinking home sizes and rising urban living costs. Younger buyers and small families are a major part of this shift, favoring pieces that combine practicality with style over furniture that locks them into one fixed layout. Demand from offices and co-working spaces has also added to the momentum, as businesses look for seating and desk systems that can be rearranged as teams and layouts change. This mix of residential and commercial demand is why modular furniture, once a mid-century design idea, has become an everyday shopping category rather than a specialty product. What are the Features of Modular Furniture True modular furniture is defined by four core traits that make it function as a system rather than just a collection of matching pieces. Each unit is built to standardized dimensions, so modules from the same collection connect without gaps or mismatched heights. Those same pieces can be rearranged into different configurations, an L-shape one month and a straight line the next, without buying anything new. Any individual module, such as an armless chair, also serves as standalone furniture when separated from the rest of the set. And because you can add new units later, the system grows with your space and needs rather than becoming obsolete when either changes. What are Types of Modular Furniture Modular design shows up in more categories than most people realize, well beyond the living room sofa. 1. Modular Sofas and Sectionals Armless chairs, corner units, chaises, and ottomans that combine into custom layouts. These pieces can be used as a sofa and a separate chair, or linked into a full sectional, depending on the room. Many systems also include a chaise module that can be moved to either end of the sofa. Best for: living rooms and shared spaces that need flexible seating arrangements. 2. Modular Shelving and Storage Systems Stackable cubes, adjustable shelves, and cabinets that expand as your storage needs grow. New units can be added on top of or beside existing ones without replacing what you already own. Some systems also allow shelves to be repositioned within the same frame as needs change. Best for: closets, home offices, and rooms that need storage to scale over time. 3. Modular Bed Systems Wall beds with built-in cabinetry, desks, or sofas that fold away when not in use. These systems allow a single room to function as a bedroom at night and an office or living space during the day. Some designs fold up vertically, while others tuck into a cabinet unit along the wall. For studios or smaller layouts, space-saving furniture can complement modular bed systems by maximizing available space and improving everyday functionality. Best for: studio apartments and guest rooms that double as other spaces. 4. Modular Office Furniture Desks, partitions, and seating systems designed to be reconfigured as office layouts change. Teams can shift from private desks to open collaboration areas without buying new furniture each time. Panels and dividers can also be added or removed to adjust privacy levels within a shared space. For home setups, minimalist home furniture choices can complement modular systems by creating flexible work areas with practical desk and storage solutions. Best for: co-working spaces and offices that frequently rearrange teams or layouts. How Much Does Modular Furniture Cost Pricing varies widely, but general market patterns give a useful starting point. Budget modular pieces, such as a single armless chair or storage cube, often start at $200 to $400 per module. Mid-range modular sectionals and shelving systems typically run $800 to $2,500 for a full set, depending on size and material. Higher-end designer modular systems, especially from brands rooted in the Eames and Nelson design tradition, can run well above that range. These figures reflect general retail patterns rather than a single fixed price, since cost depends heavily on materials, brand, and module count. What are the Benefits of Modular Furniture Modular furniture earns its popularity by solving problems that fixed furniture simply cannot. Space efficiency is usually the first draw, since modules can be rearranged or scaled down to suit furniture ideas for compact homes and multi-purpose rooms. That same setup gives you flexibility over time, letting the same pieces adapt as your needs shift, whether that is a growing family or a home office turning into a guest room. There is a cost angle too. Buying one module at a time spreads the expense, and you can replace a damaged piece individually rather than buying an entirely new set. That same modularity also makes moving day easier, since smaller pieces are far simpler to carry through narrow doorways and staircases. Modular Furniture Design Ideas for Every Home Beyond the showroom, modular design shows up in everyday settings where flexibility solves a real, ongoing problem. Micro-apartments and studio units: Wall beds and fold-away desks let one room serve as a bedroom, office, and living space depending on the time of day. Co-working offices: Movable desks and partitions let a single floor plan shift between quiet workstations and open team areas within the same day. Rental homes: Renters use modular pieces to furnish a space without committing to furniture that will not fit their next apartment. Growing families: Modular kids’ furniture, like bunk systems that separate into two beds, adapts as children grow or siblings need their own space. Hospitality and healthcare settings: Lobbies and waiting areas use modular seating to reconfigure layouts for events, social distancing needs, or changing foot traffic. How to Choose Modular Furniture for Your Space Picking the right system takes a bit more thought than a standard furniture purchase. Measure your room and doorways first, since modular pieces must still fit through hallways and entryways during delivery. Check how the modules connect, whether through clips, brackets, or simple friction fit, since sturdier connectors tend to hold up better over years of rearranging. Confirm that individual modules can be purchased separately later, in case you want to expand the set or replace a worn piece down the road, and stick to one collection or line rather than mixing modules from different product lines, since fabric and finish rarely match exactly across collections Modular Furniture vs. Sectional Furniture These two terms are constantly confused, so it helps to draw a clear line between them. Knowing the difference makes it easier to find the right product and avoid buying something that doesn’t meet your actual needs. Feature Modular Furniture Sectional Furniture Scope Covers sofas, shelving, beds, and office systems Refers specifically to seating Layout Can be split, expanded, or rearranged freely Arranged into an L-shape, U-shape, or straight line Relationship The broader category One specific type of modular seating Note: Every sectional is modular, but not everything modular is a sectional. Pros and Cons of Modular Furniture Most articles on this topic only list benefits, so here is a fairer, two-sided look. Modular furniture solves real problems, but it also comes with trade-offs worth knowing before you buy. Looking at both sides together gives a clearer picture than either list on its own. Pros Cons Rearranges to fit different rooms and layouts Can feel less structurally solid than one-piece furniture Damaged modules can be replaced individually Matching fabric or finish on future add-ons can be tricky Scales up or down as your space changes Larger systems can be complex to assemble Often easier to move through doorways in pieces Connector hardware can loosen over time with heavy use Weighing both sides against how you actually plan to use the furniture is the best way to decide if it fits your space. No single pro or con should decide the outcome, since the right answer depends on the specific room and household. Frequently Asked Questions Which brand is considered the best for modular sofas? Brands like Burrow, Lovesac, West Elm, and IKEA are highly regarded for modular sofas due to their quality, flexibility, and design options. Do modular couches stay together? Most modular couches use clips, brackets, or locking systems. These connectors prevent the individual sections from separating during use. What is the 4-inch rule for furniture? The 4-inch rule applies to the height of furniture seats. Sofas, chairs, and ottomans should have seat heights within four inches of one another. What furniture store has the best-quality furniture? The best furniture store depends on your needs and budget. Compare materials, construction, warranties, and customer reviews before purchasing. Does Walmart have quality furniture? Walmart offers several reliable and affordable furniture options. However, quality varies depending on the brand, materials, seller, and product. Final Thoughts Modular furniture solves a real problem for a country living in smaller spaces than it used to, but it works best when chosen with intention rather than picked for flexibility alone. Understanding the actual differences between modular and sectional pieces, knowing the honest trade-offs, and checking how well a system can grow with you make the difference between furniture that adapts to your life and furniture that just sits there looking flexible. The right modular setup should feel less like a compromise and more like furniture built for how you live.
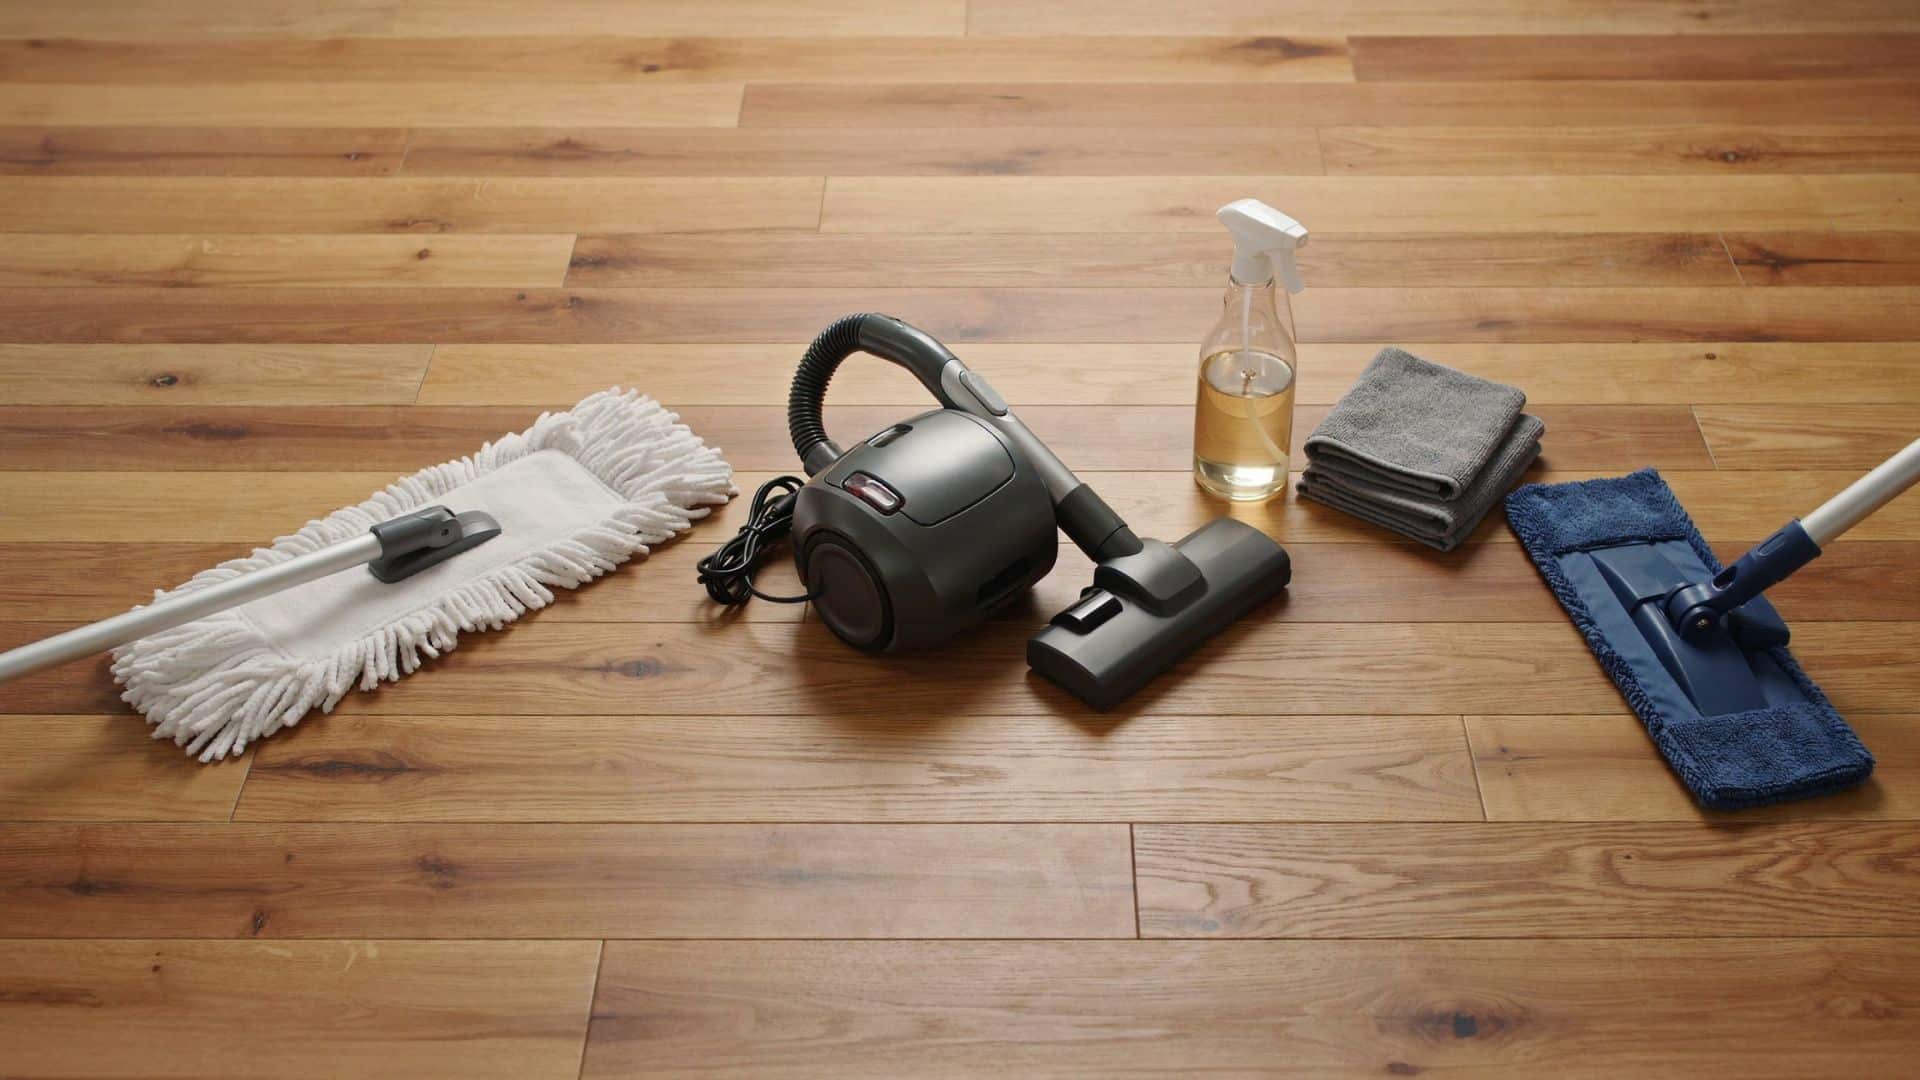
Hardwood floors add warmth and value to a home, but their finish can wear down quickly without proper care. Dust, grit, excess moisture, and the wrong cleaning products often cause scratches, dullness, and surface damage. Keeping hardwood floors clean starts with simple habits. Remove debris before mopping, use a cleaner suited to the floor’s finish, and avoid soaking the wood. The right tools and cleaning routine help protect the finish while keeping the surface looking fresh. Essential Tools and Cleaner for Hardwood Floors Before cleaning hardwood floors, gather the right tools and products to avoid scratches, residue, and moisture damage. The items below help remove dirt safely while protecting different floor finishes. Tool / Care Item How to Use It Microfiber mop Picks up dust and grime without scratching the finish, making it a safe choice for regular hardwood floor cleaning. Soft-bristle broom and microfiber cloths Remove loose dirt and handle spills, corners, and small cleaning areas quickly. Hardwood-safe vacuum Use the bare floor setting, turn off the beater bar, and choose soft attachments to prevent scratches and scuffs. pH-neutral hardwood cleaner Choose a water-based cleaner that matches your floor’s finish. Avoid harsh chemicals and residue-forming products that can dull or damage the surface. Know your floor finish. Polyurethane floors handle light damp cleaning, while oil, wax, and water-based finishes require specific products and care methods. Control moisture Use a spray bottle or a lightly damp mop instead of soaking the floor, as excess water can cause swelling or damage. Using the correct tools and controlling moisture make routine cleaning safer and more effective. Always match your cleaning method to your floor’s finish to prevent unnecessary damage. How to Clean Hardwood Floors Step by Step Before you start cleaning, it helps to follow the right order to protect your hardwood finish. The process begins with removing dirt and buildup, then moves through careful mopping, drying, and maintenance steps that keep floors looking clean without exposing them to excess moisture. 1. Remove Dirt and Stubborn Buildup First, remove dust, pet hair, and loose debris using a microfiber mop, soft broom, or hardwood-safe vacuum. For high-traffic areas, use a microfiber cloth with hardwood cleaner to lift stubborn dirt. Gently clean between floorboards with a soft attachment, avoiding excess moisture that can seep into seams. 2. Prepare the Cleaning Solution Always follow the cleaner’s instructions instead of adding extra product. Too much solution can leave behind a sticky film that attracts more dirt and makes the floor look dull. Spray a light mist over a small area rather than soaking the surface. 3. Damp Mop the Floor Use a mop that feels slightly damp, not wet. Work in small sections so moisture does not sit on the wood for too long. Rinse the mop regularly, or replace the microfiber pad when it gets dirty, to avoid spreading grime across the floor. 4. Dry the Floor Properly After cleaning each section, wipe away leftover moisture with a dry microfiber cloth or make a dry pass with your mop. Removing excess water helps protect seams and prevents issues like swelling or warping. 5. Restore Shine After Cleaning If your hardwood looks dull after cleaning, the issue may be a worn finish rather than leftover dirt. Hardwood polish can temporarily improve the appearance, but it does not repair damaged coatings. Floors with heavy wear may need professional refinishing to restore their original look. 6. Maintain Clean Floors Between Deep Cleanings Regular maintenance keeps hardwood floors cleaner and reduces the need for frequent wet cleaning. Sweep high-traffic areas often, place mats near entrances, use furniture pads to prevent scratches, and clean spills as soon as they happen to protect the finish. How to Clean Different Types of Hardwood Floors Sealed Hardwood Floors: Most modern hardwood floors are sealed with polyurethane. Use a damp mop with a pH-neutral cleaner and avoid harsh products that can damage the finish. Unfinished Hardwood Floors: Without a protective coating, hardwood is more susceptible to moisture damage. Use dry cleaning methods and avoid excess water to prevent stains or warping. Engineered Hardwood Floors: The thin layer of real wood over a composite core requires careful moisture control. Use minimal liquid and avoid soaking the surface. Older Hardwood Floors: Older finishes may react differently to cleaners. Test products in a hidden area first and use gentle cleaning methods on worn or aged floors. What Not to Use on Hardwood Floors Before cleaning hardwood floors, knowing what to avoid is just as important as knowing what to use. Certain products and cleaning methods can damage the finish, trap moisture, or create buildup that affects the floor’s appearance over time. Keep these common mistakes in mind to protect your hardwood investment. Avoid Excess Water: Standing water can seep into seams, causing swelling, warping, or cupping. Use a lightly damp mop instead of a wet one. Avoid Steam Cleaners: Steam adds heat and moisture that can penetrate between boards, damaging the wood or subfloor. Avoid Harsh Chemicals: Bleach, ammonia, and abrasive cleaners can dull or strip the hardwood finish. Avoid Wax and Oil-Based Products on Certain Finishes: These products can leave buildup on modern polyurethane floors and affect future refinishing. Always check your floor’s finish first. Common Mistakes When Cleaning Hardwood Floors One of the most common hardwood floor cleaning mistakes is mopping before removing dust and debris, as grit can scratch the finish during cleaning. Using the wrong mop can also cause problems, with abrasive materials damaging the surface and overly wet mops increasing the risk of moisture. Avoid cleaning with water too frequently, as repeated exposure to moisture can wear down the finish over time. Clean spills quickly, since liquids left sitting can seep into the wood and cause water stains or surface damage. Conclusion Keeping hardwood floors looking good comes down to gentle tools and the right cleaner for your finish. Keeping moisture to a minimum every time you clean matters just as much. None of this requires anything complicated, just a routine you actually stick to. A little consistency now saves you from a much bigger refinishing job later. It keeps the floor looking like the investment it was. Frequently Asked Questions What is the best thing to wash your hardwood floors with? Use a microfiber mop with a pH-neutral hardwood floor cleaner recommended for your finish. Avoid excess water and harsh cleaners that can damage the protective coating. Can I use Swiffer wet cloths on hardwood floors? You can use Swiffer wet cloths on some sealed hardwood floors if you use them lightly, but avoid leaving moisture behind. Always check your flooring manufacturer’s recommendations first. What do professional cleaners use on hardwood floors? Professionals typically use microfiber mops and hardwood-safe, pH-neutral cleaners designed for the floor’s specific finish. They focus on low-moisture methods to protect the wood. What is the best homemade cleaner for hardwood floors? A simple, damp microfiber mop is often the safest homemade option for many sealed hardwood floors. Avoid vinegar mixtures, as they may dull or weaken some finishes over time. Is Murphy’s Oil Soap good for wood floors? Murphy’s Oil Soap can be used on some finished wood surfaces, but it may leave residue on certain hardwood floors. Check your finish type and the manufacturer’s care instructions before using it regularly.
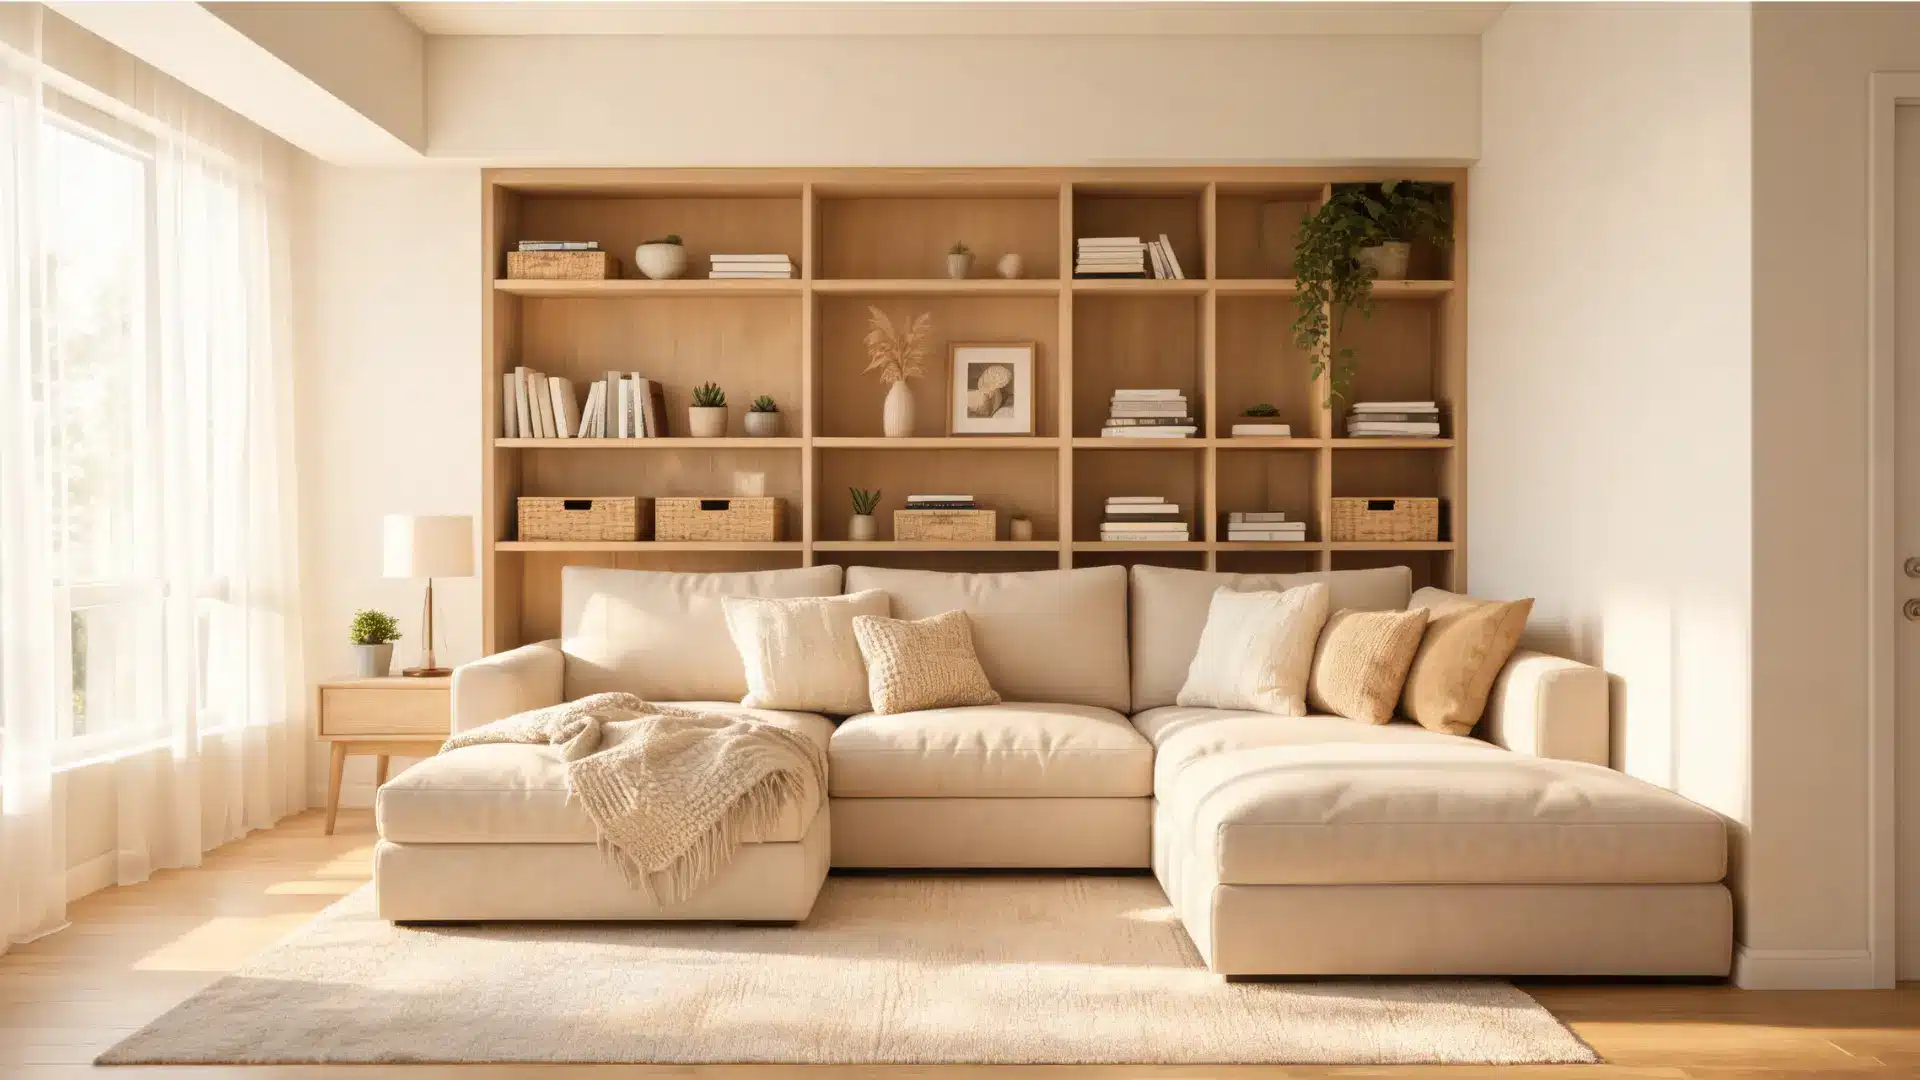
Ever bought a beautiful piece of furniture, only to realize it is too big, too small, or just not right for your space? That is exactly why custom furniture exists. I see it as furniture made around a real room, a real lifestyle, and a clear purpose. Standard store-bought pieces can make a room feel complete, but they do not always fit or function the way you need. Custom furniture gives you more control over size, style, comfort, storage, and materials, so you do not have to settle for “close enough.” Here, you will learn what it means, how it differs from ready-made options, its main types, and why it can be a smarter choice. What is Custom Furniture? Custom Furniture is the furniture designed, built, or modified to match your size, style, material, comfort, and functional needs. It may also be called custom-made furniture, bespoke furniture, or made-to-order furniture, depending on how much control you have over the final design. Furniture can make a room feel finished, but standard store-bought pieces do not always fit the way you need them to. That is where custom furniture becomes useful. When I think about custom furniture, I think of pieces made around a real space, a real lifestyle, and a clear purpose. The Four Types of Custom Furniture Not every custom furniture piece is made the same way. The differences matter, especially when it comes to cost, lead time, and how much control you actually get. Here’s how they break down: 1. Fully Custom Furniture Fully custom furniture starts from a blank slate. You bring a room problem or a specific need, and a designer or furniture maker builds something new around it. The process typically includes a consultation, exact measurements, design sketches or 3D drawings, material selection, and a final approval before anything gets cut. This is the option for people with genuinely unusual spaces: a wall-to-wall bookshelf that works around an existing window, a dining table scaled to a narrow galley-style room, a bed built to use every inch of a small bedroom. Lead times are longest here, and so is the cost. But you walk away with something that exists nowhere else. 2. Customized Furniture Customized furniture starts with an existing design but lets you change specific details, fabric, leg finish, cushion firmness, and dimensions. You’re not building from scratch, but you’re not stuck with what’s on the floor either. A sofa you can specify in 12 fabrics and three depth options is customized furniture, not fully custom. It’s a reasonable middle ground for most homeowners who want something that fits their space better than the standard version. 3. Made-to-Order Furniture Made-to-order furniture is built only after you place your order. The design template is fixed, but you choose from available options, fabric, finish, and size tier. Think of it as a step above ready-made: more choice than walking into a store, less freedom than specifying a piece from the ground up. Production begins after you commit, which means longer delivery times than stock furniture but usually shorter than fully custom work. 4. Bespoke Furniture Bespoke is often used interchangeably with “fully custom,” but in practice, it tends to signal handcrafted construction and a stronger emphasis on premium materials. A bespoke piece is made for one client. It reflects their room, their use case, and usually their taste for craftsmanship over convenience. If you’re comparing options, the word “bespoke” usually means the maker is working in solid wood with traditional joinery rather than flat-pack components. Understanding which category a piece falls into helps you evaluate the quote you’re getting. A “customized” piece priced like a fully custom one is worth questioning. Custom vs. Ready-Made: Where the Real Differences Are Ready-made furniture is mass-produced to standard sizes. You pick it, pay for it, and have it in days or weeks. That speed and accessibility is a real advantage when it matters. Custom furniture inverts the process: you define what you need, and the piece gets built around that. The trade-off is time and upfront cost. Feature Custom Furniture Ready-Made Furniture Design Built or modified for your needs Pre-designed to standard templates Size Exact measurements of your room Fixed standard sizes Materials Chosen by you, often solid wood Pre-selected, often engineered wood Timeline 4–16 weeks, depending on complexity Days to a few weeks Cost Higher upfront Lower upfront Durability Usually solid construction, longer lifespan Varies widely by price point Returns Usually not possible after approval Easier to return within policy windows The honest read on this: ready-made furniture is the right call when you need something quickly, have a tight budget, or are furnishing a space you won’t be in long. Custom furniture earns its cost when you’re staying put, the room has a layout that standard pieces can’t solve, or you want something that still looks right in 20 years. How Custom Furniture Actually Behaves Over Time This is where most buying guides stop short. Knowing what custom furniture looks like, new is the easy part — what matters more is how it performs after years of daily use. Solid wood custom pieces age in ways that engineered wood doesn’t. Oak and walnut develop a patina that typically improves their appearance over time. A well-joined solid wood frame won’t rack or sag the way particleboard does under sustained load. Dovetail drawer boxes outlast drawer slides on budget pieces by decades. That said, solid wood species like oak move with humidity; a custom oak dining table will expand and contract slightly with the seasons. A good maker accounts for this in how the top is attached to the base. A bad one doesn’t, and you find out when the top splits three years later. For upholstered custom pieces, the frame matters more than the fabric. An 8-way hand-tied spring construction in a custom sofa will outlast a sinuous spring frame regardless of how good the fabric looks on day one. If you’re specifying a custom sofa, ask about the frame and spring system before you discuss fabric. The other long-term consideration is repair and refinishing. A solid wood custom piece can be sanded, refinished, and reupholstered. Most ready-made furniture, once worn, gets replaced. Over a 20-year horizon, the economics of custom often look better than the upfront price suggests. Materials Used in Custom Furniture Material choice is where custom furniture decisions get made or wasted. Here’s how the most common options compare for furniture use: Species / Material Janka Rating (lbf) Best Furniture Use Typical Cost (board ft) Durability White Oak 1,360 Tables, cabinets, bed frames $6–$12 Excellent Walnut 1,010 Dining tables, desks, shelving $10–$20 Very Good Hard Maple 1,450 Workbenches, chairs, drawers $5–$10 Excellent Cherry 950 Cabinets, dressers, bed frames $7–$14 Good Teak 1,155 Outdoor furniture, indoor tables $20–$40 Excellent (moisture-resistant) Pine (soft) 870 Shelving, casual pieces, kids’ furniture $3–$6 Fair (dents easily) Teak is listed here because it’s also one of the more durable woods for outdoor furniture, where moisture resistance matters as much as hardness. Beyond wood, custom furniture regularly uses metal for frames and legs (especially in modern and industrial designs), glass for tabletops and cabinet faces, and upholstery materials including cotton, linen, velvet, leather, and performance fabrics for seating. Finishes, oil, lacquer, stain, paint, wax, protect the wood and determine the final visual character of the piece. Finish Interaction: What Works and What Doesn’t The finish choice depends on the species and the intended use. This is something many buyers overlook until it’s too late to change. Oil finishes (like Rubio Monocoat or Osmo) penetrate the wood surface and let it breathe. They’re ideal for walnut and oak; they deepen the grain without a plastic sheen, but they require periodic reapplication, typically every 1–3 years on a dining table. Lacquer and conversion varnish create a hard surface film. They’re more durable against water and daily wear, but can yellow over time on lighter species and are harder to spot-repair. Wax is fine for display pieces or low-wear surfaces, but has no place on a kitchen table or a desk that sees daily coffee cups. Hard wax oil gives you a middle ground on species with open grain like ash or oak, good durability with a more natural look than lacquer. One thing to check before approving a custom order: ask the maker what finish they’re applying and why. A maker who can’t explain their finish choice in relation to your specific species and use case is a concern. The finish you choose also affects how a piece reads in a room. Walnut with an oil finish and walnut under lacquer look noticeably different, the oil version reads darker and richer, the lacquer version brighter and slightly more uniform. If you’re combining a custom piece with existing furniture, matching wood tones across pieces depends as much on finish type as it does on species. The Budget Reality Check on Custom Furniture Custom furniture costs more than ready-made. That’s not the question. The question is where the cost is justified and where it isn’t. The price premium on fully custom furniture is real — a custom solid oak dining table might run $2,000–$5,000, where a comparable ready-made piece costs $600–$1,200. Most of that gap is labor: design time, joinery, hand-finishing. You’re also paying for made-to-measure fit and material quality you can verify before you sign off. Where people overpay: choosing custom for pieces where standard sizes work fine. A 72-inch dining table is a standard size for a reason, if it fits your room, a well-made, ready-made piece in solid wood can do the job at a fraction of the price. Where custom earns its cost: built-ins and room-specific pieces. A wall-to-wall storage unit or a desk built into an alcove can’t be replicated by a standard piece. The fit is functional, not cosmetic, and the price reflects work that simply can’t be done any other way. The same logic applies to awkward rooms — low ceilings, sloped walls, or unusually narrow spaces where standard furniture wastes significant floor area. The other honest caveat: “custom” doesn’t always mean better construction. Some custom shops use engineered wood cores with solid wood faces and charge full custom prices. Ask specifically: is the carcass solid wood or veneered MDF? For painted pieces, that distinction matters less. For stained or oiled natural wood, it matters a lot. Is Custom Furniture Worth It? Here’s my actual position on this: custom furniture is worth it for three situations, and borderline in most others. First, built-ins and room-specific pieces. If the piece needs to fit a specific wall, alcove, or layout, custom is the only option that makes the space work properly. Second, long-term anchor pieces in rooms you’re staying in. A solid wood dining table you’ll use for 25 years is a different financial calculation than a sofa you’ll replace in seven. Third, when you have an unusual comfort or functional need that standard options don’t address, specific ergonomic requirements, specific storage configurations, or accessibility needs. Where custom furniture is harder to justify: pieces that see light use, rooms you’re furnishing temporarily, or situations where a well-made, ready-made piece in solid wood (not particleboard) does the job. There are good, ready-made options in solid oak and walnut that perform well over time. Custom for its own sake, when a standard piece actually fits, is an expensive way to prove a point. How the Custom Furniture Process Works The process varies by maker, but most custom furniture projects follow the same sequence. Knowing it in advance helps you ask better questions and avoid delays. Consultation: You describe the space, the need, and your preferences. A good maker asks about room dimensions, how the piece will be used, who uses it (kids? pets? heavy daily use?), and what materials you’re drawn to or want to avoid. Measurements and planning: The space gets measured carefully: wall dimensions, ceiling height, door clearances, and traffic paths. For built-ins especially, this stage determines everything that follows. Design concept: Sketches, technical drawings, or 3D renders, depending on the complexity of the piece. This is the stage to push back; changes after approval are expensive. Material and finish selection: You choose species, finish type, upholstery if applicable, and hardware. Samples matter here; seeing a finish on the actual wood you’re ordering is different from seeing it on a generic sample board. Approval and production: Once you sign off, production begins. Lead times for custom furniture in the US typically run 6–14 weeks for smaller pieces, longer for complex built-ins or high-demand makers. Delivery and installation: Inspect the piece carefully at delivery: fit, finish quality, drawer function, joint alignment. Issues flagged at delivery are easier to resolve than issues raised three months later. Custom Furniture vs. Customized Furniture: The Practical Difference Custom furniture starts from nothing. Customized furniture starts from an existing design with adjustable parameters. In practice, the choice between them usually comes down to what you actually need changed. Point of Difference Custom (fully) Customized Starting point New concept based on your needs Existing design with adjustable options Design control Full: shape, size, material, joinery, finish Limited: color, fabric, size tier, finish Best for Unusual spaces, built-ins, specific functional requirements Standard layouts where stock sizes almost fit Timeline Longer — design, approval, and production Faster — base design already exists Cost Higher — design labor is a real cost More affordable than fully custom Example Wall-to-wall shelving unit built around an existing window Standard bookshelf in a different color or slightly taller If you’re trying to change color, fabric, or add 4 inches to a standard shelf height, customized furniture is likely the right move. If you need something that doesn’t exist in any catalog, that’s a fully custom project. Common Examples of Custom Furniture in Real Rooms Custom furniture appears in residential spaces most often, where standard pieces create layout problems. Common projects include sectional sofas sized for open-plan rooms, storage beds for bedrooms without closet space, built-in desks for home offices with specific wall configurations, wardrobes fitted to sloped ceilings or awkward alcoves, and media units designed to manage specific AV equipment. In minimalist bedroom layouts, a custom bed frame with integrated drawer storage is often the cleanest solution to the storage problem in rooms where adding a dresser breaks the sightlines. Commercial spaces use custom furniture heavily because branded consistency and heavy use both require pieces that standard catalogs don’t cover, hotel room furniture built to specific dimensions, restaurant banquettes fitted to irregular floor plans, and reception desks that match brand materials. Questions to Ask Before You Order Before committing to any custom furniture order, work through these questions. They clarify the brief and help the maker give you an accurate quote: What specific problem does this piece need to solve — fit, storage, function, or all three? What are the exact measurements the piece must work within? Is the carcass solid wood or veneered engineered wood? What finish are you applying, and why that finish for this species? How does the piece account for wood movement (expansion/contraction)? What is the joint construction on drawers and frames? What drawings, samples, or renders will I see before approval? What’s the lead time, and what causes it to change? Can this piece be refinished or reupholstered in the future? What’s included in delivery — will the piece be installed, or just dropped? A maker who can answer all of these without hesitation is worth the premium. One who deflects on the joinery or finish questions is a reason to pause. Frequently Asked Questions About Custom Furniture These are the questions I hear most from people who’ve already measured their space and are trying to decide whether custom is the right move. How long does custom furniture take to make? Most custom furniture takes 6–14 weeks from deposit to delivery. Complex built-ins or high-demand makers run 16–20 weeks. If a shop quotes you under 4 weeks on a fully custom piece, ask what’s actually custom about it. Is custom furniture more expensive than ready-made? Yes, almost always. A custom solid oak dining table runs $2,000–$5,000. A comparable ready-made piece in solid wood typically costs $600–$1,500. You’re paying for design labor, exact fit, and material specification — all legitimate costs when the piece needs to be right. What is the difference between custom and bespoke furniture? In practice, bespoke usually signals handcrafted and premium materials; custom is the broader category. Both are made to your specifications. Bespoke tends to imply a higher level of joinery and maker craftsmanship than the word “custom” alone conveys. Can custom furniture be made from sustainable wood? Yes. FSC-certified wood is widely available through US custom furniture makers. Ask for it specifically; it won’t be offered automatically. Some makers also work with reclaimed timber, which carries its own structural considerations around stability and drying. What wood is best for custom furniture? For tables and structural pieces, white oak and hard maple are the most reliable choices — good Janka hardness, widely available, and they take oil and stain finishes well. Walnut is the premium option for visible grain character. For pieces with heavy daily wear, avoid cherry and pine as primary structural wood. How do I find a reliable custom furniture maker? Ask for examples of finished pieces in the specific species and finish you want — not portfolio photos of other styles. Visit the shop if you can. And get a written specification document before you pay a deposit: species, grade, finish type, joint construction, and timeline should all be in writing. Does custom furniture hold its value? Solid wood custom pieces in oak or walnut hold value reasonably well compared to flat-pack furniture, which depreciates to near-zero. A well-made custom dining table in solid walnut has real resale value. The same is not true for MDF-core pieces, regardless of what they cost new. Final Verdict Investing in your home means choosing pieces that actually serve your daily life rather than forcing your lifestyle to fit standard showroom dimensions. I believe the true value of custom furniture comes down to solving real layout problems, securing long-term durability, and gaining total material control. From choosing the ideal hard maple or white oak to selecting the right resilient finish, you now have the exact blueprint to evaluate quotes and collaborate confidently with makers. Think about your own home’s most challenging layout or awkward alcove. Which specific room problem are you ready to solve with a tailored piece? Drop your thoughts in the comments below, or check out our related guides to start planning your project. Sources Janka hardness values: Wood Database (thewooddatabase.com), verified species entries FSC certification standards: Forest Stewardship Council (fsc.org) NHLA grading rules for hardwood lumber: National Hardwood Lumber Association (nhla.com) Cost ranges based on US market data, 2024–2025
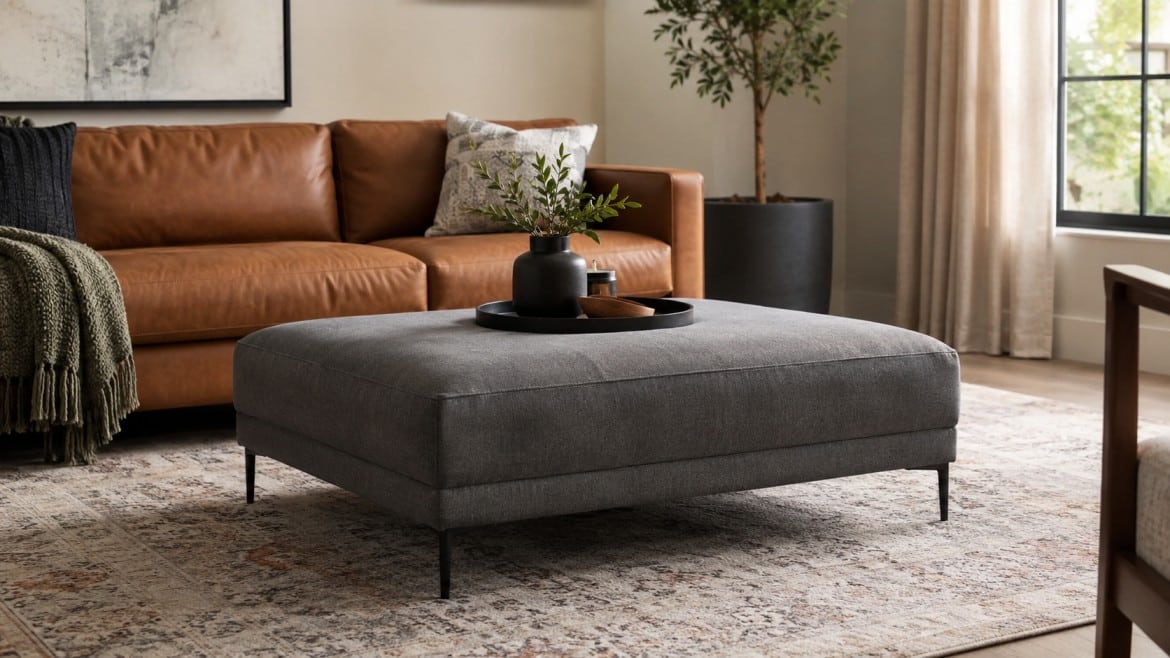
Every types of tables guide I’ve seen leads with looks. That’s the wrong place to start. The right question is how the table will behave once it’s actually in the room — the material it’s made from, the weight it carries, how it holds up to daily use, and whether it still makes sense to own three years from now. This guide covers 18 types of tables across six materials, with room-by-room picks, the mistakes that show up after the purchase, and specific advice on where each table earns its place. Choose the Right Table for Your Space Most people buy the wrong table because they focus on the wrong things at the start. Here’s where to focus before you commit: Start with the main purpose: dining, work, storage, display, outdoor use, extra seating, or small-space function, pick one and let that drive the decision. Measure the room before buying: check table length, width, walking space, chair pull-out clearance, door clearance, and drawer clearance. The number that bites most buyers is the chair pull-out, allowing at least 36 inches from the table edge to the nearest wall. Check the right table height: coffee, dining, side, bedside, desk, and high-top tables all have different height requirements. Mixing them up is one of the most common and preventable mistakes. Pick a shape that fits the layout: round tables help movement, rectangular tables seat more people, square tables suit compact rooms, and oval tables soften hard corners without losing length. Choose a material you can actually maintain: think about kids, pets, spills, outdoor weather, budget, and how much cleaning effort you’ll realistically put in over time. Look for useful storage: drawers, shelves, lift tops, foldable designs, extendable tops, and hidden compartments add real function in busy homes where floor space is tight. The right table fits your space, supports your daily routine, and holds up to the way you actually live — not just how the room looks in a photo. Types of Table Material Material is where most table decisions go wrong. People pick the look and find the maintenance reality later. Here’s an honest breakdown of what each material delivers and what it costs you over time. 1. Wood Tables Wood is still the most reliable all-around table material when the build quality is honest. Oak and walnut hold up to daily use. Pine and mango wood are softer; they’ll dent in kitchens with active kids. Teak’s natural oils make it the best wood choice for outdoor or humid environments. The failure mode with wood is almost always heat and moisture: spills left sitting, hot pans placed directly on the surface, and no coaster habit. If that describes your household, choose a species with a harder Janka rating and a finish that can be recoated. For a full breakdown of which species hold up where, the guide to wood types for furniture covers the specific numbers. 2. Glass Tables Glass works well in small rooms because it doesn’t read as a solid mass. Paired with a wood, metal, or stone base, a glass table can add visual space without sacrificing surface area. The honest tradeoff: glass shows every fingerprint, every smudge, and every ring. In a home with kids or pets, you will be cleaning it constantly. For adults-only rooms or low-traffic spaces, glass is genuinely low-maintenance; a damp cloth handles most of it. For daily family use, it’s a frustration waiting to happen. 3. Metal Tables Steel and iron are heavy, stable, and hold a finish well; they work in offices, industrial-style kitchens, and outdoor areas where permanence matters. Aluminum is the better choice when you need to move the table seasonally: same weather resistance, substantially lighter. For outdoor use, the finish is what determines longevity; powder-coated steel resists rust significantly longer than bare or painted metal. Any untreated iron left outside will show rust along the welds first, usually within one season of wet weather. 4. Stone Tables Marble, granite, quartz, and travertine are all legitimate long-term choices when they’re sealed correctly and placed where they won’t be regularly moved. The weight is a real consideration; a marble dining table can exceed 300 lbs. Natural stone needs periodic resealing to resist staining, particularly from acids like wine, citrus, and coffee. Quartz is engineered and non-porous, which means it’s more stain-resistant out of the box than natural marble. If you want the look without the maintenance commitment, quartz is the more practical choice of the two. 5. Rattan and Wicker Tables Natural rattan breaks down outdoors over time, and UV exposure dries and cracks the fibers within a few seasons. Synthetic resin wicker handles weather significantly better and is the only version I’d recommend for uncovered patios. In covered outdoor areas or sunrooms, natural rattan is fine and holds its look well. These are light-use surfaces; they’re not built for heavy loads or rough daily handling. For outdoor areas that see real weather year-round, pair them with a glass or stone top for better durability. 6. Acrylic Tables Acrylic tables do one thing better than any other material: they disappear visually. In a small apartment or a room that’s already busy, a clear acrylic table stops the space from feeling cluttered. The tradeoff is scratch sensitivity, acrylic scratches from almost anything abrasive, and those scratches are highly visible. Use a microfibre cloth and a plastic-safe cleaner. Don’t stack anything rough on the surface, and don’t use it as a cutting or prep surface. Within those limits, acrylic holds its look well and is easy to move. With the materials covered, the next decision is which table type fits the specific room and function you’re working with. The 18 types below are organized by use, not by trend. Types of Tables and Their Best Uses The right table type comes down to what you’re actually doing at it and where it lives in the room. Every type below earns its place when it’s matched correctly, and becomes a problem when it isn’t. 1. Dining Table Best For: dining rooms | breakfast rooms | open kitchens A dining table gets more daily abuse than any other piece of furniture in a home, with meals, homework, craft projects, and laptop work. The material has to hold up to all of it. The standard dining table height is 28 to 30 inches from floor to tabletop, and that number matters more than most buyers realize. A table at the wrong height creates real discomfort over the years of use. For a full breakdown of how to get the height and apron depth right, the standard dining table height guide covers the specific measurements and where builds go wrong. Shape matters too; allow at least 36 inches of clearance on all sides for chairs and movement. Round tables seat fewer people but allow better conversation and traffic flow. Rectangular tables seat more but require more room clearance. Design Tip: Leave enough space for chairs and walking room, 36 inches minimum from table edge to wall. 2. Coffee Table Best For: living rooms | family rooms | lounge areas A coffee table works hardest when its height is right. The target is within 1 to 2 inches of the sofa seat height, usually 16 to 18 inches from the floor to the surface. Too low and you’re leaning forward to set a drink down; too high and it blocks sightlines. Round tables reduce corner injuries and allow easier movement around the sofa. Rectangular and square tables offer more surface area but require tighter placement to avoid blocking traffic paths. If the living room is shared with young children, skip glass and stone tops — wood or upholstered surfaces are safer and easier to maintain. Design Tip: Match coffee table height to sofa seat height, not overall sofa height. 3. Side Table Best For: living rooms | bedrooms | hallways | empty corners A side table is one of the most flexible pieces in any room. It can hold a lamp, a plant, a tray, or a stack of books, and it can move when the room layout changes. Slim rectangular and round styles fit tight spaces better than square ones. Rattan and metal side tables both work well where a wood piece would feel too heavy. If the corner is empty and underused, a side table with a lower shelf adds storage without adding bulk. Design Tip: Pick a slim footprint for tight rooms, a table wider than 18 inches starts blocking movement in narrow spaces. 4. Console Table Best For: entryways | hallways | dining rooms | behind sofas Console tables are long and narrow, designed for wall placement. In an entryway, they handle the daily drop zone, keys, mail, baskets, and lamps without blocking the path. Behind a sofa, they close off the back visually and give you a surface for lamps or decor. Depth matters here: a console deeper than 14 to 16 inches starts to eat into hallway clearance. Wood and metal both work; stone tops add weight that can make the piece feel anchored to the wall, which is a feature in an entryway but a drawback in a sofa application where the visual should feel lighter. Design Tip: If the console will sit near the front door, choose a version with a drawer or lower shelf, entry storage earns its place immediately. 5. Bedside Table Best For: bedrooms | guest rooms | kids’ rooms The right bedside table height is level with the top of the mattress, or within an inch in either direction. Too low and you’re reaching down to silence an alarm in the dark; too high and the lamp is at eye level. Most mattresses with a box spring sit at 25 to 27 inches, so bedside tables in that height range are the practical starting point. Drawers beat open shelves in most bedrooms because they keep the surface clear. If the bedroom is small, a floating wall-mounted bedside shelf does the same job without using any floor space. Design Tip: Measure from the floor to the top of the mattress before buying, matching that height exactly avoids the awkward reach. 6. Nesting Tables Best For: small living rooms | apartments | flexible seating areas Nesting tables, typically sold as a set of two or three, solve a specific problem: you need extra surfaces when guests arrive but don’t have the floor space to park them permanently. When nested, they occupy roughly the same footprint as one side table. Pulled apart, they give you three independent surfaces. Metal frames with wood or glass tops give you the best longevity in this format, all-acrylic nesting sets tend to scratch quickly from repeated pulling and pushing. If the apartment is small and the living room doubles as a workspace, nesting tables are worth the slightly higher price over a single side table. Design Tip: Separate them before guests arrive, not during, moving furniture mid-gathering is awkward and risks scratching floors. 7. Outdoor Table Best For: patios | balconies | decks | porches | gardens Outdoor tables fail when the material isn’t matched to the actual climate. Teak handles moisture and UV better than most species, but it’s expensive and needs annual oiling to stay rich in color, untreated, it fades to silver-grey within a year, which some people prefer. Aluminum is the low-maintenance outdoor option: rust-resistant, light, and easy to move inside during storms. Powder-coated steel is more durable than aluminum but heavier and needs its coating checked annually for chips that lead to rust. For outdoor table materials matched to specific climates, the outdoor furniture wood guide covers what holds up where. Design Tip: Uncovered outdoor tables need a material that handles standing water — avoid untreated natural rattan and unsealed stone in wet climates. 8. Bistro Table Best For: balconies | breakfast corners | patios | small kitchens A bistro table is built for one or two people and works precisely because it takes up so little space. A round top at 24 to 30 inches in diameter gives two people enough surface for a meal without the table dominating the space around it. Metal and glass bistro tables are the most practical for outdoor use, folding metal versions can be stored flat against a wall during off-seasons. In small kitchens, a round bistro table against a wall handles everyday breakfasts and frees up the kitchen worktop for prep. Design Tip: Folding bistro tables earn their price in apartments with a balcony, they’re furniture when you need them, storage when you don’t. 9. Ottoman Coffee Table Best For: living rooms | family rooms | cozy seating areas An ottoman coffee table works as a footrest, a secondary seat when guests arrive, and a surface when topped with a firm tray. Fabric ottomans are softer and warmer in family rooms but stain more readily, performance fabric versions resist spills better than standard upholstery. Leather and faux leather clean up easily but feel cold in winter. For households with small children, an upholstered ottoman is the practical choice over a hard-edged coffee table, no sharp corners at fall height. Design Tip: Add a large tray, without it, drinks tip and items roll, which defeats the purpose of using it as a table surface. 10. High-Top Table Best For: kitchens | breakfast areas | game rooms | casual dining spots High-top tables come in two height ranges: counter height at 34 to 36 inches and bar height at 40 to 42 inches. Counter height works with stools that seat 24 to 26 inches from the floor to the seat. Bar height needs stools at 28 to 30 inches. Buying the wrong stool height for the table is the most common mistake with this type, the seat-to-tabletop clearance needs to be 10 to 12 inches for comfortable seating. Check both measurements before ordering, not just the table height. Design Tip: Confirm stool seat height before buying the table — seat-to-surface clearance of 10 to 12 inches is the target, and it’s easy to get wrong. 11. Drink Table Best For: beside sofas | chairs | bathtubs | reading corners A drink table holds one drink, one book, or one lamp. It’s the right choice when the spot next to a chair or sofa is too narrow for even a small side table. Most drink tables have a round top between 8 and 12 inches in diameter, set on a single post or tripod base. Metal is the most practical material for this format; it’s light enough to reposition easily, and the slim profile doesn’t collect dust the way open-shelf side tables do. Design Tip: If a standard side table won’t fit the space comfortably, a drink table is the right fix, not a smaller side table that still crowds the path. 12. Pedestal Table Best For: dining rooms | breakfast rooms | foyers A pedestal table has a single center base rather than four legs, which gives everyone at the table full legroom with no corner post to work around. This matters most in small dining rooms where seating is tight. Round pedestal tables are the most space-efficient dining format when the room is compact. The one structural check: make sure the base is wide enough to be stable when loaded. A narrow pedestal under a large top will tip if someone leans hard on one edge. For rooms where shape matters as much as size, the table shape guide covers round vs rectangular vs oval in detail. Design Tip: Check base width before buying, a pedestal base needs to be proportionate to the top or the table will feel unstable under real use. 13. Extendable Table Best For: small homes | dining rooms | kitchens | hosting spaces An extendable table solves a real space problem: you need four seats on weeknights and eight seats for holidays, but you don’t have room for a table that seats eight permanently. Butterfly leaf extensions that store under the top are the most convenient format; the leaf is always there, and the table extends in under a minute. Separate leaf systems are cheaper but require storage space for the leaf and two people to manage the extension. Measure both the closed size and the fully extended size, and make sure the extended version actually fits the room with chairs pulled out. Design Tip: Measure the fully extended size with chairs pulled out on all sides, that’s the real footprint you’re committing to when guests arrive. 14. Folding Table Best For: events | crafts | laundry rooms | extra dining space Folding tables are for occasional use, not permanent placement. The plastic top versions are the lightest and cheapest, but they flex under load. They work for light craft and party setups, not for anything structural. Laminate tops on steel frames are heavier but noticeably more rigid and better for regular use. If the folding table will come out weekly for craft or hobby work, spend more on the frame; the hinges on cheap folding tables fail within a year of regular handling. Design Tip: If you’ll use it weekly, buy a heavier-gauge steel frame, cheap hinges are the first thing to fail on low-cost folding tables. 15. Drop-Leaf Table Best For: small kitchens | apartments | multipurpose rooms A drop-leaf table has hinged sides that fold down when not in use, reducing the footprint significantly, some narrow to as little as 12 inches deep when both leaves are down, making them storable against a wall. With both leaves raised, the same table seats four. This is the right choice for a studio apartment or a small kitchen where a full dining table won’t fit permanently. Wood is the most common material because the hinge mechanism integrates cleanly into a wood frame. Check that the leaf support hardware is solid; metal support brackets hold better over the years of raising and lowering than the older wooden gate-leg designs. Design Tip: Place it against a wall when folded, and both leaves are down, it becomes nearly invisible and frees the floor entirely. 16. Desk Table Best For: home offices | bedrooms | study corners A desk table needs to be 28 to 30 inches high, the same as a dining table, to allow comfortable seated work with a standard chair. Depth is where most desk purchases go wrong: a 20-inch-deep desk is enough for a laptop but not for a monitor, keyboard, and mouse setup, which typically needs 28 to 30 inches of front-to-back space. Corner desks give the most surface area for the floor space used. L-shaped designs work well when the room has the footprint. For standing desks, look for motorized height adjustment with memory settings rather than fixed-height standing desks, which most people stop using within weeks. Design Tip: Check cord routing before buying a desk without a cable management solution, as it becomes unusable fast in any setup with more than one device. 17. Dressing Table Best For: bedrooms | walk-in closets | getting-ready areas A dressing table works when it’s placed with the right light. Natural side lighting, a window to the left or right of the mirror, is the most accurate for makeup and grooming. Overhead lighting creates shadows under the eyes and along the jawline, making color matching unreliable. If the room can’t offer natural side light, LED strip lighting mounted on both sides of the mirror is the practical fix. Drawer count matters more than surface size in most dressing tables; small items multiply fast, and an open surface fills up with no storage behind it. Design Tip: Choose side lighting over overhead, overhead light creates shadows that make makeup application unreliable, regardless of mirror quality. 18. C Table Best For: sofas | chairs | beds | small rooms A C table slides over the arm of a sofa, chair, or bed; the C-shaped metal base passes underneath, leaving the surface cantilevered above the armrest. This format works anywhere that a side table would block movement or take up floor space that isn’t available. Before buying, measure the height of the sofa arm and the clearance under the arm to the floor. The base of the C needs to clear the sofa leg and frame without rocking. Metal frames are more stable than wood in this format because the geometry relies on rigidity, not mass. Design Tip: Measure sofa arm height and clearance to the floor before ordering. The base needs to slide under cleanly, and dimensions vary significantly between sofas. Once the type is matched to the function, the room-by-room summary below makes the selection even faster. Best Types of Tables for Each Room The table that works in a dining room will fight against you in a hallway. Here’s the practical match for each space: Room Best Table Types Why They Work Living Room Coffee table, side table, ottoman coffee table, C table, nesting tables Living rooms need one main surface plus smaller surfaces near sofas and chairs for drinks, books, lamps, and remotes. Dining Room Dining table, extendable table, pedestal table, drop-leaf table Dining tables need to handle daily meals and expand for guests without permanently occupying the full guest-seating footprint. Bedroom Bedside table, dressing table, side table, C table Bedroom tables should keep daily items within reach while adding storage. Height relative to the mattress determines whether they actually get used. Entryway and Hallway Console table, side table Narrow tables work here because they hold keys, mail, and decor without blocking foot traffic. Depth over 16 inches creates a bottleneck. Outdoor Area Outdoor table, bistro table, folding table Outdoor tables need to handle sun, moisture, and temperature changes, material choice is the only variable that matters here. Office and Study Desk table, folding table, C table Office and study tables need the right height for seated or standing work, enough depth for the actual setup, and a solution for cable management. The table summary above is a starting point; the right pick shifts based on room size, how many people use the space, and what other furniture is already there. Common Mistakes When Choosing a Table Most of the mistakes I’ve seen happen after the purchase, when the table is in the room, and something doesn’t work. Here’s what to check before you commit: Buying the wrong size: the table is fine until a chair won’t pull out, a door won’t open, or someone has to turn sideways to get through the room. Measure clearance paths, not just the table footprint. Ignoring table height: coffee tables, bedside tables, desks, and high-top tables all have height requirements tied to how they’re used. A desk at the wrong height creates ergonomic problems over months of daily use. Picking the wrong material for the actual use: glass in a family kitchen, natural rattan in an uncovered outdoor area, and unsealed marble in a household with coffee drinkers are all purchases that create problems within a year. Skipping storage consideration: drawers, shelves, and lift tops add real function in rooms where surface clutter is a daily problem. A table without storage in a busy room fills up and stays filled. Forcing a match across all tables: every table in a room doesn’t need to be the same material, finish, or shape. Mixing works when the proportions and scale are consistent. Buying for how the room looks in photos: the right table is the one that fits how the room actually gets used — not how it looks in a styled photo where no one is home. Underestimating weight: stone and solid wood tables are difficult to move once placed. A 250 lb marble dining table isn’t something you rearrange seasonally. If flexibility matters, weight matters. Frequently Asked Questions These are the questions that come up most often once people have narrowed down the type but aren’t sure about the specifics. What is the most common type of table? The dining table is the most common table type found in homes. It sits at 28 to 30 inches high and comes in rectangular, round, square, and oval shapes. Most households have one dining table plus at least one coffee table or side table in the living area. What type of table is best for a small living room? Nesting tables or a round coffee table under 36 inches in diameter work best in small living rooms. Both formats take up minimal floor space while providing usable surface area. C tables are a better fit than side tables in very tight rooms where floor clearance next to the sofa is limited. What is the difference between a side table and an end table? End tables typically sit at the ends of a sofa at arm height. Side tables are a broader category that includes end tables and any small surface table used beside furniture. In practice, most furniture retailers use the terms interchangeably. What type of table material lasts the longest? Stone and solid hardwood last longest when maintained correctly. Granite and quartz are non-porous and resistant to chipping. Hardwoods like oak and walnut can last decades with periodic refinishing. Metal frames outlast most tops in structural terms but surface finishes need maintenance to prevent rust. What are the different types of dining table shapes? Dining tables come in rectangular, round, square, oval, and pedestal (single-base) configurations. Rectangular seats the most people per square foot of table. Round promotes conversation and eliminates sharp corners. Oval splits the difference. Square works in compact square dining rooms. What height should a coffee table be? A coffee table should sit within 1 to 2 inches of the sofa’s seat height, typically 16 to 18 inches from floor to surface. A table lower than 15 inches requires too much forward lean. Higher than 20 inches starts to visually divide the seating area. What type of table works best for a home office? A dedicated desk table at 28 to 30 inches high with at least 24 to 28 inches of front-to-back depth is the practical baseline. Corner and L-shaped desks offer the most surface area for the floor space used. For laptop-only setups, 20 inches of depth is adequate. Final Thoughts on Choosing the Right Types of Tables The best tables are the ones that get out of the way and do their job every day without requiring workarounds. Start with the function, what the table needs to do, in what room, for which people, and the material and type follow from that. A dining table in a family kitchen needs a harder material and a finish that can take daily cleaning. A side table in a bedroom corner needs to match mattress height and hold what you actually put on it at night. Get those specifics right and the rest — shape, finish, size — is largely about preference. If you’re still working out which table shape fits your room layout, the table shape guide is the next step.
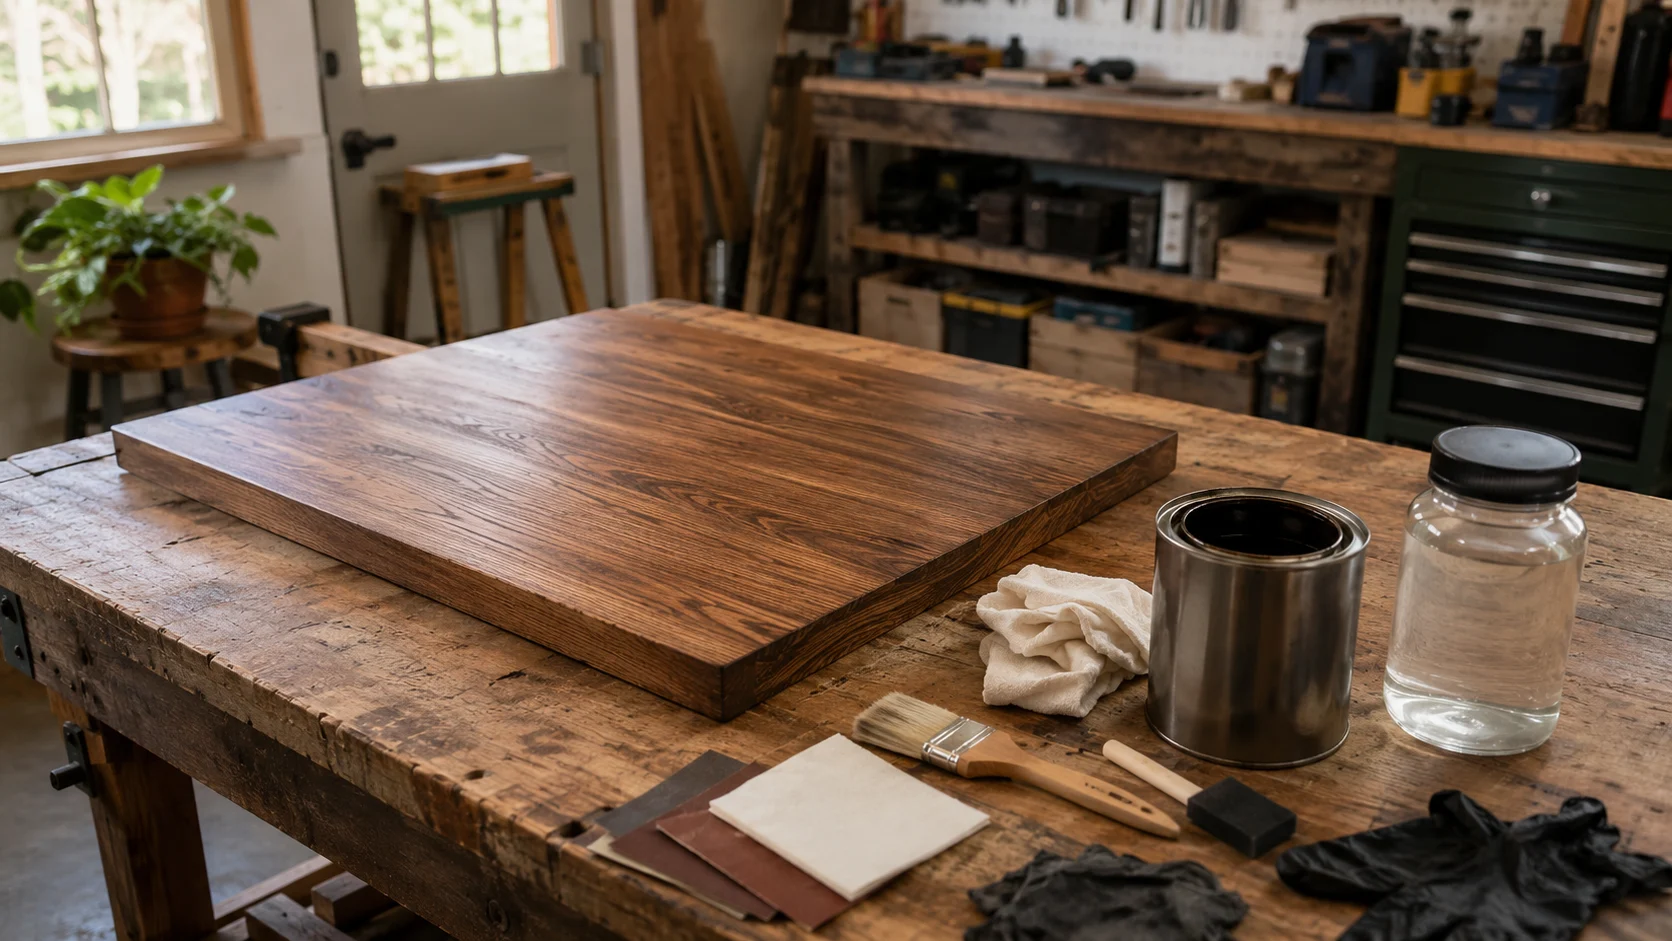
Difficulty 2/5 — manageable for a first-timer with patience Time 4–6 hours (including dry time between steps) Cost $30–$80 for a standard indoor piece Tools Needed Sanding block or orbital sander, 80/120/180-grit sandpaper, clean rags, bristle or foam brush, pre-stain conditioner (for softwoods), wood stain, polyurethane sealer Skill Required Beginner Learning how to stain wood correctly is a half-day project that goes wrong for the same reasons every time: skipping prep, using too much stain, or not wiping off the excess before it dries. I made all three of those mistakes on my first bookshelf. The second time, I got a finish I was genuinely happy with, and the only real difference was following the right order and not rushing. This guide covers every step from raw wood to sealed surface, including the prep work that most tutorials skip past too quickly. It also covers what changes depending on your wood type, because pine and oak behave very differently under the same stain. What Can Go Wrong Before You Open the Can The most common staining failures are not application errors. They happen in the prep stage, and by the time you see them, the stain has already dried. Here is what to watch for before you start. Stain needs bare, open wood pores to absorb evenly. Any old finish, glue residue, wax, or even fine sanding dust sitting on the surface can block absorption and leave blotchy or pale patches. Minwax notes that a stain applied over an existing sealed surface will not penetrate the wood at all; it will simply sit on top and wipe off. Surface Condition What It Means for Your Prep Bare, unfinished wood Ready for sanding and dust removal Old clear coat or paint Needs full sanding or chemical stripping first Glue spots Block stain and leave pale patches, scrape and sand out Deep scratches Hold extra stain and darken more than the surrounding wood Softwood (pine, poplar, maple) Absorbs unevenly, needs pre-stain conditioner Run your hand over the whole surface before anything else. If you feel rough patches, old finish buildup, or sticky spots, address those first. Stain will make every surface problem more visible, not less. How to Stain Wood Step by Step Follow this order exactly. Each step sets up the next one, and skipping ahead is where results fall apart. Tools You Need to Stain Wood You do not need a large kit. For most indoor pieces, this list covers everything. The one item people skip most often is the pre-stain conditioner, and that skip is the reason softwood staining jobs end up blotchy. Prep Tools Application Finishing Sanding block or orbital sander Wood stain Polyurethane or polycrylic sealer 80-grit sandpaper Pre-stain conditioner Foam brush 120-grit sandpaper Bristle or foam brush 180-grit sandpaper (between coats) 180-grit sandpaper Clean cotton rags Extra clean rags Damp cloth Slightly damp application cloth Small roller (large flat pieces) Safety Note: Oil-based stains can cause rags to self-ignite when balled up and left in a warm place. OSHA requires solvent-soaked rags to be stored in sealed, fire-resistant metal containers until disposal. Lay used rags flat outside to dry completely, or submerge them in water in a sealed metal bin before binning. With tools sorted, the actual work starts with the sandpaper, not the stain can. Step 1: Sand the Surface Start with 120-grit sandpaper on bare wood, or 80-grit if you are removing an old finish. Always sand with the grain, not across it. Cross-grain scratches hold more stain than the surrounding wood and show up as dark lines once the stain dries. After the first pass, move to 180-grit for a smooth surface. Wipe the wood with a barely damp cloth to raise the grain slightly, let it dry for 15 minutes, then sand again lightly with 180-grit. This prevents the grain from lifting under the stain and creating a rough texture after it dries. Pro Tip: Do not go finer than 180-grit (or whatever the stain label recommends) on wood you plan to stain. Sanding too fine closes the wood pores and the stain will sit on top rather than soak in. I learned this the hard way on a maple tabletop that came out looking almost gray. Step 2: Remove All the Dust Vacuum the surface first, then wipe with a clean, dry cloth. Pay attention to corners, grooves, and edges — sanding dust collects there and is easy to miss. Any grit left behind will create rough specks in your finish and can block even stain absorption. If the wood has any deep carvings or profiles, use a soft brush or compressed air to clear those out before wiping down the flat surfaces. Step 3: Apply Pre-Stain Conditioner (Softwoods Only) If you are working with pine, poplar, maple, or any other softwood, do not skip this step. These woods absorb stain at different rates in different spots, which produces the blotchy, uneven look that frustrates most beginners. A pre-stain conditioner slows that absorption down and gives the stain a more even base to work from. Apply the conditioner with a brush or rag, follow the product label for how long to let it sit (usually 5 to 15 minutes), then move to staining while the surface is still slightly tacky. Do not let the conditioner dry completely before staining. Step 4: Apply the Stain Stir the stain slowly before you start. Shaking it introduces bubbles that can leave marks in the finish. Once it is well mixed, use a slightly damp cloth or a clean brush to apply a thin, even coat. Work with the grain and keep the coat light. The goal is to build color gradually, not load it all on in one pass. Do not let stain pool in corners or grain pockets. Those areas absorb faster and will dry darker than the rest if you let the stain sit unevenly. Step 5: Wipe Off the Excess After the stain sits for the time listed on the label (typically 1 to 5 minutes), wipe off all excess with a clean, dry cloth. Move with the grain. Stain that sits too long dries sticky, dark, and uneven. Wiping it off is not optional; it is part of the application process. If the color looks lighter than you expected, that is normal. A wet stain always looks darker than the dried result. Judge the color only after a full dry cycle, usually 4 to 8 hours for water-based stain and 8 to 24 hours for oil-based. Step 6: Seal the Surface Once the stain is fully dry and no longer tacky, apply a clear protective topcoat. For most indoor furniture and shelves, polyurethane gives the most durable protection. Polycrylic (water-based) is a good option for lighter-colored stains where you want to avoid any yellowing over time. Apply two thin coats with a foam brush. Let each coat dry completely before adding the next. Light sanding with 220-grit between coats gives a smoother final surface. Allow at least four hours before putting the piece into use, and 24 hours before placing anything heavy on it. How to Prep Wood Before Staining: Quick Reference If you remember nothing else from this guide, remember this order: sand with the grain, remove every bit of dust, condition softwoods, test on scrap first, then apply stain in thin coats and wipe off the excess before it dries. That sequence is what separates a flat, even result from a blotchy one. Note: Always test your stain on a scrap piece or the underside of the project before committing to the visible surface. If you plan to apply a clear coat, test that too — some finishes deepen the color noticeably. Mistakes That Make Wood Stain Look Uneven Most stain problems are caused by decisions made before the brush touches the wood. Here is what goes wrong and how to avoid it. Mistake What Happens What to Do Instead Skipping sanding The stain absorbs unevenly across the surface Sand to the grit listed on the stain label before applying Sanding against the grain Cross-grain scratches darken and show through Always sand in the direction of the grain Sanding too fine Closed pores repel stains instead of absorbing them Stop at the grit the label recommends, usually 180 Leaving dust behind The stain looks speckled or blocked in spots Vacuum then wipe with a dry cloth before staining Skipping conditioner on softwood Pine and poplar come out blotchy Always condition pine, poplar, and maple Shaking the stain can Air bubbles mark the finish Stir slowly with a stir stick Applying too much at once Surface goes sticky and dries unevenly Thin coats only, build color in passes Not wiping off excess Stains pool and dry darker in some areas Wipe with the grain within the time on the label Judging the color wet A wet stain always looks darker than the dry result Wait for a full dry before assessing the color Skipping topcoat Stained surface scratches and fades quickly Seal any piece that will see regular handling Piling oily rags Fire risk from spontaneous combustion Lay flat to dry or store in a sealed metal container These problems stack. Sanding marks darken under stain, dust blocks even absorption, and a clear coat locks whatever result you get in place permanently. If something looks wrong before sealing, fix it then — not after. What Changes for Different Wood Types The basic process is the same for all wood, but a few adjustments make a real difference depending on what you are working with. 1. Staining Pine, Poplar, and Maple These woods absorb stain unevenly, which is why they are prone to blotching. Use a test board first, always apply a pre-stain conditioner, and keep coats thin. If the result still looks patchy after conditioning, gel stain is worth trying — it sits on the surface rather than soaking in, which gives more consistent color on problem woods. 2. Staining Oak and Open-Grain Woods Oak takes stain well overall, but the open grain lines hold more color than the surrounding wood. Wipe evenly and check corners and grain pockets specifically; let the stain sit in those spots too long, and they go noticeably darker than the flat surface. For floating shelf builds in oak, this grain behavior is actually a positive; it adds depth without any extra work. If you want to see how oak handles a stained natural finish compared to other species, the floating shelves guide covers wood selection for shelf builds in detail. 3. Staining Furniture with Legs and Detail Stain the detailed areas first, legs, grooves, carved edges, then move to the flat sections. If you do it the other way, the flat areas sit with stain on them longer while you work the details, and you end up with uneven drying across the piece. 4. Staining Cabinets Remove all hardware before you start. Cabinets often have cooking grease, hand oils, and old finish built up near handles and edges. Degrease thoroughly, let the surface dry, then test inside a door panel before committing to the exterior faces. 5. Staining Previously Finished Wood Standard penetrating stain will not work over an existing clear coat. The stain cannot reach the wood. You need to either sand back to bare wood or use a product specifically designed for going over existing finishes. The same prep logic applies to any stair tread makeover where the old finish needs to come off the wood surface before the new color goes on. Check the label before buying — not all stains work the same way. How to Seal Stained Wood for Daily Use Stain only changes the wood’s color. It does not protect the surface. For daily-use pieces like shelves, tables, and cabinet doors, the sealer or topcoat provides the real protection. Wait until the stain is fully dry: Do not apply sealer over tacky stain, because it can smear the color and create an uneven finish under the clear coat. Use polyurethane for heavy-use pieces: Polyurethane is a strong choice for tables, shelves, and cabinets because it resists scratches, wear, and everyday handling better. Use polycrylic for lighter stains: Polycrylic works well on indoor pieces with light-colored stains because it stays clearer and avoids the amber tint of oil-based polyurethane. Apply thin coats: Use two thin coats instead of one thick coat. Thin coats dry more evenly and reduce brush marks, bubbles, and cloudy spots. Sand lightly between coats: If the product label allows it, sand lightly with 220-grit sandpaper between coats to help the next layer bond smoothly. Let the final coat cure: Give the final coat at least 24 hours before placing items on the surface, and longer for heavy use if the label recommends it. Frequently Asked Questions How do you stain wood without blotching? Sand with the grain to the grit on the stain label, remove all dust, and apply a pre-stain conditioner before staining softwoods like pine or poplar. Thin coats and prompt wiping prevent most blotting. Testing on scrap wood first shows you how the specific wood and stain combination will behave before you commit. What is the best way to apply wood stain? Use a clean cotton rag or bristle brush, apply with the grain in thin, even passes, and wipe off excess within the time listed on the product label. Thin coats give more control over color depth than one heavy application, and excess stain left on the surface dries sticky and uneven. How long do you leave the stain on before wiping? Most stain labels recommend 1 to 5 minutes. Check yours specifically, because dwell time varies by brand and formula. The longer you leave it, the darker the result. If you want a lighter color, wipe sooner. Always wipe off excess before it dries, not after. Can you stain wood without sanding first? Gel stains and some specialty products allow application without sanding, but standard penetrating wood stain requires a sanded, bare surface to absorb correctly. Skipping sanding on standard stain produces uneven color and areas where the stain sits on top rather than soaking in. Why does my stained wood feel sticky after drying? Sticky wood stain means too much was left on the surface. Stain soaks into the wood — the excess needs to be wiped off. If it has already dried sticky, wipe the surface with the mineral spirits or solvent listed on the product label, or sand back lightly and reapply with proper wiping technique. Can you mix two wood stain colors together? Yes, if both stains are the same type — oil-based with oil-based, or water-based with water-based. Mix a small batch first, test on scrap wood, and write down the ratio. Never mix oil-based and water-based stains together; they will not bond correctly and the finish will fail. How do you fix a wood stain that came out too dark? If the stain is still wet, wipe more off immediately. If it has dried, light sanding followed by a second application of a lighter stain or a thin coat of the same stain in a lighter shade can reduce the effect. Test any fix on a hidden area before touching the main surface. Do you need to seal wood after staining? For decorative pieces that will not see regular use, sealing is optional. For furniture, shelves, cabinets, or any surface that will be touched, cleaned, or used daily, a clear topcoat is necessary. Stain alone provides no meaningful protection against scratches, moisture, or wear. Final Verdict: Is Staining Wood Worth Doing Yourself? Transforming raw timber into a beautifully finished piece is incredibly rewarding once you respect the process. Achieving a flawless result relies entirely on patience, proper grain sanding, and never skipping the pre-stain conditioner on softwoods. When you understand how to stain wood with a methodical approach, wiping away excess product on time, and applying thin, protective topcoats, you guarantee a durable finish that protects against daily wear and tear. Now that you have the blueprint to avoid the most common beginner pitfalls, it is time to grab your sandpaper and get started. What project are you tackling first? Share your upcoming woodworking plans or drop your questions in the comments below. Sources Minwax — Wood Stain Product Application Guidelines OSHA — Hazard Communication: Flammable Liquids and Oily Rag Disposal Home Depot — How to Stain Wood (Video)
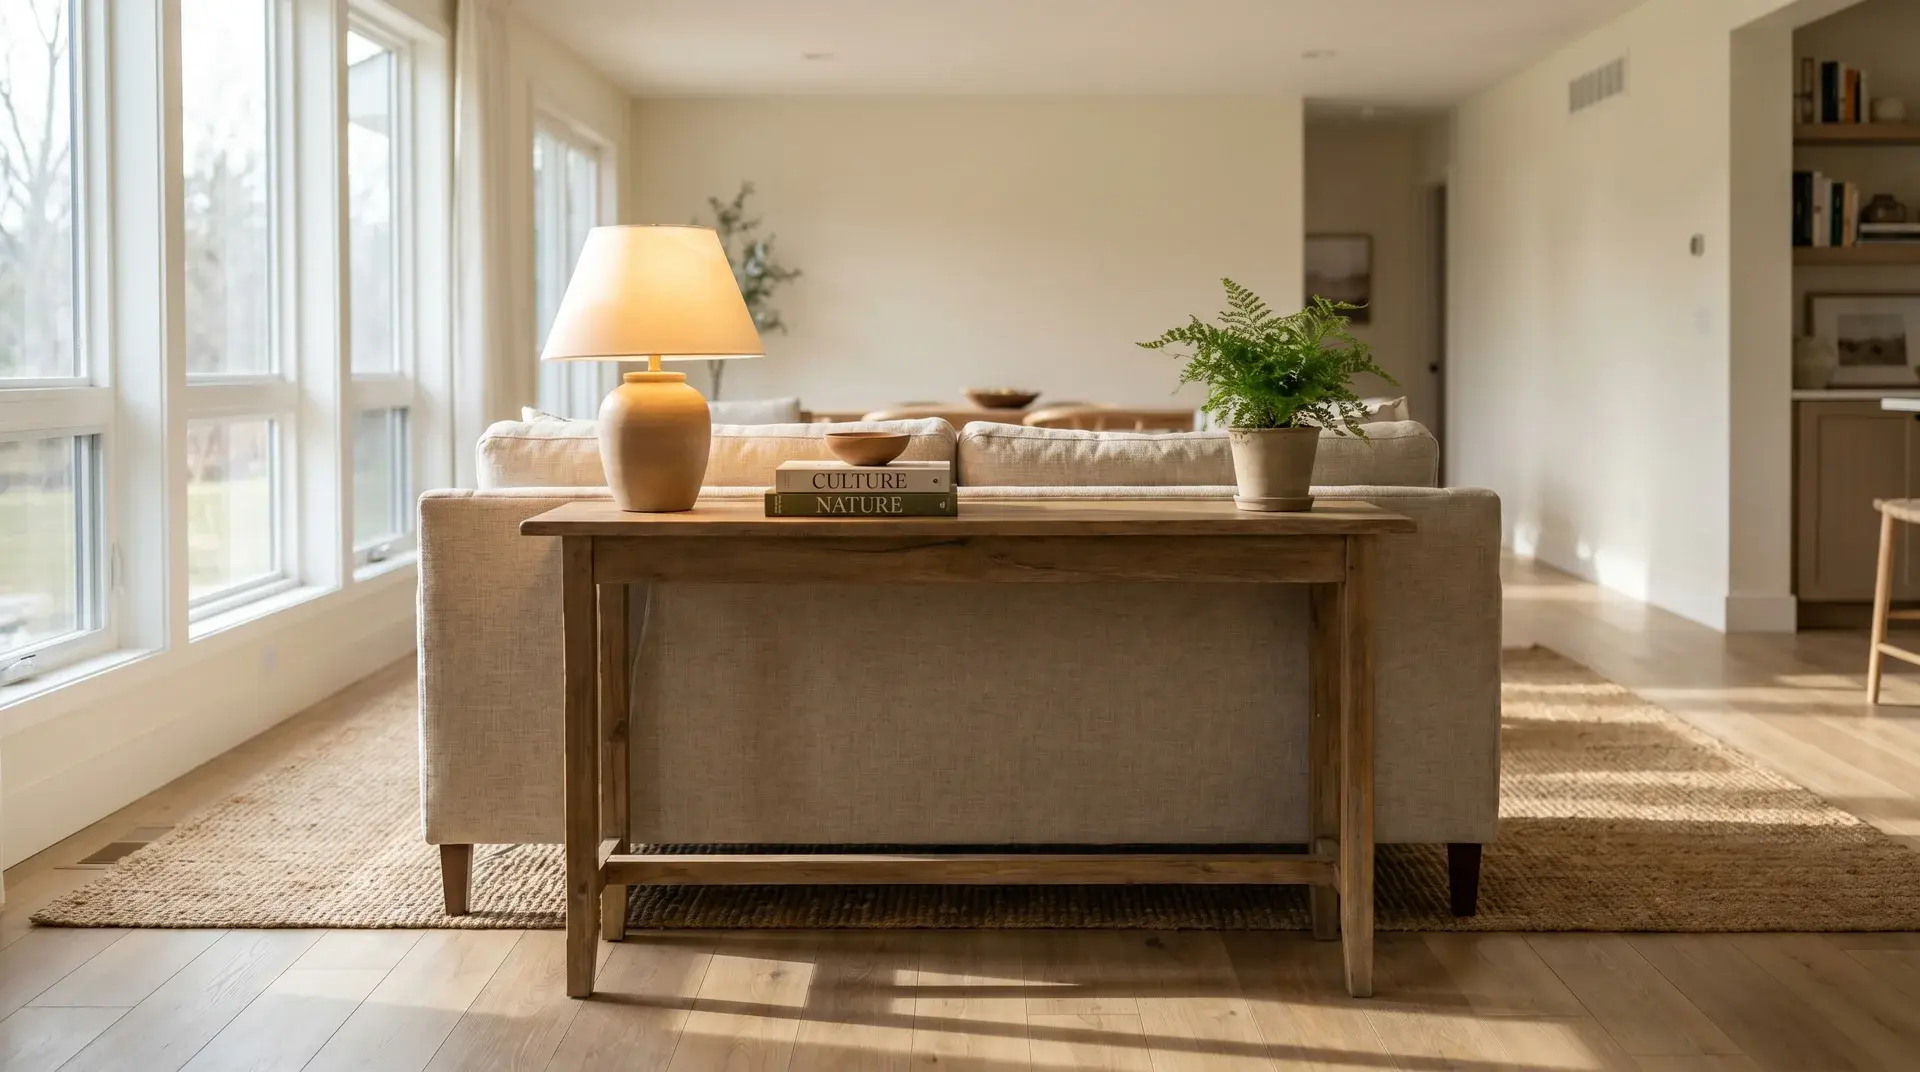
The space behind a floating sofa is one of the most overlooked layout problems I run into. The sofa looks fine from the front. From behind, it looks unfinished like someone moved in but didn’t finish the room. A sofa table solves that. It gives the back of the couch a clear edge, a surface, and sometimes storage, without adding a piece of furniture that fights the room. A sofa table is a long, narrow table that sits directly behind a sofa. It typically runs level with the sofa back or 1 to 2 inches lower, and most models range from 48 to 72 inches in length and 10 to 18 inches deep. That slim footprint is what separates it from other table types, it fits behind seating without blocking the walkway. In open-plan living rooms, a sofa table behind the couch also marks the edge of the living zone. It separates the seating area from the dining area, kitchen, or entry path without needing a wall to do it. That’s a layout job a lamp on the floor cannot do. Typical Length 48 to 72 inches (half to two-thirds of sofa length) Typical Depth 10 to 18 inches (10 to 12 inches for tight walkways) Typical Height Level with sofa back or 1 to 2 inches lower Also Called Couch table, behind-the-couch table, sofa console table Primary Placement Behind a sofa or sectional, especially when the back faces a room The table above covers the basics. The rest of this article covers which type of sofa table fits which room problem – and how to choose the right one without wasting space or money. Sofa Table vs Console Table, Coffee Table, and End Table These four table types look similar in furniture stores. The difference is where they sit and what work they’re doing. A sofa table is built for the space behind a couch. A console table is a broader category, the same shape, but meant for hallways, entryways, or any wall that needs a surface. The terms overlap, which is why many listings use both. If it’s going behind a sofa specifically, sofa table is the more accurate search term. Table Type Where It Goes What It Does Key Difference Sofa Table Behind a sofa or sectional Adds a surface, lighting, and storage to the back of seating Height and depth are sized specifically for behind-couch placement Console Table Entryway, hallway, or against a wall Drop zone, decor anchor, or storage piece Same shape, broader placement options Coffee Table In front of the sofa Holds drinks, remotes, books, and trays Lower profile, made for daily arm-reach use End Table Beside a sofa or chair Keeps a lamp, glass, and phone within reach Small, meant for one side of a seating piece The practical takeaway: if the problem is the exposed sofa back in an open room, a sofa table solves it directly. A console table could work in the same position, but size it like a sofa table – same height, same depth, same length rules – or it will look awkward. What a Sofa Table Is Used For I use five tests before recommending a sofa table for any room. If the piece doesn’t solve at least two of these, the room usually doesn’t need one. 1. Filling the Exposed Back of a Floating Sofa This is the most common reason. When a sofa sits away from the wall – in an open-plan room, a studio, or any layout where the back of the couch is visible from another area – that back edge looks unfinished. A sofa table behind the couch closes that visual gap and gives the sofa a defined boundary. 2. Adding a Surface for Lighting End tables only reach the sides of a sofa. If the reading or ambient light needs to come from behind – which is often better for open rooms – a sofa table is the only practical place to put a lamp without running a cord across the floor. 3. Dividing an Open-Plan Room In rooms without walls between the living area and dining area, a sofa table acts as the boundary marker. The sofa faces the room; the table defines its edge. This works better than a rug alone because it reads clearly from the kitchen or dining zone. If you’re working through a full open-plan arrangement, the small living room layout guide covers zone separation in detail. 4. Providing Accessible Storage Remotes, chargers, blankets, and books collect near every sofa. A sofa table with shelves or drawers gives those items a home within arm’s reach, without requiring a separate storage piece in the room. 5. Creating a Charging Station Some sofa tables include built-in outlets and USB ports. In apartments or family rooms where the sofa floats far from a wall outlet, this solves a wiring problem that otherwise means a cord running across open floor. Types of Sofa Tables: Matched to Room Problems The right type depends on what the room actually needs. Here’s how to match the problem to the piece. Standard Sofa Table A flat top, four legs, nothing extra. This is the right choice when the room needs a surface and nothing else – a lamp, a tray, a few books. It sits quietly behind the sofa without pulling attention from the seating area. I default to this type in rooms that are already well-organized; adding storage here just creates more places for clutter to land. Material: Wood, metal, or wood-and-metal mix Best for: Rooms that need a clean surface, not additional storage Sofa Table With Shelves Open shelves below the tabletop hold baskets, books, and folded blankets. This works in rooms where everyday items pile up but a full cabinet would feel heavy. Keep in mind that open shelves show everything – this type rewards tidiness. Confirm the depth stays under 14 inches or it starts to feel like a bookcase, not a table. Material: Wood, metal frame with wood shelves, or rattan Best for: Rooms that need accessible storage without a large cabinet Sofa Table With Drawers Drawers keep remotes, chargers, cords, and mail out of sight. This is the version I recommend for family rooms – it resets easily at the end of the day because there’s a place for everything. Before buying, check that the drawers open fully without hitting the back of the sofa cushions. Material: Solid wood, engineered wood, or painted wood Best for: Family rooms and homes with high daily item turnover near the sofa Sofa Table With Outlets Built-in outlets and USB ports solve the cord problem in rooms where the sofa sits far from the wall. The lamp, phone, and tablet all have power without cords running across the floor. Measure the distance from the nearest wall outlet before choosing this type – the table still needs to plug into something. Material: Wood or metal with integrated power strip Best for: Apartments and family rooms where the sofa floats away from outlets Sofa Table With Stools Stools tuck under the table and pull out when someone needs a seat or a surface for a laptop or snacks. This type earns its footprint in studios and small apartments where a table and extra seating need to share one piece. Confirm there is enough clearance to pull stools out fully without bumping the back of the sofa. Material: Wood, metal, or mixed with sturdy stools Best for: Studios, small apartments, and open-plan rooms that need flexible seating Slim or Narrow Sofa Table At 10 to 12 inches deep, a narrow sofa table fits behind a couch in spaces where a standard depth would close off the walkway. This is the version to choose when the path behind the sofa is less than 36 inches wide. It still holds a lamp and a tray – it just doesn’t crowd the floor. Material: Metal, slim wood, or wood-and-metal mix Best for: Narrow rooms, apartment layouts, and any walkway under 36 inches behind the couch Storage Sofa Table Combines shelves and drawers into one piece. This is the version that makes sense in a family room with kids, where blankets, games, books, and remotes need multiple homes. Open shelves on the bottom for baskets, a drawer or two for smaller items. It’s the most functional type – also the heaviest, so check weight if you move furniture often. Material: Wood or engineered wood with mixed storage Best for: Family rooms with high storage demand and frequent daily use Live-Edge Sofa Table The natural outer edge of the wood slab is kept intact, so each table has a different shape. This looks best in rooms with warm or natural materials throughout. Since the table itself is a feature, keep styling minimal – a lamp, a bowl, one plant. This type works well in rustic, farmhouse, and warm modern rooms. Material: Solid wood slab, usually with metal legs Best for: Rustic, farmhouse, natural, or warm modern rooms Glass Sofa Table A glass top reads as lighter than solid wood or stone, which helps in small rooms that already have heavy furniture. It doesn’t visually break the room the way an opaque piece can. Choose tempered glass with rounded edges, especially in homes with kids or pets. Material: Tempered glass with metal or wood legs Best for: Small or modern rooms with heavier existing furniture Metal Sofa Table Open metal legs keep the floor visible, which helps in smaller rooms. Metal is also easy to clean – useful in high-traffic areas or homes with pets. Most metal sofa tables pair with a wood or glass top, which softens the industrial feel if that’s not the room’s style. Material: Steel or iron, usually with a wood or glass top Best for: Modern, industrial, and high-use rooms where durability matters Rattan or Cane Sofa Table Rattan and cane bring softness to rooms where solid wood or metal feels too heavy. Good in sunrooms, coastal rooms, and casual living spaces. Keep it away from damp areas or anywhere it takes regular hard use – cane scratches and bends under sustained weight. Material: Rattan, cane, or wood with woven details Best for: Coastal, boho, farmhouse, and casual living rooms Stone-Look Sofa Table Faux marble and concrete-look tops carry more visual weight than glass or slim wood. This helps in larger living rooms where the sofa back looks too light or where the room reads as underfurnished. Real stone is available but adds significant weight – verify load capacity before ordering if the floor is on an upper level. Material: Faux marble, stone-look laminate, concrete-look, or real stone Best for: Larger living rooms and formal sitting areas How to Choose the Right Sofa Table Size comes first. Every other decision – material, storage type, style – is easier once you know the table fits the space. Here’s the process I use: Step 1: Match the Height The table should sit level with the sofa back or 1 to 2 inches lower. Measure from the floor to the top of the sofa cushions – that number is your ceiling. A table that sits several inches higher than the sofa back draws attention to itself; one that sits too low disappears visually and wastes the surface. Step 2: Set the Length A sofa table that spans the full length of the sofa tends to look too symmetrical – like a ledge, not a piece of furniture. Aim for half to two-thirds of the sofa length. For an 84-inch sofa, that means a table between 42 and 56 inches long. This gives the sofa visual breathing room on each side. Step 3: Check the Depth Against the Walkway The path behind a sofa needs at least 24 to 30 inches of clear walking space. Measure from the back of the sofa cushions to the nearest wall or furniture. Subtract your table depth from that number. If the result is under 24 inches, choose a slim sofa table at 10 to 12 inches deep instead of a standard 14 to 18 inches. For more on clearance paths and how they affect furniture placement in open-plan rooms, the minimalist living room guide covers the 30-inch rule in detail. Step 4: Decide on Storage Before Style The biggest mistake I see is choosing a table for how it looks on a product page, then realizing there’s nowhere to put the remotes. Answer this first: what items currently pile up near the sofa? Remotes and chargers need drawers. Blankets and books work on open shelves. If the answer is “nothing, the room is tidy,” a standard top is enough. Step 5: Check Edge Safety if You Have Kids or Pets Rounded corners and a stable base matter more in active households than most furniture guides admit. Glass sofa tables with sharp corners and narrow legs get knocked over. If there are kids or large dogs in the house, eliminate those options first before comparing anything else. Sofa Table Materials: What to Know Before Buying The material determines how the table holds up over time, not just how it looks on delivery day. Here’s the honest breakdown: Material Durability Maintenance Best Room Type Solid Wood High – scratches but refinishes Occasional oiling or waxing Most rooms; warmest finish Engineered Wood (MDF/Veneer) Medium – chips on edges under impact Wipe clean; avoid standing water Budget rooms with low daily wear Metal High – scratches but wipes clean Minimal; occasional polish on brass Modern, industrial, high-traffic rooms Tempered Glass Medium – strong but chips at edges Fingerprints visible; needs frequent wiping Small rooms where visual lightness helps Rattan/Cane Low to medium – scratches easily Dusting; keep dry Casual, coastal, and seasonal rooms Faux Stone / Concrete-Look Medium – surface-level scratching possible Wipe clean; check weight before upper floors Larger or formal living rooms Solid wood is the most forgiving over time – you can sand and refinish a scratch that would permanently damage engineered wood. If the budget is tight, metal frames with wood tops split the difference well. Sofa Table Styling: What Actually Stays Tidy Styling a sofa table is easier when you start with function and add decor second – not the other way around. Most sofa table styling that looks cluttered within a week was styled backwards. One Tall Piece as the Anchor Start with one tall piece on one end: a lamp, a tall vase, or a ceramic candleholder over 12 inches. This gives the table a clear vertical anchor. Everything else stays lower. Without an anchor, the table reads flat regardless of how many objects are on it. A Tray for Daily Items Remotes, coasters, and phone chargers belong in a tray, not loose on the surface. A tray groups small items into one visual unit and makes the whole table easier to clear – you lift the tray, not six individual things. A 12- to 14-inch rectangular tray in a natural material (wood, rattan, or matte ceramic) works in most living rooms. Vary the Heights Three items at the same height read as a lineup, not a composition. Combine a tall lamp with a medium-height vase or plant and a low stack of books or a shallow bowl. Behind a floating sofa, keep the tallest piece under 30 inches so it doesn’t obstruct sightlines from across the room. One Plant or Fresh Stems A single plant softens the surface, especially on metal or glass tables that read cold without organic material. A small pothos in a terracotta pot on one end is enough. If you travel frequently or forget to water, dried stems in a simple bud vase require nothing. Leave One Open Spot A surface that’s fully covered is a surface that stops working. Leave at least one-third of the table top open for a book, a glass, or a phone. That gap also makes the styled pieces look more deliberate – crowded surfaces look accidental even when each item was chosen intentionally. Do You Actually Need a Sofa Table? Not every living room does. A sofa table earns its place when it solves a specific problem. Here’s a quick check: Get a sofa table if: Skip it if: The back of your sofa is fully visible from another area The sofa is pushed against a wall You need a lamp behind the seating area You already have enough table surface nearby Small items pile up near the sofa with nowhere to go The room already has adequate storage The sofa separates two zones in an open-plan room The room feels full and adding furniture would crowd it There is at least 24 inches of walkable space behind the sofa The path behind the sofa is already tight If the room meets two or more of the left column conditions, a sofa table will likely improve both function and layout. If the sofa is against the wall and storage isn’t a problem, there’s no layout reason to add one. Common Sofa Table Mistakes These are the five errors I see most often – all fixable before purchase: Wrong height: Buying a table 4 or 5 inches taller than the sofa back. It looks like a bar table was placed behind a couch. Always measure the sofa back height first. Too long: A table that matches the sofa’s full length looks like a shelf, not furniture. Stay within two-thirds of the sofa length. Too deep for the walkway: An 18-inch-deep table in a narrow passage behind the sofa blocks movement. Measure the clearance before deciding on depth. Overloading the top: Six items that all compete for attention read as clutter. One anchor piece plus a few supporting objects is the right limit. Unfinished back panel: If the sofa floats and the table back faces the dining or kitchen area, make sure the table looks finished from that side. Some console-style pieces have a raw back edge meant to sit against a wall. Frequently Asked Questions These are the questions that come up most often once someone has measured their space and is deciding whether to commit. What is a sofa table called? It goes by several names: sofa table, couch table, behind-the-couch table, sofa console table, or console table. All describe the same piece – a narrow table placed behind a sofa. What is the difference between a sofa table and a console table? Console table is a broader category covering any long, narrow table used in hallways, entryways, or against walls. A sofa table is a console table sized and positioned specifically for behind a sofa – similar shape, specific placement. How tall should a sofa table be? Level with the sofa back or 1 to 2 inches lower. Measure from the floor to the top of the sofa cushions – that’s your maximum table height. Most sofa tables run 28 to 32 inches tall, which suits standard sofas with 30-inch back heights. How long should a sofa table be relative to the sofa? Half to two-thirds of the sofa length. For an 84-inch sofa, target 42 to 56 inches. A table matching the full sofa length looks rigid; one significantly shorter looks undersized. Can a sofa table work with a sectional? Yes, on the straight back section. Measure the linear run of the sofa back that faces a room or walkway and size the table to fit that segment – not the full sectional perimeter. What can I use instead of a sofa table? A slim console table, low bookshelf, narrow storage bench, or cube shelf unit all work behind a sofa. The best alternative depends on whether you need a surface, storage, or both. How deep should a sofa table be for a narrow walkway? 10 to 12 inches. Measure the clear space behind the sofa and leave at least 24 to 30 inches of walking clearance. Anything over 14 inches deep starts to feel like furniture, not a background piece. Should the back of a sofa table look finished? Yes, if it faces a room. Floating sofas expose the table back to views from the kitchen or dining area. Choose a table finished on all sides, or check that the product description confirms a finished back panel. Final Verdict: Does Your Room Need a Sofa Table? If your sofa floats in an open room and the back edge looks unfinished, a sofa table is the most direct fix. Measure the sofa back height, confirm at least 24 inches of walkable clearance behind it, then choose the type that matches your actual storage need – not the one that looks best in a product photo. For most rooms, a standard or slim sofa table in solid wood or a metal-and-wood combination is the right starting point. Put a lamp on one end, a tray for daily items on the other, and leave at least a third of the top clear.
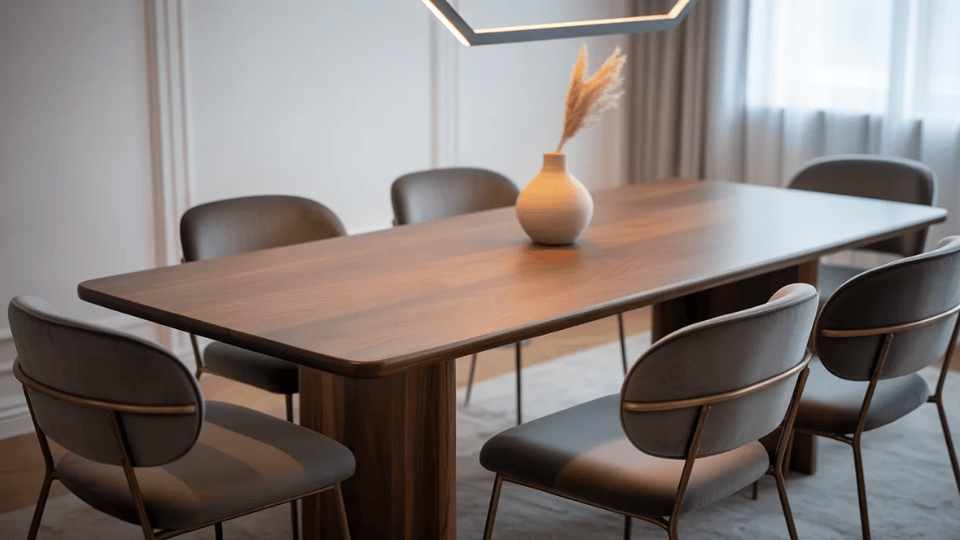
Standard Dining Table Height 28–30 inches (floor to tabletop) Chair Seat Height 17–19 inches Seat-to-Tabletop Clearance 10–12 inches Apron Underside to Floor 24–25 inches minimum Counter Height 34–36 inches Bar Height 40–42 inches The standard dining table height is 28 to 30 inches, measured from the floor to the tabletop surface. That number has been the industry benchmark long enough that most chair manufacturers design around it. Most apron depths assume it, and most people building or buying a dining table treat it as settled, much the same way bar stool height follows its own set of benchmarks for counter and bar seating. It mostly is. But “mostly” is doing a lot of work in that sentence, and the inch or two where it stops working is exactly where most build mistakes happen. I’ve seen enough tables come through the workshop that sit right but feel wrong to know the number alone isn’t enough. Height is a relationship: your chair, your apron depth, your floor, and the people eating at that table every night. Get the relationship right, and the table works for years. Get one element slightly off, and you’ll feel it at every long meal. The Core Height Numbers for Dining Tables Before anything else, here are the measurements that matter. These aren’t soft guidelines. They’re the numbers that determine whether a chair clears the apron and whether someone can sit comfortably for two hours. Measurement Standard Range Table surface height 28–30 inches Chair seat height 17–19 inches Seat-to-tabletop clearance 10–12 inches Apron underside to floor 24–25 inches minimum That last row is the one most guides skip. The apron underside-to-floor measurement matters more than the surface height for daily comfort, especially if your chairs have armrests. Start With the Chair, Not the Table The formula is straightforward: table height equals chair seat height plus 10 to 12 inches. That 10-to-12-inch range isn’t arbitrary. Ten inches produces a more relaxed seated posture. Twelve-inch suits people who prefer to sit upright. For long dinners, stay closer to 10. If your chairs sit at 18 inches, your table should land between 28 and 30 inches. If your chairs sit at 19 inches, build to 29–31 inches. The relationship is what you’re designing, not a single fixed number. One thing I’ve learned to always do: measure the actual chair, not the listed seat height on a spec sheet. Manufacturers measure inconsistently. Some measure to the top of the cushion, some to the frame. That variation can be 1 to 2 inches, which is enough to shift your entire table height calculation. Measure the chair you’re actually using before you cut anything. Pro Tip: Set plywood on sawhorses at your target height, sit at it for a full meal, and see how it feels. It takes twenty minutes and will tell you more than any calculation. The Apron: The Measurement Most Builders Miss The apron underside-to-floor measurement is where most dining table builds go wrong in ways that aren’t immediately obvious. The standard surface height of 29 to 30 inches assumes a certain apron depth. If you’re running a deep apron for visual weight or structural rigidity, that apron’s underside can drop below the comfortable threshold before you realize it. The target is 24 to 25 inches minimum from the apron’s lower edge to the floor. Below that, seated adults start to feel cramped in the thighs. Below 23 inches, it becomes genuinely uncomfortable for anyone with longer legs. Armrests make this more critical. Measure the height from the floor to the top of the armrest, then compare it to your apron’s lower edge. If the armrest height is greater than the apron underside height, the chair won’t push in cleanly. Allow at least a half-inch clearance between the armrest top and the apron underside. More is always better. This is one of those problems that’s easy to design around before the build and nearly impossible to fix after. Dining Table Height for Different Users Standard numbers are a starting point. The people sitting at your table are the actual specification. Here’s how the numbers shift across different users. User Table Height Seat Height Notes Standard adult 28–30″ 17–19″ Works for most adults in the 5’4″–6’1″ range Tall adult (6’2″+) 30–31″ 19–20″ Raise both table and chair; raising only the table doesn’t solve legroom Child (6–10 yrs) 22–24″ 12–14″ Separate kids’ table or a booster seat at the adult table Wheelchair user 28–34″ — Minimum 27″ knee clearance underneath; ADA guideline Mixed-height household 29″ 17–18″ No perfect solution; 29″ is the workable middle ground For mixed-height households, adjustable leg feet only give you a quarter to a half inch of range. That’s for leveling, not bridging a meaningful height gap. If you have both tall adults and shorter adults at the same table regularly, 29 inches is the realistic compromise height. It won’t be perfect for either end of the spectrum, but it won’t be actively uncomfortable for either. For long meals, tighter clearances become a problem over time. Holiday dinners and extended gatherings are where a table that’s “fine for regular use” starts to feel wrong. If you’re building for that kind of use, add clearance and keep the apron depth simple. Dining Height vs Counter Height vs Bar Height A lot of households eat at a kitchen island or a breakfast counter, not just a formal dining table. If you’re planning or building one, kitchen island height follows its own set of rules that are worth understanding alongside these dining table numbers. Each surface sits at a different height and needs a different seat to match. These are not interchangeable. Type Table Height Seat Height Best For Dining 28–30″ 17–19″ Standard seated meals, long dinners, and formal dining rooms Counter 34–36″ 24–26″ Kitchen islands, casual eating, open-plan layouts Bar 40–42″ 28–30″ Standing bars, high stools, and entertainment spaces A counter-height table with standard dining chairs doesn’t work. Neither does a dining table with counter stools. The seat-to-surface clearance falls outside the comfortable 10-to-12-inch range, and the whole fit feels wrong regardless of chair quality. Before you decide which height to build, decide how you actually use the space and whether you’re eating, working, or doing both. Community’s Words on Dining Table Heights A Reddit discussion about the blog post “Dining room table height” centers on a builder unsure whether the standard 30-inch measurement refers to the tabletop or the clearance beneath it. Most replies clarify that 30 inches typically means floor-to-tabletop, with minor variations (30–31 inches) considered negligible. Commenters emphasize flexibility, suggesting a range of 28 to 33 inches depending on user height and chair compatibility, while encouraging practical testing over overthinking details. Personally, this reflects how craftsmanship balances standards with real-life usability. Exact numbers matter less than comfort, proportions, and how the table actually feels during everyday use. How Your Room Type Affects the Right Dining Table Height The room itself introduces variables that affect which height works best in practice. In apartments and open-plan condos, counter-height tables tend to feel less imposing and integrate better with kitchen islands and casual layouts. In a dedicated dining room in a suburban or farmhouse home, the standard 30-inch table remains the most natural fit for a full chair set and extended meals. That said, room type is context, not a rule. The people sitting at the table and the specific chairs you’re using will always matter more than what the floor plan suggests. If you’re getting the height right for the chairs and the users, the room will work around it. Build Mistakes That Actually Ruin the Fit Most dining table height problems don’t come from bad math. They come from small assumptions that seemed reasonable during the build and turned out to be wrong. Here are the ones I see repeatedly. Trusting the listed seat height on a chair without measuring it yourself. Manufacturers measure seat height differently, top of cushion, frame, or compressed sit, with a 1-2-inch variation, affecting table-to-chair fit. Always measure the actual chair. Cutting legs to the final length before dry-fitting the top. Top attachment hardware, such as bolts, fasteners, and tenons, adds height you might not have considered. Dry-fit first, check height, then make cuts. Armrests are hitting the apron. A table and chair that are perfectly proportioned on their own can still be incompatible. Check armrest height against apron height before committing to your base design. Not accounting for chair leg splay. Chair legs angling outward reduce knee clearance underneath, which isn’t dramatic but noticeable on lower-clearance tables, especially with wider chairs. Building before the flooring is finalized. New hardwood, tile, or thick rugs can raise the floor ¼ to ½ inch after the table is complete, shifting the seat-to-table relation without touching the table. Know your final floor height before making final cuts. Height problems are easier to prevent than fix. If a scenario fits you, do a mock-up first: set plywood on sawhorses at your target height, sit at it for a meal, and see how it feels. It takes twenty minutes and reveals more than calculations. Final Verdict The standard dining table height is straightforward once you stop treating it as a single number and start treating it as a relationship among your chair, your top, your apron, your floor, and the people who’ll sit there daily. Get the chair height first. Protect the underside clearance. Mock it up before you cut. Those three things alone will save most builders from the mistakes I’ve seen come through my workshop over the years. If you’re building a dining table, I’d love to hear what you’re working on. Drop a comment below and share what you’re making. Frequently Asked Questions What is the standard dining table height? The standard dining table height is 28 to 30 inches, measured from the floor to the tabletop surface. Most dining chairs are designed around this range, with seat heights between 17 and 19 inches. How high should a dining table be for an 18-inch chair? With an 18-inch seat height, your table should land between 28 and 30 inches. That gives you the 10-to-12-inch seat-to-surface clearance needed for comfortable seating. Measure the actual chair, not the listed height, before finalizing your table height. What chairs fit a 30-inch dining table? Chairs with a seat height between 18 and 20 inches work comfortably with a 30-inch table. That produces 10 to 12 inches of clearance between the seat and the tabletop. Verify armrest height against the apron underside before committing to chairs with arms. What is counter height vs dining table height? Standard dining tables sit at 28 to 30 inches. Counter-height tables sit at 34 to 36 inches and require stools with a seat height of 24 to 26 inches. Bar-height tables sit at 40 to 42 inches and require stools at 28 to 30 inches. These heights are not interchangeable, and mixing the wrong chairs with the wrong table height produces a consistently uncomfortable setup regardless of quality. What is the ADA-compliant dining table height? ADA guidelines require a minimum of 27 inches of knee clearance underneath the table for wheelchair users, with a table surface between 28 and 34 inches. The apron design matters here as much as the surface height. A table at 30 inches with a deep apron that drops to 22 inches underneath doesn’t meet the clearance requirement, even though the surface height does. Can I adjust a dining table that’s too tall or too short? If a table is too tall, you can trim the legs if the construction allows it. Remove the top, trim each leg evenly, reassemble, and recheck. If the table is too short, furniture risers are the practical fix. Adjustable leg levelers give only a quarter to a half inch of range; they’re for leveling an uneven floor, not correcting a meaningful height mismatch. Does rug thickness affect dining table height? Yes, in practice. A thick area rug raises the chair legs by up to an inch, while the table legs may sit on the bare floor at the rug’s edge. That shifts the seat-to-table relationship without changing either piece of furniture. Always mock up your height with the rug in place before making final cuts.
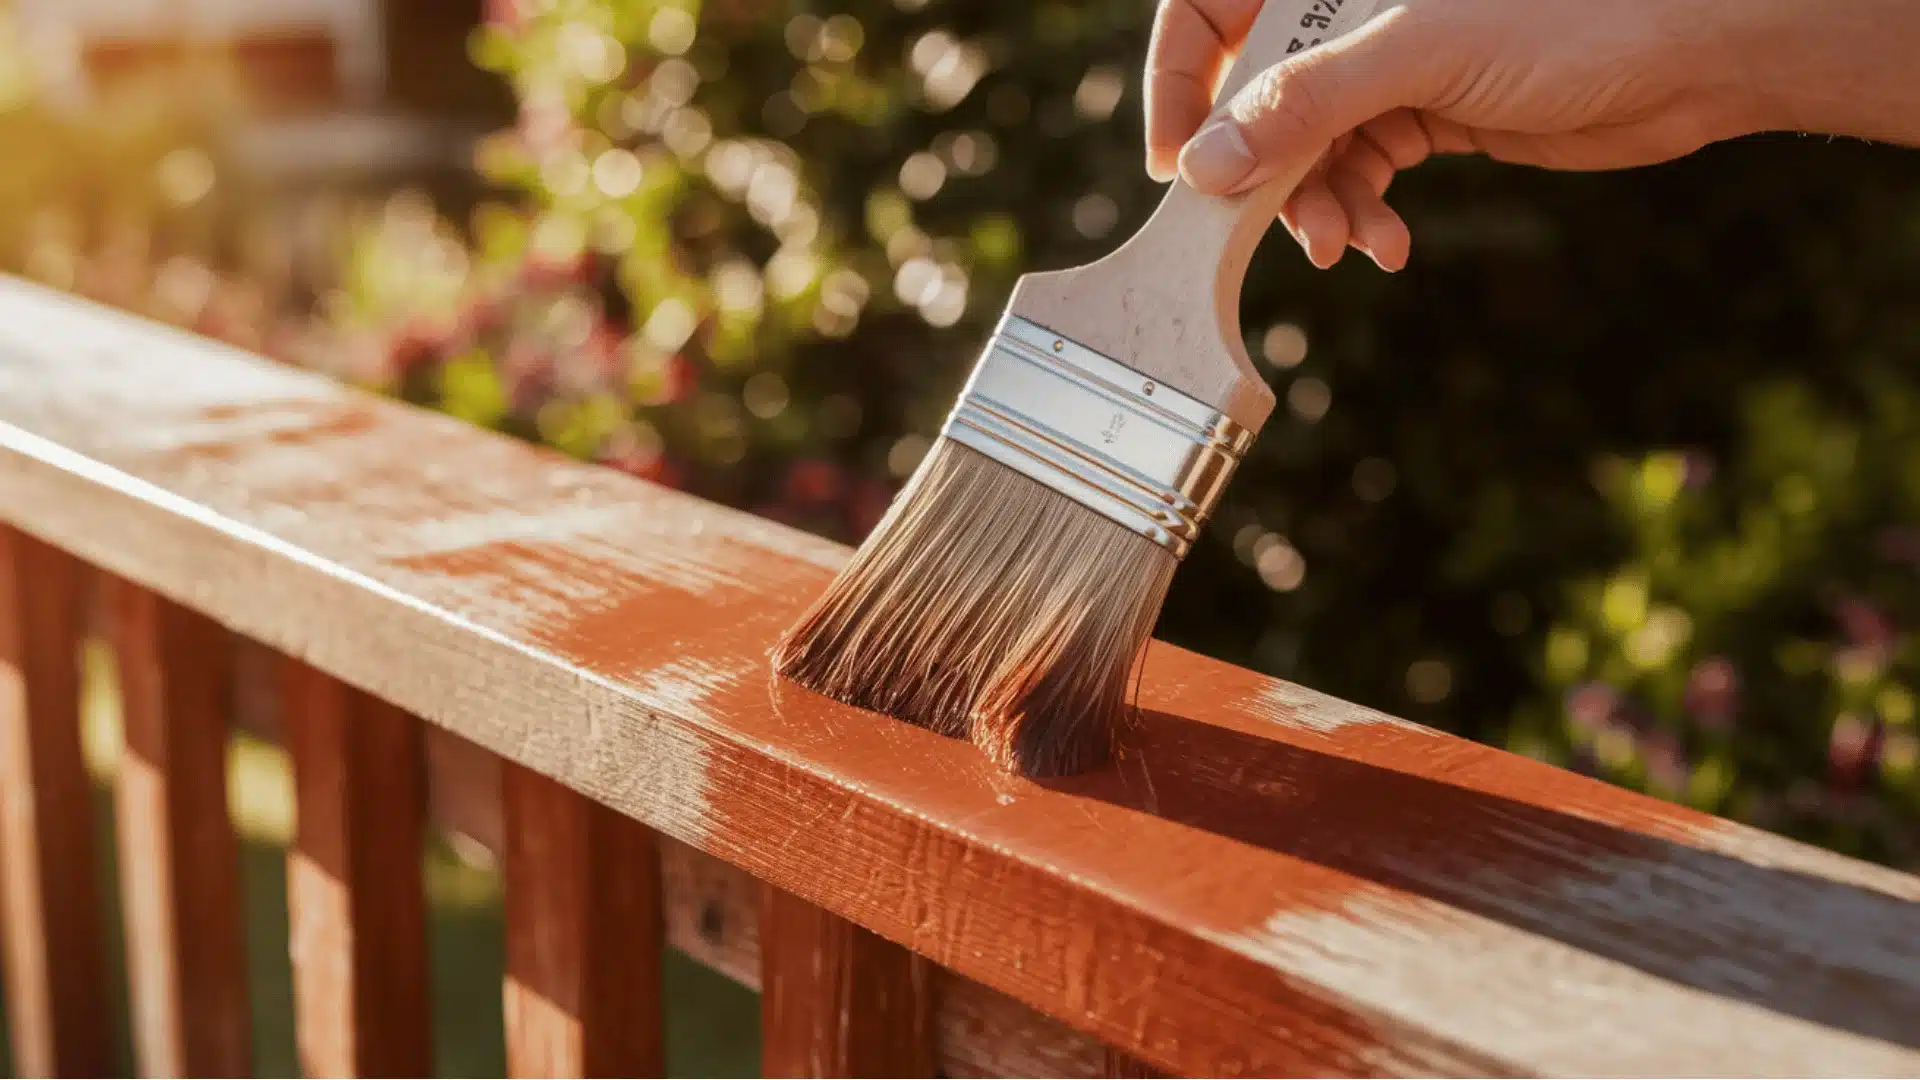
I’ve seen a lot of people run into the same issue. You buy pressure-treated wood, start planning the finish, and then realize things aren’t as straightforward as they seem. If you’re asking, Can you paint treated wood, you’re probably trying to avoid a result that looks good at first but doesn’t hold up. A big part of that comes down to picking the right paint, especially when comparing latex vs acrylic paint differences . It looks ready, but something feels off. The surface behaves differently, and what should be a simple step suddenly turns into confusion. That’s where most mistakes happen. Small details get ignored, and the results don’t turn out the way you expected. If you want a clean, long-lasting finish, understanding what’s happening beneath the surface makes all the difference. Understanding of Pressure-Treated Wood? Pressure-treated wood is basically regular lumber that’s been given superpowers. I remember helping my dad build a fence, and he explained how manufacturers force special chemicals deep into the wood using high pressure , kind of like giving it a protective shield. These chemicals prevent rot, insects, and moisture damage that would otherwise destroy regular wood in just a few years. That’s why you’ll see it used for decks, fences, raised garden beds, and outdoor furniture. The wood usually has a greenish or brownish tint from the treatment. While untreated wood rots quickly when buried in soil or exposed to rain, pressure-treated lumber can last for decades outdoors. Most modern pressure-treated lumber uses copper-based compounds , specifically micronized copper azole (MCA) or copper quaternary (CA-C), which replaced the older arsenic-based CCA formula phased out for residential use in 2003. This matters for painting because these newer copper compounds are water-based , which is exactly why a water-based primer and paint bonds to them far better than oil-based products. Can You Paint Treated Wood? Yes, you can paint treated wood, but timing and prep matter. Freshly treated wood holds moisture from the treatment process, which can stop paint from sticking properly. The most important factor is moisture content, not just time. Aim for 15% or less before painting. Some boards start at 40% or more, so the common “wait six weeks” rule isn’t always accurate. In humid areas, it may take longer, while kiln-dried wood may be ready sooner. Before painting, clean the surface to remove dirt and mildew, then sand it lightly. Apply a high-quality primer made for treated wood, followed by durable exterior paint. Done right, this gives you a finish that looks good and lasts longer. Why Should You Paint Pressure-Treated Wood? Painting pressure-treated wood provides both aesthetic and functional benefits. It enhances appearance, provides additional protection, and extends the lifespan of wood. Improved Appearance: Adds color and creates a polished, refined look. Weather Protection: Guards against moisture, UV damage, and wear from the elements. Extended Durability: Keeps wood looking fresh and durable for a longer time Proper preparation and maintenance are essential for achieving the best and longest-lasting results. Paint vs. Stain: Which Should You Choose? Choosing between paint and stain can feel confusing at first. I’ve faced this myself, and the right option really comes down to how you want your wood to look and perform over time. Feature Paint Stain Coverage Full, opaque color that hides imperfections Semi-transparent, shows natural wood grain Finish Type Sits on top of the surface Penetrates into the wood Durability Can peel or crack over time Less likely to peel Best Use Areas Fences, siding, vertical surfaces Decks, outdoor flooring, high-traffic areas Maintenance Needs recoating every 2–3 years (on decks) Lasts 3–5 years with proper application Look Clean, uniform, bold color Natural, textured appearance Now, beyond looks and durability, there are also a few practical risks you should keep in mind. Peeling or Fading: Happens when proper preparation or regular maintenance is skipped. Adhesion Problems: Paint may not stick well if the wood isn’t fully dry or properly primed. Slippery Surface: Painted decks can become slick when wet, especially on walking areas. One important thing I’ve learned from experience is this: if you’re painting a surface you walk on, always mix in an anti-slip additive. It’s cheap, easy to apply, and makes a big difference in safety. In simple terms, go with paint if you want a bold, uniform look for vertical surfaces. Choose stain if you want something lower maintenance and better suited for decks or high-use areas. This becomes even more important if you’re dealing with older finishes and thinking about painting over stained wood . Steps to Painting Pressure-Treated Wood Follow these steps to properly paint pressure-treated wood: prepare, clean, dry, prime, and use suitable paint for lasting results. Materials Needed for Painting Before starting your project, gather all your supplies so you’re not running to the store mid-job. Trust me, nothing kills momentum like realizing you forgot something important halfway through: Pressure washer or deck and wood cleaner Duct tape 3-mil plastic sheeting Drop cloth Exterior oil-based paint or stain Metal bucket Stir stick High-quality paint brush (such as a wide exterior brush) Nail (to test wood dryness) Water (for cleaning brush) Having everything ready beforehand makes the job smoother and helps you finish faster with better results, plus you’ll avoid those frustrating trips back to the hardware store. Step 1: Clean and Prep the Pressure-Treated Wood Before painting, you need a spotless surface. Always start by pressure-washing the wood to blast away dirt, mildew, and grime. You can also use a deck cleaner for stubborn spots. Let everything dry completely. This usually takes a few days. Here’s a trick: press your fingernail into the wood. If moisture appears, wait longer. Clean, dry wood helps paint stick better and last way longer without peeling. Step 2: Protect Nearby Surfaces Paint loves to splatter onto concrete, sidewalks, and nearby plants when you least expect it. learned this after accidentally staining my neighbor’s driveway. Tape plastic sheeting along walls and fence bases using strong duct tape. Lay drop cloths on the ground below your work area. Spending ten extra minutes protecting surfaces now saves you hours of scrubbing later. Step 3: Mix and Test the Paint Always mix your paint thoroughly before starting; the pigments settle at the bottom. Pour mine into a metal bucket for easier handling and keep stirring throughout the project so colors stay consistent. Test your paint on a hidden spot first, like a board edge or back corner. If it absorbs nicely without beading up, you’re ready. This quick test prevents nasty surprises and ensures your finish looks professional wherever you use it. Step 4: Apply the Paint Properly Use a high-quality brush for the best coverage. Cheap brushes leave streaks and shed bristles everywhere. Prefer wide brushes because they cover more area faster. Start at the top and work downward to catch drips as you go. Brush paint on generously, then spread it evenly into cracks, edges, and corners. Pay special attention to cut ends since they’re super absorbent and need extra coats for protection. Step 5: Let It Dry and Maintain It After finishing, check the weather forecast; you need at least 24 to 48 hours without rain. Some spots might look lighter at first, but that’s just because they dry faster. The beauty of quality exterior paint is that when it fades over time, you don’t need to strip everything. Just clean the surface with a deck cleaner, let it dry, and apply a fresh coat to bring back that gorgeous color. Want to see these techniques in action? Head over to the YouTube “Home Repair Tutor” channel for video demonstrations and extra insights. Considerations When Painting Pressure-Treated Wood When painting pressure-treated wood, it’s important to consider moisture levels, paint type, and ongoing maintenance. These factors ensure your paint adheres properly and lasts for a long time. Consideration Details Moisture and Humidity Wait until the moisture content is 15% or below. Use the water-drop test or a moisture meter. Standard treated lumber takes 2–6 months; KDAT lumber dries much faster. Paint Type and Compatibility Use exterior water-based latex paint and latex primer. Oil-based paints do not adhere properly to treated lumber and can trap moisture, causing peeling. Surface Orientation Paint lasts longer on vertical surfaces (fences, siding) than horizontal ones (deck boards). For horizontal surfaces, consider a solid stain or add an anti-slip additive. Maintenance Regular touch-ups and care help maintain the paint job and prevent wear, peeling, and fading over time. Proper preparation and careful selection of materials will ensure a lasting finish and protect your wood over time. Common Mistakes to Avoid When Painting Pressure-Treated Wood Avoiding common mistakes will save time and money, ensuring your paint job lasts. Here’s what to watch for: Painting Too Soon: Painting before wood has dried properly traps moisture, causing bubbling and peeling. Wait 6 weeks to 3 months. Using Oil-Based Paint: Oil-based paints do not bond well to pressure-treated lumber and trap residual moisture. Always use exterior latex (water-based) paint. Wrong Paint Choice: Never use interior paint outdoors. Always use exterior acrylic latex, oil-based paint, or solid stains. Ignoring Weather Conditions: Paint only when temperatures are between 50°F and 85°F, with humidity below 70%. Wait for 48 hours of dry weather. Skipping Primer: Primer is not optional on treated wood. Without it, even excellent topcoat paint will peel prematurely because the wood surface lacks adhesion. Painting in Bad Weather: Avoid painting during blazing sun, morning dew, or strong winds. Waiting for ideal weather ensures a lasting finish. Wrap Up Painting pressure-treated wood comes down to two things: patience and the right products. Wait until moisture content drops to 15% or below, confirm it with the water-drop test or a moisture meter, and never reach for oil-based paint. In over twenty years of working with wood, I’ve seen more paint jobs fail from impatience than from any other cause. The second most common culprit is skipping the primer. Get those two things right, and the rest follows naturally. Once painted, check horizontal surfaces and cut ends every spring. A quick touch-up now saves a full repaint later. Have questions or tips from your own project? Drop them in the comments below. Frequently Asked Questions Can you paint pressure-treated wood right away? No. Fresh wood holds moisture that blocks paint from sticking. Wait until moisture drops to around 15%, which can take a few weeks to a few months depending on conditions. What type of paint works best on treated wood? Use exterior water-based latex paint with a compatible primer. It bonds better with treated wood and allows moisture to escape, helping prevent peeling and long-term damage. How do you know if treated wood is ready to paint? Use a moisture meter or the water-drop test. If water absorbs into the surface, it’s ready. If it beads up, the wood still has too much moisture. Do you need to prime pressure-treated wood before painting? Yes. Primer helps paint stick and creates a stable base. Skipping it often leads to peeling and uneven coverage, especially in outdoor conditions. Is it better to paint or stain pressure-treated wood? Paint works best for vertical surfaces and gives full coverage. Stain is better for decks and high-traffic areas since it penetrates the wood and holds up longer.