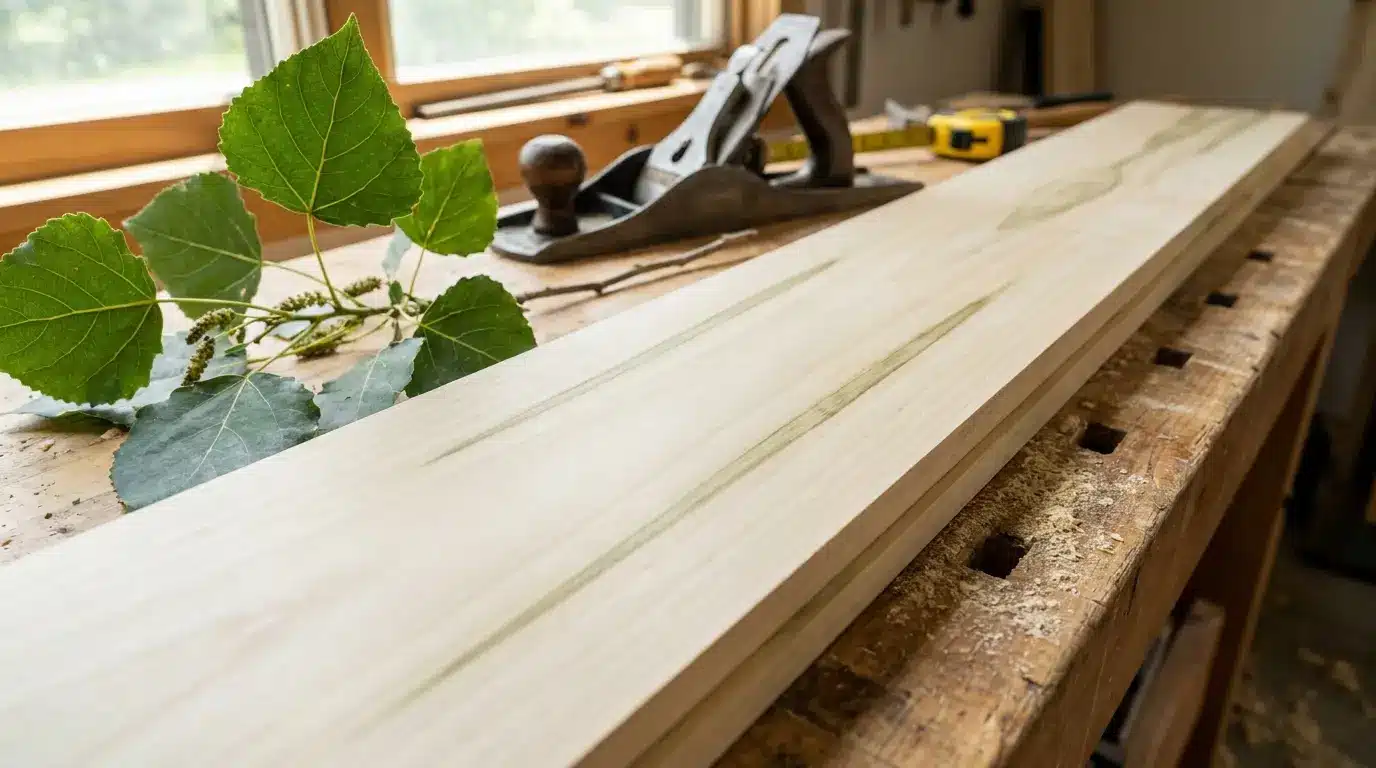
Poplar wood Value Classification Hardwood Janka hardness 540 lbf Common nicknames Tulip poplar, yellow poplar, whitewood Best for Painted furniture, frames, trim, plywood Not ideal for Flooring, cutting boards, outdoor furniture With more than 20 years of woodworking experience in carpentry and custom furniture, I have seen how different woods perform in real-world projects and which lower-cost options are actually worth using. Yes, poplar is a hardwood. It comes from a broadleaf tree rather than a conifer, which is why it’s classified as such. Still, its Janka hardness rating is much lower than woods like oak or maple, so it dents and scratches more easily. That is why poplar often causes confusion at the lumberyard. Although it is technically a hardwood, it behaves more like a softer wood in everyday use. Why Poplar Counts as a Hardwood The hardwood and softwood labels do not describe how hard a wood feels to the touch. Hardwood comes from angiosperms, flowering trees that drop their leaves each fall. Softwood comes from gymnosperms, mostly cone-bearing evergreens like pine, spruce, and cedar. Poplar flowers every spring and sheds its leaves every autumn. That single trait places it in the hardwood group, no matter how soft the milled lumber feels. Most lumber sold as poplar actually comes from the tulip tree, or Liriodendron tulipifera. American yards almost always stock this wood as poplar, even though true Populus trees, like aspen and cottonwood, also exist. Pine, fir, and cedar never enter this conversation, since they grow cones instead of flowers. Density and weight play no part in the classification at all. How to Identify Poplar Wood If you already own a board and want to confirm the species, follow these steps. Check the color: Poplar sapwood runs creamy white in most boards you encounter. Its heartwood shifts from pale yellow-brown to olive green, sometimes within the same board. Check the grain and texture: The grain remains straight and even, with a fine-to-medium texture, similar to oak or ash. Look for mineral streaks: Some boards pick up green, gray, or purple streaks as the tree grows. Woodworkers call this rainbow poplar, and it often sells at a premium. Compare the weight: Hold a poplar board next to an oak board of the same size. The poplar will feel noticeably lighter almost right away. What Poplar Wood is Used for Builders reach for poplar all the time, just not always where you can see it. 1. Furniture and Frame Parts These sit under upholstery or paint, where appearance is not important to the buyer. Among the types of wood for furniture, poplar is commonly used for hidden frames because it is lightweight, affordable, and easy to work with. Builders choose it for furniture supports since the frame stays concealed after assembly. Its low weight also helps reduce shipping costs on large orders. 2. Paint-ready Cabinets and Trim Cabinets, shelves, and trim take a smooth coat once primed properly. Millwork, molding, and door parts often use poplar, too, since most are painted rather than left natural. The straight grain helps paint sit evenly across long trim runs. Many kitchen cabinet makers use poplar for face frames before painting the whole piece. 3. Plywood Core Material Plywood cores gain lightweight strength from poplar without adding much extra bulk. This makes plywood easier to install without giving up rigidity. Manufacturers like poplar cores because they resist warping better than some softwood alternatives. This keeps plywood sheets flat during storage and shipping. 4. Pallets and Crates These rely on poplar for its low cost and light weight during transport. Poplar boards withstand repeated loading without breaking down quickly. Shipping companies also value how easily poplar takes nails and staples. Its lightweight also keeps freight costs down for large shipments. 5. Small Hobby Builds Carved signs, wooden toys, and photo frames made at home often use poplar. Its soft texture makes hand carving easier for beginners. Poplar also holds paint and varnish well on finished projects. Painters favor poplar because it holds a clean, even coat without much prep work. Carpenters like it because it rarely splits when nailed close to an edge, even on thin trim pieces. Why Poplar Feels Softer than Other Hardwoods The Janka scale ranks wood hardness by pressing a steel ball into a board until it embeds halfway. Poplar scores 540 pounds of force, compared to 1,290 for red oak, 1,450 for maple, and 1,010 for walnut. Even Douglas fir, a softwood commonly used for house framing, rates around 700 on the Janka hardness scale, making it harder than poplar. This lower Janka rating helps explain why poplar is easy to cut, shape, and work with in a workshop. A quick comparison clears up why poplar confuses so many buyers. Trait Hardwood Softwood Tree type Angiosperm, flowering Gymnosperm, cone-bearing Leaves Broad, drop each fall Needles, mostly evergreen Common examples Oak, maple, poplar Pine, cedar, fir Typical density Usually higher Usually lower Exceptions Poplar, balsa Douglas fir, yew Density sits in the usual column for a reason. Poplar and balsa are both hardwoods that score low on the Janka scale. Douglas fir and yew are softwoods that hold up better than people expect. The tree’s method of reproduction determines the label, not how the board feels in your hand. Poplar Compared to Other Common Hardwoods A side-by-side table makes these differences easier to see than raw numbers alone. Wood Janka hardness Durability Best use Poplar 540 lbf Low to moderate Painted furniture, frames, trim Black cherry 950 lbf Moderate Fine furniture, cabinets Black walnut 1,010 lbf High Furniture, veneer, gun stocks Red oak 1,290 lbf High Flooring, cabinets, trim Hard maple 1,450 lbf Very high Flooring, butcher blocks Poplar sits at the bottom of this list on hardness, but it also costs noticeably less than the others. For painted or hidden work, like frames or trim, that price gap usually favors poplar. For daily use in the open, such as a dining tabletop, oak or maple makes more sense. Is Poplar a Durable Hardwood Durability depends on how you use the wood, not just its hardwood label. Indoors, poplar lasts for years, especially once painted or sealed. It works well for modularfurniture, cabinet parts, and frames where heavy impact is limited. It dents more easily than oak or maple, so it struggles on floors or tabletops. Furniture frames, cabinet boxes, and trim rarely take hard hits, making poplar a practical choice for these applications. Regular dusting and occasional waxing help painted poplar furniture maintain its finish longer. Outdoors, poplar breaks down quickly without a sealed finish. With the right protection, it can still perform well for suitable projects. A fresh coat of paint or sealant every few years helps keep outdoor pieces protected. Poplar’s Limits Worth Knowing No single wood species works for every job, and poplar has a few clear limits worth knowing. Dents and scratches under everyday use, making it a poor fit for tabletops or floors with regular traffic. Blotches when stained, unless you apply a pre-stain wood conditioner first to even out absorption. Rots fairly quickly outdoors without a sealed finish over the top. Carries none of the natural rot resistance found in cedar or redwood. Needs a sealed finish before it faces rain, sun, or ground contact. Frequently Asked Questions Is it okay to burn poplar in a wood stove? Yes, seasoned poplar can be burned in a wood stove. It lights easily but burns faster and produces less heat than denser hardwoods. Is poplar better than pine? Poplar is usually better for indoor furniture because it is smoother and has less resin. Pine is often preferred when you want a stronger grain and a rustic look. Which variety of poplar is best? Tulip poplar is one of the best varieties for woodworking because it is lightweight, easy to shape, and widely available. The best type depends on the project. What is the lifespan of a poplar tree? Most poplar trees live for about 30 to 50 years. Some healthy varieties may survive for 100 years or longer in suitable conditions. How fast can a poplar tree grow? Poplar trees are fast-growing and may grow about 3 to 5 feet each year. Growth depends on the variety, soil, sunlight, and water supply. Is Poplar the Right Choice? Picking poplar comes down to what the finished piece needs to survive over time. Choose poplar for painted furniture, hidden frames, interior trim, and budget builds where looks matter more than raw toughness. Skip it for flooring, cutting boards, or any surface that sees daily wear without a protective coat. Its lower price beats oak, maple, or walnut whenever a project calls for paint over a natural wood look. A first apartment bookshelf, a painted nightstand, or a set of interior door trim all fit this description well. If the piece stays indoors under a coat of paint or primer, poplar rarely disappoints the person who picked it.
Most furniture is built for a fixed room in a fixed life. Buy a sofa, put it against the wall, leave it there for a decade. That approach works until the room changes, the family grows, or the apartment gets smaller, and the sofa suddenly does not fit through the door. Modular furniture was designed around that problem. Instead of one rigid piece, you get a system of components that can be rearranged, expanded, or scaled down as your space and needs shift over time. This blog covers what modular furniture actually is, the main types available, how it differs from sectional furniture, what it typically costs, and what to check before buying a system for your home. What is Modular Furniture? Modular furniture is built from separate, standardized units called modules that can be combined, rearranged, or expanded to fit different spaces and needs. Instead of buying one fixed piece, you assemble a system from individual components. A modular sofa might include armless seats, corner pieces, and ottomans that can be arranged in dozens of layout combinations. The same logic applies to shelving, storage, beds, and office furniture, where each module functions independently yet connects seamlessly with others. A modular shelving unit, for example, might start as a single small cube and later grow into a full wall of connected storage without replacing the original piece. Why Modular Furniture is Popular Now Modular furniture has moved well beyond a niche design trend to become a genuine market force, backed by real numbers. The U.S. modular furniture market reached $24.3 billion in 2025 and is projected to continue growing steadily through 2035, driven largely by shrinking home sizes and rising urban living costs. Younger buyers and small families are a major part of this shift, favoring pieces that combine practicality with style over furniture that locks them into one fixed layout. Demand from offices and co-working spaces has also added to the momentum, as businesses look for seating and desk systems that can be rearranged as teams and layouts change. This mix of residential and commercial demand is why modular furniture, once a mid-century design idea, has become an everyday shopping category rather than a specialty product. What are the Features of Modular Furniture True modular furniture is defined by four core traits that make it function as a system rather than just a collection of matching pieces. Each unit is built to standardized dimensions, so modules from the same collection connect without gaps or mismatched heights. Those same pieces can be rearranged into different configurations, an L-shape one month and a straight line the next, without buying anything new. Any individual module, such as an armless chair, also serves as standalone furniture when separated from the rest of the set. And because you can add new units later, the system grows with your space and needs rather than becoming obsolete when either changes. What are Types of Modular Furniture Modular design shows up in more categories than most people realize, well beyond the living room sofa. 1. Modular Sofas and Sectionals Armless chairs, corner units, chaises, and ottomans that combine into custom layouts. These pieces can be used as a sofa and a separate chair, or linked into a full sectional, depending on the room. Many systems also include a chaise module that can be moved to either end of the sofa. Best for: living rooms and shared spaces that need flexible seating arrangements. 2. Modular Shelving and Storage Systems Stackable cubes, adjustable shelves, and cabinets that expand as your storage needs grow. New units can be added on top of or beside existing ones without replacing what you already own. Some systems also allow shelves to be repositioned within the same frame as needs change. Best for: closets, home offices, and rooms that need storage to scale over time. 3. Modular Bed Systems Wall beds with built-in cabinetry, desks, or sofas that fold away when not in use. These systems allow a single room to function as a bedroom at night and an office or living space during the day. Some designs fold up vertically, while others tuck into a cabinet unit along the wall. For studios or smaller layouts, space-saving furniture can complement modular bed systems by maximizing available space and improving everyday functionality. Best for: studio apartments and guest rooms that double as other spaces. 4. Modular Office Furniture Desks, partitions, and seating systems designed to be reconfigured as office layouts change. Teams can shift from private desks to open collaboration areas without buying new furniture each time. Panels and dividers can also be added or removed to adjust privacy levels within a shared space. For home setups, minimalist home furniture choices can complement modular systems by creating flexible work areas with practical desk and storage solutions. Best for: co-working spaces and offices that frequently rearrange teams or layouts. How Much Does Modular Furniture Cost Pricing varies widely, but general market patterns give a useful starting point. Budget modular pieces, such as a single armless chair or storage cube, often start at $200 to $400 per module. Mid-range modular sectionals and shelving systems typically run $800 to $2,500 for a full set, depending on size and material. Higher-end designer modular systems, especially from brands rooted in the Eames and Nelson design tradition, can run well above that range. These figures reflect general retail patterns rather than a single fixed price, since cost depends heavily on materials, brand, and module count. What are the Benefits of Modular Furniture Modular furniture earns its popularity by solving problems that fixed furniture simply cannot. Space efficiency is usually the first draw, since modules can be rearranged or scaled down to suit furniture ideas for compact homes and multi-purpose rooms. That same setup gives you flexibility over time, letting the same pieces adapt as your needs shift, whether that is a growing family or a home office turning into a guest room. There is a cost angle too. Buying one module at a time spreads the expense, and you can replace a damaged piece individually rather than buying an entirely new set. That same modularity also makes moving day easier, since smaller pieces are far simpler to carry through narrow doorways and staircases. Modular Furniture Design Ideas for Every Home Beyond the showroom, modular design shows up in everyday settings where flexibility solves a real, ongoing problem. Micro-apartments and studio units: Wall beds and fold-away desks let one room serve as a bedroom, office, and living space depending on the time of day. Co-working offices: Movable desks and partitions let a single floor plan shift between quiet workstations and open team areas within the same day. Rental homes: Renters use modular pieces to furnish a space without committing to furniture that will not fit their next apartment. Growing families: Modular kids’ furniture, like bunk systems that separate into two beds, adapts as children grow or siblings need their own space. Hospitality and healthcare settings: Lobbies and waiting areas use modular seating to reconfigure layouts for events, social distancing needs, or changing foot traffic. How to Choose Modular Furniture for Your Space Picking the right system takes a bit more thought than a standard furniture purchase. Measure your room and doorways first, since modular pieces must still fit through hallways and entryways during delivery. Check how the modules connect, whether through clips, brackets, or simple friction fit, since sturdier connectors tend to hold up better over years of rearranging. Confirm that individual modules can be purchased separately later, in case you want to expand the set or replace a worn piece down the road, and stick to one collection or line rather than mixing modules from different product lines, since fabric and finish rarely match exactly across collections Modular Furniture vs. Sectional Furniture These two terms are constantly confused, so it helps to draw a clear line between them. Knowing the difference makes it easier to find the right product and avoid buying something that doesn’t meet your actual needs. Feature Modular Furniture Sectional Furniture Scope Covers sofas, shelving, beds, and office systems Refers specifically to seating Layout Can be split, expanded, or rearranged freely Arranged into an L-shape, U-shape, or straight line Relationship The broader category One specific type of modular seating Note: Every sectional is modular, but not everything modular is a sectional. Pros and Cons of Modular Furniture Most articles on this topic only list benefits, so here is a fairer, two-sided look. Modular furniture solves real problems, but it also comes with trade-offs worth knowing before you buy. Looking at both sides together gives a clearer picture than either list on its own. Pros Cons Rearranges to fit different rooms and layouts Can feel less structurally solid than one-piece furniture Damaged modules can be replaced individually Matching fabric or finish on future add-ons can be tricky Scales up or down as your space changes Larger systems can be complex to assemble Often easier to move through doorways in pieces Connector hardware can loosen over time with heavy use Weighing both sides against how you actually plan to use the furniture is the best way to decide if it fits your space. No single pro or con should decide the outcome, since the right answer depends on the specific room and household. Frequently Asked Questions Which brand is considered the best for modular sofas? Brands like Burrow, Lovesac, West Elm, and IKEA are highly regarded for modular sofas due to their quality, flexibility, and design options. Do modular couches stay together? Most modular couches use clips, brackets, or locking systems. These connectors prevent the individual sections from separating during use. What is the 4-inch rule for furniture? The 4-inch rule applies to the height of furniture seats. Sofas, chairs, and ottomans should have seat heights within four inches of one another. What furniture store has the best-quality furniture? The best furniture store depends on your needs and budget. Compare materials, construction, warranties, and customer reviews before purchasing. Does Walmart have quality furniture? Walmart offers several reliable and affordable furniture options. However, quality varies depending on the brand, materials, seller, and product. Final Thoughts Modular furniture solves a real problem for a country living in smaller spaces than it used to, but it works best when chosen with intention rather than picked for flexibility alone. Understanding the actual differences between modular and sectional pieces, knowing the honest trade-offs, and checking how well a system can grow with you make the difference between furniture that adapts to your life and furniture that just sits there looking flexible. The right modular setup should feel less like a compromise and more like furniture built for how you live.

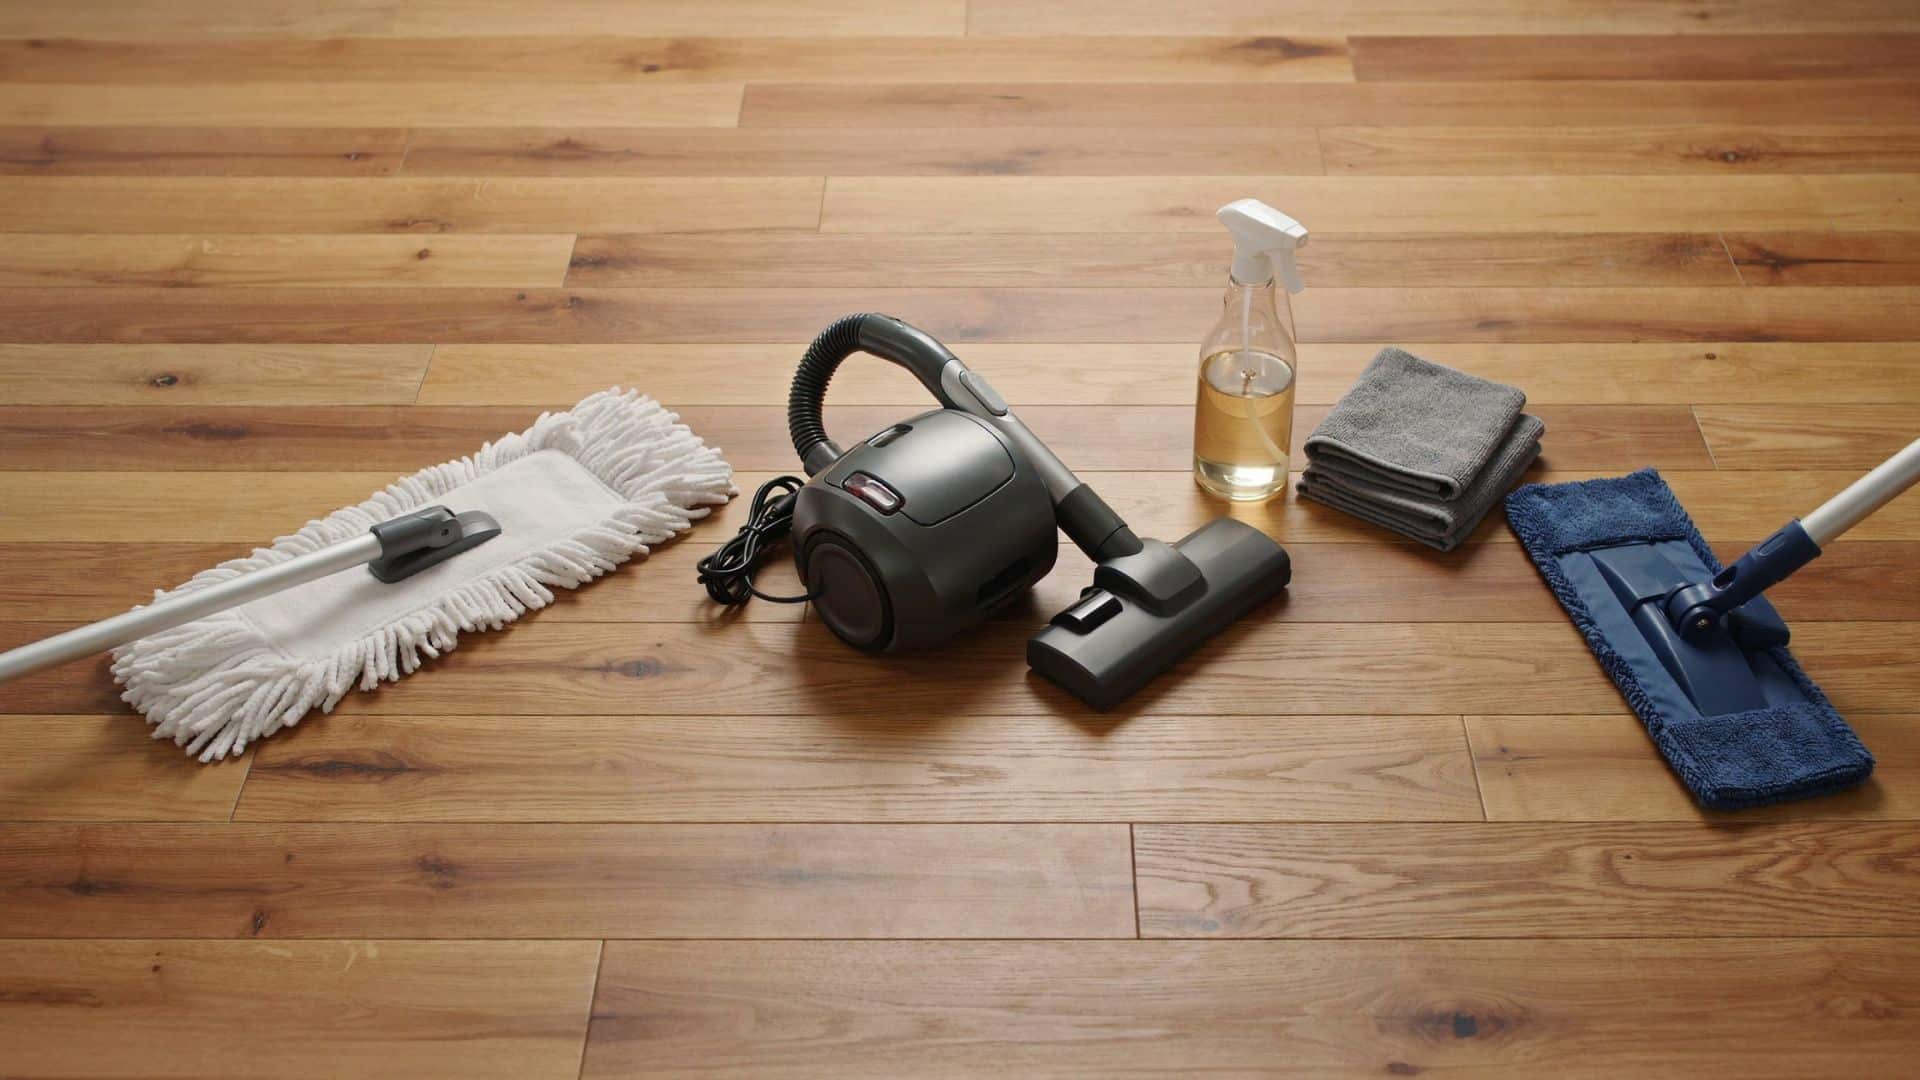
Hardwood floors add warmth and value to a home, but their finish can wear down quickly without proper care. Dust, grit, excess moisture, and the wrong cleaning products often cause scratches, dullness, and surface damage. Keeping hardwood floors clean starts with simple habits. Remove debris before mopping, use a cleaner suited to the floor’s finish, and avoid soaking the wood. The right tools and cleaning routine help protect the finish while keeping the surface looking fresh. Essential Tools and Cleaner for Hardwood Floors Before cleaning hardwood floors, gather the right tools and products to avoid scratches, residue, and moisture damage. The items below help remove dirt safely while protecting different floor finishes. Tool / Care Item How to Use It Microfiber mop Picks up dust and grime without scratching the finish, making it a safe choice for regular hardwood floor cleaning. Soft-bristle broom and microfiber cloths Remove loose dirt and handle spills, corners, and small cleaning areas quickly. Hardwood-safe vacuum Use the bare floor setting, turn off the beater bar, and choose soft attachments to prevent scratches and scuffs. pH-neutral hardwood cleaner Choose a water-based cleaner that matches your floor’s finish. Avoid harsh chemicals and residue-forming products that can dull or damage the surface. Know your floor finish. Polyurethane floors handle light damp cleaning, while oil, wax, and water-based finishes require specific products and care methods. Control moisture Use a spray bottle or a lightly damp mop instead of soaking the floor, as excess water can cause swelling or damage. Using the correct tools and controlling moisture make routine cleaning safer and more effective. Always match your cleaning method to your floor’s finish to prevent unnecessary damage. How to Clean Hardwood Floors Step by Step Before you start cleaning, it helps to follow the right order to protect your hardwood finish. The process begins with removing dirt and buildup, then moves through careful mopping, drying, and maintenance steps that keep floors looking clean without exposing them to excess moisture. 1. Remove Dirt and Stubborn Buildup First, remove dust, pet hair, and loose debris using a microfiber mop, soft broom, or hardwood-safe vacuum. For high-traffic areas, use a microfiber cloth with hardwood cleaner to lift stubborn dirt. Gently clean between floorboards with a soft attachment, avoiding excess moisture that can seep into seams. 2. Prepare the Cleaning Solution Always follow the cleaner’s instructions instead of adding extra product. Too much solution can leave behind a sticky film that attracts more dirt and makes the floor look dull. Spray a light mist over a small area rather than soaking the surface. 3. Damp Mop the Floor Use a mop that feels slightly damp, not wet. Work in small sections so moisture does not sit on the wood for too long. Rinse the mop regularly, or replace the microfiber pad when it gets dirty, to avoid spreading grime across the floor. 4. Dry the Floor Properly After cleaning each section, wipe away leftover moisture with a dry microfiber cloth or make a dry pass with your mop. Removing excess water helps protect seams and prevents issues like swelling or warping. 5. Restore Shine After Cleaning If your hardwood looks dull after cleaning, the issue may be a worn finish rather than leftover dirt. Hardwood polish can temporarily improve the appearance, but it does not repair damaged coatings. Floors with heavy wear may need professional refinishing to restore their original look. 6. Maintain Clean Floors Between Deep Cleanings Regular maintenance keeps hardwood floors cleaner and reduces the need for frequent wet cleaning. Sweep high-traffic areas often, place mats near entrances, use furniture pads to prevent scratches, and clean spills as soon as they happen to protect the finish. How to Clean Different Types of Hardwood Floors Sealed Hardwood Floors: Most modern hardwood floors are sealed with polyurethane. Use a damp mop with a pH-neutral cleaner and avoid harsh products that can damage the finish. Unfinished Hardwood Floors: Without a protective coating, hardwood is more susceptible to moisture damage. Use dry cleaning methods and avoid excess water to prevent stains or warping. Engineered Hardwood Floors: The thin layer of real wood over a composite core requires careful moisture control. Use minimal liquid and avoid soaking the surface. Older Hardwood Floors: Older finishes may react differently to cleaners. Test products in a hidden area first and use gentle cleaning methods on worn or aged floors. What Not to Use on Hardwood Floors Before cleaning hardwood floors, knowing what to avoid is just as important as knowing what to use. Certain products and cleaning methods can damage the finish, trap moisture, or create buildup that affects the floor’s appearance over time. Keep these common mistakes in mind to protect your hardwood investment. Avoid Excess Water: Standing water can seep into seams, causing swelling, warping, or cupping. Use a lightly damp mop instead of a wet one. Avoid Steam Cleaners: Steam adds heat and moisture that can penetrate between boards, damaging the wood or subfloor. Avoid Harsh Chemicals: Bleach, ammonia, and abrasive cleaners can dull or strip the hardwood finish. Avoid Wax and Oil-Based Products on Certain Finishes: These products can leave buildup on modern polyurethane floors and affect future refinishing. Always check your floor’s finish first. Common Mistakes When Cleaning Hardwood Floors One of the most common hardwood floor cleaning mistakes is mopping before removing dust and debris, as grit can scratch the finish during cleaning. Using the wrong mop can also cause problems, with abrasive materials damaging the surface and overly wet mops increasing the risk of moisture. Avoid cleaning with water too frequently, as repeated exposure to moisture can wear down the finish over time. Clean spills quickly, since liquids left sitting can seep into the wood and cause water stains or surface damage. Conclusion Keeping hardwood floors looking good comes down to gentle tools and the right cleaner for your finish. Keeping moisture to a minimum every time you clean matters just as much. None of this requires anything complicated, just a routine you actually stick to. A little consistency now saves you from a much bigger refinishing job later. It keeps the floor looking like the investment it was. Frequently Asked Questions What is the best thing to wash your hardwood floors with? Use a microfiber mop with a pH-neutral hardwood floor cleaner recommended for your finish. Avoid excess water and harsh cleaners that can damage the protective coating. Can I use Swiffer wet cloths on hardwood floors? You can use Swiffer wet cloths on some sealed hardwood floors if you use them lightly, but avoid leaving moisture behind. Always check your flooring manufacturer’s recommendations first. What do professional cleaners use on hardwood floors? Professionals typically use microfiber mops and hardwood-safe, pH-neutral cleaners designed for the floor’s specific finish. They focus on low-moisture methods to protect the wood. What is the best homemade cleaner for hardwood floors? A simple, damp microfiber mop is often the safest homemade option for many sealed hardwood floors. Avoid vinegar mixtures, as they may dull or weaken some finishes over time. Is Murphy’s Oil Soap good for wood floors? Murphy’s Oil Soap can be used on some finished wood surfaces, but it may leave residue on certain hardwood floors. Check your finish type and the manufacturer’s care instructions before using it regularly.
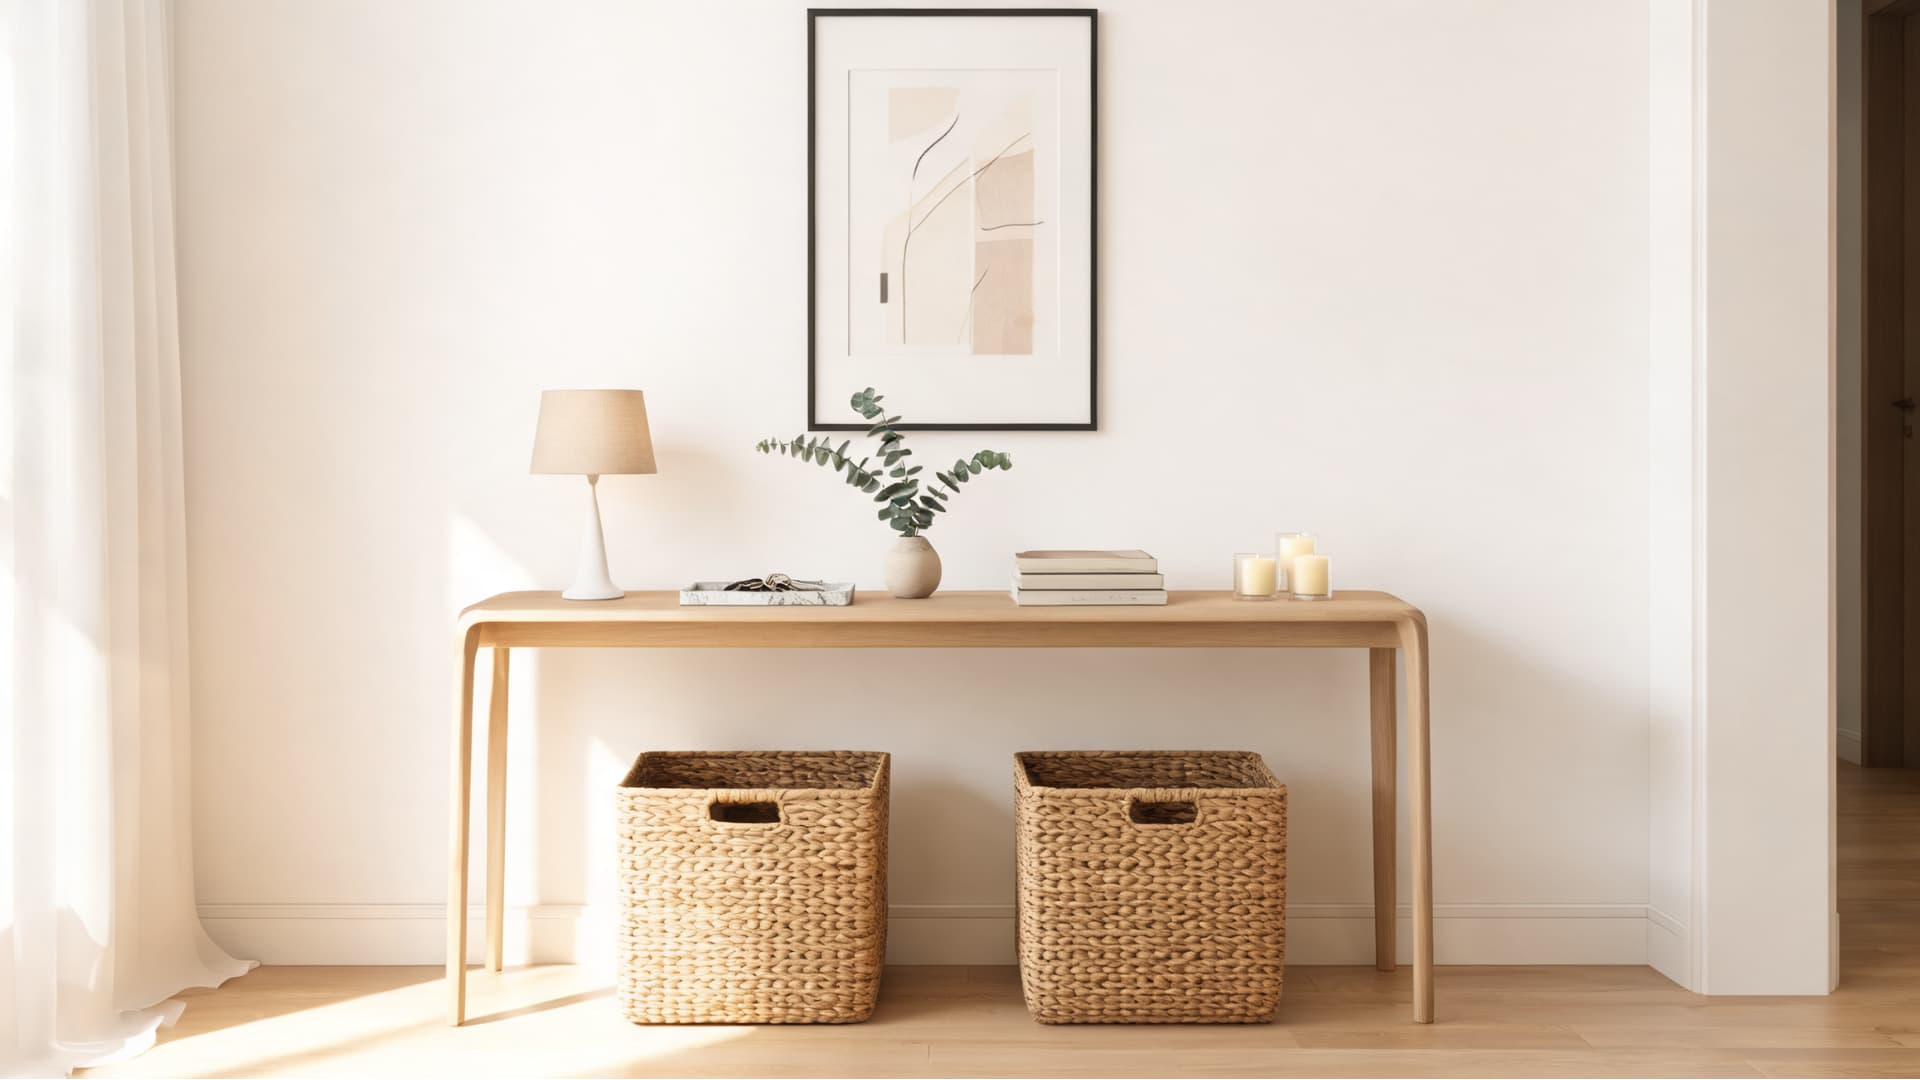
A console table is a long, narrow table designed to sit against a wall or behind a sofa, and the reason it works so well in so many rooms comes down to one thing: its depth is kept shallow enough that it doesn’t pull floor space away from you. Most run 12 to 18 inches deep, 30 to 36 inches tall, and anywhere from 36 to 60 inches wide. That combination lets it function where full-sized furniture can’t, in hallways, entryways, behind sofas, and along blank walls that would otherwise go unused. Here’s what actually happens when you add one to a room: the space stops feeling unresolved. An entryway gets a surface for daily essentials. A hallway gets a visual anchor. A living room gets storage or lighting without adding bulk. The console table isn’t a decorative afterthought — it’s solving a layout problem that most people don’t even name until after it’s fixed. Shape Long and narrow Common height 30–36 inches (should match or sit just below sofa back height when used behind a sofa) Common depth 12–18 inches, stay under 14 inches in hallways to keep the passage clear Common width 36–60 inches, ideally no more than two-thirds of the wall width Best placement Entryway, hallway, living room wall, behind the sofa Main use Storage, display, lighting, daily essentials Common materials Wood, metal, glass, marble, rattan, and mirrored finishes Those depth numbers matter more than most guides let on. A 14-inch-deep console table in a 36-inch-wide hallway leaves you 22 inches of clearance, just enough. Go to 18 inches of depth, and you’re down to 18 inches of walkway, which starts to feel tight every time someone passes through carrying bags. Size first, then everything else. What is a Console Table Used For? Console tables are useful because they solve small space problems while also making a room feel more finished. Instead of being just decorative furniture, they add function to areas that would otherwise remain empty or underused. Holding everyday essentials: Console tables are commonly used in entryways to keep daily items like keys, mail, wallets, sunglasses, bags, phones, and trays in one easy-to-reach place. This helps create an organized “drop zone” right at the entrance of the home. Displaying decor: They work as a display surface for decorative pieces such as lamps, vases, framed photos, artwork, candles, plants, books, and decorative bowls. This makes them ideal for adding personality and style to a space. Adding extra storage: When designed with drawers, shelves, or baskets, console tables can store practical items like cables, remote controls, documents, table linens, dinnerware, or other small household essentials that often create clutter. Filling empty wall space: A console table can instantly make a blank wall, narrow hallway, or unused alcove feel intentional and functional without taking up much floor area or making the space feel crowded. Creating a room divider: When placed behind a sofa, a console table can subtly divide an open-plan layout into separate zones, such as distinguishing the seating area from a walkway, while still keeping the space visually open. Where to Put a Console Table: Room-by-Room Placement The right placement comes down to the specific layout problem you’re solving. Here’s what each location actually requires. 1. Entryway or Foyer Near the front door, the console table functions as the organizational anchor of the entryway. The most useful setup: a tray or small bowl for keys and change, a lamp or wall-mounted light if the entryway is dim, and at least one basket or hook solution below for bags. A mirror above it is one of the most practical additions in any entryway — a last look before you leave, and it bounces light into spaces that often have none. Sizing note: In a foyer, leave at least 36 inches of clear walkway in front of the table. If the hall is narrower than 48 inches, stay at a maximum depth of 12 inches. 2. Hallway Hallways are the most difficult placement because the walkway constraint is real. A 12-inch-deep console works in most halls. A slim lamp, a single piece of art above, and one small object on the surface, that’s all that fits before it starts to read as cluttered. If the hallway is also the path to bedrooms, leave the lower shelf completely clear so the space stays easy to move through. 3. Living Room Wall Against a living room wall, the console table works as a display anchor and lighting solution. This is where you have the most styling flexibility; it’s not a high-traffic zone, so you can go slightly deeper (up to 18 inches) and use the surface more fully. The common mistake here is treating it like a shelf and stacking too much. Pick one anchor piece, a lamp, a large mirror, or a framed artwork, and build around it with two or three supporting objects. The wall above the table is part of the arrangement, not separate from it. For more on minimalist living room layout and furniture proportions, the scale principles there apply directly to console table placement decisions. 4. Dining Room A console table in the dining room fills the role of a slim sideboard — serving surface, bar area, or storage for linens and glassware that don’t have another home. This works best in smaller dining rooms where a full buffet cabinet would dominate the wall. At 15 to 18 inches of depth, you get enough surface for functional staging without the room feeling compressed. 5. Bedroom In the bedroom, a console table works as a compact vanity when paired with a mirror and stool. The table depth here should match the stool depth so you can sit comfortably without the stool jutting out awkwardly when it’s pushed in. Look for a stool that tucks flush underneath the table’s apron when not in use. 6. Bathroom In larger bathrooms, a console table organizes towels, baskets, and toiletries while keeping the surface accessible. Some bathroom console tables are specifically designed to support a vessel sink, with plumbing clearance built into the open frame. Confirm weight capacity before loading a ceramic sink, standard decorative console tables are not rated for that load. 7. Alcove or Awkward Corner Alcoves and recessed walls are exactly what the narrow format was designed for. A console table fits the footprint without competing with the architecture. In an alcove, the depth of the recess usually determines how deep your table can be — measure the recess depth first and choose a table at least 2 inches shallower than that clearance so the table looks intentional rather than jammed in. Best Console Table Materials Material choice affects three things: maintenance burden, visual weight, and how the table holds up in high-traffic areas. Here’s an honest read on each. Material Best For Things to Consider Wood High-traffic areas, warm or traditional rooms Solid wood holds up well; veneer can chip at corners in entryways Metal Modern or industrial rooms Cold on its own — needs soft decor or a wood top to balance it Glass Small spaces and lighter layouts Shows fingerprints constantly; tempered glass is safer in entryways Marble Formal or premium rooms Heavy, requires sealing, and stains if liquids sit on it Rattan or cane Relaxed, natural, or coastal interiors Collects dust in open weave — harder to keep clean in hallways Mirrored finish Compact rooms where light matters High maintenance — smudges are visible from across the room Mixed material Modern homes with flexible styling Must match at least one existing material in the room The entryway is the most demanding location for material choice because it’s the first thing you touch and see every day. Wood, particularly solid hardwood, handles daily use better than glass or marble in that context. For hallways and living room walls, where traffic is lower, the visual priority can take over from the durability concern. If you’re also thinking through the broader material decisions for your space, the principles in minimalist home decor rules how material selection interacts with room scale and furniture choices. Common Types of Console Tables The type of console table you choose changes both the function and the visual weight of the piece in the room. Each works better in some contexts than others. 1. Rectangular Console Table The standard format. Clean lines, easy to style, fits most rooms. This is the right starting point unless you have a specific layout constraint that calls for something else. 2. Demi-Lune Console Table A half-moon shape that trades surface area for a softer edge profile. Works well in tight entryways where the curved front means fewer corners catching bags and elbows. You lose some usable surface depth, so it’s better suited to display-only setups rather than daily storage. 3. Console Table With Drawers Drawers add hidden storage without increasing the footprint. This is the right call for entryways where daily clutter — chargers, receipts, spare keys, takeout menus — needs somewhere to go that isn’t the surface. One or two drawers is usually enough; a full bank of drawers starts to look like a dresser and reads oddly in a hallway. 4. Console Table With Shelves A lower shelf adds storage capacity without drawers. Baskets on the lower shelf handle shoes, bags, or charging cables while keeping the surface clear. The tradeoff: open shelves require more styling discipline than drawers because everything on them is visible. 5. Open-Frame Console Table Slim legs and a minimal frame keep the floor visible, which makes small rooms feel larger than solid-sided furniture would. The right call for tight hallways and rooms where visual weight is the main concern. These typically have no storage beyond what you add with a basket or tray. 6. Mirrored or Glass Console Table Reflective surfaces bounce light and reduce the visual footprint of the table in the room. Useful in dark or small rooms where solid furniture would feel heavy. Practical downside: Mirrored and glass surfaces show every fingerprint and dust, so maintenance is higher than wood or metal. 7. Sculptural Console Table A sculptural console table is a statement piece first and a surface second. The base becomes the focal point, which means the styling on top needs to be minimal enough not to compete with it. If you buy a table for its base design and then pile objects on top, you’ve hidden the reason you bought it. Console Table vs. Side Table: What Is the Difference? These two furniture pieces solve entirely different problems and shouldn’t be confused when planning a room layout. Feature Console Table Side Table Shape Long and narrow Small, square, round, or rectangular Height 30–36 inches 18–24 inches (matches arm height) Placement Against walls, behind sofas, in halls Besides chairs, sofas, or beds Main use Display, storage, lighting, entryway surface Drinks, remotes, books are accessible from the seat The height difference is the clearest signal: a side table is designed to be reached from a sitting position. A console table is not. If you use a console table next to a chair, the surface is above arm height, and anything you place on it requires you to reach up or stand, which defeats the point. How to Choose the Right Console Table The sequence matters: get the dimensions right first, then decide on the function, and pick the style last. Reversing this order is how you end up with a beautiful table that blocks traffic or sits too low to see from a standing position. Measure the space before anything else. Width of the wall, depth of the clearance zone in front of it, and height of any nearby furniture the console will sit beside or behind. For hallways, confirm 36 inches of clearance remains after the table is in place. Match height to context. In an entryway or hallway, 30 to 34 inches is comfortable for most adults. Behind a sofa, match the sofa back height exactly or go up to 2 inches lower. Choose depth by traffic. Narrow hallway, 12 inches max. Entryway with space, 14 to 16 inches. Living room wall, up to 18 inches if clearance allows. Decide whether storage is functional or decorative. If you actually have things to store, get drawers or shelves. If storage is conceptual, you’ll end up with empty drawers and a cluttered surface anyway, just buy the clean open frame and use a basket below. Check weight capacity before buying. If you’re adding a heavy lamp, a stone vase, or a mirror leaning against the wall above, confirm the table is rated for that load. Most decorative console tables have surface limits of 30 to 50 pounds. How to Style a Console Table Most console tables end up over-styled because the format is long enough that it feels like it should be filled. The rule that actually works: choose one anchor piece, add height with something tall, and leave at least a third of the surface empty. Styling Move What It Does One anchor piece (lamp, mirror, large art) Establishes the focal point so everything else reads as supporting it Vertical element (tall lamp, tall vase) Counterbalances the horizontal length of the table A tray for small items Contains clutter, so it reads as intentional grouping, not scattered Mix of object sizes Creates visual rhythm — one large, one medium, one small reads better than three equal objects Basket or storage on the lower shelf Adds function and grounds the table visually Empty surface space Prevents the “cluttered shelf” look — negative space is part of the styling, not a failure to fill it One more specific note: if you’re adding a mirror above the console table, the bottom of the mirror should sit 4 to 6 inches above the table surface. Any closer and the mirror reads as resting on the table rather than hanging above it. Any higher and the proportional relationship between mirror and table breaks — they start to look like two separate things sharing a wall rather than one coherent arrangement. Console Table Mistakes to Avoid Too deep for the space. A 16-inch-deep table in a 36-inch hallway leaves 20 inches — that’s tight. Measure actual clearance, not available wall width. Too tall for the sofa. If the table tops the sofa back by more than 2 inches, the setup looks like a shelf bolted to the wall, not furniture that belongs together. Over-styling the surface. Ten small objects always look like a collection of things, not a styled surface. Edit to five maximum, and leave some surface empty. Ignoring the wall above. A blank wall above a console table makes the table look like it was put there because nowhere else worked. A mirror, artwork, or wall-hung fixture completes the arrangement. Using it as a TV stand. Most console tables are not rated for the weight of a television, and the surface height is wrong for viewing. TV-specific media consoles are built with load ratings and cable management that a decorative console table won’t have. Choosing style before dimensions. A console table that looks right in a showroom but doesn’t fit your clearance path is furniture that creates a problem rather than solves one. Frequently Asked Questions Can a console table go under a window? Yes, a console table can go under a window if it does not block airflow, curtains, or natural light. Choose a low, simple design that sits below the window frame. Keep styling minimal so the setup feels open instead of crowded or visually heavy. Should a console table touch the wall? A console table should usually sit close to the wall, but it does not always need to touch it. Leave a small gap if there are baseboards, outlets, or cords behind it. The table should still feel stable and aligned with the wall. Can I use a console table as a desk? You can use a console table as a light desk if the height, depth, and chair clearance feel comfortable. It works best for laptops, writing, or short work sessions. For daily office use, a proper desk is usually better because it offers more depth. What size lamp works on a console table? A lamp should feel balanced with the table and nearby wall decor. For most console tables, a medium-height lamp works best. Avoid lamps that are too wide, too tall, or too heavy. The base should leave enough room for a tray or decor. Can a console table work in a small apartment? Yes, a console table can work well in a small apartment because it adds function without taking much floor space. Use it as an entryway surface, slim storage piece, or sofa-back table. Choose a shallow style with drawers or shelves for better use. How do I stop a console table from wobbling? First, check that the floor is level and all screws are tight. Add felt pads or furniture levelers under uneven legs if needed. If the table is tall, narrow, or placed in a busy area, consider securing it to the wall for safety. What color console table should I choose? Choose a color that connects with furniture already in the room. Wood tones feel warm, black adds contrast, white keeps things light, and metal can feel modern. If the room is small, a lighter or open-frame design often feels less heavy. Can a console table replace a dresser? A console table cannot fully replace a dresser because it has less storage and shallower depth. It can hold small items, decor, or baskets, but it is not ideal for full clothing storage. Use it as a support piece, not primary storage. Final Verdict A console table works best when it solves a real problem, not when it simply fills a gap. I’d start by looking at where you need a slim surface, better storage, or a stronger visual anchor. Then check the depth, height, material, and placement before thinking about style. You now have the basics for using a console table in an entryway, hallway, living room, dining room, bedroom, bathroom, or awkward corner. You also know how different types, materials, and styling choices affect daily use. I hope this helps you choose with more confidence. Try measuring your space today, then share which console table setup fits your home best or needs.
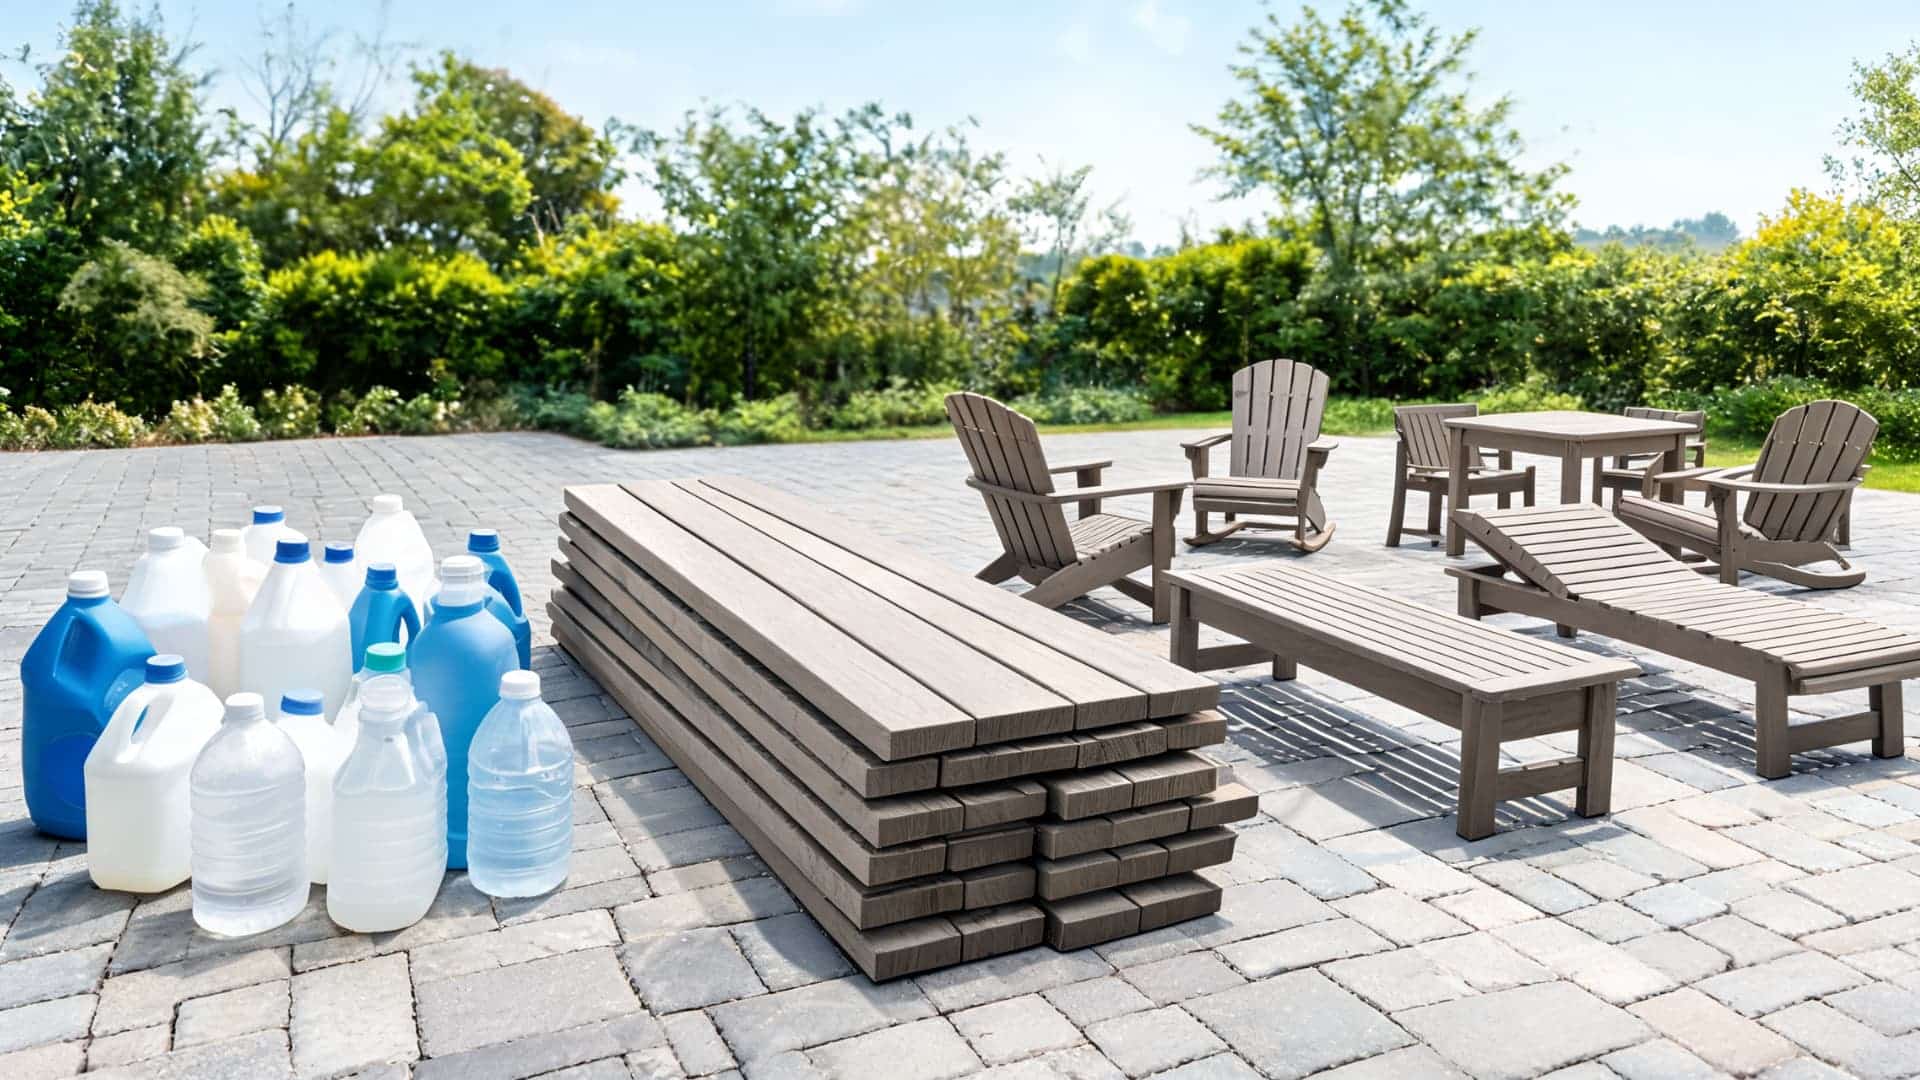
Polywood furniture holds up. That’s the honest starting point. I’ve watched real wood patio sets rot out in three seasons on an uncovered deck, and I’ve seen cheap molded plastic buckle under UV and split at the seams before two winters are done. The question worth asking before you spend $800 on an Adirondack chair is exactly what you’re buying and whether it earns the price. This guide covers what Polywood is made of, how it performs across different climates, how it compares to natural wood, and which furniture types are worth the money. Material High-density polyethylene (HDPE) plastic lumber Primary Source Recycled plastics, milk jugs, detergent bottles, post-consumer HDPE Color Method UV inhibitors and pigments blended into the lumber, not surface-painted Maintenance Required Soap, water, and a soft brush, no sealing, staining, or oiling Warranty (Brand) 20 years (Polywood brand) Best For Uncovered patios, pool areas, coastal environments, high-traffic outdoor spaces Not Ideal For Buyers wanting authentic wood grain, the lowest upfront price, or lightweight furniture That’s the short version. The full picture is more useful than a spec sheet, so let’s get into it. What is Polywood Made Of? Polywood furniture is made from high-density polyethylene (HDPE) sourced primarily from recycled plastics like milk jugs, detergent bottles, and post-consumer packaging. The raw material is processed into dense boards that are shaped, cut, and assembled like lumber. From a distance, a well-made Polywood Adirondack chair looks like painted wood. Up close, the surface texture is smoother and more uniform than timber grain. What separates HDPE lumber from cheap patio plastic is density and how color is applied. UV inhibitors and pigments are blended into the material during manufacturing, not applied as a surface coat. That means the color runs through the board. A deep scratch on a Polywood slat won’t reveal a stark white interior the way a painted plastic chair would; the tint carries through. It also means the UV protection is structural rather than cosmetic. The boards are then cut and drilled like dimensional lumber and fastened with stainless steel hardware to resist corrosion. The result is furniture that looks like traditional outdoor wood furniture but behaves like a dense plastic material, which is exactly what it is. Pro Tip: Check the hardware before you buy any poly lumber furniture. Stainless steel fasteners are the standard for quality HDPE pieces. Zinc or plated screws will rust and stain the boards faster than the material itself degrades. Is Polywood Real Wood? No, and the name trips people up constantly. Polywood is HDPE plastic lumber shaped to resemble timber. It comes in wood-inspired colors like teak, mahogany, driftwood, and natural, and the board profiles mimic the proportions of dimensional wood stock. That’s where the resemblance ends. There’s no grain, no fiber structure, and nothing in it that came from a tree. It won’t accept stain, it doesn’t need sealing, and it won’t develop the silver patina that teak does over time. Buyers who want the natural behavior and aesthetic of real wood, including how it weathers, how it takes oil finishes, how it smells in the sun, will find that Polywood doesn’t replicate any of that. What it does offer is a stable, predictable surface that requires almost no maintenance to keep looking the same year over year. Polywood vs. Natural Wood: How They Actually Compare For the outdoor context, uncovered pool decks and porches, and lakefront docks — the material differences translate into real performance gaps over time. Here’s how they compare across the factors that matter most for outdoor furniture Factor Polywood (HDPE) Natural Wood (Teak, Cedar, Pine) Rot resistance Does not rot, HDPE has no organic fiber Varies by species; pine rots fast without treatment; teak holds up well Splintering Does not splinter Splinters as the surface dries and cracks over the seasons Maintenance Soap and water only Annual sealing, oiling, or refinishing, depending on species Fade resistance UV inhibitors built into the material hold color well Fades and grays without a UV-protective finish applied Weight and stability Heavier than lightweight plastic; stable in moderate wind Varies; teak is heavy, pine is lighter Upfront cost Higher, expect $300-$900 for a quality Adirondack chair Wide range; painted pine is cheap, teak is expensive Long-term cost Lower, minimal upkeep, long lifespan Higher annual maintenance costs add up; replacement is more likely Appearance over time Stays consistent; does not age like wood Develops character with age (silver patina, grain variation) The comparison changes depending on which wood you’re actually using. A quality teak set maintained properly will last decades and look better for it. The problem is most buyers aren’t comparing Polywood against teak; they’re comparing it against painted pine or basic acacia that won’t survive three winters without significant work. Against that standard, HDPE lumber wins on durability and long-term cost without much debate. For guidance on which outdoor wood species actually hold up. How Polywood Performs in Real Weather The material doesn’t care what the weather is doing. That’s the practical reality of HDPE, and it’s why Polywood gets recommended for the situations where real wood tends to struggle. Here’s how it holds up across the conditions that matter. 1. Hot and Sunny Climates UV inhibitors built into the material slow the fading process significantly compared to painted or stained wood. That said, dark colors, navy, black, and deep charcoal, absorb heat and can become uncomfortable to touch on a July afternoon in direct sun. If your patio gets full sun from 10 am to 4 pm, lighter colors are the practical choice for comfort. The material itself won’t degrade from UV exposure the way unstabilized plastic does. 2. Rainy and Humid Environments HDPE doesn’t absorb water. There’s no swelling, warping, or surface checking from moisture cycling the way you’d see in untreated or even sealed wood. Surface dirt, pollen, and mildew can still collect on the boards; the material isn’t self-cleaning, but a scrub brush with soapy water handles all of it without needing to let the furniture dry out or condition it afterward. 3. Cold and Snowy Climates The material holds up through freeze-thaw cycles that crack and split wood. Polywood can stay outside through a northern winter without the fiber stress that causes untreated wood to check and split when moisture in the grain freezes and expands. Covers are optional, but they help reduce cleaning time when spring arrives. Stacking chairs or bringing cushions inside over winter extends cushion life; the frames don’t need it. 4. Coastal and Poolside Use Salt air and pool splash are where HDPE furniture has a clear structural advantage over most wood alternatives. The material doesn’t absorb chlorine or salt, doesn’t corrode (provided the hardware is stainless), and doesn’t need rinsing for its own protection, though rinsing to remove salt buildup on visible surfaces keeps it looking clean. This is one of the strongest use cases for poly lumber furniture. Polywood vs. Poly Lumber: Why the Distinction Matters Polywood is a brand name, not a material category. When people say “polywood furniture,” they sometimes mean furniture made by the Polywood brand specifically, and sometimes they mean any furniture made from poly lumber or HDPE boards, regardless of manufacturer. The distinction matters because quality and warranty coverage vary between manufacturers even when the base material is the same. Term What It Means When to Use It Polywood Specific brand, founded in 1990, US-manufactured HDPE furniture with a 20-year warranty When referring to the brand specifically Poly lumber The material category, HDPE boards used by many furniture manufacturers When discussing the material, regardless of brand HDPE furniture An accurate generic term for any furniture made from high-density polyethylene Technical or comparative contexts The Polywood brand offers a 20-year warranty against structural defects, which is the benchmark for the category. Other poly lumber brands, Breezesta, DuraWeather, Berlin Gardens, and Seaside Casual, use comparable HDPE material but carry different warranty terms and quality tiers. Buying from a brand that specifies HDPE content and backs the product with a long warranty is a better investment than buying unbranded poly lumber furniture where those specs aren’t disclosed. Why Polywood Furniture Costs More A single Polywood Adirondack chair runs $250 to $400. A dining set for six can run $1,500 to $3,000. The higher price reflects the density of the material, the quality of the hardware, and the cost of domestic manufacturing, not padding. Here’s what drives the cost. First, HDPE lumber itself is denser and heavier than the molded plastic used in cheap patio furniture. Processing recycled HDPE into furniture-grade boards — blending UV stabilizers and pigments into the material during extrusion- costs more per unit than injection-molded plastic. Second, stainless steel hardware is standard on quality poly lumber pieces. It’s more expensive than zinc or plated fasteners, and it matters for long-term performance. Corroding hardware on an outdoor furniture frame leaves rust streaks on the boards and eventually compromises the joints. Third, the Polywood brand specifically manufactures in the US, which is reflected in the price. The 20-year warranty coverage they offer also reflects the manufacturer’s confidence in the product’s lifespan, which factors into the cost structure. The cost-per-year math is worth running. A $350 Polywood chair that lasts 20+ years costs roughly $17-18 per year. A $90 molded-plastic chair that needs replacing every 4-5 years costs $18-22 per year and generates more waste. The upfront number is larger; the long-term number is often comparable or better. Note: Cost estimates for Polywood furniture reflect the brand’s current US pricing. Poly lumber furniture from other manufacturers (Breezesta, DuraWeather, Berlin Gardens) may vary significantly. Prices fluctuate seasonally; peak spring pricing (March–May) runs higher than off-season pricing. The Main Characteristics of Polywood Outdoor Furniture Five things separate POLYWOOD from standard outdoor furniture, and from each other, depending on where you use it. No routine maintenance. No staining, oiling, sanding, or sealing, ever. Soap and water handle everything. Fade resistance is built into the board. Pigment is blended through the HDPE before extrusion, not coated on. No peeling, no blotchy patches. No rot, no splinters. HDPE has no organic fiber for fungi to break down, a direct advantage on pool decks and rental properties. Heavy and stable, but awkward to move. The density that holds chairs steady in the wind makes large pieces difficult to store seasonally. More sustainable, not zero-impact. Recycled HDPE diverts post-consumer plastic from landfills. Manufacturing still uses energy; the furniture is not biodegradable. Taken together, these characteristics make POLYWOOD well-suited to high-exposure, low-intervention outdoor situations, and a harder case for anyone who prefers the feel of natural wood or moves furniture often. Best Types of Polywood Furniture to Buy Some Polywood furniture types offer better long-term value than others. The best choices are pieces that stay outdoors, face the weather often, and benefit from strong, low-maintenance HDPE construction. Polywood Furniture Type Best For Why It’s Worth Buying Adirondack Chairs Fire pits, lawns, decks, patios Adirondack chairs are one of the best Polywood buys because they handle constant outdoor exposure well. Their slatted design drains water easily, and the material resists rot, moisture, and ground contact. Dining Sets Covered and uncovered patios Polywood dining sets work well for regular outdoor meals. Their heavier weight keeps tables steady in the wind, while stainless steel hardware adds durability for long-term use. Rockers, Gliders, and Porch Swings Front porches and covered seating areas These pieces are ideal when furniture stays in one place but faces changing weather. HDPE holds up well to repeated rocking or gliding without the loosening common in older wood joints. Chaise Lounges and Deep Seating Pool areas, patios, lounge spaces Poolside Polywood furniture performs well because HDPE resists moisture, chlorine, sunscreen, and wet use. For cushioned pieces, choose quick-dry, fade-resistant fabric with available replacement cushions. Benches and Planters Gardens, walkways, porches Polywood benches need little maintenance beyond cleaning and work well in exposed spaces. Planters are also durable, but drainage holes are important because HDPE does not breathe like wood. Polywood is most worth the price when the furniture stays outside year-round. Start with chairs, dining sets, or benches if you want practical pieces that need little upkeep. How to Choose the Right Polywood Furniture for Your Space The material decision comes first. Once you’ve decided HDPE furniture is the right call for your outdoor space, the purchase decision narrows down to a few practical questions. Measure before you buy. Polywood pieces run large, especially Adirondack chairs (typically 29–32 inches wide) and dining tables. Leaving 36 inches of clearance behind a dining chair for a comfortable pull-out is the minimum, more if it’s a high-traffic path. Sectional components add up fast in smaller patios. Match the piece to the use. If you eat outside three times a week, a dining set earns its keep. If the patio is mostly for relaxed weekend seating, two Adirondack chairs and a side table will serve better than a formal dining set that sits empty most days. Color choice is a comfort decision, not just aesthetic. Dark colors, black, navy, charcoal, hold up fine in UV terms, but get hot in direct afternoon sun. For pool decks and sun-exposed patios, lighter colors (white, sand, natural) are cooler to the touch and show less heat absorption. For shaded porches, color choice is mostly aesthetic. Check cushion availability for deep seating. Adirondack chairs and rockers often work well without cushions. Covers are optional, but they help reduce cleaning time when spring arrives, the same logic applies to any exposed deck surface around them. Confirm replacement cushions are available and priced before committing to a deep seating set. Frequently Asked Questions About Polywood Furniture These are the questions that come up most often from people who’ve narrowed their decision down to Polywood and want specifics before buying. Is polywood furniture worth the money? For outdoor spaces with significant weather exposure and minimal maintenance attention, yes. The cost-per-year math favors HDPE furniture over most alternatives when you factor in replacement cycles and maintenance costs. It’s not worth it if you want authentic wood grain or need the lowest possible upfront price. Can polywood furniture be left outside year-round? Yes. HDPE lumber is designed for year-round outdoor exposure. Covers are optional — they reduce cleaning time after winter but aren’t required to protect the material. Bring cushions inside or store them in a weatherproof box over winter. Does polywood furniture get hot in the sun? Dark-colored poly lumber furniture can get uncomfortably warm in direct afternoon sun. Lighter colors stay cooler. This is a material property, not a brand-specific issue — dark-colored plastic and metal furniture both run hotter than light-colored alternatives in direct sunlight. Can polywood furniture be painted? Not recommended. HDPE has low surface adhesion for most paints, so conventional paint won’t bond reliably and will peel faster than it would on wood. The color is built into the material — repainting isn’t typically needed and usually causes more problems than it solves. Does polywood furniture attract termites or insects? No. HDPE has no organic fiber content. Termites, carpenter ants, and wood-boring insects are not attracted to it and cannot damage it the way they would timber furniture. How do you clean polywood furniture? Mild dish soap, warm water, and a soft-bristle brush. Rinse with a garden hose. For stubborn mildew or staining on the surface, a diluted bleach solution (1/3 cup per gallon of water) works without damaging the material. No pressure washer required. Is polywood furniture good for rental properties? Yes. The combination of durability, low maintenance, and resistance to rot, splinters, and fading makes it a practical choice for rental properties where furniture needs to hold up through tenant turnover without constant attention. What is the difference between polywood and composite decking? Composite decking typically combines wood fiber with plastic binders, which can retain moisture and support mold growth under some conditions. Polywood is pure HDPE with no wood fiber content — it doesn’t absorb water and has no organic material for fungi to break down. They are different materials with different performance profiles. Final Verdict Polywood makes the most sense when you want outdoor furniture that can stay outside and still hold up with very little work. I like it most for patios, pool decks, porches, and coastal spaces where rain, sun, salt, and daily use can wear down cheaper materials fast. You now know what Polywood furniture is made of, why HDPE performs differently from real wood, how it handles different climates, and which pieces offer the best value. The upfront price is higher, but the low maintenance and long lifespan can make it easier to justify. Before you buy, measure your space, choose the right color, and share which piece you are considering. Sources Polywood Brand, “Materials and Sustainability.” polywood.comFamily Handyman, “The 10 Best Outdoor Furniture Brands, According to Designers.” 2025. familyhandyman.comCasual Furniture World, “What Is Polywood Furniture? Definition, Materials, History & Brands.” 2025. casualfurnitureworld.com
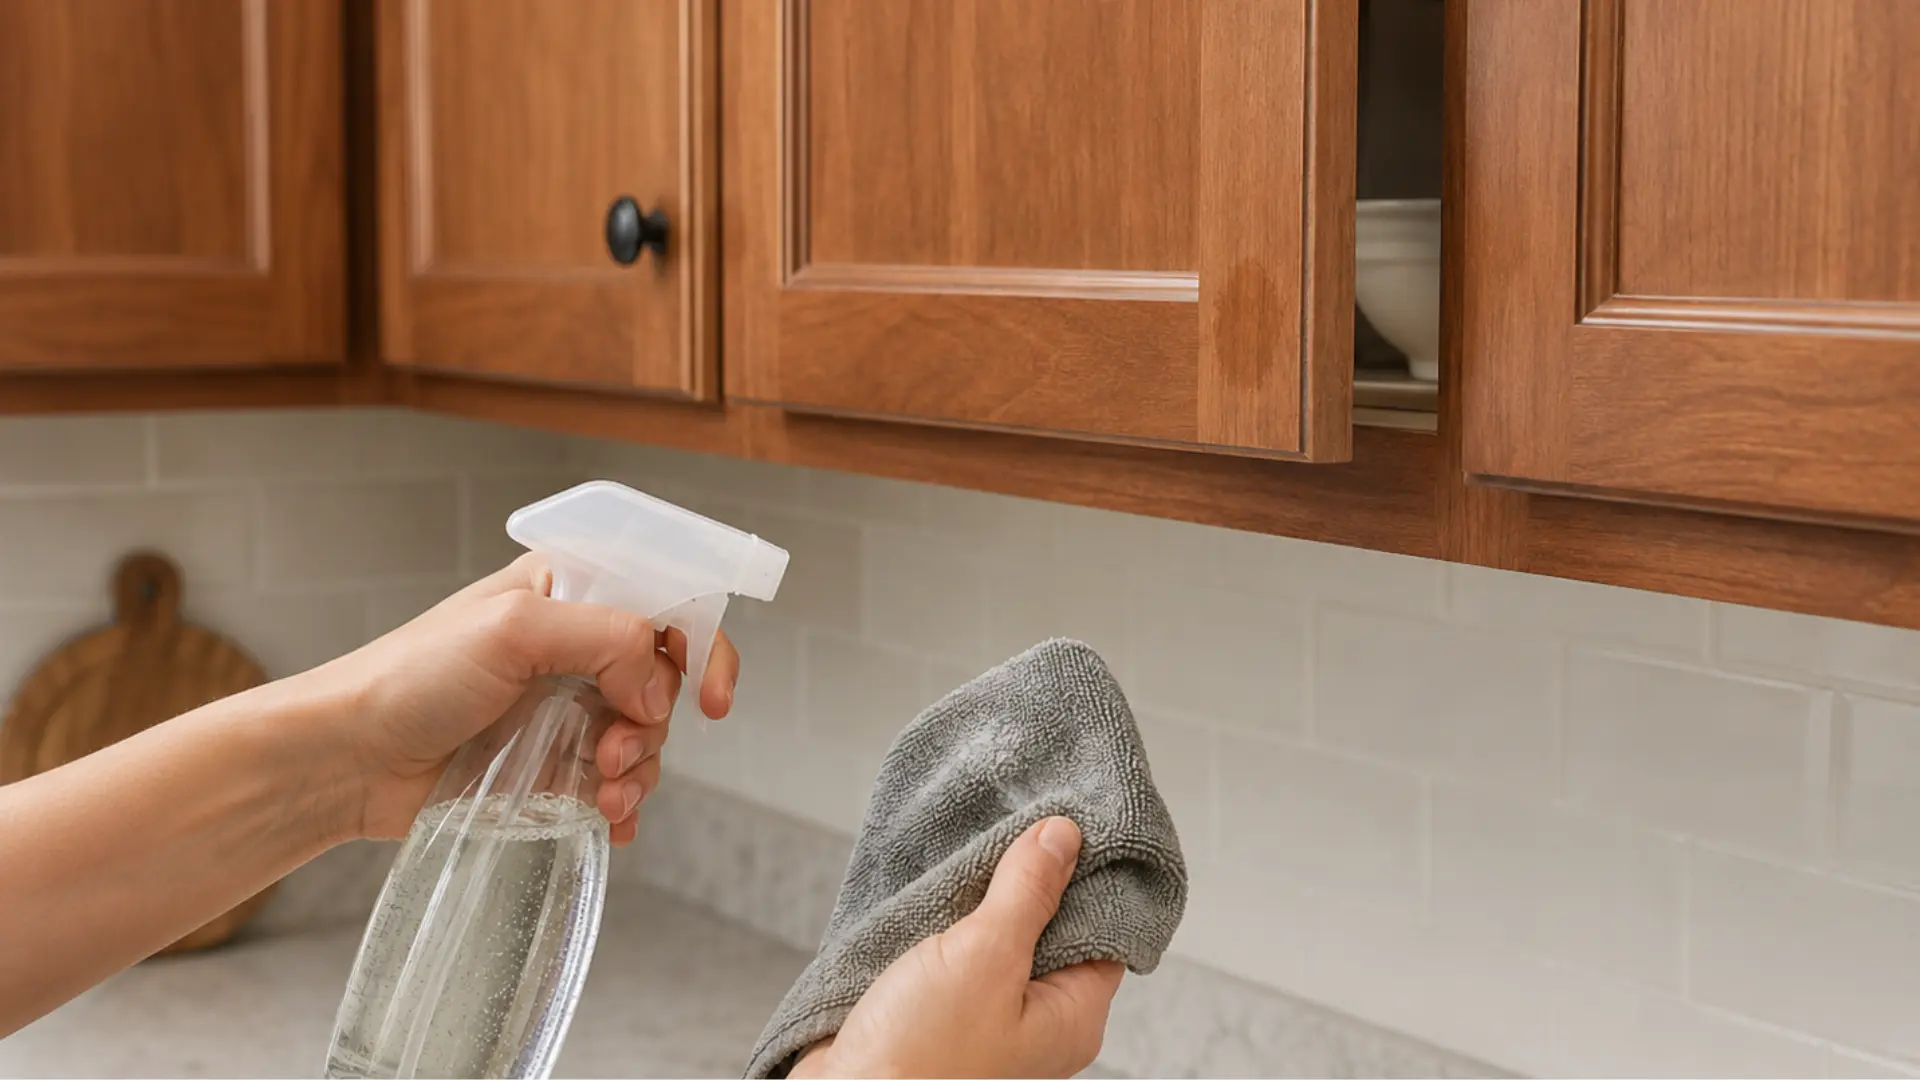
Most people reach for the wrong cleaner first. The greasy, sticky film on wood cabinets near the stove doesn’t need a harsh chemical to come off. it needs the right gentle method applied consistently. Use too much water and the finish clouds. Use a solvent or ammonia-based cleaner and you’ll strip the surface permanently. I’ve seen both outcomes in kitchens that were cleaned with good intentions using the wrong tools. Here’s what actually works when you’re cleaning wood cabinets: mild dish soap for routine grime, Dawn or Murphy Oil Soap for grease buildup, a toothbrush for corners, and a dry towel immediately after. Everything else in this guide is detail around that core method, including what to do with cherry wood, how to remove stubborn buildup without scratching, and which products will quietly ruin a cabinet finish over time. Primary Method Mild dish soap + warm water + microfiber cloth Grease Removal Dawn dish soap or Murphy Oil Soap spray Stubborn Spots Baking soda paste, small areas only What to Avoid Bleach, ammonia, undiluted vinegar, excess water, steel wool Finishing Step Dry immediately with a soft towel, every time Cleaning Frequency High-touch areas weekly; full deep clean twice a year That reference is your baseline. The sections below explain exactly how to execute each step and why getting the order right matters for the finish. What You Need Before You Start Set everything up in one place before touching the cabinets. Stopping to search for a dry towel while soapy water sits on wood is how water damage starts. These are the tools worth having on hand for a thorough clean: Swiffer-style duster or vacuum with soft brush attachment Two buckets, one for cleaning solution, one for clean rinse water Murphy Oil Soap or mild dish soap Blue Dawn dish soap (for stove-area grease only) Three microfiber cloths, one for cleaning, one for rinsing, one for drying Soft toothbrush (for corners, grooves, and around hardware) Non-scratch sponge like a Scrub Mommy, dampened and warmed Baking soda (for stubborn sticky spots) Plastic tote for emptying drawers and cabinet contents Parchment paper or paper towels for cabinet tops (after cleaning) The three-cloth setup is the part most people skip, and it’s the reason cabinets come out streaky or damp. One cloth washes. One rinses. One dries. Each task needs its own cloth, using the same one for all three steps just pushes grime and moisture around. How to Clean Wood Cabinets: Step by Step Step 1: Dust First, Always Start dry. Work from the top of each cabinet down so loose debris, pet hair, and kitchen dust fall toward the floor rather than landing on areas you’ve just cleaned. A Swiffer duster handles flat cabinet fronts well. For grooves, ledges, and recessed detail trim, a vacuum with a soft brush attachment does a cleaner job than any cloth. Skip this step and any dry debris turns to a muddy film once your wet cloth hits it, harder to clean, not easier. Step 2: Mix Your Cleaning Solution Fill one bucket with warm water and add one capful of Murphy Oil Soap. That’s it. Murphy Oil Soap is concentrated, more product doesn’t mean better cleaning. It means stickier residue that attracts dust after the cabinets dry. In the second bucket, put clean warm water with nothing added. That’s your rinse water, and it stays clean for the entire job. Step 3: Use Three Cloths, Not One Dip cloth one into the cleaning solution. Wring it out firmly, it should feel damp, not wet. Wipe one cabinet at a time, top to bottom. Then take cloth two, dip it in clean rinse water, wring it out, and wipe the same surface to remove any soap residue. Finish with cloth three, dry, buffing the surface immediately. This sequence prevents watermarks, residue buildup, and the moisture seeping into seams that causes wood to swell or finishes to peel. Step 4: Handle Tough Buildup Gently For buildup in corners, around hinges, or along groove detail, use a soft toothbrush dipped in the cleaning solution. Gentle pressure. The goal is to loosen the grime and let the cleaner do the work, not to scrub through it. A dampened Scrub Mommy, warmed under hot water first so it’s soft rather than stiff, works well for larger sticky sections. If your cloths are turning brown mid-job, replace them. Cleaning with a saturated cloth just redistributes old grease back onto the wood. Step 5: Use Dawn for Stove-Area Grease Cabinets directly above the oven or range hood collect a different kind of buildup, grease that has been aerosolized by heat and then settled and cooled into a sticky film. Murphy Oil Soap handles general kitchen grime, but this type of grease needs a degreaser. Blue Dawn dish soap is the one I reach for. Apply a small amount to a soft sponge, work in sections, let the soap sit for about 30 seconds to break down the fat, then wipe away. Rinse with clean water and dry immediately. Use Dawn only on grease-heavy areas — it’s effective, but repeated use on the rest of the cabinet surface can dry out the finish over time. Step 6: Clean Inside Cabinets One at a Time Empty one cabinet at a time into a plastic tote. Don’t unload the whole kitchen at once, the clutter will overwhelm the counter space and stall the job. Vacuum the interior first, then run the same three-cloth sequence: clean, rinse, dry. While the cabinet is empty, it’s worth checking what goes back in. Expired items, rarely used equipment, and anything that belongs in a different cabinet slow down the next cleaning session too. Step 7: Vacuum Drawers Before Wiping Drawers collect crumbs and fine debris that a cloth will push around rather than remove. Always vacuum drawers first with a soft brush attachment before introducing any moisture. Empty each drawer into the plastic tote, vacuum the inside thoroughly, especially corners and back edges, then clean, rinse, and dry with the three-cloth method. Only return items you actively use. Step 8: Clean Cabinet Tops and Add a Liner Cabinet tops near the stove are some of the most neglected surfaces in a kitchen and often the most contaminated. The buildup is a combination of kitchen grease and settled dust, it has a tacky, dark texture that a cloth alone won’t cut. Dust first, then use your cleaning solution with a softened Scrub Mommy for any sections with heavy accumulation. Clean, rinse, dry. Once the surface is dry, lay parchment paper or paper towels across the top. Next time, you pull off the liner instead of scrubbing old grease again. Best Products for Cleaning Wood Cabinets The right product depends on what you’re dealing with. Routine grime needs a different approach than thick grease buildup, and stained wood that’s gone dull after cleaning needs something different again. Here’s how the product options stack up across those scenarios. Product Best For Why It Works Use Carefully Mild dish soap Everyday cleaning and light grease Gentle, affordable, safe for most finished wood Keep cloth damp, not wet Dawn dish soap Greasy doors near the stove Cuts kitchen grease better than regular soap Rinse thoroughly and dry right away Murphy Oil Soap spray Heavier buildup on finished wood Penetrates grime without stripping finish Spray onto cloth, never directly on wood Diluted vinegar and water Light residue, natural cleaning Dissolves mild grease and old residue Never full strength — high acidity damages finish Baking soda paste Small sticky spots Lifts stubborn grime when used gently Small areas only — avoid hard scrubbing Microfiber cloths Wiping cabinet doors and frames Lifts dust, fingerprints, and grease without scratching Wash often — dirty cloths spread grime Soft toothbrush Corners, grooves, and hardware recesses Gets where cloths can’t reach Light pressure only Cabinet-safe polish Dull stained wood after cleaning Adds light protective sheen Use sparingly — overuse collects dust Wood conditioner Dry-looking stained wood Restores depth and richness to flat-looking grain Test first, follow label directions Paste wax Protective sheen on suitable stained wood Adds thin protective layer when used lightly Avoid overuse — wax collects dust over time Glass cleaner on a cloth Glass cabinet panels only Removes smudges without wetting the wood frame Keep glass cleaner off surrounding wood finish Start with mild dish soap and water for weekly maintenance. Move to Dawn or Murphy Oil Soap only when grease needs more than routine cleaning can handle. Polish, conditioner, or paste wax belong at the end of a deep clean, not as a substitute for it. How to Remove Grease from Wood Cabinets Grease is the main reason cabinets feel sticky even after a wipe-down. The stove, oven, range hood, and high-touch handles are the primary collection points. How you remove it depends on how long it’s been building up. Light Grease: Mild Dish Soap and Warm Water For recent, light grease, a few drops of mild dish soap in warm water is enough. Dip a microfiber cloth, wring it out well, and wipe the greasy area. Pay attention to handles, lower door edges, and the corners where people grab without thinking. After cleaning, wipe with a second clean-water cloth to remove soap residue, then dry immediately with a third cloth. Stove-Area Grease: Dawn or Murphy Oil Soap Cabinets near the stove accumulate a different kind of grease — aerosolized cooking fat that settles and hardens into a sticky film. Dawn dish soap or Murphy Oil Soap spray handles this better than regular dish soap. Apply to the cloth, not directly to the wood. Work in small sections. If grease remains after one pass, hold the damp cloth on the spot for 30 seconds before wiping again — let the product break down the fat rather than scrubbing through it. Stubborn Sticky Buildup: Baking Soda Paste For spots that survive both of the above methods, mix baking soda with just enough water to form a soft paste. Apply it to the problem area with a cloth, rub gently, and let it work for about a minute. The mild abrasion lifts embedded grime without harsh chemicals. The critical word here is gently — baking soda is abrasive enough to dull or scratch a finish if you apply pressure. After the spot clears, wipe away the paste with a clean damp cloth and dry the surface fully. How to Clean Different Cabinet Finishes The finish on your cabinets matters more than the wood species underneath. The same cleaning method that works on stained oak can damage painted maple or thermofoil. Here’s how to match the approach to the surface. 1. Stained Wood Cabinets Stained wood shows the grain, which makes it look better than painted wood but also makes moisture damage more visible. Clean with mild dish soap, warm water, and a well-wrung microfiber cloth. Always wipe with the grain direction — across the grain leaves micro-scratches that catch light badly over time. Dry immediately after rinsing. If the surface looks flat or dull after cleaning, a light application of cabinet-safe conditioner or paste wax restores depth — and if you’re thinking about changing the color entirely, it helps to know what’s involved in painting over stained wood before committing. 2. Painted Wood Cabinets Paint finishes are more fragile than most people expect. Bleach discolors them. Ammonia-based cleaners lift the sheen. Abrasive pads leave dull scratches that don’t polish out. Mild dish soap and water with a soft microfiber cloth is the only method I’d use regularly on painted cabinets. For stubborn spots, wet the area and let it soak for 30 to 60 seconds before wiping, mechanical scrubbing is more likely to damage the surface than more dwell time with a gentle cleaner. 3. Cabinets with Glass Panels Glass panels need separate treatment from the surrounding wood frame. Many glass cleaners contain ammonia, which causes wood finishes to go cloudy or peel near the seams. Spray the glass cleaner onto your cloth first, then wipe the glass only. Clean the wood frame separately with the soap-and-water method. Dry the entire assembly, glass and frame, before moving to the next cabinet. How to Clean Cherry Wood Cabinets Cherry wood darkens with age and light exposure. That patina is one of the things that makes it worth the price. It’s also exactly what tells you when you’ve used the wrong cleaner, bleached patches, cloudy spots, or uneven darkening are permanent on cherry. The method is the same as stained wood, but executed with more care at every step. Use mild dish soap and warm water with a well-wrung microfiber cloth. Wipe with the grain. Remove every trace of soap residue with a second clean-water cloth before drying. For greasy areas, a small amount of Dawn or Murphy Oil Soap on the cloth, never sprayed or poured onto the surface. Dry immediately and completely, especially around edges, hinges, and panel seams where moisture accumulates. Avoid bleach, ammonia, rough scrubbers, and straight vinegar entirely on cherry. What Not to Use on Wood Cabinets The products below come up regularly in cleaning forums and general household guides. None of them belong on finished wood cabinets. Some cause damage on first use. Others degrade the finish gradually until you notice one day that a section looks different from the rest. Avoid Why It Damages Wood Cabinets Bleach Discolors wood and degrades the protective finish. Damage is permanent. Ammonia-based cleaners Strips finish and leaves wood looking dull and flat. Common in all-purpose sprays. Abrasive scrub pads Scratches the surface and removes protective coatings, even on the first use. Steel wool Leaves fine scratches and risks rust staining on light wood finishes. Undiluted vinegar High acidity gradually wears down finish. Diluted 50/50 is the safe limit. Excess water Seeps into seams, causes swelling, warping, and finish separation over time. Wax buildup products used too often Residue accumulates and becomes tacky, attracting dust and grime. Strong solvents Dissolve or soften cabinet finishes. Often found in spray-and-wipe general cleaners. Check the ingredient list on any “all-purpose” or “kitchen” cleaner before using it near cabinet surfaces. Ammonia appears under several names including ammonium hydroxide. The absence of “wood-safe” or “safe for finished wood” on the label is a reason to test on a hidden area first, or to skip it entirely. How to Protect Wood Cabinets After Cleaning Cleaning removes what’s already built up. Protecting the cabinet means changing the conditions that let the buildup happen in the first place. Three habits make a noticeable difference over six months. Install knobs or pulls on every cabinet door and drawer if they’re not already there. Most grease and fingerprint buildup happens at the edges where hands grab. Hardware redirects that contact away from the wood finish entirely. It’s the single highest-return change you can make to a cabinet that keeps getting grimy. Keep wet dish towels off cabinet fronts. A damp towel hung over a lower cabinet door for an hour is enough to cause moisture damage along the bottom edge — peeling, swelling, or a watermark that doesn’t buff out. Use a towel bar or drying rack positioned away from cabinet surfaces. Wipe spills immediately. Grease, sauce, coffee, and food splatter are easy to remove when fresh and require serious effort once they dry and bond to the finish. A quick pass with a damp microfiber cloth right after cooking saves a much harder cleaning session later. DIY vs. Commercial Cleaners: Which Is Better for Wood Cabinets Both work, depending on what you’re trying to accomplish. The real difference isn’t cleaning power — it’s convenience and control. Factor DIY (dish soap + water) Commercial (Murphy Oil Soap, dedicated cabinet cleaners) Cost Pennies per use Higher upfront, but ready to use Convenience Requires mixing and two buckets Spray and wipe — faster for spot cleaning Cleaning strength Handles light dirt and routine maintenance well Better for grease and heavier buildup Safety for finishes Excellent when properly diluted and used with damp (not wet) cloth Generally safe as labelled, but still test on hidden area first Ingredient control You know exactly what’s in it May contain fragrance, solvents, or other agents Long-term care Effective for keeping up, not for restoring Some products include conditioners for added protection For weekly maintenance, DIY soap and water is the better choice — lower cost, no residue risk, full control. For a quarterly deep clean or stove-area grease that resists lighter cleaners, Murphy Oil Soap spray or a purpose-made cabinet cleaner is worth the convenience. Common Mistakes That Damage Wood Cabinets Most cabinet finish damage doesn’t come from one catastrophic cleaning session. It accumulates from small repeated errors — usually the same four or five mistakes. Too much water on cloth damages cabinets by soaking seams and causing swelling. Always use a barely damp cloth and dry surfaces immediately after wiping. Scrubbing instead of soaking can scratch finishes. Let cleaner sit briefly to loosen grime, then wipe gently instead of forceful scrubbing. Skipping spot testing is risky because finishes react differently. Always test cleaners on a hidden area before full use. Spraying directly on wood leads to drips and moisture in gaps. Spray onto the cloth first for better control. Ignoring drying leaves watermarks and damage. Always finish with a dry cloth to protect the surface. Frequently Asked Questions About Cleaning Wood Cabinets These are the questions I hear most often after people have already read the basic method and run into something the general guide doesn’t cover. What is the best cleaner for greasy wood cabinets? For light grease, mild dish soap in warm water handles it well. For stove-area buildup, Dawn dish soap or Murphy Oil Soap spray cuts grease more effectively. Use a damp cloth — never a wet one — and dry the surface immediately after rinsing. Can you use Dawn dish soap on wood cabinets? Yes, on finished wood. Dilute it in warm water, apply with a damp microfiber cloth, rinse with a second clean-water cloth, and dry right away. Use it only on grease-heavy areas, not as the routine cleaner across all surfaces — repeated use can dry out the finish. How do I clean sticky wood cabinets? Start with warm water and mild dish soap. If residue remains, try Murphy Oil Soap spray on a cloth. For persistent stickiness, a baking soda paste applied gently to the spot, rinsed and dried fully, handles what soap alone won’t. How often should wood cabinets be cleaned? High-touch areas and handles need a quick wipe weekly. Stove-adjacent cabinets need attention after heavy cooking sessions. A full inside-and-outside deep clean twice a year is enough if you maintain the weekly wipe-down routine. How do I make dull wood cabinets shine again? Clean the surface first to remove grease and residue, polish over grime doesn’t restore shine, it just seals it in. Once clean and fully dry, apply a thin coat of cabinet-safe conditioner or paste wax and buff with a soft microfiber cloth. Is vinegar safe on wood cabinets? Diluted vinegar (50/50 with water) is safe for most finished wood cabinets in small quantities. Undiluted vinegar is acidic enough to degrade finishes with repeated use. Don’t let it sit on the surface, wipe and dry quickly. Test on a hidden area before using it broadly. Can Murphy Oil Soap damage wood cabinets? Not when used correctly. One capful per gallon of water is enough, more product creates a residue that attracts grime after drying. Spray onto the cloth, not the cabinet, and dry the surface fully after rinsing. How do I clean wood cabinets without removing the finish? Use mild dish soap or Murphy Oil Soap with a damp (not wet) microfiber cloth. Avoid bleach, ammonia, abrasive pads, steel wool, and straight vinegar. Dry the surface immediately after every cleaning step. Final Verdict The three-cloth method, clean, rinse, dry, is what separates a cleaning session that protects the finish from one that gradually degrades it. Mild dish soap handles most of what kitchens produce. Dawn or Murphy Oil Soap handles stove-area grease when regular soap isn’t enough. Baking soda paste handles what neither of those will shift. Everything beyond that, bleach, ammonia, abrasive pads, excess water, direct spraying, removes more than the grime. If your wood cabinets are already looking flat or dull, clean them first, let them dry completely, then apply a light coat of cabinet-safe conditioner. That’s the order. Clean before you condition. Dry before you polish. And test any new product on a hidden surface before you commit to the rest of the cabinet. Get those three sequences right and wood cabinets hold up for a long time. Sources:Murphy Oil Soap, “How to Clean Wood Cabinets.” murphyoilsoap.comLowe’s Editorial Team, “How to Clean Wood Cabinets.” February 2025. lowes.com/n/how-to/how-to-clean-wood-cabinets

Ever watch a gorgeous showroom table fall apart in less than two years? It’s incredibly frustrating to spend hard-earned money on pieces that look solid but secretly rely on cheap materials. When you are hunting for the most durable furniture material, you aren’t just buying a look, you are investing in structural survival. Navigating the marketing jargon to find what actually lasts can feel like guesswork. I have laid out the ultimate breakdown of structural materials, high-traffic fabrics, and outdoor options. By the end of this guide, you will know exactly how to spot generational quality, decode rub counts, and avoid the beautiful fakes that compromise your home. What is the Most Durable Furniture Material? A piece can look solid in the showroom and fall apart in 18 months. I’ve seen it happen with oak-finish particleboard dining tables, bonded leather sofas, and powder-coated steel outdoor chairs that weren’t actually powder-coated, just painted. The most durable furniture material depends entirely on what the piece is, where it lives, and how hard it gets used. There is no single answer that works for every room. What there is: a clear hierarchy of materials that hold up versus ones that don’t, and a set of construction details that separate long-lasting furniture from furniture that just looks like it should last. Most Durable Furniture Materials: Quick Comparison Different materials serve different functions. A dining table, a sofa frame, an outdoor bench, and a dresser all face different types of stress, weight, friction, moisture, UV exposure, and mechanical impact. This table covers the materials that consistently perform across those categories. Material Janka / Hardness Best Use Cost Range Durability Hickory (hardwood) 1,820 lbf Frames, tables, chairs $6–$10/board ft Very High Hard maple (hardwood) 1,450 lbf Dining tables, dressers $5–$9/board ft Very High White oak (hardwood) 1,360 lbf Tables, bed frames, cabinets $6–$12/board ft Very High Teak (hardwood) 1,155 lbf Outdoor furniture $20–$35/board ft Very High (outdoor) Steel (powder-coated) N/A — tensile Frames, patio, shelving Mid–high (finished piece) Very High Aluminum N/A — tensile Outdoor chairs, frames Mid High (rust-resistant) Granite / Quartz N/A — Mohs 6–7 Tabletops High Very High Performance fabric (Crypton) N/A — rub count Sofas, dining chairs Mid–high High Full-grain leather N/A — rub count Sofas, chairs High Very High (maintained) HDPE N/A — plastic Outdoor benches, chairs Mid High High-pressure laminate N/A — surface Desks, kids’ furniture Low–mid Medium Low-grade particleboard Very low Budget decorative only Low Low Hardwood Janka ratings from the Wood Database. Janka hardness measures the force required to embed a steel ball halfway into the wood, higher numbers mean harder wood and better resistance to denting and wear. Most Durable Materials for Frames, Tables, and Storage 1. Solid Hardwood Solid hardwood is the benchmark for frame durability. What makes it different from engineered alternatives isn’t appearance, it’s how the material responds to stress over time. Kiln-dried hardwood resists warping and cracking because the moisture has been removed before the wood was milled. A dining table frame made from kiln-dried white oak (1,360 lbf Janka) will absorb daily use, minor impacts, and seasonal humidity changes without losing structural integrity. The same table built from undried or low-grade softwood will start showing movement within a few years. Species matter. Oak, maple, hickory, walnut, and ash all outperform pine, poplar, or rubber wood in a structural role. Teak sits in its own category for outdoor applications because of its natural oil content, which makes it resistant to moisture and insects without annual treatment. Durability: Very high when kiln-dried and properly finished.Best for: Dining tables, bed frames, bookshelves, dressers, sofa frames, cabinets.Worst for: Perpetually damp spaces, solid wood moves with moisture, and a basement or bathroom will eventually work against it regardless of finish quality. 2. Metal (Steel and Aluminum) Steel is one of the strongest structural materials available for furniture, and it’s used in commercial seating and shelving specifically because it doesn’t flex under sustained load the way wood eventually can. The catch is finish quality. Bare steel rusts. Powder coating, where electrostatically charged pigment particles are baked onto the surface, creates a protective layer that resists chipping and corrosion. Ask specifically whether outdoor metal furniture uses powder-coated steel or just painted steel. Painted steel looks identical and fails within two to three seasons in a wet climate. Aluminum is the right choice where rust resistance is the priority. It weighs about a third as much as steel, doesn’t corrode, and holds up well in coastal and high-humidity environments without any protective coating. The trade-off is that aluminum dents more easily than steel under impact. Durability: Very high for structural use; powder-coated steel and aluminum outperform bare metal significantly outdoors.Best for: Bed frames, desk frames, shelving, patio chairs, dining chair bases.Worst for: Coastal outdoor settings if untreated, saltwater accelerates corrosion even on coated steel. 3. Stone (Granite and Quartz) For tabletops, granite and quartz are about as close to indestructible as a surface material gets. Granite rates 6–7 on the Mohs hardness scale, harder than most metals. Quartz tabletops are engineered from about 90% crushed quartz bound with resin, which makes them slightly more consistent and less porous than natural stone. Marble belongs in a separate category: it scores 3–4 on the Mohs scale, which means it scratches easily and etches permanently when exposed to acids, wine, citrus, vinegar, even sealed. The practical limitation of stone is weight and brittleness at the edges. A dropped pot or a sharp corner impact can chip granite, and replacing a stone tabletop section isn’t possible the way refinishing wood is. Durability: Very high for scratch and heat resistance; edge vulnerability is the weak point.Best for: Dining tables, coffee tables, console tables where the surface takes regular use.Worst for: Homes where the furniture gets moved frequently, stone tabletops are heavy and the edges don’t tolerate rough handling. Most Durable Upholstery Materials for Sofas and Seating Frame durability and upholstery durability are separate questions. A sofa can have an excellent kiln-dried hardwood frame and fail in three years because the fabric couldn’t handle daily use. Upholstery wear is measured differently, look for rub count ratings, which measure how many double rubs (back-and-forth passes) the fabric survives before breaking down. For a family sofa in daily use, anything below 15,000 double rubs is a risk. 30,000 and above is where the fabric starts to become genuinely long-lasting. 4. Performance Fabric (Including Crypton)
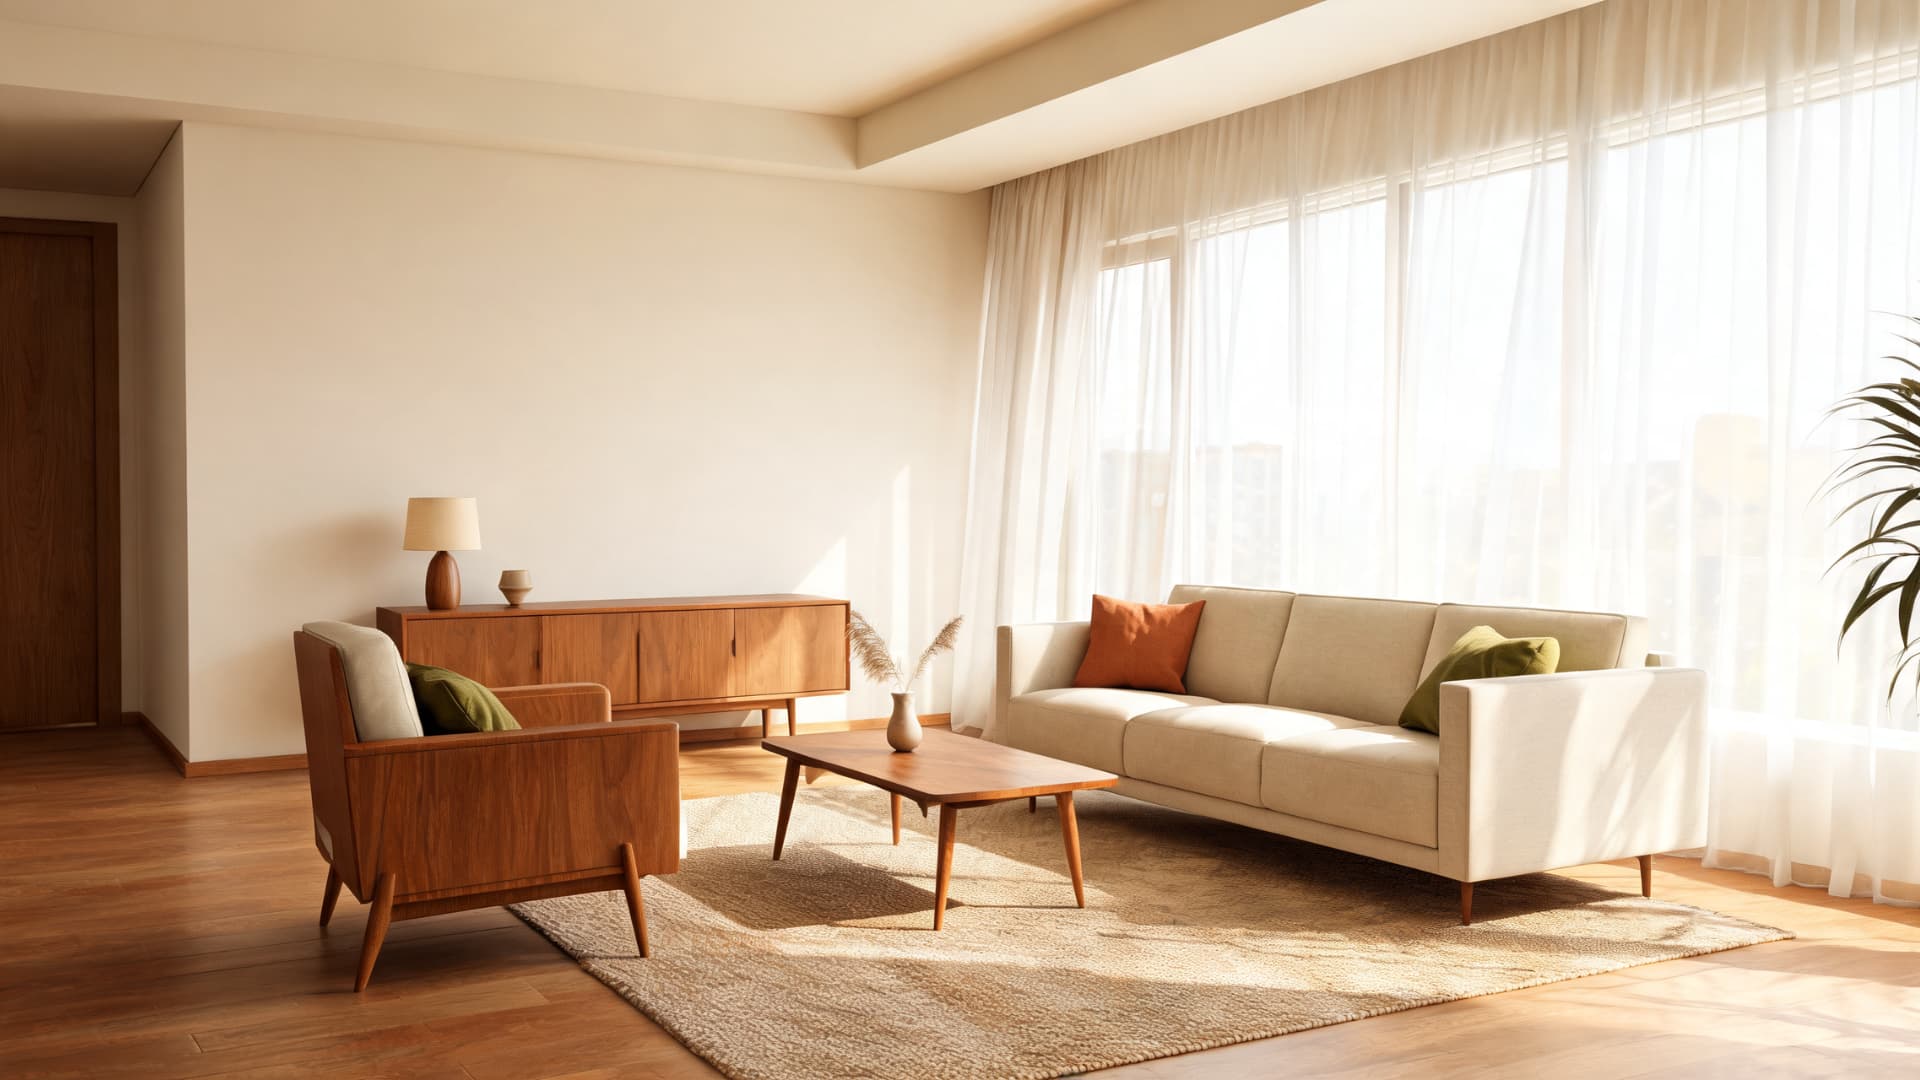
Mid-century modern is one of those design terms that gets used constantly and explained poorly. So, what is MCM furniture? MCM furniture refers to mid-century modern pieces designed with clean lines, tapered legs, warm wood tones, low profiles, and practical function. Most people can point to an Eames chair or a walnut credenza and say “that’s MCM,” but knowing what actually makes a piece fit the style is what separates a room that works from one that just looks like a vintage prop store. This guide covers the history, defining features, furniture details, and how to use mid-century modern style in a real home without over-theming it. Where Mid-Century Modern Came From MCM is a design movement that ran roughly from 1945 to 1969, shaped almost entirely by the events of World War II. Returning soldiers needed affordable, functional homes. Manufacturers were sitting on new materials, molded plywood, fiberglass, plastic, tubular steel, developed for wartime production. Architects and furniture designers had a practical question to answer: how do you build something that works well, uses these new materials efficiently, and doesn’t look heavy or oppressive in a small postwar house? The answer became mid-century modern furniture. Designers like Charles and Ray Eames, George Nelson, Arne Jacobsen, and Eero Saarinen created pieces that were structurally light, visually open, and centered on how people actually used a room. The Bauhaus movement and Scandinavian design, particularly Danish Modern, heavily influenced their approach, form follows function, materials are honest, and decoration adds nothing if the form is already right. The term “mid-century modern” was formally defined in Cara Greenberg’s 1984 book Mid-Century Modern: Furniture of the 1950s. The style itself had been named by then, but the book gave it a framework that design historians and collectors use today. What Defines Mid-Century Modern Furniture MCM furniture has a few features that appear across nearly every piece, regardless of who designed it or when it was made. Once you know what to look for, the style becomes easy to identify. Feature What It Looks Like Tapered or angled legs Slim, splayed legs that lift furniture off the floor and keep it feeling light Low profile Sofas, beds, and case goods sit closer to the floor than traditional furniture Warm wood tones Walnut, teak, and oak dominate — chosen for grain, durability, and warmth Organic curves Chairs and accent pieces use soft curves drawn from natural forms, not pure geometry Minimal hardware Sideboards and dressers use recessed pulls, small handles, or no visible hardware Mixed materials Wood paired with leather, metal, molded plastic, or glass — often on the same piece What connects all of these features is the same logic: the piece should be useful, it should feel light in the room, and the form itself should do the work that decoration would otherwise be doing. Walnut and teak are the two woods that appear most consistently across original MCM pieces; both have a warm grain, take a clear finish well, and hold up over decades of use. A good overview of how wood species compare for furniture is worth knowing before you buy, because not all woods sold as “walnut-finish” actually use walnut. Key Features of Mid-Century Modern Style The full MCM look is a combination of principles that work together. Individually, most of them also appear in other styles. The combination, and the restraint in how each is applied, is what makes a room read as mid-century modern rather than just clean or contemporary. Here’s the concise version: Clean Lines and Simple Shapes: MCM furniture uses clear forms like rectangles, circles, and soft angles. The shape itself is the detail, not carved trim or extra decoration. Organic Curves With Geometry: MCM balances straight-lined pieces with curved chairs and accents. This keeps rooms from feeling cold while still looking clean. Functional Design First: Every piece should be useful, comfortable, and practical. MCM design is not just about looks; it has to work well in daily life. Natural Materials: Walnut, teak, leather, stone, metal, and glass are common. The look is warm and refined, not rustic or distressed. Open Space and Outdoor Connection: MCM rooms feel open, light, and uncluttered. Large windows, plants, and natural light help connect the indoors with the outdoors. Color Palette: MCM uses neutral bases with earthy accents such as olive, rust, mustard, and terra cotta, plus bold pops like teal, avocado, and burnt orange. If you’re choosing wall colors to pair with warm wood furniture, the principles of choosing paint colors for your decor apply directly to an MCM palette. How to Identify Real MCM Furniture Not everything with tapered legs is mid-century modern. Here’s what to check when evaluating a piece, whether you’re buying vintage, secondhand, or new. Shape first: Clean lines, low profile, clear silhouette with no ornamental additions. If the shape is busy, it’s probably not MCM. Check the legs: Tapered, angled, or splayed legs are a consistent MCM marker. Straight boxy legs, turned legs, or no legs at all lean toward other styles. Material matters: Walnut, teak, oak, leather, molded plywood, and glass are period-correct. Distressed pine, ornate veneers, and glossy lacquer are not. Look at the hardware: Small handles, recessed pulls, or no hardware. Large decorative pulls, bin handles, and ornate knobs are off-style. Proportions: The piece should look balanced at a glance. Not too heavy, not too thin. If anything about the silhouette feels awkward or overpowered, the proportions are off. Function: Can it do what it’s supposed to do comfortably? A chair that looks right but doesn’t seat well is not MCM in spirit. Pro Tip: If you’re buying secondhand MCM-style furniture, check the leg attachment points. Original or quality reproductions use a solid wood-to-wood joint or a metal plate. Furniture with legs attached by a single bolt through thin particleboard will wobble within months of regular use. Mid-Century Modern vs. Modern, Contemporary, and Scandinavian Style These four styles share enough DNA that they get confused regularly. The differences are real, and knowing them helps when you’re trying to mix pieces or evaluate what fits. Style Mood Key Difference Mid-Century Modern Warm, clean, slightly retro Rooted in 1945-1969 design; defined by warm wood tones, tapered legs, and organic curves alongside clean geometry Modern Minimal, neutral, streamlined A broader movement; tends cooler and more spare than MCM, with less emphasis on warm wood and organic form Contemporary Current, flexible, trend-driven Reflects present-day design preferences; absorbs whatever is current, so it shifts year to year Scandinavian Light, cozy, simple Pale woods, white walls, soft textures, and hygge-influenced warmth; similar bones to MCM but noticeably lighter and airier The practical way to think about it: MCM is warmer than modern, more structured than Scandinavian, and less trend-dependent than contemporary. If you’re mixing styles, MCM pieces tend to work alongside Scandinavian furniture well — the materials and scale are compatible, and the warmth of one offsets the lightness of the other without conflict. How to Use Mid-Century Modern Style Room by Room The method is the same regardless of the room: start with one or two anchor pieces that establish the MCM character, then build around them with open space, warm materials, and minimal decoration. Resist the urge to fill corners. 1. Living Room A low-profile sofa, a walnut or oak coffee table, and one sculptural accent chair are all you need to establish the look. Float the furniture away from the walls, at a minimum of 18 inches of clearance behind the sofa, to keep the room from feeling like a furniture showroom. A textured rug grounds the seating area. Warm overhead lighting or a mid-century-style arc floor lamp handles atmosphere. Keep surfaces clear. If the room has a low ceiling, the low-profile MCM furniture scale actually works in your favor; the same principle applies in these low ceiling design tricks. 2. Dining Room A solid wood dining table with tapered legs and four to six matching chairs is the core. Wood choice matters more in a dining table than almost any other piece of furniture because it takes daily wear, scratches, moisture, and heat exposure. The comparison of wood options for dining tables is a useful reference before committing. A sputnik-style pendant or a clean drum shade above the table does the decorating. Keep the tabletop clear between meals, a small tray or a low centerpiece at most. One piece of framed abstract art on the wall is enough. 3. Home Office A solid wood desk, ideally walnut veneer or solid oak, with a task chair and open shelving handles most of what the room needs to do. Keep desk storage in a credenza or a low sideboard rather than bulky overhead cabinets, which break the clean sightline. One plant, a focused desk lamp, and a rug under the chair if the floor is hard. The room should be calm enough to work in, not decorative enough to distract. 4. Bedroom A low platform bed frame in walnut or oak is the anchor. Match the nightstands to the bed frame, the consistency matters more here than it does in other rooms. A dresser with tapered legs and minimal hardware against one wall keeps the room from needing additional storage pieces that clutter the floor. Soft, layered lighting matters: a small lamp on each nightstand, and either overhead dimmer control or no overhead light at all. Bedding in neutral linen or cotton keeps the room restful. 5. Entryway A slim console table, a simple round or rectangular mirror above it, and a small lamp or plant are enough. The entryway sets the expectation for the rest of the home; it should feel organized and uncluttered, not like a landing zone. If you need shoe storage, look for a bench with hidden storage or a low cabinet that fits cleanly under the console. One hook strip for bags and coats, mounted cleanly, handles the functional side without visual chaos. Common Mistakes That Undercut Mid-Century Modern Style Most MCM rooms that don’t work have the same problems. None of them is hard to avoid once you know what to look for. Too many statement pieces are competing at once. Pick one: the chair, the sofa, the light fixture. Three sculptural pieces in the same sightline cancel each other out. Prioritizing looks over function. MCM furniture is supposed to be used. A sofa that photographs well but is uncomfortable to sit on is a category error. If you’re buying for daily use, sit in it first. Overcrowding the room. The open space is part of the design. A credenza needs breathing room. A chair needs clearance. If every surface has something on it and every corner has a piece of furniture, the clean lines disappear. Stacking too many retro accents. A vintage-style lamp, a starburst clock, a record player, and a rotary phone on one shelf is not curated — it’s themed. Two or three well-chosen vintage-inspired pieces are enough. Forgetting texture. All-wood, all-leather rooms can read cold. A textured rug, a bouclé throw, or upholstered seating in a warm fabric adds the sensory layer that makes an MCM room livable rather than museum-like. Frequently Asked Questions These are the questions that come up most often from people who are actively furnishing a space rather than just researching the style. What makes furniture mid-century modern? Tapered legs, low profile, clean geometric or organic silhouette, warm wood tones (walnut, teak, oak), and minimal hardware or decoration. The piece should feel visually light and serve a functional purpose — together, these two things define the aesthetic more accurately than any single feature. Is mid-century modern still popular in 2025? Yes, and consistently so for the past decade. The style holds because it’s genuinely functional and pairs well with other aesthetics. It doesn’t depend on a single trend cycle. A quality walnut credenza bought in 2010 fits as naturally in a 2025 room as it did then. What colors are mid-century modern? Warm neutrals as a base — white, warm beige, soft gray — with earthy accent tones like olive, mustard, rust, and terra cotta. Bold pops of teal, avocado green, or burnt orange add energy in small doses through upholstery or accessories. The key is restraint: one or two accent colors, not five. What is the difference between mid-century modern and contemporary style? MCM is period-specific — its forms are rooted in 1945-1969 design logic. Contemporary style reflects current trends, which change year to year. A contemporary room in 2025 may look nothing like one from 2018. A mid-century modern room has a consistent reference point regardless of when it’s built. Can you mix mid-century modern with other styles? Yes. MCM works particularly well with Scandinavian furniture (similar scale and material palette), Japandi-influenced decor (shared emphasis on natural materials and negative space), and even some industrial elements. The constraint is consistency in proportion and material quality. MCM pieces tend to lose coherence when mixed with heavy traditional or ornate furniture. How do I make mid-century modern feel cozy rather than cold? Add texture and warmth through soft goods: a wool or jute rug, linen or bouclé upholstery, a chunky throw, and layered lighting. Plants help. Wood accessories — a tray, a small bowl, a lamp base — reinforce the warmth of the furniture. The cold reading usually comes from too much hard surface with no soft counterpoint. Does mid-century modern work in a small apartment? It’s well-suited to small spaces. The low profiles keep rooms feeling open vertically, the tapered legs leave floor space visible under furniture (which reads as more room), and the emphasis on built-in or consolidated storage keeps clutter from accumulating. Avoid oversized MCM pieces — scale matters more in small rooms than in large ones. Final Verdict Mid-Century Modern remains popular because it makes a simple design feel warm, useful, and refined. I find its strength in how clean lines, natural materials, practical furniture, and open layouts create a home that feels calm without feeling empty. If you came here wondering what MCM is, the answer is clear: it is a design style built around comfort, purpose, and visual balance. Once you understand its history, key features, colors, and furniture details, the style becomes easier to recognize and apply. Use these ideas to choose Mid-Century Modern pieces that feel timeless, practical, and true to your home. Now that Mid-Century Modern style feels a little clearer, I’d love to hear your take. Which part of the style stands out most to you: the furniture, colors, history, or simple design? Let me know in the comments. Sources:Cara Greenberg, Mid-Century Modern: Furniture of the 1950s. 1984.The Spruce, “Mid-Century Modern Design Guide.” https://www.thespruce.com/mid-century-modern-design-guideHouzz, “Mid-Century Modern Style Guide.” https://www.houzz.com/ideabooks/mid-century-modern
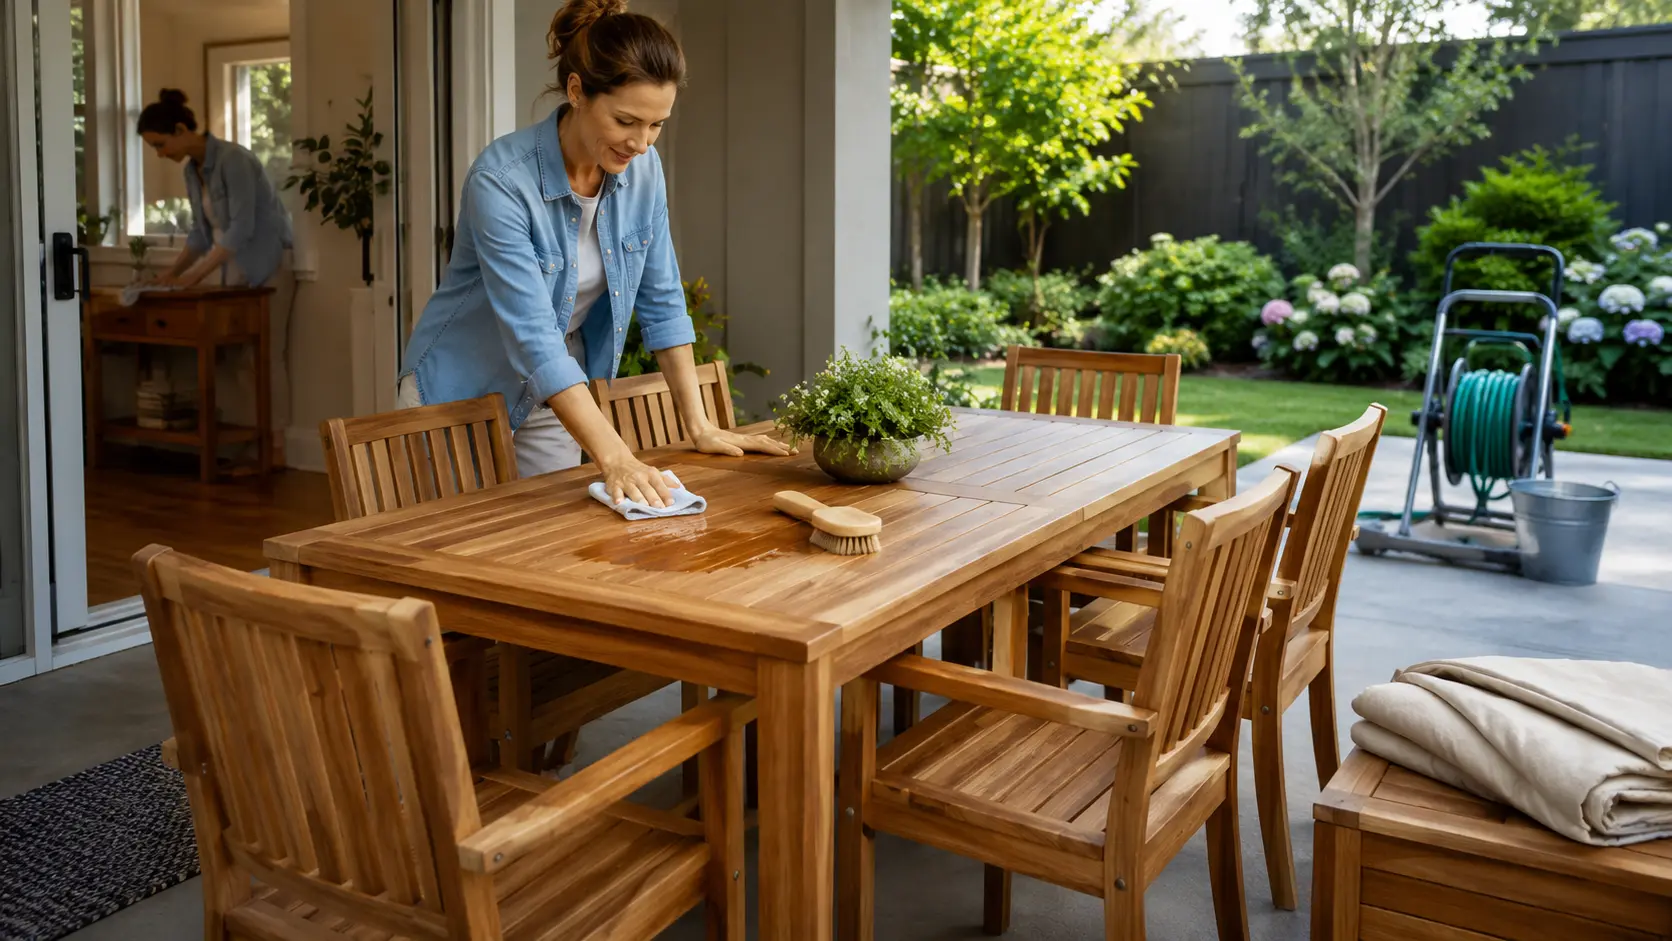
Teak doesn’t fail the way most outdoor wood does. After a rainy season, the surface goes gray, not damaged, just weathered. The oils that make teak resistant to rot are still there. The grain is still sound. What’s changed is the surface color, and that changes what you need to do before you touch it with any cleaner or finish. If you know how to clean teak wood before you reach for a protector or oil, you’ll save yourself the most common mistake: applying finish to a dirty or damp surface and trapping the problem rather than fixing it. I’ve seen sets come in that were oiled annually for five years and looked worse than a set that hadn’t been touched. The cleaning step matters more than the product you use after it. Species Teak (Tectona grandis) Janka Rating 1,070 lbf, hard enough for outdoor use, machines and sands cleanly Natural oil content High, resists moisture and rot without finishing, but absorbs less than dry hardwoods Grade to look for Grade A (heartwood only, tight grain, fewest knots, best durability) Outdoor lifespan untreated 25–50 years with basic cleaning; will gray naturally after 6–12 months of UV exposure What fails first Surface finish if applied over damp or dirty wood; mildew in joints if moisture is trapped That reference box is the short version. The rest of this guide walks through how to clean teak wood furniture by condition, light dirt, gray weathering, mildew, and stubborn stains, and what to do with the surface afterward. Know What Your Teak Needs First Before choosing a cleaner, take a quick look at the teak. A dusty chair, a gray bench, and a table with dark spots should not all be treated the same way. The goal is to clean the surface without roughening the grain, trapping dirt, or adding finish too soon. Light dust, pollen, and loose outdoor dirt usually need only mild dish soap, warm water, and a soft-bristle brush. This is the safest starting point if the furniture still looks even in color. Gray teak is usually weathered by the sun and rain, not damaged. Teak ages into that silver-gray tone naturally, and it’s one reason teak stays a strong choice when weighing the best wood for outdoors against alternatives like ipe or acacia. If you like the silver-gray look, clean it and leave it alone. If you want the warmer brown back, clean first, then use a teak brightener only if needed. Dark spots may come from mildew, wet leaves, planters, spills, or dirt sitting in the grain. Wash the furniture first, let it dry fully, and check the marks again before sanding. If the surface feels rough, wait until the wood is dry before sanding lightly. If it feels sticky, clean off old oil or buildup before adding any new oil, protector, or sealer. Choose the Right Cleaner for the Job The cleaner should match the condition of the teak. For regular care, mild dish soap and warm water are enough. Use stronger options only when the furniture has mildew, gray buildup, or deep outdoor grime. Cleaner or product Best for Use with care when Mild dish soap and water Dust, pollen, light grime The piece has heavy gray buildup Diluted white vinegar Light mildew or musty smell The wood is very dry or cracked Teak cleaner Weathered, gray, or dirty outdoor pieces The furniture only needs a light wash Teak brightener Bringing back a warmer tone after cleaning Dirt is still on the surface Bleach-based mix Stubborn mildew Routine cleaning or food-contact pieces Start with the mildest option that fits the problem. Use teak cleaner for heavy buildup, brightener for color correction, and bleach-based mixes only for stubborn mildew. How to Clean Teak Wood Furniture Step by Step Cleaning teak furniture works best when you keep the process gentle. Before you start, gather the basics: mild dish soap, warm water, a bucket, a soft-bristle nylon brush, a sponge or clean cloth, and a garden hose or clean rinse water. For heavier buildup, keep teak cleaner and teak brightener nearby. If the surface feels rough after drying, 220-grit sandpaper can help. Use gloves if you plan to use stronger cleaners. Most outdoor teak does not need harsh chemicals, heavy sanding, or strong water pressure. Start with a mild wash, then use a teak cleaner only if the wood still looks gray, stained, or patchy after the first clean. Step 1: Clear the Surface and Wet the Wood Start by removing dry leaves, pollen, dust, sand, and loose debris from the furniture. Small bits of grit can scratch the surface once you begin scrubbing, especially on tabletops, chair arms, and bench seats. After the loose dirt is gone, wet the teak with clean water. A garden hose works well for outdoor furniture, while a bucket and sponge are better for indoor pieces or balcony setups. The wood should be damp, not soaked. This helps the soap spread evenly and keeps dry teak from absorbing the cleaner too quickly in one spot. Step 2: Wash Gently With Mild Soap Mix mild dish soap with warm water in a bucket. You do not need a strong soap mix. The goal is to loosen dirt from the surface without leaving residue in the grain. Use a soft-bristle nylon brush or sponge and scrub with the grain. This keeps the surface smoother and lowers the chance of scratch marks. Avoid steel wool, wire brushes, rough pads, and pressure washing because they can damage the surface. For slatted chairs, benches, and dining tables, clean one small area at a time. This keeps the soap from drying on the teak before you rinse it. Step 3: Use Teak Cleaner Only for Heavy Buildup If mild soap does not remove gray buildup, mildew, or deep outdoor grime, use a cleaner made for teak. This step is not needed every time you wash the furniture. It is mainly for pieces that still look weathered or uneven after a normal clean. Follow the product label closely. Let the cleaner sit only for the suggested time, then scrub gently with the grain. Use teak brightener after cleaning only if you want to bring back a warmer tone. Step 4: Rinse Well and Let It Dry Fully Rinse the furniture with clean water until all soap or cleaner is gone. Leftover residue can dry into the grain and leave the surface looking dull, streaky, or patchy. Use a regular hose, sponge, or clean bucket of water. Do not use a pressure washer. Strong pressure can raise the grain, roughen the wood, and leave marks that may need sanding later. After rinsing, let the teak dry in open air for 24 to 48 hours. Do not sand, oil, seal, or cover the furniture while it is damp. If the wood feels cool, dark, or damp in some areas, give it more time. Step 5: Sand Only If the Surface Feels Rough Once the teak is fully dry, run your hand over the surface. If it feels smooth, you can skip sanding. If it feels rough or fuzzy, sand lightly with fine-grit sandpaper, such as 220 grit. Always sand with the grain and wipe away dust afterward. The goal is to smooth the raised grain, not remove a thick layer of wood. If you plan to use oil, protector, or sealer, apply it only after the teak is clean, dry, and dust-free. Choose a Finish: Natural Gray, Oil, Protector, or Sealer Once the furniture is clean and fully dry, decide how you want the teak to age. You can let it turn silver-gray naturally, or you can use oil, protector, or sealer to keep a warmer brown color. Teak behaves differently from most species once a finish is applied; its natural oil content means it absorbs less than drier hardwoods, which affects how each finish performs. If you are still deciding on which outdoor species to buy, the full breakdown on types of wood furniture is suited for comparing teak, acacia, and ipe side by side. The best finish choice depends on how much upkeep you want and how much the furniture gets exposed to the weather. On teak oil: “Teak oil” is typically linseed oil mixed with solvents. It is not extracted from teak trees. Applied too heavily or too often, it sits on the surface and turns sticky, collecting dirt and promoting mildew, particularly in humid climates. If you use it, apply very thin coats and wipe off the excess completely. Many teak specialists recommend water-based sealers over teak oil for outdoor pieces because they last longer and don’t carry the same buildup risk. Finish Best for Upkeep Watch out for Natural gray (no finish) Low-maintenance outdoor pieces Low, annual soap wash Still needs cleaning; mildew forms on dirty wood regardless of finish Teak oil Restoring warmer brown tone Medium to high, reapply every 3–4 months in sun-exposed settings Turns sticky if applied too heavily; can feed mildew in humid climates Teak protector Slowing the gray transition Medium, reapply once or twice yearly Works only on clean, fully dry teak; surface prep is non-optional Water-based teak sealer Longer protection, fewer applications Medium, one or two coats annually Don’t apply over dirt, damp wood, or any sticky old finish, strip first If you use teak oil, handle oily rags with care. Do not leave them in a pile. Lay them flat outside to dry or follow the disposal steps on the product label. Keep Teak Clean Longer: A Seasonal Routine One deep clean a year stops working when teak sits under trees, near a pool, or in a damp climate. A light routine spread across the seasons prevents the buildup that turns a 30-minute wash into a half-day restoration job. Season What to do Why it matters Spring Full wash, check for mildew and rough spots, apply sealer or protector if using one Clears winter buildup before heavy use begins Summer Wipe spills immediately, rinse pollen every few weeks, move planters to prevent moisture rings Stops stains from setting in the grain Fall Clean and dry fully before storing or covering Prevents trapped moisture over winter Winter Store indoors or use breathable covers; lift covers occasionally to let air circulate Tight plastic covers trap moisture, breathable fabric covers don’t For indoor teak, use less water throughout. Dust regularly, wipe with a barely damp cloth, and dry the surface immediately. Joints, edges, and veneer on indoor pieces absorb moisture differently than outdoor solid teak, soaking an indoor piece can cause swelling at the joints that takes weeks to fully reverse. Mistakes That Damage Teak and How to Avoid Them Most teak damage I’ve seen comes from three things: water pressure, trapped moisture, and too much finish. Each one is avoidable. Pressure washing: Raises the grain, strips natural oils, and leaves marks that need sanding to fix. Use a regular hose. Scrubbing across the grain: Leaves visible scratch marks in the wood fibers. Always scrub with the grain. Oiling dirty or damp wood: Traps the dirt and moisture under the finish. Clean and dry first, every time. Thick oil coats: Extra oil sits on the surface, turns sticky, and becomes a mildew trap in humid weather. Thin coats, wiped off completely. Covering damp furniture: Moisture trapped under a cover is the primary cause of mildew at joints and slat edges. Fully dry before covering. Steel wool or wire brushes: Metal particles lodge in the grain and rust, leaving orange stains that don’t come out. Use nylon brushes only. One more worth flagging: applying teak brightener before cleaning. Brightener is a mild acid, it works by stripping the oxidized gray surface layer to reveal the warmer wood underneath. If there’s dirt or mildew on the surface when you apply it, the brightener works on that instead. Cleaning first means the brightener reaches the wood. Frequently Asked Questions Can I use dish soap to clean teak wood? Yes. Mild dish soap mixed with warm water is the right starting point for routine cleaning. Scrub with a soft nylon brush along the grain and rinse fully so no residue dries into the wood. Can I use vinegar on teak furniture? Diluted white vinegar works for light mildew and musty smell, use one cup per four liters of water. Rinse well. Avoid it on very dry or cracked teak, and don’t use it as a substitute for teak cleaner on heavily weathered pieces. Can you use bleach on teak wood? A diluted bleach solution (1:4 with water) handles stubborn black mildew that won’t respond to vinegar. Wear gloves, rinse thoroughly, and don’t use it on food-contact surfaces or as routine care, it’s harsh on the grain over time. Can I pressure wash teak furniture? Not at standard pressure settings. High PSI raises the grain, roughens the surface, and strips natural oils. If you do use a pressure washer, keep it below 1,200 PSI with a wide fan nozzle. A regular hose is better. Is gray teak wood damaged? No, gray teak is normal outdoor aging, not structural damage. UV exposure and rain oxidize the surface oils and produce the silver patina within 6–12 months. You can leave it gray, or clean and brighten it if you prefer the warmer brown. Should I oil teak furniture every year? It depends on the product. Teak oil needs reapplication every 3–4 months in direct sun, annually is too infrequent to maintain color and too frequent if buildup accumulates. A water-based sealer applied once in spring is lower-maintenance and less prone to sticky buildup. How do I restore teak to its original color? Clean the surface thoroughly, rinse, and dry fully. Then apply teak brightener according to the label instructions. The brightener strips the oxidized gray layer and brings back the warmer tone. After brightening, apply a sealer or protector to slow the next cycle of graying. How often should I clean teak furniture? Once or twice a year for most outdoor sets. If the furniture sits under trees, near a pool, or in a coastal or humid climate, check it every few months for mildew and pollen buildup and rinse as needed between deep cleans. Final Verdict Teak care works best when it stays simple. Wash with mild soap for normal dirt, use a teak cleaner for heavier buildup, and let the wood dry fully before any finish touches the surface. Once the piece is clean, choose a sealer, protector, natural gray finish, or teak oil for outdoor furniture based on how much upkeep you want. If you came here to learn how to clean teak wood, the rule is clear: clean gently, dry fully, and protect only when needed. Give your set a quick look this week. Start with one chair or table, then use that result to plan the rest. Small care now prevents bigger repair work later.