

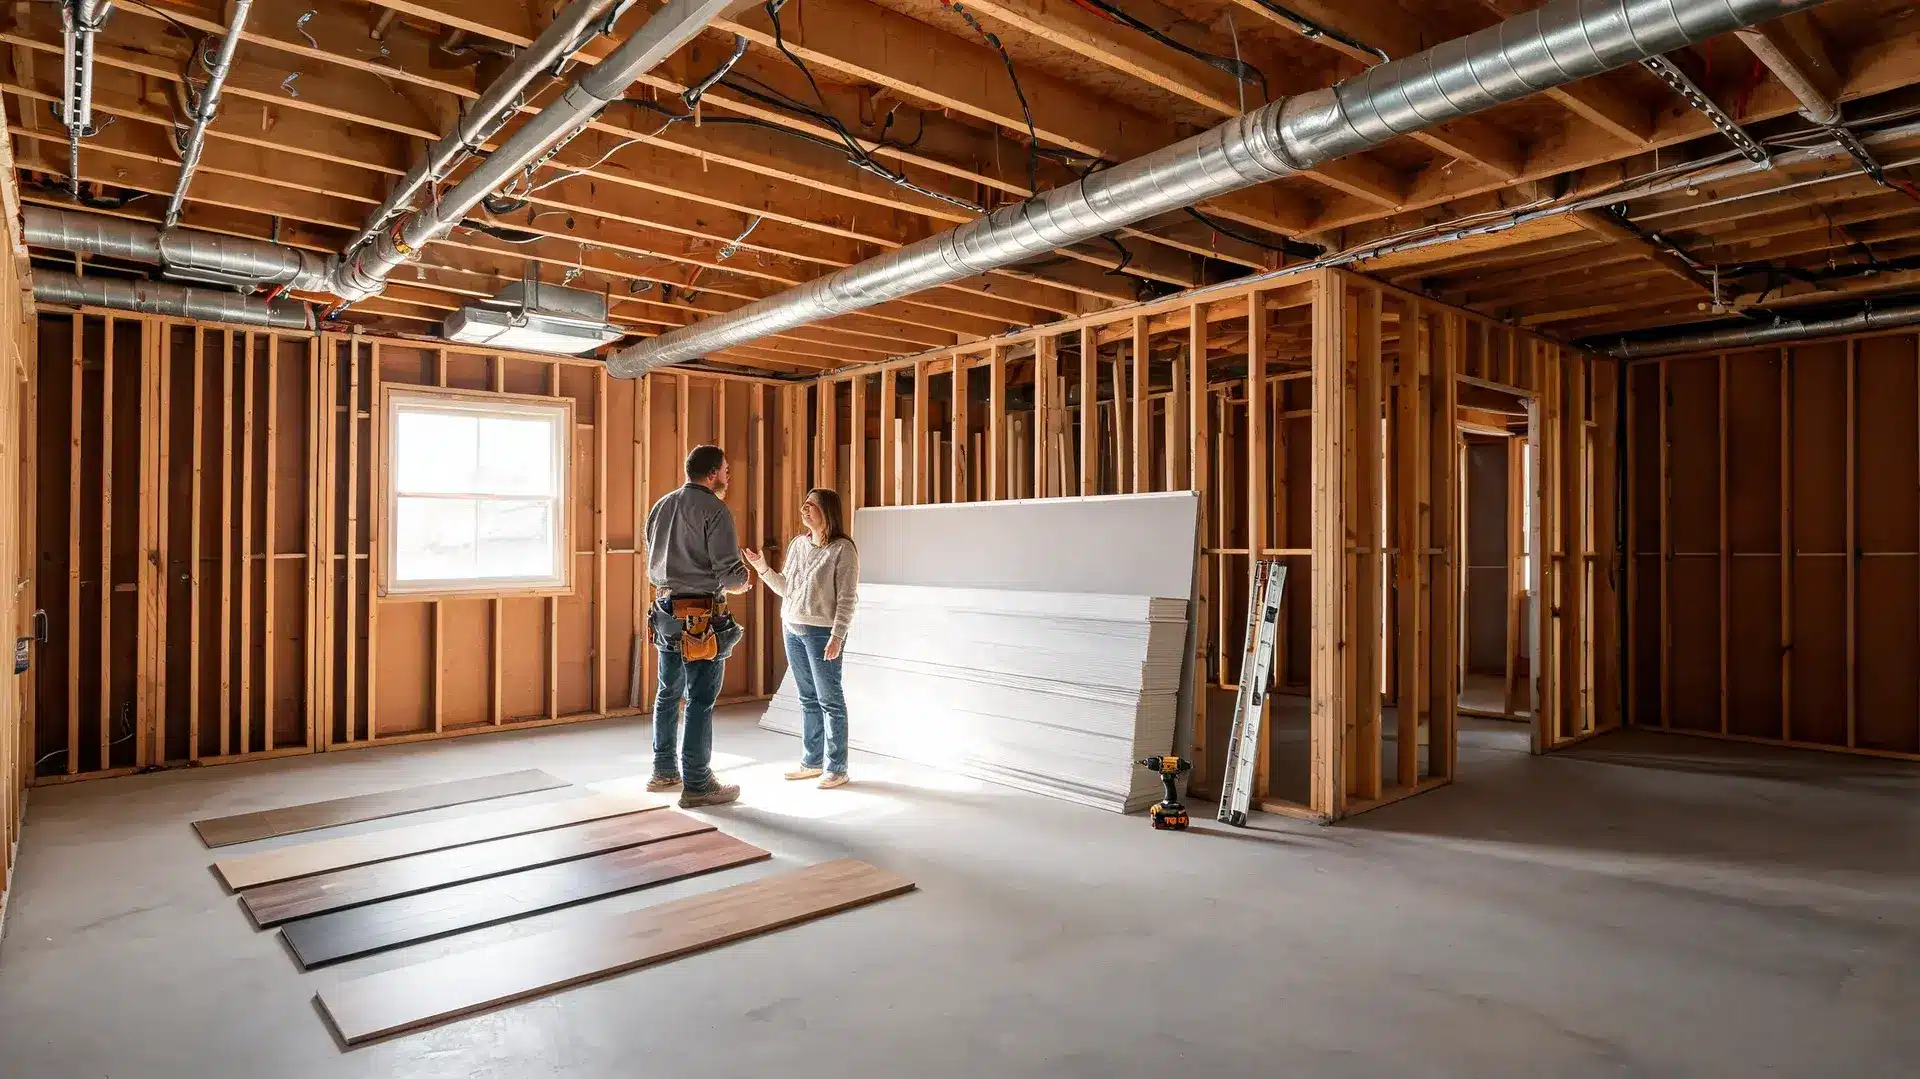
Finish Level Cost Per Sq Ft Best For Basic $25 to $50 Open family room, play area, simple office, storage zone Mid-range $50 to $75 Bedroom, home office, upgraded flooring, cleaner layout High-end $75 to $100+ Bathroom, wet bar, media room, built-ins, premium fixtures How much it costs to finish a basement comes down to three things: the size of the space, the finish level you choose, and the condition of the space before a single wall goes up. Most projects land between $25 and $75 per square foot, with a national average around $32,000 for a mid-size basement. High-end projects with bathrooms, wet bars, major repairs, or premium finishes push well past $100 per square foot. The range only makes sense once you know which end of it your project sits on. A dry, code-compliant lower level with decent ceiling height and no moisture issues starts from a far better position than one with cracks, mold, or wiring that predates current code. Both projects look like “finishing a basement” on paper. They are not the same project at all. Before you ask a single contractor for a quote: know your space, set a budget tied to function rather than finish, and read the section on hidden costs. That is where most budgets go wrong. Cost Note: Figures in this article are estimates based on national averages from Angi (2026) and HomeAdvisor (2025). Actual costs vary significantly by region, contractor, materials, and project scope. Always get at least three quotes before committing to any project above $1,000. What Finishing a Basement Actually Includes When people ask how much it costs to finish a basement, they usually have one number in mind: the finished space they want. What they underestimate is the list of work that has to happen first. At its most complete, a basement finishing project covers framing, insulation, drywall, ceiling work, flooring, electrical outlets, recessed lighting, HVAC connections, permits, and moisture control. Most projects do not need all of those from scratch. If the space already has rough plumbing, solid ceiling height, safe stairs, and dry walls, a significant portion of that list is already handled, and the cost drops accordingly. If it has leaks, mold, cracked foundation walls, or wiring that predates current code, those repairs take precedence over any decorative decisions. The most useful baseline is a dry, code-compliant, permitted space that functions like a normal living area. That gives you something honest to compare quotes against. Basement Finishing Cost by Square Footage Square footage gives you a starting point, but it does not tell the full story. The finished basement cost can change quickly once you add a bathroom, bedroom, wet bar, media room, or upgraded flooring. Use the table below as a planning range, then adjust based on the actual work your basement needs. Finished Area Basic Mid-Range High-End 300 sq ft $7,500 to $15,000 $15,000 to $22,500 $22,500 to $30,000+ 500 sq ft $12,500 to $25,000 $25,000 to $37,500 $37,500 to $50,000+ 700 sq ft $17,500 to $35,000 $35,000 to $52,500 $52,500 to $70,000+ 1,000 sq ft $25,000 to $50,000 $50,000 to $75,000 $75,000 to $100,000+ 1,500 sq ft $37,500 to $75,000 $75,000 to $112,500 $112,500 to $150,000+ 2,000 sq ft $50,000 to $100,000 $100,000 to $150,000 $150,000 to $200,000+ These figures give you a planning range, not a final quote. A contractor still needs to assess moisture levels, ceiling height, plumbing access, electrical capacity, stair code compliance, egress windows, drainage, slab condition, and local permit requirements before any number becomes real. Use this table to sanity-check a quote — not to build a budget from scratch. The Four Cost Drivers That Determine Your Final Number Most budget surprises in a basement finishing project come from one of four areas. Understanding what each adds to the total — and whether your space already has a problem in that category — is the most useful thing you can do before sitting down with a contractor. 1. Moisture and Foundation Work Water control comes before walls, flooring, and trim, every time. If your lower level shows staining, smells damp, or has cracks in the foundation, those repairs are not optional extras. Covering moisture issues with new materials produces mold behind the drywall, warped flooring, and repair bills far higher than the waterproofing work would have cost in the first place. A full interior waterproofing system typically runs $3,000 to $15,000, depending on the scope. Exterior waterproofing pushes costs higher. Crack injection, sump pump installation, and interior drain tile are all separate line items. Budget for this before anything else moves. If you’re unsure what your basement needs, the guide to basement waterproofing costs walks through each method and what drives the price. 2. Plumbing and Bathroom Addition A basement bathroom is one of the largest single budget items in any lower-level project. It may require rough-in work, drain relocation, ejector pump installation, venting, tile, fixtures, and its own inspection, and every one of those has a separate cost. Keeping new plumbing close to existing lines controls the total. A full bathroom addition on a space with no existing rough-in can add $8,000 to $25,000 or more to the project, depending on complexity and local labor rates. Below-grade ejector pump requirements push costs toward the higher end of that range. Factor this as a fixed line item before comparing bids. 3. Egress Windows and Bedroom Requirements A lower-level bedroom requires an approved egress window to meet code in most jurisdictions. Some areas require egress windows for any finished basement, regardless of use. Check your local code before assuming the standard applies. Beyond the window, a legal bedroom also needs proper heat, smoke alarms, carbon monoxide detection, and a minimum ceiling height. Egress window installation typically costs $2,500 to $5,500, depending on the size of the opening and the amount of foundation cutting required. These are non-negotiable for both safety and future resale paperwork. Skipping them creates compliance problems during inspections and disclosure problems when you sell. 4. Electrical and HVAC More finished living space puts more demand on your home’s systems. Additional outlets, recessed lighting, dedicated office circuits, panel capacity upgrades, HVAC duct extensions, and added return air all affect the project price and the daily comfort of the finished space. A mini-split system for a basement without existing duct access runs $3,000 to $7,000 installed, with single-zone systems starting closer to $2,000 and multi-zone setups going higher. Electrical panel upgrades vary widely depending on current capacity, budget $1,500 to $4,000 if your panel is close to its limit. An electrician can assess that in a single site visit before you commit to anything. Permit Warning: Never skip a permit to save money on a basement finishing project. Unpermitted work creates insurance, resale, and code compliance problems, and may require costly demolition and redo if flagged during a home inspection. Permits for a basement project typically run $500 to $2,000, depending on local fees and scope. That cost is small compared to the problems unpermitted work creates at sale time. Cost by Room Type Your room plan changes the total because each use brings different system requirements. An open family room needs basic finishes. A bedroom or bathroom needs plumbing, code compliance, and safety features on top of standard finish work. Use this to understand what each room type adds before committing to a layout. Room Type Main Work Required Budget Impact Family room Open layout, flooring, ceiling, lighting, outlets Lower to mid-range Home office Lighting, outlets, data wiring, sound control Lower to mid-range Bedroom Egress window, closet, heat, alarms, code inspection Mid-range to high Bathroom Plumbing, pump if needed, fixtures, tile, and ventilation fan High Wet bar Sink, cabinets, counters, outlets, refrigeration space Mid-range to high Media room Sound control, AV wiring, lighting, seating, built-ins High The room type decision is a budget decision. Choose the layout based on what you will use every day before considering finishes. Money tied to a function ages better than money tied to a single-use layout that may not suit a future buyer. Hidden Costs That Catch Homeowners Off Guard These items rarely appear in a first quote but show up on nearly every project. Leaving no room for them is the most common reason a basement project runs over budget. Waterproofing and drainage: Crack sealing, sump pump work, interior drain tile, and grading corrections are often identified after work begins — not before. Mold remediation: Any musty smell or visible growth needs professional assessment and clearance before walls close. Enclosing active mold is not a solution. Panel upgrades: More lights, circuits, and outlets can push an older panel to its limit, requiring an upgrade before the electrical inspection passes. Floor leveling: Uneven concrete affects flooring installation, door swing, and trim fitting. Leveling compound adds both cost and time. Debris removal: Old insulation, paneling, carpet, and drywall from demo work need hauling — this rarely appears in an initial quote. Permit fees: City and county fees vary and can add $500 to $2,000 or more, depending on scope and jurisdiction. Furniture and setup: Seating, storage, rugs, desks, and window coverings are easy to forget until the space is done and empty. Set aside 10 to 20 percent as a contingency before work starts. That buffer covers most of these items and avoids a difficult mid-project conversation about needing more money. Line-Item Cost Breakdown This is the format you should request from every contractor you consider. A lump-sum bid tells you nothing useful — a line-item bid lets you compare scope, identify what’s included or missing, and make targeted cuts if the total runs over. Line Item Low End High End What Drives Variation Waterproofing/moisture control $3,000 $15,000+ Interior vs. exterior, sump pump, drain tile scope Framing $1,500 $6,500 Square footage, number of partition walls, ceiling type Insulation $1,000 $4,000 Type (spray foam vs. batt), wall vs. ceiling vs. floor Drywall $1,500 $5,000 Square footage, number of corners, finish level Flooring $1,500 $8,000 Material (LVP vs. tile vs. carpet), square footage Electrical $1,500 $6,000 Outlets, lighting, circuits, panel upgrade if needed HVAC / mini-split $2,000 $7,000 Duct extension vs. separate mini-split unit Bathroom addition $8,000 $25,000+ Rough-in status, ejector pump, fixture, and tile selection Egress window $2,500 $5,500 Foundation wall thickness, opening size, and well cover Permits $500 $2,000 Local jurisdiction fees, scope of permitted work Contingency (10–20%) Set aside before work starts, not after surprises appear These ranges are built from national averages. Regional labor markets, existing conditions, and contractor availability all affect where your project lands. The table is a cross-check tool, not a substitute for a written itemized bid. DIY, Contractor, or a Mixed Approach Choosing who does the work matters as much as choosing what gets done. Each path carries a different risk and cost profile. Approach Best Fit Main Risk Full DIY Painting, trim, some flooring, and cleanup Slower timeline; potential redo costs if mistakes occur General contractor Full project, permits, trade coordination, inspections Higher upfront cost Mixed plan Pros handle systems; the homeowner handles finish tasks Requires a clearly defined task split from the start The mixed plan is the right call for most homeowners. Let licensed tradespeople handle electrical, plumbing, HVAC, and any structural work. Take on painting, cleanup, trim, and simple flooring yourself. That keeps risk low while delivering real labor savings. The task split needs to be agreed in writing before work begins; mid-project confusion about who does what costs time and money. For a broader look at how this fits into larger home renovation decisions, the house additions before and after show how homeowners typically divide that responsibility across different project types. Ways to Reduce the Cost of Finishing a Basement Real savings come from simplifying the plan, not from cutting safety or skipping permits. Every item below reduces costs without compromising the parts that protect the investment long term. Keep the layout open: Fewer walls, doors, and built-in storage reduce both materials and labor hours significantly. Work with existing plumbing locations: Moving drain lines and supply pipes across a slab is among the most expensive decisions you can make. Keep wet areas where plumbing already exists. Choose durable flooring from the start: Luxury vinyl plank and tile handle the moisture and temperature fluctuations of a below-grade space better than carpet or hardwood — and they cost less to replace if needed. Paint yourself: Painting is one of the few finish tasks most homeowners can handle safely and well. On a 1,000 sq ft basement, that’s a meaningful labor savings. Use stock cabinetry: Custom built-ins add significantly to the budget. Stock kitchen or laundry cabinets installed as a wet bar or storage wall look clean at a fraction of the price. Leave unneeded areas unfinished: Mechanical rooms, utility areas, and storage zones do not need to be completed. Only finish the square footage you will actually use. Get at least three bids: Compare scope, materials, permit inclusion, and warranty — not just the bottom-line number. The lowest bid is often missing something the higher bids include. None of these cuts requires a lower-quality result. A simpler layout with durable materials consistently outperforms a complex design with built-in shortcuts — in daily use and at resale. Is a Finished Basement Worth the Money? A finished lower level adds usable space and resale appeal when it solves a real space problem. ROI on basement finishing typically runs 64 to 70 percent, according to data from Angi and HomeAdvisor, meaning a $32,000 project can add $20,000 to $22,000 in resale value to a typical home. Functional layouts for family rooms, guest bedrooms, home offices, and bathrooms perform best across most markets. Specialty or highly personal designs perform worse. Good value add Family room, guest bedroom, home office, bathroom, laundry space, and clean storage Less flexible value Specialty theater, oversized wet bar, single-use niche rooms, rare custom materials Strong reason to start You need more living area, plan to use it daily, and have the budget to do it correctly Reason to pause The quote strains your budget, the space has unresolved moisture issues, or the goal is resale value only Spend first on dryness, safety, lighting, and flexible room use. Buyers respond to clean, code-ready spaces that serve multiple purposes. Highly personal designs and niche configurations cost more and appeal to fewer people at resale, regardless of the quality of materials used. This is the same conclusion I’ve seen hold across markets at every price point. The basement remodel cost guide by size breaks down how those value-add decisions play out at different square footage ranges if you want to dig further into the numbers. Questions to Ask a Contractor Before You Sign A strong contractor answers these questions directly and in writing before any deposit is paid. Hesitation or vague replies to any of them are a signal worth noting before you commit. Are permits pulled and included in the bid, or are they charged separately? Who coordinates and manages plumbing, electrical, and HVAC subcontractors? What material allowances are built into the quote, and what happens when you exceed them? How are change orders handled, priced, and approved? What is the process if moisture, mold, or structural issues are found after work begins? What is the payment schedule, and is the final payment tied to passing inspection? What warranty covers labor and materials after the project is complete? Can you provide references from recent projects of similar scope? Tie the final payment to passing inspection, not to the contractor’s own sign-off. That single condition protects your budget and ensures code compliance before any remaining money leaves your account. 📝 Note: Request a line-item bid rather than a single lump-sum number. Line items let you compare competing quotes on the same scope, identify what each contractor has or has not included, and make targeted cuts if the total comes in over budget. FAQs About Basement Finishing Costs These are the questions I hear most often from homeowners who’ve already gotten one quote and realized they need to understand the numbers better before they get the next two. How much does it cost to finish a 1,000 sq ft basement? A 1,000 sq ft basement typically runs $25,000 to $50,000 at a basic finish level and $50,000 to $75,000 at mid-range. High-end finishes with a bathroom, media room, or significant moisture work push the total past $100,000. The specific features, not just the square footage, determine where you land. What is the cheapest way to finish a basement? Keep the layout open, skip the bathroom, use luxury vinyl plank flooring, paint yourself, and use stock cabinetry for any storage walls. Handle cleanup and trim as DIY. Let licensed trades handle electrical, plumbing, and HVAC. That combination produces a functional, code-compliant space at the lowest cost per square foot. Do low ceilings limit what you can do with a basement? Yes. Most jurisdictions require a minimum ceiling height of 7 feet for habitable space, though local rules vary. Pipes, beams, and ductwork can reduce that further. A drop ceiling can conceal mechanicals while meeting height requirements but reduces finished clearance by 4 to 6 inches and adds cost. Can I finish part of my basement and leave the rest unfinished? Yes, and it often makes sense. Leaving mechanical rooms, utility areas, and storage zones unfinished reduces total cost and keeps access to shutoffs, panels, sump pumps, and drains easier for future maintenance. Only finish the square footage you plan to use regularly. How long does it take to finish a basement? Most basement finishing projects take four to eight weeks for a straightforward open layout. Adding a bathroom, egress window, or significant moisture remediation extends that timeline. Permit approval windows vary by jurisdiction and can add two to four weeks before work even begins. What flooring is best for a finished basement? Luxury vinyl plank is the strongest choice for most basements. It handles moisture and temperature fluctuations better than carpet or engineered hardwood, installs directly over concrete, and costs $3 to $7 per square foot installed. Tile is better in bathrooms and laundry areas. Fix any water issues before any floor goes down. Final Thoughts Getting an accurate answer on how much it costs to finish a basement starts with knowing your space before anyone prices it. Measure the area you plan to use, identify any moisture or structural issues that need to be resolved first, choose a finish level that fits the home and your actual budget, and list the rooms you need in order of daily importance. My straightforward take on the cost of finishing a basement is this: the money you spend on dryness, safety, and flexible room layout holds its value. The money spent on personal features and single-use designs rarely does. A dry, permitted, practical lower level is worth far more at resale, and in daily use, than a costly niche space that only works for one kind of buyer. Drop a comment below and let me know how your basement turned out. Sources Angi: How Much Does It Cost to Finish a Basement? (2026 data) HomeAdvisor: Basement Finishing Cost (2025 data) National Association of Home Builders (NAHB): Cost of Construction Survey
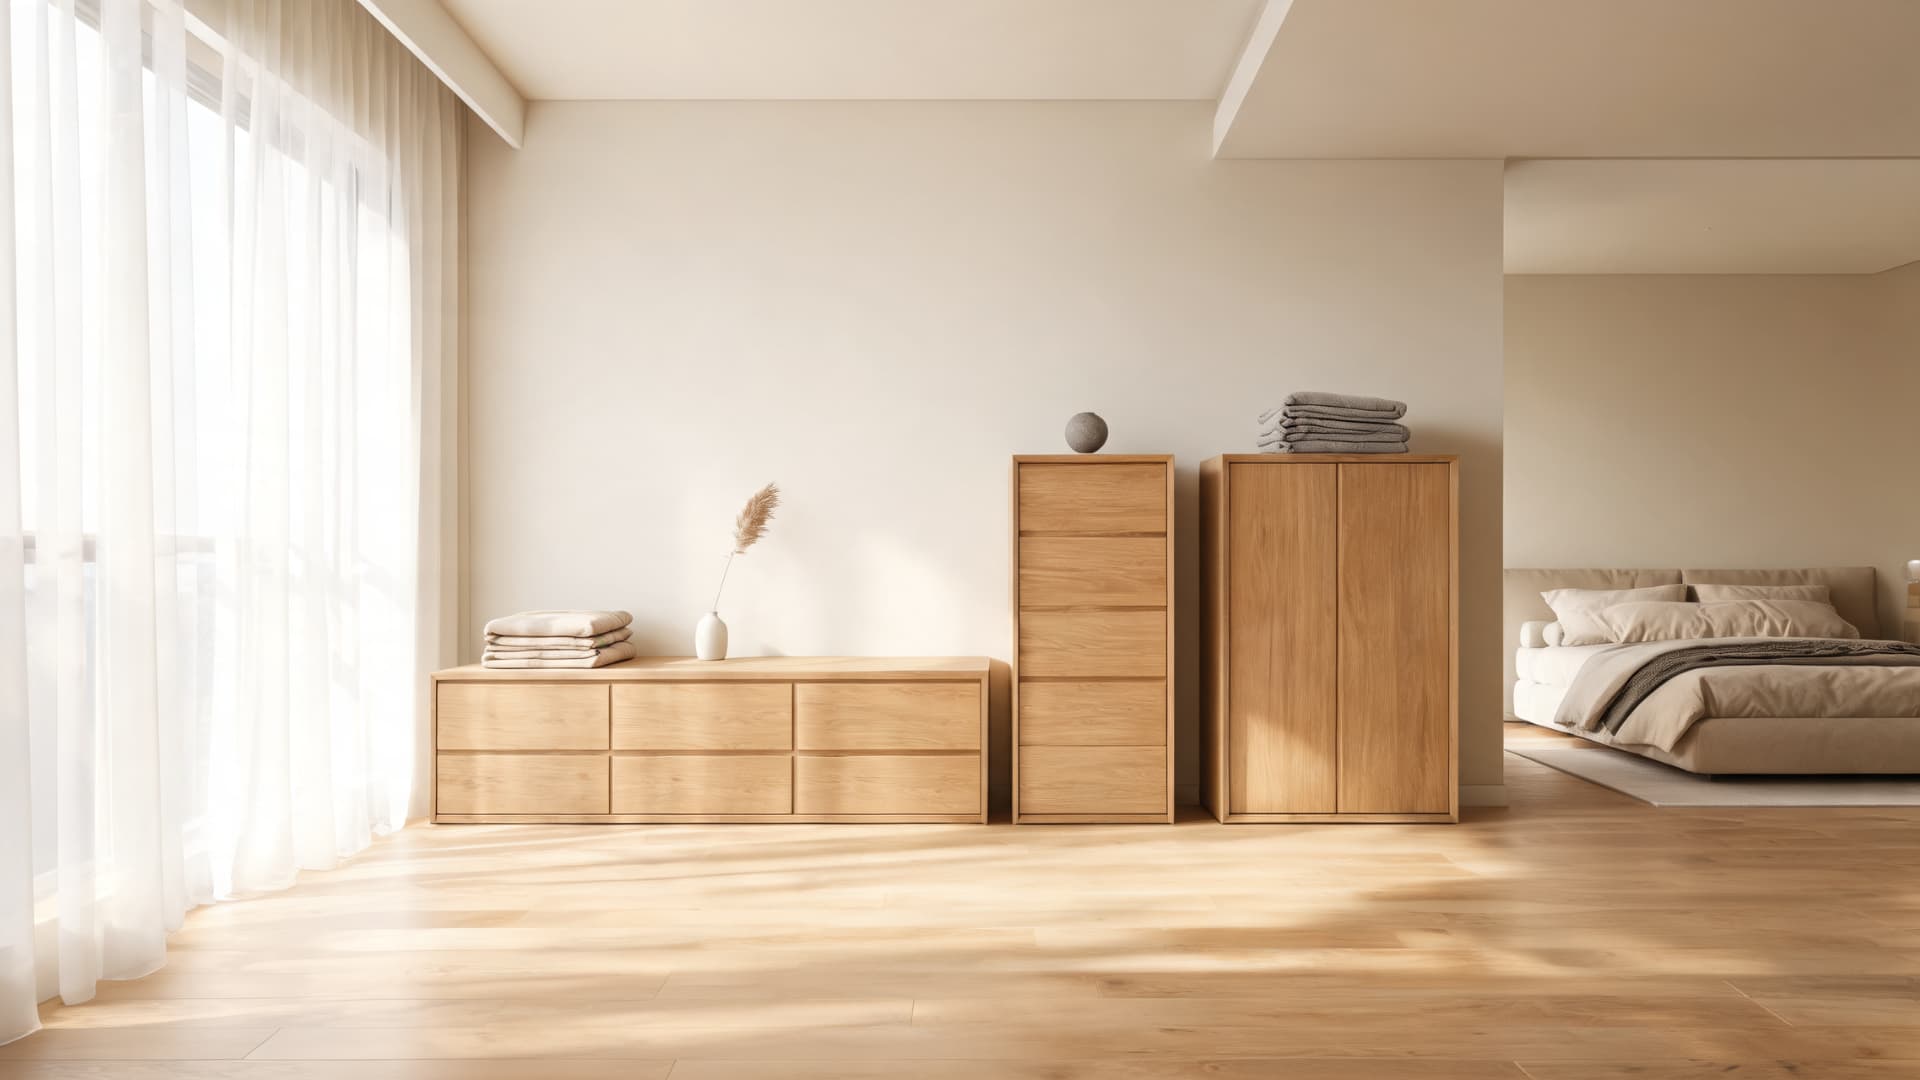
If you’re standing in a showroom, or scrolling through furniture listings at midnight, trying to figure out why a “highboy” costs three times what a “tallboy” does, this guide is for you. The types of dressers you’ll encounter share one function (storing clothing) but differ sharply in height, width, drawer layout, and what they’re actually built to solve. Before you buy, you need to know what each type is designed to do and which one fits your room’s specific constraints. Note: “Dresser,” “chest of drawers,” “tallboy,” and “highboy” are used inconsistently across furniture brands. Ignore the name. Compare height, width, drawer count, and storage configuration instead — those are the specs that determine whether a piece actually fits your room. Dresser vs Chest of Drawers: The Shape Difference That Matters These two terms are often treated as synonyms, but the design difference affects how the piece sits in a room and how much surface area you actually get. Feature Dresser Chest of Drawers Shape Wide and low Tall and narrow Drawer layout Side by side Stacked vertically Top surface Larger — room for mirror, lamp, decor Smaller — limited surface use Wall space needed More width required Fits narrow gaps Best for Shared storage, mirror setups, primary bedrooms Small rooms, apartments, tight wall spaces In practice, a vertical dresser and a chest of drawers are often the same piece described differently, depending on the retailer. What changes is the physical footprint, and that’s what you should be measuring against your wall space before anything else. The Types of Dressers Explained Before choosing any bedroom dresser, start with the limits of your room. Measure the wall width, ceiling height, and the space needed for drawers to open fully. Also, think about what you need to store, from everyday clothes to bulky sweaters or extra bedding. Once you know those details, it becomes much easier to pick a dresser type that fits your room instead of crowding it. 1. Horizontal Dresser The horizontal dresser is the layout baseline for most primary bedrooms — wide, low, and built for maximum top surface. Drawers run side by side rather than stacking, which keeps the piece low enough to pair with a mirror and wide enough to share between two people. Typical dimensions: 50–70 inches wide, 16–22 inches deep, 30–36 inches tall. Best for: Medium to large bedrooms with enough wall length to clear the piece without blocking doors or closet access. Folded clothes, shared wardrobe storage, and mirror setups. Before you buy: Measure 24–30 inches of clearance in front of the drawers. A horizontal dresser that opens into a bed frame or bedroom door becomes a daily frustration. 2. Double Dresser A double dresser is a wider version of the horizontal dresser — typically two full columns of drawers side by side. It’s the most common choice for couples or anyone with a large wardrobe who needs more drawer volume than a standard dresser provides. Typical dimensions: 60–80 inches wide, 18–22 inches deep. Best for: Primary bedrooms with enough wall length to absorb the width. Deep drawers make it practical for bulkier folded items — sweaters, jeans, extra linens. Before you buy: A double dresser can eat the longest wall of a smaller room and still leave the bed area feeling crowded. Map the full room footprint first. 3. Vertical Dresser A vertical dresser trades width for height. The same number of drawers, stacked rather than spread. That footprint reduction is exactly what small bedroom storage layouts need — the piece can fit in a 30-inch gap beside a closet or between windows where a horizontal dresser simply won’t. Typical dimensions: 28–42 inches wide, 16–20 inches deep, 48–60 inches tall. Best for: Small bedrooms, studio apartments, and any room where floor space is the hard constraint. Before you buy: Anchor it to the wall — especially in a child’s room or a busy bedroom where drawers may be opened at the same time. A tall dresser with open drawers can become top-heavy. 4. Highboy Dresser A true highboy is a chest-on-chest design — one cabinet stacked on top of another, historically joined at the base. The upper section typically has shallower drawers for smaller items; the lower section has deeper drawers for bulkier ones. Many pieces sold as “highboys” today are simply tall dressers using the name loosely. Typical dimensions: 30–45 inches wide, 18–22 inches deep, 60–72 inches tall. Best for: Rooms with high ceilings and narrow wall space. Bedrooms with a traditional or antique furniture style. Before you buy: Confirm whether the listing describes a true chest-on-chest construction or just a tall dresser. The distinction affects both stability and price. 5. Lowboy Dresser The lowboy is the vanity-adjacent dresser, shorter than a standard piece, wider than it is tall, and designed to sit at a height that makes surface items easy to reach and mirrors practical to use while seated or standing. Think of it as a dressing table that also has drawers. In low-ceiling bedrooms, the lowboy’s reduced height keeps the furniture line well below the ceiling plane, which matters more than most buyers initially realize. Typical dimensions: 40–60 inches wide, 16–22 inches deep, 28–34 inches tall. Best for: Dressing corners, guest rooms with lower ceilings, or spaces where the dresser needs a lower visual profile to keep the room feeling open. 6. Tallboy Dresser The tallboy and the vertical dresser describe roughly the same thing — a narrow, tall storage piece — though some tallboys include a combination of drawers and a cabinet section. The term varies enough between manufacturers that actual specs matter more than the label. Typical dimensions: 28–40 inches wide, 16–22 inches deep, 50–65 inches tall. Best for: Compact bedrooms, apartments, and guest rooms. Works particularly well in spaces where wall width is the binding constraint. Before you buy: Check that drawer heights are accessible for whoever will use the piece most. Top drawers on a 65-inch tallboy are genuinely hard to reach for shorter users. 7. Bachelor’s Chest The bachelor’s chest is a compact multi-use piece — short enough and deep enough to double as a nightstand, but wide enough to store a meaningful amount of clothing. In studio apartments and small guest rooms, one piece doing two jobs is worth a lot more than square footage allows for two separate ones. Typical dimensions: 24–36 inches wide, 14–18 inches deep. Best for: Guest rooms, studio apartments, and bedrooms where floor space won’t allow a standard dresser plus a nightstand. Before you buy: Check that the top surface is sturdy enough for a lamp, glass of water, or phone charger. Not all compact chests are built to handle constant nightstand-style use. 8. Gentleman’s Chest A gentleman’s chest combines drawers with cabinet or hanging sections in a single unit — the furniture equivalent of a wardrobe and dresser merged into one piece. It’s the right choice when the closet isn’t large enough to hold a full wardrobe, and you need both folded and hanging storage without adding two separate pieces of furniture. Typical dimensions: 38–55 inches wide, 18–24 inches deep. Best for: Bedrooms with limited closet space. Suits, jackets, and dress shirts that need to hang, plus everyday folded clothing in the drawers. Before you buy: Check the hanging depth inside the cabinet section. Anything under 22 inches creates problems with shoulder width on most garments. 9. His and Hers Chest A his-and-hers chest provides divided storage for two people in one piece — typically two distinct sections with equal (or designated) drawer space. The appeal is eliminating two separate dressers while keeping individual storage clearly separated. The challenge is that it requires a wider wall than a single dresser. Typical dimensions: 50–70 inches wide, 18–22 inches deep. Best for: Shared primary bedrooms where both people need organized storage, and the wall allows the width. Before you buy: Look at whether both sides actually have equal storage volume. Some designs are balanced in appearance but not in drawer count or depth. 10. Combo Dresser A combo dresser mixes drawers with open cabinet sections — giving you a place to store folded clothes alongside bags, extra bedding, or bulky items that won’t fold flat. It’s a better fit for bedrooms with varied storage needs than a pure drawer layout, but it works best when the cabinet space is purposeful rather than just decorative. Typical dimensions: 45–70 inches wide, 18–24 inches deep. Best for: Medium and large bedrooms where mixed storage matters — extra blankets, large bags, or items that need more space than a standard drawer allows. Before you buy: Adjustable shelves are worth the premium if you plan to store items of varying sizes. 11. Chifferobe A chifferobe is a combined dresser and wardrobe in one tall unit — drawers on one side, hanging space and shelves on the other, behind a cabinet door. It was the standard solution in homes built before built-in closets became standard. It still makes practical sense in older homes, rental bedrooms, and any room where no closet exists. Typical dimensions: 36–60 inches wide, 20–26 inches deep. Best for: Older homes without closets, guest rooms, and rentals where you can’t modify the walls. Before you buy: Measure the cabinet door swing. In a tight bedroom, a door that opens into the walking path kills the advantage of the extra storage. 12. Armoire An armoire is a freestanding wardrobe with doors — typically offering a combination of hanging space, shelves, and sometimes a drawer section. It functions as a standalone closet. The ceiling height and door clearance requirements are real constraints that buyers often underestimate until delivery day. Typical dimensions: 36–60 inches wide, 20–26 inches deep, 70–90 inches tall. Best for: Bedrooms without built-in closets. Coats, dresses, and any garments that need to hang full length. Before you buy: Measure ceiling height, door clearance, and hallway width for delivery. Armoires often need to be partially disassembled to get through standard doorways. 13. Lingerie Chest A lingerie chest is a narrow tower of shallow drawers — not a primary storage solution but a supplement to one. The shallow depth is the defining design feature: these drawers are sized for socks, undergarments, scarves, and accessories that would get lost in the deeper drawers of a standard dresser. Typical dimensions: 18–28 inches wide, 14–18 inches deep. Best for: Bedroom corners, walk-in closets, and dressing areas. Works alongside a larger dresser rather than replacing it. Before you buy: Drawer dividers make a significant difference. Without them, shallow drawers with small items turn into one tangled drawer per opening. 14. Mirrored Dresser A mirrored dresser uses reflective surfaces — either on the drawer fronts or via an attached mirror — to add light and visual depth to a room. In smaller or darker bedrooms, that reflection can make a real difference. The trade-off is fingerprints, smudging, and the need to avoid direct glare from a nearby window or lamp. Typical dimensions: 45–70 inches wide, 16–22 inches deep. Best for: Small or dark bedrooms where reflection helps the room feel larger. Dressing areas and glam-style interiors. Before you buy: Position it where light is soft and diffuse, not where a window or bright fixture will hit the mirror directly. 15. Media Chest A media chest solves a specific layout problem: the bedroom where the TV and dresser need to share the same wall. Open shelving on top holds the TV and streaming devices; drawers below hold clothing. Many models include cable management cutouts built into the back panel. Typical dimensions: 36–60 inches wide, 18–22 inches deep. Best for: Bedrooms with a TV directly opposite the bed, where a separate TV stand and dresser would take too much floor space. Before you buy: Check the shelf’s weight capacity and dimensions against your TV size before ordering. 16. Mule Chest A mule chest is a high-capacity storage piece — drawers plus cabinet sections — built for rooms that need to store more than clothing. Blankets, pillows, bulky seasonal items. The sheer size requires a substantial wall and enough floor space that delivery and placement need to be planned ahead of purchase. Typical dimensions: 55–75 inches wide, 18–24 inches deep. Best for: Large primary bedrooms, guest suites, and rooms where maximum storage volume is the priority. Before you buy: Measure doorways, stairwells, and hallways before the delivery date — not after. 17. Chesser A chesser is a hybrid — somewhere between a standard dresser and a chest of drawers in both height and width. The term is used inconsistently across manufacturers. The practical value is finding a piece that fits where a standard dresser is too wide and a chest is too narrow. Evaluate by drawer count, dimensions, and configuration rather than the label. Typical dimensions: 40–65 inches wide, 16–22 inches deep. Best for: Bedrooms that need flexible storage but have space constraints that rule out both a full dresser and a narrow chest. 18. Changing Table Dresser A changing table dresser is a nursery-specific piece that combines drawers for baby essentials with a top surface designed to hold a changing pad. The dual function is the point — one piece instead of two in a room where floor space is already under pressure from a crib, glider, and storage. Typical dimensions: 36–60 inches wide, 18–22 inches deep. Best for: Nurseries. Keeps diapers, wipes, onesies, and burp cloths within reach of the changing surface. Before you buy: Choose a model with a removable changing tray. Once the child outgrows it, the piece converts to a standard dresser without modification. 19. Cloth Drawer Dresser A cloth drawer dresser uses fabric drawers on a metal or wood frame, is lightweight, portable, and inexpensive. It is a short-term solution, not a long-term one. The drawers handle light clothing well, but sag under weight and degrade faster than any wood piece. It earns its place in dorm rooms, kids’ rooms, and temporary living situations where portability matters more than durability. Typical dimensions: 24–45 inches wide, 12–16 inches deep. Best for: Short-term setups, kids’ rooms for lightweight clothing, and closet overflow storage. Not a permanent solution. 20. Rolling Chest A rolling chest is a compact storage unit on casters — designed to be moved around a bedroom, closet, or multi-purpose room as the layout shifts. Useful for organizing overflow items: accessories, shoes, undergarments, craft supplies. It’s not a replacement for a primary dresser but a flexible supplement. Typical dimensions: 18–36 inches wide, 14–20 inches deep. Best for: Closets, craft rooms, dorm rooms, and anywhere the layout changes often enough that fixed furniture is a liability. Before you buy: Locking casters are worth it on hard floors. A rolling chest without locks will shift every time a drawer is opened. 21. Dresser Desk A dresser desk combines storage drawers with a built-in workspace, either a fixed writing surface or a fold-down panel. In studio apartments and small guest rooms where one piece needs to do two things, this cuts down on furniture count without eliminating function. The desk surface needs to be at a comfortable seated height, which isn’t always the case with converted furniture pieces. Typical dimensions: 30–50 inches wide, 16–24 inches deep. Best for: Studio apartments, work-from-bedroom setups, and guest rooms that double as home offices. Before you buy: Sit at the surface with a chair before committing. Desk height and chair clearance are easy to miss in product photos. 22. Bombe Dresser A bombe dresser is chosen for its shape first and its storage second. The curved, rounded front and ornate hardware make it a visual anchor in traditional, antique-style, or French-country rooms. Drawer depth is typically shallower than a standard dresser of the same width — the curve takes up interior space. Buy it knowing that. Typical dimensions: 35–55 inches wide, 18–24 inches deep. Best for: Traditional and formal bedrooms where the dresser is part of the room’s visual identity, not just its storage plan. Where to Place Each Type of Dresser The right dresser in the wrong position stops working immediately. These placement rules apply regardless of which type you choose. Placement Rule Why It Matters Leave 24–30 inches in front of all drawers Drawers need clearance to open fully without hitting the bed frame or a second piece of furniture Wide dressers go on the longest open wall Keeps the room balanced and uses wall space that would otherwise be dead Vertical dressers fit in narrow gaps Between windows, beside closets, or at the foot of the bed in a long narrow room Media chests go opposite the bed Positions the TV at the right viewing angle without requiring a separate stand Mirrored dressers belong in soft, indirect light Avoids glare from windows or overhead fixtures hitting the reflective surface Don’t place tall dressers near kids’ play zones Open drawers raise the center of gravity — anchor tall pieces to the wall Rolling chests belong in closets or corners Their value is mobility — a fixed position removes the only advantage they have None of these rules is optional. Ignoring clearance in front of drawers is the single most common furniture placement mistake in bedrooms — and the most annoying one to live with. Maintenance and Safety A few things that matter more than most buyers realize until after the piece is in the room: Anchor every tall dresser, highboy, armoire, and chifferobe to the wall, especially in homes with children or pets Keep heavier items in lower drawers; top-loading a tall piece makes it easier to tip Close drawers when not in use, open drawers, shift the balance point forward Don’t put a heavy TV on a narrow dresser; use a media chest or a proper TV stand Clean wooden surfaces with a lightly dampened cloth. The species of wood for furniture affects how the surface responds to moisture, so excess water can warp joints or lift veneer, depending on the construction Use felt pads or a tray on the top surface to prevent scratches from daily items Tighten hardware regularly, drawer pulls, and knobs loosen faster than expected under daily use When a Dresser Isn’t the Right Answer Some bedrooms don’t have the floor space, wall width, or clearance to make a standard dresser work. These alternatives are worth considering before forcing the wrong piece into a room that can’t accommodate it. Alternative Best For What It Solves Wardrobe / freestanding closet Hanging clothes Replaces a built-in closet entirely Closet organizer system Small bedrooms with existing closets Turns unused closet space into folded-clothing storage Storage bed frame Hidden seasonal storage Linens and off-season clothing without using wall space Nightstand with drawers Small daily essentials Keeps bedside items organized without adding a full piece Under-bed storage bins Seasonal and overflow clothing Uses dead space under the platform or raised beds Cube storage unit Kids’ rooms and flexible layouts Adjustable, rearrangeable, and low-profile If the room can’t provide 24–30 inches of drawer clearance and enough wall width for the piece to sit without blocking traffic, one of these alternatives will serve better than a dresser that’s technically in the room but practically impossible to use. Frequently Asked Questions What dresser material lasts the longest? Solid wood usually lasts the longest because it handles daily use better than particleboard or thin veneer. Hardwoods like oak, maple, and walnut are especially durable. Engineered wood can still work well, but check drawer joints, weight, and hardware quality before buying. Are soft-close drawers worth it? Yes, soft-close drawers are worth it if the dresser will be used daily. They reduce slamming, protect drawer joints, and feel smoother over time. They are especially helpful in shared bedrooms, nurseries, and guest rooms where quieter furniture makes the space more comfortable. What dresser size works for a small bedroom? A narrow vertical dresser usually works best in a small bedroom because it uses height instead of floor width. Look for a piece under 40 inches wide with enough drawer depth for folded clothes. Always leave space for drawers to open fully. Can I use a dresser as a TV stand? Yes, but only if the dresser is wide, stable, and strong enough for the TV. Check the top surface weight limit and make sure the screen sits at a comfortable viewing height. Avoid placing heavy TVs on narrow or tall dressers. How do I stop dresser drawers from sticking? First, remove the drawer and check for dust, loose screws, or warped wood. Clean the tracks and apply drawer wax or a dry lubricant. If the drawer still sticks, the frame may be uneven, overloaded, or affected by humidity. Should a dresser be taller than the bed? A dresser does not have to be taller than the bed. What matters more is balance, reach, and room layout. Low dressers feel open and work well with mirrors, while taller dressers save floor space and add more vertical storage. How much should a good dresser cost? A good dresser can vary widely in price based on size, material, and construction. Budget pieces may work for short-term use, while solid wood options cost more but last longer. Focus on sturdy drawers, smooth glides, stable legs, and strong hardware. How do I style the top of a dresser? Keep the top simple and useful. Add a lamp, mirror, tray, small plant, or framed photo. Group items in different heights so it feels balanced. Leave some empty space so the dresser still looks clean and does not become cluttered. Final Verdict Choosing the right dresser starts with knowing your room, not just liking a style. I always look at wall width, drawer clearance, ceiling height, and storage needs before picking a piece. A wide dresser may work well in a large bedroom, while a vertical dresser, tallboy, or bachelor’s chest may fit better in a smaller space. If your room lacks closet storage, an armoire, chifferobe, or gentleman’s chest may solve more problems than a standard dresser. I also recommend measuring doorways and walkways before buying, so delivery and daily use are easier. Use this guide to compare your options, measure your space, and choose a dresser that truly fits your bedroom
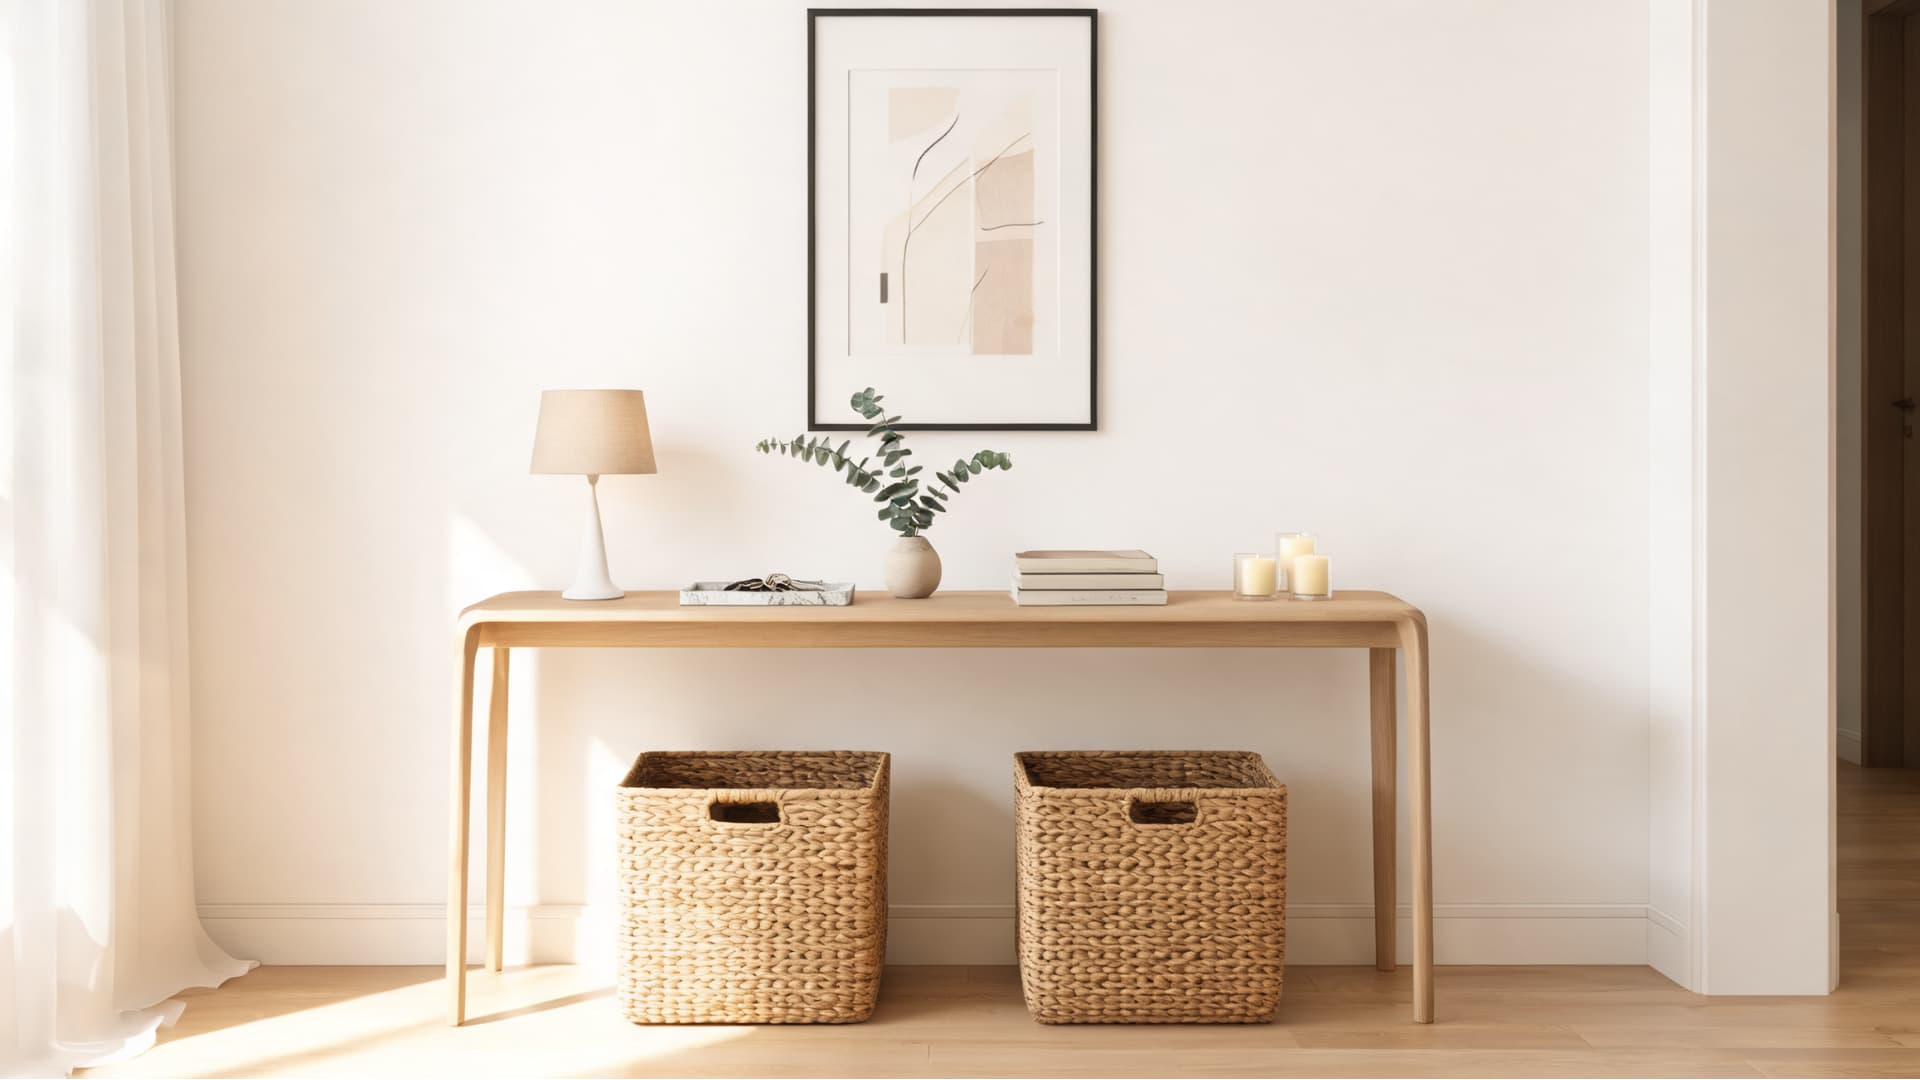
A console table is a long, narrow table designed to sit against a wall or behind a sofa, and the reason it works so well in so many rooms comes down to one thing: its depth is kept shallow enough that it doesn’t pull floor space away from you. Most run 12 to 18 inches deep, 30 to 36 inches tall, and anywhere from 36 to 60 inches wide. That combination lets it function where full-sized furniture can’t, in hallways, entryways, behind sofas, and along blank walls that would otherwise go unused. Here’s what actually happens when you add one to a room: the space stops feeling unresolved. An entryway gets a surface for daily essentials. A hallway gets a visual anchor. A living room gets storage or lighting without adding bulk. The console table isn’t a decorative afterthought — it’s solving a layout problem that most people don’t even name until after it’s fixed. Shape Long and narrow Common height 30–36 inches (should match or sit just below sofa back height when used behind a sofa) Common depth 12–18 inches, stay under 14 inches in hallways to keep the passage clear Common width 36–60 inches, ideally no more than two-thirds of the wall width Best placement Entryway, hallway, living room wall, behind the sofa Main use Storage, display, lighting, daily essentials Common materials Wood, metal, glass, marble, rattan, and mirrored finishes Those depth numbers matter more than most guides let on. A 14-inch-deep console table in a 36-inch-wide hallway leaves you 22 inches of clearance, just enough. Go to 18 inches of depth, and you’re down to 18 inches of walkway, which starts to feel tight every time someone passes through carrying bags. Size first, then everything else. What is a Console Table Used For? Console tables are useful because they solve small space problems while also making a room feel more finished. Instead of being just decorative furniture, they add function to areas that would otherwise remain empty or underused. Holding everyday essentials: Console tables are commonly used in entryways to keep daily items like keys, mail, wallets, sunglasses, bags, phones, and trays in one easy-to-reach place. This helps create an organized “drop zone” right at the entrance of the home. Displaying decor: They work as a display surface for decorative pieces such as lamps, vases, framed photos, artwork, candles, plants, books, and decorative bowls. This makes them ideal for adding personality and style to a space. Adding extra storage: When designed with drawers, shelves, or baskets, console tables can store practical items like cables, remote controls, documents, table linens, dinnerware, or other small household essentials that often create clutter. Filling empty wall space: A console table can instantly make a blank wall, narrow hallway, or unused alcove feel intentional and functional without taking up much floor area or making the space feel crowded. Creating a room divider: When placed behind a sofa, a console table can subtly divide an open-plan layout into separate zones, such as distinguishing the seating area from a walkway, while still keeping the space visually open. Where to Put a Console Table: Room-by-Room Placement The right placement comes down to the specific layout problem you’re solving. Here’s what each location actually requires. 1. Entryway or Foyer Near the front door, the console table functions as the organizational anchor of the entryway. The most useful setup: a tray or small bowl for keys and change, a lamp or wall-mounted light if the entryway is dim, and at least one basket or hook solution below for bags. A mirror above it is one of the most practical additions in any entryway — a last look before you leave, and it bounces light into spaces that often have none. Sizing note: In a foyer, leave at least 36 inches of clear walkway in front of the table. If the hall is narrower than 48 inches, stay at a maximum depth of 12 inches. 2. Hallway Hallways are the most difficult placement because the walkway constraint is real. A 12-inch-deep console works in most halls. A slim lamp, a single piece of art above, and one small object on the surface, that’s all that fits before it starts to read as cluttered. If the hallway is also the path to bedrooms, leave the lower shelf completely clear so the space stays easy to move through. 3. Living Room Wall Against a living room wall, the console table works as a display anchor and lighting solution. This is where you have the most styling flexibility; it’s not a high-traffic zone, so you can go slightly deeper (up to 18 inches) and use the surface more fully. The common mistake here is treating it like a shelf and stacking too much. Pick one anchor piece, a lamp, a large mirror, or a framed artwork, and build around it with two or three supporting objects. The wall above the table is part of the arrangement, not separate from it. For more on minimalist living room layout and furniture proportions, the scale principles there apply directly to console table placement decisions. 4. Dining Room A console table in the dining room fills the role of a slim sideboard — serving surface, bar area, or storage for linens and glassware that don’t have another home. This works best in smaller dining rooms where a full buffet cabinet would dominate the wall. At 15 to 18 inches of depth, you get enough surface for functional staging without the room feeling compressed. 5. Bedroom In the bedroom, a console table works as a compact vanity when paired with a mirror and stool. The table depth here should match the stool depth so you can sit comfortably without the stool jutting out awkwardly when it’s pushed in. Look for a stool that tucks flush underneath the table’s apron when not in use. 6. Bathroom In larger bathrooms, a console table organizes towels, baskets, and toiletries while keeping the surface accessible. Some bathroom console tables are specifically designed to support a vessel sink, with plumbing clearance built into the open frame. Confirm weight capacity before loading a ceramic sink, standard decorative console tables are not rated for that load. 7. Alcove or Awkward Corner Alcoves and recessed walls are exactly what the narrow format was designed for. A console table fits the footprint without competing with the architecture. In an alcove, the depth of the recess usually determines how deep your table can be — measure the recess depth first and choose a table at least 2 inches shallower than that clearance so the table looks intentional rather than jammed in. Best Console Table Materials Material choice affects three things: maintenance burden, visual weight, and how the table holds up in high-traffic areas. Here’s an honest read on each. Material Best For Things to Consider Wood High-traffic areas, warm or traditional rooms Solid wood holds up well; veneer can chip at corners in entryways Metal Modern or industrial rooms Cold on its own — needs soft decor or a wood top to balance it Glass Small spaces and lighter layouts Shows fingerprints constantly; tempered glass is safer in entryways Marble Formal or premium rooms Heavy, requires sealing, and stains if liquids sit on it Rattan or cane Relaxed, natural, or coastal interiors Collects dust in open weave — harder to keep clean in hallways Mirrored finish Compact rooms where light matters High maintenance — smudges are visible from across the room Mixed material Modern homes with flexible styling Must match at least one existing material in the room The entryway is the most demanding location for material choice because it’s the first thing you touch and see every day. Wood, particularly solid hardwood, handles daily use better than glass or marble in that context. For hallways and living room walls, where traffic is lower, the visual priority can take over from the durability concern. If you’re also thinking through the broader material decisions for your space, the principles in minimalist home decor rules how material selection interacts with room scale and furniture choices. Common Types of Console Tables The type of console table you choose changes both the function and the visual weight of the piece in the room. Each works better in some contexts than others. 1. Rectangular Console Table The standard format. Clean lines, easy to style, fits most rooms. This is the right starting point unless you have a specific layout constraint that calls for something else. 2. Demi-Lune Console Table A half-moon shape that trades surface area for a softer edge profile. Works well in tight entryways where the curved front means fewer corners catching bags and elbows. You lose some usable surface depth, so it’s better suited to display-only setups rather than daily storage. 3. Console Table With Drawers Drawers add hidden storage without increasing the footprint. This is the right call for entryways where daily clutter — chargers, receipts, spare keys, takeout menus — needs somewhere to go that isn’t the surface. One or two drawers is usually enough; a full bank of drawers starts to look like a dresser and reads oddly in a hallway. 4. Console Table With Shelves A lower shelf adds storage capacity without drawers. Baskets on the lower shelf handle shoes, bags, or charging cables while keeping the surface clear. The tradeoff: open shelves require more styling discipline than drawers because everything on them is visible. 5. Open-Frame Console Table Slim legs and a minimal frame keep the floor visible, which makes small rooms feel larger than solid-sided furniture would. The right call for tight hallways and rooms where visual weight is the main concern. These typically have no storage beyond what you add with a basket or tray. 6. Mirrored or Glass Console Table Reflective surfaces bounce light and reduce the visual footprint of the table in the room. Useful in dark or small rooms where solid furniture would feel heavy. Practical downside: Mirrored and glass surfaces show every fingerprint and dust, so maintenance is higher than wood or metal. 7. Sculptural Console Table A sculptural console table is a statement piece first and a surface second. The base becomes the focal point, which means the styling on top needs to be minimal enough not to compete with it. If you buy a table for its base design and then pile objects on top, you’ve hidden the reason you bought it. Console Table vs. Side Table: What Is the Difference? These two furniture pieces solve entirely different problems and shouldn’t be confused when planning a room layout. Feature Console Table Side Table Shape Long and narrow Small, square, round, or rectangular Height 30–36 inches 18–24 inches (matches arm height) Placement Against walls, behind sofas, in halls Besides chairs, sofas, or beds Main use Display, storage, lighting, entryway surface Drinks, remotes, books are accessible from the seat The height difference is the clearest signal: a side table is designed to be reached from a sitting position. A console table is not. If you use a console table next to a chair, the surface is above arm height, and anything you place on it requires you to reach up or stand, which defeats the point. How to Choose the Right Console Table The sequence matters: get the dimensions right first, then decide on the function, and pick the style last. Reversing this order is how you end up with a beautiful table that blocks traffic or sits too low to see from a standing position. Measure the space before anything else. Width of the wall, depth of the clearance zone in front of it, and height of any nearby furniture the console will sit beside or behind. For hallways, confirm 36 inches of clearance remains after the table is in place. Match height to context. In an entryway or hallway, 30 to 34 inches is comfortable for most adults. Behind a sofa, match the sofa back height exactly or go up to 2 inches lower. Choose depth by traffic. Narrow hallway, 12 inches max. Entryway with space, 14 to 16 inches. Living room wall, up to 18 inches if clearance allows. Decide whether storage is functional or decorative. If you actually have things to store, get drawers or shelves. If storage is conceptual, you’ll end up with empty drawers and a cluttered surface anyway, just buy the clean open frame and use a basket below. Check weight capacity before buying. If you’re adding a heavy lamp, a stone vase, or a mirror leaning against the wall above, confirm the table is rated for that load. Most decorative console tables have surface limits of 30 to 50 pounds. How to Style a Console Table Most console tables end up over-styled because the format is long enough that it feels like it should be filled. The rule that actually works: choose one anchor piece, add height with something tall, and leave at least a third of the surface empty. Styling Move What It Does One anchor piece (lamp, mirror, large art) Establishes the focal point so everything else reads as supporting it Vertical element (tall lamp, tall vase) Counterbalances the horizontal length of the table A tray for small items Contains clutter, so it reads as intentional grouping, not scattered Mix of object sizes Creates visual rhythm — one large, one medium, one small reads better than three equal objects Basket or storage on the lower shelf Adds function and grounds the table visually Empty surface space Prevents the “cluttered shelf” look — negative space is part of the styling, not a failure to fill it One more specific note: if you’re adding a mirror above the console table, the bottom of the mirror should sit 4 to 6 inches above the table surface. Any closer and the mirror reads as resting on the table rather than hanging above it. Any higher and the proportional relationship between mirror and table breaks — they start to look like two separate things sharing a wall rather than one coherent arrangement. Console Table Mistakes to Avoid Too deep for the space. A 16-inch-deep table in a 36-inch hallway leaves 20 inches — that’s tight. Measure actual clearance, not available wall width. Too tall for the sofa. If the table tops the sofa back by more than 2 inches, the setup looks like a shelf bolted to the wall, not furniture that belongs together. Over-styling the surface. Ten small objects always look like a collection of things, not a styled surface. Edit to five maximum, and leave some surface empty. Ignoring the wall above. A blank wall above a console table makes the table look like it was put there because nowhere else worked. A mirror, artwork, or wall-hung fixture completes the arrangement. Using it as a TV stand. Most console tables are not rated for the weight of a television, and the surface height is wrong for viewing. TV-specific media consoles are built with load ratings and cable management that a decorative console table won’t have. Choosing style before dimensions. A console table that looks right in a showroom but doesn’t fit your clearance path is furniture that creates a problem rather than solves one. Frequently Asked Questions Can a console table go under a window? Yes, a console table can go under a window if it does not block airflow, curtains, or natural light. Choose a low, simple design that sits below the window frame. Keep styling minimal so the setup feels open instead of crowded or visually heavy. Should a console table touch the wall? A console table should usually sit close to the wall, but it does not always need to touch it. Leave a small gap if there are baseboards, outlets, or cords behind it. The table should still feel stable and aligned with the wall. Can I use a console table as a desk? You can use a console table as a light desk if the height, depth, and chair clearance feel comfortable. It works best for laptops, writing, or short work sessions. For daily office use, a proper desk is usually better because it offers more depth. What size lamp works on a console table? A lamp should feel balanced with the table and nearby wall decor. For most console tables, a medium-height lamp works best. Avoid lamps that are too wide, too tall, or too heavy. The base should leave enough room for a tray or decor. Can a console table work in a small apartment? Yes, a console table can work well in a small apartment because it adds function without taking much floor space. Use it as an entryway surface, slim storage piece, or sofa-back table. Choose a shallow style with drawers or shelves for better use. How do I stop a console table from wobbling? First, check that the floor is level and all screws are tight. Add felt pads or furniture levelers under uneven legs if needed. If the table is tall, narrow, or placed in a busy area, consider securing it to the wall for safety. What color console table should I choose? Choose a color that connects with furniture already in the room. Wood tones feel warm, black adds contrast, white keeps things light, and metal can feel modern. If the room is small, a lighter or open-frame design often feels less heavy. Can a console table replace a dresser? A console table cannot fully replace a dresser because it has less storage and shallower depth. It can hold small items, decor, or baskets, but it is not ideal for full clothing storage. Use it as a support piece, not primary storage. Final Verdict A console table works best when it solves a real problem, not when it simply fills a gap. I’d start by looking at where you need a slim surface, better storage, or a stronger visual anchor. Then check the depth, height, material, and placement before thinking about style. You now have the basics for using a console table in an entryway, hallway, living room, dining room, bedroom, bathroom, or awkward corner. You also know how different types, materials, and styling choices affect daily use. I hope this helps you choose with more confidence. Try measuring your space today, then share which console table setup fits your home best or needs.
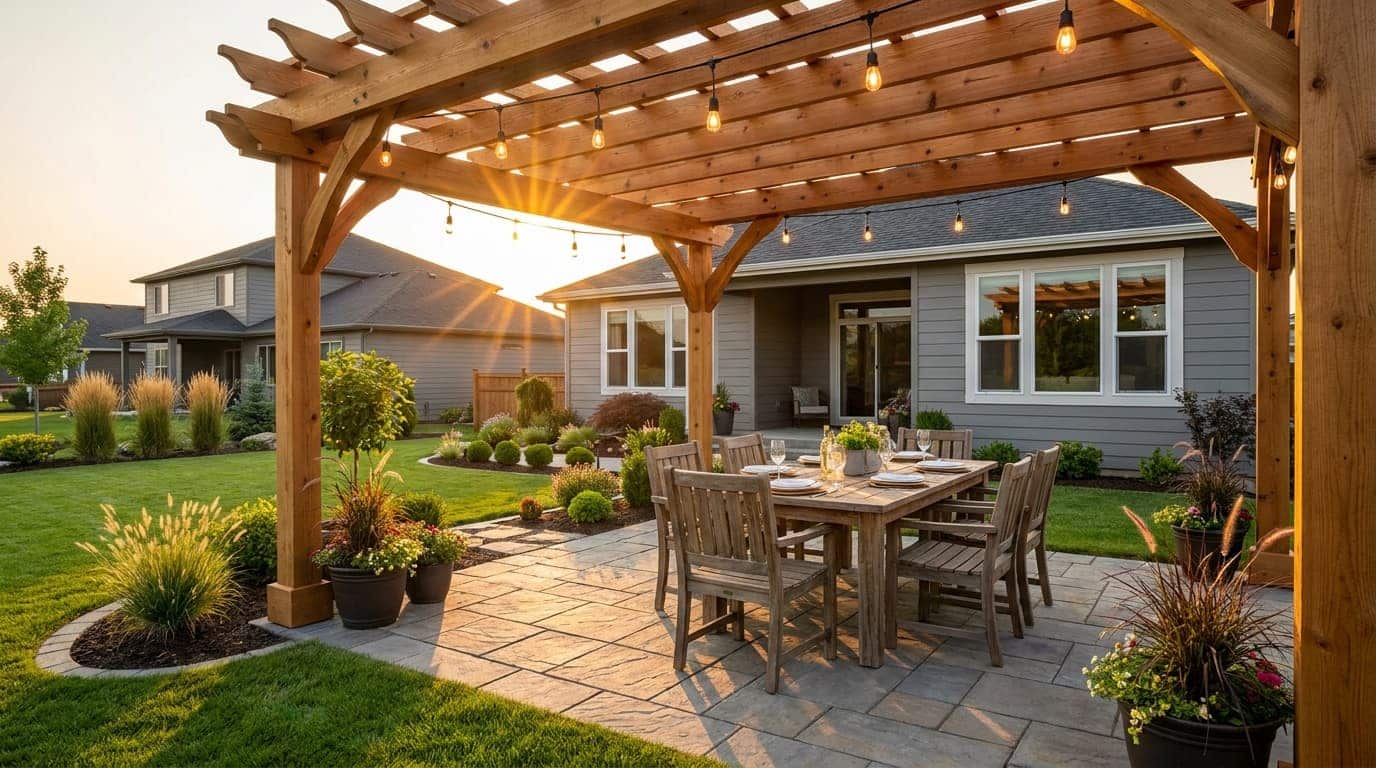
A DIY pergola is one of the best ways to upgrade your backyard without building a full outdoor room. It gives your patio, garden, or deck a clear focal point while adding shade, comfort, and style. If you enjoy weekend projects, learning how to build a pergola can be a smart and rewarding choice. The best part is that you do not need to be a professional builder to get started. With the right pergola plans, basic tools, strong materials, and careful measuring, you can build a structure that looks clean and lasts for years. Here you will find planning, materials, tools, building steps, costs, mistakes, and maintenance, so you can start your project with more confidence. Is Building a DIY Pergola Worth the Effort? A DIY pergola is worth it if you want to save money and control the final look. When you build it yourself, you can choose the size, wood type, stain, height, width, and extra features that fit your yard. You also avoid high labor costs, which makes this project a smart choice if you enjoy using tools and have some free time. Still, DIY is not right for every project. You may want to hire a professional if your pergola is large, attached to your home, or built on uneven ground. A pro can help with permits, safety, measurements, and heavy lifting. Before you decide, be honest about your skill level, tools, and time. A simple freestanding pergola is usually the easiest option. Planning Your Pergola Before You Build Good planning makes your pergola project easier and safer. Before buying lumber, decide on the location, size, style, and layout that best fit your yard. Choose the location: Pick a useful spot, like apatio, deck, garden path, or dining area. Check the sunlight so the space gets enough shade. Decide the size: Common sizes are 10×10 or 12×12 feet. Measure your furniture and leave room to walk around. Check permits: Some pergolas need local permits, especially attached ones or structures near property lines. Call utilities before digging. Pick the style: A freestanding pergola works in open yards. An attached pergola connects to your home and needs extra care. Once your plan is clear, the build feels smoother. A few smart choices now can help you avoid wasted materials, permit issues, and expensive fixes later. How to Build a DIY Pergola Step by Step Before you start building, understand the full process from layout to final checks. These steps follow the video and keep the project clear, safe, and organized. Materials and Tools Needed Before you start building, gather all the materials and tools you need in one place. This helps you avoid delays, incorrect purchases, and extra trips to the store. Item What You Need Quantity Purpose Lumber 6×6 posts, beams, rafters, and cross slats As per the plan Builds the main pergola frame and roof pattern Anchoring supplies Concrete mix, gravel, post anchors, or metal post bases As needed Secures the pergola and keeps it stable Fasteners and hardware Outdoor screws, bolts, washers, brackets, and joist hangers As needed Connects posts, beams, and rafters strongly Measuring tools Tape measure, level, and speed square 1 each Helps with accurate layout, spacing, and straight cuts Cutting and drilling tools Circular saw and drill 1 each Cuts lumber and fastens pieces together Digging tools Post hole digger or auger 1 Digs holes for pergola posts Holding and tightening tools Clamps and socket wrench 1 set Holds boards in place and tightens bolts Access and safety gear Ladder, gloves, eye protection, and hearing protection 1 set Helps you work safely while cutting and installing With the right lumber, hardware, tools, and safety gear, your DIY pergola project becomes easier, safer, and more organized from start to finish. Step 1: Plan the Size and Layout Plan the size of your pergola before starting any work. In the video, the builder chose a 12×20 ft pergola to fit neatly within the patio slab. He wanted the structure to remain within the paver area so it would look custom and balanced. Marking the layout first helps you avoid spacing mistakes before digging, cutting, or buying final materials. Step 2: Remove Pavers and Mark Footings Remove only the pavers needed for the post footings. The builder traced around the concrete forms so he did not cut away too much of the paver grid. This helped keep the patio clean and made it easier to place the surrounding pavers back later. Careful marking also keeps each footing in the right spot. Step 3: Dig Footing Holes Below Frost Line Dig each footing hole deep enough to pass the frost line. In the video, the builder first used an auger, then widened the holes by hand because the tubes were larger. This step matters because shallow footings can shift during winter freeze-and-thaw cycles. Strong footings help keep the pergola stable for years. Step 4: Add Gravel and Adjust Spacing Add gravel at the bottom of each footing hole to improve drainage. The builder also had to adjust the post spacing because his boards were not long enough for the planned overhang. This is a good reminder to check lumber lengths before concrete work. An early layout fix can prevent bigger problems later. Step 5: Pour Concrete and Set Anchors Pour concrete into the footing forms and set the metal post anchors while the mix is still wet. The builder used a string line to keep all anchors facing the same direction. This helps the posts line up cleanly when installed. Take time here because crooked anchors can make the rest of the pergola harder to build. Step 6: Cure Footings and Seal Lumber Let the concrete cure overnight before installing the posts. While waiting, seal or stain the lumber before assembly. The builder used a transparent wood sealer to protect the boards and avoid drips on the patio later. Pre-sealing also makes it easier to coat edges and surfaces before the lumber is raised overhead. Step 7: Cut and Install Posts Choose your final pergola height before setting the posts. The builder started with 12-ft posts but cut them down to 10 ft because they looked better with the house. Each post was placed into its anchor, checked with a level, and secured. Level anchors make this step much easier and help the frame stay straight. Step 8: Install Main Beams Cut decorative ends from the main beams for a cleaner custom look. The builder used large 2×10 beams and secured them with strong 5-inch lag bolts. These beams form the main support layer of the pergola. Make sure they are straight, level, and tightly fastened before adding the upper rafters. Step 9: Add Cross Rafters and Top Layer Install the 2×6 cross rafters across the main beams, spacing them evenly. In the video, the spacing was around 9–10 inches apart for shade and style. Then add the final 2×4 top layer. Leave small gaps where boards meet so the wood can expand and contract without buckling later. Step 10: Add Braces and Final Check Add decorative braces between the posts and beams using long lag bolts. These braces add detail and can help reduce side-to-side movement. Once they are installed, tighten all hardware, check alignment, and inspect the full pergola. In the video, the total project cost came to around $1,500, including lumber, concrete, hardware, and stain. Once the pergola is built, review every connection, post, and board. A careful final check helps your structure stay strong, clean, and ready to use. DIY Pergola Cost Breakdown Building a DIY pergola can fit many budgets, from simple backyard projects to large custom outdoor spaces. Understanding the main costs helps you plan smarter before buying materials. Pergola Cost Type Estimated Cost Best For Main Cost Drivers Basic DIY Pergola $800–$1,500 Small pergolas and simple designs Pressure-treated lumber, basic hardware, no add-ons Mid-Range DIY Pergola $1,500–$3,000 10×10 or 12×12 pergolas Better wood, stronger hardware, stain or sealer Large DIY Pergola $3,000–$5,000 Bigger backyard pergolas Longer beams, more rafters, extra supports Professional Pergola Build $3,000–$8,000+ Large, attached, or complex builds Labor, permits, design work, structural needs Extra Add-Ons $100–$1,000+ Comfort and style upgrades Lights, curtains, privacy screens, shade covers, plants Your final pergola cost depends on the size, wood type, hardware, and extra features you choose. A clear budget plan helps avoid overspending and unexpected project delays later Pergola Design Ideas for Your Backyard After the structure is built, design details can make your pergola feel like a real outdoor living space. Keep the style simple and useful. 1. Pergola With String Lights String lights are one of the easiest ways to upgrade a pergola and instantly change its mood. When placed along beams, rafters, or wrapped around posts, they create a soft, warm glow that works well for evenings. Choose outdoor-rated, weatherproof lights so they last longer in rain and heat. Secure the wiring neatly to avoid sagging or safety issues. This setup is perfect for dinners, casual seating, or relaxing nights outside. 2. Pergola With Climbing Plants Climbing plants bring a natural, living feel to your pergola while also improving shade over time. Popular choices include wisteria, jasmine, roses, and grapevines because they grow well and look attractive. However, it’s important to match plants with your local climate and ensure they don’t become too heavy for the structure. Regular pruning is needed to control growth and prevent damage. Over time, they can turn your pergola into a green, shaded retreat. 3. Pergola With Curtains Outdoor curtains add both style and function by making your pergola feel more private and comfortable. They help block harsh sunlight, reduce wind, and create a cozy, enclosed space when needed. Always use weather-resistant fabric that can handle outdoor conditions without fading or tearing. Strong rods or cables are necessary to support movement. This setup works especially well for patios, seating corners, or hot tub areas where privacy and shade are important. 4. Modern Minimal Pergola A modern minimalist pergola focuses on clean structure, simple lines, and uncluttered design. Instead of heavy decoration, it relies on shape, proportion, and material finish. Dark wood stains or neutral paint tones often work best for this style. Furniture and lighting should stay simple and functional to maintain a balanced look. This design fits well with contemporary homes and creates a calm, organized outdoor space without feeling overly decorated or busy. How to Maintain Your DIY Pergola A DIY pergola needs simple care to stay strong, clean, and good-looking. Regular cleaning and quick checks can help prevent damage over time. Clean it regularly: Wash the pergola once or twice a year with mild soap, water, and a soft brush. Remove debris: Clear leaves, dirt, vines, and buildup from the top so moisture does not sit on the wood. Check for damage: Inspect posts, beams, bolts, and rafters for cracks, rot, rust, or loose fasteners. Tighten hardware: Tighten loose bolts, screws, and brackets as needed to keep the structure stable. Reseal the wood: Apply stain or sealer when the wood looks dry, faded, or weather-worn. Trim plants: Cut back climbing plants before they get too heavy or start pulling on the pergola. Control water exposure: Keep sprinklers from spraying the posts every day to reduce moisture damage. A little maintenance helps your DIY pergola last longer and look better. If you care for it annually, you can avoid more extensive repairs later. Common Pergola Building Mistakes to Avoid Small mistakes can make yourDIY pergola weaker, uneven, or harder to maintain. Knowing what to avoid helps you build safer and cleaner from the start. Skipping permit checks: Always check local permits, property lines, and utility locations before digging. Skipping this can lead to fines, delays, or forced changes later. Using weak posts: Thin posts may wobble under weight or wind. For most backyard pergolas,6×6 posts are stronger than 4×4 posts. Poor post depth: Shallow posts can shift after rain, frost, or strong winds. Follow local depth rules to create a stable base. Uneven rafter spacing: Mark rafter positions before installing them. Even spacing gives your pergola a cleaner roof pattern and better finished look. Avoiding these common mistakes keeps your pergola stronger, safer, and better looking. A little prep before building can save time, money, and repairs later. Frequently Asked Questions Can you build a pergola on grass? Yes, you can build a pergola on grass, but the posts still need strong footings. Do not place posts directly on soil. Use concrete footings or approved anchors to keep the structure level, stable, and protected from ground moisture. What direction should pergola rafters face? Pergola rafters should usually run in the direction that gives the shade you want most. If you need afternoon shade, first study how the sun moves across your yard. The right rafter direction can make the space more comfortable. Can a pergola handle strong winds? A pergola can withstand wind if it is well anchored, built with strong posts, and secured with proper hardware. Open roofs allow some wind to pass through, but weak footings or loose connections can make the structure unsafe during storms. Can you add a roof to a pergola later? Yes, you can add a roof later, but the pergola must be strong enough to carry the extra weight. Solid panels, shade covers, or clear roofing may need stronger framing. Always check the structure before adding anything heavy. How long does a wooden pergola last? A wooden pergola can last many years if it is built with outdoor-rated lumber and maintained well. Regular cleaning, sealing, and hardware checks help extend its life. Weather, moisture, insects, and sun exposure all affect how long it lasts. Final Thoughts A pergola can turn a plain outdoor spot into a space you actually want to use. I like that you can plan it around your yard, budget, and skill level instead of forcing a design that does not fit. You now know how to choose the right plan, gather materials, lay a strong foundation, build the frame, avoid common mistakes, estimate costs, and maintain it over time. These steps matter because a DIY pergola should not only look good, but also stay safe and useful for years. When you take your time and follow each part carefully, the whole project feels easier. Try these tips in your own build, and check out more related blogs for extra ideas.
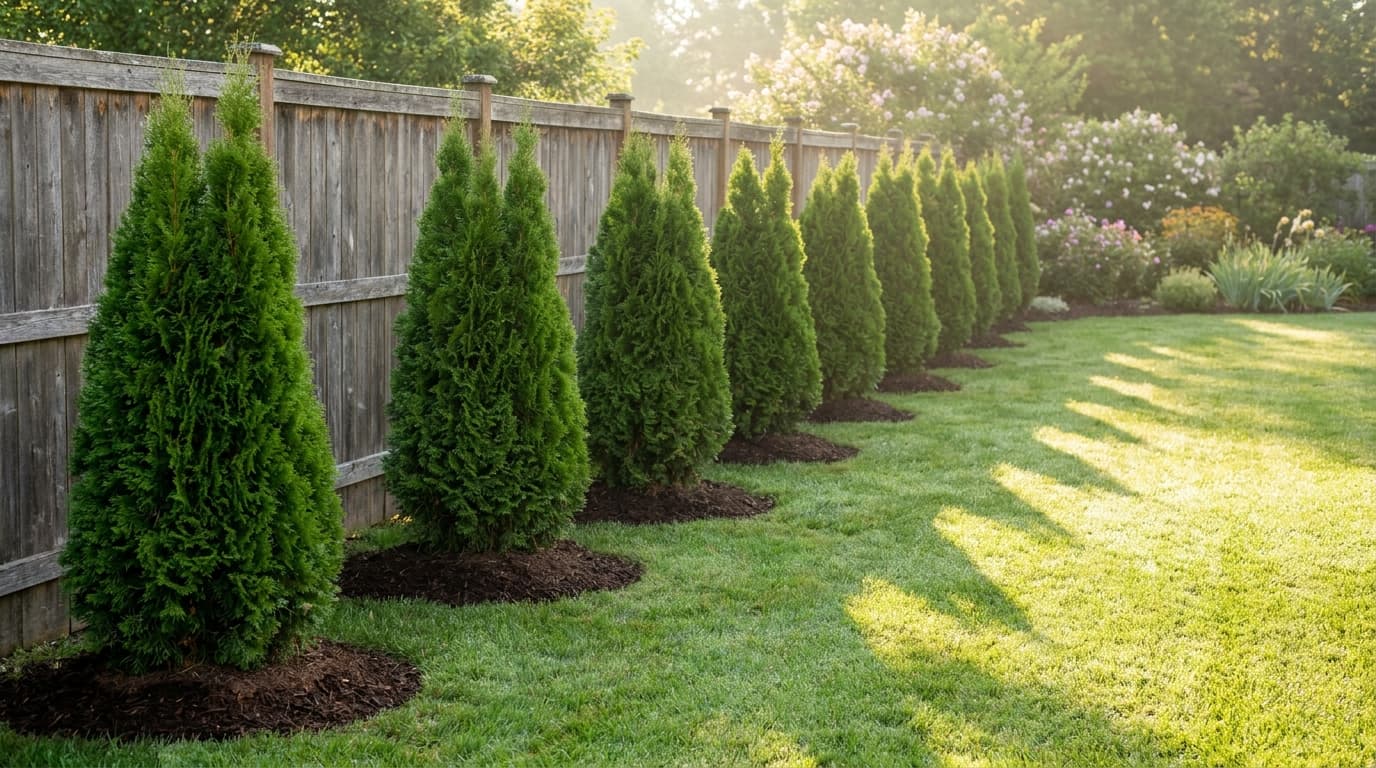
Emerald Green Arborvitae spacing is the one decision that determines whether a privacy row holds up or turns into a patchy, overcrowded mess five years from now. Get it wrong at planting, and you’re either pruning constantly or filling gaps with expensive replacement trees. Get it right, and these things run themselves. The short answer: 2 to 3 feet apart for a tight privacy hedge, 3 to 4 feet for a balanced screen, and 5 to 6 feet for individual specimens. But the right number depends on your yard size, the goal of the planting, and how much airflow the row needs in the long term. What follows covers each scenario specifically. Botanical Name Thuja occidentalis ‘Smaragd’ Mature Height 10 to 15 feet Mature Width 3 to 4 feet Growth Rate 6 to 9 inches per year (slow to moderate) USDA Hardiness Zones Zones 3 to 7 Soil pH 6.0 to 8.0, well-drained Sunlight Full sun to partial shade (6+ hours direct sun preferred) Hedge Spacing 2 to 3 feet center-to-center Screen/Windbreak Spacing 3 to 5 feet center-to-center Individual Specimen 5 to 6 feet from other plants or structures What Is Emerald Green Arborvitae? Emerald Green Arborvitae is a narrow, upright evergreen, with the botanical name Thuja occidentalis ‘Smaragd, native to eastern North America in its parent species form and reliably cold-hardy through USDA Zone 3. That cold tolerance is part of why it shows up on so many property lines across the upper Midwest and Northeast. It handles hard winters without the dieback you’d see from something like Leyland cypress in a zone-4 climate. At maturity, it reaches 10 to 15 feet tall and 3 to 4 feet wide with a consistent pyramidal form. That narrow footprint is what makes it useful for tight situations. A 4-foot-wide tree planted 3 feet from a fence gives you a screen without eating up the whole yard. Growth rate runs 6 to 9 inches per year in good conditions. It’s not fast, which means spacing mistakes compound slowly, but they still compound. Why Emerald Green Arborvitae Spacing Is the First Decision Before the first hole is dug, Spacing affects three practical things: how quickly the row fills in, how much air moves through the hedge, and whether each tree has enough room to keep its lower branches or start declining from the inside out. Tight spacing gets you coverage faster. It also puts root systems in direct competition and cuts airflow down the center of the hedge where moisture sits longest. Even fill-in requires consistent spacing: Trees planted at uneven intervals don’t meet the same way. Some sections close fast, others stay open for years. Measure center-to-center, not branch tip to branch tip. Airflow prevents inner browning: Dense Thuja foliage holds moisture. Without airflow, the inner canopy browns out. This isn’t cosmetic; once the inner branches die back, they don’t recover. Root competition slows the row: At tighter spacing, expect more pruning and closer watering attention. The trees that lose that competition thin out. You end up with an uneven row that needs replacement trees mid-hedge. Structure integrity over time: Emerald Green holds its pyramidal shape without heavy pruning when given the right spacing. Crowd it, and you spend every spring cutting it back to keep the form. Note: Year one after planting, expect minimal height gain. These trees put energy into root development first. If yours aren’t growing much upward in the first 12 months, that’s normal — not a spacing or soil failure. By year two, with consistent watering and good drainage, height gain becomes visible. How Far Apart to Plant Emerald Green Arborvitae by Use Case The right spacing changes based on what the planting is supposed to do. A privacy hedge and an open windbreak have different requirements, and treating them the same is the most common mistake I see. 1. Privacy Hedge: 2 to 3 Feet Apart For a solid privacy screen, plant center-to-center at 2 to 3 feet. At that spacing, branches meet within 3 to 4 years, and the row closes into a continuous wall. I’d use 3 feet as the default, close enough to get coverage without pushing the trees into each other’s root zones. Go tighter than 2 feet, and you’re asking for pruning problems and inner dieback as the hedge matures. At close spacing, plan to trim once a year to keep the hedge tight and maintain airflow. 2. Windbreak or Open Screen: 4 to 5 Feet Apart A windbreak doesn’t need to be a wall. At 4 to 5 feet apart, each tree has room to develop a full canopy without fighting its neighbors. Coverage takes longer, figure 5 to 7 years before the row reads as a solid screen, but the trees will be healthier and need less maintenance once established. This spacing also works along long property lines where cost per tree matters; you’re using fewer trees to cover the same run. 3. Standalone Specimen: 5 to 6 Feet From Other Plants or Structures As an individual specimen, 5 to 6 feet of clearance from neighboring plants, fences, and walls gives the tree room to hold its natural pyramidal shape without trimming. Crowd a standalone specimen, and it starts growing asymmetrically toward the light; the side pressed against a fence or structure stays thin while the open side fills out. That’s hard to correct without heavy pruning, which usually makes it worse. 4. Foundation Planting: At Least 3 Feet From Walls The minimum clearance from a wall or foundation is 3 feet, and that’s tight. A mature Emerald Green runs 3 to 4 feet wide, which means at 3 feet from the house, the outer branches are just clearing the siding when the tree is fully grown. More clearance is better if the access corridor allows it. Also check for utility vents, AC units, and basement windows. Planting too close creates structural moisture problems over time, the same kind that drives up foundation repair costs years down the line. Blocking airflow to those areas causes maintenance issues unrelated to the tree itself. Matching spacing to the intended use of the planting removes most of the guesswork. The spacing numbers above are starting points; the next section refines them by yard type. Emerald Green Arborvitae Spacing by Yard Size Yard dimensions add another variable. A 4-foot spacing that works perfectly along a 200-foot property line is too generous for a 20-foot side yard. Here’s how to adjust. 1. Small Backyard: 3 Feet Apart In a small backyard, 3 feet center-to-center balances privacy and airflow without the row taking over the space. It fills in well near patios and seating areas within 3 to 5 years. Don’t go tighter than this in confined spaces — the trees won’t have enough root room and the inner canopy will suffer. 2. Narrow Side Yard: 2 to 3 Feet Apart Side yards make this tree earn its keep. At 2 to 3 feet apart, a row fits into corridors where most plants can’t function as a screen. Use 3 feet where the run is long enough to allow it. At 2 feet, expect to trim once a year minimum; the hedge needs management to stay healthy at that density. Also keep the row pulled away from both the fence and the house wall by at least 18 inches so you can walk the corridor when you need to. 3. Medium Backyard: 3 to 4 Feet Apart Three to 4 feet is the most balanced range for a mid-sized yard. It gives enough density for a real privacy screen while keeping the row healthy over time. Trees at this spacing need less regular trimming than a tight 2-foot hedge and fill in fully within 5 to 7 years. For yards where the hedge sits behind a patio and deck ideas layout, this is typically the spacing that lets the seating area breathe while still delivering solid coverage. 4. Large Yard or Open Property: 4 to 5 Feet Apart On large properties, 4 to 5 feet gives each tree enough space to develop fully without competing. The row reads as a softer, more natural screen rather than a clipped hedge. Along long runs, this spacing also reduces cost — you’re buying fewer trees to cover the same footage while getting a healthier result long-term. 5. Front Yard or Accent Areas: 5 to 6 Feet Apart In front yards or accent plantings where the tree is part of the visual design rather than a privacy barrier, give each one 5 to 6 feet of clearance. At this spacing, each tree holds its distinct pyramidal shape and contributes to the composition as an individual specimen rather than disappearing into a hedgerow. Single Row vs. Staggered Row: Which Layout Delivers Better Coverage Most residential privacy hedges use a single row. Staggered rows are better when you have the yard depth and need to close gaps faster without pushing the trees closer together. Layout Recommended Spacing Best For What to Expect Single row 2 to 3 ft apart Tight privacy hedge Fuller screen faster; requires annual trimming Single row 3 to 4 ft apart Balanced privacy screen Healthy spacing; fills in over 5 to 7 years Single row 4 to 5 ft apart Open screen or windbreak Natural look; minimal trimming needed Staggered (2 rows) 3 to 4 ft in each row Maximum gap coverage Layered screen; closes sight lines faster than single row Staggered (2 rows) 3 to 4 ft between rows Wider planting footprint Needs 6 to 8 ft of total planting depth A staggered row offsets the gaps in the front row with trees in the back row. The result is faster visual coverage without requiring the tight spacing that causes inner dieback. The trade-off is planting depth: you need at least 6 to 8 feet of available yard space to run two rows without crowding the fence or wall behind them. Growth Rate by Year: What to Expect as the Hedge Establishes Slow growth in years one and two is normal. These trees front-load their energy into root development, which means the visible gains come later — but they come steadily once the root system is established. Year After Planting Approx. Height Approx. Width What to Expect At planting 2 to 5 ft 1 to 2 ft Young, narrow; not yet filled out Year 1 2.5 to 5.5 ft 1 to 2 ft Root establishment phase; minimal height gain Year 2 3 to 6 ft 1.5 to 2.5 ft Starts filling out with consistent watering Year 3 3.5 to 7 ft 2 to 3 ft Begins forming a visible screen Year 5 5 to 8.5 ft 2.5 to 3.5 ft Dense; reads as an established hedge Year 10 8 to 12 ft 3 to 4 ft Full privacy screen at proper spacing Mature 10 to 15 ft 3 to 4 ft Upright, dense, evergreen year-round The jump from year 3 to year 5 is usually when spacing decisions become visible. Trees planted too close start competing visibly at this stage — inner branches thin out, the base of the hedge opens up. Trees with adequate spacing continue filling in evenly from base to top. Emerald Green vs. Green Giant and Techny: Choosing the Right Tree Not every privacy hedge calls for Emerald Green. If you have the yard space and want faster coverage, other arborvitae varieties outperform it. The comparison below covers what each option actually delivers at maturity. Variety Mature Size Growth Rate Spacing Need When to Choose It Emerald Green 10–15 ft tall, 3–4 ft wide 6–9 in/year 2–4 ft for hedges Limited yard space; formal, narrow hedge; zones 3–7 Green Giant 30–50 ft tall, wider footprint 3–5 ft/year 6–8 ft minimum Large property; fast coverage needed; zones 5–8 Techny 15–20 ft tall, wider than Emerald Moderate 4–6 ft Cold climates; denser hedges; more horizontal space available Emerald Green is the right call when space is tight and the hedge needs to stay manageable without constant trimming. Green Giant covers ground faster but eventually outgrows residential yards unless it’s kept pruned — and at 30 to 50 feet mature height, that becomes a real maintenance commitment. Techny splits the difference for cold-climate plantings where you need something hardier and denser but can give the row more lateral room. How to Lay Out and Plant the Row Correctly Layout is where spacing decisions either hold or fall apart. A marked row that looks straight on paper can still end up uneven if the center-to-center measurements drift. Here’s how to do it correctly from first stake to final mulch. Decide spacing before buying trees: Know whether this is a 2-foot hedge or a 4-foot screen before purchasing. Buying trees and then figuring out placement leads to compromised spacing to make the count work. Mark center-to-center, not tip-to-tip: Young trees vary in branch spread. Measure trunk center to trunk center — that measurement stays consistent regardless of how full the nursery stock is. Set the first and last stake, then fill in: Anchor both ends of the row, run a string line between them, then place intermediate stakes at the correct interval. Pull the line tight — it’s the only way to keep the row straight. Check clearance from structures before digging: Walk the marked line and confirm distance from fences, walls, sidewalks, driveways, and property lines. Adjusting stakes costs nothing. Moving a planted tree is expensive and stressful to the root system. Review from multiple angles: Walk away from the marked row and look at it from the patio, from the neighbor’s side, and from the house. Spacing errors that don’t show up from one angle are obvious from another. Dig wide, not just deep: The hole should be twice as wide as the root ball but no deeper than it — the top of the root ball should sit level with the surrounding ground. Setting it too deep is the single most common planting mistake and leads to slow decline over 2 to 3 years. Water immediately and deeply: Fill the hole, then water until the soil is saturated around the full root zone. For the first 48 hours after planting, these trees need consistent moisture at the root level to begin establishment. Don’t rely on rain for that first watering. Mulch correctly: Two to 3 inches of mulch over the root zone keeps moisture in and soil temperature stable. Keep it a few inches away from the trunk — mulch piled against the bark traps moisture and invites rot and pest damage. Pro Tip: For a staggered double row, set the back row first, then place the front row stakes in the gaps. It’s much easier to adjust the front row position relative to established back stakes than to try to offset both rows simultaneously from a center line. Planting and Care After the Row Is in the Ground Spacing gets the hedge off to the right start. What happens in the first two growing seasons determines whether it actually thrives. Sunlight requirement: Full sun means 6 or more hours of direct light daily. Partial shade works, but hedges in full sun grow denser and hold that deep emerald color better through winter. A row planted along a north-facing fence that never sees direct afternoon light will be thin by comparison. Soil pH and drainage: These trees want soil pH between 6.0 and 8.0 — they’re not picky, but they won’t tolerate standing water. If the planting area drains poorly, amend with coarse material or regrade before the trees go in. Planting into wet soil and hoping it drains is how you end up with root rot two years later. Watering schedule: Deep, infrequent watering beats frequent shallow watering every time. Soak the root zone thoroughly, then let the top few inches dry before watering again. During the first growing season, that typically means once or twice a week in dry weather. Pruning frequency: At 2 to 3 foot spacing, plan for one annual trim in early spring to keep the hedge tight and maintain airflow. At 3 to 5 foot spacing, light trimming every 2 to 3 years is usually enough to maintain the pyramidal shape. Winter prep: Water deeply in late fall before the ground freezes. Dry roots heading into winter is the most common cause of winter burn — the foliage desiccates because the frozen root zone can’t move water to the canopy. Heavy snow: Brush accumulation off branches before the weight bends them. A limb that stays bent under snow for a week rarely springs fully back. Warning Signs to Watch, and What They Actually Mean Most problems with Emerald Green Arborvitae come back to one of three causes: water, airflow, or spacing. Here’s what each warning sign is telling you. Problem Signs Likely Cause Fix Browning foliage Brown tips or patches Dry soil or winter burn Water deeply; water before first freeze Yellowing foliage Pale or yellow growth Overwatering or poor drainage Let soil dry; improve drainage Thin inner canopy Sparse inside branches Too-close spacing, reduced airflow Prune lightly; consider removing one tree from the row if chronic Bagworms Small hanging bags on branches Pest infestation Hand-remove bags in fall/winter; treat in late spring when larvae are young Spider mites Fine webbing, dusty or dull foliage Hot, dry weather Spray foliage with strong stream of water; inspect weekly in dry spells Root rot Wilting; slow, ongoing decline Saturated soil, too-deep planting Improve drainage; avoid overwatering Winter burn Brown outer foliage in spring Cold wind, dry roots before freeze Late fall deep watering; windbreak protection for exposed rows Snow damage Bent or split branches Heavy wet snow accumulation Brush off snow gently with a broom before it sets The one on that list that spacing directly controls is thin inner canopy. If the inner branches on your established hedge are dying back, it’s an airflow problem. You can prune to open the canopy, but if the spacing is too tight, that’s a band-aid. The long-term fix is giving the row more room — which in an established planting sometimes means removing every third tree and accepting a temporary gap that fills in over 2 to 3 years. Common Planting Mistakes and How They Play Out Over Time The mistakes below aren’t immediately obvious — they show up 3 to 7 years after planting, which is why they keep getting made. Planting too close based on nursery size, not mature width: A 3-foot-wide nursery tree planted 2 feet from its neighbor looks fine at installation. At year 5, when both trees are 3.5 feet wide, the root zones are in full competition and the inner canopy is dying. Measuring branch tip to branch tip: Young trees come in varying sizes from the nursery. Measuring tips means the spacing varies with the size of individual trees rather than staying consistent. Trunk center to trunk center is the only reliable measurement. Planting flush against a structure: A tree 12 inches from a fence looks natural as a 2-foot sapling. At maturity, it can’t develop evenly and needs constant trimming to keep it from growing into the fence. Poor drainage and hoping for the best: These trees look fine in the first year in wet soil. Root rot takes 2 to 3 years to manifest, and by then the tree is usually too far gone to save. Address drainage before planting. Inconsistent watering in year one: The establishment period is when these trees are most vulnerable. Letting the soil dry out completely during the first summer — even once — can set back establishment by a full season. Mulch against the trunk: A mulch volcano looks tidy. It’s slowly killing the root collar. Keep mulch 3 to 4 inches away from the bark. Landscaping Ideas That Put the Spacing to Work Emerald Green Arborvitae does more than one job in a yard, and the spacing approach changes slightly depending on which role you’re asking it to play. 1. Living Privacy Wall Behind a Patio Behind a patio, space these trees at 2.5 to 3 feet for a full screen within 3 to 4 years. Keep the row back at least 4 feet from seating areas so the branches don’t encroach into the usable space as the hedge matures. If the surface underneath is still undecided, the stamped concrete vs pavers comparison is worth reading before you lay anything permanent. 2. Entry Framing Along a Walkway or Gate One tree on each side of an entry or gate works best with matching specimens from the same nursery lot — size variation between the two flanking trees becomes more obvious as they mature. Position them so their eventual 3- to 4-foot width doesn’t crowd the walkway clearance. 4. Green Backdrop for a Perennial Bed At the back of a perennial bed, 3 to 4 feet apart gives enough density for a solid backdrop without overwhelming the plantings in front. The year-round green structure keeps the bed from looking bare in winter when the perennials are dormant. 5. Corner Softening in a Small Backyard A group of three in a corner, planted in a loose triangle with 4 to 5 feet between them, softens the hard geometry of a fence corner without becoming a full hedge. This works in smaller yards where a full row isn’t needed, but the corner needs vertical interest. 6. Driveway Border Along a driveway, keep the row at least 4 feet from the pavement edge. Car doors open 2 to 3 feet and drivers need clearance to step out. A tree planted 18 inches from the concrete is a problem within 3 years. The modern driveway ideas guide covers how surface material and border plantings work together, which is worth considering if the driveway itself is also part of the project. Frequently Asked Questions These are the questions that come up most often once someone is standing in the yard with a row staked out and a flat of trees waiting to go in. How far apart should I plant emerald green arborvitae for privacy? Two to 3 feet center-to-center for a solid privacy hedge. At 2 feet, the row closes fastest but needs annual trimming. At 3 feet, it takes a bit longer but stays healthier with less maintenance long-term. How many emerald green arborvitae do I need for 100 feet? At 3-foot spacing, plan for 34 trees. At 4-foot spacing, 26 trees. At 5-foot spacing, 21 trees. Always add 10% to account for nursery variability and any trees that don’t establish. Do emerald green arborvitae grow better with closer or wider spacing? Wider spacing produces healthier individual trees with better airflow and root development. Closer spacing produces faster privacy but requires more maintenance and risks inner dieback as the hedge matures. Can emerald green arborvitae be planted 2 feet apart? Yes, but expect to trim once a year minimum. At 2 feet, the hedge fills in fast, but the inner canopy needs airflow management to stay healthy. It’s the right call for tight side yards where faster coverage matters more than long-term ease. How close to a fence can I plant emerald green arborvitae? Keep at least 2 to 3 feet between the trunk and the fence. At maturity, the 3- to 4-foot canopy width needs somewhere to go. A tree pushed against a fence grows asymmetrically and becomes difficult to maintain without heavy pruning. How long does it take for emerald green arborvitae to fill in? At 2 to 3 foot spacing, a privacy screen reads as solid around year 3 to 4. At 4 to 5 foot spacing, expect 5 to 7 years. Full maturity at either spacing is a 10-year picture. Can emerald green arborvitae be planted in clay soil? Not without amendment. Clay holds water, and these trees need drainage. Amend with coarse material and organic matter before planting, or build a slightly raised planting bed. Planting into heavy clay without addressing drainage leads to root rot within a few years. Are emerald green arborvitae deer resistant? No. Deer browse Thuja heavily in winter when other food is scarce. Young trees under 4 feet are most vulnerable. Use deer fencing or a repellent spray from November through March if deer pressure is high in your area. Final Verdict If the planting area is tight, the yard is a standard residential lot, and the goal is a hedge that stays manageable without turning into a maintenance project, Emerald Green Arborvitae spacing at 3 feet center-to-center is the most reliable starting point. It delivers solid privacy coverage, keeps root competition at a reasonable level, and produces a hedge that doesn’t require annual trimming to prevent it from overrunning the space. For yards with more room and less urgency around coverage speed, push to 4 feet and let these trees develop at their own pace. The single most important step before anything goes in the ground: set your stakes, measure center-to-center, and walk the line from a distance before you dig. Adjusting a stake takes 30 seconds. Moving a planted tree takes a full day and sets the root system back by a season.
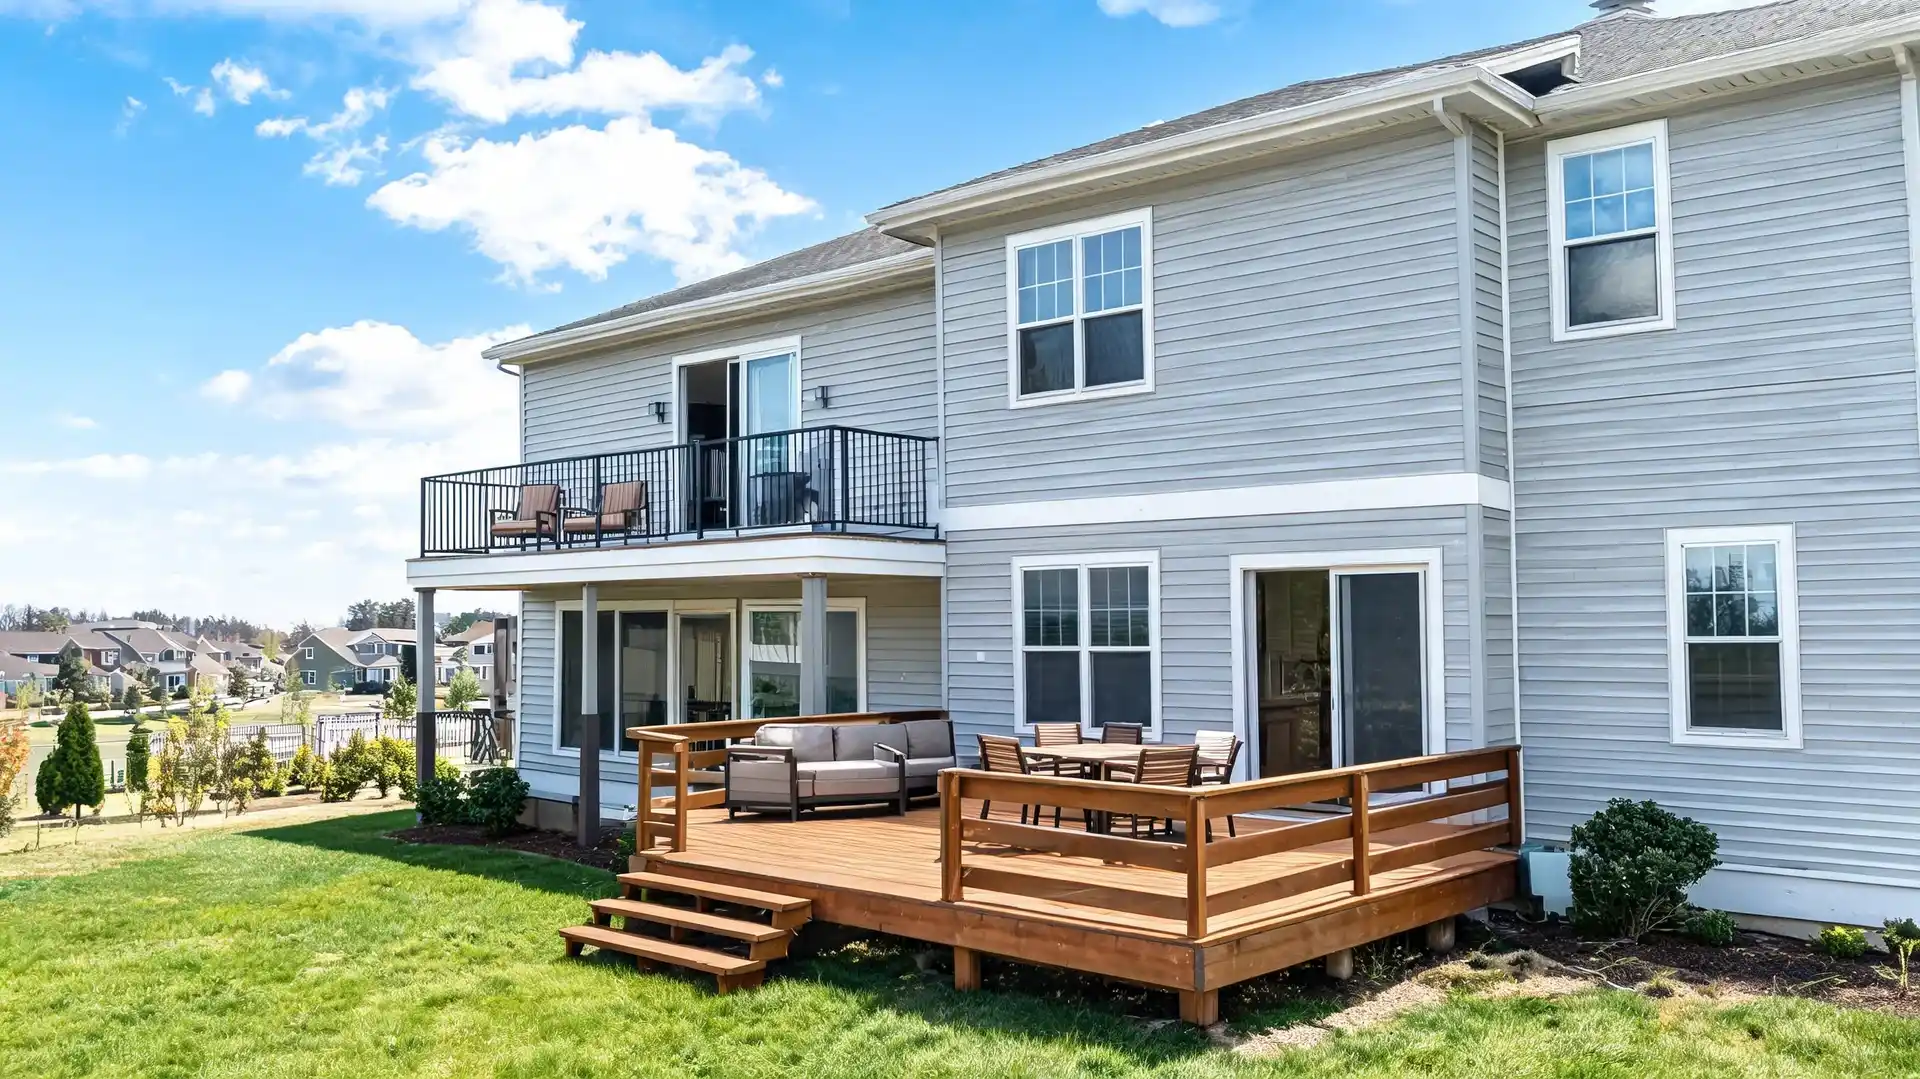
Structure Deck Balcony Location Ground level or slightly raised, attached to back or side of home Second floor or higher, projecting from exterior wall Access Ground-floor door, yard stairs, or direct from backyard Interior room only, bedroom, living room, or upper hallway Typical Size 200–400 sq ft 40–80 sq ft Support Posts, beams, and concrete footings anchored to the ground Cantilevered from building frame or supported by columns Avg Cost $4,340–$12,589 installed $8,000–$25,000 installed Maintenance Surface sealing, board checks, drainage Waterproofing, railing checks, wall-connection seal Best For Groups, grilling, outdoor dining, yard access Private sitting, views, upper-floor rooms If you care about how your home feels outside, the words you use matter more than you may think. I have seen people point to an upper-floor platform and call it a deck, while others call the same thing a balcony. That small mix-up can change the quote, the permit, and the safety checks. So let’s make this simple. If you are planning a new outdoor space, updating an old one, or just trying to understand what your home already has, this balcony vs deck comparison will help. I will walk you through how each one is built, where it sits, how you use it, what can affect cost, and how it compares with patios, porches, verandas, and other outdoor spaces. By the end, you will know what to call your space and how to plan it with more confidence. Cost Note: Figures in this article are estimates. Actual costs vary significantly by region, contractor, materials, and project scope. Always get at least three quotes before committing to any project above $1,000. What Is a Deck? A deck is a flat outdoor platform usually attached to the back or side of a home. It sits at or slightly above ground level, though homes on sloped lots may have decks raised 8 to 12 feet. It is still a deck when it uses posts, beams, and footings and connects through a ground-floor door or stairs. Decks are common in single-family homes because they provide open access to the yard and enough space for a grill, dining table, chairs, and guests. They are often built from pressure-treated wood, composite decking, cedar, or hardwood. The average deck costs about $8,250, with most projects ranging from $4,340 to $12,589. Pressure-treated wood runs $25 to $40 per square foot installed, while composite decking runs $20 to $45 per square foot for material alone. Best for: Grilling, large seating groups, outdoor dining, yard access, and family use. Common deck types: Attached decks, freestanding decks, ground-level decks, raised decks, multi-level decks, wraparound decks, and rooftop decks. What Is a Balcony? A balcony is a small, elevated platform projecting from the exterior wall of a building, typically on the second floor or higher. It is reached from inside, usually through a bedroom, living room, or hallway door. That upper-floor, inside-only access is the main clue. Most balconies are smaller than decks, often around 40 to 80 square feet. That is enough for two chairs, a small table, and a planter. Some balconies are purely decorative, while others serve as private outdoor seating areas. A balcony can be cantilevered from the building frame or supported by posts and beams. Both types need careful planning because load, drainage, waterproofing, and wall connections are more complex than a ground-level build. Building a balcony costs $8,000 to $25,000, with an average of about $14,000. Per square foot, expect $30 to $90, depending on materials, support type, waterproofing, and railing specs. Best for: Views, fresh air, private sitting, and upper-floor access in apartments, condos, and multi-story homes. Common balcony types: Cantilevered balconies, supported balconies, Juliet balconies, recessed balconies, stacked balconies, and wraparound balconies. Balcony vs Deck: Differences Across Every Factor This is where the balcony vs deck comparison gets practical. Each of the factors below can be shown visually, and each one affects how you build, what you spend, and how you use the space. 1. Location and Floor Level A deck sits at or near ground level, typically behind or beside a single-family home. It connects directly to the yard and the ground floor of the structure. A balcony always sits on the second floor or higher, projecting from the exterior wall above an open space. That floor-level difference is not just about height. It changes what you see, how you enter, who can access it, and what the structure below it must handle. 2. Access and Entry Point A deck can be reached in multiple ways: through a ground-floor door, down a staircase, or directly from the yard. This open-access design makes decks practical for gatherings, outdoor cooking, or frequent trips between the house and yard. A balcony has a single access point: through the door of the room it connects to. Usually, that is a bedroom, master suite, or upstairs living area. Nobody enters a true balcony from the street, yard, or a staircase off the ground. Takeaway: Decks support group movement and outdoor hosting. Balconies are personal, accessed by the one or two people in the connected room. 3. Size and Furniture Space A standard family deck covers 200 to 400 square feet. That fits a six-seat dining table, a grill station, lounge chairs, and enough clearance between them that people aren’t constantly shuffling around each other. Larger lots push decks to 600 square feet or more. A balcony averages 40 to 80 square feet. Two chairs and a side table fill it. A 100-square-foot balcony gives a bit more room, but large furniture sets don’t work, and anything over 80 pounds per square foot needs a structural review before you bring it up. 4. Structure and Support A deck’s structural system starts in the ground. Posts are embedded in concrete footings; beams span between the posts; joists run across the beams; and decking boards lie on top. The IRC Chapter 5 (R507) covers deck structural requirements, including ledger attachment, post sizing, and footing depth. A balcony attaches to the building’s structure rather than the ground. A cantilevered balcony uses joists that extend through the exterior wall and are locked into the building’s frame. A supported balcony uses columns or posts running to the ground. Both methods require careful load analysis because the support point is an upper wall or floor system rather than the earth. Takeaway: A deck builds up from the earth. A balcony builds out from the building. Different engineering paths, different inspection requirements, different costs. 5. Safety, Railings, and Load Under IRC Section R312.1.2, guardrails are required on any elevated walking surface that is 30 inches or more above grade. This applies to both decks and balconies, but the safety stakes are higher for balconies because of the open space below. Balcony railings must meet load-bearing tests and attachment requirements that account for outward and downward force. Balcony floors also need waterproofing and a drainage slope to prevent water from tracking back into the wall connection or pooling under the flooring system. Decks need railing when elevated, plus stair guards and proper footing depth. But a structural failure on a deck at ground level carries less risk than a failure on a balcony 20 feet up. Takeaway: Both need proper railings, but balcony safety requirements include upper-floor load attachment and waterproofing, which decks do not always require. 6. Cost and Build Complexity A standard ground-level deck of 200 square feet, built with pressure-treated wood, runs roughly $5,000 to $16,000 installed. Composite material pushes that to $10,000 to $18,000 or more. Deck cost scales mostly with size, material, and the complexity of stairs and railings. A 60-square-foot balcony can cost $8,000 to $25,000, depending on the support method, waterproofing needs, railing specifications, and whether it is new construction or an addition to an existing structure. Cantilevered designs and post-construction balcony additions on existing homes run toward the higher end. Line Item Deck (200 sq ft) Balcony (60 sq ft) What Drives Variation Materials $2,500–$9,000 $2,000–$8,000 Wood vs composite; railing spec Labor $1,500–$5,000 $3,000–$10,000 Upper-floor tie-in adds hours on balconies Waterproofing Not always required $500–$2,000 Mandatory on balconies; membrane + slope Permits & Engineering $300–$800 $500–$2,500 Structural calcs required for balconies Total Range $5,000–$16,000 $8,000–$25,000 Balcony costs more per sq ft, less in total sq ft 7. Maintenance and Water Control Wood decks need cleaning, sealing, and staining every 1 to 3 years. Composite decks are low-maintenance but still require periodic cleaning and occasional board checks. Drainage on a deck mostly means water running off the sides or through the deck board gaps. Balconies require a more controlled approach to water. The floor must slope toward a drain or outward edge, and the wall connection must be sealed with a waterproof membrane. Water that pools on a balcony or sits against the wall connection can work into the building’s framing over time. Railing posts and balusters also need periodic tightening and corrosion checks, especially in coastal climates. The framing beneath the deck surface should also be properly finished; the deck skirting options chosen affect both airflow under the structure and how effectively debris and pests are kept out. Takeaway: Decks need surface upkeep. Balconies need a surface, waterproofing, a drainage slope, and wall-connection maintenance. 8. Construction and Materials Decks are usually built with pressure-treated wood, cedar, hardwood, composite boards, or PVC decking. The frame often uses treated lumber for posts, beams, and joists, along with concrete footings. Material choice affects cost, maintenance, heat, slip resistance, and the surface’s longevity. Balconies use a wider range of structural and finish materials because they are attached to the building. The frame may include steel, reinforced concrete, treated wood, or engineered supports. The walking surface may be tile, concrete, waterproof decking, or a coated system. Waterproofing matters more on a balcony because water can move into the wall or floor structure if the surface fails. Pros and Cons: Balcony vs Deck Before choosing between a balcony and a deck, it helps to see the trade-offs side by side. One gives you more space and yard access. The other offers privacy, views, and upper-floor access. This table makes the choice easier to compare. Factor Deck Balcony Space Large, flexible layouts Small, compact footprint Access Open, yard, and ground-floor Private, inside room only Use Groups, grilling, dining Personal sitting, views, fresh air Cost to Build Lower per sq ft, higher total Higher per sq ft, lower total Privacy Moderate, visible from the yard Higher, reached from inside Views Ground level or slightly raised Elevated, better long-range views Maintenance Surface, boards, drainage Waterproofing, railing, and wall seal Safety Rules Railing when 30 in+ above grade Railing plus load and seal requirements Resale Impact Strong for single-family homes Adds value in multi-story, city homes Best For Families, entertaining, yard life Individuals, couples, upper-floor rooms A deck usually wins for space, hosting, and family use. A balcony works better when you want a smaller, private outdoor spot connected to an upper room. Once you know your main use, the better option becomes much clearer. Balcony vs Patio vs Deck vs Porch vs Veranda: What Is the Difference? The difference between a patio and a balcony is one of the most-searched questions in this category, and it is easy to answer once you understand the floor level. A patio is always at ground level and paved. A balcony is always elevated, attached to an upper floor, and reached from inside. They serve entirely different homes, rooms, and use cases. Here is a plain breakdown of all seven outdoor structures that regularly get mixed up: Structure Floor Level Roof Access Best For Deck Ground to slightly raised Open Ground floor or yard Groups, grilling, yard access Balcony Second floor or higher Open or partial Interior room only Views, private sitting Patio Ground level, paved Open Ground floor or yard Casual seating, low-cost outdoor space Porch Ground level or slightly raised Always covered Entry or front of home Shade, curb appeal, entry Veranda Ground level Covered, wraps around home Multiple sides Shaded outdoor living Terrace Rooftop or raised grade Open Rooftop or hillside access Urban homes, hillside builds Lanai Ground level Covered, often screened Ground floor Florida and tropical climates The difference between patio and balcony goes beyond materials. A patio sits on the earth and can be added to almost any home without structural work. A balcony requires upper-floor attachment, structural load analysis, waterproofing, permits, and is closer to a room addition than a ground-level pour. If you’re also weighing a covered entry structure, the deck vs porch comparison covers the resale and structural differences in detail. If a contractor or real estate listing uses any of these terms and you’re unsure what structure is actually described, ask them to confirm the floor level, the access point, and whether a roof is included. Those three facts identify the structure without ambiguity. Pro Tip: Before signing any contract, confirm the floor level, access point, and structural support method with your contractor in writing. These three details determine the permit category, the engineering requirements, and ultimately what the project costs. A verbal description and a written scope are not the same thing. Which Is Better for Your Home: Balcony or Deck? Neither option is better for every home. The right choice in the balcony vs deck decision depends on your home type, floor level, yard space, budget, and how you plan to use it. Choose a deck if: You have a single-family home with a yard. You want space for grilling, dining, or hosting. You need easy access from the house to the backyard. You want room for larger furniture. Your budget favors a lower cost per square foot. Choose a balcony if: You want outdoor access from an upper floor. You live in an apartment, condo, or townhouse. You want a private sitting spot. You care more about views than a large space. You only need room for chairs, plants, or a small table. On hillside lots, either can work. A raised deck connects better to the main floor when the grade drops away from the back door, and on flatter ground, a concrete patio and wood deck pairing often handles the yard transition better than either structure alone. A balcony can make more sense off an upper bedroom when the slope is severe enough that a raised deck would require significant post height and structural complexity. Confirm all permits and HOA requirements with your local building office before finalizing any design. You can find your local permit authority through USA.gov’s permit guidance. Common Mistakes When Comparing a Balcony and Deck Small wording mistakes can lead to wrong quotes, wrong permits, and extra work later. Before you price anything, make sure you are naming the structure correctly and thinking through the parts that affect safety, water, and approvals. Calling every raised platform a deck: A raised platform attached to an upper floor and reached from inside is a balcony, not a deck. Using the wrong term can lead to the wrong quote, permit category, and material plan. Ignoring water drainage on balconies: A flat balcony can hold water and send it toward the wall connection. Every balcony needs a clear drainage plan, so water moves away from the building, not into it. Assuming smaller means simpler: A small balcony can cost more than a larger deck because upper-floor support, waterproofing, and load checks add complexity. Skipping Permit or HOA Checks: Both structures require permits in most US jurisdictions. Balconies may also trigger HOA rules in condos, townhomes, and planned communities. These mistakes are easy to avoid when you start with the right name, check local rules early, and ask your contractor how the structure will handle support, drainage, railing, and long-term wear. According to the U.S. Department of Housing and Urban Development (HUD), major structural additions, including outdoor platforms, must comply with local safety and building codes. Starting without a permit can create problems when you sell the home or file an insurance claim. Frequently Asked Questions Can you add a balcony to an existing house? Yes, but it is often more complex than adding a deck. A contractor must check the wall framing, floor structure, waterproofing, railing support, and door opening. It may also need engineering approval, permits, and HOA permission before any exterior work can begin safely on site. Can you put a grill on a balcony? Sometimes, but many apartments, condos, HOAs, and fire codes restrict grills on balconies. Open-flame grills are often not allowed, especially on covered or small balconies. Check local fire rules and building policies first. A deck usually offers safer grill placement and clearance around nearby walls. Which lasts longer, a balcony or a deck? A well-built deck can last 10 to 30 years, depending on material, climate, and upkeep. Wood usually needs more care than composite. A balcony can also last decades, but its waterproofing, railing connections, and wall attachment must be inspected regularly to prevent damage over time. Can you enclose a balcony or deck? You may be able to enclose either one, but approval matters. Enclosing a deck can turn it into a screened room or porch. Enclosing a balcony can affect airflow, drainage, load, and exterior appearance, so condos and HOAs often have stricter rules for this work. Does a deck or balcony add more resale value? It depends on the home type. A well-built deck adds $10,000 to $20,000 in resale value for single-family homes with usable yards, where outdoor entertaining space is expected. A balcony adds value in multi-story and urban homes where upper-floor outdoor access is otherwise unavailable. Neither adds value if it was built without permits. Should you tell insurance before adding a balcony or deck? Tell your home insurance provider before adding a balcony or deck. A new outdoor structure can affect replacement value, liability risk, and coverage needs. If it is built without permits or proper inspections, future claims may be harder to settle after damage or injury later. Final Thoughts The balcony vs. deck choice becomes much easier when you stop looking at photos and start considering how you will use the space. I always tell homeowners to begin with four things: floor level, access, structure, and daily use. The right answer follows the structure of your home, not a preference for one look over another. If you have a single-family home with a yard and you want space for people, a grill, and a dining setup, a deck built from pressure-treated lumber or composite will do that for $5,000 to $16,000 with far less engineering complexity. If you have an upper-floor room and no yard access, a balcony is the only way to get outdoor space from that room. At $8,000 to $25,000, that access comes at a real cost, so make sure the waterproofing and structural tie-in are done right the first time. Before you call anyone, get the floor level, access point, and drainage plan confirmed in writing. That’s the single most important step before any money changes hands.
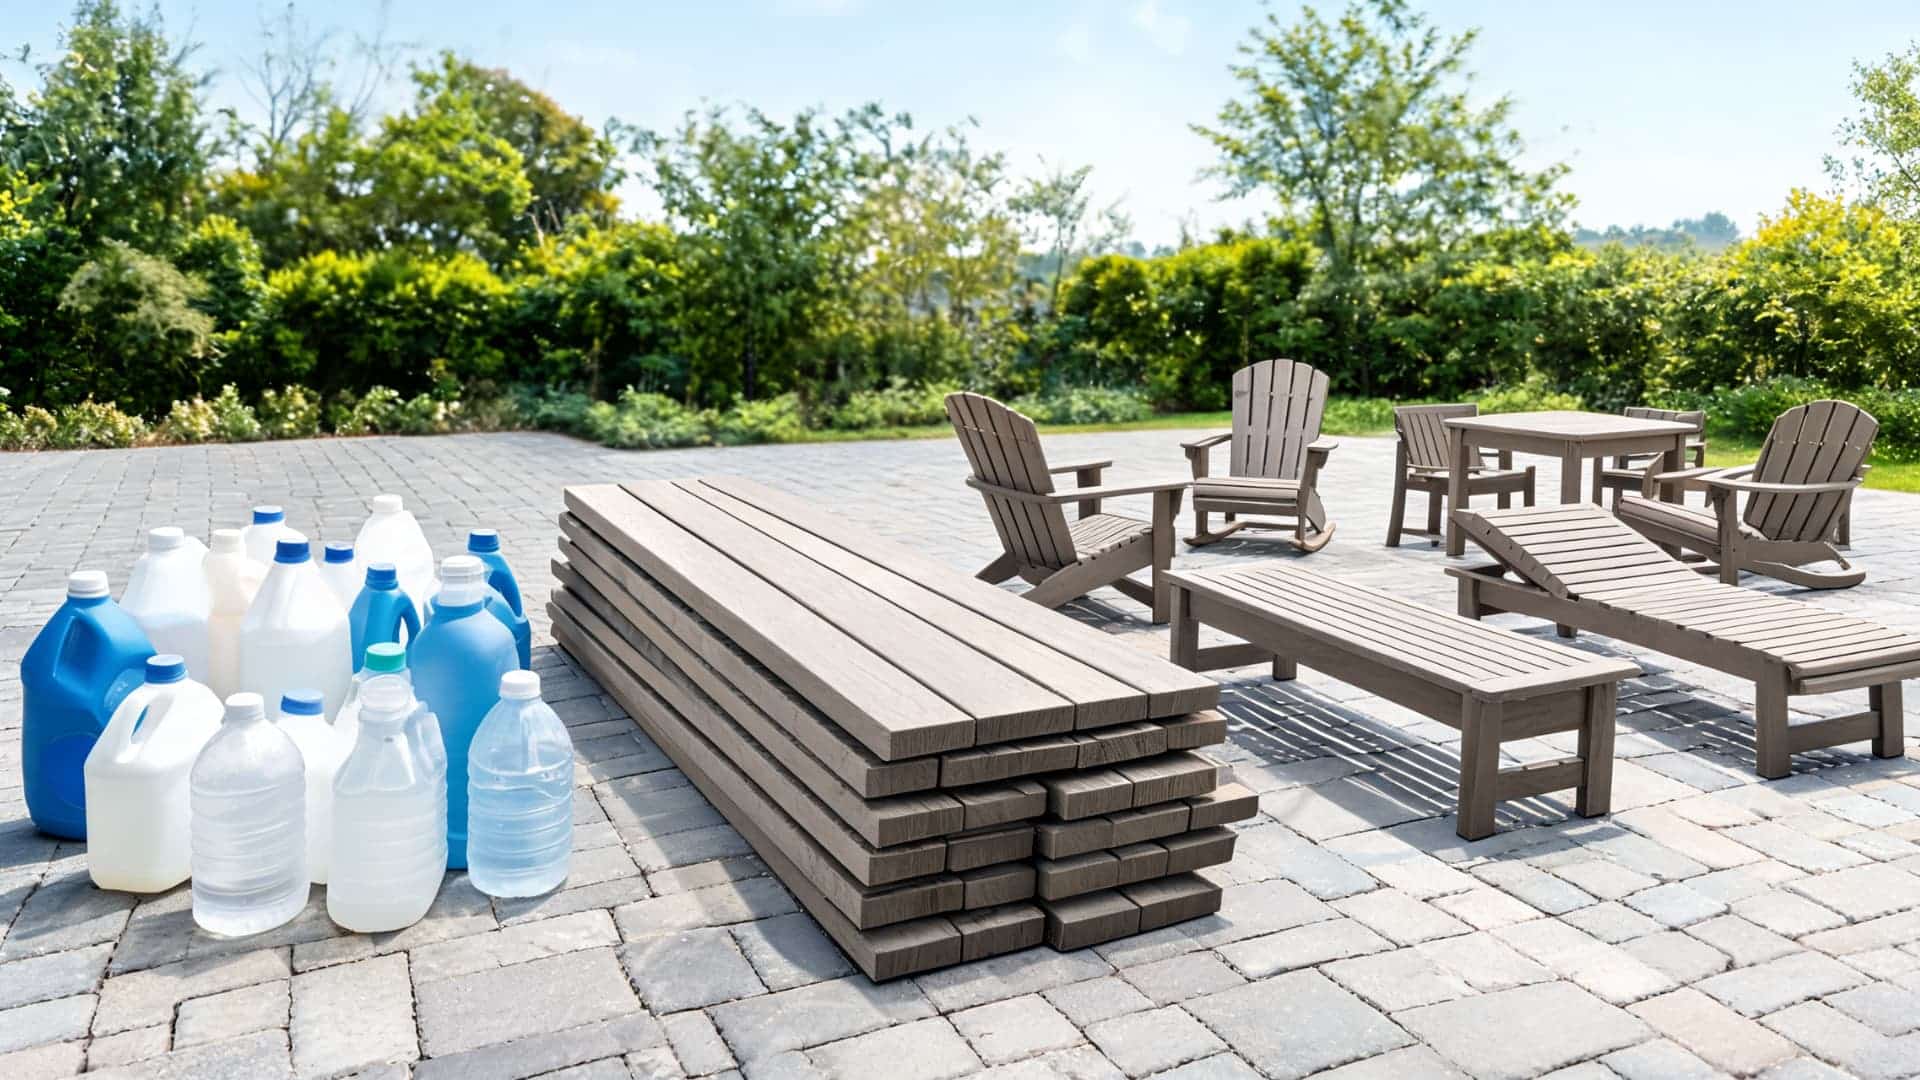
Polywood furniture holds up. That’s the honest starting point. I’ve watched real wood patio sets rot out in three seasons on an uncovered deck, and I’ve seen cheap molded plastic buckle under UV and split at the seams before two winters are done. The question worth asking before you spend $800 on an Adirondack chair is exactly what you’re buying and whether it earns the price. This guide covers what Polywood is made of, how it performs across different climates, how it compares to natural wood, and which furniture types are worth the money. Material High-density polyethylene (HDPE) plastic lumber Primary Source Recycled plastics, milk jugs, detergent bottles, post-consumer HDPE Color Method UV inhibitors and pigments blended into the lumber, not surface-painted Maintenance Required Soap, water, and a soft brush, no sealing, staining, or oiling Warranty (Brand) 20 years (Polywood brand) Best For Uncovered patios, pool areas, coastal environments, high-traffic outdoor spaces Not Ideal For Buyers wanting authentic wood grain, the lowest upfront price, or lightweight furniture That’s the short version. The full picture is more useful than a spec sheet, so let’s get into it. What is Polywood Made Of? Polywood furniture is made from high-density polyethylene (HDPE) sourced primarily from recycled plastics like milk jugs, detergent bottles, and post-consumer packaging. The raw material is processed into dense boards that are shaped, cut, and assembled like lumber. From a distance, a well-made Polywood Adirondack chair looks like painted wood. Up close, the surface texture is smoother and more uniform than timber grain. What separates HDPE lumber from cheap patio plastic is density and how color is applied. UV inhibitors and pigments are blended into the material during manufacturing, not applied as a surface coat. That means the color runs through the board. A deep scratch on a Polywood slat won’t reveal a stark white interior the way a painted plastic chair would; the tint carries through. It also means the UV protection is structural rather than cosmetic. The boards are then cut and drilled like dimensional lumber and fastened with stainless steel hardware to resist corrosion. The result is furniture that looks like traditional outdoor wood furniture but behaves like a dense plastic material, which is exactly what it is. Pro Tip: Check the hardware before you buy any poly lumber furniture. Stainless steel fasteners are the standard for quality HDPE pieces. Zinc or plated screws will rust and stain the boards faster than the material itself degrades. Is Polywood Real Wood? No, and the name trips people up constantly. Polywood is HDPE plastic lumber shaped to resemble timber. It comes in wood-inspired colors like teak, mahogany, driftwood, and natural, and the board profiles mimic the proportions of dimensional wood stock. That’s where the resemblance ends. There’s no grain, no fiber structure, and nothing in it that came from a tree. It won’t accept stain, it doesn’t need sealing, and it won’t develop the silver patina that teak does over time. Buyers who want the natural behavior and aesthetic of real wood, including how it weathers, how it takes oil finishes, how it smells in the sun, will find that Polywood doesn’t replicate any of that. What it does offer is a stable, predictable surface that requires almost no maintenance to keep looking the same year over year. Polywood vs. Natural Wood: How They Actually Compare For the outdoor context, uncovered pool decks and porches, and lakefront docks — the material differences translate into real performance gaps over time. Here’s how they compare across the factors that matter most for outdoor furniture Factor Polywood (HDPE) Natural Wood (Teak, Cedar, Pine) Rot resistance Does not rot, HDPE has no organic fiber Varies by species; pine rots fast without treatment; teak holds up well Splintering Does not splinter Splinters as the surface dries and cracks over the seasons Maintenance Soap and water only Annual sealing, oiling, or refinishing, depending on species Fade resistance UV inhibitors built into the material hold color well Fades and grays without a UV-protective finish applied Weight and stability Heavier than lightweight plastic; stable in moderate wind Varies; teak is heavy, pine is lighter Upfront cost Higher, expect $300-$900 for a quality Adirondack chair Wide range; painted pine is cheap, teak is expensive Long-term cost Lower, minimal upkeep, long lifespan Higher annual maintenance costs add up; replacement is more likely Appearance over time Stays consistent; does not age like wood Develops character with age (silver patina, grain variation) The comparison changes depending on which wood you’re actually using. A quality teak set maintained properly will last decades and look better for it. The problem is most buyers aren’t comparing Polywood against teak; they’re comparing it against painted pine or basic acacia that won’t survive three winters without significant work. Against that standard, HDPE lumber wins on durability and long-term cost without much debate. For guidance on which outdoor wood species actually hold up. How Polywood Performs in Real Weather The material doesn’t care what the weather is doing. That’s the practical reality of HDPE, and it’s why Polywood gets recommended for the situations where real wood tends to struggle. Here’s how it holds up across the conditions that matter. 1. Hot and Sunny Climates UV inhibitors built into the material slow the fading process significantly compared to painted or stained wood. That said, dark colors, navy, black, and deep charcoal, absorb heat and can become uncomfortable to touch on a July afternoon in direct sun. If your patio gets full sun from 10 am to 4 pm, lighter colors are the practical choice for comfort. The material itself won’t degrade from UV exposure the way unstabilized plastic does. 2. Rainy and Humid Environments HDPE doesn’t absorb water. There’s no swelling, warping, or surface checking from moisture cycling the way you’d see in untreated or even sealed wood. Surface dirt, pollen, and mildew can still collect on the boards; the material isn’t self-cleaning, but a scrub brush with soapy water handles all of it without needing to let the furniture dry out or condition it afterward. 3. Cold and Snowy Climates The material holds up through freeze-thaw cycles that crack and split wood. Polywood can stay outside through a northern winter without the fiber stress that causes untreated wood to check and split when moisture in the grain freezes and expands. Covers are optional, but they help reduce cleaning time when spring arrives. Stacking chairs or bringing cushions inside over winter extends cushion life; the frames don’t need it. 4. Coastal and Poolside Use Salt air and pool splash are where HDPE furniture has a clear structural advantage over most wood alternatives. The material doesn’t absorb chlorine or salt, doesn’t corrode (provided the hardware is stainless), and doesn’t need rinsing for its own protection, though rinsing to remove salt buildup on visible surfaces keeps it looking clean. This is one of the strongest use cases for poly lumber furniture. Polywood vs. Poly Lumber: Why the Distinction Matters Polywood is a brand name, not a material category. When people say “polywood furniture,” they sometimes mean furniture made by the Polywood brand specifically, and sometimes they mean any furniture made from poly lumber or HDPE boards, regardless of manufacturer. The distinction matters because quality and warranty coverage vary between manufacturers even when the base material is the same. Term What It Means When to Use It Polywood Specific brand, founded in 1990, US-manufactured HDPE furniture with a 20-year warranty When referring to the brand specifically Poly lumber The material category, HDPE boards used by many furniture manufacturers When discussing the material, regardless of brand HDPE furniture An accurate generic term for any furniture made from high-density polyethylene Technical or comparative contexts The Polywood brand offers a 20-year warranty against structural defects, which is the benchmark for the category. Other poly lumber brands, Breezesta, DuraWeather, Berlin Gardens, and Seaside Casual, use comparable HDPE material but carry different warranty terms and quality tiers. Buying from a brand that specifies HDPE content and backs the product with a long warranty is a better investment than buying unbranded poly lumber furniture where those specs aren’t disclosed. Why Polywood Furniture Costs More A single Polywood Adirondack chair runs $250 to $400. A dining set for six can run $1,500 to $3,000. The higher price reflects the density of the material, the quality of the hardware, and the cost of domestic manufacturing, not padding. Here’s what drives the cost. First, HDPE lumber itself is denser and heavier than the molded plastic used in cheap patio furniture. Processing recycled HDPE into furniture-grade boards — blending UV stabilizers and pigments into the material during extrusion- costs more per unit than injection-molded plastic. Second, stainless steel hardware is standard on quality poly lumber pieces. It’s more expensive than zinc or plated fasteners, and it matters for long-term performance. Corroding hardware on an outdoor furniture frame leaves rust streaks on the boards and eventually compromises the joints. Third, the Polywood brand specifically manufactures in the US, which is reflected in the price. The 20-year warranty coverage they offer also reflects the manufacturer’s confidence in the product’s lifespan, which factors into the cost structure. The cost-per-year math is worth running. A $350 Polywood chair that lasts 20+ years costs roughly $17-18 per year. A $90 molded-plastic chair that needs replacing every 4-5 years costs $18-22 per year and generates more waste. The upfront number is larger; the long-term number is often comparable or better. Note: Cost estimates for Polywood furniture reflect the brand’s current US pricing. Poly lumber furniture from other manufacturers (Breezesta, DuraWeather, Berlin Gardens) may vary significantly. Prices fluctuate seasonally; peak spring pricing (March–May) runs higher than off-season pricing. The Main Characteristics of Polywood Outdoor Furniture Five things separate POLYWOOD from standard outdoor furniture, and from each other, depending on where you use it. No routine maintenance. No staining, oiling, sanding, or sealing, ever. Soap and water handle everything. Fade resistance is built into the board. Pigment is blended through the HDPE before extrusion, not coated on. No peeling, no blotchy patches. No rot, no splinters. HDPE has no organic fiber for fungi to break down, a direct advantage on pool decks and rental properties. Heavy and stable, but awkward to move. The density that holds chairs steady in the wind makes large pieces difficult to store seasonally. More sustainable, not zero-impact. Recycled HDPE diverts post-consumer plastic from landfills. Manufacturing still uses energy; the furniture is not biodegradable. Taken together, these characteristics make POLYWOOD well-suited to high-exposure, low-intervention outdoor situations, and a harder case for anyone who prefers the feel of natural wood or moves furniture often. Best Types of Polywood Furniture to Buy Some Polywood furniture types offer better long-term value than others. The best choices are pieces that stay outdoors, face the weather often, and benefit from strong, low-maintenance HDPE construction. Polywood Furniture Type Best For Why It’s Worth Buying Adirondack Chairs Fire pits, lawns, decks, patios Adirondack chairs are one of the best Polywood buys because they handle constant outdoor exposure well. Their slatted design drains water easily, and the material resists rot, moisture, and ground contact. Dining Sets Covered and uncovered patios Polywood dining sets work well for regular outdoor meals. Their heavier weight keeps tables steady in the wind, while stainless steel hardware adds durability for long-term use. Rockers, Gliders, and Porch Swings Front porches and covered seating areas These pieces are ideal when furniture stays in one place but faces changing weather. HDPE holds up well to repeated rocking or gliding without the loosening common in older wood joints. Chaise Lounges and Deep Seating Pool areas, patios, lounge spaces Poolside Polywood furniture performs well because HDPE resists moisture, chlorine, sunscreen, and wet use. For cushioned pieces, choose quick-dry, fade-resistant fabric with available replacement cushions. Benches and Planters Gardens, walkways, porches Polywood benches need little maintenance beyond cleaning and work well in exposed spaces. Planters are also durable, but drainage holes are important because HDPE does not breathe like wood. Polywood is most worth the price when the furniture stays outside year-round. Start with chairs, dining sets, or benches if you want practical pieces that need little upkeep. How to Choose the Right Polywood Furniture for Your Space The material decision comes first. Once you’ve decided HDPE furniture is the right call for your outdoor space, the purchase decision narrows down to a few practical questions. Measure before you buy. Polywood pieces run large, especially Adirondack chairs (typically 29–32 inches wide) and dining tables. Leaving 36 inches of clearance behind a dining chair for a comfortable pull-out is the minimum, more if it’s a high-traffic path. Sectional components add up fast in smaller patios. Match the piece to the use. If you eat outside three times a week, a dining set earns its keep. If the patio is mostly for relaxed weekend seating, two Adirondack chairs and a side table will serve better than a formal dining set that sits empty most days. Color choice is a comfort decision, not just aesthetic. Dark colors, black, navy, charcoal, hold up fine in UV terms, but get hot in direct afternoon sun. For pool decks and sun-exposed patios, lighter colors (white, sand, natural) are cooler to the touch and show less heat absorption. For shaded porches, color choice is mostly aesthetic. Check cushion availability for deep seating. Adirondack chairs and rockers often work well without cushions. Covers are optional, but they help reduce cleaning time when spring arrives, the same logic applies to any exposed deck surface around them. Confirm replacement cushions are available and priced before committing to a deep seating set. Frequently Asked Questions About Polywood Furniture These are the questions that come up most often from people who’ve narrowed their decision down to Polywood and want specifics before buying. Is polywood furniture worth the money? For outdoor spaces with significant weather exposure and minimal maintenance attention, yes. The cost-per-year math favors HDPE furniture over most alternatives when you factor in replacement cycles and maintenance costs. It’s not worth it if you want authentic wood grain or need the lowest possible upfront price. Can polywood furniture be left outside year-round? Yes. HDPE lumber is designed for year-round outdoor exposure. Covers are optional — they reduce cleaning time after winter but aren’t required to protect the material. Bring cushions inside or store them in a weatherproof box over winter. Does polywood furniture get hot in the sun? Dark-colored poly lumber furniture can get uncomfortably warm in direct afternoon sun. Lighter colors stay cooler. This is a material property, not a brand-specific issue — dark-colored plastic and metal furniture both run hotter than light-colored alternatives in direct sunlight. Can polywood furniture be painted? Not recommended. HDPE has low surface adhesion for most paints, so conventional paint won’t bond reliably and will peel faster than it would on wood. The color is built into the material — repainting isn’t typically needed and usually causes more problems than it solves. Does polywood furniture attract termites or insects? No. HDPE has no organic fiber content. Termites, carpenter ants, and wood-boring insects are not attracted to it and cannot damage it the way they would timber furniture. How do you clean polywood furniture? Mild dish soap, warm water, and a soft-bristle brush. Rinse with a garden hose. For stubborn mildew or staining on the surface, a diluted bleach solution (1/3 cup per gallon of water) works without damaging the material. No pressure washer required. Is polywood furniture good for rental properties? Yes. The combination of durability, low maintenance, and resistance to rot, splinters, and fading makes it a practical choice for rental properties where furniture needs to hold up through tenant turnover without constant attention. What is the difference between polywood and composite decking? Composite decking typically combines wood fiber with plastic binders, which can retain moisture and support mold growth under some conditions. Polywood is pure HDPE with no wood fiber content — it doesn’t absorb water and has no organic material for fungi to break down. They are different materials with different performance profiles. Final Verdict Polywood makes the most sense when you want outdoor furniture that can stay outside and still hold up with very little work. I like it most for patios, pool decks, porches, and coastal spaces where rain, sun, salt, and daily use can wear down cheaper materials fast. You now know what Polywood furniture is made of, why HDPE performs differently from real wood, how it handles different climates, and which pieces offer the best value. The upfront price is higher, but the low maintenance and long lifespan can make it easier to justify. Before you buy, measure your space, choose the right color, and share which piece you are considering. Sources Polywood Brand, “Materials and Sustainability.” polywood.comFamily Handyman, “The 10 Best Outdoor Furniture Brands, According to Designers.” 2025. familyhandyman.comCasual Furniture World, “What Is Polywood Furniture? Definition, Materials, History & Brands.” 2025. casualfurnitureworld.com
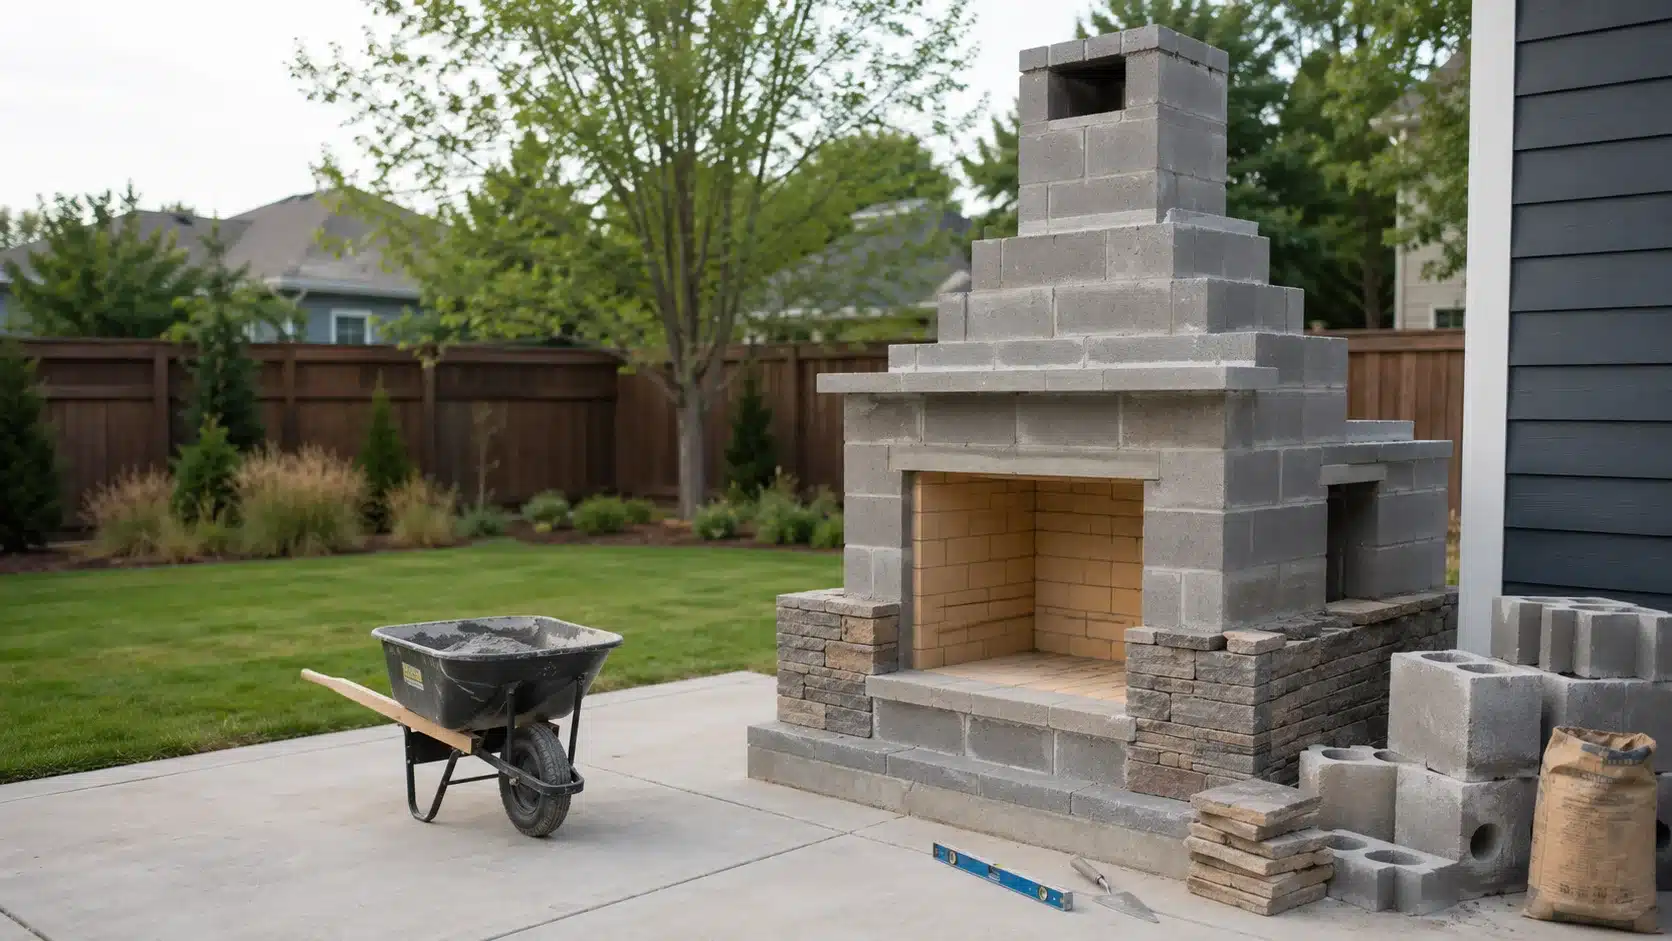
Cost Note: Figures in this article are estimates based on national averages. Actual costs vary significantly by region, contractor, materials, and project scope. Always get at least three quotes before committing to any project above $1,000. If you want to know how to build an outdoor fireplace that actually draws well and holds up past the second winter, start with the footing, the firebox, and the chimney height, in that order. Every problem I’ve seen in outdoor fireplace builds traces back to one of those three things being wrong. The finished work on top doesn’t matter if the base shifts or the smoke rolls into the seating area. I bring to you the full build sequence: what to check before you break ground, which materials withstand direct heat without cracking, how the foundation and firebox work together, where a DIY build makes sense, and when the smart move is to call a mason. I’ll also give you real cost ranges so you’re not surprised at the lumber yard. Can You Build an Outdoor Fireplace Yourself? The short answer is yes, if the design is a prefab kit or a simple dry-stack system, you’re comfortable with concrete work, and your site is flat with no drainage issues. The moment you’re building full masonry from scratch, adding a gas line, or working near a roofline, the complexity multiplies fast. Factor DIY-Friendly Hire a Pro Skill level Intermediate, comfortable with concrete and basic masonry Beginner masonry skill Build type Prefab kit or simple dry-stack Full custom masonry with chimney Time 2–5 days for a kit, plus curing time Faster with a crew Site Level yard, good drainage, easy access Sloped ground, soft soil, tight access Fuel Wood-burning kit with clear instructions Gas line, propane, or complex venting Risk level Lower if the plan is simple and code-approved Close to structures, trees, or rooflines A prefab kit is the right starting point for most first-time builders. The firebox dimensions and chimney layout are already engineered; you’re handling the footing, the outer shell, and the finish. A scratch-built masonry fireplace is a different project: it needs a mason’s understanding of firebox geometry, smoke shelf placement, and chimney draw. Getting the firebox shape wrong means the fireplace smokes badly even when the outside looks finished. How an Outdoor Fireplace Differs from a Fire Pit The structural difference is more significant than it looks. A fireplace has a contained firebox and a chimney that directs smoke upward. A fire pit is open, so smoke drifts in all directions with the wind. That changes where you can put it, how you seat people around it, and what kind of base it needs. Feature Outdoor Fireplace Fire Pit Main structure Tall firebox with chimney Open bowl, ring, or low wall Smoke path Directed upward through the flue Moves with wind, no fixed direction Build difficulty Higher: footing, firebox, and chimney required Lower to moderate: depending on size Base requirements Reinforced concrete footing Gravel, pavers, or lighter base Heat direction Focused toward the front opening Radiates around all sides Seating layout Facing the opening Surrounding the pit Permits More likely to require review Varies, sometimes required A fire pit is the simpler build. An outdoor fireplace requires more work but offers better smoke control, a taller focal point, and a more defined seating arrangement. Once you’ve made that choice, the planning below applies specifically to the fireplace build. What to Plan Before You Build an Outdoor Fireplace The decisions you make before the first shovel goes in set the difficulty, cost, and long-term performance of the whole project. Here’s what to nail down first. 1. Check Permits and Local Rules Call your local building office before buying materials. Ask about permits, setbacks from structures and property lines, chimney height minimums, burn restrictions, and fuel type limitations. HOA rules apply separately; check those too. Skipping this step can mean tearing out work you’ve already paid for. 2. Mark the Location Carefully Use stakes or spray paint to mark the full footprint, including clearance paths, wood storage, and seating. Keep at least 10 feet of clearance from fences, structures, and overhead branches. Check the prevailing wind direction; you want smoke moving away from the house and your seating area, not into them. The placement at the opening matters as much as the location itself. A well-thought-out outdoor seating plan around the fireplace opening will save you from repositioning furniture every night by the fire. 3. Study the Ground Look for soft spots, areas that stay wet after rain, visible tree roots, and drainage patterns. Clay soil expands when wet and contracts when dry, on clay, widen footings by 6 inches and go 8 inches thick rather than 4. Weak or unstable ground will shift the base over time, and a leaning chimney is not a small repair. 4. Choose Your Fuel Type Wood gives you the real fire experience, but it also means ash cleanup, storing wood within 20 feet of the fireplace (which creates a fire risk if it’s too close), and occasional chimney checks. Gas is cleaner and easier to start, but it requires a licensed contractor to run the line in most jurisdictions, which adds cost and scheduling time to the project. 5. Decide on the Build Method Choose between a prefab kit, a contractor kit (unfinished block system), or a full scratch-built masonry design before buying anything. Each significantly changes the tool list, the required skills, and the final cost. If you’re working on an existing concrete surface, check its thickness and load capacity before treating it as the base. Most residential patios are poured for foot traffic, not the dead weight of a full masonry fireplace. Your patio surface material also affects layout, weight limits, and how the structure ties in at the base. How to Build an Outdoor Fireplace: Step-by-Step Each phase of this build depends on the one before it being solid and cured. Rushing any stage, especially the foundation and firebox- creates problems that show up later as cracks, smoke issues, or structural movement that can’t easily be fixed from the outside. Phase 1: Foundation What you need: Shovel, spade, wheelbarrow, level, hand tamper, concrete forms, steel mesh or rebar, concrete mix, hose, gloves, safety glasses. Dig the footing. Excavate to at least 18 inches deep in most climates, deeper if you’re in a freeze-thaw zone and the frost line in your region goes lower. The excavation widens near the firebox area to distribute the load. Your local building code sets the minimum; use that as your floor, not your target. Compact and set forms. Tamp the soil firmly, set your concrete forms to the correct footprint, and check the level in both directions. Add reinforcement and pour. Place rebar or steel mesh before pouring, even where code doesn’t require it, reinforcement helps the footing resist freeze-thaw cracking. Pour, screed level, and keep the concrete moist during curing. Wait a full 48–72 hours before applying any weight to it, and don’t stack blocks until the slab has fully cured. Pro Tip: Don’t guess on footing depth. Frost line depth, soil type (clay vs. sandy vs. loam), and total fireplace weight can each change what your base needs. A concrete footing that moves is the most expensive fix in any outdoor fireplace build. Phase 2: Firebox What you need: Masonry trowel, rubber mallet, level, angle grinder with masonry blade, mixing bucket, fire brick, refractory mortar, sand, gloves, safety glasses. Build the block support base. Once the footing has cured, lay concrete block as the support platform for the firebox. Keep it dead level; the firebox sits directly on top, and any tilt here multiplies as you build higher. Lay the fire brick floor and walls. Fire brick is non-negotiable in the firebox. It’s engineered to handle temperatures up to 2,000°F; regular brick cracks under that kind of repeated heat. Use refractory mortar throughout, not standard mortar. Dry-lay the first course before mortaring so you can see spacing and cuts before they’re permanent. Shape the firebox geometry. The sidewalls should angle outward slightly, with the front wider than the back. The back wall angles forward slightly at the top. This geometry directs smoke upward into the flue rather than letting it spill forward into the seating area. Get a piece of paper, sketch the cross-section, and understand the shape before laying the first fire brick. Add the smoke shelf. If your design includes one, and it should for wood-burning builds, the smoke shelf sits just above the firebox opening. It catches downdrafts and prevents outside air from pushing smoke back out the front. Safety Note: The firebox is the one phase where hiring a mason is worth considering, even if you’re handling the rest yourself. A firebox built with the wrong geometry will smoke badly regardless of how good the chimney is. There’s no easy fix once it’s mortared in. Phase 3: Outer Shell and Chimney What you need: Masonry trowel, 4-foot level, rubber mallet, angle grinder, brick hammer, mortar tub, CMU blocks, brick, angle iron, plywood, 2x4s, flue liner, gloves, safety glasses. Build the outer shell. Stack concrete blocks and bricks around the firebox to form the main structure. Stagger the seams on every course, spread mortar on the edges, not just the face shells, and check plumb and level after every 2–3 courses. A small lean at the base becomes a significant offset by the time you reach chimney height. Support the opening. The masonry above the firebox opening needs a proper lintel. Cut angle iron to span the opening and set it in mortar before laying the courses above. This is a structural element, not an optional detail; without it, the opening will eventually crack or fail. Form the arch (if applicable). Build a plywood-and-2×4 template to the arch profile, lay cut brick over it, let the mortar set to initial cure, then remove the form. If you’re working from a kit that has a flat lintel instead, follow the kit design; don’t improvise an arch into a system that wasn’t designed for one. Install the flue liner. Set the flue liner above the firebox before filling in the surrounding block. The flue is what determines smoke draw. Chimney height matters: a taller chimney creates a stronger draft. Most outdoor fireplaces perform best at a total height of 10–12 feet, and local code will specify a minimum. Follow both your plan and the code, whichever is more demanding. Build the chimney to a height. Check level and plumb every 3–4 courses. The earlier you catch the deviation, the less cutting and relaying later. Pro Tip: A chimney that’s slightly out of plumb near the bottom looks dramatically worse at 8 feet. Check it often. Use a 4-foot level and check in both directions, front-to-back and side-to-side, at every course. Phase 4: Finish and Hearth What you need: Masonry trowel, mortar bag, wire brush, angle grinder, veneer stone, mortar, hearthstones, capstone, level, gloves, and safety glasses. Build seating and hearth areas. If your design includes built-in bench seating or a hearth extension, build those after the fireplace body is roughed in. A lightweight CMU block works for a bench structure; brick shapes more easily for the curved hearth profile if that’s part of your design. Lay the stone veneer. Start at the firebox opening, the most visible focal point, and work outward. Back-butter each piece, press it firmly into the mortar, and vary the stone sizes so the joints don’t align in repetitive patterns. Manufactured stone veneer is lighter than natural stone and easier to handle on a block shell. Natural stone costs more and adds load; confirm your base can handle it before you order. Fill the joints. Use a piping bag or grout bag to fill mortar joints once the veneer has set enough to hold position. Slightly overfill, let it firm to thumbprint hardness, then smooth with a wire brush. Don’t let it fully harden before tooling; it gets brittle and cracks. Set hearthstones and capstone. Use exterior-rated stone or pavers for any horizontal surface that will hold water. The capstone at the chimney top helps deflect sparks and keeps rain from entering the flue. A metal chimney cap is an even better solution; it extends liner life and prevents debris nesting. Pro Tip: Every finish material needs to be exterior-rated. Outdoor fireplaces cycle through heat, rain, freezing, and UV exposure. Indoor stone or standard mortar will fail faster than you expect. Apply an exterior masonry sealer after the finish has fully cured, and plan to reapply it every 3–5 years, depending on your climate. Phase 5: First Fire Test Wait for a full cure. Let all concrete, mortar, fire brick, and finish materials cure completely before lighting anything. The minimum is 7 days from the last mortar joint. 14 days is better. Heat applied to uncured mortar creates steam pockets that crack the joints from the inside. Light a small fire. Burn a small amount of clean, dry hardwood, oak, maple, hickory, or ash. Watch where the smoke goes. A well-built outdoor fireplace cleanly draws smoke upward through the flue. If smoke rolls out the front, stop and diagnose before building a larger fire. Check the draw. Smoke rollout points to three possible causes: firebox geometry is off, the chimney is too short to create adequate draft, or wind is pushing into the opening. Identify which one before making any changes. Safety Note: Never use accelerants to start the fire. Keep a garden hose, a bucket of water or sand, and a fire extinguisher within reach during the first burn. Do not light if the mortar still looks damp, if any visible cracks have appeared in the firebox or foundation, or if a burn ban is active in your area. How Much Does It Cost to Build an Outdoor Fireplace? Cost depends heavily on build type, site conditions, finish material, and whether you’re hiring any labor. A prefab kit with a basic concrete base and standard veneer sits at the lower end. A custom masonry fireplace with built-in seating, premium stone, and gas work is a different budget conversation entirely. If the fireplace area also needs new hardscape, factor in paver installation costs before you finalize any budget; treating them as an afterthought creates cost surprises mid-project. Line Item Low End High End What Drives the Variation Prefab kit installed $1,500 $9,000 Kit size, finish level, and labor market Contractor kit (unfinished) $1,000 $4,000 Block system size before finishing work Custom masonry installed $6,000 $20,000 Size, chimney height, stone type, and labor Site prep $500 $2,000 Clearing, grading, and drainage corrections Permits $50 $500 Varies significantly by municipality Mason labor $70/hr $100/hr Region, complexity, access Gas line installation $350 $2,000 Distance from source, buried vs. surface run Stone veneer materials $11/sq ft $18/sq ft Manufactured vs. natural, thickness For a mid-size DIY outdoor fireplace built from a kit, with a concrete base, basic masonry work, and a veneer finish, budget $2,500 to $6,000 in total. Add a 15–20% buffer for waste, extra mortar, cut losses, delivery fees, and the small fixes that show up in every masonry project. Prices based on 2024–2025 national averages; verify current material costs with local suppliers before finalizing your budget. How to Finish an Outdoor Fireplace The finish work happens after the structure is fully cured and solid. This phase is about protecting the shell, closing exposed surfaces, and giving the fireplace its final look. The finish can’t rescue weak masonry — but it can significantly extend the life of a good build. 1. Stone and Brick Veneer Manufactured stone veneer is the most common choice for block-shell fireplaces. It’s lighter than natural stone, bonds well to a prepared CMU surface, and comes in profiles that closely resemble the real thing. Natural stone adds weight and cost but gives a denser, longer-lasting surface. Confirm your footing can carry it before ordering. Brick veneer suits a more traditional look and is easier to lay in consistent patterns than random stone, but it still needs proper surface prep, consistent joint depth, and exterior-rated materials throughout. 2. Stucco Stucco is a reasonable choice for a simpler outdoor fireplace build. Apply it in proper coats over a prepared masonry surface, and use exterior-rated stucco formulated for temperature variation. It’s less forgiving than veneer if the base moves, any crack in the substrate shows through stucco faster than through stone. 3. Hearth and Capstone Surfaces Any horizontal surface, hearth extension, bench top, chimney cap, needs to handle standing water, frost, and heat cycling. Use exterior-rated stone, brick, or concrete pavers. A metal chimney cap is worth adding at the top; it keeps rain out of the flue, reduces liner deterioration, and prevents animals from nesting in the chimney between seasons. 4. Sealing Apply a penetrating exterior masonry sealer after all finish materials have fully cured, usually 28 days after the last mortar joint. Sealer reduces water absorption, which is the primary driver of freeze-thaw spalling in outdoor masonry. Reapply every 3–5 years or whenever water no longer beads on the surface. Safety Checks Before the First Fire Check What to Do Why It Matters Full cure Wait at least 7 days, 14 is better, before any fire Heat on uncured mortar creates steam pockets that crack joints Clear the area Remove furniture, cushions, leaf debris, and any stored wood within 10 feet Embers travel further than expected Overhead clearance Check for low branches, rooflines, or covered patio overhangs above the chimney Rising heat and sparks need a clear path Smoke direction Light a small fire and watch the drawing for 10 minutes Smoke rollout is a structural signal, not just a comfort issue Safety gear Keep a hose, fire extinguisher, sand, or water bucket nearby First burns are the highest-risk burns Do not light if the mortar still looks damp, if visible cracks have appeared in the firebox or foundation, if a burn ban is active, if wind is pushing directly into the fireplace opening, or if flammable materials are too close to the structure. Common Mistakes That Show Up Later Most outdoor fireplace problems I’ve seen weren’t caused by bad materials; they were caused by decisions made in the first two phases of the build. The footing and the firebox are where the damage happens, even when the finish looks clean. Footing too thin or too small. A base that can’t carry the load cracks and shifts. Pour a reinforced concrete slab over compacted gravel. Minimum 4 inches thick, 6–8 inches for full masonry builds on clay or soft soil. Using regular brick in the firebox. Standard brick cracks under repeated exposure to direct heat. Fire brick and refractory mortar are required for any surface that comes into contact with the flame. No lintel over the opening. Masonry above the firebox opening needs structural support. Angle iron or a reinforced concrete lintel is mandatory; without it, the opening eventually cracks or drops. Chimney too short for the draft. A short chimney doesn’t generate enough draft to pull smoke cleanly. Follow your fireplace plan’s height spec and your local code minimum, whichever is taller. Skipping the permit check. Local rules affect setback, fuel type, chimney height, and spark control. Getting caught after the build is more expensive than the permit. Building too soon after pours. Concrete and mortar that haven’t fully cured can crack when subjected to load or heat. The waiting time feels wasteful, the repair cost doesn’t. Ignoring wind direction. The opening faces the wrong direction, and smoke rolls into the seating area all season. Walk the site on a calm day and check the direction of the prevailing breeze before you stake the location. For decks and outdoor deck layouts, wind direction affects where the fireplace fits relative to seating zones. Frequently Asked Questions About Building an Outdoor Fireplace These are the questions that come up most often once people have a plan in hand and start getting into the actual build details. Can I build an outdoor fireplace on an existing concrete patio? Only after checking the slab’s thickness, reinforcement, and condition. Most residential patios are poured at 3–4 inches for foot traffic, not for a structure that can weigh several tons. If the slab is thin, uneven, or cracked, pour a separate footing rather than loading the existing surface. What is the best material for an outdoor fireplace firebox? Fire brick laid with refractory mortar. Fire brick is engineered for temperatures up to 2,000°F. Standard brick and standard mortar crack under repeated heat cycling. Don’t substitute, even on budget builds; firebox repairs are expensive. Why is my outdoor fireplace smoking? Three likely causes: the firebox geometry is wrong (opening too wide relative to the flue), the chimney isn’t tall enough to generate draft, or prevailing wind is pushing into the opening. Diagnose which one to modify before anything, each has a different fix. Can I use an outdoor fireplace under a covered patio? It depends on overhead clearance and local code. The chimney must clear any overhead structure, and most codes require a minimum distance between the chimney top and any combustible overhead surface. A masonry fireplace under a covered patio almost always requires a permit review; don’t skip it. Final Verdict For most outdoor spaces, yes, if you start with a plan that matches your skill level and your site. A prefab kit build on a flat yard with a good concrete base is a project an experienced DIYer can finish in a long weekend and get right. A custom masonry outdoor fireplace on an irregular lot, or anything involving a gas line, is a different scope: budget accordingly, pull the permit, and hire a mason for at least the firebox phase. The foundation, firebox geometry, and chimney height are what determine whether this thing draws cleanly and lasts. Get those three right, and the finish is straightforward. Before you buy materials, check your local permit requirements and measure the clearances; those two steps alone prevent most of the expensive mistakes I’ve seen when learning how to build an outdoor fireplace.
A room can sound fine until one recording exposes every echo. If you are researching diy acoustic panels, you probably want more than a list of supplies. You want to know what actually works in real rooms before spending money, cutting wood, or wrapping insulation in fabric. I get that, because small choices like panel thickness, breathable cloth, core material, and wall placement can change the result fast. The sections ahead keep the focus on practical decisions people discuss in forums every day: what to build first, what to avoid, where panels should go, and how to test the difference. By the end, you will have a clearer plan for a room that sounds controlled, not overdone. Difficulty 2 out of 5, simple build, but clean fabric wrapping and safe insulation handling need care Time 1–2 hours per panel for beginners; faster if the wood is pre-cut Cost $30–$100+ per panel, depending on core material, fabric, frame wood, and mounting hardware Tools Needed Staple gun, drill/driver, saw, measuring tape, square, scissors, clamps, safety gloves, mask, eye protection Skill Required Beginner-friendly, basic measuring, cutting, drilling, and stapling; a helper is useful for larger wall or ceiling panels What Do Acoustic Panels Do, and Are They Worth It? Acoustic panels control sound inside a room by absorbing echoes, reverb, and sharp reflections from hard surfaces. They are not made to block outside noise or fully soundproof walls, so that difference matters before starting. If your voice recordings sound hollow, video calls feel echoey, or speakers sound harsh, DIY panels can be worth making at home. The main value comes from using the right absorbing material, breathable fabric, and proper placement. A homemade panel can work well when it is built with enough thickness and placed where sound first bounces. The real benefit is control: you can choose the size, fabric, cost, and design that fit your room. For many small studios, offices, and gaming rooms, that makes the project practical and useful. Methods of Building an Acoustic Panel and Which is Right for You? The right acoustic panel method depends on how much time, budget, and finish quality you want. If you are building your first panel, a simple framed design is usually the safest choice. If the panels will stay visible in a living room or home theater, a decorative border may be worth the extra effort. For renters, freestanding panels make more sense because they avoid wall damage. The goal is to pick a method that matches your room, tools, and comfort level, not the most complicated design. Building Method Best For Skill Level Main Benefit Keep in Mind Basic wood frame panel Beginners, bedrooms, offices, small studios Easy Simple, affordable, and reliable Finish may look basic without trim Two-part frame panel Cleaner builds and larger panels Medium Stronger frame with less bowing Takes more cutting and assembly time Decorative border panel Home theaters, living rooms, visible walls Medium Looks more polished and furniture-like Costs more and needs careful fitting Frameless panel Quick builds and lightweight panels Easy Fast, cheap, and simple Less durable and harder to hang neatly Freestanding panel Renters, podcasts, movable setups Medium No wall mounting needed Takes up floor space Ceiling cloud panel Studios, desks, mixing spots, theaters Medium to hard Reduces ceiling reflections well Needs very secure mounting If you want the most balanced option, choose the basic wood frame panel. It gives you good sound control, simple construction, and enough flexibility for most rooms. How to Build DIY Acoustic Panels: Step by Step Building DIY acoustic panels becomes easier when the steps follow a clear order. This process covers sizing, framing, fabric wrapping, insulation, finishing, and mounting. Materials and Tools Cost Table Before buying anything, it helps to separate must-have materials from tools you may already own. The total cost can look higher on paper because items like a drill, saw, or staple gun are usually one-time purchases. For the actual panel, the main cost comes from the absorbing core, wood frame, fabric, and mounting hardware. Material or Tool Quantity Estimated Cost Purpose Mineral wool or rigid fiberglass 1 board per panel $8–$20 Main sound-absorbing core Recycled denim insulation 1 board per panel $12–$25 Alternative sound-absorbing core Pine boards or plywood strips 4 pieces per panel $12–$30 Builds the panel frame Breathable fabric Enough to cover front, sides, and back edges $8–$25 Covers the panel neatly Backing fabric 1 piece per panel $3–$10 Covers the rear side Screws 8 to 12 per panel $3–$8 Joins the frame corners Wood glue 1 small bottle $4–$8 Strengthens the frame joints Staples 30 to 50 per panel $3–$8 Holds fabric in place Staple gun 1 $10–$25 Attaches fabric to the frame Saw 1 $20–$80 Cuts the wood pieces Drill 1 $40–$120 Makes pilot holes and drives screws Measuring tape 1 $5–$15 Measures wood, fabric, and wall space Gloves 1 pair $3–$10 Protects hands while handling insulation Mask 1 $2–$10 Protects from dust and loose fibers Eye protection 1 pair $5–$15 Protects eyes during cutting and handling French cleats, Z-clips, or brackets 1 set per panel $5–$20 Mounts the panel on the wall Ceiling anchors 2 to 4 per ceiling panel $5–$15 Secures ceiling cloud panels This table provides a realistic starting point, but the final cost depends on panel size, material quality, and the number of tools already available. Step 1: Plan the Panel Size Around the Insulation Start with the size of your acoustic insulation. In the transcript, the insulation came in a 4 x 2 ft size, so the frame was designed around that instead of cutting the insulation down. Add a small amount of extra space to the frame. The builder added about 1/8 inch to the length and width for easier fitting, plus a little extra depth so the insulation would not press tightly against the fabric. Step 2: Cut, Assemble, and Strengthen the Frame Use 3/4-inch birch plywood for the frame because it is straight, smooth, strong, and less likely to warp. The builder made a two-part frame: one section held the insulation, and the other helped support the fabric and outer trim. If you enjoy working with plywood and want to put the same grain-matching and edge skills to use on a smaller scale, the wood inlay beginner guide covers exactly that kind of close-tolerance work. Join the frame pieces with wood glue and brad nails. The glue adds strength, while the nails hold everything in place as it dries. Let the frame cure overnight if possible before moving on. Step 3: Sand the Frame and Prepare the Surface Sand all edges where the fabric will touch the frame. This is important because sharp plywood edges can snag or tear thin stretch fabric. Use 220-grit sandpaper, then wipe the frame with a damp cloth to remove dust. A smooth frame makes the fabric easier to wrap and helps the finished panel look cleaner. Step 4: Choose and Wrap the Front Fabric Pick a thin, breathable fabric that allows sound to pass through. The builder used polyester stretch fabric because it was light, smooth, and less likely to wrinkle. Wrap the front by starting with one long side. Secure it lightly with fabric tape, then staple it. Move to the opposite long side and stretch the fabric toward yourself before stapling. Finish with the two short sides, folding the corners neatly and trimming extra fabric. Step 5: Add the Acoustic Insulation and Close the Back Place the rigid acoustic insulation inside the frame. warns against using regular loose home insulation because it may sag and will not give the same neat finish. After the insulation is in place, wrap the back with another piece of fabric. Staple it flat and keep the edges clean. Make sure no staples stick out, especially if you plan to add a wood border. Step 6: Build and Finish the Optional Wood Border For a more finished look, cut strips from 3/4-inch oak plywood to create an outer border. Test-fit one strip first, then use it as a guide for the rest. The border should fit snugly around the panel. Sand the border, add edge banding if needed, then stain and seal it. Let the finish dry overnight before attaching it to the panel. The same stain-and-seal process is covered in detail in the barn door building, which walks through surface prep and finish coats for exposed oak and pine. Step 7: Attach the Border and Mounting Hardware Slide the finished oak border around the panel and secure it with brad nails. The builder used one nail on each side to hold the border tight. Then install low-profile French cleats on the back of the panel and on the wall. These help the panel hang flat and secure. Use stronger anchors for heavier panels or ceiling-mounted panels. Step 8: Hang the Panels and Test the Room Hang the panels in the room and listen for the change. In the transcript, the builder installed 10 panels in a small home theater room and noticed a clear drop in room noise. Conversations and movie dialogue became easier to hear. Start with the most important wall areas first, then test before adding more panels. This keeps the room controlled without making it feel too dull. Once the panels are hung, test the room before building more. Small placement changes can improve clarity without making the space feel too flat. Here’s the detailed video overview: Where to Place DIY Acoustic Panels Panel placement matters as much as the build itself. A few well-placed DIY acoustic panels can make a room sound clearer without covering every wall. Placement Area Where to Put Panels Why It Helps Best For First reflection points Side walls where the speakers first bounce sound. Use the mirror trick to find the spot. Reduces early reflections and improves clarity. Music, mixing, gaming, and home theater Behind speakers Front wall behind speakers, monitor, or desk. Controls front-wall reflections and softens harsh sound. Studios, desk setups, speaker rooms Behind the listening position Wall behind your chair, sofa, or mixing seat. Reduces rear-wall bounce, especially in small rooms. Home theaters, studios, small rooms Ceiling cloud Above a desk, studio chair, or main listening seat. Cuts reflections between the floor and the ceiling. Studios, offices, podcast rooms Corners and bass traps Room corners, especially near speakers or bass-heavy areas. Controls low-end buildup better than flat wall panels. Music rooms, theaters, bass-heavy rooms Start with the strongest reflection points, then test the room. Good placement helps you use fewer panels while still getting cleaner sound. Real Community Questions About DIY Acoustic Panels Reddit users explain that DIY acoustic panels are not as mysterious as they may seem. In this discussion, builders point out that standard panels or gobos are usually insulation placed inside a wood frame and covered with cloth. Several comments push back against the idea that branded acoustic treatment is always special, since many companies use the same or similar insulation materials that DIYers can buy themselves. The thread also adds useful nuance around bass traps. Some users say corner traps can be built using the same basic idea, while others note that certain designs, such as membrane resonators, limp mass panels, and diffusers, are more complex. Overall, the advice supports DIY panels when design, materials, and placement are handled properly. How to Test Your Panels After Installation Testing shows whether your DIY acoustic panels are actually helping. Use simple checks first, then adjust placement before building or buying more panels. Clap test: Stand in the room and clap once. Listen for ringing, flutter echo, or a sharp bounce after the clap. Voice recording test: Record the same sentence before and after installing panels. Check if your voice sounds clearer and less hollow. Speaker listening test: Play familiar music or movie dialogue. Notice if voices sound cleaner and harsh reflections feel softer. Video call test: Join a call or record a short sample. Listen for reduced echo and better speech clarity. Before-and-after phone recording: Use the same phone, same spot, and same distance so the comparison stays fair. Room measurement software: Use this only if you want more detail about reflections, reverb, or frequency issues. Do not judge the panels by looks alone. A quick sound test helps you place them smarter and avoid over-treating the room. Common Mistakes Acoustic Panels DIY Builders Make Most DIY acoustic panel mistakes come from rushed choices. The wrong fabric, a weak frame, or poor placement can cause a good panel to perform poorly. Common Mistake Why It Matters Better Approach Using the wrong core material Loose or soft insulation can sag and lose shape. Use rigid mineral wool, rigid fiberglass, or acoustic insulation boards. Choosing a non-breathable fabric Thick or coated fabric can block sound before it reaches the core. Use fabric that lets air pass through easily. Making panels too thin Thin panels may reduce sharp echo but leave the room sounding boxy. Use thicker panels when space allows. Skipping surface prep Rough frame edges can snag, wrinkle, or tear the fabric. Sand the frame before wrapping. Wrapping fabric poorly Uneven tension can create wrinkles, bumps, and loose corners. Secure one side first, then stretch evenly. Placing panels randomly Panels may miss the spots where reflections cause the most problems. Start with the first reflection points and test the room. Using weak mounting hardware Panels can loosen, tilt, or fall over time. Match brackets, cleats, or anchors to the panel weight. A better build comes from simple care at each stage. Choose the right materials, wrap cleanly, and place panels where the sound actually needs help. Tips for Better DIY Acoustic Panels A few smart habits can make your panels cleaner, safer, and more useful. These tips help you avoid wasted time and extra cost. Build one test panel first: Check the size, fabric tension, core fit, and hanging method before making a full set. This same test-before-committing approach pays off in any multi-piece build. It is the same reason most people start with a single prototype on projects like these, whiskey barrel furniture builds, where sizing can vary between barrels. Use insulation size as your guide: Build the frame around the board to avoid rough cuts and waste. Leave slight frame space: Let the core sit flat without pressing hard against the fabric. Use fabric tape before stapling: Hold the cloth in place so wrinkles are easier to fix. Keep staples flat: Neat staples help the backing, trim, and mounting parts sit properly. Add an air gap when possible: A small wall gap can improve absorption. Test before building more: Move panels around and listen before adding extra panels. Use stronger hardware overhead: Ceiling panels need safer anchors because they hang above people. Good panels are not just about what you buy. Careful sizing, clean wrapping, safe mounting, and testing make the final result much stronger. Frequently Asked Questions How long do DIY acoustic panels usually last? Well-built DIY acoustic panels can last for years if the fabric stays tight, the frame remains dry, and the core does not sag. Check them once in a while for dust, loose staples, fabric fading, or frame movement issues, too. Can humidity affect DIY acoustic panels? Yes, humidity can affect the frame, fabric, and some core materials over time. Use straight plywood or sealed wood, keep panels away from damp walls, and avoid installing them in basements with moisture problems unless the room is controlled properly. Should DIY acoustic panels be fire-resistant? Fire safety is worth thinking about, especially in studios with lights, cables, or electronics nearby. Choose safer materials when possible, avoid placing panels against heat sources, and check local fire rules if panels are used in commercial or shared spaces. Can acoustic panels be cleaned? Yes, but clean them gently. Use a soft brush, a lint roller, or a low-suction vacuum. Avoid soaking the fabric, because moisture can affect the core or frame. Removable fabric covers make cleaning easier in dusty rooms or pet areas. Should panels match the room layout symmetrically? For listening rooms, symmetry usually helps because both ears receive more balanced reflections. Place matching panels on the left and right sides when possible. For voice recording, exact symmetry matters less than treating the strongest echo around the microphone area. Final Thoughts A better-sounding room usually comes down to smart choices, not complicated gear. I would start with the basics: choose the right core material, use breathable fabric, build a solid frame, and place each panel where reflections actually happen. You also saw why testing matters, because a small placement change can improve clarity before you spend more money. DIY acoustic panels are worth the effort when you want better voice recordings, cleaner calls, clearer movie dialogue, or a calmer studio setup. The best part is that you can shape the build around your room and budget. Try the tips, test your space, and share your results or questions in the comments.
Project Type DIY wall shelves (5 methods) Difficulty Range Beginner to Intermediate Time Per Shelf 2–6 hours, depending on the method Cost Range $10–$180 depending on method and materials Tools Needed Drill, saw, level, stud finder, sandpaper, measuring tape Skill Required Beginner-friendly; no professional experience needed Learning how to build wall shelves is one of the most practical weekend projects you can tackle, and one of the few DIY jobs where a beginner can get a clean, useful result without owning a truck full of tools. I’ve built all five methods in this guide. The first time I built bracket shelves, I drilled into a stud and had a level shelf up in an afternoon. The fifth time, I was cutting 30-degree angles for hexagons and wishing I’d started simpler. Start with the method that matches where you are right now. There are five distinct approaches to building DIY wall shelves here, from basic scrap wood brackets to simple DIY floating shelves to honeycomb display shelves, with step-by-step instructions, a cost comparison, and the mistakes that trip people up most on their first build. Is Building Your Own Wall Shelves Worth It? If you want shelves that fit a specific wall, hold a specific load, and match a specific finish, yes. Store-bought shelves are built for average spaces. DIY wall shelves are built for you. You choose the depth, the length, the wood species, the color, and how the brackets look. For a first project, a simple bracket shelf can cost under $30 and be done in a Saturday. That said, not every situation calls for DIY. Very heavy shelves above beds, shelves on tile or masonry, or shelves in rental units where wall damage isn’t an option, those deserve a harder look at whether building is the right call. For most rooms, a well-mounted bracket shelf is the safest and most beginner-accessible starting point. Choose the Right Method Before You Buy Anything Most people pick a shelf style because it looks good in a photo. The better question is whether that method suits your wall type, the weight you plan to put on it, and your current skill level. Here’s a direct comparison before you spend a dollar on materials: Method Best For Skill Level Cost Range Scrap Wood Bracket Shelf Beginners, books, everyday storage Beginner $10–$60 No-Hardware Dowel Floating Shelf Clean modern rooms, bathrooms, and light storage Beginner to Intermediate $10–$80 Floating Corner Shelf Small rooms, offices, unused corners Beginner to Intermediate $40–$150 Picture Ledge Shelf Frames, art, kids’ books, family photos Beginner $30–$120 Hexagon / Honeycomb Shelf Wall decor, plants, candles, light display items Intermediate $40–$180 The method you choose shapes every decision after it, what wood to buy, which hardware to use, and how long the project realistically takes. Once that’s settled, everything else becomes a checklist. Planning Your Wall Shelves Before You Build Good planning makes your DIY shelf project easier and safer. Before you buy wood or start drilling, decide where the shelf will go, what it will hold, and how much support it needs. Choose the location: Pick a useful wall in your living room, kitchen, bedroom, bathroom, office, or garage. Make sure the shelf will not block doors, windows, switches, or walkways. Decide the size: Measure the wall space before choosing the shelf length and depth. A small shelf may be 24 inches wide, while a larger shelf may be 36 to 48 inches wide. Think about weight: Light decor needs less support. Books, dishes, tools, and storage baskets need stronger brackets and better wall support. Check the wall: Use a stud finder before drilling. Wall studs provide the shelf with greater strength than drywall alone. Plan the spacing: If you are building more than one shelf, leave enough space between them for books, baskets, plants, or decor. Once your plan is clear, the project feels much easier. A few careful choices at the start can help you avoid crooked shelves, weak support, and wasted materials. Materials by Method: What You Actually Need to Buy The materials list stays simple when it matches the shelf type. Here is what each wall-shelf method requires. Basic Bracket Shelf: Use a wood board, two or more shelf brackets, screws, wall anchors, sandpaper, wood filler, paint or stain, and a clear sealer if needed. This is the best first project for most beginners. Floating Shelf: Use a shelf board or shelf box, hidden floating-shelf brackets, or a wood cleat; long screws, wall anchors if needed, sandpaper, wood filler, paint, stain, or sealer. Floating shelves need strong hidden support to avoid sagging. Corner Shelf: Use two shelf boards or one corner-cut board, small brackets or cleats, screws, anchors, wood glue, sandpaper, and finish. Measure carefully because corner walls are not always perfectly square. Picture Ledge Shelf: Use a back board, bottom board, front lip, wood glue, brad nails or screws, sandpaper, and paint or stain. This is great for frames, books, and small decor, but not heavy storage. Heavy-Duty Shelf: Use thick boards or plywood, heavy-duty brackets, long structural screws, washers, wall studs, anchors if needed, and a strong finish. This shelf type is best for garages, laundry rooms, and pantries. Once you have the materials matched to the shelf type, the build steps become much easier. The next section walks through each method from the first measurement to the final check. How to Build Wall Shelves: Step-by-Step Guide by Method The shelf method decides the build order. Each method below follows the same basic idea: measure carefully, find strong support, install level hardware, and test the shelf before loading it. Pre-Use Safety Checklist: Level and wobble: Push the shelf gently from the front and sides. Check the level across the shelf. Tighten any loose screws. Wall support: Confirm that heavy shelves are mounted to studs when possible. Drywall alone should not carry heavy loads. Bracket or cleat strength: Check that brackets, cleats, or hidden hardware do not move under pressure. Weight check: Add items slowly. Do not place heavy books, dishes, or tools on the shelf until you know it is secure. Method 1: Scrap Wood Bracket Wall Shelf Materials you need: 1x boards, 1×2 pieces, wood screws, pocket-hole screws, 5/8-inch brad nails, 1 1/4-inch wood screws, wall anchors if needed, primer, paint, drill, saw, countersink bit, level, safety gear, and sandpaper. Step 1: Cut the Shelf Boards and Bracket Pieces: Cut your 1x shelf boards to the needed length. This project used one 1×6 board and one 1×4 board. Then cut 1×2 bracket pieces. Use 2 1/2-inch and 3 1/4-inch pieces for the narrow shelf, and 5-inch and 6-inch mitered pieces. Step 2: Dry-Fit and Assemble the Brackets: Lay the bracket pieces under each shelf before fastening. Check the cuts, angles, and fit first. For the wider shelf, join the 5-inch and 6-inch pieces at a 90-degree angle with wood screws. Use a countersink bit so screw heads sit flush and neatly. Step 3: Sand, Prime, and Paint the Shelves: Sand shelf boards and bracket pieces before mounting. Smooth the edges, corners, and cut ends so they feel clean and safe. Wipe away dust, then prime and paint. The shelves were painted black, while the brackets stayed natural wood. Let each coat dry. Step 4: Attach the Brackets to the Shelves: Attach larger brackets under the wider shelf using 1 1/4-inch wood screws. For the narrow shelf, attach brackets to the back edge with pocket-hole screws. Keep each bracket straight and tight, and make sure screws do not poke through the top. Step 5: Mount the Shelves to the Wall: Hold each shelf against the wall and mark screw spots. Use a level before drilling so the shelves sit straight. For a wider shelf, drive screws through each support piece. Use wall anchors without studs. For the narrow shelf, screw into studs when aligned. Step 6: Add the Mitered Supports and Check the Shelf: Attach the mitered angled pieces with 5/8-inch brad nails to complete the bracket shape. These pieces add a handmade look. After installing both shelves, check that they are level, tight, and secure. Push gently, then tighten anything that moves Method 2: No-Hardware Dowel Floating Shelves The cleanest-looking method in this list. The shelf slides onto wall-mounted dowel pins with no visible hardware on the face. It takes more preparation than a bracket shelf, but the finished look is worth it for modern rooms and bathrooms. Step 1: Cut Boards and Dowels: Start with one 2x8x8 board, remove any damaged corners, and cut it into three shelf pieces, each just under 31 inches long. Use a speed square as a saw guide. Cut a 36-inch oak dowel into nine 4-inch pins, giving each shelf three supports total. Step 2: Mark and Drill Dowel Holes: Mark three dowel points on each shelf: one in the center and two about two inches from each outside edge. Find the center of each line. Tape the 1/2-inch bit to set depth, clamp the board, and drill all nine holes carefully and cleanly. Step 3: Rip and Label Back Supports: Rip a 1 1/2-inch strip from each shelf board to create the back wall support. Use a circular saw guide, or a table saw if available. Mark each shelf-and-support pair before separating them, so the dowel holes stay aligned during final assembly. Step 4: Sand Dowels and Shelf Pieces: Test each dowel in the holes. The back support side should fit tightly, but the shelf side should slide on smoothly. Sand the exposed dowel ends by spinning them in a drill with sandpaper. Sand all shelves and round edges for a cleaner finish. Step 5: Install Dowels and Lock Supports: Line up each shelf with its matching back support. Hammer dowel pins into the back support holes. Add glue if needed, though a tight fit may hold well. Clamp the pieces, pre-drill, countersink, and add one screw through the middle dowel for stability. Step 6: Stain and Seal the Shelves: Apply pre-stain conditioner to prevent blotchy absorption. Let it dry, sand lightly, then wipe on the stain and remove excess. Light woods like maple and pine behave differently under stain; a maple stain color chart helps you pick a tone before committing to a full board. Finish with two or three coats of spray polyurethane, sanding lightly between coats. Step 7: Mount and Secure the Shelves: Level each back support on the wall and mark studs. Drill holes, then screw into studs or strong wall anchors. Slide the shelves onto their dowel pins, use scrap wood to ensure even spacing, and add a safety screw so the shelves cannot slide off. Method 3: DIY Floating Corner Shelves Materials you need: Shelf boards, small brackets or cleats, screws, anchors, wood glue, drill, level, stud finder, sandpaper, paint, stain, or sealer. Step 1: Cut the Frame and Shelf Pieces: Cut the 2×4 frame pieces to length, then cut the 1/4-inch plywood for the top and bottom faces. Keep each shelf’s parts together so nothing gets mixed up. Use clean, straight cuts along the wall sides and front edges, as these areas remain visible. Step 2: Assemble the Shelf Frames and Add Supports: Build each corner shelf frame with one long 2×4 and shorter side pieces. Add two middle supports inside each frame, using a scrap spacer to keep them even. Countersink the screw holes, drive in 3-inch screws, then nail one plywood face onto the frame. Step 3: Sand, Fill, Trim, and Paint: Sand the rough edges, plywood faces, and exposed 2×4 areas until smooth. Fill nail holes, screw holes, and small gaps with wood filler or joint compound. Add decorative trim if needed, cut the visible corners at 45 degrees, then paint the shelves and trim before mounting. Step 4: Mark the Wall and Mount the Frames: Set the first shelf on scrap spacers at your chosen height. Use a level, mark the wall, and find studs where possible. Drill pilot holes through the frame, then use screws into studs or strong wall anchors to secure each shelf firmly. Step 5: Attach the Bottom Face and Front Trim: After the frame is mounted, attach the front 2×4 edge with countersunk screws. Nail the bottom plywood face in place, then install the painted molding along the exposed edges. Use brad nails for the trim, and check that every shelf fits tightly before finishing. Step 6: Caulk, Touch Up, and Final Check: Caulk the back edges where the shelves meet the wall, especially if the corner is not perfectly square. Let it dry, then touch up the paint on the shelf and wall. Once everything is dry, load the shelves slowly and check for movement, sagging, or loose screws. Method 4: DIY Picture Ledge Shelves Materials you need: Poplar board, table saw, nail gun, wood glue, clamps, wood putty, sandpaper, stain, spar urethane, screws, drill, level, stud finder, tape measure, and safety gear. Step 1: Cut the Shelf Boards: Start with a wide poplar board and cut it slightly longer than the final shelf size. For this project, the final ledges were 60 inches long, so the boards were first cut to 61 inches. Rip three pieces for each shelf: 2 inches, 3 inches, and 4 1/2 inches. Step 2: Dry-Fit the Shelf Pieces: Gather the three boards for one ledge and dry-fit them before adding glue or nails. This helps you check that the pieces line up well. The 3-inch board forms the base, the 4 1/2-inch board becomes the back, and the 2-inch board creates the front lip. Step 3: Glue and Nail the Back Board: Clamp the 3-inch board flat on the workbench to keep it straight. Run wood glue along the bottom edge of the 4 1/2-inch board. Attach it to the 3-inch board, nail both ends first, then check that everything is flush before adding more nails. Step 4: Attach the Front Lip: Add the 2-inch piece to the front edge of the ledge the same way. Use wood glue first, then nail both ends to hold it in place. Check that the front lip is straight and flush with the base before nailing across the full length. Step 5: Trim the Ends and Fill Holes: Cut one end of the ledge clean, then measure 60 inches from that fresh edge and cut the other end. This gives the shelf smooth, flush sides. Fill all nail holes with wood putty using your finger, then let the putty dry fully before sanding. Step 6: Sand, Stain, and Seal: Sand off any excess wood putty and smooth the entire ledge before finishing. Apply the stain evenly, wipe off the excess, and let it dry for 24 hours. After that, add spar urethane to protect the wood and give the picture ledge a clean finished surface. Step 7: Mount and Style the Ledges: Measure the wall so the picture ledges hang centered. Since they may hold frames and artwork, screw them into wall studs for stronger support. Once mounted, place frames and art on the ledges, stand back, rearrange, and keep adjusting until the display looks balanced. Method 5: DIY Hexagon or Honeycomb Shelves Materials you need: Lumber, miter saw or circular saw, stop block, painter’s tape, wood glue, brad nailer, 1 1/2-inch brad nails, sander, sandpaper, router with 45-degree bit, polyurethane, drill, screws, stud finder, and safety gear. Step 1: Cut Matching Hexagon Pieces: Choose lumber like pine, walnut, or ash. For eight-inch sides, use about 50 inches of board per shelf. Cut each piece at a 30-degree angle, flipping the board after each cut. Use a stop block so all six pieces stay the same length. Step 2: Sand and Tape the Pieces: Sand each cut piece before assembly to remove saw marks and rough edges. Smooth the faces and angled ends so the joints fit tightly. Lay all six pieces side by side, press the joints together, and run painter’s tape across them to hold the layout in place. Step 3: Glue, Fold, and Nail the Shelf: Flip the taped pieces so the inside joints face up. Apply wood glue to each angled joint, then fold the strip into a hexagon shape. Press the corners tight, wipe away glue squeeze-out, and add 1 1/2-inch brad nails for extra strength if needed. Step 4: Let It Dry and Fix the Joints: Let the shelf dry overnight before removing the tape. Check every joint for gaps or loose areas. If nail tips stick out, trim them first, then sand them down. Sand raised joints, glue marks, and uneven spots until the full shelf feels smooth. Step 5: Add Bevels and Finish: If you want a cleaner edge, use a router with a 45-degree bit to bevel the outside edges. Then apply clear satin polyurethane or your chosen finish. Let it dry, sand lightly with 220-grit sandpaper, and add extra coats for better protection. Step 6: Mark, Mount, and Secure: Choose your wall layout, then mark stud locations on the shelf and wall. Drill countersunk holes where screws will sit. Drive screws into studs, leaving them slightly proud. Hang the shelf on the screws, check that it feels secure, then style it with light decor. These shelf methods give you several ways to match your skill level, room style, and storage needs while keeping the project practical and customizable. What Each Method Actually Costs These figures reflect material costs at a standard home improvement store. Your total will shift depending on wood species, finish quality, and whether you already own the tools. Method Estimated Cost Main Cost Drivers Scrap Wood Bracket Shelf $10–$60 1× boards, 1×2 brackets, screws, paint No-Hardware Dowel Floating Shelf $10–$80 2×8 lumber, oak dowel, stain, polyurethane Floating Corner Shelf $40–$150 2×4 frame, plywood faces, trim, paint Picture Ledge Shelf $30–$120 Poplar board, glue, nails, stain, spar urethane Hexagon / Honeycomb Shelf $40–$180 Lumber species choice, miter cuts, finish, and hardware The single biggest cost variable across all five methods is wood species. Pine sits at the low end. Walnut, ash, and hardwood poplar add $20–$60 to the same build. The same poplar boards that work well for picture ledges also translate directly to a painted DIY bookshelf once you’re comfortable with the cuts. The hardware itself, brackets, anchors, and screws, is usually under $15 per shelf, regardless of method. Common DIY Shelf Mistakes to Avoid Small errors during measuring, mounting, or finishing can weaken your shelves. Watch for these common mistakes so your project stays straight, safe, and useful. Skipping the level: Always use a level before drilling, because even a small tilt can make the shelf look uneven. Not finding studs: Heavy shelves should be mounted to studs when possible, since drywall alone cannot safely hold heavy loads. Using weak anchors: Choose wall anchors that match your wall type and the total weight your shelf will carry. Choosing thin wood: Thin boards may bend or sag over time, especially when holding books, dishes, or storage baskets. Making shelves too deep: Deep shelves need stronger brackets because extra depth puts more pull on the wall support. Overloading the shelf: Stay within the hardware weight limit and keep heavier items close to the wall. Painting after mounting: Cut ends, and undersides are hard to reach once the shelf is on the wall. Finish the shelf completely before installing it. If you’re starting with a stained board and want a painted finish, painting over stained wood needs different prep than bare pine does. Touching up the wall is fine; fully painting after the fact is a frustration. Ignoring hidden wires or pipes: Check carefully before drilling, especially near outlets, switches, kitchens, bathrooms, and shared plumbing walls. Avoiding these mistakes helps your DIY shelves stay secure, level, and clean-looking while reducing the chance of wall damage or future repairs. Keeping Wall Shelves in Good Shape After Installation A well-built shelf can last decades. These habits help. Let the finish cure fully before placing items on the shelf; most paint and polyurethane products need 24–72 hours of full cure before they can be handled without contact. Lift items rather than dragging them; dragging leaves scratches that are hard to fix without refinishing. Add felt pads under anything ceramic, glass, or metal to protect the surface. In bathrooms, use sealed wood and keep the room ventilated. Unsealed wood in a humid bathroom will absorb moisture and eventually warp. Check the shelf brackets and screws every 6–12 months. Wood expands and contracts with seasonal humidity changes, and fasteners can loosen over time in ways that aren’t visible until something shifts. When things go wrong, a screw starts to pull, a bracket creaks, fix it immediately rather than waiting. A loose anchor is a 10-minute fix. A shelf that falls and damages the wall, floor, or whatever was on it is not. Frequently Asked Questions How do you build floating wall shelves without visible brackets? Use the dowel method in Method 2 above: a back support mounts to the wall with screws, wooden pins extend from it, and the shelf slides over the pins. The result is a shelf with no visible hardware on the face or underside. What wood is best for DIY wall shelves? For most builds, 3/4-inch pine or poplar boards from a home improvement store work well and stay affordable. For heavier loads or a higher-end look, 3/4-inch birch plywood or hardwood boards like oak hold up better and resist sagging over wider spans. How do you mount wall shelves without studs? Use toggle bolts or snap toggles rather than standard plastic expansion anchors. Toggle bolts distribute load across a larger area of drywall and hold considerably more weight. Avoid drywall-only mounting for shelves that will hold books, dishes, or anything above 20 lbs. How deep should DIY wall shelves be? 6 to 8 inches for decor and small plants. 8 to 10 inches for books. 10 to 12 inches for storage baskets. Beyond 12 inches, the leverage on the wall mount increases significantly; you’ll need stronger brackets or a cleat system mounted to multiple studs. How do you build corner wall shelves? Use the 2×4 frame method in Method 3. Build the L-shaped frame, attach plywood faces, paint before mounting, then drive screws into studs or anchors on both walls. Caulk the back edges after mounting; corners are almost never perfectly square, and a thin bead of caulk closes the gap cleanly. Can I build wall shelves as a beginner with no woodworking experience? Yes, with Method 1 or Method 4. Both use straight cuts with standard lumber sizes and visible hardware that’s forgiving to install. A miter saw helps, but a circular saw with a guide gets the same result. Allow extra time on the first build; the second one always goes faster. How do you keep wall shelves level? Mark the bracket or cleat locations with a spirit level before drilling any holes. Don’t rely on eyeballing it; even a 1/4-inch tilt is obvious once items are on the shelf. For shelves wider than 36 inches, check the level at both ends and the center before committing to screw positions. Final Thoughts Wall shelves can turn empty space into useful storage when you plan the build with care. I like this project because you can choose a simple bracket shelf, a clean floating style, a corner shelf, a picture ledge, or a hexagon design based on your room and skill level. You have seen how to choose materials, compare costs, cut and finish boards, mount supports, avoid common mistakes, and keep shelves safe over time. Knowing how to build wall shelves helps you save money, use your walls better, and create storage that fits your home. I would start with one easy shelf first, then try another method once you feel ready. Share your results or questions below.

