


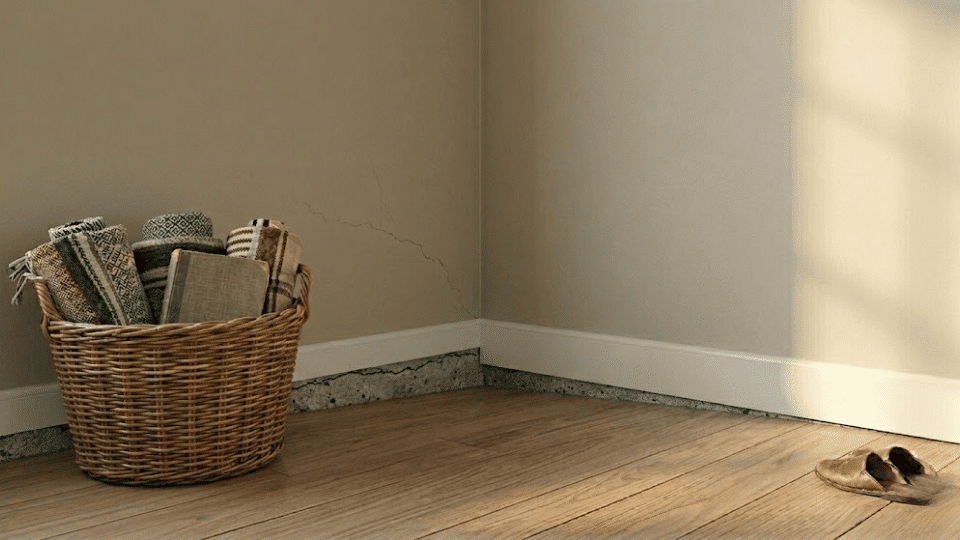
A sinking foundation tends to announce itself quietly, a door that won’t close right, a hairline crack along the baseboard, a floor that feels slightly off underfoot. By the time most people notice something is wrong, the settling has already been going on for a while. The good news is that foam jacking foundation repair is often far less invasive and less expensive than most expect. I’ve seen people assume the worst and end up with a same-day fix. My goal here is to break down what polyurethane foam actually does beneath a settling slab, where it works well, where it falls short, what it realistically costs, and how to find a contractor who’s actually worth trusting with your foundation. What Is Foam Jacking? Foam jacking is a foundation repair method where polyurethane foam is injected through small drilled holes into the voids beneath a settling or sinking concrete slab. Once it enters, it expands, filling gaps, stabilizing loose soil, and lifting the slab back toward its original position. The foam cures in as little as 15 to 30 minutes and can support between 6,000 and 14,000 lbs per square foot once set. What I think makes it genuinely practical is its lightweight design. Unlike heavier slurry-based methods, it doesn’t pile additional stress onto soil that’s already compromised. Holes are drilled, foam is pumped in, holes are patched, and in most cases, you’re walking on it the same day. What Foam Jacking Can and Can’t Fix Not every sinking slab is a foam jacking job. Knowing the difference upfront saves you time, money, and the frustration of a repair that doesn’t hold. Here’s where it works well, and where it doesn’t. Where Foam Jacking Works Foam jacking performs best when the concrete itself is structurally sound, and the problem is what’s happening underneath it. Cases that tend to respond well include: Settled or sinking slab foundations with identifiable voids beneath Sunken garage floors caused by soil erosion or poor original compaction Uneven driveways or concrete flatwork adjacent to the home’s foundation, where creative modern driveway ideas can improve both function and appearance. Void filling under concrete caused by water washout or soil shrinkage Minor-to-moderate settlement where the slab hasn’t cracked through or broken apart Where Foam Jacking Won’t Work Foam jacking stabilizes what’s there; it can’t fix structural issues or correct an ongoing problem with the ground itself. It’s the wrong call when: The foundation slab has significant structural cracking or has begun to break apart Active soil movement is still occurring (expansive clay, ongoing erosion) Settlement occurs due to unrepaired plumbing leaks, leading to foam eventually being compromised by water. Voids are too large or too deep for foam expansion to fill reliably The foundation requires underpinning with piers to reach stable load-bearing soil Foam Jacking vs. Other Options Foam jacking isn’t the only way to address a settling foundation, and it’s not always the right one. Here’s how it stacks up against the three most common alternatives. Method Works Best on Cost Range Advantage Limitation Polyurethane Foam Jacking Moderate settling, intact slab, identifiable voids $5–$25/sq ft Lightweight, fast cure, same-day use Won’t fix active movement or severe structural failure Mudjacking Larger areas, budget-conscious repairs $3–$6/sq ft Lower upfront cost, proven method Heavy, adds load to compromised soil; can re-settle Pier/Pile Systems Serious structural settlement $1,000–$3,000+ per pier Permanent stabilization addresses the root cause Most invasive and expensive option Full Replacement Severely cracked or broken foundation $50–$75/sq ft Clean slate, long-term fix Highest cost, most disruptive, long curing time Foam jacking sits in the middle, not the cheapest, but significantly less invasive and faster than the heavy-duty options. If your slab is still largely intact and the soil beneath it is the problem, it’s a strong candidate. What Does Foam Jacking Cost? Understanding foam jacking costs helps you set realistic expectations before getting quotes. Prices can vary widely, so knowing the baseline and key drivers gives you better control. Average Cost of Foam Jacking Foam jacking for foundation repair usually ranges from $2,000 to $7,500 for most homes. On a per-square-foot basis, expect $5 to $25, depending on job size. Smaller areas often cost more per square foot, while larger projects reduce that rate. Labor makes up about 40–60% of the total cost, covering inspection, setup, drilling, and injection. The remaining cost mostly comes from polyurethane foam, which is priced higher than traditional materials. Factors That Affect Foam Jacking Costs Several factors can shift your final quote up or down: Area size: Larger jobs cost more overall but often less per square foot Void depth and severity: Deeper gaps need more foam, increasing cost Accessibility: Tight or interior spaces can add 20–50% to labor costs Soil conditions: Weak or shifting soil may need extra stabilization Location: Labor rates vary, with urban areas usually costing more Most contractors also charge a minimum fee of $300 to $700, regardless of project size. What the Process Looks Like If you’ve scheduled a foam jacking appointment, here’s what to expect on the day so you can tell whether the job is being done properly. Initial assessment: The technician walks the area, checks elevation levels, and identifies injection points before any drilling begins. Drilling: Small holes (roughly the size of a penny) are drilled through the slab at calculated intervals. Foam injection: Polyurethane is pumped in under controlled pressure; it expands to fill voids and lift the slab. Monitoring: The crew tracks slab elevation during injection to avoid over-lifting. This is where experience matters most. Hole patching: Injection holes are filled, and the surface is cleaned up. Cure and walkthrough: Foam sets in 15–30 minutes. The contractor should walk you through what was done and flag anything that needs monitoring. A typical residential job takes a few hours. If a contractor rushes through the assessment or skips the monitoring step during injection, that’s a problem worth raising before they leave. How Long Does It Last? Done right, foam jacking can last 10 years or more; some installations hold significantly longer. The foam itself is durable; it’s moisture-resistant, doesn’t wash out over time the way mudjacking slurry can, and holds its structural integrity well. What actually determines longevity isn’t the material; it’s whether the underlying cause of the settling was addressed. If water is still pooling against your foundation, if drainage hasn’t been corrected, or if soil movement is ongoing, the repair will eventually lose ground. Foam jacking fixes the symptom effectively. The soil and water conditions around your foundation determine whether that fix holds for a decade or needs to be revisited in a few years. How to Vet a Contractor This is where many homeowners move too fast. Foundation repair isn’t something to decide on solely based on price. A few checks here can save you from bigger issues later. Start with licensing, insurance, and certifications. Confirm general liability and workers’ compensation coverage, and verify with your state board. Certifications like SPFA or BHA’s CSRS show added training. Check track record and compare quotes. Review complaint patterns, not just ratings. Get at least three detailed estimates. Avoid single-number pricing. Before committing, ask about foam type and strength, lifting control method, warranty details, and the full scope of drainage work included. A rushed quote without proper measurements is a clear red flag that warrants walking away. Taking an extra day or two to vet your contractor properly can save you thousands down the road. How to Prevent Future Foundation Settling Preventing foundation settling comes down to controlling water and soil movement around your home. Taking small steps early can help you avoid costly repairs later. Maintain proper drainage around your home. Make sure water flows away from the foundation, not toward it. Poor drainage is one of the main causes of soil movement and settling issues. Keep soil moisture consistent. Dry soil shrinks, while overly wet soil expands. Water your yard evenly during dry periods to reduce stress on your foundation. Manage gutters and downspouts well. Clean them often and extend downspouts at least a few feet away from your home to prevent water buildup near the base. Use smart landscaping techniques. Avoid planting large trees too close, and ensure grading slopes away from your foundation to limit long-term soil pressure. Taking these steps helps you stay ahead of foundation problems. A little maintenance now can protect your home’s structure and save you from major repairs later. Final Words Foundation settling isn’t always the crisis it feels like, but it does deserve a straight answer, not a guessing game. Foam jacking foundation repair handles a specific set of problems well: voids beneath intact slabs, moderate settlement, and situations where the concrete itself is still sound. It won’t address active soil movement or structural failure, and the price range is wide enough that an itemized quote is always necessary. The real strength of polyurethane foam lies in what it doesn’t do: it doesn’t overload compromised soil, doesn’t take days to cure, and doesn’t require tearing anything apart. If this helped clarify where you stand, drop a comment below with any questions, or pass it on to someone dealing with a settling slab. Frequently Asked Questions Can you do this yourself? Rental equipment for foam jacking isn’t available to the public in most areas, and injection pressure requires calibrated machinery. This one needs a licensed contractor; there’s no real DIY version. Does your insurance cover foam jacking? Usually not. Insurers classify foundation settling as normal wear and tear. The exception is if a covered event, like a burst pipe, directly caused the damage. Always check your specific policy. Is the foam safe around plumbing or drinking water? Reputable contractors use foam certified to NSF/ANSI 61 standards, meaning it’s approved for contact with drinking water. Ask your contractor for product certification before work begins. What if the slab sinks again? Retreatment is possible and typically costs less than the initial job, since the contractor already knows the site. Longevity improves significantly when drainage issues are fixed alongside the repair. How will I know if the lift actually worked? Doors and windows that were sticking should close more smoothly. Gaps along baseboards should visibly reduce. A good contractor will show you before-and-after elevation readings before leaving.
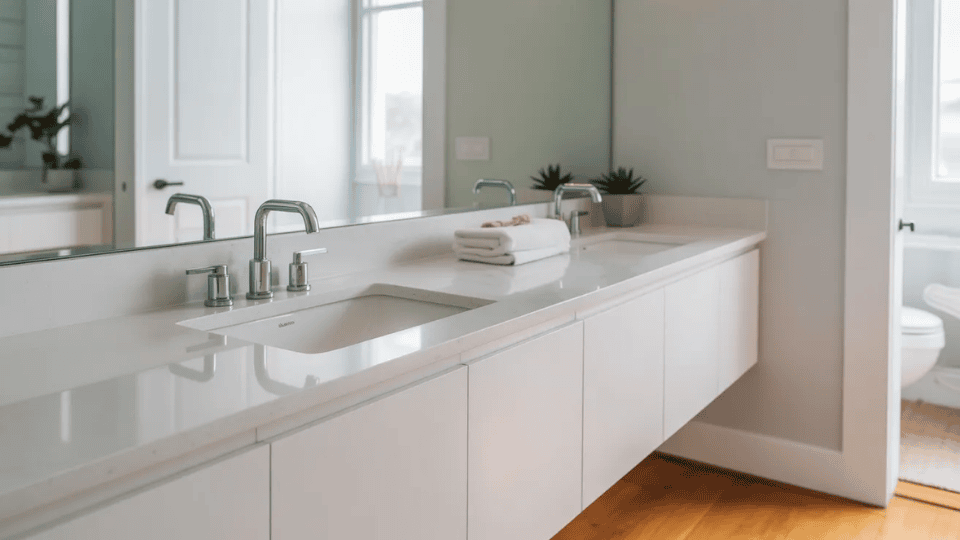
When I started looking into bathroom upgrades, I quickly realized that one of the easiest ways to refresh the space is by replacing the vanity. But the first question that came to my mind was simple: what is the real cost to replace a bathroom vanity? The price can vary a lot depending on the size of the vanity, the materials used, and whether you install it yourself or hire a professional. In some cases, it can cost just a few hundred dollars, while larger or custom vanities can cost several thousand. In this guide, I’ll walk you through the average costs, labor fees, material options, and extra expenses you should expect so you can plan your bathroom project with confidence. Average Cost to Replace a Bathroom Vanity The cost to replace a bathroom vanity usually ranges from $300 to $4,000, depending on the size of the vanity, the materials used, and whether you hire a professional installer. On average, most homeowners in the U.S. spend around $1,600 for a vanity and installation combined. A small prefabricated vanity with basic installation can cost as little as $300 to $900, while larger double-sink or custom-built vanities can cost $2,000 to $4,000 or more. Labor, plumbing adjustments, and countertop materials can also increase the total price. If you choose to install the vanity yourself and reuse existing plumbing, the total cost can be significantly lower. Signs It’s Time to Replace Your Bathroom Vanity Over time, a bathroom vanity can start to show wear and tear. If you notice certain problems, it may be a good sign that it’s time to replace it. Common signs include: Water damage or swelling: Cabinets may swell, warp, or peel after long exposure to moisture. Mold or mildew around the base: Moisture buildup can cause mold or mildew to grow near the bottom of the vanity. Cracked or damaged countertop: Chips or cracks in the countertop can make the vanity look worn and harder to clean. Outdated design: An old-style vanity can make the whole bathroom look dated. Limited storage space: Older vanities often have less storage and may not meet your current needs. One signal people often overlook: if the vanity cabinet doors no longer close flush or the drawer slides are broken, that’s a functional failure that affects daily use more than any cosmetic issue. A vanity that works poorly every single day justifies replacement even before it shows visible wear. If you notice several of these issues, replacing the vanity can improve both the appearance and functionality of your bathroom. Bathroom Vanity Replacement Cost Breakdown When I looked into replacing a bathroom vanity, I learned that the total price is made up of several costs. The vanity itself is usually the biggest expense, but labor and removal of the old unit can also add to the final bill. 1. Cost of the Vanity Unit The vanity unit is the cabinet, sink, and sometimes the countertop. Prices can vary a lot depending on the style and materials. Prefabricated vanity: $100 – $2,600 Custom vanity: $500 – $3,500+ A few things can change the price: Size: Larger vanities cost more. Materials: Solid wood and stone tops are more expensive than laminate. Storage features: Extra drawers or shelves can increase the price. Sink type: Double sinks or special sink designs usually cost more. Before buying a vanity unit, measure the exact rough-in width of the existing space, not just the old vanity’s face. Also, measure the door clearance. Barn doors and pocket doors have different swing requirements than hinged doors. A vanity that’s even 2 inches wider than your opening requires drywall work and potentially baseboard trimming, which adds $200–$500 to the project. Confirm the plumbing drain centerline location as well, since moving it adds $450–$800 in plumbing costs. 2. Labor Cost to Install a Bathroom Vanity If you hire a professional, you’ll also pay for installation. Labor costs depend on the complexity of the job. Professional installation: $200 – $1,000 Plumber hourly rate: $45 – $200 per hour Total labor for a full replacement: $665 – $3,300 If plumbing lines need to be moved or repaired, the labor cost can go up. Who should handle the install? For a straightforward like-for-like swap (same size, same plumbing locations), a skilled handyperson ($50–$80/hour) can often handle the job and costs less than a licensed plumber or contractor. If the project involves new plumbing, drain relocation, or moving supply lines, hire a licensed plumber. Unpermitted plumbing work can create problems when selling your home and may not be covered by homeowner’s insurance if something goes wrong. 3. Cost to Remove and Dispose of the Old Vanity Before the new vanity can be installed, the old one needs to be removed. Some contractors include this in their price, but sometimes it’s a separate cost. Typical removal and disposal cost comes to around $150 – $400. This usually covers disconnecting the plumbing, taking out the old vanity, and hauling it away. Cost by Bathroom Vanity Size The total cost to replace a bathroom vanity can also vary depending on the size. Typical installed price ranges are shown below: Vanity Type Typical Width Typical Cost Installed What’s Typically Included Small single vanity 18″–30″ $300 – $900 Prefab cabinet, integrated sink top, basic installation Mid-size vanity 31″–48″ $600 – $1,700 Cabinet, separate or integrated top, standard installation Double sink vanity 49″–72″ $700 – $2,600 Cabinet, two sinks, countertop; may need plumbing for a second drain Custom luxury vanity Any size, built to spec $2,000 – $5,000+ Custom cabinetry, premium countertop, full installation with plumbing These estimates include the vanity unit and basic installation, but the final price can be higher if you choose premium materials or need additional plumbing work. Cost of Different Vanity Materials The material you choose for your bathroom vanity can significantly affect the final price. Some materials are simple and budget-friendly, while others are stronger, more stylish, and more expensive. 1. Budget Materials Budget materials are great if you want a quick upgrade without spending too much money. They are common in prefabricated vanities and work well for smaller bathrooms or guest bathrooms. Common budget materials include: Laminate MDF (medium-density fiberboard) Cultured marble tops These materials are affordable and easy to find, but they may not last as long as higher-end options. Typical cost:$100 – $500 MDF durability: MDF vanities are the most budget-friendly but are the most vulnerable to water damage at the base and around the sink cutout. If you choose MDF, seal all exposed edges before installation and ensure the plumbing connections are watertight. A small, slow leak onto an MDF vanity base can cause swelling within weeks. 2. Mid-Range Materials Mid-range materials offer a good balance between price, durability, and appearance. Many homeowners choose these options because they look nicer than basic materials but still stay within a reasonable budget. Common mid-range materials include: Solid wood cabinets Ceramic sinks Quartz composite countertops These materials are stronger and usually last longer than budget options. Typical cost:$500 – $1,500 3. Luxury Materials Luxury materials are used in high-end bathrooms and custom vanities. They often have a premium look and can increase the value of your bathroom. Common luxury materials include: Granite countertops Marble tops Custom hardwood cabinetry These materials are durable and beautiful, but they also cost much more than basic options. Typical cost:$1,500 – $4,000+ Countertop Material Cost Comparison The countertop is often the biggest single cost variable in a vanity replacement. Here’s how common materials compare: Material Cost per Sq. Ft. Durability Best For Laminate / cultured marble $10–$40 Low–moderate; scratches easily Guest baths, budget renovations Ceramic / porcelain tile $7–$20 + $13–$28 labor Good; grout lines require maintenance Mid-range bathrooms, classic look Quartz composite $50–$200 Excellent; non-porous, moisture-resistant Primary baths, high-use vanities Granite $5–$100 (varies by slab) Very good; requires annual sealing Mid-to-high end bathrooms Marble $40–$150+ Moderate; etches with acidic products High-end primary baths; low-traffic use Concrete $75–$135 Good; heavy, requires strong cabinet support Industrial or custom aesthetic Quartz has overtaken granite as the most popular vanity countertop material among homeowners, largely because it’s non-porous, doesn’t require sealing, and resists the moisture and cleaning products that bathrooms are exposed to daily. Additional Costs That Can Increase the Price When replacing a bathroom vanity, the price is not always limited to the vanity and installation. In some cases, extra repairs or upgrades may be needed, which can increase the total project cost. Some of the most common additional expenses include: Plumbing repairs or upgrades: $450 – $1,800 Countertop replacement: $300 – $5,400 Faucet installation: $60 – $600 Flooring or wall repairs: $500 – $2,000 Electrical or lighting adjustments: $150 – $800 Permit requirement: Replacing a vanity in the same location with no plumbing changes typically does not require a permit. However, if you’re moving the drain, adding a second sink, or making any changes to supply lines, most jurisdictions require a plumbing permit ($50–$300). Working without a required permit can cause issues when selling your home and may void homeowner’s insurance coverage on related claims. When in doubt, call your local building department; it’s a quick call that can save significant headaches later. DIY vs Professional Vanity Replacement Cost Before deciding how to replace your vanity, it helps to compare the cost and benefits of doing the job yourself versus hiring a professional. The table below shows the main differences between the two options: Factor DIY Bathroom Vanity Replacement Hiring a Professional Average Cost $150 – $800 $400 – $1,700+ Labor Cost None (you do the work) $200 – $1,000 depending on the job Skill Level Needed Basic DIY and plumbing knowledge No skills needed from the homeowner Installation Time May take longer if you are learning Usually completed in a few hours Risk Level Higher risk of plumbing or installation mistakes Lower risk due to professional experience Best For Simple vanity swaps with existing plumbing Complex installs or plumbing changes Both options can work well, depending on your budget, skills, and the type of vanity replacement you plan. DIY time estimate: A first-time DIY vanity replacement on a simple like-for-like swap typically takes 4–8 hours. That includes shutting off the water, disconnecting the old plumbing, removing the vanity, setting and leveling the new one, reconnecting the drain and supply lines, and caulking. If you’ve never worked with P-traps or compression fittings, budget toward the higher end and watch a full installation video for your specific vanity type before you start. Shared Experiences on Vanity Replacement In a Reddit thread, a user asked how much professionals usually charge to remove and replace a single-sink bathroom vanity. The poster mentioned that a plumber would handle the pipe connections separately and estimated the work would take about 3 hours. One commenter replied that they were doing a similar job the next day and planned to charge about $300. Another user shared a higher quote, estimating around $900 for removing and reinstalling the vanity, reconnecting the water and drain lines, and painting the small bathroom. The $300–$900 range in that thread is consistent with what I’ve seen for straightforward single-sink replacements where plumbing stays in place. The moment you add plumbing work, wall repairs, or a larger vanity, quotes climb quickly. Always get at least three written quotes for any job over $500; the spread between contractors for identical work can be $300–$600, which is significant at this project scale. Tips to Save Money on Bathroom Vanity Replacement Replacing a bathroom vanity can get expensive, but there are a few simple ways to keep the cost lower. Small choices during the project can make a big difference in the final price. Choose prefabricated vanities: These are usually much cheaper than custom-built vanities and are widely available in stores. Reuse existing plumbing: Keeping the sink and pipes in the same place helps avoid costly plumbing changes. Keep the same vanity size: Installing a vanity with the same dimensions prevents extra work on walls, floors, or countertops. Install the vanity yourself: If the plumbing setup is simple, doing the installation on your own can save labor costs. Shop seasonal sales: Many home improvement stores offer discounts during holiday sales or clearance events. Buy the vanity cabinet and countertop separately: Many retailers bundle these together at a premium. Buying a solid wood cabinet from one source and a quartz top from a fabricator often costs 15–25% less than a pre-bundled unit of equivalent quality. This requires a bit more coordination, but the savings on a mid-range project can be $200–$400. Planning ahead and comparing options can help you upgrade your bathroom while staying within your budget. Does a New Bathroom Vanity Add Value to Your Home? If you’re replacing a vanity partly with resale in mind, it helps to understand the actual return. Industry data on bathroom remodels consistently shows that midrange updates (new vanity, updated fixtures, fresh tile) return roughly 65–75% of their cost at resale. That means a $1,500 vanity replacement might add $975–$1,125 in home value on a national average basis. A floating vanity with a quartz countertop is one of the specific upgrades most often cited by real estate professionals as contributing to buyer appeal. Modern vanities signal a well-maintained, updated bathroom, which reduces the buyer’s negotiating leverage on price. Key context on ROI: Minor cosmetic updates (new vanity, fixtures, lighting) tend to recoup the highest percentage of cost, often 70–85%, because the investment is smaller. Upscale custom vanities with premium stone recoup a lower percentage (50–60%) because the cost is high relative to what buyers are willing to pay. Double vanities are consistently cited by real estate professionals as a high-appeal feature in primary bathrooms, particularly for buyers with families or couples sharing a space. ROI varies significantly by local market. In high-demand areas, bathroom updates are more directly rewarded in the sale price. In slower markets, returns the more indirect, with improved days-on-market and reduced buyer concessions. Is Replacing a Bathroom Vanity Worth the Cost? Replacing a bathroom vanity is often worth the cost because it can quickly improve both the look and function of the space. A new vanity can provide better storage, a cleaner sink area, and a more comfortable layout for everyday use. It is also one of the easiest ways to modernize an outdated bathroom without doing a full remodel. Many homeowners choose this upgrade because it can make the bathroom feel fresh and more organized in just a few hours of work. In addition, a stylish, well-installed vanity can enhance the home’s overall appeal, potentially increasing resale value if you plan to sell in the future. From my own experience overseeing these projects, the satisfaction-to-cost ratio of a vanity replacement is genuinely high compared to most home upgrades. It’s visible every single day, it directly affects morning and evening routines, and a well-chosen vanity can even make a dated bathroom feel current. It’s one of the few upgrades where the functional improvement and the aesthetic improvement happen simultaneously, which is hard to match at this price point. Final Thoughts Replacing a bathroom vanity is one of the easiest ways I’ve found to upgrade a bathroom without doing a full remodel. The cost to replace a bathroom vanity can range from a few hundred dollars for a simple DIY swap to several thousand for a custom installation. The final price usually depends on the vanity size, materials, and whether plumbing changes are needed. Planning ahead and understanding the cost breakdown can help you avoid surprises and stay within budget. With the right choice, a new vanity can make your bathroom more functional, organized, and stylish. Ready to upgrade your bathroom? Start searching vanity options and estimate your project cost today, and share them in the comments below.
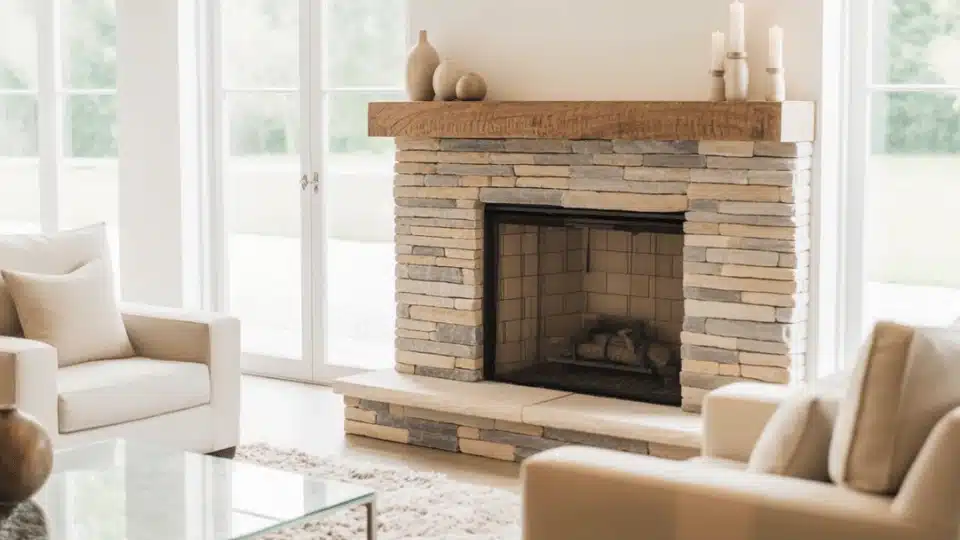
When I first thought about updating my fireplace, the biggest question on my mind was simple: how much would it actually cost? I quickly learned that fireplace remodel costs can vary a lot. Some homeowners spend just a few hundred dollars on paint and small upgrades, while others invest thousands for a full redesign with stone, inserts, or a new mantel. I’ll walk through real fireplace remodel cost ranges, what affects the price, and what homeowners usually wish they knew before starting. I’ll also share budgeting tips, common hidden costs, and smart ways to save money so you can plan your remodel with confidence. Fireplace Remodel Cost at a Glance Understanding general price ranges helps you set realistic expectations before meeting contractors or shopping for materials. These typical costs reflect common remodel paths homeowners choose today. Cosmetic update: $200 – $650 Fireplace refacing: $600 – $4,500 Full remodel: $2,000 – $8,000+ New fireplace build: $7,000 – $10,000+ These ranges vary based on material quality, fireplace size, labor rates, and structural changes. Defining your project scope early keeps your budget controlled and prevents unnecessary upgrades later. Real Homeowner Fireplace Remodel Costs and Experiences In a Reddit discussion, a homeowner asked contractors how much it would cost to raise an old fireplace into a modern stone design. Several replies suggested the project could cost anywhere from about “$30,000 to $50,000 or more”, depending on materials like granite and the weight the floor must support. Some users warned that heavy stone might require additional beams or structural work, which could quickly increase the total cost. The conversation showed how fast a simple visual upgrade can turn into a large construction project. Reading this made me realize that the cost of every fireplace remodel depends heavily on hidden structural needs. I think homeowners should always get inspections first and set aside extra budget before starting any fireplace upgrade. Fireplace Remodel Cost Breakdown Understand exactly where your fireplace remodel budget goes, including materials, inserts, mantels, and labor, so you can plan costs clearly and avoid unexpected expenses. 1. Refacing Costs Refacing focuses on updating the outer surface of your fireplace without rebuilding the internal structure. This usually includes installing tile, stone veneer, brick panels, or modern surround materials to refresh the appearance. I’ve noticed many homeowners choose this option when the fireplace works fine but looks outdated. The final cost depends on material choice, design complexity, and fireplace size. Custom patterns, premium stone, or intricate layouts push pricing toward the higher end of that range. 2. Fireplace Insert Costs If your fireplace does not heat efficiently, adding a new insert can significantly improve performance. Inserts come in gas, electric, or wood-burning models, and each option affects total cost differently. The unit itself generally costs between $500 and $2,000. However, that number rarely reflects the final bill. Installation, gas line connections, venting modifications, and possible electrical upgrades increase the total. I’ve seen homeowners underestimate these add-ons, so planning for both equipment and professional installation is important. 3. Mantel Installation Costs Updating the mantel can completely change how your fireplace looks without altering the firebox. Mantels range from simple pre-made wood shelves to large custom-built stone or reclaimed wood designs. Basic options may cost a few hundred dollars, while custom builds can reach several thousand. Installation typically ranges from $500 to $5,000, depending on material weight, design complexity, and finishing details. Decorative molding, floating supports, and integrated lighting can also raise costs beyond the base price. 4. Labor Costs and Professional Services Labor often represents a significant portion of your total remodeling budget. Even small projects may require skilled professionals to ensure safety and code compliance. Masonry work for brick or stone, gas line installation for inserts, and electrical upgrades for lighting or electric fireplaces all require licensed trades. The more complex the project, the higher the labor cost. Structural reinforcement or demolition work can increase labor hours substantially, which directly affects your final total investment. Hidden Fireplace Remodel Costs Most Homeowners Miss Before starting your fireplace remodel, it’s smart to know that the listed price is not always the final price. Many homeowners run into extra costs once the work begins. Permit fees: Many cities require a permit before you change a fireplace, especially if gas lines, vents, or structure are involved. Fees are usually small, but skipping this step can lead to fines later. Chimney repairs: Once work begins, contractors sometimes find cracks, blockages, or liner damage inside the chimney. Fixing these problems can add unexpected costs to the project. Structural reinforcement: If the wall or floor cannot safely hold heavy stone, brick, or a new insert, extra support may be needed. This hidden work increases labor and material costs. Venting upgrades: New gas or wood inserts often require updated venting systems to ensure safe airflow. Adding or replacing vents can raise the total remodel price. Hearth code compliance: Local safety rules may require a larger hearth, heat-safe materials, or extra spacing. Meeting these rules protects your home but may add to your budget. Knowing about these hidden expenses ahead of time helps you plan a safer budget and avoid stressful surprises during the remodel. Is Remodeling a Fireplace Worth the Investment? When I looked into remodeling my fireplace, I kept asking myself if the cost would truly pay off. In many cases, it does. Small updates like paint, tile, or a new mantel can dramatically improve the look of your living space without requiring a huge budget. Larger renovations, such as adding an insert or upgrading materials, can increase heating efficiency and reduce energy waste. If you plan to sell, many homeowners recover between 50% and 90% of their investment, depending on market conditions and build quality. Even if you are staying put, a refreshed fireplace often becomes the visual centerpiece of the room, adding warmth, comfort, and long-term enjoyment to your home. Final Thoughts After researching fireplace remodel costs and seeing what real homeowners spend, I’ve learned there isn’t one single price that fits every project. A small refresh can be very affordable, while a full remodel with new materials or inserts can cost much more. The key is to know your goal first: if you want a simple visual upgrade or a complete fireplace transformation. If you plan carefully, compare quotes, and focus on the upgrades that matter most, you can achieve beautiful results without overspending. If you’re thinking about remodeling your fireplace soon, start by setting your budget and save this post today so your project stays smooth and stress-free.
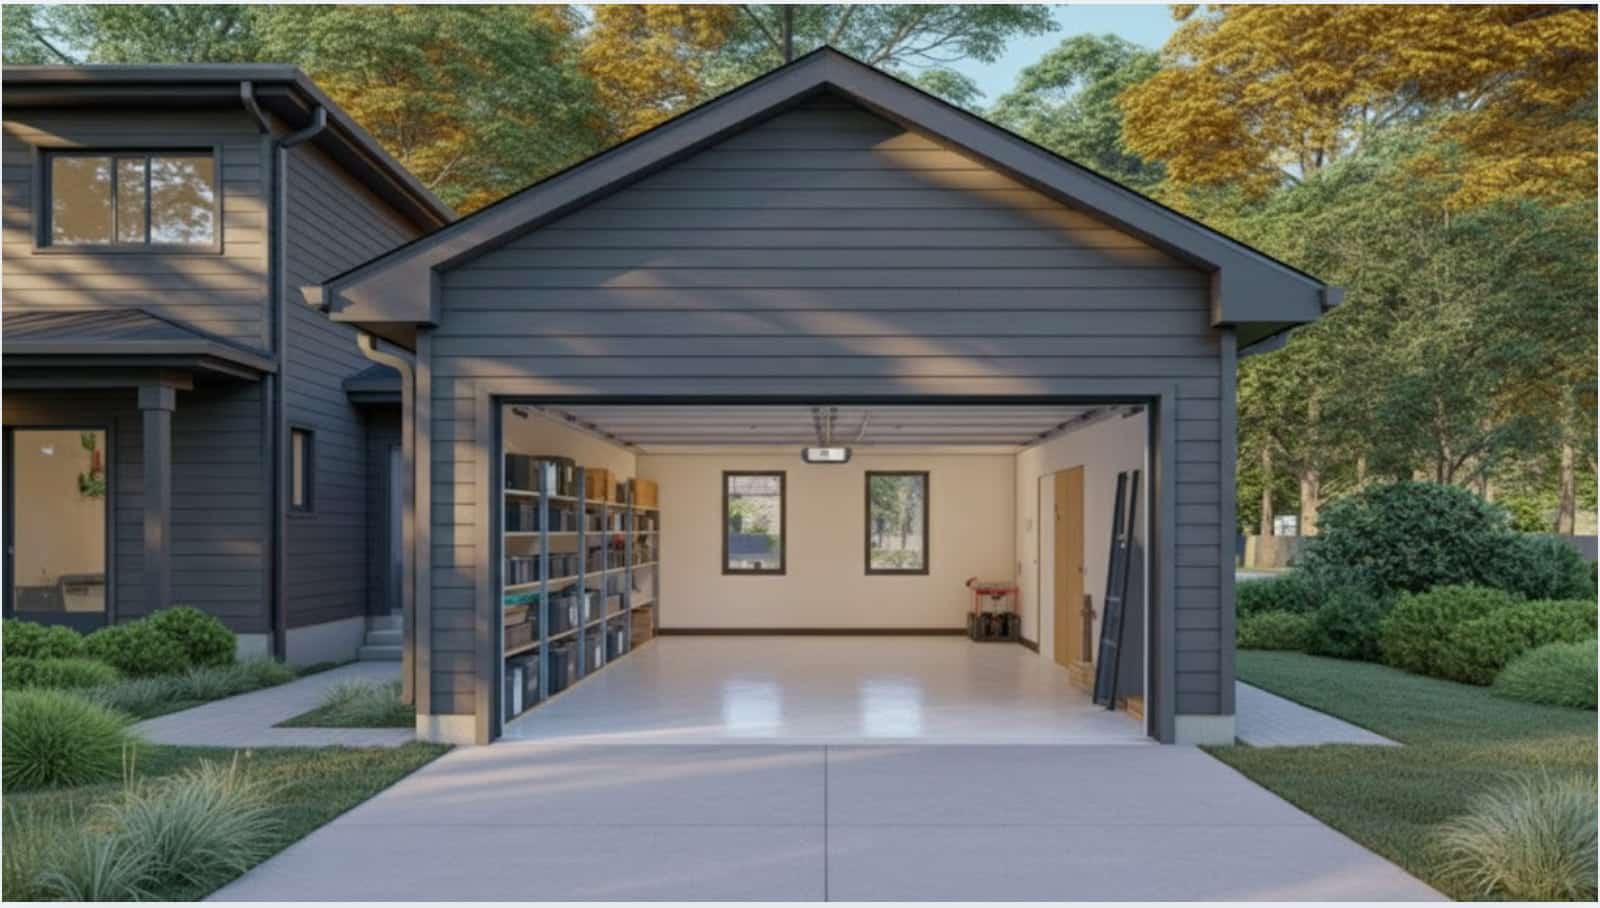
Want to finally park your car in an actual garage instead of playing Tetris with storage boxes? You just need smart garage addition ideas and a solid plan. I love having space that fits real life. A garage can do more than hold a car. It can store tools, support hobbies, or even double as a workspace. That flexibility makes daily life easier. When I talk to contractors, I slow down. Their ideas might be good, but I want to understand my options first. Making an informed choice feels better than rushing in. I’ve seen neighbors skip planning and regret it. The right garage addition ideas balance practical needs with creative solutions and can even increase your home’s value Why I Think You Should Consider a Garage Addition I’ll be honest with you, adding a garage wasn’t on my radar until I realized how much stuff I was cramming into every corner of my house. The benefits go way beyond just having a place to park. Extra storage space means you can finally clear out that spare bedroom you’ve been using as a junk room. Your home becomes more functional overnight. I’ve noticed that properties with good garage space sell faster in my neighborhood, which makes sense. Buyers want turnkey homes that work for modern life. If you work from home, having a separate workspace above your garage can significantly improve productivity and mental health. The physical separation between home life and work life matters more than I ever expected. Plus, if you’re into cars, woodworking, or any hobby that needs space, a garage addition gives you room to actually pursue those interests without taking over the entire house. Types of Garage Additions Each option I’m about to share works for different situations and budgets. I’ll give you the facts so you can decide what works best for your property. 1. Attached Garage Extension Sometimes the simplest answer is the best one: just make your existing garage bigger. Here’s what you need to know: Expands current footprint for additional vehicle or storage capacity Costs typically range from $20,000 to $50,000, depending on size Maintains roof connection with existing structure for seamless integration Works well for homes with adequate side yard space Can accommodate extra parking, workshop area, or dedicated storage zones Often, the most cost-effective option, since foundation and walls already exist This approach makes sense if you already like where your garage sits and just need more room to work with. 2. Above-Garage Living Space I find this option fascinating because you’re building up instead of out, which is perfect for smaller lots. Let me break down the details: Creates a bonus room above the existing or new garage structure Investment ranges from $60,000 to $200,000 based on finish level Perfect for a home office, studio apartment, or guest suite with a private entrance Requires structural support calculations for the second-story weight load Adds significant value since you’re essentially adding livable square footage Provides rental income potential if designed as a separate apartment Needs proper insulation to separate the living space from the garage temperature fluctuations You’re getting two improvements in one: parking below and a living space above that serves multiple purposes over time. 3. Detached Garage Addition Sometimes you want the garage completely separate from your main house, and that’s perfectly fine. Here’s what makes this option work: Stands alone from the primary residence with an independent structure Costs generally range from $20,000 to $50,000 for basic construction Ideal for RV storage, workshop, or hobby space without noise concerns Offers flexibility in placement based on property layout and access needs Can serve as a future guest house or rental with proper planning Requires separate utility connections if you want power and water I like this option when you want a clear separation between your living areas and workspace, or when the property layout favors it. Building any of these takes planning, but I’ve seen homeowners successfully complete each type. Creative Ideas for Your Garage Space Let me share some approaches that go beyond basic parking and storage. These are real solutions I’ve seen work: 1. Multi-Functional Garage Spaces The best garage additions I’ve toured do double or triple duty, and that’s where the real value comes in. You might park your car there at night, but use half the space as a home gym during the day. I’ve set up my garage so one bay holds the car while the other serves as my woodworking shop. The key is proper organization, and maybe some portable equipment you can move around. 2. Home Office and Workspace Solutions You can add a desk in your garage during business hours, then park your car there in the evening, so you can just roll into the office chair to the side. It’s about being creative with layout. Install good climate control if you’re spending real time out there, because working in extreme temperatures gets old fast. Think about what you actually do with your time, then design space that supports those activities. 3. Smart Storage That Maximizes Every Inch Vertical space is your secret weapon in any garage, and most people completely waste it. You should install some ceiling-mounted racks that can hold all your camping gear, holiday decorations, and other stuff you need only twice a year. That will free up wall space for tools and equipment you use weekly. Custom cabinetry isn’t cheap, but it makes such a difference when everything has a designated spot. 4. Organizing Awkward Items and Equipment You can find garage-specific storage systems that handle awkward items like ladders, bikes, and sports equipment. Install heavy-duty wall hooks to keep large items off the floor and free up valuable space. Magnetic strips hold small metal tools right where you need them. The goal is to get as much as possible off the floor so you keep the space open and usable. 5. Building Green with Eco-Friendly Features Garage additions create good opportunities to build more sustainably. Solar panels on the garage roof can help offset energy costs without affecting the look of your main living areas. Proper insulation matters more than most people expect. It keeps the space comfortable year-round and reduces heating and cooling waste. Use LED lighting throughout since it lasts longer and uses less power. Smart building choices today lower long-term energy use and reduce environmental impact. Design Considerations that Actually Matter Before you start building, I want you to think through these practical elements that make or break a garage addition. Good design isn’t about making things fancy, it’s about making them work: Lighting and Electrical Setup Getting the power and lighting right from the start makes your garage actually usable for real work and projects year-round. Here’s what I recommend focusing on: Install multiple outlets along walls at workbench height for power tools and chargers Consider LED shop lights for bright, energy-efficient workspace illumination throughout the space Add motion-sensor lights near entries for hands-free convenience when carrying items Plan for 240V outlets, in case you might want electric vehicle charging capability later These electrical choices seem minor now, but they make a huge difference in how you actually use the space daily. Structural and Storage Solutions The physical details determine whether your garage looks like part of your home or an obvious add-on that hurts value. Here’s what will help you: Match siding materials and colors so the addition looks original to your house Coordinate rooflines carefully to avoid awkward transitions that scream afterthought Install epoxy-coated floors that resist stains and clean up easily with simple mopping Build in wall-mounted storage before you move anything in to maximize usable floor space I’ve learned that getting these details right from the start saves you from expensive fixes later. Don’t cut corners on the basics that you’ll interact with every single day. Key Considerations Before You Start Getting the planning right prevents expensive mistakes and legal headaches down the road. I learned these lessons by watching others struggle, so let me save you the trouble. Here’s what you need to know: Check local zoning laws for setback requirements and obtain all necessary permits before construction starts Schedule required inspections at appropriate project stages and verify HOA rules if applicable Interview at least three licensed contractors with garage addition experience, and actually call their references Verify current insurance coverage and contractor licensing before signing any agreements Research property value impact, garage additions typically return 65-80% of investment at resale Keep documentation of all permits and work for future sale and property tax assessment purposes Get detailed written quotes breaking down materials and labor separately, never pay more than 10-20% upfront Planning takes time but saves money and stress when done right. I spent weeks researching before breaking ground, and looking back, that preparation made all the difference in how smoothly everything went. Budgeting and Cost Breakdown I know talking about money can feel uncomfortable, but having real numbers helps you plan properly. Here’s what different garage additions actually cost: Addition Type Cost Range What Affects the Price Timeline Attached Extension $20,000 – $50,000 Square footage, foundation work, materials 4-8 weeks Above-Garage Living Space $60,000 – $200,000 Finish level, plumbing, HVAC systems 8-16 weeks Detached Garage $20,000 – $50,000 Foundation type, utility connections, and distance 6-12 weeks Foundation Work $3,000 – $12,000 Soil conditions, drainage, and size 1-2 weeks Electrical & Lighting $1,500 – $8,000 Outlet quantity, 240V circuits, fixtures 3-5 days Premium Doors & Windows $2,000 – $15,000 Door type, window count, insulation rating 1-2 weeks Built-In Storage Systems $1,000 – $12,000 Custom vs. prefab, materials, complexity 1-3 weeks Site Preparation $2,000 – $15,000 Grading needs, tree removal, drainage fixes 1-4 weeks These numbers reflect what I’ve seen in the current market, though your actual costs depend on location and specific choices. I financed mine through a home equity line of credit for flexibility. Common Mistakes to Avoid When Adding a Garage Here are mistakes you’d better avoid: Skipping required permits creates serious problems when you sell or need insurance claims processed later. Underestimating total costs is incredibly common. Always add 15-20% to your budget for unexpected issues. Choosing the cheapest contractor often results in lower-quality work that requires expensive repairs within just a few years. Poor ventilation systems lead to moisture problems and rust that damage stored items. Not matching your home’s style significantly hurts the addition’s resale value. Blocking natural light to the main living areas creates regrets people face daily. Forgetting about future needs, such as electric vehicle charging, means missing the chance to install capacity while walls are open. These mistakes cost real money and create lasting problems you’ll regret. Think long-term about how this changes your property’s flow and function. Planning ahead prevents regrets that last for decades. Wrapping Up Your home is definitely missing something if you haven’t considered a garage addition yet. The extra space and functionality are the foundation, but without proper planning, your addition might stay just average. I’ve learned that homeowners who don’t settle for shortcuts end up with spaces that serve them for decades. Take time to think through which garage addition ideas fit your actual lifestyle. Work with experienced professionals who understand local codes and quality construction methods. Get multiple quotes and don’t rush the planning phase. Years from now, your family will thank you for creating a space that adds real value to daily life. Drop a comment below and tell me what you’re planning for your property.
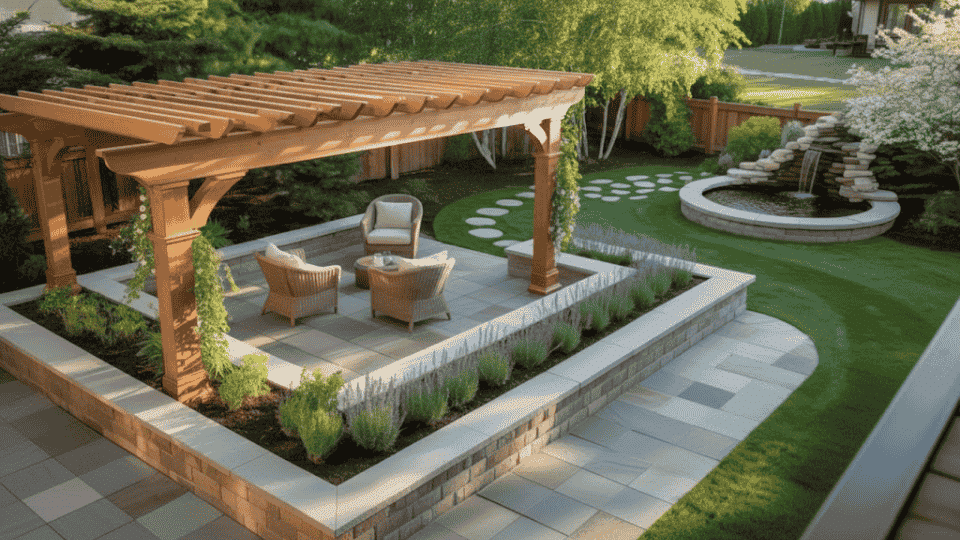
Ever had a contractor quote you a backyard remodel cost that made your jaw drop? I’m guessing that’s exactly why you’re here reading this, and I bet you’re someone who wants to understand every dollar before committing to a project. From the outside, backyard remodels look straightforward, but I’ve watched too many homeowners dive in without understanding the real cost, only to hit surprise expenses halfway through that derail everything. The total depends on your yard’s size, the features you want, the materials you choose, and local labor rates. But don’t worry, your backyard fairy is here, and I’ll help you by breaking down the actual cost factors of a backyard remodel so you can budget smartly from day one and avoid costly surprises. Understanding the Basics of Backyard Remodel Costs Before you pull out your wallet, let me walk you through what actually goes into a backyard remodel. I’m talking about the real work that needs to be done, not just the pretty finished product you see in magazines. Most projects start with demolition and removal, getting rid of what’s already there. That old concrete patio? It needs to go. The patchy grass won’t grow, right? Time to rip it out. You might need to haul away an old shed, clear out years of accumulated debris, or remove tree stumps. Then comes the fun part: installing new features like patios, gardens, outdoor kitchens, or fire pits. Each of these tasks carries its own price tag, and they add up faster than you’d think. Key Factors that Drive Your Backyard Remodel Cost It’s hard to price out backyard remodels, especially when certain factors consistently push budgets higher. Understanding these variables helps you estimate costs more accurately: Yard size: A 500-square-foot space costs significantly less than a 2,500-square-foot area across all tasks Site accessibility: Tight spaces that block equipment access drive labor costs up quickly Disposal requirements: Hauling concrete, dirt, and debris to dumps adds fees that vary by location Regional labor rates: Urban contractors charge more per hour than rural professionals Project complexity: Custom designs and intricate patterns require more skilled labor hours Material quality: Natural stone runs higher than concrete pavers, and premium plants cost more than basic varieties Knowing these cost drivers lets you make informed choices about where to spend and where to save on your project. Backyard Removal and Cleanup Costs Understanding the financial commitment of each demolition and preparation task helps you budget accurately and avoid surprises during your backyard transformation: 1. Lawn and Debris Removal Costs Removing existing grass typically costs $1.14 – $1.78 per sq ft, with dense root systems pushing prices higher. Budget $500 to $1,500 for a typical 500-square-foot yard. Professional debris removal averages $200–$500 per truckload for a ¼-acre yard, while heavily overgrown areas can reach $800–$1,600 or more, depending on load size. 2. Concrete and Shed Demolition Costs Breaking up concrete costs $2 to $6 per square foot, depending on thickness and reinforcement. Expect $585 to $2,790 for a 1,000-square-foot patio removal. Shed removal costs range from $600 to $2,000, depending on size and material. Concrete pads beneath sheds add $200 to $500 to the cost of complete demolition. 3. General Yard Cleanup Costs Cleaning a quarter-acre lot costs $200 – $600 and includes weeding, trash removal, and debris hauling. Heavily wooded lots with thick leaf buildup require more hours than open lawns. Regularly maintained yards typically stay near $215, while neglected properties can reach $465, depending on vegetation density and accessibility challenges. Installation and Feature Addition Costs Beyond demolition and cleanup, I think your backyard remodel requires smart investments in new features, plants, and structures to create a functional outdoor oasis: 1. Landscaping and Planting Costs Installing plants and greenery forms the foundation of most backyard remodels. Here’s what you can expect to spend on professional landscaping services: Small annuals: $5 each for seasonal flowers and ground cover plants Mature trees: $50+ depending on species, size, and root ball dimensions Professional labor: $50 to $150 per hour for experienced landscapers Cost per square foot: $4.50–$17 for typical landscaping work Full installation: $3,300–$13,200 average for complete yard landscaping Getting detailed quotes that separate plant costs from labor helps you identify where to save money by strategically purchasing materials yourself. 2. Hardscaping Installation Costs Patios, walkways, and retaining walls create structure and functionality in your outdoor space. Understanding hardscaping costs helps you plan features that fit your budget: Material and installation: $10 to $30 per square foot combined Concrete pavers: Lower end of price range, budget-friendly option Natural flagstone: Higher costs due to material premium and installation complexity Professional labor: $50 to $75 per hour, added to material expenses Design complexity: Simple rectangular layouts cost less than custom curves and patterns Simple concrete paver patios remain budget-friendly, while custom flagstone designs with curves and intricate patterns command premium prices for both materials and skilled labor. 3. Outdoor Structures Adding permanent structures such as pergolas, gazebos, and outdoor kitchens creates defined spaces for entertaining and relaxing. These investments vary widely based on size and features: Basic pergola or gazebo: $2,000 to $5,000 for standard designs Outdoor kitchens: $7,000–$35,000+ depending on appliances and finishes Built-in grills: Add $1,500–$5,000 to your outdoor kitchen budget Countertops and sinks: Increase costs based on the material quality chosen Premium finishes: Custom structures with high-end appliances and integrated utilities represent the largest investments Custom outdoor structures with premium finishes, integrated utilities, and high-end appliances represent the largest single investment in most backyard remodel projects after the initial demolition. 4. Irrigation and Drainage Systems Proper water management protects your landscaping investment and prevents costly damage. Installing irrigation and drainage systems ensures your backyard stays healthy and functional year-round: Sprinkler system installation: $1,800–$3,500 for average-sized yards Drip irrigation: $300–$1,200 for targeted watering in garden beds French drain installation: $2,000–$6,000, depending on length and depth Drainage solutions: Vary based on yard slope and water pooling severity Smart controllers: Add $100–$300 but save on water bills long-term Investing in proper drainage prevents foundation damage, standing water, and plant loss, making it worth the upfront cost for long-term yard health and maintenance savings. These additional investments complete your backyard remodel and create a space you’ll use and appreciate for years to come. Prioritize features based on your lifestyle and budget constraints. Ways to Save on Your Backyard Remodel Cutting costs doesn’t mean sacrificing quality; it means being smart about where you spend. I have found several reliable ways to keep your backyard remodel cost reasonable without ending up with a space you’re unhappy with. Here are some money-saving strategies: Get three quotes minimum: Contractor prices vary wildly for the same work, so comparison shopping pays off Buy materials yourself: Purchasing pavers, plants, or lumber directly cuts out contractor markups of 20-40% Rent equipment: A concrete saw or sod cutter rental for a day costs less than hiring someone Handle your own cleanup: Clearing debris and pulling weeds yourself eliminates hundreds of dollars in labor charges Time your project right: Contractors offer better rates during their slow season, typically late fall and winter Start small: Complete your remodel in phases over multiple years to spread out the financial burden Do demo work yourself: Breaking up small concrete areas or removing an old shed saves significant labor costs Remember that DIY work trades your time for money. If you’re spending three weekends on a task a pro could finish in a day, calculate what your time is worth before deciding. Planning Your Backyard Remodel Budget Creating a realistic budget starts with understanding typical cost ranges for your yard size. I’ve broken down average expenses to help you plan accordingly and anticipate what different project scales require: Yard Size Budget Range Typical Inclusions Small (500-1,000 sq ft) $3,000 – $10,000 Basic cleanup, simple patio, minimal planting Medium (1,000-2,500 sq ft) $10,000 – $50,000 Multiple features, moderate hardscaping, and landscaping Large (2,500+ sq ft) $50,000 – $100,000 Complex designs, pools, outdoor kitchens, extensive work Extra Large (5,000+ sq ft) $70,000-$150,000+ Full estate landscaping, multiple structures, luxury amenities Premium Estate (1+ acre) $150,000-$300,000+ Complete outdoor living spaces, high-end materials, custom everything Add-ons such as swimming pools ($32,000–$60,000), fire pits ($300–$2,500), going fancier to $ 5,000, or deck installation ($1,000 – $11,500+) fall outside these base ranges. I always recommend padding your budget by 10-15% for unexpected issues; something always comes up during construction. Disclaimer: These prices are estimates and may vary by location, season, and market conditions. Always check with local contractors and suppliers for accurate, up-to-date pricing specific to your area before starting your project. Common Mistakes to Avoid Knowing what not to do saves you as much money as knowing what to do. I’ve watched homeowners make these mistakes repeatedly, and they’re completely preventable with a little forethought. Here’s what you can’t do: Skipping permits: Fines exceed permit costs, and you’ll eventually need them anyway for legal compliance Choosing the cheapest bid: Lowest quotes often mean cut corners or surprise fees appearing later Ignoring drainage: Poor drainage causes flooding and foundation damage, costing thousands to repair Overbuilding: Installing unused features wastes money better spent on daily-use amenities you’ll actually enjoy No written contract: Verbal agreements inevitably lead to disputes over scope, timeline, and payment Forgetting utilities: Hitting buried gas or electric lines during excavation creates expensive, dangerous situations Always verify that contractors are licensed and insured. Checking references takes thirty minutes but prevents months of headaches. Wrapping Up The backyard remodel cost you’ll pay depends entirely on your choices, but now you’ve got realistic numbers to control your spending instead of guessing blindly. I’ve provided the actual pricing for removal, installation, and features so you can build a budget that works for your situation. Start by measuring your yard and separating must-haves from nice-to-haves. Get at least three contractor quotes, ask every question that pops into your head, and never rush decisions under pressure. Phasing your remodel over time spreads costs and lets you adjust as you learn what works. Your backyard should bring daily joy, not financial regret from overspending or cheap shortcuts.
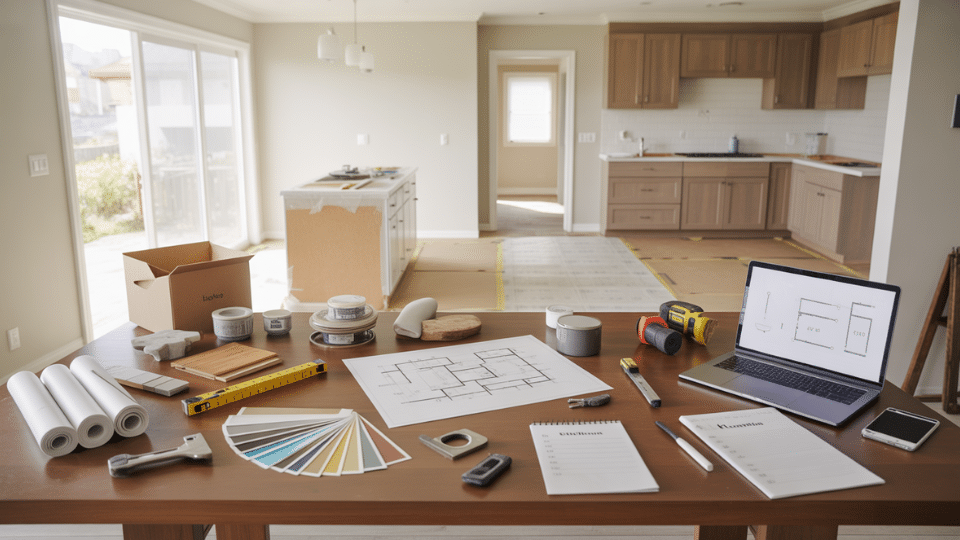
Planning a whole home remodeling feels overwhelming when you’re staring at six-figure estimates. I get it, the numbers seem impossible to predict. But here’s what contractors won’t tell you upfront: your budget blows up because of planning gaps, not because renovations are inherently expensive. Most projects run $100–$300 per square foot, depending on scope, but that range means nothing without context. I’m breaking down real costs, the factors that push prices higher or lower, and a bulletproof budgeting system that prevents overruns. With inflation still affecting materials and labor, guessing your numbers isn’t an option anymore. How Much Does a Whole House Remodel Cost? National averages give you a starting point, but remember, square footage alone won’t tell your story. Projects vary wildly based on scope, not just size. Home Size Light Remodel ($100–$150/sq ft) Mid-Range ($150–$250/sq ft) High-End ($250–$350/sq ft) 1,500 sq ft $150,000–$225,000 $225,000–$375,000 $375,000–$525,000 2,000 sq ft $200,000–$300,000 $300,000–$500,000 $500,000–$700,000 2,500 sq ft $250,000–$375,000 $375,000–$625,000 $625,000–$875,000 3,000 sq ft $300,000–$450,000 $450,000–$750,000 $750,000–$1,050,000 Light remodels keep existing layouts and upgrade systems. Mid-range adds some layout changes and better finishes. High-end means custom everything. Your location, home age, and material choices can shift these numbers ±30% easily. Use these as checkpoints, not promises. What Impacts the Cost of a Whole Home Remodel? Seven factors control where your budget lands. Some you can manage, others you can’t, knowing the difference saves money. 1. Scope and Layout Changes Moving walls, adding square footage, or changing room locations eats budget fast. Each structural change adds engineering fees, permits, and labor hours that compound quickly across your project timeline. Keep the footprint and major systems where they are. Prioritize must-haves and challenge every “nice-to-have” requiring structural work. This is your biggest cost control lever. 2. Kitchen and Bathroom Count These rooms cost more per square foot than any other space. Expect $25,000–$75,000 per bathroom and $50,000–$150,000+ per kitchen. The number in your project directly impacts your bottom line significantly. You can’t reduce existing bathrooms easily, but you can phase work across multiple years to spread costs. Updating two bathrooms this year and one next year helps cash flow. 3. Plumbing and Electrical Moves Every pipe or wire you relocate requires opening walls and rerouting systems. Moving a kitchen island with a sink adds $3,000–$8,000 just for plumbing. Electrical panel relocations cost even more with permits. Keeping sinks, toilets, and panel locations where they are saves thousands. Design around existing infrastructure whenever possible. This decision alone can drop costs by 15% or more. 4. System Upgrades HVAC, electrical panels, and water heaters over 20 years old often require replacement for code compliance. Budget $15,000–$40,000 for major system overhauls depending on home size and system complexity chosen. You can’t skip aging system replacements, but you control efficiency levels. A basic furnace costs half what high-efficiency heat pumps do. Choose system tiers that match your budget and needs. 5. Home Age and Code Requirements Older homes hiding knob-and-tube wiring, asbestos, or foundation issues force expensive upgrades. Once walls open, inspectors require current code compliance regardless of your original budget or scope plans. Homes built before 1980 need an automatic 20% contingency for surprises. You can’t skip code work, but planning for it prevents mid-project financial panic and contractor disputes. 6. Finish Quality Builder-grade cabinets, laminate counters, and vinyl floors cost 50-70% less than custom cabinetry, quartz, and hardwood. Finish selections create the widest price gap between identical layouts in similar-sized homes. This is your biggest control lever. Pick three rooms for high-end finishes and go mid-range everywhere else. Most guests can’t distinguish quality in hallways or secondary spaces anyway. 7. Location and Labor Rates Urban contractors charge $75–$150 per hour, while rural areas run $50–$85. Coastal markets cost 40% more than Midwest cities. Material delivery fees and permit costs also vary significantly by region and jurisdiction. You can’t change your location, but timing helps. Winter brings lower contractor demand and better availability, creating negotiating room. Off-season scheduling can save 10-15% on labor costs. How to Budget for a Whole House Remodel Smart budgeting happens in stages. Skip one, and you’re guessing. Follow all six, and you’ll sleep through demo day without financial nightmares. Step 1: Lock Your Scope First. Write every must-have before discussing money. Separate needs (safety, function) from wants (aesthetics). This stops mid-project upselling. Step 2: Allocate by Priority Buckets. Kitchen: 25-30%. Bathrooms: 20-25%. Systems: 15-20%. Structure/permits: 10-15%. Finishes: 20-30%. Adjust based on scope. Step 3: Build a 15-20% Contingency Fund. Hidden rot and code upgrades hit 80% of projects. Set money aside separately for genuine surprises only. Step 4: Account for Soft Costs. Permits run 2-5%. Temporary housing: $5,000–$15,000. Design fees: 8-15%. These aren’t in construction bids. Step 5: Compare Three Scope-Matched Quotes. Use identical scope documents. Compare line items, not bottom-line numbers. One bid might exclude demolition or trim. Step 6: Create a Cash Flow Timeline. Map payments to milestones: 10% upfront, 40% midpoint, 40% completion, 10% walkthrough. Decide on a phasing strategy. These six steps prevent budget chaos. Lock your numbers before signing contracts, and surprises become manageable instead of catastrophic. Common Mistakes to Avoid and Their Fixes Issue Fix Chasing the Lowest Bid Low quotes often mean missing work; demand itemized quotes showing labor, materials, and tasks. Compare line items, not totals. Unrealistic Material Allowances Visit showrooms before signing contracts. Pick actual products, then add 15% to prices for waste and installation complexity. Scope Creep During Construction “While walls are open, let’s add…” adds 30-50% markup for rescheduling and rush orders. Lock all decisions pre-construction. Demolishing Before Selections Are Final Order long-lead items (cabinets, tile, windows) 8-12 weeks before demo. Delays mean contractors move to other jobs and timelines collapse. Ignoring Value Engineering Find savings in aesthetics (paint vs wallpaper), not systems. Cheap HVAC or electrical systems create repair bills within years. Avoid these mistakes, and your budget stands a fighting chance. Most overruns come from preventable decisions, not bad luck. The Bottom Line I’ve walked you through the real numbers behind a whole house remodel, from $100–$300 per square foot ranges to the seven factors that control costs. Your success doesn’t come from finding magical, cheap contractors. It comes from defining scope precisely, budgeting a 15-20% contingency automatically, and avoiding mistakes that sink projects before they start. The difference between budget disasters and smooth renovations isn’t luck. It’s preparation. Start today by writing your must-have list and getting three detailed, scope-matched quotes. Don’t demo a single wall until your numbers and scope are completely locked in writing. What’s your biggest budget concern going into a project? Drop a comment below, I’d love to hear what’s keeping you up at night and help you work through it.
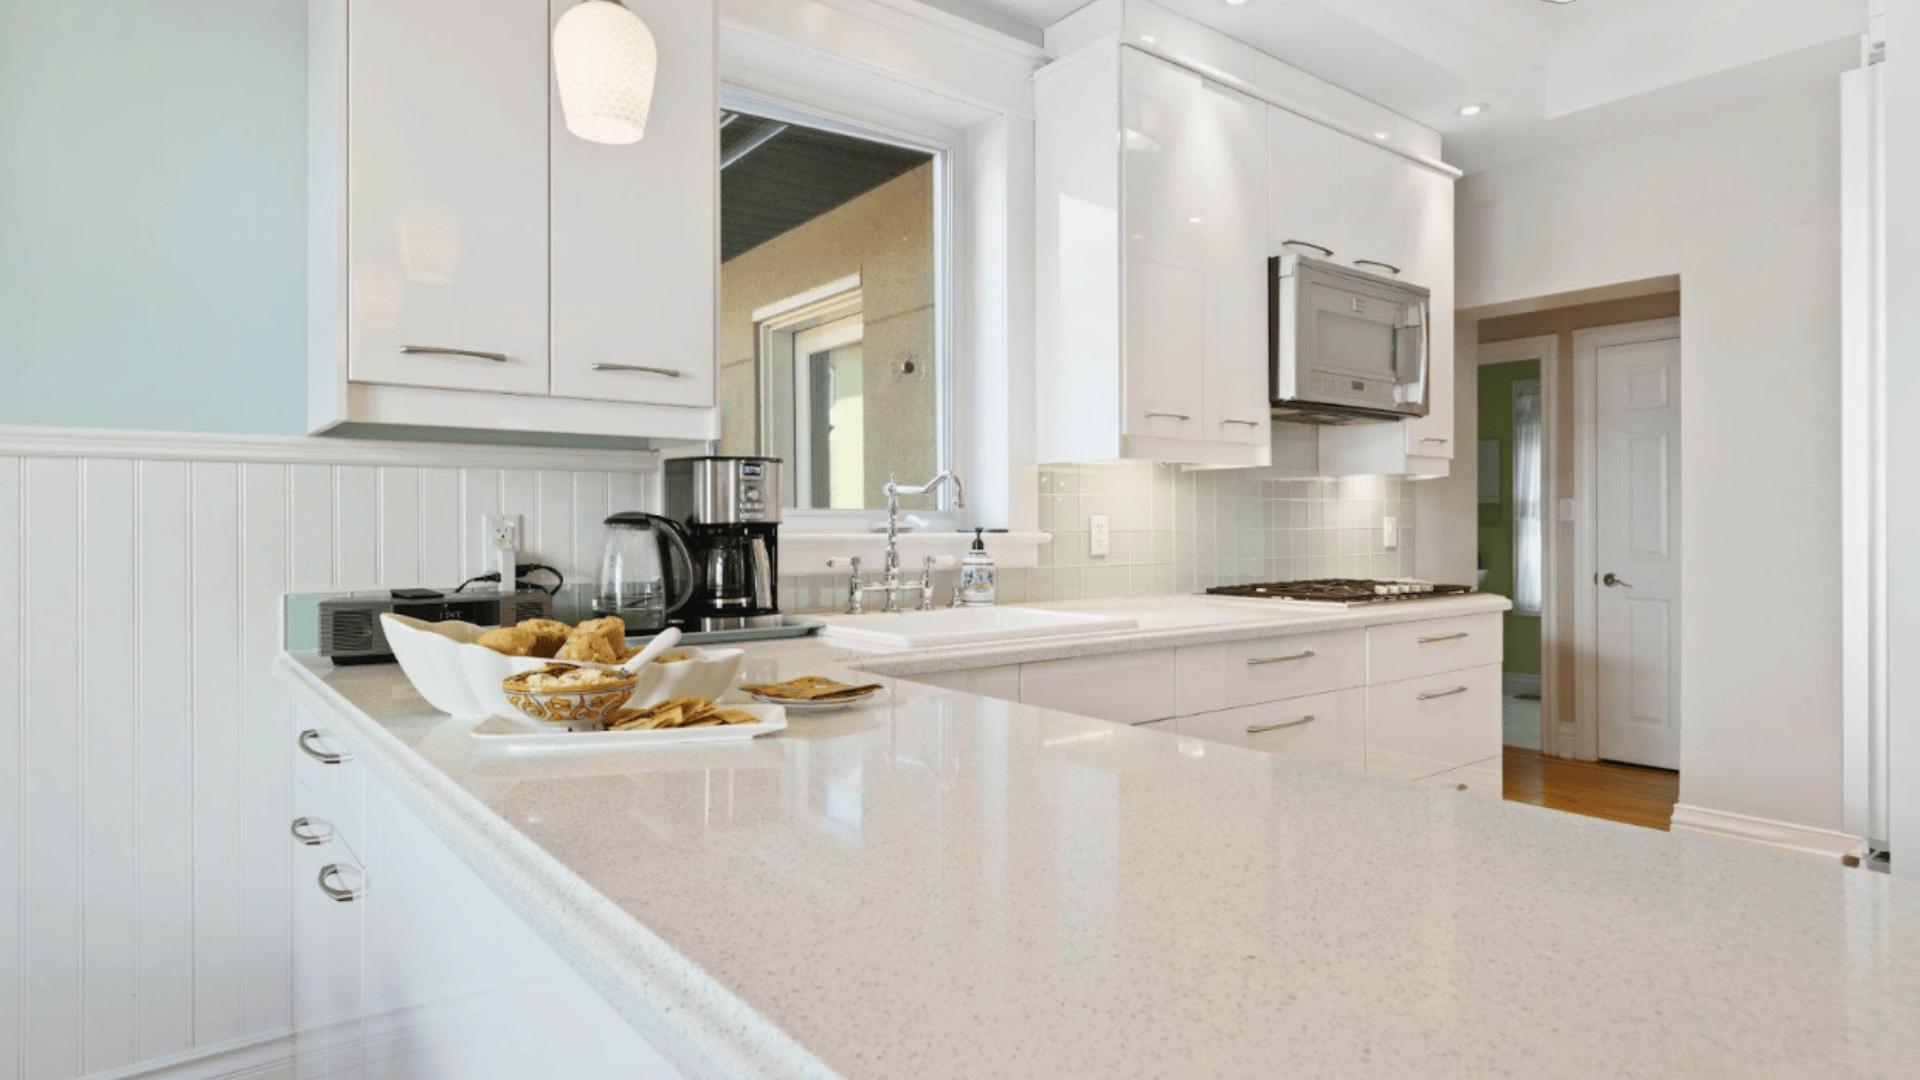
If you’ve been thinking about upgrading your kitchen, granite has probably crossed your mind. I love it because it’s durable, looks amazing, and can handle pretty much anything daily cooking throws at it. The challenge is figuring out what it will actually cost. Granite prices per square foot can vary a lot, and it’s not just the stone you’re paying for; installation and finishing can add a big chunk to the total. I’ll walk you through the typical price ranges, what can affect the cost, and how the different grades compare. I’ll also share a few tips I’ve used to save money so you can get the countertop you want without going over budget. Average Granite Price Per Square Foot Many homeowners have the same question about how much granite is per square foot. Most granite countertops cost between $40 and $100 per square foot installed. This range covers materials, fabrication, and professional installation: Low-end granite: runs $30 to $50 per square foot. These stones have simple patterns and common colors like beige or gray. You’ll find these options at big-box stores. Mid-range granite: costs $50 to $80 per square foot. These slabs offer more interesting patterns and better consistency. Local stone suppliers often carry these grades. High-end granite: ranges from $80 to $200 per square foot. These premium stones feature rare colors, exotic patterns, or unique mineral formations. Home Depot typically stocks granite starting around $35 per square foot. Lowe’s offers similar pricing for its basic selections. Local suppliers often provide a better variety and competitive pricing for mid-range options. Granite Cost by Quality Grade Granite comes in different quality grades, each with its own look, durability, and price point. Here’s how the cost can vary depending on the grade you choose: Grade Price per Sq. Ft. Description Class A $80 – $200 Premium quality; perfect patterns, consistent color, high durability, minimal variation. Class B $60 – $100 Good consistency; minor pattern variations; common in high-end kitchens. Class C $40 – $70 More pattern differences, structurally sound; good for budget projects. Class D $30 – $50 Noticeable variations may require extra support; best for low-traffic areas. Class E & F $20 – $40 Significant flaws or thin slabs; generally not recommended for countertops. Knowing the cost by grade helps you choose granite that fits your budget while still giving you the style and durability you want for your space. Factors Affecting Granite Cost Knowing what impacts granite cost makes it easier to plan your budget and prioritize the features that matter most for your kitchen. There are key factors that determine what you’ll pay for granite countertops: Grade and quality: Makes the biggest difference in price. Higher grades cost more but offer better appearance and durability. The stone’s thickness also affects structural integrity and cost. Color and pattern: Rarity drives up prices significantly. Common colors like black or brown cost less than exotic blues or greens. Unique patterns with dramatic veining command premium prices. Edge profiles: Adds to fabrication costs. Simple straight edges cost less than ornate profiles like ogee or bullnose. Complex edges require more labor and specialized equipment. Installation complexity: Affects labor costs. Straight runs cost less than layouts with multiple angles. Islands, cutouts for sinks, and backsplash work increase the total price. Local market differences: Create regional price variations. Areas with many stone suppliers tend to have competitive pricing. Remote locations often pay more for delivery and installation. By keeping these factors in mind, you can make informed choices that balance appearance, performance, and cost for your granite countertops. Granite Price by Color & Type Granite prices can also vary depending on the color and type you choose. Here’s how different shades and patterns can affect the overall cost: Granite Type Price Range per Sq Ft Black Galaxy $65 – $85 White Ice $45 – $65 Ubatuba $35 – $55 Giallo Ornamental $40 – $60 Baltic Brown $35 – $50 Emerald Pearl $70 – $95 Blue Pearl $80 – $120 Kashmir White $55 – $75 Santa Cecilia $40 – $60 Venetian Gold $45 – $65 With a clear idea of how color and type influence price, you can select a granite option that matches your style and stays within your budget. Granite Slab vs. Prefabricated Granite Pricing Your choice between a full granite slab and prefabricated granite can have a big impact on both cost and installation. Here’s how the pricing compares: Custom granite slabs: They cost $60 to $200 per square foot installed. You select the exact stone and have it cut to fit your space. This option offers unlimited design flexibility and seamless installation. Prefabricated granite: costs $25 to $60 per square foot installed. These pieces come pre-cut in standard sizes with finished edges. You’ll save money, but have limited size and edge options. Understanding the price difference between slabs and prefabricated granite will help you decide which option gives you the best balance of value and appearance. Comparing Granite Prices to Other Countertops Granite isn’t your only countertop option, and prices can vary widely between materials. Here’s how granite compares to other popular choices: Material Price per Sq. Ft. Installed Key Notes Granite $40 – $150 Natural stone with unique patterns; requires periodic sealing. Quartz $50 – $120 Engineered stone, consistent appearance; no sealing needed. Marble $60 – $150 Luxurious look; more porous; needs careful maintenance. Laminate $10 – $40 Very budget-friendly; less durable; limited resale value. By seeing how granite stacks up against other countertop materials, you can choose the one that best fits your budget, style, and maintenance preferences. Additional Costs to Consider Beyond the price per square foot, there are extra expenses that can significantly affect your total granite countertop cost. Planning for these ahead of time will help you avoid budget surprises: Sealing costs The cost runs from $150 to $300 for most kitchens. Granite needs sealing every 1 to 2 years to prevent stains. Some granite types need sealing more frequently. Delivery fees Range from $100 to $500, depending on distance. Local suppliers often include delivery in their pricing. Long-distance deliveries cost more. Cutouts and fabrication Add $100 to $200 per cutout. Sink cutouts are standard, but cooktop and faucet holes cost extra. Complex shapes require more fabrication time. Backsplash installation The cost is $10 to $25 per square foot. Granite backsplashes create a cohesive look but add to your budget. You can save money by choosing different backsplash materials. Regional Granite Price Differences Where you live can make a big difference in granite pricing. Here’s how regional factors can affect the cost of your countertops: Region Price Trend Reason Northeast 10–20% above the national average Higher labor costs and installation rates. Southeast Often below the national average Port access and multiple local suppliers keep prices competitive. West Coast 15–25% above the national average Higher transport costs and stricter local regulations. Midwest Near the national average Strong supplier competition, but added costs from port transport. Southwest Often below the national average Close to quarries and processing facilities. Knowing the regional price differences can help you set a more accurate budget and decide when and where to buy your granite. How to Save Money on Granite Countertops Granite can be an investment, but there are ways to keep costs down without sacrificing quality. Here are some tips to help you save money on your countertops: Buy remnants for smaller projects to save 30–50%. Pick common colors like black or beige for lower prices. Bundle installation with purchase for package discounts. Shop in slow seasons like winter for better deals. Get multiple quotes to compare rates. Consider thinner slabs if your cabinets can support them. With these strategies, you can enjoy the beauty and durability of granite while staying within your budget. Wrapping Up Granite price per square foot can vary a lot, but knowing the ranges makes planning easier. Now I’ve given a solid idea of what affects the cost, from grade and color to all the little installation details that can add up faster than you expect. Think about how much you want to spend, the style you like, and how you’ll use the space every day. You can still get a great countertop without going for the highest grade. If you take time to compare suppliers, ask about remnants, and shop during slower months, you’ll stretch your budget further. I hope this helped you feel ready to start your project. Take a look at my other blogs for more ideas and practical tips.
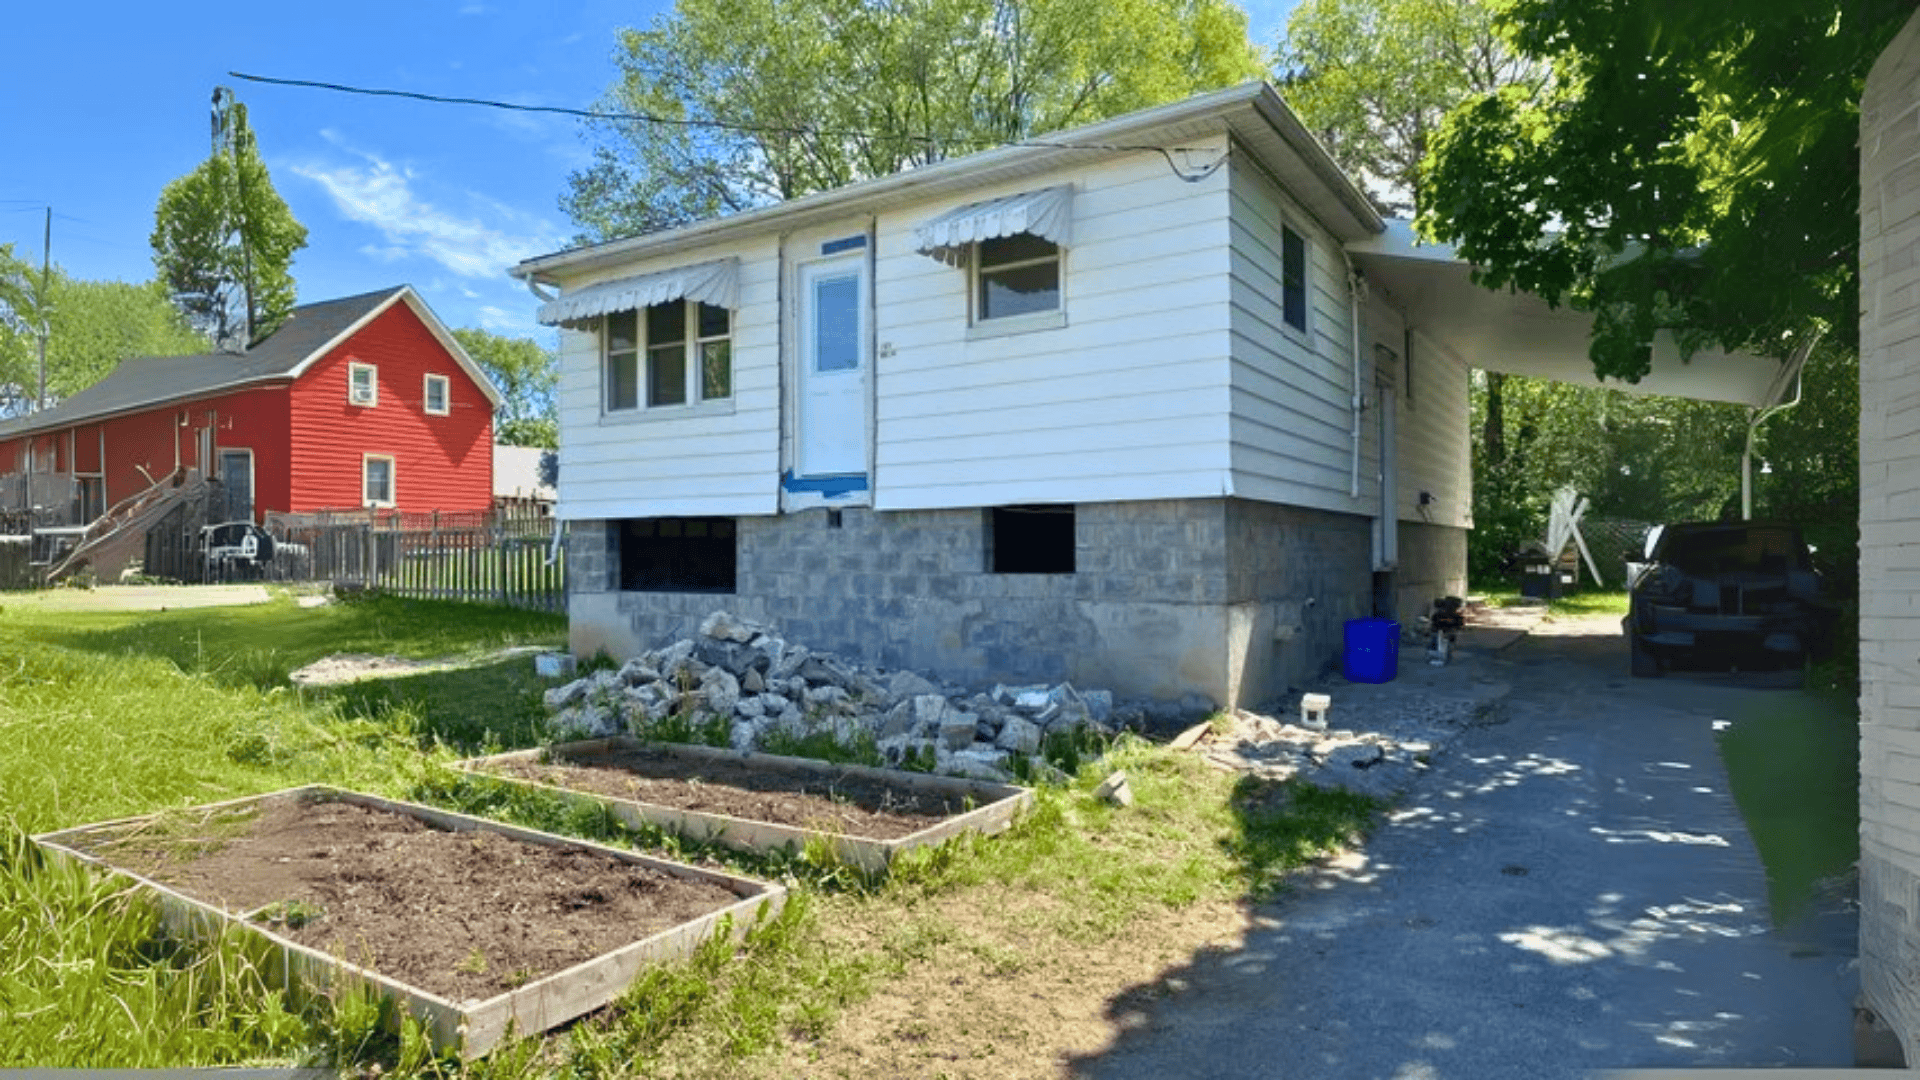
I’ve been thinking lately about ways to add more space to my home, and one question kept coming up: can you add a basement to a house that’s already built? The short answer is yes, but I’ve learned it’s not a simple project. It takes careful planning, the right conditions, and a skilled team to get it done. The costs can also be high, so it’s not something to jump into without weighing your options. In this post, I’ll share what I’ve found about adding a basement, how to tell if your home is a good fit, the methods contractors use, and what it might cost. By the end, you’ll have what you need to decide with confidence. Can You Add a Basement to a House? Yes, you can add a basement to most existing homes. But several factors determine if it’s actually doable for your specific property. The success of your project depends on your home’s foundation type. It also relies on the soil conditions under your house. Your local building codes play a big role, too. Some homes are better candidates than others. Homes with crawl spaces often work well for basement additions. Houses built on concrete slabs face more challenges. Foundation Type Before moving forward, it’s worth looking at your home’s foundation type, since some make the project much easier while others can be far more challenging. Here are some situations you might find yourself in: Homes with crawl space foundations are usually the best candidates. The space already exists under your house. Contractors can work with the existing structure more easily. Slab-on-grade foundations create more problems. The concrete slab sits directly on the ground. Adding a basement means breaking through this slab completely. Basement foundations might seem like they’d work well. But if you already have a partial basement, extending it requires careful planning. Soil Conditions The type of soil beneath your home can make a big difference when adding a basement, as some soils are stable and easy to work with, while others can cause major challenges. These are some soil conditons to observe: Clay soil can shift and move over time. This creates problems for new basement walls. Sandy soil drains well but may not provide strong support. Rocky soil is often ideal for basement construction. It provides solid support and good drainage. However, rocky soil is also expensive to excavate. Your contractor will need to test your soil before starting. This testing reveals the soil’s bearing capacity and drainage properties. Structural Integrity Your existing house must be strong enough to handle the construction process. Adding a basement means digging under your current foundation. This temporarily weakens the support for your home. Your house needs enough structural strength to stay stable during construction. Older homes might need reinforcement before a basement addition can begin. This adds extra time and cost to your project. A structural engineer should evaluate your home first. They’ll determine what reinforcement might be needed. Local Building Codes Every city and county has different rules about basement additions. Some areas don’t allow basement construction at all. Others have strict requirements about depth and drainage. You’ll need permits before any work can start. Building codes also affect the final design of your basement. They determine ceiling height, emergency exits, and ventilation requirements. Check with your local building department early in the planning process. This saves you from expensive surprises later. When It’s Not Recommended: Avoid basement additions in flood zones, with high water tables, weak or damaged foundations, or utilities running under the house. Ways to Add a Basement Contractors use different methods depending on your home’s situation. Each method has its own benefits and challenges. The three main approaches are underpinning, top-down construction, and excavating under the existing home. Your contractor will recommend the best method for your specific situation. 1. Underpinning Underpinning strengthens your existing foundation while adding basement space below. This method works by digging small sections at a time. Contractors pour new concrete footings deeper than your current foundation. They then build new basement walls that connect to these footings. The process happens in stages to keep your house stable. Only small sections get excavated at once. This prevents your foundation from shifting or settling. Underpinning works well for homes with shallow foundations. It’s also good when you need to go deeper for code requirements. The main downside is time. This method takes longer than other approaches. It also requires careful coordination to maintain structural integrity. 2. Top-Down Construction Top-down construction builds the new basement from the top level down. Contractors start by installing support beams and temporary foundations. They then excavate from inside your existing basement or crawl space. New walls get built as they dig deeper. This method offers better control over the excavation process. It also provides more working space for contractors. The existing structure stays more stable during construction. Top-down construction works well for larger basement additions. It’s also useful when soil conditions are challenging. The method requires more initial setup and planning. It can also be more expensive than other approaches. 3. Excavating Under an Existing Home Direct excavation involves digging out space under your current foundation. This method requires lifting or supporting your house during construction. Contractors use hydraulic jacks or steel beams to hold up the structure. They then excavate the soil and build new basement walls. Direct excavation can be faster than other methods. It also allows for more design flexibility in your new basement space. However, this approach carries higher risks. Moving your house even slightly can cause cracks or structural damage. It requires experienced contractors and careful monitoring. Budgeting for a Basement Addition A basement addition is one of the most expensive upgrades you can make to your home. The price can swing a lot depending on your property, location, and the complexity of the work. Here’s a breakdown of the main costs you might face: Cost Item Typical Range Notes Total Project Cost $40,000 – $100,000+ Basic addition; complex builds can exceed $150,000 Labor 40% – 60% of the total cost Skilled trades, excavation crew, structural work Excavation Varies widely Higher for rocky soil or poor site access Waterproofing Included or +$5,000+ Needed for poor drainage areas Permits & Inspections $2,000 – $5,000 Required for code compliance Engineering Consults $1,500 – $3,000 Ensures safe design and construction Materials 30% – 50% of the total cost Concrete, reinforcement, and insulation Regional Adjustments Variable Urban labor costs are higher; rural areas may have higher transport fees Costs can rise quickly when you hit unexpected challenges, such as hitting bedrock or needing major waterproofing. This is why it’s important to get multiple detailed quotes and factor in a contingency budget before you start. How Long Does It Take to Complete a Basement Addition? Most basement addition projects take 3-6 months to complete. Simple projects with good soil conditions might finish in 8-12 weeks. Complex projects with challenging conditions can take 6-9 months or longer. Several variables affect your timeline. Weather delays are common during excavation phases. Permit approval can add weeks to your schedule. Unexpected problems often extend construction time. Hidden utilities, poor soil conditions, or structural issues create delays. Plan for 20-30% longer than the initial estimates. The method chosen also affects timing. Underpinning typically takes longer than direct excavation. Top-down construction falls somewhere in between. Pros and Cons of Adding a Basement Adding a basement can bring valuable space and functionality to your home, but it also comes with challenges. Here are the main pros and cons to consider: Benefits Drawbacks Significant increase in living space Very high upfront costs Adds storage without using yard space Long construction timeline Can increase home value by 10-20% Major disruption to daily life Provides space for utilities and mechanicals Risk of moisture problems Creates opportunities for rental income Requires ongoing maintenance Improves the home’s foundation strength Limited ceiling height options Adds emergency shelter space Potential for cost overruns Weighing these pros and cons will help you decide if adding a basement is worth the investment and effort for your specific home and needs. Basement Addition vs. Other Expansion Options When you need more space, a basement is just one of several expansion options. Here’s how it stacks up against other ways to increase your home’s square footage: Second-story additions: Typically cost less than basement additions and cause less disruption to your daily routine. However, they change your home’s exterior appearance significantly. Ground-level extensions: Often the most cost-effective option, easier to build, and cause fewer structural concerns. But they reduce your yard space permanently. Basement additions: Don’t change your home’s exterior appearance or reduce outdoor living space. The added space works well for utilities, storage, or recreation. Consider your specific needs and budget. Also, think about your neighborhood’s character and your long-term plans for the home. Permits, Codes, and Inspections Basement additions need permits and inspections. Plans must meet safety codes, including 7–8 foot ceilings, emergency egress windows, and proper ventilation. Electrical and plumbing require separate permits and must meet current standards. Inspections happen at key stages: foundation, framing, and final approval. Start the permit process early, as reviews can take weeks and may need soil reports or engineering stamps. How to Choose the Right Contractor for a Basement Addition A basement addition is a major project, and the contractor you hire can make all the difference in the outcome. Start by reviewing their permit history through public records to see if they’ve successfully completed similar basement projects in your area. Ask about subcontractors so you know exactly who will be doing the work and whether they’re properly licensed. Always get a detailed written contract that includes the project scope, materials, schedule, and payment terms to avoid confusion later. Finally, confirm whether they offer a workmanship warranty and how long it lasts. Taking these steps will help you choose a contractor who delivers quality results and keeps your project running smoothly from start to finish. Long-Term Maintenance for the Basement Keeping your basement in great shape over the years takes regular care and attention. Here are some key maintenance tips to protect your investment: Clean drains, gutters, and downspouts. Inspect for cracks or leaks yearly. Control humidity with dehumidifiers. Keep the soil sloped away from the foundation. Check for water intrusion after heavy rain. With consistent upkeep, your basement will stay functional, comfortable, and valuable for many years to come. Wrapping Up Adding more space has completely changed how I use and enjoy my home. If you’ve ever wondered, “Can you add a basement to a house?” you now have a clearer picture of what’s involved. From checking the structure to understanding costs, permits, and hiring the right people, I’ve learned this is a project that takes serious planning. It’s not the easiest thing to take on, but if your home and budget are a good fit, the results can be worth it. I hope walking through these steps has made things clearer for you, too. If you’re looking for more ideas and practical home tips I’ve tried myself, read other posts on the website; you might find your next project waiting there.
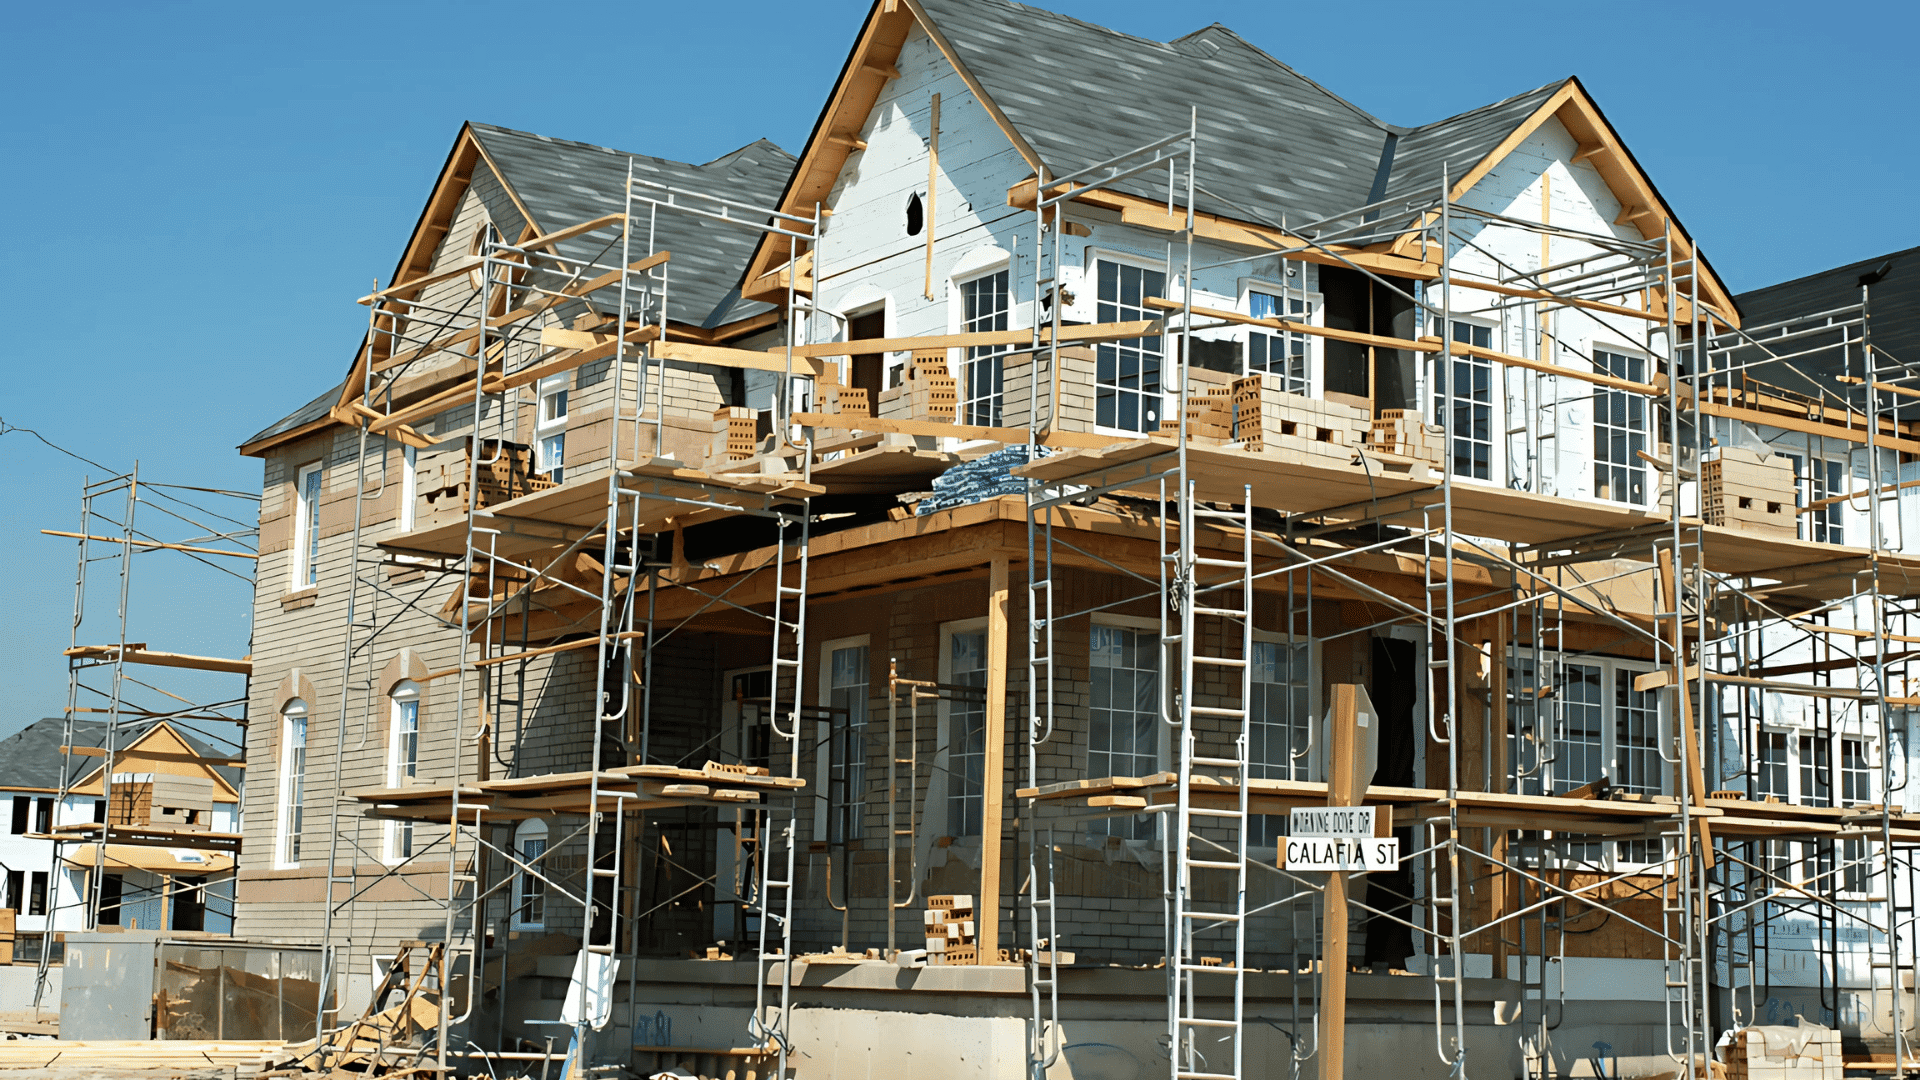
Planning a new home is exciting, but it also comes with big questions. One of the first things you need to know is your construction cost per square foot. Knowing this number gave me a solid starting point for my budget. I could take my planned square footage, multiply it by the local rate, and get a realistic idea of my base cost. I’ll walk you through what’s included in that number, what can make it go up or down, and how it changes from state to state. You’ll also see examples, so you can plan with confidence and avoid the surprises that catch many homeowners off guard. National Ranges for Construction Cost per Square Foot Understanding the average construction cost per square foot can help you plan your budget with more confidence. These figures vary based on location, building type, and project complexity, but national ranges give a helpful starting point for estimates. Finish Level Cost Per Square Foot Basic $100 – $130 Mid-Range $130 – $180 Custom $180 – $300+ Factors that push costs higher: Certain choices and conditions can quickly increase your construction costs. Here are some key factors that can push your price per square foot higher: Complex roof lines High-end materials Multiple stories Remote locations Tight labor markets Costs per Square Foot by Location Construction costs can shift significantly depending on where you’re building. Factors like labor rates, material availability, and regional demand all play a role. Comparing location-based averages helps you set realistic expectations and align your project with your budget. State Averages Construction costs vary widely across the country. Here’s what you can expect by region: Lower cost states: $90 – $120 per square foot Alabama, Mississippi, Arkansas Rural areas with lower labor costs Average cost states: $120 – $160 per square foot Texas, Florida, North Carolina Growing markets with steady demand Higher cost states: $160 – $250+ per square foot California, New York, Massachusetts Urban areas with expensive labor and materials City and Zip Code Factors Urban areas typically cost 20 – 40% more than rural locations. Labor rates drive most of this difference. Climate affects costs, too. Cold regions need better insulation and heating systems. Areas with hurricanes or earthquakes require special construction methods. Building codes also vary. Some cities have stricter energy requirements or fire safety rules that add to your budget. Market Examples To give a clearer sense of how construction costs vary across the country, here are sample estimates from three very different markets: Market Type 1,500 sq ft 2,000 sq ft 2,500 sq ft Low-cost (Rural Alabama) $135,000 – $165,000 $180,000 – $220,000 $225,000 – $275,000 Average (Austin, Texas) $195,000 – $240,000 $260,000 – $320,000 $325,000 – $400,000 High-cost (San Jose, California) $300,000 – $375,000 $400,000 – $500,000 $500,000 – $625,000 These figures reflect typical price ranges for new home construction in each area and can help you understand how location influences your budget. What “Cost per Square Foot” Includes (and What It Doesn’t) When looking at construction cost per square foot, it’s important to know what’s part of the calculation and what’s not. Here’s what to know: Included Not Included Foundation and framing Land purchase Roofing and siding Utility connections to the street Interior walls and flooring Landscaping and driveways Basic kitchen and bathroom fixtures Architectural design fees Standard electrical, plumbing, and HVAC Building permits Insulation and drywall Appliances and furniture Garage or outbuildings Tip: These boundaries can vary by builder, so always confirm exactly what’s covered in your estimate before comparing prices. Construction Soft Costs and Site Costs Beyond the base construction price, there are additional expenses that cover planning, permits, and preparing the building site. These costs can significantly impact your overall budget and should be factored in early. Here’s what to know about construction soft costs and site costs: Soft Costs (15-25% of construction) Soft costs cover the behind-the-scenes expenses that keep your project moving, from design fees to permits. Here’s what typically falls into the 15–25% range: Architectural plans: $5,000 – $15,000 Engineering: $2,000 – $8,000 Building permits: $1,000 – $5,000 Inspections: $500 – $2,000 Site Work Ranges Site preparation can vary widely in cost depending on the location and condition of your land. Here’s a look at common site work ranges to help you budget: Basic grading: $2,000 – $5,000 Septic system: $8,000 – $15,000 Well drilling: $3,000 – $10,000 Long driveways: $3,000 – $12,000 Rock removal: $5,000 – $20,000 Design and Specification Drivers The design choices and specifications you select for your home can have a big impact on overall costs. Here are the main factors that often influence the final price: Foundation type matters. Slab foundations cost less than full basements. Crawl spaces fall in the middle. More stories mean higher costs. Two-story homes need more complex framing and additional stairs. Roof complexity adds expense. Simple gable roofs cost less than hip roofs with multiple dormers. Kitchen and bathroom count. These rooms have the highest cost per square foot due to plumbing, electrical, and fixtures. Material choices make a big difference. Vinyl siding costs much less than stone or brick. Market Notes and Trends Material costs have stabilized after the big increases of recent years. Lumber prices remain higher than pre-pandemic levels, but aren’t spiking anymore. Labor shortages continue in most markets. This keeps wages high and can extend construction timelines. Supply chain issues have mostly resolved. Most materials arrive on schedule now. Interest rates affect your construction loan costs. Higher rates mean higher carrying costs during the build process. Timing your build When you choose to start construction can affect both your budget and your timeline. Here’s what to consider when timing your build: Start planning 6-12 months ahead Get multiple bids early Lock in your construction loan rate when possible Plan for weather delays in your timeline Commercial Construction Cost per Square Foot Commercial construction costs can vary even more widely than residential projects, depending on the type of building, its purpose, and the required specifications. Understanding these averages can help set realistic expectations before diving into project planning. Typical Ranges Here’s an overview of the typical cost ranges you can expect, helping you see what your project is might fall and plan your budget more accurately: Office Buildings: Class A $200–$300, Class B $150–$220, Class C $100–$170 per sq ft Retail Spaces: Strip centers $120–$180, shopping malls $180–$250, standalone stores $140–$200 per sq ft Warehouse & Industrial: Basic warehouse $60–$90, manufacturing $80–$120, cold storage $150–$200 per sq ft Regional Premiums In some locations, especially large metropolitan areas, building costs can be much higher than the national average. Here’s how regional premiums can impact your budget: New York City: Add 40-60% to national averages San Francisco: Add 35-50% to national averages Washington, DC: Add 25-35% to national averages Seattle: Add 20-30% to national averages Denver: Add 15-25% to national averages Core and Shell vs. Tenant Improvements Commercial projects are split into two main categories: Core and shell cover the basic building structure, roof, exterior walls, and utilities in each space. This typically runs $80-150 per square foot. Tenant improvements (TI) include interior build-out, flooring, lighting, and finished surfaces. Budget $30-100 per square foot, depending on the use. Common Mistakes to Avoid Avoiding a few common pitfalls can save you time, money, and stress during your build. Here are the mistakes to watch out for when planning your project: Underestimating soft costs: Planning fees, permits, and engineering can add 15–25% to your base construction cost. Skipping a contingency fund: Unexpected expenses are almost guaranteed. Set aside at least 10–15% for surprises. Not accounting for site work: Driveways, grading, or rock removal can add thousands if not budgeted from the start. Choosing materials too late: Last-minute selections can delay schedules and increase costs due to rush orders. Failing to confirm what’s included: Builders vary in what they cover for the quoted cost per square foot. Taking these into account early helps prevent cost overruns and project delays. Summing Up Planning a new home is a big project, and knowing your construction cost per square foot gives you a strong starting point. It’s the number that helps you see how size, finishes, and location all shape your budget. I’ve shared what’s usually included, what’s not, and how costs shift from one area to another. You’ve also seen how extras like soft costs and site work fit into the bigger picture. Now it’s your turn to put the numbers to work. Use them to plan smarter, talk with local builders, and keep your budget realistic from day one. If this was helpful, take a look at other blogs on the website for more tips and practical ideas.
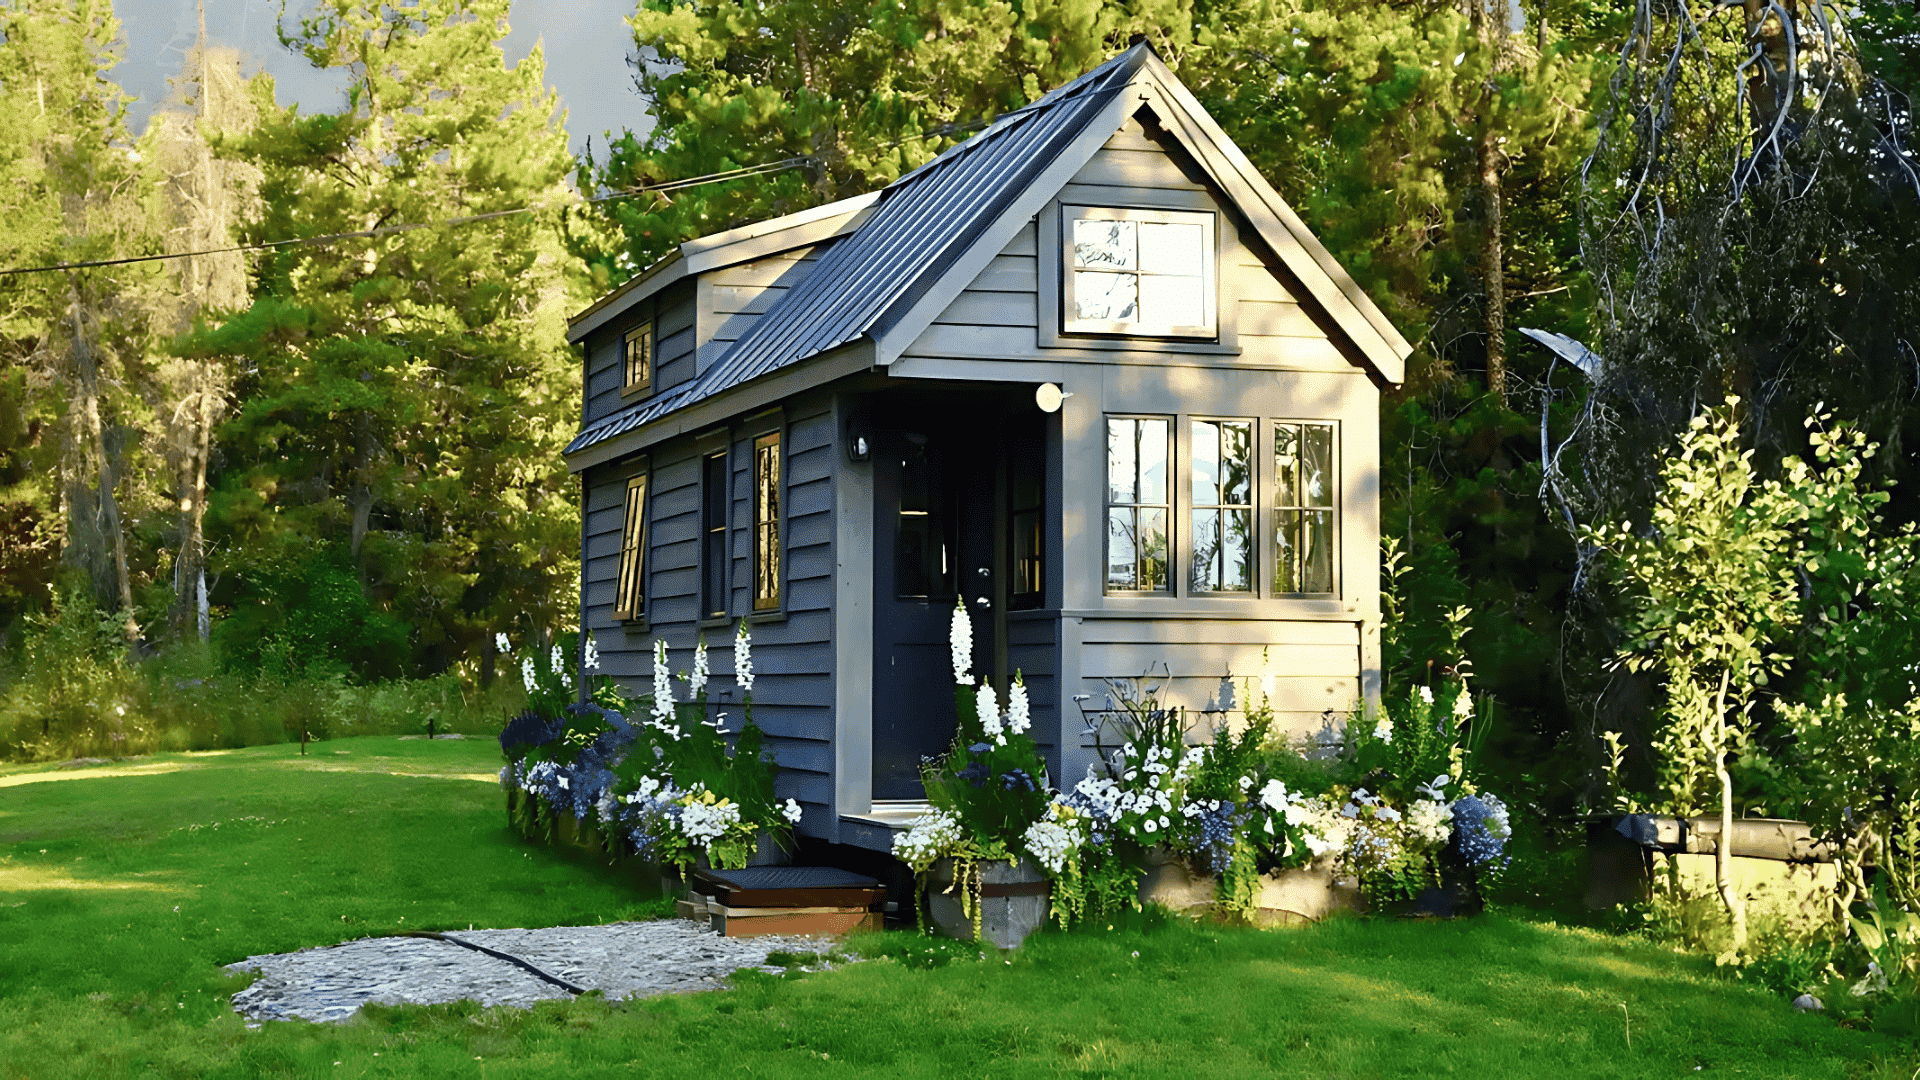
Building your own tiny house can feel exciting. You get to design a space that fits your life and budget. Building mine was one of the most exciting projects I’ve ever taken on. I loved the idea of creating a space that truly fit my life. But before I even started, I needed to answer one big question: how much does it cost to build a tiny house? The truth is, there’s no one-size-fits-all number. Your costs will depend on your building method, materials and location. I’ve seen people make it happen for around $15,000, while others have spent well over $150,000. In this post, I’ll break down each major cost factor so you can plan with confidence and avoid expensive surprises. How Much Does It Cost to Build a Tiny House So, how much does a tiny house cost? Most tiny houses cost between $30,000 and $150,000 to build. The national average sits around $65,000 for a complete build. Tiny houses typically cost $150 to $400 per square foot. Traditional homes cost about $100 to $200 per square foot. This means tiny houses cost more per square foot, but your total cost stays much lower. Here’s a quick breakdown by budget level: Budget Builds: $15,000 – $30,000 Basic materials and DIY labor Simple layouts with minimal features Often built on trailers Mid-Range Builds: $30,000 – $80,000 Quality materials with some professional help Standard appliances and fixtures Good insulation and electrical work High-End Builds: $80,000 – $150,000+ Premium materials and professional construction Custom cabinetry and high-end appliances Advanced systems like solar panels Your final cost comes down to the choices you make for design, finishes, and construction method. Factors That Affect the Cost of Building a Tiny House Before you set a budget for your tiny house, it’s important to understand the factors that can raise or lower the total cost. Here are the main things to consider: 1. Size of the Home Size directly impacts your total cost. Most tiny houses range from 100 to 400 square feet. A 200 square foot home will cost roughly twice as much as a 100 square foot space. The difference comes from materials, labor time, and complexity. Smaller homes under 200 square feet keep costs low. Larger homes over 300 square feet approach traditional construction costs. 2. Materials Your material choices make a huge difference in final costs. Basic materials like pine lumber, vinyl flooring, and standard fixtures keep budgets tight. Premium materials like hardwood, stone counters, and designer fixtures can double your costs. Reclaimed materials offer a middle ground. You save money while getting a unique character. Old barn wood, salvaged windows, and used appliances cut costs significantly. 3. Foundation Type You have two main foundation options: wheels or permanent. Trailer foundations cost $3,000 to $7,000. This includes the trailer, tie-downs, and basic setup. Mobile tiny houses offer flexibility but face more legal restrictions. Permanent foundations cost $5,000 to $15,000. This covers concrete pours, utility connections, and site prep. Permanent homes qualify as traditional housing in most areas. 4. Labor Labor represents your biggest potential savings or expense. DIY builds can save you $20,000 to $50,000 in labor costs. You’ll need basic construction skills, tools, and plenty of time. Most DIY builds take 6 months to 2 years to complete. Professional builds cost $50 to $120 per square foot for labor. Contractors handle permits, inspections, and warranty work. Professional builds finish in 2 to 6 months. 5. Location Regional costs vary significantly across the country. Rural areas typically cost 20-30% less than urban markets. Material delivery costs more, but labor and permits cost less. High-cost areas like California or New York add 40-60% to total costs. Low-cost areas like the Midwest or the South offer the best value. 6. Features & Finishes Special features and upgrades add costs quickly. Off-grid systems cost $10,000 to $30,000 extra. This includes solar panels, batteries, water tanks, and waste systems. Custom-built-ins like Murphy beds, fold-out desks, and hidden storage add $2,000 to $8,000. High-end appliances and fixtures can add another $5,000 to $15,000. Tiny House Cost Comparison Looking at real-world examples can give you a clearer idea of what building a tiny house might cost. Here’s a comparison to help you see the range: Category Cost Components Estimated Cost Range Pros Cons DIY Build Materials: $15k–$50kTools: $2k–$5kPermits: $500–$2k $17,500–$57,000 Low cost, full control, skill building Time-intensive, skills required, risk of mistakes Professional Build Materials & Labor: $40k–$120kPermits: $1k–$3k $41,000–$123,000 Fast, warranties, no learning curve Higher cost, less flexibility Pre-Built (Shell Kit) Kit: $15k–$40kDelivery: $2k–$8k $17,000–$48,000 Structure done, interior flexible Finish the work required Pre-Built (Turn-Key) Home: $50k–$120kDelivery: $2k–$8k $52,000–$128,000 Move-in ready Premium price, limited changes Custom-Built Varies by design & finishes Varies widely Tailored layout, material choice Longer build time, budget creep Cheaper options require more work, while pricier builds offer speed and convenience. Choose based on your skills, budget, and timeline. Hidden and Ongoing Costs to Consider While Building a Tiny House The upfront build isn’t the only expense when it comes to a tiny house. There are hidden and ongoing costs that can add up over time. Here’s what to keep in mind: Permits and Legal Costs Building permits cost $500 to $3,000, depending on location. Some areas require architectural plans, adding another $1,000 to $5,000. Zoning compliance can be tricky. Many areas don’t allow tiny houses as primary residences. Legal consultation costs $150 to $300 per hour. Land Costs You need somewhere to put your tiny house. Land purchase costs vary wildly by location. Rural lots start around $10,000 while urban lots can cost $50,000 or more. RV parks and tiny house communities charge $200 to $1,000 per month. Some include utilities while others charge separately. Utilities and Systems Connecting to city utilities costs $2,000 to $8,000 for water, sewer, and electrical hookups. Off-grid systems cost more upfront but eliminate monthly utility bills. Expect $15,000 to $35,000 for complete solar, water, and waste systems. Insurance and Maintenance Tiny house insurance costs $300 to $1,000 per year. Coverage depends on whether your home is mobile or permanent. Annual maintenance costs about 1-2% of home value. This covers roof repairs, system maintenance, and regular upkeep. Regional and Legal Considerations Where you build your tiny house and the local laws you follow can have a big impact on your plans and budget. Here are some key factors to consider: Cost Variations by Region Southern states offer the lowest construction costs. Texas, Alabama, and Mississippi provide cheap materials and labor. Western states cost the most due to higher wages and material costs. California, Washington, and Colorado add 40-60% to typical budgets. Northeastern states fall in the middle range. New England offers good contractors but higher material costs. Legal Requirements Building codes vary significantly between states and municipalities. Some areas treat tiny houses like RVs. Others require full residential building codes. A few states have created special tiny house regulations. Massachusetts, for example, allows tiny houses as ADUs (accessory dwelling units) in many towns. They must meet residential building codes and connect to utilities. Research your local laws before starting construction. Code violations can be expensive to fix later. Cost-Saving Tips for Building a Tiny House Building a tiny house on a budget is possible if you plan carefully and make smart choices along the way. Here are some tips to help you save money without cutting quality: Use reclaimed materials: Save 30–50% by sourcing lumber and supplies from construction sites, old barns, or demolition projects. Shop discount outlets: Visit Habitat for Humanity ReStores for low-cost windows, doors, and appliances. Check online marketplaces: Monitor Craigslist and Facebook Marketplace for lightly used building materials. DIY selective projects: Take on painting, flooring, and basic electrical; hire pros for plumbing, structural, and HVAC work. Build in phases: Start with a shell and essentials, then add features as budget allows. With the right strategies, you can keep costs down and still create a tiny house that’s comfortable, functional, and built to last. Summing Up While doing my own build, I quickly realized that every choice shaped the whole project. Size, materials, labor, and location all played a huge role in how much it cost and how much effort it took. Doing the work myself gave me more control, but also meant taking on a lot more responsibility. On the other hand, hiring professionals made things run more smoothly and quickly, though I had to step back from some decisions. I also learned to think beyond just construction; planning ahead for permits, land, and utilities saved me from big headaches later. If this gave you a clearer picture of the process, take a look at other blogs for tips, practical advice, and real examples you can use!
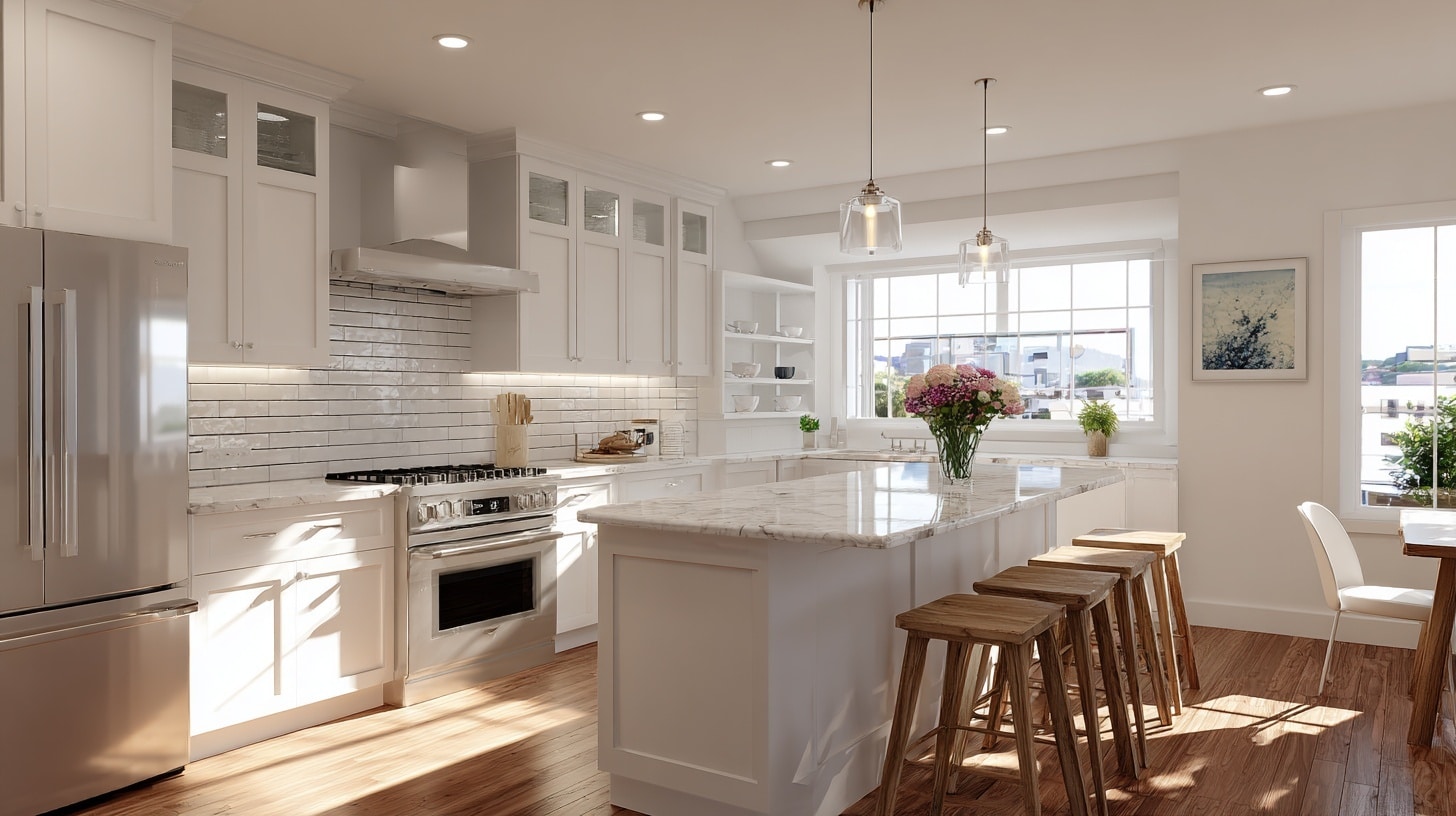
If you’ve been wondering about the 12×12 kitchen remodel cost, it can be hard to find clear answers. Prices vary widely, and when I first started researching, the range of numbers felt overwhelming. You want to make smart choices, but there are so many factors to think about: materials, labor, layout changes, and even where you live, along with details like popular granite colors. I’ll walk you through real cost ranges, the key factors that can change them, and some before-and-after examples I’ve found helpful, so you can plan your remodel with confidence. Average Cost of a 12×12 Kitchen Remodel Remodeling a 12×12 kitchen in 2025 typically costs between $18,000 and $42,000, depending on materials, labor, and the scope of work. A mid-range remodel averages around $26,960. Measured by square footage, budget projects usually cost $100–$125 per sq. ft., mid-range remodels run $200–$250 per sq. ft., and high-end projects can exceed $300 per sq. ft. These estimates include cabinetry, countertops, flooring, appliances, and labor. This cost range gives you a clear view of what’s realistic for your kitchen, so you can choose a remodel tier that fits your goals. Factors and Cost Breakdown for a 12×12 Kitchen Remodel Knowing the factors that influence cost and how expenses break down can help you plan a 12×12 kitchen remodel that fits your budget. Here’s what to consider: Scope of Work The size and complexity of your remodel have a major impact on costs. Minor updates, such as painting cabinets, replacing fixtures, and adding a backsplash, typically cost $10,000–$15,000. A full gut renovation with layout changes, premium materials, and new appliances can reach $30,000–$42,000. Larger projects require more labor, materials, and time, significantly increasing both the total price and the per-square-foot cost. Material Quality Material choices directly affect cost and durability. Stock, semi-custom, and custom cabinets vary widely in cost; see the cost by remodel type table for ranges. Countertops, flooring, and fixtures also come in a range of options, from budget-friendly to high-end, influencing both appearance and lifespan. Labor Costs Labor makes up 25–35% of a remodel budget. In 2025, rates range $75–$150 per hour in metropolitan areas and $50–$90 per hour in rural locations. Specialized tasks, such as custom carpentry or intricate tile installation, can cost more but ensure better quality. Total labor costs for a 12×12 remodel often fall between $4,500–$12,000, depending on complexity, scope, and the expertise of the professionals you hire. Location Where you live plays a major role in cost. In 2025, a 12×12 kitchen remodel in the New York metro area can exceed $40,000, while similar work in the Midwest may cost $25,000–$35,000. This difference is often due to higher labor rates, increased demand, higher permit costs, and shipping fees for materials in urban areas compared to smaller cities or rural regions. Appliances Appliance pricing depends on brand, features, and efficiency. Budget models cost $100–$1,000 each, mid-range options run $1,000–$3,000, and high-end appliances can exceed $10,000. When selecting appliances, consider their performance, energy efficiency, and lifespan. A higher upfront investment can sometimes save money in the long term by reducing energy use and extending the period before a replacement is needed. Backsplash & Fixtures Backsplashes cost between $500–$1,700, depending on material choice, design complexity, and installation method. Fixtures, such as sinks and faucets, range from $100–$1,000 each, with costs rising for premium finishes and advanced features. While these items may be smaller parts of the remodel, they have a significant impact on both the overall function and the final appearance of your kitchen. DIY vs. Professional Completing some work yourself can reduce labor costs by as much as 30%. DIY-friendly tasks include painting, assembling cabinets, or installing a simple backsplash. However, plumbing, electrical, and structural work should be handled by licensed professionals to ensure safety and compliance with building codes. A blended approach, using DIY for basic work and professionals for complex jobs, often offers the best balance between savings and quality. Cost by Remodel Type Remodel costs vary widely based on finish quality, material selection, and project scope. This table compares budget, mid-range, and high-end options, with example upgrades to help you visualize each tier: Remodel Type Total Cost Range Example Upgrades Budget $18,000 – $22,500 Painted cabinets, peel-and-stick backsplash, and LED lighting Mid-Range $28,800 – $33,000 Undercabinet lighting, tile backsplash, stainless steel appliances High-End $43,200+ Layout changes, island with seating, built-in wine fridge This breakdown helps you compare tiers and choose one that aligns with your priorities and budget. Before and After 12×12 Kitchen Remodel Examples These real-life remodel examples show how different budgets and styles change a 12×12 kitchen while meeting various design goals: 1. Budget Remodel Under $15K This cost-friendly update included painting existing cabinets, installing laminate countertops, and adding a peel-and-stick backsplash. All labor was handled as a DIY project, significantly reducing expenses. While budget appliances were used, the changes refreshed the space’s appearance and functionality without major structural work. Perfect for homeowners wanting a fresh look without the financial commitment of a large-scale renovation. 2. Mid-Range Refresh at $25K This remodel introduced semi-custom cabinets, quartz countertops, and a sleek tile backsplash. Updated mid-range appliances improved performance and efficiency. Lighting upgrades, including under-cabinet fixtures, brightened the space while creating a modern feel. The project balanced quality and cost, offering long-lasting materials and stylish features without reaching high-end prices, making it ideal for homeowners who want a noticeable change that remains budget-conscious. 3. High-End Remodel at $45K This upscale renovation featured custom cabinetry, professional-grade appliances, and natural stone countertops. Layout adjustments improved traffic flow and added storage, while premium finishes created a polished appearance. High-quality materials ensured durability, and modern conveniences enhanced daily use. This type of remodel suits homeowners looking for a statement kitchen that combines functionality with long-term investment value, particularly for properties aiming to stand out in competitive real estate markets. 4. Vintage to Modern for $20K Dated wood paneling was removed to open up the space visually. Shaker-style cabinets replaced older units, and durable vinyl plank flooring was installed for easy maintenance. New hardware and energy-efficient appliances completed the change. This remodel preserved beauty where possible but focused on practical updates, giving the kitchen a fresh, inviting look without exceeding a moderate budget. 5. Coastal Style Upgrade for $30K This remodel brought a light and breezy look with white cabinetry, a butcher block island, and a subway tile backsplash. The layout stayed the same to control costs, while mid-range appliances and open shelving added both function and character. This style works well for homeowners seeking a bright, relaxed atmosphere that feels updated yet welcoming, especially in coastal or casual home settings. 6. Rustic Farmhouse Look for $28K Reclaimed wood elements, open shelving, and an apron-front sink defined this farmhouse-style remodel. Black hardware and durable stone-look countertops provided contrast and practicality. The project balanced rustic beauty with modern convenience, using mid-range appliances and a mix of natural textures. This approach is ideal for those who want a warm, inviting kitchen that blends style with day-to-day functionality. 7. Minimalist Makeover at $18K This remodel focused on clean lines and uncluttered surfaces, using flat-front cabinets and quartz-look laminate countertops. Stainless appliances added a sleek touch, while neutral colors kept the design classic. Costs were kept low by maintaining the existing layout and limiting structural changes. This style suits homeowners who value simplicity, efficiency, and a low-maintenance kitchen environment without sacrificing modern appeal. 8. Luxury Entertainer’s Kitchen for $60K Designed for hosting, this remodel featured double ovens, a waterfall quartz island, and a built-in wine fridge. Custom cabinets provided ample storage, and high-end appliances ensured performance for large gatherings. The open layout connected the kitchen to the living areas, making it both functional and social. This option is perfect for homeowners who entertain frequently and want a showpiece kitchen. 9. Space-Optimized Remodel for $22K This remodel maximized storage with pantry cabinets, pull-out shelving, and a multi-functional island. Durable tile flooring and mid-range appliances kept costs manageable while enhancing practicality. The layout was refined to improve workflow, making the most of every square foot. This approach is ideal for smaller households or those who need efficient use of space without overspending. How to Save Money on a 12×12 Kitchen Remodel You can keep costs down without sacrificing style by reusing your existing cabinets and giving them a fresh finish instead of replacing them. Shopping seasonal sales for appliances, fixtures, and materials often delivers major savings. Mixing one or two high-impact features with more affordable finishes creates a balance between cost and style. Hiring contractors during their off-season may lower labor rates. Finally, DIY-friendly tasks, such as painting or installing a backsplash, can reduce labor expenses by up to 30%, leaving more budget for essential upgrades. Return on Investment (ROI) A 12×12 kitchen remodel can return about 50–70% of its cost in increased home resale value. The key is planning with long-term appeal and function in mind. Neutral, durable finishes and a practical layout help attract future buyers while maintaining everyday usability. Even if you’re not planning to sell soon, these updates can improve your daily experience in the kitchen. By choosing upgrades with broad appeal, you can protect your investment and ensure that your remodel delivers lasting benefits well beyond the initial project. Final Thoughts Now you have a clear picture of the 12×12 kitchen remodel cost and the key factors that shape it. You’ve seen how materials, labor, and even location can make a big difference. I’ve shared examples so you can picture what’s possible in your own space, plus tips to stretch your budget without cutting quality. If you’re ready to take the next step, start by listing your must-have upgrades and comparing them to your budget range. From there, you can decide to DIY, hire a pro, or mix the two. And if you want more ideas, check out my other kitchen remodel guides; they’ll help you plan with confidence.
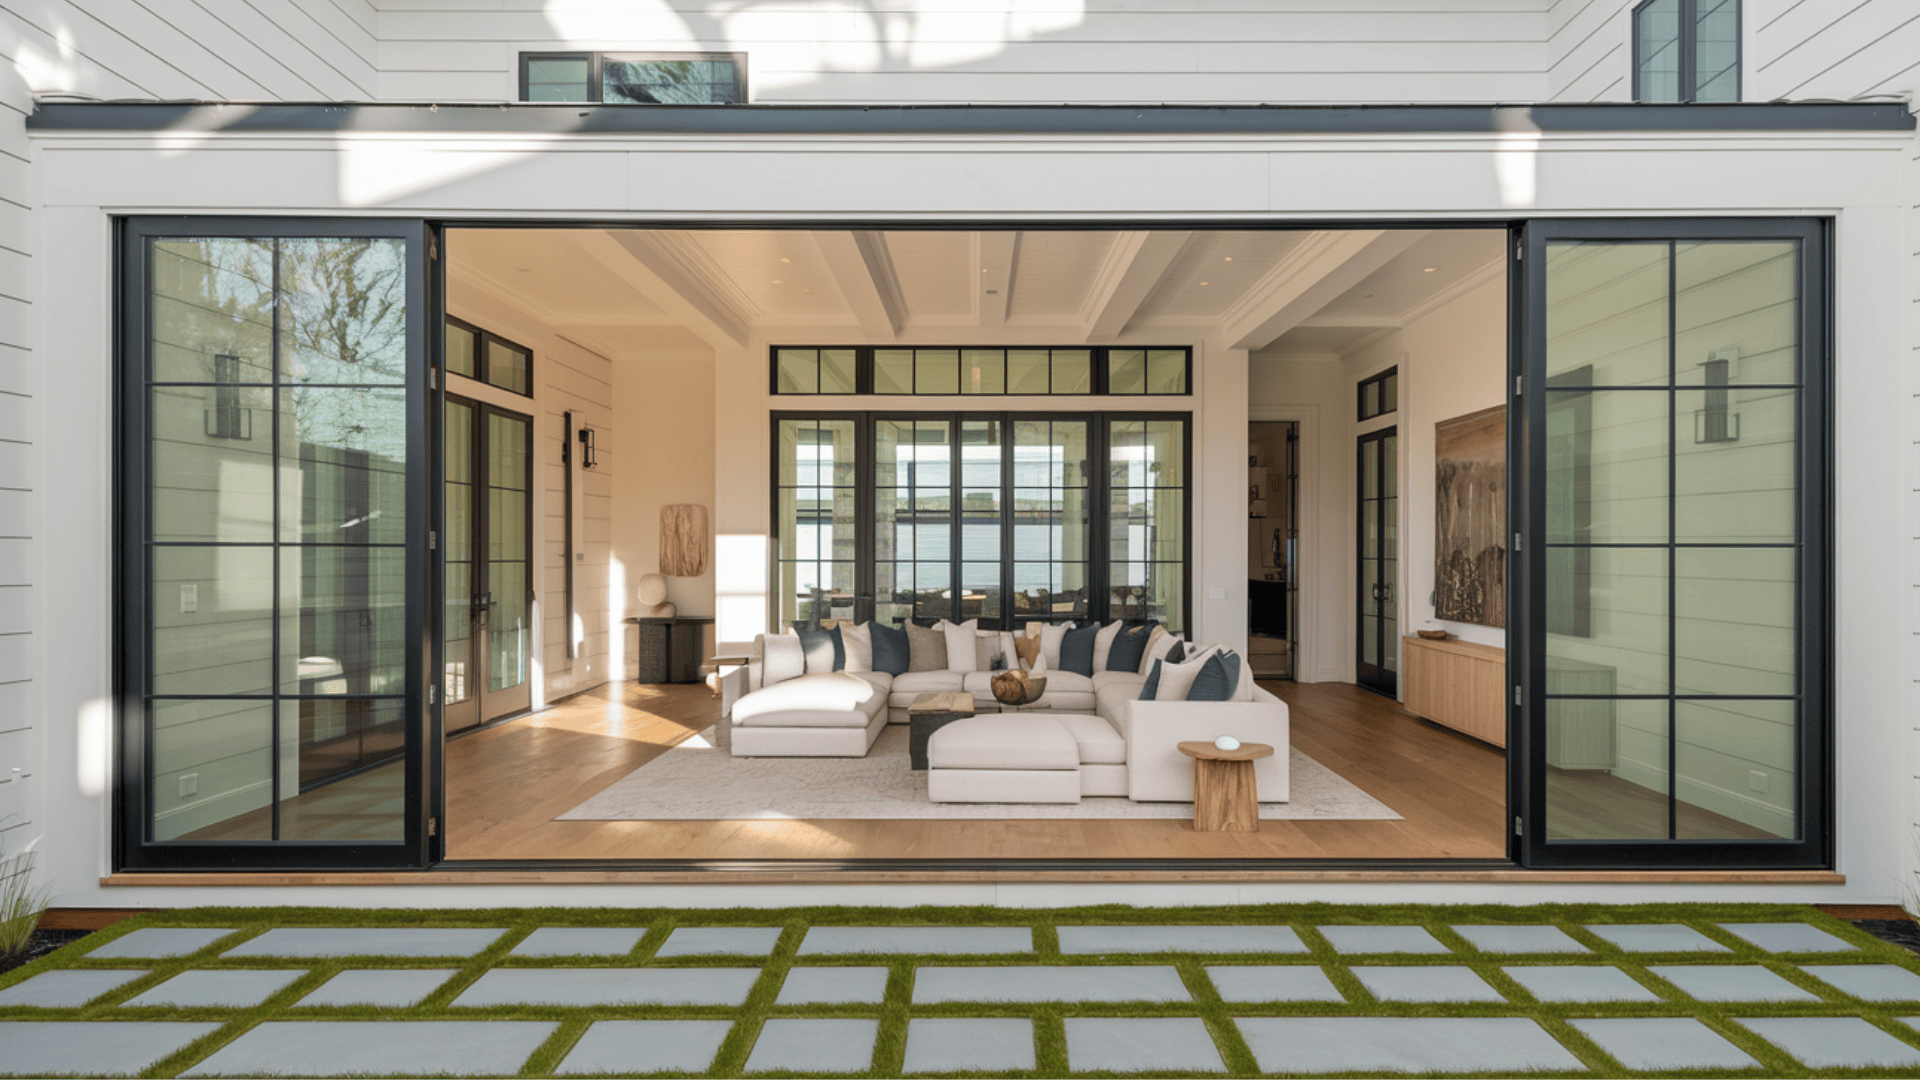
When I first looked into adding space to my home, I had no idea what it might cost. Maybe you’re in the same spot, imagining an extra bedroom, a larger family room, or the kitchen you’ve always wanted. The truth is, a room addition can be a great upgrade, but the cost can vary a lot. If you’re unsure how to budget or what to expect, this will help. You’ll learn the average room addition cost, how size and room type affect the price, what real homeowners have spent, and smart ways to save without cutting corners. By the end, you’ll know what to consider before calling a contractor. So, how much could your new space cost? Let’s find out. Average Room Addition Costs at a Glance The cost of a room addition typically ranges from $21,000 to $100,000, with most homeowners spending around $48,000-$50,000. On a per-square-foot basis, costs run $80 to $300, with the majority falling between $125 and $250/sq. ft., while high-end or complex projects. Small additions of about 120 sq. ft. often range from $12,500 on the low end to $18,000-$30,000 mid-range, and $36,000–$45,000+ for high-end finishes. Medium additions of 240 sq. ft. typically cost $25,000 low-end, $36,000-$55,000 mid-range, and $72,000-$85,000+ high-end. Large additions of 400 sq. ft. generally start at $50,000 low-end, $80,000-$90,000 mid-range, and can reach $100,000-$160,000+. Key factors influencing price include room size and complexity, type of room (with kitchens and bathrooms costing more due to plumbing and electrical), materials and finishes, labor rates, permit and inspection fees, site preparation, and utility hookups. In rare cases, luxury primary suites, home offices, or upscale bathroom additions can cost $130,000-$250,000+, but this is not the norm for most projects. House Addition Cost Typically, the cost falls between $35,000 and $160,000 for all types and sizes. Standard single-room additions typically range from $21,000 to $100,000, with many basic projects landing around $48,000–$50,000. Cost per square foot is one of the best ways to compare: Typical range: $125–$250/sq. ft. Low end: $80–$100/sq. ft. (basic finishes, rural areas) High end: $300+/sq. ft. (urban areas, complex designs, premium finishes) Here are average costs that range for common house addition types, from basic bedrooms to full primary suites: Addition Type Typical Cost Range Small bedroom $20,000–$50,000 Bathroom $30,000–$90,000+ Kitchen $50,000–$125,000+ Living/Family room $30,000–$80,000 Primary suite $90,000–$175,000+ Sunroom $25,000–$70,000 Basement conversion $30–$50/sq. ft. (basic finish) Several key factors influence the cost of a house addition, and understanding them helps you plan your budget. Here are some of them: Size and scope: Larger, more complex builds cost more. Room type: Kitchens, baths, and accessory dwelling units (ADUs) are the most expensive. Materials and finishes: Custom or luxury choices increase totals quickly. Labor rates: Higher in cities like NYC, SF, and Seattle; lower in the Midwest and South. Permits, inspections, and site prep: Can add thousands to your project. Structural work: Foundation upgrades, roof tie-ins, and blending old with new add hidden expenses. Start with the national averages to set a baseline. Then, compare your planned room size and type to more detailed cost breakdowns. This helps you build a realistic budget before requesting contractor quotes. Real Homeowner Experiences & Community Insights Hearing from homeowners who have completed additions can give you a realistic picture of what to expect. These real stories highlight how costs often shift from the first quote to the final bill. 12×12 Bedroom Addition A Midwest homeowner planned a 144 sq. ft. bedroom with basic finishes. The initial quote was $22,000, but upgraded windows, better flooring, and extra outlets pushed the final cost to $28,500. Even small upgrades can add thousands to your budget. 20×20 Family Room In Texas, a 400 sq. ft. family room was quoted at $65,000. Unexpected foundation work and HVAC changes increased the total to $78,000. Hidden structural issues are common; plan a contingency fund. Kitchen Extension A California homeowner budgeted $95,000 for a kitchen extension. Premium appliances, custom cabinets, and high-end finishes raised the final cost to $128,000. Upgrades and custom work can increase your budget by 20–30%. Factors That Influence Room Addition Cost Several factors can affect how much you’ll pay for a room addition. Knowing these will help you set a realistic budget: Size and complexity: Larger builds or designs with complex layouts cost more to construct. Room type: Kitchens and bathrooms cost more than bedrooms or living rooms due to plumbing and electrical work. Materials and finishes: Premium flooring, fixtures, and custom-built elements raise the total. Labor rates and location: Urban areas often have higher labor and material costs than rural or suburban regions. Permits and code compliance: Meeting local building codes and passing inspections adds to the expense. Site preparation and demolition: Clearing the space, removing old structures, or grading land can add thousands. Custom features: Built-ins, specialty lighting, and unique architectural elements increase both time and cost. The more specialized your addition, the higher the cost. Balancing your wish list with your budget is key to keeping expenses in check. Room Addition Timeline The time needed for a room addition depends on the size and complexity of the project. A small bedroom or home office can take 4-8 weeks, while a bathroom addition usually runs 8-12 weeks. Kitchens often require 10-16 weeks, and larger spaces like a family room or multi-room addition may take 12-20 weeks. Complex projects, such as a primary suite, can extend to 16-24 weeks or more. Delays can add significant costs. Longer build times may mean higher labor expenses, rising material prices, or extra permit renewal fees. In some cases, you might also need temporary housing if parts of your home are unusable. Planning for a realistic schedule and allowing a buffer for setbacks can help you stay on budget and reduce stress during construction. Planning Checklist A smooth room addition starts with a clear plan. Use this checklist to keep your project on track from start to finish. Apply for the required permits early and schedule inspections at key stages. Choose licensed, insured professionals and check references before signing agreements. Decide on finishes, fixtures, and other materials in advance to avoid delays. Set a realistic timeline with clear checkpoints for each phase of construction. Following a checklist helps you stay organized, avoid delays, and keep your project within budget. Cost-Saving Strategies Experienced contractors say a few smart decisions can help you cut costs without sacrificing quality. You should consider these strategies for cost-saving: Building up instead of out: Adding a second story can be cheaper than expanding the footprint, especially when lot space is limited. Off-season construction: Scheduling work in the contractor’s slow season can lead to better pricing and availability. Reusing or recycling materials: Salvaging doors, fixtures, or trim from your own home or resale shops can save money and add character. Getting multiple quotes: Comparing at least three detailed bids helps you find the best value and avoid overpriced proposals. Negotiating labor contracts: Clear agreements on payment terms, timelines, and included work can prevent cost overruns. Careful planning and smart choices can make a big difference in keeping your addition on budget. Conclusion Adding more space to my home was exciting, but I quickly learned that knowing the room addition cost ahead of time made all the difference. Now you’ve seen how size, type, materials, and location can influence the price, and how other homeowners have handled their budgets. With that knowledge, you can plan smarter, avoid costly surprises, and make choices that work for your needs. I always recommend setting a realistic budget, keeping a contingency fund, and hiring experienced contractors. Even small upgrades can add big value when done right. If you’re ready to move forward, check out my other posts for more home improvement tips and ideas to help you create a space you’ll love while staying within budget. Frequently Asked Questions How can I finance a room addition? Common options include home equity loans, home equity lines of credit (HELOC), cash-out refinancing, and personal loans. Some homeowners also use renovation-specific financing programs. Can I live in my home during a room addition project? In many cases, yes. However, large or complex additions, especially kitchens or major structural changes, may require temporary relocation for safety and convenience. What’s the difference between a room addition and a bump-out? A bump-out expands an existing room without adding a full separate structure, making it smaller and less expensive than a full addition.





