

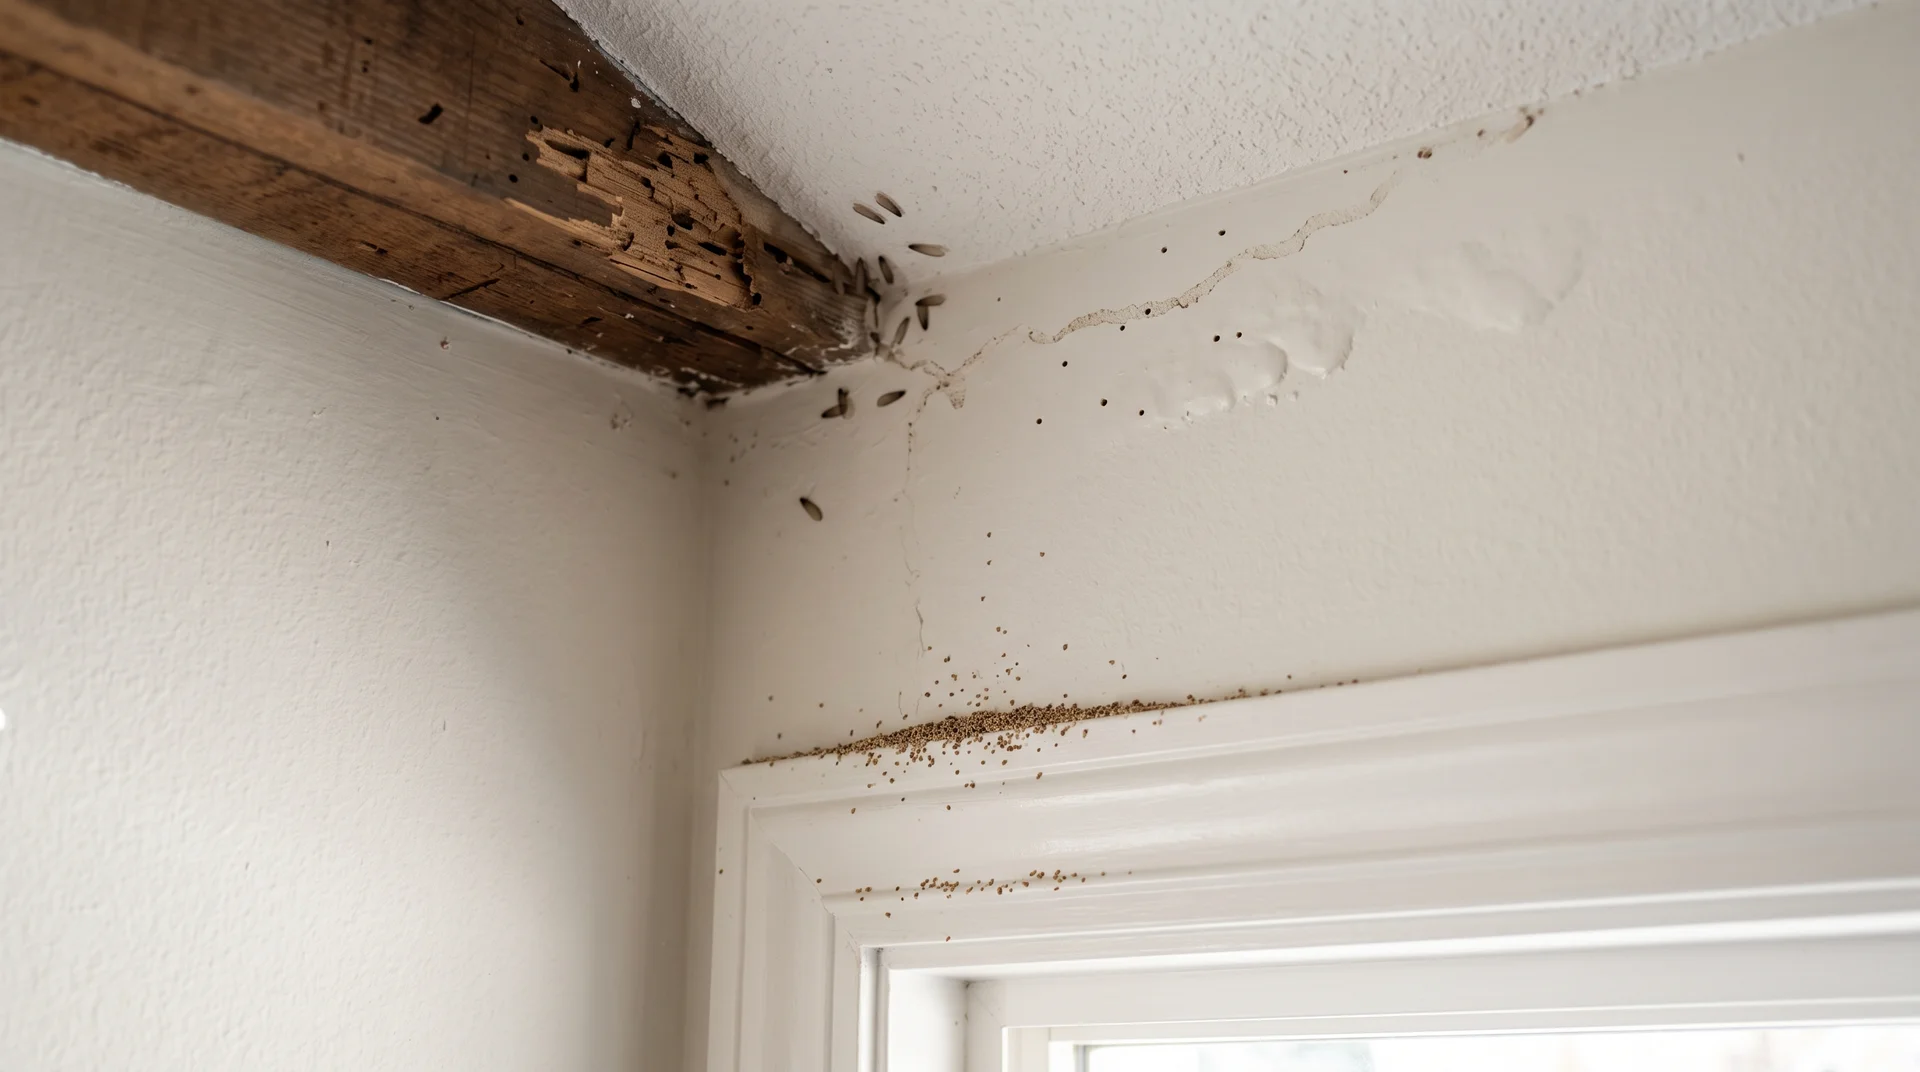
Early signs of termites in a ceiling include tiny holes, pellet-like droppings, mud tubes, irregular surface trails, discarded wings, hollow or weakened ceiling wood, and unexplained bubbling or peeling paint. A single hole or patch of damaged paint does not confirm a termite infestation. Nail marks, leaks, settling, and other insects can create similar symptoms. Several related signs in the same area are more concerning than a single isolated mark. For example, a small ceiling hole directly above a fresh pile of pellets deserves closer attention than a hole with no debris or other termite clues nearby. 8 Early Stage Signs of Termites in the Ceiling Ceiling termite activity often leaves small, easy-to-miss clues before obvious damage appears. Check for several related signs in the same area rather than relying on a single symptom. 1. Tiny Holes in Drywall or Plaster Small holes in modern drywall texture or plaster may appear when termites push waste from their galleries or emerge from infested wood. These small, round holes may occur around ceiling seams, crown molding, beams, corners, light fixtures, or attic openings. Drywood termites commonly create kick-out holes, while other insects, old repairs, or settling can cause similar marks. Look for nearby pellets, wings, trails, or other signs before concluding that termites are present. 2. Pellet-Like Droppings Below the Ceiling Small piles of hard pellets beneath a ceiling area may indicate drywood termite activity. These pellets, called frass, are pushed out through kick-out holes as termites clear their galleries. Frass is usually small, hard, and uniform in shape. It may resemble coarse sand or pepper and often collects beneath a single opening. If fresh pellets return after cleaning, the opening may still be active. Check the surrounding area for pellets, discarded wings, irregular trails, or damaged wood before assuming termites are responsible. 3. Mud Tubes or Soil-Like Material Subterranean termites build mud tubes to travel safely between the soil and wooden parts of a building. Made from soil, moisture, and termite saliva, these tubes may appear as narrow brown lines, dried mud, or raised trails. Around ceilings and attics, they may occur near wall joints, joists, plumbing openings, chimneys, masonry, or areas connected to the foundation. Ceiling-level mud tubes are less common but may indicate termites have moved upward through hidden framing or wall cavities. Leave them intact for inspection. 4. Raised or Sunken Surface Trails Termite galleries near the ceiling surface may create irregular lines or changes in texture. These signs can appear as narrow dents, raised paint lines, vein-like marks beneath drywall paper, darker tracks, or uneven areas that do not follow straight seams. Unlike normal drywall joints, termite trails are usually irregular and may curve or branch. They are more concerning when found with pinholes, frass, mud material, or damaged wood. 5. Bubbling or Peeling Paint Paint may bubble, blister, peel, or become uneven when the surface beneath it is disturbed. Termites are one possible cause, but moisture issues are more common. Check for leaks, condensation, poor ventilation, or previous water damage before assuming an infestation. Water damage often causes staining and swelling, while termite activity may create thin, uneven surfaces with nearby holes or debris. Treat damaged paint as a supporting clue, not proof on its own. 6. Hollow or Papery Wood Termites often feed inside wood while leaving the outer layer intact, so joists, beams, molding, or trim may look normal despite internal damage. Affected wood may look thin, blistered, uneven, or cracked, with small holes nearby. Avoid testing suspicious wood by pressing or striking it, as weakened surfaces may break. If an exposed beam appears damaged or unstable, stop examining it and keep people away until it is assessed. 7. Discarded Wings or Termite Swarmers Winged reproductive termites, known as swarmers, leave established colonies to start new ones. They may emerge from ceiling cavities, attic framing, or upper walls and shed their wings near windows, vents, lights, or attic openings. Termite wings are usually similar in length and appear in small piles. Swarmers have straight antennae and four equal-sized wings, unlike flying ants. Shed wings indoors can indicate termite activity. Finding shed wings indoors, especially near ceiling openings or wooden framing, can be an important sign of termite activity. 8. Faint Clicking or Rustling Sounds Termites can sometimes produce faint sounds inside wood, such as soft tapping or rustling. However, ceiling noises are more often caused by plumbing, HVAC systems, rodents, or normal house movement. Sounds alone do not confirm the presence of termites and are more meaningful when accompanied by signs such as pellets, holes, mud tubes, or wings. What to Do After Finding Possible Termite Signs Finding one suspicious sign does not mean you need to begin tearing out the ceiling. The next steps should focus on safety and professional confirmation. 1. Avoid Disturbing the Area Do not spray household insecticide into holes or ceiling cavities. Killing a few visible termites will not eliminate a hidden colony and may push the remaining insects deeper into the structure. Avoid patching holes, painting over surface damage, breaking mud tubes, removing damaged wood, opening the ceiling, or cleaning away debris before documenting the evidence. Move furniture away if loose material may fall. 2. Address Active Leaks Repair active roof or plumbing leaks, but do not cover the suspected termite opening before inspection. Fixing moisture problems can help prevent further deterioration and make it easier to determine whether termites or water damage caused the issue. Check areas around the ceiling for signs of ongoing leaks, condensation, or poor ventilation that may be affecting the structure. Avoid cosmetic repairs, such as patching holes or repainting damaged areas, until you confirm the cause. Covering the evidence too early can make it harder to identify the source of the problem. 3. Arrange a Licensed Termite Inspection A professional may inspect the ceiling and attic framing, connected walls, foundations and crawl spaces, mud tubes and frass, moisture conditions, plumbing and utility routes, and other areas with structural wood. Ask whether the evidence appears active, which type of termite is suspected, and whether any parts of the structure could not be accessed. The inspection should also explain the recommended treatment and whether a contractor or structural professional should assess damaged materials. Ways to Make Ceiling Areas Less Inviting to Termites Home remedies can help reduce conditions that favor termites. They cannot remove termites hidden inside ceiling wood or framing. If you see multiple signs of termites, schedule a professional inspection. 1. Reduce Excess Moisture: Fix roof leaks, plumbing leaks, and condensation issues. Keep attic spaces dry with proper ventilation. Dry wood is less attractive to termites. 2. Remove Wood and Cellulose Debris: Remove old lumber, cardboard, branches, and firewood near the building. Keep wood materials away from exterior walls. Clear unused wood scraps from attic spaces. 3. Vacuum Visible Swarmers and Wings: Vacuum termite swarmers and discarded wings when found indoors. Seal and dispose of vacuum contents outside. Record where swarmers appeared for inspection. 4. Keep the Area Dry and Ventilated: Use fans or dehumidifiers in damp areas. Improve airflow in attic and ceiling spaces. Reducing humidity helps protect wooden structures. 5. Avoid Unproven DIY Treatments: Vinegar, bleach, oils, and household sprays may only kill visible termites. They cannot reach hidden colonies inside wood. Avoid drilling holes or applying mixtures into ceilings. How to Prevent Future Termite Activity 1. Control Moisture- Repair roof leaks, plumbing problems, condensation, and overflowing gutters before water reaches the attic or ceiling framing. Improve attic ventilation where humidity regularly builds up. 2. Remove Wood-to-Soil Contact- Check siding, porch posts, deck supports, steps, and other wooden materials that touch the soil. Create separation between structural wood and the ground where possible. 3. Protect the Foundation and Exterior- Keep gutters clear and extend downspouts so water drains away from the foundation. Store firewood off the ground and away from exterior walls. Remove dead wood, stumps, and leftover building timber near the home. 4. Schedule Periodic Inspections- The right inspection schedule depends on local termite pressure, previous infestations, construction type, moisture conditions, and any existing termite warranty. Homes with a history of termite activity may need closer monitoring than properties with no previous evidence. What Early Termite Signs Could Be Telling You Most ceiling termite activity remains hidden well before visible evidence appears. When clues surface, such as a fresh pile of frass, a cluster of shed wings near a vent, or irregular surface trails, they typically indicate a colony that has been active for some time. Acting on early evidence keeps repair scope limited. Infestations identified before structural deterioration sets in tend to require less remediation. Waiting until visible damage appears often means managing an active infestation and the resulting structural repairs simultaneously. Frequently Asked Questions Can Termites Be in the Ceiling Without Visible Damage? Yes. Termites can remain behind drywall, insulation, or framing while feeding on hidden wood. Wings, frass, mud material, or small holes may appear before the ceiling shows obvious damage. Why Do Termite Pellets Keep Appearing After Cleaning? Drywood termites may continue pushing frass through an active kick-out hole. Pellets that repeatedly return beneath the same ceiling location are more concerning than one old, undisturbed pile. Can Ceiling Termites Spread to Other Rooms? Yes. Termites can move through connected joists, wall cavities, roof framing, and other wooden components. Visible evidence in one room may represent only part of the affected area. How Quickly Can Termites Damage Ceiling Joists? The rate varies based on colony size, termite type, moisture, wood condition, and the duration of the infestation. Visible sagging, cracking, or surface deterioration suggests you should not delay a professional assessment.
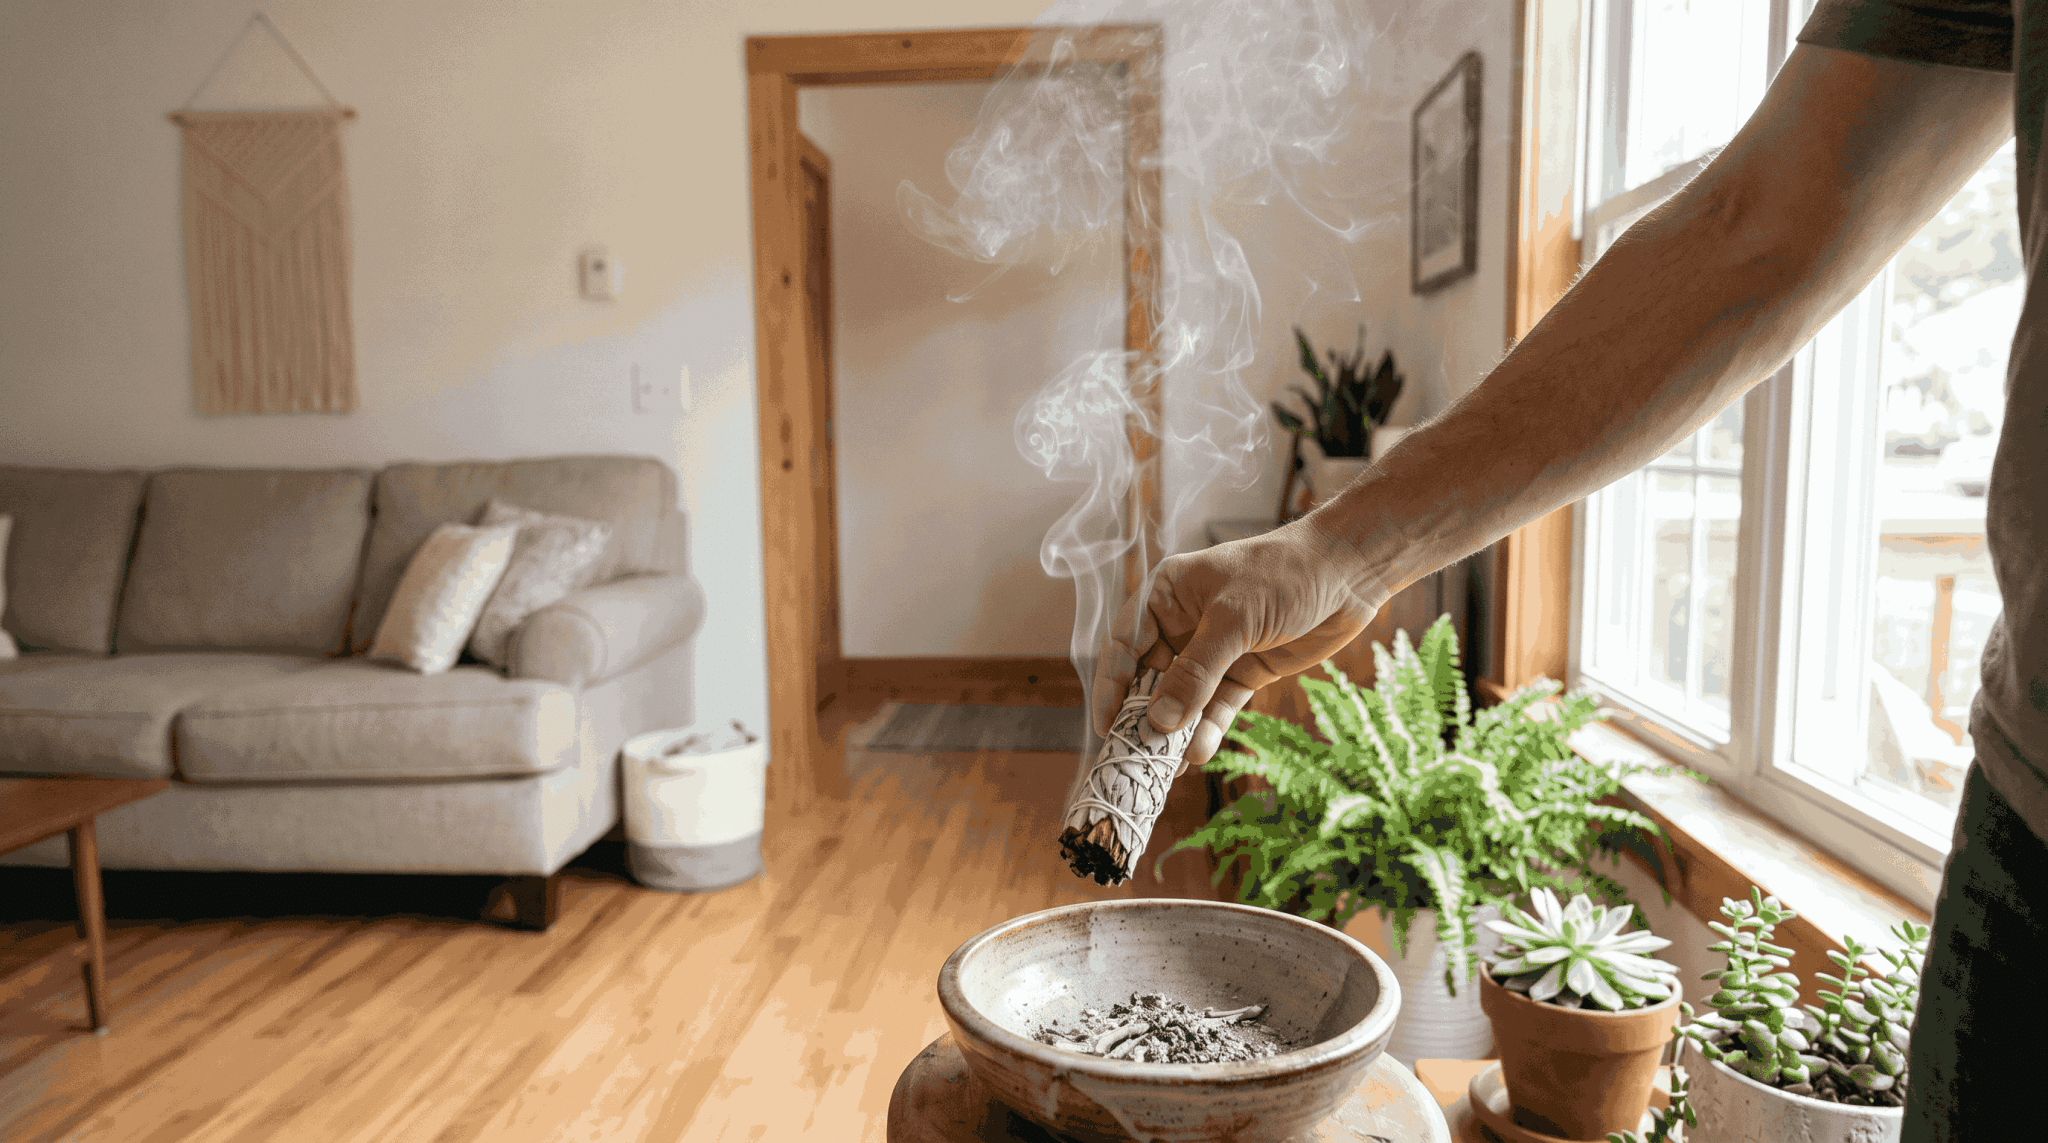
Some rooms just feel off. Not cluttered, not dirty, just heavy. The kind of feeling that settles in after a stressful week, a big life change, or simply too much time spent indoors without a real reset. For that kind of heaviness, people have been turning to sage for centuries. Rooted in Indigenous and spiritual traditions across cultures, the ritual uses the slow drift of sage smoke to clear stagnant energy and invite calm back into a space. It’s less about belief and more about intention, a deliberate, unhurried act that signals to your mind and your home that something is shifting. If you’ve been curious about trying it, this blog covers everything you need to know: what to gather, how to move through each room, and how to do it safely from start to finish. What Does Saging a House Mean? House saging is the practice of burning dried sage and letting the smoke drift through each room to clear stagnant energy and refresh the space. Many people use it after a stressful event, a move, or simply when a home starts to feel heavy or unsettled. It can also become part of a broader home-reset routine, alongside decluttering, opening windows, rearranging furniture, or creating a calmer atmosphere. The smoke itself isn’t magic. What matters most to practitioners is the intention behind the ritual and the sense of a fresh start it creates. What You Need to Sage Your House Gathering supplies ahead of time keeps the ritual calm and uninterrupted. A sage bundle or loose sage A fireproof bowl or abalone shell Matches or a lighter Sand or water for extinguishing the sage An open window or maybe a bathroom door An optional feather or hand fan to guide the smoke. How to Prepare Your House Before Burning Sage A little prep work before lighting the sage makes the whole process safer and more effective. Tidy clutter and remove trash. Open windows and interior doors. Turn off fans that may spread embers. Move flammable objects away from your path. Keep children and pets in a safe area. Decide on an intention for the ritual. How to Sage Your House for the First Time Safely First-timers often worry about doing it wrong, but the process is forgiving. The steps below walk through everything from lighting the bundle to finishing near the front door. Step 1: Set a Clear Intention Choose a simple purpose for the cleansing before you begin, like creating a peaceful environment or marking a fresh start after a hard week. Keeping it short and specific makes it easier to stay focused on the rest of the ritual. Safety tip: Keep your fireproof bowl and extinguishing material within reach before you begin. Step 2: Open a Window or Door Ventilation lets smoke leave the home rather than build up indoors, so open at least one window or door before lighting the sage. This single step does more to keep the air breathable than almost anything else in the process. Safety tip: Check that smoke alarms near the opened window won’t trigger from drifting smoke. Step 3: Light the Sage Bundle Safely Hold the sage bundle over your fireproof bowl, light the tip, let it burn for a few seconds, then gently blow out the flame so it smolders and produces smoke instead of fire. A steady stream of smoke, rather than an open flame or flickering light, is the sign that the sage is smoldering properly and producing smoke as intended. Safety tip: Never light the bundle near curtains, paper, or other flammable materials. Step 4: Begin at the Main Entrance Many people start at the front door since it’s considered the main point where energy enters the home, then move through the house in one continuous direction. Starting here also gives you a clear reference point to return to later. Safety tip: Keep pets and children away from the entryway while the sage is lit. Step 5: Move Slowly Through Each Room Carry the sage in its fireproof bowl and walk slowly through each room, letting a small amount of smoke drift into the space as you go. There’s no need to fill the room with smoke, just enough to pass through each area. Safety tip: Watch for falling ash and keep the bundle angled downward over the bowl as you walk. Step 6: Focus on Corners, Doors, and Windows Direct the smoke toward corners, closets, entryways, and painted vinyl windows other spots where air tends to sit still, since these areas are often the focus of the ritual. These are the same spots that tend to collect dust and stale air day to day. Safety tip: Keep a safe distance from window treatments and stored items in closets. Step 7: Repeat Your Intention As you move from room to room, repeat your chosen intention quietly or aloud. Keeping the same words in mind can help you stay focused and present throughout the process. There is no need to rush. Move at a comfortable pace and repeat the intention whenever you feel your attention drifting. Safety tip: Don’t let focus on the intention distract you from watching the burning tip. Step 8: Return to the Starting Point Finish your path near the main entrance or the open window you started with, completing the loop through the home. This closes out the ritual with the same clear structure it started with. Safety tip: Do a quick visual check of the bundle for any active embers before setting it down. Step 9: Extinguish the Sage Completely Press the burning end firmly into sand or a fireproof container and check closely for any remaining embers before setting it aside. This last step matters just as much as the ritual itself. Safety tip: Confirm the bundle is fully cold to the touch before storing it away. How Often Should You Sage Your House? There’s no fixed schedule for saging a house. Many people do it after moving into a new home, following an argument, before starting something new, after guests leave, or simply whenever the space starts to feel unsettled. The ritual is performed as needed rather than on a strict routine. Some people prefer a light, regular rhythm, like once a season or at the start of a new month, while others reach for sage only when something specific prompts them. Neither approach is more correct than the other. The right frequency really comes down to how often the home feels like it needs a reset, not a set number of times per year. Which Direction Should You Move While Saging? There’s no single required direction for staging a house, so the table below covers the most common approaches. Approach How It Works Best For Clockwise Starts at the front entrance and follows a consistent clockwise path room to room People who want a simple, repeatable routine Counterclockwise Moves in the opposite direction from clockwise, starting at the same entry point Practitioners with a personal or traditional preference Natural layout Follows the home’s floor plan in whatever order feels easiest to walk through Larger or irregularly shaped homes What matters more than the exact direction is covering every room at a steady, unhurried pace; sticking to the same path each time can make the ritual feel more familiar over time. How to Complete Your House Cleansing Ritual A few simple steps wrap up the ritual once you’ve worked through every room. Let fresh air circulate for a few minutes before closing the windows. Dispose of ash safely and store the cooled sage bundle in a dry, fire-safe place. Take a quiet moment to acknowledge the fresh start before returning to your routine. Check the room where you started one last time to make sure no embers remain. How to Choose Sage for House Cleansing When buying sage for house cleansing, look beyond price and packaging. The more important details are the type of sage, where it was grown, and whether the seller explains how it was harvested. You can find white sage from established herb suppliers such as Mountain Rose Herbs, which offers organically cultivated white sage of California origin, and Taos Herb Company, which carries California white sage sourced from private land. For smaller growers, marketplaces can also be useful, especially when sellers provide clear details about cultivation and harvesting. For example, Blossom Valley Sage grows and harvests white sage on private property in San Diego, California. Before buying, check whether the sage is cultivated or wild-harvested, where it comes from, and whether the seller provides transparent sourcing information. White sage is particularly vulnerable to overharvesting, so cultivated plants or responsibly harvested sage from private land are better options when available. Common Mistakes to Avoid When Saging a House A few small missteps account for most of the problems people run into with this ritual. Creating too much smoke is one of the most common mistakes, since a light, steady stream works better than a heavy cloud that overwhelms the space. Skipping ventilation quickly compounds the problem, so keep windows and doors open throughout. Carrying the bundle without a fireproof bowl underneath it is another oversight worth correcting before you start, as ash and embers drop without warning. Moving too quickly through each room undermines the whole process; slow, deliberate movement gives the smoke time to do its work. Keep an eye on anything flammable nearby, including curtains, loose papers, and dry decorative pieces, since sage burns longer than it appears to. When you’re done, make sure the bundle is fully extinguished rather than just set aside, since smoldering sage left unattended is a fire risk. Frequently Asked Questions What time of day should you smudge your house? You can smudge at any time, though many people prefer the morning or before a new beginning to create a fresh atmosphere. Does burning sage invite bad spirits? No, there is no evidence that burning sage invites bad spirits; many people use it as a symbolic cleansing practice based on personal or cultural beliefs. Does sage have to be gifted? No, Sage does not have to be gifted; you can purchase it yourself if you choose to use it respectfully. What is the prayer for powerful home cleansing? There is no single required prayer; you can say a simple, sincere intention asking for peace, protection, and positive energy in your home. Does dried sage ever go bad? Dried sage does not spoil quickly, but it can lose its fragrance and burn quality over time if stored in a damp or humid place. A Fresh Start for Your Home Sagging a house comes down to a few simple stages: preparing the space, lighting the bundle safely, moving smoke through each room with intention, and finishing the ritual with care. Keep the smoke light, the ventilation open, and let the process bend to your own beliefs and your household’s needs rather than a rigid set of rules. Long after the smoke has cleared, what stays behind is the quiet shift in how the home feels. That’s the real point of the ritual, not the smoke itself.
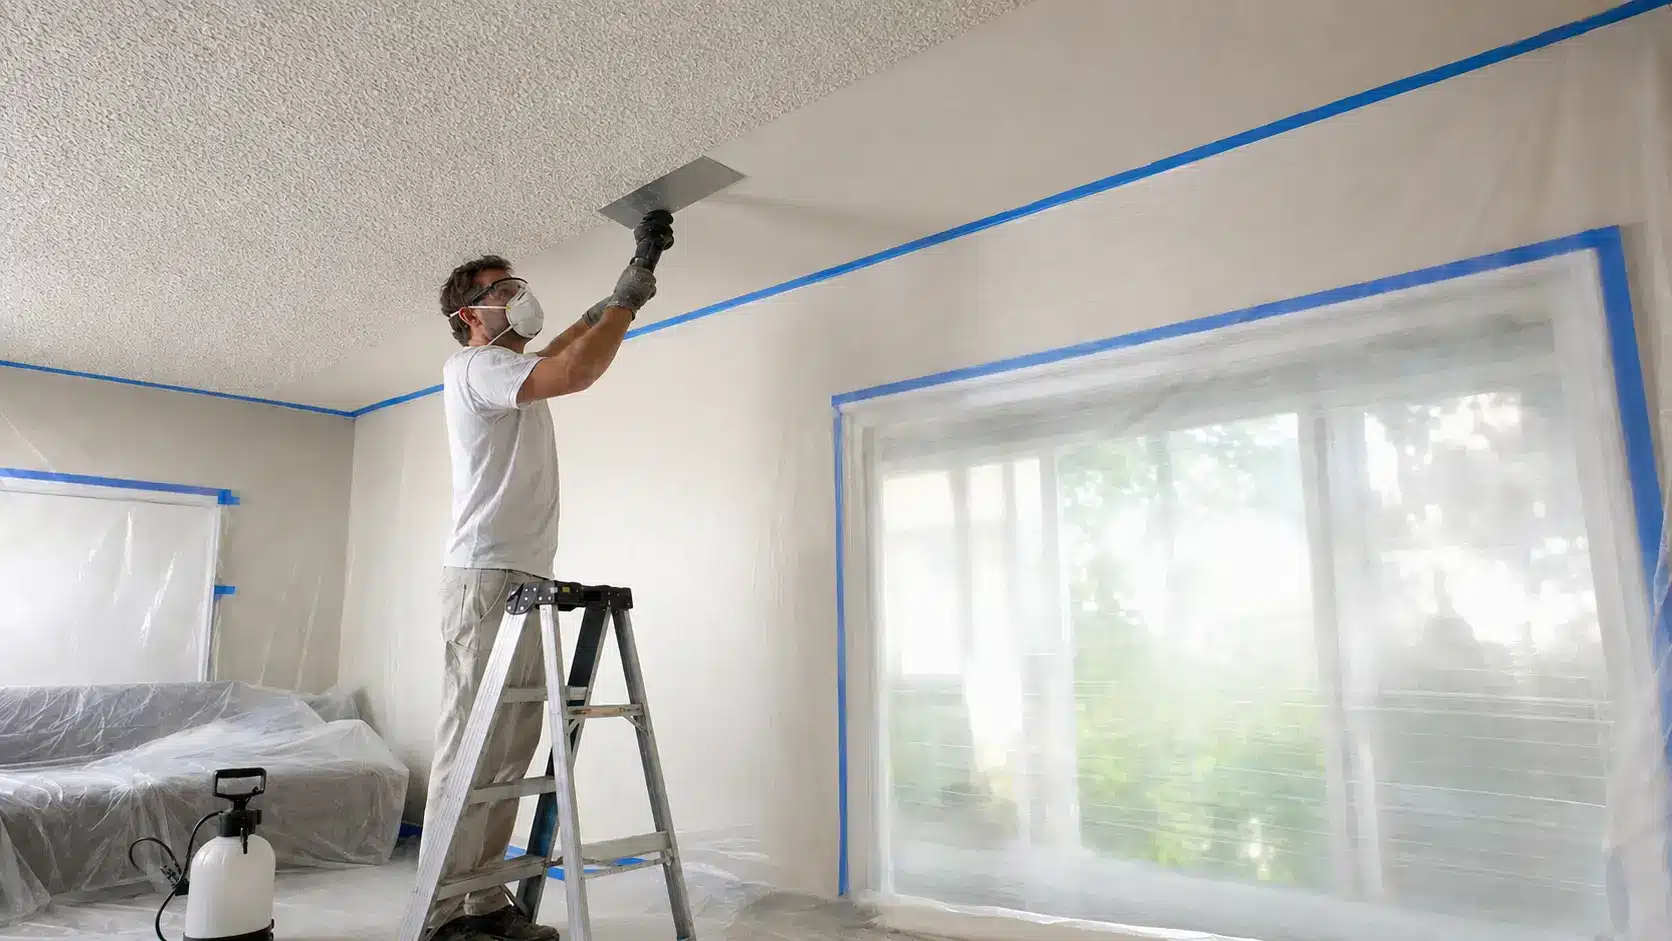
Removing a popcorn ceiling can give a room a cleaner, more updated finish, but the process involves more than simply scraping away the texture. Safety checks, proper preparation, careful removal, and surface repairs all play a role in achieving a smooth result without unnecessary damage. This blog explains how to remove a popcorn ceiling step by step, including asbestos testing, the tools you’ll need, DIY versus professional removal, expected costs and timelines, common mistakes, and alternatives if you prefer to cover the texture instead. Test Your Ceiling for Asbestos Before You Start This step determines everything else about your project, so it comes first for a reason. Older homes are more likely to have asbestos in the ceiling texture, so it is best to test first rather than guess. Testing is simple: Use an EPA-approved test kit, costing about $30 to $50 Results usually come back within about a week If positive, stop right away, do not scrape or sand, and call a certified asbestos abatement contractor If negative, you are safe to move forward with removal yourself Tools and Materials You Will Need Gather everything before you start so you don’t stop mid-job to run to the hardware store. Protective gear: Goggles, a dust mask or respirator, and old clothes you don’t mind ruining. Plastic sheeting: Enough to cover floors, walls, and furniture in the work area. A garden sprayer: For wetting down the texture in sections. A wide scraper and a sturdy ladder: For safely removing softened texture and reaching the ceiling. Joint compound, sandpaper, primer, and paint: For repairing and refinishing the ceiling once the texture is off, especially when preparing a smooth finish that complements a cathedral ceiling. How to Remove a Popcorn Ceiling Step by Step Working in small sections keeps the texture manageable and prevents the ceiling from drying out before you can scrape it. 1. Test a Small Area with Water Spray a small patch first to confirm the texture softens and comes off without damaging the drywall underneath. This test run tells you how long the texture needs to soak and whether your scraper is the right tool before you commit to the full ceiling. Reminder: Wait a few minutes after spraying before you test scrape, since rushing the test can give you a false read on how the texture behaves. 2. Spray the Ceiling in Small Sections Mist a three-foot by three-foot section with water from the garden sprayer, avoiding oversaturation that can soak into the drywall. Working in small patches keeps the texture wet enough to scrape while you finish each section before it dries out again. Reminder: Keep a light, even mist instead of soaking the surface, since heavy spraying is what leads to drywall damage down the line. 3. Let the Texture Soften Give the water a few minutes to soak in until the texture looks darker and feels soft to the touch. Softening time varies depending on texture thickness, so check a small spot with your scraper before working across the whole section. Reminder: Don’t let a sprayed section sit too long, since texture that dries back out will need another pass of water before it scrapes clean. 4. Scrape without Damaging the Drywall Hold the scraper at a low angle and work in gentle, even strokes to lift the softened texture without gouging the surface underneath. A wide, flexible scraper distributes pressure more evenly than a narrow one, helping protect the drywall as you go. Reminder: Stop and re-wet any spot that feels like it’s fighting back, since forcing a dry patch is what causes gouges and extra repair work. 5. Collect and Dispose of the Debris Scoop the wet debris into a trash bag as you go, then wrap up the plastic sheeting once the room is clear. Wet popcorn debris is heavier than it looks, so double-bag it before hauling it out to avoid tears or spills. Reminder: Check local disposal rules first if there’s any chance the texture contains asbestos, since regular trash pickup may not allow that material. DIY vs Professional Popcorn Ceiling Removal The right choice depends on how much time you have, how comfortable you are with the mess, and the condition of the ceiling. Factor DIY Professional Cost Lower, materials only Higher, includes labor Safety Depends on asbestos status Trained for hazardous materials Time Longer, especially for beginners Faster with experienced crews Mess Contained but hands-on Managed with less homeowner effort Ceiling condition Best for simple, unpainted texture Better for damaged or painted ceilings Finish quality Varies with skill level Consistently smooth results If your ceiling is simple and asbestos-free, DIY can save real money. Anything more complicated is usually worth handing off to a pro. How Long Does Popcorn Ceiling Removal Take The timeline depends on the room size, how well the texture absorbs water, and the amount of follow-up repair work. Preparing and covering the room can take a couple of hours, while spraying and scraping a single average bedroom often takes a few more hours. Drying time between repair coats, sanding, and painting usually stretches the full project across two to four days from start to finish. Painted or heavily textured ceilings tend to push that timeline toward the longer end, since extra scraping, skim coating, or minor concrete repair around adjoining surfaces can add more time. How Much Does Popcorn Ceiling Removal Cost Cost varies significantly depending on whether you do the work yourself or hire someone to do it. Option Typical Cost Notes DIY removal Often under $100 per room Covers an asbestos test kit, scraper, sprayer, and finishing supplies Professional removal $932 to $3,086 on average Contractors typically charge $1 to $6 per square foot Higher-end costs Toward the top of the professional range Driven by water damage, cracking, or unusually high ceilings needing extra repair and equipment Get a quote from at least two contractors before committing, since pricing can vary based on local labor rates. Factor in the cost of an asbestos test either way, since it protects you regardless of which route you choose. Popcorn Ceiling Removal Mistakes to Avoid A few small missteps can turn an easy weekend project into extra repair work, so it helps to know what to avoid. Oversaturating the drywall lets water soak through and damage the paper backing, while scraping too hard gouges the surface and creates more repair work than the texture removal itself. Skipping an asbestos test in an older home can expose you to fibers that are dangerous to breathe, and leaving fixtures uncovered puts them at risk of water and debris damage. Painting over damp joint compound is another common mistake, since it often bubbles, peels, or shows uneven texture once dry. Failing to protect floors and walls with plastic sheeting or drop cloths can leave behind a difficult cleanup, as wet texture tends to stick to nearby surfaces. Ways to Decorate Over a Popcorn Ceiling Removing the texture is not the only option, and decorating over it can work well if you would rather skip the mess entirely. Wood plank ceiling: Adds warmth and fully hides the texture once installed over furring strips. Works well in living rooms and bedrooms where a rustic or coastal look fits the space. Drop ceiling tiles: A straightforward option that also gives easy access to wiring or plumbing above. Popular in basements and utility spaces where future access matters more than a seamless finish. Textured wallpaper or ceiling paper: Covers the popcorn look with a fresh pattern without removing anything. A budget-friendly choice that can be swapped out again later if your style changes. Tin or faux tin ceiling tiles: Add a decorative, vintage look while fully covering the old texture. Common in kitchens and dining rooms, where a pressed-metal pattern adds character. Beadboard panels: Create a clean, cottage-style look and can be installed directly over the existing texture with minimal prep. A good fit for bathrooms and entryways seeking a classic, textured wall-to-ceiling look. Frequently Asked Questions Can I Just Put Drywall Over a Popcorn Ceiling? Yes, you can install drywall over a popcorn ceiling as long as the existing surface is stable and there are no signs of moisture damage or structural problems. Does Removing a Popcorn Ceiling Increase Home Value? Removing a popcorn ceiling can make a room look cleaner and more modern, which may improve buyer appeal, though the effect on resale value depends on the home and local market. Is It Safe to Sleep in a Room with a Popcorn Ceiling? Yes, sleeping in a room with an intact popcorn ceiling is generally safe, but you should avoid scraping, sanding, or damaging it if asbestos may be present. When Should I Worry About a Popcorn Ceiling? You should be concerned if the ceiling is crumbling, stained, water-damaged, or showing signs of disturbance, especially in homes built before the mid-1980s. Will 30 Minutes of Asbestos Exposure Hurt You? A brief exposure does not guarantee illness, but no asbestos exposure is considered completely safe; contact a professional if exposure occurred. Final Thoughts A smooth ceiling comes down to following the sequence: test first, prepare the room, soften the texture, scrape carefully, repair the surface, then prime and finish. Skipping a step creates more work later, so take it one stage at a time, and the results will hold up. Give yourself a full weekend if it’s your first time, and don’t rush the drying stages between repairs and paint. Once that last coat goes on, you’ll have a ceiling that finally matches the rest of the room.

A well-built DIY outdoor bar runs about $400–$800 in materials for a freestanding 72-inch unit, more if you use premium cedar throughout, less if you stick to pressure-treated framing with cedar slats only on the visible faces. I’ve seen homeowners spend twice that by skipping the planning stage and buying the wrong lumber twice. The build I’m walking through here avoids that. It uses a strong exterior-grade frame, vertical wood slats over dark backing panels, a sealed countertop, open back storage, and warm under-counter LED lighting. Done right, this is a bar that survives real weather and still looks intentional two winters later. Cost Note: Figures in this article are estimates based on national averages as of 2026. Actual costs vary significantly by region, lumber prices, and material choices. Always price your cut list at a local lumber yard before committing to the build. Difficulty 3/5 — Basic carpentry, no specialist skills needed Time 1–2 weekends (build) + 1 day (finish and cure) Cost $400–$800 in materials depending on wood choice Tools Needed Circular saw or miter saw, drill/driver, clamps, level, tape measure, speed square, sander Skill Required Intermediate — confident measuring, cutting, and driving screws square What This Build Creates The finished bar is freestanding, approximately 72 inches wide, 24 inches deep, and 42 inches high, proper bar height for standard stools with a 28–30-inch seat. The front and sides have a warm, vertical wood-slat finish over dark backing panels. The countertop overhangs the frame slightly and is finished with a thick front edge so it reads as a solid slab. The back is open for storage, with two shelves and one open bay sized for a cooler or storage bin. Under-counter LED strip lighting and a black foot rail finish the build. It sits on a patio, deck, or paved area. It does not belong on grass, more on that under mistakes to avoid. The One Failure Mode to Know Before You Start The most common reason DIY outdoor bars look rough after one season: unsealed wood. Not just the faces but the cut ends, the undersides, the corners, the hidden frame members. Raw end grain is the first place water gets in, and once it’s in, it works fast. Seal everything before assembly where you can, and again after final assembly where you can’t reach it earlier. That’s the step most people skip because it’s tedious and invisible. It’s also the step that determines whether this bar looks good in year three or starts delaminating by year two. Pro Tip: Pre-seal all cut ends with a penetrating outdoor wood sealer before assembly. Once the frame is together, you won’t reach half these surfaces. A foam brush and five minutes per board before you build saves you a resealing job next spring. Materials and Cut List The quantities below are based on the 72 × 24 × 42-inch finished size. Buy 10–15% extra on lumber for trimming, ripped pieces, and spacing adjustments. Pressure-treated lumber is the right call for the hidden frame. It handles ground moisture and repeated wet/dry cycles without degrading. Cedar is the better choice for the visible slats because it takes stain well, has natural rot resistance, and looks warmer than treated wood. Material Cut Size Qty Use 2×4 pressure-treated or exterior-grade lumber 72 in 4 Long sides of top and bottom frames 2×4 exterior-grade lumber 21 in 8 Short sides of top/bottom frames and side rails 2×4 exterior-grade lumber 40½ in 8 Corner posts and mid-span support posts 2×4 exterior-grade lumber 69 in 3 Front and back horizontal support rails 1×2 or 1×3 lumber Custom 4–6 Back shelf support cleats Exterior plywood (¾ in) 72 × 38 in 1 Front backing panel Exterior plywood (¾ in) 24 × 38 in 2 Side backing panels Exterior plywood or sealed boards Custom 2 shelves Lower and middle back shelves Cedar slats (1×2 or 1×3) 38 in tall 40–45 Front slatted finish Cedar slats (1×2 or 1×3) 38 in tall 24–30 Side slatted finish Countertop base (2× lumber or ¾ in plywood laminated) 76 × 29 in 1 Main countertop base Countertop edge trim 76 in front, 29 in sides 3 Thick countertop edge profile The countertop base is the one place to spend more time than you think it needs. A single layer of ¾-inch plywood will flex over a 76-inch span. Either laminate two layers or use solid 2× material ripped and glued side by side. The edge trim is what makes it look like a slab, add a 1½-inch thick face on the front and sides, and nobody will know it’s plywood underneath. Hardware, Finishes, and Accessories Category What to Buy Fasteners Exterior-grade coated screws (2½ in for frame, 1¼ in for slats and panels) Countertop finish Dark charcoal, black, or concrete-look outdoor coating — apply 2 coats minimum Wood finish for slats Warm exterior stain + outdoor sealer rated for UV exposure Backing panel finish Black or charcoal exterior paint before slats go on Lighting Outdoor-rated warm white LED strip (2700–3000K) with weatherproof power supply Foot rail Black tubular steel foot rail kit, mounted to the lower front frame Optional hardware Bottle opener, side hooks, magnetic bar tool holder The LED strip color temperature matters more than most people realize. Warm white at 2700–3000K reads like candlelight and makes the cedar slats glow at night. Anything above 4000K pushes into cool white territory, and the whole setup starts looking like a work light instead of a bar. Step-by-Step DIY Outdoor Bar Build Step 1: Mark the Footprint Mark a 72 × 24-inch rectangle on the patio, deck, or pavers where the bar will live. Keep the front — the slatted side — facing the seating area. Confirm the surface is flat with a long level. A half-inch of slope across 72 inches is manageable with shims; more than that and the frame will rack. Step 2: Build the Main Timber Frame Build the bottom rectangle first using the 72-inch and 21-inch 2×4s. Set it flat on the ground and confirm it’s square — diagonal measurements should match within ⅛ inch. Build an identical top rectangle. Then stand the eight vertical posts between them: four corners and four mid-span supports. Screw everything tight, recheck square and level, and brace it diagonally with a clamp across the frame while the structure sets. At this stage you should have a rigid open box. If it flexes when you push it, the problem is easier to fix now than after panels go on. Step 3: Add Horizontal Support Rails Run the three 69-inch horizontal rails across the front and back of the frame at mid-height and at the shelf positions. Add 21-inch side rails at matching heights. These rails carry the panel weight, give the shelves something to land on, and eliminate flex in the long front span. A 72-inch frame without mid-span support will visibly bow over time as wood moves through seasons. Step 4: Attach the Dark Backing Panels Cut and fit the exterior plywood panels to the front and both sides of the frame. Before you screw them in, paint them black or dark charcoal on the face side. The dark color shows through the gaps between slats and is what gives the finished front its depth. Skip this step and the gaps will expose raw plywood, which looks unfinished and holds water. Two coats of exterior paint is enough — the slats protect the panel face from direct weather. Step 5: Install the Vertical Cedar Slats Start at the center of the front panel and work outward, using a consistent spacer — a ¼-inch scrap of plywood works fine — between each slat. Starting from the center keeps the pattern symmetrical even if the last slat on each end needs to be ripped slightly. Continue the same treatment around the sides. Use 1¼-inch exterior screws through the slat face into the backing panel and into any support rail behind it. This is the step where the bar starts to look like something. The warm cedar grain against the dark backing is most of the visual result. Step 6: Add the Back Shelves Screw the shelf support cleats to the inside of the back frame rails. Set the lower shelf 6–8 inches from the ground — high enough to clear puddles, low enough for a full-size cooler in the open bay beside it. Set the middle shelf at whatever height your bottles and glassware need. Keep one bay at least 18 inches wide and 15 inches clear for the cooler. Seal all shelf boards on all six sides before installing them. Shelves in outdoor builds take the most moisture abuse of any part of the structure. Step 7: Install the Countertop The countertop base is 76 × 29 inches, overhanging the 72 × 24-inch frame by 2 inches front and back and 2 inches per side. Attach the 1½-inch thick edge trim flush to the bottom of the base on the front and both sides to create the slab profile. Secure the assembly from underneath using screws up through the top frame into the countertop base. At 42 inches tall with the countertop in place, the bar is at proper serving height. Step 8: Finish All Surfaces Sand the cedar slats to 120 grit, knock off the sharp corners on the slat edges, then apply two coats of warm exterior stain. Apply the dark countertop coating in two coats, feathering the edges over the trim. Seal everything from countertop face and edges, slat faces and any unsealed backs, the top of the frame underneath the counter where water will pool. Give the sealer 48 hours to cure before use. Once the finish is dry, mount the LED strip on the underside of the countertop lip. Route the wire down the back corner of the frame to the power supply. Mount the black foot rail 6–8 inches from the ground on the front lower frame using the included hardware. Step 9: Style the Finished Bar Two or three stools spaced 24 inches apart work well for a 72-inch bar. Set a tray, a few glasses, an ice bucket, and one or two bottles on the counter just enough to look ready, not enough to look crowded. Add a small potted plant or two at one end. The bar does the heavy visual lifting already; the styling just activates it. Outdoor Bar Ideas to Personalize the Build The base build is the structure. These additions change how the bar is used and how it reads in the space — each one is a one-day job once the main build is done. Add a Wall Shelf Behind the Bar A narrow wall-mounted shelf behind the bar gives bottles and glasses a home and creates a proper backdrop. Useful if the bar sits against a fence or exterior wall. Keep it shallow like 6–8 inches deep, so it doesn’t compete with the counter workspace. Seal it the same way as the main build. Use a Removable Ice Bucket A removable ice bucket avoids the plumbing and drainage problems of a built-in sink while giving the bar a functional serving feature. Stainless steel holds cold better than plastic alternatives. It sits on the counter during use and goes in the back shelf bay when the bar is idle. Add a Narrow Backsplash Ledge A 4-to-6-inch ledge running the full back width of the countertop adds a small display shelf without reducing usable counter space. Useful for bottles, garnishes, or a few candles. Seal the ledge with the same countertop coating so it handles spills the same way the main surface does. Style With Potted Herbs Mint, rosemary, and thyme in terracotta pots beside the bar serve two functions: they look right against the warm cedar, and they’re actually useful at a bar. Keep them on the counter only if you have counter space to spare — they’re better placed on an adjacent surface or the ground beside a stool. Match Your Stools to the Build For a 42-inch bar, you need stools with a seat height of 28–30 inches, any lower and the counter is in your armpits. Black metal stools read modern and clean against the cedar slats. Woven stools push the look warmer and more casual. What to avoid: anything plastic, anything with a seat height labeled for a 36-inch counter, anything that won’t survive being left outside. If you want stools that hold up the same way the bar does, look for aluminum or powder-coated steel frames with a weather-rated seat material. The outdoor bar stools at Minimal & Modern include weather-rated options in the right height range. Add Lighting Around the Bar Zone The under-counter LED handles the bar itself. String lights above define the zone. Solar lanterns on the ground or on nearby surfaces add layers of light at different heights. The goal is a warm ambient glow, not a single bright source. If you’re building on a covered patio or under a pergola, a wall-mounted fixture at the back of the bar zone completes the setup and adds task light for pouring. Mistakes That Show Up Two Winters Later Most of these aren’t obvious at build time. They’re the kind of failure you notice a year or two in, when it’s already a bigger fix than it should have been. Building on grass or soil: Wood that sits on ground contact wicks moisture from below continuously. The base frame rots from the bottom up, and you won’t notice until it’s structural. Use a paved or composite base, or set the bar on adjustable post bases that keep the frame off the surface. Skipping exterior-grade fasteners: Standard interior screws rust through in one season in a wet climate. Exterior-coated screws cost a few dollars more per box. Use them on every single connection. Leaving raw end grain exposed: End grain absorbs water 40–50 times faster than face grain. Seal cut ends with penetrating sealer before or immediately after cutting, every piece. A countertop that’s too thin across the span: A single ¾-inch plywood panel over 76 inches will deflect visibly over time. Either laminate two layers or use solid 2× material and add the thick edge trim. LED strip visible from the front: Mount it under the countertop lip recessed at least 1½ inches, not flush to the front edge. If you can see the strip from the seating position, it’s poorly positioned — move it back. No airflow around a mini-fridge: If you plan to add a mini-fridge in the open bay, leave 2–3 inches of clearance on the sides and back. A fridge with no airflow runs hot and fails early. Unsupported long front span: A 72-inch front frame needs at least two mid-span posts and two horizontal rails to stay rigid. One post at center is not enough over time as wood expands and contracts seasonally. Frequently Asked Questions About DIY Outdoor Bars These are the questions that come up most often once the build is underway, usually when someone is at the lumber yard or halfway through the frame. What is the standard height for a DIY outdoor bar? 42 inches is the standard. That matches most bar stools with 28–30-inch seat heights and puts the counter at a comfortable working height for standing adults. A 36-inch counter requires shorter stools and reads more like a table, usable, but not a bar. What wood is best for an outdoor bar build? Pressure-treated lumber for the hidden frame, it handles moisture and ground proximity without degrading. Cedar for the visible slats, it takes stain well, resists rot naturally, and looks better than treated wood. Seal both regardless of species. How cheap can you build a DIY outdoor bar? A basic version using pressure-treated framing and construction-grade cedar slats comes in around $400 for a 72-inch unit. The cost climbs to $600–$800 if you use clear-grade cedar throughout, a commercial foot rail kit, and a pre-made concrete countertop coating rather than painted plywood. Can I leave a DIY outdoor bar outside year-round? Yes, if properly sealed and placed on a solid surface. A covered patio or pergola significantly extends the finish life. In harsh freeze-thaw climates, a fitted outdoor cover over winter will protect the countertop seams and any exposed end grain from moisture intrusion. Do I need outdoor bar plans before I start? A dimensioned sketch is enough for this build — you don’t need formal plans. Draw the frame members with labeled lengths, mark your shelf positions, and note the countertop overhang. Print the cut list from this article. That’s all the planning a straightforward freestanding bar needs. How do I stop an outdoor bar from wobbling? Build the frame square from the start, drive every screw tight, and include all mid-span posts and horizontal rails. If the bar still moves after assembly, add a diagonal brace inside the back panel — a 2×4 running corner to corner kills the racking immediately. Does an outdoor bar countertop need to be waterproof? Yes. Rain, spills, condensation from ice buckets, and cleaning all attack an unsealed top. Apply a waterproof exterior coating to the top surface, all four edges, and any seams. Reapply annually or whenever the surface shows signs of wear — water beads on a sealed top, soaks in when it needs recoating. Final Verdict For $400–$800 in materials and two weekends of work, this outdoor bar build delivers something that costs $1,500–$2,500 if you bought it pre-made. And most of what’s available pre-made won’t hold up outdoors as well as a properly sealed frame-and-cedar build. The design is not complicated. The sealing is not complicated. What trips most people up is skipping steps, usually the sealing and the mid-span supports. If you build the frame square, seal every cut end before assembly, and add the horizontal rails where the instructions say to, this diy outdoor bar will still look right in year four. Before you buy anything, price your cut list at a local lumber yard because cedar prices vary significantly by region, and knowing your actual materials cost before you start avoids the most common budget surprise.
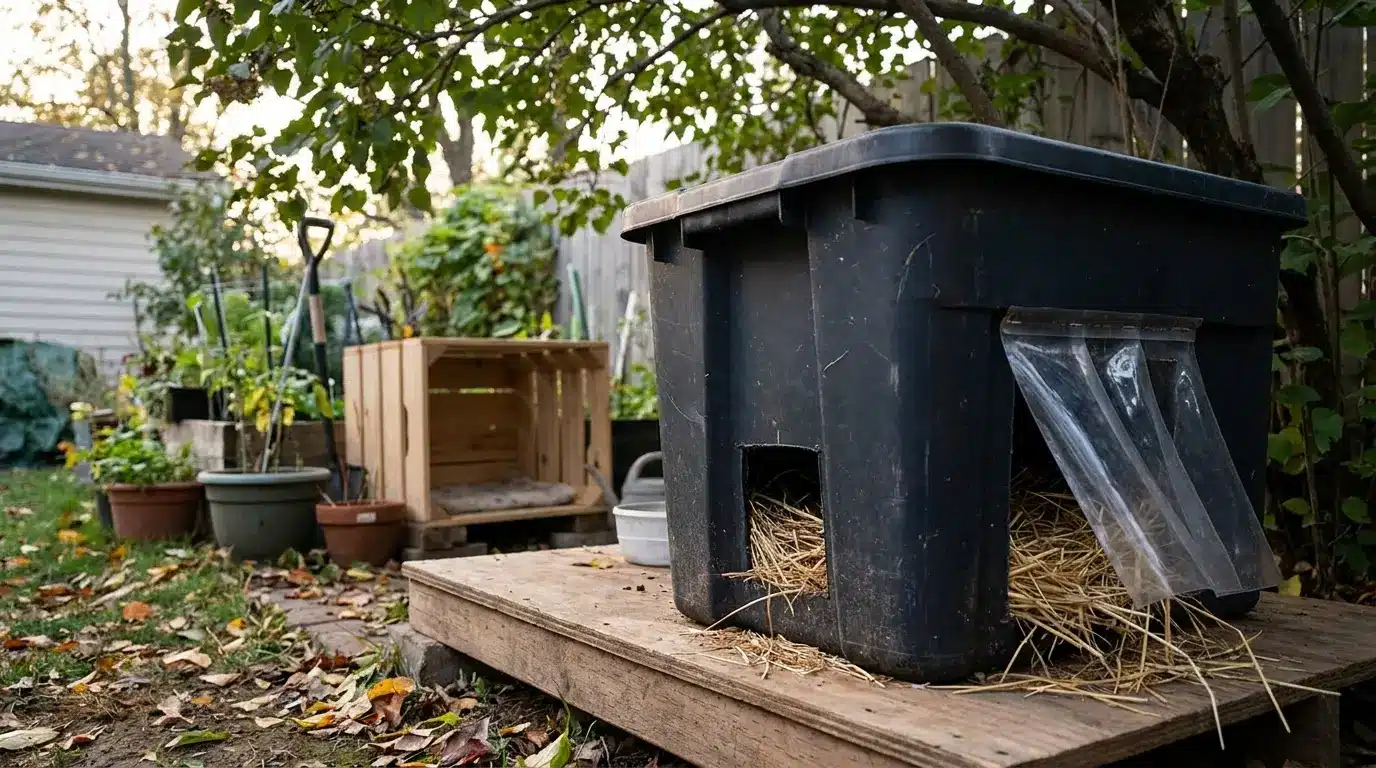
A DIY outdoor cat house that keeps rain out and holds warmth sounds simple. In practice, most first builds fail at the same three points: the bedding gets wet from the bottom up, the entrance lets cold air pour straight in, and the shelter sits directly on ground that pulls heat away all night. Fix those three things before you cut anything, and the rest falls into place. This guide covers the double plastic bin build that most people should start with, plus a full wooden build for anyone who wants something that lasts more than one winter. You’ll get the steps, the supplies, the sizing logic, and the honest mistakes to skip the first time around. Difficulty 2/5 – straightforward cuts and assembly, no advanced tools needed Time 1–3 hours (bin build) or a full weekend (wooden build) Cost $15–$40 (bin build) or $80–$180 (wooden build) Tools Needed Box cutter or jigsaw, tape measure, duct tape or staple gun, marker Skill Required Beginner – the bin build genuinely needs no prior experience Before picking a build type, understand what the shelter actually needs to do. A feral cat shelter should trap body heat, shed rain, resist wind, stay clean to maintain, and sit above cold or wet ground. Every decision below traces back to those five requirements. Which DIY Outdoor Cat House Build Is Right for Your Situation There are three real options. The bin build is right for most people. The wooden build is right if you want something that survives two winters without replacement. The foam cooler option is a short-term emergency fix, not a long-term solution. Build Type Best For Cost Range Durability Build Time Double plastic bin Most readers – first build, multiple cats $15–$40 1–2 seasons with care 1–2 hours Wooden insulated shelter Year-round use, long-term colony care $80–$180 3–5+ years sealed well Full weekend Foam cooler shelter Emergency cold weather, same-day setup $10–$20 One season – cracks under UV 30 minutes A foam cooler shelter gets a cat through a cold night, but the material degrades quickly outdoors and isn’t worth rebuilding. Use it to buy time while you build something more solid. How to Build a DIY Outdoor Cat House: Double Plastic Bin Method This is the build I’d start with if I were doing it now. You need two bins – one large to act as the outer shell, one smaller to sit inside as the sleeping chamber – plus foam insulation to fill the gap between them. The layered design is what makes it work: the outer bin blocks wind and rain, the insulation layer traps warmth, and the inner bin keeps the sleeping area snug and easy to clean. Supplies for the Bin Build One large plastic storage bin (18–25 gallon) with a lid – Rubbermaid or HDX polypropylene hold up better in cold than Sterilite, which tends to crack One smaller plastic bin or styrofoam cooler to fit inside the large bin with a 2-inch gap on all sides Rigid foam insulation board (or bubble insulation like Reflectix) cut to fill the gap Loose straw for bedding – not hay, not blankets, not towels (see below) Box cutter or jigsaw Heavy duct tape or Gorilla tape Marker and ruler Two bricks, wooden blocks, or a small pallet to raise the shelter Optional: a short length of vinyl or rubber to make a door flap Pro Tip: Straw, not hay. Hay absorbs moisture and turns cold and moldy. Loose straw stays drier and lets cats burrow down into it, which is exactly how they hold body heat through a cold night. Alley Cat Allies and the Feral Cat Coalition of Oregon both make this the first rule of outdoor cat shelter bedding. Step 1. Mark and Cut the Entrance On the large outer bin, mark an entrance rectangle on one of the short ends. Keep it 5 to 6 inches wide and 5 to 7 inches tall, positioned about 2 inches up from the bottom edge – the slight height keeps rain from pooling at the threshold and blowing straight in. Cut with a box cutter; if the plastic is thick, heating the blade briefly with a lighter makes the cut cleaner. Make the same size cut in the smaller inner bin, aligned to match the outer opening. Both cuts need to line up when the bins are stacked. Step 2. Cut and Fit the Insulation Measure the floor, walls, and lid of the inner bin, then cut rigid foam or bubble insulation to fit each surface. Foam board works better than bubble wrap because it won’t compress over time and lose its insulating value. Tape each piece into place inside the outer bin before nesting the inner bin in. The goal is a snug layer on all sides, with no large air gaps. Air gaps feel like insulation but actually let cold circulate. Step 3. Nest the Inner Bin Place the inner bin inside the outer bin so the two entrance holes line up. If the inner bin sits too low, add a piece of foam under it as a floor pad. Pack any remaining gaps around the sides with cut foam offcuts – this is where most of the warmth gets lost if it’s left loose. Don’t worry about a perfect finish; the cats don’t care. Focus on blocking air movement. Step 4. Tape the Seams and Lid Run a strip of duct tape around the joint where the outer bin’s lid meets the body. The lid on most bins doesn’t seal tightly enough to keep rain out through a storm. Don’t seal the lid permanently – you need to open the shelter to replace bedding. The tape here is weatherproofing, not bonding; it peels away for cleaning and goes back on afterward. Step 5. Add the Door Flap A loose flap cut from a vinyl placemat, heavy rubber mat, or thick plastic sheeting reduces the cold air entering through the entrance. Tape it across the top of the hole on the outside so it swings freely. This is the step most people skip and then wonder why the shelter feels drafty. One catch: some cats won’t use a shelter with a flap until they’ve checked it out. Tape the flap open for two or three days when you first set the shelter out, then let it fall into place once the cat is used to going in and out. Step 6. Add Straw Bedding and Raise the Shelter Fill the inner bin with 3 to 4 inches of loose straw – enough for the cat to push down into it, not so much that the space feels cramped and the cat can’t turn around. Set the shelter on two bricks, a pallet, or a stack of wooden boards. Getting it 3 to 4 inches off the ground is enough to stop cold from wicking up through the base and to keep the underside dry after rain. How to Build a Wooden DIY Outdoor Cat House The wooden build takes longer and costs more, but it holds up in a way that plastic doesn’t. A well-sealed timber frame with OSB sheathing, foam insulation, plywood interior lining, and roofing felt on top should last several winters without the lid cracking or the sides warping. This is the build to choose if you’re caring for a colony long-term. Before choosing your lumber, it’s worth knowing how different boards behave outdoors – our guide to the best types of wood and their uses covers how species and engineered boards like OSB and plywood hold up over time. Here’s the material list based on the cat shelter build: Scrap 2×4 boards for the main frame 2×6 or 2×8 boards, ripped down if needed Extra siding pieces for the outside walls Foam board insulation for added warmth Plywood pieces for panels or support areas 1-inch wood strips for smaller framing parts Particle board for covering sections, if available Old pallet wood or other spare boards Deck railing spindles or thin wood pieces for roof supports A strong ridge beam, such as poplar or maple Ondura roofing panels for the roof Wood stain or weatherproof sealer Blankets, straw, or bedding for the inside Screws or nails to hold everything together Optional plastic strips for the door openings Most of the shelter can be made from leftover wood and spare materials, so you do not need everything to match perfectly. The main goal is to make it strong, dry, and safe for outdoor cats. 1. Plan a Safe Outdoor Cat Shelter Start by deciding what the shelter needs to do. It should give outdoor cats a dry, quiet, and protected place to rest. Since it will stay outside, it needs to handle cold air, rain, snow, and other animals. A simple plan makes the build easier. Think about the size, where the doors should go, and how the cats will move through the shelter before you start cutting wood. 2. Build a Simple Frame with Two Doors A rectangular frame works well because it is easy to build and gives the cats enough room inside. Add one entrance and one exit so the cats never feel trapped. This is especially helpful for outdoor cats because they like having a quick way out if another animal comes close. The frame does not have to be perfect, but it should be strong enough to hold the walls and roof. 3. Use Baffles to Block Wind and Cold Inside the shelter, add small divider walls near the doors. These baffles let the cats walk in and out, but they stop wind from blowing straight into the sleeping area. This makes the shelter warmer and more comfortable without making it hard for the cats to use. It is a simple idea, but it adds a lot of protection. Small details like this can make the space feel much safer. 4. Finish the Inside for Comfort Once the frame is ready, make the inside cozy and easy to use. Add blankets, bedding, or soft material where the cats can curl up and rest. If there are small raised spots or ledges, cats may enjoy sitting there too. Keep the inside dry and simple so it is easy to clean later. A good shelter should feel safe, warm, and calm without being crowded or hard to maintain. 5. Add the Roof and Set It Up Finish the shelter with a strong roof that keeps rain and snow out. Overlap the roofing pieces so water runs off instead of leaking inside. A small overhang above the doors can also help keep the entrances dry. After that, place the shelter in a quiet outdoor spot and let the cats find it at their own pace. Food nearby may help, but patience matters most Watch the video for a step-by-step walkthrough of the full wooden build: How Big Should an Outdoor Cat House Be? Smaller is warmer. A shelter that fits one or two cats snugly traps far more body heat than a large box with a lot of empty air. The cat should be able to walk in, turn around, and lie down – but it shouldn’t be able to stand up fully with space to spare. That extra height is dead air the cat has to heat all night. Cat Count Best Setup Why It Works 1 cat Small insulated bin, roughly 14″ x 16″ interior Body heat fills the space quickly 2 cats Slightly larger inner chamber, 16″ x 20″ or similar Cats share warmth; snug still beats spacious 3+ cats Two or three separate shelters rather than one large one Multiple small shelters are warmer than one large shelter and reduce territorial conflict Not all feral cats in the same colony will share a shelter willingly, even when they feed together. Building two smaller shelters is usually more effective than building one large one. Where to Place a DIY Outdoor Cat Shelter Placement determines whether the shelter gets used. Cats are more likely to accept a new shelter if it sits near a path or resting spot they already use. A corner against a wall or fence works better than an open location – the solid backing reduces the number of directions a cat has to watch, which matters for skittish ferals. This is the same logic behind positioning any outdoor structure: tucking it against an existing feature in the yard rather than floating it in open space. Our outdoor deck ideas guide covers how to use existing structures to anchor outdoor projects – worth reading if you’re thinking about making the cat shelter part of a larger yard setup. Keep the entrance facing away from prevailing wind and not directly toward the main human foot traffic area. Avoid spots where rainwater pools. Raising the shelter on bricks helps, but a persistently wet location stays wet through and around the base regardless. The shelter should sit somewhere that drains cleanly after rain, has some natural cover overhead if possible, and gives the cat at least one clear exit direction from the entrance. Weather Setup: Cold, Rain, Wind, and Snow The same shelter behaves differently depending on the weather coming at it. These adjustments take a few minutes and make a real difference in how warm the interior stays. Cold weather: Pack the straw full enough that the cat disappears into it when it lies down. If the shelter has a flap, make sure the flap is in place. Insulation does more work when the air gap around it is sealed. Rainy weather: Angle the shelter entrance slightly downward at the front edge – just enough that any water that enters runs out rather than pooling at the threshold. Check the seam tape after heavy rain; once the tape fails, water follows the seam into the insulation layer, and the shelter loses most of its warmth. Windy weather: Turn the entrance to face away from the wind direction. Add weight – a flat stone or brick on top of the lid – to stop the shelter from shifting or tipping. A shelter that moves when a cat is inside will not get used twice. Snowy weather: Check the entrance daily during snowfall. Snow packs into the entrance and can trap a cat inside or lock it out. A short tube entrance – a cylinder cut from a plastic container taped to the bin opening – keeps snow from blocking the hole from the outside. Mild weather: Keep the shelter shaded so it does not overheat during the day. Check for ants, fleas, and rodents more frequently when food is placed nearby, and replace the straw if it feels even slightly damp – mild weather doesn’t dry it out the way cold nights do. Maintaining the Shelter Through the Season A shelter that hasn’t been checked in three weeks is often wet inside and useless. The bedding absorbs moisture from the cat’s breath, condensation on the plastic walls, and any small leaks at the seams. Replace straw whenever it feels damp or compressed – compressed straw has no insulating value left. The Humane Society recommends shelters small enough to retain body heat, while the Hundred Cat Foundation recommends removing all old straw in late spring, letting the shelter air out fully, then refilling with fresh dry straw before the first cold nights in fall. That seasonal reset also gives you a chance to check the foam for compression, the tape for failures, and the plastic for cracks. A cracked bin base will let water in from the ground no matter how well you seal the lid. Check Interval What to Check Weekly Straw dryness, lid seal, entrance blockage, pests near the shelter After every storm Seam tape, base position, bedding wetness, entrance clearance Each season change Full straw replacement, foam condition, lid fit, plastic integrity Replace the shelter If you find mold, soaked insulation, cracked base, or a lid that no longer seals Maintenance is the part most guides skip. A wet shelter is worse than no shelter – a cat that curls up in cold damp straw loses body heat faster than one sleeping in a dry exposed spot. Troubleshooting: When the Shelter Isn’t Working Most problems have a straightforward fix once you know where to look. If a cat has stopped using the shelter or refuses to start, run through this list before rebuilding. Problem Likely Cause Fix Cat won’t enter Flap feels unfamiliar or the shelter is in a new location Tape the flap open for 3–5 days; place a small amount of catnip near the entrance, not inside Straw is wet Water entering through seam, base, or entrance; shelter too low Re-tape all seams, raise the base, angle the entrance slightly downward at the lip Shelter feels cold inside Too much empty space, foam has compressed, or there’s an air gap Add more straw, replace compressed foam, seal any gaps around the lid and entrance edges Water enters at the doorway Entrance faces rain or wind direction Rotate the shelter so the entrance faces away from prevailing weather; add a short covered tunnel extension if needed Shelter shifts or tips Wind, uneven base, or no weight on the lid Place a flat stone or brick on top of the lid; re-level the base blocks Insects or rodents Food placed too close, or damp bedding is attracting pests Move feeding station at least 10 feet away; replace straw and let shelter air out before refilling If a cat stopped using a shelter that was working, check the bedding first. Damp or soiled straw is almost always the reason before any structural problem is. When a DIY Cat House Isn’t Enough An outdoor cat shelter helps healthy adult cats manage cold nights and wet weather. It doesn’t replace veterinary care for sick or injured cats, it can’t protect kittens in extreme cold, and it doesn’t help in flood-prone areas where the ground itself becomes the problem. If a cat appears weak, injured, or unable to stay warm despite a dry shelter, contact a local rescue group, TNR program, or vet rather than modifying the shelter further. If a cat can safely come indoors – even to an enclosed porch, basement, or garage – that’s a better option than an outdoor shelter for any cat that’s already showing signs of cold stress. Frequently Asked Questions About DIY Outdoor Cat Houses Here are the questions I hear most often from people who’ve got materials on the workbench and a skeptical feral cat watching from twenty feet away. How do you build an outdoor cat house for winter? Use a double-bin design with rigid foam insulation between the layers, a small 5–6 inch entrance, loose straw bedding inside the inner chamber, and the whole shelter raised on bricks or a pallet. The layered insulation and small entrance are what make the difference in cold weather – not the size of the bin. How do you make an outdoor cat house out of wood? Build a timber frame, sheath it with OSB, fill the wall cavities with 25 mm foam insulation, line the interior with 6 mm plywood, cover the roof with felt on top of OSB, and seal all exterior joints. Fit a cat flap to the front opening and seal the cladding and roof edges before the first rain hits. How do you insulate an outdoor cat house? Rigid foam board is the most reliable option. It doesn’t compress over time, doesn’t absorb moisture, and provides consistent R-value even when the temperature drops sharply. Fill all gaps – a few loose foam offcuts in an air gap do almost nothing useful. How do you heat an outdoor cat house without electricity? Insulation and body heat together are enough for healthy adult cats in most US climates. A snug shelter with straw bedding, rigid foam insulation, a flap-covered entrance, and no unnecessary air space inside will hold a cat’s body heat effectively through most cold nights without any powered heating. What do you put in an outdoor cat house? Loose straw only. Not hay, not blankets, not towels, not fleece. Fabric and hay both absorb moisture and get cold. Loose straw compresses slightly under the cat’s weight and stays dry much longer. Replace it when it starts to feel damp or flat – it loses its insulating value quickly after that point. Should an outdoor cat house have one door or two? One door holds warmth better. Two doors make sense if predator activity in your area is high – a second exit prevents a cat from being cornered inside. If you add a second entrance, keep both openings small to limit drafts and reduce access for larger animals. Final Verdict Yes – if you do it right and actually maintain it. The double-bin diy outdoor cat house is one of the most effective cold-weather options for community cats, and I say that having seen what happens when it’s built well versus when it’s slapped together with a single bin and a fleece blanket inside. The wooden build is worth the extra weekend if you’re caring for a colony year-round and want something that doesn’t need replacing every spring. Start with the bin version, get the sizing and bedding right, raise it off the ground, and check the straw after every storm. That’s the build that keeps working. If you’re new to this, cut the entrance hole in a spare bin first to get the feel of it – then build the real one.

Most carpet stains I’ve dealt with didn’t need anything from a store. A solid DIY carpet cleaner made from white vinegar, baking soda, and dish soap handled the coffee spill next to the couch, the muddy paw tracks near the back door, and a juice stain I let sit for two days too long. The main thing is using the right homemade carpet cleaner solution for the right type of stain, and avoiding a couple of ingredient combinations that cause more damage than the stain itself. Difficulty 1 out of 5 — no special tools or skills required Time 10–30 minutes per stain; dry time 1–4 hours Cost $5–$10 using pantry ingredients you likely already have Tools Needed Spray bottle, clean white cloths, vacuum, measuring spoons Skill Required Beginner — no experience needed What Can Go Wrong Before You Start The mistake I made the first time was using too much dish soap. It looked like it was working, the stain lifted, the carpet looked clean. Two weeks later that same spot was darker than the rest of the floor because the leftover residue kept pulling in new dirt. The second most common mistake is saturating the carpet instead of misting it lightly. Excess moisture gets trapped in the padding underneath and causes a mildew smell that’s harder to get rid of than the original stain. One more: never skip the patch test. Even mild vinegar-based solutions can affect certain wool or lightly-dyed carpets. Test in a hidden corner first and wait 10 minutes before you trust the rest of the floor. Safety Note: Never mix bleach with vinegar – the combination produces toxic chlorine gas. Never mix bleach with ammonia — this releases dangerous fumes. Keep all DIY carpet cleaner recipes simple and single-ingredient-category. If a solution changes smell, texture, or color during mixing, stop and ventilate the room. 5 DIY Carpet Cleaner Solutions by Stain Type Different stains need different approaches. Using the right DIY carpet cleaner for the job gets better results than a one-size-fits-all spray, and it reduces how much solution you need to apply, which means faster drying. 1. Homemade Carpet Cleaner Solution for Carpet Cleaning Machines This is the recipe I use every few months for the whole floor. It works in most home carpet cleaning machines when mixed with enough water to keep the foam low. The oxygen cleaner powder is the part most people leave out — it’s worth adding for heavily used areas because it helps lift embedded grime that vinegar alone won’t touch. Ingredients 1 gallon hot water, 2 tbsp mild detergent, ¼ cup white vinegar, 1 tbsp oxygen cleaner powder Best For Deep cleaning, high-traffic areas, yearly carpet washing Machine-Safe? Yes — keep soap ratio low to prevent foam overflow How to use: Mix all ingredients slowly in a large container. Fill the machine tank with hot water first, then add roughly ¼ cup of the solution per tank. Clean in slow, overlapping passes and follow with a plain-water rinse pass to clear any soap residue from the fibers. 2. DIY Spot Cleaner for Food and Drink Stains This is the first recipe I reach for after any fresh spill like coffee, wine, juice, or chocolate. The key is acting fast. The same recipe that clears a 10-minute-old wine spill in one pass will need three or four applications if the stain has dried overnight. Ingredients 1 cup warm water, 1 cup white vinegar, 1 tsp dish soap Best For Coffee, wine, juice, sauce, chocolate — fresh spills only Not For Stains older than 24 hours — use the deep-clean version below How to use: Blot the spill with a dry towel first to absorb the excess. Spray the mixture lightly — don’t soak the fibers. Let it sit for 5–10 minutes. Blot again with a clean cloth, working from the outside of the stain inward to avoid spreading it. 3. Homemade Carpet Cleaner for Pet Stains and Odors Pet accidents are different from food spills because the odor compound (urine in particular) needs to be neutralized, not just lifted. Vinegar handles the odor. Hydrogen peroxide handles the discoloration. I always do this in two separate steps rather than mixing everything together — it gives each ingredient time to work properly. Ingredients 2 cups warm water, ½ cup white vinegar, 1 tbsp baking soda, 1 tbsp hydrogen peroxide Best For Urine odors, vomit stains, muddy paw marks Caution Patch test first — hydrogen peroxide can lighten dark carpet fibers How to use: Remove any solid material and blot the excess moisture first. Spray the mixture lightly over the stained area and allow it to sit for 10 minutes. Dry the area completely using clean towels pressed firmly onto the carpet — don’t rub. For stubborn urine odors that persist after drying, repeat the application and leave it overnight before blotting again. 4. Natural Baking Soda Carpet Deodorizer (No Liquid) This is my go-to for refreshing carpets between deeper cleans, especially in bedrooms or areas where a liquid solution would take too long to dry. It takes about 30 seconds to apply and removes most stale odors without any moisture at all. Ingredients 1 cup baking soda, a few drops of essential oil (optional) Best For Quick deodorizing, light carpet refresh, homes with young children Drying Time None — vacuum up after 30 minutes or overnight How to use: Sprinkle baking soda evenly across the carpet, concentrating more heavily on any areas with noticeable odors. Leave it for at least 30 minutes — overnight works better for persistent smells. Vacuum slowly to remove all the powder, running a second vacuum pass over high-traffic areas. 5. Deep Cleaning Solution for High-Traffic Areas Hallways, stairs, and living room centers need more than a quick spray. The pre-treatment step here — baking soda sit time before you apply the liquid — is what separates a surface clean from a proper deep clean. I skipped it the first time and got mediocre results. The second time, letting the baking soda sit for 15 minutes first made a visible difference. Stair carpet in particular takes a beating, if you’re dealing with a stair runner, the DIY stair makeover guide covers how to install and maintain one properly before cleaning becomes a recurring task. Ingredients 2 cups hot water, 1 cup white vinegar, 1 tsp dish soap, baking soda for pre-treatment Best For Hallways, living room centers, stair carpets Method Pre-treat with baking soda before applying the liquid solution How to use: Sprinkle baking soda over the dirty carpet area and let it sit for 15 minutes before vacuuming it up thoroughly. Then spray the cleaning solution lightly across the pre-treated surface. Scrub gently with a brush or run it through a carpet machine using slow, overlapping passes. DIY Carpet Cleaner Quick Reference Carpet Problem Best DIY Solution Main Ingredients Method Pet stains and odors Pet stain cleaner Vinegar + baking soda + hydrogen peroxide Spot treatment Food and drink stains Vinegar spot cleaner Vinegar + dish soap Blotting Full-room deep clean Machine carpet cleaner Hot water + detergent + vinegar Carpet machine Stale odors Baking soda deodorizer Baking soda Vacuum treatment High-traffic buildup Deep cleaning solution Vinegar + baking soda + dish soap Pre-treat and scrub The pattern across all five is consistent: use less solution than you think you need, blot rather than rub, and let the carpet dry completely before walking on it. Getting that right matters more than which specific recipe you use. Ingredient Combinations to Never Use Together Most DIY carpet cleaner problems aren’t about using the wrong ingredients — they’re about mixing ingredients that react badly with each other. A few of these create fumes serious enough to require immediate ventilation. Bleach + Vinegar: Creates toxic chlorine gas. Even small amounts cause eye and throat irritation. Never combine these, even in diluted form. Bleach + Ammonia: Releases chloramine gas, which causes serious respiratory damage. Both are common household cleaners — keep them stored and used separately. Too Much Detergent: Leaves a sticky film that attracts dirt faster than the original stain would. One teaspoon per cup of water is the maximum for spot treatment. Hydrogen Peroxide on Dark Carpets: Acts like a mild bleach on darker fibers. Always patch test in a hidden area before using it on any colored carpet. Multiple Store-Bought Cleaners Mixed Together: Even products labeled “natural” can react when combined. Use one product at a time and rinse thoroughly before switching to another. Keeping recipes simple and following measured ratios is the most reliable way to avoid these issues. The Faster-Second-Time Tricks I Learned the Hard Way There are a few things nobody mentions in the recipe itself that would have saved me a lot of re-cleaning. These aren’t complicated — they’re just the adjustments that turn a decent result into a consistently good one. Pro Tip: Keep the food-and-drink spot cleaner (vinegar + water + dish soap) pre-mixed in a spray bottle under the sink. The 30 seconds you save not measuring it out while a fresh spill is soaking in is the difference between one blot and four blots. Label the bottle with the mixing date and replace it after 30 days. Treat stains immediately. A 5-minute stain blots out clean. A 2-hour stain usually takes 3 applications. An overnight stain sometimes doesn’t come out fully regardless of what you use. Use white cloths only. Colored towels can transfer dye to the carpet when wet. White cloths also let you see exactly how much of the stain is transferring so you know when to stop. Work from the outside in. Starting from the center of a stain spreads it outward. Starting from the outer edge and moving inward keeps the stain contained. Open windows after any liquid cleaning. Faster drying prevents the mildew smell. A box fan pointed at the treated area cuts dry time from 4 hours to around 1 hour. Vacuum before applying any liquid. Loose dirt turns into muddy paste when you add moisture. A 2-minute vacuum pass before treatment makes the solution more effective. DIY vs. Store-Bought Carpet Shampoo: When to Use Which A homemade carpet cleaning solution covers most household situations. There are specific cases where a store-bought product or a professional service is the better call — and knowing the difference saves a lot of wasted effort. Factor Homemade Carpet Cleaner Store-Bought or Professional Cost $5–$10 per batch $15–$40 per bottle; $120–$240 for professional cleaning Best For Fresh spills, routine maintenance, light-to-moderate stains Deep-set stains, mold, flood damage, heavy pet accidents Residue Risk Higher if too much soap used Controlled by formulation, varies by brand Eco-Friendliness Generally biodegradable Varies significantly by brand Cleaning Strength Good for regular upkeep and fresh stains Stronger for tough, deep-set buildup For most households with pets and kids, a DIY carpet cleaner handles 80–90% of what comes up. The remaining cases — an old stain that’s been there for months, or a flood-level soaking — are what professional extraction is actually for. Frequently Asked Questions About Homemade Carpet Cleaner These are the questions that come up most often once people have actually used a DIY carpet cleaner and run into a real-world situation the basic recipe didn’t cover. What is the best homemade carpet cleaning solution for machines? Hot water with 2 tablespoons of mild detergent, ¼ cup white vinegar, and 1 tablespoon of oxygen cleaner powder. Fill the tank with water first, add about ¼ cup of the solution per tank, and keep soap ratios low to avoid foam overflow in the machine. Can you use a DIY carpet cleaner solution in a Bissell or rental carpet machine? Yes, with low-soap formulas. High-foam mixtures can overflow the machine and leave residue. Use no more than 2 tablespoons of detergent per gallon of water. Always check your specific machine’s manual for restrictions on homemade solutions before filling the tank. Does a homemade carpet cleaner solution actually work on tough stains? For fresh stains and routine maintenance, yes — consistently. For stains older than a week, deeply embedded grime, mold, or heavy pet accidents, homemade solutions are often not strong enough. That’s the line where professional extraction cleaning becomes the more effective option. How often should I clean carpets with a DIY carpet cleaner? Every 2–3 months for spot maintenance in a typical household. High-traffic areas and homes with pets or children may need spot treatment monthly, with a full machine clean twice a year. Vacuuming weekly reduces how often you need to apply any liquid solution. Is it safe to reuse leftover homemade carpet cleaner solution? Yes, if stored in a sealed clean container. Discard and remake if the solution separates, smells unusual, or becomes cloudy. Vinegar-based solutions stay effective for about 30 days. Mixes containing baking soda are best used fresh — the fizzing reaction that does the cleaning work dissipates quickly. Will vinegar smell linger after cleaning carpet with a DIY solution? Temporarily, yes — until the carpet fully dries. It usually disappears within a few hours with normal ventilation. Open windows and run a fan to speed drying. The smell does not transfer to fabric or furniture once the carpet is dry. Can a DIY carpet cleaner solution work on wool or natural fiber carpets? With caution. Vinegar and hydrogen peroxide can damage wool and natural fibers or affect their dye. A mild dish soap diluted in warm water is the safest option for delicate carpets. Always patch test in a hidden corner and wait 10 minutes before treating the visible area. Final Verdict If I were starting again, I’d skip the residue mistake entirely by measuring the dish soap carefully and never eyeballing it. The five DIY carpet cleaner recipes in this article cover every routine situation a household runs into, and at a difficulty rating of 1 out of 5, there’s no reason to default to an expensive product for something a $5 batch of vinegar and baking soda handles just as well. Start with the spot cleaner recipe (vinegar, water, one teaspoon of dish soap) and keep it premixed in a spray bottle under the sink. You’ll use it within a week.

Difficulty 2/5, Straightforward build with basic power tools; no joinery skills needed Time 3 to 4 hours for a set of three shelves Cost $30 to $60 for materials (three shelves from a single 12-foot pine board) Tools Needed Circular saw, or miter saw, drill, stud finder, level, measuring tape, sandpaper Skill Required Beginner, if you can drill a straight hole and use a level, you can do this If you want to know how to make floating shelves at home without paying $80 a shelf at the store, this is the build I come back to every time. One 12-foot pine board, a handful of oak dowels, and an afternoon is all it takes for three shelves that hold up and look clean against the wall. I’ve built this set four times now, in a bathroom, two kitchens, and a small bedroom, and the second build went noticeably faster once I stopped making the mistakes I made the first time. I’ll tell you what those mistakes were before we get into the steps. Where Most People Go Wrong with DIY Floating Shelves The most common failure point isn’t the cutting or the finishing, it’s the wall mounting. Specifically, drilling the dowel holes into the wall at a slight angle without realizing it, then wondering why the shelf won’t slide straight. The second issue is skipping the stud finder and trying to anchor into drywall alone. Drywall won’t hold a loaded shelf. It will eventually pull away from the wall, sometimes with the shelf still on it. The third mistake, and this one is mine, is cutting all the boards first and drilling all the holes before doing a single dry-fit. If one measurement is off, you’ve wasted wood. Do one shelf start to finish before cutting the rest. What Size Should Floating Shelves Be? For most rooms, a length of 24 to 36 inches works well. It’s manageable to cut, carries enough surface area to be useful, and spans at least two wall studs in standard framing. A depth of 6 to 8 inches is the right call for decor, mugs, small plants, and folded towels. Go deeper than 8 inches, and you’re adding leverage on the wall that the dowel system isn’t built to handle long-term. Thickness matters more than most guides admit. A board thinner than 1.5 inches will sag under real weight, even light decor, within a year. Stick to 1.5 inches or thicker, which is exactly what a 2×8 pine board gives you after milling. If you’re stacking shelves, leave at least 10 to 12 inches of vertical clearance between them. Less than that, and you can’t actually reach the lower shelf without knocking things over. Best Wood for DIY Floating Shelves The wood you choose changes how the shelf looks, how it finishes, and what it costs. For a deeper look at how each species behaves over time, wood types for furniture covers hardness, grain, and finish compatibility in detail. For shelf builds specifically, here’s how the main options break down: Wood Type Best For Finish Cost Pine First-time builds, painted shelves Paint or light stain Lowest Poplar Smooth painted finish Paint (not stain) Low to medium Oak Stained natural wood look Stain or oil Medium to high Plywood Box-style or extra-long shelves Paint with edge banding Low Reclaimed Wood Rustic rooms; character pieces Clear coat or wax Varies widely For a first build, pine is the right call. It’s forgiving, inexpensive, and available at any hardware store. If you go with reclaimed wood, check that it’s straight and dry before you cut; warped boards are nearly impossible to hang flush against the wall. Tools and Materials You’ll Need Item What It’s For 2×8 pine board (12 feet) Main shelf body yields three 30-inch shelves 1/2-inch oak dowels (36-inch rod) Hidden wall supports Circular saw, or miter saw Cuts shelf boards and dowels to length Drill with a 1/2-inch bit Drills holes in the shelf back edge and the wall studs Stud finder Locates wall studs for safe anchoring Level (24-inch minimum) Keeps the shelf from tilting Measuring tape and pencil Marks, cuts, and wall positions Speed square Guides straight cut lines Sandpaper (120 and 220 grit) Smooths edges and preps for finish Wood stain, paint, or clear coat Final finish Wood filler Fills screw holes and small gaps Small wood screws Locking screws to secure the shelf to the dowels Safety glasses Eye protection during cutting and drilling One note on screws: the locking screw at the end of this build goes through the shelf into the dowel, not into the wall. You’re not using screws to bear load here; that’s the dowel’s job. The screw just stops the shelf from sliding forward off the wall over time. Cut List for Three Floating Shelves Part Dimensions Quantity Shelf boards 2×8, cut to 30 inches 3 Oak dowels 1/2-inch diameter, cut to 4 to 6 inches 6 to 9 (2 to 3 per shelf) Locking screws Small wood screws 1 per shelf Finish Paint, stain, or clear coat As needed Wood filler Small container As needed A 12-foot pine board gives you three shelves at just under 31 inches each, accounting for the saw kerf. Lay the full cut list out on paper before making your first cut; it takes two minutes and saves a ruined board. How to Make Floating Shelves: Step by Step This method shows you how to build floating shelves using a solid wood board and hidden dowel supports, so the shelves appear to float on the wall. It works best for light decor, mugs, small plants, candles, and bathroom items. Step 1: Cut the Shelf Boards Measure and mark each cut with a pencil and speed square. Clamp the board to a stable surface before cutting; it should not move. Make your cuts with a circular saw or miter saw, then sand the cut edges immediately with 120-grit sandpaper. Sharp edges on a shelf are an annoyance every single time you set something down. Step 2: Cut the Dowel Supports Cut the 1/2-inch oak dowel into 4 to 6-inch sections. Two dowels per shelf is the minimum; three is better for a 30-inch span. The dowels need to be consistent in length; if one sits 1/2 inch shorter than the others, the shelf will tilt slightly when it’s on the wall. Step 3: Mark and Drill the Shelf Holes Lay the shelf face down on a flat surface. Mark the dowel hole positions on the back edge, evenly spaced. Try to position them to align with wall studs; that alignment determines where the shelf actually goes on the wall, so get a stud finder out before marking and work backward from where the studs are. Drill straight into the back edge of the shelf using a 1/2-inch bit. Go slowly. If the drill drifts even 5 degrees off horizontal, the shelf will sit at an angle on the wall. Don’t drill all the way through; stop about 1/2 inch from the front face of the board. Pro Tip: Wrap a piece of masking tape around the drill bit at your target depth. When the tape hits the wood, you’re done, no guesswork, no drilling through the front. Step 4: Find the Wall Studs and Mark the Shelf Position Run the stud finder along the wall at shelf height and mark every stud center with a pencil. Standard stud spacing is 16 inches, but older homes vary; don’t assume. Use the level to draw a light horizontal line where the bottom of the shelf will sit. This line is your reference for keeping the shelf straight, and it should be checked twice before you drill anything into the wall. Step 5: Drill the Wall Stud Holes Drill matching holes into the wall studs at the marked positions. The hole placement in the wall must match the hole spacing in the shelf exactly; measure both twice. Drill at least 2 inches deep into each stud. Blow out any dust from the holes before installing the dowels. Step 6: Install the Dowels Press the dowels firmly into the wall holes. They should feel solid, no wobble. If a dowel spins in the hole, the hole is slightly too large. A drop of wood glue in the hole fixes this; let it set before sliding the shelf on. If the dowel is too tight to press in by hand, sand it lightly. Step 7: Slide the Shelf Onto the Dowels Line up the shelf holes with the dowels and slide it straight back. The back face of the shelf should sit flush against the wall. Don’t force it; if it resists, remove it and check whether the holes are aligned. Forcing the shelf on a slightly misaligned dowel can split the wood at the back edge. Once the shelf is on, lay the level on top. Make any small adjustments now, before the next step locks it in place. Step 8: Add the Locking Screw Drive a small wood screw through the underside of the shelf into one of the dowels. This isn’t a load-bearing fix; it just prevents the shelf from sliding forward on the dowels over time, which can happen in rooms with vibration or on walls that flex slightly. Fill the screw hole with wood filler if you want the underside to look clean. For a detailed walkthrough, the video below shows the full process from cut to install: The Faster Way I Found the Second Time On my first build, I finished all three shelves and then started mounting, only to find that the studs in the bathroom wall were not evenly spaced, which meant my pre-drilled shelf holes didn’t line up the way I expected. I had to redrill one shelf’s holes entirely. The fix: find the studs first, mark their center positions on the wall, and use those positions to determine your hole spacing in the shelf, not the other way around. Thirty seconds of stud-finding before you touch a drill bit saves a ruined board. How Much Weight Can DIY Floating Shelves Hold? With dowels anchored into two wall studs, a pine shelf at 1.5 inches thick can safely hold light-to-moderate everyday items, think mugs, small plants, candles, framed photos, and a few books. That’s roughly 15 to 25 lbs per shelf under normal conditions. What erodes that capacity quickly: Anchoring into drywall only: Drywall anchors pull out under sustained load. Studs are non-negotiable for this build. Shelf depth over 8 inches: Extra depth adds leverage on the wall. The further the load sits from the wall surface, the more force the dowels feel. Warped boards: A board that doesn’t sit flush against the wall stresses the dowels unevenly, especially at the ends. For anything heavier, such as cast iron cookware, stacked dishes, or storage bins, the dowel method isn’t the right system. Use a hidden bracket or a wall cleat that spans multiple studs instead. Optional Upgrades Once the Basic Shelf Is Done Upgrade What It Does Best Room Hidden bracket system Metal rods inside the shelf increase load capacity significantly Kitchen, office Wall cleat A horizontal wood support that spans studs is better for long shelves Living room, laundry Edge trim Adds visual thickness to thin boards or plywood Any room LED strip lighting Under-shelf lighting creates a usable task light or ambient glow Kitchen, bathroom, desk Clear coat topcoat Seals the finish so the shelf wipes clean easily Kitchen, bathroom Start with the upgrade that solves a real problem in the room. LED strip lighting is purely aesthetic, worth adding, but not urgent. A hidden bracket system matters the moment you plan to put anything genuinely heavy on the shelf. How to Finish and Style the Shelves Sand the shelf to 220 grit before applying any finish. Skipping that step and painting over 120-grit pine leaves a surface that looks slightly rough under good light, fine in a garage, not great in a bathroom or bedroom. For bathrooms and kitchens, a clear coat over the stain or paint is worth the extra step. Steam and cooking grease work their way into unsealed wood faster than you’d expect. A sealed shelf takes 30 seconds to wipe down; an unsealed one starts to stain around the 6-month mark. For styling ideas that work in a real minimalist room rather than a catalog shot, the minimalist home decor covers how to keep surfaces from looking cluttered without stripping them bare. When it comes to floating shelves specifically, the rule is simple: leave a third of the shelf empty. One tall item, one medium item, one small one, and an open space around all three. For bedroom shelves, the cozy minimalist bedroom ideas guide shows how to style open shelving without making the room feel busy. Avoid filling every inch. A shelf that’s loaded edge to edge reads as storage, not design. Place heavier items toward the back and closer to the wall; it reduces the forward pull on the dowels and keeps things from tipping. Common Mistakes That Derail This Project Skipping the stud finder. There is no workaround. Drywall anchors are not a substitute for studs in a floating shelf build that uses dowels. Drilling the shelf holes before finding the studs. Do the studs first, always. Reverse engineering a set of pre-drilled holes to match stud locations is a headache that usually ends with a board in the trash. Using boards thinner than 1.5 inches. They sag, they can’t fully conceal the dowel, and they feel flimsy when loaded. Not checking the level twice. Once before tightening, once after. The shelf can shift slightly as you secure the locking screw. Rushing the finish. Paint or stain that hasn’t fully dried will smear when you install the shelf or set the first item on it. Let it cure fully, typically 24 hours for paint, longer for oil-based stain. Frequently Asked Questions How do you make floating shelves without brackets? The dowel method covered in this guide is the most common bracket-free approach. Oak dowels anchor into wall studs and slide into matching holes drilled in the shelf’s back edge. The shelf sits flush against the wall with no visible hardware. A locking screw on the underside keeps it from sliding forward. What wood is best for DIY floating shelves? Pine is the best starting point for beginners, inexpensive, easy to cut, and forgiving of small mistakes. Oak works better for a stained natural finish. Poplar is the right pick if you want a painted shelf with a smooth, furniture-grade surface. Avoid particleboard for anything load-bearing. How thick should a floating shelf be? At least 1.5 inches for a standard dowel-mounted shelf. Thinner boards sag under real weight and can’t fully conceal the dowels. A standard 2×8 pine board gives you that thickness after milling and is the most common board for this build. Can floating shelves hold books? A few books, yes, if the shelf is anchored into wall studs with at least two dowels. A full row of hardcover books is pushing the limit of this build. For a dedicated bookshelf, use a hidden bracket system or a wall cleat anchored to three studs, not two. How far apart should floating shelf dowels be? Space dowels evenly, ideally lining them up with wall studs. For a 30-inch shelf, two dowels at roughly 8 inches from each end work well. For a 36-inch shelf, three dowels distributed evenly give better support across the span. Is it cheaper to build or buy floating shelves? Building is almost always cheaper if you already own the tools. A 12-foot pine board, a dowel rod, screws, and finish run $30 to $60 and yield three shelves. Store-bought floating shelves of comparable quality typically cost $40 to $80 each, and usually have less solid wood in them. How do floating shelves stay up without visible support? The dowels anchored into wall studs are the support; they’re just hidden inside the shelf. The shelf slides over the protruding dowels, and the wall bears the load through those anchored points. The shelf appears to float because no bracket or hardware extends below or around it. Final Verdict If you want to know how to make floating shelves that look clean and hold up in daily use, this dowel method is the one I’d recommend for a first build. It costs $30 to $60 in materials, takes an afternoon, and produces shelves that you can put real objects on without worrying. The one thing I’d do differently from my first attempt: find the studs before cutting a single board, and work all your measurements from there. That one change cut my installation time in half on every build since. Start with one shelf, get it level and flush, then repeat for the rest. The second one always goes faster.
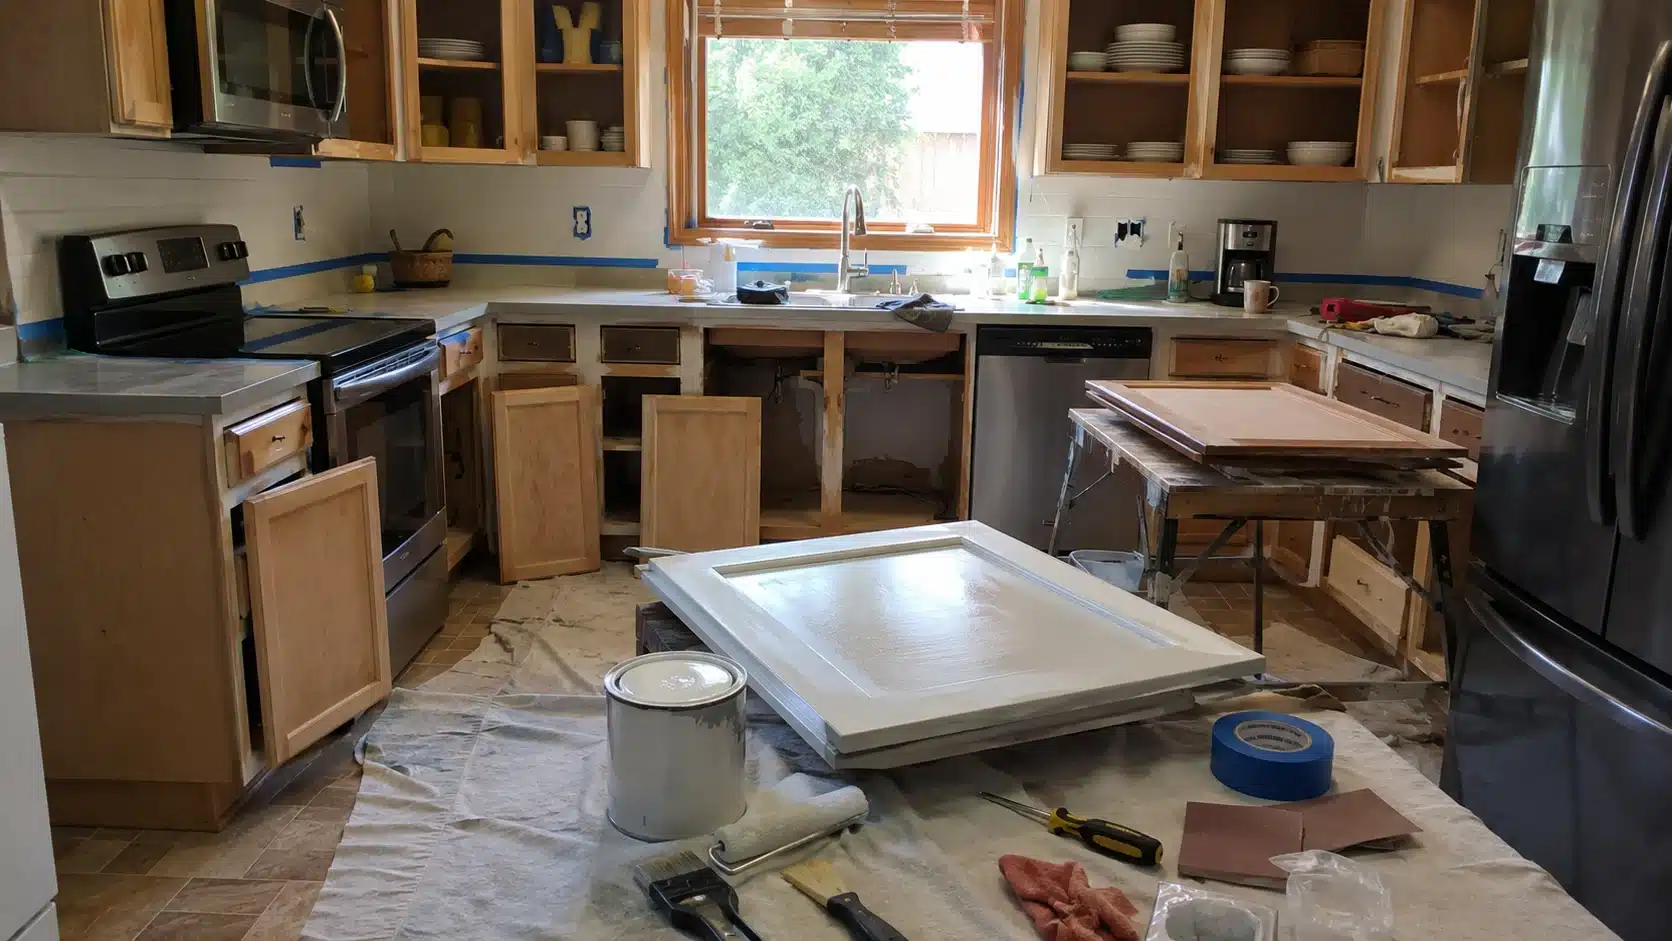
Kitchen cabinet refinishing is a weekend project that can save a tired kitchen without tearing out solid cabinets, and done right, the finish holds for a decade. I’ve refinished cabinets in three different kitchens, and the honest truth is that the difference between a result you’re proud of and one that chips by month three comes down almost entirely to prep. This guide walks through every step in sequence, including the ones most tutorials skip over. Plan for one to two full weekends depending on cabinet count, plus another week before the doors go back on. Total material cost for a typical 10-cabinet kitchen runs $150 to $400 DIY. Hiring a professional cabinet refinishing service runs $1,000 to $3,500 for the same kitchen. Cost Note: Figures in this article are estimates based on national averages. Actual costs vary significantly by region, cabinet count, materials, and project scope. Always get at least three quotes before committing to any professional cabinet refinishing above $1,000. What Is Kitchen Cabinet Refinishing? Kitchen cabinet refinishing means removing the existing surface finish like old paint, stain, or lacquer , and replacing it with a fresh one. The cabinet boxes, doors, and drawer fronts stay in place. Nothing structural changes. The work is entirely surface-level: stripping, sanding, priming, and applying a new finish coat. This is different from repainting, which works over an intact existing finish, and from full cabinet replacement. Refinishing goes deeper than a repaint but stops short of removing or rebuilding anything structural. When the finish has failed, peeling, chipping, staining that won’t clean off, kitchen cabinet refinishing is the targeted fix that addresses the actual problem without replacing what is still working. Refinishing vs. Repainting vs. Refacing: Which One Do You Actually Need? These three terms get used interchangeably online, but they involve different scopes of work, different costs, and different skill levels. Getting clear on which one matches your situation is the first step before buying a single supply. Approach What It Involves Best For Refinishing Strip existing finish, sand, prime, apply new stain or paint Solid wood or plywood cabinets where the finish has failed Repainting Clean, scuff-sand, prime, paint , no stripping required Cabinets with a sound existing finish that just needs a new color Refacing kitchen cabinets Keep existing boxes, replace doors, drawer fronts, and veneer Outdated door style where the structure underneath is still solid Refinishing is the deepest surface fix short of full replacement. If the existing finish is peeling, chipping, or stained beyond cleaning, refinishing is the right scope. Refacing is a completely different project that addresses door style rather than finish condition – if you want to understand the options before committing, this breakdown of kitchen cabinet styles and construction types covers what’s worth keeping versus what’s worth replacing. What Actually Happens to Cabinet Finish Over Time Most people notice the signs , peeling corners, chipping near handles, discoloration above the stove, but the cause usually goes unaddressed. Knowing what breaks finish down explains why the prep steps ahead are not optional. Heat from appliances causes the finish layer to expand and contract repeatedly. Over time that cycle breaks the bond between the coating and the surface beneath it. Cooking grease builds up as a thin film across every cabinet face. Over months and years it works under the finish at vulnerable points like edges, corners, and around hardware holes. Moisture near the sink and dishwasher gets absorbed into cabinet bases constantly. Wood moves with humidity, and paint or stain moves with the wood until the surface cracks. The wrong primer is often the hidden cause. A primer that sits on the surface rather than bonding to it allows the topcoat to follow every movement until it lifts and peels. Finish failure starts underneath, not at the topcoat. The paint itself is rarely the problem. Grease, moisture, and poor adhesion beneath it are what cause the surface to break down. This is why cleaning and priming correctly matter more than any other step, and why the most common mistakes all happen in prep, not in the painting itself. What Can Go Wrong (Read This Before You Start) I learned most of these the hard way. Every one of them shows up in prep, not after the topcoat is on, which means they’re all avoidable if you catch them early. Skipping the degreaser. Sanding alone does not cut through cooking grease. Without a liquid deglosser or TSP substitute, primer sits on grease rather than wood , and it lifts within months. Using wall primer. Standard drywall primer does not bond to pre-finished cabinet surfaces. Bonding primer is formulated specifically for slick, sealed, or previously painted surfaces. This single substitution is behind more DIY cabinet failures than anything else I’ve seen. Applying one thick coat. Thick coats trap solvent underneath and crack as they cure. Two thin coats dry faster and cure significantly harder. Re-hanging doors before the finish cures. Alkyd finish feels dry within hours but does not reach full hardness for 7 to 14 days. Closing doors too soon causes the finish to stick and tear when opened. Removing doors without labeling them. Re-hanging unlabeled doors means adjusting every single hinge from scratch , a 30-minute job becomes a two-hour one. Project Card Difficulty 3/5 , Manageable with basic tools, but patience in prep is what determines the result Time 1–2 full weekends of active work, plus 7–14 days cure before re-hanging Cost (DIY) $150–$400 for a typical 10-cabinet kitchen (materials only) Tools Needed Screwdrivers, painter’s tape, tack cloth, 120- and 220-grit sandpaper, foam roller, angled brush, sawhorses Skill Required Intermediate , comfortable with sanding, priming, and thin-coat paint application How to Refinish Kitchen Cabinets Step by Step The sequence is specific, and skipping any part of it , especially around sanding and priming , is the primary reason finishes fail within a season. Step 1: Remove and Label Everything Take off all cabinet doors, drawer fronts, hinges, knobs, and pulls before any prep starts. Label each piece using painter’s tape on the back and keep screws in separate labeled bags. Take a quick phone photo of each cabinet section before anything comes off, it saves real time when everything goes back on. Working on doors laid flat across sawhorses prevents drips and produces more even coverage than painting them hanging in place. Step 2: Degrease All Surfaces Cabinets collect oil, steam, fingerprints, and food film over time. Sanding before cleaning pushes grime deeper into the surface rather than removing it. Wipe everything with a TSP substitute or liquid deglosser made for painted or wood surfaces. Follow with a clean water wipe if the product label calls for it. Let everything dry fully , at least 30 minutes , before moving to the repair or sanding stage. Step 3: Fix Small Damage First Fill dents, nail holes, open seams, and damaged corners with wood filler before sanding. Press loose veneer flat only if it can be glued down and held tight. If veneer keeps lifting, refinishing may not hold in that area. Let all repairs dry fully and sand flush before moving forward, repairs that aren’t sanded flat will show through primer and every coat applied over them. Step 4: Sand or Degloss the Surface Sanding dulls the shine and gives primer a mechanical grip. The goal is a smooth, dull surface , not bare wood. Sand with 120-grit to scuff, then 220-grit to smooth. Glossy factory finishes may need both a liquid deglosser and light sanding depending on the primer being used. Wipe with a tack cloth after each stage, dust bumps are very visible once paint dries. Step 5: Fill Oak Grain If Needed Oak cabinets show open grain through paint if this step is skipped. If you’re going for a smooth painted finish, not a texture look , apply grain filler after cleaning and sanding, then sand it flat once fully dry before priming. This step adds half a day but prevents the wood pattern from telegraphing through every coat applied over it. For maple, birch, or other tight-grained species, this step is usually not needed. Step 6: Apply the Right Primer Primer is where DIY cabinet jobs win or fail. Laminate needs a bonding primer. Stained wood may need a stain-blocking primer, if you’re working over an existing stain and want to understand what’s under the finish before you commit to a product, this guide on painting over stained wood covers how to identify the finish type and pick the right primer for it. Older finishes may need an oil-based primer depending on product rules and available ventilation. Read the label, match the primer to the cabinet material, and don’t guess. Apply with a foam roller on flat panels and an angled brush on edges. Step 7: Paint, Stain, or Use a Kit Thin coats work better than heavy ones every time. Cabinet enamel, stain, and refinishing kits each have their own dry times and prep requirements. Rust-Oleum Cabinet Transformations uses a three-stage process – surface prep, bond coat, protective topcoat. Two to three thin coats of cabinet-specific alkyd paint with light sanding between coats produces a harder, more durable finish than one thick application. Paint upper cabinets before lower ones so any drips land on unpainted surfaces. Step 8: Let It Cure Before Re-Hanging Dry and cured are not the same. Dry means the surface can be handled lightly. Cured means the finish has hardened enough for normal daily use. Rehang doors gently, add door bumpers to protect the fresh finish at closing points, and avoid hard cleaning until the coating reaches full cure in typically 7 to 14 days after the final coat. If you want to understand the timing difference between dry and cure across different paint types, this breakdown of how long to wait between coats of paint is worth reading before you hang anything back up. The “Faster the Second Time” Tip The thing I do differently now that I didn’t do the first time: test color on a removed drawer front before coating any doors. Kitchen lighting reads completely differently than store swatches, what looks like a warm white at the hardware store goes greenish under fluorescent under-cabinet lights. One drawer front test costs you an afternoon. Re-coating all your doors costs a full weekend. Pro Tip: Vacuum all surfaces before each coat, then follow with a tack cloth. Don’t skip the tack cloth pass even if the vacuum looked thorough , fine dust that’s invisible to the eye becomes very visible once paint dries. Tips for Refinishing Kitchen Cabinets Yourself Photo before you remove anything. A quick phone photo of each cabinet section shows door placement and hinge position, saving real time when everything goes back on. Bag hardware by cabinet. Keep screws and hinges from each cabinet in its own labeled bag , mixed hardware causes fitting problems when doors go back on. Paint top to bottom. Always coat upper cabinets before lower ones. Drips from the top land on unpainted surfaces instead of freshly coated ones below. Skip the knob towels for two weeks. The finish feels dry but is still curing. Avoid hanging towels, slamming doors, or putting stress on the surface early. Follow kit instructions exactly. Refinishing kits like Rust-Oleum Cabinet Transformations use a specific stage process. Skipping any step changes how the finish bonds and holds. Control temperature and airflow. Rooms that are too hot, cold, or humid slow cure time and affect how each coat lays. Ideal range is 65–75°F with moderate humidity. Finish Options That Actually Work in a Kitchen The process stays the same across most finishes, but the product choice at the primer and topcoat stage shifts depending on the look and the material. These three cover the most common directions for US kitchens. Finish Type Best For Prep Needed Product White or Off-White Paint Solid wood and plywood Grain filler on oak before priming Alkyd or waterborne alkyd, satin or semi-gloss Natural Wood Stain Solid wood only Full strip to bare wood, sand with the grain Oil-based stain plus kitchen-rated topcoat sealer Deep Colors (Navy, Green, Black) Lower cabinets or island accent Two coats tinted bonding primer Alkyd paint for color depth and hard cure If you’re going with a natural wood stain finish, the species you’re working with matters , maple, oak, and pine each take stain differently. A maple stain color chart is worth checking before you commit to a shade, since the same stain product can read very differently on different wood species. The right finish comes down to material type and how much prep the surface actually needs. What Does Kitchen Cabinet Refinishing Cost? Cost is one of the top reasons people tackle this project themselves , and the gap between DIY and professional cabinet refinishing is significant. Approach Typical Cost Range What Drives the Variation DIY (materials only) $150–$400 Cabinet count, primer type, whether a kit or individual products are used Professional cabinet refinishing service $1,000–$3,500 Kitchen size, finish type, regional labor rates, spray vs brush application Full cabinet replacement $5,000–$25,000+ Cabinet grade, kitchen size, installation complexity The DIY cost range assumes solid wood or plywood cabinets in reasonable condition. Laminate cabinets add cost for bonding primer. Heavily damaged doors that need filler work and extensive grain-filling push toward the higher end of materials cost. When Is the Right Time to Refinish? Timing affects both the cure quality and how much rework the project creates when it’s sequenced incorrectly around other updates. Season matters. High humidity slows alkyd cure time and can cause adhesion issues during application. Late spring or early fall, when indoor humidity is moderate, produces the most consistent results in most parts of the US. Renovation sequence. Refinish cabinets after any plumbing, tile, or backsplash work is complete. Dust and moisture from those jobs settle on fresh finish. Paint walls after cabinets, not before, to avoid cutting in around a finished surface. Signs the timing is right. Peeling at edges and corners, chipping near hardware, and discoloration that won’t clean off are signs of adhesion failure , the point where cleaning and touch-up stop working and kitchen cabinet refinishing becomes the only real fix. Frequently Asked Questions About Kitchen Cabinet Refinishing These are the questions I hear most often from people who’ve already decided to tackle this project themselves. How much does kitchen cabinet refinishing cost? DIY materials for a typical 10-cabinet kitchen run $150–$400. Professional cabinet refinishing services typically charge $1,000–$3,500 for the same kitchen. Full cabinet replacement starts around $5,000 and goes well above that for custom work. Do kitchen cabinets need to be sanded before refinishing? Yes , even when using a liquid deglosser. Scuff sanding with 120-grit creates the surface texture primer needs to bond. Following with 220-grit smooths before the topcoat. Skipping sanding leaves the surface too slick for reliable adhesion over time. Can laminate kitchen cabinets be refinished? Yes, but laminate requires a dedicated bonding primer. Standard primer won’t adhere to slick laminate reliably. Results also depend on the laminate condition , peeling or bubbling laminate won’t hold a new finish regardless of how carefully it’s applied. Can cabinets be refinished without stripping? Yes, if the existing finish is sound with no peeling or bubbling, and the surface is cleaned and scuff-sanded properly. If the old finish is already failing, skipping the strip means the new coat bonds to a compromised surface and will peel regardless. What is the difference between cabinet refinishing and cabinet door refinishing? Cabinet door refinishing focuses on just the door panels and drawer fronts. Full kitchen cabinet refinishing includes the doors plus all the face frames, cabinet boxes, and any exposed surfaces. Doors-only costs less but leaves mismatched finishes if the box faces show wear. How long does a refinished cabinet finish last? A properly prepped finish using alkyd or waterborne alkyd paint typically lasts 8–15 years with normal kitchen use. Prep quality and primer type matter more than topcoat brand. Allowing full cure time , 7 to 14 days , before daily use is what separates a long-lasting result from early peeling. What is the best primer for kitchen cabinet refinishing? For previously painted wood or plywood, a waterborne bonding primer or shellac-based primer works well. For laminate, use a dedicated bonding primer. For cabinets with heavy stain bleed risk, an oil-based stain-blocking primer is the safest choice. Never use standard drywall primer on cabinet surfaces. Final Verdict: Is Kitchen Cabinet Refinishing Worth It? If the cabinet boxes are structurally solid and the finish is what’s failing, kitchen cabinet refinishing is the most cost-effective fix available – $150 to $400 in materials versus $5,000 and up for replacement. The project is manageable at difficulty 3 out of 5, but the prep stages are where the result is actually decided. Don’t rush the degreasing, don’t skip the bonding primer, and give the finish the full 7 to 14 days to cure before you hang anything back. Start with one door through the full process before committing to the whole kitchen , you’ll know within a day whether the prep is dialed in and whether your chosen finish lands the way you expected.
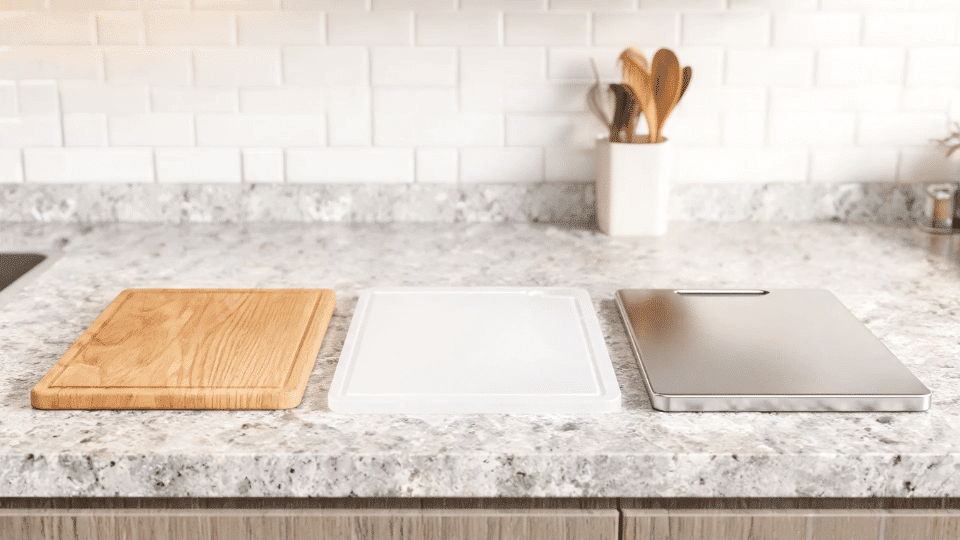
Learning how to disinfect a cutting board properly is one of those kitchen habits that takes five minutes to do right and costs you nothing, until you skip it after raw chicken and spend three days regretting it. I used to run a wooden board under hot water, wipe it down, and call it clean. That is not disinfecting. That is moving bacteria around. This guide covers what actually works: the six-step cleaning routine that applies to every board, the right method for each material, how bleach compares to vinegar and hydrogen peroxide, and the mistakes that quietly make boards harder to sanitize over time. Difficulty 2 out of 5, straightforward once you know which sanitizer matches your board material Time 5–10 minutes per board, per session Cost $2–$8 (bleach, vinegar, or hydrogen peroxide; food-grade mineral oil for wood boards) Tools Needed Bench scraper, scrub brush or sponge, spray bottle, clean paper towels Skill Required Beginner Why Proper Disinfecting Methods Matter Cutting boards pick up more than knife marks. Every prep session leaves food residue, juices, and bacteria behind, and the grooves your knife cuts into the surface over time become places where bacteria can sit even after a rinse. Raw meat, poultry, and seafood carry the highest cross-contamination risk, but fresh produce can carry bacteria too. Different materials also respond differently to water and sanitizers. Plastic and glass are nonporous, which makes them easier to sanitize fully. Wood is more sensitive to moisture; soaking a wooden board or running it through the dishwasher causes warping and cracking, and a cracked board is harder to clean than a damaged one. Bamboo absorbs less moisture than most woods, but still needs careful hand washing and complete drying after every use. A Basic Step-by-Step Cutting Board Wash No matter what material your board is made from, this routine is the safe starting point for daily kitchen cleaning. The two steps most people skip are rinsing after sanitizing and drying fully before storing. Both matter more than people expect. Step 1: Scrape off food residue: Use a bench scraper, spatula, or folded paper towel to remove crumbs, juices, and stuck-on food before washing. Letting food sit through the wash cycle makes every step after it less effective. Step 2: Wash with hot soapy water: Scrub the top, bottom, sides, and edges with hot water, dish soap, and a clean brush or sponge. Pay attention to visible knife grooves; bacteria concentrate there. Step 3: Rinse with clean water: Rinse the board thoroughly so no soap film remains before applying any sanitizer. Soap residue can reduce how well bleach or hydrogen peroxide works. Step 4: Sanitize the board: Mix 1 tablespoon of unscented liquid chlorine bleach with 1 gallon of water. Apply the solution across the full surface and let it sit for several minutes. For wood and bamboo boards, see the material-specific section below. Diluted bleach still works, but vinegar or hydrogen peroxide are gentler options for regular use. Step 5: Rinse again: Rinse off all sanitizer with clean water before the board touches food again. Bleach residue left on the surface is not safe. Step 6: Dry completely: Pat the board dry with clean paper towels, then stand it upright so air can reach both sides. A board stored flat while still damp holds moisture in grooves and edges, which defeats the point of washing it. How to Disinfect a Cutting Board Based on Material Each board material has its own care needs. Using the wrong method, soaking a wooden board, or skipping oil on bamboo, damages the surface and makes it harder to clean over time. Here is what actually works for each type: 1. How to Disinfect a Wooden Cutting Board Wood needs steady care because excess water causes warping or cracking. A well-oiled board lasts longer and is easier to clean. The second time I made this mistake, leaving a wooden board soaking in the sink overnight, it split along the grain by morning. That board went in the bin. Wash by hand: Scrape off food residue first, then wash with hot soapy water and a soft brush or sponge. Never the dishwasher. Avoid soaking: Do not leave the board sitting in water or submerged in the sink. Too much moisture causes cracks and warping, and cracked wood is a bacteria trap. Sanitize the surface: Use diluted bleach (1 tablespoon per gallon of water), undiluted white vinegar, or hydrogen peroxide after washing, especially after raw meat or strong-smelling foods. Let the sanitizer sit before rinsing. Rinse and dry upright: Rinse well after sanitizing, then stand the board upright so air reaches both sides before storing. Oil regularly: Apply food-grade mineral oil every few weeks to keep the wood from drying, cracking, or absorbing too much moisture during future washes. Understanding how different wood types behave with moisture and oil helps you pick the right maintenance schedule for your specific board. 2. How to Disinfect a Plastic Cutting Board Plastic boards are a practical choice for raw meat because they are easier to sanitize than wood, and most are dishwasher safe. That said, deep knife grooves eventually make any plastic board hard to clean thoroughly, which is when replacement becomes the right call. Rinse right after use: Remove juices, crumbs, and loose food before they dry into knife grooves. Dried-on residue takes significantly more scrubbing to shift. Wash and scrub well: Use hot soapy water and a scrub brush to clean the surface, sides, and any visible knife marks. Use the dishwasher if safe: Place the board in the dishwasher only if the manufacturer’s label confirms it is dishwasher safe. Use the sanitize cycle when available. Sanitize after raw meat: Apply diluted bleach after cutting raw meat, poultry, or seafood. Let it sit for several minutes before rinsing fully. Replace when grooves get deep: When knife marks become deep or discolored, the board is past the point of reliable sanitizing. Replace it. 3. How to Disinfect a Bamboo Cutting Board Bamboo absorbs less moisture than many woods, but it still needs hand washing, complete drying, and regular oiling to stay in reliable condition. The same surface properties that make bamboo durable make it prone to surface cracking when left wet or under-oiled. Wash after each use: Clean with hot soapy water after cooking, especially after raw proteins or strong-smelling foods. Do not soak it: Keep bamboo out of standing water. Moisture can still cause swelling, surface cracking, or joint separation, even though bamboo is denser than most wood boards. Sanitize when needed: Use diluted bleach, white vinegar, or hydrogen peroxide after raw foods. Let the sanitizer work for a few minutes before rinsing. Rinse and dry upright: Remove all soap or sanitizer with clean water, then stand the board upright until fully dry before putting it away. Oil the board: Rub with food-grade mineral oil regularly to help bamboo resist cracking and maintain its surface condition. 4. How to Disinfect Glass, Acrylic, and Nonporous Cutting Boards Nonporous boards are the easiest to sanitize fully, but they still need proper cleaning after raw proteins and regular checks for chips or cracks. A chipped glass board is a safety hazard and should be replaced immediately. Wash after every use: Clean with hot soapy water after each use, even after only produce or bread. Use the dishwasher if safe: Check the care label first. Most glass and acrylic boards handle the dishwasher well; use the sanitize cycle when available. Sanitize after raw proteins: Apply diluted bleach or hydrogen peroxide after contact with raw meat, poultry, or seafood. Let it sit, then rinse fully. Rinse and dry fully: Remove all sanitizer with clean water and dry the board completely before storing. Check for damage: Look for chips, cracks, or slippery areas. Damaged boards are harder to clean and can be unsafe. Bleach vs Vinegar vs Hydrogen Peroxide for Cutting Boards Not every sanitizer works the same way, and the right choice depends on your board material, what food touched the surface, and how strong a disinfection you actually need. Here is how they compare. Factor Bleach Vinegar Hydrogen Peroxide Lemon and Salt Best for Raw meat, poultry, seafood Odors and light cleaning Extra sanitizing after washing Smells and stains How to use Dilute 1 tbsp per gallon, let sit, rinse well Spray or wipe undiluted, then rinse Apply, let bubble briefly, rinse, dry Scrub with coarse salt, rinse, dry Best board Plastic, glass; careful use on wood Wood, bamboo, plastic Wood, plastic, bamboo Wood and bamboo Main limit Must be diluted and rinsed fully Not the strongest option after raw meat Needs thorough rinsing before food contact Not enough after raw meat Bleach is the safest choice after raw meat; nothing in the home kitchen matches it for pathogen reduction. Vinegar, hydrogen peroxide, lemon, and salt work well for odors, stains, and regular maintenance between deeper cleans. If you are using a wood board and want to avoid repeated bleach exposure, hydrogen peroxide is the most practical alternative for routine sanitizing after produce or cooked foods. What Not to Do When Disinfecting a Cutting Board Some cleaning habits damage the board’s surface and make it harder to sanitize reliably over time. These are the ones worth knowing before they become a problem. Do not soak wooden or bamboo boards in water: Too much water causes swelling, warping, and cracking, which opens up new grooves where bacteria can sit. Do not put wooden boards in the dishwasher: Heat and long water exposure damage wooden boards consistently. Plastic and glass boards are a different story; check the label first. Do not skip rinsing after sanitizer: Bleach, vinegar, and hydrogen peroxide should all be rinsed off before food touches the board surface again. Do not store boards while damp: Moisture sitting in grooves, cracks, and edges means the board stays unsafe even after washing. Stand it upright and let it air dry fully. Do not keep damaged boards: Deep grooves, cracks, warping, or splinters make boards harder to clean and a legitimate food safety concern. Replace them. Do not reuse a raw meat board without washing it first: Wash and sanitize it before it touches produce, bread, or any ready-to-eat food. How Home Cooks Sanitize Cutting Boards: Real Kitchen Habits A Reddit thread on How do you guys sanitize your cutting boards? showed how home cooks handle this in real kitchens. Several users said plastic boards go straight into the dishwasher after raw meat. Others scrub wooden boards with hot, soapy water and let them air dry. Methods mentioned included diluted bleach, iodine sanitizer, hydrogen peroxide, and keeping separate boards for meat and produce. One commenter raised a fair point: Do vegetable-only boards even need full disinfecting every time? My take: I would not reach for bleach after every onion. But after raw meat, after anything that leaves a smell, or when knife grooves start to look discolored, that is when full disinfection earns its place in the routine. Separate boards for meat and produce make this easier. It removes the guesswork about which board needs what treatment. FAQs About How to Disinfect a Cutting Board How do you deodorize a cutting board? Scrub the board with coarse salt and half a lemon, then rinse with clean water. For stronger odors, a paste of baking soda and water left on the surface for a few minutes before rinsing works well. Dry the board upright afterward. What should you do after cutting chicken or raw meat on a board? Wash immediately with hot soapy water and rinse. Then apply diluted bleach (1 tablespoon per gallon of water), let it sit for several minutes, rinse again thoroughly, and dry the board completely before storing or reusing it. Should meat boards be separate from regular cutting boards? Yes. One board for raw meat, poultry, and seafood; a separate board for produce, bread, and ready-to-eat foods. Color-coding boards by use is the simplest way to keep this consistent without relying on memory. Are cutting boards dishwasher safe? Most plastic, acrylic, and glass boards are dishwasher safe; check the label first. Wooden and bamboo boards are not. Heat and prolonged water exposure in a dishwasher consistently damage wood and bamboo, shortening the board’s lifespan and creating more surface cracks to clean around. How often should you disinfect a cutting board? After every use involving raw meat, poultry, or seafood. For boards used only for produce or bread, a thorough hot soapy wash after each use is enough, full disinfecting when odors appear, or grooves look discolored. When should you throw away a cutting board? When it has deep grooves, cracks, warping, splinters, or persistent smells that do not clear after proper cleaning. A board that cannot be cleaned thoroughly is not worth keeping. Can you use hydrogen peroxide on a wood cutting board? Yes. Pour a small amount of 3% hydrogen peroxide over the surface, let it fizz briefly, then rinse and dry upright. It is a gentler alternative to bleach for regular wood board maintenance and works well after producing or cooking foods. Final Thoughts If I were doing this again from scratch, I would start by getting two boards, one for raw meat, one for everything else, and accept that wooden boards need oiling every few weeks if you want them to last. The routine itself is not complicated: hot soapy water every time, bleach solution after raw meat, dry upright before storing. What trips people up is using the same method for every material or skipping the drying step because the board feels clean enough. Knowing how to disinfect a cutting board the right way for each material takes one read-through to get it right. After that, it is just a five-minute routine that protects every meal you prep. Start there, wash, sanitize with the right product for your board, rinse, and stand it upright. That is the whole thing.





