


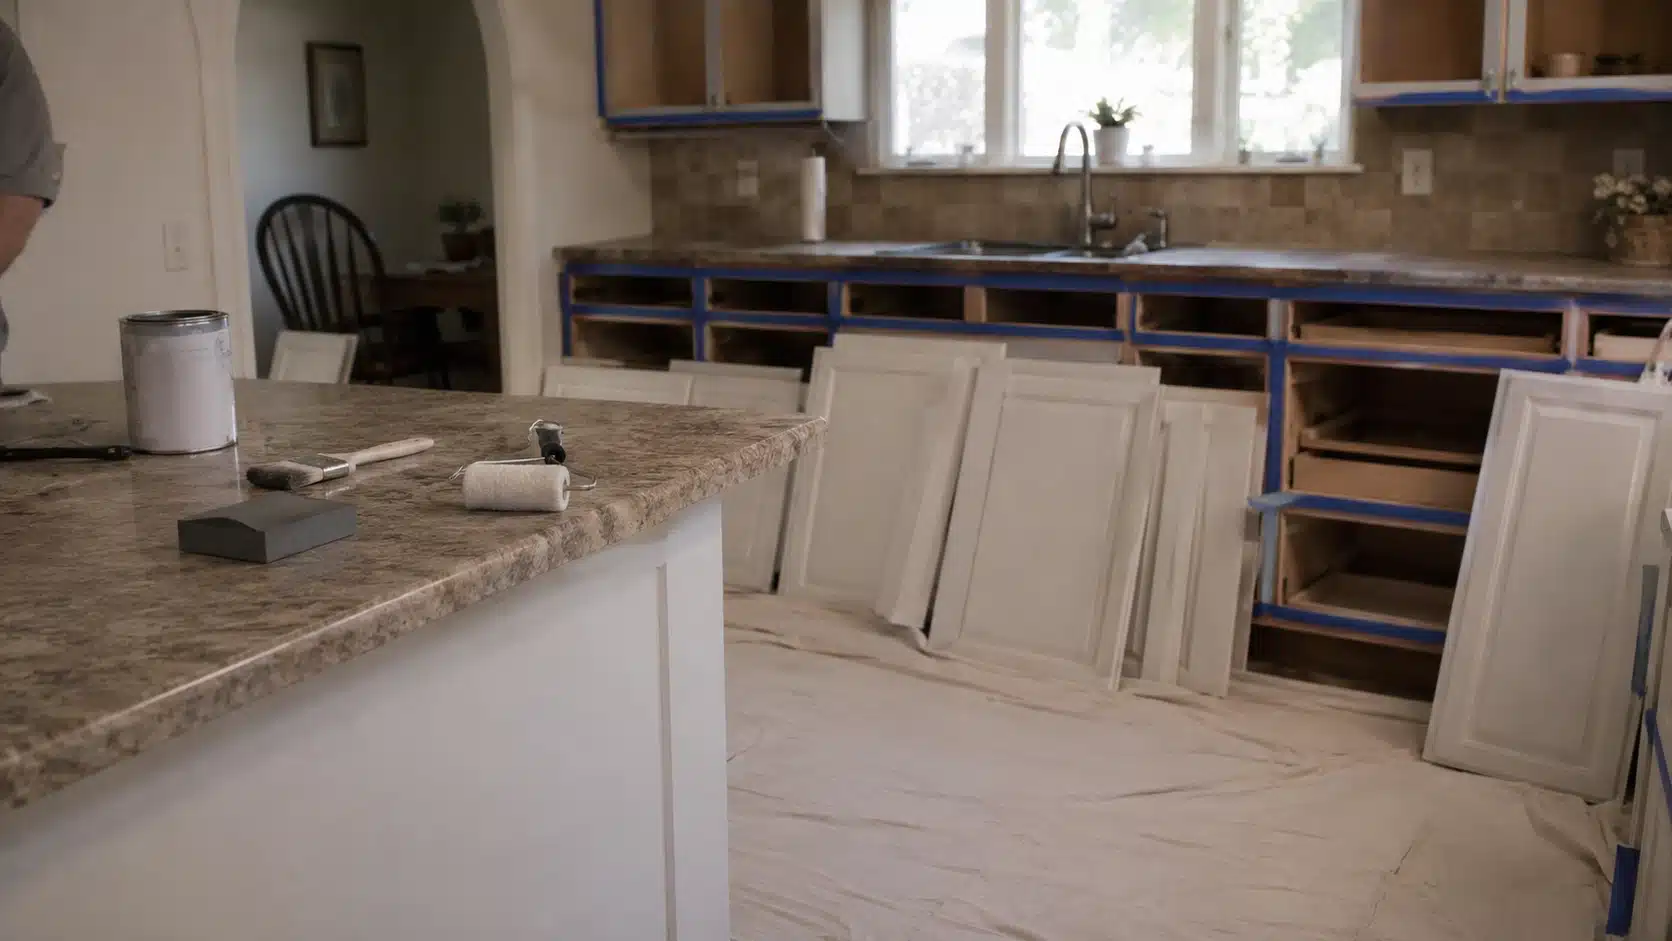
Painting kitchen cabinets sounds easy until the doors come off, the drawers are stacked in the garage, and you realize every little grease mark has been living rent-free on that surface for years. I have seen homeowners feel shocked by cabinet painting quotes, then feel even more shocked after trying to do the prep themselves. So if you are asking how much does it cost to paint kitchen cabinets, the honest answer is not just about paint. It is about time, prep, finish quality, cabinet condition, and how much of your kitchen you want painted. A small DIY project can stay under a few hundred dollars. A professional job can cost several thousand. Both can make sense, but only when you know what you are paying for. Let’s break down the real numbers in a clear way, without making your brain feel like a hardware store receipt. What You Want to Know Fast Answer Professional painting cost $2,000 to $6,500 for most kitchens DIY supply cost $200 to $600 Cost per door or drawer piece $70 to $185 depending on scope Cost per square foot $5.40 to $10.79 Time for DIY 30 to 60 hours Is it worth it vs replacing? Yes, if cabinet boxes are still solid How Much Does It Cost to Paint Kitchen Cabinets in 2026? The average cost to professionally paint kitchen cabinets is $2,000 to $6,500. DIY cabinet painting often costs about $200 to $600 in supplies, though your time can easily be the higher cost. A quick cabinet painting budget usually looks like this: Professional painting: $2,000 to $6,500 for an average kitchen DIY painting: $200 to $600 for paint, primer, tools, tape, and sanding supplies Per linear foot: about $30 to $70 for many professional jobs Per square foot: about $5.40 to $10.79 using current 2026 estimator data Per door or drawer piece: often about $125 to $185 for fine-finish spray work The reason prices swing so much is simple: cabinets are small but fussy. A painter is not just rolling paint on flat walls. They are removing doors, cleaning grease, sanding surfaces, priming, coating both sides, allowing time to dry, and reinstalling everything without turning your kitchen into a sticky puzzle. Professional Kitchen Cabinet Painting Cost vs DIY: Side by Side Professional Kitchen Cabinet Painting Cost: A professional job typically includes removing every door and drawer, labeling them, cleaning surfaces, sanding or deglossing, priming, spraying or brushing with cabinet-grade paint, drying time, and reinstalling. Many professionals also apply multiple finish coats. What is often not included: painting cabinet interiors, replacing hinges, hardware changes, or grain filling on older wood. Always ask. According to Angi’s 2026 data, smaller cabinet painting scopes may fall around $425 to $1,465, with an average near $940. Full-size kitchens with more prep, more doors, or higher-end finish work often land higher, closer to the $3,000 to $6,500 range shown in other cost guides. DIY Cabinet Painting Cost: DIY is cheaper in dollars and more expensive in weekends. A typical supply list includes degreaser, sandpaper or sanding blocks, tack cloth, painter’s tape, drop cloths, primer, cabinet-grade enamel or alkyd paint, quality brushes, a foam roller, and possibly an HVLP sprayer rental. That adds up to $200 to $600 depending on kitchen size and product quality. The hidden cost is time. Most DIY projects run 30 to 60 hours, and that does not count the days spent waiting for coats to dry. Option Typical Cost Time Professional painting $2,000 to $6,500 3 to 5 days DIY painting $200 to $600 30 to 60 hours Refinishing (professional) $1,500 to $4,500 2 to 4 days High-end spray-booth finish $6,500 to $10,000+ 5 to 7 days Painting covers the old surface with a new color. If you are leaning toward restoring the wood’s natural look instead, the cabinet refinishing process and costs are worth comparing before you commit to either route. Cost to Refinish Kitchen Cabinets vs Paint Them The cost to refinish kitchen cabinets is usually different from painting because refinishing often means sanding or stripping old stain, then applying new stain or a clear protective finish. It works best on solid wood cabinets that still look good underneath. Option Typical Cost Time Professional painting $2,000 to $6,500 3 to 5 days DIY painting $200 to $600 30 to 60 hours Cost to refinish kitchen cabinets $1,500 to $4,500 2 to 4 days High-end spray-booth finish $6,500 to $10,000+ 5 to 7 days Painting covers the old surface with a new color. Refinishing keeps more of the wood look. The cost to refinish kitchen cabinets often ranges from $1,500 to $4,500, while painting may land around $2,000 to $6,500 for many professional projects. What Drives the Price Up When Painting Kitchen Cabinets? Cabinet painting gets expensive when the job needs more handling, more prep, or a higher-end finish. Two kitchens can both have white cabinets, but the price can be totally different if one has clean flat doors and the other has greasy oak, dents, old hardware holes, and interiors included. 1. Cabinet Count and Door Style The more doors, drawers, panels, and trim pieces you have, the higher the price. Each piece must be removed, labeled, cleaned, sanded, primed, painted, dried, and reinstalled. Raised-panel doors, glass fronts, grooves, and detailed trim also take longer than flat slab doors. This is why cabinet count often matters more than kitchen size. A small kitchen with many drawers can cost more than a larger kitchen with fewer simple doors. 2. Prep Work, Repairs, and Grain Filling Prep is the part people dislike, but it is also the part that protects the finish. Grease must be cleaned off. Glossy surfaces need sanding or deglossing. Dents may need filler. Gaps may need caulk. Oak cabinets may need grain filling if you want a smoother finish. If prep is skipped, the paint may chip, peel, crack, or look rough. That cheap quote can become expensive if you need the work redone. 3. Paint Type and Finish Method Cabinet-grade paint costs more than basic wall paint because it needs to harden well and handle daily use. Many pros use enamel, alkyd, acrylic urethane, or stronger coating systems for better wear. Spraying can create a smoother finish, but it needs careful masking and controlled setup. Brush and roller work can still look good when done by a skilled painter using the right products. 4. Interiors, Hardware, and Add-Ons Painting the inside of cabinet boxes usually costs extra because it adds more cleaning, sanding, priming, and drying time. The same goes for replacing hinges, adding soft-close hardware, drilling new pull holes, and patching old ones. These extras can raise the final total more than homeowners expect. They are also easy to miss in a quick quote, so ask what is included before you compare prices. Painting vs Refinishing vs Refacing vs Replacing: Which Makes Sense? Painting is not the right move for every kitchen. If the cabinet boxes are swollen, peeling inside, moldy, or structurally soft, putting paint on top is not a fix. Option Average Cost Best When Not Best When Painting $2,000 to $6,500 pro Boxes are solid, you want a new color Boxes are damaged or heavily water-worn Cost to refinish kitchen cabinets $1,500 to $4,500 Real wood looks great, you want a natural finish You want to cover grain fully Refacing $5,000 to $13,000 Boxes are sound, doors look dated Layout no longer works Replacing $4,500 to $15,000+ Due to structural damage, the layout must change Budget is tight, boxes are sound Choose painting if the boxes are sound and you want a color change. Choose refinishing if the wood is beautiful and you want to keep it natural. Choose refacing if the layout works but the door style feels dated. Choose replacing only if the structure is compromised or the layout is genuinely not working. What Real Homeowners Are Saying About Cabinet Painting Costs People often underestimate how long DIY takes, and professional quotes vary widely because no two kitchens have the same scope. In a widely discussed Reddit thread, one homeowner was already 46 hours into prep and painting before even finishing. Quotes shared in the thread ranged from $1,000 for a small condo to $5,000 to $7,000 for a larger kitchen. One painter based in North Georgia charges around $2,500 and noted that people regularly turn down the quote as “too expensive,” not realizing what proper prep and materials actually cost. In New Jersey, someone else was quoted $16,000 from a premium company. In Massachusetts, one contractor shared that their going rate starts around $15,000 for spray-finish work. The lesson from all of it: scope matters. A $2,500 quote and a $6,500 quote are rarely for the same kitchen, finish method, or prep level. When you compare real stories, always check cabinet count, your city, whether interiors were included, and what kind of coating was used. That context is what makes a number make sense. Tips to Save Money on Cabinet Painting The safest way to save money is to reduce the scope, not weaken the prep. Skipping primer, sanding, or drying time may lower the bill today, but it can lead to chipping later. Keep the color close: Going from dark wood to bright white often needs more primer, more coats, and more labor than a softer color change. Skip the interiors: Painting inside cabinet boxes adds time and cost. If the interiors are clean, leave them alone. Reuse hardware: Keeping the same pulls and hinges avoids drilling new holes, filling old ones, and fixing alignment issues. Clear the kitchen first: Empty cabinets, clear counters, and move small appliances before painters arrive to save time. Ask for itemized quotes: Compare prep, primer, coats, paint type, finish method, cleanup, and warranty, not just the final number. Paint only sound cabinets: If boxes are swollen, peeling, or weak, painting may hide the problem for only a short time. Do not cut: cleaning, sanding, primer, or cure time. These are not optional steps. Every shortcut in prep shows up later as a chip, peel, or smear. A lower price is helpful only when the finish can still hold up. The professional kitchen cabinet painting cost should make sense on paper before anyone opens a paint can. Cabinet Painting Cost by Kitchen Size Cabinet count matters more than room size. A small kitchen packed with drawers can cost more than a larger open kitchen with fewer simple doors. Use this as a rough planning guide, and count your own cabinet pieces before calling for quotes. Kitchen Size Cabinet Count Guide Professional Cost DIY Supply Cost Small kitchen 10 to 15 doors and drawers $1,500 to $3,500 $200 to $400 Medium kitchen 20 to 30 doors and drawers $3,000 to $6,500 $350 to $600 Large kitchen with an island 35+ doors, drawers, pantry $6,000 to $10,000+ $600 to $1,000+ Count every door and drawer front before you call a contractor. That number tells more about your eventual quote than the room’s square footage ever will. If you are also weighing updates to the countertops at the same time, reviewing which countertop materials hold up in real kitchens can help you sequence and budget both projects together. Local labor markets can shift these numbers significantly, so always get quotes from at least two or three painters in your area. When Cabinet Painting Is Not Worth the Money Painting works best when the cabinet boxes are solid, and the main issue is color. If the cabinets are already damaged, paint may only hide the problem for a short time. Water damage: If cabinet boxes are swollen, soft, or warped, paint will not fix the structure. The damage can keep spreading under the new finish. Mold or moisture issues: If there is mold inside or behind the cabinets, fix the moisture problem first. Painting over it can trap the issue. Peeling laminate or thermofoil: If the outer layer is lifting, paint may not bond well. The finish can peel again even after prep. Weak cabinet frames: If doors do not close properly or the boxes feel loose, the problem is structural. Paint will not make the cabinets stronger. Bad kitchen layout: If storage, access, or daily use already feels frustrating, painting only changes the color. Refacing or replacing may be smarter. Before spending on paint, check the bones of the cabinets first. If the boxes are strong, painting can be a smart update. If the structure is failing, that money is better saved for refacing or replacing. What Budget Should You Set Before Saying Yes to a Cabinet Painting Quote? For most U.S. kitchens, a safe professional budget is $3,000 to $6,500. Smaller kitchens may come in under that, while larger kitchens with islands, cabinet interiors, oak grain, or spray finishes can run higher. If you plan to DIY, budget around $200 to $600 for supplies and plan for more time than you expect. Before you accept a quote, confirm it clearly lists the prep steps, paint products, number of coats, finish method, timeline, exclusions, and warranty. It should also cover door and drawer removal, cleaning, sanding or deglossing, primer, cabinet-grade paint, drying time, reinstallation, masking, and cleanup. Ask what costs extra, particularly cabinet interiors, grain filling, new hinges, soft-close hardware, new pull holes, water-damage repairs, and major color changes. My simple rule before approving any line item: count every door and drawer, check how much prep the surfaces actually need, and compare what each quote includes. That gives you a clearer answer than a random average when you are trying to figure out how much does it cost to paint kitchen cabinets in your specific kitchen. If you are budgeting other painting projects at the same time, the full breakdown of house painting costs covers what professional labor runs room by room. Frequently Asked Questions Will my kitchen be usable while cabinets are being painted? Your kitchen may be partly usable, but it will not feel normal. Doors and drawers are often removed, counters may be covered, and some areas may be masked off. Plan easy meals, protect pets from wet paint, and avoid heavy cooking until the finish cures. Do I need to move appliances before cabinet painting? Most painters do not need you to fully remove appliances unless cabinets are blocked or panels sit behind them. You may need to pull out small appliances, clear counters, and empty nearby cabinets. Ask the painter before moving heavy items like a refrigerator or range. What cabinet paint color is safest for resale? Soft white, warm white, light gray, greige, and muted neutral shades are usually safer for resale than bold colors. These tones work with many countertops and floors. Dark green, navy, or black can look great, but they may appeal to fewer buyers. Should I buy the paint myself to save money? Usually not. A professional painter often gets better product pricing and knows which cabinet coating works with your surface. If you buy the wrong paint, the job can fail sooner. Ask for the product name and do your research rather than trying to supply it yourself. How soon can I clean painted cabinets? Light use may be possible after a few days, but full curing can take much longer depending on the paint. Avoid scrubbing, harsh cleaners, steam, and heavy handling early on. Use a soft cloth and mild soap only after the painter confirms it is safe. Is cabinet painting worth it compared to replacing? Yes, when the cabinet boxes are structurally sound. Professional painting at $2,000 to $6,500 is a fraction of the $10,000 to $25,000 most homeowners spend on new cabinet installations. The key condition is that the boxes themselves need to be solid. Final Thoughts Cabinet painting is one of those projects that looks deceptively easy from the outside and gets very serious once the doors are off the hinges. How much does it cost to paint kitchen cabinets comes down less to how big your kitchen is and more to how many pieces need work, what condition the surfaces are in, what kind of finish you want, and whether a professional is doing the prep properly. DIY can absolutely work, especially for smaller kitchens with flat doors and a patient timeline. But knowing how much it costs to paint kitchen cabinets professionally means asking for itemized quotes, checking what is included, and not choosing the lowest price without understanding why it is low. If you have recently gotten a quote or finished a cabinet painting project, drop the cabinet count, your city, and what the job included in the comments. Real numbers from real kitchens help everyone figure out what is fair.
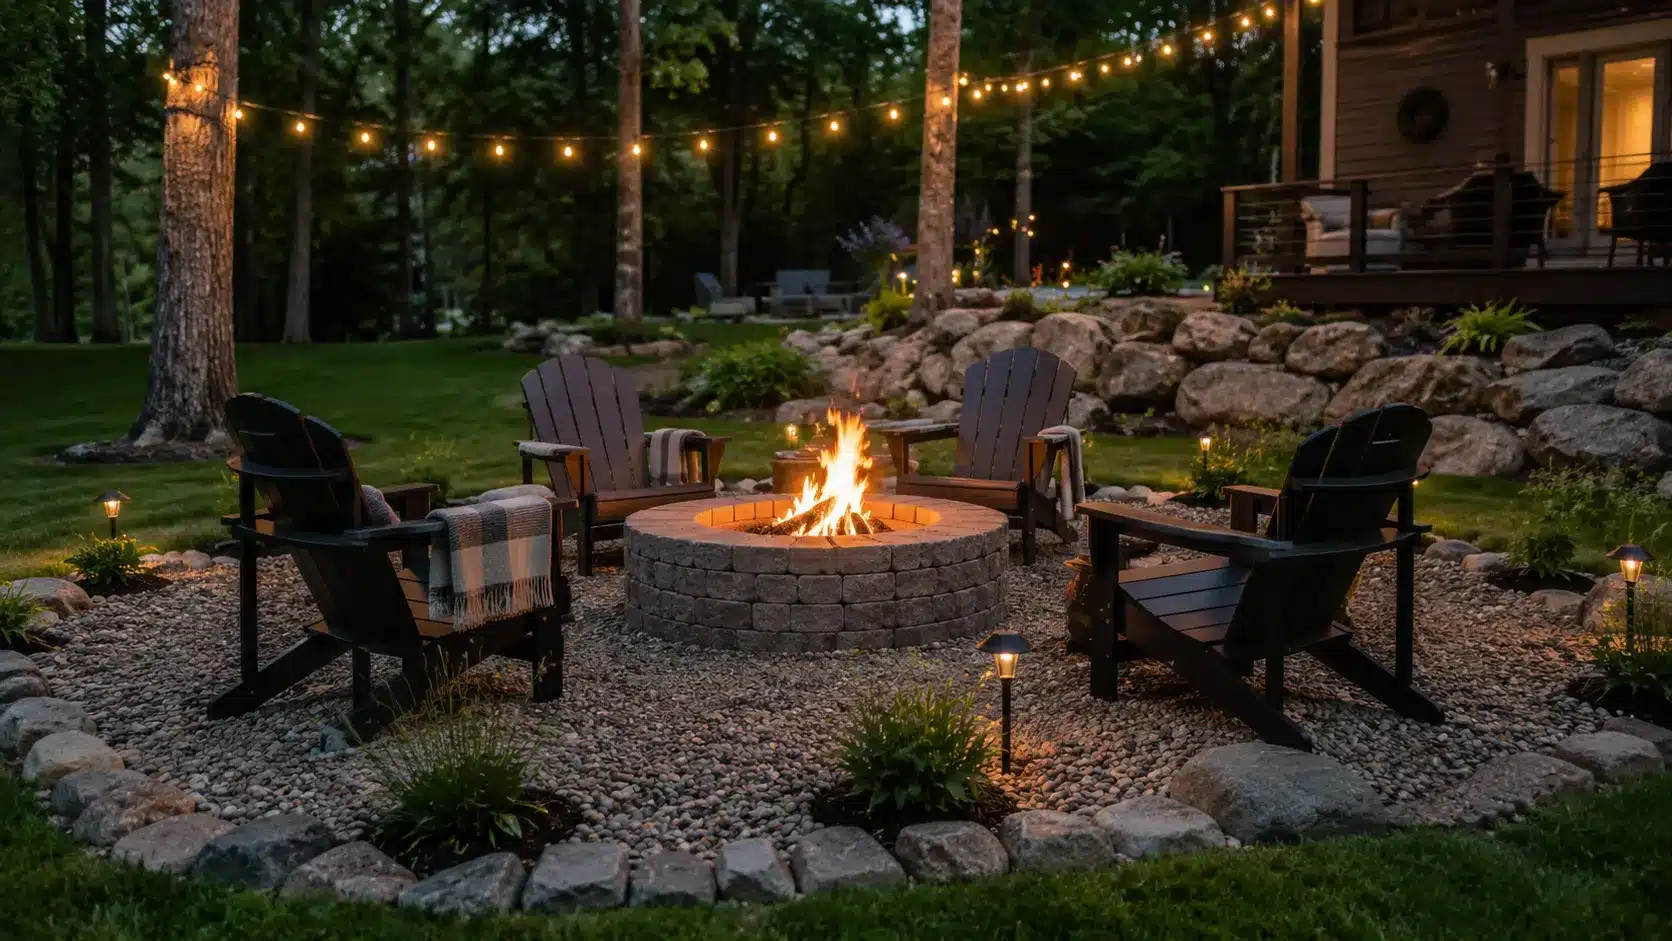
A fire pit area that looks planned and holds up over time does not have to cost a lot, and that is the premise worth starting from. The biggest mistake most people make is skipping the planning stage and going straight to buying materials. From my experience watching these projects play out, the ones that end up looking finished and feeling safe are never the most expensive. They are the ones where someone took the time to decide on placement, surface material, seating distance, and a clear border before a single bag of gravel was opened. Below I’ll cover low-cost fire pit landscape design ideas, organized by material type, backyard size, and layout style, with budget ranges, safety notes, and common failures over time. What Makes a Budget Fire Pit Area Look Planned A budget fire pit landscape is not just a metal bowl dropped onto the lawn with a few chairs around it. It is a defined outdoor zone, one with a clear non-combustible surface, a seating circle at the right distance from the flame, a border that keeps loose materials contained, and some form of low-level lighting so the space is usable after dark. The materials that make this happen well at low cost are pea gravel, crushed stone, concrete pavers, retaining wall blocks, and metal fire rings. Portable fire pits, secondhand chairs, and solar stake lights round out a setup that functions and looks considered. The four questions worth answering before buying anything: where does the pit go, what surface goes under and around it, where does seating land, and how does the area stay safe and easy to maintain season to season. Cost Note: Figures in this article are estimates based on national averages. Actual costs vary by region, supplier, and project scope. Always get at least three quotes before committing to any project above $1,000. Budget Ranges Before You Buy Anything The total spend on a fire pit seating area depends almost entirely on three variables: how large the ground surface is, what material covers it, and what the seating costs. Everything else is secondary. Here is a clear breakdown of what each budget tier realistically delivers: Budget Range What It Gets You Key Trade-offs Under $100 Portable fire bowl, small gravel ring, reused chairs No permanent structure, minimal edging $100 to $300 Metal fire ring, gravel pad up to 12 ft wide, steel edging, solar lights Still movable, no built-in seating $300 to $700 Paver or block fire pit, larger gravel zone, consistent seating More material weight, harder to relocate $700+ Fire pit kit, paver patio base, built-in bench options Closest to a permanent outdoor room Most people building on a real budget land between $150 and $400. That range covers a metal fire ring with a gravel pad, decent edging, and four chairs, which is enough to create a space that functions well for years. Choosing the Right Spot First Start with fire pit placement before buying materials because the spot affects safety, comfort, and cost. Choose flat, open ground at least 10 feet from the house, fence, shed, dry shrubs, low branches, and stored items. Check local burn rules and HOA limits before digging, since some areas restrict open flames or permanent pits. Test the location with chairs first to check wind, smoke flow, slope, and walking space. Then choose the fire type. A wood-burning fire pit costs less but needs dry wood, ash cleanup, and smoke control. A propane fire pit starts easily and burns cleaner, but costs more and needs tank storage. A portable fire bowl works well for renters, small yards, and flexible layouts. Keep every surface stable, non-burnable, clearly edged, and easy to walk on. Low-Cost Fire Pit Landscaping Ideas for a Clean Backyard Setup Use these ideas to compare fire pit layouts by cost, space, safety, upkeep, and style, so you can plan a clean backyard setup without wasting money or extra effort today. 1. Round Pea Gravel Fire Pit Circle Cost: LowBest for: Open lawn areasSetup: Metal edging, pea gravel, and fire ringSafety: Keep gravel level and chairs set back A round pea gravel fire pit circle is one of the easiest budget layouts to picture and build. Remove the grass, level the soil, add landscape fabric, then spread 2 to 3 inches of pea gravel. A black metal edge keeps the circle clean and stops stones from spreading into the lawn. 2. Square Crushed Stone Fire Pit Pad Cost: Low to mediumBest for: Modern backyards and soft groundSetup: Compacted crushed stone with straight edgingSafety: Check for sinking chair legs A square crushed stone pad gives the fire pit area a clean, simple shape. It works well with four chairs, a centered fire bowl, and straight steel or paver edging. Crushed stone is firmer than pea gravel, so chairs sit better after rain and the surface needs less fixing. 3. Small Paver Patio With a Fire Bowl Cost: MediumBest for: Stable seating and small yardsSetup: Pavers under chairs and portable fire bowlSafety: Keep pavers flat and non-slip A small paver patio makes the fire pit area feel finished without building a full outdoor room. Use pavers only under the fire bowl and chairs, then keep the shape simple. The paver pattern creates a clear, solid seating zone that holds up better than loose stone when chairs are pulled in and out frequently. Anyone planning to add outdoor furniture nearby should check what a DIY patio sofa build requires in terms of frame depth and cushion clearance before sizing the pad. 4. Cinder Block Square Fire Pit Cost: Very lowBest for: Straight-line backyard layoutsSetup: Stacked cinder blocks on gravelSafety: Add a metal liner when possible A cinder block fire pit gives you a low-cost square build with a strong shape. Stack the blocks two or three rows high on a level gravel base. Add a metal insert to reduce direct heat on the blocks. This works best in casual yards where simple materials fit the setting. 5. Retaining Wall Block Fire Pit Ring Cost: MediumBest for: Built-in look on a budgetSetup: Curved wall blocks with gravel baseSafety: Keep each row level A retaining wall block ring looks more finished than loose stones but stays beginner-friendly. Use curved blocks to form a round pit, then place a metal ring inside for heat protection. This idea is easy to photograph because the stacked wall, gravel base, and chairs create a clear focal point. 6. Brick Fire Pit With Gravel Seating Area Cost: Low if brick is reusedBest for: Older homes and rustic yardsSetup: Brick ring, gravel pad, and simple seatingSafety: Keep unknown brick away from direct flame A brick fire pit works well when you have leftover or secondhand brick. Use the brick as the outer ring or border, then place a metal insert inside. Surround it with gravel and a few basic chairs. The finished look feels warm, simple, and different from block or metal-only setups. 7. Fire Pit With Stepping Stone Paths Cost: Low to mediumBest for: Linking patios, lawns, and garden areasSetup: Gravel pad with stepping stonesSafety: Keep stones level to prevent trips Stepping stones make a fire pit area feel connected to the rest of the yard. Place flat stones from the patio or back door to the gravel fire zone. This gives guests a clear path and makes the space look planned, even when the main fire pit setup stays very simple. 8. Corner Fire Pit With L-Shaped Seating Cost: LowBest for: Small backyards and tight layoutsSetup: Corner gravel pad with bench or chairsSafety: Leave open space around the flame A corner fire pit uses yard space that often goes unused. Place a small gravel pad in one corner, add a portable fire bowl, then use an L-shaped bench or two chairs with a small table. This layout is easy to show because it looks different from a standard circle. 9. Fire Pit With Built-In Block Bench Cost: Low to mediumBest for: Fixed seating on a budgetSetup: Cinder blocks, treated boards, and cushionsSafety: Keep the bench set back from the heat A block bench gives the seating area a steady shape without buying a full patio set. Stack cinder blocks as supports, slide treated boards through or across them, and add outdoor cushions. Place the bench outside the heat zone so people can sit comfortably without being too close to the fire. 10. Log Seat Fire Pit Area Cost: Very lowBest for: Rustic yards and wooded lotsSetup: Gravel fire zone with sanded log seatsSafety: Keep logs away from sparks Log seats make sense when the yard already has a woodland or cabin feel. Use thick, flat-cut logs or stumps as extra seating around a gravel fire area. Sand the tops, seal the wood, and place them on stable ground. Pair them with regular chairs for better comfort. 11. Fire Pit With Potted Grass Border Cost: Low to mediumBest for: Softening gravel and stone areasSetup: Gravel pad with large planters around the edgeSafety: Keep plants outside the spark zone A potted grass border makes a basic fire pit area feel more styled without planting new beds. Use large pots with ornamental grasses, small shrubs, or hardy perennials around the outer edge. Keep every pot far from the flame. This idea gives you a clear visual frame and easy seasonal changes. 12. Fire Pit With Solar Path Lights and Gravel Border Cost: LowBest for: Night use and clear walkwaysSetup: Fire pit pad, path lights, and simple chairsSafety: Keep lights secure and away from foot traffic Solar path lights make the area easier to use after dark without wiring. Place stake lights along the path, around the gravel edge, or behind the chairs. Warm white bulbs look best near a fire. This idea photographs well because the lighting shows the full layout and walking path. 13. Fire Pit With a Simple Privacy Panel Cost: Low to mediumBest for: Yards near neighbors or fencesSetup: Gravel pad with one privacy screen on one sideSafety: Keep panels away from heat A privacy panel can make a fire pit area feel more tucked away. Use lattice, reed panels, slatted wood, or tall planters on one side only. Keep the screen well outside the heat zone. This gives the layout a clear backdrop and makes the image look different from open lawn setups. 14. Fire Pit With a Gravel and Mulch Combo Cost: LowBest for: Garden-style yardsSetup: Gravel fire zone with mulch planting borderSafety: Keep mulch outside the fire area A gravel and mulch combo helps separate the fire zone from the planting area. Use gravel under the fire pit and chairs, then add mulch only outside the border near shrubs or flowers. This keeps the flame area non-burnable while still giving the yard a softer, more finished edge. 15. Portable Fire Pit on a Small Stone Pad Cost: LowBest for: Renters and flexible layoutsSetup: Portable fire bowl on compact stoneSafety: Follow the product clearance rules A portable fire pit on a small stone pad is the easiest setup to move or change later. Use an 8-by-8 or 10-by-10 crushed stone area, two to four chairs, and a small side table. This works well for renters, starter yards, and anyone testing a layout before spending more. Fire Pit Layout by Backyard Size The ground surface size, seating count, and fire pit type should scale with the yard. Here is what works at each scale: Yard Size Recommended Pad Size Fire Pit Type Seating Count Small (under 500 sq ft usable) 8 x 8 ft Portable bowl or small metal ring 2 to 4 chairs Medium (500 to 1,200 sq ft usable) 12 x 12 ft Metal fire ring, block pit 4 to 6 chairs Large (over 1,200 sq ft usable) 14 to 18 ft wide circle Block fire pit, fire pit kit 6 to 8 chairs plus side tables Scaling the pad to the yard size is the single most common planning error. An oversized fire pit area in a small yard leaves no usable lawn. An undersized one in a large yard looks like an afterthought. Step-by-Step Build Plan Use this plan after choosing your fire pit type and location. It keeps the work simple, safe, and organized, so each step supports drainage, seating, and steady yard use later: Codes, rules, site: Check burn restrictions, HOA rules, and permit needs. Pick flat, open ground at least 10 feet from structures, fences, shrubs, and low branches. Mark, measure, outline: Use marking paint, string, or a garden hose to show the fire pit footprint and the full outer edge of the seating zone. Sod, soil, slope: Remove grass inside the marked area. Level the soil, then slope it slightly away from the house so rainwater can drain. Base, gravel, support: Add 2 inches of compacted gravel base. Three-quarter-inch crushed stone works well and helps stop chairs or fire pit parts from sinking. Pit, ring, center: Set the metal ring, portable bowl, or block fire pit in the middle of the pad. Follow all product safety directions closely. Edging, border, shape: Add steel, aluminum, stone, or paver edging around the outside. This holds gravel in place and gives the area a neat edge. Seating, spacing, path: Place chairs at least 36 inches from the fire pit rim. Leave a clear walking path behind the chairs for safe movement. Lights, cushions, finish: Add solar stake lights, string lights, and weather-safe cushions. Keep lighting secure and place soft items away from heat and sparks. After the build, check the area each season for loose edging, sinking chairs, weeds, and light placement. Small fixes keep the fire pit area safer and easier to use. Safety Reminder: Keep the fire pit at least 10 feet from any structure, fence, or low tree branch. Use only a non-combustible surface beneath and around the pit. Never burn on windy days, and keep a bucket of water, sand, or a fire extinguisher within reach at all times. Never leave a fire unattended. Materials That Hold Up vs. Materials That Don’t Outdoor materials need to handle rain, heat, chair weight, and seasonal ground movement. This table shows which low-cost fire pit materials hold up best over time: Material Approx. Cost Lifespan Common Issue Pea gravel $0.50 to $1.50 per sq ft Indefinite with upkeep Moves without edging; chairs may sink Crushed stone $0.50 to $1.25 per sq ft Indefinite with upkeep Needs light to respread over time Concrete pavers $2 to $6 per sq ft 20 to 30 years Can lift in freeze-thaw areas without a proper base Retaining wall blocks $1.50 to $4 per block 10 to 20 years May shift without adhesive; heat can damage edges Standard cinder blocks $1 to $2 per block 3 to 7 years near flame Can crack or flake without a metal liner Loose stone is the easiest to repair and refresh. Blocks near direct heat need a metal liner to last longer and stay safer. For anyone choosing outdoor furniture to pair with the seating area, the same durability logic applies, and it’s worth understanding how Polywood holds up outdoors compared to wood alternatives before spending on chairs or benches that face real weather. Styling the Area on a Budget A budget fire pit area looks better when the details feel simple and planned. Repeat one or two materials, such as pea gravel for the pad and crushed stone for the path, so the space feels connected. Add a steady fire pit border with metal edging, brick, stone, or pavers because a clear edge makes even cheap materials look neat. Keep the color mix to two or three tones from your house, fence, patio, or nearby plants. Let the fire pit remain the main feature instead of filling open spaces with small decor. Use a few potted plants, one set of solar lights, and chairs placed in a clean circle or half-circle. That is enough to make the area feel useful, calm, and ready for regular nights outside. Pro Tip: Buy the cushions before building the seating frame. Standard outdoor cushions come in 20×20, 21×21, and 24×24 inch sizes. The cushion width sets the seat depth, and getting this wrong means rebuilding what you just built. Common Mistakes Worth Skipping Most fire pit problems come from poor spacing, weak surfaces, or rushed layout choices. Skip these mistakes early so your backyard setup stays safer, cleaner, and easier to use: Building too close to the house, fence, shed, shrubs, or tree canopy. Placing the fire pit on grass, mulch, or wood decking without fire-safe protection under it. Making the gravel pad too small, which leaves chair legs in the grass or soil. Skipping edging, which lets gravel spread into the lawn within one season. Buying chairs before measuring the full layout and safe walking space. Mixing too many surface materials in a small area, which makes the layout feel messy. Burning wet or green wood, which creates heavy smoke and weak flames. A simple plan avoids the most costly fixes. Measure first, use a non-burnable base, add edging, leave safe chair space, and burn dry wood for cleaner, easier nights outside. Frequently Asked Questions Do I need a permit to build a fire pit? Permit requirements vary by municipality. Permanent structures, including block or concrete fire pits, are more likely to require a permit than portable fire bowls. Check with the local building department and fire code office before starting any permanent build. What is the minimum distance between a fire pit and seating? Most fire pit manufacturers recommend at least 36 inches between the fire pit rim and the nearest seating edge. For larger fire pits producing more heat, 48 inches is a more comfortable distance in practice. Does gravel around a fire pit need to be replaced over time? Gravel does not wear out, but it migrates, compacts, and accumulates debris over time. Raking annually and adding a fresh top layer every two to three years keeps the surface level and clean without full replacement. Can a propane fire pit be used on a covered patio? Propane fire pits require adequate ventilation. Using one under a solid, enclosed cover creates a carbon monoxide risk. An open pergola with good airflow is generally acceptable, but always check the manufacturer’s clearance specifications before using any gas fire feature under overhead structure. What type of gravel is best for a fire pit area? Three-quarter-inch crushed limestone or crushed granite compacts well, drains effectively, and keeps chair legs from sinking. Pea gravel is fine for aesthetics but shifts more underfoot and around chair legs. Avoid smooth river rock, it can crack or pop when exposed to direct heat. How do I keep weeds from growing through a gravel fire pit area? Lay landscape fabric over leveled soil before spreading gravel. Overlap fabric seams by at least 6 inches and pin the edges under the border edging. This is not a permanent fix, some weeds push through after several seasons, but it delays the problem significantly and makes pulling them easier when they do appear. Final Thoughts A low-cost fire pit landscape design works when the planning comes before the spending. The ideas covered here, from a simple gravel pad with a metal fire ring to a compact cinder block bench setup, all share the same core logic: define the zone clearly, use a non-combustible surface, keep seating at the right distance, and add a border that makes the whole thing look considered. The material that holds up best for most people at most budgets is crushed stone or pea gravel with steel edging, a metal fire ring centered in the pad, and chairs positioned at least 36 inches out. Start with the base and fire pit. Add seating next. Lighting and plants come last, as the budget allows. Every detail after that is just refinement, not foundation. Drop a comment below and let me know if your pit landscape turned out as good as you hoped.
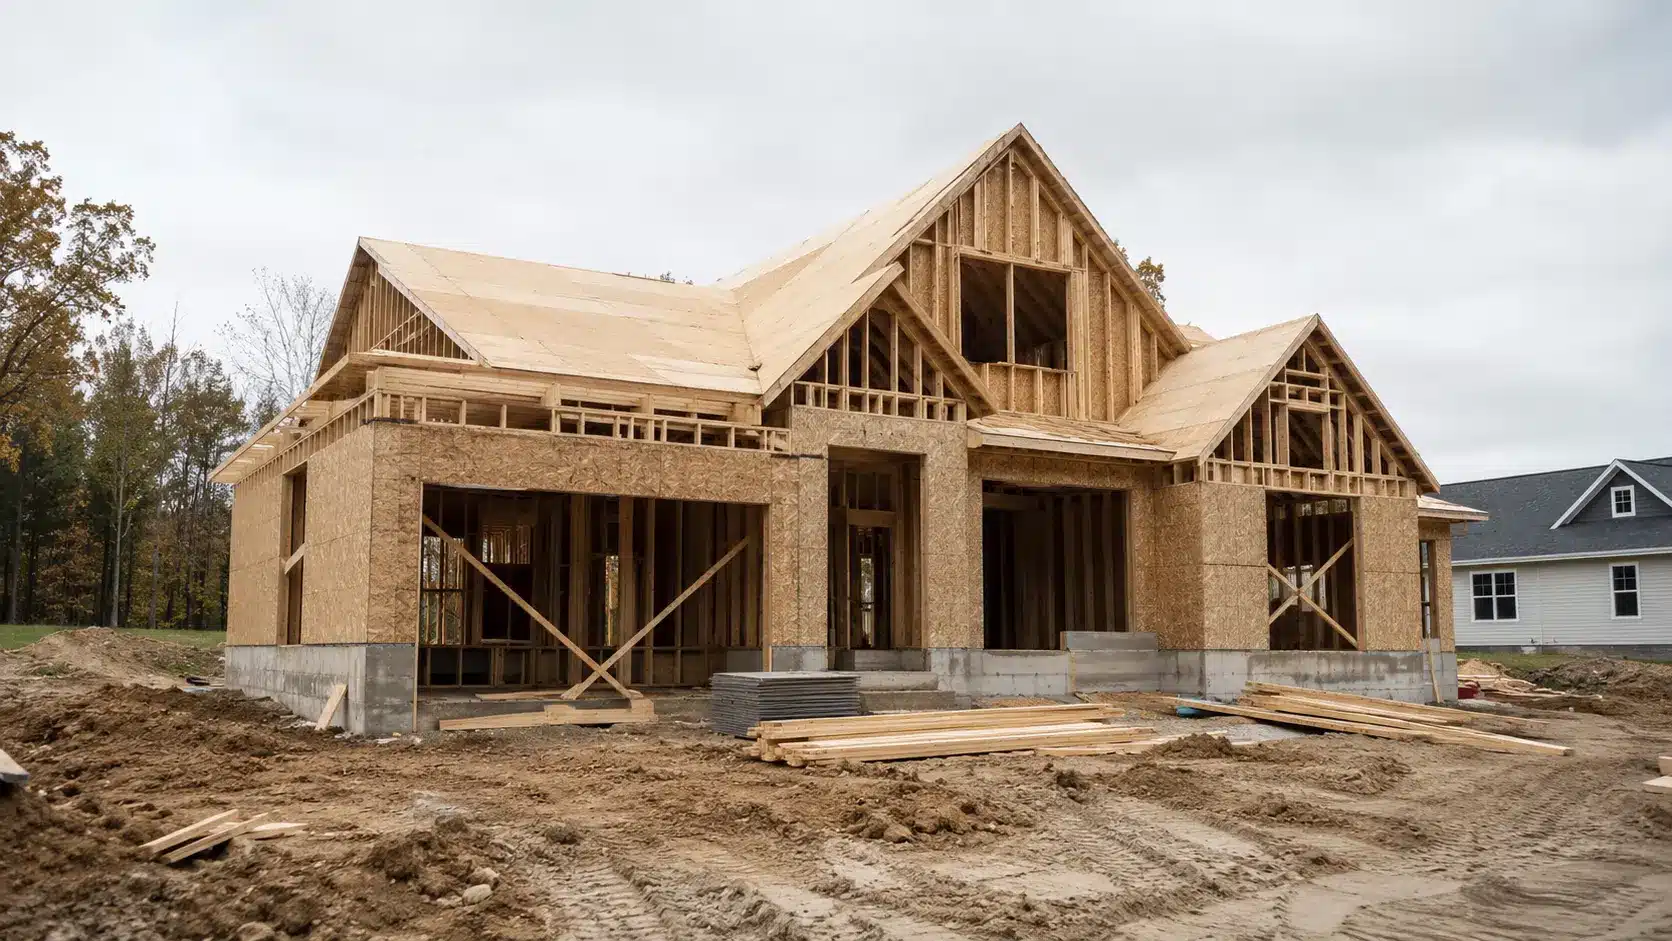
I have sat across from enough homeowners in pre-construction meetings to know that the first real question is always: “So how long is this actually going to take?” Most of them had already Googled it. They had seen “7 to 14 months” somewhere and were not sure what that meant for their specific situation, their lot, their design, their builder. That range is real, but it does not tell the full story. How long it takes to build a house depends on what you are counting, what type of home you are building, and how many avoidable delays get in the way. By the end of this, you will know the realistic timeline for each build type, what happens in each phase, why two similar homes can take very different amounts of time, and what you can actually do to keep things moving. From Planning to Keys: What the Timeline Really Covers Building a house takes longer than most people expect, and the number that trips people up is almost always the same one: “7 to 14 months.” That range is real, but it depends entirely on what you are counting, what type of home you are building, and how many avoidable delays get in the way. By the end of this, you will know the realistic timeline for each build type, what happens in each phase, and what you can actually do to keep things moving. Most homeowners assume the clock starts when construction begins. It doesn’t. Design, financing, land checks, and permits can take one to four months on their own, and that time counts. Skip it in your planning, and you will miss your target date before a single piece of lumber is ordered. According to the U.S. Census Bureau’s Survey of Construction, the average single-family home in 2024 took about 9.1 months from permit authorization to completion, with the active construction period averaging 7.6 months. That is the national average. Whether your build lands at 7 months or 14 months depends on the factors below. Stage Typical Duration Design and planning 1 to 3 months Financing and land prep 2 to 6 weeks Permitting 2 to 8 weeks Site work and foundation 2 to 6 weeks Framing 1 to 2 months Mechanical, electrical, and plumbing rough-ins 1 to 2 months Insulation and drywall 2 to 4 weeks Interior and exterior finishes 1 to 3 months Final inspection and punch list 1 to 4 weeks These phases overlap more in production builds and stack sequentially in custom builds. Local permitting speed and trade availability can significantly compress or stretch any of them. Once you know which build type you are dealing with, those phase durations start to make more sense. How Long Does It Take to Build a House by Type A production home and a custom home do not follow the same schedule, even when the square footage is identical. The difference is how many decisions are already made before work begins. Type of Home Typical Timeline Why It Takes This Long Production home 4 to 7 months Plans, materials, and processes are already set. Semi-custom home 8 to 12 months The base plan is fixed, but finish selections and modifications add time. Custom home 10 to 18+ months Design, engineering, permits, selections, and special materials all require more review. Owner-built home 12 to 16+ months The homeowner manages more decisions, trade coordination, and scheduling directly. Modular home 3 to 6 months after permits Sections are built off-site while foundation work happens simultaneously. A production home moves faster because the plans are already approved, the materials are pre-ordered in bulk, and the builder runs multiple homes on the same schedule. A custom home requires more back-and-forth on design, longer permitting review, and more specialized trades, all of which add time before and during construction. If you are weighing these options, understanding production vs custom home tradeoffs can save you months of recalibrated expectations. The Main Phases of Building a House and How Long Each Takes Each phase of construction has its own pace and its own set of things that can slow it down. Knowing what happens in each one helps set realistic expectations and makes it easier to ask the right questions when talking to a builder. Phase 1. Planning, Design, and Permits: 1 to 4 Months This phase starts with final floor plans, financing, and lot checks. The builder confirms the site is ready, then submits permits to the local building department for zoning and code review. Timelines vary by location. Some offices approve permits in two to three weeks, while others may take two to three months for complex homes or busy markets. Phase 2. Site Preparation and Foundation: 2 to 6 Weeks The lot is cleared, graded, and prepared for construction. Crews mark the home’s footprint, dig footings, set forms, and pour concrete. The foundation then needs time to cure before framing begins. The weather can affect this stage. Wet soil, poor drainage, freezing temperatures, or delayed concrete inspections can stretch this phase beyond the usual range. Phase 3. Framing: 1 to 2 Months Framing gives the home its visible shape. Crews build the floors, walls, roof structure, and sheathing. Trusses are delivered and set, and windows or exterior doors may be installed. This stage often feels fast from the outside, but weather, lumber shortages, roof work, or delayed truss delivery can slow progress. Phase 4. Plumbing, Electrical, and HVAC Rough-Ins: 1 to 2 Months This phase adds the hidden systems inside the walls. Plumbers install pipes, electricians run wiring, and HVAC crews place ducts, vents, and equipment lines. Each trade usually needs inspection before insulation, and drywall can begin. Scheduling gaps, failed inspections, or rework can hold up the next phase because the walls cannot close too early. Phase 5. Insulation and Drywall: 2 to 4 Weeks After rough-in inspections pass, insulation is installed in walls and ceilings. Drywall comes next, followed by taping, mudding, sanding, and surface prep for paint. This stage depends on drying time, so cold weather, high humidity, or poor ventilation can slow it down. Supply issues or finish quality fixes can also add extra days. Phase 6. Interior and Exterior Finishes: 1 to 3 Months This phase brings together the visible details: flooring, cabinets, countertops, tile, fixtures, paint, trim, siding, and exterior work. It often takes the longest in custom homes because many items require lead time. Cabinets, specialty tile, lighting, and non-standard fixtures can take weeks to arrive, so late selections can quickly push the schedule. Phase 7. Final Inspection and Move-In: 1 to 4 Weeks Once the finishes are complete, the builder schedules the final inspection with the local building department. If the home passes, a certificate of occupancy is issued. At the same time, the punch list is completed, covering small fixes or touch-ups. Failed inspection items, unresolved punch-list work, or inspector scheduling delays can delay move-in. With each phase laid out, the full timeline becomes easier to understand. A build does not slow down for one reason only. The next step is looking at why two homes in the same area can still finish months apart. Why Two Similar Homes Can Have Different Build Timelines Two homes can look similar on paper, but take very different amounts of time to finish. The difference usually comes from the type of build, the site, the plan details, and how many choices are already settled before work begins. Production vs custom build: A production home usually moves faster because the builder already has tested plans, set materials, and a repeatable schedule. A custom home takes longer because design, pricing, engineering, and selections need more review. Lot condition: A flat, ready-to-build lot is faster to prepare. A sloped lot, a wooded lot, poor soil, drainage issues, or a hard-to-reach utility connection can add time before the foundation begins. Plan complexity: A simple rectangular home is easier to frame and finish. A home with a basement, complex roofline, large windows, multiple roof sections, or special ceiling details needs more labor and coordination. Finish level: Standard cabinets, flooring, fixtures, and tile are easier to source. Custom cabinets, imported tile, specialty lighting, or non-standard finishes can stretch the schedule. Builder process: A builder with strong scheduling, clear selection deadlines, and reliable trade partners can keep the job moving. A builder without a clear process may leave gaps between phases. Homeowner readiness: Fast builds usually have early decisions. Slow builds often involve late selections, uncertain budgets, or changes after construction starts. The main point is simple: square footage gives only part of the answer. The smoother builds usually have a clear plan, a ready lot, standard materials, and fewer late changes. What Causes Delays in Home Construction and Why They Stack A delay does not always stay small during a home build. One late approval, missing material, or failed inspection can block the next trade from starting. That is why a one-week issue can turn into a longer schedule slip. Delay What It Can Block Possible Time Added Why It Affects the Schedule Permit backlog Groundbreaking 2 to 10 weeks Work cannot begin until the local office approves the plans. Failed inspection Next phase 1 to 3 weeks The builder must fix the issue, schedule another inspection, and wait for approval. Late windows or trusses Dry-in and framing progress 1 to 6 weeks Crews may be ready, but they cannot move forward without key materials. Weather issue Foundation, roofing, grading 1 to 4 weeks Rain, mud, snow, freezing temperatures, or heat can slow outdoor work. Late owner decisions Material ordering 1 to 6 weeks Slow choices on flooring, cabinets, lighting, tile, or counters can delay orders. Change order Drawings, pricing, materials, trades 2 to 8 weeks Changes after work starts can affect plans, permits, pricing, and trade schedules. The real issue is not only the delay itself. It is what the delay blocks next. Once one crew misses its scheduled window, the builder may need to wait for that crew to become available again. Smart Ways to Keep Your Build Timeline on Track The best way to keep a home build moving is to make key decisions before they become urgent. Most delays are not caused by weather or bad luck. They are caused by plans, permits, materials, or selections that were not ready when the builder needed them. Before work starts on site: Finalize the floor plan, confirm soil and drainage conditions, verify utility access, and secure financing before the design is complete. Ask your builder when permits will be submitted and review the full phase-by-phase schedule before signing anything. During the design phase: Choose flooring, cabinets, tile, counters, fixtures, and paint early. Ask which materials have long lead times, choose widely available products where possible, and get all selection deadlines in writing. During construction: Respond to builder questions within 24 to 48 hours so work does not pause. Avoid change orders after framing begins, visit the site regularly enough to catch issues early, and keep written records of every approval. Hire a builder with a clear process: Pick someone who can explain how they track timelines, handle permit delays, manage late materials, and show the time and cost impact of change orders upfront. For larger builds, knowing where whole-house budgets go wrong gives you a better baseline for what to protect. Add a realistic time buffer: Plan 2 to 3 extra weeks for a production home and 4 to 6 extra weeks for a custom home. Avoid scheduling movers or ending a lease based only on the best-case date. Pro Tip: Get your flooring, cabinet, and fixture selections finalized before the framing inspection. Builders typically need these ordered 8 to 12 weeks ahead of the finish phase. Missing that window is the single most common reason a build that’s on schedule suddenly isn’t. Frequently Asked Questions Can I live in the house before the final inspection? No. In most jurisdictions, you cannot move in until the home passes final inspection and receives a certificate of occupancy. Some builders allow limited walkthroughs, but full occupancy requires local approval. Moving in early can also affect your homeowner’s insurance coverage. Should I sell my current home before construction starts? Waiting is usually safer unless you have a flexible place to stay. Construction dates shift for permits, weather, inspections, and materials. Most homeowners either plan temporary housing or add extra time before committing to a final move date. How long does it take to build a house with a basement? Expect to add 2 to 4 weeks to the foundation phase. Basements require deeper excavation, additional waterproofing steps, and a separate inspection sequence. In areas with high water tables or rocky soil, that window can stretch further. How often should I check on the build during construction? A weekly site visit is enough for most homeowners. You do not need to manage the job daily, but regular visits catch questions early. Ask your builder how often visits are allowed and who should be present when you come. Do modular homes take less time to build? Yes, often significantly. Sections are manufactured off-site while foundation work runs simultaneously. Total time still depends on permits, delivery, utility hookups, and local inspections, but modular builds regularly finish in 3 to 6 months after permits are issued. What should I ask a builder before signing a contract? Ask for a phase-by-phase schedule, permit expectations, long-lead material risks, selection deadlines, and change order rules. A builder who cannot answer those questions specifically is a risk to your timeline before work even starts. How long does it take to build a tiny house? A professionally built tiny house on a permanent foundation typically takes 3 to 6 months. A trailer-mounted tiny house can be completed faster, sometimes in 8 to 16 weeks, depending on the builder’s backlog and the complexity of your layout. You can see a full cost breakdown for tiny house construction to understand how the timeline affects total spend. Ending Note Most US homeowners should plan for 7 to 14 months from planning to move-in. Production homes can close that gap considerably, often finishing in 4 to 7 months when selections are locked in early. Custom and owner-built homes regularly push past 12 months because every decision point adds time. The builds that stay closest to schedule have one thing in common: decisions made well ahead of when they are needed, not the day the builder calls asking for them. Before you sign a contract, ask your builder for a phase-by-phase schedule with specific permit and selection deadlines. That one document will tell you more about how long your build will take than any range you find online.
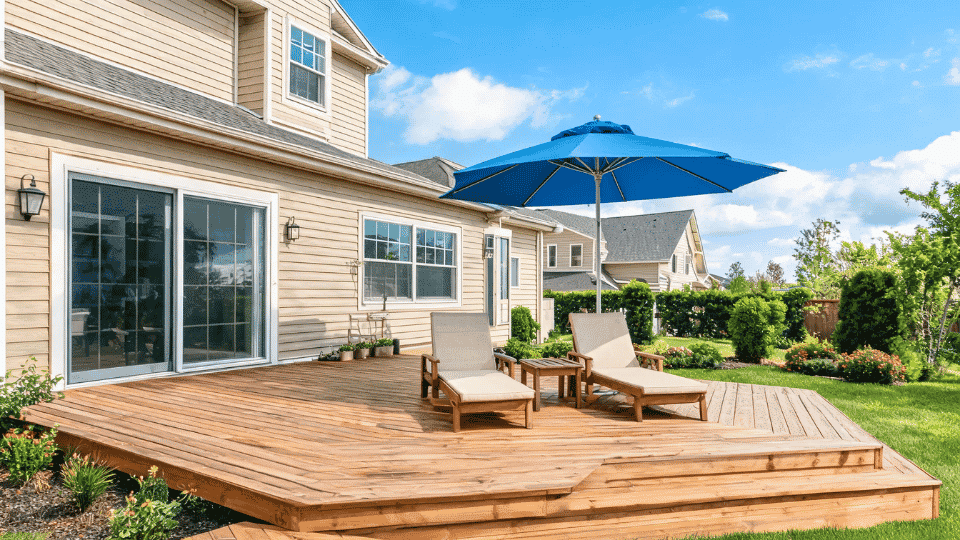
Deck quotes can be confusing because the same project name can refer to very different work. A small pressure-treated platform may cost around $4,000, while a raised composite rebuild with stairs, railings, footings, and demo can cost over $30,000. So, how much does it cost to build a deck? Start with the scope, not the headline price. The labor cost to build a deck per square foot often accounts for the largest gap, especially when the job includes old deck removal, code updates, or custom railing. Before you trust a contractor bid, compare the deck size, materials, height, permits, cleanup, and every line item. Use this step before requesting your final deck quotes. Cost Note: The mentioned figures are estimates based on current US deck pricing patterns, contractor quote ranges, and homeowner-reported examples from forums and social media. Actual costs vary by region, contractor, deck height, material, permits, and project scope. Always get at least three written quotes before signing any deck contract. How Much Does It Cost to Build a Deck by Size? Deck size sets the base price. Larger decks need more boards, more framing, more fasteners, more railing, and more labor hours. Deck Size Square Feet Basic Wood Deck Mid-Range Deck Composite or Custom Deck 10×10 100 $3,000 to $6,000 $6,000 to $9,000 $9,000 to $14,000 12×12 144 $4,500 to $8,500 $8,500 to $13,000 $13,000 to $20,000 12×16 192 $6,000 to $11,000 $11,000 to $17,000 $17,000 to $26,000 14×20 280 $9,000 to $16,000 $16,000 to $25,000 $25,000 to $35,000+ 16×20 320 $10,000 to $18,000 $18,000 to $28,000 $28,000 to $40,000+ 20×20 400 $13,000 to $24,000 $24,000 to $35,000 $35,000 to $50,000+ 500 sq ft 500 $16,000 to $30,000 $30,000 to $45,000 $45,000 to $65,000+ These numbers are not meant to replace a local quote. They are meant to help you spot a number that needs more explanation. A 300 sq ft deck can be cheap or expensive depending on what sits under it, what sits around it, and what the contractor has to remove first. However, the deck is not limited to just the wooden build; factors like furniture and outdoor features are in the mix, and they can change the cost of working on a full backyard when including the deck, skirting, patio, etc. Labor Cost to Build a Deck Per Square Foot Labor cost to build a deck usually runs $15 to $40 per square foot for standard contractor work. Simple ground-level decks can land below that range. Raised, multi-level, or composite decks can run much higher. Project Type Labor Cost Per Sq Ft Basic ground-level wood deck $10 to $20 Standard residential deck $15 to $35 Raised deck with stairs $25 to $45 Composite deck installation $25 to $50 Multi-level deck $40 to $60+ Rebuild with demo $30 to $60+ Labor is not only for board installation. You are paying for layout, post holes, concrete, framing, blocking, ledger work, stairs, railing, inspection fixes, cleanup, and contractor overhead. Even the styles picked for the parts, such as deck skirting types, finishes, and stairs, can make significant changes. That is why labor can account for a large share of the final deck cost. A 12×12 deck is 144 sq ft. If labor runs $20 to $40 per sq ft, labor alone can cost $2,880 to $5,760 before materials. Add stairs, railing, demo, or composite boards, and the labor number rises. Deck Cost by Material Material choice is one reason forum prices vary so much. A basic wood deck and a composite deck may be the same size, but the quote can differ by thousands. Deck Material Installed Cost Per Sq Ft Maintenance Best Fit Pressure-treated wood $30 to $55 High Lowest first cost Cedar $40 to $70 Medium to high Natural wood look Redwood $45 to $75 Medium to high Better natural rot resistance Composite $50 to $90 Low Lower upkeep PVC $60 to $100+ Low Wet or high-moisture areas Hardwood $70 to $120+ Medium Premium deck builds Material choice is where many online price comparisons fall apart. A pressure-treated wood deck may look cheap because the first cost is lower, while composite and PVC quotes can rise once hidden fasteners, fascia, stair trim, and upgraded railing are included. Before comparing your quote with a forum comment, check the exact material, product line, railing type, and finish details. What Drives the Final Deck Price Note: This breakdown reflects average cost distribution across deck projects and can vary; demolition may represent little to no cost on a new build where no existing structure needs to be removed. The deck boards are just the starting point. These seven factors are what separate a $6,000 quote from a $30,000 one, and what most homeowners don’t think to ask about before signing. 1. Height Ground-level decks cost less, have shorter posts, simpler framing, and faster labor. Raised decks add high cost at every level: Longer posts and stronger beams to handle increased load Cross-bracing and deeper footings required for structural stability Guardrails are commonly required on decks more than 30 inches above grade, but local code decides the final requirement. Taller, heavier, or unusual deck designs may require engineered plans or structural review. The higher the deck, the more likely it is to need guardrails, stronger framing, inspections, and added structural planning. Decks.com’s deck railing code guide is a useful starting point, but the final requirement should come from your local building department. 2. Stairs Each stair run requires stringers, treads, risers, railings, landings, and code-compliant rise-and-run dimensions. Cost drivers include: Number of runs from deck level down to grade Stair width and total drop height from deck to ground Railing type required on both sides of every run Landings are needed when connecting the deck to the patio or yard One run typically adds $1,500 to $3,500. Multiple runs can change the entire quote. 3. Railings Railing type is one of the biggest variables between two quotes for the same deck size. Cost depends on: Material choice: wood is the cheapest, cable and glass cost the most Total linear footage and required height per local code Anchoring method and fastener type used at each post Custom curves, tensioners, or premium hardware specified in the design Always ask for the railing spec before comparing quotes. 4. Footings Footings carry the full structural load of the deck. What drives cost: Soil type and bearing capacity at your specific site Local frost line depth determines how far piers must go Slope and drainage conditions requiring additional excavation or forming Code requirements tied directly to your deck’s height and size Shallow deck blocks are the cheapest. Poured concrete piers below the frost line cost more but provide long-term stability and reliably pass inspection. 5. Framing Framing is the skeleton on which everything else sits. If saving money is the goal, framing is not the place to cut corners. Cost factors for framing include: Joist, beam, and post sizing are determined by your deck’s span Many composite boards require specific joist spacing, and some layouts need tighter spacing than standard wood decking. Flashing and blocking must be installed correctly to prevent long-term water damage. Engineered beams specified for larger decks or heavier load requirements Cutting corners on framing is where decks fail structurally five to ten years later. 6. Demolition Removing an old deck adds both labor and disposal costs. Key variables: Condition of the existing structure, since rotted framing takes significantly longer Material types, such as wood, composite, concrete, and metal, are priced differently for disposal Whether hauling and dump fees are included in the quote or billed separately Yard access and protection are required to avoid damage during removal Always confirm the demo scope in writing before work starts. 7. Permits Many cities require permits for attached, elevated, or structurally significant decks, but rules vary by location. Check your city or county building department first; for example, this city deck permit page from Shoreview, Minnesota, shows the kind of local permit guidance homeowners may need to review. The process includes: Plan review and written approval are required before any construction begins Inspections at the framing stage and again at final completion Fees that vary by jurisdiction, deck size, height, and structural type Skipping permits creates liability, insurance, and resale problems. Ask upfront who pulls the permit, what inspections are required, and whether fees are included in the quote. What Homeowners Say About Real Deck Costs Homeowner threads make deck pricing feel more real than a cost calculator. In one Houzz discussion, a user asked people to share “where are you located, how big is your deck,” and what they spent, which matches how many homeowners price-check before calling contractors. Another user asked whether a simple 10×15 ground-level deck would cost “2k or 10k or more,” while a commenter said materials for a 10×10 deck were “around $1200” before labor. A bigger replacement thread shows why quotes can feel shocking. One homeowner broke down a deck quote at about “$160 a square foot” for a little over 400 sq ft. Another thread reported “$80 – $100 per sq ft” for a turnkey composite deck and porch, which proves why scope matters. These comments all point to the same lesson: forum prices help, but only when you check size, height, material, railing, demo, and labor. What to Ask Your Contractor Before Signing Before paying a deposit on any deck build, get clear answers to these five questions in writing. What exactly is included in this quote? Ask for an itemized breakdown of materials, labor, permits, demo, hauling, railings, stairs, and footings. Any item that isn’t listed isn’t included. What triggers a change order? Soft framing, poor soil, uneven ground, and rotted ledger boards are the most common reasons a fixed-price quote turns into a higher bill. Know the policy before work starts. Are you pulling the permit? If the answer is no or vague, that’s a red flag. Permitted work is inspected work. Uninspected decks have resale and liability implications. What is the framing material and spacing? Composite boards require tighter joist spacing than wood. If a contractor quotes composite boards for a wood-spaced frame, the boards will bow. What is your warranty, and who handles post-build issues? Workmanship warranties vary from 1 year to 5 years. Know who to call if a board lifts or a post shifts. What’s Negotiable and What Isn’t If you’re working toward a tighter number, some deck costs have flexibility, and some don’t. Knowing which is which before you start negotiating saves time and bad faith. Typically negotiable: Material grade (e.g., stepping down from capped composite to standard composite), railing style (wood instead of cable), deck size (reducing by 20 sq ft can save more than you’d expect), timing (off-season builds in late fall or winter often come in lower when contractors are less busy). Not negotiable: Footing depth required by code, permit filing, ledger attachment method, structural joist sizing for your span. A contractor who negotiates these items is cutting corners that show up in failed inspections or structural problems two to five years out. Why Online Deck Prices Are So Misleading A low forum price and a high contractor quote can both be real, but they may describe completely different projects. Forum posters sharing deck prices rarely include the full picture: whether they did the work themselves, whether permits were pulled, what the railing type was, whether they had to demo anything first, or what region they’re in. A 300 sq ft deck in rural Mississippi and a 300 sq ft deck in coastal Connecticut are not the same job. Houzz and Reddit comments are useful as sanity checks. One Houzz thread showed quotes ranging from around $80–$100 per square foot for turnkey composite and porch builds to roughly $160 per square foot for a composite deck on a complex property. Those are real numbers for real projects, but they’re not your numbers until you know the scope matches. Use online prices to flag outliers in your quotes. If you get three quotes and one is 40% lower than the others, ask what’s missing, not whether to take it. Frequently Asked Questions Is it cheaper to build a deck yourself or hire a contractor? DIY deck building can cost less upfront because you avoid labor charges. However, mistakes with footings, ledger attachment, framing, stairs, or permits can become expensive. A simple ground-level deck may suit DIY, but raised or attached decks are usually safer with a licensed contractor. Why is my deck quote much higher than online estimates? Online estimates often leave out stairs, railings, demolition, permits, hauling, difficult access, and upgraded materials. Your quote may also include code updates or structural repairs. Compare line items before deciding whether the price is too high. Can I lower my deck cost without cutting corners? Yes. You can reduce the size, choose pressure-treated wood, simplify the railing, avoid multiple stair runs, or build during a slower season. Do not cut costs on footings, ledger attachment, joist sizing, flashing, or permits. What should be included in a deck quote? A good deck quote should list materials, labor, deck size, railing type, stairs, footings, framing specs, permits, demolition, hauling, cleanup, payment schedule, warranty, and change-order rules. If those details are missing, ask for a revised written quote. Final Verdict So, how much does it cost to build a deck? The best answer comes from matching real quotes to the same scope, not from copying one forum number. A small wood platform can stay near the lower range, while a raised composite rebuild with stairs, railings, demo, and permits can cost far more. The labor cost per square foot to build a deck is the number I would check first because it reflects the work behind the bid. Use online prices as a rough reality check, then rely on written local quotes with the same scope. Before you sign, ask what is included, what is excluded, and how add-ons are billed. Then get at least two more quotes with the same scope to ensure the comparison is fair.
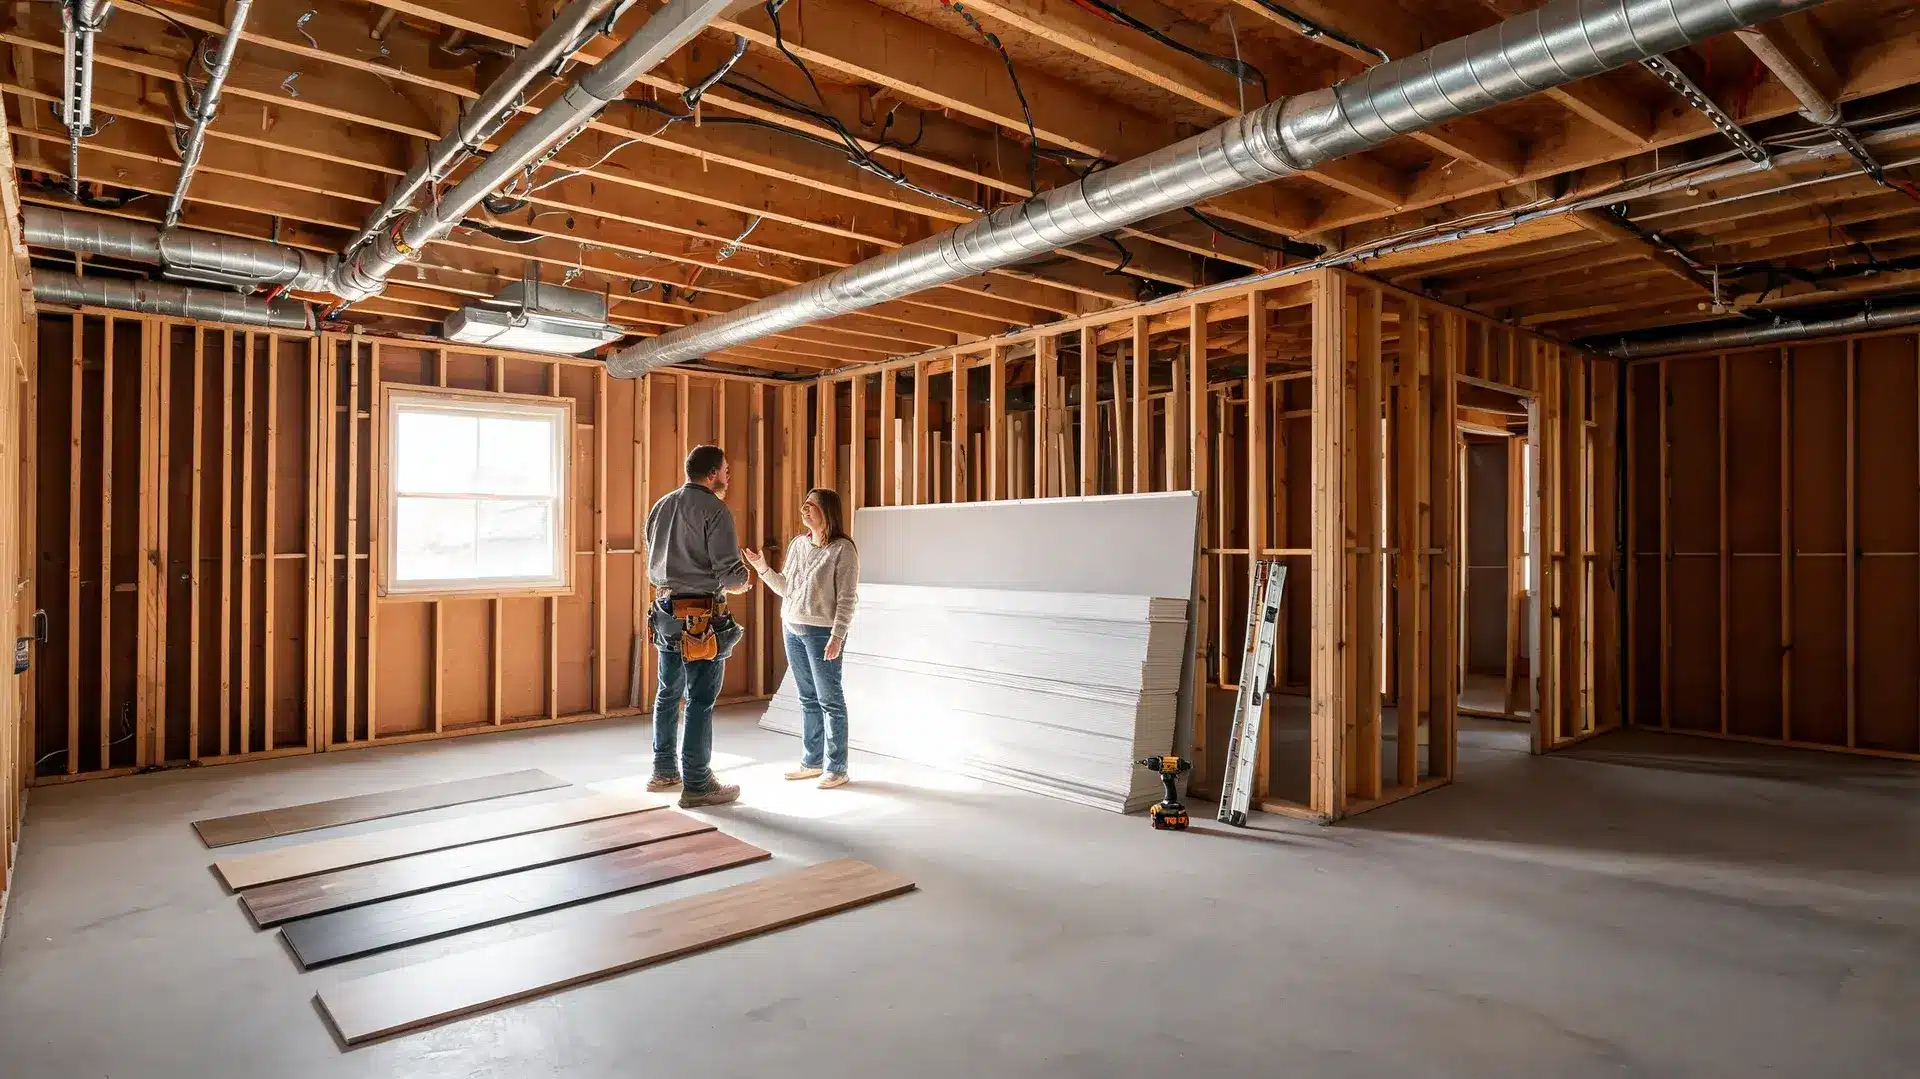
Finish Level Cost Per Sq Ft Best For Basic $25 to $50 Open family room, play area, simple office, storage zone Mid-range $50 to $75 Bedroom, home office, upgraded flooring, cleaner layout High-end $75 to $100+ Bathroom, wet bar, media room, built-ins, premium fixtures How much it costs to finish a basement comes down to three things: the size of the space, the finish level you choose, and the condition of the space before a single wall goes up. Most projects land between $25 and $75 per square foot, with a national average around $32,000 for a mid-size basement. High-end projects with bathrooms, wet bars, major repairs, or premium finishes push well past $100 per square foot. The range only makes sense once you know which end of it your project sits on. A dry, code-compliant lower level with decent ceiling height and no moisture issues starts from a far better position than one with cracks, mold, or wiring that predates current code. Both projects look like “finishing a basement” on paper. They are not the same project at all. Before you ask a single contractor for a quote: know your space, set a budget tied to function rather than finish, and read the section on hidden costs. That is where most budgets go wrong. Cost Note: Figures in this article are estimates based on national averages from Angi (2026) and HomeAdvisor (2025). Actual costs vary significantly by region, contractor, materials, and project scope. Always get at least three quotes before committing to any project above $1,000. What Finishing a Basement Actually Includes When people ask how much it costs to finish a basement, they usually have one number in mind: the finished space they want. What they underestimate is the list of work that has to happen first. At its most complete, a basement finishing project covers framing, insulation, drywall, ceiling work, flooring, electrical outlets, recessed lighting, HVAC connections, permits, and moisture control. Most projects do not need all of those from scratch. If the space already has rough plumbing, solid ceiling height, safe stairs, and dry walls, a significant portion of that list is already handled, and the cost drops accordingly. If it has leaks, mold, cracked foundation walls, or wiring that predates current code, those repairs take precedence over any decorative decisions. The most useful baseline is a dry, code-compliant, permitted space that functions like a normal living area. That gives you something honest to compare quotes against. Basement Finishing Cost by Square Footage Square footage gives you a starting point, but it does not tell the full story. The finished basement cost can change quickly once you add a bathroom, bedroom, wet bar, media room, or upgraded flooring. Use the table below as a planning range, then adjust based on the actual work your basement needs. Finished Area Basic Mid-Range High-End 300 sq ft $7,500 to $15,000 $15,000 to $22,500 $22,500 to $30,000+ 500 sq ft $12,500 to $25,000 $25,000 to $37,500 $37,500 to $50,000+ 700 sq ft $17,500 to $35,000 $35,000 to $52,500 $52,500 to $70,000+ 1,000 sq ft $25,000 to $50,000 $50,000 to $75,000 $75,000 to $100,000+ 1,500 sq ft $37,500 to $75,000 $75,000 to $112,500 $112,500 to $150,000+ 2,000 sq ft $50,000 to $100,000 $100,000 to $150,000 $150,000 to $200,000+ These figures give you a planning range, not a final quote. A contractor still needs to assess moisture levels, ceiling height, plumbing access, electrical capacity, stair code compliance, egress windows, drainage, slab condition, and local permit requirements before any number becomes real. Use this table to sanity-check a quote — not to build a budget from scratch. The Four Cost Drivers That Determine Your Final Number Most budget surprises in a basement finishing project come from one of four areas. Understanding what each adds to the total — and whether your space already has a problem in that category — is the most useful thing you can do before sitting down with a contractor. 1. Moisture and Foundation Work Water control comes before walls, flooring, and trim, every time. If your lower level shows staining, smells damp, or has cracks in the foundation, those repairs are not optional extras. Covering moisture issues with new materials produces mold behind the drywall, warped flooring, and repair bills far higher than the waterproofing work would have cost in the first place. A full interior waterproofing system typically runs $3,000 to $15,000, depending on the scope. Exterior waterproofing pushes costs higher. Crack injection, sump pump installation, and interior drain tile are all separate line items. Budget for this before anything else moves. If you’re unsure what your basement needs, the guide to basement waterproofing costs walks through each method and what drives the price. 2. Plumbing and Bathroom Addition A basement bathroom is one of the largest single budget items in any lower-level project. It may require rough-in work, drain relocation, ejector pump installation, venting, tile, fixtures, and its own inspection, and every one of those has a separate cost. Keeping new plumbing close to existing lines controls the total. A full bathroom addition on a space with no existing rough-in can add $8,000 to $25,000 or more to the project, depending on complexity and local labor rates. Below-grade ejector pump requirements push costs toward the higher end of that range. Factor this as a fixed line item before comparing bids. 3. Egress Windows and Bedroom Requirements A lower-level bedroom requires an approved egress window to meet code in most jurisdictions. Some areas require egress windows for any finished basement, regardless of use. Check your local code before assuming the standard applies. Beyond the window, a legal bedroom also needs proper heat, smoke alarms, carbon monoxide detection, and a minimum ceiling height. Egress window installation typically costs $2,500 to $5,500, depending on the size of the opening and the amount of foundation cutting required. These are non-negotiable for both safety and future resale paperwork. Skipping them creates compliance problems during inspections and disclosure problems when you sell. 4. Electrical and HVAC More finished living space puts more demand on your home’s systems. Additional outlets, recessed lighting, dedicated office circuits, panel capacity upgrades, HVAC duct extensions, and added return air all affect the project price and the daily comfort of the finished space. A mini-split system for a basement without existing duct access runs $3,000 to $7,000 installed, with single-zone systems starting closer to $2,000 and multi-zone setups going higher. Electrical panel upgrades vary widely depending on current capacity, budget $1,500 to $4,000 if your panel is close to its limit. An electrician can assess that in a single site visit before you commit to anything. Permit Warning: Never skip a permit to save money on a basement finishing project. Unpermitted work creates insurance, resale, and code compliance problems, and may require costly demolition and redo if flagged during a home inspection. Permits for a basement project typically run $500 to $2,000, depending on local fees and scope. That cost is small compared to the problems unpermitted work creates at sale time. Cost by Room Type Your room plan changes the total because each use brings different system requirements. An open family room needs basic finishes. A bedroom or bathroom needs plumbing, code compliance, and safety features on top of standard finish work. Use this to understand what each room type adds before committing to a layout. Room Type Main Work Required Budget Impact Family room Open layout, flooring, ceiling, lighting, outlets Lower to mid-range Home office Lighting, outlets, data wiring, sound control Lower to mid-range Bedroom Egress window, closet, heat, alarms, code inspection Mid-range to high Bathroom Plumbing, pump if needed, fixtures, tile, and ventilation fan High Wet bar Sink, cabinets, counters, outlets, refrigeration space Mid-range to high Media room Sound control, AV wiring, lighting, seating, built-ins High The room type decision is a budget decision. Choose the layout based on what you will use every day before considering finishes. Money tied to a function ages better than money tied to a single-use layout that may not suit a future buyer. Hidden Costs That Catch Homeowners Off Guard These items rarely appear in a first quote but show up on nearly every project. Leaving no room for them is the most common reason a basement project runs over budget. Waterproofing and drainage: Crack sealing, sump pump work, interior drain tile, and grading corrections are often identified after work begins — not before. Mold remediation: Any musty smell or visible growth needs professional assessment and clearance before walls close. Enclosing active mold is not a solution. Panel upgrades: More lights, circuits, and outlets can push an older panel to its limit, requiring an upgrade before the electrical inspection passes. Floor leveling: Uneven concrete affects flooring installation, door swing, and trim fitting. Leveling compound adds both cost and time. Debris removal: Old insulation, paneling, carpet, and drywall from demo work need hauling — this rarely appears in an initial quote. Permit fees: City and county fees vary and can add $500 to $2,000 or more, depending on scope and jurisdiction. Furniture and setup: Seating, storage, rugs, desks, and window coverings are easy to forget until the space is done and empty. Set aside 10 to 20 percent as a contingency before work starts. That buffer covers most of these items and avoids a difficult mid-project conversation about needing more money. Line-Item Cost Breakdown This is the format you should request from every contractor you consider. A lump-sum bid tells you nothing useful — a line-item bid lets you compare scope, identify what’s included or missing, and make targeted cuts if the total runs over. Line Item Low End High End What Drives Variation Waterproofing/moisture control $3,000 $15,000+ Interior vs. exterior, sump pump, drain tile scope Framing $1,500 $6,500 Square footage, number of partition walls, ceiling type Insulation $1,000 $4,000 Type (spray foam vs. batt), wall vs. ceiling vs. floor Drywall $1,500 $5,000 Square footage, number of corners, finish level Flooring $1,500 $8,000 Material (LVP vs. tile vs. carpet), square footage Electrical $1,500 $6,000 Outlets, lighting, circuits, panel upgrade if needed HVAC / mini-split $2,000 $7,000 Duct extension vs. separate mini-split unit Bathroom addition $8,000 $25,000+ Rough-in status, ejector pump, fixture, and tile selection Egress window $2,500 $5,500 Foundation wall thickness, opening size, and well cover Permits $500 $2,000 Local jurisdiction fees, scope of permitted work Contingency (10–20%) Set aside before work starts, not after surprises appear These ranges are built from national averages. Regional labor markets, existing conditions, and contractor availability all affect where your project lands. The table is a cross-check tool, not a substitute for a written itemized bid. DIY, Contractor, or a Mixed Approach Choosing who does the work matters as much as choosing what gets done. Each path carries a different risk and cost profile. Approach Best Fit Main Risk Full DIY Painting, trim, some flooring, and cleanup Slower timeline; potential redo costs if mistakes occur General contractor Full project, permits, trade coordination, inspections Higher upfront cost Mixed plan Pros handle systems; the homeowner handles finish tasks Requires a clearly defined task split from the start The mixed plan is the right call for most homeowners. Let licensed tradespeople handle electrical, plumbing, HVAC, and any structural work. Take on painting, cleanup, trim, and simple flooring yourself. That keeps risk low while delivering real labor savings. The task split needs to be agreed in writing before work begins; mid-project confusion about who does what costs time and money. For a broader look at how this fits into larger home renovation decisions, the house additions before and after show how homeowners typically divide that responsibility across different project types. Ways to Reduce the Cost of Finishing a Basement Real savings come from simplifying the plan, not from cutting safety or skipping permits. Every item below reduces costs without compromising the parts that protect the investment long term. Keep the layout open: Fewer walls, doors, and built-in storage reduce both materials and labor hours significantly. Work with existing plumbing locations: Moving drain lines and supply pipes across a slab is among the most expensive decisions you can make. Keep wet areas where plumbing already exists. Choose durable flooring from the start: Luxury vinyl plank and tile handle the moisture and temperature fluctuations of a below-grade space better than carpet or hardwood — and they cost less to replace if needed. Paint yourself: Painting is one of the few finish tasks most homeowners can handle safely and well. On a 1,000 sq ft basement, that’s a meaningful labor savings. Use stock cabinetry: Custom built-ins add significantly to the budget. Stock kitchen or laundry cabinets installed as a wet bar or storage wall look clean at a fraction of the price. Leave unneeded areas unfinished: Mechanical rooms, utility areas, and storage zones do not need to be completed. Only finish the square footage you will actually use. Get at least three bids: Compare scope, materials, permit inclusion, and warranty — not just the bottom-line number. The lowest bid is often missing something the higher bids include. None of these cuts requires a lower-quality result. A simpler layout with durable materials consistently outperforms a complex design with built-in shortcuts — in daily use and at resale. Is a Finished Basement Worth the Money? A finished lower level adds usable space and resale appeal when it solves a real space problem. ROI on basement finishing typically runs 64 to 70 percent, according to data from Angi and HomeAdvisor, meaning a $32,000 project can add $20,000 to $22,000 in resale value to a typical home. Functional layouts for family rooms, guest bedrooms, home offices, and bathrooms perform best across most markets. Specialty or highly personal designs perform worse. Good value add Family room, guest bedroom, home office, bathroom, laundry space, and clean storage Less flexible value Specialty theater, oversized wet bar, single-use niche rooms, rare custom materials Strong reason to start You need more living area, plan to use it daily, and have the budget to do it correctly Reason to pause The quote strains your budget, the space has unresolved moisture issues, or the goal is resale value only Spend first on dryness, safety, lighting, and flexible room use. Buyers respond to clean, code-ready spaces that serve multiple purposes. Highly personal designs and niche configurations cost more and appeal to fewer people at resale, regardless of the quality of materials used. This is the same conclusion I’ve seen hold across markets at every price point. The basement remodel cost guide by size breaks down how those value-add decisions play out at different square footage ranges if you want to dig further into the numbers. Questions to Ask a Contractor Before You Sign A strong contractor answers these questions directly and in writing before any deposit is paid. Hesitation or vague replies to any of them are a signal worth noting before you commit. Are permits pulled and included in the bid, or are they charged separately? Who coordinates and manages plumbing, electrical, and HVAC subcontractors? What material allowances are built into the quote, and what happens when you exceed them? How are change orders handled, priced, and approved? What is the process if moisture, mold, or structural issues are found after work begins? What is the payment schedule, and is the final payment tied to passing inspection? What warranty covers labor and materials after the project is complete? Can you provide references from recent projects of similar scope? Tie the final payment to passing inspection, not to the contractor’s own sign-off. That single condition protects your budget and ensures code compliance before any remaining money leaves your account. 📝 Note: Request a line-item bid rather than a single lump-sum number. Line items let you compare competing quotes on the same scope, identify what each contractor has or has not included, and make targeted cuts if the total comes in over budget. FAQs About Basement Finishing Costs These are the questions I hear most often from homeowners who’ve already gotten one quote and realized they need to understand the numbers better before they get the next two. How much does it cost to finish a 1,000 sq ft basement? A 1,000 sq ft basement typically runs $25,000 to $50,000 at a basic finish level and $50,000 to $75,000 at mid-range. High-end finishes with a bathroom, media room, or significant moisture work push the total past $100,000. The specific features, not just the square footage, determine where you land. What is the cheapest way to finish a basement? Keep the layout open, skip the bathroom, use luxury vinyl plank flooring, paint yourself, and use stock cabinetry for any storage walls. Handle cleanup and trim as DIY. Let licensed trades handle electrical, plumbing, and HVAC. That combination produces a functional, code-compliant space at the lowest cost per square foot. Do low ceilings limit what you can do with a basement? Yes. Most jurisdictions require a minimum ceiling height of 7 feet for habitable space, though local rules vary. Pipes, beams, and ductwork can reduce that further. A drop ceiling can conceal mechanicals while meeting height requirements but reduces finished clearance by 4 to 6 inches and adds cost. Can I finish part of my basement and leave the rest unfinished? Yes, and it often makes sense. Leaving mechanical rooms, utility areas, and storage zones unfinished reduces total cost and keeps access to shutoffs, panels, sump pumps, and drains easier for future maintenance. Only finish the square footage you plan to use regularly. How long does it take to finish a basement? Most basement finishing projects take four to eight weeks for a straightforward open layout. Adding a bathroom, egress window, or significant moisture remediation extends that timeline. Permit approval windows vary by jurisdiction and can add two to four weeks before work even begins. What flooring is best for a finished basement? Luxury vinyl plank is the strongest choice for most basements. It handles moisture and temperature fluctuations better than carpet or engineered hardwood, installs directly over concrete, and costs $3 to $7 per square foot installed. Tile is better in bathrooms and laundry areas. Fix any water issues before any floor goes down. Final Thoughts Getting an accurate answer on how much it costs to finish a basement starts with knowing your space before anyone prices it. Measure the area you plan to use, identify any moisture or structural issues that need to be resolved first, choose a finish level that fits the home and your actual budget, and list the rooms you need in order of daily importance. My straightforward take on the cost of finishing a basement is this: the money you spend on dryness, safety, and flexible room layout holds its value. The money spent on personal features and single-use designs rarely does. A dry, permitted, practical lower level is worth far more at resale, and in daily use, than a costly niche space that only works for one kind of buyer. Drop a comment below and let me know how your basement turned out. Sources Angi: How Much Does It Cost to Finish a Basement? (2026 data) HomeAdvisor: Basement Finishing Cost (2025 data) National Association of Home Builders (NAHB): Cost of Construction Survey
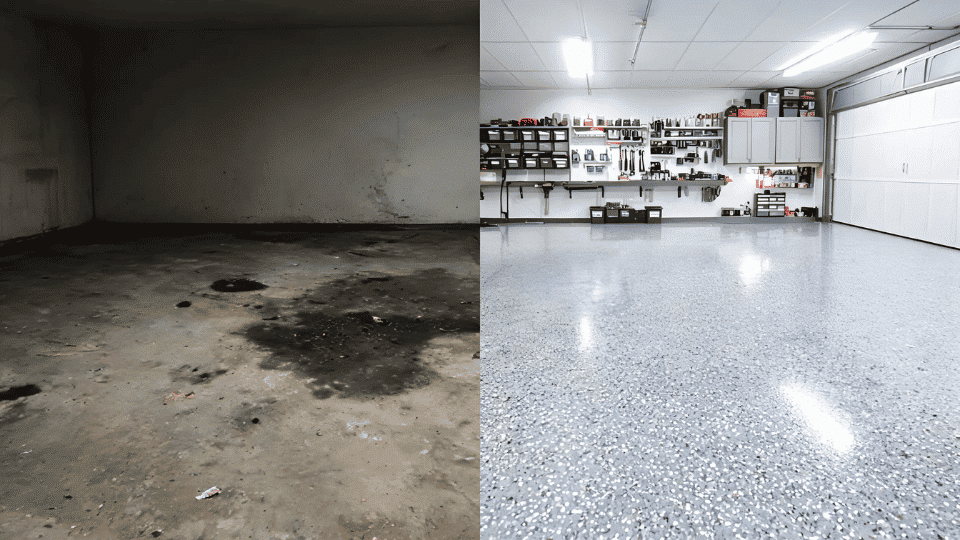
Professional epoxy garage floor cost runs $3 to $12 per square foot installed. For a 2-car garage, that puts the full project between $1,200 and $6,000, and the gap between those numbers is almost entirely explained by three things: how much prep the concrete needs, which coating system you choose, and which line items your contractor has quietly left out of the base quote. I’ve seen homeowners get two quotes for the same garage and wonder how they can differ by $3,000. The answer is almost never the epoxy itself. It’s the prep method, the number of coats, and whether grinding, crack repair, and a topcoat are included. Once you know what drives the price, comparing quotes becomes a lot more straightforward. Cost Note: Figures in this article are estimates based on national averages from HomeAdvisor/Angi data (2024–2025). Actual costs vary significantly by region, contractor, and concrete condition. Always get at least three written quotes before committing to any project above $1,000. Epoxy Garage Floor Cost at a Glance The table below gives you the working numbers before we get into what moves them up or down. Line Item Low End High End What Drives Variation Professional installation (per sq ft) $3 $12 Coating type, prep method, number of layers DIY epoxy kit (full project) $100 $500 Kit quality, garage size, whether tools are rented 1-car garage (200–300 sq ft) $700 $3,500 Concrete condition, coating system 2-car garage (400–500 sq ft) $1,200 $6,000 Most common size; premium system adds $2,500+ 3-car garage (600–700 sq ft) $2,000 $7,500+ Larger floor area, more prep time 4-car garage (800–1,000 sq ft) $3,500 $10,000+ Commercial-scale prep, premium topcoat Surface prep / concrete grinding $1/sq ft $5/sq ft Floor condition, existing coatings, moisture issues The $3–$12 range covers a lot of ground. A basic water-based epoxy on a clean slab sits at the low end. A full system with 100% solids epoxy, diamond grinding, decorative flake broadcast, and a polyaspartic topcoat sits at the high end. Both are technically “epoxy garage floor coating”, but they’re not the same product. Epoxy Garage Floor Cost by Garage Size Square footage gives you a starting number, nothing more. The same 500-square-foot garage can come in at $1,500 or $6,000 depending on the prep work required and the coating system chosen. That said, size is still the fastest way to anchor an initial estimate before you start talking to contractors. Garage Size Approx. Sq Ft Typical Cost Range Premium System Cost 1-car garage 200–300 sq ft $700–$3,500 $2,500–$3,600 2-car garage 400–500 sq ft $1,200–$6,000 $4,000–$5,500 3-car garage 600–700 sq ft $2,000–$7,500+ $5,500–$7,000 4-car garage 800–1,000 sq ft $3,500–$10,000+ $7,500–$10,000+ A 2-car garage is the most common reference point. Premium systems for that size,100% solids epoxy, decorative flake broadcast, diamond grinding, and a polyaspartic topcoat, typically land between $4,000 and $5,500. That’s not a budget project, but it’s also a floor that can last 10 to 20 years in a working garage with regular vehicle traffic. Epoxy Garage Floor Cost by Coating Type The coating system is where the real price variation lives. Each type has a different mix of strength, thickness, curing time, and finish quality — and not all of them hold up the same way under daily vehicle use. Coating Type Cost per Sq Ft Lifespan Best For Water-based epoxy (DIY) $0.50–$2 3–5 years Light-use garages, storage spaces Solid-color epoxy $3–$7 5–10 years Clean finish, basic protection Decorative flake epoxy $7–$10 10–15 years Vehicle traffic, grip, hides dirt Metallic epoxy garage floor $9–$12 10–15 years Decorative finish, showrooms Polyaspartic coating $7–$12+ 15–20 years Fast cure, UV resistance, heavy use For most working garages, decorative flake epoxy delivers the best combination of grip, durability, and price without pushing into premium territory. Metallic epoxy looks impressive in photos but is better suited to a display space than a garage where a truck parks six days a week. Epoxy vs. Polyurea: What the Quote Might Not Tell You Some contractors price their systems as “epoxy” but apply a polyurea or polyaspartic topcoat over an epoxy base. This is actually a better system than straight epoxy, polyurea cures faster, handles UV exposure without yellowing, and resists hot tire pickup more effectively. The confusion is that it gets sold under the “epoxy” umbrella even when the topcoat is a different chemistry entirely. If a contractor quotes a system with a base coat and topcoat, ask specifically whether the topcoat is polyurea or polyaspartic. That distinction matters for longevity, especially in garages with significant UV exposure through windows or an open door. A clear breakdown of what each layer costs, similar to how construction costs get itemized by component, is what you want before signing anything. DIY vs. Professional Epoxy Garage Floor Cost The price difference between DIY and professional installation is real. The performance gap is just as real, and it’s mostly about prep, not product. DIY Epoxy Garage Floor Cost A DIY epoxy garage floor kit costs $100 to $500 depending on garage size, product quality, and whether a topcoat and decorative flakes are included. Water-based DIY kits are the most common. They’re thinner than professional-grade materials, easier to apply, and they do the job adequately on a clean, dry slab with light use history. The real cost risk in DIY isn’t the kit, it’s the prep. If the concrete has oil stains, hairline cracks, old paint, or any moisture coming up from below, DIY epoxy is almost certain to peel within a year or two. Homeowners going the DIY route also typically need rollers, degreaser, etching solution, crack filler, and sometimes a rented diamond grinder, none of which are in the kit price. Total DIY project costs often land between $300 and $800 once tools and materials are factored in. Professional Epoxy Installation Cost Professional epoxy installation costs $3 to $12 per square foot. That price usually includes steps that DIY kits skip entirely: diamond grinding the concrete surface, removing old coatings, testing for moisture, applying a thicker base coat, broadcasting decorative flakes, and sealing with a protective topcoat. Each of those steps exists because skipping them causes early failure. Professional installation makes the most sense when the garage sees regular vehicle traffic, has existing stains or damage, or when you want a long-term warranty. The higher upfront cost pays for fewer failures later, a floor that peels after 18 months and needs to be stripped and redone is never cheap regardless of what it cost the first time. Which Option Makes Sense for Your Garage Choose DIY if the concrete is already in good condition, the garage sees light use, and a cosmetic refresh is the goal. Choose professional installation if you want a floor that holds up to daily vehicle traffic, chemical spills, road salt, and heavy tools, or if the concrete needs any real repair work before coating. My rule: if the floor needs grinding, crack repair, or moisture mitigation, professional prep is the only option worth paying for. Where Epoxy Garage Floor Budgets Go Wrong This is the section most cost guides skip. The base quote looks reasonable, until it doesn’t. Here are the specific line items that routinely surprise homeowners after the work begins. Surface Prep Priced Separately Grinding, acid etching, and old coating removal are often excluded from the base quote. A contractor who gives you a $1,500 quote “to epoxy the floor” may be quoting materials and labor only. Concrete grinding adds $1 to $3 per square foot. Old coating removal varies based on what’s there and how many layers. These aren’t optional steps, if they’re missing from the quote, they’re being added to the invoice later. Crack and Slab Repair Hairline cracks are common in concrete garage floors and need to be filled before any coating is applied. Most contractors won’t know the full extent of cracking until they grind the surface. Slab repairs typically cost $250 to $750 as a project add-on. Budget for it even if the floor looks clean at first inspection. Moisture Issues Moisture vapor coming up through the slab is one of the most common causes of epoxy failure. If a contractor doesn’t test for moisture before application, and moisture is present, the coating will eventually delaminate from below, usually within a year. Moisture testing costs $200 to $500. Some contractors include it; many don’t mention it until there’s a problem. Topcoat Not Included An epoxy base coat without a sealing topcoat is a floor that will show wear, scratching, and staining faster than expected. Many low quotes apply one layer of epoxy and stop there. Ask explicitly whether a topcoat or polyaspartic seal coat is included. If it isn’t, add $0.50 to $2 per square foot to the quote. Custom Finishes and Flakes Decorative vinyl flake broadcast is usually quoted as a standard upgrade, but custom color blends, full-flake systems, or metallic finishes can add $2 to $5 per square foot on top of the base price. Nail down the finish type before the quote is finalized, not after the work starts. Add-On Cost Typical Price Often Missing From Base Quote? Concrete grinding / diamond prep $1–$3/sq ft Frequently Old coating removal Varies by condition Almost always Crack and slab repair $250–$750 Frequently Moisture testing $200–$500 Usually Sealing topcoat $0.50–$2/sq ft Sometimes Decorative flake or custom finish $2–$5/sq ft extra Varies Stem wall or edge coating Varies by layout Varies A quote that looks $1,500 cheaper than the competition may simply have left these items off the paper. That’s not a bargain, it’s a deferred invoice. How Regional Location Affects Epoxy Garage Floor Cost Labor rates for coating contractors vary significantly across the US. In higher cost-of-living markets, the Northeast, Pacific Northwest, and major metro areas in California, professional epoxy installation commonly runs $8 to $12 per square foot even for standard systems. In mid-South and Midwest markets, the same work often lands between $4 and $7 per square foot. Regional variation in concrete contractor demand, material shipping costs, and local permit requirements all contribute to this gap. If you’re budgeting for a large garage in a high-cost market, add 20 to 40 percent to the national averages above. If you’re in a rural or lower-cost area, the lower end of those ranges is more realistic. This is one of the reasons why getting three local quotes is more useful than using any national average as your planning number, similar to how basement remodel costs can shift dramatically between a city project and a suburban one. Epoxy vs. Other Garage Floor Coating Options Epoxy is the most common choice, but it isn’t the only one. Here’s how it stacks up against alternatives when price and performance are both on the table. Flooring Option Cost per Sq Ft Lifespan Best For Garage floor paint $0.50–$2 1–3 years Cheapest cosmetic option Water-based epoxy (DIY) $1–$3 3–5 years Light-use garages Professional epoxy coating $3–$12 10–15 years Durable everyday protection Polyaspartic / polyurea coating $7–$12+ 15–20 years UV resistance, fast cure, heavy use Polished concrete $4–$8 10–20 years Low maintenance, industrial look Interlocking garage tiles $3–$10+ Varies DIY-friendly, removable Garage floor paint is the cheapest entry point but gives out quickly under vehicle traffic and chemical spills. Polished concrete costs about the same as mid-range epoxy and requires no topcoat, but it doesn’t hide stains as well. Polyaspartic and polyurea coatings outperform epoxy on lifespan and UV stability, if the budget allows, a hybrid epoxy base with a polyaspartic topcoat is the most durable system available in this price range. What’s Negotiable and What Isn’t Not everything in a garage floor quote is fixed. Knowing which line items have flexibility — and which don’t — helps you get better value without ending up with a floor that fails. Surface preparation is not negotiable. Diamond grinding opens the concrete pores so the epoxy bonds properly. Contractors who acid etch only (instead of grinding) are delivering an inferior prep for the same price. Don’t accept this as a cost-saving compromise. Prep quality is the single biggest predictor of whether a floor lasts 3 years or 15. The finish and topcoat are negotiable. If budget is tight, a solid-color epoxy with a standard topcoat outperforms a decorative flake system applied over inadequate prep. A plain floor that bonds properly is better than a beautiful floor that peels. Scheduling during slower contractor seasons — typically late fall and winter — can also get you 10 to 15 percent off standard rates. Moisture testing is non-negotiable on any slab that shows signs of humidity, efflorescence (white salt deposits), or prior delamination. Skipping it is a gamble that costs far more than the test when the floor fails six months later. What to Ask Your Contractor Before Signing Anything Most contractors won’t volunteer this information unless you ask for it directly. These five questions separate the thorough quotes from the ones that look good until the work starts. What prep method are you using — diamond grinding or acid etching? Grinding creates a more consistent surface profile. If the answer is acid etching only, ask why. Is moisture testing included, and what happens if moisture is found? You want to know the answer before the project starts, not after the base coat is down. What exactly is your coating system — base coat, broadcast, and topcoat? Get the product names and the number of layers in writing. Are crack repair and old coating removal included in this quote, or are they add-ons? This is the most common source of surprise invoices on garage floor projects. What warranty do you offer, and what voids it? A reputable installer stands behind the work for at least two years. If there’s no warranty, that tells you something about their confidence in the prep. Is Epoxy Garage Flooring Worth the Cost? For a garage that sees regular vehicle traffic, tool use, and chemical exposure, a professionally installed epoxy garage floor coating pays for itself in reduced cleaning time and concrete protection within a few years. The upfront cost is real, but so is the gap between scrubbing an oil-stained concrete slab every few months and washing down an epoxy surface in minutes. It’s harder to justify when the concrete has significant structural damage, active moisture problems, or the garage rarely gets used. A floor with serious underlying issues needs that work addressed before any coating is applied — no surface treatment survives a slab that’s moving or wicking moisture from below. In those cases, the epoxy cost is the second budget item, not the first. For broader renovation context, understanding the full scope of what concrete and slab work costs before any coating goes down is worth doing before you request quotes. How to Save Money Without Getting a Floor That Fails Cutting costs on epoxy should target inefficiency, not quality. These are the adjustments that save money without compromising the floor. Clear the garage completely before the installer arrives — labor charges for furniture and storage removal are real and easy to avoid. Do the basic cleaning yourself. Sweeping, degreasing surface oil, and removing loose debris are straightforward tasks that some contractors bill for. Get at least three written quotes and compare the line items, not just the totals. A lower total with prep excluded is not a better deal. Choose decorative flake over metallic epoxy when durability matters more than appearance. The performance gap doesn’t justify the price difference for a working garage. Schedule during late fall or winter. Coating contractors have slower seasons, and rates often reflect that. Confirm in writing that topcoat, crack repair, and old coating removal are included or explicitly priced as add-ons before any work begins. The one cost that is never worth cutting is surface preparation. A thin coating applied over inadequate prep will fail regardless of product quality. The labor to strip a failed floor and redo it typically costs more than the difference between a proper prep job and a shortcut one. Frequently Asked Questions These are the questions I hear most often from homeowners who’ve already started getting quotes and realize the numbers don’t quite add up. How much does it cost to epoxy a garage floor? Professional installation runs $3 to $12 per square foot. A 2-car garage typically costs $1,200 to $6,000 depending on prep depth, coating type, and whether add-ons like crack repair and topcoat are included. DIY kits cost $100 to $500 but require proper prep to last. How long does an epoxy garage floor last? A professionally installed floor with proper prep lasts 10 to 15 years under normal vehicle traffic. DIY water-based systems typically last 3 to 5 years. A polyaspartic topcoat can extend lifespan to 15 to 20 years. How long does it take to epoxy a garage floor? Most professional installations take 1 to 2 days for the coating work. Add 3 to 7 days before vehicle traffic is permitted, depending on the coating system, temperature, and humidity levels during cure. Can you epoxy a garage floor yourself? Yes, if the concrete is clean, dry, and structurally sound. DIY kits work for lightly used garages. If the floor has oil stains, cracks, old paint, or moisture issues, DIY epoxy is likely to peel early without professional-grade prep equipment. Is epoxy garage flooring worth the cost? For a garage with regular vehicle use and concrete that needs protection from oil, road salt, and chemicals, yes. It reduces cleaning time significantly and extends the life of the slab. For a garage with serious moisture or structural problems, address those first — no coating survives a compromised slab. What is the difference between epoxy and polyurea garage floor coatings? Epoxy is the base coating — it bonds to concrete and provides thickness and chemical resistance. Polyurea and polyaspartic are topcoats applied over epoxy, adding UV resistance and faster cure time. The best systems use both: epoxy base, polyaspartic topcoat. How do you clean an epoxy garage floor? Mild dish soap and warm water handles most cleaning. For oil or chemical spills, a pH-neutral cleaner and a soft-bristle brush work well. Avoid acidic cleaners and steel wool — both can damage the topcoat over time. Final Verdict The $3 to $12 per square foot range for epoxy garage floor cost is where every budget starts. Where it ends depends on what’s underneath the surface. I’ve watched homeowners accept the lowest quote and end up paying for a second installation 18 months later because the prep was inadequate. The contractors who charge $7 to $10 per square foot and grind the concrete, test for moisture, and put down three layers rarely get callbacks for failures. The contractors who quote $3 and show up with an acid etcher and one coat of water-based epoxy frequently do. Before you sign anything, ask for the full line-item breakdown, specifically whether grinding, crack repair, and topcoat are in the price. That question alone will tell you more about the quality of the job than the total at the bottom of the quote. Cost estimates based on HomeAdvisor/Angi national averages, 2024–2025. Verify current pricing with local contractors before budgeting. Sources HomeAdvisor/Angi, “Epoxy Garage Floor Cost.” 2024–2025. https://www.angi.com NAHB, “Cost of Constructing a Home.” 2024. https://www.nahb.org This Old House, “How Much Does Epoxy Flooring Cost?” March 2026. https://www.thisoldhouse.com/flooring/epoxy-floor-cost
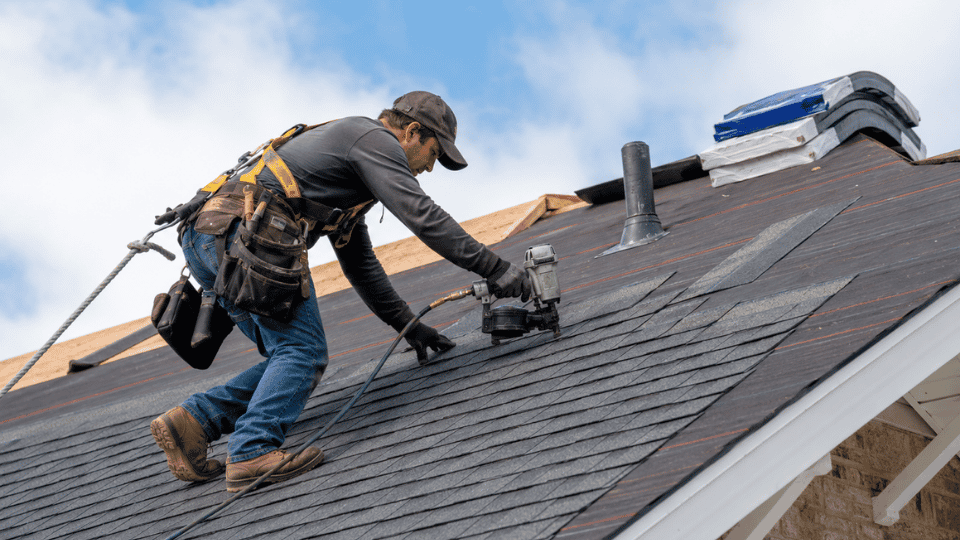
Roof replacement cost runs between $8,000 and $22,000 for most US homeowners using asphalt shingles, and the final number almost never matches the first number a contractor quotes. The gap isn’t random. It comes down to three line items that most initial bids don’t surface: pitch, decking damage, and what gets lumped into “miscellaneous.” This guide breaks down the actual cost structure by size, material, and region. It also tells you exactly which variables push your quote up and which ones are negotiable before you sign anything. Cost Note: Figures in this article are estimates based on national averages (Angi/HomeAdvisor 2026 cost data, NAHB). Actual costs vary significantly by region, contractor, materials, and project scope. Always get at least three quotes before committing to any project above $1,000. Average Roof Replacement Cost by Home Size Your home’s square footage and your roof’s actual surface area are two different numbers. Pitch multiplies the surface beyond your footprint, and overhangs add more. A 2,000 sq ft home with a medium pitch can have 26 to 32 roofing squares once the geometry is accounted for, and roofing is priced by the square (one square equals 100 sq ft of roof surface, not floor area). Home Size (sq ft) Estimated Roof Squares Estimated Cost Range 1,000 to 1,500 12 to 18 $5,500 to $10,000 1,500 to 2,000 18 to 25 $8,000 to $14,000 2,000 to 2,500 25 to 32 $11,000 to $18,000 2,500 to 3,000 32 to 40 $14,000 to $22,000 3,000+ 40+ $20,000 to $35,000+ These ranges assume standard architectural asphalt shingles, a moderate pitch, and a single-story structure. Premium materials, steep pitches, or significant decking damage will push costs higher, sometimes by 20 to 40 percent. Before calling contractors, run a quick self-estimate: multiply your home’s footprint (length x width) by a pitch multiplier (1.15 for low, 1.25 for medium, 1.41 for steep), then add 10 to 15 percent for waste. At $450 to $550 per square installed for architectural shingles, a reasonable national mid-market figure for 2026, that gives you a working baseline. A 1,800 sq ft home at medium pitch comes to roughly 25 squares, or $11,000 to $14,000 before permits and decking. Roof Replacement Cost by Material Material selection is the biggest single lever in roof replacement cost outside of square footage. Here’s how the most common options compare on installed price per square and realistic lifespan: Roofing Material Cost Per Square (Installed) Lifespan 3-tab asphalt shingles $300 to $450 15 to 20 years Architectural asphalt shingles $400 to $600 25 to 30 years Premium / designer asphalt $500 to $800 30 to 40 years Metal (steel panels) $700 to $1,400 40 to 70 years Standing seam metal $1,200 to $2,000 50 to 70 years Cedar shake $900 to $1,600 20 to 30 years Concrete tile $900 to $1,500 40 to 50 years Clay tile $1,200 to $2,500 50 to 100 years Slate $1,500 to $4,000+ 75 to 150 years Synthetic slate or shake $700 to $1,200 30 to 50 years Architectural asphalt shingles are the right choice for most homeowners. They cost 20 to 30 percent more than 3-tab but carry longer warranties and hold up significantly better over time. Metal roofing costs more upfront but often makes financial sense in high-wind, hail-prone, or extreme-climate regions where asphalt shingles degrade faster. The math only works in metal’s favor if you plan to stay in the home long enough to recoup the premium, typically 15 to 20 years. What Drives the Final Roof Replacement Cost The material and square count set the baseline. These are the variables that routinely move the final invoice away from the initial quote, sometimes by thousands of dollars. Roof Pitch and Complexity Steeper roofs require safety equipment, slower crew movement, and more labor hours per square. A simple gable roof prices differently than one with dormers, multiple valleys, hips, or skylights, even when the square footage is the same. Two 25-square roofs can have a $4,000 labor difference based entirely on shape. Always ask for the per-square labor rate broken out from the material cost. Tear-Off and Disposal Removing one layer of asphalt shingles is straightforward. Two or more layers, which many older homes have, adds labor time, dumpster weight, and disposal fees. Some local codes prohibit adding a third overlay, making removal mandatory. Ask whether tear-off, dumpster rental, and debris cleanup are included in the quote or billed separately. Underlayment Underlayment sits between the deck and the outer roofing material. Felt paper is the lower-cost option; synthetic underlayment costs more but provides better moisture resistance and durability. In colder climates, ice-and-water barrier is often required along eaves and valleys. This line item can add $500 to $1,500 to a standard job and should appear explicitly in any detailed quote. Flashing Flashing seals roof joints around chimneys, skylights, vents, and sidewalls. Poor flashing is one of the most common causes of leaks, not the shingles themselves. Ask specifically whether existing flashing will be reused, repaired, or fully replaced. Reusing 15-year-old flashing on a new roof is a cost cut that typically shows up as a callback within three years. Ventilation Blocked soffits, missing ridge ventilation, or insufficient attic airflow will shorten the lifespan of new shingles. If ventilation is inadequate, a roofer should flag it during the estimate rather than after install. Skipping the upgrade saves money upfront and costs it back within five to eight years of premature shingle degradation. Decking Condition This is the line item that surprises homeowners most. Rotted or water-damaged plywood can’t be seen until tear-off is complete, which is why it almost never shows up in the initial quote. Contractors typically charge $60 to $100 per sheet for replacement. On a large roof with significant moisture damage, that can add $1,500 to $3,000 to the final invoice. Ask for the per-sheet decking rate in writing before signing anything. Permits Most jurisdictions require a permit for full roof replacement. Permit costs vary by location and project size, typically $150 to $500, and the paperwork process can also affect scheduling. Confirm whether the contractor pulls the permit or whether you’re responsible. Any quote that doesn’t address permits at all is worth questioning. Where Budgets Go Wrong I’ve seen homeowners budget carefully for the per-square rate and get surprised by everything else. These are the line items most likely to inflate your final invoice above the initial quote: Decking replacement: Not visible until tear-off. Get the per-sheet rate in writing. It’s the single biggest source of invoice surprises. Layered tear-off: Two or more existing shingle layers add time and disposal cost that low bids often exclude. Flashing replacement: Often treated as optional when it shouldn’t be. Full replacement adds $300 to $800 but protects a $12,000 investment. Ventilation upgrades: A necessary cost on older homes, but one that some contractors defer because it adds scope to the conversation. Dumpster and cleanup: Should be included but often isn’t itemized in base quotes. Confirm in writing. Roof Replacement Cost by Region Labor rates, material costs, and permitting fees vary enough that the same architectural shingle installation can cost $9,000 in Alabama and $20,000 in California. Region matters as much as material type when you’re setting a budget. Similar cost patterns apply to other large home projects. The same regional variation shows up in sunroom addition costs, where labor accounts for a significant share of the spread. Region States Estimated Cost Range Northeast NY, MA, CT, NJ $12,000 to $25,000+ West Coast CA, WA, OR $12,000 to $22,000+ Mid-Atlantic VA, MD, PA $10,000 to $18,000 Midwest IL, OH, MI $9,000 to $17,000 Southeast GA, AL, TN $7,500 to $14,000 South Central TX, AR, OK $7,000 to $13,000 Hawaii N/A Well above national average Regions with frequent storm activity, including the Gulf Coast, Tornado Alley, and Atlantic hurricane zones, often see elevated labor demand and compressed availability following major weather events. If your roof needs replacement but isn’t actively failing, scheduling outside of post-storm seasons can improve both availability and price. What Homeowners Are Saying A thread in r/Roofing asking what to expect for a roof replacement on a 2,000 sq ft home in Jacksonville drew a range of honest responses. Commenters quickly flagged that a 2,000 sq ft footprint doesn’t equal 20 roofing squares, since pitch and waste push the number higher, with one commenter calculating roughly 25.7 squares at a 6/12 pitch. Cost estimates ranged from $350 to $400 per square to $12,000 to $18,000 total, depending on region and scope. That gap is exactly what I see in practice. The difference between what homeowners expect to pay and what they actually pay almost always comes down to pitch, waste factor, and decking repairs that nobody budgeted for. Getting the per-square rate and the per-sheet decking rate in writing before signing anything closes that gap considerably. Roof Repair vs. Roof Replacement Not every roofing problem is a full replacement. The decision comes down to age, damage extent, and the honest math between repair cost and replacement cost. Situation Recommended Action Estimated Cost Isolated leak, 1 to 5 shingles affected Repair $150 to $600 Flashing failure, no structural damage Repair or reseal $200 to $500 Granule loss in multiple areas Evaluate age first Varies Roof under 15 years old, limited damage Repair $500 to $2,500 Roof 20+ years old, widespread damage Replacement Full project cost Multiple leak points, sagging, or rot Replacement Full project cost Preparing home for sale, roof near end of life Replacement often advised Full project cost The benchmark I use: if repair costs exceed 50% of a full replacement, especially on a roof older than 15 years, replacement makes better long-term financial sense. You’re paying repair prices to extend a roof that’s already in the last quarter of its life. This same cost-versus-lifespan logic applies to other major home projects. If you’re weighing significant exterior improvements alongside the roof, the cost breakdown for house additions follows a similar structure, with permit costs, regional labor variation, and scope creep as the main variables. How to Compare Quotes Before Hiring Getting three quotes only helps if each contractor is pricing the same scope. A lower bid isn’t a better deal if it leaves out flashing, ventilation, decking repair rates, permits, or cleanup. What to Ask Your Contractor Before Signing How many roofing squares are you pricing? Home square footage and roof square footage are not the same. Get the exact number. What is your per-sheet rate for decking replacement? This is the single most important number to have before damage is found at tear-off. Is tear-off, dumpster rental, and cleanup included? These should be included. Confirm it in writing. Will the flashing be replaced or reused? Reusing old flashing on a new roof is a false economy. Who pulls the permit, and is the fee included in this quote? Red Flags in a Roofing Quote Vague scope: “New roof” with no material spec, no square count, no flashing or underlayment listed No license or insurance: Creates personal liability if something goes wrong on your property No decking repair rate: The most common source of invoice surprises Pressure to sign quickly: A decision rushed in your direction benefits the contractor, not you Very low bid with no explanation: Something is missing from the scope. Find out what before you sign. Ways to Lower Roof Replacement Cost Compare at least three written estimates from licensed local contractors Match scope before comparing totals so every bid includes the same materials and work Choose architectural asphalt shingles if upfront cost matters and premium materials aren’t needed Replace before leaks spread to decking, insulation, or framing. Deferred replacement is more expensive, not less. Ask about off-peak scheduling if you have flexibility. Post-storm seasons drive up demand and price. Check insurance eligibility after hail, wind, or storm damage before paying out of pocket Frequently Asked Questions These are the questions I hear most from homeowners who’ve already got a quote in hand and aren’t sure whether to trust it. How much does a roof replacement cost for a 1,500 sq ft house? Expect $7,000 to $12,000 for a standard architectural shingle replacement on a 1,500 sq ft home with a moderate pitch. That covers roughly 18 to 22 squares installed. Decking damage, steep pitch, or premium materials will push costs higher. How much do roofers charge per square? Most licensed contractors charge $400 to $600 per square installed for architectural asphalt shingles, including labor and materials. 3-tab shingles run $300 to $450 per square. Metal roofing starts at $700 per square and goes significantly higher for standing seam. What is the average cost of roof replacement in 2026? The national average for a full asphalt shingle roof replacement sits around $11,000 to $14,000 for a standard single-story home. That covers materials, labor, tear-off, and standard project costs, but not significant decking repairs or premium upgrades. Is it cheaper to repair or replace a roof? Repair is cheaper short-term. But if the roof is over 15 years old and repair costs exceed 50% of replacement cost, full replacement is typically the better financial decision. Partial repairs on an aging roof tend to chase the next failure point. How much is a new roof per square foot? Asphalt shingle roof replacement runs $4 to $6 per square foot installed for most homes. A 2,000 sq ft roof surface (not floor area) costs $8,000 to $12,000 in materials and labor before permits, disposal, and decking work. Does roof replacement increase home value? A new roof improves buyer confidence, supports a cleaner inspection report, and removes a negotiation point in a sale. Return on investment varies by market and material, but replacing a failing roof before listing is generally expected by buyers, not rewarded with a dollar-for-dollar premium. What time of year is cheapest to replace a roof? Late fall and winter tend to offer the most contractor availability and occasionally better pricing, as long as you’re outside of post-storm demand spikes. Avoid scheduling during or immediately after major storm events in your region, when compressed availability inflates quotes. Final Verdict The $8,000 to $22,000 range for asphalt shingle roof replacement is real, and where your project lands inside that range is decided by pitch, decking condition, and what the contractor left out of the initial bid. Before you sign anything, get the per-sheet decking rate and confirm that tear-off, flashing, and permits are included in the scope. Those three questions close most of the gap between a quoted price and a final invoice. Get at least three written estimates, compare them line by line against the same scope, and ask specifically about the one number that almost never shows up in a first quote: what does decking replacement cost per sheet if it’s needed? Cost estimates based on Angi/HomeAdvisor 2026 national averages and NAHB residential construction data. Verify current pricing with local contractors and suppliers before budgeting.
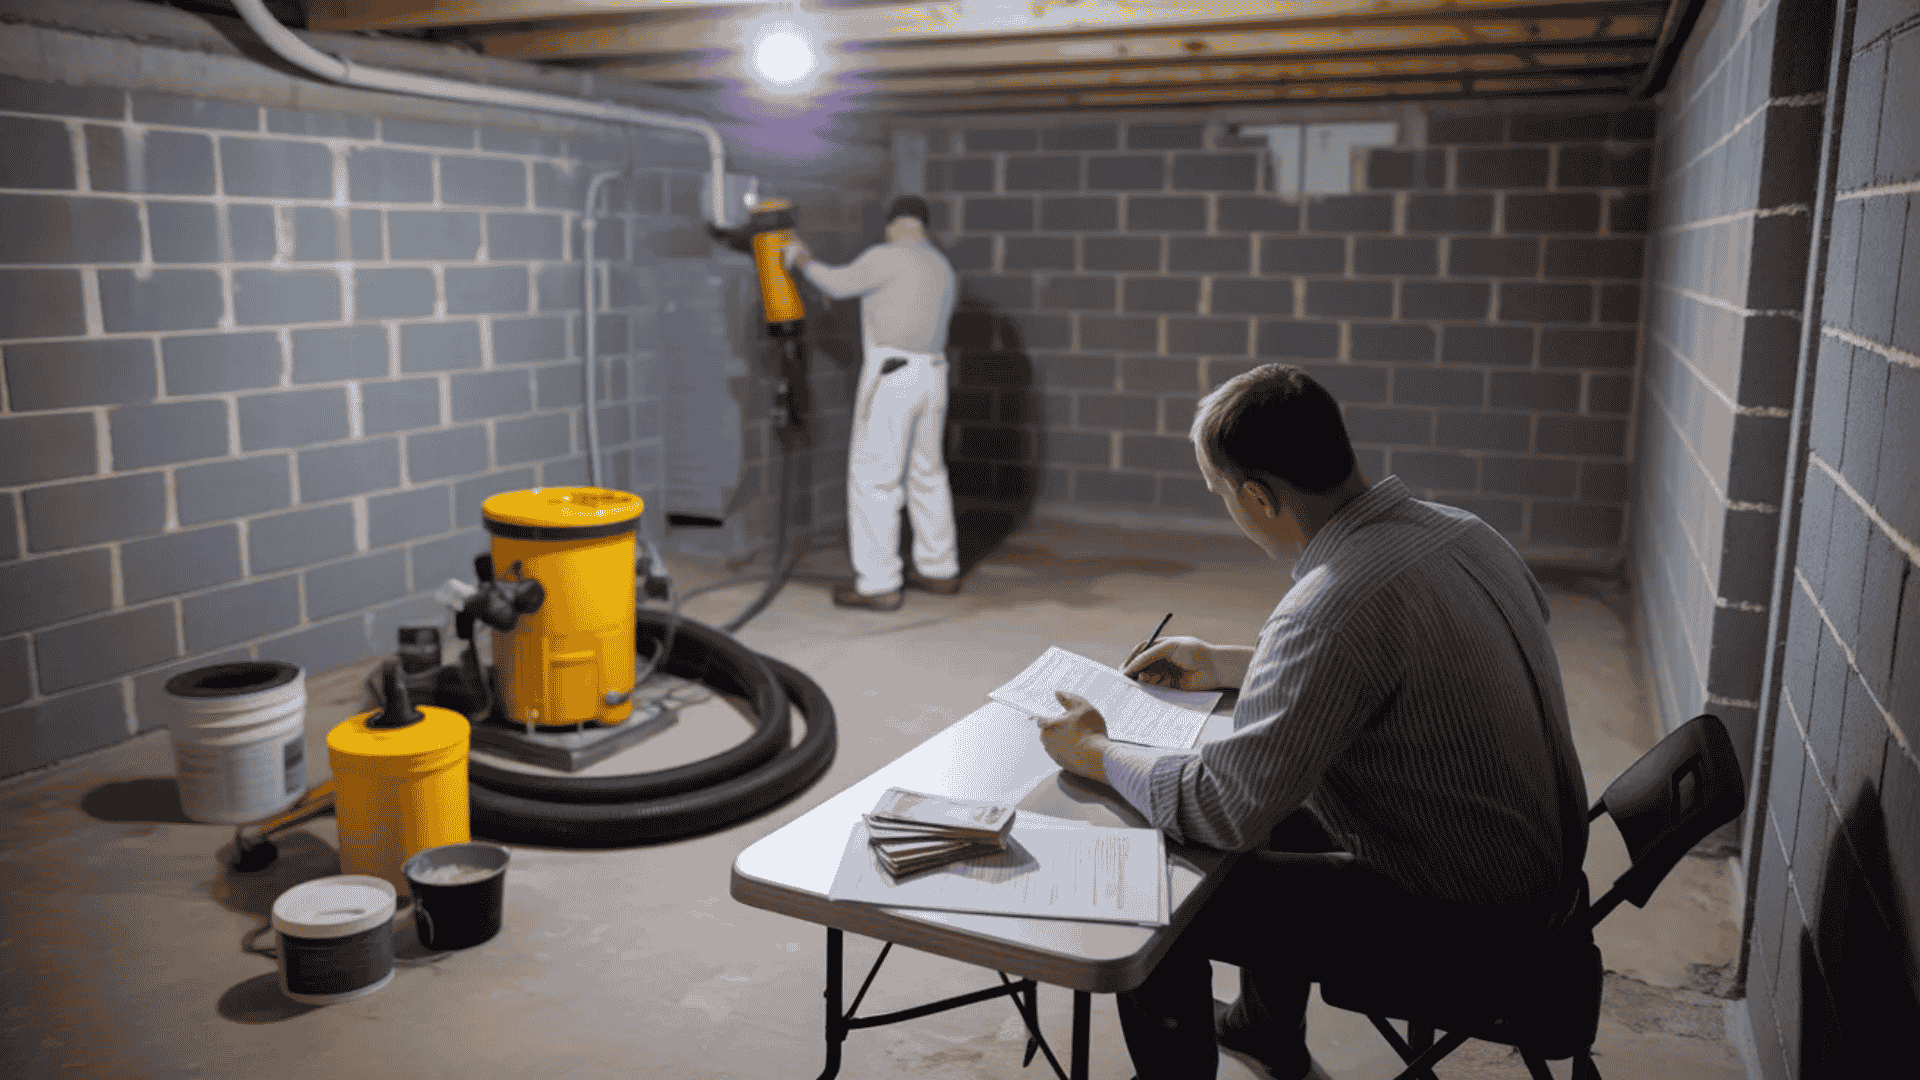
Basement water damage can cost you tens of thousands in repairs if you ignore it for too long. I’ve seen how stressful it feels when water starts creeping in, and you’re not sure what to do next. That slow seepage, damp walls, and musty smell aren’t small issues. They’re early signs of deeper structural problems that only get worse with time. Understanding basement waterproofing cost early helps you avoid expensive surprises later. I put this together to cut through contractor confusion and give you a clear breakdown of what really matters. You’ll see real costs, practical options, and simple ways to save money, so you can protect your home without second-guessing every step. What Is Basement Waterproofing? Basement waterproofing runs $500 to $30,000 for most US homes. That range is real, and it’s wide for a reason: sealing a hairline crack in a dry basement is a completely different job from excavating around a failing foundation in a house that’s been flooding for five years. The method you need determines the basement waterproofing cost almost entirely, and most homeowners don’t figure that out until after they’ve already called someone. Basement waterproofing is the process of applying techniques and materials to stop water from entering through the foundation or basement walls. It protects structural integrity, prevents mold growth, and keeps a basement usable. The four main approaches are interior waterproofing, exterior waterproofing, sump pump installation, and sealants or coatings. Each one targets moisture at a different point of entry and carries a different price tag. Cost Note: Figures in this article are estimates based on national averages. Actual costs vary significantly by region, contractor, materials, and project scope. Always get at least three quotes before committing to any project above $1,000. Average Basement Waterproofing Budget Understanding your waterproofing options starts with knowing what each method typically costs. Here is a clear breakdown of pricing across the major approaches. Method Low-End Mid-Range High-End Avg. Labor Avg. Materials Interior Waterproofing $500 $3,500 $10,000 $1,500–$3,000 $500–$2,000 Exterior Waterproofing $3,000 $12,000 $30,000+ $5,000–$15,000 $2,000–$8,000 Sump Pump Installation $600 $1,200 $4,000 $300–$700 $150–$600 Drainage Systems $2,000 $6,000 $15,000 $1,500–$5,000 $500–$3,000 Sealants & Coatings $100 $500 $2,500 $200–$800 $50–$300 Armed with these figures, you can now match your waterproofing needs to a realistic budget, making smarter decisions that protect both your basement and your wallet in the long term. Disclaimer: Costs may vary depending on your region, dispensary, brand, and local market conditions. Factors Affecting Basement Waterproofing Cost Several key variables determine how much you’ll spend on basement waterproofing: understanding each factor helps you anticipate costs and plan your budget with confidence. 1. Size and Condition of Your Basement Square footage directly drives waterproofing costs; larger basements require more materials, labor, and time. A standard 1,000 sq. ft. basement costs significantly less than a 2,500 sq. ft. space. Structural issues like cracks, deteriorating walls, or an aging foundation add complexity, pushing costs higher as contractors must address damage before applying any waterproofing solution. 2. Waterproofing Method Your chosen method is one of the biggest cost variables in any waterproofing project. Simple sealants are budget-friendly, while interior drainage systems fall in the mid-range. Exterior waterproofing requiring excavation and heavy labor sits at the premium end. Matching the right method to your specific moisture problem prevents overspending on solutions your basement may not actually need. 3. Location and Accessibility Geographic location significantly influences both labor rates and material costs, with urban areas typically commanding higher prices than rural regions. Additionally, basements that are difficult to access due to narrow entry points, finished interiors, or limited workspace increase labor hours and complexity, thereby directly raising the overall project cost regardless of the selected waterproofing method. 4. Extent of Water Damage Minor seepage or early-stage moisture issues are far less expensive to address than long-standing water damage. Severe problems such as flooded basements, crumbling walls, or extensive mold growth require remediation before waterproofing even begins. The worse the existing damage, the more contractors must repair first, compounding both material and labor costs well beyond standard waterproofing estimates. 5. Additional Factors Beyond the obvious, several hidden variables quietly shape your final bill. The foundation type, whether poured concrete, block, or stone, affects how waterproofing products are applied. A steep lot slope may complicate the installation of exterior drainage. Existing drainage systems in poor condition often need upgrading. Permit requirements, soil type, and regional climate can also add unexpected costs to your project. DIY vs. Professional Basement Waterproofing Costs Before picking an approach, it’s important to weigh your options carefully: here’s a clean comparison of DIY versus professional waterproofing across every key factor. Factor DIY Waterproofing Professional Waterproofing Common Methods Sealants, coatings, and basic drainage Full drainage systems, exterior waterproofing, and sump pumps Time Required 1–3 days 1–5 days Skill Level Low to moderate Licensed & experienced Quality of Results Moderate High Long-Term Effectiveness 1–5 years 10–25+ years Warranty None 5–25 years Risk of Errors High Low Best For Minor seepage, small cracks Severe damage, full protection Each option serves a different need and budget level: choose DIY for quick surface fixes, or invest in professional services for lasting, whole-home protection. Is Basement Waterproofing Worth the Cost? A professional waterproofing system typically costs $3,000–$10,000. Foundation repairs from prolonged water damage routinely run $20,000–$100,000. That math is straightforward, but it’s the middle-range repairs that catch most homeowners off guard. Risk Without Waterproofing Estimated Repair Cost Mold remediation $500–$6,000 Foundation crack repair $2,000–$7,500 Structural wall repair $5,000–$15,000 Full foundation replacement $20,000–$100,000 Beyond the avoided repair costs, waterproofing a basement adds 5–10% to resale value and removes one of the most common buyer negotiation points at closing. A dry basement also converts from a liability into usable square footage, and if you’re thinking about finishing that space, understanding what a full basement remodel costs helps you plan the sequence correctly. Waterproofing always comes first, before any finishing work begins. Most standard homeowner policies don’t cover gradual water intrusion or foundation failure, so the financial exposure of doing nothing is entirely yours to carry. The upfront cost is fixed and predictable. The cost of deferring it compounds every season. Where Basement Waterproofing Budgets Go Wrong? These are the line items that reliably surprise homeowners who got a quote and thought they understood the number. Pre-Waterproofing Repairs: Many quotes assume a structurally sound basement. Issues like cracked mortar, bowing walls, or bad drain tile become extra costs (change orders) if discovered later. Sump Pump Installation Costs: Breaking concrete for a sump pit can add $300–$800, often not included. Extras like a battery backup and long discharge lines further increase the total. Interior Drainage Limitations: Interior systems handle water inside only, not pressure outside. Poor yard slope or gutter placement keeps them running constantly. Regrading, downspout extensions, and drains improve performance. Pair with a backyard remodel to reduce overall costs. Missing Permit Costs: Many quotes exclude permit fees, which can add $200–$800. Always confirm whether permits are included to avoid misleading low estimates. How to Save Money on Basement Waterproofing Waterproofing doesn’t have to drain your savings: these practical strategies can help you cut costs without cutting corners on quality or long-term protection. Get Multiple Estimates: Always collect at least 3 quotes from licensed contractors. Comparing bids reveals price differences and helps you identify the fairest market rate for your specific project. Negotiate With Contractors: Don’t hesitate to negotiate, ask about price matching, scope adjustments, or discounts for prompt payment, as many contractors have flexibility built into their initial quotes. Time It Strategically: Schedule waterproofing during off-peak seasons, such as late fall or winter, when contractors are less busy and more willing to offer meaningful seasonal discounts. Bundle Services: If your home needs additional work, drainage upgrades, foundation repairs, or crawl space encapsulation, bundling multiple services with one contractor often unlocks significant package pricing. Financing Options: Many waterproofing companies offer payment plans or financing programs. Additionally, check for home improvement loans or government assistance programs that may help offset upfront costs. Smart planning and a few well-timed conversations can make a real difference in your final bill: every dollar saved on waterproofing is a dollar better invested in your home’s long-term value. What Happens If You Don’t Waterproof Your Basement? Skipping basement waterproofing may seem like a cost-saving decision today, but the long-term financial consequences far outweigh the initial investment. As many homeowners have openly shared in a Reddit discussion, the most common regret isn’t spending money on waterproofing, but waiting too long to do it. Persistent moisture seeping into your foundation gradually weakens structural integrity, leading to costly foundation repairs averaging $5,000–$50,000 . Standing water and humidity create ideal conditions for toxic mold growth, threatening family health and requiring expensive professional remediation. Over time, wood rot, deteriorating drywall, and damaged flooring compound repair bills significantly. Unaddressed water damage also reduces property value and becomes a serious obstacle during home sales. Insurance rarely covers gradual water damage, leaving homeowners fully exposed financially. Cost-Effective Alternatives for Basement Waterproofing When basement moisture becomes a concern, exploring cost-effective measures can provide temporary relief while you plan for a permanent fix. The following table outlines practical, budget-friendly alternatives to full waterproofing systems: Solution Estimated Cost What It Does Limitation Dehumidifiers $200 – $500 Reduces indoor humidity levels effectively Doesn’t address the root cause of water intrusion Exterior Drainage Improvement $50 – $150 Regrading the yard, cleaning gutters & extending downspouts redirects water away from the foundation Requires regular maintenance to remain effective Interior Sealants & Waterproof Paints $50 – $300 Creates a quick surface barrier against minor seepage Only handles minor moisture; not a permanent solution Full Waterproofing System $5,000 – $15,000 Permanently resolves water intrusion at the source Requires professional installation and budgeting While these alternatives can reduce moisture and buy valuable time, they are, at best, temporary measures. For homes with serious water intrusion, investing in professional waterproofing sooner rather than later remains the smarter and more cost-effective long-term decision. Final Thought Protecting your basement is ultimately protecting your entire home’s future, and understanding basement waterproofing cost decisions comes down to one thing: timing. The longer you wait, the more expensive the damage becomes. From costs and methods to risks and alternatives, every key factor has been covered here because informed homeowners always make better investments. No interior upgrade matters if your foundation is quietly failing beneath it. Get three contractor quotes today, compare your financing options, and take that first confident step toward a dry, stable, and valuable home. Do share your thoughts in the comments below. I’m always here to help you build smarter. Frequently Asked Questions How much does basement waterproofing cost on average? Most projects range from $3,000 to $10,000 for standard systems. Basic sealants cost less, while full exterior work with excavation can reach $10,000 to $30,000, depending on scope and conditions. How much does exterior basement waterproofing cost? Exterior work typically costs $3,000 to $30,000. Full excavation around a home often falls between $10,000 and $20,000, with labor being the largest expense due to the difficulty of digging around foundations. What is the cost of waterproofing basement walls from the inside? Interior wall systems cost $2,000 to $8,000, depending on size and setup. Simpler sealant applications range from $300 to $1,500 for standard basements without major drainage work involved. What is the cost of waterproofing basement walls from the outside? Exterior wall work ranges from $1,500 to $5,000 for small sections. Full perimeter excavation and waterproofing typically costs $8,000 to $30,000, depending on wall length and excavation depth. What is the basement waterproofing cost per linear foot? Interior drainage systems usually cost $50 to $100 per linear foot. Exterior systems with excavation range from $100 to $300 per foot, depending on soil conditions and accessibility around the home. What is the average cost for a 1,500 sq. ft. basement? Interior drainage for this size typically runs $8,000 to $16,000. Adding a sump pump increases cost slightly, while full exterior waterproofing can range from $15,000 to $30,000. What is the interior vs. exterior waterproofing cost? Interior systems cost $3,000 to $10,000 and manage water inside. Exterior solutions cost $10,000 to $30,000 and stop water at the source, making them more suitable for severe moisture problems. Does homeowners’ insurance cover waterproofing costs? Insurance usually does not cover waterproofing or gradual water damage. Sudden incidents like burst pipes may qualify, but long-term moisture issues and foundation problems are typically excluded from coverage.
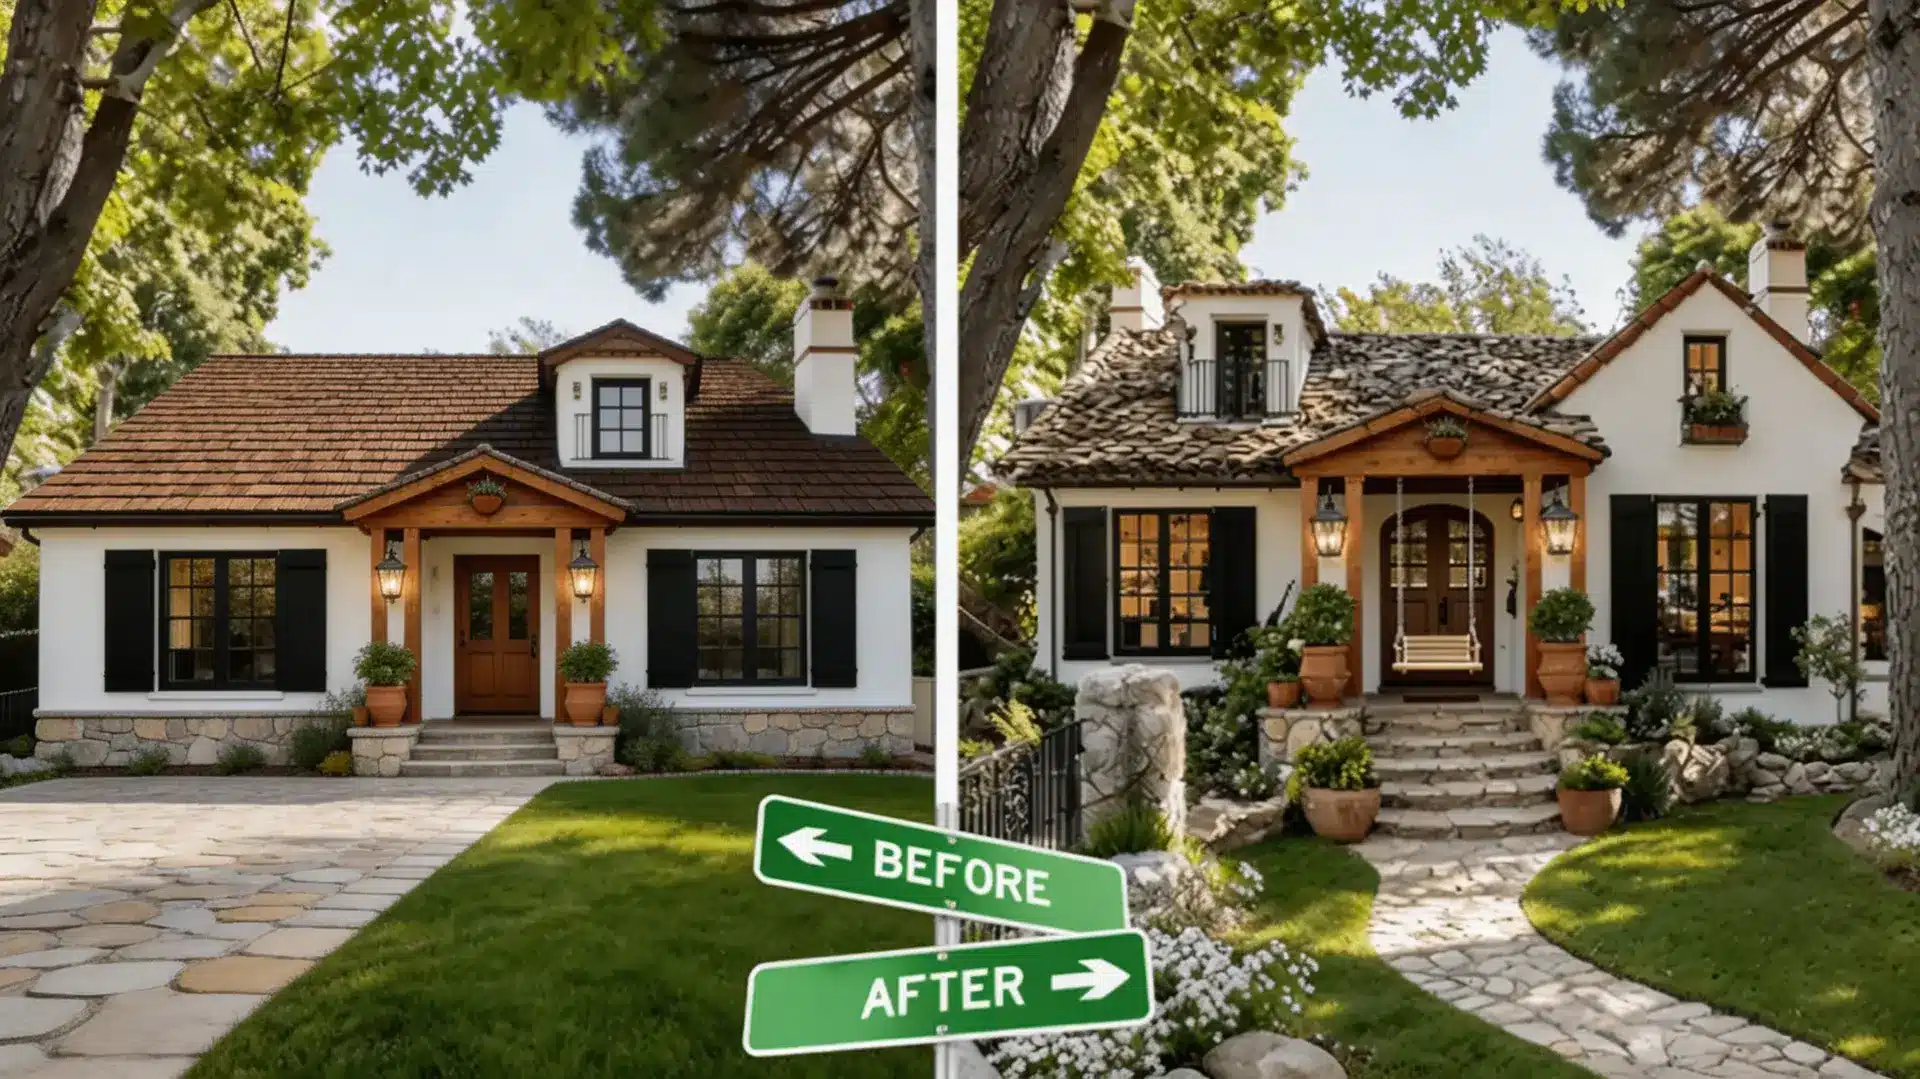
House additions run from $1,500 for a fire pit area to $350,000 for a full second story. That range is real, and the gap comes down to three things: how much of the structure already exists, how complex the permit process is in your area, and whether you have a contractor who has done this specific type of work before. The 37 house additions below cover outdoor builds, structural changes, and interior conversions, each with a before-and-after breakdown and the cost range you should actually expect. Cost Note: Figures in this article are estimates based on national averages. Actual costs vary significantly by region, contractor, materials, and project scope. Always get at least three quotes before committing to any project above $1,000. What to Expect Before Any House Addition Begins Every home addition project I’ve seen go sideways had one thing in common: the owners started construction before they understood the full scope of what they were approving. The planning phase is not optional, and it is not quick. Budget meaningful time to source and vet contractors, pull the necessary permits, and finalize a budget with a 15 to 20 percent contingency built in above the quoted figure. Timeline expectations matter too. A bump-out or garage conversion typically runs four to eight weeks. A second-story addition or basement conversion can take four to six months or longer, depending on structural complexity and local permit approval windows. The projects that finish on time and on budget are almost always the ones where every material and layout decision was locked in before anyone touched a wall. Outdoor House Additions: Before and After Outdoor spaces are the most consistently underused part of any property. A backyard that exists primarily as a maintenance obligation is leaving real value on the table. These house additions change that directly. 1. Creating an Outdoor Living Space Before: A flat yard with no furniture, no shade, and no reason to spend time there. The space exists but serves no purpose beyond weekly mowing. After: A pergola anchors the main zone. A weather-resistant sectional sits below it. A built-in stone firepit with seating is placed 10 feet away, and string lights run the length of the pergola beams. Usable for nine months of the year in most US climates. 2. Expanding the Patio or Deck Before: A small aging deck with warped boards, outdated railing, and barely enough surface for a table and two chairs. Furniture management was required before anyone sat down. After: Rebuilt in composite material with a defined dining zone and a lounge zone, built-in planters at the perimeter, cable railing keeping sightlines open, and recessed lighting at the perimeter for evening use. The difference in usable square footage is typically 150 to 300 square feet. 3. Adding a Pool House or Shed Before: Pool chemicals, floats, maintenance equipment, and towels in plastic bins against the house wall or left poolside. The yard looks disorganized regardless of how recently it was cleaned up. After: A dedicated structure with a covered entry porch, organized equipment and chemical storage, a changing area with an outdoor shower, and exterior cladding matched to the existing house. No more visual disorder around the pool perimeter. 4. Adding a Sunroom Before: A living room that backs onto the yard with no physical or visual connection to it. During cooler months the backyard is inaccessible and the interior feels closed off in every direction. After: A glass-walled room connected through French doors, with thermal glazing, a ceiling fan, wicker furniture, tile flooring, and an unobstructed garden view. In climates with cold winters, this is the home addition that extends outdoor living by three to four months per year. 5. Expanding the Yard With a Garden Before: A flat lawn with uniform grass, no planting beds, no pathways, and nothing that gives any part of the yard a distinct identity or reason to linger. After: Raised beds along one fence line, a stone path from the back door to a seating area, flowering border plants at the perimeter, and two mature shade trees transplanted in place. The yard now has zones rather than a single undifferentiated surface. 6. Adding a Pergola or Covered Patio Before: A plain concrete slab with no shade and no furniture because direct sun makes the space unusable between 10am and 5pm for most of the summer. After: A timber pergola with climbing plants along the beams, pendant lights, a ceiling fan for air movement, and weather-resistant furniture positioned within the shaded zone. One of the more cost-effective house additions at this scale. 7. Installing a Swimming Pool Before: A featureless backyard with no compelling reason to spend extended time in it during summer. Largely unused except for occasional seating. After: An inground pool with stone coping, built-in entry steps, a surrounding composite deck, sun loungers alongside, and landscaped beds at the perimeter. The pool becomes the organizing feature the entire yard was missing. Note that inground pool costs vary more by region than almost any other outdoor addition, with labor and soil conditions driving most of the range. 8. Adding a Fire Pit Area Before: An empty back corner with no purpose and no reason to go there after dark. The yard’s full footprint goes unused once daylight fades. After: A built-in stone firepit with curved stone seating around it, low perimeter lighting, and a gravel base that drains well and requires minimal upkeep. One of the few house additions that extends outdoor use into October and November in most US climates. 9. Building a Greenhouse Before: Outdoor pots that decline each winter, or an empty yard corner used for nothing specific, with no shelter to carry plants through the colder months. After: A lean-to greenhouse attached to the house wall with glass roof panels, raised growing beds, shelving for seedlings and herbs, and opening vent panels that regulate internal temperature. Extends the growing season by two to three months on either side of the standard window. 10. Adding a Front Porch Before: A plain front door with a single step, no shelter, and no transition between the yard and the entry. Rain, deliveries, and arriving guests all encounter the same unprotected opening. After: A covered porch with timber columns, a tongue-and-groove painted ceiling, a swing on one side, potted plants along the rail, and a ceiling fan for summer comfort. Also meaningfully improves curb appeal, which matters for resale regardless of when you plan to sell. 11. Adding a Hot Tub or Spa Area Before: A bare yard corner with no furniture and no draw to spend time there outside the warmest months. A dedicated outdoor retreat is possible but nothing has been done to build one. After: A hot tub recessed into a timber deck platform, surrounded by a privacy screen of tall planters, low ambient lighting at the perimeter, and a side table for towels. One of the few outdoor house additions that delivers value in all four seasons. 12. Adding Outdoor Lighting Before: A single porch light casting uneven coverage. Seating areas are dim after dark and pathways present a genuine trip hazard. The outdoor space is functionally off-limits once the sun goes down. After: Recessed deck lighting, low-voltage path lighting along garden edges, a string light canopy over the main seating zone, and spotlights on key planting areas and the rear fence line. The yard is now usable for an extra two to three hours every evening. Outdoor house additions consistently produce the most visible shift in how a property feels on a daily basis. Even a single well-executed project changes how much time you actually spend outside. Now let’s look at changes that go deeper into the structure. Outdoor Addition Cost Estimates These figures reflect typical US labor and material costs as of 2024 (HomeAdvisor national cost data). Regional variation, lot conditions, and contractor scheduling can all push costs outside these ranges. Addition Type Low End High End What Drives the Variation Outdoor Living Space $5,000 $65,000 Pergola size, built-in features, firepit complexity Patio or Deck Expansion $8,000 $45,000 Material (pressure-treated vs composite), deck size, railing type Pool House or Shed $15,000 $50,000 Foundation, utility connections, cladding to match existing house Sunroom $16,000 $75,000 Glazing type, HVAC integration, foundation requirements Garden Expansion $2,000 $15,000 Hardscaping scope, tree transplanting, irrigation Pergola or Covered Patio $5,000 $25,000 Material (kit vs custom timber), electrical for fans/lighting Inground Swimming Pool $44,000 $135,000 Pool size, soil conditions, deck scope, fencing requirements Fire Pit Area $1,500 $10,000 Gas vs wood, built-in seating, gravel vs paver base Greenhouse $5,000 $25,000 Kit vs custom, foundation type, utility connections Front Porch $10,000 $35,000 Roof tie-in, column style, permit complexity Hot Tub or Spa Area $7,000 $25,000 Hot tub model, deck platform, electrical upgrade required Outdoor Lighting System $1,000 $8,000 Low-voltage DIY vs hardwired professional installation A fire pit and lighting setup can be handled at a low cost. A pool or sunroom requires a longer financial runway and a more involved permit process. Get at least three contractor quotes before committing to anything at the top of these ranges. Structural House Additions Structural house additions alter the building’s physical capacity. They require the most planning and budget, but the results are permanent and directly reflected in the property’s square footage and market value. 13. Adding a Second Story Before: A single-story home with adequate structure but insufficient bedroom count. The lot cannot grow outward and the household has clearly outgrown the available rooms. After: A full second floor with two additional bedrooms, a new bathroom, a staircase integrated without sacrificing a main room, updated exterior cladding throughout, and an HVAC system expanded to serve both floors. This is the most disruptive of all house additions during construction, typically requiring a temporary move-out. 14. Basement Conversion Before: A dark basement used entirely for storage. Exposed concrete walls, bare bulb lighting, a sump pump in one corner, and stacked boxes throughout. It contributes nothing to daily household life despite occupying the same footprint as the entire ground floor. After: Insulated and drywalled walls, recessed lighting throughout, a large sectional facing a mounted TV, a wet bar with bar stools, a laundry alcove, and an egress window for code compliance. Basement conversions consistently rank among the best cost-per-square-foot home additions available. 15. Adding a Walk-In Closet Before: A reach-in closet with a single rail, one shelf above, and no dedicated storage for shoes or accessories. Getting dressed means moving half the closet to reach the other half. After: Dual hanging sections at two heights, open shelving for folded items, a central island with four drawers, LED strip lighting in every section, and a full-length mirror on the back wall. Often carved out of an adjacent bedroom or hallway, which is worth checking before assuming new construction is required. 16. Converting the Garage Into Living Space Before: A two-car garage used primarily for storage rather than vehicles. Bare concrete, uninsulated walls, a roll-up door, and no heating or cooling. After: Insulated walls, luxury vinyl flooring over a sealed concrete slab, recessed lighting, a glass entry door in place of the original roll-up, and a split-system unit for year-round climate control. Garage conversions are among the most cost-effective house additions because the foundation, walls, and roof already exist. 17. Adding a Room Over the Garage Before: A single-story garage with a flat or low-pitched roof and no use made of the airspace above it. The structure supports more than it is doing. After: A full room above the garage with matching exterior cladding, two front-facing windows, external staircase access, insulated walls, and a split-system unit. Works well as a guest suite, home office, or rental unit, depending on local zoning rules. 18. Adding a Home Theater Room Before: A spare room with a TV on a stand, ambient noise through the walls, no acoustic management, and seating that was never selected with viewing in mind. After: Tiered seating on two levels, acoustic panels on the walls, a full projection screen, recessed dimmable lighting, blackout curtains throughout, and a subwoofer in a corner cabinet. Best placed in a basement where sound transfer to adjacent rooms is naturally limited. 19. Adding a Music Room Before: An instrument in a spare bedroom with no acoustic management. Practice sessions create noise throughout the house and interrupt everyone else in it. After: Acoustic wall panels, sound-dampening insulation in the walls and ceiling, a floating floor to reduce vibration transfer, instrument storage along one wall, and a dedicated 20-amp circuit for amplifiers. The rest of the house stops being affected. 20. Adding a Yoga or Meditation Room Before: A living room corner or spare bedroom floor used occasionally for practice, requiring furniture to be moved every single time. That friction alone is enough to kill a consistent routine. After: A cleared room with cork or bamboo flooring, a full-length mirror on one wall, recessed dimmable lighting, built-in storage for mats and props, and a small Bluetooth speaker system. Among the lowest-cost room additions when the space already exists and only needs conversion. Structural house additions require the most upfront investment in planning and permits, but they produce results that are permanent and directly affect how the property functions every day. With those in place, here are the interior living space additions that change day-to-day household rhythm most directly. Structural Addition Cost Estimates Structural projects involve engineering reviews, extended permit timelines, and in some cases temporary displacement during construction. These ranges include labor, materials, and standard finishes based on 2024 NAHB and HomeAdvisor data. Addition Type Low End High End What Drives the Variation Second Story Addition $100,000 $350,000 Structural engineering, existing roof removal, HVAC scope Basement Conversion $25,000 $100,000 Waterproofing needs, egress window, wet bar or bathroom addition Walk-In Closet $5,000 $20,000 Custom cabinetry vs modular systems, electrical for lighting Garage to Living Space $15,000 $50,000 Insulation condition, flooring over concrete, HVAC addition Room Over Garage $60,000 $150,000 Structural assessment of existing garage, stair access type Home Theater Room $20,000 $80,000 Acoustic treatment depth, projection system spec, tiered seating Music Room $10,000 $40,000 Soundproofing level, floating floor complexity, electrical Yoga or Meditation Room $3,000 $15,000 Flooring type, lighting upgrade, storage built-ins The second-story addition is the most expensive house addition on this list and also among the most transformative. Basement and garage conversions deliver the most square footage per dollar because the structure already exists. Expanding Living Spaces Interior expansions and room conversions change how the home functions at the ground level every single day. These are the house additions that tend to show up most in how people describe living in their homes. 21. Expanding the Living Room Before: A dark room with one narrow window, furniture pushed against every wall, and natural light that barely reaches the back half. The layout discourages people from spending real time there. After: One wall pushed outward, a full bay window installed in its place, and the room now accommodating a full sectional, a reading corner, and consistent natural light throughout. Pushing a wall out by just four feet adds roughly 60 square feet to a 15-foot-wide room. 22. Adding a Family Room Before: A multipurpose space where furniture, stored items, and children’s gear compete for the same floor. Neither proper relaxation nor organized family activity works well in it. After: A purpose-built room with a stone fireplace, a large sectional, recessed dimmable lighting, and sliding glass doors connecting the space directly to the backyard. Separating this function from the main living area is a significant quality-of-life shift for households with children. 23. Expanding the Garage Before: A single-bay garage where the car fits but everything else competes for the remaining floor space. Accessing stored items means moving others first, and the disorder is essentially self-perpetuating. After: Two bays with clearance, wall-mounted storage for tools and bikes, a full-wall workbench, and an epoxy-coated floor. Expanding from one to two bays is one of the higher-ROI house additions for households that actively use the garage for more than parking. 24. Adding a Mudroom Before: Coats on door handles, shoes stacked by the entry, bags on kitchen chairs. The front door serves as a general dump zone with no dedicated storage for any of it. After: Built-in lockers with hooks above, individual cubbies for each family member, a bench for sitting while putting on shoes, and tile flooring that handles mud and moisture. This house addition is often accomplished with a back-of-house bump-out or by converting an underused closet near the entry. 25. Adding a Home Gym Before: A spare room or garage corner with no proper flooring, no equipment storage, and no ventilation suitable for sustained physical activity. The friction discourages consistent use. After: Rubber floor tiles, wall-mounted mirrors, dedicated storage for weights and resistance bands, a ceiling fan for airflow, and a mounted TV. The commute to the gym disappears, which is the single most consistent reason this room addition converts into regular daily use. 26. Attic Conversion Before: A storage space with bare rafters, inadequate insulation, and unfinished floor joists. Visited as infrequently as possible and contributing nothing to daily household life. After: Insulated and drywalled walls and ceiling, recessed lighting, a dormer window bringing in natural light, and the space converted to a guest room, quiet home office, or hobby room. Attic conversions require a minimum ceiling height of 7 feet at the center ridge to be livable; check this before planning. 27. Adding a Half Bath Before: One full bathroom serving the entire household and every guest. Mornings mean a queue. Visitors have access only to the family bathroom with personal items visible throughout. After: A powder room under the stairs with a wall-hung toilet, a compact vanity, and a pendant light. Fully functional in a 15 to 20 square foot footprint. Adding a half bath is one of the few house additions with a documented resale ROI that reliably exceeds its cost, according to the NAHB. 28. Creating a Bump-Out Extension Before: A room that almost works but doesn’t quite. Furniture placement is perpetually awkward, and a single structural adjustment would produce a noticeably better result every day. After: Two to four feet added outward creates room for a window seat, a larger counter, a soaking tub, or a reading alcove. Bump-outs use a cantilevered or mini-foundation approach that is significantly cheaper than a full room addition, making them one of the most cost-efficient house additions per usable square foot gained. 29. Adding a Dedicated Laundry Room Before: A washer and dryer in the garage or a tight hallway with no folding counter, no supply storage, and no separation from the rest of the household’s daily movement. After: Side-by-side appliances with a built-in folding counter above, floor-to-ceiling cabinetry for detergent and supplies, a utility sink, and a dedicated hanging rod. Removing the laundry function from shared living space is a daily friction reduction that most households underestimate until they have it. 30. Expanding the Master Bathroom Before: A tight bathroom with a single sink, a shower-tub combo, one small window, and no storage beyond a medicine cabinet. Two people sharing it creates a daily scheduling conflict. After: A double vanity with drawer storage, a frameless walk-in shower, a freestanding tub under the window, and heated tile throughout. An expansion of as little as two to three feet in one direction produces a noticeably different experience every morning and night. Living Space Addition Cost Estimates These figures cover interior expansions and conversions. Finish quality, existing conditions, and local labor rates all affect where a project lands within these ranges. Addition Type Low End High End What Drives the Variation Living Room Expansion $20,000 $70,000 Foundation scope, window type and size, exterior finish match Family Room Addition $40,000 $100,000 Foundation, fireplace, sliding glass doors to exterior Garage Expansion (extra bay) $20,000 $60,000 Lot constraints, foundation extension, new door and framing Mudroom Addition $6,500 $20,000 Bump-out vs interior conversion, built-in scope Home Gym Room $5,000 $25,000 Flooring type, mirror installation, HVAC upgrade Attic Conversion $10,000 $65,000 Dormer addition, stair access, insulation and HVAC scope Half Bath (Powder Room) $5,000 $15,000 Plumbing proximity, space available, finish level Bump-Out Extension $4,000 $40,000 Size, cantilevered vs mini-foundation, exterior match Dedicated Laundry Room $5,000 $20,000 Plumbing rerouting, cabinetry scope, flooring Master Bathroom Expansion $15,000 $50,000 Tile and fixture level, heated floor, plumbing relocation Bump-outs and attic conversions typically deliver the best value per square foot among these options. Bathroom expansions cost more but carry consistent resale value. Get a structural assessment before finalizing any budget that involves pushing an exterior wall. Kitchen and Dining House Additions The kitchen is where the household actually runs: cooking, eating, homework, morning routines, and most of the casual conversation that happens in a home. When the layout makes those activities harder than they need to be, the friction accumulates in ways that are disproportionate to the size of the problem. 31. Creating a Larger Kitchen Before: A narrow single-run kitchen where two people cannot occupy the space at the same time without blocking each other. Minimal counter space and appliances crowding one another. After: A center island with bar seating for four, counters doubled through an L-shaped reconfiguration, new built-in appliances, under-cabinet lighting, and pull-out storage in all lower cabinetry. A kitchen expansion is the highest-cost house addition in this section but also the one with the greatest daily impact on household function. 32. Opening the Kitchen to the Dining Area Before: A kitchen and dining room separated by a full wall with only a small pass-through window. The person cooking is isolated from the rest of the household at every meal. After: The full wall removed and replaced with a slim structural beam. A breakfast bar at the kitchen edge. Matching flooring running continuously through both areas. The spaces function as one. This is often the least expensive structural kitchen change and one of the most impactful. 33. Expanding the Dining Room Before: A small area with a round table that technically seats six but functions tightly with four. No connection to the kitchen, no outdoor access, and no room for a larger table when guests arrive. After: An extension toward the backyard adds French doors, a long table that seats ten, a built-in sideboard along one wall, and a chandelier anchoring the center. Outdoor dining in warm months becomes genuinely practical. 34. Adding a Butler’s Pantry Before: A narrow pass-through hallway between the kitchen and dining room with no counter, no storage, and no role during meal preparation or gatherings. Space that physically exists but contributes nothing. After: Upper and lower cabinetry, a marble countertop for staging and secondary prep, built-in wine storage below, a small prep sink, and glass-front upper doors for glassware. The main kitchen stays focused on cooking rather than doubling as staging space during every gathering. 35. Adding a Wet Bar Before: An empty alcove with no function. During gatherings, all drink preparation happens in the main kitchen, which creates traffic issues and pulls the host out of the room repeatedly. After: Floating shelves for bottles, a wall-mounted bar sink, a mini fridge recessed into the counter below, and two pendant lights directly above. One of the more affordable kitchen-adjacent house additions, particularly when existing plumbing is nearby. 36. Creating an Open-Plan Kitchen and Living Space Before: A compartmentalized interior where the kitchen, hallway, and living room sit as separate enclosed rooms. The ground floor feels smaller than its actual footprint. Cooking is an isolated activity. After: Walls removed, continuous flooring running throughout, the kitchen anchored by a large island, and the living area fully visible and connected. No additional square footage is added, but the perception of space changes significantly. This is one of the few house additions that changes how a home feels without changing its size. 37. Creating a Prep Kitchen Before: All chopping, mixing, and preparation happens in the same visible space as finished cooking. Guests see the full process, and managing the cleanup during a gathering requires constant attention. After: A separate prep zone with its own sink, counter space, lower cabinetry, and a door that closes it off from the dining and living areas. The main kitchen remains presentable throughout the entire gathering without sacrificing any prep capacity. Kitchen and Dining Addition Cost Estimates Kitchen projects routinely involve plumbing, electrical, and ventilation upgrades that sit outside the cabinetry and countertop scope. Confirm the full mechanical scope with your contractor before finalizing any kitchen addition budget. Addition Type Low End High End What Drives the Variation Larger Kitchen Expansion $50,000 $150,000 Foundation scope, appliance tier, cabinetry material Kitchen and Dining Wall Removal $3,000 $40,000 Load-bearing vs non-load-bearing, beam and flooring work Dining Room Expansion $20,000 $70,000 Foundation, French doors, sideboard built-ins Butler’s Pantry $10,000 $50,000 Plumbing for prep sink, cabinetry spec, countertop material Wet Bar Addition $5,000 $25,000 Plumbing proximity, mini fridge, cabinetry depth Open-Plan Kitchen/Living Conversion $20,000 $70,000 Structural beam, flooring continuity, electrical reconfiguration Prep Kitchen $15,000 $60,000 New plumbing rough-in, ventilation, door and partition work Opening a kitchen to a dining or living area delivers the most visible change per dollar of any kitchen-adjacent project. A full kitchen expansion costs significantly more but produces daily returns that most households don’t overestimate. Common Mistakes to Avoid With House Additions Most house addition problems are avoidable. The issues that derail projects or produce long-term regret almost always trace back to decisions made before construction begins, not during it. Skipping permits is the mistake I see most often cause the most damage. It creates legal liability and can make a property unsellable until the work is properly documented and inspected. No time savings is worth the risk. Beyond permits, ignoring the contingency budget causes more mid-project crises than any other planning error. Budget 15 to 20 percent above the quoted figure on every project without exception. Choosing a contractor on price alone is the third most common problem. The lowest bid usually reflects either missing scope or underqualified labor. Check references, verify license status, and look at completed work before committing. Starting construction before all design decisions are finalized is equally damaging: mid-project changes are expensive in both money and schedule, and contractors who bid a defined scope are not positioned to absorb the cost of revisions. Finally, don’t ignore how a new addition affects adjacent rooms. A poorly positioned room addition can block natural light in a room that currently gets it, disrupt the main traffic path through the house, or make a neighboring room feel cut off from the rest of the ground floor. Good addition planning considers the whole floor, not just the new square footage being added. Frequently Asked Questions About House Additions How much does a home addition cost per square foot? Most home additions run $100 to $400 per square foot depending on the type. A basic room addition using existing structure, like a garage conversion or basement finish, sits toward the low end. A second story or full kitchen expansion with new foundation work sits toward the high end. Kitchens and bathrooms cost more per square foot than general living space because of the plumbing and electrical work involved. What are the top tips for a home addition? The three that matter most: get permits for everything regardless of timeline, build 15 to 20 percent contingency into the budget, and lock in all material and layout decisions before work begins. Mid-project changes are the single most consistent cause of cost overruns. Every other tip is secondary to those three. What is the cheapest home addition to build? A bump-out extension and a fire pit area are among the lowest-cost options. A basic fire pit with gravel base and stone seating runs $1,500 to $4,000. A bump-out of two to four feet can be done for $4,000 to $15,000 depending on cantilevered depth and exterior finish requirements. For indoor space, a half bath under the stairs is often the cheapest room addition with a meaningful return on investment. Does a home addition add value? Yes, most house additions add measurable resale value, though the return varies significantly by type. Adding a bathroom, especially a half bath in a home with only one full bath, consistently returns a high percentage of its cost at resale. Kitchen expansions and second-story additions also add value but at higher upfront costs. Outdoor additions like pools and pergolas add lifestyle value but vary in resale return depending on the market. Do I need a permit for a house addition? For any structural change, yes. This includes new rooms, second stories, basement conversions, bump-outs, sunrooms, and garage conversions. Outdoor additions like decks, pergolas, and pools typically require permits as well, depending on the municipality and size of the build. Interior cosmetic work, including flooring, painting, and cabinetry replacement, usually does not require a permit. When in doubt, contact your local building department before starting work. How long does a home addition take? A bump-out, mudroom, or garage conversion typically runs four to eight weeks from permit to completion. A basement conversion takes six to twelve weeks. A second-story addition or major kitchen expansion can run four to six months or longer, depending on permit approval timelines and construction complexity. Planning always takes longer than people expect, so factor three to six weeks for the permit and design phase before construction begins. What single story ranch house additions work best? Single story ranch house additions before and after transformations most often involve horizontal expansion: a bump-out at the rear for a larger kitchen or master bath, a family room addition off the main living area, a mudroom at the side entry, or a dedicated laundry room carved out of an oversized hallway or adjacent bedroom. Attic conversions are limited on ranch homes due to low roof pitch, but garage conversions and room-over-garage additions both work well on detached garage configurations. These questions come up in almost every addition planning conversation I have. The answers don’t change much by project type, but the decisions that follow from them do. Final Verdict: Which House Additions Are Actually Worth It House additions are worth doing when they solve a real problem in how the home functions every day. The ones that produce regret are the ones built around trends or theoretical future buyers rather than the actual friction the household lives with right now. If your family shares one bathroom and mornings are a scheduling problem, adding a half bath is worth every dollar. If your kitchen cannot accommodate two people cooking at the same time, a wall removal or bump-out will change the quality of daily life more than any cosmetic update you could make instead. The cost ranges in this article are planning baselines, not quotes. The next step is to pick the addition that addresses the most consistent friction in your household, call three licensed contractors with completed project references, and get formal bids. That conversation will tell you what it actually costs in your area and whether the timeline fits your situation. Start there. Cost estimates based on HomeAdvisor national averages and NAHB Cost of Construction Survey, 2024. Verify current pricing with local contractors and suppliers before budgeting.
A sunroom addition costs between $22,000 and $75,000 for most US homeowners, with a national average around $47,000 as of 2026. That range sounds reassuring until you realize both a 120 sq ft prefab screen room and a 400 sq ft fully insulated four-season room sit somewhere inside it. Where your project lands depends on four things: the type of room you’re building, the foundation situation you’re starting from, what climate control it needs, and who’s doing the work. I’ve seen enough sunroom projects go sideways at the budget stage to know that the number contractors quote first and the number homeowners pay at the end are rarely the same. A pattern that shows up across most major home projects, including exterior house painting costs, where the final invoice routinely surprises homeowners. Here, I’ll break down everything you need to know about sunroom addition costs, the factors that drive prices up or down, and whether this upgrade truly delivers value for your money. Cost Note: Figures in this article are estimates based on national averages. Actual costs vary significantly by region, contractor, materials, and project scope. Always get at least three quotes before committing to any project above $1,000. What Is a Sunroom Addition? A sunroom addition is a glass-enclosed living space designed to maximize natural light while protecting from the elements. Through my research, I’ve learned that sunrooms come in two primary varieties: three-season and four-season rooms. Three-season sunrooms are typically used during spring, summer, and fall, featuring basic insulation and ventilation but lacking the robust climate control needed for harsh winters. Four-season sunrooms, on the other hand, are fully insulated with heating and cooling systems, making them comfortable year-round. The key features that define these spaces include expansive windows or glass walls, varying levels of insulation depending on the season rating, integrated HVAC systems for four-season models, and proper flooring that can withstand temperature fluctuations and sunlight exposure. What Kind of Sunroom Are You Actually Building? The type of sunroom you choose sets the cost ceiling before any other factor comes into play. There are four distinct categories, and they’re not interchangeable. 1. Screen Rooms and Sun Porches These are the most affordable options, typically $5,000 to $30,000, depending on size. They offer insect protection and some weather shielding, but no real climate control. If you’re weighing a screen room against a broader outdoor upgrade, understanding backyard remodel cost helps put both investments in perspective. Buyers often discount them at resale because of the limited usability. 2. Three-Season Sunrooms Designed for spring through fall use, these rooms use single or double-pane glass, minimal insulation, and no dedicated HVAC. A 150 to 250 sq ft three-season room typically costs $10,000 to $35,000. In colder states, expect them to sit empty from November through March, which limits both daily value and resale appeal. 3. Four-Season Sunrooms Fully insulated with heating and cooling, these rooms function as additional living space year-round. They require insulated glass panels, proper wall and ceiling insulation meeting local energy codes, and either extended ductwork or a dedicated mini-split system. Cost range: $40,000 to $80,000 for most projects, with premium builds running past $100,000. Four-season rooms are the only type that typically adds to your home’s appraised square footage. 4. Full Addition Sunrooms Architecturally integrated into the home’s footprint, with load-bearing walls, matched rooflines, and interior finishes continuous with the rest of the house. These cost $80,000 to $150,000 or more but carry the best resale return because appraisers count them as living space. If you’re in a market where price per square foot matters, this is the version worth pricing seriously. Factors That Affect the Cost of a Sunroom Addition The cost of adding a sunroom varies dramatically based on several key factors. I’ve found that understanding these elements upfront helps you budget realistically and avoid unexpected expenses down the line. 1. Size and Layout Size is the most obvious cost driver; larger sunrooms require more materials, labor, and time to complete. However, layout complexity matters just as much; a simple rectangular design will cost significantly less than an elaborate multi-angled structure with custom architectural details. I understood that even adding curves, multiple roof levels, or integrated structural columns can push costs up by 20-30% compared to basic designs. 2. Type of Materials Used Material selection dramatically impacts both upfront costs and long-term durability. Here’s a breakdown of your options: Material Cost Level Insulation Maintenance Best For Vinyl Frames Budget-friendly (30–40% less than premium) Decent Low Cost-conscious homeowners Aluminum Frames Mid-range Poor in extremes Low Modern aesthetics Wood Frames Premium Excellent High Traditional style Composite Materials High-end Excellent Low Best of both worlds Each material brings its own trade-offs between initial cost and upkeep. Your climate, budget, and style preferences should guide your choice. 3. Location and Site Preparation Where you build your sunroom significantly affects the bottom line. I found that ground-level additions on existing concrete patios are far more affordable than second-story installations or builds requiring extensive foundation work. Site conditions like sloped terrain, poor drainage, underground utilities, or the need to remove existing structures can add thousands to your project before construction even begins. 4. Additional Features and Upgrades Beyond the basic structure, customization options can quickly elevate your sunroom from simple to spectacular. Consider these popular upgrades: Custom or oversized windows: Large windows with UV protection and energy-efficient glass Skylights and roof windows: Extra natural light from above for an open, airy feel Premium flooring: Heated tile, hardwood, or vinyl that handles temperature changes and sunlight Integrated electrical and lighting: Ceiling fans, lights, outlets, and smart home controls Built-in furnishings: Window seats, storage benches, or shelving for extra space These features can add a few hundred to several thousand dollars each. I recommend choosing upgrades based on how you’ll actually use the space rather than adding everything available. Sunroom Addition Cost Breakdown: The Line Items That Move Your Budget Most estimates you’ll see online bury the variables that actually control your final number. Here’s what the real cost structure looks like. Line Item Cost Range Key Driver Foundation/Slab $0 – $8,000 Existing patio vs new slab Framing/Structure $4,000 – $25,000 Prefab vs custom build Windows/Glazing $2,000 – $15,000 Glass type and panel count Roofing $3,000 – $15,000 Standard vs glass panels HVAC (4-season) $1,500 – $10,000 Duct extension vs mini-split Electrical $800 – $3,000 Basic vs upgraded fixtures Flooring $1,500 – $6,000 Vinyl vs tile/hardwood Permits $250 – $2,000 Local rules and scope Site Prep $500 – $5,000 Flat vs complex lot Labor $8,000 – $30,000 Location + project size Labor still makes up a big chunk of the total, often 40% to 60%, so it’s usually the biggest factor behind final cost changes. A breakdown that looks similar to the cost to build small structures like tiny houses, where labor and materials follow the same proportional weight. Regional Pricing: Where You Live Changes Your Budget Significantly National averages are a starting point, not a contract. Labor markets and permitting requirements create real, measurable price differences by region. Region 3-Season Room (200 sq ft) 4-Season Room (300 sq ft) Key Cost Drivers Northeast / West Coast $20,000–$45,000 $65,000–$110,000 High labor rates, strict permitting, and energy code compliance Southeast $14,000–$32,000 $45,000–$75,000 Moderate labor costs; humidity-driven HVAC needs push 4-season costs up Midwest $12,000–$28,000 $38,000–$65,000 Lower labor rates; insulation requirements add cost in colder states Southwest / Mountain $15,000–$35,000 $50,000–$80,000 UV-rated glazing required; cooling loads drive HVAC sizing up Coastal and metro labor markets run 30% to 50% higher than rural equivalents. That gap compounds across every line item: your framing contractor, your electrician, and your HVAC installer all reflect local market rates. If you’re building in a high-cost area, budget accordingly and don’t rely on national averages to set your expectations. How to Reduce Your Sunroom Addition Cost Without Compromising the Structure There are legitimate ways to save money on a sunroom project, and there are ways that feel like savings now and show up as problems later. Here’s what actually works. Building on an existing concrete patio saves $4,000 to $8,000 in foundation work. Verify it’s structurally sound first. A prefab three-season kit with professional installation can run 30%–40% less than a custom stick-built room of the same size. Choosing a mini-split over ductwork extension is often cheaper when your existing HVAC system is near capacity, and it avoids the cost of system upgrades. Pulling your own permits, where your municipality allows it, removes the markup contractors add to permitting fees. This requires time and follow-up but saves $300 to $800 in most markets. Building a three-season room now and designing it for future four-season conversion saves $10,000 to $20,000 upfront. This only works if your contractor designs the structure to support the upgrade from the start. Pro Tip: Building in fall or winter typically saves 15%–25% on labor costs. Sunroom contractors are less busy, and you’ll have more scheduling flexibility. The main constraint is weather-dependent foundation work, so confirm your contractor’s cold-weather pour policy before booking. The True Value of a Sunroom Addition Based on my research into real estate data, sunrooms typically recoup 50-70% of their cost at resale, which is decent compared to other major renovations, as shown below: Screen rooms/sun porches cost $5,000–$30,000 and offer the lowest ROI of 20–40%, as limited seasonal use reduces buyer appeal. Three-season sunrooms cost $8,000–$50,000 and offer a 30–50% ROI. Affordable, but no insulation or heating means lower resale value in colder climates. Four-season sunrooms cost $20,000–$80,000 and deliver a stronger 50–60% ROI thanks to year-round usability and full HVAC integration. Full addition sunrooms are the priciest but offer the best return at 50–70% ROI. Since they add to the official square footage, they have the greatest impact on the appraised value. The more you invest in year-round functionality and seamless design, the better your financial return and your daily enjoyment will be. User Stories: Is a Sunroom Addition Worth It? I’ve spent hours reading real homeowner experiences and comparing sunrooms to other popular home additions. The consensus from threads, home improvement blogs, and forums is overwhelmingly positive. Most homeowners absolutely love their sunrooms and use them daily for morning coffee, reading, or family gatherings. However, many wish they’d invested in four-season options from the start or budgeted more for quality HVAC systems. Here is a “Reddit” post of “General cost of a sunroom and covered porch?” that can help you understand better. Questions to Ask Your Contractor Before Signing Anything The contractor conversation is where projects succeed or fail before construction even begins. These are the questions that surface the information you actually need. Does this project require separate electrical, HVAC, or zoning permits beyond the building permit, and will you pull all of them? The answer should be yes to both. What’s the realistic processing timeline for permits in this municipality? If they say “a few weeks,” ask for the actual average from their last five local projects. Is my existing HVAC system capable of handling this addition, or will I need a separate system? Get this answered before finalizing the scope. What’s your process if you encounter unexpected foundation or site issues during the build? You want a clear change-order process, not a verbal assurance. Do you carry general liability insurance and workers’ compensation coverage for this project? Request certificates of insurance, not just confirmation. Final Thoughts Sunroom addition costs, materials, and real homeowner experiences, one thing is clear: this investment is worth it if you’re looking to add natural light and a functional living space without the expense of a full home addition. Start by collecting quotes from at least three licensed contractors who specialize in sunrooms specifically. Be transparent about your budget, desired features, and timeline from the start. Ask for references, review past projects, and confirm they manage permits and inspections on your behalf. The most successful sunroom projects share a common thread: clear communication and realistic expectations around both cost and timeline. If you’re in the planning stages, drop a comment below, share your approach, and help others who are just getting started. Frequently Asked Questions How much does a small sunroom addition cost? A small sunroom addition in the 100 to 150 sq ft range typically costs $10,000 to $30,000 for a three-season build, or $20,000 to $45,000 for a four-season room. Building on an existing patio rather than pouring a new foundation is the single biggest cost lever at this size. Does a sunroom add to square footage for appraisal purposes? Only four-season rooms that meet your state’s building code requirements for livable space, including minimum insulation ratings, HVAC connectivity, and electrical standards, are counted as square footage in appraisals. Three-season rooms and screen rooms are not. Confirm with your appraiser and permit office before assuming your addition qualifies. Do you need a permit for a sunroom addition? Yes, in virtually every US municipality. Sunrooms are permanent structures that require building permits at a minimum. Four-season rooms often require additional HVAC and electrical permits. Building without permits creates liability issues, complicates resale, and can invalidate homeowner’s insurance claims related to the addition. How much does a four-season sunroom cost compared to a three-season room? A comparable-sized four-season room typically costs 60% to 100% more than a three-season build. The difference comes from insulated framing, higher-performance glazing, HVAC integration, and the additional permits and inspections that climate-controlled additions require. For a 200 sq ft room, expect to pay $25,000 to $40,000 for a three-season versus $45,000 to $70,000 for a four-season in most US markets. Can I finance a sunroom addition? Home equity loans and HELOCs are the most common financing options for sunroom additions, as they typically carry lower interest rates than personal loans, and the interest may be tax-deductible depending on your situation. Some sunroom specialty contractors offer financing programs directly. Consult a tax professional or financial advisor before assuming deductibility on your specific project. How long does a sunroom addition take to build? From permit approval to completion, a typical sunroom addition takes four to twelve weeks. Prefab three-season kits can go up in one to three days once permits clear. Custom four-season rooms take longer due to foundation work, framing inspections, and HVAC and electrical rough-in sequences. Permit approval timelines, which can run from two weeks to several months depending on your municipality, are not included in most contractor timeline estimates. Is a sunroom addition worth the cost? For homeowners who will use the space daily and plan to stay in the home at least five years, the lifestyle value combined with a 50% to 55% average resale return makes a four-season sunroom a reasonable investment. Three-season rooms make sense for moderate-climate markets or homeowners whose primary goal is seasonal use, not appraisal value. Screen rooms are worth it where the upfront cost is low, and the climate permits year-round use.
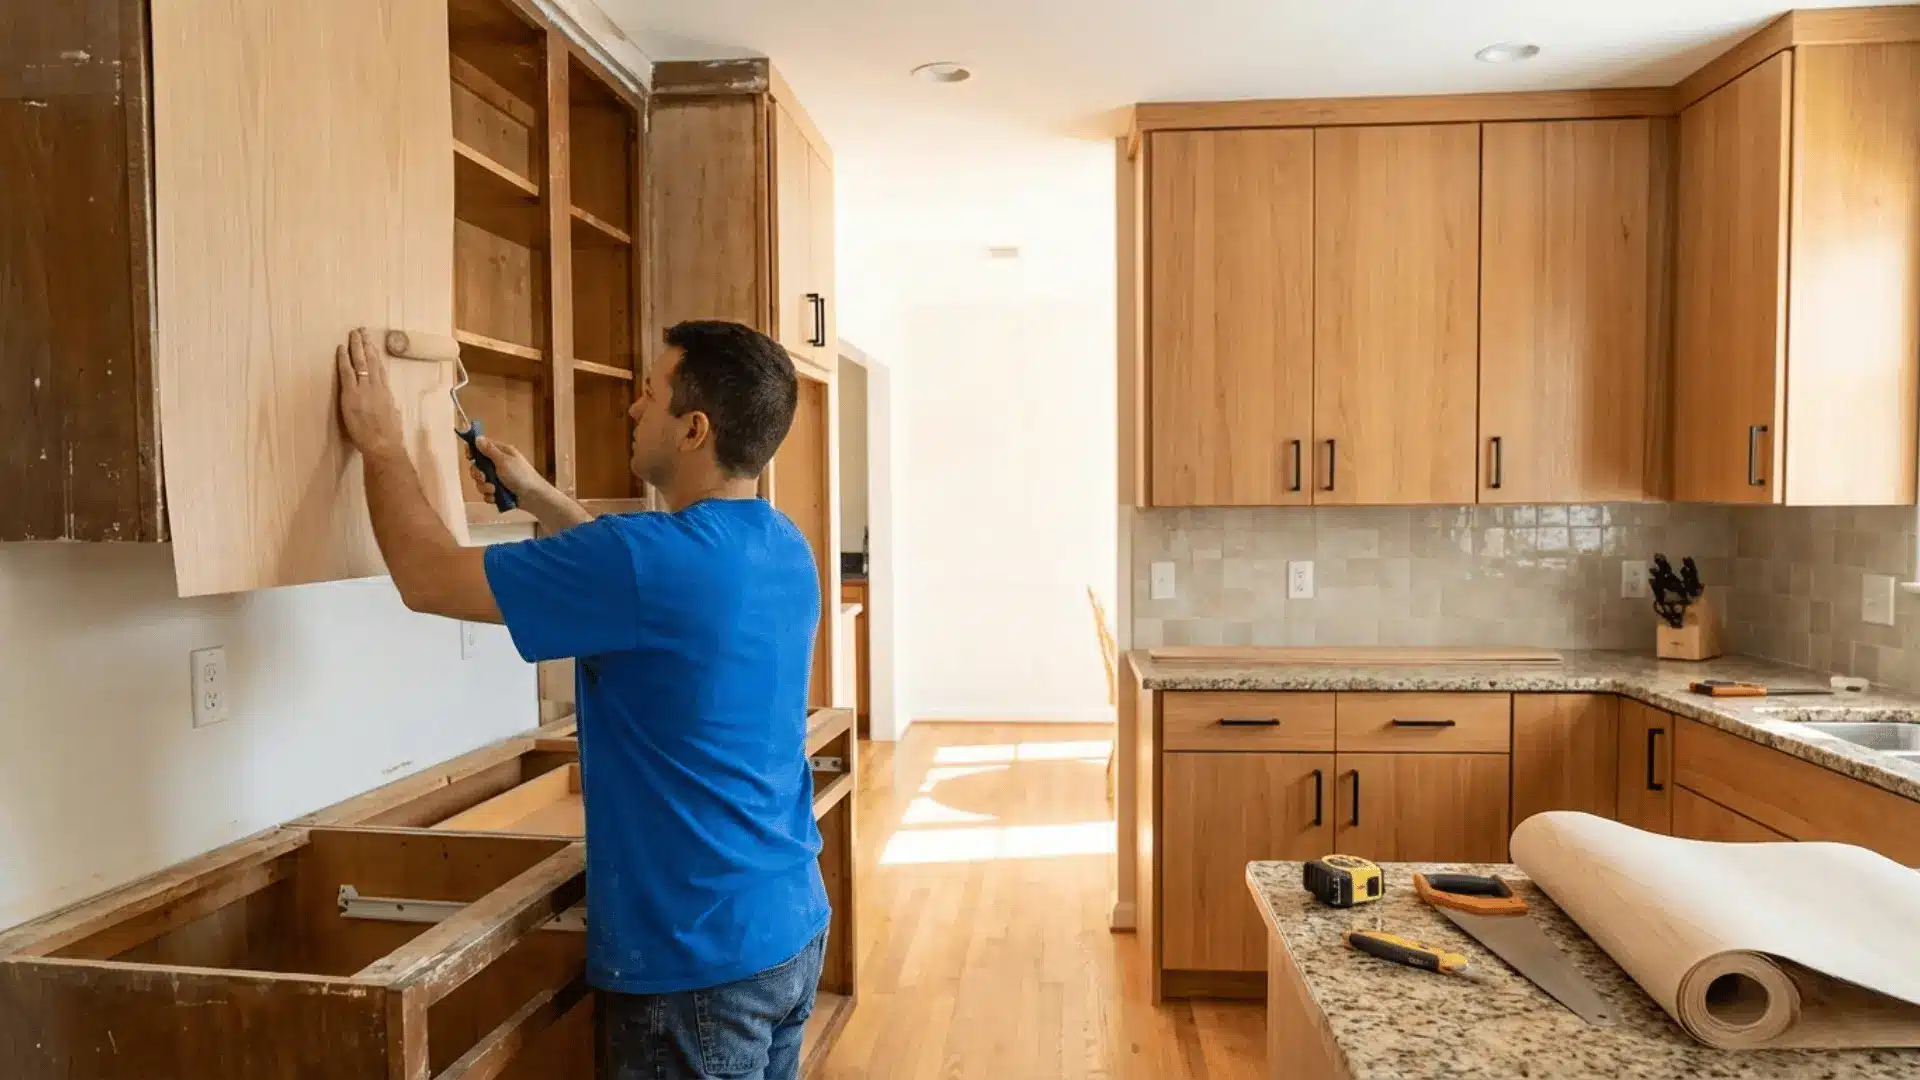
Are you tired of walking into a kitchen that feels stuck in another decade? I know how frustrating it is to feel trapped between a dated space and the massive price tag of a full kitchen remodel. You deserve a beautiful home without draining your savings or living in a construction zone for months. This guide breaks down exactly how much cabinet refacing costs and the specific factors that push your quote up or down. You will find the truth about material quality, labor rates, and whether a DIY approach is actually worth the risk. By the end, you’ll have a realistic budget and the confidence to choose the best path for your renovation. Kitchen Cabinet Refacing Basics Cabinet refacing gives your kitchen a fresh look without removing the full cabinet setup. You keep the existing cabinet boxes and structure, but update all the visible parts. This includes replacing doors, drawer fronts, handles, and the outer surface finish, so everything looks new from the outside. Inside, the layout and storage stay the same, which helps you avoid major changes. When you compare refacing to full replacement, the difference is clear. Refacing costs less, takes less time, and creates less mess in your home. Full replacement, on the other hand, involves removing cabinets, higher costs, and longer work time. If your cabinet structure is still strong, refacing is a smart and practical way to refresh your space. One thing that often surprises homeowners: because labor makes up 50–70% of a refacing quote, two contractors using the same materials can give you estimates that differ by thousands of dollars. That’s not a red flag. It reflects regional labor rates, their overhead, and how they price access and complexity. Getting three quotes is not optional. Key Factors That Affect Cabinet Refacing Cost Cabinet refacing costs aren’t one-size-fits-all, and that’s exactly why two neighbors can get wildly different quotes for seemingly similar kitchens. Understanding what’s actually driving your number helps you budget smarter and negotiate better. 1. Kitchen Size Kitchen size is the most direct cost driver in any refacing project. Contractors price per door and drawer front, typically $75–$150 per door for materials and labor combined. A small kitchen with 10–15 doors runs $1,500–$4,000, while a large kitchen with 25–35 doors can push $6,000–$12,000. Before requesting quotes, count every door and drawer front separately; that number is what contractors actually price against, not square footage. 2. Material Choice Material selection can shift your total refacing cost by thousands. Vinyl wrap and RTF doors are the most budget-friendly at $50–$100 per door. Wood veneer sits in the mid-range at $100–$200 per door, offering a more premium appearance. Solid wood doors command $200–$400 per door at the high end. For an average kitchen, upgrading from vinyl to solid wood alone can add $3,000–$6,000 to your total project cost. 3. Door Style Door profile directly affects both fabrication time and material cost. Flat-panel doors are the most affordable, typically priced 20–30% lower than other styles. Shaker doors sit in the mid-range and remain the most popular choice, adding moderate cost without an excessive premium. Raised-panel doors require precision routing and more raw material, pushing per-door costs 35–50% higher than flat-panel equivalents. On a 20-door kitchen, that style difference alone can mean $1,500–$3,000 in additional spend. 4. Location Similar trends appear in projects like remodel costs of a basement, where location alone can significantly change pricing. In high-cost states like California, New York, and Washington, labor alone can account for $3,000–$5,000 of a mid-size kitchen project. Midwestern and Southern states typically run $1,200–$2,500 for a comparable labor scope. The same kitchen, same materials, and same door count can carry a $2,000–$3,000 price difference purely based on your zip code and local contractor market rates. For a concrete example, refacing an average kitchen in Boise, Idaho, runs around $5,000. The same project in New York City typically costs twice that. If you’re in a high-cost metro, build in a 20–30% buffer above the national average when you’re planning your budget. 5. Condition of Existing Cabinets Cabinet condition quietly adds cost that most initial quotes don’t include. Water damage repairs typically run $200–$600 per affected cabinet box. Warped frames, soft spots, or compromised hinges require structural work before any refacing begins, often adding $500–$2,000 to the total project cost depending on severity. Contractors assess box condition during the estimate visit, but requesting a written breakdown of repair costs separately from refacing costs protects you from budget surprises mid-project. Each of these factors compounds on the others; a large kitchen with premium doors, solid wood veneers, and repairs needed can cost two to three times a straightforward small-kitchen job. Know your variables before you commit. Add-Ons That Raise Your Final Quote Most refacing quotes you see online don’t include the extras, and most homeowners add at least a few. Here’s what the common upgrades actually cost, based on current contractor pricing: Add-On Typical Cost Range Worth It? Soft-close hinges and drawer slides $20–$50 per set Yes, adds years of daily use satisfaction New hardware (knobs and pulls) $100–$1,000 total Yes, fastest visual upgrade per dollar Crown molding $300–$570 installed Yes, if staying long-term Glass door inserts $150–$500 per door Situational, adds visual depth but increases cleaning Under-cabinet lighting $200–$350 per fixture High impact for resale and daily use Pull-out shelves and organizers $200–$500 per cabinet Yes, if the function is a complaint Island or peninsula panels $1,000–$4,000 Major visual upgrade; price varies widely by size If you’re working with a tight budget, prioritize soft-close hinges and new hardware first. They cost the least and deliver the most visible difference per dollar. Crown molding and glass inserts are finishing touches; add them only after your primary scope is locked in, and the budget can absorb them. Signs You Should Reface and Signs You Shouldn’t Refacing is not always the right answer. The honest version of this conversation includes knowing when to walk away from it. Refacing makes sense when: Cabinet boxes are structurally solid, with no soft spots, water damage, or warping You’re happy with the layout and don’t need to add or remove cabinets The existing door style is your only complaint, not the function You’re planning to stay in the home for at least 5–7 more years You want a kitchen update with minimal disruption (most refacing projects are completed in 2–5 days) Refacing doesn’t make sense when: Cabinet boxes are damaged, warped, or have significant water or pest damage You want to change the layout, add an island, or reconfigure storage The existing boxes are particleboard in poor condition, and veneers won’t adhere reliably Your kitchen is so dated that the counters, layout, and footprint all need to be changed anyway. In that case, full replacement at the same time saves you labor costs overall. I’ve seen homeowners spend $7,000 refacing cabinets that were genuinely on their last legs structurally. Two years later, they were replacing everything anyway. If the boxes are questionable, pay a contractor $150–$300 for a structural assessment before you commit to refacing. What Real Homeowners Are Saying Real homeowners have plenty to say about cabinet refacing on Quora. One seller shared on Quora that their home “desperately needed a kitchen facelift” and chose refacing since the layout already worked just fine, a smart, budget-friendly call. Not all feedback is glowing, on Quora a real estate investor bluntly cautioned that refacing structurally weak cabinets is “like putting lipstick on a pig,” since buyers notice the difference the moment they open a door. The consistent takeaway across all posts: refacing pays off only when the cabinet boxes are solid, and the existing layout already works for you The experience highlights something most homeowners discover too late: refacing can cost significantly more than expected, even when the layout works perfectly. Getting multiple quotes before committing is essential. I hear a version of that investor’s warning constantly from contractors I work with. The most experienced ones will actually turn down a refacing job if the boxes aren’t worth saving. That’s worth paying attention to. If a contractor is eager to start without looking closely at your box condition, that’s a flag. DIY Cabinet Refacing Cost vs Risk Refacing your cabinets yourself sounds like an easy way to save thousands, and sometimes it genuinely is. But the gap between a clean DIY finish and a costly mistake is smaller than most people expect. Breakdown DIY Refacing Professional Refacing Average Cost $1,000 – $3,500 $3,000 – $8,000 Material Cost $600 – $2,000 Included in quote Labour Cost Your time only $1,500 – $4,000 Time Required 1–2 weekends minimum 2–4 days Skill Level Needed Moderate – High Professional Warranty None 1–5 years The numbers tell part of the story, but skill level and warranty protection tell the rest. If your kitchen is small and your doors are flat, a DIY is worth a try. Anything beyond that, trust a professional. Is Cabinet Refacing Worth It? Cabinet refacing sits in a unique sweet spot; it’s not the cheapest option and not the most comprehensive, but for the right kitchen, it delivers results that genuinely rival full replacement at a fraction of the disruption, cost, and time. The real question isn’t whether refacing works, it’s whether your specific kitchen warrants it. Structurally healthy cabinets with an outdated appearance are the ideal candidate. Refacing saves 40–60% over full replacement, completes in days, and when paired with hardware and countertop upgrades, produces a transformation most homeowners struggle to distinguish from a complete remodel. The value is real, but only when the foundation underneath deserves it. Common Mistakes to Avoid When it comes to DIY cabinet refacing, it’s easy to overlook a few key details. But these common mistakes can really derail your project, leaving you with results that don’t match your expectations. Let’s take a closer look at what to avoid. Poor Door Alignment: Misaligned doors are the most visible DIY error, making even quality materials look unprofessional and rushed. Choosing Cheap Veneer: Low-grade materials peel within months, especially near heat and moisture, turning your savings into a repeat expense. Skipping Surface Prep: Refacing over dirty, greasy, or uneven cabinet boxes guarantees poor adhesion and a finish that deteriorates quickly. Ignoring Box Condition: Applying new faces over damaged or soft cabinet frames wastes money on a foundation that will fail regardless. Questions to Ask Before Hiring a Cabinet Refacing Contractor Not all refacing contractors are equally experienced, and the quality difference in a finished kitchen is visible. Before signing anything, ask every contractor these questions: Do you apply veneer on-site or do the doors go to a shop? (Shop work is generally cleaner.) What happens if you find box damage during the project? Is that quoted separately? Can I see a recently completed project in person or photos with client references? What does your warranty cover, and for how long? Can I supply my own hardware, or does it need to come from you? Will you add features like crown molding, glass inserts, or under-cabinet lighting? A contractor who hesitates on any of these, especially the box condition question, is worth removing from your shortlist. The best ones will volunteer that information before you even ask. Cabinet Refacing vs. Painting and Replacing I’ve worked with all three options, and each one fits a different situation. If you’re unsure what makes sense for your budget or goals, this simple table will help you compare them side by side and choose what works best for you. Factors Painting Refacing Replacing Average Cost $500 – $1,500 $3,000 – $8,000 $8,000 – $25,000+ Durability 3–5 years 10–15 years 15–25 years Time to Complete 1–2 days 2–4 days 2–5 weeks Structural Fix No No Yes Layout Change No No Yes Resale Value Impact Low Moderate High DIY Friendly Yes Partially Rarely Low Budget (Under $2,000) Best move Out of range Not feasible Mid Budget ($3,000–$9,000) Underspending Best value Stretching thin High Budget ($10,000+) Underutilising Possible Maximum return From what I’ve seen, painting works when you need a quick, low-cost fix, especially in rentals. If your cabinet boxes are still strong but look old, refacing gives you better long-term value. I usually suggest replacement only when there’s real damage or layout issues, since it costs much more but solves deeper problems properly. Wrap Up Cabinet refacing is one of those decisions that looks simple on the surface but carries a lot of moving parts underneath. I’ve walked you through everything that shapes the final number, from kitchen size and material choice to location, cabinet condition, and the real cost of going DIY. Now you have a clear picture of how much does cabinet refacing cost and, more importantly, what drives that cost up or down. The smartest move you can make is to assess your cabinet boxes honestly, set a realistic budget, and match your choice to your goals, not just the lowest quote. If this helped you think it through more clearly, drop your questions in the comments or read our related guides on kitchen renovation budgeting. Frequently Asked Questions How does refacing impact the resale value of a home? Refacing offers a high return on investment by modernizing the kitchen’s aesthetic for less. It typically recovers 60–80% of costs during a home sale if the layout is functional. Can I add new features like soft-close hinges during refacing? Yes, refacing is the perfect time to upgrade functional hardware. Most professionals include new soft-close hinges and modern drawer glides as part of the standard installation process for better performance. Is it possible to reface only the upper or lower cabinets? You can certainly reface specific sections to save money or create a “two-tone” look. However, matching finishes later can be difficult, so it is usually best to do both. Do I need to empty my kitchen cabinets before the pros arrive? Unlike a full remodel, you often only need to clear the items near the front. Since the cabinet boxes remain intact, most homeowners keep their dishes and pantry items inside.
Concrete cracks have a way of showing up at the worst time, right before a gathering or when the home repair list is already long. A thin line across the driveway or a wider gap in the garage floor both raise the same question: how much will this cost? Based on my research and what most homeowners report, concrete crack repair costs can vary widely depending on the severity and type of repair needed. Knowing where your situation falls helps you budget before calling a contractor, ask the right questions, and avoid getting caught off guard when estimates arrive. Let me walk you through the typical pricing, common repair methods, and the key factors that push costs up or down. Understanding Concrete Cracks and Repairs Concrete crack repair is the process of sealing, filling, or stabilizing cracks in concrete surfaces to restore their functionality and prevent further damage. Cracks can form in driveways, patios, sidewalks, garage floors, and foundations, and not all of them are equal in severity. Some are purely surface-level, caused by minor shrinkage, while others signal more serious structural concrete damage that needs professional attention. The repair method used depends heavily on the crack’s size, depth, and location. Catching the problem early is what keeps repair costs manageable. Waiting too long usually means a small sealing job turns into a full resurfacing or slab replacement project, which costs significantly more. Factors That Cause Concrete Cracks Understanding why concrete cracks helps explain why repair costs vary so much from one job to the next. The cause often determines the repair method required: Concrete shrinkage: As concrete cures, it naturally contracts, creating hairline cracks on the surface Temperature fluctuations: Concrete expands in heat and tightens in cold. Repeated cycles put stress on the slab Shifting soil: Unstable ground beneath a slab can cause uneven settling, leading to cracking Heavy loads: Driveways and garage floors bearing the weight of vehicles over time develop pressure cracks Poor installation: Concrete poured without proper reinforcement or allowed to cure too quickly tends to crack prematurely Tree root growth: Roots pushing up under sidewalks or patios can fracture even well-laid concrete Knowing the root cause behind a crack is useful before calling a contractor. It gives you a better sense of what repair method fits and what the job might involve beyond the surface. Average Concrete Crack Repair Cost Below is a combined cost table covering flat-rate and per-foot pricing to help you find a clear reference point before budgeting: Repair Type Average Cost Range Pricing Method Minor crack repair $50 – $150 Per crack Moderate crack repair $150 – $400 Per crack Large structural crack repair $400 – $1,000+ Per crack Minor crack sealing $3 – $12 Per linear foot Professional crack repair $15 – $18 Per linear foot Concrete leveling $3 – $25 Per sq ft Concrete resurfacing $3 – $5 Per sq ft Slab replacement $2,000 – $15,000+ Per project As a general rule, longer and deeper cracks cost more to fix, both because more material is needed and because the labor time increases with complexity. Common Concrete Crack Repair Methods Here are the four most commonly used approaches. Concrete crack repair methods vary in complexity and price, so matching the right technique to the crack type is key. 1. Crack Filling or Sealing This is the most straightforward repair option. A flexible sealant or filler is applied directly into the crack to prevent water and debris from getting in. It works best for minor surface cracks that have not penetrated deeply into the slab. Costs typically range from $50 to $200, making it the most budget-friendly professional option. 2. Epoxy Injection Epoxy injection is used for cracks that run deeper into the concrete and need structural reinforcement. The epoxy is pumped under pressure into the crack, bonding the two sides together once it cures. This method is common for foundation crack repair and costs between $300 and $900 per crack. It is more involved than surface sealing but delivers a stronger, longer-lasting result. 3. Polyurethane Injection Polyurethane foam is injected into cracks to stop active water leaks and stabilize the concrete. It expands as it cures, filling irregular gaps that epoxy might miss. This method is especially useful for basement and foundation cracks where moisture is a problem. Expect to pay between $300 and $800, depending on the crack size and the amount of material needed. 4. Concrete Leveling (Mudjacking or Foam Lifting) When a slab has sunken or shifted unevenly, leveling becomes necessary before or alongside crack repair. Either a slurry mixture (mudjacking) or expanding foam is injected beneath the slab to lift it back into position. This method applies to driveways, sidewalks, and patios and costs between $500 and $6,000 based on the size of the area being lifted. Choosing the right repair method from the start avoids repeat work and helps the fix hold up over time, especially in areas exposed to weather or heavy use. Typical Cost of Concrete Crack Repair Repair pricing shifts depending on whether you are looking at crack size or the specific surface being repaired. Both factors matter when estimating the cost of a job. Getting a clear picture of what falls under each category helps you set realistic expectations before requesting quotes. Cost by Crack Size Crack size is one of the first things a contractor looks at when estimating a repair. Knowing the general price ranges by crack size helps you anticipate costs before getting a quote: Hairline cracks: These are surface-level and mostly cosmetic. Repair costs typically run $50–$150 using crack fillers or sealants Medium cracks (up to ½ inch wide): These require deeper sealing or injection. Expect to pay $150 – $400, depending on length and depth Large or structural cracks: Cracks this size often point to soil movement or slab failure. Repairs start at $400 and can climb well beyond that if reinforcement or leveling work is required Crack width alone does not tell the full story; depth and length are just as important when a contractor calculates the final price. Cost by Surface Area Where the crack sits on your property affects both the repair method and what you end up paying. Different surfaces come with different labor demands and material requirements: Driveways: Crack sealing costs $0.50 to $3 per linear foot; resurfacing runs $3 to $5 per square foot; full replacement averages $6,900 for a standard driveway Garage floors: Sealant or epoxy injection is the common fix, costing $10–$20 per linear foot Patios and sidewalks: Surface patching or sealing usually costs between $150 and $800, depending on the extent of the damage Surface location also affects labor pricing. Garage floors and basements are often harder to access and prepare, which can increase overall costs. Additionally, if the surface is painted, removing the paint from concrete is crucial to ensure proper adhesion and prevent peeling, which could compromise the durability of the repair. DIY Concrete Crack Repair Cost Smaller, non-structural cracks are well within reach for a DIY fix. Hardware stores carry several product types suitable for surface crack repair that do not require professional tools or skills: DIY Product Average Cost Best For Concrete crack filler $5 – $20 Hairline and small surface cracks Concrete patch kits $20 – $50 Wider or shallower surface cracks Epoxy repair kits $25 – $100 Deeper non-structural cracks DIY repairs work well when the crack is cosmetic and stable. If the crack is growing, wider than half an inch, or located near a foundation wall, a professional assessment is worth the cost before attempting any fix on your own. Tips for Managing Concrete Crack Repair Costs A few practical steps can keep repair costs from climbing higher than they need to. Small decisions made early, such as addressing a minor crack or comparing contractor quotes, can lead to real savings: Repair early: Small cracks cost far less to fix than structural damage. Acting quickly saves money Check drainage: Water pooling near a crack will cause repairs to fail. Fix drainage before patching Get multiple quotes: Labor rates vary by region, so comparing two or three estimates helps you find a fair price Ask about the method upfront: Knowing whether a contractor plans to seal, inject, or level helps you compare quotes accurately Bundle repairs: Multiple cracks on the same surface done in one visit usually cost less per crack than separate trips Taking a proactive approach to concrete maintenance is almost always cheaper in the long run than waiting until the damage becomes unavoidable. Common Mistakes to Avoid When Repairing Concrete Cracks Skipping a few basic steps can turn a straightforward repair into a repeat job that costs twice as much the second time around. Here are the few common mistakes: Common Mistake Explanation Recommended Action Ignoring small cracks Hairline fractures can widen over time due to water infiltration and freeze-thaw cycles. Inspect regularly and fill early using a suitable filler. Using the wrong repair product Surface sealants over deep cracks won’t hold; the product must match the crack type. Match the repair product to the crack depth and type. Skipping surface prep Concrete must be clean, dry, and free of loose debris; poor preparation leads to poor adhesion. Clean, dry, and remove loose debris before repair. Attempting structural repairs Foundation cracks and major slab damage require professional help; misjudging their severity can worsen the damage. Hire a professional for structural assessment and repair. Avoiding these mistakes upfront saves you both the cost of redoing the work and the frustration of watching a repair fail within a season or two. Frequently Asked Questions Why does my repaired concrete crack keep coming back? The underlying cause was not addressed. Shifting soil, tree roots, or water pressure cannot be fixed by surface sealing alone. Diagnose the cause before attempting any repair. Does homeowners’ insurance cover concrete crack repair? Sudden damage like falling trees or vehicle impact may be covered. Gradual deterioration and normal settling are almost always excluded. Check your specific policy before assuming any coverage. What is the best time of year to repair concrete cracks? Spring and fall are ideal; temperatures between 50 and 70 degrees allow even curing. Late fall scheduling often means lower contractor pricing due to reduced labor demand. Final Thoughts Concrete crack repair costs depend on crack size, repair method, surface location, and local labor rates. Minor repairs can cost under a hundred bucks as a DIY fix, while professional work on structural damage can run into the thousands. From my experience researching this, the simplest advice holds true: act early. A small crack sealed now is far cheaper than a shifted slab or a weakened foundation down the road. Knowing what drives concrete crack repair pricing helps you make smarter decisions, whether you grab a patch kit or call a contractor. Have questions or dealt with a tricky repair on your property? Drop them in the comments below.





