


Ever watch a gorgeous showroom table fall apart in less than two years? It’s incredibly frustrating to spend hard-earned money on pieces that look solid but secretly rely on cheap materials. When you are hunting for the most durable furniture material, you aren’t just buying a look, you are investing in structural survival. Navigating the marketing jargon to find what actually lasts can feel like guesswork. I have laid out the ultimate breakdown of structural materials, high-traffic fabrics, and outdoor options. By the end of this guide, you will know exactly how to spot generational quality, decode rub counts, and avoid the beautiful fakes that compromise your home. What is the Most Durable Furniture Material? A piece can look solid in the showroom and fall apart in 18 months. I’ve seen it happen with oak-finish particleboard dining tables, bonded leather sofas, and powder-coated steel outdoor chairs that weren’t actually powder-coated, just painted. The most durable furniture material depends entirely on what the piece is, where it lives, and how hard it gets used. There is no single answer that works for every room. What there is: a clear hierarchy of materials that hold up versus ones that don’t, and a set of construction details that separate long-lasting furniture from furniture that just looks like it should last. Most Durable Furniture Materials: Quick Comparison Different materials serve different functions. A dining table, a sofa frame, an outdoor bench, and a dresser all face different types of stress, weight, friction, moisture, UV exposure, and mechanical impact. This table covers the materials that consistently perform across those categories. Material Janka / Hardness Best Use Cost Range Durability Hickory (hardwood) 1,820 lbf Frames, tables, chairs $6–$10/board ft Very High Hard maple (hardwood) 1,450 lbf Dining tables, dressers $5–$9/board ft Very High White oak (hardwood) 1,360 lbf Tables, bed frames, cabinets $6–$12/board ft Very High Teak (hardwood) 1,155 lbf Outdoor furniture $20–$35/board ft Very High (outdoor) Steel (powder-coated) N/A — tensile Frames, patio, shelving Mid–high (finished piece) Very High Aluminum N/A — tensile Outdoor chairs, frames Mid High (rust-resistant) Granite / Quartz N/A — Mohs 6–7 Tabletops High Very High Performance fabric (Crypton) N/A — rub count Sofas, dining chairs Mid–high High Full-grain leather N/A — rub count Sofas, chairs High Very High (maintained) HDPE N/A — plastic Outdoor benches, chairs Mid High High-pressure laminate N/A — surface Desks, kids’ furniture Low–mid Medium Low-grade particleboard Very low Budget decorative only Low Low Hardwood Janka ratings from the Wood Database. Janka hardness measures the force required to embed a steel ball halfway into the wood, higher numbers mean harder wood and better resistance to denting and wear. Most Durable Materials for Frames, Tables, and Storage 1. Solid Hardwood Solid hardwood is the benchmark for frame durability. What makes it different from engineered alternatives isn’t appearance, it’s how the material responds to stress over time. Kiln-dried hardwood resists warping and cracking because the moisture has been removed before the wood was milled. A dining table frame made from kiln-dried white oak (1,360 lbf Janka) will absorb daily use, minor impacts, and seasonal humidity changes without losing structural integrity. The same table built from undried or low-grade softwood will start showing movement within a few years. Species matter. Oak, maple, hickory, walnut, and ash all outperform pine, poplar, or rubber wood in a structural role. Teak sits in its own category for outdoor applications because of its natural oil content, which makes it resistant to moisture and insects without annual treatment. Durability: Very high when kiln-dried and properly finished.Best for: Dining tables, bed frames, bookshelves, dressers, sofa frames, cabinets.Worst for: Perpetually damp spaces, solid wood moves with moisture, and a basement or bathroom will eventually work against it regardless of finish quality. 2. Metal (Steel and Aluminum) Steel is one of the strongest structural materials available for furniture, and it’s used in commercial seating and shelving specifically because it doesn’t flex under sustained load the way wood eventually can. The catch is finish quality. Bare steel rusts. Powder coating, where electrostatically charged pigment particles are baked onto the surface, creates a protective layer that resists chipping and corrosion. Ask specifically whether outdoor metal furniture uses powder-coated steel or just painted steel. Painted steel looks identical and fails within two to three seasons in a wet climate. Aluminum is the right choice where rust resistance is the priority. It weighs about a third as much as steel, doesn’t corrode, and holds up well in coastal and high-humidity environments without any protective coating. The trade-off is that aluminum dents more easily than steel under impact. Durability: Very high for structural use; powder-coated steel and aluminum outperform bare metal significantly outdoors.Best for: Bed frames, desk frames, shelving, patio chairs, dining chair bases.Worst for: Coastal outdoor settings if untreated, saltwater accelerates corrosion even on coated steel. 3. Stone (Granite and Quartz) For tabletops, granite and quartz are about as close to indestructible as a surface material gets. Granite rates 6–7 on the Mohs hardness scale, harder than most metals. Quartz tabletops are engineered from about 90% crushed quartz bound with resin, which makes them slightly more consistent and less porous than natural stone. Marble belongs in a separate category: it scores 3–4 on the Mohs scale, which means it scratches easily and etches permanently when exposed to acids, wine, citrus, vinegar, even sealed. The practical limitation of stone is weight and brittleness at the edges. A dropped pot or a sharp corner impact can chip granite, and replacing a stone tabletop section isn’t possible the way refinishing wood is. Durability: Very high for scratch and heat resistance; edge vulnerability is the weak point.Best for: Dining tables, coffee tables, console tables where the surface takes regular use.Worst for: Homes where the furniture gets moved frequently, stone tabletops are heavy and the edges don’t tolerate rough handling. Most Durable Upholstery Materials for Sofas and Seating Frame durability and upholstery durability are separate questions. A sofa can have an excellent kiln-dried hardwood frame and fail in three years because the fabric couldn’t handle daily use. Upholstery wear is measured differently, look for rub count ratings, which measure how many double rubs (back-and-forth passes) the fabric survives before breaking down. For a family sofa in daily use, anything below 15,000 double rubs is a risk. 30,000 and above is where the fabric starts to become genuinely long-lasting. 4. Performance Fabric (Including Crypton)
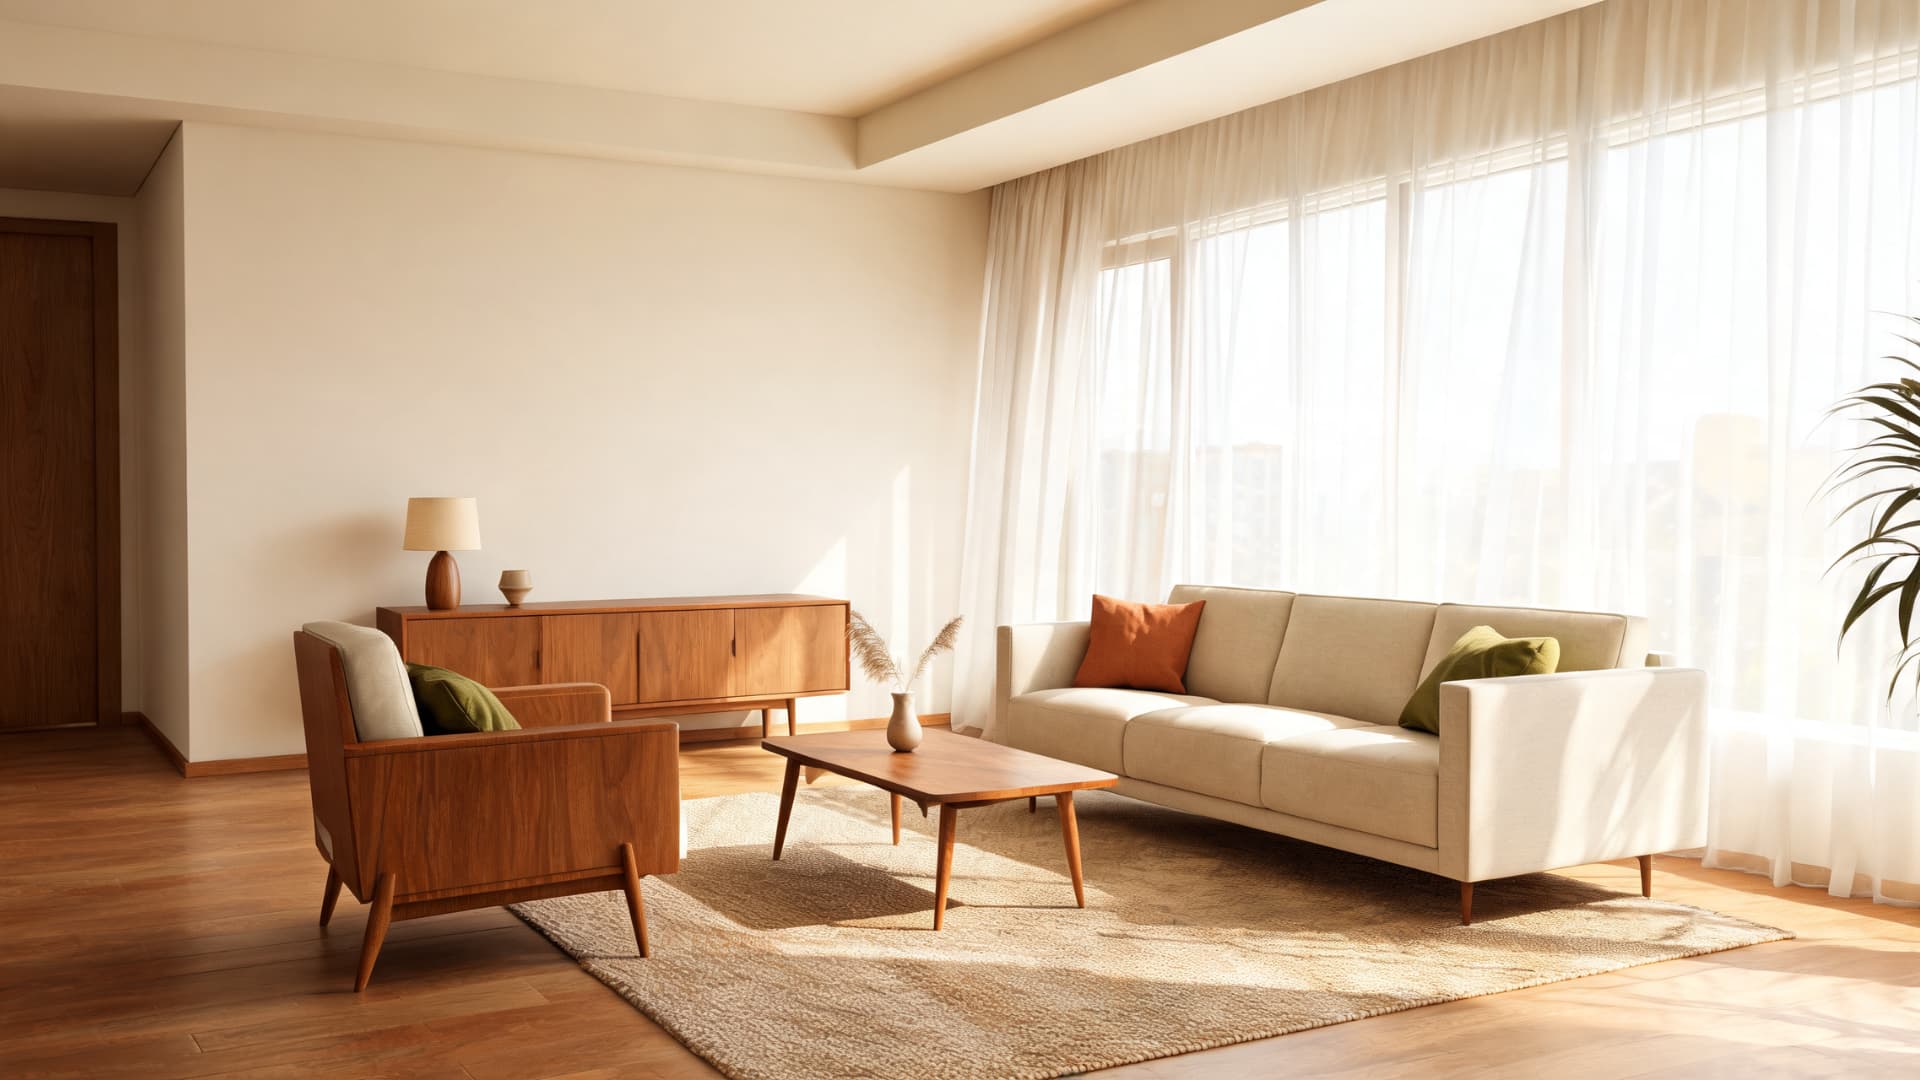
Mid-century modern is one of those design terms that gets used constantly and explained poorly. So, what is MCM furniture? MCM furniture refers to mid-century modern pieces designed with clean lines, tapered legs, warm wood tones, low profiles, and practical function. Most people can point to an Eames chair or a walnut credenza and say “that’s MCM,” but knowing what actually makes a piece fit the style is what separates a room that works from one that just looks like a vintage prop store. This guide covers the history, defining features, furniture details, and how to use mid-century modern style in a real home without over-theming it. Where Mid-Century Modern Came From MCM is a design movement that ran roughly from 1945 to 1969, shaped almost entirely by the events of World War II. Returning soldiers needed affordable, functional homes. Manufacturers were sitting on new materials, molded plywood, fiberglass, plastic, tubular steel, developed for wartime production. Architects and furniture designers had a practical question to answer: how do you build something that works well, uses these new materials efficiently, and doesn’t look heavy or oppressive in a small postwar house? The answer became mid-century modern furniture. Designers like Charles and Ray Eames, George Nelson, Arne Jacobsen, and Eero Saarinen created pieces that were structurally light, visually open, and centered on how people actually used a room. The Bauhaus movement and Scandinavian design, particularly Danish Modern, heavily influenced their approach, form follows function, materials are honest, and decoration adds nothing if the form is already right. The term “mid-century modern” was formally defined in Cara Greenberg’s 1984 book Mid-Century Modern: Furniture of the 1950s. The style itself had been named by then, but the book gave it a framework that design historians and collectors use today. What Defines Mid-Century Modern Furniture MCM furniture has a few features that appear across nearly every piece, regardless of who designed it or when it was made. Once you know what to look for, the style becomes easy to identify. Feature What It Looks Like Tapered or angled legs Slim, splayed legs that lift furniture off the floor and keep it feeling light Low profile Sofas, beds, and case goods sit closer to the floor than traditional furniture Warm wood tones Walnut, teak, and oak dominate — chosen for grain, durability, and warmth Organic curves Chairs and accent pieces use soft curves drawn from natural forms, not pure geometry Minimal hardware Sideboards and dressers use recessed pulls, small handles, or no visible hardware Mixed materials Wood paired with leather, metal, molded plastic, or glass — often on the same piece What connects all of these features is the same logic: the piece should be useful, it should feel light in the room, and the form itself should do the work that decoration would otherwise be doing. Walnut and teak are the two woods that appear most consistently across original MCM pieces; both have a warm grain, take a clear finish well, and hold up over decades of use. A good overview of how wood species compare for furniture is worth knowing before you buy, because not all woods sold as “walnut-finish” actually use walnut. Key Features of Mid-Century Modern Style The full MCM look is a combination of principles that work together. Individually, most of them also appear in other styles. The combination, and the restraint in how each is applied, is what makes a room read as mid-century modern rather than just clean or contemporary. Here’s the concise version: Clean Lines and Simple Shapes: MCM furniture uses clear forms like rectangles, circles, and soft angles. The shape itself is the detail, not carved trim or extra decoration. Organic Curves With Geometry: MCM balances straight-lined pieces with curved chairs and accents. This keeps rooms from feeling cold while still looking clean. Functional Design First: Every piece should be useful, comfortable, and practical. MCM design is not just about looks; it has to work well in daily life. Natural Materials: Walnut, teak, leather, stone, metal, and glass are common. The look is warm and refined, not rustic or distressed. Open Space and Outdoor Connection: MCM rooms feel open, light, and uncluttered. Large windows, plants, and natural light help connect the indoors with the outdoors. Color Palette: MCM uses neutral bases with earthy accents such as olive, rust, mustard, and terra cotta, plus bold pops like teal, avocado, and burnt orange. If you’re choosing wall colors to pair with warm wood furniture, the principles of choosing paint colors for your decor apply directly to an MCM palette. How to Identify Real MCM Furniture Not everything with tapered legs is mid-century modern. Here’s what to check when evaluating a piece, whether you’re buying vintage, secondhand, or new. Shape first: Clean lines, low profile, clear silhouette with no ornamental additions. If the shape is busy, it’s probably not MCM. Check the legs: Tapered, angled, or splayed legs are a consistent MCM marker. Straight boxy legs, turned legs, or no legs at all lean toward other styles. Material matters: Walnut, teak, oak, leather, molded plywood, and glass are period-correct. Distressed pine, ornate veneers, and glossy lacquer are not. Look at the hardware: Small handles, recessed pulls, or no hardware. Large decorative pulls, bin handles, and ornate knobs are off-style. Proportions: The piece should look balanced at a glance. Not too heavy, not too thin. If anything about the silhouette feels awkward or overpowered, the proportions are off. Function: Can it do what it’s supposed to do comfortably? A chair that looks right but doesn’t seat well is not MCM in spirit. Pro Tip: If you’re buying secondhand MCM-style furniture, check the leg attachment points. Original or quality reproductions use a solid wood-to-wood joint or a metal plate. Furniture with legs attached by a single bolt through thin particleboard will wobble within months of regular use. Mid-Century Modern vs. Modern, Contemporary, and Scandinavian Style These four styles share enough DNA that they get confused regularly. The differences are real, and knowing them helps when you’re trying to mix pieces or evaluate what fits. Style Mood Key Difference Mid-Century Modern Warm, clean, slightly retro Rooted in 1945-1969 design; defined by warm wood tones, tapered legs, and organic curves alongside clean geometry Modern Minimal, neutral, streamlined A broader movement; tends cooler and more spare than MCM, with less emphasis on warm wood and organic form Contemporary Current, flexible, trend-driven Reflects present-day design preferences; absorbs whatever is current, so it shifts year to year Scandinavian Light, cozy, simple Pale woods, white walls, soft textures, and hygge-influenced warmth; similar bones to MCM but noticeably lighter and airier The practical way to think about it: MCM is warmer than modern, more structured than Scandinavian, and less trend-dependent than contemporary. If you’re mixing styles, MCM pieces tend to work alongside Scandinavian furniture well — the materials and scale are compatible, and the warmth of one offsets the lightness of the other without conflict. How to Use Mid-Century Modern Style Room by Room The method is the same regardless of the room: start with one or two anchor pieces that establish the MCM character, then build around them with open space, warm materials, and minimal decoration. Resist the urge to fill corners. 1. Living Room A low-profile sofa, a walnut or oak coffee table, and one sculptural accent chair are all you need to establish the look. Float the furniture away from the walls, at a minimum of 18 inches of clearance behind the sofa, to keep the room from feeling like a furniture showroom. A textured rug grounds the seating area. Warm overhead lighting or a mid-century-style arc floor lamp handles atmosphere. Keep surfaces clear. If the room has a low ceiling, the low-profile MCM furniture scale actually works in your favor; the same principle applies in these low ceiling design tricks. 2. Dining Room A solid wood dining table with tapered legs and four to six matching chairs is the core. Wood choice matters more in a dining table than almost any other piece of furniture because it takes daily wear, scratches, moisture, and heat exposure. The comparison of wood options for dining tables is a useful reference before committing. A sputnik-style pendant or a clean drum shade above the table does the decorating. Keep the tabletop clear between meals, a small tray or a low centerpiece at most. One piece of framed abstract art on the wall is enough. 3. Home Office A solid wood desk, ideally walnut veneer or solid oak, with a task chair and open shelving handles most of what the room needs to do. Keep desk storage in a credenza or a low sideboard rather than bulky overhead cabinets, which break the clean sightline. One plant, a focused desk lamp, and a rug under the chair if the floor is hard. The room should be calm enough to work in, not decorative enough to distract. 4. Bedroom A low platform bed frame in walnut or oak is the anchor. Match the nightstands to the bed frame, the consistency matters more here than it does in other rooms. A dresser with tapered legs and minimal hardware against one wall keeps the room from needing additional storage pieces that clutter the floor. Soft, layered lighting matters: a small lamp on each nightstand, and either overhead dimmer control or no overhead light at all. Bedding in neutral linen or cotton keeps the room restful. 5. Entryway A slim console table, a simple round or rectangular mirror above it, and a small lamp or plant are enough. The entryway sets the expectation for the rest of the home; it should feel organized and uncluttered, not like a landing zone. If you need shoe storage, look for a bench with hidden storage or a low cabinet that fits cleanly under the console. One hook strip for bags and coats, mounted cleanly, handles the functional side without visual chaos. Common Mistakes That Undercut Mid-Century Modern Style Most MCM rooms that don’t work have the same problems. None of them is hard to avoid once you know what to look for. Too many statement pieces are competing at once. Pick one: the chair, the sofa, the light fixture. Three sculptural pieces in the same sightline cancel each other out. Prioritizing looks over function. MCM furniture is supposed to be used. A sofa that photographs well but is uncomfortable to sit on is a category error. If you’re buying for daily use, sit in it first. Overcrowding the room. The open space is part of the design. A credenza needs breathing room. A chair needs clearance. If every surface has something on it and every corner has a piece of furniture, the clean lines disappear. Stacking too many retro accents. A vintage-style lamp, a starburst clock, a record player, and a rotary phone on one shelf is not curated — it’s themed. Two or three well-chosen vintage-inspired pieces are enough. Forgetting texture. All-wood, all-leather rooms can read cold. A textured rug, a bouclé throw, or upholstered seating in a warm fabric adds the sensory layer that makes an MCM room livable rather than museum-like. Frequently Asked Questions These are the questions that come up most often from people who are actively furnishing a space rather than just researching the style. What makes furniture mid-century modern? Tapered legs, low profile, clean geometric or organic silhouette, warm wood tones (walnut, teak, oak), and minimal hardware or decoration. The piece should feel visually light and serve a functional purpose — together, these two things define the aesthetic more accurately than any single feature. Is mid-century modern still popular in 2025? Yes, and consistently so for the past decade. The style holds because it’s genuinely functional and pairs well with other aesthetics. It doesn’t depend on a single trend cycle. A quality walnut credenza bought in 2010 fits as naturally in a 2025 room as it did then. What colors are mid-century modern? Warm neutrals as a base — white, warm beige, soft gray — with earthy accent tones like olive, mustard, rust, and terra cotta. Bold pops of teal, avocado green, or burnt orange add energy in small doses through upholstery or accessories. The key is restraint: one or two accent colors, not five. What is the difference between mid-century modern and contemporary style? MCM is period-specific — its forms are rooted in 1945-1969 design logic. Contemporary style reflects current trends, which change year to year. A contemporary room in 2025 may look nothing like one from 2018. A mid-century modern room has a consistent reference point regardless of when it’s built. Can you mix mid-century modern with other styles? Yes. MCM works particularly well with Scandinavian furniture (similar scale and material palette), Japandi-influenced decor (shared emphasis on natural materials and negative space), and even some industrial elements. The constraint is consistency in proportion and material quality. MCM pieces tend to lose coherence when mixed with heavy traditional or ornate furniture. How do I make mid-century modern feel cozy rather than cold? Add texture and warmth through soft goods: a wool or jute rug, linen or bouclé upholstery, a chunky throw, and layered lighting. Plants help. Wood accessories — a tray, a small bowl, a lamp base — reinforce the warmth of the furniture. The cold reading usually comes from too much hard surface with no soft counterpoint. Does mid-century modern work in a small apartment? It’s well-suited to small spaces. The low profiles keep rooms feeling open vertically, the tapered legs leave floor space visible under furniture (which reads as more room), and the emphasis on built-in or consolidated storage keeps clutter from accumulating. Avoid oversized MCM pieces — scale matters more in small rooms than in large ones. Final Verdict Mid-Century Modern remains popular because it makes a simple design feel warm, useful, and refined. I find its strength in how clean lines, natural materials, practical furniture, and open layouts create a home that feels calm without feeling empty. If you came here wondering what MCM is, the answer is clear: it is a design style built around comfort, purpose, and visual balance. Once you understand its history, key features, colors, and furniture details, the style becomes easier to recognize and apply. Use these ideas to choose Mid-Century Modern pieces that feel timeless, practical, and true to your home. Now that Mid-Century Modern style feels a little clearer, I’d love to hear your take. Which part of the style stands out most to you: the furniture, colors, history, or simple design? Let me know in the comments. Sources:Cara Greenberg, Mid-Century Modern: Furniture of the 1950s. 1984.The Spruce, “Mid-Century Modern Design Guide.” https://www.thespruce.com/mid-century-modern-design-guideHouzz, “Mid-Century Modern Style Guide.” https://www.houzz.com/ideabooks/mid-century-modern
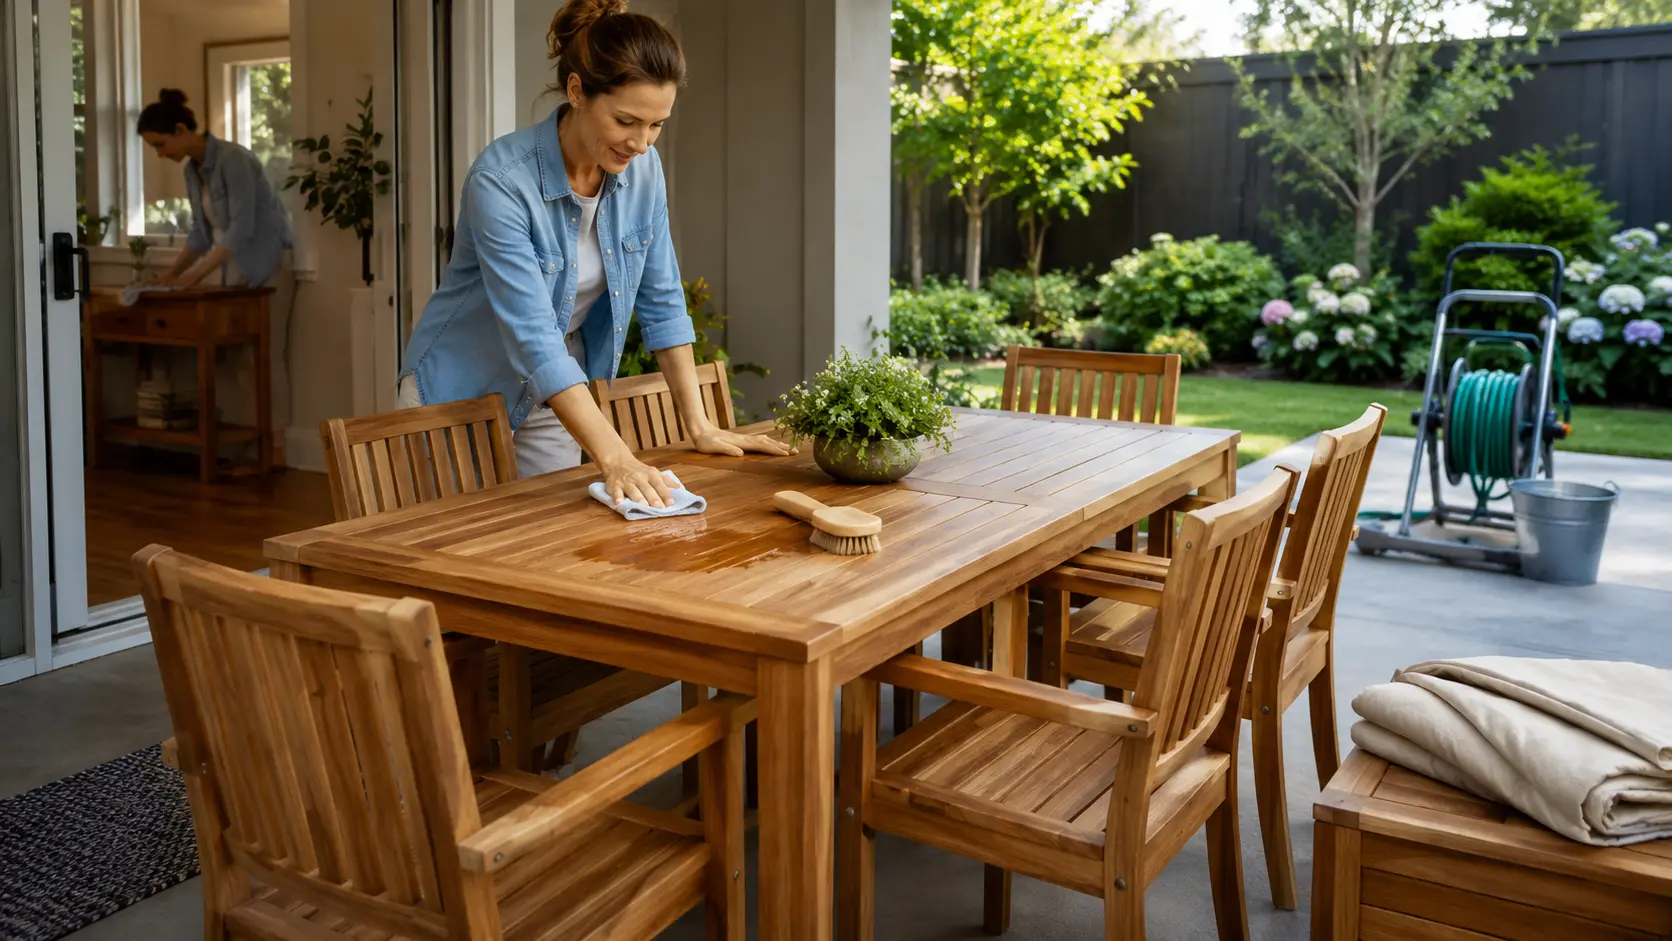
Teak doesn’t fail the way most outdoor wood does. After a rainy season, the surface goes gray, not damaged, just weathered. The oils that make teak resistant to rot are still there. The grain is still sound. What’s changed is the surface color, and that changes what you need to do before you touch it with any cleaner or finish. If you know how to clean teak wood before you reach for a protector or oil, you’ll save yourself the most common mistake: applying finish to a dirty or damp surface and trapping the problem rather than fixing it. I’ve seen sets come in that were oiled annually for five years and looked worse than a set that hadn’t been touched. The cleaning step matters more than the product you use after it. Species Teak (Tectona grandis) Janka Rating 1,070 lbf, hard enough for outdoor use, machines and sands cleanly Natural oil content High, resists moisture and rot without finishing, but absorbs less than dry hardwoods Grade to look for Grade A (heartwood only, tight grain, fewest knots, best durability) Outdoor lifespan untreated 25–50 years with basic cleaning; will gray naturally after 6–12 months of UV exposure What fails first Surface finish if applied over damp or dirty wood; mildew in joints if moisture is trapped That reference box is the short version. The rest of this guide walks through how to clean teak wood furniture by condition, light dirt, gray weathering, mildew, and stubborn stains, and what to do with the surface afterward. Know What Your Teak Needs First Before choosing a cleaner, take a quick look at the teak. A dusty chair, a gray bench, and a table with dark spots should not all be treated the same way. The goal is to clean the surface without roughening the grain, trapping dirt, or adding finish too soon. Light dust, pollen, and loose outdoor dirt usually need only mild dish soap, warm water, and a soft-bristle brush. This is the safest starting point if the furniture still looks even in color. Gray teak is usually weathered by the sun and rain, not damaged. Teak ages into that silver-gray tone naturally, and it’s one reason teak stays a strong choice when weighing the best wood for outdoors against alternatives like ipe or acacia. If you like the silver-gray look, clean it and leave it alone. If you want the warmer brown back, clean first, then use a teak brightener only if needed. Dark spots may come from mildew, wet leaves, planters, spills, or dirt sitting in the grain. Wash the furniture first, let it dry fully, and check the marks again before sanding. If the surface feels rough, wait until the wood is dry before sanding lightly. If it feels sticky, clean off old oil or buildup before adding any new oil, protector, or sealer. Choose the Right Cleaner for the Job The cleaner should match the condition of the teak. For regular care, mild dish soap and warm water are enough. Use stronger options only when the furniture has mildew, gray buildup, or deep outdoor grime. Cleaner or product Best for Use with care when Mild dish soap and water Dust, pollen, light grime The piece has heavy gray buildup Diluted white vinegar Light mildew or musty smell The wood is very dry or cracked Teak cleaner Weathered, gray, or dirty outdoor pieces The furniture only needs a light wash Teak brightener Bringing back a warmer tone after cleaning Dirt is still on the surface Bleach-based mix Stubborn mildew Routine cleaning or food-contact pieces Start with the mildest option that fits the problem. Use teak cleaner for heavy buildup, brightener for color correction, and bleach-based mixes only for stubborn mildew. How to Clean Teak Wood Furniture Step by Step Cleaning teak furniture works best when you keep the process gentle. Before you start, gather the basics: mild dish soap, warm water, a bucket, a soft-bristle nylon brush, a sponge or clean cloth, and a garden hose or clean rinse water. For heavier buildup, keep teak cleaner and teak brightener nearby. If the surface feels rough after drying, 220-grit sandpaper can help. Use gloves if you plan to use stronger cleaners. Most outdoor teak does not need harsh chemicals, heavy sanding, or strong water pressure. Start with a mild wash, then use a teak cleaner only if the wood still looks gray, stained, or patchy after the first clean. Step 1: Clear the Surface and Wet the Wood Start by removing dry leaves, pollen, dust, sand, and loose debris from the furniture. Small bits of grit can scratch the surface once you begin scrubbing, especially on tabletops, chair arms, and bench seats. After the loose dirt is gone, wet the teak with clean water. A garden hose works well for outdoor furniture, while a bucket and sponge are better for indoor pieces or balcony setups. The wood should be damp, not soaked. This helps the soap spread evenly and keeps dry teak from absorbing the cleaner too quickly in one spot. Step 2: Wash Gently With Mild Soap Mix mild dish soap with warm water in a bucket. You do not need a strong soap mix. The goal is to loosen dirt from the surface without leaving residue in the grain. Use a soft-bristle nylon brush or sponge and scrub with the grain. This keeps the surface smoother and lowers the chance of scratch marks. Avoid steel wool, wire brushes, rough pads, and pressure washing because they can damage the surface. For slatted chairs, benches, and dining tables, clean one small area at a time. This keeps the soap from drying on the teak before you rinse it. Step 3: Use Teak Cleaner Only for Heavy Buildup If mild soap does not remove gray buildup, mildew, or deep outdoor grime, use a cleaner made for teak. This step is not needed every time you wash the furniture. It is mainly for pieces that still look weathered or uneven after a normal clean. Follow the product label closely. Let the cleaner sit only for the suggested time, then scrub gently with the grain. Use teak brightener after cleaning only if you want to bring back a warmer tone. Step 4: Rinse Well and Let It Dry Fully Rinse the furniture with clean water until all soap or cleaner is gone. Leftover residue can dry into the grain and leave the surface looking dull, streaky, or patchy. Use a regular hose, sponge, or clean bucket of water. Do not use a pressure washer. Strong pressure can raise the grain, roughen the wood, and leave marks that may need sanding later. After rinsing, let the teak dry in open air for 24 to 48 hours. Do not sand, oil, seal, or cover the furniture while it is damp. If the wood feels cool, dark, or damp in some areas, give it more time. Step 5: Sand Only If the Surface Feels Rough Once the teak is fully dry, run your hand over the surface. If it feels smooth, you can skip sanding. If it feels rough or fuzzy, sand lightly with fine-grit sandpaper, such as 220 grit. Always sand with the grain and wipe away dust afterward. The goal is to smooth the raised grain, not remove a thick layer of wood. If you plan to use oil, protector, or sealer, apply it only after the teak is clean, dry, and dust-free. Choose a Finish: Natural Gray, Oil, Protector, or Sealer Once the furniture is clean and fully dry, decide how you want the teak to age. You can let it turn silver-gray naturally, or you can use oil, protector, or sealer to keep a warmer brown color. Teak behaves differently from most species once a finish is applied; its natural oil content means it absorbs less than drier hardwoods, which affects how each finish performs. If you are still deciding on which outdoor species to buy, the full breakdown on types of wood furniture is suited for comparing teak, acacia, and ipe side by side. The best finish choice depends on how much upkeep you want and how much the furniture gets exposed to the weather. On teak oil: “Teak oil” is typically linseed oil mixed with solvents. It is not extracted from teak trees. Applied too heavily or too often, it sits on the surface and turns sticky, collecting dirt and promoting mildew, particularly in humid climates. If you use it, apply very thin coats and wipe off the excess completely. Many teak specialists recommend water-based sealers over teak oil for outdoor pieces because they last longer and don’t carry the same buildup risk. Finish Best for Upkeep Watch out for Natural gray (no finish) Low-maintenance outdoor pieces Low, annual soap wash Still needs cleaning; mildew forms on dirty wood regardless of finish Teak oil Restoring warmer brown tone Medium to high, reapply every 3–4 months in sun-exposed settings Turns sticky if applied too heavily; can feed mildew in humid climates Teak protector Slowing the gray transition Medium, reapply once or twice yearly Works only on clean, fully dry teak; surface prep is non-optional Water-based teak sealer Longer protection, fewer applications Medium, one or two coats annually Don’t apply over dirt, damp wood, or any sticky old finish, strip first If you use teak oil, handle oily rags with care. Do not leave them in a pile. Lay them flat outside to dry or follow the disposal steps on the product label. Keep Teak Clean Longer: A Seasonal Routine One deep clean a year stops working when teak sits under trees, near a pool, or in a damp climate. A light routine spread across the seasons prevents the buildup that turns a 30-minute wash into a half-day restoration job. Season What to do Why it matters Spring Full wash, check for mildew and rough spots, apply sealer or protector if using one Clears winter buildup before heavy use begins Summer Wipe spills immediately, rinse pollen every few weeks, move planters to prevent moisture rings Stops stains from setting in the grain Fall Clean and dry fully before storing or covering Prevents trapped moisture over winter Winter Store indoors or use breathable covers; lift covers occasionally to let air circulate Tight plastic covers trap moisture, breathable fabric covers don’t For indoor teak, use less water throughout. Dust regularly, wipe with a barely damp cloth, and dry the surface immediately. Joints, edges, and veneer on indoor pieces absorb moisture differently than outdoor solid teak, soaking an indoor piece can cause swelling at the joints that takes weeks to fully reverse. Mistakes That Damage Teak and How to Avoid Them Most teak damage I’ve seen comes from three things: water pressure, trapped moisture, and too much finish. Each one is avoidable. Pressure washing: Raises the grain, strips natural oils, and leaves marks that need sanding to fix. Use a regular hose. Scrubbing across the grain: Leaves visible scratch marks in the wood fibers. Always scrub with the grain. Oiling dirty or damp wood: Traps the dirt and moisture under the finish. Clean and dry first, every time. Thick oil coats: Extra oil sits on the surface, turns sticky, and becomes a mildew trap in humid weather. Thin coats, wiped off completely. Covering damp furniture: Moisture trapped under a cover is the primary cause of mildew at joints and slat edges. Fully dry before covering. Steel wool or wire brushes: Metal particles lodge in the grain and rust, leaving orange stains that don’t come out. Use nylon brushes only. One more worth flagging: applying teak brightener before cleaning. Brightener is a mild acid, it works by stripping the oxidized gray surface layer to reveal the warmer wood underneath. If there’s dirt or mildew on the surface when you apply it, the brightener works on that instead. Cleaning first means the brightener reaches the wood. Frequently Asked Questions Can I use dish soap to clean teak wood? Yes. Mild dish soap mixed with warm water is the right starting point for routine cleaning. Scrub with a soft nylon brush along the grain and rinse fully so no residue dries into the wood. Can I use vinegar on teak furniture? Diluted white vinegar works for light mildew and musty smell, use one cup per four liters of water. Rinse well. Avoid it on very dry or cracked teak, and don’t use it as a substitute for teak cleaner on heavily weathered pieces. Can you use bleach on teak wood? A diluted bleach solution (1:4 with water) handles stubborn black mildew that won’t respond to vinegar. Wear gloves, rinse thoroughly, and don’t use it on food-contact surfaces or as routine care, it’s harsh on the grain over time. Can I pressure wash teak furniture? Not at standard pressure settings. High PSI raises the grain, roughens the surface, and strips natural oils. If you do use a pressure washer, keep it below 1,200 PSI with a wide fan nozzle. A regular hose is better. Is gray teak wood damaged? No, gray teak is normal outdoor aging, not structural damage. UV exposure and rain oxidize the surface oils and produce the silver patina within 6–12 months. You can leave it gray, or clean and brighten it if you prefer the warmer brown. Should I oil teak furniture every year? It depends on the product. Teak oil needs reapplication every 3–4 months in direct sun, annually is too infrequent to maintain color and too frequent if buildup accumulates. A water-based sealer applied once in spring is lower-maintenance and less prone to sticky buildup. How do I restore teak to its original color? Clean the surface thoroughly, rinse, and dry fully. Then apply teak brightener according to the label instructions. The brightener strips the oxidized gray layer and brings back the warmer tone. After brightening, apply a sealer or protector to slow the next cycle of graying. How often should I clean teak furniture? Once or twice a year for most outdoor sets. If the furniture sits under trees, near a pool, or in a coastal or humid climate, check it every few months for mildew and pollen buildup and rinse as needed between deep cleans. Final Verdict Teak care works best when it stays simple. Wash with mild soap for normal dirt, use a teak cleaner for heavier buildup, and let the wood dry fully before any finish touches the surface. Once the piece is clean, choose a sealer, protector, natural gray finish, or teak oil for outdoor furniture based on how much upkeep you want. If you came here to learn how to clean teak wood, the rule is clear: clean gently, dry fully, and protect only when needed. Give your set a quick look this week. Start with one chair or table, then use that result to plan the rest. Small care now prevents bigger repair work later.
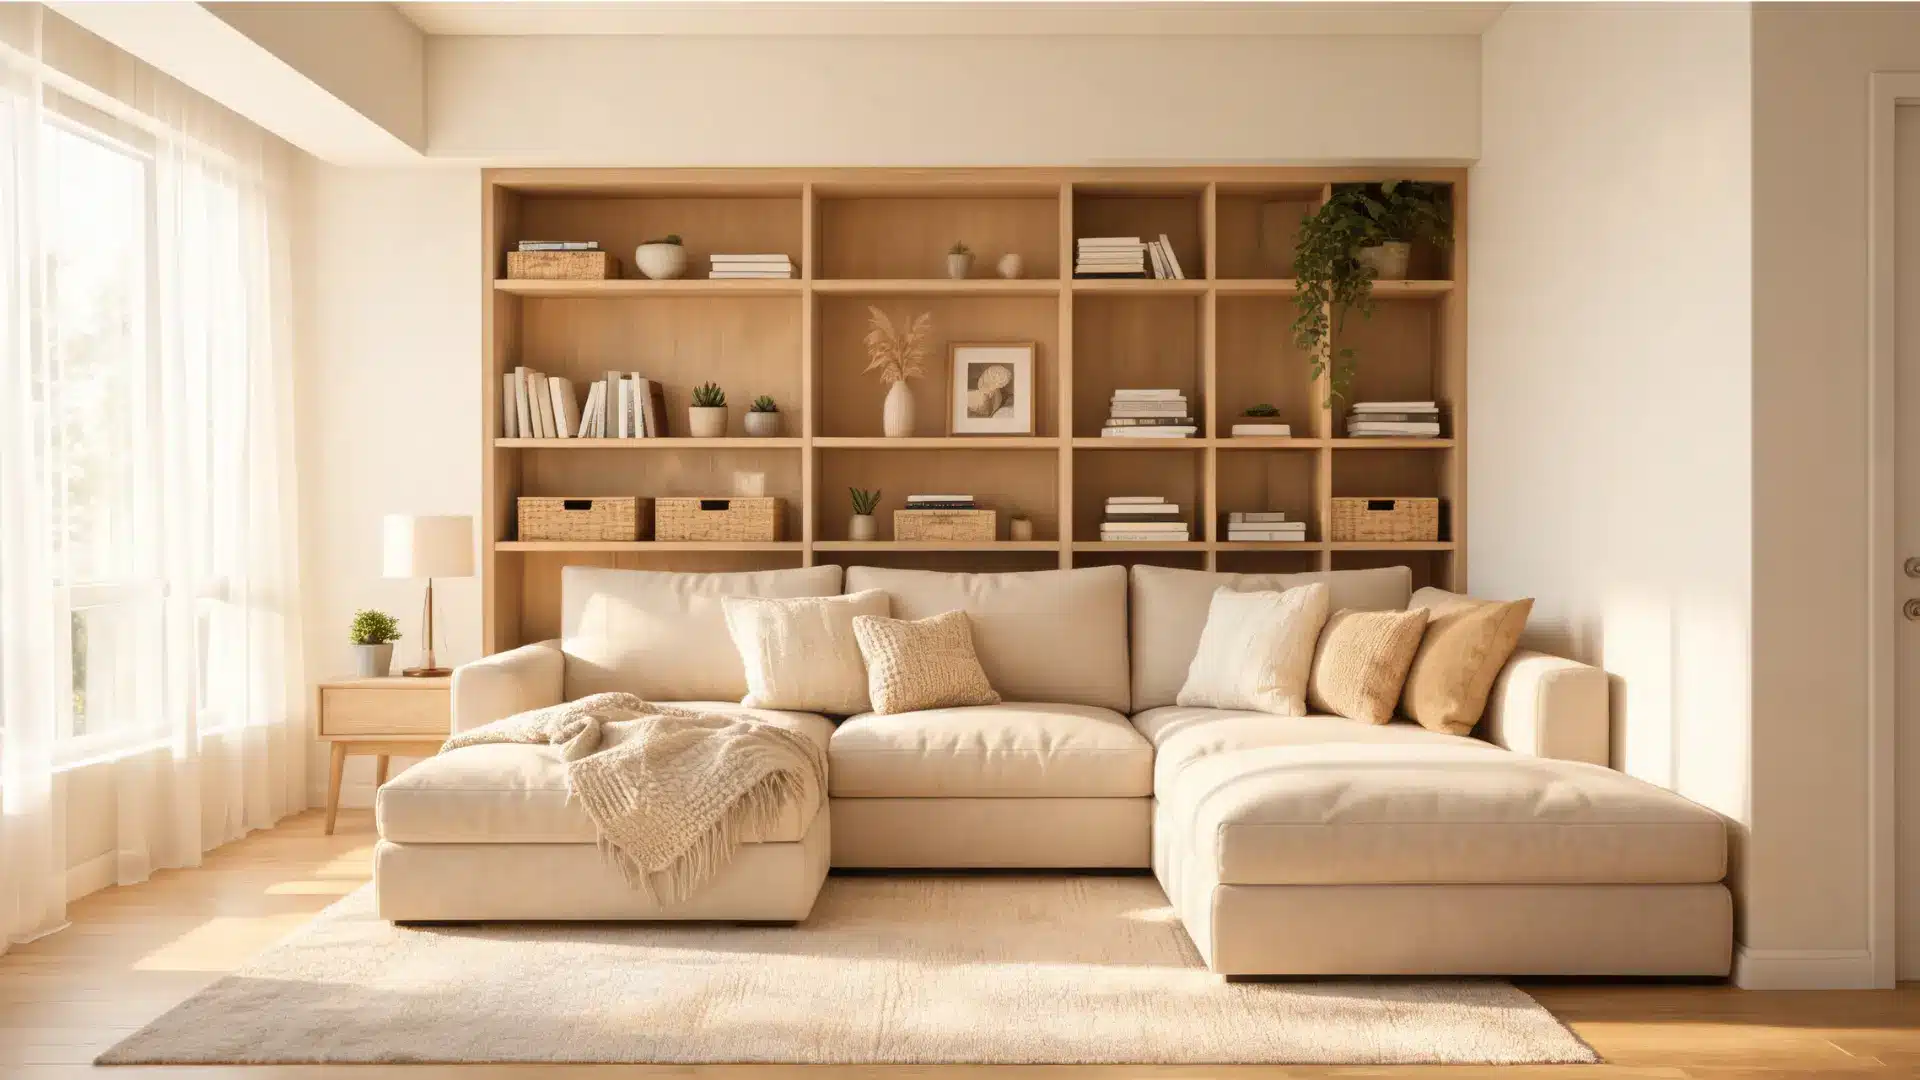
Ever bought a beautiful piece of furniture, only to realize it is too big, too small, or just not right for your space? That is exactly why custom furniture exists. I see it as furniture made around a real room, a real lifestyle, and a clear purpose. Standard store-bought pieces can make a room feel complete, but they do not always fit or function the way you need. Custom furniture gives you more control over size, style, comfort, storage, and materials, so you do not have to settle for “close enough.” Here, you will learn what it means, how it differs from ready-made options, its main types, and why it can be a smarter choice. What is Custom Furniture? Custom Furniture is the furniture designed, built, or modified to match your size, style, material, comfort, and functional needs. It may also be called custom-made furniture, bespoke furniture, or made-to-order furniture, depending on how much control you have over the final design. Furniture can make a room feel finished, but standard store-bought pieces do not always fit the way you need them to. That is where custom furniture becomes useful. When I think about custom furniture, I think of pieces made around a real space, a real lifestyle, and a clear purpose. The Four Types of Custom Furniture Not every custom furniture piece is made the same way. The differences matter, especially when it comes to cost, lead time, and how much control you actually get. Here’s how they break down: 1. Fully Custom Furniture Fully custom furniture starts from a blank slate. You bring a room problem or a specific need, and a designer or furniture maker builds something new around it. The process typically includes a consultation, exact measurements, design sketches or 3D drawings, material selection, and a final approval before anything gets cut. This is the option for people with genuinely unusual spaces: a wall-to-wall bookshelf that works around an existing window, a dining table scaled to a narrow galley-style room, a bed built to use every inch of a small bedroom. Lead times are longest here, and so is the cost. But you walk away with something that exists nowhere else. 2. Customized Furniture Customized furniture starts with an existing design but lets you change specific details, fabric, leg finish, cushion firmness, and dimensions. You’re not building from scratch, but you’re not stuck with what’s on the floor either. A sofa you can specify in 12 fabrics and three depth options is customized furniture, not fully custom. It’s a reasonable middle ground for most homeowners who want something that fits their space better than the standard version. 3. Made-to-Order Furniture Made-to-order furniture is built only after you place your order. The design template is fixed, but you choose from available options, fabric, finish, and size tier. Think of it as a step above ready-made: more choice than walking into a store, less freedom than specifying a piece from the ground up. Production begins after you commit, which means longer delivery times than stock furniture but usually shorter than fully custom work. 4. Bespoke Furniture Bespoke is often used interchangeably with “fully custom,” but in practice, it tends to signal handcrafted construction and a stronger emphasis on premium materials. A bespoke piece is made for one client. It reflects their room, their use case, and usually their taste for craftsmanship over convenience. If you’re comparing options, the word “bespoke” usually means the maker is working in solid wood with traditional joinery rather than flat-pack components. Understanding which category a piece falls into helps you evaluate the quote you’re getting. A “customized” piece priced like a fully custom one is worth questioning. Custom vs. Ready-Made: Where the Real Differences Are Ready-made furniture is mass-produced to standard sizes. You pick it, pay for it, and have it in days or weeks. That speed and accessibility is a real advantage when it matters. Custom furniture inverts the process: you define what you need, and the piece gets built around that. The trade-off is time and upfront cost. Feature Custom Furniture Ready-Made Furniture Design Built or modified for your needs Pre-designed to standard templates Size Exact measurements of your room Fixed standard sizes Materials Chosen by you, often solid wood Pre-selected, often engineered wood Timeline 4–16 weeks, depending on complexity Days to a few weeks Cost Higher upfront Lower upfront Durability Usually solid construction, longer lifespan Varies widely by price point Returns Usually not possible after approval Easier to return within policy windows The honest read on this: ready-made furniture is the right call when you need something quickly, have a tight budget, or are furnishing a space you won’t be in long. Custom furniture earns its cost when you’re staying put, the room has a layout that standard pieces can’t solve, or you want something that still looks right in 20 years. How Custom Furniture Actually Behaves Over Time This is where most buying guides stop short. Knowing what custom furniture looks like, new is the easy part — what matters more is how it performs after years of daily use. Solid wood custom pieces age in ways that engineered wood doesn’t. Oak and walnut develop a patina that typically improves their appearance over time. A well-joined solid wood frame won’t rack or sag the way particleboard does under sustained load. Dovetail drawer boxes outlast drawer slides on budget pieces by decades. That said, solid wood species like oak move with humidity; a custom oak dining table will expand and contract slightly with the seasons. A good maker accounts for this in how the top is attached to the base. A bad one doesn’t, and you find out when the top splits three years later. For upholstered custom pieces, the frame matters more than the fabric. An 8-way hand-tied spring construction in a custom sofa will outlast a sinuous spring frame regardless of how good the fabric looks on day one. If you’re specifying a custom sofa, ask about the frame and spring system before you discuss fabric. The other long-term consideration is repair and refinishing. A solid wood custom piece can be sanded, refinished, and reupholstered. Most ready-made furniture, once worn, gets replaced. Over a 20-year horizon, the economics of custom often look better than the upfront price suggests. Materials Used in Custom Furniture Material choice is where custom furniture decisions get made or wasted. Here’s how the most common options compare for furniture use: Species / Material Janka Rating (lbf) Best Furniture Use Typical Cost (board ft) Durability White Oak 1,360 Tables, cabinets, bed frames $6–$12 Excellent Walnut 1,010 Dining tables, desks, shelving $10–$20 Very Good Hard Maple 1,450 Workbenches, chairs, drawers $5–$10 Excellent Cherry 950 Cabinets, dressers, bed frames $7–$14 Good Teak 1,155 Outdoor furniture, indoor tables $20–$40 Excellent (moisture-resistant) Pine (soft) 870 Shelving, casual pieces, kids’ furniture $3–$6 Fair (dents easily) Teak is listed here because it’s also one of the more durable woods for outdoor furniture, where moisture resistance matters as much as hardness. Beyond wood, custom furniture regularly uses metal for frames and legs (especially in modern and industrial designs), glass for tabletops and cabinet faces, and upholstery materials including cotton, linen, velvet, leather, and performance fabrics for seating. Finishes, oil, lacquer, stain, paint, wax, protect the wood and determine the final visual character of the piece. Finish Interaction: What Works and What Doesn’t The finish choice depends on the species and the intended use. This is something many buyers overlook until it’s too late to change. Oil finishes (like Rubio Monocoat or Osmo) penetrate the wood surface and let it breathe. They’re ideal for walnut and oak; they deepen the grain without a plastic sheen, but they require periodic reapplication, typically every 1–3 years on a dining table. Lacquer and conversion varnish create a hard surface film. They’re more durable against water and daily wear, but can yellow over time on lighter species and are harder to spot-repair. Wax is fine for display pieces or low-wear surfaces, but has no place on a kitchen table or a desk that sees daily coffee cups. Hard wax oil gives you a middle ground on species with open grain like ash or oak, good durability with a more natural look than lacquer. One thing to check before approving a custom order: ask the maker what finish they’re applying and why. A maker who can’t explain their finish choice in relation to your specific species and use case is a concern. The finish you choose also affects how a piece reads in a room. Walnut with an oil finish and walnut under lacquer look noticeably different, the oil version reads darker and richer, the lacquer version brighter and slightly more uniform. If you’re combining a custom piece with existing furniture, matching wood tones across pieces depends as much on finish type as it does on species. The Budget Reality Check on Custom Furniture Custom furniture costs more than ready-made. That’s not the question. The question is where the cost is justified and where it isn’t. The price premium on fully custom furniture is real — a custom solid oak dining table might run $2,000–$5,000, where a comparable ready-made piece costs $600–$1,200. Most of that gap is labor: design time, joinery, hand-finishing. You’re also paying for made-to-measure fit and material quality you can verify before you sign off. Where people overpay: choosing custom for pieces where standard sizes work fine. A 72-inch dining table is a standard size for a reason, if it fits your room, a well-made, ready-made piece in solid wood can do the job at a fraction of the price. Where custom earns its cost: built-ins and room-specific pieces. A wall-to-wall storage unit or a desk built into an alcove can’t be replicated by a standard piece. The fit is functional, not cosmetic, and the price reflects work that simply can’t be done any other way. The same logic applies to awkward rooms — low ceilings, sloped walls, or unusually narrow spaces where standard furniture wastes significant floor area. The other honest caveat: “custom” doesn’t always mean better construction. Some custom shops use engineered wood cores with solid wood faces and charge full custom prices. Ask specifically: is the carcass solid wood or veneered MDF? For painted pieces, that distinction matters less. For stained or oiled natural wood, it matters a lot. Is Custom Furniture Worth It? Here’s my actual position on this: custom furniture is worth it for three situations, and borderline in most others. First, built-ins and room-specific pieces. If the piece needs to fit a specific wall, alcove, or layout, custom is the only option that makes the space work properly. Second, long-term anchor pieces in rooms you’re staying in. A solid wood dining table you’ll use for 25 years is a different financial calculation than a sofa you’ll replace in seven. Third, when you have an unusual comfort or functional need that standard options don’t address, specific ergonomic requirements, specific storage configurations, or accessibility needs. Where custom furniture is harder to justify: pieces that see light use, rooms you’re furnishing temporarily, or situations where a well-made, ready-made piece in solid wood (not particleboard) does the job. There are good, ready-made options in solid oak and walnut that perform well over time. Custom for its own sake, when a standard piece actually fits, is an expensive way to prove a point. How the Custom Furniture Process Works The process varies by maker, but most custom furniture projects follow the same sequence. Knowing it in advance helps you ask better questions and avoid delays. Consultation: You describe the space, the need, and your preferences. A good maker asks about room dimensions, how the piece will be used, who uses it (kids? pets? heavy daily use?), and what materials you’re drawn to or want to avoid. Measurements and planning: The space gets measured carefully: wall dimensions, ceiling height, door clearances, and traffic paths. For built-ins especially, this stage determines everything that follows. Design concept: Sketches, technical drawings, or 3D renders, depending on the complexity of the piece. This is the stage to push back; changes after approval are expensive. Material and finish selection: You choose species, finish type, upholstery if applicable, and hardware. Samples matter here; seeing a finish on the actual wood you’re ordering is different from seeing it on a generic sample board. Approval and production: Once you sign off, production begins. Lead times for custom furniture in the US typically run 6–14 weeks for smaller pieces, longer for complex built-ins or high-demand makers. Delivery and installation: Inspect the piece carefully at delivery: fit, finish quality, drawer function, joint alignment. Issues flagged at delivery are easier to resolve than issues raised three months later. Custom Furniture vs. Customized Furniture: The Practical Difference Custom furniture starts from nothing. Customized furniture starts from an existing design with adjustable parameters. In practice, the choice between them usually comes down to what you actually need changed. Point of Difference Custom (fully) Customized Starting point New concept based on your needs Existing design with adjustable options Design control Full: shape, size, material, joinery, finish Limited: color, fabric, size tier, finish Best for Unusual spaces, built-ins, specific functional requirements Standard layouts where stock sizes almost fit Timeline Longer — design, approval, and production Faster — base design already exists Cost Higher — design labor is a real cost More affordable than fully custom Example Wall-to-wall shelving unit built around an existing window Standard bookshelf in a different color or slightly taller If you’re trying to change color, fabric, or add 4 inches to a standard shelf height, customized furniture is likely the right move. If you need something that doesn’t exist in any catalog, that’s a fully custom project. Common Examples of Custom Furniture in Real Rooms Custom furniture appears in residential spaces most often, where standard pieces create layout problems. Common projects include sectional sofas sized for open-plan rooms, storage beds for bedrooms without closet space, built-in desks for home offices with specific wall configurations, wardrobes fitted to sloped ceilings or awkward alcoves, and media units designed to manage specific AV equipment. In minimalist bedroom layouts, a custom bed frame with integrated drawer storage is often the cleanest solution to the storage problem in rooms where adding a dresser breaks the sightlines. Commercial spaces use custom furniture heavily because branded consistency and heavy use both require pieces that standard catalogs don’t cover, hotel room furniture built to specific dimensions, restaurant banquettes fitted to irregular floor plans, and reception desks that match brand materials. Questions to Ask Before You Order Before committing to any custom furniture order, work through these questions. They clarify the brief and help the maker give you an accurate quote: What specific problem does this piece need to solve — fit, storage, function, or all three? What are the exact measurements the piece must work within? Is the carcass solid wood or veneered engineered wood? What finish are you applying, and why that finish for this species? How does the piece account for wood movement (expansion/contraction)? What is the joint construction on drawers and frames? What drawings, samples, or renders will I see before approval? What’s the lead time, and what causes it to change? Can this piece be refinished or reupholstered in the future? What’s included in delivery — will the piece be installed, or just dropped? A maker who can answer all of these without hesitation is worth the premium. One who deflects on the joinery or finish questions is a reason to pause. Frequently Asked Questions About Custom Furniture These are the questions I hear most from people who’ve already measured their space and are trying to decide whether custom is the right move. How long does custom furniture take to make? Most custom furniture takes 6–14 weeks from deposit to delivery. Complex built-ins or high-demand makers run 16–20 weeks. If a shop quotes you under 4 weeks on a fully custom piece, ask what’s actually custom about it. Is custom furniture more expensive than ready-made? Yes, almost always. A custom solid oak dining table runs $2,000–$5,000. A comparable ready-made piece in solid wood typically costs $600–$1,500. You’re paying for design labor, exact fit, and material specification — all legitimate costs when the piece needs to be right. What is the difference between custom and bespoke furniture? In practice, bespoke usually signals handcrafted and premium materials; custom is the broader category. Both are made to your specifications. Bespoke tends to imply a higher level of joinery and maker craftsmanship than the word “custom” alone conveys. Can custom furniture be made from sustainable wood? Yes. FSC-certified wood is widely available through US custom furniture makers. Ask for it specifically; it won’t be offered automatically. Some makers also work with reclaimed timber, which carries its own structural considerations around stability and drying. What wood is best for custom furniture? For tables and structural pieces, white oak and hard maple are the most reliable choices — good Janka hardness, widely available, and they take oil and stain finishes well. Walnut is the premium option for visible grain character. For pieces with heavy daily wear, avoid cherry and pine as primary structural wood. How do I find a reliable custom furniture maker? Ask for examples of finished pieces in the specific species and finish you want — not portfolio photos of other styles. Visit the shop if you can. And get a written specification document before you pay a deposit: species, grade, finish type, joint construction, and timeline should all be in writing. Does custom furniture hold its value? Solid wood custom pieces in oak or walnut hold value reasonably well compared to flat-pack furniture, which depreciates to near-zero. A well-made custom dining table in solid walnut has real resale value. The same is not true for MDF-core pieces, regardless of what they cost new. Final Verdict Investing in your home means choosing pieces that actually serve your daily life rather than forcing your lifestyle to fit standard showroom dimensions. I believe the true value of custom furniture comes down to solving real layout problems, securing long-term durability, and gaining total material control. From choosing the ideal hard maple or white oak to selecting the right resilient finish, you now have the exact blueprint to evaluate quotes and collaborate confidently with makers. Think about your own home’s most challenging layout or awkward alcove. Which specific room problem are you ready to solve with a tailored piece? Drop your thoughts in the comments below, or check out our related guides to start planning your project. Sources Janka hardness values: Wood Database (thewooddatabase.com), verified species entries FSC certification standards: Forest Stewardship Council (fsc.org) NHLA grading rules for hardwood lumber: National Hardwood Lumber Association (nhla.com) Cost ranges based on US market data, 2024–2025
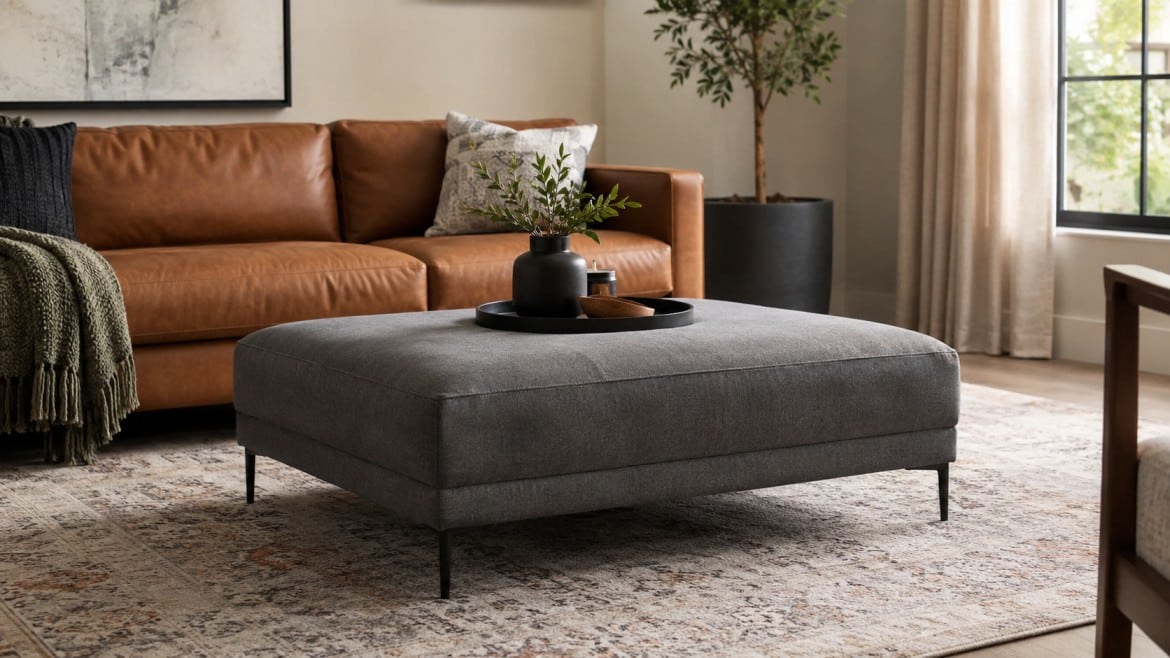
Every types of tables guide I’ve seen leads with looks. That’s the wrong place to start. The right question is how the table will behave once it’s actually in the room — the material it’s made from, the weight it carries, how it holds up to daily use, and whether it still makes sense to own three years from now. This guide covers 18 types of tables across six materials, with room-by-room picks, the mistakes that show up after the purchase, and specific advice on where each table earns its place. Choose the Right Table for Your Space Most people buy the wrong table because they focus on the wrong things at the start. Here’s where to focus before you commit: Start with the main purpose: dining, work, storage, display, outdoor use, extra seating, or small-space function, pick one and let that drive the decision. Measure the room before buying: check table length, width, walking space, chair pull-out clearance, door clearance, and drawer clearance. The number that bites most buyers is the chair pull-out, allowing at least 36 inches from the table edge to the nearest wall. Check the right table height: coffee, dining, side, bedside, desk, and high-top tables all have different height requirements. Mixing them up is one of the most common and preventable mistakes. Pick a shape that fits the layout: round tables help movement, rectangular tables seat more people, square tables suit compact rooms, and oval tables soften hard corners without losing length. Choose a material you can actually maintain: think about kids, pets, spills, outdoor weather, budget, and how much cleaning effort you’ll realistically put in over time. Look for useful storage: drawers, shelves, lift tops, foldable designs, extendable tops, and hidden compartments add real function in busy homes where floor space is tight. The right table fits your space, supports your daily routine, and holds up to the way you actually live — not just how the room looks in a photo. Types of Table Material Material is where most table decisions go wrong. People pick the look and find the maintenance reality later. Here’s an honest breakdown of what each material delivers and what it costs you over time. 1. Wood Tables Wood is still the most reliable all-around table material when the build quality is honest. Oak and walnut hold up to daily use. Pine and mango wood are softer; they’ll dent in kitchens with active kids. Teak’s natural oils make it the best wood choice for outdoor or humid environments. The failure mode with wood is almost always heat and moisture: spills left sitting, hot pans placed directly on the surface, and no coaster habit. If that describes your household, choose a species with a harder Janka rating and a finish that can be recoated. For a full breakdown of which species hold up where, the guide to wood types for furniture covers the specific numbers. 2. Glass Tables Glass works well in small rooms because it doesn’t read as a solid mass. Paired with a wood, metal, or stone base, a glass table can add visual space without sacrificing surface area. The honest tradeoff: glass shows every fingerprint, every smudge, and every ring. In a home with kids or pets, you will be cleaning it constantly. For adults-only rooms or low-traffic spaces, glass is genuinely low-maintenance; a damp cloth handles most of it. For daily family use, it’s a frustration waiting to happen. 3. Metal Tables Steel and iron are heavy, stable, and hold a finish well; they work in offices, industrial-style kitchens, and outdoor areas where permanence matters. Aluminum is the better choice when you need to move the table seasonally: same weather resistance, substantially lighter. For outdoor use, the finish is what determines longevity; powder-coated steel resists rust significantly longer than bare or painted metal. Any untreated iron left outside will show rust along the welds first, usually within one season of wet weather. 4. Stone Tables Marble, granite, quartz, and travertine are all legitimate long-term choices when they’re sealed correctly and placed where they won’t be regularly moved. The weight is a real consideration; a marble dining table can exceed 300 lbs. Natural stone needs periodic resealing to resist staining, particularly from acids like wine, citrus, and coffee. Quartz is engineered and non-porous, which means it’s more stain-resistant out of the box than natural marble. If you want the look without the maintenance commitment, quartz is the more practical choice of the two. 5. Rattan and Wicker Tables Natural rattan breaks down outdoors over time, and UV exposure dries and cracks the fibers within a few seasons. Synthetic resin wicker handles weather significantly better and is the only version I’d recommend for uncovered patios. In covered outdoor areas or sunrooms, natural rattan is fine and holds its look well. These are light-use surfaces; they’re not built for heavy loads or rough daily handling. For outdoor areas that see real weather year-round, pair them with a glass or stone top for better durability. 6. Acrylic Tables Acrylic tables do one thing better than any other material: they disappear visually. In a small apartment or a room that’s already busy, a clear acrylic table stops the space from feeling cluttered. The tradeoff is scratch sensitivity, acrylic scratches from almost anything abrasive, and those scratches are highly visible. Use a microfibre cloth and a plastic-safe cleaner. Don’t stack anything rough on the surface, and don’t use it as a cutting or prep surface. Within those limits, acrylic holds its look well and is easy to move. With the materials covered, the next decision is which table type fits the specific room and function you’re working with. The 18 types below are organized by use, not by trend. Types of Tables and Their Best Uses The right table type comes down to what you’re actually doing at it and where it lives in the room. Every type below earns its place when it’s matched correctly, and becomes a problem when it isn’t. 1. Dining Table Best For: dining rooms | breakfast rooms | open kitchens A dining table gets more daily abuse than any other piece of furniture in a home, with meals, homework, craft projects, and laptop work. The material has to hold up to all of it. The standard dining table height is 28 to 30 inches from floor to tabletop, and that number matters more than most buyers realize. A table at the wrong height creates real discomfort over the years of use. For a full breakdown of how to get the height and apron depth right, the standard dining table height guide covers the specific measurements and where builds go wrong. Shape matters too; allow at least 36 inches of clearance on all sides for chairs and movement. Round tables seat fewer people but allow better conversation and traffic flow. Rectangular tables seat more but require more room clearance. Design Tip: Leave enough space for chairs and walking room, 36 inches minimum from table edge to wall. 2. Coffee Table Best For: living rooms | family rooms | lounge areas A coffee table works hardest when its height is right. The target is within 1 to 2 inches of the sofa seat height, usually 16 to 18 inches from the floor to the surface. Too low and you’re leaning forward to set a drink down; too high and it blocks sightlines. Round tables reduce corner injuries and allow easier movement around the sofa. Rectangular and square tables offer more surface area but require tighter placement to avoid blocking traffic paths. If the living room is shared with young children, skip glass and stone tops — wood or upholstered surfaces are safer and easier to maintain. Design Tip: Match coffee table height to sofa seat height, not overall sofa height. 3. Side Table Best For: living rooms | bedrooms | hallways | empty corners A side table is one of the most flexible pieces in any room. It can hold a lamp, a plant, a tray, or a stack of books, and it can move when the room layout changes. Slim rectangular and round styles fit tight spaces better than square ones. Rattan and metal side tables both work well where a wood piece would feel too heavy. If the corner is empty and underused, a side table with a lower shelf adds storage without adding bulk. Design Tip: Pick a slim footprint for tight rooms, a table wider than 18 inches starts blocking movement in narrow spaces. 4. Console Table Best For: entryways | hallways | dining rooms | behind sofas Console tables are long and narrow, designed for wall placement. In an entryway, they handle the daily drop zone, keys, mail, baskets, and lamps without blocking the path. Behind a sofa, they close off the back visually and give you a surface for lamps or decor. Depth matters here: a console deeper than 14 to 16 inches starts to eat into hallway clearance. Wood and metal both work; stone tops add weight that can make the piece feel anchored to the wall, which is a feature in an entryway but a drawback in a sofa application where the visual should feel lighter. Design Tip: If the console will sit near the front door, choose a version with a drawer or lower shelf, entry storage earns its place immediately. 5. Bedside Table Best For: bedrooms | guest rooms | kids’ rooms The right bedside table height is level with the top of the mattress, or within an inch in either direction. Too low and you’re reaching down to silence an alarm in the dark; too high and the lamp is at eye level. Most mattresses with a box spring sit at 25 to 27 inches, so bedside tables in that height range are the practical starting point. Drawers beat open shelves in most bedrooms because they keep the surface clear. If the bedroom is small, a floating wall-mounted bedside shelf does the same job without using any floor space. Design Tip: Measure from the floor to the top of the mattress before buying, matching that height exactly avoids the awkward reach. 6. Nesting Tables Best For: small living rooms | apartments | flexible seating areas Nesting tables, typically sold as a set of two or three, solve a specific problem: you need extra surfaces when guests arrive but don’t have the floor space to park them permanently. When nested, they occupy roughly the same footprint as one side table. Pulled apart, they give you three independent surfaces. Metal frames with wood or glass tops give you the best longevity in this format, all-acrylic nesting sets tend to scratch quickly from repeated pulling and pushing. If the apartment is small and the living room doubles as a workspace, nesting tables are worth the slightly higher price over a single side table. Design Tip: Separate them before guests arrive, not during, moving furniture mid-gathering is awkward and risks scratching floors. 7. Outdoor Table Best For: patios | balconies | decks | porches | gardens Outdoor tables fail when the material isn’t matched to the actual climate. Teak handles moisture and UV better than most species, but it’s expensive and needs annual oiling to stay rich in color, untreated, it fades to silver-grey within a year, which some people prefer. Aluminum is the low-maintenance outdoor option: rust-resistant, light, and easy to move inside during storms. Powder-coated steel is more durable than aluminum but heavier and needs its coating checked annually for chips that lead to rust. For outdoor table materials matched to specific climates, the outdoor furniture wood guide covers what holds up where. Design Tip: Uncovered outdoor tables need a material that handles standing water — avoid untreated natural rattan and unsealed stone in wet climates. 8. Bistro Table Best For: balconies | breakfast corners | patios | small kitchens A bistro table is built for one or two people and works precisely because it takes up so little space. A round top at 24 to 30 inches in diameter gives two people enough surface for a meal without the table dominating the space around it. Metal and glass bistro tables are the most practical for outdoor use, folding metal versions can be stored flat against a wall during off-seasons. In small kitchens, a round bistro table against a wall handles everyday breakfasts and frees up the kitchen worktop for prep. Design Tip: Folding bistro tables earn their price in apartments with a balcony, they’re furniture when you need them, storage when you don’t. 9. Ottoman Coffee Table Best For: living rooms | family rooms | cozy seating areas An ottoman coffee table works as a footrest, a secondary seat when guests arrive, and a surface when topped with a firm tray. Fabric ottomans are softer and warmer in family rooms but stain more readily, performance fabric versions resist spills better than standard upholstery. Leather and faux leather clean up easily but feel cold in winter. For households with small children, an upholstered ottoman is the practical choice over a hard-edged coffee table, no sharp corners at fall height. Design Tip: Add a large tray, without it, drinks tip and items roll, which defeats the purpose of using it as a table surface. 10. High-Top Table Best For: kitchens | breakfast areas | game rooms | casual dining spots High-top tables come in two height ranges: counter height at 34 to 36 inches and bar height at 40 to 42 inches. Counter height works with stools that seat 24 to 26 inches from the floor to the seat. Bar height needs stools at 28 to 30 inches. Buying the wrong stool height for the table is the most common mistake with this type, the seat-to-tabletop clearance needs to be 10 to 12 inches for comfortable seating. Check both measurements before ordering, not just the table height. Design Tip: Confirm stool seat height before buying the table — seat-to-surface clearance of 10 to 12 inches is the target, and it’s easy to get wrong. 11. Drink Table Best For: beside sofas | chairs | bathtubs | reading corners A drink table holds one drink, one book, or one lamp. It’s the right choice when the spot next to a chair or sofa is too narrow for even a small side table. Most drink tables have a round top between 8 and 12 inches in diameter, set on a single post or tripod base. Metal is the most practical material for this format; it’s light enough to reposition easily, and the slim profile doesn’t collect dust the way open-shelf side tables do. Design Tip: If a standard side table won’t fit the space comfortably, a drink table is the right fix, not a smaller side table that still crowds the path. 12. Pedestal Table Best For: dining rooms | breakfast rooms | foyers A pedestal table has a single center base rather than four legs, which gives everyone at the table full legroom with no corner post to work around. This matters most in small dining rooms where seating is tight. Round pedestal tables are the most space-efficient dining format when the room is compact. The one structural check: make sure the base is wide enough to be stable when loaded. A narrow pedestal under a large top will tip if someone leans hard on one edge. For rooms where shape matters as much as size, the table shape guide covers round vs rectangular vs oval in detail. Design Tip: Check base width before buying, a pedestal base needs to be proportionate to the top or the table will feel unstable under real use. 13. Extendable Table Best For: small homes | dining rooms | kitchens | hosting spaces An extendable table solves a real space problem: you need four seats on weeknights and eight seats for holidays, but you don’t have room for a table that seats eight permanently. Butterfly leaf extensions that store under the top are the most convenient format; the leaf is always there, and the table extends in under a minute. Separate leaf systems are cheaper but require storage space for the leaf and two people to manage the extension. Measure both the closed size and the fully extended size, and make sure the extended version actually fits the room with chairs pulled out. Design Tip: Measure the fully extended size with chairs pulled out on all sides, that’s the real footprint you’re committing to when guests arrive. 14. Folding Table Best For: events | crafts | laundry rooms | extra dining space Folding tables are for occasional use, not permanent placement. The plastic top versions are the lightest and cheapest, but they flex under load. They work for light craft and party setups, not for anything structural. Laminate tops on steel frames are heavier but noticeably more rigid and better for regular use. If the folding table will come out weekly for craft or hobby work, spend more on the frame; the hinges on cheap folding tables fail within a year of regular handling. Design Tip: If you’ll use it weekly, buy a heavier-gauge steel frame, cheap hinges are the first thing to fail on low-cost folding tables. 15. Drop-Leaf Table Best For: small kitchens | apartments | multipurpose rooms A drop-leaf table has hinged sides that fold down when not in use, reducing the footprint significantly, some narrow to as little as 12 inches deep when both leaves are down, making them storable against a wall. With both leaves raised, the same table seats four. This is the right choice for a studio apartment or a small kitchen where a full dining table won’t fit permanently. Wood is the most common material because the hinge mechanism integrates cleanly into a wood frame. Check that the leaf support hardware is solid; metal support brackets hold better over the years of raising and lowering than the older wooden gate-leg designs. Design Tip: Place it against a wall when folded, and both leaves are down, it becomes nearly invisible and frees the floor entirely. 16. Desk Table Best For: home offices | bedrooms | study corners A desk table needs to be 28 to 30 inches high, the same as a dining table, to allow comfortable seated work with a standard chair. Depth is where most desk purchases go wrong: a 20-inch-deep desk is enough for a laptop but not for a monitor, keyboard, and mouse setup, which typically needs 28 to 30 inches of front-to-back space. Corner desks give the most surface area for the floor space used. L-shaped designs work well when the room has the footprint. For standing desks, look for motorized height adjustment with memory settings rather than fixed-height standing desks, which most people stop using within weeks. Design Tip: Check cord routing before buying a desk without a cable management solution, as it becomes unusable fast in any setup with more than one device. 17. Dressing Table Best For: bedrooms | walk-in closets | getting-ready areas A dressing table works when it’s placed with the right light. Natural side lighting, a window to the left or right of the mirror, is the most accurate for makeup and grooming. Overhead lighting creates shadows under the eyes and along the jawline, making color matching unreliable. If the room can’t offer natural side light, LED strip lighting mounted on both sides of the mirror is the practical fix. Drawer count matters more than surface size in most dressing tables; small items multiply fast, and an open surface fills up with no storage behind it. Design Tip: Choose side lighting over overhead, overhead light creates shadows that make makeup application unreliable, regardless of mirror quality. 18. C Table Best For: sofas | chairs | beds | small rooms A C table slides over the arm of a sofa, chair, or bed; the C-shaped metal base passes underneath, leaving the surface cantilevered above the armrest. This format works anywhere that a side table would block movement or take up floor space that isn’t available. Before buying, measure the height of the sofa arm and the clearance under the arm to the floor. The base of the C needs to clear the sofa leg and frame without rocking. Metal frames are more stable than wood in this format because the geometry relies on rigidity, not mass. Design Tip: Measure sofa arm height and clearance to the floor before ordering. The base needs to slide under cleanly, and dimensions vary significantly between sofas. Once the type is matched to the function, the room-by-room summary below makes the selection even faster. Best Types of Tables for Each Room The table that works in a dining room will fight against you in a hallway. Here’s the practical match for each space: Room Best Table Types Why They Work Living Room Coffee table, side table, ottoman coffee table, C table, nesting tables Living rooms need one main surface plus smaller surfaces near sofas and chairs for drinks, books, lamps, and remotes. Dining Room Dining table, extendable table, pedestal table, drop-leaf table Dining tables need to handle daily meals and expand for guests without permanently occupying the full guest-seating footprint. Bedroom Bedside table, dressing table, side table, C table Bedroom tables should keep daily items within reach while adding storage. Height relative to the mattress determines whether they actually get used. Entryway and Hallway Console table, side table Narrow tables work here because they hold keys, mail, and decor without blocking foot traffic. Depth over 16 inches creates a bottleneck. Outdoor Area Outdoor table, bistro table, folding table Outdoor tables need to handle sun, moisture, and temperature changes, material choice is the only variable that matters here. Office and Study Desk table, folding table, C table Office and study tables need the right height for seated or standing work, enough depth for the actual setup, and a solution for cable management. The table summary above is a starting point; the right pick shifts based on room size, how many people use the space, and what other furniture is already there. Common Mistakes When Choosing a Table Most of the mistakes I’ve seen happen after the purchase, when the table is in the room, and something doesn’t work. Here’s what to check before you commit: Buying the wrong size: the table is fine until a chair won’t pull out, a door won’t open, or someone has to turn sideways to get through the room. Measure clearance paths, not just the table footprint. Ignoring table height: coffee tables, bedside tables, desks, and high-top tables all have height requirements tied to how they’re used. A desk at the wrong height creates ergonomic problems over months of daily use. Picking the wrong material for the actual use: glass in a family kitchen, natural rattan in an uncovered outdoor area, and unsealed marble in a household with coffee drinkers are all purchases that create problems within a year. Skipping storage consideration: drawers, shelves, and lift tops add real function in rooms where surface clutter is a daily problem. A table without storage in a busy room fills up and stays filled. Forcing a match across all tables: every table in a room doesn’t need to be the same material, finish, or shape. Mixing works when the proportions and scale are consistent. Buying for how the room looks in photos: the right table is the one that fits how the room actually gets used — not how it looks in a styled photo where no one is home. Underestimating weight: stone and solid wood tables are difficult to move once placed. A 250 lb marble dining table isn’t something you rearrange seasonally. If flexibility matters, weight matters. Frequently Asked Questions These are the questions that come up most often once people have narrowed down the type but aren’t sure about the specifics. What is the most common type of table? The dining table is the most common table type found in homes. It sits at 28 to 30 inches high and comes in rectangular, round, square, and oval shapes. Most households have one dining table plus at least one coffee table or side table in the living area. What type of table is best for a small living room? Nesting tables or a round coffee table under 36 inches in diameter work best in small living rooms. Both formats take up minimal floor space while providing usable surface area. C tables are a better fit than side tables in very tight rooms where floor clearance next to the sofa is limited. What is the difference between a side table and an end table? End tables typically sit at the ends of a sofa at arm height. Side tables are a broader category that includes end tables and any small surface table used beside furniture. In practice, most furniture retailers use the terms interchangeably. What type of table material lasts the longest? Stone and solid hardwood last longest when maintained correctly. Granite and quartz are non-porous and resistant to chipping. Hardwoods like oak and walnut can last decades with periodic refinishing. Metal frames outlast most tops in structural terms but surface finishes need maintenance to prevent rust. What are the different types of dining table shapes? Dining tables come in rectangular, round, square, oval, and pedestal (single-base) configurations. Rectangular seats the most people per square foot of table. Round promotes conversation and eliminates sharp corners. Oval splits the difference. Square works in compact square dining rooms. What height should a coffee table be? A coffee table should sit within 1 to 2 inches of the sofa’s seat height, typically 16 to 18 inches from floor to surface. A table lower than 15 inches requires too much forward lean. Higher than 20 inches starts to visually divide the seating area. What type of table works best for a home office? A dedicated desk table at 28 to 30 inches high with at least 24 to 28 inches of front-to-back depth is the practical baseline. Corner and L-shaped desks offer the most surface area for the floor space used. For laptop-only setups, 20 inches of depth is adequate. Final Thoughts on Choosing the Right Types of Tables The best tables are the ones that get out of the way and do their job every day without requiring workarounds. Start with the function, what the table needs to do, in what room, for which people, and the material and type follow from that. A dining table in a family kitchen needs a harder material and a finish that can take daily cleaning. A side table in a bedroom corner needs to match mattress height and hold what you actually put on it at night. Get those specifics right and the rest — shape, finish, size — is largely about preference. If you’re still working out which table shape fits your room layout, the table shape guide is the next step.
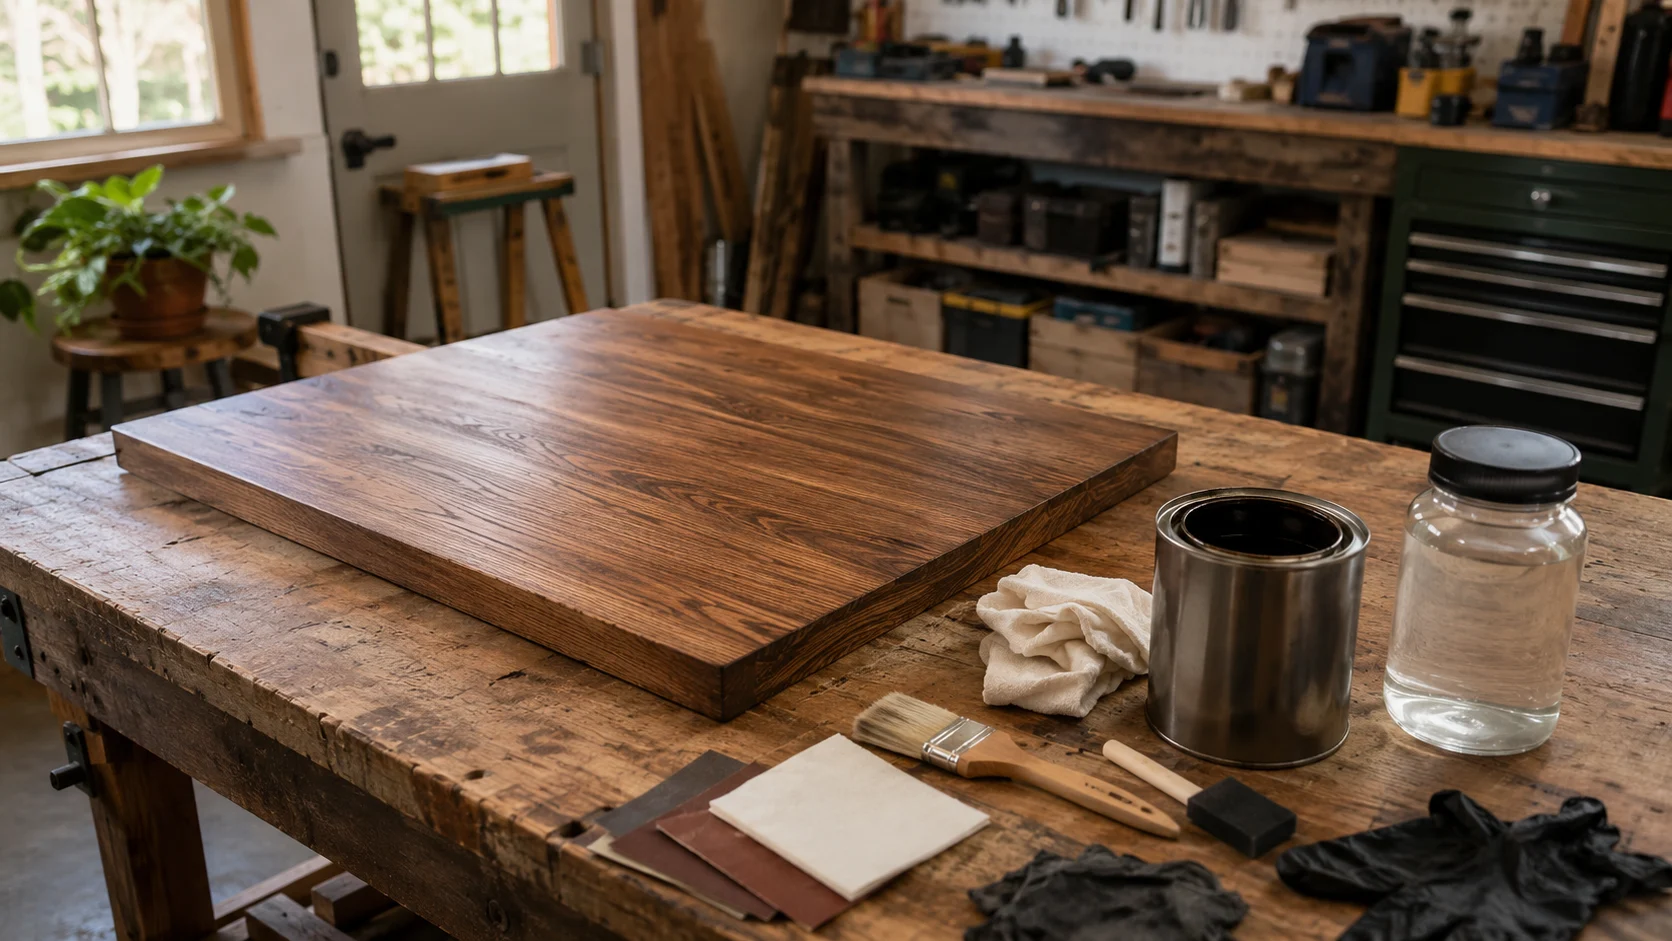
Difficulty 2/5 — manageable for a first-timer with patience Time 4–6 hours (including dry time between steps) Cost $30–$80 for a standard indoor piece Tools Needed Sanding block or orbital sander, 80/120/180-grit sandpaper, clean rags, bristle or foam brush, pre-stain conditioner (for softwoods), wood stain, polyurethane sealer Skill Required Beginner Learning how to stain wood correctly is a half-day project that goes wrong for the same reasons every time: skipping prep, using too much stain, or not wiping off the excess before it dries. I made all three of those mistakes on my first bookshelf. The second time, I got a finish I was genuinely happy with, and the only real difference was following the right order and not rushing. This guide covers every step from raw wood to sealed surface, including the prep work that most tutorials skip past too quickly. It also covers what changes depending on your wood type, because pine and oak behave very differently under the same stain. What Can Go Wrong Before You Open the Can The most common staining failures are not application errors. They happen in the prep stage, and by the time you see them, the stain has already dried. Here is what to watch for before you start. Stain needs bare, open wood pores to absorb evenly. Any old finish, glue residue, wax, or even fine sanding dust sitting on the surface can block absorption and leave blotchy or pale patches. Minwax notes that a stain applied over an existing sealed surface will not penetrate the wood at all; it will simply sit on top and wipe off. Surface Condition What It Means for Your Prep Bare, unfinished wood Ready for sanding and dust removal Old clear coat or paint Needs full sanding or chemical stripping first Glue spots Block stain and leave pale patches, scrape and sand out Deep scratches Hold extra stain and darken more than the surrounding wood Softwood (pine, poplar, maple) Absorbs unevenly, needs pre-stain conditioner Run your hand over the whole surface before anything else. If you feel rough patches, old finish buildup, or sticky spots, address those first. Stain will make every surface problem more visible, not less. How to Stain Wood Step by Step Follow this order exactly. Each step sets up the next one, and skipping ahead is where results fall apart. Tools You Need to Stain Wood You do not need a large kit. For most indoor pieces, this list covers everything. The one item people skip most often is the pre-stain conditioner, and that skip is the reason softwood staining jobs end up blotchy. Prep Tools Application Finishing Sanding block or orbital sander Wood stain Polyurethane or polycrylic sealer 80-grit sandpaper Pre-stain conditioner Foam brush 120-grit sandpaper Bristle or foam brush 180-grit sandpaper (between coats) 180-grit sandpaper Clean cotton rags Extra clean rags Damp cloth Slightly damp application cloth Small roller (large flat pieces) Safety Note: Oil-based stains can cause rags to self-ignite when balled up and left in a warm place. OSHA requires solvent-soaked rags to be stored in sealed, fire-resistant metal containers until disposal. Lay used rags flat outside to dry completely, or submerge them in water in a sealed metal bin before binning. With tools sorted, the actual work starts with the sandpaper, not the stain can. Step 1: Sand the Surface Start with 120-grit sandpaper on bare wood, or 80-grit if you are removing an old finish. Always sand with the grain, not across it. Cross-grain scratches hold more stain than the surrounding wood and show up as dark lines once the stain dries. After the first pass, move to 180-grit for a smooth surface. Wipe the wood with a barely damp cloth to raise the grain slightly, let it dry for 15 minutes, then sand again lightly with 180-grit. This prevents the grain from lifting under the stain and creating a rough texture after it dries. Pro Tip: Do not go finer than 180-grit (or whatever the stain label recommends) on wood you plan to stain. Sanding too fine closes the wood pores and the stain will sit on top rather than soak in. I learned this the hard way on a maple tabletop that came out looking almost gray. Step 2: Remove All the Dust Vacuum the surface first, then wipe with a clean, dry cloth. Pay attention to corners, grooves, and edges — sanding dust collects there and is easy to miss. Any grit left behind will create rough specks in your finish and can block even stain absorption. If the wood has any deep carvings or profiles, use a soft brush or compressed air to clear those out before wiping down the flat surfaces. Step 3: Apply Pre-Stain Conditioner (Softwoods Only) If you are working with pine, poplar, maple, or any other softwood, do not skip this step. These woods absorb stain at different rates in different spots, which produces the blotchy, uneven look that frustrates most beginners. A pre-stain conditioner slows that absorption down and gives the stain a more even base to work from. Apply the conditioner with a brush or rag, follow the product label for how long to let it sit (usually 5 to 15 minutes), then move to staining while the surface is still slightly tacky. Do not let the conditioner dry completely before staining. Step 4: Apply the Stain Stir the stain slowly before you start. Shaking it introduces bubbles that can leave marks in the finish. Once it is well mixed, use a slightly damp cloth or a clean brush to apply a thin, even coat. Work with the grain and keep the coat light. The goal is to build color gradually, not load it all on in one pass. Do not let stain pool in corners or grain pockets. Those areas absorb faster and will dry darker than the rest if you let the stain sit unevenly. Step 5: Wipe Off the Excess After the stain sits for the time listed on the label (typically 1 to 5 minutes), wipe off all excess with a clean, dry cloth. Move with the grain. Stain that sits too long dries sticky, dark, and uneven. Wiping it off is not optional; it is part of the application process. If the color looks lighter than you expected, that is normal. A wet stain always looks darker than the dried result. Judge the color only after a full dry cycle, usually 4 to 8 hours for water-based stain and 8 to 24 hours for oil-based. Step 6: Seal the Surface Once the stain is fully dry and no longer tacky, apply a clear protective topcoat. For most indoor furniture and shelves, polyurethane gives the most durable protection. Polycrylic (water-based) is a good option for lighter-colored stains where you want to avoid any yellowing over time. Apply two thin coats with a foam brush. Let each coat dry completely before adding the next. Light sanding with 220-grit between coats gives a smoother final surface. Allow at least four hours before putting the piece into use, and 24 hours before placing anything heavy on it. How to Prep Wood Before Staining: Quick Reference If you remember nothing else from this guide, remember this order: sand with the grain, remove every bit of dust, condition softwoods, test on scrap first, then apply stain in thin coats and wipe off the excess before it dries. That sequence is what separates a flat, even result from a blotchy one. Note: Always test your stain on a scrap piece or the underside of the project before committing to the visible surface. If you plan to apply a clear coat, test that too — some finishes deepen the color noticeably. Mistakes That Make Wood Stain Look Uneven Most stain problems are caused by decisions made before the brush touches the wood. Here is what goes wrong and how to avoid it. Mistake What Happens What to Do Instead Skipping sanding The stain absorbs unevenly across the surface Sand to the grit listed on the stain label before applying Sanding against the grain Cross-grain scratches darken and show through Always sand in the direction of the grain Sanding too fine Closed pores repel stains instead of absorbing them Stop at the grit the label recommends, usually 180 Leaving dust behind The stain looks speckled or blocked in spots Vacuum then wipe with a dry cloth before staining Skipping conditioner on softwood Pine and poplar come out blotchy Always condition pine, poplar, and maple Shaking the stain can Air bubbles mark the finish Stir slowly with a stir stick Applying too much at once Surface goes sticky and dries unevenly Thin coats only, build color in passes Not wiping off excess Stains pool and dry darker in some areas Wipe with the grain within the time on the label Judging the color wet A wet stain always looks darker than the dry result Wait for a full dry before assessing the color Skipping topcoat Stained surface scratches and fades quickly Seal any piece that will see regular handling Piling oily rags Fire risk from spontaneous combustion Lay flat to dry or store in a sealed metal container These problems stack. Sanding marks darken under stain, dust blocks even absorption, and a clear coat locks whatever result you get in place permanently. If something looks wrong before sealing, fix it then — not after. What Changes for Different Wood Types The basic process is the same for all wood, but a few adjustments make a real difference depending on what you are working with. 1. Staining Pine, Poplar, and Maple These woods absorb stain unevenly, which is why they are prone to blotching. Use a test board first, always apply a pre-stain conditioner, and keep coats thin. If the result still looks patchy after conditioning, gel stain is worth trying — it sits on the surface rather than soaking in, which gives more consistent color on problem woods. 2. Staining Oak and Open-Grain Woods Oak takes stain well overall, but the open grain lines hold more color than the surrounding wood. Wipe evenly and check corners and grain pockets specifically; let the stain sit in those spots too long, and they go noticeably darker than the flat surface. For floating shelf builds in oak, this grain behavior is actually a positive; it adds depth without any extra work. If you want to see how oak handles a stained natural finish compared to other species, the floating shelves guide covers wood selection for shelf builds in detail. 3. Staining Furniture with Legs and Detail Stain the detailed areas first, legs, grooves, carved edges, then move to the flat sections. If you do it the other way, the flat areas sit with stain on them longer while you work the details, and you end up with uneven drying across the piece. 4. Staining Cabinets Remove all hardware before you start. Cabinets often have cooking grease, hand oils, and old finish built up near handles and edges. Degrease thoroughly, let the surface dry, then test inside a door panel before committing to the exterior faces. 5. Staining Previously Finished Wood Standard penetrating stain will not work over an existing clear coat. The stain cannot reach the wood. You need to either sand back to bare wood or use a product specifically designed for going over existing finishes. The same prep logic applies to any stair tread makeover where the old finish needs to come off the wood surface before the new color goes on. Check the label before buying — not all stains work the same way. How to Seal Stained Wood for Daily Use Stain only changes the wood’s color. It does not protect the surface. For daily-use pieces like shelves, tables, and cabinet doors, the sealer or topcoat provides the real protection. Wait until the stain is fully dry: Do not apply sealer over tacky stain, because it can smear the color and create an uneven finish under the clear coat. Use polyurethane for heavy-use pieces: Polyurethane is a strong choice for tables, shelves, and cabinets because it resists scratches, wear, and everyday handling better. Use polycrylic for lighter stains: Polycrylic works well on indoor pieces with light-colored stains because it stays clearer and avoids the amber tint of oil-based polyurethane. Apply thin coats: Use two thin coats instead of one thick coat. Thin coats dry more evenly and reduce brush marks, bubbles, and cloudy spots. Sand lightly between coats: If the product label allows it, sand lightly with 220-grit sandpaper between coats to help the next layer bond smoothly. Let the final coat cure: Give the final coat at least 24 hours before placing items on the surface, and longer for heavy use if the label recommends it. Frequently Asked Questions How do you stain wood without blotching? Sand with the grain to the grit on the stain label, remove all dust, and apply a pre-stain conditioner before staining softwoods like pine or poplar. Thin coats and prompt wiping prevent most blotting. Testing on scrap wood first shows you how the specific wood and stain combination will behave before you commit. What is the best way to apply wood stain? Use a clean cotton rag or bristle brush, apply with the grain in thin, even passes, and wipe off excess within the time listed on the product label. Thin coats give more control over color depth than one heavy application, and excess stain left on the surface dries sticky and uneven. How long do you leave the stain on before wiping? Most stain labels recommend 1 to 5 minutes. Check yours specifically, because dwell time varies by brand and formula. The longer you leave it, the darker the result. If you want a lighter color, wipe sooner. Always wipe off excess before it dries, not after. Can you stain wood without sanding first? Gel stains and some specialty products allow application without sanding, but standard penetrating wood stain requires a sanded, bare surface to absorb correctly. Skipping sanding on standard stain produces uneven color and areas where the stain sits on top rather than soaking in. Why does my stained wood feel sticky after drying? Sticky wood stain means too much was left on the surface. Stain soaks into the wood — the excess needs to be wiped off. If it has already dried sticky, wipe the surface with the mineral spirits or solvent listed on the product label, or sand back lightly and reapply with proper wiping technique. Can you mix two wood stain colors together? Yes, if both stains are the same type — oil-based with oil-based, or water-based with water-based. Mix a small batch first, test on scrap wood, and write down the ratio. Never mix oil-based and water-based stains together; they will not bond correctly and the finish will fail. How do you fix a wood stain that came out too dark? If the stain is still wet, wipe more off immediately. If it has dried, light sanding followed by a second application of a lighter stain or a thin coat of the same stain in a lighter shade can reduce the effect. Test any fix on a hidden area before touching the main surface. Do you need to seal wood after staining? For decorative pieces that will not see regular use, sealing is optional. For furniture, shelves, cabinets, or any surface that will be touched, cleaned, or used daily, a clear topcoat is necessary. Stain alone provides no meaningful protection against scratches, moisture, or wear. Final Verdict: Is Staining Wood Worth Doing Yourself? Transforming raw timber into a beautifully finished piece is incredibly rewarding once you respect the process. Achieving a flawless result relies entirely on patience, proper grain sanding, and never skipping the pre-stain conditioner on softwoods. When you understand how to stain wood with a methodical approach, wiping away excess product on time, and applying thin, protective topcoats, you guarantee a durable finish that protects against daily wear and tear. Now that you have the blueprint to avoid the most common beginner pitfalls, it is time to grab your sandpaper and get started. What project are you tackling first? Share your upcoming woodworking plans or drop your questions in the comments below. Sources Minwax — Wood Stain Product Application Guidelines OSHA — Hazard Communication: Flammable Liquids and Oily Rag Disposal Home Depot — How to Stain Wood (Video)
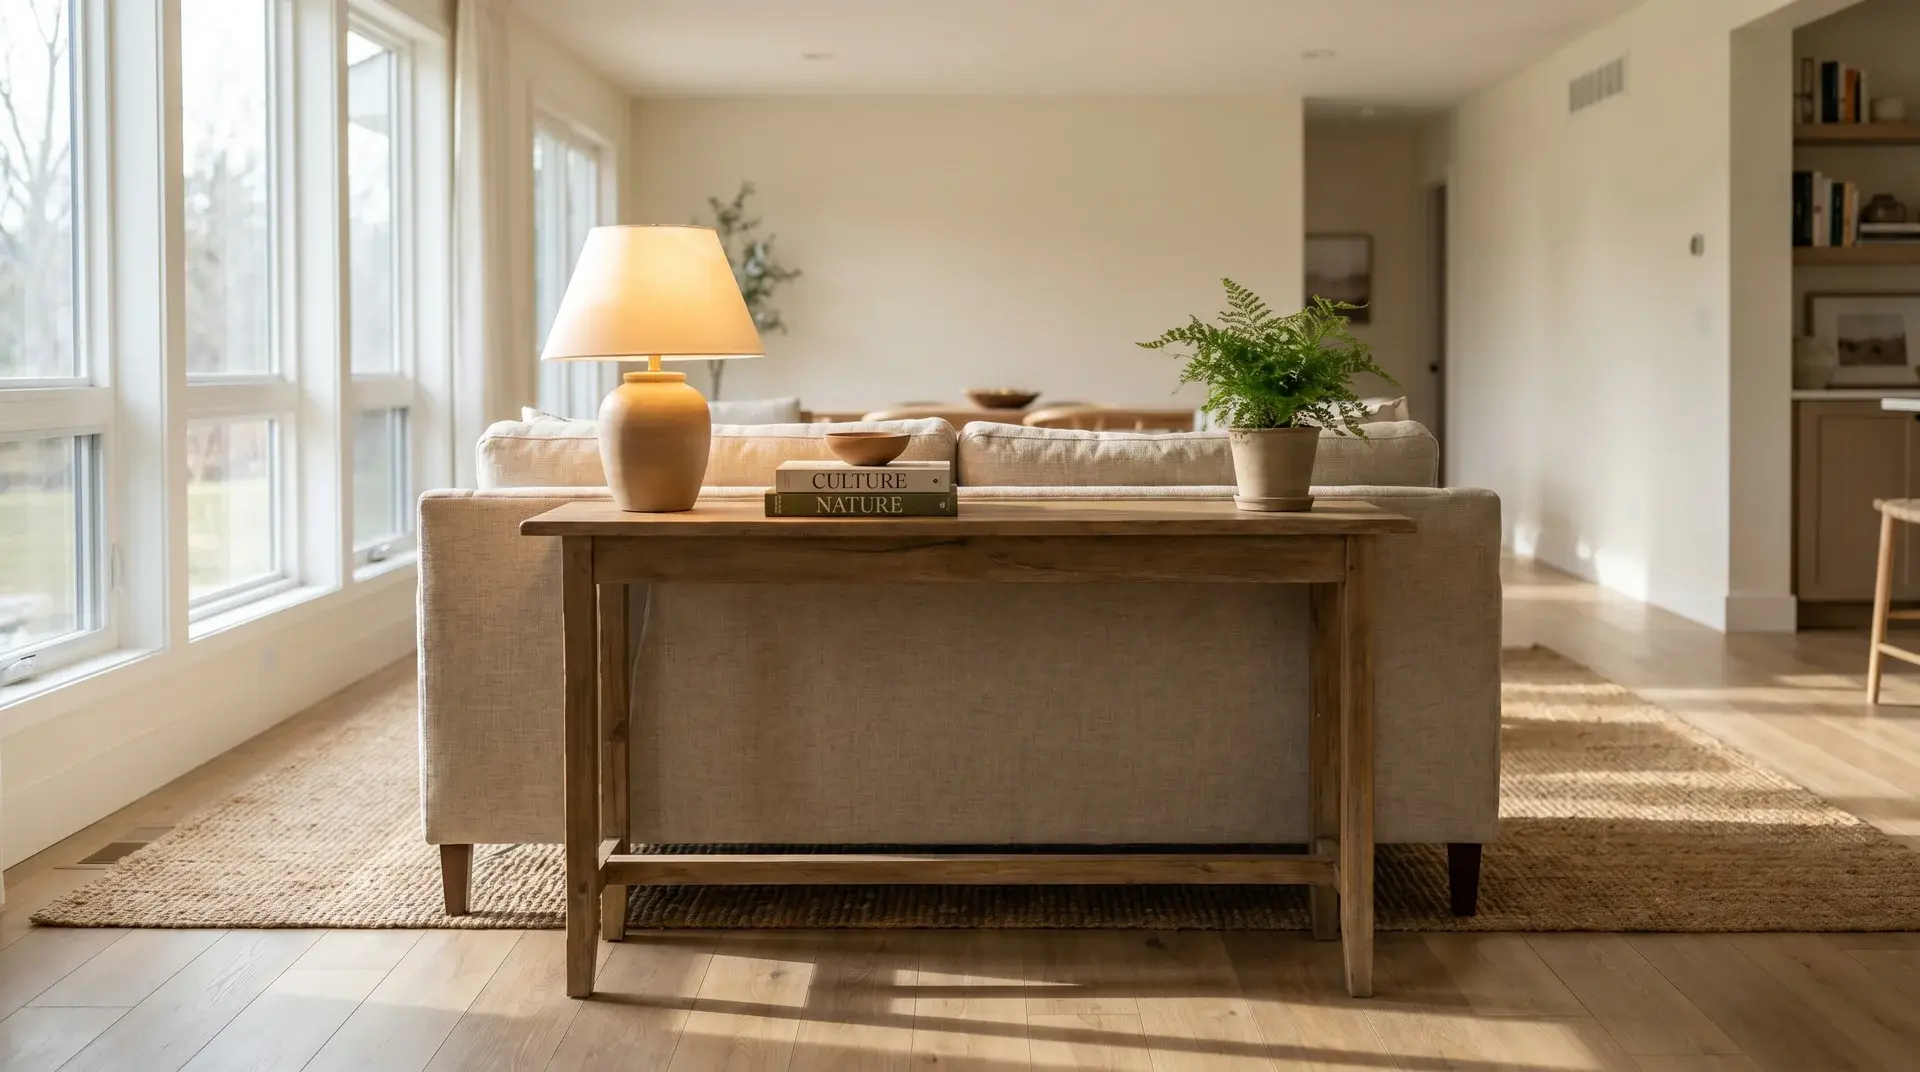
The space behind a floating sofa is one of the most overlooked layout problems I run into. The sofa looks fine from the front. From behind, it looks unfinished like someone moved in but didn’t finish the room. A sofa table solves that. It gives the back of the couch a clear edge, a surface, and sometimes storage, without adding a piece of furniture that fights the room. A sofa table is a long, narrow table that sits directly behind a sofa. It typically runs level with the sofa back or 1 to 2 inches lower, and most models range from 48 to 72 inches in length and 10 to 18 inches deep. That slim footprint is what separates it from other table types, it fits behind seating without blocking the walkway. In open-plan living rooms, a sofa table behind the couch also marks the edge of the living zone. It separates the seating area from the dining area, kitchen, or entry path without needing a wall to do it. That’s a layout job a lamp on the floor cannot do. Typical Length 48 to 72 inches (half to two-thirds of sofa length) Typical Depth 10 to 18 inches (10 to 12 inches for tight walkways) Typical Height Level with sofa back or 1 to 2 inches lower Also Called Couch table, behind-the-couch table, sofa console table Primary Placement Behind a sofa or sectional, especially when the back faces a room The table above covers the basics. The rest of this article covers which type of sofa table fits which room problem – and how to choose the right one without wasting space or money. Sofa Table vs Console Table, Coffee Table, and End Table These four table types look similar in furniture stores. The difference is where they sit and what work they’re doing. A sofa table is built for the space behind a couch. A console table is a broader category, the same shape, but meant for hallways, entryways, or any wall that needs a surface. The terms overlap, which is why many listings use both. If it’s going behind a sofa specifically, sofa table is the more accurate search term. Table Type Where It Goes What It Does Key Difference Sofa Table Behind a sofa or sectional Adds a surface, lighting, and storage to the back of seating Height and depth are sized specifically for behind-couch placement Console Table Entryway, hallway, or against a wall Drop zone, decor anchor, or storage piece Same shape, broader placement options Coffee Table In front of the sofa Holds drinks, remotes, books, and trays Lower profile, made for daily arm-reach use End Table Beside a sofa or chair Keeps a lamp, glass, and phone within reach Small, meant for one side of a seating piece The practical takeaway: if the problem is the exposed sofa back in an open room, a sofa table solves it directly. A console table could work in the same position, but size it like a sofa table – same height, same depth, same length rules – or it will look awkward. What a Sofa Table Is Used For I use five tests before recommending a sofa table for any room. If the piece doesn’t solve at least two of these, the room usually doesn’t need one. 1. Filling the Exposed Back of a Floating Sofa This is the most common reason. When a sofa sits away from the wall – in an open-plan room, a studio, or any layout where the back of the couch is visible from another area – that back edge looks unfinished. A sofa table behind the couch closes that visual gap and gives the sofa a defined boundary. 2. Adding a Surface for Lighting End tables only reach the sides of a sofa. If the reading or ambient light needs to come from behind – which is often better for open rooms – a sofa table is the only practical place to put a lamp without running a cord across the floor. 3. Dividing an Open-Plan Room In rooms without walls between the living area and dining area, a sofa table acts as the boundary marker. The sofa faces the room; the table defines its edge. This works better than a rug alone because it reads clearly from the kitchen or dining zone. If you’re working through a full open-plan arrangement, the small living room layout guide covers zone separation in detail. 4. Providing Accessible Storage Remotes, chargers, blankets, and books collect near every sofa. A sofa table with shelves or drawers gives those items a home within arm’s reach, without requiring a separate storage piece in the room. 5. Creating a Charging Station Some sofa tables include built-in outlets and USB ports. In apartments or family rooms where the sofa floats far from a wall outlet, this solves a wiring problem that otherwise means a cord running across open floor. Types of Sofa Tables: Matched to Room Problems The right type depends on what the room actually needs. Here’s how to match the problem to the piece. Standard Sofa Table A flat top, four legs, nothing extra. This is the right choice when the room needs a surface and nothing else – a lamp, a tray, a few books. It sits quietly behind the sofa without pulling attention from the seating area. I default to this type in rooms that are already well-organized; adding storage here just creates more places for clutter to land. Material: Wood, metal, or wood-and-metal mix Best for: Rooms that need a clean surface, not additional storage Sofa Table With Shelves Open shelves below the tabletop hold baskets, books, and folded blankets. This works in rooms where everyday items pile up but a full cabinet would feel heavy. Keep in mind that open shelves show everything – this type rewards tidiness. Confirm the depth stays under 14 inches or it starts to feel like a bookcase, not a table. Material: Wood, metal frame with wood shelves, or rattan Best for: Rooms that need accessible storage without a large cabinet Sofa Table With Drawers Drawers keep remotes, chargers, cords, and mail out of sight. This is the version I recommend for family rooms – it resets easily at the end of the day because there’s a place for everything. Before buying, check that the drawers open fully without hitting the back of the sofa cushions. Material: Solid wood, engineered wood, or painted wood Best for: Family rooms and homes with high daily item turnover near the sofa Sofa Table With Outlets Built-in outlets and USB ports solve the cord problem in rooms where the sofa sits far from the wall. The lamp, phone, and tablet all have power without cords running across the floor. Measure the distance from the nearest wall outlet before choosing this type – the table still needs to plug into something. Material: Wood or metal with integrated power strip Best for: Apartments and family rooms where the sofa floats away from outlets Sofa Table With Stools Stools tuck under the table and pull out when someone needs a seat or a surface for a laptop or snacks. This type earns its footprint in studios and small apartments where a table and extra seating need to share one piece. Confirm there is enough clearance to pull stools out fully without bumping the back of the sofa. Material: Wood, metal, or mixed with sturdy stools Best for: Studios, small apartments, and open-plan rooms that need flexible seating Slim or Narrow Sofa Table At 10 to 12 inches deep, a narrow sofa table fits behind a couch in spaces where a standard depth would close off the walkway. This is the version to choose when the path behind the sofa is less than 36 inches wide. It still holds a lamp and a tray – it just doesn’t crowd the floor. Material: Metal, slim wood, or wood-and-metal mix Best for: Narrow rooms, apartment layouts, and any walkway under 36 inches behind the couch Storage Sofa Table Combines shelves and drawers into one piece. This is the version that makes sense in a family room with kids, where blankets, games, books, and remotes need multiple homes. Open shelves on the bottom for baskets, a drawer or two for smaller items. It’s the most functional type – also the heaviest, so check weight if you move furniture often. Material: Wood or engineered wood with mixed storage Best for: Family rooms with high storage demand and frequent daily use Live-Edge Sofa Table The natural outer edge of the wood slab is kept intact, so each table has a different shape. This looks best in rooms with warm or natural materials throughout. Since the table itself is a feature, keep styling minimal – a lamp, a bowl, one plant. This type works well in rustic, farmhouse, and warm modern rooms. Material: Solid wood slab, usually with metal legs Best for: Rustic, farmhouse, natural, or warm modern rooms Glass Sofa Table A glass top reads as lighter than solid wood or stone, which helps in small rooms that already have heavy furniture. It doesn’t visually break the room the way an opaque piece can. Choose tempered glass with rounded edges, especially in homes with kids or pets. Material: Tempered glass with metal or wood legs Best for: Small or modern rooms with heavier existing furniture Metal Sofa Table Open metal legs keep the floor visible, which helps in smaller rooms. Metal is also easy to clean – useful in high-traffic areas or homes with pets. Most metal sofa tables pair with a wood or glass top, which softens the industrial feel if that’s not the room’s style. Material: Steel or iron, usually with a wood or glass top Best for: Modern, industrial, and high-use rooms where durability matters Rattan or Cane Sofa Table Rattan and cane bring softness to rooms where solid wood or metal feels too heavy. Good in sunrooms, coastal rooms, and casual living spaces. Keep it away from damp areas or anywhere it takes regular hard use – cane scratches and bends under sustained weight. Material: Rattan, cane, or wood with woven details Best for: Coastal, boho, farmhouse, and casual living rooms Stone-Look Sofa Table Faux marble and concrete-look tops carry more visual weight than glass or slim wood. This helps in larger living rooms where the sofa back looks too light or where the room reads as underfurnished. Real stone is available but adds significant weight – verify load capacity before ordering if the floor is on an upper level. Material: Faux marble, stone-look laminate, concrete-look, or real stone Best for: Larger living rooms and formal sitting areas How to Choose the Right Sofa Table Size comes first. Every other decision – material, storage type, style – is easier once you know the table fits the space. Here’s the process I use: Step 1: Match the Height The table should sit level with the sofa back or 1 to 2 inches lower. Measure from the floor to the top of the sofa cushions – that number is your ceiling. A table that sits several inches higher than the sofa back draws attention to itself; one that sits too low disappears visually and wastes the surface. Step 2: Set the Length A sofa table that spans the full length of the sofa tends to look too symmetrical – like a ledge, not a piece of furniture. Aim for half to two-thirds of the sofa length. For an 84-inch sofa, that means a table between 42 and 56 inches long. This gives the sofa visual breathing room on each side. Step 3: Check the Depth Against the Walkway The path behind a sofa needs at least 24 to 30 inches of clear walking space. Measure from the back of the sofa cushions to the nearest wall or furniture. Subtract your table depth from that number. If the result is under 24 inches, choose a slim sofa table at 10 to 12 inches deep instead of a standard 14 to 18 inches. For more on clearance paths and how they affect furniture placement in open-plan rooms, the minimalist living room guide covers the 30-inch rule in detail. Step 4: Decide on Storage Before Style The biggest mistake I see is choosing a table for how it looks on a product page, then realizing there’s nowhere to put the remotes. Answer this first: what items currently pile up near the sofa? Remotes and chargers need drawers. Blankets and books work on open shelves. If the answer is “nothing, the room is tidy,” a standard top is enough. Step 5: Check Edge Safety if You Have Kids or Pets Rounded corners and a stable base matter more in active households than most furniture guides admit. Glass sofa tables with sharp corners and narrow legs get knocked over. If there are kids or large dogs in the house, eliminate those options first before comparing anything else. Sofa Table Materials: What to Know Before Buying The material determines how the table holds up over time, not just how it looks on delivery day. Here’s the honest breakdown: Material Durability Maintenance Best Room Type Solid Wood High – scratches but refinishes Occasional oiling or waxing Most rooms; warmest finish Engineered Wood (MDF/Veneer) Medium – chips on edges under impact Wipe clean; avoid standing water Budget rooms with low daily wear Metal High – scratches but wipes clean Minimal; occasional polish on brass Modern, industrial, high-traffic rooms Tempered Glass Medium – strong but chips at edges Fingerprints visible; needs frequent wiping Small rooms where visual lightness helps Rattan/Cane Low to medium – scratches easily Dusting; keep dry Casual, coastal, and seasonal rooms Faux Stone / Concrete-Look Medium – surface-level scratching possible Wipe clean; check weight before upper floors Larger or formal living rooms Solid wood is the most forgiving over time – you can sand and refinish a scratch that would permanently damage engineered wood. If the budget is tight, metal frames with wood tops split the difference well. Sofa Table Styling: What Actually Stays Tidy Styling a sofa table is easier when you start with function and add decor second – not the other way around. Most sofa table styling that looks cluttered within a week was styled backwards. One Tall Piece as the Anchor Start with one tall piece on one end: a lamp, a tall vase, or a ceramic candleholder over 12 inches. This gives the table a clear vertical anchor. Everything else stays lower. Without an anchor, the table reads flat regardless of how many objects are on it. A Tray for Daily Items Remotes, coasters, and phone chargers belong in a tray, not loose on the surface. A tray groups small items into one visual unit and makes the whole table easier to clear – you lift the tray, not six individual things. A 12- to 14-inch rectangular tray in a natural material (wood, rattan, or matte ceramic) works in most living rooms. Vary the Heights Three items at the same height read as a lineup, not a composition. Combine a tall lamp with a medium-height vase or plant and a low stack of books or a shallow bowl. Behind a floating sofa, keep the tallest piece under 30 inches so it doesn’t obstruct sightlines from across the room. One Plant or Fresh Stems A single plant softens the surface, especially on metal or glass tables that read cold without organic material. A small pothos in a terracotta pot on one end is enough. If you travel frequently or forget to water, dried stems in a simple bud vase require nothing. Leave One Open Spot A surface that’s fully covered is a surface that stops working. Leave at least one-third of the table top open for a book, a glass, or a phone. That gap also makes the styled pieces look more deliberate – crowded surfaces look accidental even when each item was chosen intentionally. Do You Actually Need a Sofa Table? Not every living room does. A sofa table earns its place when it solves a specific problem. Here’s a quick check: Get a sofa table if: Skip it if: The back of your sofa is fully visible from another area The sofa is pushed against a wall You need a lamp behind the seating area You already have enough table surface nearby Small items pile up near the sofa with nowhere to go The room already has adequate storage The sofa separates two zones in an open-plan room The room feels full and adding furniture would crowd it There is at least 24 inches of walkable space behind the sofa The path behind the sofa is already tight If the room meets two or more of the left column conditions, a sofa table will likely improve both function and layout. If the sofa is against the wall and storage isn’t a problem, there’s no layout reason to add one. Common Sofa Table Mistakes These are the five errors I see most often – all fixable before purchase: Wrong height: Buying a table 4 or 5 inches taller than the sofa back. It looks like a bar table was placed behind a couch. Always measure the sofa back height first. Too long: A table that matches the sofa’s full length looks like a shelf, not furniture. Stay within two-thirds of the sofa length. Too deep for the walkway: An 18-inch-deep table in a narrow passage behind the sofa blocks movement. Measure the clearance before deciding on depth. Overloading the top: Six items that all compete for attention read as clutter. One anchor piece plus a few supporting objects is the right limit. Unfinished back panel: If the sofa floats and the table back faces the dining or kitchen area, make sure the table looks finished from that side. Some console-style pieces have a raw back edge meant to sit against a wall. Frequently Asked Questions These are the questions that come up most often once someone has measured their space and is deciding whether to commit. What is a sofa table called? It goes by several names: sofa table, couch table, behind-the-couch table, sofa console table, or console table. All describe the same piece – a narrow table placed behind a sofa. What is the difference between a sofa table and a console table? Console table is a broader category covering any long, narrow table used in hallways, entryways, or against walls. A sofa table is a console table sized and positioned specifically for behind a sofa – similar shape, specific placement. How tall should a sofa table be? Level with the sofa back or 1 to 2 inches lower. Measure from the floor to the top of the sofa cushions – that’s your maximum table height. Most sofa tables run 28 to 32 inches tall, which suits standard sofas with 30-inch back heights. How long should a sofa table be relative to the sofa? Half to two-thirds of the sofa length. For an 84-inch sofa, target 42 to 56 inches. A table matching the full sofa length looks rigid; one significantly shorter looks undersized. Can a sofa table work with a sectional? Yes, on the straight back section. Measure the linear run of the sofa back that faces a room or walkway and size the table to fit that segment – not the full sectional perimeter. What can I use instead of a sofa table? A slim console table, low bookshelf, narrow storage bench, or cube shelf unit all work behind a sofa. The best alternative depends on whether you need a surface, storage, or both. How deep should a sofa table be for a narrow walkway? 10 to 12 inches. Measure the clear space behind the sofa and leave at least 24 to 30 inches of walking clearance. Anything over 14 inches deep starts to feel like furniture, not a background piece. Should the back of a sofa table look finished? Yes, if it faces a room. Floating sofas expose the table back to views from the kitchen or dining area. Choose a table finished on all sides, or check that the product description confirms a finished back panel. Final Verdict: Does Your Room Need a Sofa Table? If your sofa floats in an open room and the back edge looks unfinished, a sofa table is the most direct fix. Measure the sofa back height, confirm at least 24 inches of walkable clearance behind it, then choose the type that matches your actual storage need – not the one that looks best in a product photo. For most rooms, a standard or slim sofa table in solid wood or a metal-and-wood combination is the right starting point. Put a lamp on one end, a tray for daily items on the other, and leave at least a third of the top clear.
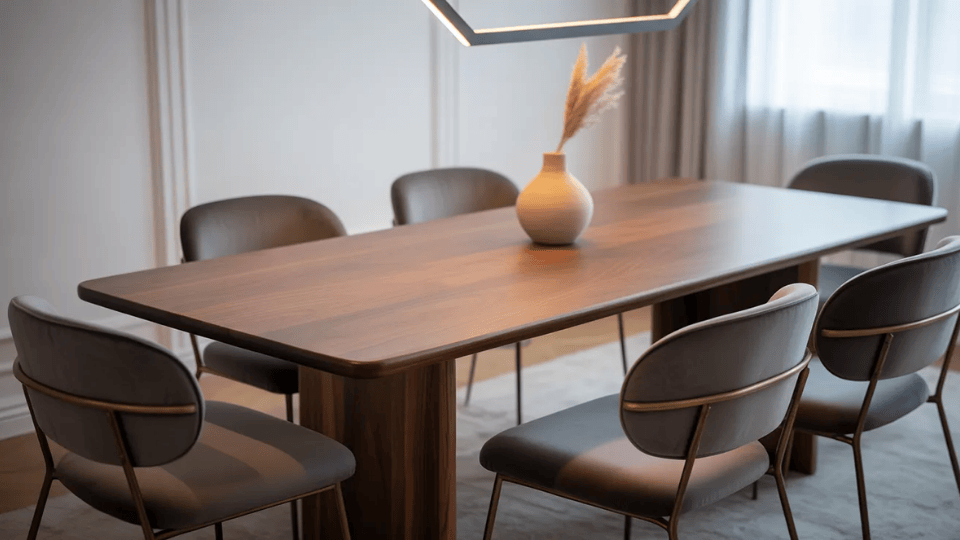
Standard Dining Table Height 28–30 inches (floor to tabletop) Chair Seat Height 17–19 inches Seat-to-Tabletop Clearance 10–12 inches Apron Underside to Floor 24–25 inches minimum Counter Height 34–36 inches Bar Height 40–42 inches The standard dining table height is 28 to 30 inches, measured from the floor to the tabletop surface. That number has been the industry benchmark long enough that most chair manufacturers design around it. Most apron depths assume it, and most people building or buying a dining table treat it as settled, much the same way bar stool height follows its own set of benchmarks for counter and bar seating. It mostly is. But “mostly” is doing a lot of work in that sentence, and the inch or two where it stops working is exactly where most build mistakes happen. I’ve seen enough tables come through the workshop that sit right but feel wrong to know the number alone isn’t enough. Height is a relationship: your chair, your apron depth, your floor, and the people eating at that table every night. Get the relationship right, and the table works for years. Get one element slightly off, and you’ll feel it at every long meal. The Core Height Numbers for Dining Tables Before anything else, here are the measurements that matter. These aren’t soft guidelines. They’re the numbers that determine whether a chair clears the apron and whether someone can sit comfortably for two hours. Measurement Standard Range Table surface height 28–30 inches Chair seat height 17–19 inches Seat-to-tabletop clearance 10–12 inches Apron underside to floor 24–25 inches minimum That last row is the one most guides skip. The apron underside-to-floor measurement matters more than the surface height for daily comfort, especially if your chairs have armrests. Start With the Chair, Not the Table The formula is straightforward: table height equals chair seat height plus 10 to 12 inches. That 10-to-12-inch range isn’t arbitrary. Ten inches produces a more relaxed seated posture. Twelve-inch suits people who prefer to sit upright. For long dinners, stay closer to 10. If your chairs sit at 18 inches, your table should land between 28 and 30 inches. If your chairs sit at 19 inches, build to 29–31 inches. The relationship is what you’re designing, not a single fixed number. One thing I’ve learned to always do: measure the actual chair, not the listed seat height on a spec sheet. Manufacturers measure inconsistently. Some measure to the top of the cushion, some to the frame. That variation can be 1 to 2 inches, which is enough to shift your entire table height calculation. Measure the chair you’re actually using before you cut anything. Pro Tip: Set plywood on sawhorses at your target height, sit at it for a full meal, and see how it feels. It takes twenty minutes and will tell you more than any calculation. The Apron: The Measurement Most Builders Miss The apron underside-to-floor measurement is where most dining table builds go wrong in ways that aren’t immediately obvious. The standard surface height of 29 to 30 inches assumes a certain apron depth. If you’re running a deep apron for visual weight or structural rigidity, that apron’s underside can drop below the comfortable threshold before you realize it. The target is 24 to 25 inches minimum from the apron’s lower edge to the floor. Below that, seated adults start to feel cramped in the thighs. Below 23 inches, it becomes genuinely uncomfortable for anyone with longer legs. Armrests make this more critical. Measure the height from the floor to the top of the armrest, then compare it to your apron’s lower edge. If the armrest height is greater than the apron underside height, the chair won’t push in cleanly. Allow at least a half-inch clearance between the armrest top and the apron underside. More is always better. This is one of those problems that’s easy to design around before the build and nearly impossible to fix after. Dining Table Height for Different Users Standard numbers are a starting point. The people sitting at your table are the actual specification. Here’s how the numbers shift across different users. User Table Height Seat Height Notes Standard adult 28–30″ 17–19″ Works for most adults in the 5’4″–6’1″ range Tall adult (6’2″+) 30–31″ 19–20″ Raise both table and chair; raising only the table doesn’t solve legroom Child (6–10 yrs) 22–24″ 12–14″ Separate kids’ table or a booster seat at the adult table Wheelchair user 28–34″ — Minimum 27″ knee clearance underneath; ADA guideline Mixed-height household 29″ 17–18″ No perfect solution; 29″ is the workable middle ground For mixed-height households, adjustable leg feet only give you a quarter to a half inch of range. That’s for leveling, not bridging a meaningful height gap. If you have both tall adults and shorter adults at the same table regularly, 29 inches is the realistic compromise height. It won’t be perfect for either end of the spectrum, but it won’t be actively uncomfortable for either. For long meals, tighter clearances become a problem over time. Holiday dinners and extended gatherings are where a table that’s “fine for regular use” starts to feel wrong. If you’re building for that kind of use, add clearance and keep the apron depth simple. Dining Height vs Counter Height vs Bar Height A lot of households eat at a kitchen island or a breakfast counter, not just a formal dining table. If you’re planning or building one, kitchen island height follows its own set of rules that are worth understanding alongside these dining table numbers. Each surface sits at a different height and needs a different seat to match. These are not interchangeable. Type Table Height Seat Height Best For Dining 28–30″ 17–19″ Standard seated meals, long dinners, and formal dining rooms Counter 34–36″ 24–26″ Kitchen islands, casual eating, open-plan layouts Bar 40–42″ 28–30″ Standing bars, high stools, and entertainment spaces A counter-height table with standard dining chairs doesn’t work. Neither does a dining table with counter stools. The seat-to-surface clearance falls outside the comfortable 10-to-12-inch range, and the whole fit feels wrong regardless of chair quality. Before you decide which height to build, decide how you actually use the space and whether you’re eating, working, or doing both. Community’s Words on Dining Table Heights A Reddit discussion about the blog post “Dining room table height” centers on a builder unsure whether the standard 30-inch measurement refers to the tabletop or the clearance beneath it. Most replies clarify that 30 inches typically means floor-to-tabletop, with minor variations (30–31 inches) considered negligible. Commenters emphasize flexibility, suggesting a range of 28 to 33 inches depending on user height and chair compatibility, while encouraging practical testing over overthinking details. Personally, this reflects how craftsmanship balances standards with real-life usability. Exact numbers matter less than comfort, proportions, and how the table actually feels during everyday use. How Your Room Type Affects the Right Dining Table Height The room itself introduces variables that affect which height works best in practice. In apartments and open-plan condos, counter-height tables tend to feel less imposing and integrate better with kitchen islands and casual layouts. In a dedicated dining room in a suburban or farmhouse home, the standard 30-inch table remains the most natural fit for a full chair set and extended meals. That said, room type is context, not a rule. The people sitting at the table and the specific chairs you’re using will always matter more than what the floor plan suggests. If you’re getting the height right for the chairs and the users, the room will work around it. Build Mistakes That Actually Ruin the Fit Most dining table height problems don’t come from bad math. They come from small assumptions that seemed reasonable during the build and turned out to be wrong. Here are the ones I see repeatedly. Trusting the listed seat height on a chair without measuring it yourself. Manufacturers measure seat height differently, top of cushion, frame, or compressed sit, with a 1-2-inch variation, affecting table-to-chair fit. Always measure the actual chair. Cutting legs to the final length before dry-fitting the top. Top attachment hardware, such as bolts, fasteners, and tenons, adds height you might not have considered. Dry-fit first, check height, then make cuts. Armrests are hitting the apron. A table and chair that are perfectly proportioned on their own can still be incompatible. Check armrest height against apron height before committing to your base design. Not accounting for chair leg splay. Chair legs angling outward reduce knee clearance underneath, which isn’t dramatic but noticeable on lower-clearance tables, especially with wider chairs. Building before the flooring is finalized. New hardwood, tile, or thick rugs can raise the floor ¼ to ½ inch after the table is complete, shifting the seat-to-table relation without touching the table. Know your final floor height before making final cuts. Height problems are easier to prevent than fix. If a scenario fits you, do a mock-up first: set plywood on sawhorses at your target height, sit at it for a meal, and see how it feels. It takes twenty minutes and reveals more than calculations. Final Verdict The standard dining table height is straightforward once you stop treating it as a single number and start treating it as a relationship among your chair, your top, your apron, your floor, and the people who’ll sit there daily. Get the chair height first. Protect the underside clearance. Mock it up before you cut. Those three things alone will save most builders from the mistakes I’ve seen come through my workshop over the years. If you’re building a dining table, I’d love to hear what you’re working on. Drop a comment below and share what you’re making. Frequently Asked Questions What is the standard dining table height? The standard dining table height is 28 to 30 inches, measured from the floor to the tabletop surface. Most dining chairs are designed around this range, with seat heights between 17 and 19 inches. How high should a dining table be for an 18-inch chair? With an 18-inch seat height, your table should land between 28 and 30 inches. That gives you the 10-to-12-inch seat-to-surface clearance needed for comfortable seating. Measure the actual chair, not the listed height, before finalizing your table height. What chairs fit a 30-inch dining table? Chairs with a seat height between 18 and 20 inches work comfortably with a 30-inch table. That produces 10 to 12 inches of clearance between the seat and the tabletop. Verify armrest height against the apron underside before committing to chairs with arms. What is counter height vs dining table height? Standard dining tables sit at 28 to 30 inches. Counter-height tables sit at 34 to 36 inches and require stools with a seat height of 24 to 26 inches. Bar-height tables sit at 40 to 42 inches and require stools at 28 to 30 inches. These heights are not interchangeable, and mixing the wrong chairs with the wrong table height produces a consistently uncomfortable setup regardless of quality. What is the ADA-compliant dining table height? ADA guidelines require a minimum of 27 inches of knee clearance underneath the table for wheelchair users, with a table surface between 28 and 34 inches. The apron design matters here as much as the surface height. A table at 30 inches with a deep apron that drops to 22 inches underneath doesn’t meet the clearance requirement, even though the surface height does. Can I adjust a dining table that’s too tall or too short? If a table is too tall, you can trim the legs if the construction allows it. Remove the top, trim each leg evenly, reassemble, and recheck. If the table is too short, furniture risers are the practical fix. Adjustable leg levelers give only a quarter to a half inch of range; they’re for leveling an uneven floor, not correcting a meaningful height mismatch. Does rug thickness affect dining table height? Yes, in practice. A thick area rug raises the chair legs by up to an inch, while the table legs may sit on the bare floor at the rug’s edge. That shifts the seat-to-table relationship without changing either piece of furniture. Always mock up your height with the rug in place before making final cuts.
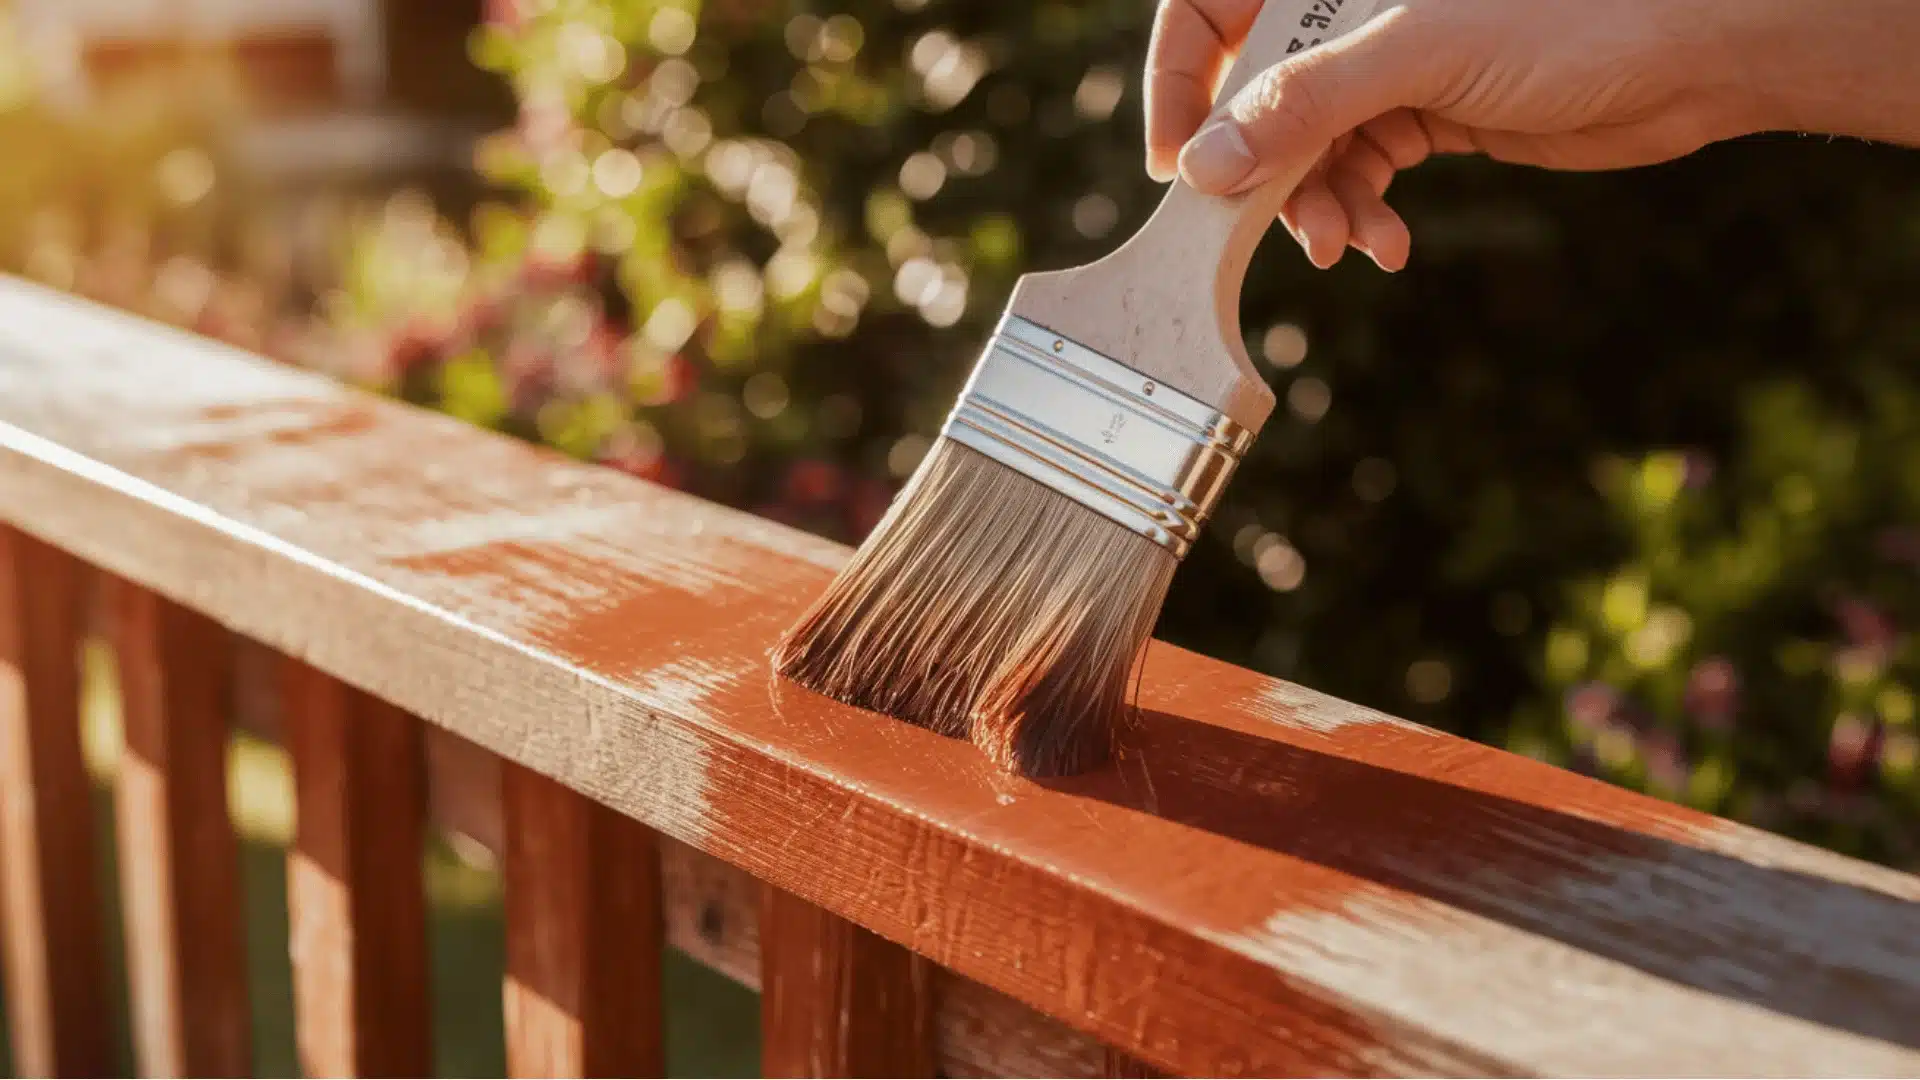
I’ve seen a lot of people run into the same issue. You buy pressure-treated wood, start planning the finish, and then realize things aren’t as straightforward as they seem. If you’re asking, Can you paint treated wood, you’re probably trying to avoid a result that looks good at first but doesn’t hold up. A big part of that comes down to picking the right paint, especially when comparing latex vs acrylic paint differences . It looks ready, but something feels off. The surface behaves differently, and what should be a simple step suddenly turns into confusion. That’s where most mistakes happen. Small details get ignored, and the results don’t turn out the way you expected. If you want a clean, long-lasting finish, understanding what’s happening beneath the surface makes all the difference. Understanding of Pressure-Treated Wood? Pressure-treated wood is basically regular lumber that’s been given superpowers. I remember helping my dad build a fence, and he explained how manufacturers force special chemicals deep into the wood using high pressure , kind of like giving it a protective shield. These chemicals prevent rot, insects, and moisture damage that would otherwise destroy regular wood in just a few years. That’s why you’ll see it used for decks, fences, raised garden beds, and outdoor furniture. The wood usually has a greenish or brownish tint from the treatment. While untreated wood rots quickly when buried in soil or exposed to rain, pressure-treated lumber can last for decades outdoors. Most modern pressure-treated lumber uses copper-based compounds , specifically micronized copper azole (MCA) or copper quaternary (CA-C), which replaced the older arsenic-based CCA formula phased out for residential use in 2003. This matters for painting because these newer copper compounds are water-based , which is exactly why a water-based primer and paint bonds to them far better than oil-based products. Can You Paint Treated Wood? Yes, you can paint treated wood, but timing and prep matter. Freshly treated wood holds moisture from the treatment process, which can stop paint from sticking properly. The most important factor is moisture content, not just time. Aim for 15% or less before painting. Some boards start at 40% or more, so the common “wait six weeks” rule isn’t always accurate. In humid areas, it may take longer, while kiln-dried wood may be ready sooner. Before painting, clean the surface to remove dirt and mildew, then sand it lightly. Apply a high-quality primer made for treated wood, followed by durable exterior paint. Done right, this gives you a finish that looks good and lasts longer. Why Should You Paint Pressure-Treated Wood? Painting pressure-treated wood provides both aesthetic and functional benefits. It enhances appearance, provides additional protection, and extends the lifespan of wood. Improved Appearance: Adds color and creates a polished, refined look. Weather Protection: Guards against moisture, UV damage, and wear from the elements. Extended Durability: Keeps wood looking fresh and durable for a longer time Proper preparation and maintenance are essential for achieving the best and longest-lasting results. Paint vs. Stain: Which Should You Choose? Choosing between paint and stain can feel confusing at first. I’ve faced this myself, and the right option really comes down to how you want your wood to look and perform over time. Feature Paint Stain Coverage Full, opaque color that hides imperfections Semi-transparent, shows natural wood grain Finish Type Sits on top of the surface Penetrates into the wood Durability Can peel or crack over time Less likely to peel Best Use Areas Fences, siding, vertical surfaces Decks, outdoor flooring, high-traffic areas Maintenance Needs recoating every 2–3 years (on decks) Lasts 3–5 years with proper application Look Clean, uniform, bold color Natural, textured appearance Now, beyond looks and durability, there are also a few practical risks you should keep in mind. Peeling or Fading: Happens when proper preparation or regular maintenance is skipped. Adhesion Problems: Paint may not stick well if the wood isn’t fully dry or properly primed. Slippery Surface: Painted decks can become slick when wet, especially on walking areas. One important thing I’ve learned from experience is this: if you’re painting a surface you walk on, always mix in an anti-slip additive. It’s cheap, easy to apply, and makes a big difference in safety. In simple terms, go with paint if you want a bold, uniform look for vertical surfaces. Choose stain if you want something lower maintenance and better suited for decks or high-use areas. This becomes even more important if you’re dealing with older finishes and thinking about painting over stained wood . Steps to Painting Pressure-Treated Wood Follow these steps to properly paint pressure-treated wood: prepare, clean, dry, prime, and use suitable paint for lasting results. Materials Needed for Painting Before starting your project, gather all your supplies so you’re not running to the store mid-job. Trust me, nothing kills momentum like realizing you forgot something important halfway through: Pressure washer or deck and wood cleaner Duct tape 3-mil plastic sheeting Drop cloth Exterior oil-based paint or stain Metal bucket Stir stick High-quality paint brush (such as a wide exterior brush) Nail (to test wood dryness) Water (for cleaning brush) Having everything ready beforehand makes the job smoother and helps you finish faster with better results, plus you’ll avoid those frustrating trips back to the hardware store. Step 1: Clean and Prep the Pressure-Treated Wood Before painting, you need a spotless surface. Always start by pressure-washing the wood to blast away dirt, mildew, and grime. You can also use a deck cleaner for stubborn spots. Let everything dry completely. This usually takes a few days. Here’s a trick: press your fingernail into the wood. If moisture appears, wait longer. Clean, dry wood helps paint stick better and last way longer without peeling. Step 2: Protect Nearby Surfaces Paint loves to splatter onto concrete, sidewalks, and nearby plants when you least expect it. learned this after accidentally staining my neighbor’s driveway. Tape plastic sheeting along walls and fence bases using strong duct tape. Lay drop cloths on the ground below your work area. Spending ten extra minutes protecting surfaces now saves you hours of scrubbing later. Step 3: Mix and Test the Paint Always mix your paint thoroughly before starting; the pigments settle at the bottom. Pour mine into a metal bucket for easier handling and keep stirring throughout the project so colors stay consistent. Test your paint on a hidden spot first, like a board edge or back corner. If it absorbs nicely without beading up, you’re ready. This quick test prevents nasty surprises and ensures your finish looks professional wherever you use it. Step 4: Apply the Paint Properly Use a high-quality brush for the best coverage. Cheap brushes leave streaks and shed bristles everywhere. Prefer wide brushes because they cover more area faster. Start at the top and work downward to catch drips as you go. Brush paint on generously, then spread it evenly into cracks, edges, and corners. Pay special attention to cut ends since they’re super absorbent and need extra coats for protection. Step 5: Let It Dry and Maintain It After finishing, check the weather forecast; you need at least 24 to 48 hours without rain. Some spots might look lighter at first, but that’s just because they dry faster. The beauty of quality exterior paint is that when it fades over time, you don’t need to strip everything. Just clean the surface with a deck cleaner, let it dry, and apply a fresh coat to bring back that gorgeous color. Want to see these techniques in action? Head over to the YouTube “Home Repair Tutor” channel for video demonstrations and extra insights. Considerations When Painting Pressure-Treated Wood When painting pressure-treated wood, it’s important to consider moisture levels, paint type, and ongoing maintenance. These factors ensure your paint adheres properly and lasts for a long time. Consideration Details Moisture and Humidity Wait until the moisture content is 15% or below. Use the water-drop test or a moisture meter. Standard treated lumber takes 2–6 months; KDAT lumber dries much faster. Paint Type and Compatibility Use exterior water-based latex paint and latex primer. Oil-based paints do not adhere properly to treated lumber and can trap moisture, causing peeling. Surface Orientation Paint lasts longer on vertical surfaces (fences, siding) than horizontal ones (deck boards). For horizontal surfaces, consider a solid stain or add an anti-slip additive. Maintenance Regular touch-ups and care help maintain the paint job and prevent wear, peeling, and fading over time. Proper preparation and careful selection of materials will ensure a lasting finish and protect your wood over time. Common Mistakes to Avoid When Painting Pressure-Treated Wood Avoiding common mistakes will save time and money, ensuring your paint job lasts. Here’s what to watch for: Painting Too Soon: Painting before wood has dried properly traps moisture, causing bubbling and peeling. Wait 6 weeks to 3 months. Using Oil-Based Paint: Oil-based paints do not bond well to pressure-treated lumber and trap residual moisture. Always use exterior latex (water-based) paint. Wrong Paint Choice: Never use interior paint outdoors. Always use exterior acrylic latex, oil-based paint, or solid stains. Ignoring Weather Conditions: Paint only when temperatures are between 50°F and 85°F, with humidity below 70%. Wait for 48 hours of dry weather. Skipping Primer: Primer is not optional on treated wood. Without it, even excellent topcoat paint will peel prematurely because the wood surface lacks adhesion. Painting in Bad Weather: Avoid painting during blazing sun, morning dew, or strong winds. Waiting for ideal weather ensures a lasting finish. Wrap Up Painting pressure-treated wood comes down to two things: patience and the right products. Wait until moisture content drops to 15% or below, confirm it with the water-drop test or a moisture meter, and never reach for oil-based paint. In over twenty years of working with wood, I’ve seen more paint jobs fail from impatience than from any other cause. The second most common culprit is skipping the primer. Get those two things right, and the rest follows naturally. Once painted, check horizontal surfaces and cut ends every spring. A quick touch-up now saves a full repaint later. Have questions or tips from your own project? Drop them in the comments below. Frequently Asked Questions Can you paint pressure-treated wood right away? No. Fresh wood holds moisture that blocks paint from sticking. Wait until moisture drops to around 15%, which can take a few weeks to a few months depending on conditions. What type of paint works best on treated wood? Use exterior water-based latex paint with a compatible primer. It bonds better with treated wood and allows moisture to escape, helping prevent peeling and long-term damage. How do you know if treated wood is ready to paint? Use a moisture meter or the water-drop test. If water absorbs into the surface, it’s ready. If it beads up, the wood still has too much moisture. Do you need to prime pressure-treated wood before painting? Yes. Primer helps paint stick and creates a stable base. Skipping it often leads to peeling and uneven coverage, especially in outdoor conditions. Is it better to paint or stain pressure-treated wood? Paint works best for vertical surfaces and gives full coverage. Stain is better for decks and high-traffic areas since it penetrates the wood and holds up longer.
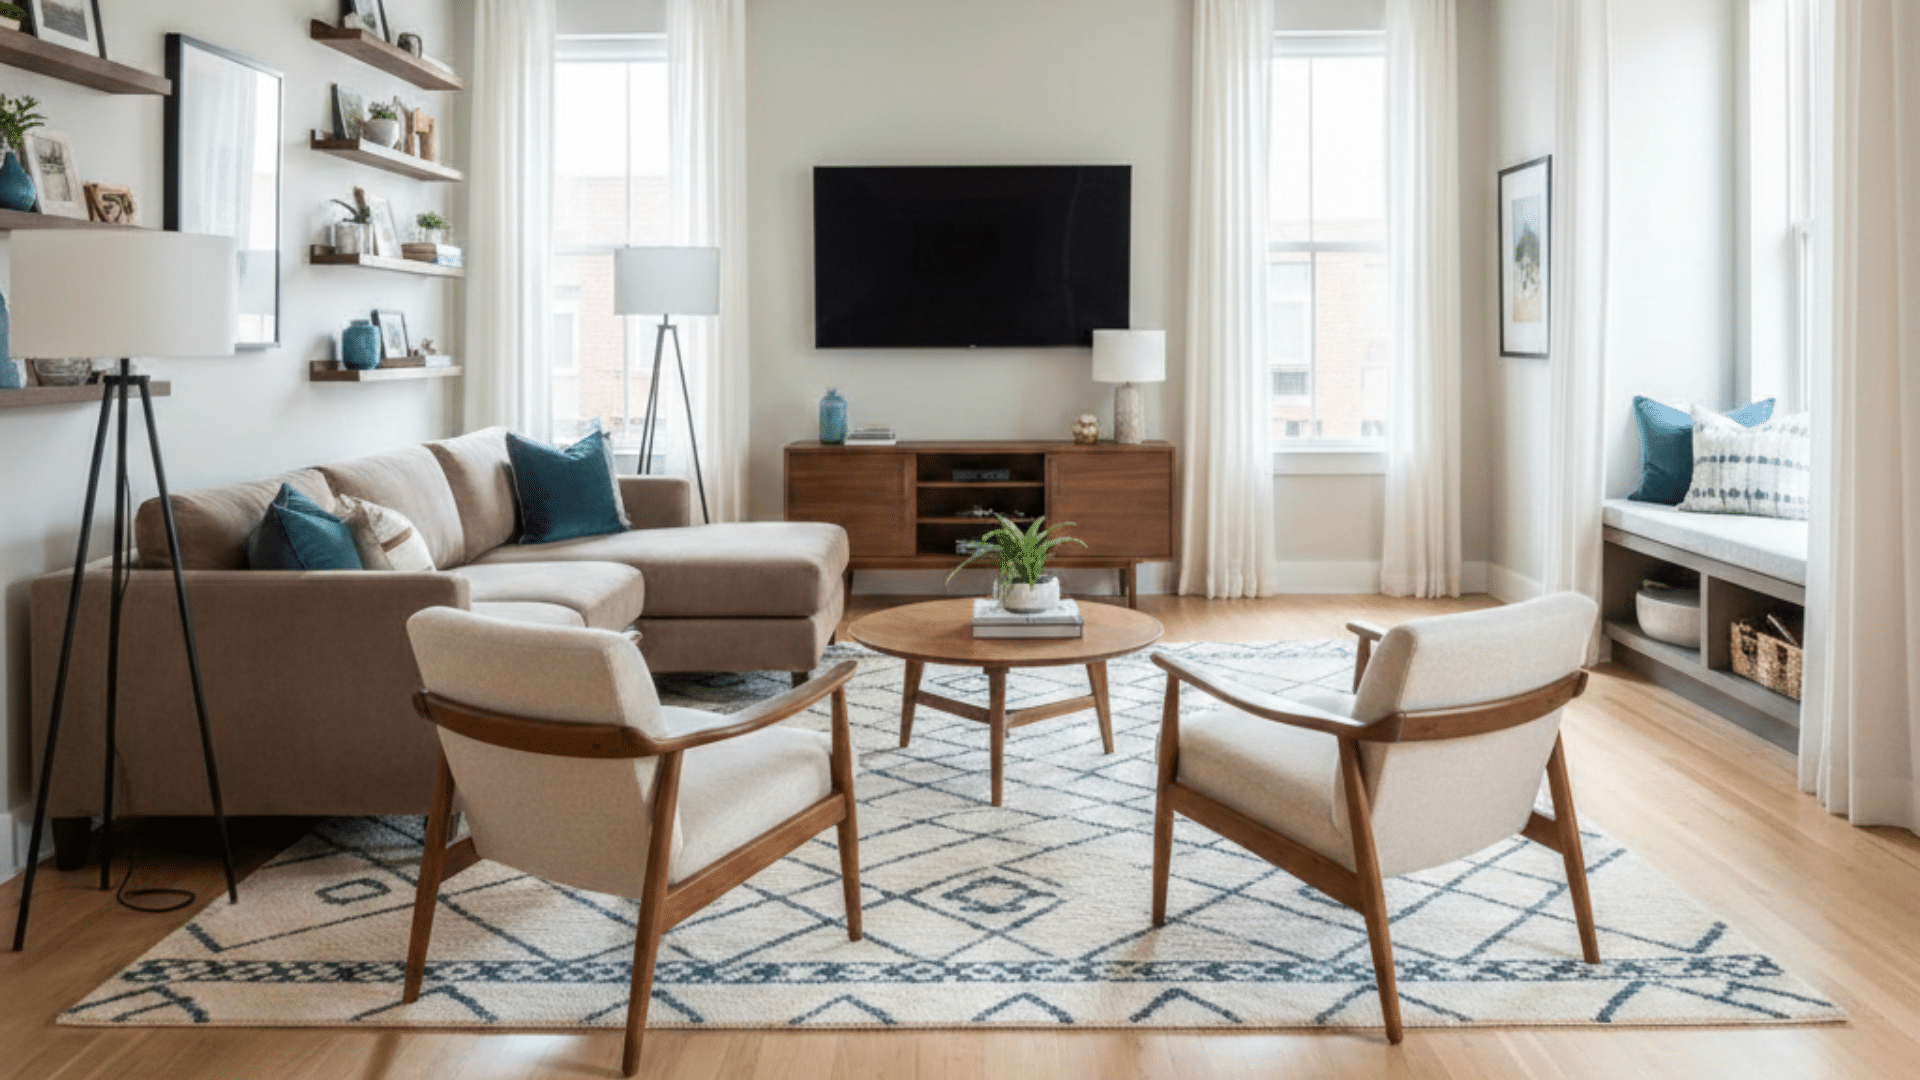
Arranging living room furniture can be a real headache. If you’re dealing with a narrow, long room, an awkward L-shape, or just furniture that doesn’t fit, most of us have been stuck in the process. You try moving things around, only to realize nothing feels quite right. But guess what? You don’t need to be an interior designer to make it work. In this, I’ll walk you through practical, real-life solutions for tricky living room layouts, from minimalist principles in Japanese design living rooms to maximizing every square inch of a family hub. And the best part? You’ll get advice from real people who faced the same challenges you’re dealing with. So if you’re struggling to find the right layout, keep reading. Measure and Understand Your Space: The First Big Step Before you start rearranging your living room, it’s crucial to measure your space and understand its layout. Begin by taking accurate measurements of the room, length, width, and height, and note doors, windows, and features such as fireplaces. This gives you a clear picture of the available space you’re working with. One thing most people miss when measuring: door swing clearances. A door that opens into the room can quietly kill your best layout option, and it’s easy to forget until you’ve moved everything and discovered the armchair blocks it. Write down every door swing direction before you plan anything. Also, consider traffic flow: Think about how people will move through the room. Ensure there’s enough space between furniture for easy passage, especially if you have a busy household. Finally, take into account how you use the room, whether it’s for lounging, TV watching, or entertaining, to guide your decisions on where to place each piece of furniture for maximum function and comfort. Living Room Furniture Placement for Small Apartments When working with limited space in small apartments, the goal is to maximize every inch without sacrificing comfort or style. Use Multi-Functional Furniture: Opt for furniture pieces that serve dual purposes, like a sofa that doubles as a bed or a coffee table with storage. Choose Slim-Profile Seating: Select seating that doesn’t overpower the room and allows for easy movement. Add Floating Shelves: Install shelves that provide storage without taking up floor space, keeping the room open and functional. These smart strategies will help you create a functional living area in your small apartment, maximizing space and comfort. How to Arrange Living Room Furniture for Maximum Comfort and Flow In a Reddit thread, users shared their struggles and solutions for arranging living room furniture. Key suggestions included optimizing space with multi-functional pieces like compact L-shaped sofas and moving the TV for better viewing angles. Others recommended adjusting furniture placement to improve traffic flow and create conversation zones. Many emphasized using furniture that suits the room’s size and layout. As someone who’s rearranged living rooms for both style and functionality, I agree that maximizing space without overcrowding is key. The thread provides practical tips for tackling common layout challenges, focusing on furniture selection, layout balance, and thoughtful placement for better flow and comfort. The pattern I see most consistently in these conversations: people keep adding chairs when what the room actually needs is fewer, larger pieces oriented toward a single focal point. Less furniture, better positioned, almost always wins. Creating the Perfect Layout: Key Furniture Rules That Actually Work Now that you’ve measured and thought about how you use the room, let’s get into some of the key rules that will upgrade your space. These are the tried-and-true strategies that work across most rooms. 1. Don’t Push Furniture Against the Walls It might seem like pushing your sofa and chairs up against the walls will make a room feel bigger, but it actually does the opposite. Furniture pushed against the walls creates distance, and the room can feel disconnected and empty. Instead, pull the furniture away from the walls (even a few inches) to create a more inviting space; a technique often used to achieve a balanced, natural modern living room. This layout encourages cozy conversation zones, helps the room feel more balanced, and adds more flow. Pro Tip: If you have a large room, float your sofa toward the center. It helps break up open space and creates natural gathering spots. 2. Create Conversation Areas Whether it’s for family time, casual conversations, or entertaining, having conversation zones is key. The best way to do this is by arranging sofas and chairs facing one another (not necessarily straight on). That way, people can talk comfortably without straining their necks. If your room is big, create multiple conversation areas by breaking up the furniture into smaller groupings. You can use area rugs to define these sections, which gives each zone its own unique feel. 3. Consider Traffic Flow Think of your room as a walkway for people to move freely. Don’t clutter the space with too much furniture in high-traffic areas. Keep clear paths between furniture, like from the sofa to the TV or from the entry to the rest of the house. If your space is tight, make sure people can move without steppingover furniture. This is especially important if you have children or pets who might be darting through the room! 4. Use the Right-Sized Rugs When arranging furniture, rugs matter more than you think. A rug that’s too small can make the room feel disjointed. Instead, choose a rug large enough for the front legs of your furniture to sit on. If the rug is too small, it will look like it was an afterthought. 5. Don’t Forget Lighting Proper lighting is essential for making the space feel cozy and functional. Combine overhead lighting, floor lamps, and table lamps at different heights to balance the room. Layering light helps with both practicality and ambiance. Consider how much natural light your room gets, and use it to your advantage when positioning furniture. If your living room gets too much sun, consider adding sheer curtains to soften the light. TV glare and window placement: If your room has large windows, position the TV perpendicular to them, not opposite. A screen facing a window fights the light all day. This is one of those details that sounds minor until you’re squinting through a reflection every evening. Solving Common Layout Problems: Real-Life Solutions Many living rooms face common layout issues that can make arranging furniture a challenge. Here are practical, real-life solutions: Narrow, Long Rooms: Narrow, elongated rooms often feel disconnected. Try positioning the sofa perpendicular to the long walls to create a more balanced look. Awkward Layouts: Rooms with odd corners or bay windows can feel hard to arrange. Use multi-functional furniture and zone the space to make the most of each section. Fireplace vs. TV Debate: Choosing between a TV and a fireplace as the focal point can be tricky. You can face seating toward the fireplace or position the TV above it, depending on your preferences. Family Room Layouts: For rooms with kids or pets, prioritize traffic flow and ensure there’s enough space for play zones. Use storage ottomans to reduce clutter. Empty Spaces in Big Rooms: Large rooms with empty areas can feel underutilized. Break the room into distinct zones using rugs or furniture arrangements that separate the space into functional areas. By applying these simple fixes, you’ll be able to tackle common layout problems and make your living room work for you. Furniture Ideas for Every Room Find out practical and stylish furniture solutions for different room types. If you have a small space, a family room, or a large living area, these ideas will help maximize functionality and style. 1. Small Living Rooms For New York apartments with narrow living rooms, consider using a compact sofa with storage underneath to save space and reduce clutter. Here’s how to do it: Multi-functional furniture: Choose storage ottomans or folding chairs that double as tables or extra seating. Slim-profile seating: Opt for sleek sofas and chairs that leave space for movement. Avoid bulky pieces: Keep furniture minimal to avoid overcrowding. Use floating shelves:Floating shelves provide extra storage without taking up floor space. Declutter with purpose: Keep surfaces clean and organized to make the room feel open and tidy. These simple ideas will keep your small living room both spacious and practical. 2. Family Rooms and Play Areas When arranging a family room, it’s important to balance comfort, functionality, and play space. Here’s how: Sofa placement: Position your sofa away from high-traffic areas to keep it functional and comfortable. Durable fabrics: Use leather or microfiber furniture to stand up to wear and tear, especially with kids or pets. Multi-purpose furniture: Add storage benches or ottomans to reduce clutter and maintain organization. Create zones: Designate areas for play and relaxation, such as a safe space for kids and a cozy corner for adults to unwind. Space for movement: Ensure there’s enough open space for active play and circulation around the furniture. By dividing the room into zones, you’ll make it more functional for both kids and adults. 3. Big Rooms with Empty Spaces In larger rooms, it’s essential to break up the space to prevent it from feeling too open or underutilized. Here are some tips: Divide the space into zones: Create distinct areas for conversation, entertainment, or reading. Use area rugs: Rugs help to visually separate spaces, giving the room a sense of purpose and warmth. Furniture arrangement: Group chairs and small tables together to create cozy conversation corners. TV placement: Position your TV or entertainment center on the opposite side to balance the room. Low-profile furniture: Use benches or side tables to complement larger pieces and prevent overwhelming the room. These steps will keep your room functional and visually appealing. Avoiding Common Mistakes: Simple Fixes for Your Layout After two decades of working with furniture and the people who live with it, these same mistakes repeat across every budget and every room size. The good news is that every one of them is free to fix. Mistake The Problem Quick Fix Too Much Furniture in One Area Trying to fill every corner or wall space makes the room feel cluttered and hard to navigate Keep some empty space around your furniture to create flow and let the room breathe Pushing Everything Against the Wall Makes the room feel distant and disconnected from the seating area Pull your furniture away from the walls to create a more inviting, intimate layout Not Using Area Rugs Properly Small rugs look out of place and make the room feel disconnected and disjointed Ensure your rug is big enough to fit under all furniture, or at least the front legs of each piece I’ve found that fixing even one of these mistakes transforms how a room feels immediately. Small adjustments in furniture placement create a more comfortable, functional space without buying anything new. When to Seek Professional Help If your living room layout still feels off after trying different arrangements, it might be time to consider professional help. Interior designers bring expertise and an eye for detail that can help solve layout problems you might have missed. They can suggest furniture placements that maximize both functionality and aesthetic appeal, particularly for tricky spaces. If you’re unsure about making significant changes or feel stuck, online consultations and floor planning services are excellent alternatives. These services provide detailed design plans, giving you a clearer picture of what will work best for your space without the guesswork. Professionals can also recommend furniture, lighting, and decor that enhance the room’s functionality, making your space work perfectly for your needs. Free tools before paid help: Try a free floor-planning tool like RoomSketcher or Planner 5D first. Enter your room dimensions and drag scaled furniture outlines around the floor plan. It won’t replace a designer’s eye, but it will show you immediately whether your planned layout has the clearances it needs, and it takes about 20 minutes. Wrap Up Rearranging your living room doesn’t have to be overwhelming. By following these simple steps and considering your space’s unique needs, you can create a layout that balances both function and style. If you’re working with a narrow room, awkward corners, or simply need more storage, there are plenty of ways to upgrade your space. Don’t be afraid to experiment with different arrangements and live with them for a few days. Remember, it’s about what works for you and your family, not perfection. So, if you’re wondering how to arrange living room furniture to maximize comfort and flow, you now have the tools to do it. Enjoy the process and share your progress in the comments. You’ve got this! Frequently Asked Questions How can I arrange furniture in a small living room without overcrowding? In a small living room, focus on multi-functional furniture, such as storage ottomans, and use slim-profile seating to save space. Avoid bulky pieces, and consider using floating shelves to add storage without taking up floor space. What should I do if my living room has an awkward layout? For awkward spaces, try using multi-functional furniture and create defined zones. You can use area rugs to divide the space and ensure there’s enough open space for easy movement. What are some quick fixes for a living room layout? A simple solution includes pulling furniture away from the walls to create a more inviting layout, ensuring proper rug sizes to anchor the space, and avoiding too much furniture in one area to keep the room feeling open.
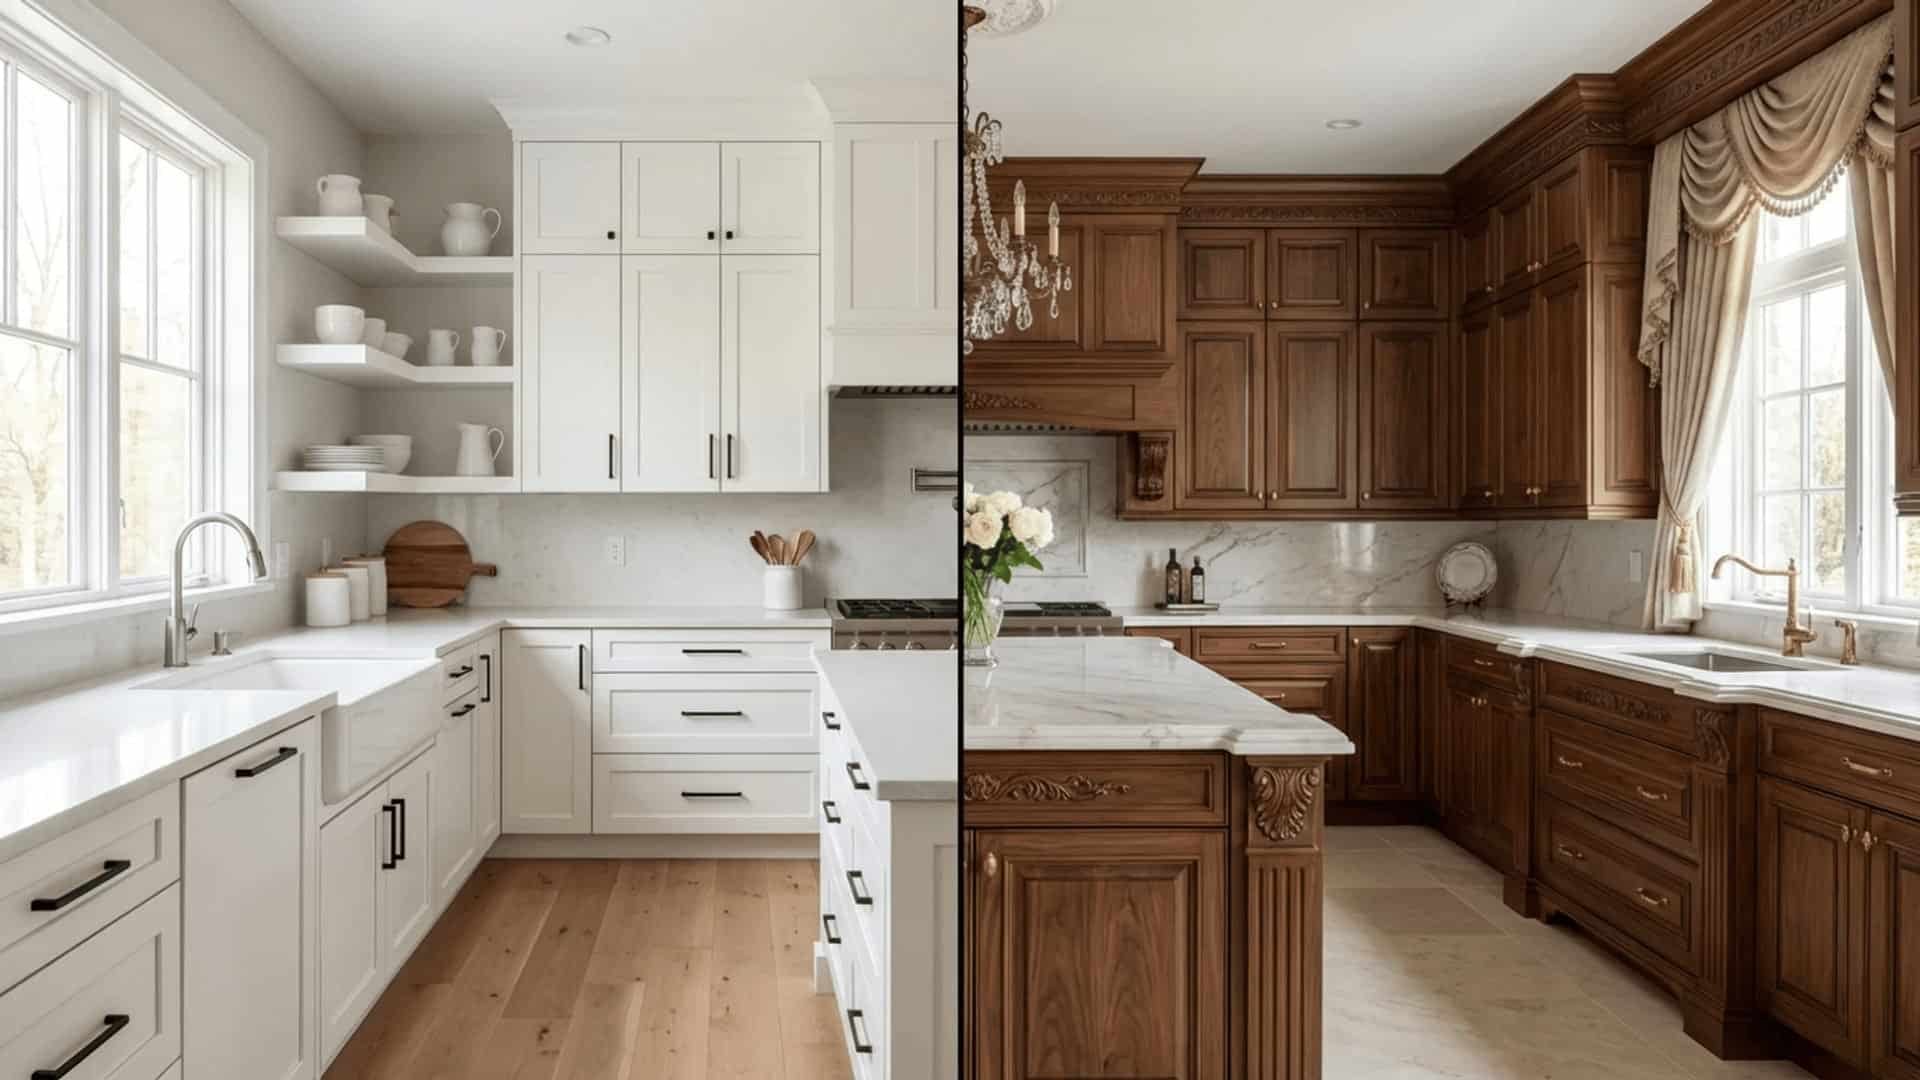
Cabinet style shapes how a kitchen feels the moment you walk in. When people ask me about shaker cabinets vs traditional cabinets, they’re usually trying to understand which design will actually work better in their space. After more than twenty years working with wood and building custom cabinetry, I’ve installed both styles in all kinds of kitchens. Each one has strengths that become obvious once you look closely at construction, design, and long-term durability. I’ll walk you through the key differences that matter when choosing between kitchen cabinet styles. You’ll see how shaker and traditional designs compare in style, materials, cost, cleaning, and overall kitchen compatibility, so you can make a confident decision for your home. What are Shaker Cabinets? Shaker cabinets trace back to the Shaker religious community in 18th-century America . They valued simplicity and function, and that philosophy shows in the cabinet design. Each door uses a five-piece construction: four frame pieces surrounding a flat, recessed center panel . The edges stay square and clean, with no curves or decorative carving. Most shaker cabinets come in white, grey, navy, or natural wood finishes. Materials range from solid wood to MDF, depending on budget. They suit modern, farmhouse, and transitional kitchens particularly well. One thing I’ve noticed over the years: shaker doors are forgiving to paint and repaint. If a homeowner wants to update the kitchen color five years down the road without replacing the boxes, shaker is almost always the right starting point. The flat panel takes paint cleanly and evenly, unlike raised-panel doors, where touch-ups around the molding edges tend to show. The design has stayed popular because it doesn’t lean too far in any one direction, making it easy to style around. What are Traditional Cabinets? Traditional cabinets have a heavier, more detailed look than the shaker-style cabinets. The defining feature is the raised center panel , which sits higher than the door frame, creating depth and shadow lines that give the cabinet a rich, layered appearance. Decorative molding runs along the edges, and the profiles are often curved or beveled . Crown molding at the top, rope detailing, and carved accents are common touches. Nothing about this style is minimal. These cabinets fit naturally in classic kitchens, think warm wood tones, stone countertops, and antique-style hardware. In luxury home designs, they add a formal, built-over-time feel that shaker cabinets simply don’t replicate. If the kitchen leans traditional or high-end, this cabinet style tends to feel right at home. Shaker Cabinets vs Traditional Cabinets: Key Differences Cabinet appearance shapes the entire feel of a kitchen. Here’s how shaker and traditional styles differ visually from door to frame. 1. Design and Style Shaker: Shaker cabinets focus on simple, functional design. A flat recessed center panel sits inside a square frame with no carving or trim. Clean lines keep the look balanced and work well in many kitchen styles. Traditional: Traditional cabinets highlight decorative detail. Raised panels, carved trim, and crown molding add depth and shadow lines. The layered design gives kitchens a more formal appearance and makes the cabinets stand out. 2. Materials and Finishes Shaker: Shaker cabinets often feature natural wood or smooth painted finishes. If you’re choosing paint colors with white cabinets, neutral tones like grey or light wood work particularly well. These finishes help the cabinets blend easily with different kitchen materials. Traditional: Traditional cabinets often use deeper wood tones, such as cherry or walnut. Finishes may include glazing or lacquer that highlight carved details and trim, giving the cabinets a richer, more decorative look. 3. Cabinet Doors and Panels Shaker: Shaker cabinet doors feature a flat, recessed center panel within a square frame. The simple construction keeps the door profile clean and balanced, making it suitable for both modern and farmhouse kitchens. Traditional: Traditional cabinet doors usually feature raised center panels. Decorative molding or carved edges often appear around the frame, creating stronger depth and giving the cabinets a classic, detailed appearance. 4. Hardware Choices Shaker: Shaker cabinets pair well with simple hardware. Matte black, brushed nickel, or stainless knobs and pulls keep the design clean and understated while supporting the cabinet’s minimal style. Traditional: Traditional cabinets often use decorative hardware such as brass, gold, or antique-finish knobs and pulls. These choices complement the detailed cabinet surfaces and reinforce the classic kitchen style. 5. Cleaning and Maintenance This is where shaker cabinets have a real, practical advantage. The flat recessed panel has almost no areas where grease, dust, and moisture can collect and hide. A damp cloth wipes clean in seconds. Traditional cabinets are the opposite. Every carved edge and molding profile is a groove where cooking residue can settle. Cleaning thoroughly requires a soft-bristle brush or toothbrush to get into those crevices, especially around the raised panel edges and crown molding. For families who cook frequently, this ongoing maintenance commitment is worth taking seriously before choosing the style. I have clients who loved the look of traditional cabinets when they installed them and came to genuinely resent the cleaning by year three. That’s not a knock on the style; it’s just an honest heads-up. 6. Resale Value and Market Appeal From a resale perspective, shaker cabinets are the safer choice in most markets. Their neutral, versatile appearance appeals to a wide range of buyers, and real estate professionals consistently note that transitional and contemporary kitchens tend to photograph better and attract broader buyer interest. Traditional cabinets hold their value well in the right home, a formal colonial or Tudor-style property where the interior architecture supports the style. In a mid-century ranch or a contemporary open-plan home, traditional cabinets can actually narrow your buyer pool. They signal a specific aesthetic that not every buyer shares. This doesn’t mean you should design your kitchen around resale. But if you’re planning to sell within five to ten years, it’s a factor worth knowing. Cost Comparison: Shaker vs. Traditional Cabinets Cabinet cost depends on construction complexity, materials, and installation. Understanding these factors helps you estimate the real budget needed for each style. Cost Factor Shaker Cabinets Traditional Cabinets Estimated Cost (Per Linear Foot – USA) Manufacturing Complexity Simple five-piece construction with flat panels makes production easier and faster. Raised panels, carving, and decorative molding require more detailed manufacturing. Shaker: $60–$650 / Traditional: $150–$1,200+ Material Costs Often available in MDF or solid wood with painted finishes, which keeps costs moderate. Typically built from premium hardwoods like cherry or walnut, increasing overall material costs. Shaker: $60–$200 (stock) up to $1,200+ custom / Traditional: $200–$1,200+ Installation Costs Straightforward designs are quicker to install, reducing labor time. Heavier doors and trim require more labor and precision. Shaker: $100–$450 / Traditional: $150–$500+ Customization Options Easy to customize with paint colors and hardware changes. Detailed molding and finishes increase the cost significantly. Shaker: $150–$650 / Traditional: $300–$1,200+ In most kitchens, shaker cabinets cost less because of their simpler construction, while traditional cabinets often require higher budgets for materials and craftsmanship. Hidden Costs to Watch For The per-linear-foot numbers above cover the cabinets themselves, but there are real additional costs that can catch homeowners off guard. With traditional cabinets, the crown molding installation, custom corbels, and glazing touchups after delivery add up. I’ve seen projects where the “extras” pushed the total budget 20–30% higher than the original quote. Always ask your cabinet supplier for an itemized quote that includes trim, hardware, and finish work. With shaker cabinets, the biggest cost variable is whether you’re buying stock, semi-custom, or fully custom. Stock shaker cabinets from big-box retailers can be perfectly serviceable, but the box construction is often thinner and the hardware is basic. Semi-custom is usually the sweet spot for quality-conscious buyers who don’t want to pay fully custom prices. Which Cabinet Style is Right for You? Choosing between the two comes down to your home’s existing style, budget, and the level of detail that feels right for the space. When Shaker Cabinets Make More Sense Shaker cabinets tend to be the more practical pick for most renovations. Here’s when they’re clearly the better direction. Modern, transitional, or farmhouse interior style Working within a moderate or mid-range budget Low-maintenance cleaning is a priority Smaller kitchen where visual weight needs to stay light Planning to resell with a broad buyer appeal in mind Clean, functional look preferred over decorative detailing Shaker cabinets work well in most renovation scenarios. They’re versatile, practical, and easy to style around. When Traditional Cabinets are a Better Choice Traditional cabinets make sense in specific situations, when the home and budget genuinely support the style. Classic, formal, or luxury interior design direction Large kitchen that can carry heavier visual weight Crown molding and ornate fixtures are already present Budget supports higher manufacturing and installation costs Detailed woodwork and craftsmanship are a priority Comfortable with regular cleaning and maintenance upkeep Traditional cabinets are worth it in the right setting, when the home, budget, and design vision all align. Can You Mix Shaker and Traditional Elements? Yes, and this is increasingly common in high-end kitchen renovations. A popular approach is using traditional-style cabinets for the perimeter cabinetry and a shaker-style island, or vice versa. The contrast can look intentional and layered when the hardware and color palette tie both elements together. I’ve completed a handful of kitchens where the upper cabinets were inset shaker in a warm white, and the lower cabinets were a more traditional raised-panel design in a walnut stain. The mix worked because both pieces shared the same hardware finish and the same countertop material. When the bridge elements are consistent, mixing profiles reads as a design choice rather than an inconsistency. If you’re considering a mixed approach, stick to one unifying element, whether that’s hardware finish, color family, or countertop material, and let everything else flex around it. Final Thoughts By now, you should have a clearer understanding of how shaker cabinets vs traditional cabinets compare in real kitchens. Shaker cabinets bring simple lines, versatile design, and practical maintenance that works well in many homes. Traditional cabinets offer deeper detail, raised panels, and a more formal presence that suits classic interiors. After years of building and installing cabinets, I’ve found that the right choice always depends on the kitchen itself. You want cabinets that match the home’s character, hold up to daily use, and fit comfortably within your budget. When those elements align, the result feels natural and lasting. Take a good look at your space before deciding, and if this guide helped you narrow the choice, share which cabinet style you’re leaning toward. Frequently Asked Questions Do shaker cabinets increase home value? Shaker cabinets often help with resale because they suit many kitchen styles. Buyers usually prefer simple designs that feel current, making these cabinets a safer option when preparing a home for sale. Are traditional cabinets going out of style? Traditional cabinets are not outdated, but they work best in homes with classic architecture. In modern layouts, they can feel heavy, so their appeal depends on how well they match the overall design. Which cabinet style lasts longer? Both styles can last decades if built with quality materials. Durability depends more on construction, wood type, and hardware than the door style itself, along with proper care and regular maintenance. Can shaker cabinets look high-end? Yes, shaker cabinets can look upscale when paired with premium finishes, solid wood, and good hardware. Details like soft-close hinges and custom paint colors can make a big difference in overall appearance. Are traditional cabinets harder to clean? Traditional cabinets need more effort to clean due to grooves and carved details. Grease and dust settle into these areas, so regular wiping and occasional detailed cleaning help keep them in good condition. What kitchen styles suit shaker cabinets best? Shaker cabinets fit modern, transitional, and farmhouse kitchens. Their simple design blends easily with different materials and colors, making them a flexible option for many home layouts.
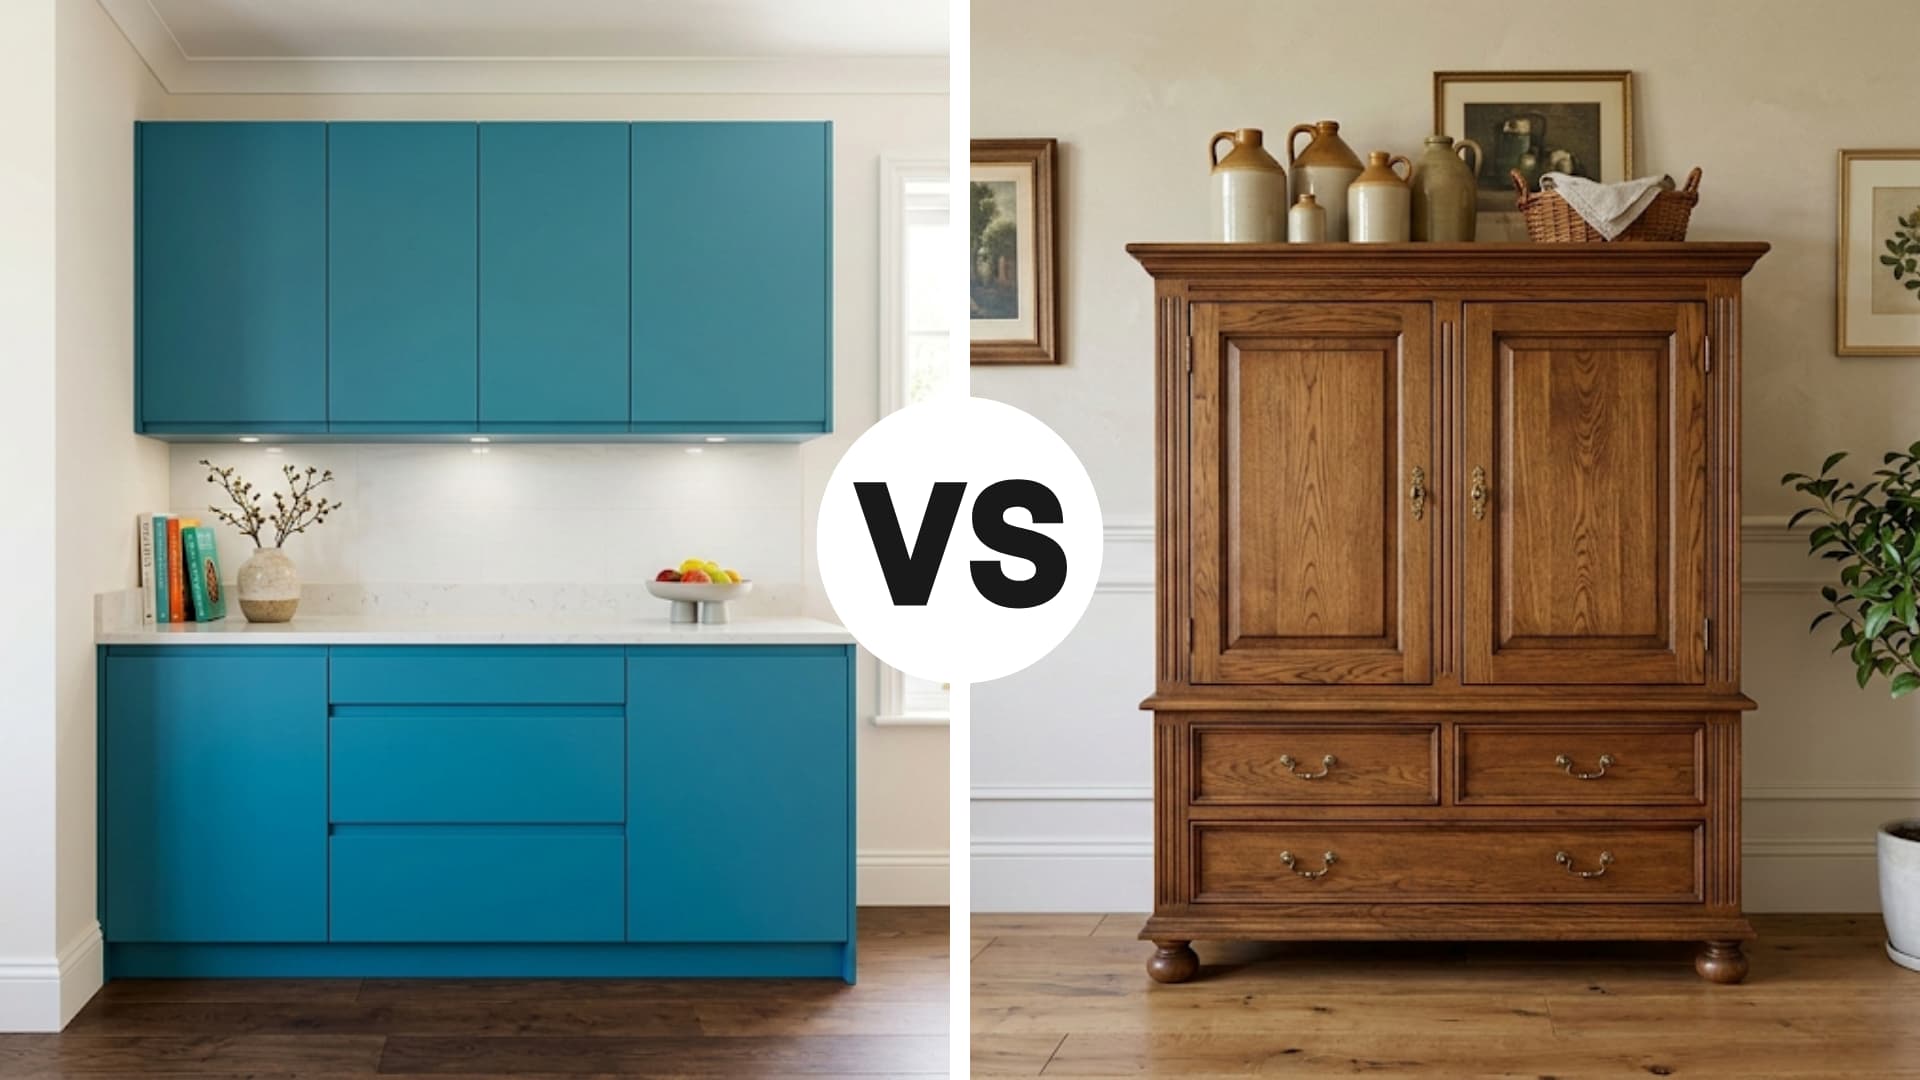
Standing in the middle of a renovation and realizing you have been using the wrong word for years, that is a specific kind of humbling moment. The cupboard vs cabinet debate sounds simple until you are actually standing in a showroom trying to explain what you need. After two decades of building custom furniture and fielding this exact question from clients, I can tell you the confusion makes complete sense. These two words get used interchangeably in showrooms, contractor bids, and online listings all the time, often by people who should know better. I will cover definitions, key differences, and regional uses to help you figure out which one belongs in your home. What Is a Cupboard? A cupboard is a freestanding storage unit with doors and shelves, designed to keep household items neatly out of sight. Unlike cabinets, cupboards are not fixed to a wall, and in my experience, that flexibility is what makes them so practical for everyday homes. They carry a traditional, classic character that works beautifully in farmhouse or vintage-inspired spaces where warmth matters more than sleek modern design. You will find them in kitchens for food and dishes, in bedrooms for clothes or linens, and in hallways for general storage. Common types include food cupboards, linen cupboards, and under-stair cupboards for tucked-away hidden storage. What Is a Cabinet? A cabinet is a built-in or wall-mounted storage unit with doors and shelves, designed to sit permanently in a space. In most homes I work with, cabinets are fixed to walls or fitted under counters, giving kitchens, bathrooms, and home offices a clean, structured look that freestanding furniture simply cannot replicate. What I find most useful about cabinets is how many forms they take. Wall cabinets sit above counters, base cabinets sit on the floor, and tall pantry cabinets handle the heavy-duty storage. Each cabinet style fits a specific room and purpose, making cabinets one of the most versatile storage solutions in any home. Cupboard vs. Cabinet: Key Differences Explained Cupboards and cabinets may look similar, but they differ in design, function, size, installation, shelving, and build quality. Here is a closer look at how each one stands apart across every category: 1. Design and Construction Cupboards: Usually freestanding pieces with simple door styles and basic finishes. They have a more traditional look and are often made from solid wood with minimal detailing. Cabinets: Typically built-in with custom finishes and more design options. You can choose from various door styles, materials, and hardware to match your space perfectly. 2. Function and Purpose Cupboards: Great for storing everyday items like food, clothes, or linens. They keep things hidden and organized without needing much thought about layout or accessibility. Cabinets: Designed with specific storage needs in mind. Think kitchen cabinets with pull-out drawers or bathroom cabinets with built-in organizers — function drives every design decision. 3. Size and Placement Cupboards: Usually tall and vertical, making good use of floor space. They stand alone in a room and can be moved around without any hassle or tools. Cabinets: Come in all sizes and can be placed horizontally or vertically. They are designed to fit a specific wall or space, so sizing is planned from the start. 4. Installation Cupboards: No installation needed. They sit on the floor and can be moved whenever you want. Perfect if you rent or like to rearrange your space often. Cabinets: Permanently mounted to walls or fitted under counters. Once they are in, they stay put. This makes them sturdier but harder to move or replace later. 5. Shelving Cupboards: Usually come with fixed shelves in a set layout. You work around what is already there, which keeps things simple but limits how you organize your stuff. Cabinets: Often have adjustable shelves you can move up or down. This makes it easy to store items of different sizes without wasting any space inside. 6. Material and Build Cupboards: Typically built from solid wood with straightforward construction. They are durable and have a classic feel, but they do not usually come with high-end finishes or custom options. Cabinets: Often custom-built with better quality materials and finishes. You can go as simple or as detailed as your budget allows, making them feel more polished overall. Cupboard & Cabinet: Cost Comparison Budget plays a big role in this decision, and the cost difference between cupboards and cabinets can be significant. Cabinets are generally more expensive because they are custom-built, professionally installed, and designed to fit your specific space. Here’s a rough idea of what to expect: Stock cabinets (pre-made, basic finishes): $100 – $300 per linear foot Semi-custom cabinets: $150 – $650 per linear foot Custom cabinets: $500 – $1,500+ per linear foot Installation costs are separate and can add another $50 – $250 per cabinet, depending on your location and contractor. Cabinets are a long-term commitment. Once they’re installed, they stay. Cupboards are generally more affordable because they are freestanding and require no professional installation. Cupboards give you flexibility; you can rearrange, repaint, or relocate them as your needs change.: Basic freestanding cupboards: $80 – $400 Mid-range solid wood cupboards: $400 – $1,000 High-end or antique-style cupboards: $1,000 – $3,000+ If you rent your home, a freestanding cupboard is a smarter investment, you can take it with you when you move. Cabinets stay with the property. Cupboard & Cabinet in Different Rooms The room you’re furnishing changes everything. Let me walk you through how cupboards and cabinets are used differently across the most common spaces in your home. 1. Kitchen The kitchen is where this debate gets the most heated. In the US, you’ll almost always hear “kitchen cabinets”; they’re built-in or wall-mounted and designed for maximum efficiency. But in the UK, the exact same storage unit is called a “kitchen cupboard.” Both hold your dishes, pots, and pantry items. The key difference is feel; cabinets come across as permanent and polished, while cupboards lean toward tradition and functionality. That polished finish is also why decisions like kitchen cabinet paint color matter so much more with cabinets than with cupboards. If you’re renovating a modern kitchen, cabinets are almost always the standard choice. 2. Bathroom In the bathroom, cabinets clearly take the lead. Think medicine cabinets mounted above the sink or vanity cabinets installed under the counter. They’re sleek, space-saving, and built to hold toiletries, towels, and cleaning supplies neatly out of sight. A freestanding cupboard in the bathroom isn’t impossible, but it’s far less common. You might find one in a larger bathroom used to store extra linens or backup supplies when built-in storage simply isn’t enough. 3. Dining Room In the dining room, both terms show up, but with very different purposes. A cabinet here usually means a display cabinet or china cabinet with glass-paneled doors, used to showcase your fine dishes, glassware, or decorative pieces. A cupboard, on the other hand, is a closed storage unit meant to keep things tucked away and out of sight. The rule of thumb is simple: if you want to display, go with a cabinet. If you want to store and hide, go with a cupboard. 4. Pantry A pantry sits right in the middle of this debate. It’s essentially a large cupboard or a dedicated cabinet space used purely for food storage. In modern homes, pantry cabinets are built-in units with adjustable shelves and pull-out drawers. In older or more traditional homes, a pantry cupboard is a freestanding wooden unit with fixed shelves. Either way, the goal is the same: keeping your dry goods, canned items, and snacks organized and easy to reach whenever you need them. 5. Laundry Room The laundry room is often overlooked in storage planning, but it matters more than most people think. Wall-mounted cabinets above the washer and dryer are the most popular choice; they keep detergents, fabric softeners, and cleaning supplies close but safely out of reach. A freestanding cupboard also works well in a larger laundry space for storing towels or extra supplies. The decision really comes down to your space size, your budget, and whether you want permanent or flexible storage. Which One Should You Choose for Your Home? Your home style plays a big role in choosing between cupboards and cabinets. The right choice should match your design, mood, and overall aesthetic. Modern or contemporary home: Go with cabinets. Their clean lines, adjustable shelves, and built-in finish will complement your space perfectly. Farmhouse or traditional home: A freestanding cupboard adds warmth, character, and a timeless charm that built-in cabinets often lack. Transitional style (mix of modern and classic): You can actually use both, cabinets in the kitchen and bathroom, cupboards in the dining room or bedroom. When you match storage to your home style, everything feels intentional and balanced. Choose what fits your space best, and your home will feel complete. Pro Tip: Mixing both is perfectly fine. Use built-in cabinets where you need efficiency and a polished look, and bring in a statement cupboard where you want personality and warmth. Cupboard, Cabinet, and Other Storage: How Do They Compare? Many storage terms sound similar, which can make things confusing fast. Here’s a clear comparison: Storage Type Primary Use Design & Features Where It’s Found Cupboard Store dishes, food, or linens Small, enclosed unit, typically with shelves Kitchens, hallways, or utility rooms Cabinet General-purpose storage Can be freestanding or built-in, with doors/drawers Kitchens, bathrooms, offices Closet Store clothes and accessories Built-in space, typically with hanging rods or shelves Bedrooms, entryways, hallways Pantry Store food and kitchen supplies Larger than a cupboard, purpose-built for food Kitchens or nearby rooms Drawer Store smaller items Horizontal pull-out, part of a cabinet or standalone Kitchen cabinets, desks, and nightstands Wardrobe Store clothes Freestanding, often with hanging rods and shelves Bedrooms, dressing rooms Knowing these distinctions makes it easier to shop smarter, talk to contractors confidently, and choose the right storage for every room. Final Thoughts So now you know, a cupboard vs. a cabinet isn’t exactly the same thing, even though people treat them like they are. From how they’re built to where they’re placed and what they store, each has its own personality. If you want something sleek, built-in, and modern, a cabinet is your best bet. If you prefer something freestanding, traditional, and easy to move around, go with a cupboard. And if you’re in the UK, well, you’re probably calling both a cupboard anyway, and that’s perfectly fine! I hope this guide helped clear things up for you. Have thoughts or questions? Drop a comment below, I’d love to hear what you prefer: cupboards or cabinets!





