


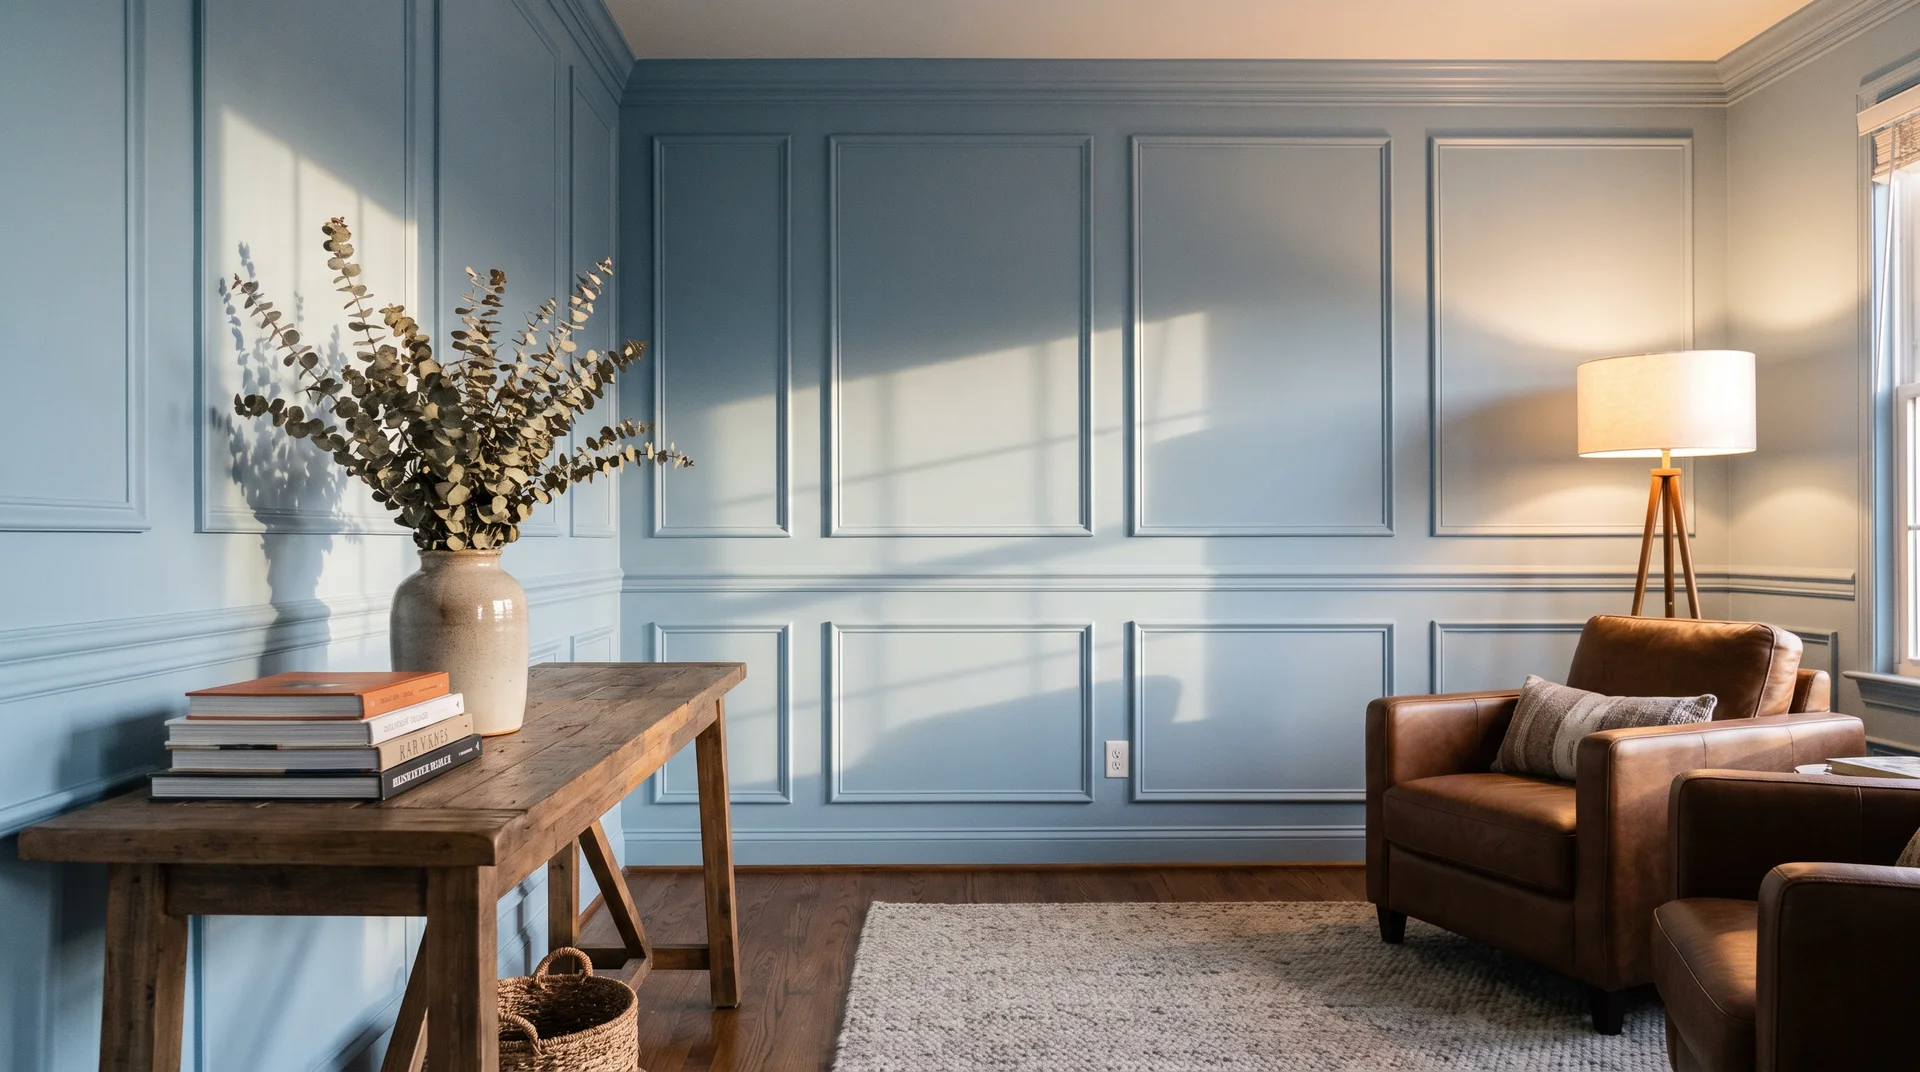
A DIY accent wall with trim and paint is one of the highest-impact home upgrades you can complete in a single day without calling a contractor. The materials cost a fraction of what most people expect, the tools are basic, and the result is the kind of architectural detail that makes a room look intentionally designed rather than casually assembled. This guide covers exactly how to build a picture frame trim accent wall from start to finish, the same method I used on a 9-by-14-foot recessed wall next to my front door that completely changed how the entryway felt. Whether this is your first time picking up a brad nailer or your tenth weekend project, the process is more forgiving than it looks and more rewarding than almost anything else you can do to a wall in a day. Tools and Materials for Your DIY Accent Wall Before the first nail goes in, having everything on the work surface saves multiple trips and keeps the project moving at the pace it should. Speed square Contractor framing square Angle finder Tape measure Chop saw / miter saw Brad nailer CA glue with accelerator Stud finder DAP Patch and Paint spackle Random orbital sander Caulk gun and paintable caulk Painter’s tape and drop cloths Respirator1x2 MDF trim, 10-foot lengths How to Build a DIY Accent Wall With Trim and Paint in 10 Steps Everything in this project follows a sequence that builds on itself. Skipping steps costs more time fixing problems later than the step itself would have taken. Step 1: Choose Your Wall and Plan Your DIY Accent Wall Layout Recessed walls, walls beside entryways, and walls directly opposite doorways produce the strongest visual impact. The wall I worked on sat in a recessed area next to my front door, approximately 9 feet tall by 14 feet long, and it changed how the whole entryway felt. Sketch the layout on paper first and decide between a picture frame system, a grid pattern, or a mixed panel arrangement before touching the lumber. And if you are wondering whether accent walls are out of style, the picture frame trim version has been gaining ground in US home design since the early 2020s and shows no sign of slowing. What dated was the single painted stripe with nothing behind it. Trim-based detail is architecture, not a trend. Step 2: Measure the Space and Calculate Your Materials Take the total square footage of the wall, add a 20% waste factor, and round up to the nearest whole number of 10-foot MDF lengths. Running short mid-installation costs you an afternoon. MDF comes off the shelf straight, stays that way during installation, and costs less per linear foot than solid wood. Step 3: Locate and Mark Your Studs Run the stud finder across the full wall before marking a single trim position. Stud locations determine where you can fasten securely and shape where trim sections begin and end. Mark every stud with painter’s tape at the top. For sections where no stud is reachable, CA glue with accelerator holds MDF panels firmly without a nail. Step 4: Set Up Your Chop Saw and Start Cutting Elevate the saw before making a single cut. Kneeling for dozens of cuts adds real fatigue to a project that already demands a lot. Use the angle finder to verify wall corners before setting the miter. Drywall corners often run closer to 46 degrees than 45. Mark cuts directly on the board rather than transferring tape measurements. Step 5: Install the Outer Frame First The outer frame defines the entire picture-frame accent wall. Any error in the perimeter carries through the whole wall. Start with the horizontal top and bottom lengths, then add the vertical sides. Check each board for level. For spans longer than 10 feet, cut 45-degree angles and overlap them. The angled splice disappears under paint. A butt splice never does. Step 6: Install the Interior Trim Sections With the outer perimeter secured, cut the interior horizontal and vertical panels that create the framed sections. Work from the center outward to keep spacing symmetrical on both sides. Factory drywall corners are slightly rounded, so boards butting into corners need a small back-edge adjustment with a utility knife before they sit flush against the wall. Step 7: Caulk All Edges of Your DIY Trim Accent Wall Every gap between MDF and drywall will show through paint. Apply a thin bead of paintable caulk along every edge where trim meets drywall, and smooth it with a damp finger before it skins over. Caulk corners where boards meet, and anywhere trim meets the adjacent wall. The difference is visible from across the room. Step 8: Fill Nail Holes and Sand the Surface Smooth Apply DAP Patch and Paint spackle to every nail hole, splice joint, and trim intersection. It dries in 30 minutes, does not shrink, is sandable, and needs no primer before paint. Once dry, sand every filled area with 320-grit paper until no seam is detectable by touch. Wipe all dust off the wall before taping for paint. Step 9: Tape Off the Space and Paint Your Modern Accent Wall Flat-finish paint adds depth that eggshell and satin cannot match. Benjamin Moore Regal Select in flat covers in two passes. Spray with the Wagner Flexio 3000, thinned 5% to 10% with water, for full coverage in about 20 minutes per coat. Remove painter’s tape while the second coat is slightly damp, not fully dry. Step 10: Remove Tape and Reinstall Outlet Covers Pull tape back at a 45-degree angle rather than straight away from the wall. Work the full run slowly rather than pulling in one fast strip. Reinstall outlet covers once the paint is dry. A painted-over cover is the first thing any trained eye notices. Step back from the doorway. If the proportions landed, you will know. Tips to Get a Professional-Looking Accent Wall Small details often make the biggest difference when building an MDF accent wall. These simple habits help avoid visible mistakes and give the finished design a cleaner, more polished look. Buy 10 to 15% extra MDF for mistakes: Extra material covers imperfect cuts, split edges, and measurement errors. It also saves you from stopping the project for an unexpected store run. Label every cut piece before installation: Mark each MDF piece on the back as soon as it is cut. Similar-looking boards can easily get mixed up and cause unnecessary rework. Apply and smooth caulk right away: Work in one direction and smooth the bead immediately. Once caulk starts drying, going back over it can create ridges that show through paint. Allow paint coats to dry before removing tape: Removing painter’s tape too early can pull up wet paint and leave uneven edges. Let the first coat fully cure for cleaner lines. Conclusion A DIY accent wall with trim and paint is the kind of project that permanently changes how a room reads, not temporarily. The wall you are looking at right now is one day of work away from looking like something a designer charged four figures to produce. The materials are affordable, the tools are accessible, and the process outlined here removes every guessing point that turns a motivated homeowner into a frustrated one halfway through. Pick the wall. Buy the trim. Cut the angles. The transformation that follows is not subtle, and the next person who walks into that room will ask who you hired. Tell them you did it yourself, because you did. Frequently Asked Questions What is the most trending color for a DIY accent wall? Deep olive green, warm beige, charcoal gray, muted terracotta, and dark navy are the top accent wall colors, pairing well with natural wood furniture and warm lighting throughout US homes. Can a DIY Accent Wall Make a Small Room Look Bigger? Yes. Vertical trim lines draw the eye upward and add perceived ceiling height. Lighter colors on the accent wall combined with balanced furniture placement improve the overall sense of space considerably. How Much Does a DIY Accent Wall Cost Compared to Hiring a Contractor? A DIY trim accent wall typically runs $150 to $400 in materials. Professional installation on the same wall costs $2,000 to $3,500, making the DIY route a significant saving for most homeowners.

That dark spotting around the grout can make a clean bathroom feel neglected fast. If you are trying to figure out how to remove mold from shower surfaces, the first step is knowing what is safe to use and what might make the problem worse. Shower mold usually grows because moisture, soap residue, and poor airflow give it the right place to spread. I know it can feel annoying when the same spots return after cleaning, but the cause is often easier to fix than it looks. You’ll learn how to spot common mold signs, choose the right cleaner for tile, grout, and caulk, clean safely, and build small habits that help keep the shower drier longer. Is Shower Mold Actually Dangerous, or Just Annoying to Look At? A few dark specks on tile or glass are usually more of an eyesore than a health emergency, and you can often clear them yourself with a cleaner, a stiff brush, and a few minutes of drying time. A mildewy shower curtain or a damp bath mat is even easier: wash it, dry it, done. Pay closer attention when the mold keeps returning within days, the bathroom smells musty even after it has fully dried, or the caulk has gone soft, cracked, or started peeling away from the tile. Loose tiles, staining creeping onto nearby walls, or anyone in the house managing asthma or allergies are all reasons to treat it as more than a cosmetic problem. A dull or stained bathroom floor tile finish nearby can point to the same kind of moisture damage, so it is worth checking both surfaces at once. Shower Mold Types and What’s Actually Growing in There Mold shows up in different colors depending on what it is feeding on, but the root cause is almost always the same combination: leftover moisture and not enough airflow. Knowing which one you are dealing with makes the cleanup faster. Black mold: The most common offender on grout, caulk, and ceiling corners, and it settles wherever water sits the longest. Green mold: Tends to appear near drains and on grout lines where soap scum has had time to build up. Pink or orange film: Usually not true mold but a bacterium (Serratia marcescens) that thrives on soap residue near drains and shower floors, still worth cleaning promptly. White mold: Fuzzy or chalky patches that often hide behind fixtures or in corners with a slow, unnoticed leak. Most of this starts small and stays manageable if you catch it early. A patch that keeps spreading, or a smell that lingers no matter how much you clean, is usually a sign of moisture hiding somewhere you cannot see. How to Remove Mold From Shower Areas Three cleaners handle almost everything a shower can throw at you, and none of them require a trip past the cleaning aisle’s fanciest (and priciest) bottles. The method is always the same shape: apply, let it sit, scrub, rinse, and dry the area completely so moisture has no reason to linger. Task Removing mold from shower tile, grout, glass, and caulk Time 20–90 minutes, depending on how set-in the mold is Tools Spray bottle, stiff grout brush or old toothbrush, gloves, clean cloth Frequency Spot-clean weekly; deep-clean monthly Difficulty Easy ⚠️ Safety Note: Run the bathroom fan or crack a window while cleaning, since vinegar and hydrogen peroxide fumes can irritate eyes and airways in a small space. Never combine bleach with vinegar or ammonia-based cleaners. The mix releases chlorine gas, which is genuinely dangerous to breathe. Use one cleaner at a time and rinse the surface before switching products. Method 1: Vinegar for Deep Penetration Distilled white vinegar is my go-to for grout and tile corners because the acidity loosens mold sitting in porous, hard-to-reach spots, the same way it cuts through a hard-water ring on a faucet. What You Need: distilled white vinegar, a spray bottle, a firm grout brush or old toothbrush, warm water, a clean cloth, and gloves. Pour undiluted vinegar into a spray bottle. Full strength works better on grout and tile edges than a watered-down mix. Saturate the moldy areas, focusing on grout lines, corners, and the spots around fixtures and drains where water sits longest. Let it sit for at least 1 hour so the acid has time to break the mold down. Scrub with the grout brush or toothbrush. Rinse thoroughly with warm water, then wipe dry with a clean cloth. Leave the door or curtain open so the area can air out completely. Best For: grout, tile corners, shower walls, drain areas, and door tracks. Skip it on natural stone like marble, limestone, or travertine, since the acid can etch the surface. Method 2: Hydrogen Peroxide for Stain Removal and Disinfecting When mold has left behind a dark stain rather than just a fuzzy patch, 3% hydrogen peroxide is the better pick, since it lifts discoloration the way a good stain remover saves a white shirt. What You Need: 3% hydrogen peroxide, a spray bottle, a stiff brush, warm water, a clean cloth, and gloves. Spray the moldy area until it is fully wet, including grout lines and stained corners. Let it sit for 20 to 30 minutes. Light bubbling is normal, as the peroxide breaks down buildup on the surface. Scrub with a stiff brush or toothbrush. Rinse with warm water and dry the area completely with a clean cloth. Best For: stained grout, tile, shower corners, and drain areas. For a stubborn stain, sprinkle a little baking soda over the wet, peroxide-soaked grout before scrubbing. The mild abrasion helps lift what the peroxide alone leaves behind. Method 3: Baking Soda Paste for Scrubbing Power Baking soda is the gentlest option here, and it is the one I reach for when mold is tangled up with regular soap scum rather than sitting on its own. What You Need: baking soda, a small bowl, water, a spoon, a stiff brush, warm water, a clean cloth, and gloves. Mix ½ cup baking soda with a few tablespoons of water until it forms a thick paste, adding more baking soda if it feels runny. Apply the paste directly to moldy grout or tile and let it sit for 10 to 15 minutes. Scrub gently with a stiff brush, focusing on grout lines, corners, and shower floors. Rinse well and dry the surface with a clean cloth. Best For: surface mold mixed with soap scum, grout lines, shower floors, and mild odor issues. Quick Cleaner Comparison: What Should You Reach For? Cleaner Best For Avoid Vinegar Grout, tile corners, routine upkeep Natural stone (marble, limestone, travertine) Hydrogen peroxide Stains, disinfecting, caulk Colored fabrics that may fade, so spot-test first Baking soda paste Soap-scum buildup, mild odor, gentle scrubbing Very delicate or scratch-prone surfaces If the mold is light, the baking soda paste is usually enough on its own. Grout and corners tend to respond best to vinegar, and stains call for hydrogen peroxide. That is really the whole playbook for how to remove mold from shower surfaces without overthinking it. Stick to one cleaner per session, and always finish by drying the shower fully. Why Mold Keeps Growing Back in Your Shower Moisture that never fully dries: Steam settles on tile, grout, glass, and caulk after every shower, and mold thrives on surfaces that stay damp. A bathroom fan that is not pulling its weight: A weak exhaust fan or a closed door traps humid air inside, which gives mold exactly the environment it wants. Soap scum and body oils: Mold feeds on this residue the same way it would on any organic buildup, and grout lines collect it fastest. Cracked grout or failing caulk: Water seeps behind damaged grout or caulk and grows mold you cannot see or reach with surface cleaning alone. Installing moisture-resistant beadboard panels along the lower wall is one way to keep water from soaking into the wall itself. Your Shower’s New Maintenance Schedule Mold is genuinely bad at surviving a routine, the same way a great skincare habit beats an occasional splurge product, and a little upkeep after every shower beats one big scrub-down a month. Schedule Quick Tasks After every shower Squeegee glass and tile, run the fan for 20–30 minutes, leave the curtain or door cracked open Weekly Spot-clean grout, wash the bath mat, wipe down corners and caulk lines Monthly Deep-clean grout, check caulk for gaps, clean the exhaust fan cover Yearly Reseal grout if it is due, replace failing caulk, check for any hidden leaks, and consider repainting shower tile if it still looks dull once everything else is clean A dehumidifier earns its keep in a bathroom with weak airflow, and fixing a slow drip around a faucet or showerhead the day you notice it saves you a much bigger cleanup later. If you are rethinking the whole space, better airflow often starts with smarter small bathroom layouts that leave room for the fan and door to actually do their job. When a Mold Problem Needs a Professional, Not a Sponge Call in a mold remediation professional when the mold covers a large area, keeps coming back after repeated cleaning, or the bathroom has a musty smell you cannot trace to a visible spot. These are signs of trouble beyond the surface: Soft or bubbling drywall Tiles that have come loose Staining spreading onto nearby walls or the ceiling Flooring that stays damp with no obvious source A professional can check for damage behind the walls, subfloor issues, plumbing leaks, and failed grout or caulk, and it is worth calling one quickly if anyone in the home has a strong reaction to mold exposure. Frequently Asked Questions Can I shower right after cleaning with vinegar or hydrogen peroxide? Rinse the treated area well and let the bathroom air out for a bit first, especially if fumes are still noticeable. A quick rinse of the cleaner is not the same as a full shower with steam, which can reactivate lingering residue. Will mold come back if I only clean the caulk and skip the grout? Likely, yes. Caulk and grout usually mold at the same time because they sit in the same damp zone, so treating one and ignoring the other just gives the mold a place to regroup. Does a magic eraser work on shower mold? It can lift light surface staining on tile and glass, but it will not reach mold sitting inside porous grout the way a vinegar or peroxide soak does, and the abrasive texture can dull glossy tile over time. Can mold permanently stain grout even after it’s removed? Yes, mold can leave a shadow behind after it is dead and gone, especially on light-colored grout. At that point, a grout stain remover or a fresh coat of grout sealant is a better fix than more scrubbing. Why does my shower smell musty even though I don’t see any mold? The mold is often hiding somewhere you cannot see, like behind a caulk line, under a loose tile, or inside a slow leak near the drain. A lingering smell with no visible source is one of the clearest signs it is time to call a professional. To Sum Up Shower mold is easier to handle when you treat the cause, not just the spots you can see. I’d start with safe cleaning, then make drying and airflow part of your routine. Vinegar can help with grout, hydrogen peroxide can lift darker stains, and baking soda paste can scrub away buildup without harsh fumes. You also want to watch cracked caulk, damp towels, weak fans, and musty smells because they can point to a bigger moisture issue. Learning how to remove mold from shower areas helps you clean smarter and keep the bathroom fresher between deep cleans. Try these tips in your own shower, then share what worked for you in the comments.
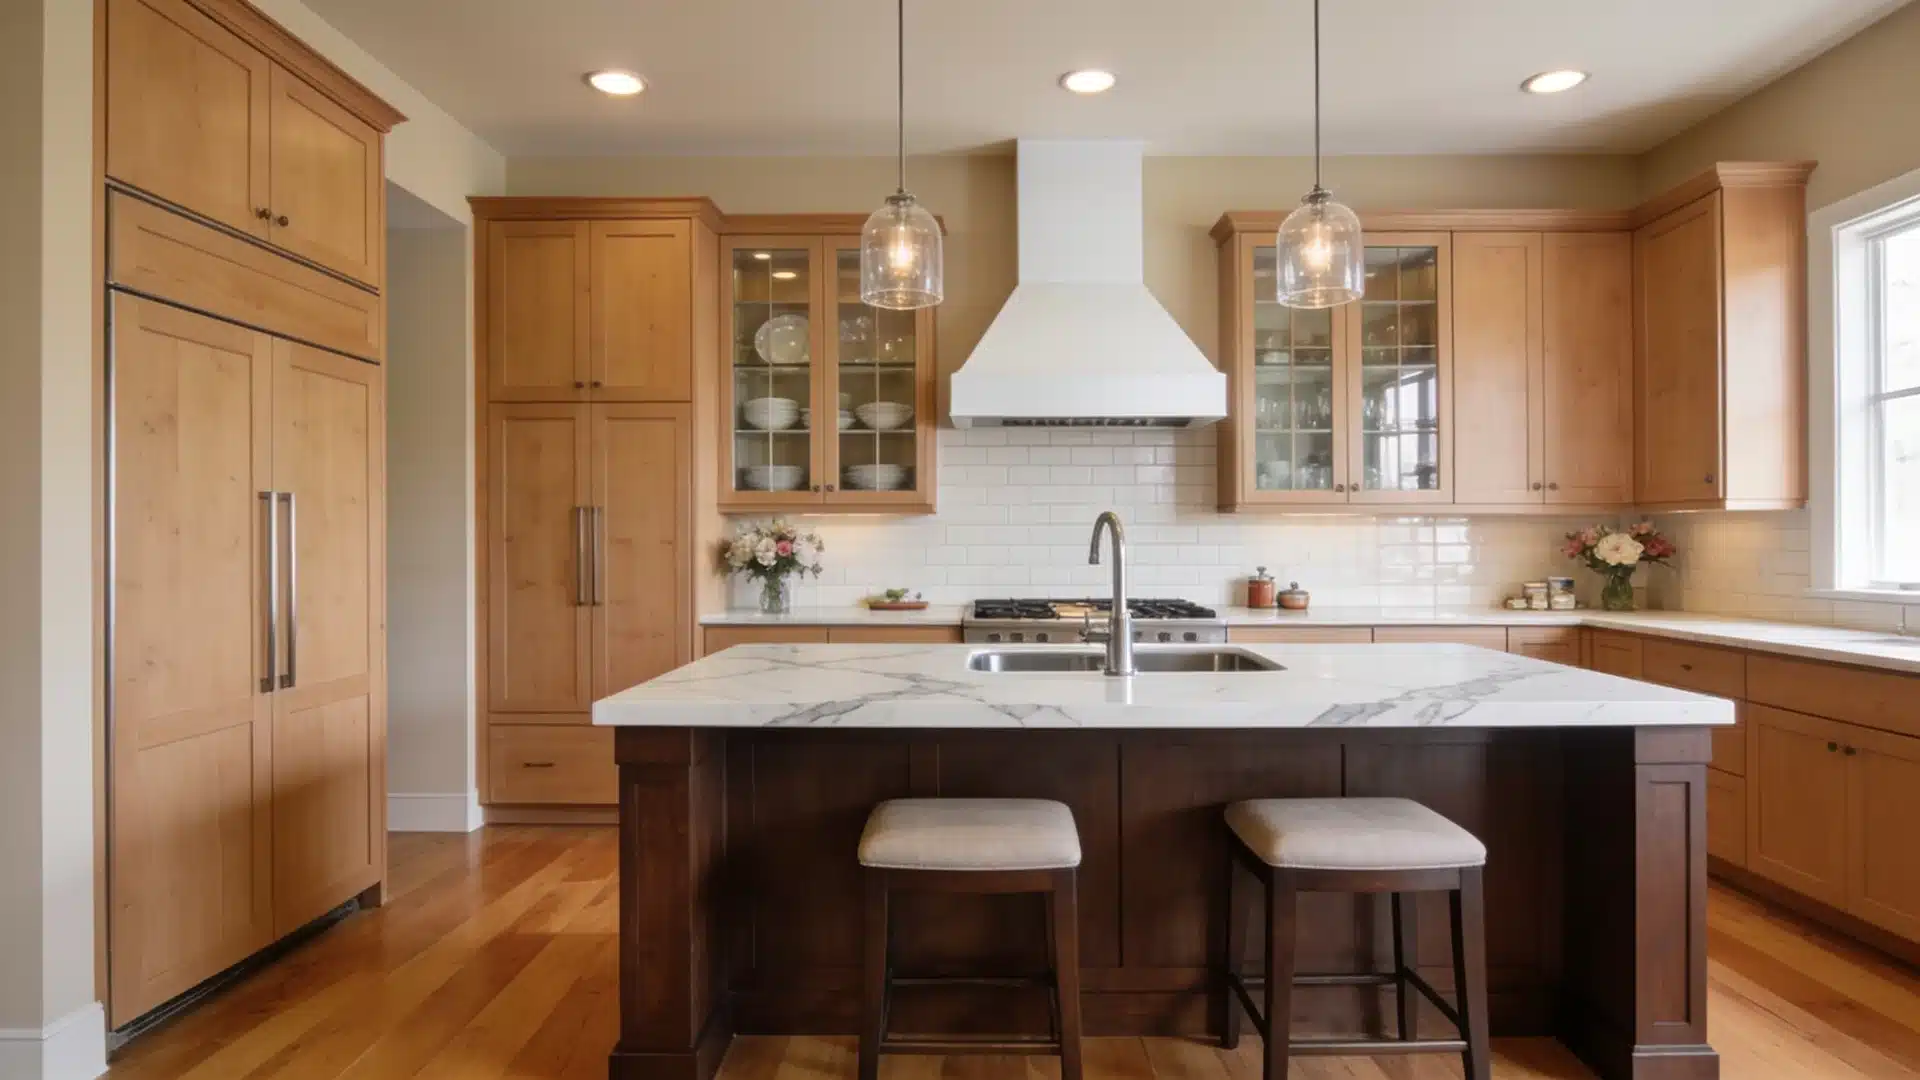
Kitchen remodel prices can feel hard to pin down, especially when every quote seems to tell a different story. If you are asking how much a 10×10 kitchen remodel should cost, the answer depends on the level of finishes, layout changes, and labor involved in your project. I know that number can still feel broad, but it becomes easier once the budget is broken into cabinets, countertops, labor, flooring, appliances, and surprise costs. A 10×10 kitchen may be compact, yet small choices can quickly change the final price. The goal here is to help you read estimates with more confidence and spot where the money really goes before the project begins. Cost Note: Figures in this article are estimates based on national averages and current 2026 tariff data. Actual costs vary by region, contractor, and material sourcing. Always get at least three quotes before committing to any project above $1,000. What a 10×10 Kitchen Really Means A 10×10 kitchen is about 10 feet by 10 feet, or roughly 100 square feet. In remodeling, it’s less a real room shape and more a shared measuring stick. Contractors and cabinet brands use it to estimate cabinet packages, material needs, and labor because it holds still long enough to compare quotes fairly. A typical 10×10 estimate assumes about 20 linear feet of combined cabinet, base, and wall space, so your actual number will vary depending on whether your kitchen needs more or less. A 10×10 kitchen remodel usually includes: Cabinets and hardware Countertops Sink and faucet Appliances Flooring Backsplash Lighting Labor Demo and cleanup That’s the skeleton. What determines whether your total lands near $15,000 or near $55,000 is everything layered on top of it. How Much Should a 10×10 Kitchen Remodel Cost Cabinets, labor, countertops, appliances, and finish details are what actually move the number on your quote. Think of this the way you’d think of a beauty routine: a few items do most of the heavy lifting, and the rest is where you either save or splurge. 1. Cabinets and Hardware Cabinets are almost always the highest single cost in a kitchen remodel, the same way a great coat anchors an outfit and everything else gets built around it. Your price depends on whether you keep the existing boxes, buy stock cabinets, go semi-custom, or go fully custom. If clean lines and hidden hardware appeal to you, leaning into a minimalist cabinet style can actually narrow down this decision rather than complicate it. Hardware matters too. Pulls, knobs, soft-close hinges, and drawer systems add up fast once you start picking finishes. Cabinet Type Estimated Cost Refacing or refinishing $400 to $1,800 Stock cabinets $2,000 to $8,000 Semi-custom cabinets $4,000 to $14,000 Custom cabinets $10,000 to $30,000+ If the boxes underneath are still solid, refacing is the equivalent of a good tailor instead of a whole new wardrobe. If the layout genuinely doesn’t work for how you cook, the replacement earns its price. 2. Countertops Countertop cost depends on material, edge profile choice, thickness, and square footage. A 10×10 kitchen doesn’t need much counter space, but material choice still swings the budget hard. Countertop Material Estimated Cost Laminate $1,000 to $2,500 Butcher block $2,000 to $5,000 Granite or quartz $2,500 to $5,000 Marble, quartzite, or porcelain $3,500 to $7,500+ Quartz and granite tend to be the sweet spot: durable, timeless, and not the thing that blows your budget the way a full marble slab can. If the look still calls to you, a faux marble finish gets you close for a fraction of the price. 3. Appliances A full appliance package (fridge, range, dishwasher, microwave, hood) can eat a large share of the budget fast, especially if you’re replacing everything at once. Appliance Package Estimated Cost Basic package $3,000 to $5,000 Mid-range package $5,000 to $10,000 Premium package $10,000 to $15,000+ Before you buy, confirm whether delivery, installation, haul-away, and hookups are included in the sticker price. That’s usually where the “wait, why is this $400 more” moment happens. 4. Flooring, Backsplash, Lighting, and Fixtures These feel like the accessories of the kitchen, small on paper, but they’re what makes the whole thing look finished instead of half-done. A tile backsplash or a better faucet does for a kitchen what the right lip color does for a whole face: it pulls everything together. Finish Category Estimated Cost Flooring $400 to $2,500+ Backsplash $500 to $3,000+ Lighting and electrical fixtures $1,000 to $5,000 Sink and faucet $500 to $2,500+ This is a good place to control spending without the kitchen feeling unfinished. Pick practical finishes first, then spend more only where the upgrade earns its keep daily. Main Factors That Change the Final Cost Two kitchens with identical square footage can land on very different totals, because what’s happening behind the walls, the material quality, and the local labor market all pull in different directions. 1. Layout Changes Keeping the same layout is the single easiest lever for controlling cost. When the sink, stove, fridge, and dishwasher stay in place, the project requires less plumbing, electrical, and structural work. Move a sink, shift a gas line, or open the kitchen into another room, and you’re bringing in more trades, more labor hours, and often permits. If the layout opens up enough to fit an island, getting the counter height right matters just as much as the square footage. If your layout already works, better storage and finishes usually beat a full rebuild. 2. Material Quality Material choices can quickly turn a remodel from budget-friendly to expensive. Stock cabinets, laminate counters, basic tile, and standard fixtures keep costs down while still looking fresh. Semi-custom cabinets, quartz counters, and better lighting put you in the mid-range. Custom cabinets, premium stone, and designer fixtures raise the number much faster. Spend where it improves daily use, and keep it simple where the upgrade is mostly visual. 3. Labor and Location Labor costs depend heavily on where you live, how busy local contractors are, and how much repair work the kitchen needs beneath the surface. Labor Cost Estimated Range Demo and cleanup $500 to $2,500 Cabinet installation $1,500 to $4,000 Plumbing $1,000 to $4,000 Electrical $1,000 to $5,000 Flooring install $800 to $3,000 Backsplash install $500 to $2,500 Painting and finishing $500 to $2,000 Contractor fee 10% to 20% of the project Older homes tend to reveal their secrets mid-project. Wiring, plumbing, subfloors, and drywall can all need attention beyond the original quote, so budget for surprises the way you’d budget for the fact that your closet always has more clutter than you remember. If the project snowballs into a full-house repaint, the per-room numbers above shift considerably once hallways and bedrooms are added. How Tariffs Can Raise Your Remodel Quote Tariffs are one reason 2026 kitchen remodel prices read higher than older cost guides, and it’s not a small footnote anymore. If suppliers pass those import costs down, your quote rises even if you haven’t changed a single design decision. Cabinet and Wood Product Tariffs Cabinets matter most here because they’re often the biggest line item in a 10×10 kitchen budget. As of 2026, imported wooden kitchen cabinets are subject to a 25% tariff. A planned jump to 50% was delayed and is now scheduled for January 1, 2027, so the 25% rate is what’s actually in effect through the rest of this year. Country-specific rates can run even higher, with cabinets sourced from Vietnam facing a 46% rate, while imported softwood lumber carries a separate 10% tariff. A cabinet package that once cost $3,000 can end up closer to $4,000 once tariffs, freight, and supplier markups are added. Appliance, Steel, and Aluminum Tariffs Appliances can also be affected, since many refrigerators, dishwashers, ranges, and range hoods contain steel or aluminum. A 50% tariff on the steel and aluminum content of several household appliance categories took effect in mid-2025 and has remained a live cost factor since. The exact mechanics of how these duties get calculated have continued to shift through 2026, so ask your retailer directly whether current pricing already reflects the latest tariff structure before you assume a quote is locked in. Before buying, ask whether the appliances are imported, whether the price is locked in, and whether delivery, installation, and hookups are included. Domestic cabinets and appliances can reduce some of this exposure, but compare quality, warranty, and lead time too, not just the tariff line. Permit Costs You Should Plan For Permit and inspection costs depend on your city, the scope of the project, and whether plumbing, electrical, gas, or layout changes are involved. A cosmetic refresh may need almost nothing here. A full remodel usually needs several. Permit or Inspection Item Estimated Cost Basic building permit $100 to $500 Electrical permit $50 to $300 Plumbing permit $50 to $300 Gas line permit $100 to $500 Structural or layout-change permit $500 to $2,000+ Final inspection fees $50 to $250 Total common range $200 to $2,500+ These fees rarely show up in the first quote, so ask before work begins. They protect you later at resale, at inspection, and if you ever file an insurance claim tied to the kitchen. Smart Ways to Lower Your Remodel Cost You can save money without the kitchen feeling cheap. The trick is spending on what affects safety and daily use, and keeping the rest simple: Keep the existing layout to avoid extra plumbing, gas, and electrical work Reface cabinets if the boxes are strong and the layout still works Compare at least three quotes to catch pricing that’s high or unclear Ask for line-item pricing so every cost is easy to review Choose in-stock materials to avoid delays and rush fees Compare domestic and imported cabinets, since tariffs and shipping affect the total Avoid last-minute changes, since they add labor, materials, and delays DIY only the safe tasks, like painting or swapping hardware Don’t cut corners on electrical, plumbing, gas, permits, structural work, or complex cabinet installation. Those are the categories where a cheap fix now becomes an expensive fix later. Hidden Costs Homeowners Often Miss A kitchen remodel looks simple on paper until demo starts and the walls start talking back. Cost Why It Matters Delivery fees May apply to cabinets, counters, appliances, tile, and fixtures Waste disposal Demo debris may need a dumpster or haul-away service Demo surprises Old walls, floors, or cabinets can reveal hidden damage Mold or water damage Leaks can raise repair costs fast Old wiring May need updates for new outlets, lights, or appliances Uneven floors Can make cabinet and flooring installation harder Drywall or subfloor repair Often needed after demo or electrical and plumbing work Temporary kitchen setup A small fridge, microwave, or prep area may add cost 10% to 20% buffer Protects the project if hidden issues appear None of these are avoidable in every case, but they’re much easier to handle when you’ve already set money aside for them. Is a Kitchen Remodel Even Worth the Cost? Yes, when it improves both resale value and how you actually use the space day to day. Buyers notice the kitchen first, the same way people notice a well-organized closet the second they open it. Updated cabinets, counters, appliances, and lighting can make a home feel move-in ready. Minor and mid-range remodels tend to make more financial sense than luxury upgrades, since they cost less and appeal to a wider range of buyers. For daily use, better storage, safer wiring, and newer appliances make cooking and cleaning genuinely easier. Just don’t spend more than your home or neighborhood can support. Sample Budgets for a 10×10 Kitchen Remodel Budget Level What It Can Cover Best Fit $15,000 Same layout, painted or refaced cabinets, basic counters, simple fixtures, light DIY A light refresh when the layout still works $35,000 Stock or semi-custom cabinets, quartz or granite, new appliances, lighting, backsplash, sink, and faucet A mid-range remodel with better function and finishes $60,000+ Custom cabinets, premium counters, upgraded appliances, better storage, possible layout changes Long-term homes or higher-value properties Treat these as a starting point, then compare against a detailed contractor quote so you can see what’s included, what’s missing, and where the number might move. Questions to Ask Your Contractor A kitchen remodel quote can look clear at first, but small details may be missing. Before signing anything, ask direct questions so you know what the price covers and what may cost extra later. Ask these questions before signing so your quote is clear from the start: What is included in the price? Are the cabinets stock, semi-custom, or custom, and where are they made? Does the quote already account for current tariffs? Are delivery, installation, and permits included? How will hidden damage be priced if it turns up mid-project? What is the payment schedule, and what warranty is included? Frequently Asked Questions Does a 10×10 kitchen remodel cost more or less than a full kitchen renovation? A 10×10 remodel is a pricing benchmark, not a smaller project by default. Cost still depends on cabinet grade, materials, and whether the layout changes, not the label itself. What percentage of a 10×10 kitchen budget should go to cabinets? Cabinets typically take up 30% to 40% of the total budget in a 10×10 kitchen, more if you go custom. It’s usually the single largest line item on any quote. Can you write off home remodeling on your taxes? Most remodeling costs aren’t deductible right away for a personal home. Some energy upgrades may qualify for credits, and improvements can affect your cost basis when you sell. Ask a tax professional before claiming anything. What cabinet color is outdated right now? Cool gray, high-gloss white, and heavy espresso can read dated next to older counters. That doesn’t mean avoid them entirely; balanced color, clean hardware, and good lighting matter more than any single trend. Should I remodel now or wait for tariffs to change? Waiting for tariffs to drop is a gamble, since the scheduled 50% cabinet increase is only delayed, not canceled. If your kitchen already needs work, locking in a quote at the current 25% rate is usually the safer move. Final Takeaway A 10×10 kitchen may be small, but the budget can shift quickly once materials, labor, and layout choices come into play. I’d treat the first estimate as a starting point, not the final answer. You’ll get a clearer number when you separate the cost of cabinets, countertops, flooring, appliances, permits, and hidden repairs. Knowing how much a 10×10 kitchen remodel should cost helps you compare quotes, avoid weak budgets, and make smarter choices before work starts. The right plan can keep the project useful, clean, and easier to manage. Try the budgeting tips before getting quotes, and share your remodel questions or plans in the comments.
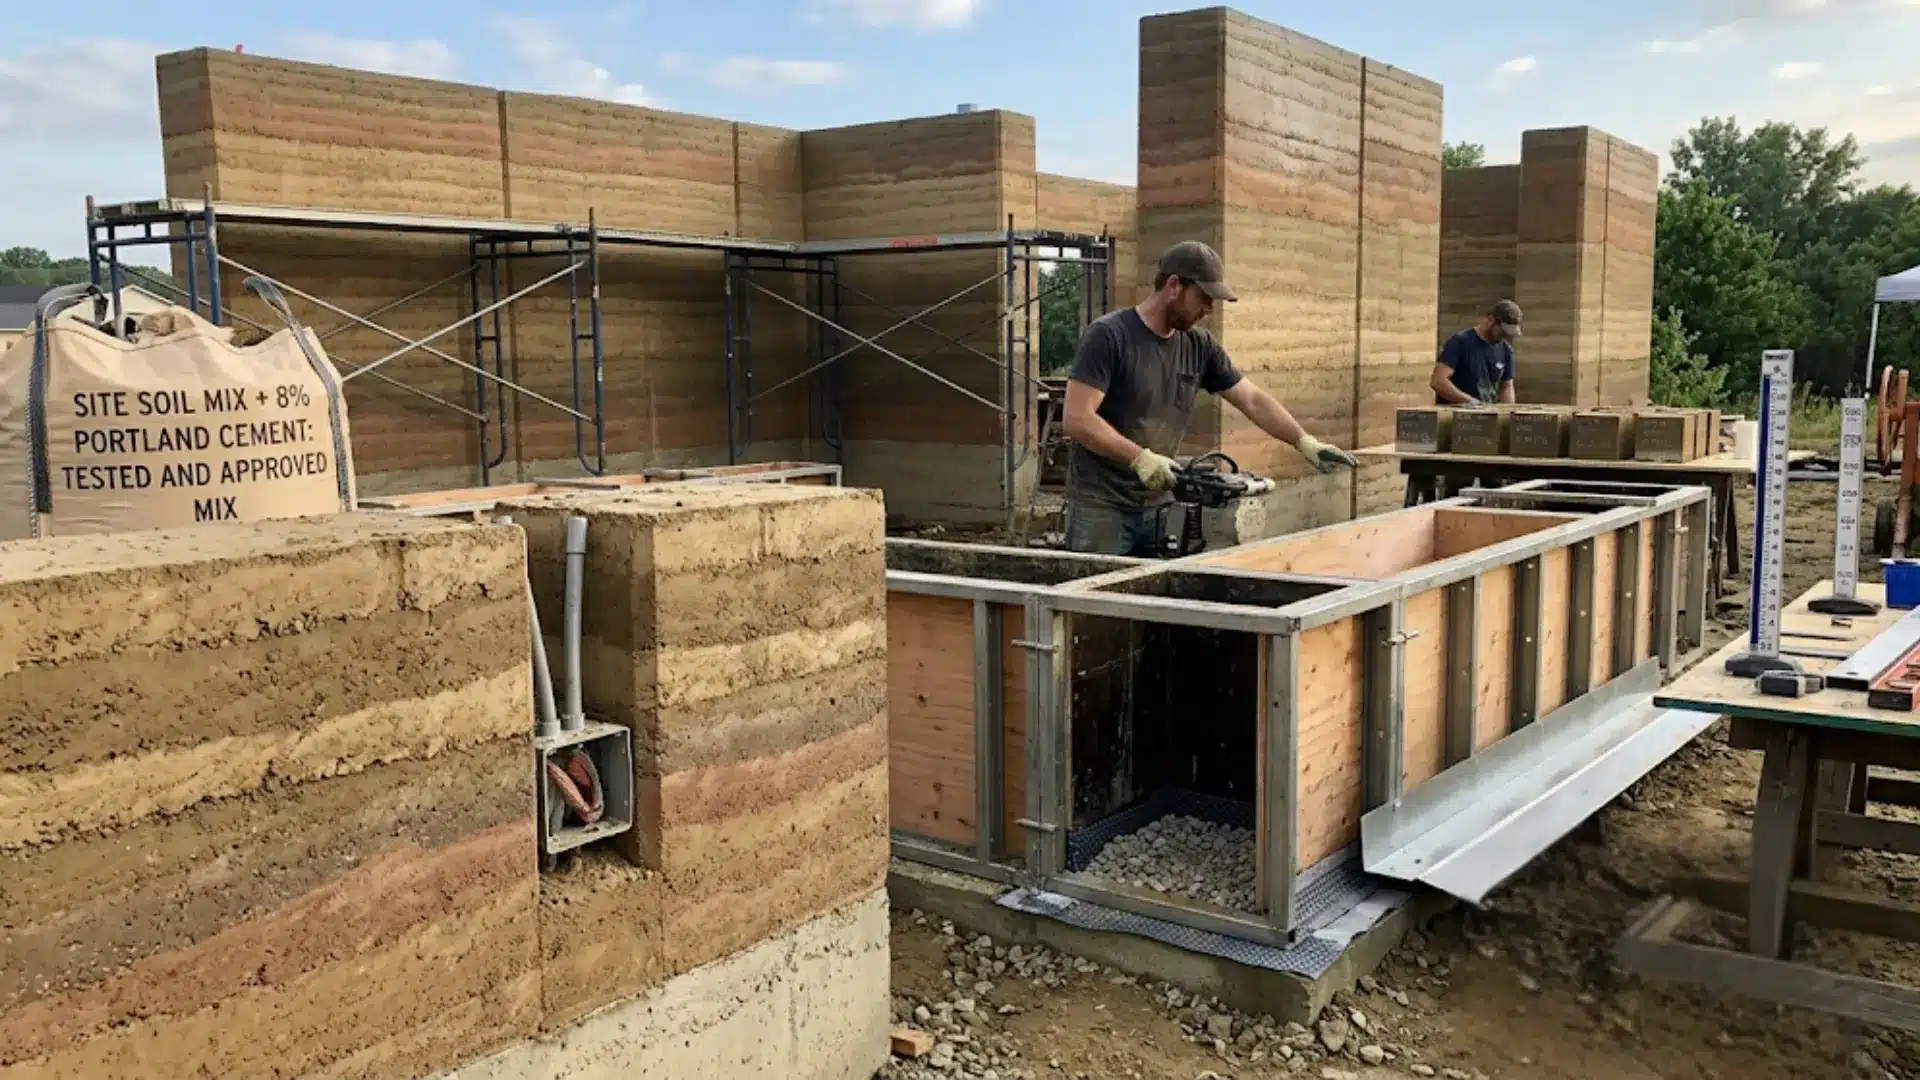
Rammed earth looks simple, but the design details can make or break the wall. If you are planning a home, feature, or landscape or retaining wall, you need more than just a nice texture sample. You need to understand the structure, moisture risks, insulation limits, services, and finishes before construction starts. That is where rammed earth construction details become important. I like to think of this material as both wall and system because every choice affects the next. Here, you will learn how wall type, climate, thickness, openings, footings, sealers, service routes, and cost decisions shape a stronger and longer-lasting project. You will also see what to plan early, what to discuss with your builder, and what mistakes to avoid before formwork begins. What Rammed Earth Construction Actually Costs and What the Details Mean for Your Budget Rammed earth construction details are not just a design checklist. Every decision about wall thickness, soil source, footing depth, and moisture protection has a direct cost consequence, and most budgets go wrong before the first layer is compacted. If you are pricing a rammed earth home or feature wall in the US, the wall-only installed cost typically runs $50 to $225 per square foot depending on complexity, stabilizer content, and whether a specialist contractor needs to travel to your site. That is a wide range for a reason, and understanding what drives it is what this article is about. Cost Note: Figures in this article are estimates based on 2024-2025 US contractor and specialist data from Asiri Designs, GLS Rammed Earth, and Architecture Courses. Rammed earth pricing varies significantly by region, contractor availability, and design complexity. Always get at least three itemized quotes before committing to any project above $1,000. How Rammed Earth Walls Are Built, What Your Contractor Is Actually Doing Understanding the build sequence matters for budget planning because each stage has cost implications that are easy to underestimate when you are looking at a flat per-square-foot rate. The process begins with soil testing and sample production. A good contractor will not skip this step. Test blocks are made using different soil types, cement percentages, and pigment combinations, then left outside to assess color stability, hardness, erosion resistance, and cracking behavior. The soil mix that performs best in testing is the one that goes into your wall, and that decision affects both cost and long-term durability. Once the mix is confirmed, the contractor sets up formwork, typically metal-framed forms with plywood inserts, or a simpler plywood-and-pipe-clamp system. Form release is applied to every interior face before soil goes in. Then the mix is placed in measured layers called lifts, each compacted by pneumatic or manual tampers until it reaches full density. For pneumatic tamping, lifts run about six inches of loose material. For hand tamping, four to five inches is the practical limit. The formwork rises with each completed section until the full wall height is reached. What takes time, and drives labor cost, is that none of this can be rushed. Each lift must reach consistent density before the next one goes down. Moisture content must stay within a workable range throughout. And the formwork must stay level and square at every stage, because rammed earth takes the exact shape of its mold. Rammed Earth Construction Details: The Technical Decisions That Drive Cost These are the specific design and engineering choices that determine what your rammed earth project actually costs to build and maintain over time. Finalizing them early, before formwork is ordered, is the single most effective way to avoid expensive mid-project changes. 1. Wall Thickness and Structural Load External load-bearing walls are typically at least 300mm (roughly 12 inches) thick. Insulated rammed earth assemblies start at 400mm and can exceed 18 inches. Thicker walls mean more material, more labor, and a larger formwork footprint, all of which compound on large or complex floor plans. Internal non-load-bearing walls can be reduced to 200mm, but that change should be confirmed with your structural engineer before it shows up on the drawings. 2. Soil Source and Stabilizer Content Using on-site soil is one of the most effective cost levers available. If your site has suitable clay, sand, and gravel composition, your contractor can blend and test it rather than importing material. If the site soil fails testing, imported material adds transport cost and sometimes a significant delay. Most stabilized rammed earth mixes use 5 to 10% Portland cement. Higher cement content increases compressive strength but also raises embodied carbon and material cost, worth discussing with your builder early rather than accepting a default spec. 3. Footings and Ground Conditions Rammed earth walls are heavy, and that weight has to go somewhere. Modern rammed earth buildings are built on conventional concrete footings or a reinforced slab base. Your soil classification determines footing depth, the amount of steel mesh required, and excavation scope, none of which are visible line items when you look at a wall quote. A structural engineer should assess your site conditions before any cost estimate is treated as reliable. 4. Expansion Joints and Control Joints Long wall runs need planned joints to manage movement from temperature and moisture changes. Without them, cracking is not a question of whether, it is a question of where and when. These joints need to be detailed in the drawings before construction begins because adding them after the wall is up is not a straightforward fix. 5. Electrical and Plumbing Integration Service lines must be routed through conduit embedded in the wall as it is built. Electrical boxes are installed as the wall rises. Doing this right requires coordination between your contractor and your trades before the first lift goes down. Retrofitting services through a finished rammed earth wall is disruptive and expensive, this is not a detail to sort out during construction. Rough-in plumbing and electrical are predictable costs when trades are coordinated before the wall rises; they become unpredictable when they are not. 6. Window and Door Framing Every opening needs reinforced framing to carry the load above. More openings, wider openings, and taller openings all increase the lintels and structural work required. This is also where wall-length limits come in, the plastic index of your soil mix determines how long a continuous wall section can run without cracking, and openings are factored into that calculation. 7. Waterproofing and Capillary Breaks Rammed earth’s primary vulnerability is sustained moisture exposure. The wall base should sit at least 225mm above ground level on a raised foundation, and roof overhangs should be designed to direct water away from wall faces. Breathable sealers, drainage layers at the footing, and cap flashings are not optional upgrades, they are the details that determine whether your wall lasts decades or develops erosion problems within the first few years. Skipping or minimizing moisture protection to reduce upfront cost is the single most common source of expensive long-term repairs in rammed earth buildings. Cost of Rammed Earth Construction in the USA Rammed earth pricing in the US is genuinely difficult to pin down because so few specialist contractors publish detailed rate cards, and because the variable that matters most, whether a qualified builder is available within driving distance of your site, often moves the number more than the design choices do. Here is how the cost picture actually breaks down. Line Item Low End High End What Drives the Variation Soil testing and samples $500 $3,000+ Lab testing vs field testing; number of sample batches; imported vs on-site soil Formwork system Included in labor rate $5,000-$15,000 separately Whether contractor owns forms or rents them; complexity of wall geometry Rammed earth wall (installed, per sq ft) $50 $225 Wall thickness, stabilizer %, site access, specialist travel, finish complexity Structural engineering $2,500 $10,000+ Project scale, seismic requirements, footing complexity Surface sealing $1,500 $8,000+ Wall area, sealer type, number of coats, internal vs external application Permits and inspections $800 $5,000+ Local code familiarity with rammed earth; whether material testing is required for approval Labor consistently represents the largest share of rammed earth cost. Soil, cement, and aggregate are relatively inexpensive. What drives the quote is skilled setup time, form management, compaction labor, and the coordination required to integrate services and openings correctly. A project where the contractor must mobilize from out of state can add $10,000 to $30,000 before a single lift is placed. Regional Variation: Where You Build Changes the Number Significantly The US is not one rammed earth market. The Southwest, particularly New Mexico, Arizona, and California, has the deepest pool of experienced contractors and the most favorable climate for rammed earth performance. Projects in those regions tend to land at the lower end of the installed cost range, assuming on-site soil is viable. The Northeast and Pacific Northwest present a different picture. Cold climate requirements, stricter energy codes, and the near-absence of local rammed earth specialists mean most projects in those regions require insulated wall assemblies (which add thickness and cost), specialist travel, and more engineering input to meet building code. Projects in those markets routinely sit at the high end of the range or above it. The Midwest and South fall somewhere in between. Labor costs are generally lower, but rammed earth specialists are scarce in many metro areas, which pushes travel costs back into the equation. If you are building in a market where rammed earth is uncommon, budget for the learning curve on the permit side as well, local building departments unfamiliar with the material often require additional testing documentation before approvals are issued. Where Rammed Earth Budgets Go Wrong These are the line items I see consistently surprise homeowners who thought they had a solid cost picture going in. 1. Treating the Wall Quote as the Project Cost A rammed earth wall quote covers the wall. It does not cover footings, engineering, permits, service integration, moisture protection, sealing, or the additional structural work that openings require. I have watched homeowners add 40 to 60 percent to their wall quote to get to actual all-in cost, and that was before any site surprises showed up. 2. Underpricing Specialist Access If the nearest experienced rammed earth contractor is three states away, their mobilization cost is real. Some projects in underserved markets spend more on getting the right people to the site than they spend on materials. The answer is not to use an inexperienced local contractor. The answer is to budget the travel cost honestly from the start. 3. Skipping Soil Testing to Save Time Test samples that fail late, after formwork is set up and the schedule is committed, cost far more than the soil testing that would have caught the problem weeks earlier. This is especially true when site soil looks suitable but has clay content or plasticity that only shows up under lab conditions. 4. Underestimating Curing Time Cement-stabilized rammed earth requires a minimum of 28 days of curing before it reaches working strength. Projects that compress that timeline to hit a move-in date risk cracking and surface failure. Curing time is not negotiable, it needs to be in the schedule before the schedule is agreed. 5. Ignoring Climate Exposure in the Design A wall that performs beautifully in Arizona can fail within a few wet winters in the Pacific Northwest if the moisture detailing is not specified for that climate. Roof overhang depth, drainage slope, base height above grade, and sealer type all need to reflect your specific rainfall and temperature conditions, not a generic rammed earth specification. What is Negotiable and What Isn’t The soil mix ratio and compaction standard are not negotiable. Neither is the structural engineering or the moisture protection at the base. These are the things that determine whether the wall stands up in 20 years, and cutting them is where rammed earth projects fail at a structural rather than cosmetic level. What is negotiable: the finish complexity, the number of openings, the wall geometry (simpler rectangular plans cost less to form), and the pigment or color variation in the mix. Using on-site soil rather than imported material, if it passes testing, is one of the most effective cost levers on the material side. Minimizing the number of control joints needed by keeping individual wall lengths within the limits your soil mix supports is another. Best Use Cases for Rammed Earth Construction Rammed earth is best suited for projects where durability, thermal performance, and natural aesthetics are essential. It is a long-term building material choice rather than a low-cost wall system. Residential Homes in Stable Climates: Rammed earth works well in homes where thermal mass improves comfort and energy efficiency. Dry or stable climates reduce moisture risks and allow the material to perform at its best over time. Eco-Resorts and Hospitality Projects: Hotels and resorts use rammed earth for its natural look and sustainability value. The material enhances guest experience while supporting eco-friendly branding and low-impact design goals. Landscape and Retaining Walls: These applications are ideal because one side is often protected by soil or grade. This reduces weather exposure and allows cost-effective use of rammed earth in outdoor structural features. Commercial and Civic Buildings: Used in offices and public buildings focused on green certification, rammed earth provides low embodied carbon construction while acting as both structure and finished surface in many designs. Advantages and Limitations: What to Weigh Before You Commit Advantages Limitations Low embodied energy when local soil is used High labor and formwork cost in most US markets Excellent thermal mass for temperature regulation Poor standalone insulation, requires added assembly in cold climates Monolithic, durable structural wall when properly stabilized Moisture-sensitive without correct base and surface detailing Minimal maintenance when drainage and sealing are handled correctly Specialist contractors are scarce outside the Southwest Off-form finish eliminates the need for separate interior and exterior cladding Permits may require additional material testing documentation in unfamiliar jurisdictions These trade-offs are worth mapping against your specific site conditions and budget before you treat rammed earth as a confirmed decision. The thermal mass benefit, for example, is most valuable in climates with significant day-night temperature swings. In a consistently mild coastal climate, you may not get the energy performance return that justifies the premium. What to Ask Your Contractor Before Signing Anything These are the questions that separate a quote you can rely on from one that will surprise you mid-project. Ask whether the quote is based on your site soil or imported material, and what happens to the cost if the site soil fails testing. Ask how their formwork is set up for your specific wall geometry and whether that cost is included in the rate or quoted separately. Ask what engineering documentation they will provide for the permit application and whether they have experience with your local building department. Ask what the curing schedule looks like and what the weather contingency plan is, rammed earth cannot be placed in freezing temperatures or heavy rain. And ask specifically what moisture protection details are included in the scope, and which ones would be billed as additions. A contractor who can answer all five clearly and specifically, without defaulting to “it depends” on every item, is a contractor who has done enough of this work to plan your project rather than discover it. Frequently Asked Questions How long do rammed earth walls last? Well-built stabilized rammed earth walls can last for generations. Many historic earth structures have stood for centuries. Longevity depends on mix quality, compaction, moisture protection, drainage, and prompt repair of any surface damage. The wall base and roof overhang details matter more than almost any other factor. Is rammed earth construction expensive compared to conventional building? Yes, upfront. Installed wall cost runs $50 to $225 per square foot in the US, compared to $15 to $40 for standard framed walls. Labor is the dominant cost driver. Long-term maintenance is minimal by comparison, which shifts the cost picture over a 30-plus year horizon. Can rammed earth walls get wet? They can tolerate rain when properly detailed — raised foundation, roof overhang, breathable sealer, and good drainage. Sustained moisture against an unprotected wall face will erode the surface over time. The base is the most critical exposure point and should be treated as the primary moisture risk in your design. How thick are rammed earth walls? External load-bearing walls are typically 300mm (about 12 inches) at minimum. Insulated assemblies start at 400mm and can reach 18 to 24 inches. Internal non-load-bearing walls can be reduced to 200mm, but that reduces their structural capacity. Does rammed earth have good insulation? No, not on its own. Rammed earth has excellent thermal mass but low R-value as a standalone wall. In cold climates, insulation must be built into the assembly. Insulated rammed earth walls in the northern US typically achieve R-22 to R-30 with added rigid foam. Is rammed earth allowed by US building codes? It can be approved in most jurisdictions, but familiarity varies by region. Structural calculations, material testing documentation, energy compliance data, and fire rating information may all be required before permits are issued. Your contractor’s experience navigating this process in your specific area is worth asking about directly. Can rammed earth be used for a two-story home? Yes, when engineered correctly. Wall thickness, compressive strength, opening placement, lintels, roof loads, floor loads, and footing design all need professional review. It is not uncommon — it requires the right engineering input from the start. What maintenance does a rammed earth wall need? Keep the base dry, reapply exterior sealer as needed (every 10 to 15 years typically), repair surface chips promptly, and keep sprinkler heads and standing water away from the wall face. Most maintenance is simple when drainage and moisture detailing were done correctly at the outset. How long does rammed earth construction take? Wall construction pace depends on crew size, wall area, and weather. Cement-stabilized walls require a minimum 28-day curing period before the wall reaches working strength. Overall project timeline typically runs longer than equivalent framed construction — factor this into your construction loan and move-in planning the same way you would with any custom house build. Is rammed earth a good DIY project? For small landscape or garden walls, experienced DIY builders can get reasonable results. Structural home construction is a different scope entirely — mix design, formwork engineering, compaction consistency, code compliance, moisture detailing, and permit documentation leave very little room for learning on the job. Conclusion A good rammed earth wall starts long before the first layer is compacted. You need the wall’s purpose, structure, climate response, openings, services, moisture protection, and finish planned together, not handled as separate choices. I would treat rammed earth as a full building system because small decisions can affect strength, comfort, cost, and long-term care. Therammed-earth construction details covered here can help you ask better questions, avoid late changes, and work more effectively with your designer, engineer, or builder. Use these points as a practical checklist before finalizing drawings, choosing wall finishes, approving service routes, or setting a budget. If you are planning a project, share your questions, compare your options carefully, or check out related blogs before you move ahead. Cost estimates based on 2024-2025 US contractor and specialist data from Asiri Designs, GLS Rammed Earth, Architecture Courses, and Colorado Hardscapes. Actual costs vary significantly by region, soil conditions, contractor availability, and design complexity. Verify current pricing with at least three local or regional contractors before budgeting.

Have you ever turned on the shower and noticed the water spraying everywhere except where you need it? It usually means your showerhead needs a good clean. If you’re wondering how to clean a showerhead buildup the easy way, this guide will walk you through it. Shower heads get clogged when hard water leaves mineral buildup behind. Soap scum can stick around the nozzles, too. Over time, moisture can also lead to mold or a musty smell. I’ll show you three simple ways to fix it: The Baggie Soak Method, Detach & Deep Clean, and The Natural Scrub Method. You’ll know which method best fits your shower. Why Should You Clean Your Shower Head Regularly? Cleaning your showerhead regularly helps keep the water flowing evenly and prevents mineral buildup from blocking the spray holes. Over time, hard water, soap scum, and moisture can accumulate inside and around the showerhead, leading to reduced water pressure, uneven spray patterns, and stains. Regular cleaning can also help reduce mold and mildew growth, especially in humid bathrooms. A clean shower head not only works better but can also make your showers feel more comfortable. It may even help extend the life of the fixture by preventing buildup from becoming difficult to remove. Spending a few minutes on routine cleaning can save you from dealing with stubborn clogs and deeper cleaning later. Signs Your Shower Head Needs Cleaning Your showerhead may need cleaning when the water flow starts to change or the surface looks dirty. These signs usually mean that mineral buildup, grime, or mold may be blocking the spray holes. Weak water pressure can mean the spray holes are clogged. Water spraying in odd directions often means that buildup is blocking some nozzles. White, chalky buildup is usually a sign of hard-water minerals. Brown or green stains can come from rust, minerals, or old buildup. A musty smell may mean mold or mildew is growing around the showerhead. Uneven water flow may mean some spray holes are blocked. If you notice any of these signs, a quick clean can help your showerhead work better and feel fresher. How Often Should You Clean a Showerhead? You should lightly clean your showerhead once a week to prevent buildup from getting worse. A vinegar soak once a month is a good way to keep the spray holes clear and the water flowing well. For a deeper clean, remove and clean the showerhead every 3 to 6 months. If you have hard water, you may need to clean it more often because mineral buildup can form faster. Method 1: How to Clean a Shower Head If your showerhead looks cloudy, crusty, or the water sprays in odd directions, I’d start here. A simple bag-and-vinegar trick that helps loosen limescale in about 30 minutes using common household items. This is the easiest method because you do not need to remove the showerhead: Step 1: Fill a Plastic Bag With Vinegar Take a sturdy plastic bag and pour enough white vinegar into it to cover the showerhead. You do not need to fill the whole bag. Just add enough so the spray holes will sit inside the liquid. White vinegar works well because it helps break down the white, chalky buildup caused by hard water. Hold the bag upright while filling it so it does not spill before you place it over the showerhead Step 2: Place the Bag Over the Shower Head Carefully lift the vinegar-filled bag and slide it over the showerhead; secure it with a rubber band, hair tie, or zip tie. Make sure the nozzles are fully covered by the vinegar. This part matters because the vinegar needs to come into direct contact with the clogged spray holes. If your showerhead is larger, use a bigger bag. Adjust the bag slowly so it sits well and does not pull too hard on the shower pipe. Keep the opening of the bag near the shower arm. Let It Soak for 30 Minutes Step 3: Remove the Bag Carefully After soaking, hold the bag with one hand and remove the band with the other. Lower the bag slowly so the vinegar does not spill on you or the floor. Pour the used vinegar down the drain. You may see small bits of buildup in the liquid, which means the soak helped loosen the clog. Wipe the showerhead with a damp cloth to remove any vinegar residue on the outside. Step 4: Run Hot Water Through the Shower Head Turn on the shower and let the hot water run for a minute or two. This helps flush out loosened buildup from the spray holes. You may notice the water pressure looks better right away. If some holes are still blocked, gently rub them with your fingers or use an old toothbrush. Do not use sharp metal tools because they can damage the nozzles. Finish by wiping the showerhead dry with a clean cloth. Best For: This method is best for light to moderate mineral buildup on the shower head, fixed shower heads that are hard to remove, and regular monthly cleaning to keep water flowing well. Pro Tips Do not soak brass, nickel, or gold finishes for too long. Use warm vinegar to help loosen buildup faster. Add baking soda after soaking for extra scrubbing power. For more details, refer to the video below. Method 2: Detach & Deep Clean This method is best when your showerhead is badly clogged, and a simple soak does not fix it. By removing the showerhead, you can clean both the inside and the outside more thoroughly. I’d use this method when the water pressure is very low or the showerhead hasn’t been cleaned in months. Cleaning Instruction: Turn off the shower before you start. Unscrew the showerhead by hand, or use pliers if it feels stuck. Wrap a cloth around the showerhead before using tools to protect the finish. Place the showerhead in a bowl filled with white vinegar. Let it soak for several hours or overnight for heavy buildup. Scrub the inside and outside with an old toothbrush. Use a toothpick to clear blocked spray holes gently. Rinse the showerhead well with warm water. Screw the showerhead back onto the shower arm. Run water for a few minutes to flush out loose dirt and buildup. Best For: Severe clogging that blocks the spray holes | Very low shower pressure | Hard water buildup on the showerhead | Showerheads that have not been cleaned in months. Pro Tips: Check the washer or filter screen while the showerhead is removed. Replace worn washers if you notice leaks after reattaching them. Note: Avoid harsh cleaners on coated finishes can cause damage. Method 3: The Natural Scrub Method This method is great when your showerhead only needs a quick clean. I’d use it for light stains, small spots, or weekly upkeep. It is also a good choice for delicate finishes because you can clean it gently without soaking the showerhead for long. Cleaning Instruction: Mix baking soda with a little water to make a thick paste. Apply the paste to the showerhead with your fingers or a soft cloth. Gently scrub the showerhead with an old toothbrush. Focus on the nozzles and stained areas where buildup collects. Wipe the showerhead with a damp cloth. Run warm water for a minute to rinse the paste away. Dry the showerhead with a microfiber cloth to prevent water spots. Best For: Quick refreshes between deeper cleans | Mild stains on the showerhead | Weekly maintenance to prevent buildup | Showerheads with delicate finishes. Pro Tips: Add a small amount of vinegar for tougher spots. Dry the showerhead after cleaning to slow future buildup. Note: Do not use rough scrubbers because they can scratch the finish. Which Method Is Best for You? Here’s a simple table to help you pick the best method based on how dirty or clogged your showerhead is. Method Best For Why Choose It The Baggie Soak Method Light to moderate mineral buildup, fixed shower heads, and monthly cleaning It is easy, quick, and you do not need to remove the showerhead Detach & Deep Clean Severe clogging, very low water pressure, and heavy hard water buildup It gives the showerhead a deeper clean, both inside and out. The Natural Scrub Method Quick refreshes, mild stains, weekly upkeep, and delicate finishes It is gentle, simple, and good for keeping buildup from getting worse. If you are not sure where to start, I’d choose the Baggie Soak Method first. It works well with most showerheads and helps you see if a deeper clean is needed later. What Not to Use on a Shower Head Some cleaners and tools can damage your showerhead or make cleaning unsafe. I’d avoid these items to prevent scratching the finish, damaging the spray holes, or creating strong fumes. Do not mix bleach with vinegar because it can create unsafe fumes. Do not use steel wool, as it can scratch the showerhead’s finish. Do not use harsh abrasive powders because they can wear down coated surfaces. Do not use strong acids because they may damage metal or special finishes. Do not use undiluted chemical cleaners because they can be too harsh. Do not use sharp metal tools on spray holes because they can bend or damage them. A gentle cleaner, a soft brush, and regular upkeep are usually enough to keep your showerhead clean and working well. How to Prevent Future Buildup? To prevent future buildup, try to keep your showerheads as dry and clear as possible between cleans. After each shower, wipe the showerhead with a soft cloth so water droplets do not dry on the surface and leave mineral spots. This small habit can slow down white chalky buildup, especially if your home has hard water. If you deal with hard water often, a water softener can help reduce mineral buildup before it reaches your showerhead. You can also install a shower filter to catch some minerals and other particles. After cleaning, run hot water through the showerhead for a minute to flush out any loose dirt or buildup. For regular upkeep, rub the nozzles once a week with your fingers, a soft cloth, or an old toothbrush. This helps keep the spray holes open and stops clogs from forming. Keep the bathroom fan on or open a window after showers to lower the moisture. Good airflow helps prevent musty smells, mold, and mildew around the showerhead. Frequently Asked Questions How do you remove mineral buildup from a showerhead? Soak the showerhead in white vinegar to loosen the mineral buildup. You can use the baggie method if it is still attached, or remove it for a deeper soak. After soaking, scrub the nozzles with an old toothbrush and run warm water to rinse. How to clean the buildup inside the showerhead? Remove the showerhead and place it in a bowl of white vinegar for several hours. After soaking, scrub the inside opening with a small brush. Rinse it well with warm water, then reattach it and run the shower to flush out loose buildup. How to decalcify a showerhead without removing it? Fill a plastic bag with white vinegar and place it over the showerhead. Make sure the nozzles are covered. Secure the bag with a rubber band and let it sit for about 30 minutes to a few hours. Remove the bag, scrub gently, and rinse. How often should I replace the mineral balls in my showerhead? Replace the mineral balls according to the product instructions, as each showerhead filter is different. Many need to be replaced every few months, depending on water use and water quality. If water flow drops, odor returns, or the balls look worn, it may be time. Do I need to descale my showerhead? Yes, you should descale your showerhead if the water pressure is weak, the spray holes look blocked, or you see white, chalky buildup. Descaling helps remove mineral deposits and keeps the water flowing evenly. A monthly vinegar soak is usually enough for regular care. To Sum Up Now you know how to clean the showerhead buildup without making the job feel hard. I’d start with the Baggie Soak Method because it works well with most showerheads and doesn’t take much time. It is a simple fix when you notice light buildup, weak spray, or water going in different directions. If your showerhead is badly clogged or the water pressure feels very low, Detach & Deep Clean is the better choice. It lets you clean both the inside and the outside more thoroughly. For quick touch-ups, The Natural Scrub Method is great for light stains, weekly upkeep, and delicate finishes. Try to clean your showerhead once a month. A little care can help keep the water flowing better and stop buildup from getting harder to remove later.
I love a bedroom project that saves floor space and makes the room feel more planned. A good bunk bed can do that in a kids’ room, guest room, cabin, or small bedroom, especially when it looks like it belongs to the wall instead of sitting there as bulky furniture. That is where diy bunk beds need more thought than a saved photo. The goal is not only to stack two mattresses. The better goal is to build something that fits the room, feels safe, adds storage where possible, and has the finished look of real carpentry. If you want a simple frame, structure matters most. If you want the look of built in bunk beds, details like wall fit, trim, panel facing, access, lighting, and paint need to be part of the plan from the start. Before You Build DIY Bunk Beds: What Should You Know? Before choosing a design, start with the room you are trying to improve. A custom bunk should solve a real layout problem, such as a small bedroom, shared kids’ room, awkward wall, guest space, or cabin sleeping area. Measure first, then decide what kind of bunk actually fits. Use this quick planning check before saving plans or buying lumber: Room Size: Measure the wall length, ceiling height, and open floor area. Mattress Fit: Decide on twin, twin XL, full, or mixed mattress sizes first. Access: Choose a ladder, stairs, or built-in steps based on space and age. Anchoring: Find the wall studs before planning any built-in structure. Finish Level: Decide between a simple frame and a full carpentry look with trim. Future Use: Think about whether the room will still need bunks in five years. The best plan is the one that fits the room before it looks good in paint. Once the measurements work, the finish details become easier to choose. Why Do Built In Bunk Beds Look More Finished? Built in bunk beds look more finished because they are planned as part of the room, not just placed inside it. The frame, wall fit, panels, trim, storage, and access all work together to make the bed feel intentional. The biggest difference comes from choosing details before the build starts: Strong Framing: A finished look still starts with structure. Framing often uses 2×4 or 2×6 lumber, with secure attachment to wall studs where the design calls for it. Clean Panel Facing: Plywood, MDF, shiplap, beadboard, or paint-grade boards can cover rough framing and make the bed look like built-in carpentry. Trim And Paint: Baseboards, edge trim, caulk, sanding, primer, and matching paint help the bunk blend into the walls instead of standing apart. Storage That Fits The Room: Stair drawers, cubbies, lower drawers, or side shelves can make the bed more useful, but they need space and clearance planned early. Personal Bed Zones: Small shelves, reading lights, curtains, or niches make each bunk feel more comfortable without adding bulky furniture. Practical Access: A ladder or stair position should feel natural in the room, with enough space to climb, change bedding, and move around. This section supports both planning goals: it shows what creates the custom look readers want, while also helping them compare which bunk bed ideas are worth building before they choose a plan. DIY Bunk Beds Vs Store-Bought Bunk Beds: Which Makes More Sense? Building is not always cheaper, and buying is not always better. The smarter choice depends on whether you need a custom room solution or a quick sleeping setup. Factor DIY Project Store-Bought Frame Cost Can save money if tools and materials are already available Gives a clearer upfront price Fit Works well for odd walls, tight rooms, and custom mattress layouts Usually limited to standard dimensions Look Can create a built-in, wall-to-wall, or finished carpentry style Depends on available retail designs Storage Can include drawers, shelves, cubbies, or stair storage Storage depends on the model Time Needs measuring, cutting, sanding, assembly, and finish work Faster to assemble and use Skill Level Requires basic carpentry confidence Usually requires basic assembly only Best For Custom bedrooms, kids’ rooms, cabins, storage needs, and built-ins Rentals, quick setups, and simple sleeping needs If the room needs a polished wall-to-wall look, building gives you more control. If speed, simplicity, or a tested retail frame matters more, buying may be the cleaner choice. Bunk Bed Ideas And Plans To Compare Before Building A good bunk bed idea should solve a real room problem, not just look nice in a photo. Compare each concept by space, skill level, storage, safety, and whether it works better as a built-in/custom project or a simple freestanding plan. 1. Simple Twin-Over-Twin Bunk Bed A twin-over-twin bunk is the simplest option to build and compare against other plans. It is best for simple freestanding layouts because the structure usually needs two mattress frames, corner posts, guardrails, and a ladder. You can still make it feel custom with paint, matching bedding, or a small shelf, but it will not have the same wall-to-wall finish as built in bunk beds. It is the easiest starting point. 2. Wall-to-Wall Built-In Bunk Bed A wall-to-wall bunk is best for a built-in or custom look. The frame usually connects to the room through studs, panels, trim, paint, and caulk, so it feels like part of the wall instead of separate furniture. This idea works well in kids’ rooms, cabins, and narrow bedrooms, but it needs careful measuring because changing the room later takes more planning, patching, and repair. Best for permanent rooms. 3. Bunk Beds With Stairs A stair bunk is best for custom rooms where storage and safer-feeling access matter more than saving every inch of floor space. The steps can hide drawers, cubbies, or bedding storage, which gives the project a finished carpentry look. It is less ideal for simple freestanding plans because stairs need more lumber, hardware, width, and build time than a straight ladder. Choose it when storage matters as much as sleeping. 4. Bunk Beds With Storage Drawers A bunk with storage drawers is useful for both freestanding and custom designs. It is best when the room has limited closet space and needs hidden storage for sheets, toys, pajamas, or guest supplies. The key is drawer clearance. Before building, check rugs, nearby furniture, closet doors, and walls so the drawers can open fully after the bed is finished. This one is practical without feeling overly complicated. 5. Triple Bunk Beds A triple bunk is best for cabins, vacation homes, large families, and sleepover rooms where sleeping capacity matters most. It can be built vertically, along one wall, or in an L-shape. This is more of an intermediate custom project than a starter freestanding plan because headroom, guardrails, ladder access, mattress support, and room circulation all become harder to plan safely. Choose it only with a very clear plan. 6. L-Shaped Bunk Beds An L-shaped bunk is best for corner rooms or shared bedrooms where one straight wall is not enough. It can feel more custom because the lower bed turns into the room and leaves space for shelves, a desk, or a reading corner. It can be freestanding, but it usually looks better when the corner is planned with trim, lighting, or storage. It works well when the room needs zones. 7. Loft Bed With Desk Below A loft bed with a desk below is best for older kids, teens, and small bedrooms that need a study zone. It is usually a freestanding concept, but it can look custom if you add side panels, shelves, lighting, and matching paint. The main planning details are ceiling height, ladder placement, rail height, and whether the desk area below feels open enough. Good when one room has two jobs. 8. Low Bunk Beds For Younger Kids A low bunk is best for younger kids, smaller rooms, and lower ceilings. It is usually a simple freestanding plan because the shorter height makes the project less visually heavy. You can still add a custom feel with paint, rounded edges, simple trim, or low storage. It should still have proper guardrails, steady access, and mattress support like a taller bunk. This option keeps the room easier to manage. 9. House-Style Bunk Bed A house-style bunk is best for kids’ rooms where the bed should feel playful and designed, not just stacked. It can work as a freestanding frame or a semi-custom feature with wall color, curtains, and trim. Keep the roofline and decorative pieces smooth, secure, and simple. This idea looks custom quickly, but the added shapes should never weaken access or safety. Keep the design playful, not overbuilt. 10. Bunk Beds With Privacy Curtains A bunk with privacy curtains is best for shared bedrooms, guest rooms, or sleepover spaces where each sleeper needs a small personal zone. It works with both freestanding and built-in plans. The custom look comes from matching fabric, simple rods, and neat mounting. Use lightweight curtains that open easily, and avoid loose loops, heavy fabric, or hardware that creates climbing hazards. It adds comfort without changing the main structure. 11. Bunk Beds With Reading Lights A bunk with reading lights is best for custom rooms, older kids, and guest spaces where each bed needs its own function. It can improve both freestanding and built-in designs. Plan lights before closing trim or panels so cords and switches do not look messy. Plug-in or battery lights are easier, while hardwired lighting should be handled by a qualified electrician. It makes bedtime easier without adding storage. 12. Bunk Beds With Built-In Shelves Bunk beds with built-in shelves are best when the room has no space for nightstands. Shelves near each mattress can hold books, glasses, water bottles, or small bedtime items. This idea strongly supports a custom look, especially when shelves are framed into the side panels. Keep them shallow, smooth-edged, and placed where they will not become steps or head-bumping spots. This solves a common problem in tight rooms. 13. Renter-Friendly Built-In Look A renter-friendly built-in look is best when you want custom style without permanent construction. Use a freestanding bunk, removable panels, curtains, matching paint colors, and separate storage pieces to create the feel of built in bunk beds. This is useful for apartments or future room changes. Avoid unsafe wall-attachment shortcuts and follow lease rules before adding anything fixed. It gives style without committing to permanent framing. Choose the design that fits the room first, then style it. A bunk bed that looks perfect online can still fail in real life if the ceiling, ladder, guardrail, mattress, or storage plan does not match the space. How Do You Build DIY Bunk Beds Step By Step? A bunk bed build should follow a measured plan instead of guesswork. This sequence follows a common 2×6 and 2×4 build style, where the frames, slats, legs, supports, and hidden fasteners come together before finishing. Tools You May Need: Measuring And Marking Cutting And Shaping Assembly And Fastening Finishing And Safety Tape measure Circular saw Drill and driver Sander Pencil Table saw, optional Pocket hole jig Safety glasses Clamps Band saw, optional Wood screws or structural screws Hearing protection Straight fence or cutting jig Thickness planer, optional Block plane Paint, stain, wax, or finish of choice Step 1: Prepare The 2×6 and 2×4 Lumber: Start with straight 2x6s and 2x4s because they are affordable, strong, and easy to find. Clean up manufacturer marks, rough ends, and sharp edges before assembly. A planer helps, but sanding or using a block plane can also make the boards cleaner and easier to finish. Step 2: Build The Mattress Frames First: Make the two rectangular mattress frames from 2×6 boards. Pocket holes can speed up the build and keep most screw heads hidden. This step matters because the frames carry the mattresses, so they need to be square, sturdy, and sized correctly before anything else is added. Step 3: Add Cleats and Slats for Mattress Support: Install 2×2 cleats inside each frame so the slats have a solid ledge to rest on. Then cut and fit the slats, usually from 2x4s. The slats should sit evenly and support the mattress without shifting, sagging, or leaving large gaps. Step 4: Build The L-Shaped Corner Legs: Make each leg by joining a 2×4 to a 2×6, forming an L-shaped post. Place pocket holes where the bed frame or ladder pieces will hide them later. This keeps the outside of the bunk cleaner while still giving the structure stronger corner support. Step 5: Use Locating Blocks and Fasten The Frames: Add small blocks to the legs to help position the mattress frames during assembly. Once the frames sit correctly, fasten them from the inside. This keeps visible hardware to a minimum and helps prevent the frame from twisting or racking during use. Step 6: Check Strength, Sand, and Finish: Before painting or staining, check the whole bunk for wobble, shifting, rough corners, and loose fasteners. Add guardrails and access details according to your plan. Sand every edge that hands, feet, bedding, or skin may touch, then apply the finish only after the structure feels solid. This build works best when the hidden structure is planned as carefully as the visible finish. If the bed shifts, racks, or feels loose during assembly, fix that before sanding, staining, or moving it into a bedroom. How Much Do Different Bunk Bed Projects Usually Cost? Exact prices vary with lumber, location, tools, and finish choices, so treat these as planning ranges rather than final quotes. The total usually depends on how much framing lumber, plywood, trim, hardware, paint, and storage detail your design needs. Project Type Estimated Material Cost Why It Costs That Way Simple Twin Bunk $250 to $600 Basic lumber, slats, screws, sanding supplies, and a simple ladder Low Bunk $200 to $500 Smaller frame, less lumber, but still needs rails and strong support Built-In Bunk $700 to $1,800 Framing, plywood or MDF panels, trim, paint, caulk, and wall anchoring Stair Bunk $900 to $2,300 Extra plywood, drawer slides, stair framing, trim, and more hardware Triple Bunk $1,000 to $2,800 More mattress platforms, guardrails, supports, fasteners, and finishing time Renter-Friendly Look $350 to $900 Freestanding frame plus removable panels, curtains, storage, or styling pieces Note: These numbers do not include mattresses, bedding, new tools, delivery fees, or paid labor. I always price the boring supplies too: screws, sandpaper, primer, paint, caulk, extra blades, and mistake boards. Those small items can quietly add more than expected. What Safety Checks Should You Make Before Building A Bunk Bed? Safety planning should happen before the first cut, not after the frame is standing. The U.S. Consumer Product Safety Commission, 16 CFR Part 1513, and 16 CFR Part 1213 outline important bunk bed rules around guardrails, openings, entrapment risks, and warning labels. Plan Guardrails And Mattress Height Together: A thick mattress can reduce how much guardrail protection is left. Follow Top Bunk Age Guidance: The upper bunk is not recommended for children under 6. Avoid Risky Gaps And Openings: Spaces around rails, ends, ladders, and walls should not create entrapment risks. Secure The Frame Properly: Built-ins need strong support, usually into studs. Drywall alone should not carry the structure. Make Climbing Safe: Ladders or stairs should feel steady, smooth, wide enough, and easy to grip. Check Daily Use Details: Leave room for bedding, drawers, vents, windows, outlets, and walkways. A safe bunk bed should feel steady, practical, and easy to use. If anything wobbles, shifts, blocks movement, or feels uncertain, fix that before paint, trim, or styling. Are DIY Bunk Beds Cheaper, And Which Plans Should You Compare First? DIY bunk beds can cost less when the design is simple and you already own the tools. They can cost more when the plan includes stairs, drawers, trim, panels, paint, new tools, or delivery. Before choosing, compare two or three plans by how complete and realistic they are. What To Compare What To Check Finished Size The full bed dimensions, ceiling height, mattress size, and room clearance Cut List A clear lumber list and cut list so you are not guessing during the build Guardrail Plan Top bunk rail height, mattress thickness, and safe gap spacing Ladder Or Stair Design Safe climbing access, floor space, grip, and placement Fastening Details Clear support points, screws, bolts, anchors, or joinery instructions Storage Details Drawers, shelves, stairs, or cubbies that match your budget and skill level Build Vs Buy Decision Build for custom fit and storage. Buy for speed, simpler setup, or tested retail structure A pretty image without measurements is only inspiration, not a build plan. If price and speed matter most, buying may win. If fit, storage, and built in bunk beds style matter more, building can be the better choice. How Can You Make A Bunk Room Feel Custom? A bunk room feels custom when every sleeper has a small, useful zone. You do not need an expensive build for that. The goal is to make the details feel planned, comfortable, and connected to the room. Add Personal Bedside Zones: Place a small shelf near each pillow for books, glasses, a water bottle, or bedtime items. Use Matching Reading Lights: Add simple lights near each bunk so every sleeper has their own usable corner. Blend The Frame With The Room: Paint the bunk the same color as the walls or use trim to cover uneven gaps. Add Privacy Without Clutter: Use lightweight curtains if the room is shared, but keep them easy to open and safe. Control Visual Mess: Use closed storage, simple bedding, and calm colors so the bunk does not overwhelm the room. Make Access Feel Finished: Add a small step light near stairs or ladders if it fits the room safely. This is where a plain build starts feeling like a room feature instead of a large piece of furniture. When Should You Buy Instead Of Build? Buy instead of building when safety, timing, or structure feels uncertain. A solid store-bought frame is better than a homemade bunk that looks nice but wobbles, shifts, or leaves you unsure at bedtime. Buying is usually smarter if you do not have the right tools, cannot secure the frame properly, need a clear adult weight rating, are renting, have a low ceiling, or need the bed immediately. A DIY project should make the room better, not make everyone nervous about using it. Frequently Asked Questions Can a Bunk Bed Be Built Into a Closet Nook? Yes, if the nook has enough width, headroom, ventilation, and safe access. Check wall studs, mattress clearance, lighting, and escape path before planning. Avoid blocking vents, outlets, or windows. A closet-style bunk can look clever, but it still needs proper structure. What Mattress Thickness Works Best For The Top Bunk? A thinner mattress is often better for the top bunk because it helps preserve guardrail height. Always check your plan or bed specifications before buying. If the mattress is too thick, the rail may not protect the sleeper properly during movement at night. How Do You Make Bunk Beds Easier To Make? Use fitted bedding, thinner comforters, and washable layers that tuck easily. Leave enough side access so changing sheets does not become a weekly battle. Built-in bunks look beautiful, but tight wall-to-wall openings can make bedding harder than expected. Can a Bunk Bed Work In a Guest Room? Yes, especially in cabins, vacation homes, or rooms used by families. Choose a sturdy design, clear ladder access, and mattresses that suit the likely guests. If adults may sleep there, pay close attention to structure, comfort, and weight expectations. How Do You Keep a Bunk Room From Feeling Crowded? Use light wall colors, built-in storage, simple bedding, and clear floor space. Avoid oversized ladders, bulky rails, and too many decorative pieces. A bunk room feels calmer when each sleeping space has one shelf, one light, and a place for personal items. Final Thoughts DIY bunk beds work best when the plan starts with the room, not the lumber pile. A strong build should save floor space, fit the mattress properly, give each sleeper a clear zone, and feel steady enough for everyday use. If the goal is a finished carpentry look, built in bunk beds are usually the better design direction. They need more planning, but the result can feel cleaner, more useful, and more connected to the bedroom. Before buying materials, measure the room, compare a few plans, check the safety rules, and decide which built-in details are worth the work. That small pause can save money, time, and a lot of rework.
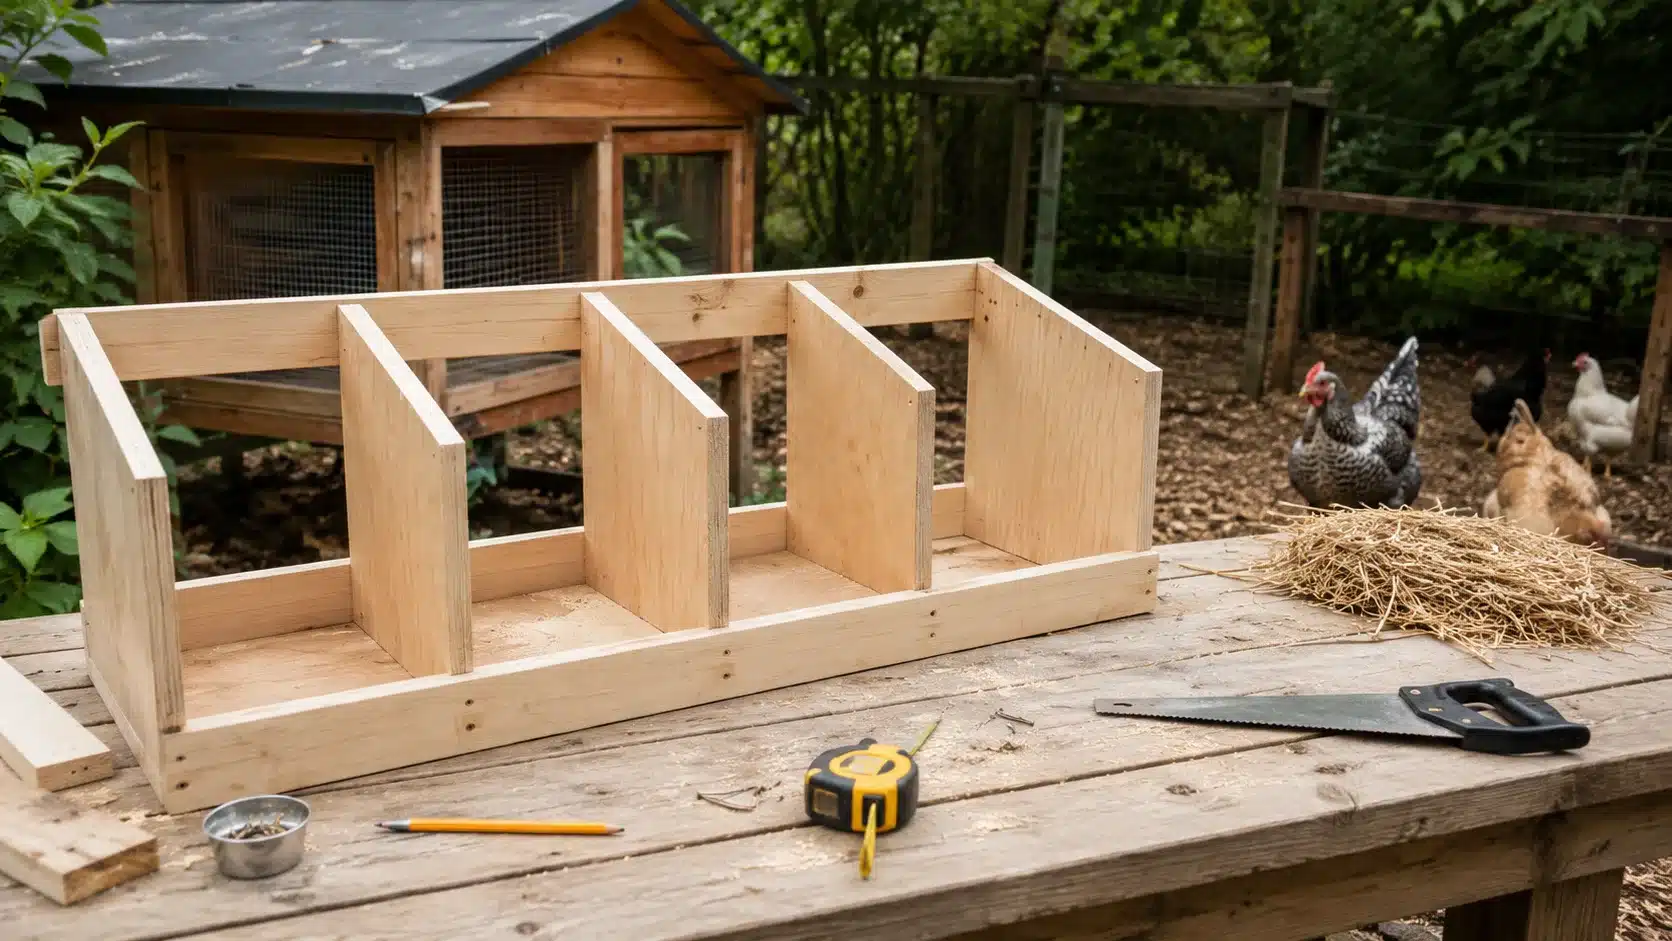
The first time I watched a hen pace around the coop looking for a spot to lay, I thought something was wrong. Turns out, something was, just not with the hen. There was nowhere comfortable, private, or clean enough for her to settle. That was the day I built my first nesting box from leftover plywood and a few screws I found in the garage. It was not fancy. It was not perfect. But by the next morning, she used it, and the egg was clean. That small win is exactly what diy nesting boxes are about. This piece covers what a nesting box needs to do, how to size one correctly, five budget-friendly build methods, smart placement, and how to keep boxes working after the build. Pick one method, gather your materials, and have something functional by Sunday. What Should a Chicken Nesting Box Actually Do? A nesting box gives a laying hen exactly what she is looking for: a quiet, dark, private, and stable space to deposit an egg without being disturbed. When that space exists in the right place inside the coop, hens stop laying in corners, under feeders, or in random bedding piles. Eggs stay cleaner, fewer crack, and collection becomes a quick daily habit instead of a small hunt. The box is not a sleeping space. Hens should roost on perch bars at night, away from the nesting area. A box that becomes a sleeping spot fills quickly with droppings, which dirtier eggs and faster bedding turnover. Keeping roost bars higher than the nesting boxes helps because chickens naturally sleep at the highest available point. A good nesting box passes a simple four-point check: it stays dark and dry inside, sits stable when a hen climbs in, offers easy outside access for egg collection, and takes less than five minutes to clean. What Size Should DIY Nesting Boxes Be? Getting the size right before building saves a lot of fixing later. A box that is too small stresses the hen. One that is too large feels exposed and gets treated as a toilet. The University of Minnesota Extension recommends keeping laying hen housing comfortable, with appropriate space and clean conditions to support consistent egg production. Build Detail Recommended Starting Point Why It Matters Box width and depth About 12 by 12 inches Fits most laying breeds comfortably Box height 12 to 14 inches Enough room without feeling too open Front lip height 3 to 4 inches Keeps bedding and eggs inside the box Hen-to-box ratio One box for every 4 to 5 hens Reduces fighting over the same favorite Bedding depth 2 to 3 inches minimum Cushions eggs and absorbs moisture Placement height 18 to 24 inches from the floor Accessible but not beside the roost mess One note from building a few of these: measure the wall space inside the coop before buying materials. It sounds obvious, but cutting lumber to fit a space you have not measured first is how a Saturday project becomes a Wednesday project. More boxes do not always mean hens spread out evenly. Many flocks still crowd into one preferred box, no matter how many you provide. The ratio above is a starting point, not a guarantee. How to Build DIY Nesting Boxes at Home Every method below works on its own. The approach is simple: pick the one that matches what you already have or can get without a special trip. These are practical homemade diy chicken nesting boxes that any backyard keeper can put together in an afternoon. A reference video will be added under each method for step-by-step visual guidance. 1. 5-Gallon Bucket Nesting Box A clean 5-gallon bucket laid on its side creates a curved, private shape that hens take to quickly. It is one of the fastest diy nesting boxes to set up, needs almost no tools, and costs very little if the bucket is already on hand. It works especially well for small co-ops or anyone who wants a removable, easy-to-clean option. Tools you need: clean 5-gallon bucket, jigsaw or utility knife, sandpaper, drill, screws, scrap wood shelf, bedding Step 1: Clean the bucket: Remove any residue and let it dry fully before use. Step 2: Cut the front opening: Lay the bucket on its side and cut away the upper half of the front, leaving a 3 to 4 inch lip at the bottom. Step 3: Smooth all edges: Sand or file every cut edge so no sharp plastic remains. Step 4: Secure the bucket: Attach it to a wall-mounted shelf or screw it between two sideboards so it stays still. Step 5: Add bedding: Fill with 2 to 3 inches of pine shavings or straw. Step 6: Test stability: Push it firmly and confirm it does not shift when weight is applied. 2. Wooden Plywood Nesting Box This is the standard build most people picture when they think of homemade diy chicken nesting boxes. It takes more steps than the bucket, but the finished box is sturdier, easier to size for multiple hens, and fits better into a permanent coop. Penn State Extension supports 12-by-12-inch box dimensions as a solid starting point for most laying breeds. Tools you need: plywood sheet, 2×4 supports, screws, drill, circular saw or handsaw, tape measure, pencil, sandpaper, bedding Step 1: Measure the coop wall: Note the width, height, and depth available before cutting anything. Step 2: Cut all panels: Cut front, back, bottom, top, and side panels to size. Step 3: Build the frame: Assemble the outer box with screws and check that the corners are square. Step 4: Add dividers: Cut and attach interior dividers to create separate compartments. Step 5: Attach the front lip: Screw a 3 to 4-inch board across the front bottom opening. Step 6: Add a slanted roof: Cut the back panel taller than the front so the lid angles downward, stopping hens from perching on top. 3. Milk Crate Nesting Box A plastic milk crate is one of the most available and free options for a fast setup. It is light, movable, and easy to scrub out. The main thing to fix before use is the floor, since the grid base lets bedding fall through. A scrap wood insert or rubber mat solves that immediately. Tools you need: sturdy milk crate, scrap plywood or rubber mat, zip ties or screws, small front board, bedding Step 1: Choose a strong crate: Pick one with thick walls that does not flex under light pressure. Step 2: Add a solid floor: Cut a plywood or rubber mat insert to fit inside the base. Step 3: Attach a front lip: Zip-tie or screw a short board across the front to hold bedding in. Step 4: Place in a quiet corner: Position it away from drafts and the roost area. Step 5: Secure it: Tie or screw the crate to the wall so it cannot tip sideways. Step 6: Add bedding: Fill with clean shavings or straw and check that the floor insert sits flat. 4. Roll-Away Nesting Box This build is worth the extra effort for anyone dealing with cracked eggs, egg eating, or hens tracking dirt across fresh eggs before collection. The sloped floor lets an egg roll gently into a covered tray at the back right after laying. The slope must be shallow enough that the egg rolls slowly, typically 3 to 5 degrees; otherwise, eggs crack on arrival. Tools you need: plywood, screws, drill, circular saw, indoor-outdoor carpet or nesting mat, egg catch tray, measuring tape Step 1: Build the outer box: Assemble the main box frame at standard 12-by-12 dimensions. Step 2: Cut the sloped floor: Cut the floor panel so it sits at a slight downward angle toward the back. Step 3: Build the egg catch tray: Create a shallow, covered tray that sits below the sloped floor exit point. Step 4: Line the slope: Glue or staple indoor-outdoor carpet or a soft nesting mat across the angled floor. Step 5: Test with a fake egg: Roll a practice egg down the slope before hens use the box. Step 6: Adjust as needed: If the egg rolls too fast or veers sideways, add a small lip guide or reduce the angle. 5. Plastic Storage Bin Nesting Box A thick plastic storage bin is a solid low-effort option when cleaning ease matters most. The smooth walls wipe down in under a minute. The main concern is durability, since thin bins crack under regular use or temperature changes. Choosing a bin with walls at least 4mm thick extends the life significantly. Tools you need: thick plastic storage bin, utility knife or jigsaw, sandpaper, screws, washers, bedding Step 1: Pick a sturdy bin: Press the walls firmly. If they flex easily, choose a thicker bin. Step 2: Cut the front opening: Cut away the upper section of the front panel, leaving a 3 to 4 inch base lip. Step 3: Smooth every edge: Sand or tape any rough cut lines before placing hens near it. Step 4: Mount it securely: Drill through the back panel and screw into the coop wall with large washers to spread the load. Step 5: Add bedding: Fill with clean, dry materials Step 6: Check for movement: Test that the bin does not flex or shift when you press one side. 6. Wooden Pallet Nesting Box Wooden pallets are often free or very cheap, making them a popular option for backyard chicken keepers. The wood is already cut into usable sections, so there is less measuring and fewer materials to buy. This method works well for larger co-ops and anyone who wants sturdy diy nesting boxes without purchasing full plywood sheets. Make sure the pallet is clean and safe for poultry use before building. Tools you need: clean pallet wood, pry bar, hammer, screws, drill, saw, measuring tape, sandpaper, bedding Step 1: Disassemble the pallet: Remove boards carefully and set aside the best pieces. Step 2: Measure and cut panels: Cut the pallet boards into sides, back, floor, and divider sections. Step 3: Build the frame: Assemble the outer structure using screws instead of nails for better strength. Step 4: Add dividers: Create individual nesting spaces based on flock size. Step 5: Install a front lip: Attach a 3 to 4-inch board across the opening. Step 6: Sand rough surfaces: Smooth splinters before adding bedding and introducing hens. 7. Repurposed Cabinet or Drawer Nesting Box Old cabinets, dresser drawers, and storage units can become homemade diy chicken nesting boxes with very little work. The structure is already built, which makes this one of the fastest upcycling projects. It is especially useful for anyone with leftover furniture in a garage, shed, or workshop. The main goal is to create a stable, easy-to-clean nesting area with enough privacy for laying hens. Tools you need: old drawer or cabinet, drill, screws, sandpaper, scrap wood for front lip, bedding Step 1: Inspect the furniture: Remove loose hardware, broken parts, and peeling materials. Step 2: Clean thoroughly: Wash and dry the unit before bringing it into the coop. Step 3: Add a front lip: Attach a short board across the opening to keep bedding inside. Step 4: Secure the unit: Screw it to a wall or stable support so it cannot tip. Step 5: Check for rough edges: Sand any splinters, sharp corners, or damaged wood. Step 6: Add bedding: Fill with clean straw or pine shavings and test accessibility. All five builds can work well once the box feels safe, dry, and simple to maintain. The best build is the one the reader will actually keep clean. Before moving on, placement matters just as much as the build itself. Which DIY Nesting Box Method Should You Choose? The best method depends on what is sitting in the garage, how much cutting feels realistic, and whether the priority is speed, durability, or egg cleanliness. This table gives a fast comparison before the full build steps. Method Best For Watch-Out 5-gallon bucket Beginners, small flocks, renters Must be secured so it cannot roll Wooden plywood box Permanent coop, long-term use Takes more measuring and cutting Milk crate Fast setup, movable use Needs a solid floor insert for stability Roll-away box Dirty eggs, egg-eating issues Slope must be gentle, or eggs crack Plastic storage bin Easy cleaning, quick build Thin bins crack over time; choose thick ones Quick guide: bucket for speed, wood for durability, roll-away for egg protection. For a first build, the bucket or the wooden box covers most backyard setups well. Where Should Nesting Boxes Sit Inside the Coop? A well-built box that sits in the wrong spot gets ignored. Hens need to feel safe inside the box, which means the surrounding area matters as much as the box itself. Good placement checks: Quiet corner: Away from feeders, waterers, and the busiest foot traffic areas Away from roost droppings: Boxes placed directly below or beside roost bars get soiled quickly Moderate height: Between 18 and 24 inches off the floor is accessible without feeling exposed Outside access, if possible: A lid or door that opens from outside the coop makes collection faster and reduces flock stress A common placement mistake is mounting boxes directly under the roost. Droppings fall overnight and cover both the box and any eggs inside by morning. That single change, moving the box away from the roost line, fixes the dirty egg problem for a lot of backyard keepers before any other adjustment is needed. The USDA National Agricultural Library supports providing hens with clean, dry, and well-maintained laying areas to support egg quality and flock health. What Mistakes Make Chickens Avoid Nesting Boxes? Even a correctly sized and well-placed box can sit empty if a few small details are off. These are the most common reasons hens skip the box, along with the fix for each one. Too much light: Hens want privacy when they lay. Add a curtain, reposition the box, or build a partial hood over the opening. Dirty or wet bedding: Replace bedding the moment it feels damp or smells off. Hens will not use a box that does not feel clean. Unstable box: A bucket or bin that shifts when a hen steps in creates a safety signal. Secure every box firmly before introducing hens to it. Placed near roost mess: Move the box to the opposite side of the coop from the roost bars if droppings are landing nearby. No front lip: Without a lip, bedding falls out, and eggs roll to the edge. A simple 3 to 4-inch board screwed across the front fixes this immediately. Hard egg collection: If eggs stay in the box for too long because collection is inconvenient, hens get used to laying elsewhere. Make access easy. Small fixes usually make the biggest difference. Hens may avoid a box because it feels too bright, messy, shaky, or hard to use. Once you correct those details, simple diy nesting boxes often become a comfortable laying spot instead of empty coop furniture. Are DIY Nesting Boxes Better Than Store-Bought Ones? DIY nesting boxes work just as well as store-bought models when they are correctly sized, safely built, and properly maintained. The main advantage of building your own is flexibility: the dimensions, material, number of compartments, and access door placement all fit the actual coop rather than a standard retail design. Store-bought boxes can save time and give a uniform look, which matters to some keepers. The tradeoff is that they may not fit every coop layout, and some are sized for appearance rather than hen comfort. Where DIY sometimes falls short is in access for cleaning. A poorly designed box can trap moisture, hide mites, or make bedding replacement awkward. Planning the cleaning routine before the build, not after, closes that gap. The CDC supports handwashing and surface cleaning when handling backyard poultry and eggs, making an easy-to-clean box design a practical health consideration, not just a convenience. Frequently Asked Questions Can I leave nesting boxes open at night? Boxes should ideally be closed or blocked at night to stop hens from sleeping inside them. Hens sleeping in boxes leave droppings on the bedding and eggs. Roost bars positioned higher than the boxes usually solve this naturally, since hens prefer the highest sleeping spot available. How often should nesting box bedding be fully replaced? Full bedding replacement depends on flock size and how often eggs are collected, but a complete swap every one to two weeks is a reasonable baseline. Spot-clean damp or soiled areas daily during egg collection. Fresh, dry bedding keeps the box inviting and eggs cleaner between full changes. Do nesting boxes need ventilation? Nesting boxes do not need direct ventilation, but the coop itself must have good airflow to prevent moisture buildup, which affects bedding quality inside the boxes. A box that sits in a damp, poorly ventilated coop will develop mold and mite issues regardless of how well it was built. Can I use cardboard boxes as temporary nesting boxes? Cardboard can work as a short-term option if nothing else is available, but it absorbs moisture quickly, cannot be cleaned, and breaks down fast. Replace it with a more durable option within a week or two. A plastic bin, bucket, or crate is a better low-cost alternative that actually lasts. At what age do pullets start using nesting boxes? Most pullets begin laying and using nesting boxes between 18 and 24 weeks of age, depending on breed. Some keepers place a fake egg or golf ball inside the box a week before the expected laying age to guide young hens toward the right spot before instinct fully kicks in. Final Thoughts The best diy nesting boxes are not the ones that photograph well. They are the ones hens use without hesitation, eggs stay clean in, and the keeper does not dread maintaining. Start with the right size, a safe and cleanable material, and a quiet spot away from the roost. Whether the build is a five-minute bucket or a full plywood setup, homemade diy chicken nesting boxes can be finished in a weekend with supplies most people already have around the house. Getting the placement right, adding a proper front lip, and staying consistent with bedding changes will do more for egg quality than any upgrade after the fact. Build it simple, build it stable, and let the hens do the rest. Which method are you planning to try first: bucket, wood, crate, bin, or roll-away? Drop it in the comments so others can see what is working in real co-ops.
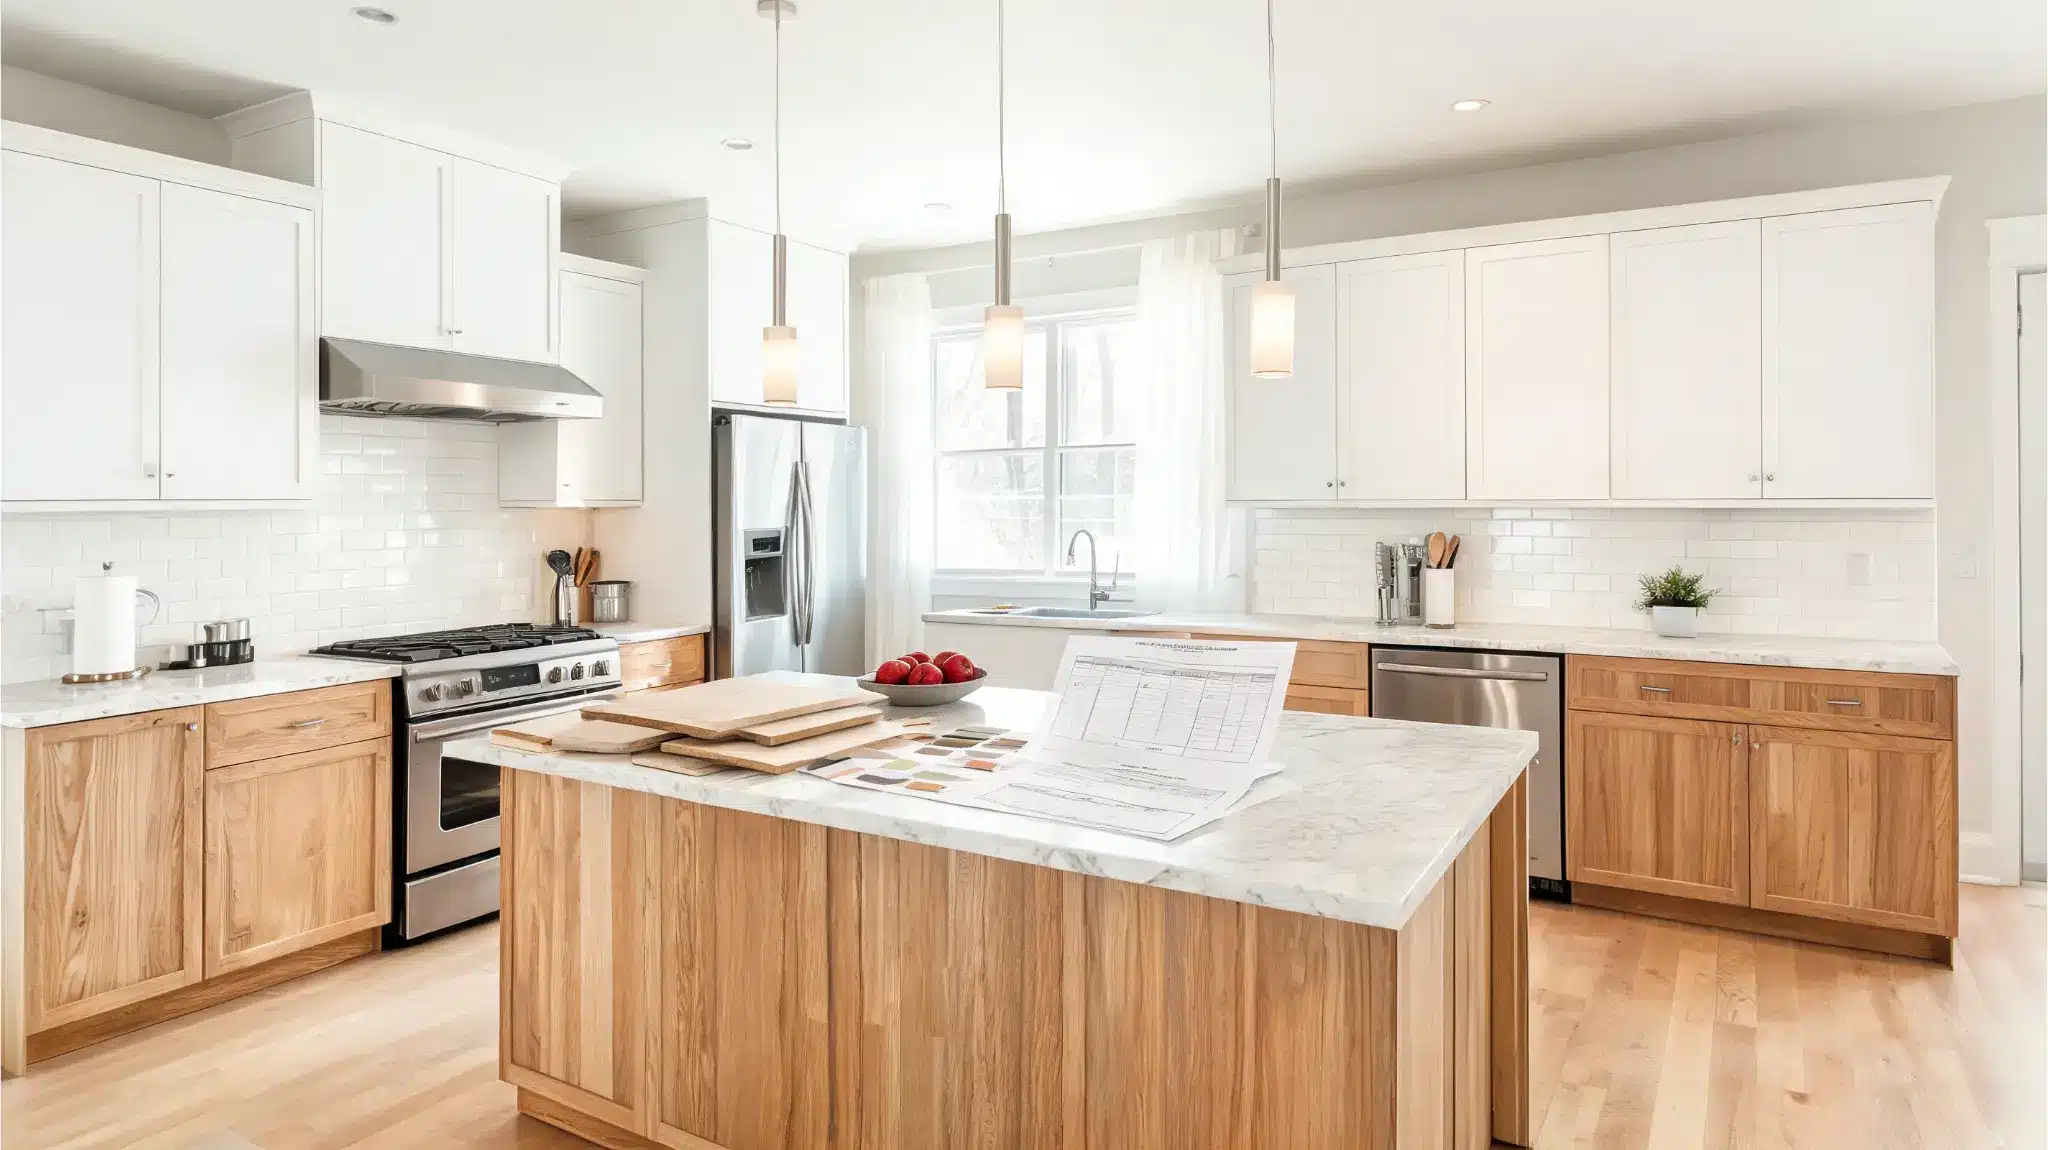
Kitchen renovation prices can be hard to pin down because the final number depends on size, layout, materials, labor, and where the home is located. A small refresh may cost around $10,000, while a larger remodel with new cabinets, counters, flooring, appliances, lighting, and licensed labor can reach $75,000 or more. I’d start by separating must-have fixes from nice-to-have upgrades, then compare costs by project scope. That makes it easier to read contractor quotes, spot missing line items, and avoid surprises. If you are asking how much does it cost to renovate a kitchen, the answer starts with your scope, your space, and the choices that matter most. How Much Does It Cost to Renovate a Kitchen? The average kitchen remodel cost in the U.S. often falls between $15,000 and $50,000 for a standard full update. Smaller cosmetic jobs can cost less, while full gut renovations with new cabinets, stone counters, better appliances, licensed labor, and layout work can pass $75,000. A basic refresh usually keeps the same layout. A mid-range remodel replaces the main surfaces and improves storage. A high-end project often adds custom work, better materials, and licensed trades for plumbing, gas, or electrical changes. Remodel Type Typical Cost Range Best For Common Updates Basic Refresh $8,000 – $20,000 Tight budgets Paint, hardware, lighting, simple counters Mid-Range Remodel $20,000 – $50,000 Most homes Cabinets, counters, flooring, backsplash, appliances Major Remodel $50,000 – $90,000 Older kitchens New layout, better storage, licensed trade work High-End Remodel $90,000+ Luxury homes Custom cabinets, premium appliances, structural work Use these ranges as a starting point, then adjust your budget based on your kitchen size, layout, material choices, and local labor costs. Cost Breakdown for a Kitchen Renovation Knowing what each part of a kitchen renovation costs makes it easier to plan your budget and compare contractor quotes line by line. Cabinets and labor consistently take the largest share. Smaller details like fixtures and backsplash tile can still add up quickly if they aren’t planned before work starts. Line Item Low End High End What Drives the Variation Cabinets $5,000 $30,000+ Stock vs. custom, pull-outs, pantry units, finish level Labor $2,300 $12,000+ Scope of work, demo, trades, location Countertops $1,500 $6,000+ Material, island size, edge profile, cutouts Appliances $2,000 $10,000+ Brand, size, built-in vs. freestanding Flooring $1,000 $4,000+ Material, subfloor condition, prep work Plumbing & Electrical $1,000 $10,000+ Layout changes, code updates, panel upgrades Permits $500 $2,700 City, county, project scope Backsplash & Fixtures $600 $2,700+ Tile type, wall size, sink, and faucet finish Lighting $500 $3,000+ Fixture count, wiring needed, recessed vs. pendant The sections below break down each line item with the specific choices that move the price up or down. If you’re comparing quotes, this is the order to check them against. 1. Cabinets Cabinets are often the single highest cost in a kitchen renovation, ranging from $5,000 to $30,000 or more depending on kitchen size, cabinet type, and finish level. Stock cabinets cost less and work well with standard layouts. Semi-custom cabinets give you better storage options at a higher price. Custom cabinets can raise the total quickly, especially when the kitchen has unusual corners, tall pantry units, pull-outs, or special trim. If your budget is tight, refacing the existing cabinet boxes costs significantly less than full replacement and can produce a similar visual result. 2. Labor Labor can make up about 15% to 30% of a kitchen remodel budget. For many projects, total labor costs can fall between $2,300 and $12,000 or more, depending on the scope of work and where the home is located. A simple update with no layout changes usually costs less. A full renovation takes more time because crews may need to handle demolition, cabinet installation, plumbing, electrical work, flooring, tile, painting, cleanup, and inspections. 3. Countertops Countertops often cost between $1,500 and $6,000 for a standard kitchen. Laminate and butcher block are usually the lower-cost choices, while quartz and granite sit in the mid-range for most U.S. homes. A detailed look at countertop materials and their costs can help narrow down which surface fits both your budget and your kitchen’s use. The price rises with larger islands, premium stone, special edges, extra seams, and sink or cooktop cutouts. Ask whether your quote includes templating, fabrication, delivery, old counter removal, and installation. 4. Appliances Appliance pricing depends on brand, size, features, and finish. A basic kitchen appliance package may cost around $2,000 to $4,000, while mid-range packages can run $4,000 to $10,000 or more. High-end appliances can cost much more, especially if you choose a built-in refrigerator, wall oven, cooktop, range hood, or panel-ready units. I would set an appliance allowance early so one item does not take money away from cabinets, counters, or labor. 5. Flooring Kitchen flooring typically costs between $1,000 and $4,000, depending on the material, square footage, and prep work needed. Vinyl, laminate, and luxury vinyl plank usually cost less. Tile costs more because it needs careful subfloor prep and skilled installation. If you’re considering vinyl plank, understanding how to lay vinyl plank flooring correctly can help you decide whether it’s a viable DIY option. Old floor removal, water damage repair, and subfloor leveling can all add to the total; ask your contractor if those items are included in the quote. 6. Plumbing and Electrical Plumbing and electrical work can range from $1,000 to $10,000 or more, depending on what needs to be moved, replaced, or brought up to code. Larger plumbing changes alone can reach $15,000 in complex projects. Electrical costs can include new outlets, dedicated appliance circuits, recessed lights, under-cabinet lighting, panel updates, and code fixes. These items are easy to miss in early quotes, so they should be listed clearly. 7. Permits Permits often cost between $500 and $2,700, but the final amount depends on your city, county, and project scope. Cosmetic updates may need little or no permitting, while plumbing, electrical, gas, or structural work often requires approval. Your quote should explain who pulls the permits, who pays for them, and whether inspection fees are included. This helps prevent surprise charges once the project starts. 8. Backsplash and Fixtures Backsplash installation often costs between $500 and $1,700, depending on the tile, wall size, pattern, and labor. Simple subway tile usually costs less, while handmade tile, full-height backsplash work, and detailed layouts cost more. Fixtures, such as sinks and faucets, can range from $100 to $1,000 or more each. Premium finishes, workstation sinks, touchless faucets, and added accessories can raise the price. 9. Lighting Lighting can add $500 to $3,000 or more, depending on how many fixtures you add and how much wiring is needed. Basic ceiling lights cost less, while recessed lighting, pendants, dimmers, and under-cabinet lights cost more. Plan lighting before work starts. Last-minute changes can require new wiring, extra labor, drywall repairs, and longer timelines. Kitchen Renovation Cost by Project Size Size matters, but it is not the only driver. A small kitchen with custom cabinets can cost more than a larger kitchen with stock products. Still, square footage gives you a starting point. Kitchen Size Typical U.S. Cost Range Notes Small kitchen under 100 sq. ft. $7,500 – $25,000 Lower material volume, but fixed labor still applies 12×12 kitchen, 144 sq. ft. $15,000 – $42,000 A common mid-size example for checking the 12×12 kitchen remodel cost Medium kitchen, 150-200 sq. ft. $20,000 – $65,000 More cabinets, counters, flooring, and labor Large kitchen over 200 sq. ft. $65,000 – $130,000+ Often includes islands, more storage, higher labor, and premium choices Taking time to compare the details now can help you avoid costly surprises once the remodel begins. What Affects the Final Price? A kitchen can look simple on the surface, but then it becomes expensive once the walls open up. These are the cost factors I would check before saying yes to a quote. 1. Keeping or Changing the Layout Keeping the sink, range, dishwasher, and fridge in the same spots is one of the best ways to control costs. Moving plumbing, gas, or electrical lines adds skilled labor and permits. Removing a wall can cost much more if it is load-bearing. 2. Material Choices Material choices can change the total quickly. Stock cabinets, laminate counters, and standard appliances cost less. Custom cabinets, stone slabs, built-in appliances, and handmade tile raise the budget. 3. Location Labor rates are not the same across the U.S. Large, high-cost metro areas often cost more than smaller cities or lower-cost regions. Permit fees, contractor demand, delivery, parking, and disposal can also shift the final price. 4. Age of the Home Older homes can hide extra work behind walls and floors. You may find old wiring, weak plumbing, uneven framing, asbestos risk, rot, or water damage. I would keep a 10% to 20% cushion for these problems, especially if the home is several decades old. 5. DIY vs. Professional Work DIY can help with painting, hardware swaps, cabinet assembly, or simple backsplash work. Licensed pros should handle electrical, plumbing, gas, and structural work. A mixed plan often works best. You save where the risk is low and pay pros where safety matters. What Homeowners Say About Kitchen Renovation Costs Homeowner discussions on Reddit and Houzz show why kitchen remodel prices can feel confusing. Many people start with one budget, then find out cabinets, counters, labor, plumbing, electrical work, permits, cleanup, and small repairs can raise the total fast. One homeowner on Reddit shared that a $30,000 budget started to feel closer to $50,000 after pricing cabinets, quartz counters, layout changes, appliances, plumbing, and electrical work. That kind of jump is common when the project moves beyond surface updates. On Houzz, another homeowner showed how cabinet quotes ranged from about $11,000 to $27,000, while labor ranged from about $8,700 to $23,000. This shows why two kitchen quotes can look very different, even for the same room. The main takeaway is to compare the full scope, not just the final number. Ask what each quote includes, what is left out, and how much room you should keep for hidden repairs. A higher quote may be more complete, while a lower one may leave costs for later. How to Plan Your Budget and Save Money Start with what the kitchen needs most, then match your budget to that scope. This helps you spend on the right upgrades and avoid surprise costs. Fix major issues first, such as leaks, bad wiring, broken appliances, or damaged flooring. Keep what still works, like cabinet boxes, appliances, flooring, or the current layout. Choose your remodel level before picking finishes. Set aside 10% to 20% for unexpected costs. Get at least three quotes with the same scope. Ask for labor, materials, permits, demolition, disposal, cleanup, and allowances in writing. Save by keeping the layout, refacing cabinets, using standard countertop slabs, shopping appliance sales, and choosing simple tile. Spend more on cabinets, lighting, sink, faucet, and durable flooring. Cut back on upgrades that are easy to change later. If you’re weighing a smaller-scope project, the cost breakdown for a kitchen remodel without appliances covers where the biggest savings come from when you’re keeping existing units. What to Ask Your Contractor Before Signing Anything Most budget problems start with a quote that left something out. These five questions surface the gaps before work begins. What exactly is included in the labor line? Ask whether demo, cleanup, inspections, and touch-up painting are covered, or if those are billed separately. Who pulls the permits, and are the fees included? Some contractors include permit costs in the quote; others bill them as a pass-through. Clarify before signing. What’s your process when hidden conditions are found? A contractor who has a clear answer, written change order, and agreed markup rate is more reliable than one who says “we’ll figure it out.” Are allowances real, or placeholders? Some quotes list $500 for tile or $2,000 for fixtures. Ask whether those numbers reflect your actual selections or whether they’ll change once you pick materials. What’s the payment schedule? Avoid contractors who require more than a 30% to 40% deposit upfront. Payment tied to project milestones protects you if the schedule slips. Return on Investment Kitchen updates can support resale value, but the largest project isn’t always the smartest financial move. According to Hanley Wood Market Intelligence’s 2025 Cost vs. Value Report, a minor midrange kitchen remodel, recouped a higher percentage of its cost than a major upscale remodel nationally. Smaller, well-executed updates tend to perform better on resale percentage than full gut renovations. That said, larger remodels can still make sense if you plan to stay for years and want better daily use from the space. For resale, keep material choices neutral, durable, and consistent with the price range of nearby homes. A kitchen that outspends the neighborhood rarely recovers the premium at sale. Frequently Asked Questions What costs the most in a kitchen renovation? Cabinets take the largest share of most renovation budgets because the cost includes boxes, doors, drawers, hardware, trim, and installation. Custom sizes, soft-close features, pull-outs, pantry units, and premium finishes all raise the price significantly. Should I change the kitchen layout? Change the layout only when the current setup creates real daily problems. Moving a sink, range, gas line, or wall adds labor, permits, and time. If the room functions reasonably well, keeping the existing layout can save several thousand dollars. How many contractor quotes should I get? Get at least three quotes with the same scope. Ask each contractor to separate labor, materials, permits, and allowances into distinct line items. A low quote is not always better if it omits cleanup, inspections, or key materials. Can I do part of a kitchen renovation myself? Yes, for low-risk tasks. Painting, cabinet hardware, simple demo, and some backsplash work are DIY-friendly. Licensed pros should handle electrical, plumbing, gas, structural work, and anything tied to permits or inspections. How long does a kitchen renovation take? A basic cosmetic refresh may take two to four weeks. A mid-range remodel typically runs six to ten weeks, including ordering lead time for cabinets. A full gut renovation with layout changes can take three to six months from demo to punch list. Does kitchen renovation cost more in certain states? Yes, significantly. Labor and permit costs in high-cost metros like San Francisco, New York, or Seattle can run 30% to 50% higher than the national average. States with lower labor costs and simpler permitting requirements can come in at the lower end of national ranges. Final Thoughts Now you have a clearer view of how much does it cost to renovate a kitchen and why prices vary so much. The smartest budget starts with scope, not finishes. Decide what must change, what can stay, and how much risk your home may hide behind the walls. A 12×12 space may land near $15,000 for a lighter refresh or pass $40,000 with fuller upgrades. Larger or higher-end projects can cost far more. If you are ready to plan, measure your space, list your must-have updates, and collect three detailed quotes before you choose a contractor. Use that process before signing anything, and your budget will be easier to defend from the start.
Most DIY room decor projects take one afternoon and cost under $25. The ones that fail take all weekend because you skipped the planning step, not because the idea was bad. I’ve done both, and I can tell you that picking one mood before you make anything is the single change that turns a scattered room into one that looks intentional. This guide covers DIY bedroom decor that a real person with basic supplies can finish and actually be happy with. Difficulty 1–3 (varies by project; most are beginner-level) Time 30 minutes to half a day per project Cost $0–$60 depending on the project Tools Needed Scissors, washi tape, removable strips, basic paint supplies, optional: canvas, clay, fairy lights Skill Required Beginner. No power tools needed for most projects. Before touching a single wall, decide which direction your room is going. Every project in this guide works for at least one of these six looks, so pick yours first, and every piece you make connects to everything else already in the room. Pick One Room Mood Before You Make Anything The most common mistake I see isn’t a bad DIY project. It’s making five decent projects that don’t talk to each other. A cozy macrame wall hanging beside a sleek LED strip and a pastel photo collage reads as unfinished, even when each piece is well made. You don’t need a rigid theme. You need one direction. Look at what already exists in the room: wall color, bedding, the main light source, and the desk area. Then pick the look that already feels closest to what’s there. Building on it is faster and cheaper than fighting it. Cozy: warm fairy lights, layered bedding, soft neutrals, natural textures Minimal: clean surfaces, calm colors, one piece of simple wall art Boho: macrame, plants, woven baskets, earth tones Cute / Aesthetic: pastels, photo walls, soft shapes, Polaroids Modern: clean lines, LED accents, bold contrast Rustic: wood tones, vintage finds, linen textures With your direction set, each project below becomes a simple yes-or-no. That’s what makes the room look planned instead of assembled by accident. DIY Bedroom Wall Decor Ideas Walls decide what your eyes land on first. A plain wall doesn’t just look unfinished; it makes every other piece in the room work harder to compensate. One clear wall idea solves this faster than any amount of shelf styling or bed arranging. These are the wall decor projects worth your time. 1. Photo Collage Wall The thing people get wrong with photo collages is mixing photo tones at random. Warm, slightly faded prints next to bright phone photos next to black-and-white postcards look chaotic even when every individual image is meaningful. Before printing anything, choose one tonal direction: warm and golden, muted and soft, or true black-and-white. Then the collage reads as a single piece instead of a bulletin board. Place it above the bed, beside the desk, or on a single plain wall. Not across multiple walls. Use washi tape, small clips, or removable strips to avoid holes. Cost: $5–$15. Time: 1–2 hours. Pro Tip: Print photos at 4×6 inches for a clean, consistent grid. Mixing 4×6 with phone-printed wallet sizes is what makes collages look uneven. 2. Magazine Collage Art Magazine collages cost almost nothing and take about 90 minutes, which makes them one of the most honest beginner DIY bedroom decor projects. The version that actually looks good has a restricted color palette: soft pink and cream, brown and beige, or black and white. Pull pages only in those tones, and the piece looks art-directed. Pull every page that looks interesting, and it looks like a waiting-room table. Keep the collage in one area: behind the bed, above the desk, or beside a mirror. Spreading it across multiple walls is the version I regret. Cost: $0–$5. Time: 1–2 hours. 3. DIY Canvas Art A painted canvas doesn’t need to be complicated, and the simple versions often look better than the ambitious ones. Soft color blocks, a single brushstroke shape, or one short quote painted in a color pulled from your bedding can look genuinely finished. Use painter’s tape for clean lines if you want a graphic look. Use a wide, loose brush and skip the tape if you want something softer. Pick colors already in the room: bedding, curtains, or the rug. One canvas works for a small wall; two or three need matching color schemes to stay cohesive. Cost: $10–$25. Time: 2–3 hours including dry time. 4. Washi Tape Frames Washi tape frames are the right call for renters, dorm rooms, and anyone who’s moved the furniture three times already and knows holes are a bad bet. Tape a thin border around a print, a postcard, or a small quote card, and you get the visual structure of a framed piece without the commitment. The version that looks clean uses one tape color that matches the room, not a mix of patterns. Above the desk, around a mirror, or in a single column beside the bed all work well. Cost: $5–$10. Time: 30–45 minutes. 5. Peel-and-Stick Wallpaper Accent Wall This is the biggest visual impact per hour of any project on this list, but it’s also the one most people rush and then regret. The problem isn’t the pattern choice; it’s skipping the level check and the corner test. Use a long level to mark a straight vertical line before your first strip. Press each panel with a flat card as you go. If you skip both steps, you’ll notice the drift by the fourth strip, and it only gets worse. Soft florals, subtle checks, and muted stripes work better than loud patterns in most rooms. Apply it to one wall only: behind the bed or the desk. Test a small hidden corner first in any rented room. Cost: $25–$60. Time: 2–4 hours. 6. Macrame Wall Hanging Macrame fits best in cozy, boho, and neutral-toned rooms. If your room has plants, woven baskets, or warm wood tones, it will slot right in. If your room is minimal or modern, it creates visual friction that works against everything else you’ve done. Hang it above the bed or beside a mirror, and leave empty space around it. The piece needs room to read as a texture detail rather than clutter. You can make one with macrame cord and a wooden dowel, or use a starter kit. Cost: $10–$20. Time: 2–4 hours. 7. Fabric Wall Accent A fabric panel above the bed reads as a soft headboard from across the room and costs almost nothing if you already own a scarf or a spare piece of fabric. Neutral linen, soft florals, or muted checks all work. Loud patterns compete with bedding and rarely win. Keep the rest of the wall clear. One fabric piece works as a focal point; anything else turns it into clutter. Cost: $5–$25. Time: 20–40 minutes. With the walls sorted, lighting is the next thing that moves a room from looking nice in photos to feeling good in real life. DIY Lighting Decor for Bedrooms A room can have strong wall decor and layered bedding and still feel flat if the only light source is overhead. The overhead light is functional, not atmospheric. These lower-light additions are what change how the room actually feels at night. Safety Note: Never cover fairy or string lights with fabric, paper, or any flammable material. Keep all string lights away from curtains and bedding, avoid overloaded outlets, and unplug them before sleeping. 1. Fairy Light Wall Warm white fairy lights are the most versatile thing on this list. They work around the bed, behind a desk, along a shelf, or framing a mirror. Color-changing lights are better for a playful room; warm white works in almost every other style. The version that looks intentional routes the wire close to wall edges or behind furniture. A wire dangling across open space reads as unfinished. Use small removable hooks or strips to keep it tight. Cost: $10–$20. Time: 45–60 minutes. 2. Branch Lights Dried branches in a tall vase wrapped with battery-operated LED lights look better in a cozy or boho room than any purchased lamp at the same price point. The shape does the work; the lights just make it visible at night. Keep the vase simple and matte so the branches stay the focus. Place it in an empty corner, beside a mirror, or on a desk surface. Warm white for warm-toned rooms; soft white for cooler palettes. Cost: $5–$15. Time: 30 minutes. 3. Glass Jar Candle Holders Clean pasta sauce or pickle jars wrapped in twine, ribbon, or frosted spray paint become legitimate good nightstand or desk decor. Use battery-powered tea lights inside for the same warm glow with no fire risk. One or two jars per surface is the right number. More than that starts looking like a craft store display. Cost: $0–$8. Time: 30–45 minutes. 4. LED Strip Light Shapes LED strips work well behind a desk, under a shelf, or around a mirror. A simple shape like a heart, star, or soft curve can work on a plain wall if the rest of the wall is clear. The strip itself is the detail; it doesn’t need anything competing with it. Hide the wire where possible. Cost: $10–$25. Time: 30–60 minutes. Lighting changes the mood of the whole room, so the bed area needs to match it. DIY Bed Area Decor The bed is where most people look first when they walk into a bedroom. If the bed area looks put together, the room feels put together, even when the desk is messy and the closet door is closed. Start above the bed, then connect it to the bedding and the surrounding lights. 1. Fabric Headboard Look A fabric panel, padded board, or thick folded textile hung behind the bed adds the visual softness of a real headboard without the cost or the installation. Choose a fabric that connects with your bedding: if the bedding has a pattern, keep the panel plain; if the bedding is solid, a soft texture or subtle print works. Cost: $10–$30. Time: under an hour. 2. Canopy Over the Bed Sheer curtain panels draped above or behind the bed make the whole area feel enclosed and softer without adding weight. White, cream, blush, and soft sage are the colors that work here. Heavy or dark fabric fights itself in this position. Let it be the main visual detail near the bed, and don’t stack it with a wall piece, a photo collage, and a macrame hanging. Cost: $10–$25. Time: 30–45 minutes. 3. Throw Pillow Refresh New pillow covers are the fastest single change you can make to how the bed reads. Two or three covers in the room’s main color direction, cream, sage, blush, or warm brown for a calm room, or one brighter accent against softer bases for a playful one, shifts the whole bed area in about 15 minutes. Three to five pillows total are enough for most beds. Cost: $5–$20. Time: 15 minutes. 4. Layered Bedding A duvet, a throw blanket, and a mix of pillows in connected colors make the bed look more deliberate than a single flat comforter ever can. The difference in texture matters as much as the color. A smooth duvet, a knit throw, and a linen pillow read as considered. Fold the throw at the foot of the bed instead of spreading it flat. It keeps the layers visible without making the bed look unmade. Once the bed is sorted, the desk is usually the next surface that needs attention, and it’s where most of the daily visual clutter lives. DIY Desk and Vanity Decor The desk is the hardest surface to keep looking intentional because it’s actually used. Charging cables, notebooks, pens, and half-finished projects collect there daily. The goal isn’t a perfectly styled surface. It’s a surface where the functional stuff has a place, so the decorative stuff can actually be seen. 1. Painted Organizers Old jars, plain cups, empty boxes: paint them in one color family and group them together on one side of the desk. White, beige, sage, or black each work depending on the room’s direction. The trick is painting everything the same color so the group reads as a set. Individual multicolored jars look collected; a set of matching ones looks purposeful. Cost: $2–$8 plus dry time. Time: 30–45 minutes. 2. Clay Trinket Dishes Air-dry clay shaped into a small dish gives you somewhere to put jewelry, hair clips, and small items without them migrating across the surface. Shape it, let it dry fully (usually 24–48 hours), then paint it in a color that matches the desk or bedding. One dish on the nightstand or vanity is the right scale. It’s a utility piece with a handmade feel, not a decor collection. Cost: $5–$10 plus dry time. Time: 1–2 hours active, overnight dry. 3. DIY Mirror Frame Update A plain mirror, whether vanity, wall-mounted, or full-length, takes a frame update well. Rope wrapped around the edge, small craft sticks painted and glued on, dried flowers pressed into gaps, or washi tape in a geometric border all work depending on the room’s mood. Keep the frame simple if the wall already has a photo collage or art piece. If the wall is plain, the frame can carry more detail. A full-length mirror also does real work in a small room. Place it near the brightest natural light source, and it visually doubles the light. Add a plant or a floor basket beside it so it reads as a composed corner rather than a stray object. Cost: $5–$20. Time: about 1 hour. 4. Desk Photo Board A corkboard, wire grid, or cardboard panel above the desk makes the study area feel personal without taking over the wall. Pin photos, notes, small prints, and color swatches. Keep the colors close to whatever’s already on the walls so the desk corner feels connected to the rest of the room rather than competing with it. Cost: $5–$15. Time: 30–60 minutes. All of this decor works better when the surface clutter around it is managed, so here’s a quick word on storage that doesn’t fight the room’s look. Hide Clutter Without Ruining the Look Even well-made DIY bedroom decor loses the effect when every surface is full. The room needs clear space for the handmade pieces to read as intentional. These five storage additions work without adding visual weight. Storage type Use it for Why it works Small tray Perfume, jewelry, skincare, stationery Groups small items so they read as a display, not scatter Woven basket Blankets, bags, extra items Hides clutter while adding warmth and texture Painted box Chargers, clips, makeup extras, desk supplies Keeps storage hidden and color-matched to the room Glass jar Pens, brushes, flowers, clips, battery lights Reuses a simple container without adding visual weight Closed box Shelves, closets, small rooms, under-bed spaces Hides more than open storage and keeps the room calmer Most of these cost $5–$25 and take under 30 minutes to set up. In a small bedroom, trays, baskets, and closed boxes consistently outperform adding more open shelving, which tends to generate display pressure more than it solves storage problems. DIY Bedroom Decor Mistakes That Waste Your Time These are the patterns I’ve done wrong myself, and the ones I see repeated most often in rooms that look almost right but don’t quite land. No color plan before starting. Two main colors and one accent. Write them down before making the first thing. Random colors make even good individual pieces feel disconnected. Too many small items without negative space. Every object you add makes the room busier. Give each piece breathing room, including the handmade ones. Visible wires on finished walls. Loose wires around lights and desk setups undo the effect of everything around them. Tuck them behind furniture or route them along the wall edge with a removable clip strip. Wall pieces placed too high. Art and wall decor should connect visually with the bed, desk, or furniture it sits above, not float in the upper third of the wall where nothing else lives. Putting one idea on every wall. Choose one main wall feature. Photo collage on one wall, LED lights on another, macrame on a third, and a fabric panel on the fourth reads as a showroom sample space, not a bedroom. Copying a room photo without adjusting for your space. A large, bright loft room and a small north-facing bedroom don’t use the same solution. Scale every idea to your actual room. If you want to go deeper into specific bedroom layout decisions, including how furniture placement affects how a room reads before any decor goes up, the cozy minimalist bedroom guide covers that framework in detail. For the mood board side of things, the chill aesthetic room guide is a useful next read. Frequently Asked Questions These are the questions I get most often from people who’ve already picked their mood and are standing in the room wondering where to actually start. What is the cheapest DIY room decor to make? Magazine collage art ($0–$5), glass jar candle holders from reused jars ($0–$8), and painted organizers from existing containers ($2–$8) are the lowest-cost options. All three take under two hours and require no specialist tools. How do I make my bedroom look aesthetic without buying anything? Rearrange what you already have: remove half the items from the desk and nightstand, fold your throw blanket and drape it at the foot of the bed, and move any lamp to sit on a surface rather than on the floor. Visual edits cost nothing and often do more than new items. What DIY room decor works for renters with no holes in walls? Washi tape frames, removable peel-and-stick wallpaper tested on a hidden corner first, fairy lights on removable hooks, and fabric panels draped over curtain rods or tension rods are all renter-safe. Avoid real nails wherever possible; removable strips work for most prints up to standard poster size. How do I make a small bedroom look better with DIY decor? Use one clear wall feature instead of spreading decor across every surface. A mirror near the window doubles perceived light. Keep storage closed or grouped on trays. Pale bedding and low-level lighting both make a small room feel more spacious than anything you can hang on the wall. What is a good DIY bedroom wall decor idea for above the bed? A photo collage with consistent tonal colors, a single macrame wall hanging, a fabric panel, or one piece of DIY canvas art each works well above the bed. The key is picking one, not two or three, and giving it enough clear space around it to read as a focal point. How do I decorate my bedroom on a budget with DIY projects? Start with the projects that use what you already own: repaint existing organizer jars, rearrange current photos into a collage, swap pillow covers rather than buying new pillows. Then add one purchased item, a single string of fairy lights or a small canvas, that connects to the colors already in the room. Can you DIY room decor for a cute aesthetic bedroom? Yes. A pastel photo wall, soft fairy lights, clay trinket dishes in blush or cream, a canopy above the bed, and painted organizers in matching pale tones all work for a cute aesthetic bedroom. The approach is the same: pick the palette first, then make items that stay within it. For a broader view of cozy aesthetic room ideas, that guide covers the full picture. What room colors make a small bedroom feel softer and bigger? Soft white, cream, beige, sage, blush, and warm brown. Pick two as your main colors and one as an accent, then repeat those shades across bedding, wall pieces, and small decor. Consistency across surfaces is what makes a small room read as intentional rather than cramped. If you want to take the wall side further with painting, texture, or a more permanent accent wall treatment, the DIY ombre wall paints guide and the DIY wall shelves guide are the natural next steps. For larger room transformation projects that go beyond decoration, the DIY home projects overview covers what’s actually worth the effort at different skill levels. Summing Up If I were starting again in a room that felt unfinished, I’d do the photo collage wall and the fairy lights on the same afternoon. Together, they cost under $30, take about two hours, and change more about how the room feels than any single higher-cost project. After that, the bed area: new pillow covers and a folded throw blanket at the foot of the bed. That combination of one clear wall feature, soft lighting, and a composed bed area is what turns DIY bedroom decor from scattered craft projects into a room that reads as deliberate. Start with the wall above your bed today, pick one tonal direction for the photos, and go from there.
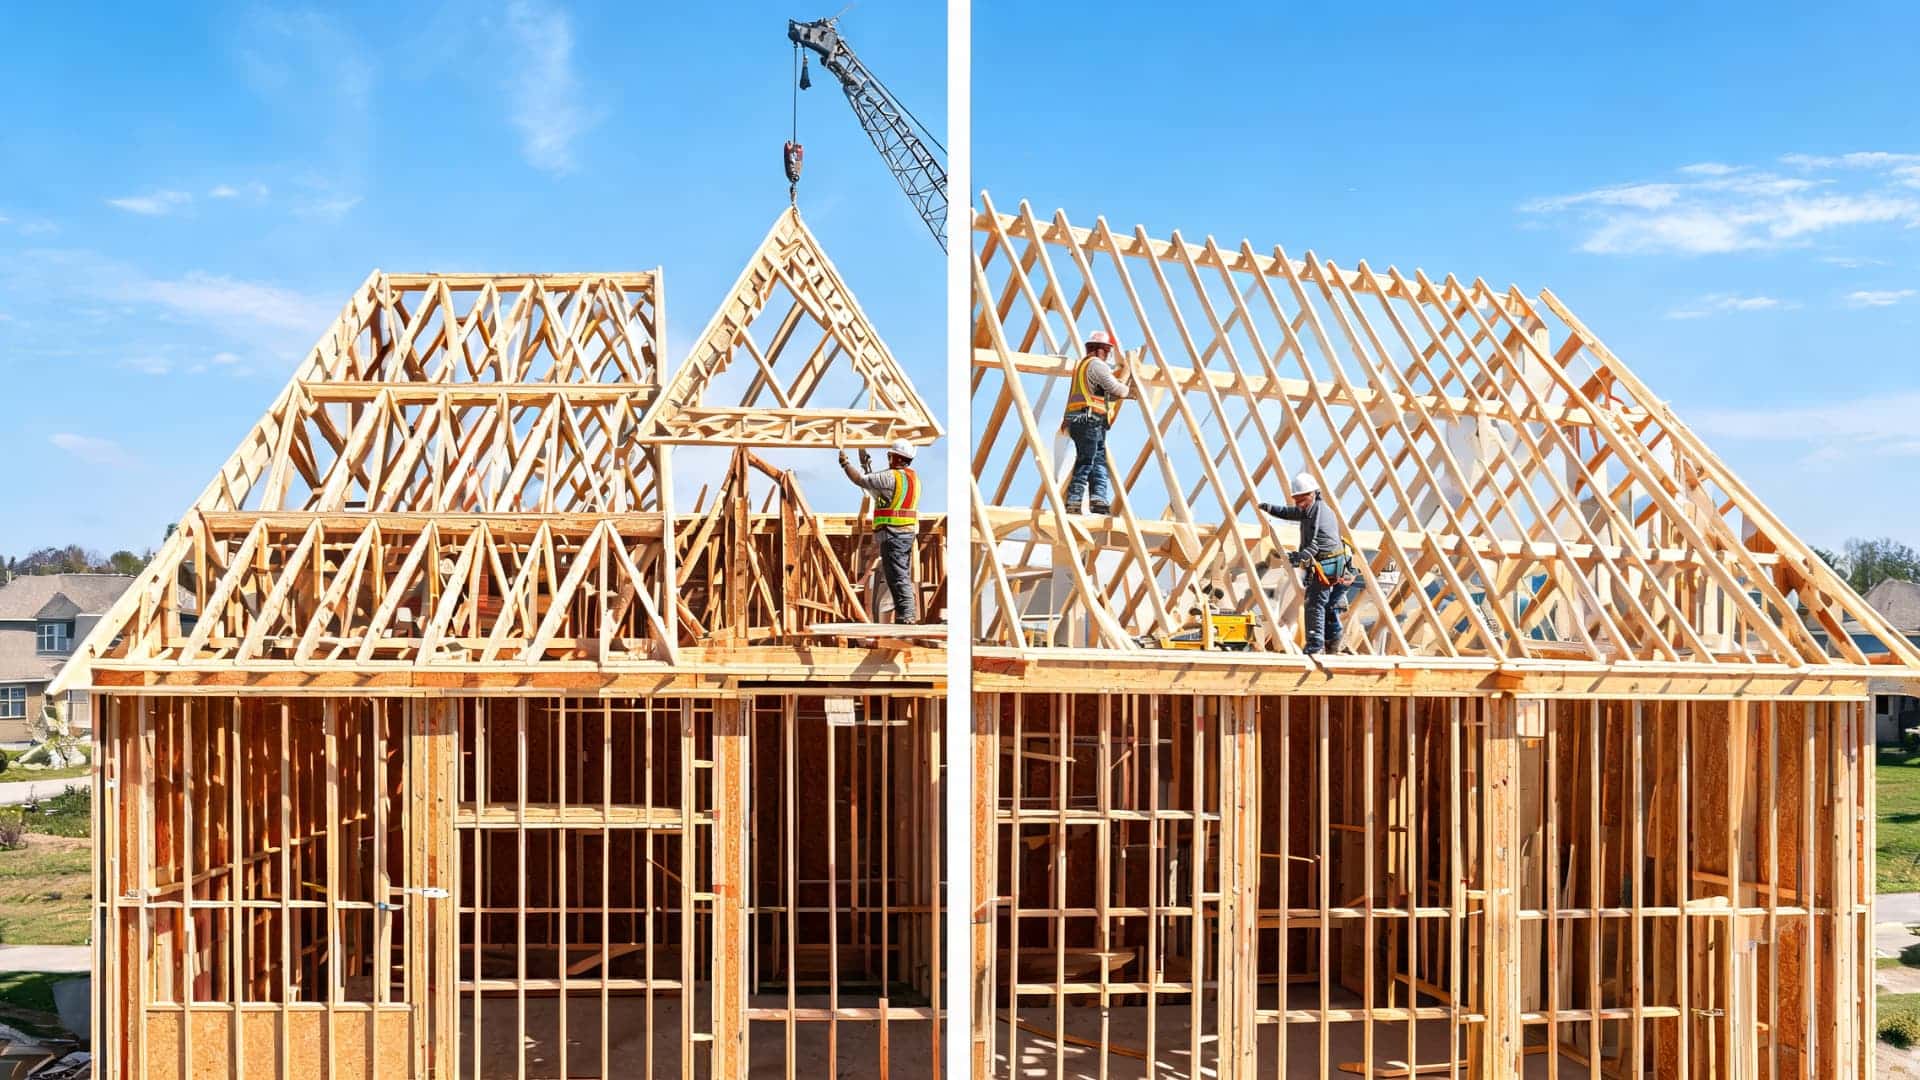
Roof trusses typically cost $1.50 to $4.50 per square foot of floor area installed. Rafter framing runs $3.00 to $6.00 per square foot once you include skilled labor. That gap is the starting point, not the whole story, and it is almost never the number that surprises homeowners most in a real build. I’ve spent a decade tracking residential construction budgets, and roof framing decisions create downstream costs that don’t show up in the initial bid. The choice between roof trusses vs rafters affects your attic plans, your ceiling design, your build timeline, and what happens years later when you want to modify the space. Getting it wrong at the framing stage costs real money to fix. This guide breaks down what trusses and rafters actually cost, where each system fits your project, and what to ask before your contractor orders materials. Cost Note: Figures in this article are estimates based on national averages from NAHB 2024 and HomeAdvisor/Angi 2025 data. Actual costs vary significantly by region, contractor, lumber market conditions, and project scope. Always get at least three quotes before committing to any project above $1,000. What are Residential Roof Trusses? Residential roof trusses are pre-engineered framing systems manufactured off-site. A structural engineer designs each truss for the home’s specific span, pitch, and roof load before it leaves the factory. The triangular web pattern of top and bottom chords and interior web members, connected by metal plates, distributes roof loads efficiently across the structure, typically without relying on interior load-bearing walls. A crew can set trusses for an average-sized home in one to two days. The trade-off is planning: truss dimensions are locked in before fabrication, and changes after ordering are expensive. Large trusses also require crane access on installation day, adding $400 to $900 to the job on lots with clear access. Where it isn’t, trusses may not be practical at all. What is a Rafter? A rafter is a sloped structural beam that runs from the roof ridge down to the wall plate, forming the skeleton of the roof. Rafters are cut and assembled on-site one at a time, which is why this method is called stick framing in the trades. Together, common rafters carry the roof deck, shingles, insulation, and all exterior loads from rain, wind, and snow down to the exterior walls. Several rafter types appear in residential construction. Common rafters run perpendicular from the ridge to the wall plate and are the primary structural members. Hip rafters run diagonally from the ridge to an outside corner of the wall on hip roofs. Jack rafters are shorter members that connect to a hip or valley rafter rather than the main ridge. A rafter tail is the portion of each rafter that extends past the wall plate to form the eave overhang. Rafter ties are horizontal members that connect opposing rafters near the wall plate to resist the outward thrust the roof load creates. Because rafters don’t use the interior webbing of a truss, the space under a rafter roof stays open. That is the core advantage: usable attic space, vaulted ceilings, and mechanical access without structural interference. The trade-off is labor. Each board is measured, cut, and fitted individually, and the quality of the finished roof depends heavily on the framing crew’s skill. Roof Trusses vs Rafters: Cost Breakdown The meaningful comparison is installed cost, not material cost alone. Material-only comparisons miss labor, delivery, crane rental, and the downstream effects on attic and ceiling plans. Line Item Roof Trusses Rafters What Drives the Gap Materials $1.50–$4.50 per sq ft $1.00–$2.50 per sq ft lumber Trusses include engineering and factory fabrication Installation labor $0.80–$1.50 per sq ft $2.00–$4.00 per sq ft Rafter framing requires significantly more on-site carpentry hours Crane rental $400–$900 per day Not required Large trusses cannot be safely set by hand above a certain span Engineering Included in truss price $300–$1,200 if custom design Complex custom rafter roofs may need a structural engineer’s stamp Total installed (typical home) $3,500–$9,000 $6,000–$14,000+ Based on 1,500–2,500 sq ft floor area; range reflects pitch and design complexity These numbers hold for standard residential construction. A complex roof with multiple hips, dormers, or a steep pitch significantly changes both columns. Trusses tend to be cheaper on a standard build, but the gap narrows when crane access is limited or scissor trusses are required for vaulted ceilings. Main Differences Between Roof Trusses and Rafters Beyond cost, the framing choice shapes what you can do with the space both during and after construction. Attic Space and Ceiling Design Standard residential roof trusses use interior web members that run through the center of the roof space. That webbing is structural and cannot be removed without engineering approval. It significantly limits what you can do with the attic: storage is difficult, finishing is impractical with standard trusses, and running mechanical systems requires reviewed penetration details. Rafter framing leaves the attic open. Usable storage, finished attic space, vaulted ceilings, or mechanical access are all achievable without structural interference. Attic trusses are a specialized solution engineered with a raised bottom chord to create usable floor space, but they cost more than standard trusses and must be specified at the design stage, before fabrication. Load-Bearing Wall Implications Most residential roof trusses are designed to span from exterior wall to exterior wall with no interior load-bearing walls required. That is a real advantage in open-plan layouts and simplifies future wall removal. Rafter roofs typically require a ridge beam or ridge board at the peak, and the load from that ridge transfers down through the structure via interior bearing walls or structural posts. This affects where walls can and cannot go on the floor below and makes interior wall removal more structurally complex in rafter-framed homes. Design Flexibility and Timeline Trusses are fabricated off-site as complete units. Once they arrive, setting them is fast: a full house can be framed in a day or two. The constraint is lead time. Truss fabrication typically takes two to four weeks after the roof plan is finalized, and any design change after that point costs extra and resets the clock. Rafters are cut on-site, so there is no lead time to manage. The carpenter can adjust in real time if the structure isn’t perfectly plumb or square, and late design changes, such as a dormer addition or a ceiling height shift in one room, are workable during framing. The trade-off is schedule: rafter framing adds several days to the timeline on a standard home, more on a complex one. Strength and Engineering Neither system is inherently stronger. A well-built rafter roof and a properly engineered truss roof both perform to code when installed correctly. Trusses distribute loads through triangular geometry, which makes them efficient and predictable for long spans. Rafter performance depends more on field workmanship: correct sizing, proper spacing, ridge support, rafter ties, and collar ties all affect the final result. The question that matters is not which is generically stronger, but whether the specified framing meets the load requirements for your roof’s span, pitch, snow load, and wind exposure. Ask that question directly before accepting any framing bid. Pros and Cons: Roof Trusses vs Rafters Here is the direct comparison across the factors that move real project budgets. Factor Roof Trusses Rafters Installed cost (standard home) Lower: $3,500–$9,000 typical Higher: $6,000–$14,000+ typical Installation speed Faster: 1 to 2 days to set Slower: several days to a week or more Attic space Limited by web members unless attic trusses are specified Open and accessible Vaulted or cathedral ceilings Possible with scissor trusses, but must be designed in advance Straightforward: the standard approach Interior load-bearing walls Often not needed: trusses span exterior to exterior May require interior bearing walls or ridge beam support Design lock-in High: dimensions must be finalized before fabrication Low: adjustments possible during framing Future modifications Engineering approval required for any alteration More flexible: standard header-and-cripple approach applies Crane required Yes, for larger spans No special equipment needed No framing choice is universally better. The right answer depends on the budget, roof design, attic plans, and whether the design is fully locked before the contractor orders materials. When to Use Roof Trusses vs Rafters Here is where each system belongs in a real project, based on constraints that matter in the field. Project Type Better Option Why Standard new home, simple roofline Trusses Faster to set, lower installed cost, consistent engineering Custom home, complex roofline or dormers Rafters On-site flexibility accommodates irregular shapes and late design changes Vaulted or cathedral ceiling Rafters (or scissor trusses, if designed in advance) Rafter framing creates open ceiling space naturally Usable attic or planned attic conversion Rafters or attic trusses Standard trusses block usable floor space in the attic Large span over 40 feet Trusses Engineered for long spans; rafters at these distances need costly LVL ridge beams Older home renovation or addition Rafters Matching irregular existing framing is easier with stick framing Tight build schedule Trusses Two to three days of framing vs a week or more for complex stick framing Shed or outbuilding Rafters for spans under 20 feet; trusses for larger spans Small shed spans are easy to stick-frame; larger sheds benefit from truss engineering Limited crane access on lot Rafters If the crane cannot reach the roof line, large trusses cannot be set safely A contractor who pushes one option without asking about your attic plans, ceiling design, and site access is missing part of the conversation. The framing decision affects work that happens months after the framing crew is gone. Regional Cost Variation Where you build moves these numbers more than most homeowners expect. Labor markets are the biggest driver. Framing labor in California or the Northeast runs 40 to 60 percent higher than in the Midwest or Southeast. Lumber prices are less regionally variable now than they were in 2021 and 2022, but truss delivery costs add up in rural markets where fabrication plants are far from the job site. Three patterns worth knowing before you get bids. In high-cost labor markets like California, the New York metro, and the Pacific Northwest, the labor savings from trusses are proportionally larger: cutting two to three days of skilled framing crew time saves more when the daily rate is $800 rather than $500. In rural markets, confirm the truss delivery cost separately before comparing bids, as it isn’t included in a stick-framing quote. In snow-load regions such as the Mountain West, Upper Midwest, and New England, trusses must be engineered for local design snow loads. This is standard practice at reputable plants, but verify it explicitly and ask for the load specification in writing. Per the NAHB, framing and exterior finishes together account for roughly 30 percent of average construction costs on a new home. For context on how that fits the full build, the construction cost per square foot breakdown covers how each phase contributes to the final number by region and building type. Can You Modify or Replace Roof Trusses? Modifying trusses and replacing them are two separate conversations, and both require more planning than most homeowners expect. Roof trusses should never be cut, notched, drilled, or altered without written authorization from a structural engineer or the original truss manufacturer. Every web member, chord, and connector plate has a specific role in the load path. Removing a single piece without authorization alters how forces propagate through the entire system, and the failure may not be immediately apparent. Inspectors find unauthorized truss modifications during re-inspections and home sales, and the remediation cost is high: $3,000 to $8,000 or more, depending on the scope. HVAC runs, electrical, plumbing penetrations, and attic access openings all require reviewed and approved details before any truss member is touched. Safety Note: Never cut, notch, drill, or remove any member of a roof truss without a written repair or modification plan from a licensed structural engineer or the original truss manufacturer. Unauthorized modifications are a code violation in most jurisdictions and can compromise the structural integrity of the entire roof. Replacing rafters with trusses is possible during a full roof rebuild, but it is a major structural project, not a framing swap. It requires a structural review of the existing walls, demolition of the existing roof, new engineering, permits, and inspection. If the home’s interior walls currently carry roof load, those walls may need modification once trusses span exterior to exterior. Budget for a full roof reconstruction, not a renovation line item, and engage a structural engineer before pricing the work. If the remodel also involves full roof replacement, that is the right moment to evaluate whether a framing system change makes structural and financial sense. Where Budgets Go Wrong The framing decision itself is rarely where homeowners lose money. The problems come from the assumptions made around it. Comparing material-only prices instead of installed cost. Neither truss materials nor rafter lumber tells you what the roof actually costs. The number that matters is fully installed: materials, labor, crane, delivery, engineering, and permits are all included. Not deciding on attic use before ordering trusses. I’ve seen homeowners commit to standard trusses, get the roof on, and then realize they want a finished bonus room above the garage. Converting that space after the fact requires attic trusses or a full structural rework, typically $15,000 to $40,000. Decide before you order. Missing crane cost in the framing bid. The crane isn’t always included in the framing quote. On lots with trees, overhead utility lines, or narrow access, crane coordination adds time and cost beyond the standard lift rate. Ask whether it’s included and get a separate crane quote regardless. Cutting trusses during renovation. This is how a $5,000 HVAC project becomes a $20,000 structural remediation. Never alter trusses without written authorization from the manufacturer or an engineer. Ignoring truss lead time in the build schedule. Fabrication takes two to four weeks. If the framing crew arrives on schedule and the trusses are not ready, every trade that follows gets pushed back. Confirm the lead time before the project timeline is set, and order early. What to Ask Your Contractor Before Signing These five questions separate a well-scoped framing bid from one that surprises you mid-project. Is crane rental included in the framing bid, or billed separately? If included, ask for the line item. If separate, get a standalone crane quote for comparison. What is the truss fabrication lead time, and when does the design need to be finalized? Two to four weeks is standard. If your build schedule doesn’t account for it, the framing crew arrives before the materials do. Are the trusses engineered for my local snow load and wind zone? Ask for the design load specifications in writing and verify they match your local building code requirements. Do not assume. What does the attic space look like with this framing system? Ask for a cross-section sketch showing clear height and accessible area. If attic storage or a future room matters, have this conversation before accepting the bid. What permits are required, and who pulls them? Structural framing requires permits in essentially all jurisdictions. Any contractor who suggests otherwise is not someone you want on a structural project. Frequently Asked Questions These are the questions that come up most often from homeowners comparing bids or working through the roof framing decision for the first time. How far apart are roof trusses? Standard residential roof trusses are spaced 24 inches on center for most applications, though 16-inch spacing is used on some designs. The spacing is specified by the truss engineer based on the roof’s load requirements and roof decking thickness. Can you replace rafters with trusses? It is possible during a full roof rebuild, but it is not a simple swap. The project requires structural engineering, permits, full roof demolition, and an evaluation of the existing wall framing. Plan and budget for it as a major structural project. Are trusses or rafters better for a shed? For a shed under 20 feet wide, rafter framing is fast and cost-effective. For spans over 20 feet, trusses provide better structural efficiency and are easier to set without a large framing crew. Summing Up On a standard new build with a simple roofline, trusses are the practical default. The installed savings of $2,500 to $5,000 over rafter framing, combined with a faster frame-up, makes the choice straightforward when the roof design is locked and the attic is not part of the plan. If you need a vaulted ceiling, usable attic space, or flexibility during the build, the higher cost of rafter framing buys you real options that standard trusses close off permanently once the roof goes on. Make the attic decision before the contractor orders materials. Confirm site access for crane delivery if trusses are the plan. Understand what the lead time means for your build sequence.
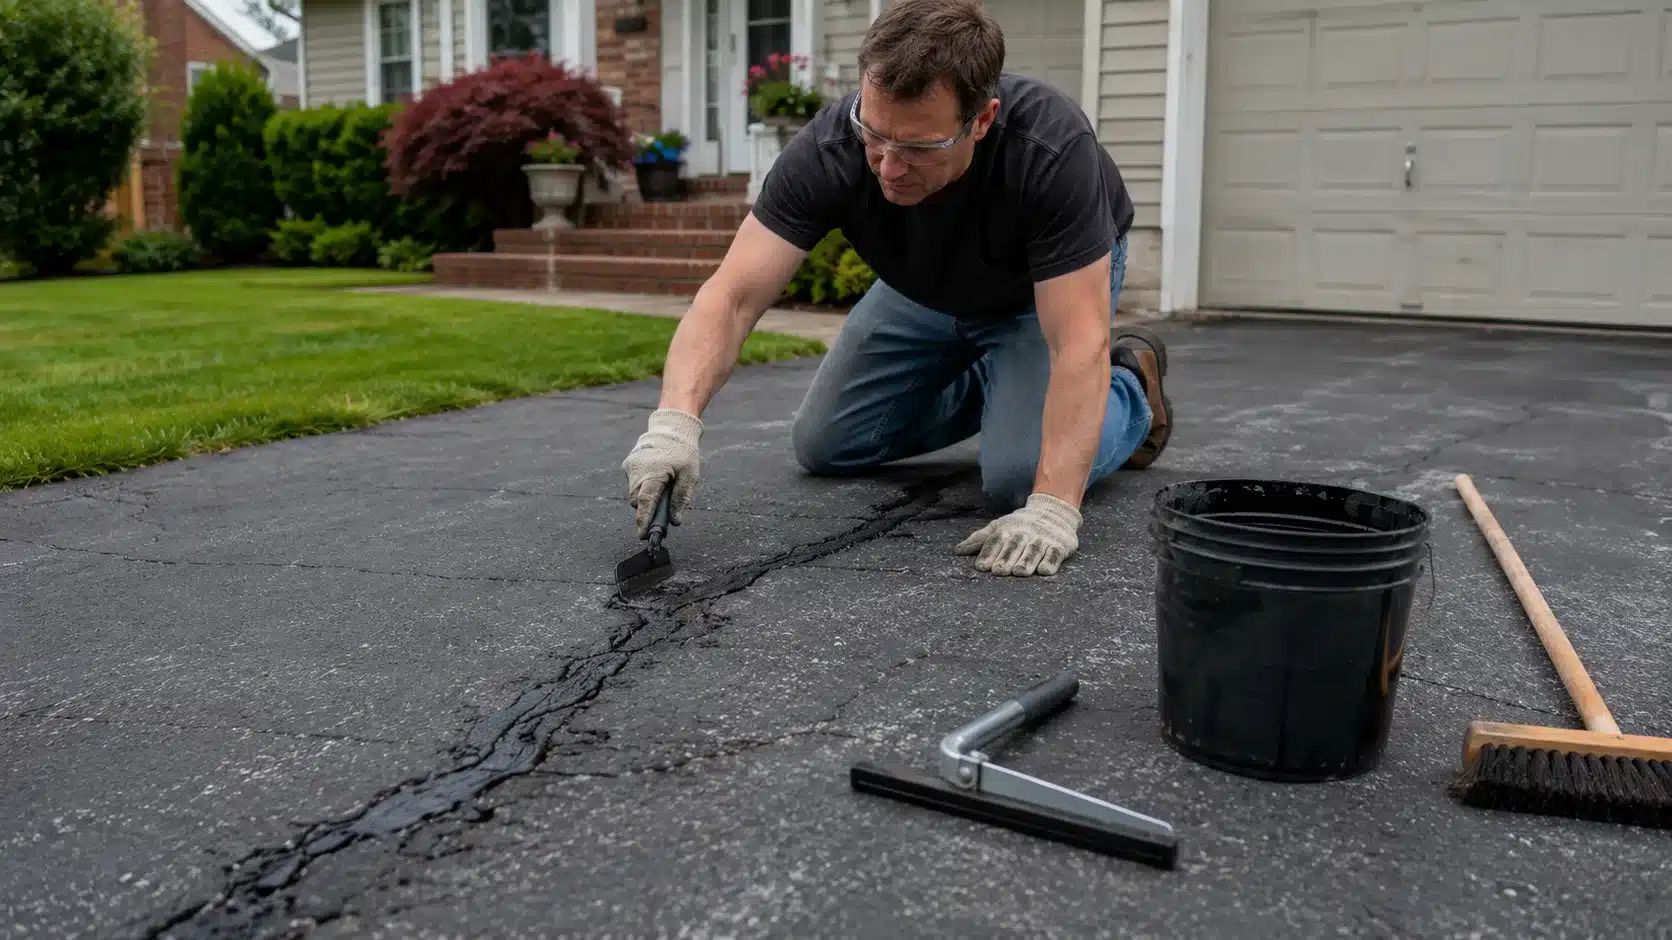
Most driveway repair cracks start small enough to step over. A year later, they’re wide enough to catch a tire edge, and the repair bill has gone from $150 in materials to a conversation with a contractor about full resurfacing. I’ve watched that sequence happen enough times to know where it goes wrong: people recognize the crack and then wait for it to get “bad enough” to deal with. By the time it looks bad, the base has usually started to move. This guide covers what causes driveways to crack, how to read whether yours needs repair, resurfacing, or replacement, the full step-by-step DIY driveway repair process for both asphalt and concrete, a realistic cost breakdown, and the factors that push those numbers up or down. The goal is to help you make the right call before the repair window closes. Cost Note: Figures in this article are estimates based on national averages. Actual costs vary significantly by region, contractor, materials, and project scope. Always get at least three quotes before committing to any project above $1,000. Why Driveways Crack: The Mechanics Behind the Damage A driveway doesn’t crack because it’s old. It cracks because water found a way in. Everything else is downstream of that. Here’s how the cycle runs: Water infiltration Rain and snowmelt enter hairline cracks on the surface, sit in the base layer, and soften the ground underneath. Once the base loses density, the surface above it cracks further under ordinary vehicle weight. The surface crack isn’t the problem. It’s the entry point for what becomes the real problem. Freeze-thaw pressure Water expands roughly 9% when it freezes. A narrow crack that collects moisture and sits through a cold night comes out the other side slightly wider. Do that cycle forty times across one winter in a northern state, and a hairline crack becomes a structural gap. This is why driveway repair matters more in cold climates. Not because the pavement is weaker, but because the physics are more aggressive. Surface aging and UV breakdown UV radiation dries out asphalt binder over time, making the surface brittle and more prone to cracking under load. Concrete slabs can shrink slightly as they cure over years, opening control joints and creating new moisture entry points. Neither process is fast, but neither one stops on its own. Asphalt vs. Concrete Driveways: What Changes the Repair Approach Before you buy anything, you need to know what your driveway is made of. Asphalt crack filler won’t bond to a concrete slab. Concrete patching compound won’t hold on asphalt. The wrong product means the repair fails in one season, sometimes faster. Feature Asphalt Driveway Concrete Driveway Material Bitumen and aggregate mix Cement, sand, and gravel Appearance Black or dark grey Light grey or tan Common damage types Cracks, potholes, alligator cracking, surface erosion Spalling, scaling, hairline cracking, edge breakout DIY repair product Elastomeric crack filler, cold patch, polymer resurfacer Concrete crack filler, hydraulic cement, concrete resurfacer Sealer required Yes, every 2 to 3 years Optional but recommended Typical lifespan with maintenance 20–30 years 30–50 years Primary repair cost driver Surface area and damage depth Slab thickness and crack pattern Asphalt is more flexible, which helps it handle minor ground movement without cracking, but it needs regular sealing to stay water-resistant. If your asphalt driveway was installed less than 90 days ago, wait before applying any sealer. The binder needs time to fully cure, and sealing too early traps off-gassing and weakens the bond. Concrete is harder and longer-lasting, but when the ground shifts under it, the cracks follow specific patterns. Control joints and slab edges are typically the first places to show it, and both tell you something about the base beneath. Repair, Resurface, or Replace? Reading the Right Answer from Your Driveway This decision saves or wastes more money than any product choice you’ll make. Getting it right matters before you spend anything. Repair: Isolated Damage with a Sound Base If you have a few cracks under an inch wide, a pothole or two, or a limited rough patch, repair is the right call. The base is still solid. You’re filling specific damage and sealing against water, not rebuilding anything. Most DIY driveway repair projects fall here, and materials run $100 to $250 for a standard two-car driveway. Resurface: Widespread Wear with the Base Still Intact If the whole surface looks worn or faded, or shows many hairline cracks, but the driveway isn’t sinking, heaving, or soft underfoot along the edges, resurfacing can add five to eight years. A new layer goes over the old one. The key qualifier is a stable base. Don’t waste money resurfacing a driveway that sinks slightly at the edges or holds standing water after rain. That water is sitting on a compromised base, and a new surface coat will fail in one season on top of it. Replace: structural base failure Replacement is the answer when sections are sinking or heaving, the base has softened, drainage is broken, or more than a third of the surface is cracked and uneven. No amount of patching changes that outcome. If replacement opens the question of switching materials entirely, paver costs vary significantly by type and square footage, and it’s worth knowing before you commit to like-for-like asphalt again. Recognizing Alligator Cracking Before It Becomes a Replacement Decision There’s a damage pattern worth knowing by name: alligator cracking. It looks like a network of interconnected cracks forming irregular polygons across the surface, similar to dried mud or, as the name suggests, the texture of alligator skin. It almost always signals base failure underneath, not just surface aging. Standard crack filler doesn’t solve alligator cracking. The surface cracks are a symptom of a base that has lost density and support. If you fill them without addressing the cause, the pattern returns within a season. Small sections of alligator cracking can sometimes be cut out, the base rebuilt, and the area cold-patched. Widespread alligator cracking across more than a third of the driveway is a replacement signal. Pro Tip: Walk the edges and corners of your driveway on a dry day. Press down with your heel. Any flex or soft give underfoot indicates base saturation, even if the surface looks intact. That’s your real repair signal, not the visible crack width. Driveway Repair DIY: Step-by-Step Asphalt driveway repair isn’t just filling cracks and spreading a coat on top. The order of operations matters because each step creates the conditions the next one needs to work. Dirt weakens filler. Open cracks compromise resurfacing. Oil stops new material from bonding. Do these in sequence, and the repair holds. Skip steps, and you’ll be doing it again. Tools and Materials Cleaning & Prep Crack & Pothole Repair Resurfacing Wire brush Liquid elastomeric crack filler Polymer-modified asphalt resurfacer Leaf blower or stiff broom Trowel-grade filler Bonding agent Scrub brush Cold patch asphalt (for potholes) 4-inch paintbrush Garden hose with spray nozzle 2-inch putty knife Wide squeegee Pressure washer Wide putty knife/trowel Cordless drill with paddle mixer Household bleach & degreaser Caulking gun (if filler uses cartridge) Work gloves and safety glasses Step 1: Pull weeds and clear loose debris Remove weeds growing from any crack, taking the roots where you can. Roots left behind will push through fresh filler. Clear loose surface debris around damaged areas before brushing or washing. Step 2: Loosen packed material from cracks Use a wire brush to break up compacted dirt, gravel, and old filler from wider cracks. Follow with a leaf blower to clear the cracks out. A blower reaches into gaps where a broom can’t. The goal is open, clean crack edges, not just a swept surface. Step 3: Kill algae and biological growth Mix one gallon of household bleach with four gallons of water. Apply with a scrub brush and let it sit for about 10 minutes. No heavy scrubbing needed. Rinse with fresh water, then use the hose nozzle to flush remaining debris out of the cracks. Step 4: Pressure wash (optional but worth it) Pressure washing removes embedded dirt that a broom and hose miss. A cleaner surface means better adhesion for filler, bonding agent, and resurfacer. Let the driveway dry fully before applying any repair product. Visually dry isn’t always dry. Give it several hours on a warm day. Step 5: Fill narrow cracks with liquid elastomeric filler For cracks up to about half an inch wide, use liquid elastomeric crack filler. Cut the nozzle to about a quarter inch. Move backward while slightly overfilling the crack, adjusting speed for depth. Smooth the bead with a 2-inch putty knife. Elastomeric filler stays flexible after curing, which matters. A rigid fill in a flexible surface cracks again at the repair edge. Step 6: Patch eroded areas, larger cracks, and potholes Use trowel-grade filler for cracks up to about one inch wide and eroded surface areas. For potholes deeper than an inch, use a cold-patch asphalt product. Remove all loose material from the pothole first. Square up crumbling edges with a chisel until you’re working against solid pavement. Fill in lifts for deep holes rather than one pour, compacting each layer. Smooth the patch flush with the surrounding surface. Step 7: Treat oil stains before sealing Clean oil-stained areas with a degreaser, then apply a bonding agent over the treated spot before resurfacing. Oil residue stops the resurfacer from bonding. Skipping this step produces a soft spot that peels within one season. The bonding agent dries clear. Step 8: Mix and apply the resurfacer Mix the resurfacer with a cordless drill and paddle mixer attachment before pouring. Even the texture before application matters. Unmixed product spreads unevenly and cures with soft spots. Brush the driveway edges first with a 4-inch paintbrush for control near curbs, borders, and lawn edges. Then pour and spread from the top of the driveway toward the street, using a wide squeegee in steady back-and-forth passes. Keep a wet edge moving. If a section dries before you reach the overlap, you’ll have a visible seam and a weak bond at that line. Two people make this step significantly easier: one to pour, one to spread. Keep all traffic off the driveway for a minimum of 24 to 48 hours. Check the product label, as cure times vary by formulation and temperature. How to Repair Concrete Driveways Concrete driveway repair follows the same principle: clean, fill, protect. But the products are different, and applying asphalt products to concrete is a mistake that won’t hold. Concrete needs cement-based materials. Damage Type Right Repair What to Do Hairline and narrow cracks Concrete crack filler Clean loose material, blow out dust, fill the crack, smooth flush with a putty knife Surface scaling and spalling Concrete resurfacer Sound slabs only, no heaving. Keep the slab damp (not wet) before applying for adhesion Broken edges and deep holes Hydraulic cement or patching compound Patch the structural damage first, let it set fully, then decide whether resurfacing makes sense on top One more thing specific to concrete: if your slab shows cracking along multiple control joints or across slab boundaries, the ground beneath may be settling unevenly. Patching the surface won’t stop that movement. If you’re weighing whether concrete is even the right long-term material for your situation, the comparison between stamped concrete and alternatives is worth knowing before you invest in repairs. When to Call a Contractor Instead of Doing It Yourself Most driveway repair on isolated cracks and potholes with a sound base is DIY territory. A few conditions change that calculation. Call a professional when cracks are wider than one inch across most of the surface. Call one if any section sinks or flexes underfoot, if visible alligator cracking covers more than a quarter of the surface, or if drainage is pooling toward the foundation of your house. Potholes that reappear within a season of patching are also a contractor signal. These conditions require base work: excavation, gravel replacement, and proper grading. That goes beyond what a DIY surface repair can address. Professional driveway repair costs $300 to $1,000+ for targeted work, and full resurfacing or replacement typically starts at $2,000 and scales with the job’s size. Get at least three quotes before committing to anything above $1,000. DIY Driveway Repair Cost Breakdown Repair Stage Typical Product Approx. Cost Notes Cleaning Bleach, degreaser, scrub brush $5–$20 Pressure washer rental adds $40–$80/day Crack filling (under ½ in.) Liquid elastomeric filler $8–$20 per tube One tube covers 30–60 linear ft Patching (cracks up to 1 in. / potholes) Trowel-grade compound or cold patch $15–$40 per bucket Coverage varies with damage depth Oil stain treatment Degreaser + bonding sealer $10–$25 Required step. Skipping causes failure Resurfacing Polymer asphalt resurfacer $20–$75 per pail One pail covers 250–500 sq ft Sealcoating Asphalt driveway sealer $20–$50 per pail One pail covers 250–500 sq ft For a standard two-car driveway of 400 to 600 square feet, a complete DIY driveway repair and resurfacing project runs roughly $100 to $250 in materials when damage is moderate. Larger driveways or deeper damage push that range higher, and tool rental adds $40 to $100 if you don’t already own a pressure washer or drill. Factors That Push the Price Up or Down Two driveways with identical surface cracks can have very different repair costs depending on what’s going on underneath. Surface area scales cost almost directly. More square footage means more filler, more resurfacer, more sealer. Damage depth matters more than crack count. A surface crack is cheap. A two-inch-deep pothole needs multiple fill lifts and significantly more material. Driveway material affects both product cost and long-term maintenance frequency. Asphalt products generally cost less upfront, but asphalt driveways need sealing every two to three years. Drainage problems are the hidden cost driver. If water is pooling because the slope is off or the base is soft, no surface repair lasts, and drainage correction adds real cost. Tool ownership changes the equation significantly. If you already have a pressure washer, drill, and squeegee, you’re paying almost entirely for materials. Product grade matters too. Budget elastomeric and polymer products cost less upfront but don’t perform as well through freeze-thaw cycles. Mid-grade products hold better and typically justify the price difference in cold-climate states. How Long Does Driveway Repair Last? A well-prepped crack fill on an asphalt driveway can hold for two to five years before needing attention. A full resurfacing job on a sound base, done correctly and sealed afterward, can add five to eight years to the driveway’s life. Concrete patch repairs on stable slabs often last longer still. What shortens that lifespan: shallow prep before filling patching over a soft or shifting base skipping the sealer after resurfacing, driving on the repair before it fully cures repeated freeze-thaw cycles without seasonal maintenance A useful habit is to walk the driveway in early spring after the last hard freeze. Look for new cracks, soft edges, or spots where last year’s repair has shifted. A small top-up caught then is a fraction of the cost of a repair left to a second winter. Most homeowners in cold-climate states who sealcoat their asphalt driveways every two to three years significantly reduce the rate of new crack formation. Mistakes That Cause Driveway Repairs to Fail Most driveway repair failures trace back to steps that happened, or didn’t happen, before the first product went on. The surface looked ready, the filler looked easy, and one skipped step later the repair is peeling by spring. Skipping the cleaning step. Filler applied over dirt, algae, or debris doesn’t bond. The surface needs to be clean and completely dry before anything else goes on. Repairing on a wet surface. Moisture under a filler prevents adhesion. After rinsing or pressure washing, wait several hours, not just until it looks dry. Using the wrong filler for the crack size. Liquid elastomeric filler is for cracks under half an inch. Trowel-grade or cold patch is for wider gaps and potholes. The thinner product in a deep gap shrinks and cracks again. Ignoring oil stains. Resurfacer won’t bond to oil. The degreaser-and-bonding-agent step on stained areas is not optional. Skip it, and that spot fails within one season. Applying resurfacer too thick. Thicker isn’t stronger. Applying it beyond the label’s coverage rate causes uneven curing and surface cracking. Follow the spread rate. Working in the wrong weather. Most driveway repair products require 50 to 90°F and dry conditions. Cold temperatures slow curing. Rain before the product sets washes it off entirely. Direct high heat dries the surface before you can spread it evenly. Breaking the wet edge. Letting the squeegee edge dry before completing a pass creates a visible seam and a weak bond at the overlap. Keep it moving. Frequently Asked Questions About Driveway Repair These come up consistently once someone is standing in front of an actual crack, trying to figure out what to do. How do you repair cracks in a concrete driveway? Clean the crack thoroughly, blow out all dust, and apply a concrete-specific crack filler, not asphalt filler. Smooth it flush with a putty knife. For wider cracks, use hydraulic cement or a patching compound. For surface spalling across a stable slab, a concrete resurfacer applied over a damp (not wet) surface is the right call. How do you repair cracks in an asphalt driveway? Clean and dry the crack completely, apply liquid elastomeric filler for gaps under half an inch, and trowel-grade compound for wider damage. Smooth flush, let it cure, then sealcoat the full surface to protect the repair. Don’t use concrete products on asphalt. The materials are chemically incompatible. How do you repair large cracks in a concrete driveway? Remove all loose material, undercut the crack edges slightly if possible for better mechanical adhesion, and fill in stages with hydraulic cement or a structural patching compound. Let each lift set before adding the next. Smooth flush and allow full cure before traffic. How do you repair large cracks in an asphalt driveway? Use trowel-grade filler or cold patch asphalt for cracks wider than half an inch. Fill in layers for deep gaps, compacting each one. For cracks approaching or exceeding one inch wide across a significant area, assess the base. Widespread large cracks usually signal base movement, not just surface wear. How do you repair driveway cracks yourself? Clean thoroughly, remove weeds and debris, dry completely, fill with the right product for your material and crack width, and seal when done. The cleaning and drying steps are where most DIY repairs fail, not the filling itself. Does homeowners insurance cover driveway repair? Only if the damage came from a covered sudden event: a falling tree, storm impact, or vehicle accident. Normal aging, frost heave, and surface cracking are maintenance, not claims. Document the cause with photos and check your specific policy before making repairs. How long should I stay off a repaired driveway? At least 24 to 48 hours for most products. Check the label. Walking on it too early leaves marks. Driving too soon can damage the repair before it bonds properly. Why do driveway cracks keep coming back after repair? Usually, because the cause wasn’t addressed. A soft base, drainage that pulls water under the surface, or incomplete cleaning before filling are the common culprits. Filler closes the gap but can’t stop ongoing base movement. If the same crack returns within a season, the problem is underneath the surface, not in the filler you used. Summing Up DIY driveway repair works when the base is solid and the damage is surface-level. If you’ve got isolated cracks under an inch wide, a pothole or two, and a driveway that doesn’t flex or hold water, you can handle this with a weekend and $150 to $250 in materials. The freeze-thaw cycle won’t wait for you to get around to it, and every season you leave a crack open makes the next repair more expensive. Before you buy anything, walk the edges of your driveway and press down with your heel. If it’s firm, you’re in repair territory. If it gives, get a professional to look at the base before you spend money on the surface. That’s the one decision worth making before anything else.
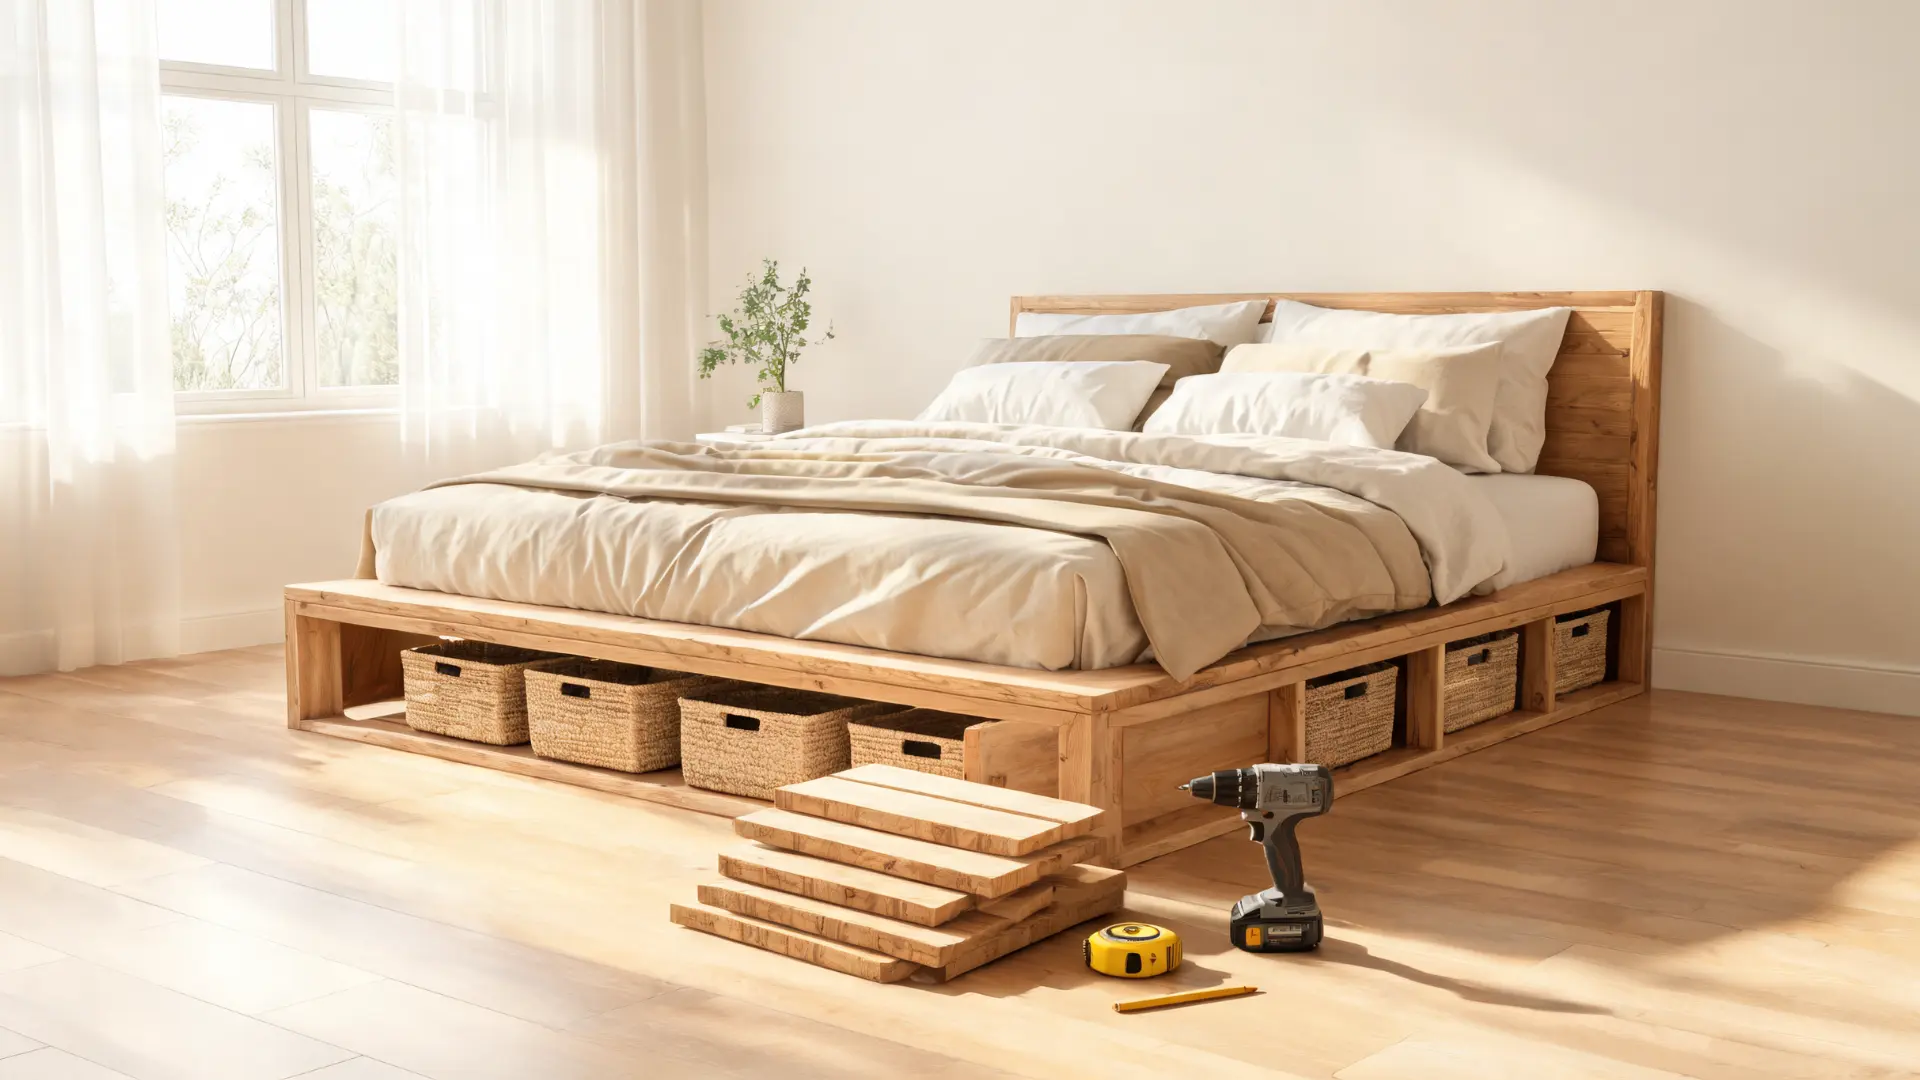
Building a bed frame can feel expensive, but it does not have to be. If you want a sturdy bed without paying for store-bought furniture or paid plans, I get why you are looking for better options. It can also be hard to know which plan is worth your time when every design uses different tools, wood, measurements, and support details. Understanding how a platform bed structure works makes the base easier to plan before choosing a build type. I’ll help you compare ideas by mattress size, storage needs, skill level, tools, wood type, and cost. By the end, you will know which free DIY bed plans make sense for your space and what to check before you start building. The Best Free DIY Bed Frame Plans by Need The best DIY bed plans depend on your mattress size, room layout, storage needs, budget, tools, and comfort level with woodworking. A simple platform bed is usually the easiest place to start because it supports the mattress with slats or plywood and often removes the need for a box spring. Storage bed plans work well in small bedrooms because drawers, cubbies, or raised frames can hold bedding, clothes, or baskets. Pallet bed frames are a smart, low-budget option, especially for a relaxed or rustic look, as long as the pallets are clean, sturdy, and well sanded. Traditional wood bed frames are better if you want a raised bed with legs, a headboard, or a footboard. The DIY bed frame ideas below can be built from free tutorials or adapted from free cut lists to fit your space. Basic DIY Guide: How to Build a Simple Platform Bed Frame Before looking at different DIY bed frame plans, beginners should understand the basic structure of a simple platform bed. Most DIY bed frames use the same core parts: a mattress-sized outer frame, support legs, a center beam, and slats. Measure Mattress: Start by measuring the mattress or checking its standard size. The frame should fit the mattress comfortably, neither too tight nor too loose. Build Outer Frame: Create a rectangular base using two side rails and two end rails. This outer frame forms the main shape of the bed. Add Center Support: Install a center support beam through the middle of the frame. This is especially important for full, queen, and king beds because it helps prevent sagging. Attach Legs: Add legs to each corner of the frame. For wider beds, add extra middle legs under the center support beam for better weight support. Install Slats: Place wooden slats evenly across the frame. These slats support the mattress, so keep the gaps small and consistent. Sand Wood: Smooth all rough edges, corners, and surfaces before using the frame. This helps prevent splinters and keeps bedding from catching. Finish Frame: Seal, stain, or paint the wood based on the bedroom style. Let the finish dry fully before placing the mattress on top Free DIY Bed Plan Ideas to Consider The best DIY bed frame ideas match your room size, mattress, budget, and skill level. This usually results in a calm minimalist bedroom layout that creates balance around the bed structure. A simple platform is ideal for beginners, while storage beds suit small rooms needing extra space. Pallet frames are low-cost but need cleaning and sanding. For a more finished look, opt for wood frames with headboards, footboards, or upholstered rails. Consider comfort, support, tools, and storage needs before choosing a plan. 1. Simple Platform Bed Frame Plan A simple platform bed frame is a basic wooden structure that supports a mattress on a rectangular base with slats and a center beam. It helps beginners practice measuring, cutting, joining boards, and building a stable, square, functional frame. Materials: 2×4 boards, 1×4 slats, screws, wood glue, stain or paint Plan Note: Keep the design plain and strong before adding a headboard or storage Budget: $75–$150 What to watch for: Keep the frame square. Check all four corners with a carpenter’s square before fastening. A frame that’s even a degree off will wobble and feel unstable regardless of how solid the joints are. If you plan to add a headboard later, run two 2×6 boards along the head end instead of 2x4s so you have material to bolt into. 2. Low Floor Bed Frame Plan A low floor bed frame sits close to the ground and creates a minimal, open bedroom feel. It uses plywood, boards, and slats, with careful spacing to ensure airflow under the mattress and prevent moisture buildup over time. Materials: Plywood, 2×4 boards, slats, screws Plan Note: Ensure adequate airflow under the mattress Budget: $100–$200 3. Floating Bed Frame Plan A floating bed frame uses a recessed base that is smaller than the top platform, creating a visual effect of the bed hovering above the floor. The hidden structure still requires strong support and proper weight distribution. Materials: 2×4 boards, plywood, screws, optional LED strip Plan Note: Hidden base must have strong center support Budget: $150–$300 4. Storage Bed Frame Plan A storage bed frame integrates drawers, cubbies, or shelf-style compartments beneath the mattress for practical storage. It maximizes bedroom space while maintaining a stable base that evenly supports weight across the entire structure. Materials: Plywood, drawer units, cube shelves, screws, brackets Plan Note: Ready-made storage units simplify construction Budget: $250–$600 5. Pallet Bed Frame Plan A pallet bed frame uses stacked or joined wooden pallets to create a simple base with minimal construction work. Only heat-treated pallets should be used, and all surfaces must be cleaned, sanded, and checked for safety. Materials: Heat-treated pallets, sandpaper, screws, wood sealer Plan Note: Inspect for nails, splinters, pests, and chemical marks Budget: $40–$120 Safety Note: Only use heat-treated (HT-stamped) pallets. Avoid any pallet with stains, unusual odors, or missing stamps, these are signals of chemical contamination. Sand all surfaces to 120-grit minimum before contact with bedding. 6. Bookcase Bed Frame Plan A bookcase bed frame uses cube shelves or low bookcases arranged as a base, with a solid top layer placed above for mattress support. The structure provides built-in storage while keeping construction simple and modular. Materials: Cube shelves or bookcases, plywood, brackets, screws Plan Note: Secure shelves to prevent shifting under weight Budget: $180–$450 7. Upholstered Bed Frame Plan An upholstered bed frame starts with a wooden base covered in foam, batting, and fabric for a soft, finished look. The process focuses on smooth fabric stretching and stapling for a clean surface without wrinkles or gaps. Materials: Wood frame, foam, batting, fabric, staple gun Plan Note: Start with an upholstered headboard if needed Budget: $200–$500 8. Reclaimed Wood Bed Frame Plan A reclaimed wood bed frame is built from salvaged boards arranged into a platform structure that highlights natural texture and variation. Each piece must be cleaned, sanded, and inspected to ensure it is structurally safe for use. Materials: Reclaimed boards, screws, slats, sandpaper, sealant Plan Note: Check wood for cracks, pests, nails, and weak spots Budget: $100–$300 9. Hairpin Leg Bed Frame Plan A hairpin leg bed frame combines a simple wooden platform with metal hairpin legs attached underneath for a lighter, modern appearance. The platform must be reinforced in the center to support mattress and sleeper weight safely. Materials: Plywood or boards, hairpin legs, screws, slats Plan Note: Choose legs rated for bed weight Budget: $150–$350 10. Canopy Bed Frame Plan A canopy bed frame includes a raised structure with four tall posts and connecting rails above a platform base. It creates a larger visual presence in a room and requires precise alignment for stability and safety. Materials: 4×4 posts, 2×4 rails, slats, screws, brackets Plan Note: Posts must be straight, secure, and properly braced Budget: $300–$700 11. Twin Bed Frame Plan A twin bed frame is a compact wooden structure designed for smaller mattresses, making it easier to build, move, and assemble. It uses a basic rectangular frame with slats and optional center support for stability. Materials: 2×4 boards, 1×4 slats, screws, wood glue, sandpaper, stain or paint Plan Note: Ensure correct twin mattress dimensions and solid slat support Budget: $50–$120 Tools and Materials Needed for Most DIY Bed Frames Most DIY bed plans use the same basic tools and materials, though storage beds, upholstered beds, and larger king-size frames may need extra parts. Before buying anything, read the full plan, check the cut list, and measure your mattress. Many builds rely on a wooden bed base frame setup to keep weight evenly supported across the structure. Having everything ready before you start makes the build go more smoothly and helps you avoid stopping halfway through the project. Category Common Items Notes Lumber 1x boards, plywood, slats The exact lumber depends on the bed size, frame style, and whether you are adding a headboard or storage. Fasteners Wood screws, pocket screws, bolts, washers, brackets Bolts and brackets add strength to larger frames, especially queen and king beds. Tools Drill, sander, square, clamps, tape measure A carpenter square helps keep the frame straight, while clamps hold boards steady during assembly. Finish Stain, paint, varnish, sealer Sand the wood before applying the finish so the surface is smooth and comfortable to the touch. Support Center beam, cross supports, slats, plywood Wider beds need stronger support to prevent sagging, shifting, or noisy slats. Optional Add-ons Drawer slides, casters, fabric, batting, headboard hardware These are useful for storage beds, rolling beds, upholstered frames, or separate headboards. A basic platform bed can be built with fewer supplies, which makes it a good first project for many DIYers. A storage bed, upholstered bed, floating frame, or king-size bed needs more planning because the weight, support system, and joinery matter more. It is also worth buying a little extra sandpaper, screws, and finish so you are not short on small supplies during the final steps. Common DIY Bed Frame Mistakes to Avoid Even a simple DIY bed frame can wobble, sag, or feel uncomfortable if a few small details are missed. Check these common mistakes before cutting, assembling, or finishing your frame. Measure The Mattress First: Check the actual mattress size before cutting wood so the frame does not end up too tight or too loose. Leave Bedding Clearance: Add a little extra space for sheets, blankets, and mattress movement, making the bed easier to make. Add Center Support: Queen, king, and storage beds need a center beam or legs to prevent sagging. Space Slats Properly: Keep slats close enough to support the mattress and follow the mattress requirements. Check Corners For Square: Use a carpenter’s square so the frame does not wobble, twist, or sit unevenly. Choose Straight Boards: Avoid warped or twisted lumber because it makes the frame harder to build and less stable. Sand Before Finishing: Smooth rough edges so the wood does not snag bedding, scratch skin, or make paint look uneven. Plan The Bed Height: Think about mattress thickness, storage needs, and how easy it is to get in and out of bed. Avoiding these mistakes will make the bed frame safer, steadier, and easier to use every day. Take your time with measuring, support, and hardware, so the finished frame holds up well. Safety and Stability Checks Before Sleeping on the Bed Before using your DIY bed frame, go through these quick safety checks: Tighten all hardware: Check all bolts, screws, brackets, and joints before adding the mattress. Test for wobbling: Gently shake the frame; if it moves, check and tighten the legs, corners, and fasteners. Press each corner: Push down on each corner of the frame to make sure it feels steady and evenly supported. Check the center support: Ensure the center support is secure and touches the floor if needed. Inspect the slats: Make sure all slats are evenly spaced, firmly attached, and not cracked or loose. Sand sharp edges: Smooth rough edges around the frame, headboard, footboard, and storage openings. Lock the casters: If the bed has wheels, use locking casters and lock them before sleeping. Secure the headboard: Make sure the headboard is fixed safely to the wall or attached firmly to the frame. Listen for squeaks: After a few nights, check for squeaks, movement, or loose hardware. Re-tighten after use: Re-tighten screws, bolts, and brackets after the bed has been used for a few nights. Frequently Asked Questions What is the easiest bed frame to build? A simple platform bed is usually the easiest bed frame to build. It uses a basic rectangular frame, slats or plywood support, and optional legs. It also removes the need for a box spring in many cases. Is it cheaper to build a bed frame or buy one? Building a bed frame is often cheaper with simple DIY plans. In this list, the pallet bed frame is the lowest-cost option. Cost: $40–$120 (pallet bed frame) Do I need a box spring with a DIY bed frame? Not always. Platform beds and frames with enough slats usually support the mattress without a box spring. Traditional frames may still need one, depending on the design and mattress requirements. How much space should be between bed slats? The right spacing depends on the mattress, but many mattresses need slats close enough to prevent sagging. Always check the mattress brand’s support requirements before final assembly. How do I stop a DIY bed frame from squeaking? Tighten loose hardware, check slats, add felt or cork where wood pieces rub, and make sure the frame is square. Squeaks often come from loose slats, bolts, or shifting supports. Conclusion A bed frame should fit your room, your mattress, and the way you actually use the space. With the right DIY bed frame plans, you can build something simple, sturdy, and useful without buying expensive furniture. A platform bed is usually the easiest place to start, while storage beds, pallet frames, canopy beds, loft beds, upholstered frames, and raised wood frames give you more choices. The main things to remember are simple: measure first, choose straight wood, match the plan to your tools, add proper support, check slat spacing, and finish the frame safely. I would start with the idea that fits your budget and comfort level. Try one plan, take your time with the details, then check more bedroom DIY projects for your next build.





