


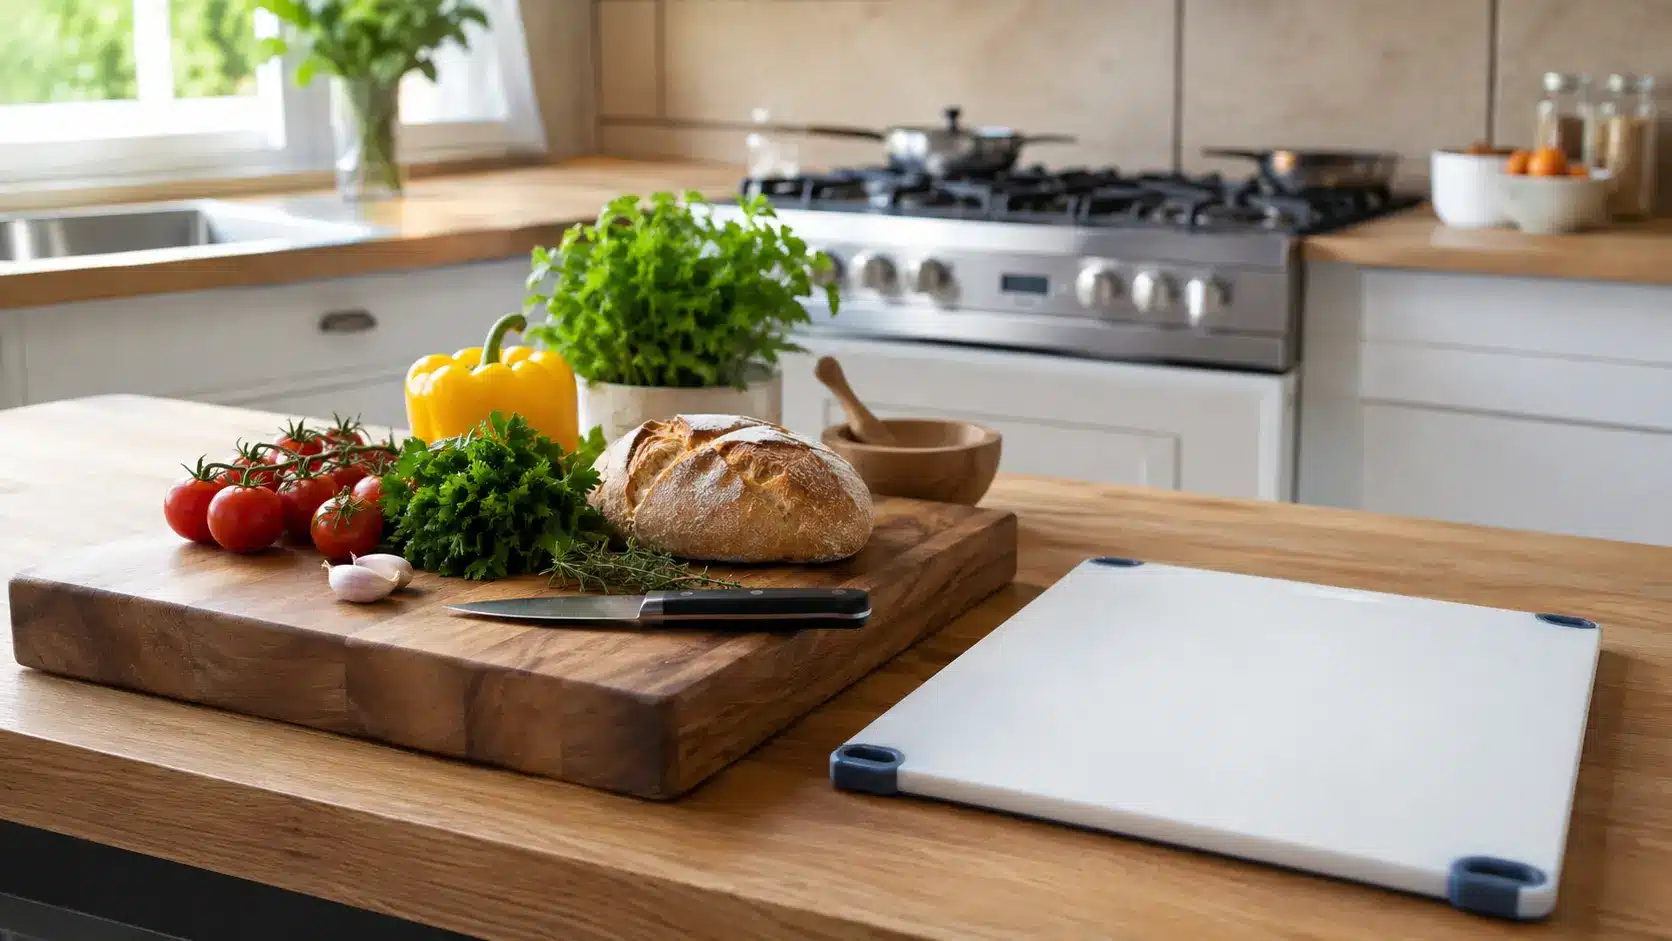
Ever wonder what’s actually sitting under your knife every time you prep a meal? Choosing the best cutting boards for health matters more than most people realize in a kitchen. You end up using the same worn surface for everything from raw chicken to fresh fruit, which raises concerns about hygiene and long-term safety. I know it can feel confusing figuring out which materials are actually safe and which ones quietly create problems over time. I’ll help you sort through which materials actually make sense, how they perform in daily use, and what to avoid. By the end, you’ll know which cutting board materials support safer food prep, how to set up a practical two-board system, and how to keep your kitchen routine cleaner and more consistent for overall safety. Best Cutting Boards for Health: Non-Toxic Materials for Daily Kitchen Prep A cutting board looks simple until you think about every food that lands on it. Raw chicken, apples, bread, onions, and herbs should not all share one worn surface, and the best cutting boards for health make that separation easier, not harder. The practical starting point is two boards: one solid hardwood board for daily chopping, and one separate easy-clean board for raw meat, poultry, and seafood. From there, the material you choose shapes how the board holds up, how easy it is to keep clean, and whether you are introducing plastic or unknown coatings into your prep routine. Best Material for Daily Prep Solid maple, walnut, or beech Best Material for Raw Meat Rubber, stainless steel, titanium, or dishwasher-safe plastic Boards to Avoid for Daily Use Glass, worn plastic, bamboo with unknown adhesives Key Maintenance Rule Wash, dry upright, and oil hardwood when it looks dry Replace When Deep grooves, cracks, lasting odor, or heavy staining appear The table above covers the short version. Everything below explains why each material behaves the way it does, so you can pick the right board for how you actually cook, not just what looks best on a counter. What Makes a Cutting Board Non-Toxic? A non-toxic cutting board needs to pass a straightforward test: it should be made for direct food contact, easy to clean consistently, and free from finishes or coatings that peel or wear into food during regular chopping. Feature Why It Matters Food-safe material The board should be made specifically for cutting and food prep, not repurposed from a surface with unknown treatment Clear finish details Unknown coatings wear down during chopping and can end up in food No strong chemical smell when new out of the box Odor can point to poor finishes, composite adhesives, or materials not suited to food contact Smooth, intact surface Rough spots and grooves hold food residue that normal washing does not reach Stable thickness Thin boards slide under pressure, wear faster, and crack sooner Simple, realistic care needs A board only stays safe if you can clean it properly in your actual kitchen routine The safest board is not necessarily the most expensive one. It is the board with known materials, food-safe construction, and a surface you will actually maintain. A premium walnut board that never gets oiled and develops cracks is less safe than a basic rubber board that gets washed after every use. Best Cutting Board Materials for a Health-Focused Kitchen Material choice drives most of the decision here. The right one depends on what you cut most often, how frequently you cook, and how much upkeep you are willing to do. Here is how each option holds up under real conditions. 1. Solid Maple Solid maple is the most reliable all-around choice for daily food prep. Among common hardwood species, maple ranks around 1,450 lbf on the Janka hardness scale, hard enough to resist deep knife grooves without being so rigid that it wears blades quickly. It holds up well over years of use, takes food-grade mineral oil easily, and does not bring plastic into your chopping routine. Maple works best for fruit, bread, herbs, and vegetables. It is gentle enough on knife edges to protect a quality chef’s knife from premature dulling, which matters if you are chopping daily. The surface stays tight for a long time before knife marks become deep enough to trap residue. Choose maple if you want a non-toxic cutting board for daily use, a surface that can last a decade or longer with proper care, and a clear step away from thin plastic for most prep work. It needs handwashing and thorough drying after every use, and food-grade mineral oil when the surface starts to look dry or feel rough. 2. Walnut Walnut sits softer than maple at around 1,010 lbf Janka, which makes it noticeably more pleasant for long chopping sessions. The closed grain resists moisture well, and the darker color hides light staining better than a pale maple board. If you already think about wood tones across your kitchen, walnut reads warm and grounded on a counter without looking out of place. The main tradeoff is cost. Walnut boards run higher than comparable maple, and like all hardwoods, they should not sit in water or go through the dishwasher. Keep walnut for produce, bread, and cooked foods rather than raw meat prep, where you need aggressive cleaning after every use. Oil it with food-grade mineral oil when it starts to look pale or dry. 3. Beech Beech is the budget-smart hardwood in this category. It comes in at around 1,300 lbf Janka, closer to maple than walnut, and performs well for everyday chopping. It is often significantly cheaper than thick end-grain maple or premium walnut while offering the same core benefit: a solid wood surface that does not shed plastic. The feel is firm and clean. Beech handles regular prep well when washed promptly and dried upright after each session. It is a practical first hardwood board for a kitchen making the switch away from cheap plastic, and it oils and maintains the same way as maple or walnut. 4. Rubber Rubber boards are the strongest middle-ground option for anyone who wants easy cleaning without relying on cheap plastic. They grip the counter well without a damp towel underneath, which reduces slipping during fast prep work. The surface is gentler on knife edges than glass or steel, and it holds up to daily use without developing the deep grooves that make plastic boards a microplastic concern. Rubber works well for both meat prep and daily chopping. It is heavier than plastic and more expensive, but that weight also makes it more stable. If you cook frequently and want a single board that handles everything including raw proteins, rubber is worth the higher entry cost. It does not need oiling like wood, though it is not dishwasher-safe on most models. 5. Stainless Steel Stainless steel boards are nonporous, easy to sanitize, and do not absorb meat juices or strong odors. They work well for raw meat, fish, garlic, and anything with a strong smell that you do not want migrating to your hardwood daily board. The surface cleans quickly and can be sanitized with a diluted bleach solution without any risk of damage. The practical downside is feel and knife wear. Steel is hard, loud under a blade, and will dull a good knife faster than wood or rubber. Use it as a task-specific board rather than your main daily surface. Short prep jobs, breaking down chicken, portioning fish, and slicing garlic are where stainless steel earns its place. Extended chopping sessions belong on wood or rubber. 6. Titanium Titanium boards appeal to people who want a completely plastic-free, nonporous surface for raw meat and seafood prep. They are lightweight relative to their durability, nonreactive with acidic foods, and easy to wash. The health case for titanium is simple: no plastic, no porous material to trap bacteria, no coatings that wear off. They share the same limitation as stainless steel: hard on knives and noisy under a blade. If smooth, quiet chopping matters to you, wood or rubber will feel significantly better. Titanium is best positioned as a meat-and-fish board that gets washed immediately after use, not a board for a long prep session involving precise knife work. 7. Bamboo Bamboo is often sold as the natural, eco-friendly choice, and in some respects it is. It is lightweight, usually affordable, and grows faster than hardwood trees. For light prep work, fruit, bread, and herbs, it performs adequately as a plastic-free starter option. The structural problem is that bamboo is technically a grass pressed and glued into board form, not solid wood. Many bamboo boards use formaldehyde-based adhesives to bond the strands, which undermines the non-toxic case entirely. Bamboo also runs harder than maple or walnut at around 1,380 lbf, which makes it noticeably rougher on knife edges with regular use. If bamboo is on your shortlist, verify that the adhesive is food-safe before buying. If that information is not clearly stated by the manufacturer, choose a different material. 8. High-Density Plastic Plastic has not become completely useless in a health-conscious kitchen, but it carries real limitations that get worse with age. New, thick high-density polyethylene boards are dishwasher-safe and easy to sanitize after raw meat prep. The problem is what happens once the surface shows real wear. A 2023 study reported by the American Chemical Society found that chopping on polyethylene and polypropylene boards can release microplastic particles into food, with the amount varying by cutting force, board condition, and material. Deep knife grooves accelerate this. If you keep plastic boards, use them only for raw meat where easy sanitation is the priority, replace them before grooves look deep, and do not use old, scratched plastic for daily produce prep. 9. Glass Glass is genuinely nonporous and does not absorb odors or bacteria, which sounds like an advantage until you factor in what it does to knife edges. Glass is too hard for regular knife work; it will dull a blade noticeably faster than any other material listed here. The surface also tends to be slippery during active chopping, which creates a safety problem independent of hygiene. Glass belongs on the counter as a serving board for cheese, crackers, and soft fruit — not as your main cutting surface. If you already own one, use it for its strengths and keep it out of your daily prep rotation. The Two-Board Setup That Makes Sense for Most Kitchens The safest practical setup is not one board for everything. It is two boards with clear roles, kept separate and maintained consistently. Board Use It For Best Material Everyday board Fruit, bread, herbs, vegetables, cooked foods Maple, walnut, or beech Raw meat board Chicken, beef, fish, seafood Rubber, stainless steel, titanium, or replaceable HDPE plastic The USDA notes that both wood and nonporous boards can be used safely in home kitchens, but using separate boards reduces the chance of raw meat juices contacting foods like bread, fruit, and salad ingredients that will not be cooked before eating. The everyday board should feel steady and knife-friendly. The raw meat board should be easy to wash and sanitize immediately after use, without the kind of care routine that hardwood requires. Microplastics and Cutting Board Wear Worn plastic raises health questions that new plastic does not. Once knife marks become deep, they trap residue and, with polyethylene and polypropylene boards, contribute to microplastic release during active chopping. The American Chemical Society reported in 2023 that this effect varies with cutting force, food type, and how worn the surface already is. Plastic does not need to disappear from every kitchen. But old, deeply scratched plastic should not be a daily prep surface for produce and ready-to-eat foods. The table below identifies when it is time to replace any board, not just plastic ones. Sign What to Do Deep grooves that do not wash clean Replace the board Rough, pitted surface Stop using it for daily prep Persistent odor after washing Discard it Heavy staining that cleaning does not shift Replace with a fresh board Cracks or splits in wood Replace — cracks trap bacteria and cannot be fully sanitized A board in good condition is significantly safer than the same board with a year of heavy use and no maintenance. The material matters, but so does the current state of the surface. How to Keep a Board Safer for Longer Good care habits extend the useful life of any board and reduce the window during which surface damage becomes a hygiene concern. Wood species vary in how they respond to finishing and moisture. Understanding how hardwoods behave over time helps you maintain the surface before problems develop rather than after. Wash after every use. Hot, soapy water removes food residue and juices before they have time to set into the surface or dry into grooves. Do not soak wood or bamboo. Prolonged water contact causes swelling, warping, and cracks, all of which create surfaces that cannot be cleaned properly. Dry boards upright. Standing the board on its edge lets air reach both sides. Flat storage traps moisture underneath and speeds up warping. Sanitize after raw meat. Wash the board first, then sanitize. The USDA recommends a diluted bleach solution (one tablespoon per gallon of water) for nonporous boards after raw meat contact. Oil hardwood when it looks pale or dry. Food-grade mineral oil is the right product. Apply it, let it soak in for several hours, then wipe off the excess. Do not use cooking oils like olive or vegetable oil — they go rancid inside the wood. Use the dishwasher only when the board allows it. Hardwood, bamboo, and most rubber boards should not go in the dishwasher. Check the manufacturer’s guidance before assuming. These habits matter most for hardwood boards, which require more consistent attention than rubber or steel. But even a rubber board that never gets fully dried after washing will develop problems over time. The board material sets the ceiling; how you maintain it determines where you land. Frequently Asked Questions About Non-Toxic Cutting Boards What is the safest cutting board material for everyday use? Solid hardwood — maple, walnut, or beech — is the safest everyday choice for fruit, bread, herbs, and vegetables. These surfaces are plastic-free, knife-friendly, and durable when maintained properly with regular washing, drying, and occasional oiling with food-grade mineral oil. Are wooden cutting boards more hygienic than plastic? Research from the Journal of Consumer Protection and Food Safety found little difference in bacterial counts between wood and plastic boards after proper cleaning. Hardwood does have natural antimicrobial properties, but the more important factor for both materials is surface condition — deep grooves on either material are harder to clean than a smooth, well-maintained surface. Do plastic cutting boards release microplastics? Yes, worn polyethylene and polypropylene boards can release microplastic particles during chopping, according to a 2023 American Chemical Society report. The amount varies with board condition, cutting force, and food type. Replace plastic boards before grooves become deep, and avoid using old, scratched plastic for daily produce prep. What cutting board should I use for raw chicken? Use a dedicated board that you can sanitize immediately after use. Rubber, dishwasher-safe HDPE plastic, stainless steel, or titanium all work well. Keep this board entirely separate from your everyday produce and bread board to prevent raw juices from reaching food you will eat without cooking. Is bamboo a good non-toxic cutting board option? Bamboo can be a budget-friendly plastic-free option, but check the adhesive before buying. Many bamboo boards use formaldehyde-based glues to bond the strands. If the manufacturer does not clearly state that the adhesive is food-safe, choose a different material. Bamboo also runs harder than maple, which wears knife edges faster with regular use. When should I replace a cutting board? Replace any board when deep grooves appear that do not wash clean, cracks develop in wood, persistent odor remains after washing, or heavy staining cannot be removed. A board that cannot be cleaned fully is not worth keeping, regardless of how good the original material was. Is glass a good cutting board for health-conscious kitchens? Glass is nonporous and easy to clean, but it is too hard for regular knife work and dulls blades quickly. Save glass for serving cheese or slicing soft foods. It is not a practical daily prep surface. Final Thoughts Choosing the best cutting board changes for health how you handle food safety, knife care, and everyday kitchen prep more than you might expect. The main takeaway is simple: wood works best for daily produce, rubber or steel for raw meat, and worn plastic should be replaced before it becomes unsafe. Keeping these roles clear helps you reduce contamination risks and maintain a cleaner cooking routine without overcomplicating your kitchen setup. Ultimately, the best cutting boards for health come down to choosing known materials, maintaining them properly, and matching each board to its specific kitchen task. I’d suggest you review your current boards and try one change that improves safety and daily prep today.
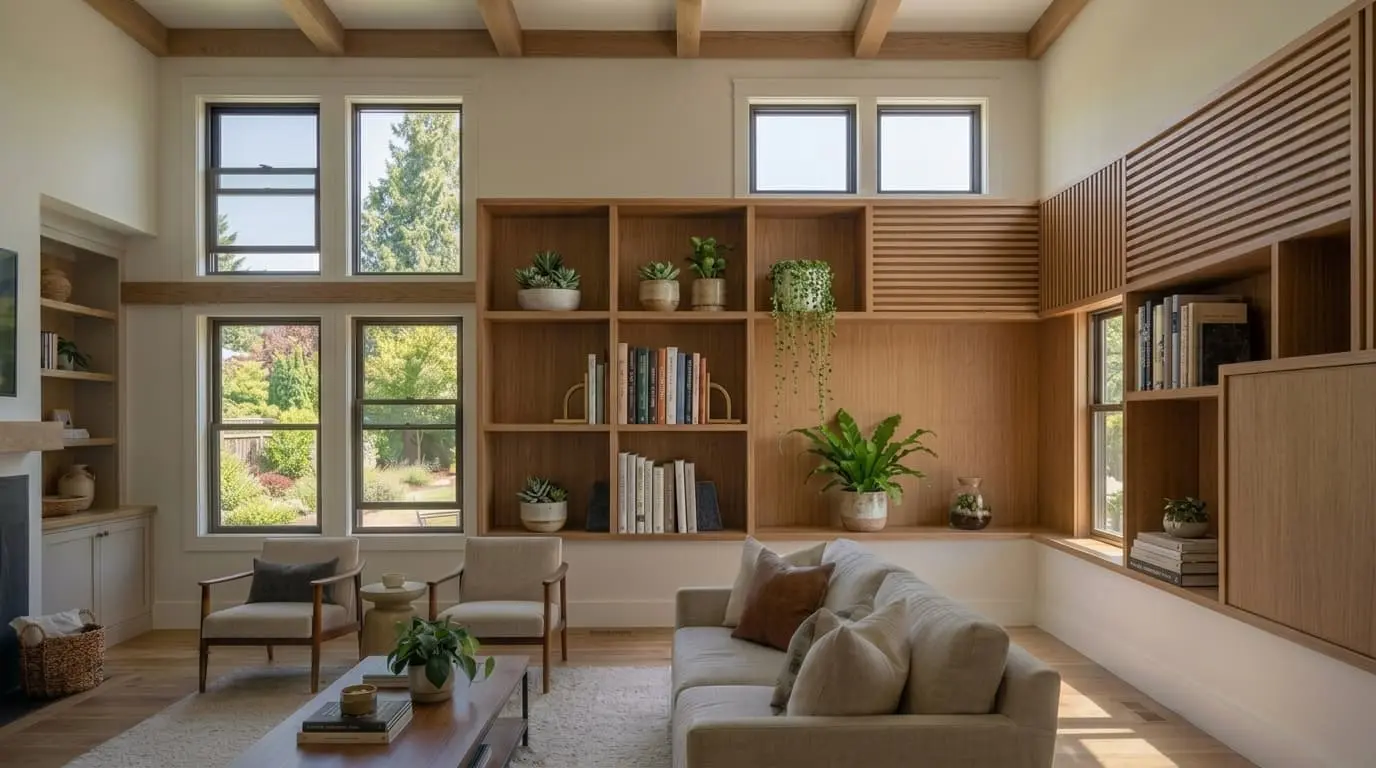
A window does more work than most people credit it for. It controls light, airflow, energy efficiency, and quietly shapes how a room feels to live in, yet the decision gets less thought than most furniture choices. I have seen homeowners spend weeks on paint colors and minutes on windows, then spend years dealing with drafts, high energy bills, and rooms that never feel quite right. The window style you choose matters more than the view it frames. Understanding the types of windows for the home is what turns a guesswork decision into a confident one. Large picture windows flood a room with natural light and openness, while smaller fixed styles create a more private, contained feel. Beyond aesthetics, windows control airflow, influence layout options, and define the connection between indoors and outdoors. For anyone planning a new build or renovation, especially a project like a glass-heavy sunroom addition, window type is one of the most consequential decisions in the entire project. The Impact of Window Styles on Light and Living Space Windows are more than just openings in a wall; they define your home’s character and comfort. The right window style can completely change your space. A large picture window floods a room with light and openness, while smaller windows create a cozy, private feel. I’ve seen how even a small change in window style can shift the mood of a space. Windows control how light flows through your home. More light makes rooms feel open and inviting, while softer light sets a calm mood. They influence airflow, layout, and the connection to the outdoors. For those who prefer a modern or classic design, choosing the right windows is one of the most impactful decisions one can make for a home. Types of Windows for Home: Style-By-Style Breakdown Not every window is built for the same purpose. Some are made for airflow, some for views, some for safety, and others for privacy or design. Here are the types of windows worth knowing before choosing one for your home. 1. Single Hung Windows Single-hung windows are simple, practical, and budget-friendly. Only the bottom sash moves, while the top sash stays fixed. This makes the design easy to use and easier to maintain than many moving window styles. They work well in bedrooms, living rooms, rental homes, and traditional houses where cost and function matter most. Single-hung windows also seal fairly well because they have fewer moving parts. Best For: Standard home installations where affordability, simple use, and low upkeep are the main priorities. 2. Double Hung Windows Double-hung windows offer more flexibility than single-hung windows. Both the top and bottom sashes can move, which gives better control over airflow. You can open the top, bottom, or both at the same time. They are also easier to clean because many modern designs tilt inward. This is helpful for upper floors where outside cleaning is harder. These windows suit bedrooms, kitchens, living rooms, and family spaces. Best For: Multi-story homes where safe cleaning, flexible ventilation, and everyday use matter. 3. Casement Windows Casement windows open outward from the side with a hinge. They usually use a crank handle, which makes them easy to open even in tight spots. Their wide opening allows strong airflow into the room. When closed, casement windows seal tightly, making them a good choice for energy efficiency. They work well in kitchens, bathrooms, and rooms where you want fresh air and clear outdoor views. Best For: Side walls, kitchens, and rooms where strong airflow and tight sealing are important. 4. Awning Windows Awning windows are hinged at the top and open outward from the bottom. When open, they form a small cover that helps keep rain out. This makes them useful in places where you want airflow even during light rain. They are often placed higher on walls, which helps with privacy. Awning windows work well in bathrooms, kitchens, basements, and laundry rooms where ventilation is needed without giving up privacy. Best For: Wet climates and high-humidity rooms that need fresh air and privacy. 5. Sliding Windows Sliding windows open sideways along a track. They do not need hinges or extra space to swing open, which makes them useful in compact areas. Their simple design also makes them easy to operate and maintain. They are a good fit for modern homes, hallways, utility rooms, and wide wall openings. Sliding windows are also practical in rooms where vertical space is limited. Best For: Wide openings, tight spaces, garages, and rooms where simple operation matters. 6. Picture Windows Picture windows are fixed windows that do not open. Their main purpose is to bring in natural light and frame outdoor views. Since they have no moving parts, they can offer strong insulation when installed properly. They work best in living rooms, dining rooms, stairwells, and spaces with a scenic view. The only drawback is that they do not provide ventilation. Best For: Rooms with strong outdoor views where light and design matter more than airflow. 7. Bay Windows Bay windows extend outward from the wall and usually include three panels. The center window is often larger, with two angled side windows. This design adds depth, light, and extra interior space. They can create a small seating area, display ledge, or reading corner. Bay windows work well in living rooms, dining rooms, bedrooms, and front-facing walls. Best For: Homes that need more light, extra space, and stronger curb appeal. 8. Bow Windows Bow windows also extend outward, but they use four or more panels to create a curved shape. They feel softer and more rounded than bay windows. This makes them a strong choice for classic and traditional home designs. They bring in light from multiple angles and make rooms feel larger. Bow windows often work best in large living rooms, sitting areas, and formal dining spaces. Best For: Larger rooms where a curved, elegant window design can add light and character. 9. Specialty Windows Specialty windows are custom-shaped windows made for design impact. They can be round, arched, triangular, hexagonal, or any unique shape that fits the home’s style. They are often used as accent windows rather than main windows. You may see them above doors, along staircases, or beside larger windows. They add personality without taking over the whole design. Best For: Accent areas where shape, style, and architectural detail matter more than ventilation. 10. Bi-Fold Windows Bi-fold windows have panels that fold to one or both sides, creating a wide opening between indoor and outdoor spaces when fully open. They work especially well in kitchens, patios, pool areas, and entertaining spaces where the goal is to blur the line between inside and outside. They are a practical choice for any home designed around outdoor connection, similar to the thinking that goes into modern beach house design, where indoor-outdoor flow is central to the layout. Best For: Modern homes where indoor-outdoor living and open entertaining are important. 11. Multi-Slide Windows Multi-slide windows use large glass panels that slide along tracks. Unlike regular sliding windows, they can include several panels that stack or disappear into a pocket wall. This creates a much wider opening. They are popular in luxury homes, patio-facing rooms, and open-plan layouts. They bring in light, views, and a strong indoor-outdoor feel. Best For: Large modern spaces where wide views and open wall access are the main goals. 12. Hopper Windows Hopper windows are hinged at the bottom and open inward from the top. This design is the opposite of an awning window. Their compact shape makes them useful in small or low wall spaces. They are often used in basements, bathrooms, garages, and utility rooms. Hopper windows provide ventilation while keeping the opening controlled and secure. Best For: Basements and compact rooms where small openings need reliable airflow. 13. Transom Windows Transom windows sit above doors or larger windows. They are usually narrow and fixed, but some designs can open. Their main role is to bring extra light into a room without taking up wall space. They work well in entryways, hallways, interior doorways, and rooms that need borrowed light. They also add a clean architectural detail. Best For: Above doors and windows where extra daylight and design detail are needed. 14. Jalousie Windows Jalousie windows are made of horizontal glass slats that open and close together. They work much like blinds. This design allows steady airflow and easy control over ventilation. They are most useful in warm and humid regions. They are not the best choice for cold climates because they do not seal as tightly as many modern window types. Best For: Coastal, tropical, and warm-climate homes where airflow matters more than insulation. 15. Garden Windows Garden windows project outward from the wall like a small glass box. They usually have glass on the front, sides, and top, creating a sunny shelf inside the home. They are often installed above kitchen sinks. They are useful for herbs, small plants, and decorative items. Garden windows bring light from several angles and add charm to everyday spaces. Best For: Kitchens where natural light, plants, and a useful display ledge add value. 16. Clerestory Windows Clerestory windows are placed high on the wall, close to the roofline. Their position lets natural light enter without reducing privacy or taking up lower wall space. They are common in modern homes, studios, open-plan layouts, and rooms with high ceilings. They can also help release warm air when designed to open. Best For: Brightening deep interiors while keeping privacy and usable wall space. 17. Skylight Windows Skylight windows are installed in the roof instead of the wall. They bring overhead light into spaces that may not have enough side windows. This can make dark rooms feel brighter and more open. Some skylights are fixed, while others open for ventilation. They work well in hallways, bathrooms, lofts, attics, and rooms with limited exterior walls. Best For: Interior rooms and roof-level spaces where wall windows are not practical. 18. Glass Block Windows Glass block windows are made from thick glass blocks set together. They allow light to enter while blocking clear views. This makes them a strong choice for privacy. They are often used in bathrooms, basements, stairwells, and ground-level spaces. They are durable and low-maintenance, but they usually do not open unless a vent section is added. Best For: Bathrooms and basements where privacy, light, and durability are key needs. 19. Egress Windows Egress windows are designed for safety. They are large enough to be used as an emergency exit, especially in basements and sleeping areas. Many building codes require them in certain rooms. They bring in light and ventilation while also offering a safe escape route. Their size, placement, and opening method must meet local code rules. Best For: Basements and bedrooms where emergency exit access is required. 20. Storm Windows Storm windows are installed over existing windows to add protection. They help improve insulation, reduce drafts, and protect against harsh weather. They are often used in older homes. They can be installed on the inside or outside of the main window. Storm windows are a good option when full window replacement is not possible or not needed. Best For: Older homes that need better insulation, draft control, and weather protection. 21. Tilt and Turn Windows Tilt and turn windows open in two ways. They can tilt inward from the top for gentle ventilation or swing inward like a door for full airflow and easy cleaning. They are common in modern and energy-efficient homes. Their tight seal helps with insulation, while the dual-opening design adds flexibility. They work well in bedrooms, offices, kitchens, and upper-floor rooms. Best For: Homes that need secure ventilation, easy cleaning, and strong energy performance. These types of windows for the home offer unique advantages depending on room function, climate, and design preferences. Choosing the right window style can improve comfort, efficiency, and appearance. How to Choose the Right Types of Windows for Home Choosing the right types of windows for the home affects more than how a room looks. The right window improves airflow, natural light, energy efficiency, privacy, and daily comfort, and those benefits compound over time. The wrong one shows up in monthly energy bills and rooms that never quite breathe right. These are the factors that should drive the decision: Measure accurately. Incorrect measurements lead to installation gaps, air infiltration, and costly adjustments. Measure rough opening width and height at multiple points; openings are rarely perfectly square. Match style to architecture. Double-hung windows suit traditional homes; casement and tilt-and-turn styles fit contemporary builds. Choosing a style that fights the home’s architecture creates visual dissonance that is hard to fix later. The same logic applies when picking interior design styles; the architectural shell has to agree with what goes inside it. Check energy ratings. Prioritize Energy Star certification, Low-E glass coatings, and triple glazing in cold climates. Frame material matters too; fiberglass and vinyl outperform aluminum for thermal performance in most US regions. Factor in climate and storm resistance. Humid climates need moisture-resistant frames. Storm-prone zones, the Gulf Coast, the Atlantic coast, and the Southeast need impact-resistant glass and tested pressure ratings. This is especially relevant if you are planning any house additions with large glass areas. Prioritize easy maintenance. Tilt-in sashes make cleaning significantly easier than fixed windows, particularly on upper floors. Simpler hardware means fewer failure points over the window’s 20-to-25-year lifespan. Verify warranties. A solid product warranty (10+ years on glass, 5+ years on hardware) and a separate installation warranty protect the investment. Condensation between panes after the warranty period is a common and expensive surprise. The goal is not to choose attractive windows; it is to choose windows that make the home more comfortable, efficient, and practical every day. Mistakes to Avoid When Choosing Window Styles I have seen how easy it is to get this wrong, and the mistakes almost always show up after installation. Here are the ones worth catching early. Mistake Why It Happens How to Avoid It Focusing Solely on Aesthetics Visual appeal overshadows performance Check energy ratings and seal quality alongside style Ignoring Maintenance Requirements Upkeep demands are underestimated at purchase Match window style to a realistic lifestyle and schedule Overlooking Energy Efficiency Energy costs feel abstract until the monthly bill arrives Verify glazing options, energy ratings, and frame material Ignoring Room Functionality Style chosen for looks over actual room usage Match window type to ventilation needs and usage patterns Mismatching Style to Architecture The window chosen in isolation from the home’s exterior Use the architecture match guide above before finalizing any order You do not need expert knowledge to avoid these mistakes; it only requires asking the right questions before the decision is made. Maintenance and Cleaning Tips for Every Type of Window Windows last longer and perform better with consistent upkeep. Here is everything needed to keep them in good condition year-round. 1. Cleaning Frequency by Window Style Different window styles collect dust, moisture, and debris at different speeds. A cleaning schedule helps every type of window stay clear, smooth, and long-lasting. Window Style Recommended Cleaning Frequency Double-Hung Every 3 months, tilt-in sashes allow easy interior cleaning Casement Every 3 months, wipe the tracks and hinges each time Fixed Windows Every 6 months, the exterior requires a ladder or professional access Bay and Bow Every 3 months, multiple panes need individual attention Skylight Every 6 months, seasonal cleaning prevents debris buildup 2. Tips for Hard-to-Reach Windows Upper-floor, fixed, and skylight windows need extra care during cleaning. Using the right tools keeps the glass clean while helping you avoid unsafe positions. Telescopic cleaning poles with microfiber heads handle upper-floor exteriors safely Magnetic window cleaners work on fixed double-pane windows from the inside Professional cleaning is worth scheduling annually for skylights and fixed windows above the second floor Never lean out of a window to clean: always work from a stable ladder positioned safely against the exterior wall 3. Hardware and Frame Maintenance Frames, hinges, locks, and tracks affect how well windows open, close, and seal. Regular maintenance prevents rust, drafts, sticking, and long-term damage. Vinyl Frames: Wipe with mild soap and water every 3 months. Avoid abrasive cleaners. Wood Frames: Inspect for moisture damage every 6 months. Repaint or reseal every 2 to 3 years. Aluminum Frames: Clean with a non-abrasive cleaner and apply car wax annually to prevent oxidation. Hardware: lubricate hinges and locks with silicone spray every 6 months and check for corrosion early. 4. Seasonal Inspection Checklist Each season can affect windows in a different way. A simple seasonal check helps catch drafts, moisture, damaged seals, and hardware issues early. Spring: replace compressed weatherstripping, clean tracks, test all locks, and inspect exterior caulking. Summer: check screens for tears, inspect for condensation between panes, and lubricate sliding mechanisms. Autumn: inspect weatherstripping, check frames for moisture damage, and reapply caulk where gaps appear. Winter: seal drafts immediately, wipe interior condensation regularly, and avoid forcing frozen mechanisms. Consistent seasonal maintenance extends window lifespan significantly and prevents minor issues from turning into costly repairs. The details behind every good window decision are simple. Trust me, the ones who skip these steps always find out the hard way. Frequently Asked Questions Which types of windows for home reduce noise most effectively? Casement and fixed picture windows seal tightly against the frame and reduce outside noise better than most operable styles. Double or triple glazing adds another meaningful layer of sound control. These are the right choices for homes near roads, schools, flight paths, or busy commercial areas. Do types of windows affect a home’s resale value? Yes. Modern, well-sealed windows signal to buyers that the home has been maintained. Outdated or drafty windows are frequently flagged during inspections and can reduce offers or trigger replacement credits. Energy-efficient windows also show up favorably in a home’s energy audit, which matters in markets where efficiency is a selling point. How long do different types of windows typically last? Most quality windows last 20 to 25 years with proper maintenance. Lifespan depends on frame material, weather exposure, installation quality, and upkeep. Foggy glass, sticking frames, drafts around the perimeter, and rising energy bills are the clearest signals that replacement is overdue. Can window performance be improved without full replacement? Yes. Storm windows, updated weatherstripping, exterior caulking, and Low-E window films can meaningfully reduce drafts and heat transfer when the existing frames are still structurally sound. This approach is particularly useful in older homes where the original windows have historic value or where full replacement budgets are not available. Which window types work best for basement bedrooms? Egress windows are the required choice for any basement sleeping area in the US; they must meet minimum size and opening requirements under local building codes. Hopper windows can supplement ventilation in non-bedroom basement spaces. If the basement conversion is part of a broader project, reviewing construction cost structures before finalizing the scope helps prevent budget surprises on egress installation. Are specialty or custom window shapes worth the cost? Specialty windows make sense as accent pieces in homes with strong architectural character, above a front entry, beside a staircase landing, or paired with a standard window for visual interest. As primary windows in a room, they are rarely practical. The cost premium for custom shapes is significant, and the payoff is design-only; they add no ventilation or insulation advantage over standard windows of the same glass area. Summing Up Picking the right window Styles is one of those decisions that feels simple until you are actually standing in a room that does not breathe right or watching energy bills climb every season. I have seen how much difference the right choice makes, and how quietly the wrong one costs. Every option I have covered in this guide exists for a reason, and matching that reason to a specific space is what makes a home feel genuinely comfortable. Ventilation, energy efficiency, and room function are not just specs; they are daily lived experiences. If this helped narrow things down, share it with someone who needs it. Questions? Drop them below in Comments.
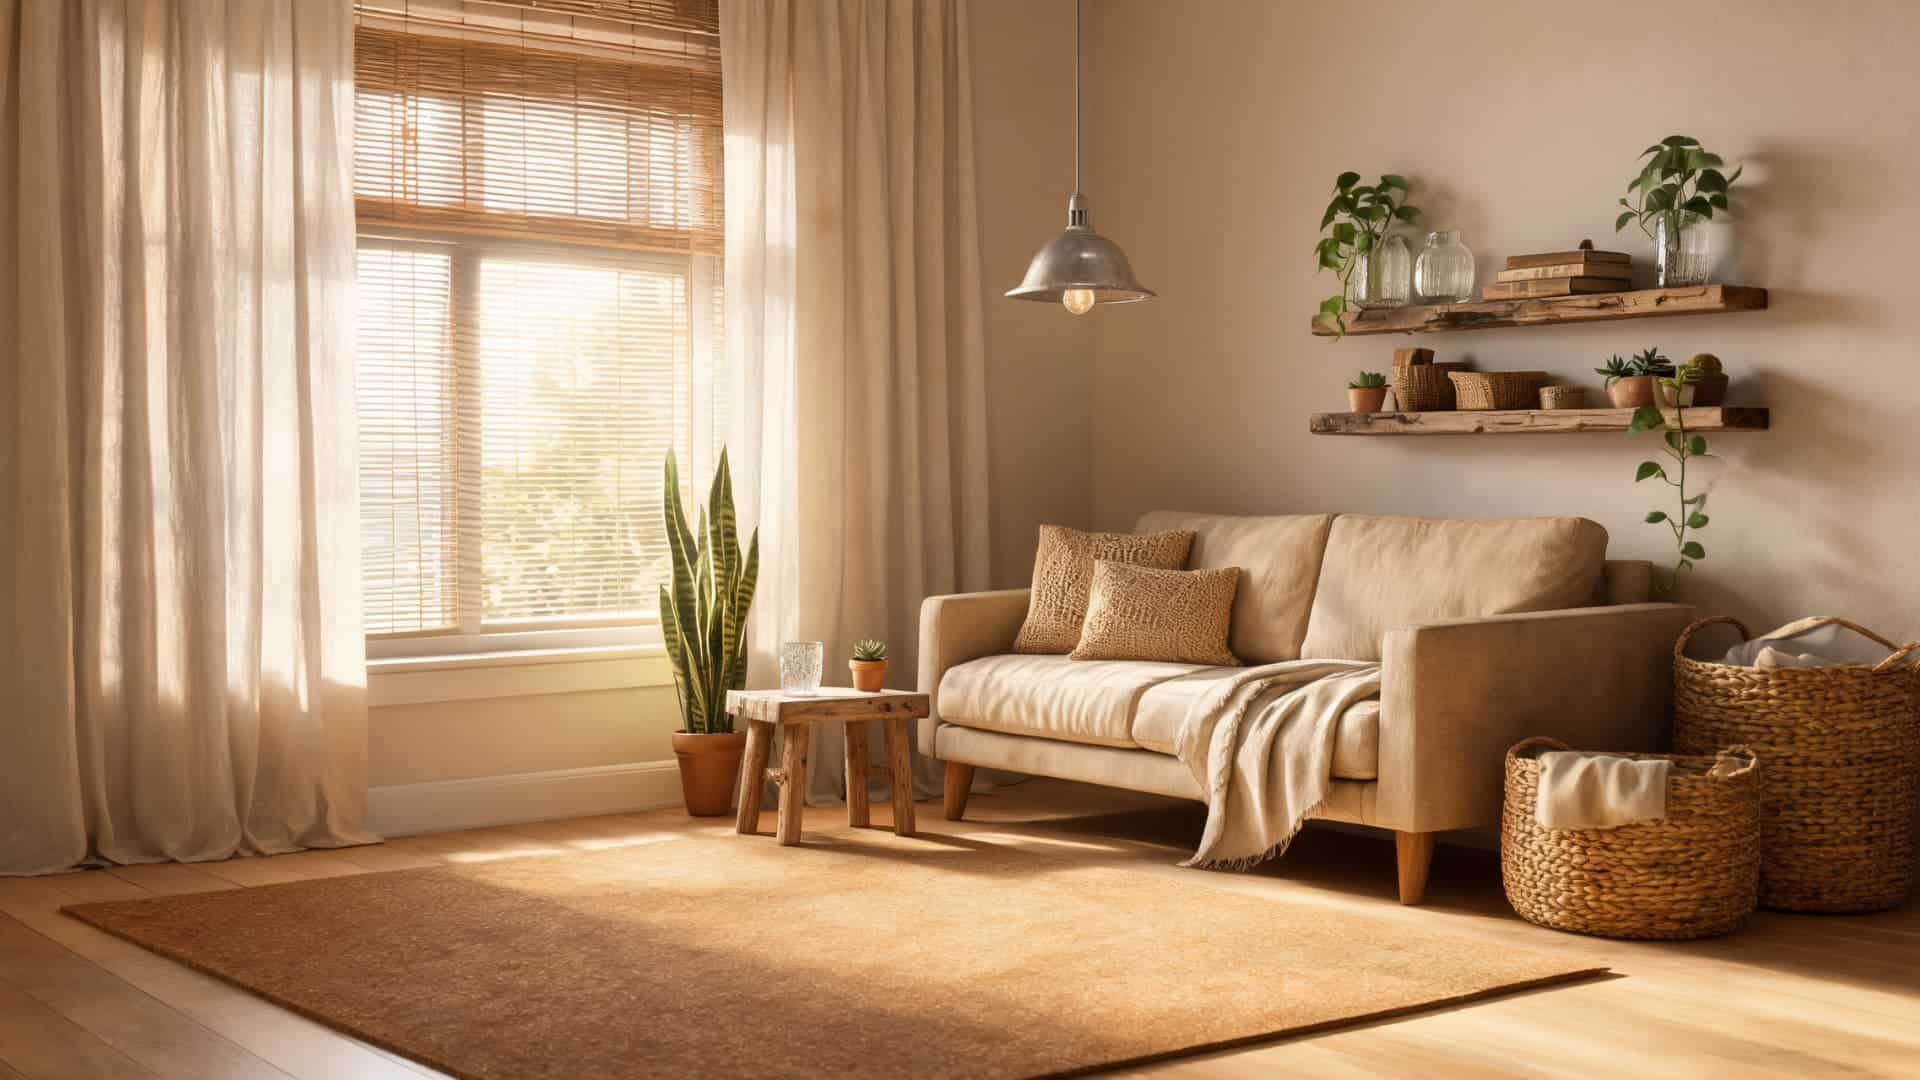
Most rooms don’t need a full renovation to become more sustainable. They need better decisions about what stays, what gets replaced, and what gets chosen the next time something wears out. Sustainable interior design is the process applied room by room, material by material, choice by choice. It covers where materials come from, how furniture is made, how much energy a space uses, and what happens to an item when it’s no longer needed. Done right, it produces rooms that are healthier to live in, cheaper to maintain, and less wasteful over time. Done wrong, it’s a label on a product that doesn’t hold up past the second year. This guide covers the materials that actually perform, how to choose them by room, what to avoid, and how to make progress without replacing everything at once. Sustainable Interior Design at a Glance Sustainable interior design means planning indoor spaces to reduce environmental impact, support healthier air quality, minimize waste, and extend the useful life of every material and piece of furniture in the room. It looks at the full life of a space: where materials come from, how they’re made, how much energy the room uses, and what happens when something is removed or replaced. A room can look responsible and still rely on finishes that off-gas for years, furniture that can’t be repaired, or materials that were sourced without accountability. The practical value is real. Durable furniture, repairable pieces, low-energy lighting, and quality materials tend to outlast cheaper alternatives that cycle in and out every few years. That saves money over time and keeps usable items out of landfills. Pro Tip: Before buying anything new, check what can be repaired, repainted, moved to a different room, or reused first. The most sustainable choice is almost always the one already in the house. Best Materials for Sustainable Interiors The right sustainable material depends on the room it’s going into. Moisture level, foot traffic, cleaning habits, sunlight exposure, and expected lifespan all affect whether a material will actually last. A natural label doesn’t mean much if the finish is high-VOC, the adhesive is toxic, or the piece won’t survive five years of daily use. Use this table to compare common materials before choosing one for a specific room. It shows where each material performs well and why it earns a place in a more sustainable interior. Material Best Used For Why It Works FSC-certified wood Furniture, flooring, cabinetry Responsibly sourced, auditable supply chain, durable Reclaimed wood Tables, beams, shelves, wall accents Reuses existing material, no new harvesting required Bamboo Flooring, furniture, accessories Fast-growing, renewable, comparable hardness to many hardwoods Cork Flooring, wall panels, underlayment Harvested without cutting the tree, soft underfoot, sound-absorbing Recycled metal Lighting, furniture frames, hardware Durable, reusable, and requires less energy to produce than virgin metal Recycled glass Tiles, countertops, decorative accents Diverts waste from landfill, adds texture and visual depth Natural fiber textiles Rugs, curtains, upholstery, bedding Biodegradable, breathable, no synthetic off-gassing Low-VOC paint Walls, trim, ceilings Reduces volatile organic compound emissions after application Linoleum Flooring Made from linseed oil and natural materials, long-lasting, biodegradable at end of life Wool Rugs, upholstery, acoustic insulation Natural, durable, flame-resistant without chemical treatment The best choice is rarely the most popular one. It’s the one that fits the room’s conditions, holds up under daily use, and uses finishes that won’t compromise indoor air quality. Best Sustainable Materials by Room A material that performs well in a bedroom may fail quickly in a bathroom or kitchen. Before choosing anything, think about the conditions that the room creates every day: moisture, sunlight exposure, foot traffic, cleaning chemicals, and how long you need the material to last. That context determines whether a sustainable choice is actually practical. 1. Living Room Living rooms see daily use from multiple people, so the materials here need to handle wear, support comfort over years, and be repairable when something eventually gives. Start with the largest pieces first: they drive the most cost, waste, and long-term impact. Reclaimed wood works well for shelves, coffee tables, media units, and wall accents. It keeps usable material out of landfills and gives the room a character that new MDF can’t replicate. Vintage furniture with solid frames offers the same advantage, especially pieces where broken joints or worn upholstery can be fixed rather than thrown out. The types of wood for furniture matter here: oak and walnut hold up significantly better under daily use than softer species. Wool rugs hold up in high-traffic seating areas better than most synthetic options and are naturally stain-resistant when cared for properly. Recycled metal lighting is a long-lasting choice. Low-VOC paint on the walls reduces ongoing chemical exposure. Bamboo blinds add natural texture and are a renewable alternative to synthetic window treatments. Key Materials Reclaimed wood shelving and tables, vintage furniture with repairable frames, wool rugs, recycled metal lighting, low-VOC paint, bamboo blinds Priority Start with the largest furniture pieces first. They account for the most waste and the most cost over time. 2. Bedroom Bedrooms are where most people spend six to eight hours a night, so indoor air quality matters more here than in almost any other room. Avoid finishes, adhesives, or synthetic textiles that continue off-gassing after installation. The bedroom is not the place to save money on paint or mattress covers. Organic cotton bedding and linen curtains create a breathable environment without synthetic fibers that trap heat or off-gas over time. Solid wood furniture is worth the investment here: it can be refinished when it shows wear instead of being replaced. Cork flooring is soft and quiet underfoot and performs well in a low-traffic room. Understanding VOC levels in paint matters in a room where the windows may stay closed for hours. Key Materials Organic cotton bedding, linen curtains, wool rugs, solid wood furniture, cork flooring, low-VOC paint Priority Paint and bedding first. These directly and continuously affect indoor air quality. 3. Kitchen Kitchens need materials that handle heat, moisture, cleaning products, and daily use without deteriorating quickly. Replacing worn-out cabinets or counters every few years is neither sustainable nor economical. Durability comes first here. FSC-certified wood cabinets are the responsible sourcing choice for new installations. Before replacing cabinets entirely, cabinet refacing is worth considering: it keeps the existing carcasses in place and updates only the door fronts and drawer faces, cutting both waste and cost significantly. Recycled glass tile handles moisture well and brings recycled content into a heavily used area. Low-VOC finishes on cabinets matter in a room where ventilation may be limited. A minimalist kitchen layout also reduces the total surface area requiring material, which compounds the savings across every material choice. Key Materials FSC-certified wood cabinets, reclaimed wood accents, recycled glass backsplash tile, recycled metal hardware, low-VOC cabinet finishes, LED task lighting Priority Assess existing cabinets for refacing before replacing. A refaced kitchen produces a fraction of the waste of a full replacement. 4. Bathroom Water, steam, and frequent cleaning are hard on weak finishes. Every material choice in a bathroom needs to be assessed for moisture resistance before anything else. A beautiful material that degrades in humid conditions is a replacement job waiting to happen. Recycled glass tile performs well on shower walls and backsplashes. Responsibly sourced stone is durable when maintained and sealed correctly. Water-saving fixtures are among the highest-impact changes in a bathroom: low-flow showerheads and dual-flush toilets reduce daily water consumption without a noticeable change in function. Low-VOC mildew-resistant paint protects walls that stay damp. Durable metal hardware outlasts cheaper finishes in high-humidity environments. Key Materials Recycled glass tile, responsibly sourced stone, water-saving fixtures, low-VOC mildew-resistant paint, durable metal hardware, bamboo accessories Priority Water fixtures first. They reduce ongoing resource use and pay back the investment over time. 5. Home Office A home office needs furniture that supports posture and focus across long days. The desk and chair are the most important pieces to get right. A second-hand solid wood desk often outlasts a new budget alternative by a decade or more, and it costs less. That’s not a compromise: that’s a better purchase. Bamboo shelving provides renewable storage that holds books and equipment without the particleboard off-gassing common in flat-pack alternatives. Cork boards replace single-use adhesive notes and sticky strips with a reusable surface. Recycled metal lamps and LED task lighting reduce energy use in a room that may be lit for eight or more hours a day. An ergonomic chair with replaceable parts extends the product’s useful life significantly. Key Materials Second-hand solid wood desk, bamboo shelving, cork board, recycled metal lamp, LED task lighting, repairable ergonomic chair Priority Desk and chair first. They affect both daily function and long-term cost more than any other piece in the room. 6. Small Apartment Every item in a small apartment has to earn its place. The sustainable choice here isn’t about finding the greenest product: it’s about buying fewer things that do more. A storage bench that seats two and holds linens replaces two separate pieces. A foldable dining table reclaims floor space for six hours a day. That’s the design principle that matters most in a compact layout. Second-hand storage pieces extend the useful life of furniture that would otherwise sit in a landfill. Natural fiber rugs add warmth without overwhelming a small floor plan. Modular shelving adapts as storage needs change, which reduces the need to buy new furniture when the room’s function shifts. Thermal curtains regulate indoor temperature and cut heating and cooling costs in apartments with older windows. Key Materials Multifunctional furniture, second-hand storage pieces, natural fiber rugs, LED lighting, thermal curtains, modular shelving Priority Multifunctional pieces first. They reduce the total number of items needed, which is the most direct path to a less wasteful room. How to Choose the Right Sustainable Material A product can carry every eco-friendly claim on the packaging and still be the wrong choice for the room. Before buying any material, run through these four checks first. What to Check Why It Matters What to Look For Room conditions Bathrooms and kitchens need moisture-safe materials. Bedrooms need breathable textiles and low-emission finishes. Getting this wrong produces early failures. Assess moisture, sunlight, foot traffic, cleaning routines, and whether children or pets are using the space before finalizing any choice. Full life cycle A reused or repairable material usually outperforms a new item that needs replacing in three years. Ask where it came from, how it was made, how long it’s expected to last, and what happens when it’s removed. Finish and adhesive Natural base materials can still use toxic adhesives, sealers, stains, or coatings that undermine the environmental case. Check finishes on wood furniture, bamboo flooring, cork tiles, cabinetry, upholstery, and rugs before purchasing. Maintenance requirements A material that fails early because it’s hard to clean or care for is not a sustainable choice regardless of its sourcing. Stone may need periodic sealing. Cork needs moisture protection in wet areas. Wool needs correct cleaning products. Solid wood may need refinishing over time. Know the maintenance schedule before buying. A good material fits daily life in that specific room, not just a certification label. The right choice is one that suits the conditions, lasts well under actual use, and can be maintained without ongoing stress or cost. Sustainable Interior Design Practices That Matter Most Sustainable interior design is not only about buying eco-friendly products. It often starts with buying less, using items longer, and choosing better when something needs replacing. Reuse First: Repair, repaint, refinish, or reupholster what is already there before buying new. Buy Second-Hand: Look for solid wood tables, sturdy chairs, lamps, mirrors, shelving, and storage pieces. Check Condition: Avoid items with mold, water damage, broken frames, or strong chemical odors. Choose Quality: Pick durable, repairable pieces instead of cheap items that need replacing quickly. Try The 50/50 Method: Mix second-hand or upcycled pieces with new items to reduce waste. Source Locally: Use nearby woodworkers, upholstery shops, salvage stores, and repair services when possible. Plan for Flexibility: Choose furniture that can work in more than one room as needs change. What To Avoid In Sustainable Interior Design A lower-waste room is not only about adding better materials. It also means avoiding choices that break quickly, affect indoor air, or create more waste later. Avoid fast furniture that breaks quickly and has limited repair value. Do not replace everything at once if existing pieces can be repaired, refaced, donated, or reused. Choose low-VOC paints, stains, sealers, and adhesives to support better indoor air. Avoid non-certified wood with unclear sourcing. Do not trust green claims without material details, certifications, or brand transparency. Check the finish, adhesive, and coating, not just the base material. Pick materials based on moisture, traffic, sunlight, pets, children, and cleaning needs. Avoid hard-to-recycle mixed materials unless the product is durable enough to last. Skip trend-only purchases that may be replaced quickly. Think about repair, resale, donation, recycling, and disposal before buying. Frequently Asked Questions What makes a home truly eco-friendly inside? A truly eco-friendly home reduces waste, uses durable materials, and avoids harmful emissions. It focuses on long-lasting furniture, safe finishes, and efficient energy use. The goal is not just appearance but how responsibly each item is sourced, used, and eventually replaced or reused over time. Can sustainable design still look modern? Yes, sustainable design can look very modern and stylish. Clean lines, neutral tones, natural textures, and minimal layouts often come from sustainable choices. Materials like wood, stone, cork, and recycled metals blend easily into contemporary interiors without losing visual appeal or comfort. Are eco materials more expensive overall? Eco materials can cost more upfront, but they often save money long term. Durable furniture, repairable pieces, and low-maintenance finishes reduce replacement costs. Over time, fewer replacements and lower energy use make sustainable choices more economical than cheaper short-life alternatives. Do sustainable interiors need special cleaning? Not always. Most sustainable materials can be cleaned with simple, mild products. Natural fiber rugs, wood, and stone may need gentle care, but they don’t require complex routines. The key is choosing materials that match your lifestyle so maintenance stays simple and realistic. Is second-hand furniture always sustainable? Second-hand furniture is often more sustainable, but condition matters. Items should be structurally sound, safe, and free from damage or harmful finishes. When chosen carefully, reused furniture reduces waste and extends product life, making it one of the most practical eco-friendly choices. How does lighting affect sustainability indoors? Lighting impacts energy use and comfort. LED lighting reduces electricity consumption and lasts longer than traditional bulbs. Good lighting design also reduces the need for excess fixtures. Natural daylight use further improves efficiency and lowers environmental impact over time. Can small changes really improve sustainability? Yes, small changes make a big difference over time. Switching to LED bulbs, choosing low-VOC paint, or repairing furniture instead of replacing it reduces waste. Sustainable design works best when improvements are made step by step rather than all at once. What is the biggest mistake in eco design? The biggest mistake is focusing only on labels instead of long-term durability. A product may look eco-friendly but fail quickly or use harmful finishes. True sustainability depends on lifespan, repairability, and how well the material performs in real daily conditions. Summing Up Creating a more thoughtful home doesn’t require a full renovation or expensive upgrades. With sustainable interior design, I focus on choosing materials, furniture, and finishes that last longer and reduce unnecessary waste over time. From FSC-certified wood to low-VOC paint and recycled materials, each decision adds up across every room in your home. When you start thinking in terms of durability, air quality, and long-term use, your space naturally becomes healthier and more efficient. Sustainable interior design works best when you apply it step by step, starting with the spaces you use the most and building from there. Try one small change today and see how your home improves naturally.
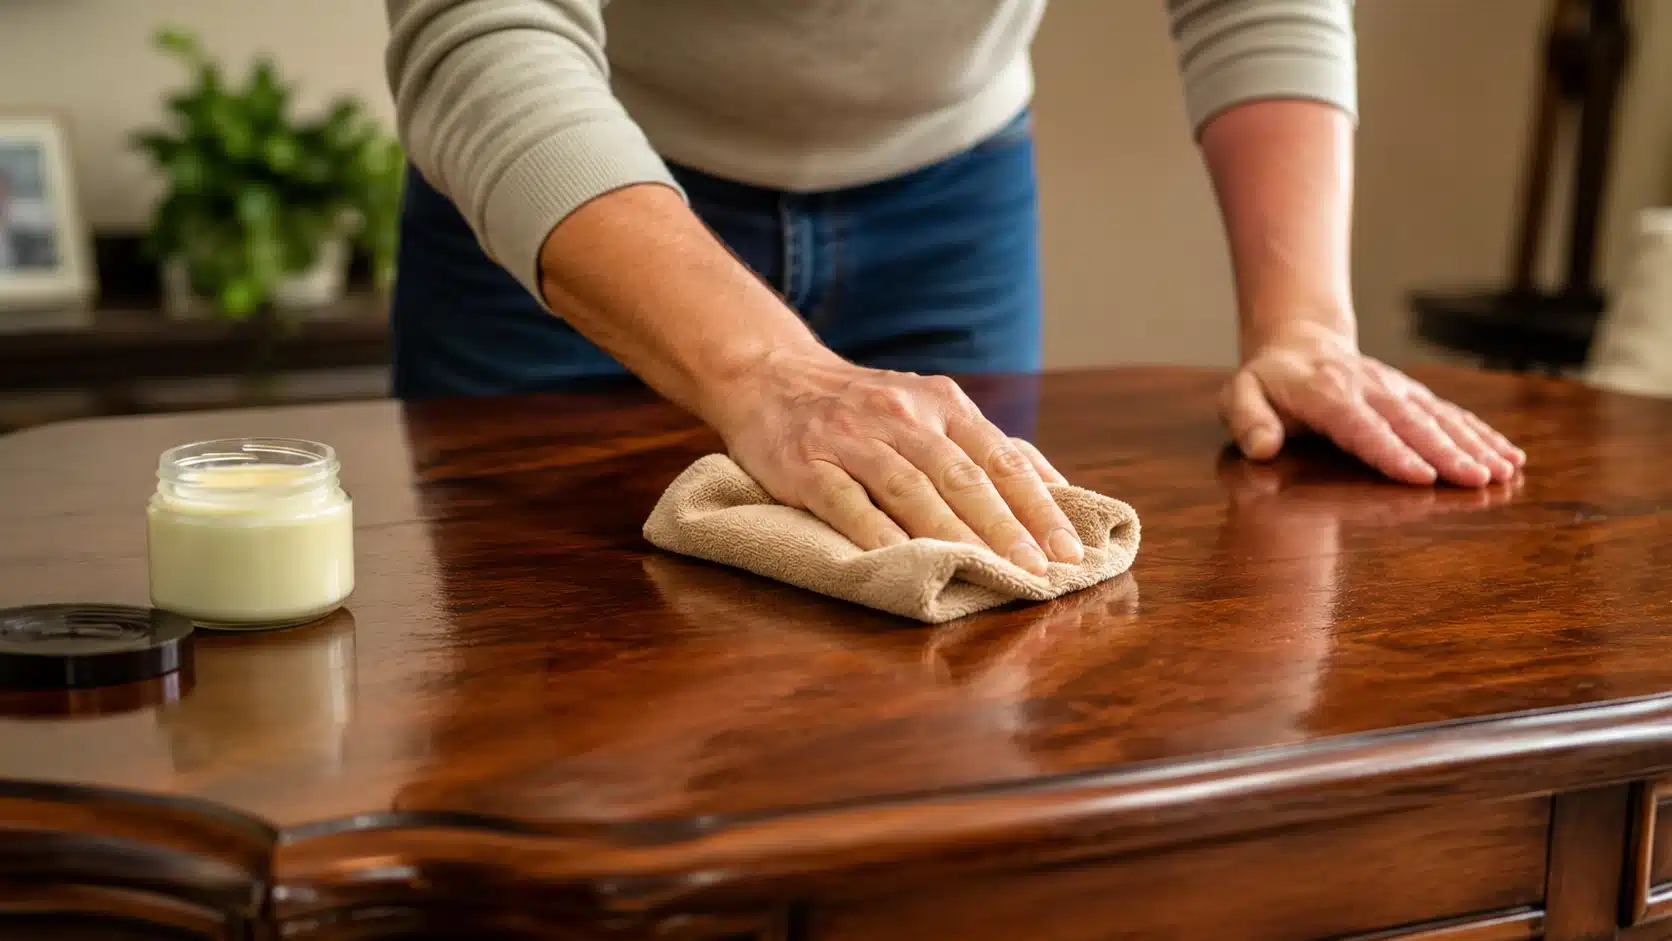
My rule for wood furniture care is simple: clean first, polish second. Skipping that order is where most mistakes start. When you rub polish into a dusty, sticky, or greasy surface, you trap the grime instead of removing it. The wood can end up looking dull, cloudy, or streaky even after you put in the work. A good polish should refresh the finish, not cover dirt. Today I will show you how to polish wood furniture the right way, from the first wipe-down to the final buff. You will learn how to clean, choose a polish, apply it lightly, and keep the surface smooth without overusing the product. Identify Your Finish Before You Open Anything The finish determines the product. Using the wrong polish on the wrong finish causes cloudiness and is hard to fix. Test with mineral spirits; residue indicates wax, while no change suggests lacquer, polyurethane, or varnish. Oil finishes are matte; a drop of linseed oil will bead if cured.Wood polish affects the surface, not the wood. Most furniture, whether solid oak, walnut, or a veneered piece, has a clear topcoat, lacquer, or oil finish already applied. Finish Type How to Identify Best Polish Type Avoid Lacquer / Polyurethane Hard surface; mineral spirits test shows no change Liquid spray or cream polish, light application Heavy wax can cloud the surface Wax finish Soft sheen; mineral spirits lifts residue onto cloth Paste wax, pure beeswax or carnauba Spray polishes and oil mixes, both strip wax Oil finish Matte look; linseed oil beads rather than absorbs Feed-and-wax products; orange oil conditioners High-gloss sprays create buildup on oiled wood Antique / shellac Amber tone; warm, hand-rubbed appearance Pure beeswax paste only, applied very sparingly Anything with silicone, contamination is very hard to reverse Note: Many budget spray polishes contain silicone, which offers instant shine but hampers future refinishing due to bonding issues. Check labels carefully. Supplies You Need Before You Start Keep your setup simple so the process stays clean, safe, and easy to control. These basic supplies help you clean, apply product, fix light marks, and buff properly: Dry microfiber cloths, at least two, one for applying, one for buffing Mild dish soap and warm water Soft cotton cloth for cleaning Furniture polish, wax polish, or a light homemade mix, matched to your finish type A wood touch-up marker for minor scratches, addressed before polishing Optional: gloves, pure beeswax, orange oil polish for drier wood How to Polish Wood Furniture: Step-by-Step Polishing works best when you prepare the surface first. Follow these six steps in order so the wood looks clean, smooth, and evenly finished without streaks or buildup. Step 1: Dust the Surface Properly Start with a dry microfiber cloth and wipe with the grain, not across it. Dust may look harmless, but tiny grit can scratch the finish once you begin rubbing. Pay close attention to carved details, joints, legs, and edges where dirt tends to settle. For tight spots, use a clean, dry paintbrush first. This protects the wood finish and gives your furniture polish a cleaner surface. Step 2: Clean the Wood Before Polishing Dusting removes loose dirt, but it does not remove fingerprints, food film, or oily buildup. Use a barely damp cloth for light cleaning, then dry the surface right away. For sticky spots, mix a few drops of mild dish soap with warm water. Wipe in small sections and dry each one fully. Avoid soaking the surface. Clean wood furniture responds better to polish and helps prevent cloudy buildup. Step 3: Fix Marks Before You Polish Do not polish over marks and sticky areas. Polish can make dull spots stand out more. For white water rings, try a small amount of non-gel toothpaste or petroleum jelly, then wipe and buff dry. For light scratches, rub a walnut or pecan kernel along the mark. Use a matched touch-up marker for deeper lines. Fixing surface scratches first gives the wood polish a smoother result. Step 4: Choose the Right Polish Pick the polish based on the furniture finish and age, use the identification table above if you are not sure what you have. Spray or liquid polish works for lacquered and polyurethane-finished pieces that need a quick refresh. Wax polish suits older or antique furniture because it lasts longer and gives a deeper, softer shine. Homemade oil mixes can work on sealed wood, but too much leaves a sticky film and attracts dust. Test any furniture polish in a hidden spot first to protect the wood surface. Step 5: Apply Polish the Right Way Apply polish to the cloth, not directly to the wood. Work in small areas and rub with the grain using light, even pressure. You only need a thin layer. Too much product can leave streaks or a greasy feel. Follow the product label if it says to wait before buffing, some wax products need 2 to 3 minutes to begin setting before the cloth will pick up the excess cleanly. Careful polish application helps create an even wood shine without extra residue. Step 6: Buff Until the Surface Feels Dry Buffing creates the final look, so do not rush it. Use a clean, dry microfiber cloth and work over each polished area. Start with small circular motions to lift extra residue, then finish with long strokes along the grain. Keep going until the surface feels smooth, not oily. Check from a low angle with a light source raking across the surface to catch any streaks before you move on. A surface that still looks slightly cloudy needs more buffing, not more product. Proper buffing prevents furniture polish buildup over time. How Often Should You Polish Wood Furniture? You should dust wooden furniture weekly because removing dust is the easiest way to protect the finish. It only takes a minute and helps stop grit from scratching the surface. Clean spills, fingerprints, and sticky marks as soon as they appear, then dry the wood thoroughly to prevent moisture from remaining on the finish. Use furniture polish every two to three months, or only when the surface starts to look flat, dry, or dull. Polishing too often is one of the biggest mistakes. Each use leaves a thin layer behind, and those layers can build into a cloudy or tacky film over time. Good wood furniture care means polishing when the piece needs it, not every time you clean. How to Polish Specific Wood Furniture Pieces Different furniture pieces need different care. A table, chair leg, carved detail, or naturally polished surface all need a lighter hand, a clean cloth, and patient buffing. A piece with a cracked finish or deep gouges needs the finish stripped and reapplied before any surface product will be effective. The right furniture polish, used lightly and buffed fully, leaves wood looking refreshed without product buildup. 1. How to Polish a Wooden Table Wooden tables accumulate food film, hand oils, dust, and drink rings more quickly than most furniture. A light polish works best because flat tops show streaks, haze, and buildup quickly: Clear surface: Remove dishes, decor, mats, and papers before cleaning or polishing. Clean edges: Wipe the table edge and apron where oils and crumbs often collect. Use less: Apply a small amount of polish to the cloth, not the tabletop. Follow grain: Rub with the grain using light, even pressure across the full surface. Buff center: Spend extra time where hands, plates, and cups most often touch. Wait before use: Let the table sit for 30 minutes before replacing items. 2. How to Polish Wood Chair Legs and Carved Pieces Chair legs, grooves, and carved wood need careful work because polish can gather in tight spaces. Too much product dries white, sticky, or uneven in detailed areas: Dust grooves: Use a soft dry brush to remove dust from carved lines first. Fold cloth: Wrap a microfiber cloth tightly around your fingers for better control. Use sparingly: Add only a small amount of polish to avoid residue buildup. Work short: Polish in small strokes that follow the carving or wood grain. Press gently: Push the cloth into details without forcing product into cracks. Buff details: Use a clean corner of a cloth to remove excess polish from the grooves immediately, before it sets. 3. How to Polish Wood Furniture Naturally Natural polish can work for sealed lacquer or polyurethane finishes when used lightly. It is not right for every finish, avoid oil mixes on wax finishes, shellac, or any piece you plan to refinish, so test first and avoid using oils too often: Mix lightly: Use one part white vinegar with three parts olive oil. Try lemon: Swap vinegar for lemon juice for a fresher scent. Test first: Apply a small amount on a hidden area before treating the piece. Use little: Put a few drops on the cloth instead of soaking the wood. Buff fully: Keep wiping until the surface feels dry, not oily. Watch haze: Stop using oil mixes if the finish looks cloudy or tacky. Common Wood Polishing Mistakes That Dull Furniture Over Time Small polishing mistakes can leave wood looking cloudy, greasy, or scratched. Most problems come from too much product, poor cleaning, rough cloths, or not buffing long enough: Mistake Why It Dulls Furniture Better Approach Polishing dirty wood Traps dust, oil, and grime under polish Clean and dry the surface first Using too much polish Leaves a sticky film that collects dust Apply a thin layer only Spraying wood directly Creates uneven wet spots and buildup Put polish on the cloth Using rough cloths Can scratch or haze the finish Use clean microfiber cloths Using silicone-based sprays Embeds silicone into the finish; makes refinishing very difficult later Check labels before use; avoid products listing silicone or dimethicone Mixing products Layers can react or turn cloudy Remove old buildup before switching Skipping buffing Leaves residue on the surface Buff until the wood feels dry Good polishing is more about control than product. Use less, clean first, buff longer, and let the wood tell you when it needs another round. Tips to Keep Wood Furniture Looking Good Between Polishes Good daily care helps wood stay clean, smooth, and bright between polish sessions. These habits reduce fading, water marks, heat damage, scratches, and finish cracking over time: Limit sunlight: Keep wood furniture out of direct sunlight when possible. UV exposure can fade the finish and cause the topcoat to crack, this is one failure mode that polish cannot reverse once it starts. Use surface protection: Place coasters, placemats, and felt pads under cups, plates, lamps, decor, and anything that could scratch surfaces. Wipe spills fast: Use a dry cloth right away, and wipe with the grain so moisture does not sit on the surface. Avoid direct heat: Do not place hot mugs, pans, or dishes on wood. Heat can leave white marks or blister the finish. Control humidity: Keep room humidity steady where possible. Large humidity swings can make wood move and crack the finish at joints and edges. Between polishes, prevention matters most. Protect the surface, clean small messes quickly, and keep heat, sun, and moisture away from the wood whenever you can. Frequently Asked Questions How do you tell if your wood furniture has a wax finish versus a lacquer finish? Rub a small hidden spot with a cloth lightly dampened with mineral spirits. If the surface becomes slightly tacky or a residue lifts onto the cloth, it likely has a wax finish. If nothing changes, it is probably lacquer, polyurethane, or a conversion varnish. This step takes 30 seconds and tells you exactly which type of polish to reach for. Can polishing fix a finish that has turned white or cloudy? If the cloudiness is product buildup, wiping with diluted white vinegar (one part vinegar to five parts water), drying fully, and then polishing lightly often clears it. If the cloudiness is moisture trapped in the finish layer itself, polishing will not fix it; the finish needs professional attention or reapplication. Can you polish wood furniture with olive oil? A light application occasionally works on sealed lacquer or polyurethane finishes, but olive oil is not suitable for wax finishes, shellac, or any piece you plan to refinish. It can darken lighter finishes and attract dust over time. Always buff until the surface feels completely dry, not greasy at all. How do you remove furniture polish buildup from wood? Wipe the surface with a cloth dampened with diluted white vinegar (1 part vinegar to 5 parts water). Work with the grain in small sections and dry immediately after each pass. This lifts most product buildup without damaging the underlying finish. Once fully dry, apply a thin fresh coat of the appropriate polish and buff well. Final Thoughts Knowing how to properly polish wood furniture yields surprisingly subtle results, which is the main point. A clean, lightly polished, and fully buffed surface looks elegant without haze, sticky residue, or a greasy sheen that misguides the light. Begin by identifying the finish before applying any product. Match the polish to the finish type, apply it to a cloth rather than directly on the surface, and check the label for silicone. This contamination is difficult to undo. My routine is simple: dust weekly, clean as needed, and use furniture polish every two to three months or when the wood appears flat. Use small amounts and buff thoroughly; the finish will remain clean for years without buildup from overapplication. Ensure surfaces are clean, match the product, and buff until the cloth is clean. Let me know if this was helpful.
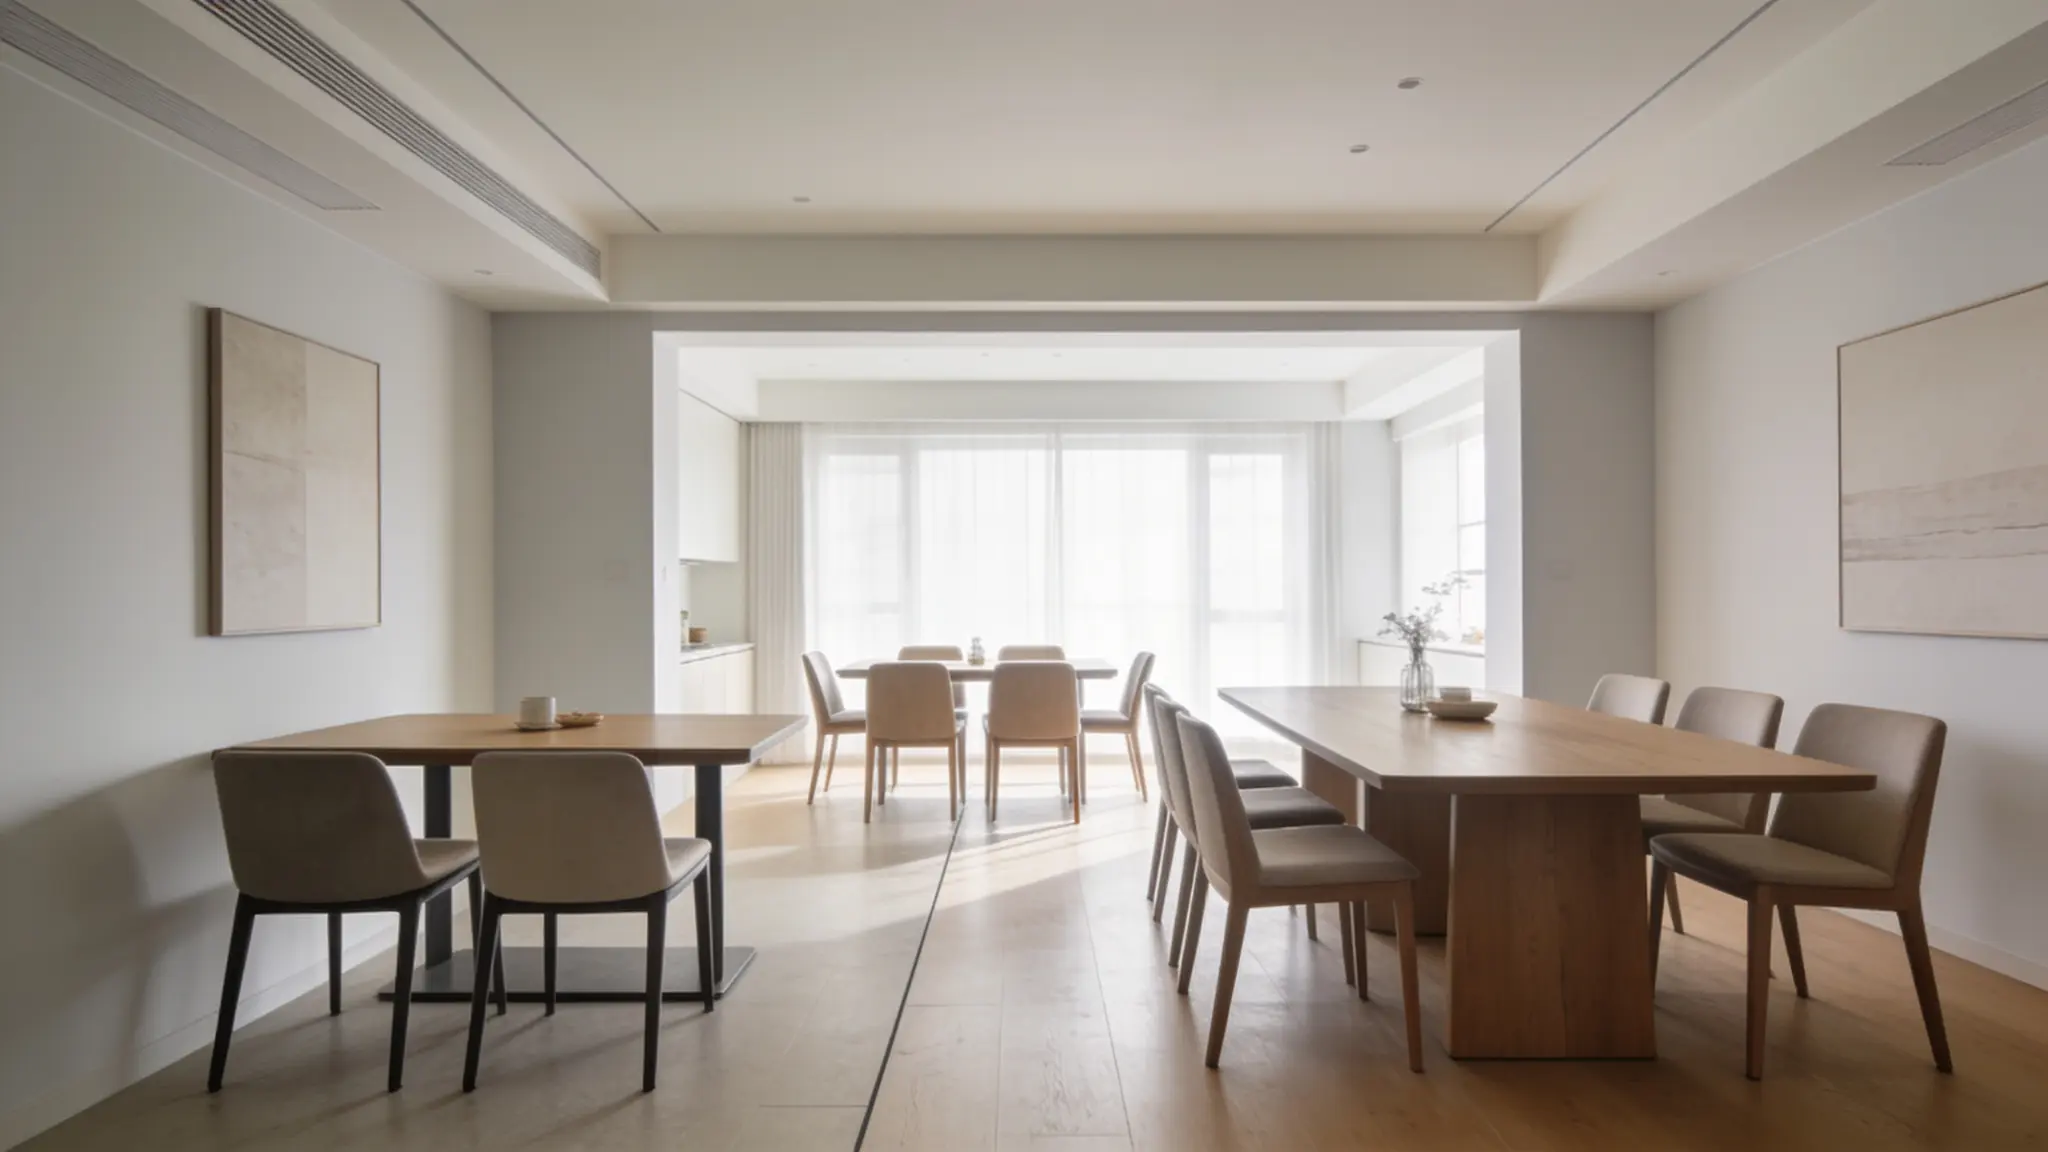
A table can measure right and still feel wrong. The missing piece is usually the space around it. Dining table dimensions matter because length, width, and height decide how many people can sit, how chairs move, and how the room feels during meals. Most dining table sizes depend on seating count, table shape, and the space around the table. Standard table sizes also change by layout, so a round six-seater will not fit the same way as a rectangular one. I’ll keep the choices simple so you can measure once, compare clearly, and buy with confidence. How Much Space Does a Dining Table Actually Need? Before comparing dining table dimensions, three numbers matter more than the table size itself: 24 inches of table edge per person: the minimum for a plate, a glass, and elbow room 36 inches of clearance around the table: enough for chairs to pull out and someone to walk behind a seated guest 42 to 48 inches of clearance on any side that serves as a main walkway through the room Most rooms don’t fail because the table is too large in the abstract; they fail because those clearance numbers weren’t applied before buying. Tape the footprint on the floor before committing to a size. That single step catches most mistakes. Pro Tip: Use painter’s tape to mark your intended table footprint on the floor, then pull a chair up to each side and check whether you can stand up without hitting the wall. If the answer is no, go smaller, not because the table won’t fit, but because the room won’t function. Standard Dining Table Dimensions by Seating Count Seating count is the right starting point. The sizes below are for rectangular tables, which are the most common. Shape-specific sizing comes in the next section. 1. Two-Person Tables A two-person table typically measures 30 x 36 inches. That gives two people room for plates, glasses, and a small central dish without taking over a compact kitchen or studio apartment. If the table also doubles as a work surface or coffee station, move up to 30 x 42 inches; the extra length makes a real difference when the table is doing more than one job. In tight spaces, one long side can sit flush with a wall, but that edge won’t work as a seating side. Plan for that before you place the order. 2. Four-Person Tables The standard four-person rectangular table runs 36 x 48 inches. This is the size that fits most apartment dining areas and smaller homes without compromising chair clearance. A 30 x 48-inch table can work if the room is genuinely tight, but 36 inches of width is the practical minimum for daily family meals, anything narrower and shared dishes in the center start to feel like a problem. 3. Six-Person Tables A six-person table needs 36 x 60 to 72 inches. The 60-inch length will technically seat six, but it works best with slim chairs and minimal place settings. A 72-inch table is the more honest answer; it gives six adults genuine elbow room and leaves space in the center for serving dishes without everyone crowding the middle. If you’re deciding between the two, check your clearance on both sides and choose 72 inches if the room can hold it. The standard dining table height of 28 to 30 inches is what most chairs are built around, but if you’re pairing a six-person table with non-standard seating, always verify the seat-to-tabletop gap measures 10 to 12 inches. 4. Eight-Person Tables Eight people need 36 to 42 inches wide and 78 to 96 inches long. A 78-inch table can work with narrow chairs, but for regular use with adults, 90 to 96 inches is more comfortable. The typical layout seats three on each long side, one at each end. Before finalizing, check whether the end chairs clear any nearby doors or walkways. End chairs are the first thing to cause a problem in a room that wasn’t measured carefully. 5. Ten to Twelve-Person Tables A ten-person table requires 40 to 44 inches wide and 96 to 120 inches long. For twelve, expect 42 to 48 inches wide and 120 to 144 inches long. These are large-room tables; they need open layouts, wide walkways, and chairs that pull back without hitting adjacent furniture. For ten people, 108 inches feels more functional than 96. For twelve, 132 inches is a better starting point than the minimum 120. Tables this size only work if the room genuinely has space around them. Measure the clearance on all four sides before comparing options. Dining Table Dimensions by Shape Shape affects how the table fits in a room, even when the seating count is the same. Decide on seat count first, then use shape to match the table to your specific room layout. The right table shape depends heavily on whether your room is long and narrow, squarish, or open-plan, and each of those layouts has a clear answer. 1. Rectangular Tables Rectangular tables are the most practical choice for most rooms because dining rooms tend to be longer than they are wide — the table follows the room rather than fighting it. They work especially well when you need end chairs or an extendable table with leaves. Best For Why It Works Long dining rooms Follows the shape of the room without wasting floor space Open layouts Defines a clear dining zone within a larger space Larger families Seats more people without requiring extra width End chairs Both ends can seat an additional person Extendable tables Leaf extensions work naturally with the rectangular format If you use an extendable table, always check the fully open dimension before buying, that’s the measurement the room needs to support, not the collapsed size. 2. Round Tables Round tables work best in square rooms. Everyone faces the center, which makes conversation easier, and there are no end positions that feel disconnected from the group. They also remove sharp corners from tight spaces, which matters in rooms where you move around the table frequently. Seats Common Diameter 2 people 30 to 36 in 4 people 36 to 48 in 6 people 54 to 60 in 8 people 72 in Round tables become impractical past six people, not because of seating, but because the center becomes unreachable. A 72-inch round table seats eight, but reaching across it at a meal is awkward. For eight or more, a rectangular or oval table is more functional. 3. Square Tables Square tables work well in square rooms for two to four people. They feel proportional and balanced, which makes them a natural fit for breakfast nooks, sunrooms, and smaller apartments. Beyond four people, a square table starts to waste floor space — each additional person adds to the width in both directions, and the center becomes hard to use. Seats Common Size 2 people 30 to 36 in 4 people 36 to 44 in 6 people 54 to 60 in 8 people 60 to 72 in If you’re choosing between a square and a round table for two to four people, the room shape makes the call: square room, square table; square room with softer furniture, round table. 4. Oval Tables An oval table gives you the seating capacity of a rectangle with softer ends and better movement around the table. In rooms where a rectangular table feels boxy or where people regularly walk around the ends, an oval is worth considering. The rounded ends make it feel less formal and easier to navigate in tighter layouts. Seats Common Length 4 people 48 to 60 in 6 people 60 to 72 in 8 people 78 to 96 in 10 people 96 to 120 in The width of an oval table is set by the manufacturer, not the seat count. Confirm the width before ordering, because a narrow oval at 32 inches will feel tight even if the length is right. Room Size and Table Dimensions at a Glance This chart combines the clearance rule, 36 inches minimum on all sides, with common table sizes to give you a practical starting range by room size. If you’re also thinking through how the dining room fits into a larger open-plan space, the principles behind feng shui dining room layout are worth reading alongside this. They address traffic flow and furniture placement in ways that overlap directly with clearance planning. Room Size Good Table Size Comfortable Seating 8 x 8 ft 30 to 36 in round or square 2 10 x 10 ft 36 to 48 in round or 36 x 48 in rectangular 4 10 x 12 ft 36 x 60 in rectangular or 48 in round 4 to 6 12 x 12 ft 54 to 60 in round or 36 x 60 in rectangular 6 12 x 14 ft 36 x 72 in rectangular 6 to 8 14 x 16 ft 40 x 84 to 96 in rectangular 8 14 x 18 ft 42 x 96 to 108 in rectangular 8 to 10 If your room has a sideboard, a wide doorway swing, or a kitchen island on one side, treat that as a wall when calculating clearance. Choose the smaller end of the table range for that room size. What Else Affects Dining Table Fit Two tables with identical listed dimensions can feel completely different at home. These four factors are worth checking before the final decision. Chair Style: Armchairs need 6–8 extra inches of space compared to side chairs. Padded or curved chairs also add depth — measure fully extended chairs before assuming they fit. Table Base and Edge: Pedestal bases improve legroom, while four-legged tables can block corner chairs. Rounded or beveled edges feel less sharp in tight spaces than square edges. Daily Use: Consider everyday activities, not just meals. Extra surface for laptops, homework, or serving dishes may require 6–12 additional inches in length. Extendable Tables: Always measure the fully extended table. Confirm leaf storage and that there’s still at least 36 inches of clearance on all sides. How to Measure for the Right Dining Table Dimensions Measuring once correctly saves a return trip. Here’s what to check before comparing any specific table: Measure the full room length and width: include any indentations or fixed furniture in the calculation, not just the open floor space Subtract 72 inches from the room length and 72 inches from the room width: what remains is the maximum table footprint (36 inches clearance on each side) Check the main traffic path: if people regularly walk behind seated guests, that side needs 42 to 48 inches of clearance, not 36 Allow 10 to 12 inches of legroom between the chair seat and the table underside, chairs sit at 17 to 19 inches, which means a standard 28 to 30-inch table height works for most Check the table apron depth: a deep apron reduces usable legroom and can stop chairs from sliding in fully; measure the underside before buying, not just the height Mark the footprint on the floor with painter’s tape and pull a chair up to each position, if you can’t sit comfortably and stand without hitting a wall, the table is too large for that room Common Sizing Mistakes to Avoid Most table purchases that don’t work come down to the same few errors. These are worth checking before you commit: Choosing the largest table the room can technically hold — technical fit is not the same as comfortable function Forgetting to add chair pull-out space to the clearance calculation Measuring room length but not checking the traffic path behind seated guests Choosing a round table large enough that no one can reach the center Checking the collapsed size of an extendable table without checking the open size Ignoring the table apron depth when evaluating legroom A floor test with painter’s tape catches most of these before they become a return shipment. Frequently Asked Questions Can lighting affect table fit in a dining room? Yes. Overhead fixtures or chandeliers need clearance above the table. Low-hanging lights can obstruct movement or create awkward sightlines, so account for their placement when measuring your table footprint to maintain a functional and visually balanced dining area. Does flooring type impact table placement? Hardwood, tile, or carpet can affect chair movement and stability. Rolling chairs slide more easily on hard surfaces, while thick rugs reduce clearance. Consider flooring type when choosing table dimensions to avoid cramped or uneven seating and ensure chairs can be pulled out comfortably. Should the table shape match the room layout? Yes, a table should complement the room’s shape. Rectangular tables suit long rooms, square or round tables fit square rooms, and oval tables improve traffic flow in tight corners. Matching shape to room improves comfort, seating efficiency, and aesthetics without overcrowding the space. How do table leaves affect everyday use? Extendable leaves change the table footprint. Even if stored within the table, extra length requires sufficient clearance for daily chairs and movement. Always plan for the maximum extended size, not just the collapsed size, to prevent congestion during meals or gatherings. Can decorative table aprons reduce usable space? Yes. Deep aprons can block chairs from sliding in fully, reducing legroom and seating comfort. Measure the underside clearance, not just the tabletop height, especially for tables in smaller rooms or when using chairs with arms. Summing Up Picking the right dining table starts with knowing how your room works every day. Dining table dimensions help you check the exact fit, dining table sizes show how many seats make sense, and standard table sizes give you a clear way to compare options before you buy. I’d measure the room first, then check seating, chair width, and clearance before looking at style. That order keeps the choice practical and saves you from buying a table that feels too tight. Use the charts above, mark the size on your floor, and check the open size if the table extends. If you’re ready to shop, take your room measurements with you and choose a table that fits daily life first.
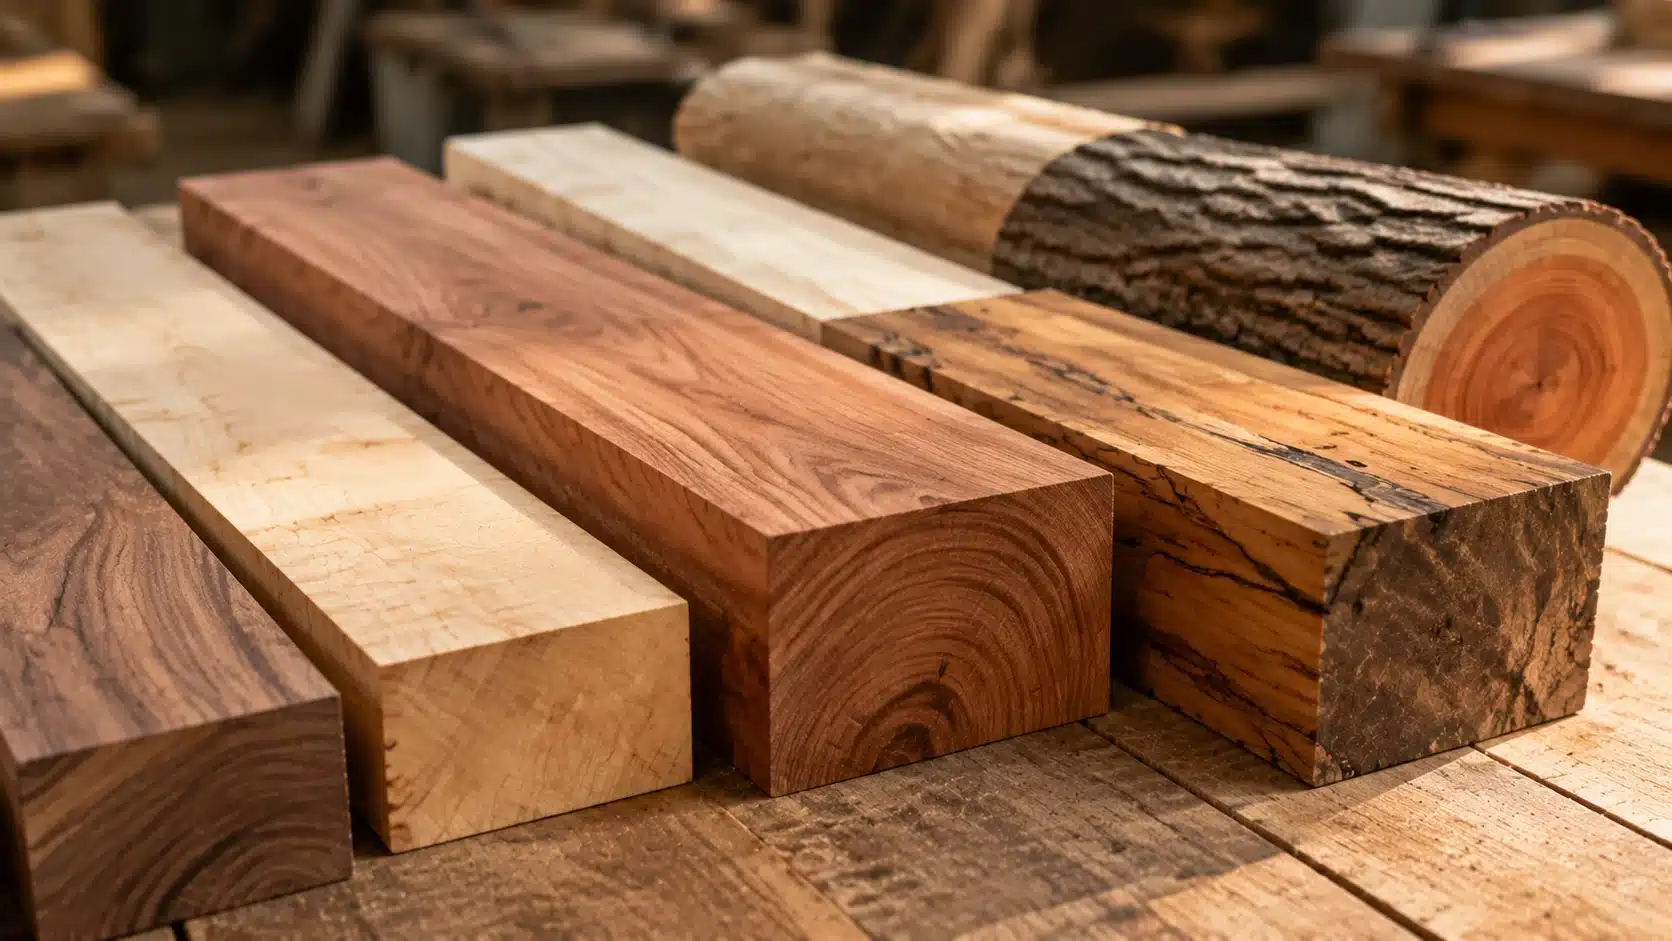
I’ve had people bring me tiny wood samples and ask one big question: which one can take the most abuse and is the strongest wood? It sounds simple until you realize the answer changes depending on what you are building. Some woods are so hard they fight your saw before you even start. Others look modest on paper but outlast everything around them. If you have ever stood in a lumber yard feeling mildly lost, this is for you. This post walks through what makes a wood strong, how the world’s top-ranked species actually compare, which ones are worth buying, and which ones belong in a museum more than your workshop. What Is The Strongest Wood? The strongest wood depends entirely on what kind of strength you need. Australian Buloke tops the Janka hardness scale at 5,060 lbf, but hardness is one dimension. For the projects I actually see in workshops, floors, furniture frames, decks, tool handles, bending strength, stiffness, crushing resistance, and rot resistance all matter as much or more than a surface dent test. I have had clients come in with a printout of a hardness ranking and ask me to source the wood at the number-one rank. Half the time, that wood is habitat-restricted, CITES-regulated, or costs more per board foot than everything else in the shop combined. The number doesn’t build the project. The right species for the job does. Species Janka Rating (lbf) Best Use Cost Range Durability Australian Buloke 5,060 Specialty turned pieces Rare / not commercially sourced Extreme, benchmark only Brazilian Quebracho ~4,800 Industrial, outdoor heavy use High/limited supply Extreme, limited availability Lignum Vitae ~4,500 Historic bearings, mallets Very high / CITES regulated Extreme, not practical to source Ipe ~3,680 Decking, outdoor boards $8–$15 per board ft Very high, FSC sourcing required Hickory ~1,820 Tool handles, furniture, flooring $4–$8 per board ft High, widely available Hard Maple ~1,450 Floors, countertops, shelving $4–$7 per board ft High, widely available White Oak ~1,350 Furniture, outdoor, flooring $4–$8 per board ft High, rot-resistant, widely available Cost figures are approximate US retail averages as of 2025 and vary by region, grade, and supplier. Verify current pricing with your local hardwood dealer before budgeting. How Wood Strength Is Actually Measured Wood strength is not one number. It is a collection of mechanical properties, each of which matters for a different type of load. The USDA Forest Products Laboratory Wood Handbook documents six core metrics, and the standard test method is ASTM D143, which uses small clear samples under controlled conditions. Real boards with knots, grain variation, or inconsistent moisture content will often perform differently than published figures suggest. Here is what each metric actually tells you and when it matters: Janka Hardness: Measures how much force it takes to push a 0.444-inch steel ball halfway into the wood. A higher number means better dent and wear resistance. Relevant for floors, tabletops, and tool handles. It does not tell you anything about how the wood bends or handles structural loads. Modulus of Rupture (MOR): Measures how much load a board can carry before it breaks under bending. This is the number that matters for shelves, furniture frames, and spanning beams. A high Janka score with a low MOR means a wood that looks hard but snaps under load, not something you want in a chair leg. Modulus of Elasticity (MOE): Measures stiffness, how much a board flexes before failing. Long shelf spans and structural supports need high MOE. A flexible wood will sag visibly under load even if it never technically breaks. Crushing Strength: Measures how well wood handles compression parallel to the grain. This is the metric for posts, legs, and any application where the load pushes straight down. Posts that carry roof loads need high crushing strength, not just hardness. Rot Resistance: Not a force measurement, it is a classification of how wood responds to moisture and fungal decay over time. This is the most important metric for anything installed outdoors. A wood that scores high on every strength test will still deteriorate quickly outside if it lacks heartwood extractives that resist decay. These metrics do not move together. A wood can be extremely hard and still be a poor choice if it is brittle, poorly rot-resistant, or so stiff it cracks instead of flexing. With that framework in place, here is how the world’s strongest species actually compare. The Strongest Wood Species, Ranked and Evaluated The following species represent the top of the hardness scale, from the extreme end down to what most workshops can actually use. 1. Australian Buloke: Janka 5,060 lbf Scientific name: Allocasuarina luehmannii | Region: Eastern and southern Australia Australian Buloke holds the highest Janka rating of any known species — 5,060 lbf. The Australian Government Department of Climate Change, Energy, the Environment and Water lists buloke woodlands as a threatened ecological community. That means this is not a shopping option. It appears on ranking lists as a benchmark. The practical woodworker should treat it as a reference point and move on. 2. Brazilian Quebracho: Janka ~4,800 lbf Scientific name: Schinopsis brasiliensis | Region: South America Quebracho translates to “axe-breaker.” That name is accurate. It has been used in railroad ties, heavy outdoor industrial applications, and tannin extraction. Supply is limited, and responsible sourcing requires careful verification. For most woodworkers, it is another reference point rather than a practical material purchase. 3. Lignum Vitae: Janka ~4,500 lbf Scientific name: Guaiacum officinale | Region: Caribbean and northern South America Lignum Vitae has natural oils that make it self-lubricating — which is why it was used in marine ship bearings for centuries before synthetic alternatives existed. It is now a CITES Appendix II-listed species, meaning international trade is regulated and permits are required. Fascinating material history; limited practical availability. 4. Ipe: Janka ~3,680 lbf Scientific name: Handroanthus spp. | Region: Central and South America Ipe is where the hardness scale meets something you can actually buy and build with. It is one of the most popular decking woods in North America, with dense grain, natural durability, and rot resistance that holds up in exposed applications. The supply chain problem is real, though. Irresponsibly sourced ipe contributes to deforestation, and you should always verify FSC certification and chain-of-custody documentation before buying. Ask your supplier for it by name. If they cannot produce it, find a different supplier. 5. Hickory: Janka ~1,820 lbf Scientific name: Carya spp. | Region: North America Hickory is where I stop referencing the chart and start recommending something. Pignut hickory ranks at the top for combined strength index, hardness, bending, stiffness, crushing strength, and density together, according to The Wood Database. It handles shock better than almost any domestic species, which is why it has been the material of choice for hammer handles, axe handles, and chairs that take real abuse. It is available at most hardwood dealers. It will work your tools harder than soft maple, but it will not fight you the way tropical exotics do. Now that you know where these species land on the scale, the more useful question is which one actually belongs in your project. Strongest Wood vs. Hardest Wood: What Changes for Real Projects The hardest wood is not always the strongest choice for a specific job. Surface hardness resists denting, but bending strength, shock absorption, and rot resistance determine whether the wood actually survives the application. Surface Hardness: Floors, countertops, cutting boards, tabletops, and tool handles need strong dent and scratch resistance. Hard maple, hickory, and white oak work well because they handle friction, impact, and repeated contact. Bending Strength: Chairs, shelves, frames, and load-bearing furniture need more than hardness. They need bending strength. White oak and hickory are good choices because they resist flexing and cracking under repeated load. Rot Resistance: Outdoor wood needs moisture, decay, and insect resistance. Ipe, teak, white oak, cedar, and redwood perform well outside. A high Janka score does not matter much if the wood absorbs water and rots. Choosing by Project Type Project Best Strong Wood Choice Why It Fits Watch Out For Furniture Hickory or white oak Strong, available, durable Hickory is hard to machine; keep tools sharp Flooring Hard maple or hickory Good wear resistance for high-traffic surfaces The finish choice affects scratch visibility significantly Decking FSC-certified ipe or white oak Rot resistance and outdoor durability Ipe requires verified sourcing; always ask for documentation Tool handles Hickory Best shock absorption of any domestic species Grain orientation matters, straight grain along the handle length only Shelving White oak or hard maple Good stiffness for long spans Board thickness still determines sag, 3/4 inch is not enough for a 36-inch unsupported span Budget projects Red oak or ash Practical, widely available, honest performers Neither is a top-tier strength choice for high-demand applications Domestic hardwoods consistently come out ahead when you factor in sourcing ease, cost, workability, and the ability to find replacement material in five years. An exotic wood you cannot re-source for a repair is often a worse choice than a domestic hardwood that performs at 90% of the exotic’s strength. How Finish Interacts With Strong Hardwoods Dense woods and standard finishing products do not always cooperate. This is where I see clients get surprised after they have already bought a planer full of expensive hardwood. Hickory has pronounced grain variation between earlywood and latewood. Stain absorbs unevenly, which means color will look blotchy without a pre-conditioner or a washcoat. Hard maple is a closed-grain wood with minimal porosity; it holds an oil finish poorly, and penetrating oils sit on the surface instead of soaking in. The reliable finish for hard maple is a surface-building film finish: water-based polyurethane or lacquer. Do not try to oil hard maple and expect it to look like walnut. Ipe has a naturally oily surface that causes adhesion problems with most standard finishes. Wipe it down with acetone before applying any finish to open the surface. For outdoor IPE decking, a penetrating oil specifically formulated for dense tropical hardwoods, not a deck sealer designed for pressure-treated pine, is the right product. White oak accepts most finishes well, including oils, hardwax oils, and film finishes; it also machines cleanly enough that table edge profiles hold their detail without tearout. It is the most forgiving of these species in the finishing room. Budget Reality Check: Cost vs Actual Performance The exotic species at the top of the hardness scale are expensive, difficult to machine, and largely impractical for the average woodworking project. The price premium does not buy proportional performance for most applications. Hickory at $4–$8 per board foot performs at or above lignum vitae or quebracho for shock resistance in tool handles, and you can buy it at a local hardwood dealer, cut it without carbide tooling rated for tropical exotics, and source replacement material without waiting weeks for a specialty import. Hard maple at a similar price point beats most flooring exotics on workability while still handling the wear load of a residential floor without issue; the same logic applies when choosing wood for dining tables, where surface hardness and budget both narrow the field considerably. The cases where paying a premium makes sense: FSC-certified ipe for decking that will take 20 years of outdoor exposure, or teak for marine applications. The cases where it does not: building indoor furniture or flooring with rare exotics when hickory, hard maple, or white oak will outlast the house. Cost Note: Board foot prices above are approximate US retail averages for 2025. Hardwood prices shift with supply chain conditions. Verify current pricing with your local hardwood dealer before budgeting any project. Is the Hardest Wood Worth the Price? For most projects, no. Australian Buloke, Lignum Vitae, and Brazilian Quebracho are not commercially available in any practical quantity, and their hardness advantages over domestic species do not translate into meaningful performance gains for furniture, flooring, or decking. They are curiosities at the top of a chart, not materials I would specify for a client project. Ipe is the exception, a genuinely superior decking material that is worth the price when sourced responsibly and installed correctly. Nothing in the domestic hardwood category matches its outdoor durability at a comparable cost. For everything else: hickory for impact applications, hard maple for wear surfaces, and white oak for anything structural or outdoor-adjacent. These three species cover the majority of strong-wood needs for real workshops and residential projects, and they are available at hardwood dealers throughout the US without special orders, import documentation, or sustainability concerns. What Makes Wood Durable Outdoors Outdoor durability is about chemistry, not hardness. Wood that resists decay does so because its heartwood contains natural extractives, tannins, oils, and resins that inhibit fungal growth and resist moisture absorption. Those properties have nothing to do with Janka ratings. A few installation details that determine how long any outdoor wood survives, regardless of species: Heartwood only for wet areas. Use heartwood sections anywhere the wood contacts moisture. Sapwood on any species, including naturally durable ones, is far more vulnerable to decay. Design for drainage. Boards should be installed with gaps so water exits rather than pooling in joints and on end grain. Trapped moisture accelerates decay faster than almost anything else. Pre-drill dense hardwoods. Hickory, ipe, and any wood above 2,000 lbf need pilot holes for fasteners. Forcing screws into dense hardwood splits the board near the end grain and creates entry points for moisture. Use corrosion-resistant fasteners. Standard steel screws react with tannins in oak and ipe, leaving black staining around every fastener hole. Stainless or coated deck screws only. Maintenance schedule. Outdoor wood lasts significantly longer when it is cleaned seasonally, checked for checking and cracking, and refinished on a regular schedule, typically every two to three years for most species. Frequently Asked Questions About the Strongest Wood These are the questions I hear most often from people who are trying to match a wood species to a real project rather than a ranking list. What is the strongest wood in the world? Australian Buloke holds the highest Janka hardness rating at 5,060 lbf, making it the hardest wood by that metric. For combined strength across hardness, bending, stiffness, and crushing resistance, hickory ranks at the top among commercially available species. Is oak the strongest wood? Oak is strong and practical, but hickory, hard maple, ipe, and several other species rank above it on the Janka scale. White oak sits around 1,350 lbf. Oak’s value is its balance of strength, workability, rot resistance, and price rather than any individual strength metric. What wood is stronger than hickory? Several exotic species have higher Janka ratings than hickory’s 1,820 lbf, including ipe, lignum vitae, Brazilian quebracho, and Australian Buloke. All are either more expensive, harder to source, regulated, or significantly harder to machine than hickory for typical workshop use. Is the hardest wood always best for furniture? No. The hardest woods are often heavy, costly, and difficult to cut, shape, and finish. Furniture needs bending strength and workability as much as surface hardness. White oak, hard maple, walnut, and hickory are better choices than most high-Janka exotics — they also respond well to refinishing, which matters for anyone working through a dining table makeover on an existing piece. What is the strongest wood for outdoor use? For outdoor use, rot resistance matters more than hardness. FSC-certified ipe is the top-performing option for hardness and durability combined. White oak and cedar are solid domestic choices. Climate, installation quality, and maintenance schedule determine actual lifespan as much as species selection does. What is the strongest wood for flooring? Hard maple at 1,450 lbf and hickory at 1,820 lbf are both reliable flooring choices for high-traffic residential applications. Brazilian cherry (jatoba) at around 2,350 lbf offers higher hardness if budget allows, though it requires more careful acclimation before installation. Does a higher Janka rating mean the wood lasts longer? Not necessarily. Janka hardness measures dent resistance, not longevity. A wood can score very high on the Janka scale and still decay quickly outdoors if it lacks natural rot resistance. Longevity depends on the full combination of species properties, application, installation quality, and maintenance. Final Verdict The best choice is rarely the wood with the biggest number beside its name. A project succeeds when the wood matches the job, the climate, the budget, and the tools available. Chasing the strongest wood on a ranking list often leads to something expensive, hard to machine, or impossible to source locally. When comparing options, the metric that matters most is the one your project actually tests: surface hardness for a floor, bending resistance for a shelf, rot resistance for a deck. Australian Buloke may hold the hardest title, but hickory, white oak, and hard maple will handle nearly anything a home workshop or residential project asks of them. What are you building? Drop a comment with the project and where it will live (indoors, outdoors, humid climate, heavy use) and I’ll point you toward the wood that actually fits. Sources USDA Forest Products Laboratory — Wood Handbook ASTM D143 — Standard Test Methods for Small Clear Specimens of Timber The Wood Database — World’s Strongest Woods CITES — Appendices I, II and III Australian Government DCCEEW — Buloke Woodlands
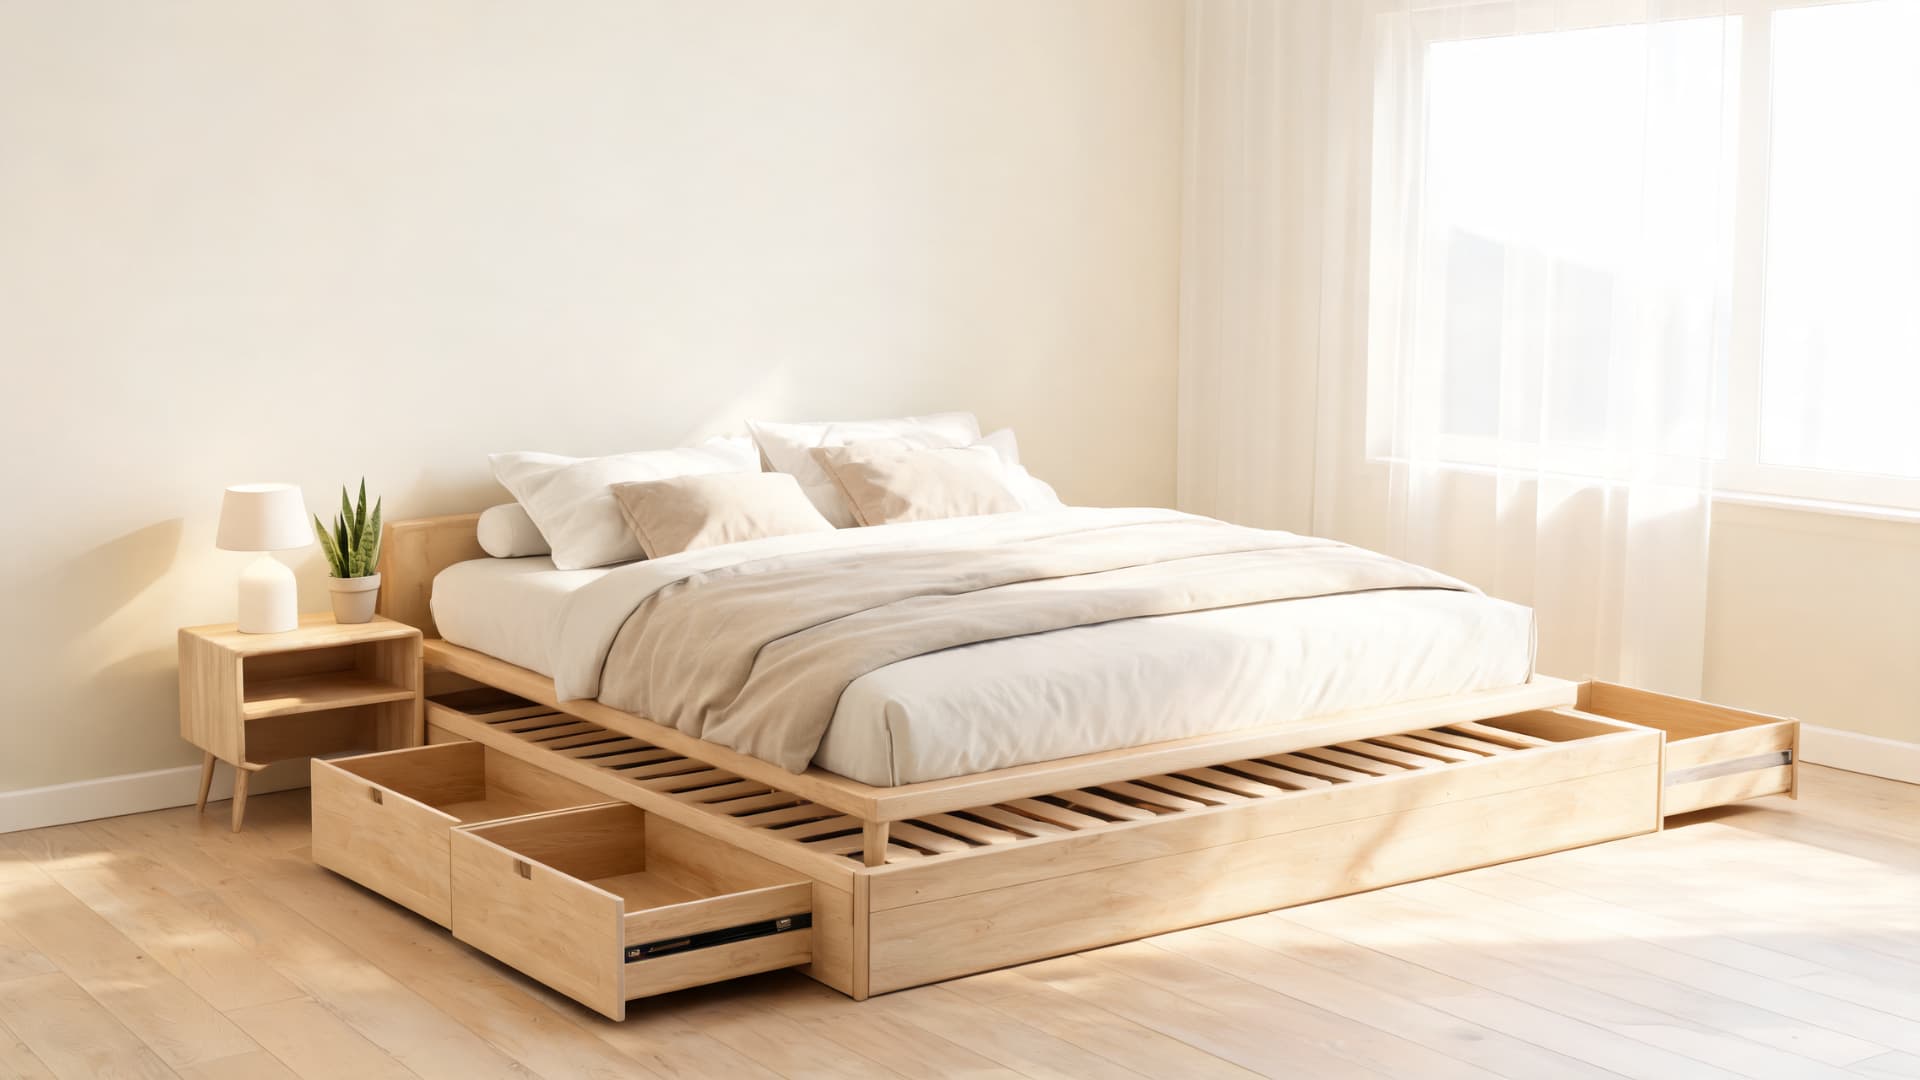
Some bed frames are easy to recognize but harder to define. You may have seen a low, clean frame with the mattress sitting directly on top and wondered how it differs from a panel bed, box spring, or regular frame, especially when comparing different types of bed frames. That confusion makes sense because platform beds are often described in terms of how they look rather than how they work. A platform bed is defined by its built-in support base. I’ll explain how that structure works, why it matters for mattress support, and how the design can affect height, storage, comfort, and room layout. You’ll also see how platform beds compare with panel beds and box springs, so you can understand the benefits and decide which setup fits your needs before buying. What Defines a Platform Bed? A platform bed is a bed frame with built-in mattress support. Instead of needing a separate box spring or foundation, the mattress rests directly on the bed’s base. That support may come from wooden slats, a solid deck, metal bars, steel mesh, plywood, or another reinforced surface. The main idea is simple: a platform bed combines the frame and mattress foundation into a single unit. Platform beds are often lower than traditional beds, but height is not what defines them. A platform bed can be wood, metal, upholstered, rustic, modern, simple, decorative, or designed with storage. What makes it a platform bed is the support system under the mattress. A platform bed is built to support the mattress directly. How a Platform Bed Frame Is Built Every platform bed frame has the same job: hold the mattress without a secondary foundation. But the parts doing that job vary considerably, and the quality of each one determines how well the bed holds up over years of daily use. 1. The Outer Frame This is the perimeter, the four sides that give the bed its shape and hold the rest of the structure in place. In solid hardwood frames, the outer frame is usually mortise-and-tenon or dowel-joined at the corners. In cheaper particleboard or MDF designs, the corners are bolted together with cam locks, which are fine for a few years but tend to loosen and wobble over time. 2. The Support Surface This is the part that replaces the box spring. It can be wooden slats, a solid plywood or MDF deck, metal bars, or steel mesh. Each behaves differently under load and affects how the mattress feels. A solid deck gives a firm, even surface, good for foam and latex. Slats add slight flex and better airflow. Metal grids are durable but only work well if the bars are close enough together (under 3 inches apart) to prevent foam from sagging through. 3. Slats and Slat Spacing Slat spacing is one of the most important specs on a platform bed and one of the most frequently glossed over in product listings. For memory foam and latex mattresses, slats need to be no more than 3 inches apart, ideally closer to 2 inches. Wider than that, the foam compresses into the gaps over time, creating pressure points and uneven wear. Innerspring mattresses are more tolerant of wider spacing, up to about 4 inches, because the coils distribute weight laterally. 4. The Center Rail and Center Legs In queen and king sizes, a frame without a center rail will eventually sag in the middle under mattress and body weight. The center rail, a longitudinal beam running head to foot, is what prevents this. Center legs underneath that rail carry the load down to the floor. On an inexpensive frame, the center legs are sometimes plastic or adjustable-height glides rather than actual structural legs. Those work, but solid wood or steel legs are more stable over time and don’t compress or shift when the mattress is loaded unevenly. 5. Storage Components Storage platform beds add drawers, cubbies, or a lift-up gas-piston mechanism under the mattress. The drawers are almost always side-opening and sized for folded bedding or clothing. Lift-up storage gives more volume but requires clearing the bed fully to access it, not ideal if you’re storing things you need regularly. The gas pistons on lift-up frames have a lifespan; on cheaper versions, they lose tension after a few years and no longer hold the mattress at height. 6. Frame Material Solid hardwood, oak, maple, walnut, or bamboo is the best long-term choice, especially if you compare the best furniture woods by strength, grain, and everyday durability. It doesn’t compress over time, holds fasteners without stripping, and can often be repaired rather than replaced. Solid pine is a step below hardwood in durability (Janka rating of around 870 lbf, compared with white oak at 1,360 lbf) but is widely used in mid-range frames and holds up well under normal loads. MDF and particleboard are the weakest options; they look fine when new but swell with humidity, strip easily at screw holes, and typically don’t survive a move intact. Metal frames made from welded steel are strong and light, but the quality varies significantly by gauge and weld quality. Pro Tip: Before buying any platform bed, ask the retailer for the slat spacing measurement and the center support configuration. These two specs, not the headboard style or the finish color, determine whether the frame will still perform well in five years. Platform Bed Base Types Compared The base type is the most consequential decision in a platform bed. Here’s how each option actually performs, beyond what the product descriptions say. Base Type Best For The Real Limitation Slatted (wood) Most modern mattresses; best airflow Slats must be ≤3 inches apart for foam; check before buying Solid deck (plywood/MDF) Firmest feel: foam and latex Traps heat and humidity under the mattress in summer Metal bar grid Durability; light weight Bar spacing varies wildly; confirm it’s under 3 inches Steel mesh Strength with some airflow Weld quality is the variable; hard to assess before delivery Storage (drawer or lift-up) Small rooms; extra organization Heavier, harder to move; lift pistons degrade over time Floating (wall-anchored) Visual impact; low-profile rooms Requires structural wall anchoring; no storage underneath The slatted base is the right default for most people, especially if the mattress is foam or hybrid. If you run warm or live somewhere humid, avoid solid decks entirely. If storage is the priority, the drawer option is the more practical choice over lift-up for everyday access. Platform Bed vs Traditional, Panel and Box Spring Bed The comparison that matters most is platform bed frame versus a traditional frame-and-box-spring setup, because that’s the real purchase decision most people are making. The differences affect more than just how the bed looks. Feature Platform Bed Traditional Frame + Box Spring Panel Bed Mattress support Built-in slats or deck Provided by the box spring Usually needs a box spring Box spring required? No Usually yes Usually yes Total setup cost Lower, one purchase Higher, frame + box spring Higher, frame + foundation Mattress feel Firm and direct More bounce from box spring flex Depends on foundation Best mattress type Foam, latex, hybrid Innerspring (designed for this pairing) Innerspring or hybrid Typical height Lower overall profile Taller, box spring adds 6–9 inches Taller, decorative frame design The practical takeaway: if you’re buying a foam or hybrid mattress, a platform bed is the simpler and cheaper path. If you already own a box spring and an innerspring mattress and they’re in good shape, replacing the whole setup with a platform bed may not deliver a meaningful improvement. The platform bed wins on cost and simplicity; the box spring wins on bounce and mattress compatibility for older innerspring designs. Where Platform Beds Make Sense and Don’t The benefits are real, but so are the limits. Here’s what to actually weigh before committing. Where a platform bed is the right call You’re buying a new foam, latex, or hybrid mattress and want to avoid paying separately for a foundation. You have a small bedroom and want to maximize visual space; lowering the bed makes the room feel less crowded, especially when paired with soft bedding and warm bedroom color ideas. You want under-bed storage without a bed skirt hiding an awkward gap. You’re assembling a bed solo and want fewer parts to deal with. Where a platform bed is the wrong call You or a partner has knee, hip, or back issues that make it difficult to get out of a low bed. Your current mattress warranty specifies a box spring or specific foundation type; using a platform bed without checking this can void coverage. You’re in a high-humidity climate, and considering a solid-deck base, trapped moisture under a foam mattress shortens its life and creates odor over time. You frequently rearrange rooms: solid-wood storage platform beds can weigh 150–200 pounds, making them genuinely difficult to move. Note: Before buying, check your mattress manufacturer’s warranty language. Many foam mattress brands require slat spacing under a specific measurement, usually 3 inches, and will deny warranty claims if the frame doesn’t meet that spec. The frame’s style is irrelevant; the slat spacing is what’s in the warranty document. Which Mattresses Work on a Platform Bed Frame Platform beds work well with most modern mattresses, but the base type and slat spacing determine whether they actually perform as advertised. Mattress Type Works on Platform Bed? What to Verify Memory foam Yes, preferred Slat spacing ≤3 inches; solid deck also fine Latex Yes, needs strong support Latex is heavy; verify center leg load rating Hybrid Yes Center support critical for queen and king sizes Innerspring Usually, check warranty Some brands require a box spring; check before buying Pillow-top Usually Adds height; confirm total bed height for room clearance Foam and latex are the clear winners here. They don’t need the spring flex of a box spring to feel comfortable; direct, firm support is actually what they’re designed for. Innerspring mattresses are the one category to double-check, because some older designs were engineered with the assumption that a box spring would absorb part of the impact load. Frequently Asked Questions Can a platform bed damage a mattress? A platform bed should not damage a mattress if the support surface matches the mattress requirements. The biggest risk comes from wide slat gaps, weak center support, or a base that does not meet the mattress warranty rules. Why do platform beds sit so low? Many platform beds sit low because they do not need a box spring underneath the mattress. That lower profile can make a bedroom feel more open, but it may not suit everyone, especially if getting in and out of bed is difficult. Do platform beds need ventilation? Yes, ventilation matters, especially for foam and latex mattresses. Slatted bases allow more airflow than solid decks. If the room is humid, a solid platform can trap moisture beneath the mattress, leading to odor or mildew issues. Are storage platform beds worth it? Storage platform beds are worth it when floor space is limited and you need hidden storage for bedding, clothes, or seasonal items. The tradeoff is weight, since storage frames are harder to move and assemble than simpler platform beds. Can you put any mattress on a platform bed? Not always. Many foam, latex, and hybrid mattresses work well on platform beds, but some innerspring mattresses may still need a box spring. Always check the mattress brand’s support guidelines before pairing it with a platform frame. Practical Takeaway A good bed frame supports your sleep, fits your room, and is easy to use daily. Choose a platform bed for built-in support, ideal for memory foam and small spaces. Pick a panel bed for a taller style, a decorative headboard, or if you have a compatible box spring. Use a box spring if your mattress recommends it, if you need extra height, or if you prefer a bouncier feel. For modern mattresses, a platform bed is simple and supportive; check slat spacing, airflow, height, support, and warranty before buying. Compare options and read related blogs for more tips.
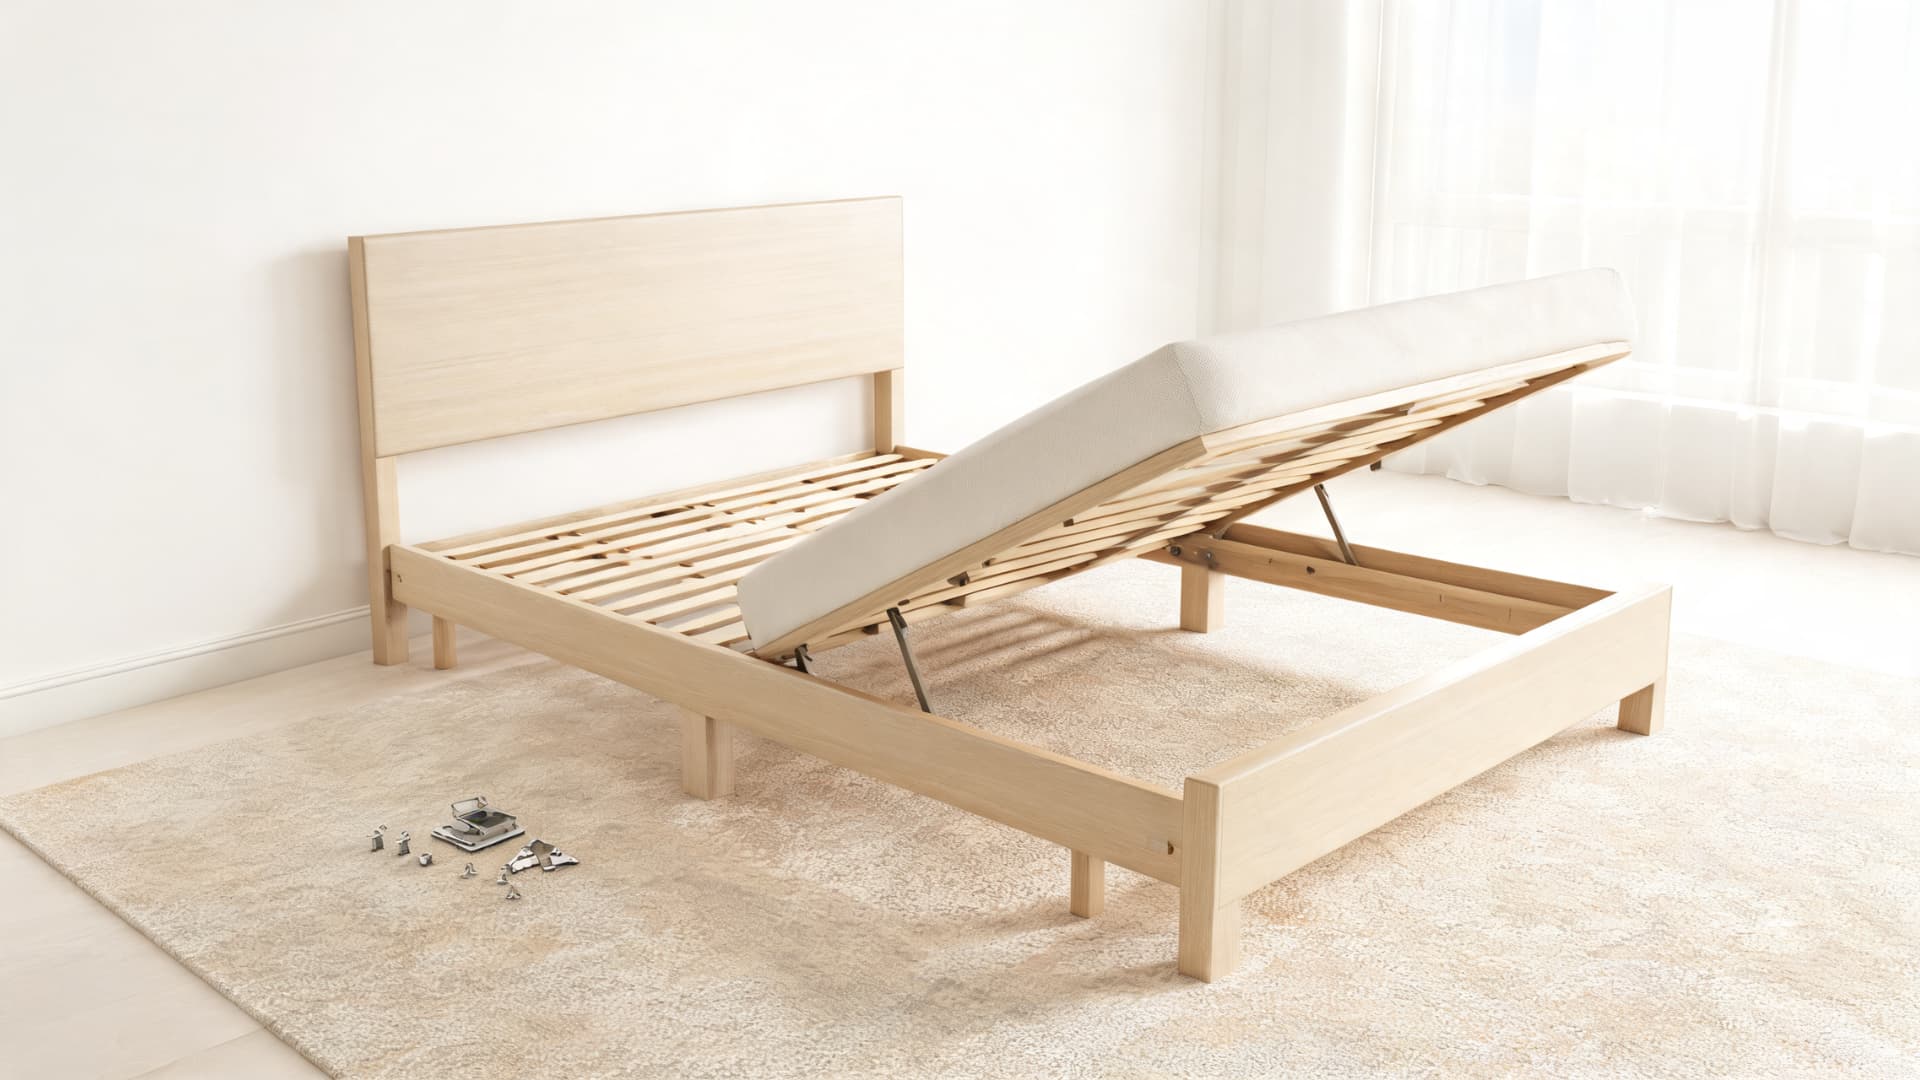
A bed is a place of comfort, but most people only notice the confusion when something starts to creak, sag, or break. That’s usually when the question comes up: What exactly am I looking at here? A bed has several interconnected elements that work together to provide support and comfort. Once you understand the main bed frame parts, side rails, slats, headboards, and the base become easier to recognize in everyday use. You can also see how the mattress sits on the structure and why problems such as movement, noise, or sinking can occur. This breakdown makes it easier to identify each part of a bed and understand what it does. What are the Main Parts of a Bed? A bed may look simple at first, but each part has a job. The frame holds the structure together; the rails and slats support the mattress, and pieces such as the headboard, footboard, and support legs enhance stability, height, and style. The table below breaks down the main parts of a bed, what each one does, and where you usually find it. Bed Part What It Does Found On Headboard Supports the head area visually and physically Most full bed frames Footboard Finishes the foot end of the bed Traditional and panel beds Side rails Connect the headboard and footboard Most framed beds Bed frame Holds the bed structure together Nearly all beds Center support beam Stops sagging in larger beds Queen, king, and California king beds Support legs Carry the weight down to the floor Larger frames Slats Support the mattress or foundation Platform beds and many wooden beds Box spring Adds height and shock absorption Some traditional setups Foundation Provides a flat mattress base Foam, hybrid, and modern mattresses Mattress Provides sleep comfort and body support Every bed Bedding Adds warmth, softness, and cleanliness Every made bed Knowing these parts makes it easier to choose a bed, fix a loose frame, or understand what a diagram is showing. Bed Frame Parts (Core Structural Breakdown) A bed frame is the main structure that holds the entire bed together. It is made of multiple connected parts, each contributing to strength, balance, and long-term stability. 1. Headboard and Footboard The headboard is the vertical panel fixed at the top end of the bed frame. It is one of the most noticeable parts of a bed and usually serves both comfort and support purposes. When you sit upright to read, work, or relax, the headboard gives your back a firm surface to lean against. It also helps keep pillows from slipping into the gap between the mattress and the wall. Wood headboards are often chosen for a sturdy, classic look. Upholstered headboards provide a softer surface for leaning. Metal headboards are durable and can suit simple or decorative bed styles. If you’re building rather than buying, the material choices for a DIY headboard follow the same logic. Bookcase headboards include built-in shelves for small storage. Slatted headboards use open rails or strips for a lighter design. The footboard is the vertical panel at the lower end of the bed frame. When included, it helps keep the mattress in place and can prevent bedding from sliding too far down. In traditional bed frames, the footboard often connects to the side rails, adding stability and helping the frame stay square. Not every bed has a footboard. Some modern beds skip it to create a cleaner, more open look, which can be helpful in smaller bedrooms. 2. Side Rails Side rails are long horizontal beams that run along both sides of the bed, connecting the headboard and footboard. They form one of the strongest structural links in the entire frame. These rails carry a large portion of the load from the mattress and the sleeper, distributing weight evenly across the bed structure. Most beds rely heavily on properly secured side rails to prevent shifting or collapse. They are usually attached with brackets, hooks, or bolts, depending on the frame design. 3. Slats (or Platform Base) Slats are a series of evenly spaced wooden or metal strips placed across the width of the bed frame. Species matter more than most people expect pine and hardwood behave very differently under sustained load. Their main function is to support the mattress while allowing airflow underneath, which helps reduce heat and moisture buildup. Proper spacing between slats is important for maintaining mattress durability and preventing sagging. In some modern beds, slats are replaced by a platform base, a solid or semi-solid surface that provides continuous support without gaps. Both systems ensure weight is distributed evenly across the frame. Pro Tip: Before buying a bed frame, ask the retailer what species the slats are made from. “Solid wood” doesn’t tell you anything useful. Pine and oak are both solid wood. One will flex under a heavy mattress within a year; the other won’t. 4. Center Support Beam The center support beam is a reinforcement structure that runs vertically through the middle of larger beds, especially queen and king sizes. It is designed to prevent the frame from bending inward or sagging over time due to the weight pressure. This beam often includes one or more support legs that transfer load directly to the floor. Without this component, larger beds may lose stability in the center, leading to uneven mattress support and reduced lifespan. 5. Bed Legs / Feet Bed legs or feet are the vertical supports that elevate the entire bed frame off the floor. They play a crucial role in stability by distributing weight evenly and preventing direct contact between the frame and the ground. This elevation also improves airflow underneath the bed, which helps maintain hygiene and reduce moisture buildup. In addition to function, bed legs also influence overall height and can affect how easy it is to get in and out of bed. They are typically made from wood or metal and are securely attached to the frame for long-term strength. Mattress and Its Components The mattress is the main comfort and support layer people sleep on. It sits above the bed frame, slats, box spring, foundation, or platform and works with that base to support the body through the night. Common mattress types include innerspring, memory foam, latex, hybrid, and flippable mattresses. This section keeps the focus on bed anatomy, so the main thing to know is that the mattress is the sleep surface, while the frame and base support it from below. 1. Mattress Support Types Before looking at the mattress itself, it helps to start with what sits underneath it. A mattress needs a steady base to stay level, prevent sagging, and properly support the sleeper. Some beds use slats, while others use a box spring, foundation, or solid platform. Support Type Best For Main Benefit Watch Out For Slats Platform beds, foam, hybrid, latex Airflow and simple support Wide spacing can damage some mattresses Box spring Traditional innerspring mattresses Height and shock absorption Not needed for many modern mattresses Foundation Foam, hybrid, latex, innerspring Flat, sturdy support Must match mattress warranty rules Solid platform Minimal bed setups No extra base needed May reduce airflow under some mattresses The right type of support depends on the mattress and bed frame. 2. Mattress Layers, Topper, and Protector A mattress may look like a single unit, but it is usually made of several layers. These layers shape comfort, firmness, pressure relief, and long-term durability. A topper and a protector sit above the mattress, adding extra comfort or protection. Cover or Ticking Layer: The outer fabric that wraps around the mattress. It protects the internal materials from dust, moisture, and wear. Comfort Layer: The upper cushioning layer, often made from foam, latex, quilting, fiberfill, or pillow-top padding. It helps reduce pressure around the shoulders, hips, and back. Transition Layer: The middle layer that balances softness and firmness. It prevents the body from sinking too deeply and helps the mattress feel smoother from top to bottom. Support Core: The main structure inside the mattress. It may be made from coils, dense foam, latex, or a hybrid system. It provides firmness, body alignment, and durability. Mattress Topper: An extra comfort layer placed above the mattress. It can make the bed feel softer, firmer, cooler, or more pressure-relieving without replacing the mattress. Mattress Protector: A protective layer that goes over the mattress and sometimes over the topper too. It shields the mattress from sweat, spills, dust, and allergens. 3. Sheets and Top Bedding Layers Sheets, blankets, comforters, duvets, and quilts are bedding layers, not parts of the bed frame or mattress structure. They sit above the mattress, adding comfort, warmth, softness, and cleanliness. Fitted Sheet: Wraps around the mattress and creates a smooth, washable layer for sleeping. Flat Sheet: Lies above the sleeper, adding a light layer between the body and heavier bedding. Pillowcases: Cover the pillows to keep them cleaner and softer against the face. Blanket: A single warm layer that can be used alone or under heavier bedding. Comforter: A thicker filled bed covering used for warmth and softness. Duvet: A soft insert placed inside a removable duvet cover, making it easier to wash the outer layer. Together, these parts move from the base of the bed to the top layers that people use every night. The support system holds the mattress steady, the mattress supports the body, and the bedding adds comfort, warmth, and cleanliness. Common Bed Frame Parts and Hardware When a bed frame breaks, loosens, or needs a missing piece replaced, the hardest part is often knowing what to search for. Use the terms below when looking for common bed frame replacement parts. Part Name What It Means Rail bracket Connects rails to the headboard or footboard Hook-on rail Rail with hooks that fit into slots Bolt-on rail Rail attached with bolts Bed bolts Long bolts are used to secure wood bed frames Corner bracket Reinforces frame corners Slat holder Keeps slats in position Center rail Middle support beam under the mattress Knowing these part names makes it easier to search for the right replacement, explain the issue to a seller, or compare hardware before buying. It can also help you fix one missing or damaged piece instead of replacing the whole bed frame. Bed Types and How Their Parts Differ Different bed types use many of the same basic parts, but their frames, supports, posts, rails, and storage features can change significantly. Platform bed: Combines the frame and support surface, usually with slats or a solid platform, so a box spring is often unnecessary. Panel bed: Uses a traditional frame with a headboard, footboard, side rails, and slats or a foundation. Canopy bed: Has four posts connected by an upper frame that can be left open or draped with fabric. Bunk bed: Stacks one sleeping space above another and usually includes guard rails, a ladder, and slats. Storage bed: Includes built-in drawers, compartments, or lift-up storage below the mattress. Adjustable bed: Uses a motorized base with moving sections that raise or lower parts of the mattress. Once you understand these differences, it becomes easier to compare frames, plan bedroom space, and find the right replacement parts when something breaks. Finish Interaction: What Works on Which Frame Material If you’re buying a raw or unfinished solid wood frame, or refinishing one, the choice of finish matters for durability as much as for aesthetics, and it starts with knowing your wood species before picking a product. Oil finishes (tung oil, Danish oil) penetrate the wood fiber and provide good moisture resistance on oak and maple. They require periodic reapplication, every few years in dry climates, annually in humid ones. They give a natural, low-sheen look that suits minimalist frames well. Polyurethane is the most durable option for a frame that will see heavy use. Water-based polyurethane dries clear and fast; oil-based adds a slight amber tone. Either works on hardwood frames. On pine, oil-based polyurethane can raise the grain and show application marks; test on an unexposed area first. Wax finishes look excellent on solid wood but offer minimal protection against moisture. Not a good choice for a frame in a humid room or near a window that gets left open in the rain. Paint on MDF or engineered wood is best applied over primer. Bare MDF absorbs paint unevenly at the edges where the material is most porous. Skip the primer step, and the finish looks fine initially, but starts showing edge absorption within six to twelve months. How to Replace or Fix Bed Parts Fixing bed issues usually starts with identifying the weak component and addressing it directly. Broken slats should be replaced with new ones of the same size and thickness to restore proper mattress support. Loose frame joints can often be solved by tightening bolts, screws, or cam locks to remove noise and movement. If the bed lacks middle support, installing a center support beam helps prevent sagging, especially in larger beds. Worn-out hardware, such as brackets or fasteners, should be replaced to improve stability and safety. Uneven bed legs can be adjusted or fitted with pads to balance the structure and reduce wobbling. Budget Reality Check: Where “Affordable” Cuts Corners The $150–$350 price range for queen bed frames is where most of the material and build compromises live. Here’s what typically gets downgraded at that price point, and whether it matters: Slat material: Budget frames use pine or poplar slats at minimum thickness. If the frame claims “solid wood” and costs $200 for a queen, the slats are almost certainly pine. That’s workable for light use but will flex under sustained heavy load. Add an extra slat in the center if gaps exceed 3 inches. Rail thickness: Thin MDF rails covered in laminate are the most common cost-reduction method. They look fine. They don’t hold joinery well after repeated assembly and disassembly. Leg attachment: Threaded plastic inserts instead of steel hardware. This is the single most common failure point in budget frames. The insert strips, the leg wobbles, the frame feels unstable. Replacement hardware is rarely stocked for specific budget frame models. Center support: Many frames in this range include a center support leg, but make the beam from thin stock or a hollow tube. For a 100+-pound hybrid mattress with two sleepers, this is not enough. A center beam that flexes defeats the purpose of having one. Note: The upgrade from a $250 engineered-wood frame to a $450 solid-hardwood frame is usually worth it in one scenario: if you move frequently. Solid wood frames with bolt-on hardware tolerate repeated disassembly far better than cam-lock MDF frames, which degrade with each reassembly. Frequently Asked Questions How many slats should a bed have for proper support? The number of slats a bed needs depends on the bed size, frame design, and mattress type. In general, slats should be spaced about 2–4 inches apart to give the mattress steady support. If the gaps are too wide, the mattress may dip between the slats, which can lead to sagging. How often should bed hardware be checked or tightened? Bed hardware should usually be checked and tightened every 6–12 months, especially if the bed is used daily. Screws, bolts, brackets, and cam locks can slowly loosen due to regular movement, weight pressure, or shifting. Do all bed frames need a center support beam? Not every bed frame needs a center support beam, but larger beds usually do. Queen, king, and heavier mattress setups often require center support to prevent the frame from bending inward or sagging in the middle. Can I use a mattress without a bed frame? Yes, a mattress can be placed directly on the floor for a short time, but it is not ideal as a permanent setup. Without a bed frame, airflow under the mattress is reduced, which can trap moisture and lead to odor or mildew concerns. End Takeaway When you’re comparing frames, the parts of a bed that determine long-term performance are the slat material and spacing, the rail attachment method, and the center beam construction, in that order. A white oak frame with properly spaced maple slats and bolted rail connections will still be solid in twenty years. A laminated MDF panel bed with cam-lock hardware and thin pine slats won’t make it to ten. The price difference between those two outcomes is usually $250–$400 at purchase. Ask the retailer for the slat species, the rail attachment type, and the center beam material before you decide. Those three answers will tell you more than any product description will.
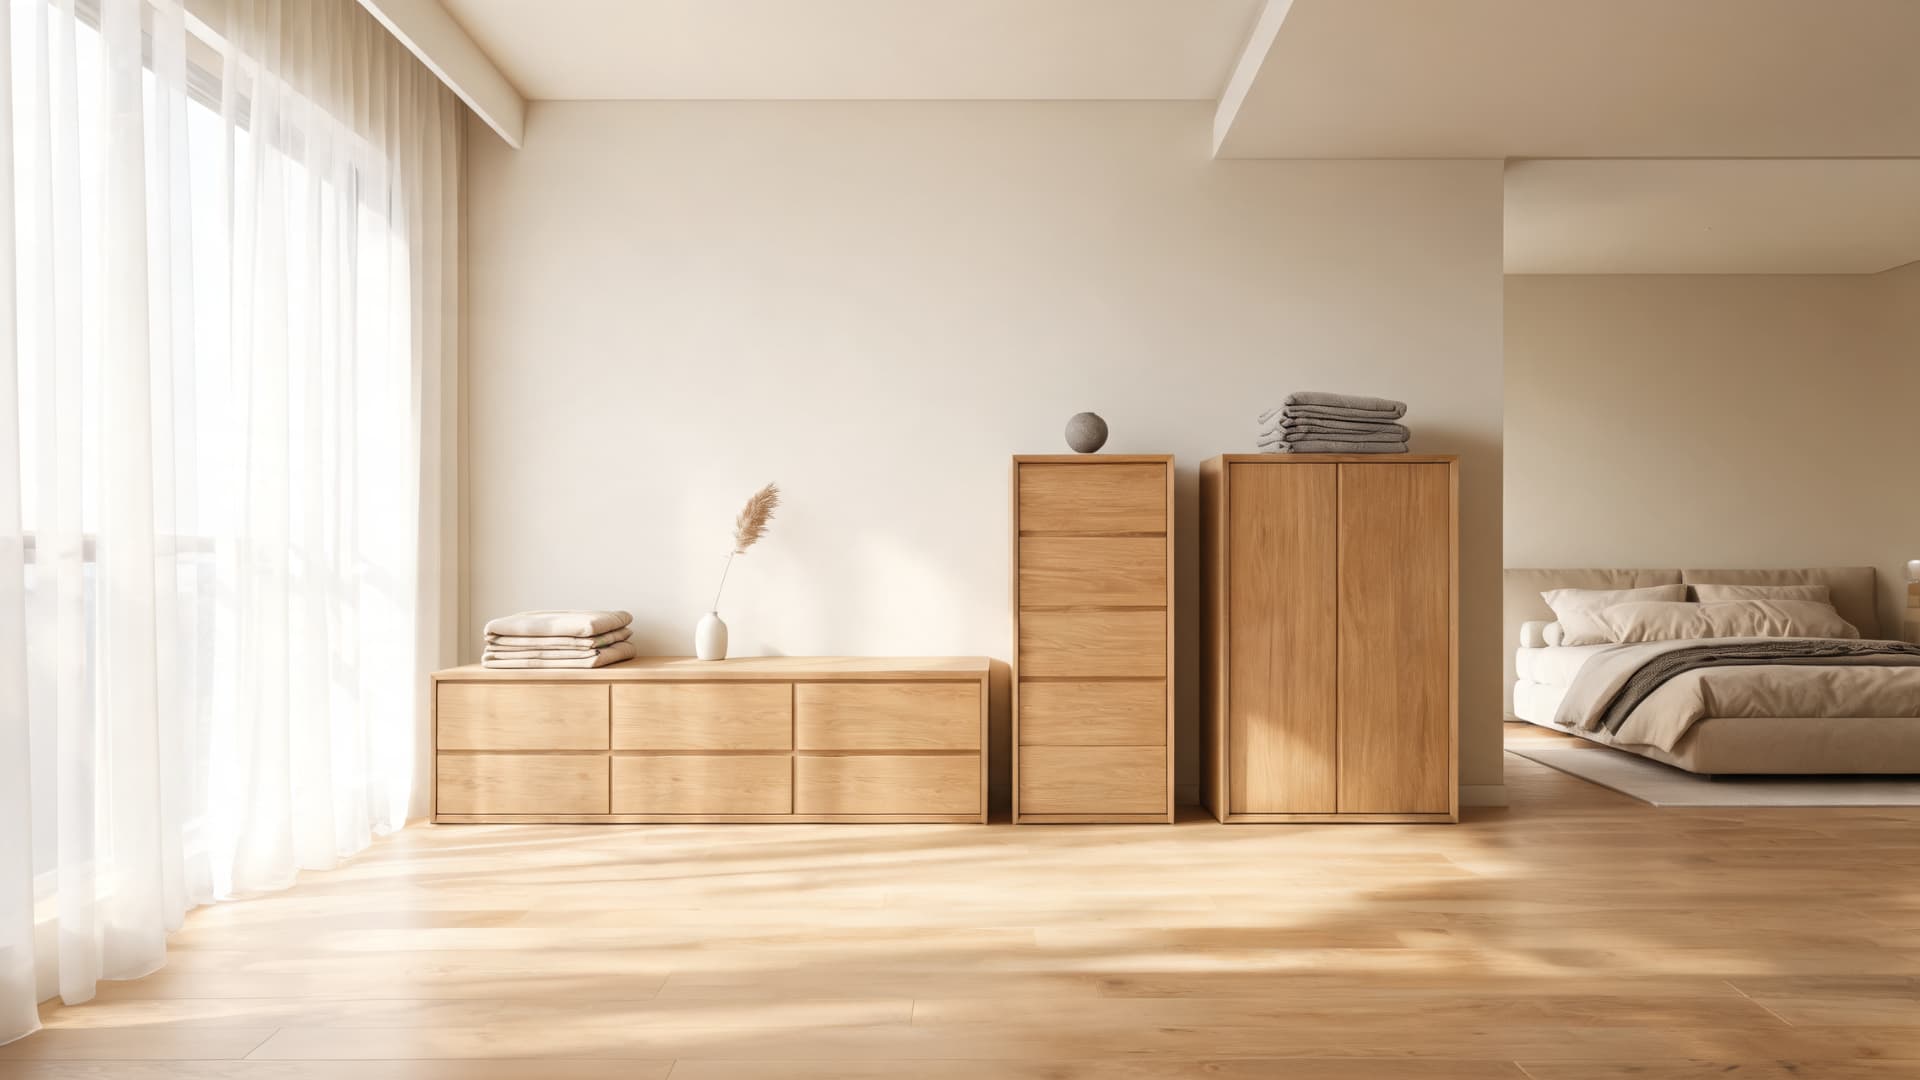
If you’re standing in a showroom, or scrolling through furniture listings at midnight, trying to figure out why a “highboy” costs three times what a “tallboy” does, this guide is for you. The types of dressers you’ll encounter share one function (storing clothing) but differ sharply in height, width, drawer layout, and what they’re actually built to solve. Before you buy, you need to know what each type is designed to do and which one fits your room’s specific constraints. Note: “Dresser,” “chest of drawers,” “tallboy,” and “highboy” are used inconsistently across furniture brands. Ignore the name. Compare height, width, drawer count, and storage configuration instead — those are the specs that determine whether a piece actually fits your room. Dresser vs Chest of Drawers: The Shape Difference That Matters These two terms are often treated as synonyms, but the design difference affects how the piece sits in a room and how much surface area you actually get. Feature Dresser Chest of Drawers Shape Wide and low Tall and narrow Drawer layout Side by side Stacked vertically Top surface Larger — room for mirror, lamp, decor Smaller — limited surface use Wall space needed More width required Fits narrow gaps Best for Shared storage, mirror setups, primary bedrooms Small rooms, apartments, tight wall spaces In practice, a vertical dresser and a chest of drawers are often the same piece described differently, depending on the retailer. What changes is the physical footprint, and that’s what you should be measuring against your wall space before anything else. The Types of Dressers Explained Before choosing any bedroom dresser, start with the limits of your room. Measure the wall width, ceiling height, and the space needed for drawers to open fully. Also, think about what you need to store, from everyday clothes to bulky sweaters or extra bedding. Once you know those details, it becomes much easier to pick a dresser type that fits your room instead of crowding it. 1. Horizontal Dresser The horizontal dresser is the layout baseline for most primary bedrooms — wide, low, and built for maximum top surface. Drawers run side by side rather than stacking, which keeps the piece low enough to pair with a mirror and wide enough to share between two people. Typical dimensions: 50–70 inches wide, 16–22 inches deep, 30–36 inches tall. Best for: Medium to large bedrooms with enough wall length to clear the piece without blocking doors or closet access. Folded clothes, shared wardrobe storage, and mirror setups. Before you buy: Measure 24–30 inches of clearance in front of the drawers. A horizontal dresser that opens into a bed frame or bedroom door becomes a daily frustration. 2. Double Dresser A double dresser is a wider version of the horizontal dresser — typically two full columns of drawers side by side. It’s the most common choice for couples or anyone with a large wardrobe who needs more drawer volume than a standard dresser provides. Typical dimensions: 60–80 inches wide, 18–22 inches deep. Best for: Primary bedrooms with enough wall length to absorb the width. Deep drawers make it practical for bulkier folded items — sweaters, jeans, extra linens. Before you buy: A double dresser can eat the longest wall of a smaller room and still leave the bed area feeling crowded. Map the full room footprint first. 3. Vertical Dresser A vertical dresser trades width for height. The same number of drawers, stacked rather than spread. That footprint reduction is exactly what small bedroom storage layouts need — the piece can fit in a 30-inch gap beside a closet or between windows where a horizontal dresser simply won’t. Typical dimensions: 28–42 inches wide, 16–20 inches deep, 48–60 inches tall. Best for: Small bedrooms, studio apartments, and any room where floor space is the hard constraint. Before you buy: Anchor it to the wall — especially in a child’s room or a busy bedroom where drawers may be opened at the same time. A tall dresser with open drawers can become top-heavy. 4. Highboy Dresser A true highboy is a chest-on-chest design — one cabinet stacked on top of another, historically joined at the base. The upper section typically has shallower drawers for smaller items; the lower section has deeper drawers for bulkier ones. Many pieces sold as “highboys” today are simply tall dressers using the name loosely. Typical dimensions: 30–45 inches wide, 18–22 inches deep, 60–72 inches tall. Best for: Rooms with high ceilings and narrow wall space. Bedrooms with a traditional or antique furniture style. Before you buy: Confirm whether the listing describes a true chest-on-chest construction or just a tall dresser. The distinction affects both stability and price. 5. Lowboy Dresser The lowboy is the vanity-adjacent dresser, shorter than a standard piece, wider than it is tall, and designed to sit at a height that makes surface items easy to reach and mirrors practical to use while seated or standing. Think of it as a dressing table that also has drawers. In low-ceiling bedrooms, the lowboy’s reduced height keeps the furniture line well below the ceiling plane, which matters more than most buyers initially realize. Typical dimensions: 40–60 inches wide, 16–22 inches deep, 28–34 inches tall. Best for: Dressing corners, guest rooms with lower ceilings, or spaces where the dresser needs a lower visual profile to keep the room feeling open. 6. Tallboy Dresser The tallboy and the vertical dresser describe roughly the same thing — a narrow, tall storage piece — though some tallboys include a combination of drawers and a cabinet section. The term varies enough between manufacturers that actual specs matter more than the label. Typical dimensions: 28–40 inches wide, 16–22 inches deep, 50–65 inches tall. Best for: Compact bedrooms, apartments, and guest rooms. Works particularly well in spaces where wall width is the binding constraint. Before you buy: Check that drawer heights are accessible for whoever will use the piece most. Top drawers on a 65-inch tallboy are genuinely hard to reach for shorter users. 7. Bachelor’s Chest The bachelor’s chest is a compact multi-use piece — short enough and deep enough to double as a nightstand, but wide enough to store a meaningful amount of clothing. In studio apartments and small guest rooms, one piece doing two jobs is worth a lot more than square footage allows for two separate ones. Typical dimensions: 24–36 inches wide, 14–18 inches deep. Best for: Guest rooms, studio apartments, and bedrooms where floor space won’t allow a standard dresser plus a nightstand. Before you buy: Check that the top surface is sturdy enough for a lamp, glass of water, or phone charger. Not all compact chests are built to handle constant nightstand-style use. 8. Gentleman’s Chest A gentleman’s chest combines drawers with cabinet or hanging sections in a single unit — the furniture equivalent of a wardrobe and dresser merged into one piece. It’s the right choice when the closet isn’t large enough to hold a full wardrobe, and you need both folded and hanging storage without adding two separate pieces of furniture. Typical dimensions: 38–55 inches wide, 18–24 inches deep. Best for: Bedrooms with limited closet space. Suits, jackets, and dress shirts that need to hang, plus everyday folded clothing in the drawers. Before you buy: Check the hanging depth inside the cabinet section. Anything under 22 inches creates problems with shoulder width on most garments. 9. His and Hers Chest A his-and-hers chest provides divided storage for two people in one piece — typically two distinct sections with equal (or designated) drawer space. The appeal is eliminating two separate dressers while keeping individual storage clearly separated. The challenge is that it requires a wider wall than a single dresser. Typical dimensions: 50–70 inches wide, 18–22 inches deep. Best for: Shared primary bedrooms where both people need organized storage, and the wall allows the width. Before you buy: Look at whether both sides actually have equal storage volume. Some designs are balanced in appearance but not in drawer count or depth. 10. Combo Dresser A combo dresser mixes drawers with open cabinet sections — giving you a place to store folded clothes alongside bags, extra bedding, or bulky items that won’t fold flat. It’s a better fit for bedrooms with varied storage needs than a pure drawer layout, but it works best when the cabinet space is purposeful rather than just decorative. Typical dimensions: 45–70 inches wide, 18–24 inches deep. Best for: Medium and large bedrooms where mixed storage matters — extra blankets, large bags, or items that need more space than a standard drawer allows. Before you buy: Adjustable shelves are worth the premium if you plan to store items of varying sizes. 11. Chifferobe A chifferobe is a combined dresser and wardrobe in one tall unit — drawers on one side, hanging space and shelves on the other, behind a cabinet door. It was the standard solution in homes built before built-in closets became standard. It still makes practical sense in older homes, rental bedrooms, and any room where no closet exists. Typical dimensions: 36–60 inches wide, 20–26 inches deep. Best for: Older homes without closets, guest rooms, and rentals where you can’t modify the walls. Before you buy: Measure the cabinet door swing. In a tight bedroom, a door that opens into the walking path kills the advantage of the extra storage. 12. Armoire An armoire is a freestanding wardrobe with doors — typically offering a combination of hanging space, shelves, and sometimes a drawer section. It functions as a standalone closet. The ceiling height and door clearance requirements are real constraints that buyers often underestimate until delivery day. Typical dimensions: 36–60 inches wide, 20–26 inches deep, 70–90 inches tall. Best for: Bedrooms without built-in closets. Coats, dresses, and any garments that need to hang full length. Before you buy: Measure ceiling height, door clearance, and hallway width for delivery. Armoires often need to be partially disassembled to get through standard doorways. 13. Lingerie Chest A lingerie chest is a narrow tower of shallow drawers — not a primary storage solution but a supplement to one. The shallow depth is the defining design feature: these drawers are sized for socks, undergarments, scarves, and accessories that would get lost in the deeper drawers of a standard dresser. Typical dimensions: 18–28 inches wide, 14–18 inches deep. Best for: Bedroom corners, walk-in closets, and dressing areas. Works alongside a larger dresser rather than replacing it. Before you buy: Drawer dividers make a significant difference. Without them, shallow drawers with small items turn into one tangled drawer per opening. 14. Mirrored Dresser A mirrored dresser uses reflective surfaces — either on the drawer fronts or via an attached mirror — to add light and visual depth to a room. In smaller or darker bedrooms, that reflection can make a real difference. The trade-off is fingerprints, smudging, and the need to avoid direct glare from a nearby window or lamp. Typical dimensions: 45–70 inches wide, 16–22 inches deep. Best for: Small or dark bedrooms where reflection helps the room feel larger. Dressing areas and glam-style interiors. Before you buy: Position it where light is soft and diffuse, not where a window or bright fixture will hit the mirror directly. 15. Media Chest A media chest solves a specific layout problem: the bedroom where the TV and dresser need to share the same wall. Open shelving on top holds the TV and streaming devices; drawers below hold clothing. Many models include cable management cutouts built into the back panel. Typical dimensions: 36–60 inches wide, 18–22 inches deep. Best for: Bedrooms with a TV directly opposite the bed, where a separate TV stand and dresser would take too much floor space. Before you buy: Check the shelf’s weight capacity and dimensions against your TV size before ordering. 16. Mule Chest A mule chest is a high-capacity storage piece — drawers plus cabinet sections — built for rooms that need to store more than clothing. Blankets, pillows, bulky seasonal items. The sheer size requires a substantial wall and enough floor space that delivery and placement need to be planned ahead of purchase. Typical dimensions: 55–75 inches wide, 18–24 inches deep. Best for: Large primary bedrooms, guest suites, and rooms where maximum storage volume is the priority. Before you buy: Measure doorways, stairwells, and hallways before the delivery date — not after. 17. Chesser A chesser is a hybrid — somewhere between a standard dresser and a chest of drawers in both height and width. The term is used inconsistently across manufacturers. The practical value is finding a piece that fits where a standard dresser is too wide and a chest is too narrow. Evaluate by drawer count, dimensions, and configuration rather than the label. Typical dimensions: 40–65 inches wide, 16–22 inches deep. Best for: Bedrooms that need flexible storage but have space constraints that rule out both a full dresser and a narrow chest. 18. Changing Table Dresser A changing table dresser is a nursery-specific piece that combines drawers for baby essentials with a top surface designed to hold a changing pad. The dual function is the point — one piece instead of two in a room where floor space is already under pressure from a crib, glider, and storage. Typical dimensions: 36–60 inches wide, 18–22 inches deep. Best for: Nurseries. Keeps diapers, wipes, onesies, and burp cloths within reach of the changing surface. Before you buy: Choose a model with a removable changing tray. Once the child outgrows it, the piece converts to a standard dresser without modification. 19. Cloth Drawer Dresser A cloth drawer dresser uses fabric drawers on a metal or wood frame, is lightweight, portable, and inexpensive. It is a short-term solution, not a long-term one. The drawers handle light clothing well, but sag under weight and degrade faster than any wood piece. It earns its place in dorm rooms, kids’ rooms, and temporary living situations where portability matters more than durability. Typical dimensions: 24–45 inches wide, 12–16 inches deep. Best for: Short-term setups, kids’ rooms for lightweight clothing, and closet overflow storage. Not a permanent solution. 20. Rolling Chest A rolling chest is a compact storage unit on casters — designed to be moved around a bedroom, closet, or multi-purpose room as the layout shifts. Useful for organizing overflow items: accessories, shoes, undergarments, craft supplies. It’s not a replacement for a primary dresser but a flexible supplement. Typical dimensions: 18–36 inches wide, 14–20 inches deep. Best for: Closets, craft rooms, dorm rooms, and anywhere the layout changes often enough that fixed furniture is a liability. Before you buy: Locking casters are worth it on hard floors. A rolling chest without locks will shift every time a drawer is opened. 21. Dresser Desk A dresser desk combines storage drawers with a built-in workspace, either a fixed writing surface or a fold-down panel. In studio apartments and small guest rooms where one piece needs to do two things, this cuts down on furniture count without eliminating function. The desk surface needs to be at a comfortable seated height, which isn’t always the case with converted furniture pieces. Typical dimensions: 30–50 inches wide, 16–24 inches deep. Best for: Studio apartments, work-from-bedroom setups, and guest rooms that double as home offices. Before you buy: Sit at the surface with a chair before committing. Desk height and chair clearance are easy to miss in product photos. 22. Bombe Dresser A bombe dresser is chosen for its shape first and its storage second. The curved, rounded front and ornate hardware make it a visual anchor in traditional, antique-style, or French-country rooms. Drawer depth is typically shallower than a standard dresser of the same width — the curve takes up interior space. Buy it knowing that. Typical dimensions: 35–55 inches wide, 18–24 inches deep. Best for: Traditional and formal bedrooms where the dresser is part of the room’s visual identity, not just its storage plan. Where to Place Each Type of Dresser The right dresser in the wrong position stops working immediately. These placement rules apply regardless of which type you choose. Placement Rule Why It Matters Leave 24–30 inches in front of all drawers Drawers need clearance to open fully without hitting the bed frame or a second piece of furniture Wide dressers go on the longest open wall Keeps the room balanced and uses wall space that would otherwise be dead Vertical dressers fit in narrow gaps Between windows, beside closets, or at the foot of the bed in a long narrow room Media chests go opposite the bed Positions the TV at the right viewing angle without requiring a separate stand Mirrored dressers belong in soft, indirect light Avoids glare from windows or overhead fixtures hitting the reflective surface Don’t place tall dressers near kids’ play zones Open drawers raise the center of gravity — anchor tall pieces to the wall Rolling chests belong in closets or corners Their value is mobility — a fixed position removes the only advantage they have None of these rules is optional. Ignoring clearance in front of drawers is the single most common furniture placement mistake in bedrooms — and the most annoying one to live with. Maintenance and Safety A few things that matter more than most buyers realize until after the piece is in the room: Anchor every tall dresser, highboy, armoire, and chifferobe to the wall, especially in homes with children or pets Keep heavier items in lower drawers; top-loading a tall piece makes it easier to tip Close drawers when not in use, open drawers, shift the balance point forward Don’t put a heavy TV on a narrow dresser; use a media chest or a proper TV stand Clean wooden surfaces with a lightly dampened cloth. The species of wood for furniture affects how the surface responds to moisture, so excess water can warp joints or lift veneer, depending on the construction Use felt pads or a tray on the top surface to prevent scratches from daily items Tighten hardware regularly, drawer pulls, and knobs loosen faster than expected under daily use When a Dresser Isn’t the Right Answer Some bedrooms don’t have the floor space, wall width, or clearance to make a standard dresser work. These alternatives are worth considering before forcing the wrong piece into a room that can’t accommodate it. Alternative Best For What It Solves Wardrobe / freestanding closet Hanging clothes Replaces a built-in closet entirely Closet organizer system Small bedrooms with existing closets Turns unused closet space into folded-clothing storage Storage bed frame Hidden seasonal storage Linens and off-season clothing without using wall space Nightstand with drawers Small daily essentials Keeps bedside items organized without adding a full piece Under-bed storage bins Seasonal and overflow clothing Uses dead space under the platform or raised beds Cube storage unit Kids’ rooms and flexible layouts Adjustable, rearrangeable, and low-profile If the room can’t provide 24–30 inches of drawer clearance and enough wall width for the piece to sit without blocking traffic, one of these alternatives will serve better than a dresser that’s technically in the room but practically impossible to use. Frequently Asked Questions What dresser material lasts the longest? Solid wood usually lasts the longest because it handles daily use better than particleboard or thin veneer. Hardwoods like oak, maple, and walnut are especially durable. Engineered wood can still work well, but check drawer joints, weight, and hardware quality before buying. Are soft-close drawers worth it? Yes, soft-close drawers are worth it if the dresser will be used daily. They reduce slamming, protect drawer joints, and feel smoother over time. They are especially helpful in shared bedrooms, nurseries, and guest rooms where quieter furniture makes the space more comfortable. What dresser size works for a small bedroom? A narrow vertical dresser usually works best in a small bedroom because it uses height instead of floor width. Look for a piece under 40 inches wide with enough drawer depth for folded clothes. Always leave space for drawers to open fully. Can I use a dresser as a TV stand? Yes, but only if the dresser is wide, stable, and strong enough for the TV. Check the top surface weight limit and make sure the screen sits at a comfortable viewing height. Avoid placing heavy TVs on narrow or tall dressers. How do I stop dresser drawers from sticking? First, remove the drawer and check for dust, loose screws, or warped wood. Clean the tracks and apply drawer wax or a dry lubricant. If the drawer still sticks, the frame may be uneven, overloaded, or affected by humidity. Should a dresser be taller than the bed? A dresser does not have to be taller than the bed. What matters more is balance, reach, and room layout. Low dressers feel open and work well with mirrors, while taller dressers save floor space and add more vertical storage. How much should a good dresser cost? A good dresser can vary widely in price based on size, material, and construction. Budget pieces may work for short-term use, while solid wood options cost more but last longer. Focus on sturdy drawers, smooth glides, stable legs, and strong hardware. How do I style the top of a dresser? Keep the top simple and useful. Add a lamp, mirror, tray, small plant, or framed photo. Group items in different heights so it feels balanced. Leave some empty space so the dresser still looks clean and does not become cluttered. Final Verdict Choosing the right dresser starts with knowing your room, not just liking a style. I always look at wall width, drawer clearance, ceiling height, and storage needs before picking a piece. A wide dresser may work well in a large bedroom, while a vertical dresser, tallboy, or bachelor’s chest may fit better in a smaller space. If your room lacks closet storage, an armoire, chifferobe, or gentleman’s chest may solve more problems than a standard dresser. I also recommend measuring doorways and walkways before buying, so delivery and daily use are easier. Use this guide to compare your options, measure your space, and choose a dresser that truly fits your bedroom
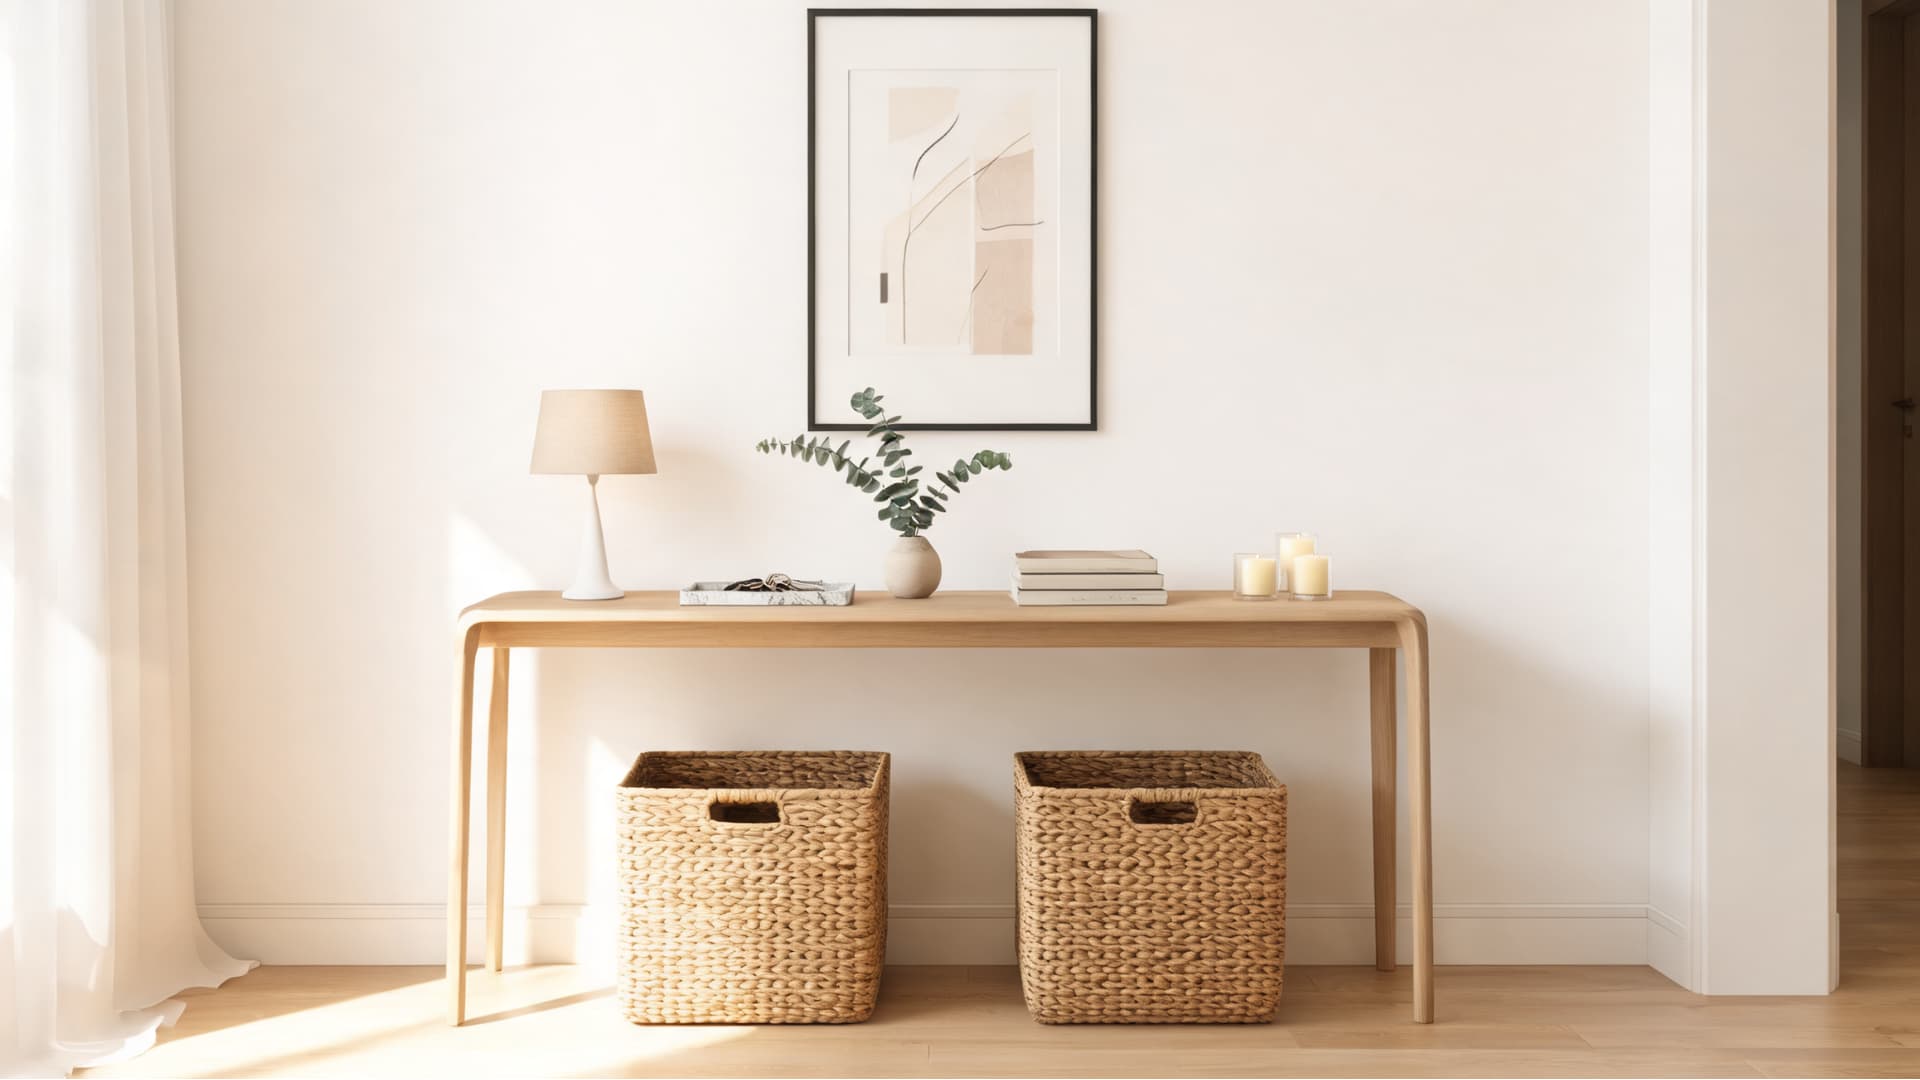
A console table is a long, narrow table designed to sit against a wall or behind a sofa, and the reason it works so well in so many rooms comes down to one thing: its depth is kept shallow enough that it doesn’t pull floor space away from you. Most run 12 to 18 inches deep, 30 to 36 inches tall, and anywhere from 36 to 60 inches wide. That combination lets it function where full-sized furniture can’t, in hallways, entryways, behind sofas, and along blank walls that would otherwise go unused. Here’s what actually happens when you add one to a room: the space stops feeling unresolved. An entryway gets a surface for daily essentials. A hallway gets a visual anchor. A living room gets storage or lighting without adding bulk. The console table isn’t a decorative afterthought — it’s solving a layout problem that most people don’t even name until after it’s fixed. Shape Long and narrow Common height 30–36 inches (should match or sit just below sofa back height when used behind a sofa) Common depth 12–18 inches, stay under 14 inches in hallways to keep the passage clear Common width 36–60 inches, ideally no more than two-thirds of the wall width Best placement Entryway, hallway, living room wall, behind the sofa Main use Storage, display, lighting, daily essentials Common materials Wood, metal, glass, marble, rattan, and mirrored finishes Those depth numbers matter more than most guides let on. A 14-inch-deep console table in a 36-inch-wide hallway leaves you 22 inches of clearance, just enough. Go to 18 inches of depth, and you’re down to 18 inches of walkway, which starts to feel tight every time someone passes through carrying bags. Size first, then everything else. What is a Console Table Used For? Console tables are useful because they solve small space problems while also making a room feel more finished. Instead of being just decorative furniture, they add function to areas that would otherwise remain empty or underused. Holding everyday essentials: Console tables are commonly used in entryways to keep daily items like keys, mail, wallets, sunglasses, bags, phones, and trays in one easy-to-reach place. This helps create an organized “drop zone” right at the entrance of the home. Displaying decor: They work as a display surface for decorative pieces such as lamps, vases, framed photos, artwork, candles, plants, books, and decorative bowls. This makes them ideal for adding personality and style to a space. Adding extra storage: When designed with drawers, shelves, or baskets, console tables can store practical items like cables, remote controls, documents, table linens, dinnerware, or other small household essentials that often create clutter. Filling empty wall space: A console table can instantly make a blank wall, narrow hallway, or unused alcove feel intentional and functional without taking up much floor area or making the space feel crowded. Creating a room divider: When placed behind a sofa, a console table can subtly divide an open-plan layout into separate zones, such as distinguishing the seating area from a walkway, while still keeping the space visually open. Where to Put a Console Table: Room-by-Room Placement The right placement comes down to the specific layout problem you’re solving. Here’s what each location actually requires. 1. Entryway or Foyer Near the front door, the console table functions as the organizational anchor of the entryway. The most useful setup: a tray or small bowl for keys and change, a lamp or wall-mounted light if the entryway is dim, and at least one basket or hook solution below for bags. A mirror above it is one of the most practical additions in any entryway — a last look before you leave, and it bounces light into spaces that often have none. Sizing note: In a foyer, leave at least 36 inches of clear walkway in front of the table. If the hall is narrower than 48 inches, stay at a maximum depth of 12 inches. 2. Hallway Hallways are the most difficult placement because the walkway constraint is real. A 12-inch-deep console works in most halls. A slim lamp, a single piece of art above, and one small object on the surface, that’s all that fits before it starts to read as cluttered. If the hallway is also the path to bedrooms, leave the lower shelf completely clear so the space stays easy to move through. 3. Living Room Wall Against a living room wall, the console table works as a display anchor and lighting solution. This is where you have the most styling flexibility; it’s not a high-traffic zone, so you can go slightly deeper (up to 18 inches) and use the surface more fully. The common mistake here is treating it like a shelf and stacking too much. Pick one anchor piece, a lamp, a large mirror, or a framed artwork, and build around it with two or three supporting objects. The wall above the table is part of the arrangement, not separate from it. For more on minimalist living room layout and furniture proportions, the scale principles there apply directly to console table placement decisions. 4. Dining Room A console table in the dining room fills the role of a slim sideboard — serving surface, bar area, or storage for linens and glassware that don’t have another home. This works best in smaller dining rooms where a full buffet cabinet would dominate the wall. At 15 to 18 inches of depth, you get enough surface for functional staging without the room feeling compressed. 5. Bedroom In the bedroom, a console table works as a compact vanity when paired with a mirror and stool. The table depth here should match the stool depth so you can sit comfortably without the stool jutting out awkwardly when it’s pushed in. Look for a stool that tucks flush underneath the table’s apron when not in use. 6. Bathroom In larger bathrooms, a console table organizes towels, baskets, and toiletries while keeping the surface accessible. Some bathroom console tables are specifically designed to support a vessel sink, with plumbing clearance built into the open frame. Confirm weight capacity before loading a ceramic sink, standard decorative console tables are not rated for that load. 7. Alcove or Awkward Corner Alcoves and recessed walls are exactly what the narrow format was designed for. A console table fits the footprint without competing with the architecture. In an alcove, the depth of the recess usually determines how deep your table can be — measure the recess depth first and choose a table at least 2 inches shallower than that clearance so the table looks intentional rather than jammed in. Best Console Table Materials Material choice affects three things: maintenance burden, visual weight, and how the table holds up in high-traffic areas. Here’s an honest read on each. Material Best For Things to Consider Wood High-traffic areas, warm or traditional rooms Solid wood holds up well; veneer can chip at corners in entryways Metal Modern or industrial rooms Cold on its own — needs soft decor or a wood top to balance it Glass Small spaces and lighter layouts Shows fingerprints constantly; tempered glass is safer in entryways Marble Formal or premium rooms Heavy, requires sealing, and stains if liquids sit on it Rattan or cane Relaxed, natural, or coastal interiors Collects dust in open weave — harder to keep clean in hallways Mirrored finish Compact rooms where light matters High maintenance — smudges are visible from across the room Mixed material Modern homes with flexible styling Must match at least one existing material in the room The entryway is the most demanding location for material choice because it’s the first thing you touch and see every day. Wood, particularly solid hardwood, handles daily use better than glass or marble in that context. For hallways and living room walls, where traffic is lower, the visual priority can take over from the durability concern. If you’re also thinking through the broader material decisions for your space, the principles in minimalist home decor rules how material selection interacts with room scale and furniture choices. Common Types of Console Tables The type of console table you choose changes both the function and the visual weight of the piece in the room. Each works better in some contexts than others. 1. Rectangular Console Table The standard format. Clean lines, easy to style, fits most rooms. This is the right starting point unless you have a specific layout constraint that calls for something else. 2. Demi-Lune Console Table A half-moon shape that trades surface area for a softer edge profile. Works well in tight entryways where the curved front means fewer corners catching bags and elbows. You lose some usable surface depth, so it’s better suited to display-only setups rather than daily storage. 3. Console Table With Drawers Drawers add hidden storage without increasing the footprint. This is the right call for entryways where daily clutter — chargers, receipts, spare keys, takeout menus — needs somewhere to go that isn’t the surface. One or two drawers is usually enough; a full bank of drawers starts to look like a dresser and reads oddly in a hallway. 4. Console Table With Shelves A lower shelf adds storage capacity without drawers. Baskets on the lower shelf handle shoes, bags, or charging cables while keeping the surface clear. The tradeoff: open shelves require more styling discipline than drawers because everything on them is visible. 5. Open-Frame Console Table Slim legs and a minimal frame keep the floor visible, which makes small rooms feel larger than solid-sided furniture would. The right call for tight hallways and rooms where visual weight is the main concern. These typically have no storage beyond what you add with a basket or tray. 6. Mirrored or Glass Console Table Reflective surfaces bounce light and reduce the visual footprint of the table in the room. Useful in dark or small rooms where solid furniture would feel heavy. Practical downside: Mirrored and glass surfaces show every fingerprint and dust, so maintenance is higher than wood or metal. 7. Sculptural Console Table A sculptural console table is a statement piece first and a surface second. The base becomes the focal point, which means the styling on top needs to be minimal enough not to compete with it. If you buy a table for its base design and then pile objects on top, you’ve hidden the reason you bought it. Console Table vs. Side Table: What Is the Difference? These two furniture pieces solve entirely different problems and shouldn’t be confused when planning a room layout. Feature Console Table Side Table Shape Long and narrow Small, square, round, or rectangular Height 30–36 inches 18–24 inches (matches arm height) Placement Against walls, behind sofas, in halls Besides chairs, sofas, or beds Main use Display, storage, lighting, entryway surface Drinks, remotes, books are accessible from the seat The height difference is the clearest signal: a side table is designed to be reached from a sitting position. A console table is not. If you use a console table next to a chair, the surface is above arm height, and anything you place on it requires you to reach up or stand, which defeats the point. How to Choose the Right Console Table The sequence matters: get the dimensions right first, then decide on the function, and pick the style last. Reversing this order is how you end up with a beautiful table that blocks traffic or sits too low to see from a standing position. Measure the space before anything else. Width of the wall, depth of the clearance zone in front of it, and height of any nearby furniture the console will sit beside or behind. For hallways, confirm 36 inches of clearance remains after the table is in place. Match height to context. In an entryway or hallway, 30 to 34 inches is comfortable for most adults. Behind a sofa, match the sofa back height exactly or go up to 2 inches lower. Choose depth by traffic. Narrow hallway, 12 inches max. Entryway with space, 14 to 16 inches. Living room wall, up to 18 inches if clearance allows. Decide whether storage is functional or decorative. If you actually have things to store, get drawers or shelves. If storage is conceptual, you’ll end up with empty drawers and a cluttered surface anyway, just buy the clean open frame and use a basket below. Check weight capacity before buying. If you’re adding a heavy lamp, a stone vase, or a mirror leaning against the wall above, confirm the table is rated for that load. Most decorative console tables have surface limits of 30 to 50 pounds. How to Style a Console Table Most console tables end up over-styled because the format is long enough that it feels like it should be filled. The rule that actually works: choose one anchor piece, add height with something tall, and leave at least a third of the surface empty. Styling Move What It Does One anchor piece (lamp, mirror, large art) Establishes the focal point so everything else reads as supporting it Vertical element (tall lamp, tall vase) Counterbalances the horizontal length of the table A tray for small items Contains clutter, so it reads as intentional grouping, not scattered Mix of object sizes Creates visual rhythm — one large, one medium, one small reads better than three equal objects Basket or storage on the lower shelf Adds function and grounds the table visually Empty surface space Prevents the “cluttered shelf” look — negative space is part of the styling, not a failure to fill it One more specific note: if you’re adding a mirror above the console table, the bottom of the mirror should sit 4 to 6 inches above the table surface. Any closer and the mirror reads as resting on the table rather than hanging above it. Any higher and the proportional relationship between mirror and table breaks — they start to look like two separate things sharing a wall rather than one coherent arrangement. Console Table Mistakes to Avoid Too deep for the space. A 16-inch-deep table in a 36-inch hallway leaves 20 inches — that’s tight. Measure actual clearance, not available wall width. Too tall for the sofa. If the table tops the sofa back by more than 2 inches, the setup looks like a shelf bolted to the wall, not furniture that belongs together. Over-styling the surface. Ten small objects always look like a collection of things, not a styled surface. Edit to five maximum, and leave some surface empty. Ignoring the wall above. A blank wall above a console table makes the table look like it was put there because nowhere else worked. A mirror, artwork, or wall-hung fixture completes the arrangement. Using it as a TV stand. Most console tables are not rated for the weight of a television, and the surface height is wrong for viewing. TV-specific media consoles are built with load ratings and cable management that a decorative console table won’t have. Choosing style before dimensions. A console table that looks right in a showroom but doesn’t fit your clearance path is furniture that creates a problem rather than solves one. Frequently Asked Questions Can a console table go under a window? Yes, a console table can go under a window if it does not block airflow, curtains, or natural light. Choose a low, simple design that sits below the window frame. Keep styling minimal so the setup feels open instead of crowded or visually heavy. Should a console table touch the wall? A console table should usually sit close to the wall, but it does not always need to touch it. Leave a small gap if there are baseboards, outlets, or cords behind it. The table should still feel stable and aligned with the wall. Can I use a console table as a desk? You can use a console table as a light desk if the height, depth, and chair clearance feel comfortable. It works best for laptops, writing, or short work sessions. For daily office use, a proper desk is usually better because it offers more depth. What size lamp works on a console table? A lamp should feel balanced with the table and nearby wall decor. For most console tables, a medium-height lamp works best. Avoid lamps that are too wide, too tall, or too heavy. The base should leave enough room for a tray or decor. Can a console table work in a small apartment? Yes, a console table can work well in a small apartment because it adds function without taking much floor space. Use it as an entryway surface, slim storage piece, or sofa-back table. Choose a shallow style with drawers or shelves for better use. How do I stop a console table from wobbling? First, check that the floor is level and all screws are tight. Add felt pads or furniture levelers under uneven legs if needed. If the table is tall, narrow, or placed in a busy area, consider securing it to the wall for safety. What color console table should I choose? Choose a color that connects with furniture already in the room. Wood tones feel warm, black adds contrast, white keeps things light, and metal can feel modern. If the room is small, a lighter or open-frame design often feels less heavy. Can a console table replace a dresser? A console table cannot fully replace a dresser because it has less storage and shallower depth. It can hold small items, decor, or baskets, but it is not ideal for full clothing storage. Use it as a support piece, not primary storage. Final Verdict A console table works best when it solves a real problem, not when it simply fills a gap. I’d start by looking at where you need a slim surface, better storage, or a stronger visual anchor. Then check the depth, height, material, and placement before thinking about style. You now have the basics for using a console table in an entryway, hallway, living room, dining room, bedroom, bathroom, or awkward corner. You also know how different types, materials, and styling choices affect daily use. I hope this helps you choose with more confidence. Try measuring your space today, then share which console table setup fits your home best or needs.
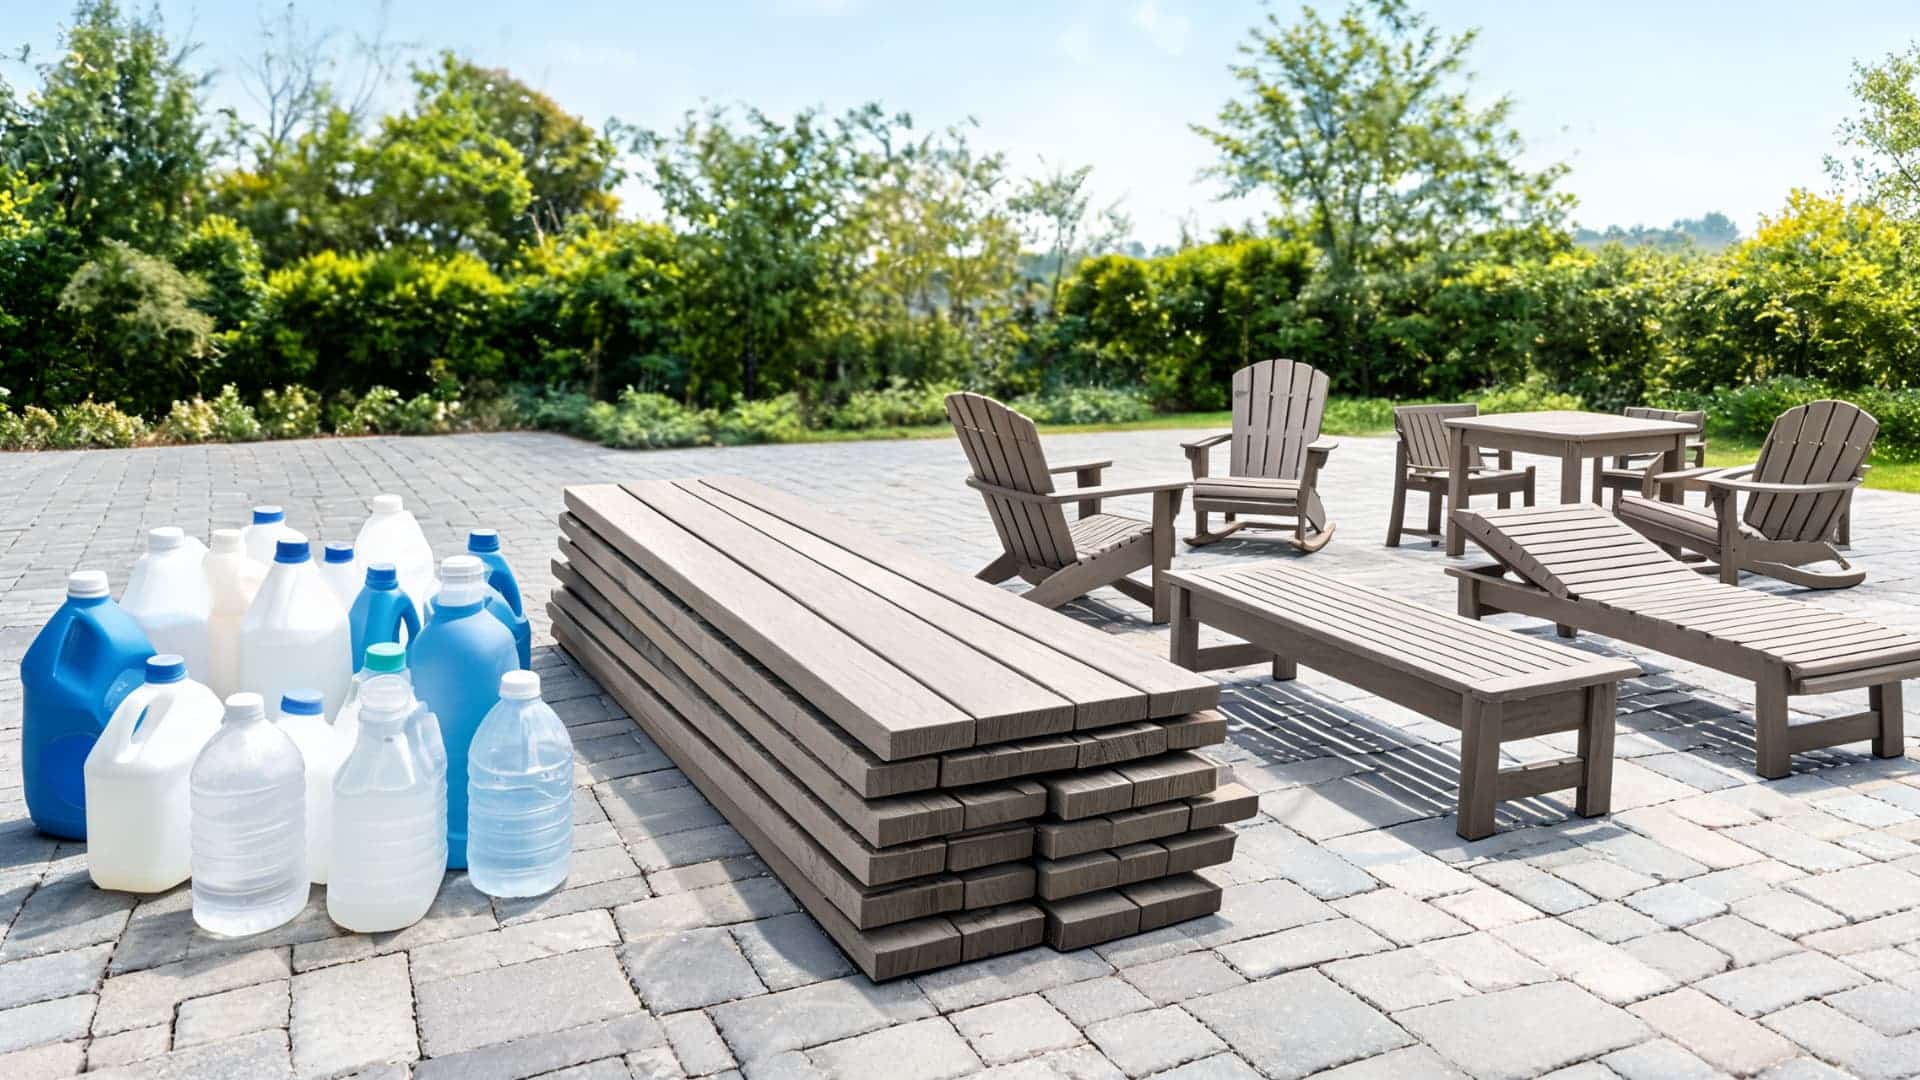
Polywood furniture holds up. That’s the honest starting point. I’ve watched real wood patio sets rot out in three seasons on an uncovered deck, and I’ve seen cheap molded plastic buckle under UV and split at the seams before two winters are done. The question worth asking before you spend $800 on an Adirondack chair is exactly what you’re buying and whether it earns the price. This guide covers what Polywood is made of, how it performs across different climates, how it compares to natural wood, and which furniture types are worth the money. Material High-density polyethylene (HDPE) plastic lumber Primary Source Recycled plastics, milk jugs, detergent bottles, post-consumer HDPE Color Method UV inhibitors and pigments blended into the lumber, not surface-painted Maintenance Required Soap, water, and a soft brush, no sealing, staining, or oiling Warranty (Brand) 20 years (Polywood brand) Best For Uncovered patios, pool areas, coastal environments, high-traffic outdoor spaces Not Ideal For Buyers wanting authentic wood grain, the lowest upfront price, or lightweight furniture That’s the short version. The full picture is more useful than a spec sheet, so let’s get into it. What is Polywood Made Of? Polywood furniture is made from high-density polyethylene (HDPE) sourced primarily from recycled plastics like milk jugs, detergent bottles, and post-consumer packaging. The raw material is processed into dense boards that are shaped, cut, and assembled like lumber. From a distance, a well-made Polywood Adirondack chair looks like painted wood. Up close, the surface texture is smoother and more uniform than timber grain. What separates HDPE lumber from cheap patio plastic is density and how color is applied. UV inhibitors and pigments are blended into the material during manufacturing, not applied as a surface coat. That means the color runs through the board. A deep scratch on a Polywood slat won’t reveal a stark white interior the way a painted plastic chair would; the tint carries through. It also means the UV protection is structural rather than cosmetic. The boards are then cut and drilled like dimensional lumber and fastened with stainless steel hardware to resist corrosion. The result is furniture that looks like traditional outdoor wood furniture but behaves like a dense plastic material, which is exactly what it is. Pro Tip: Check the hardware before you buy any poly lumber furniture. Stainless steel fasteners are the standard for quality HDPE pieces. Zinc or plated screws will rust and stain the boards faster than the material itself degrades. Is Polywood Real Wood? No, and the name trips people up constantly. Polywood is HDPE plastic lumber shaped to resemble timber. It comes in wood-inspired colors like teak, mahogany, driftwood, and natural, and the board profiles mimic the proportions of dimensional wood stock. That’s where the resemblance ends. There’s no grain, no fiber structure, and nothing in it that came from a tree. It won’t accept stain, it doesn’t need sealing, and it won’t develop the silver patina that teak does over time. Buyers who want the natural behavior and aesthetic of real wood, including how it weathers, how it takes oil finishes, how it smells in the sun, will find that Polywood doesn’t replicate any of that. What it does offer is a stable, predictable surface that requires almost no maintenance to keep looking the same year over year. Polywood vs. Natural Wood: How They Actually Compare For the outdoor context, uncovered pool decks and porches, and lakefront docks — the material differences translate into real performance gaps over time. Here’s how they compare across the factors that matter most for outdoor furniture Factor Polywood (HDPE) Natural Wood (Teak, Cedar, Pine) Rot resistance Does not rot, HDPE has no organic fiber Varies by species; pine rots fast without treatment; teak holds up well Splintering Does not splinter Splinters as the surface dries and cracks over the seasons Maintenance Soap and water only Annual sealing, oiling, or refinishing, depending on species Fade resistance UV inhibitors built into the material hold color well Fades and grays without a UV-protective finish applied Weight and stability Heavier than lightweight plastic; stable in moderate wind Varies; teak is heavy, pine is lighter Upfront cost Higher, expect $300-$900 for a quality Adirondack chair Wide range; painted pine is cheap, teak is expensive Long-term cost Lower, minimal upkeep, long lifespan Higher annual maintenance costs add up; replacement is more likely Appearance over time Stays consistent; does not age like wood Develops character with age (silver patina, grain variation) The comparison changes depending on which wood you’re actually using. A quality teak set maintained properly will last decades and look better for it. The problem is most buyers aren’t comparing Polywood against teak; they’re comparing it against painted pine or basic acacia that won’t survive three winters without significant work. Against that standard, HDPE lumber wins on durability and long-term cost without much debate. For guidance on which outdoor wood species actually hold up. How Polywood Performs in Real Weather The material doesn’t care what the weather is doing. That’s the practical reality of HDPE, and it’s why Polywood gets recommended for the situations where real wood tends to struggle. Here’s how it holds up across the conditions that matter. 1. Hot and Sunny Climates UV inhibitors built into the material slow the fading process significantly compared to painted or stained wood. That said, dark colors, navy, black, and deep charcoal, absorb heat and can become uncomfortable to touch on a July afternoon in direct sun. If your patio gets full sun from 10 am to 4 pm, lighter colors are the practical choice for comfort. The material itself won’t degrade from UV exposure the way unstabilized plastic does. 2. Rainy and Humid Environments HDPE doesn’t absorb water. There’s no swelling, warping, or surface checking from moisture cycling the way you’d see in untreated or even sealed wood. Surface dirt, pollen, and mildew can still collect on the boards; the material isn’t self-cleaning, but a scrub brush with soapy water handles all of it without needing to let the furniture dry out or condition it afterward. 3. Cold and Snowy Climates The material holds up through freeze-thaw cycles that crack and split wood. Polywood can stay outside through a northern winter without the fiber stress that causes untreated wood to check and split when moisture in the grain freezes and expands. Covers are optional, but they help reduce cleaning time when spring arrives. Stacking chairs or bringing cushions inside over winter extends cushion life; the frames don’t need it. 4. Coastal and Poolside Use Salt air and pool splash are where HDPE furniture has a clear structural advantage over most wood alternatives. The material doesn’t absorb chlorine or salt, doesn’t corrode (provided the hardware is stainless), and doesn’t need rinsing for its own protection, though rinsing to remove salt buildup on visible surfaces keeps it looking clean. This is one of the strongest use cases for poly lumber furniture. Polywood vs. Poly Lumber: Why the Distinction Matters Polywood is a brand name, not a material category. When people say “polywood furniture,” they sometimes mean furniture made by the Polywood brand specifically, and sometimes they mean any furniture made from poly lumber or HDPE boards, regardless of manufacturer. The distinction matters because quality and warranty coverage vary between manufacturers even when the base material is the same. Term What It Means When to Use It Polywood Specific brand, founded in 1990, US-manufactured HDPE furniture with a 20-year warranty When referring to the brand specifically Poly lumber The material category, HDPE boards used by many furniture manufacturers When discussing the material, regardless of brand HDPE furniture An accurate generic term for any furniture made from high-density polyethylene Technical or comparative contexts The Polywood brand offers a 20-year warranty against structural defects, which is the benchmark for the category. Other poly lumber brands, Breezesta, DuraWeather, Berlin Gardens, and Seaside Casual, use comparable HDPE material but carry different warranty terms and quality tiers. Buying from a brand that specifies HDPE content and backs the product with a long warranty is a better investment than buying unbranded poly lumber furniture where those specs aren’t disclosed. Why Polywood Furniture Costs More A single Polywood Adirondack chair runs $250 to $400. A dining set for six can run $1,500 to $3,000. The higher price reflects the density of the material, the quality of the hardware, and the cost of domestic manufacturing, not padding. Here’s what drives the cost. First, HDPE lumber itself is denser and heavier than the molded plastic used in cheap patio furniture. Processing recycled HDPE into furniture-grade boards — blending UV stabilizers and pigments into the material during extrusion- costs more per unit than injection-molded plastic. Second, stainless steel hardware is standard on quality poly lumber pieces. It’s more expensive than zinc or plated fasteners, and it matters for long-term performance. Corroding hardware on an outdoor furniture frame leaves rust streaks on the boards and eventually compromises the joints. Third, the Polywood brand specifically manufactures in the US, which is reflected in the price. The 20-year warranty coverage they offer also reflects the manufacturer’s confidence in the product’s lifespan, which factors into the cost structure. The cost-per-year math is worth running. A $350 Polywood chair that lasts 20+ years costs roughly $17-18 per year. A $90 molded-plastic chair that needs replacing every 4-5 years costs $18-22 per year and generates more waste. The upfront number is larger; the long-term number is often comparable or better. Note: Cost estimates for Polywood furniture reflect the brand’s current US pricing. Poly lumber furniture from other manufacturers (Breezesta, DuraWeather, Berlin Gardens) may vary significantly. Prices fluctuate seasonally; peak spring pricing (March–May) runs higher than off-season pricing. The Main Characteristics of Polywood Outdoor Furniture Five things separate POLYWOOD from standard outdoor furniture, and from each other, depending on where you use it. No routine maintenance. No staining, oiling, sanding, or sealing, ever. Soap and water handle everything. Fade resistance is built into the board. Pigment is blended through the HDPE before extrusion, not coated on. No peeling, no blotchy patches. No rot, no splinters. HDPE has no organic fiber for fungi to break down, a direct advantage on pool decks and rental properties. Heavy and stable, but awkward to move. The density that holds chairs steady in the wind makes large pieces difficult to store seasonally. More sustainable, not zero-impact. Recycled HDPE diverts post-consumer plastic from landfills. Manufacturing still uses energy; the furniture is not biodegradable. Taken together, these characteristics make POLYWOOD well-suited to high-exposure, low-intervention outdoor situations, and a harder case for anyone who prefers the feel of natural wood or moves furniture often. Best Types of Polywood Furniture to Buy Some Polywood furniture types offer better long-term value than others. The best choices are pieces that stay outdoors, face the weather often, and benefit from strong, low-maintenance HDPE construction. Polywood Furniture Type Best For Why It’s Worth Buying Adirondack Chairs Fire pits, lawns, decks, patios Adirondack chairs are one of the best Polywood buys because they handle constant outdoor exposure well. Their slatted design drains water easily, and the material resists rot, moisture, and ground contact. Dining Sets Covered and uncovered patios Polywood dining sets work well for regular outdoor meals. Their heavier weight keeps tables steady in the wind, while stainless steel hardware adds durability for long-term use. Rockers, Gliders, and Porch Swings Front porches and covered seating areas These pieces are ideal when furniture stays in one place but faces changing weather. HDPE holds up well to repeated rocking or gliding without the loosening common in older wood joints. Chaise Lounges and Deep Seating Pool areas, patios, lounge spaces Poolside Polywood furniture performs well because HDPE resists moisture, chlorine, sunscreen, and wet use. For cushioned pieces, choose quick-dry, fade-resistant fabric with available replacement cushions. Benches and Planters Gardens, walkways, porches Polywood benches need little maintenance beyond cleaning and work well in exposed spaces. Planters are also durable, but drainage holes are important because HDPE does not breathe like wood. Polywood is most worth the price when the furniture stays outside year-round. Start with chairs, dining sets, or benches if you want practical pieces that need little upkeep. How to Choose the Right Polywood Furniture for Your Space The material decision comes first. Once you’ve decided HDPE furniture is the right call for your outdoor space, the purchase decision narrows down to a few practical questions. Measure before you buy. Polywood pieces run large, especially Adirondack chairs (typically 29–32 inches wide) and dining tables. Leaving 36 inches of clearance behind a dining chair for a comfortable pull-out is the minimum, more if it’s a high-traffic path. Sectional components add up fast in smaller patios. Match the piece to the use. If you eat outside three times a week, a dining set earns its keep. If the patio is mostly for relaxed weekend seating, two Adirondack chairs and a side table will serve better than a formal dining set that sits empty most days. Color choice is a comfort decision, not just aesthetic. Dark colors, black, navy, charcoal, hold up fine in UV terms, but get hot in direct afternoon sun. For pool decks and sun-exposed patios, lighter colors (white, sand, natural) are cooler to the touch and show less heat absorption. For shaded porches, color choice is mostly aesthetic. Check cushion availability for deep seating. Adirondack chairs and rockers often work well without cushions. Covers are optional, but they help reduce cleaning time when spring arrives, the same logic applies to any exposed deck surface around them. Confirm replacement cushions are available and priced before committing to a deep seating set. Frequently Asked Questions About Polywood Furniture These are the questions that come up most often from people who’ve narrowed their decision down to Polywood and want specifics before buying. Is polywood furniture worth the money? For outdoor spaces with significant weather exposure and minimal maintenance attention, yes. The cost-per-year math favors HDPE furniture over most alternatives when you factor in replacement cycles and maintenance costs. It’s not worth it if you want authentic wood grain or need the lowest possible upfront price. Can polywood furniture be left outside year-round? Yes. HDPE lumber is designed for year-round outdoor exposure. Covers are optional — they reduce cleaning time after winter but aren’t required to protect the material. Bring cushions inside or store them in a weatherproof box over winter. Does polywood furniture get hot in the sun? Dark-colored poly lumber furniture can get uncomfortably warm in direct afternoon sun. Lighter colors stay cooler. This is a material property, not a brand-specific issue — dark-colored plastic and metal furniture both run hotter than light-colored alternatives in direct sunlight. Can polywood furniture be painted? Not recommended. HDPE has low surface adhesion for most paints, so conventional paint won’t bond reliably and will peel faster than it would on wood. The color is built into the material — repainting isn’t typically needed and usually causes more problems than it solves. Does polywood furniture attract termites or insects? No. HDPE has no organic fiber content. Termites, carpenter ants, and wood-boring insects are not attracted to it and cannot damage it the way they would timber furniture. How do you clean polywood furniture? Mild dish soap, warm water, and a soft-bristle brush. Rinse with a garden hose. For stubborn mildew or staining on the surface, a diluted bleach solution (1/3 cup per gallon of water) works without damaging the material. No pressure washer required. Is polywood furniture good for rental properties? Yes. The combination of durability, low maintenance, and resistance to rot, splinters, and fading makes it a practical choice for rental properties where furniture needs to hold up through tenant turnover without constant attention. What is the difference between polywood and composite decking? Composite decking typically combines wood fiber with plastic binders, which can retain moisture and support mold growth under some conditions. Polywood is pure HDPE with no wood fiber content — it doesn’t absorb water and has no organic material for fungi to break down. They are different materials with different performance profiles. Final Verdict Polywood makes the most sense when you want outdoor furniture that can stay outside and still hold up with very little work. I like it most for patios, pool decks, porches, and coastal spaces where rain, sun, salt, and daily use can wear down cheaper materials fast. You now know what Polywood furniture is made of, why HDPE performs differently from real wood, how it handles different climates, and which pieces offer the best value. The upfront price is higher, but the low maintenance and long lifespan can make it easier to justify. Before you buy, measure your space, choose the right color, and share which piece you are considering. Sources Polywood Brand, “Materials and Sustainability.” polywood.comFamily Handyman, “The 10 Best Outdoor Furniture Brands, According to Designers.” 2025. familyhandyman.comCasual Furniture World, “What Is Polywood Furniture? Definition, Materials, History & Brands.” 2025. casualfurnitureworld.com
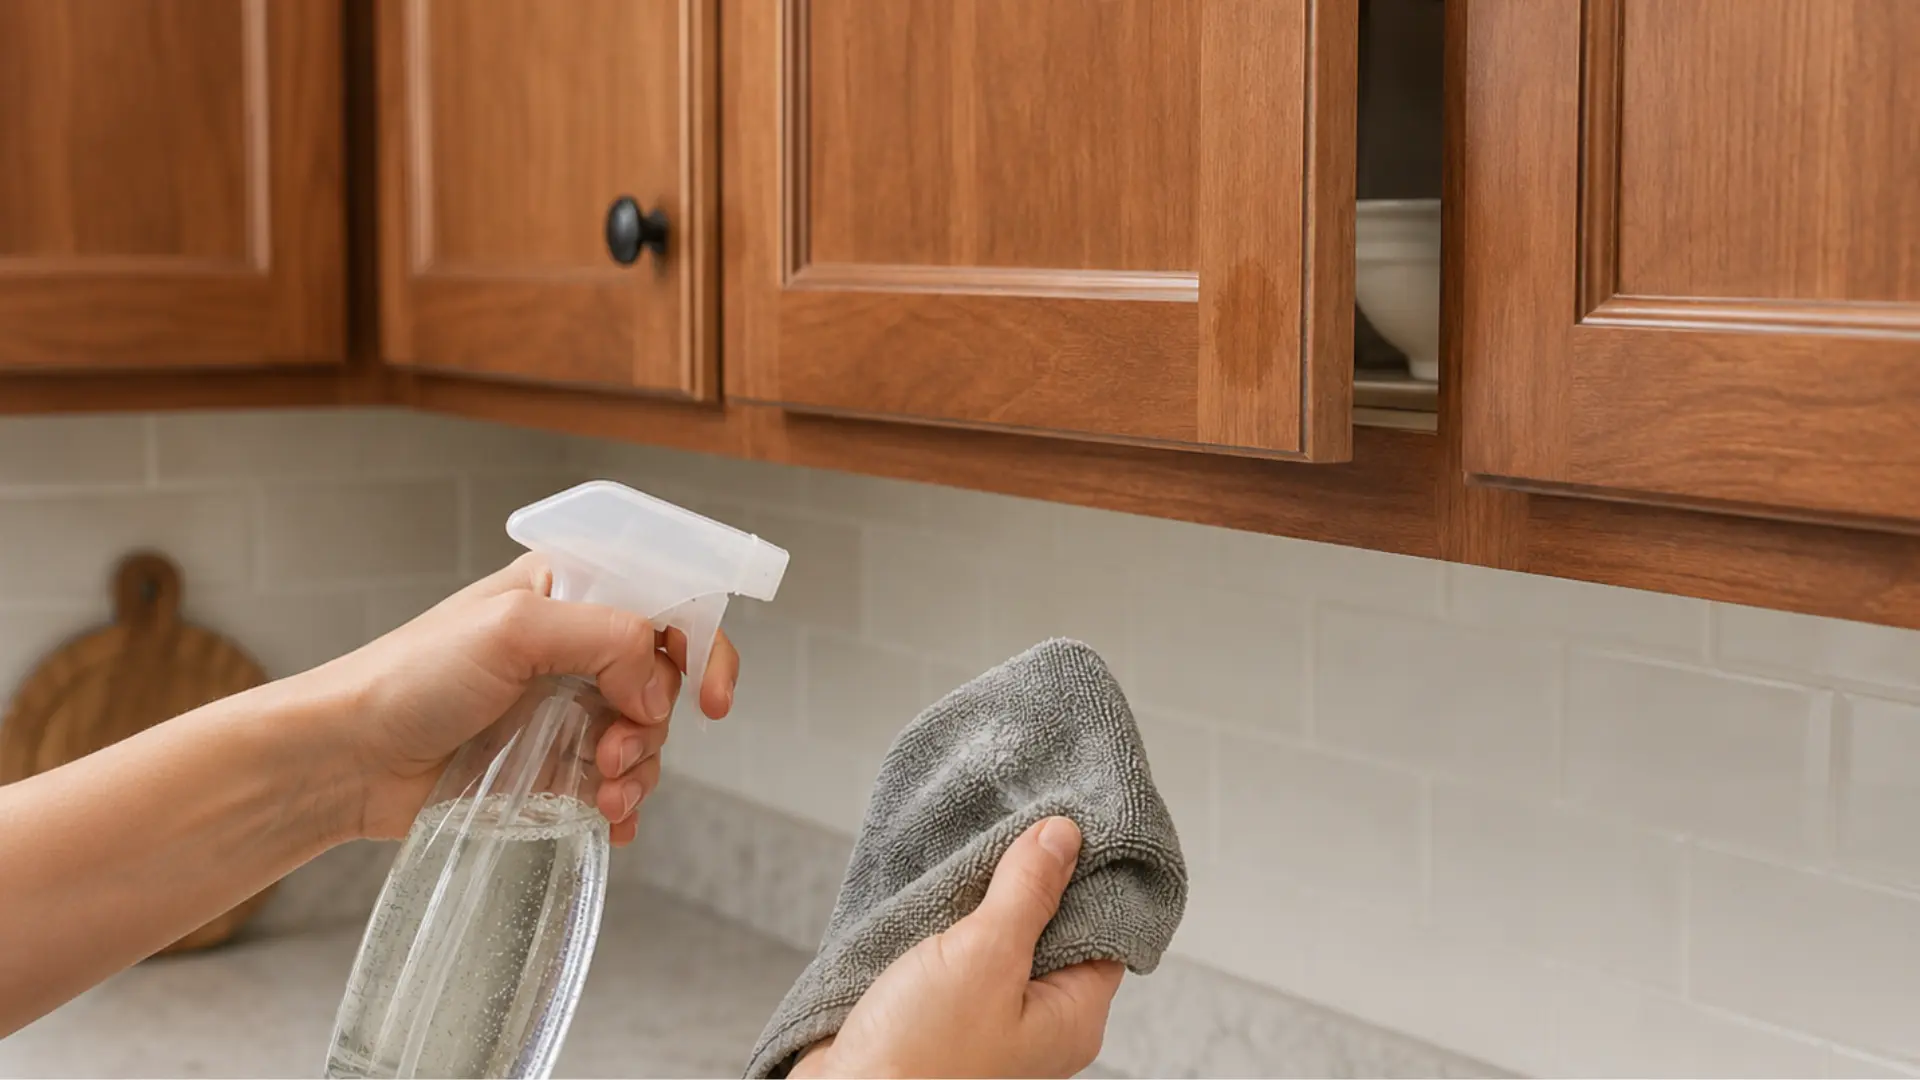
Most people reach for the wrong cleaner first. The greasy, sticky film on wood cabinets near the stove doesn’t need a harsh chemical to come off. it needs the right gentle method applied consistently. Use too much water and the finish clouds. Use a solvent or ammonia-based cleaner and you’ll strip the surface permanently. I’ve seen both outcomes in kitchens that were cleaned with good intentions using the wrong tools. Here’s what actually works when you’re cleaning wood cabinets: mild dish soap for routine grime, Dawn or Murphy Oil Soap for grease buildup, a toothbrush for corners, and a dry towel immediately after. Everything else in this guide is detail around that core method, including what to do with cherry wood, how to remove stubborn buildup without scratching, and which products will quietly ruin a cabinet finish over time. Primary Method Mild dish soap + warm water + microfiber cloth Grease Removal Dawn dish soap or Murphy Oil Soap spray Stubborn Spots Baking soda paste, small areas only What to Avoid Bleach, ammonia, undiluted vinegar, excess water, steel wool Finishing Step Dry immediately with a soft towel, every time Cleaning Frequency High-touch areas weekly; full deep clean twice a year That reference is your baseline. The sections below explain exactly how to execute each step and why getting the order right matters for the finish. What You Need Before You Start Set everything up in one place before touching the cabinets. Stopping to search for a dry towel while soapy water sits on wood is how water damage starts. These are the tools worth having on hand for a thorough clean: Swiffer-style duster or vacuum with soft brush attachment Two buckets, one for cleaning solution, one for clean rinse water Murphy Oil Soap or mild dish soap Blue Dawn dish soap (for stove-area grease only) Three microfiber cloths, one for cleaning, one for rinsing, one for drying Soft toothbrush (for corners, grooves, and around hardware) Non-scratch sponge like a Scrub Mommy, dampened and warmed Baking soda (for stubborn sticky spots) Plastic tote for emptying drawers and cabinet contents Parchment paper or paper towels for cabinet tops (after cleaning) The three-cloth setup is the part most people skip, and it’s the reason cabinets come out streaky or damp. One cloth washes. One rinses. One dries. Each task needs its own cloth, using the same one for all three steps just pushes grime and moisture around. How to Clean Wood Cabinets: Step by Step Step 1: Dust First, Always Start dry. Work from the top of each cabinet down so loose debris, pet hair, and kitchen dust fall toward the floor rather than landing on areas you’ve just cleaned. A Swiffer duster handles flat cabinet fronts well. For grooves, ledges, and recessed detail trim, a vacuum with a soft brush attachment does a cleaner job than any cloth. Skip this step and any dry debris turns to a muddy film once your wet cloth hits it, harder to clean, not easier. Step 2: Mix Your Cleaning Solution Fill one bucket with warm water and add one capful of Murphy Oil Soap. That’s it. Murphy Oil Soap is concentrated, more product doesn’t mean better cleaning. It means stickier residue that attracts dust after the cabinets dry. In the second bucket, put clean warm water with nothing added. That’s your rinse water, and it stays clean for the entire job. Step 3: Use Three Cloths, Not One Dip cloth one into the cleaning solution. Wring it out firmly, it should feel damp, not wet. Wipe one cabinet at a time, top to bottom. Then take cloth two, dip it in clean rinse water, wring it out, and wipe the same surface to remove any soap residue. Finish with cloth three, dry, buffing the surface immediately. This sequence prevents watermarks, residue buildup, and the moisture seeping into seams that causes wood to swell or finishes to peel. Step 4: Handle Tough Buildup Gently For buildup in corners, around hinges, or along groove detail, use a soft toothbrush dipped in the cleaning solution. Gentle pressure. The goal is to loosen the grime and let the cleaner do the work, not to scrub through it. A dampened Scrub Mommy, warmed under hot water first so it’s soft rather than stiff, works well for larger sticky sections. If your cloths are turning brown mid-job, replace them. Cleaning with a saturated cloth just redistributes old grease back onto the wood. Step 5: Use Dawn for Stove-Area Grease Cabinets directly above the oven or range hood collect a different kind of buildup, grease that has been aerosolized by heat and then settled and cooled into a sticky film. Murphy Oil Soap handles general kitchen grime, but this type of grease needs a degreaser. Blue Dawn dish soap is the one I reach for. Apply a small amount to a soft sponge, work in sections, let the soap sit for about 30 seconds to break down the fat, then wipe away. Rinse with clean water and dry immediately. Use Dawn only on grease-heavy areas — it’s effective, but repeated use on the rest of the cabinet surface can dry out the finish over time. Step 6: Clean Inside Cabinets One at a Time Empty one cabinet at a time into a plastic tote. Don’t unload the whole kitchen at once, the clutter will overwhelm the counter space and stall the job. Vacuum the interior first, then run the same three-cloth sequence: clean, rinse, dry. While the cabinet is empty, it’s worth checking what goes back in. Expired items, rarely used equipment, and anything that belongs in a different cabinet slow down the next cleaning session too. Step 7: Vacuum Drawers Before Wiping Drawers collect crumbs and fine debris that a cloth will push around rather than remove. Always vacuum drawers first with a soft brush attachment before introducing any moisture. Empty each drawer into the plastic tote, vacuum the inside thoroughly, especially corners and back edges, then clean, rinse, and dry with the three-cloth method. Only return items you actively use. Step 8: Clean Cabinet Tops and Add a Liner Cabinet tops near the stove are some of the most neglected surfaces in a kitchen and often the most contaminated. The buildup is a combination of kitchen grease and settled dust, it has a tacky, dark texture that a cloth alone won’t cut. Dust first, then use your cleaning solution with a softened Scrub Mommy for any sections with heavy accumulation. Clean, rinse, dry. Once the surface is dry, lay parchment paper or paper towels across the top. Next time, you pull off the liner instead of scrubbing old grease again. Best Products for Cleaning Wood Cabinets The right product depends on what you’re dealing with. Routine grime needs a different approach than thick grease buildup, and stained wood that’s gone dull after cleaning needs something different again. Here’s how the product options stack up across those scenarios. Product Best For Why It Works Use Carefully Mild dish soap Everyday cleaning and light grease Gentle, affordable, safe for most finished wood Keep cloth damp, not wet Dawn dish soap Greasy doors near the stove Cuts kitchen grease better than regular soap Rinse thoroughly and dry right away Murphy Oil Soap spray Heavier buildup on finished wood Penetrates grime without stripping finish Spray onto cloth, never directly on wood Diluted vinegar and water Light residue, natural cleaning Dissolves mild grease and old residue Never full strength — high acidity damages finish Baking soda paste Small sticky spots Lifts stubborn grime when used gently Small areas only — avoid hard scrubbing Microfiber cloths Wiping cabinet doors and frames Lifts dust, fingerprints, and grease without scratching Wash often — dirty cloths spread grime Soft toothbrush Corners, grooves, and hardware recesses Gets where cloths can’t reach Light pressure only Cabinet-safe polish Dull stained wood after cleaning Adds light protective sheen Use sparingly — overuse collects dust Wood conditioner Dry-looking stained wood Restores depth and richness to flat-looking grain Test first, follow label directions Paste wax Protective sheen on suitable stained wood Adds thin protective layer when used lightly Avoid overuse — wax collects dust over time Glass cleaner on a cloth Glass cabinet panels only Removes smudges without wetting the wood frame Keep glass cleaner off surrounding wood finish Start with mild dish soap and water for weekly maintenance. Move to Dawn or Murphy Oil Soap only when grease needs more than routine cleaning can handle. Polish, conditioner, or paste wax belong at the end of a deep clean, not as a substitute for it. How to Remove Grease from Wood Cabinets Grease is the main reason cabinets feel sticky even after a wipe-down. The stove, oven, range hood, and high-touch handles are the primary collection points. How you remove it depends on how long it’s been building up. Light Grease: Mild Dish Soap and Warm Water For recent, light grease, a few drops of mild dish soap in warm water is enough. Dip a microfiber cloth, wring it out well, and wipe the greasy area. Pay attention to handles, lower door edges, and the corners where people grab without thinking. After cleaning, wipe with a second clean-water cloth to remove soap residue, then dry immediately with a third cloth. Stove-Area Grease: Dawn or Murphy Oil Soap Cabinets near the stove accumulate a different kind of grease — aerosolized cooking fat that settles and hardens into a sticky film. Dawn dish soap or Murphy Oil Soap spray handles this better than regular dish soap. Apply to the cloth, not directly to the wood. Work in small sections. If grease remains after one pass, hold the damp cloth on the spot for 30 seconds before wiping again — let the product break down the fat rather than scrubbing through it. Stubborn Sticky Buildup: Baking Soda Paste For spots that survive both of the above methods, mix baking soda with just enough water to form a soft paste. Apply it to the problem area with a cloth, rub gently, and let it work for about a minute. The mild abrasion lifts embedded grime without harsh chemicals. The critical word here is gently — baking soda is abrasive enough to dull or scratch a finish if you apply pressure. After the spot clears, wipe away the paste with a clean damp cloth and dry the surface fully. How to Clean Different Cabinet Finishes The finish on your cabinets matters more than the wood species underneath. The same cleaning method that works on stained oak can damage painted maple or thermofoil. Here’s how to match the approach to the surface. 1. Stained Wood Cabinets Stained wood shows the grain, which makes it look better than painted wood but also makes moisture damage more visible. Clean with mild dish soap, warm water, and a well-wrung microfiber cloth. Always wipe with the grain direction — across the grain leaves micro-scratches that catch light badly over time. Dry immediately after rinsing. If the surface looks flat or dull after cleaning, a light application of cabinet-safe conditioner or paste wax restores depth — and if you’re thinking about changing the color entirely, it helps to know what’s involved in painting over stained wood before committing. 2. Painted Wood Cabinets Paint finishes are more fragile than most people expect. Bleach discolors them. Ammonia-based cleaners lift the sheen. Abrasive pads leave dull scratches that don’t polish out. Mild dish soap and water with a soft microfiber cloth is the only method I’d use regularly on painted cabinets. For stubborn spots, wet the area and let it soak for 30 to 60 seconds before wiping, mechanical scrubbing is more likely to damage the surface than more dwell time with a gentle cleaner. 3. Cabinets with Glass Panels Glass panels need separate treatment from the surrounding wood frame. Many glass cleaners contain ammonia, which causes wood finishes to go cloudy or peel near the seams. Spray the glass cleaner onto your cloth first, then wipe the glass only. Clean the wood frame separately with the soap-and-water method. Dry the entire assembly, glass and frame, before moving to the next cabinet. How to Clean Cherry Wood Cabinets Cherry wood darkens with age and light exposure. That patina is one of the things that makes it worth the price. It’s also exactly what tells you when you’ve used the wrong cleaner, bleached patches, cloudy spots, or uneven darkening are permanent on cherry. The method is the same as stained wood, but executed with more care at every step. Use mild dish soap and warm water with a well-wrung microfiber cloth. Wipe with the grain. Remove every trace of soap residue with a second clean-water cloth before drying. For greasy areas, a small amount of Dawn or Murphy Oil Soap on the cloth, never sprayed or poured onto the surface. Dry immediately and completely, especially around edges, hinges, and panel seams where moisture accumulates. Avoid bleach, ammonia, rough scrubbers, and straight vinegar entirely on cherry. What Not to Use on Wood Cabinets The products below come up regularly in cleaning forums and general household guides. None of them belong on finished wood cabinets. Some cause damage on first use. Others degrade the finish gradually until you notice one day that a section looks different from the rest. Avoid Why It Damages Wood Cabinets Bleach Discolors wood and degrades the protective finish. Damage is permanent. Ammonia-based cleaners Strips finish and leaves wood looking dull and flat. Common in all-purpose sprays. Abrasive scrub pads Scratches the surface and removes protective coatings, even on the first use. Steel wool Leaves fine scratches and risks rust staining on light wood finishes. Undiluted vinegar High acidity gradually wears down finish. Diluted 50/50 is the safe limit. Excess water Seeps into seams, causes swelling, warping, and finish separation over time. Wax buildup products used too often Residue accumulates and becomes tacky, attracting dust and grime. Strong solvents Dissolve or soften cabinet finishes. Often found in spray-and-wipe general cleaners. Check the ingredient list on any “all-purpose” or “kitchen” cleaner before using it near cabinet surfaces. Ammonia appears under several names including ammonium hydroxide. The absence of “wood-safe” or “safe for finished wood” on the label is a reason to test on a hidden area first, or to skip it entirely. How to Protect Wood Cabinets After Cleaning Cleaning removes what’s already built up. Protecting the cabinet means changing the conditions that let the buildup happen in the first place. Three habits make a noticeable difference over six months. Install knobs or pulls on every cabinet door and drawer if they’re not already there. Most grease and fingerprint buildup happens at the edges where hands grab. Hardware redirects that contact away from the wood finish entirely. It’s the single highest-return change you can make to a cabinet that keeps getting grimy. Keep wet dish towels off cabinet fronts. A damp towel hung over a lower cabinet door for an hour is enough to cause moisture damage along the bottom edge — peeling, swelling, or a watermark that doesn’t buff out. Use a towel bar or drying rack positioned away from cabinet surfaces. Wipe spills immediately. Grease, sauce, coffee, and food splatter are easy to remove when fresh and require serious effort once they dry and bond to the finish. A quick pass with a damp microfiber cloth right after cooking saves a much harder cleaning session later. DIY vs. Commercial Cleaners: Which Is Better for Wood Cabinets Both work, depending on what you’re trying to accomplish. The real difference isn’t cleaning power — it’s convenience and control. Factor DIY (dish soap + water) Commercial (Murphy Oil Soap, dedicated cabinet cleaners) Cost Pennies per use Higher upfront, but ready to use Convenience Requires mixing and two buckets Spray and wipe — faster for spot cleaning Cleaning strength Handles light dirt and routine maintenance well Better for grease and heavier buildup Safety for finishes Excellent when properly diluted and used with damp (not wet) cloth Generally safe as labelled, but still test on hidden area first Ingredient control You know exactly what’s in it May contain fragrance, solvents, or other agents Long-term care Effective for keeping up, not for restoring Some products include conditioners for added protection For weekly maintenance, DIY soap and water is the better choice — lower cost, no residue risk, full control. For a quarterly deep clean or stove-area grease that resists lighter cleaners, Murphy Oil Soap spray or a purpose-made cabinet cleaner is worth the convenience. Common Mistakes That Damage Wood Cabinets Most cabinet finish damage doesn’t come from one catastrophic cleaning session. It accumulates from small repeated errors — usually the same four or five mistakes. Too much water on cloth damages cabinets by soaking seams and causing swelling. Always use a barely damp cloth and dry surfaces immediately after wiping. Scrubbing instead of soaking can scratch finishes. Let cleaner sit briefly to loosen grime, then wipe gently instead of forceful scrubbing. Skipping spot testing is risky because finishes react differently. Always test cleaners on a hidden area before full use. Spraying directly on wood leads to drips and moisture in gaps. Spray onto the cloth first for better control. Ignoring drying leaves watermarks and damage. Always finish with a dry cloth to protect the surface. Frequently Asked Questions About Cleaning Wood Cabinets These are the questions I hear most often after people have already read the basic method and run into something the general guide doesn’t cover. What is the best cleaner for greasy wood cabinets? For light grease, mild dish soap in warm water handles it well. For stove-area buildup, Dawn dish soap or Murphy Oil Soap spray cuts grease more effectively. Use a damp cloth — never a wet one — and dry the surface immediately after rinsing. Can you use Dawn dish soap on wood cabinets? Yes, on finished wood. Dilute it in warm water, apply with a damp microfiber cloth, rinse with a second clean-water cloth, and dry right away. Use it only on grease-heavy areas, not as the routine cleaner across all surfaces — repeated use can dry out the finish. How do I clean sticky wood cabinets? Start with warm water and mild dish soap. If residue remains, try Murphy Oil Soap spray on a cloth. For persistent stickiness, a baking soda paste applied gently to the spot, rinsed and dried fully, handles what soap alone won’t. How often should wood cabinets be cleaned? High-touch areas and handles need a quick wipe weekly. Stove-adjacent cabinets need attention after heavy cooking sessions. A full inside-and-outside deep clean twice a year is enough if you maintain the weekly wipe-down routine. How do I make dull wood cabinets shine again? Clean the surface first to remove grease and residue, polish over grime doesn’t restore shine, it just seals it in. Once clean and fully dry, apply a thin coat of cabinet-safe conditioner or paste wax and buff with a soft microfiber cloth. Is vinegar safe on wood cabinets? Diluted vinegar (50/50 with water) is safe for most finished wood cabinets in small quantities. Undiluted vinegar is acidic enough to degrade finishes with repeated use. Don’t let it sit on the surface, wipe and dry quickly. Test on a hidden area before using it broadly. Can Murphy Oil Soap damage wood cabinets? Not when used correctly. One capful per gallon of water is enough, more product creates a residue that attracts grime after drying. Spray onto the cloth, not the cabinet, and dry the surface fully after rinsing. How do I clean wood cabinets without removing the finish? Use mild dish soap or Murphy Oil Soap with a damp (not wet) microfiber cloth. Avoid bleach, ammonia, abrasive pads, steel wool, and straight vinegar. Dry the surface immediately after every cleaning step. Final Verdict The three-cloth method, clean, rinse, dry, is what separates a cleaning session that protects the finish from one that gradually degrades it. Mild dish soap handles most of what kitchens produce. Dawn or Murphy Oil Soap handles stove-area grease when regular soap isn’t enough. Baking soda paste handles what neither of those will shift. Everything beyond that, bleach, ammonia, abrasive pads, excess water, direct spraying, removes more than the grime. If your wood cabinets are already looking flat or dull, clean them first, let them dry completely, then apply a light coat of cabinet-safe conditioner. That’s the order. Clean before you condition. Dry before you polish. And test any new product on a hidden surface before you commit to the rest of the cabinet. Get those three sequences right and wood cabinets hold up for a long time. Sources:Murphy Oil Soap, “How to Clean Wood Cabinets.” murphyoilsoap.comLowe’s Editorial Team, “How to Clean Wood Cabinets.” February 2025. lowes.com/n/how-to/how-to-clean-wood-cabinets





