


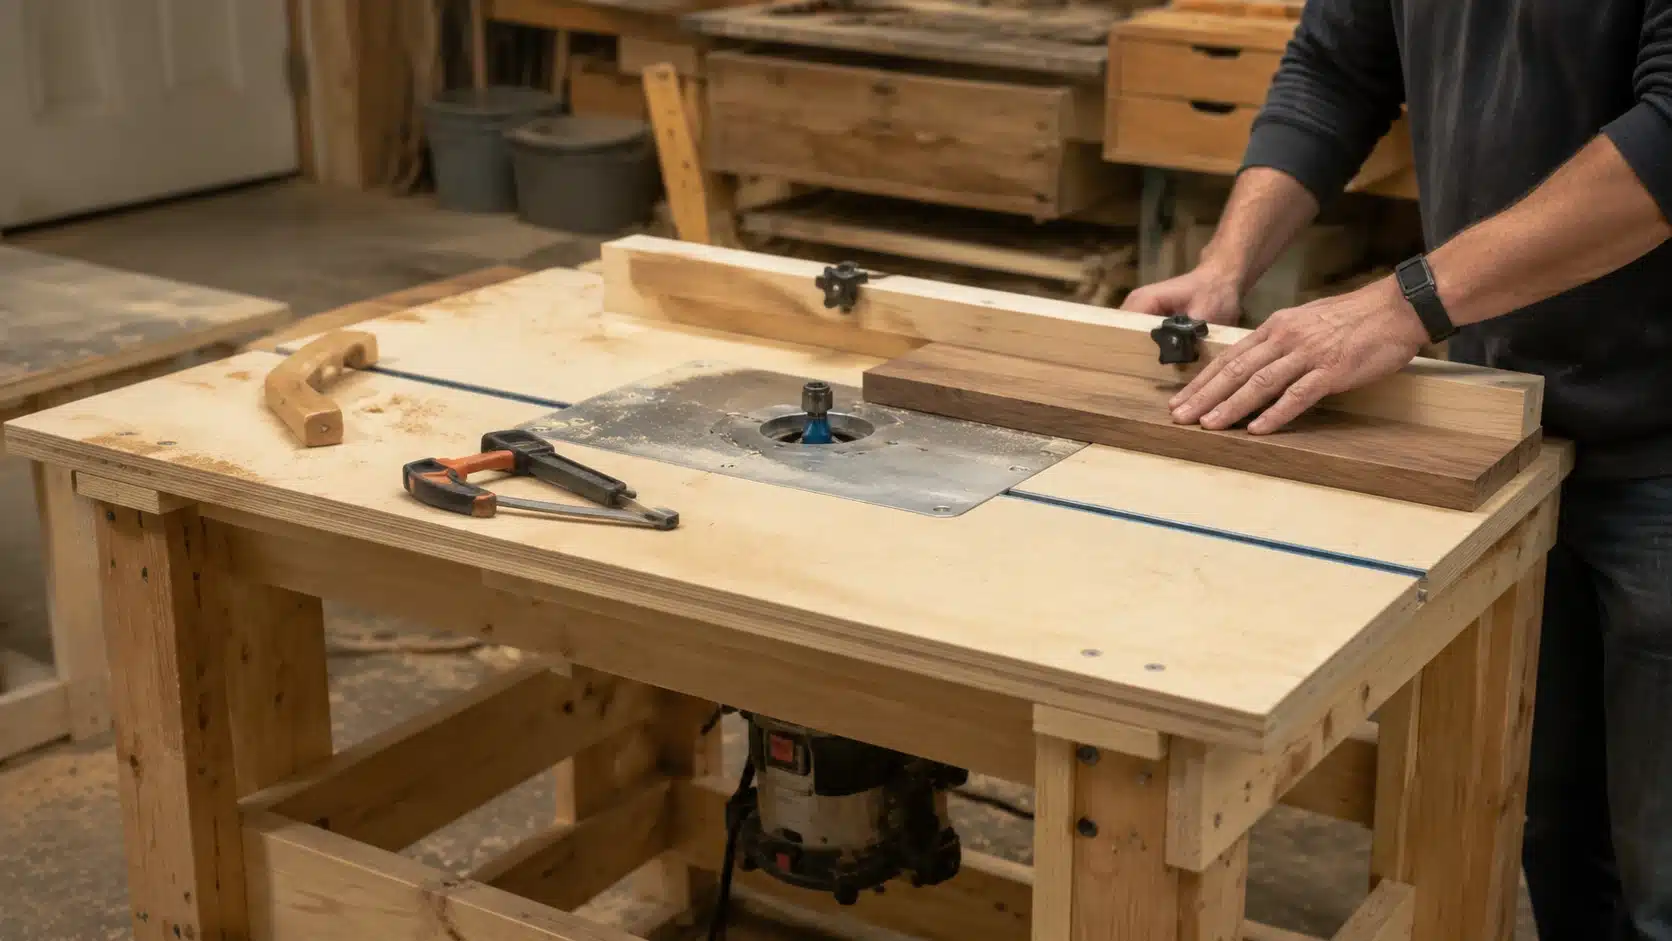
I’ve always loved woodworking, but nothing frustrated me more than seeing a router table that didn’t fit my router or my workshop. Buying one often meant compromising; it was either too expensive or the wrong size. That’s when I decided to make my own router table. It was not only cheaper but could be customized to my exact needs. This guide will walk you through everything you need to create a functional and sturdy router table. From the essential tools and materials to step-by-step assembly, common mistakes to avoid, and layout options for your workspace, you’ll gain a complete plan to build your ideal router table. Even if this is your first DIY woodworking project, it’s beginner-friendly and easy to follow, with safety and precision in mind. If you’ve already worked on a workbench build guide, this setup will feel familiar. Once you finish, you’ll have a table that fits perfectly into your workshop and workflow. Cost Note: Figures here are estimates based on national averages. Actual costs vary significantly by region, material quality, and router model. Always price out your specific material list before starting. Why Build Your Own Router Table? Building your own router table gives you complete control over size, stability, and features. You can save money, match your workshop layout, and design a table that works exactly as you need it. It also provides the satisfaction of completing a hands-on project that’s fully customized. A DIY router table allows you to: Custom Fit: Ensure your router table perfectly matches your router and workshop space. Cost Savings: Avoid paying high prices for commercial tables that may not meet your needs. Flexibility: Add features like T-tracks, adjustable fences, and storage shelves. Skill-Building: Improve your woodworking skills while constructing a functional piece. Understanding these advantages shows why DIY is often better than buying a pre-made table. Once you know the benefits, the next step is gathering the right tools and materials to ensure smooth assembly and safe operation. Supplies & Tools You’ll Need Preparing the correct tools and materials before starting saves time, ensures safety, and prevents mistakes. This section lists the essentials and optional items for improved functionality and workflow. Tool / Material Description Tip Router Cordless or fixed base Check compatibility with your table cutout Plywood (18mm) Tabletop and braces High-quality plywood ensures durability Adjustable feet Level the table on uneven floors Drill accurately to prevent wobble Screws & bolts Assembly Counter-sink for a smooth surface T-track & T-bolts Fence adjustment Measure placement carefully before cutting Square & speed square Accuracy Keep cuts straight and aligned Optional extras: dust extraction port, shop vacuum, casters for mobility, or a removable top insert for different routers. Planning ahead ensures smooth progress and fewer interruptions during assembly. This step-by-step process ensures stability, precision, and safety while assembling the router table. Each step includes practical tips and cautions to help you avoid common mistakes and create a functional workspace. The frame construction here follows the same basic principles as a sturdy workshop workbench build if you’ve done one, the sequencing will feel familiar. Step-by-Step Construction of Your Router Table Before starting, it’s important to understand each step’s purpose. Following the sequence ensures a stable, safe, and fully functional router table that fits your workspace. The instructions are detailed enough for beginners to follow without prior experience. Safety Note: Always disconnect the router from power before installing or adjusting the router plate, checking bit height, or making any changes inside the table cabinet. Routing is loud, wear hearing protection and eye protection for every step that involves the router running. Step 1: Building the Table Frame Start by selecting sturdy plywood, ideally 18–25mm thick. Cut four legs and side, front, and back rails according to your desired height (34–36 inches) and top size (24 “x 36 “is common). Understanding different types of tables helps in choosing the right structure strength before assembly. Mark joints carefully with a square, pre-drill holes to avoid splitting, and clamp pieces before screwing. Double-check squareness and rigidity. Add cross braces if needed to prevent wobbling and ensure a strong foundation for your router table. Step 2: Fitting the Base Shelf Measure and cut a shelf to fit snugly between the table legs, ensuring it doesn’t interfere with braces or the router. Attach it using screws and reinforce it with small braces underneath. The shelf adds structural rigidity while providing storage for bits, push blocks, and other tools. Use a square to confirm level alignment. A well-installed shelf ensures stability and organizes your workshop workspace efficiently. Step 3: Bracing the Table Install side and back braces to reduce lateral movement and absorb pressure when feeding wood through the router. Place each brace flush against the frame and evenly spaced, then secure with screws. Proper bracing prevents wobble, protects hands during use, and allows safe handling of long or heavy boards. Double-check alignment with a square to maintain an even, sturdy, and safe working surface. Step 4: Setting Out the Table Top Position and mark the table top for the router plate placement. Outline the exact area to cut, ensuring the router will fit perfectly. Consider the layout for fence placement, T-tracks, and other features before cutting. Use precise measurements and mark multiple points for accuracy. Planning the tabletop ensures the router sits flush, the surface remains level, and your woodworking setup stays precise and safe. Step 5: Cutting Out for the Base Plate Carefully cut the router plate opening in the table top using the marked template. Make slow, controlled cuts with a straight bit or router for clean edges. Check frequently to ensure proper depth and alignment. This step ensures the router sits securely and flush with the tabletop, preventing wobbling. A precise cut allows the base plate to fit perfectly and ensures smooth, safe operation. Pro Tip: Use a scrap piece of the same plywood to practice your rebate cut before touching the actual tabletop. Five minutes of practice saves an hour of fixing. Step 6: Creating the Base Plate Rebate Rebate the edges of the router plate cutout so the plate sits flush with the tabletop. Remove small amounts gradually, sanding the edges afterward to prevent splinters. Double-check the plate fit and alignment with the surrounding surface. Properly rebating the plate ensures stability, prevents vibration during use, and creates a flat working area that supports accurate and safe routing operations for various woodworking projects. Step 7: Positioning and Grooving the T Track Mark and cut grooves for the T-track in the tabletop where the fence or stops will slide. Drill bolt holes carefully and check alignment. The T-track allows quick attachment of fences, stops, or clamps for jigs. Ensure the track sits level and smooth to prevent binding. Proper placement enhances precision, allows adjustable setups, and ensures safe operation during cuts and woodworking tasks. Step 8: Fixing the Base Plate Secure the router plate into the cutout using screws. Ensure it sits flush and level with the tabletop. Check all corners and sides for tightness without over-tightening, which could warp the plate or plywood. Confirm alignment with the fence area. Proper attachment stabilizes the router, reduces vibration, and provides a safe working surface for precise cuts, making the table ready for additional assembly steps. Step 9: Fixing the Table Top Attach the completed tabletop to the frame, ensuring alignment with the legs and braces. Use screws or brackets, spacing them evenly for maximum stability. Avoid overtightening to prevent splitting plywood. Check levelness and adjust if necessary. A secure tabletop ensures a flat, sturdy surface, creating a reliable foundation for fence installation, router mounting, and all future woodworking operations on your DIY router table. Step 10: Building the Fence Assemble the fence components and attach them to the table or T-track. Ensure it slides smoothly while locking securely. Verify that the fence is square to the table and aligns with the router opening. Use clamps if necessary to hold parts in place during assembly. A properly built fence enables repeatable, accurate cuts, prevents kickback, and provides consistent control while guiding materials through the router. Step 11: Attaching the Router Place your router into the plate opening and secure it with screws. Remove unnecessary screws from the router base for maximum clearance. Align it carefully with the table surface and fence. Avoid overtightening, which could warp the base. Verify the router is flush and stable. Proper attachment guarantees smooth, safe operation and maintains precision for all routing tasks, making your table fully functional. Step 12: Testing It Out Power on the router and check overall table stability. Test fence movement, T-tracks, and router operation using scrap wood. Look for wobble, uneven cuts, or misalignment. Adjust feet, braces, or screws as necessary. This final test ensures safety, accuracy, and smooth workflow. A well-tested table is ready for all woodworking projects, providing confidence in both performance and user safety. After completing all assembly steps, your router table is fully functional and ready for projects. Testing ensures safety, stability, and precision. Next, explore layouts and configurations to optimize your workflow, storage, and efficiency for your woodworking space. Router Table Maintenance A router table is an investment in your woodworking setup. Proper maintenance keeps it stable, accurate, and durable for years of use. Routine checks and simple care prevent issues like wobbling, misalignment, or uneven cuts. Check Screws, Braces, and Fence Alignment: Over time, screws can loosen and braces can shift. Inspect all components periodically and tighten or adjust as needed to maintain stability. Clean and Lubricate T-Track: Dust and debris can accumulate in T-tracks, causing fences or stops to bind. Keep the tracks clean and lightly lubricated for smooth, repeatable fence movement. Maintain the Table Surface: Sanding and resealing the table top prevents warping and splinters. Use a light coat of finish or wax for smooth operation, especially around the router plate cutout. Inspect Router Plate and Inserts: Ensure the router plate sits flush with the table top and that inserts remain secure. Misaligned plates can reduce cut quality and increase safety risks. Regular maintenance preserves your router table’s accuracy, stability, and lifespan. With a well-maintained setup, you can focus on your projects without worrying about equipment issues or safety hazards. Cost and Time Estimates for DIY Router Table Building your own router table involves basic materials, optional upgrades, and assembly time. This table provides a realistic overview of costs and how long each step might take, helping you plan your project efficiently. Component / Step Estimated Cost (USD) Approx. Time for Beginners Plywood (18–25mm, table top & braces) $40–$80 1–2 hours for cutting & prepping Router $80–$200 (if not owned) N/A (existing tool) Screws, bolts, brackets $10–$20 30–45 minutes Adjustable feet $15–$25 15–30 minutes installation T-track & T-bolts $15–$25 30–45-minute installation Dust collection port (optional) $20–$40 20–30 minutes Featherboards (optional) $10–$20 10–15-minute installation Storage drawers/shelves (optional) $20–$50 30–60 minutes assembly Casters (optional) $15–$30 15–20 minutes installation Step-by-step assembly (frame, top, fence, router installation) Included in the materials above 4–6 hours total for beginners Testing and adjustments Free 30–45 minutes Notes: Costs vary by location, plywood quality, and router type. Time estimates assume beginner-level familiarity; experienced woodworkers may finish faster. Optional upgrades increase functionality but are not required for a basic, fully usable router table. Planning ahead with a cost and time overview helps you budget, schedule, and approach your DIY router table project with confidence. You’ll know what materials to buy, what optional features to include, and how long each step should take. Router Table Plans and Examples Creating a DIY router table allows you to match your workspace, workflow, and woodworking projects perfectly. The right plan balances portability, precision, and storage while giving you a solid, functional table. Below are five practical examples to inspire your build, each designed for specific needs and setups. 1. Compact Benchtop Table Perfect for small workshops or limited spaces, this table sits on a workbench and is lightweight enough to move or store easily. It provides just enough surface for precise routing without taking up too much room. A simple fence and optional dust port make it functional, while the compact design ensures it fits comfortably in small areas, ideal for beginners or hobbyists. 2. Mobile Router Table This flexible setup includes lockable casters for easy movement around the workshop and storage beneath for bits, tools, or jigs. Adjustable feet ensure stability on uneven floors, making it suitable for larger projects. The portable design allows you to position the table wherever you need it, combining mobility, convenience, and functionality without sacrificing strength or precision in your woodworking. 3. Integrated Multi-Tool Table Designed for serious workshop setups, this table combines a router, sander, and jointer into one station, saving space while improving workflow. It features T-tracks and adjustable fences for versatile cutting and shaping. Integrated dust collection keeps the workspace clean, while a robust base supports heavier tools and materials, making it ideal for multi-step projects or workshops that handle varied woodworking tasks. 4. Extended Work Table Aimed at handling larger boards and complex projects, this table has a wide top, multiple T-tracks, and an adjustable fence. Reinforced braces ensure rigidity under heavy use, while optional drawers provide convenient storage for tools and bits. Its design allows for longer or wider workpieces, making it perfect for detailed joinery, large panels, or advanced DIY projects that require extra workspace and precision. 5. DIY Trim Router Table Ideal for hobbyists or small-scale projects, this compact table focuses on precision and ease of use. It includes a split fence and T-track for featherboards, ensuring accurate cuts. Its lightweight design allows easy relocation in your workspace, while still providing a stable surface for trim, small moldings, or detailed routing tasks. Perfect for home workshops or specialty projects where space is limited. These router table examples offer clear guidance for building a table suited to your space and project needs. Optional upgrades such as dust collection, adjustable fences, T-tracks, and storage solutions can further improve safety, workflow, and usability. Common Mistakes to Avoid Avoiding common mistakes during your DIY router table build ensures the table is not only functional but also safe and long-lasting. Many beginner projects fail because of rushed measurements, skipped structural supports, or improper router installation. Taking your time and following the right sequence prevents issues and improves your overall woodworking experience. Ignoring Measurements: Failing to measure accurately can lead to a table that is unstable, uneven, or difficult to assemble. Always double-check lengths, widths, and spacing before cutting materials. Proper measurements are the foundation of a durable and safe table. Skipping Braces: Braces provide essential structural support. Without them, your table may wobble or vibrate during operation, reducing precision and potentially causing safety hazards. Always install side and back braces, make sure they are level and flush. Incorrect Router Fit: Using a router that doesn’t fit the cutout or plate properly can block movement and compromise safety. Verify your router dimensions and adjust the template or plate if necessary before securing it. Over-tightening Screws: Screws that are too tight can crack plywood or warp the table surface. Counter-sink screws where necessary and tighten gradually, checking alignment as you go to maintain a smooth, flat surface. By paying attention to these common pitfalls and carefully assembling each component, your router table will remain stable, precise, and safe for years of reliable woodworking. Frequently Asked Questions What type of router is best for these plans? Most standard routers will work, but always check the dimensions carefully. Some may need custom mounting plates or slight adjustments to fit securely. Test-fit your router before permanent installation to ensure it operates smoothly, safely, and doesn’t obstruct movement or the table fence during cutting tasks. How can I improve accuracy for repeated cuts? Use a T-track fence with adjustable stops and make sure the tabletop is perfectly flat. Level the table using adjustable feet. This setup allows consistent placement of workpieces, ensuring precise, repeatable cuts without measuring each piece repeatedly, saving time and reducing errors in your woodworking projects. Can I add storage or drawers to this router table? Yes, you can install shelves or drawers under the table to organize router bits, clamps, and tools. Ensure the supports are strong enough to maintain stability. Position drawers so they don’t interfere with the fence, T-tracks, or router, keeping the workspace safe and accessible while maximizing efficiency. How do I prevent the table from rocking during use? Adjust each foot individually to level the table on uneven floors, and test by pressing on all corners. If needed, add shims under the legs. A stable table minimizes vibration, enhances cut precision, and ensures safety while feeding wood through the router, particularly for larger or heavier pieces. Is it possible to make this router table portable? Yes, add lockable casters to the table legs. Ensure the frame is sturdy enough to handle movement without shifting. Lock the casters during operation to maintain stability. This setup allows easy relocation within your workshop while keeping the table secure and safe during routing tasks. Wrapping Up Using these router table plans, you can build a fully customized table that saves money, enhances safety, and fits perfectly into your workshop. A strong frame, braces, adjustable feet, and a carefully installed fence ensure stability, precision, and durability. Add T-tracks, dust collection, or storage to suit your workflow, and test each component for smooth operation. Following these steps prevents common mistakes and ensures years of reliable service. A DIY router table not only improves your woodworking efficiency but also builds confidence in your skills. Share your experience or questions in the comments to connect with other woodworkers and get feedback on custom setups.
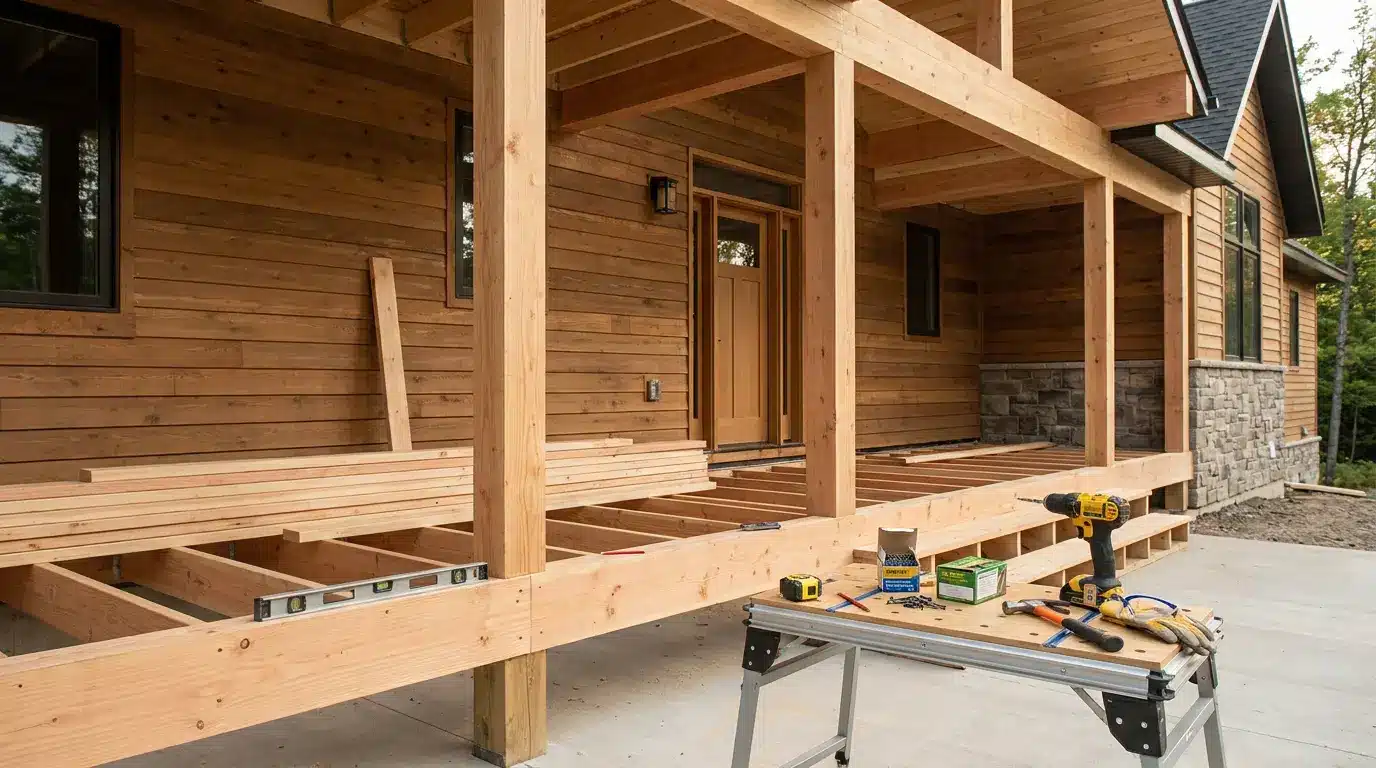
A porch looks simple until you start planning one. Then the questions show up fast, right? If you want to know how to build a porch without turning your entryway into a half-finished mess, you need a clear order before the first board is cut. I’ve seen porch jobs go sideways because someone rushed the layout, guessed the beam size, or left temporary supports doing permanent work. That’s where a calm plan helps. You’ll learn what a porch includes, which type fits your home, what tools and materials to gather, and how the main framing steps come together. By the end, you’ll know where DIY makes sense and where a pro should step in before you spend real money wisely. Cost Note: Figures in this article are estimates based on national averages. Actual costs vary significantly by region, contractor, materials, and project scope. Always get at least three quotes before committing to any project above $1,000. What Building a Porch Involves? A porch that supports only foot traffic is a different structural problem than one that carries roof framing. That’s the first thing to understand before you price lumber. The load path, where weight travels from the surface down to the ground, determines every beam size, post spacing, and footing depth in the design. A basic porch frame includes footings or a slab, posts, beams, blocking, decking, stairs, and railings. A covered porch adds roof framing, flashing, and ceiling work. Each component has a job. Posts carry weight vertically. Beams spread that weight horizontally across the opening. Fasteners hold the assembly together under wind, foot traffic, furniture, and weather cycles. For a small open porch, a capable DIYer can handle most of the framing. For anything with a roof, structural spans over eight feet, or attachment to the house’s main framing, get a builder or structural engineer involved before cutting a single board. The cost of that consultation is cheap compared to a failed inspection or a porch that racks in the first winter. Types of Porches Before you pick up a saw, choose the porch style that fits your home and daily use. A front entry needs different choices than a backyard sitting space. This table provides a clear way to compare common porch types. Here’s how the main porch styles differ. Porch Type Best For What to Know Before Building Front porch Entry appeal, seating, and weather cover near the main door It should match the home’s front layout and leave enough space for safe entry. Back porch Backyard access, outdoor meals, and quiet sitting It often connects to patios, gardens, or yard paths, so traffic flow matters. Open porch A simple porch floor with no roof It’s usually easier to build than a covered porch, but it still needs safe support. Covered porch Shade, rain cover, and a more finished entry Roof weight changes the framing plan, so beam and post sizing matter more. Screened porch Sitting outside with fewer bugs It needs extra framing for screens and may need planning for airflow and doors. Wraparound porch Larger homes and wide outdoor sitting areas It uses more material, more support points, and more careful layout work. Your choice here affects everything that follows. An open porch keeps the build simpler, while a covered or wraparound porch requires more planning. Once the type is clear, you can move on to layout, framing, and safe support decisions. Common Porch Materials: What Holds Up and What Doesn’t The material choices you make for decking and framing will still be visible, or failing, ten years from now. Here’s how the main options compare on cost, durability, and maintenance load after two or three winters. Material Cost per Sq Ft (Installed) Lifespan Maintenance Climate Suitability Pressure-treated pine $8–$15 15–25 years Seal every 2–3 years; watch for checking All climates; standard choice for framing Cedar $14–$22 20–30 years Oil or stain every 2–3 years to prevent grey weathering Good in wet climates; naturally rot-resistant Composite decking $20–$38 25–30 years Minimal; rinse annually, check for mold in shaded areas All climates; watch for heat buildup in direct sun Ipe (hardwood) $30–$50 40–75 years Oil annually if keeping color; greys naturally without it Excellent in all climates; heavy and dense Concrete/slab $6–$18 30–50 years Seal every 3–5 years; repair cracks before they spread Good overall; avoid in areas with heavy freeze-thaw without proper drainage Pressure-treated pine is the right call for framing regardless of what decking goes on top, it’s what building codes expect, and it holds fasteners well. For decking itself, composite costs more upfront but removes the annual sealing labor. Cedar is the middle option: real wood feel with better rot resistance than standard pine, but it still needs maintenance. Ipe lasts a generation but requires pre-drilling every fastener and is harder to source than big-box options. If you’re building a deck alongside the porch, consistent decking material across both keeps the look cleaner and the maintenance schedule simpler. What Fails After Two or Three Winters Most porch problems don’t show up on day one. They show up after the first freeze-thaw cycle, the first heavy rain season, or the first summer of direct UV exposure on an unsealed surface. The failures are almost always in the same places. Ledger connection rot: If the ledger board that attaches the porch to the house isn’t properly flashed, water gets behind it. The house rim joist behind it rots quietly for two or three years before the porch starts to pull away. This is one of the most expensive repairs in porch construction and one of the most preventable. Post base failures: Posts set directly in concrete without post anchors hold moisture against the wood end grain. In climates with wet winters, the base of an embedded post can rot from the inside while looking fine from the outside. Use rated post anchors on top of footings, not posts buried in concrete. Undersized footings in freeze-thaw zones: A footing that doesn’t reach below the frost line will heave. One hard winter pushes a post up; the next one drops it. The deck boards crack, the railings go out of plumb, and the whole frame racks over time. Local code specifies frost depth for a reason — don’t shortcut it. Inferior fasteners: Standard zinc-plated screws corrode when used with pressure-treated lumber, which contains copper compounds that accelerate corrosion. Within a few years, fastener heads rust, the wood stains brown-red, and connections loosen. Use hot-dipped galvanized or stainless steel hardware rated for ACQ-treated lumber throughout. How to Build a Porch Step by Step To build a porch correctly, start with the plan on paper before touching lumber. Every step that follows depends on the load math and layout decisions made before the first cut. Here’s the full sequence for framing an open or covered porch. Difficulty 3/5, Open porch; 4/5, Covered porch Time 2–3 days (open); 1–2 weeks (covered) Cost $4,000–$30,000+ depending on type and size Tools Needed Tape measure, chalk line, framing square, level, circular saw, drill, impact driver, post hole digger, ladders, safety gear Skill Required Intermediate, open porch; Experienced or professional, covered/wraparound Materials list: Pressure-treated lumber (posts, beams, joists, rim boards) Concrete mix and gravel for footings Post anchors (rated for ACQ lumber) Hot-dipped galvanized or stainless structural screws and joist hangers Decking boards (PT pine, cedar, or composite) Temporary bracing boards (2x4s) Railing posts, rails, and balusters Stair stringers and treads Flashing (for covered porches attaching to the house) Step 1: Read the Porch Plan and Understand the Load Before you touch the lumber, look at the porch plan and figure out what the frame has to carry. A porch that supports only foot traffic is different from one that also carries roof framing. Check where the posts land, where each beam runs, and how the load is transferred to the slab or footings. This is also the time to spot special details, such as built-up beams, notches, or a roofline that must stay level with the house framing. Caution: Don’t guess structural sizes. If the porch carries roof weight, use approved plans or ask a qualified builder or engineer before cutting anything. Step 2: Gather Your Tools and Materials First Get everything on-site before you start building. You’ll need measuring tools, a chalk line, a level, a framing square, saws, a drill, an impact driver, ladders, screws, glue (if specified), plywood spacers, 2x lumber, posts, and temporary bracing boards. This may feel like basic prep, but it saves a lot of wasted time. When the beams are half-built, you don’t want to stop because one fastener, board, or support post is missing from the pile. Advice: Group materials by use before work starts. Keep beam lumber, post material, screws, and bracing boards separate so you can move faster. Step 3: Build the Main Porch Beams Build the beams before you try to install them. For a built-up beam, lay one board down, add the spacer material, then place the second board on top. Keep the edges flush and fasten the layers with the correct structural screws. If glue is called for, apply it evenly before screwing the beam together. Let the beam run a little long during assembly. Once the beam is solid, you can cut it to the final length with better control. Note: Built-up beams should match your own plan. The board size, spacer, glue, and screws all depend on the porch span and load. Step 4: Cut and Fit the Short Side Beams Start with the shorter side beams because they help set the porch frame’s first fixed points. Mark where each beam sits against the house framing or beam pocket. If a notch is needed, make it clean and only as deep as required. The top of the beam should line up with the framing height it supports. Take your time here. A short beam that sits too high, too low, or twisted can affect the front beam later. Caution: Check every notch before cutting. Removing too much wood weakens the beam and can make the fit loose or uneven. Step 5: Brace the Frame and Square the First Beams Once a beam is lifted into place, don’t trust it to stay still on its own. Use temporary posts and diagonal bracing to hold it. To square the porch frame, use the 3-4-5 method. Measure three feet along one side, four feet along the other, and five feet across the diagonal. When those marks line up, the corner is square. Fasten the brace so the beam cannot drift while you work on the other side. Advice: Bracing may look temporary, but it protects the whole setup. A few minutes of bracing can prevent a long reset later. Step 6: Install the Support Posts After the side beams are held in the right position, install the support posts that will actually carry the load. Set each post on its proper base or bearing point, then check it with a level. The post should be plumb before it is fastened. If temporary 2x4s helped during layout, replace them with the correct permanent posts now. This step turns the beam from “held in place” into “properly supported.” Caution: Never leave temporary boards as final supports. They are useful for setup, but they are not meant to carry porch loads long-term. Step 7: Lift and Set the Front Beams The front beams are often the heaviest and most awkward pieces in the porch frame. Before lifting, cut them to fit and plan how to hold each end. Temporary T-supports or blocks can make the lift safer and easier. Start screws before climbing if that helps. Once the beam is up, align it with the side beams and house reference points. Fasten it only after you know the height and bearing points are right. Advice: Don’t rush a heavy lift. Have enough help, clear the work area, and decide each person’s job before anyone climbs a ladder. Step 8: Confirm the Frame Is Aligned With the beams and posts in place, pause and measure the frame carefully. Check that the front beam is parallel to the house. Measure both ends from the same reference points and compare the numbers. Sight across the beam tops to see whether they line up. Also check for side movement, loose points, or spots that still depend on temporary blocks. This is the best time to correct small errors before more framing covers them. Note: A frame can look straight and still be off. Use measurements, not just your eye, before moving to the next stage. Step 9: Add Ceiling Nailers or Framing Support If the porch will have a finished ceiling, install nailers before closing the area. Mark the height with a laser or chalk line, then add temporary cleats to support the nailer frame while you lift it. You can build sections on the ground first, then raise them into position. Fasten the frame to the house side and the beam side so the ceiling material has a flat, steady surface to attach to later. Advice: Think about lights before fastening every nailer. Leave open space where a fixture box, wiring, or extra blocking may be needed. Step 10: Fasten Everything and Remove Temporary Pieces Finish the porch frame by securing every connection that the plan calls for. Drive the remaining screws or nails, then remove cleats, blocks, and temporary braces only after the permanent frame is solid. Recheck posts, beams, and nailers one last time. Look for gaps, loose fasteners, uneven bearing, or parts that moved during lifting. When everything is tight, square, and supported, the porch frame is ready for the next phase. Caution: Don’t hide framing mistakes under finish materials. Fix loose, crooked, or unsupported parts now while everything is still easy to reach Watch this video for a step-by-step process: How Much Does It Cost to Build a Porch? Porch costs change quickly because size, material, height, and roof support all affect the bill. A simple open porch may stay fairly modest, while a covered porch needs more framing, stronger support, and often skilled labor. Use this breakdown to see where most of the budget goes. Cost Area What It Includes Estimated Cost Range Permits and planning Local permits, inspections, drawings, or basic design help $100 to $2,000 Foundation and support Footings, concrete, gravel, post anchors, posts, and beams $1,800 to $12,500 Framing and porch floor Joists, rim boards, blocking, hangers, screws, and porch boards $2,500 to $14,000 Stairs and railings Stringers, treads, railing posts, rails, balusters, and handrails $1,000 to $6,500 Roof and finishing Roof framing, roofing, flashing, gutters, paint, stain, sealer, and trim $3,300 to $18,000+ Labor Builder, carpenter, concrete crew, electrician, or engineer $3,000 to $20,000+ Note: These costs can vary by location, porch size, labor rates, material prices, permit rules, soil condition, roof design, railing style, and how much of the work you do yourself. The foundation and framing lines are where you should spend without cutting corners. Footings that fail and beams that sag are the two most expensive repairs a porch owner faces. Spend what the structure requires, then choose finish materials at whatever price point fits the remaining budget. The balcony vs deck cost comparison covers how these structural costs stack up across similar outdoor builds if you’re weighing your options before committing. How Long Does It Take to Build a Porch? A porch timeline gets easier to judge when you separate framing work from waiting time. You may build quickly on a clear day, only to lose hours to drying concrete, inspections, or weather. Plan the calendar, not just the labor involved. Here’s what usually affects the schedule. Small open porch: A skilled DIYer may frame and finish a basic open porch in a few days, especially when materials are ready and the ground requires little prep. Larger porch: A wider or deeper porch can stretch into one or more weeks because every extra span adds cutting, fastening, checking, and finish work. Covered porch: A roofed build takes longer because posts, beams, roof framing, flashing, and ceiling work need careful setup. Concrete timing: Footings or slab work can slow the project because concrete needs time to reach full working strength. Permit and inspection windows: Local approval can add waiting days, even when the actual work is moving well. Weather delays: Rain, high heat, wind, and muddy soil can slow framing and make lifting beams less safe. Material delivery: Having lumber and hardware on-site before the build starts can save a full day or more. Common Porch Building Mistakes to Avoid A lot of porch problems start before the first board is fastened. Most issues come from small shortcuts, like skipping layout checks, using the wrong hardware, or guessing structural details. Catch these early, and the whole build becomes safer and cleaner. Mistake Why It Causes Problems Better Move Starting without a permit It can lead to fines, failed inspections, or resale issues. Check local rules before work begins. Guessing beam sizes The porch may not carry the load safely. Follow approved plans or ask an engineer. Using indoor fasteners They can rust or fail outdoors. Use exterior-rated structural hardware. Leaving temporary posts in place Temporary supports are not made for long-term loads. Replace them with proper permanent posts. Cutting oversized notches Removing too much wood can weaken the beam. Mark carefully and cut only what the plan allows. Skipping bracing and alignment checks Beams can shift, and finishes may not fit cleanly. Brace the frame and check for square before fastening. Poor flashing at the house Water can enter the wall and cause rot. Install flashing before closing the area. Weak railings or uneven stairs These can create fall or trip hazards. Build stairs and rails to local code. Mistakes are easier to avoid when each step has a stopping point. Set the beam, then check it. Set the post, then check it. That rhythm may feel slow, but it saves time near the finish When to Hire a Professional An open ground-level porch with basic framing is a realistic DIY project for someone with structural framing experience. Once the project moves beyond that, a professional isn’t optional, it’s what keeps the structure sound and the permit process clean. Hire a licensed carpenter or builder for any covered porch, any porch that attaches to the house’s main structural framing, any porch that needs deep footings, or any build on uneven or unstable soil. The roof framing, ledger attachment, and flashing are the three areas where amateur work most often creates expensive problems later. Hire a structural engineer when spans, roof loads, or support points aren’t clearly specified in the plan, and any time the porch ties into a load-bearing wall. Use a licensed electrician for any wiring, whether it’s a single outlet, ceiling fan, or exterior lighting circuit. Attempting unlicensed electrical work on an outdoor structure is both a code violation and a fire risk. Hiring a professional for a portion of the work doesn’t mean handing over the whole project. You can frame and finish independently while a pro handles the roof, flashing, and inspection sign-off. If you’re planning adding a pergola overhead instead of a full roof, that’s a simpler structural problem that many experienced DIYers can take on without an engineer. How to Maintain a Porch After Building It Good porch maintenance is plain, small work done before damage spreads. You’re watching for movement, moisture, wear, and weak spots. A porch that gets checked twice a year is much easier to protect than one ignored for several full seasons. Here’s a simple care routine to follow. Clean the surface: Sweep off leaves, dirt, and grit so moisture does not sit against the porch boards. Check fasteners: Look for raised screws, rusted hardware, or loose connectors around posts, beams, stairs, and railings. Watch for movement: Step on different areas and feel for any bounce, wobble, or shifting that wasn’t there before. Look for wood damage: Soft spots, dark stains, cracks, and a peeling finish can indicate trapped water. Protect exposed wood: Repaint, restain, or reseal when the surface starts looking dry, faded, or worn. Keep water moving away: Clear gutters on covered porches and make sure water does not collect near the house. Trim nearby plants: Keep shrubs and vines from trapping moisture against posts, railings, or siding. Inspect stairs and rails: These take the most daily wear. Fix loose balusters and wobbly newel posts before they become a fall hazard. Pair the porch space with durable outdoor furniture built to last and you’ll spend less time on overall upkeep. Frequently Asked Questions How do I know what size beams my porch needs? Beam sizing is determined by the span (distance between supports) and the load the beam carries. For an open porch, use a residential span table, the IRC (International Residential Code) publishes these and most local building departments have them. For a covered porch carrying roof weight, have a structural engineer or licensed builder specify the beam before you buy lumber. Can I add a roof to an existing open porch? Yes, but only if the existing frame can carry the added load. The posts, footings, beams, and house connection all need to be evaluated before any roof framing goes up. A roof adds dead load plus wind and snow load depending on your region. Get a builder or structural engineer to assess the existing frame first. Should a porch floor slope away from the house? Yes. A slope of about 1/8 inch per foot away from the house is standard for solid porch floors and slabs. Open-gap decking drains naturally, but solid surfaces need that pitch to move water away from the ledger and foundation. What is the minimum roof pitch for a covered porch? It depends on the roofing material. Asphalt shingles typically require a 2:12 pitch minimum; metal panels can work at 1:12 or lower with correct detailing; membrane roofing can handle near-flat. Check the roofing manufacturer’s spec sheet and local code before framing the roof. Can I attach a porch roof to the fascia board? No. Fascia is finish trim, it’s not rated to carry roof loads. A porch roof must connect to structural framing: either a properly installed ledger board bolted to the house rim joist, or a freestanding beam structure. Attaching to fascia is a structural defect that will eventually pull the connection apart. Do I need a permit to build a porch? Almost always, yes. Most US jurisdictions require a permit for any attached structure with a roof, any structure over 200 square feet, or any build that involves structural connection to the house. Check with your local building department before starting. An unpermitted porch can create problems at resale and may need to be removed or rebuilt to pass inspection. What type of wood is best for porch framing? Pressure-treated pine is the standard for all structural framing, posts, beams, joists, and rim boards. It’s what building codes expect, widely available, and holds structural fasteners well. For decking surfaces, cedar or composite adds rot resistance and visual appeal. Never use untreated dimensional lumber for any part of the frame in contact with the ground or exposed to weather. Final Thoughts Learning how to build a porch is really about slowing down before the heavy work starts. You’re not just adding boards near a door. You’re creating a place that has to stand straight, carry weight, shed water, and feel safe every time someone steps on it. I’d treat the plan, beams, posts, and final checks with the same respect as the visible finish, because that hidden structure does the real work. If your porch is simple, you can take this one stage at a time and build with care. If it carries a roof or ties into the house, bring in help. Ready to start? Measure your space, check your code, and plan your build today with confidence and patience.
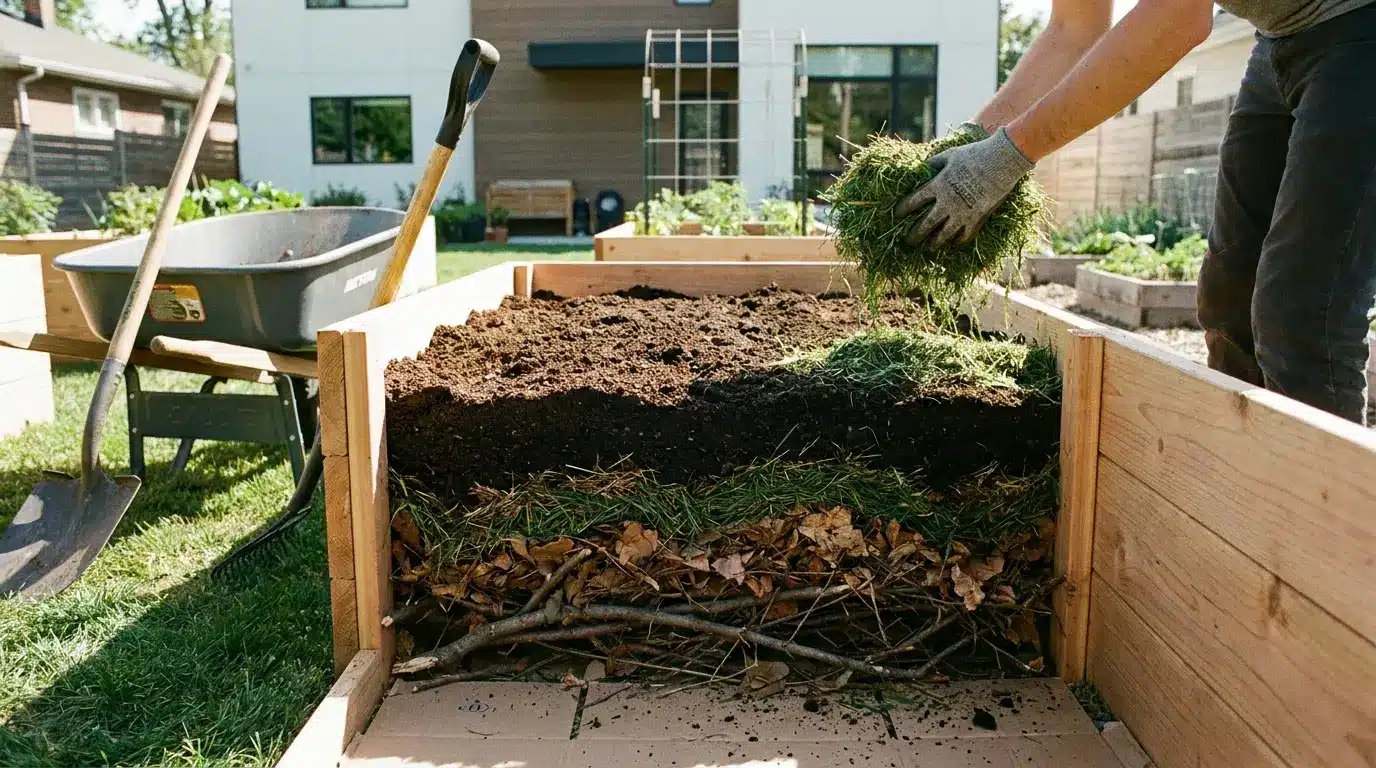
Difficulty 2 out of 5, no special skills required, just some measuring and basic assembly Time One weekend (frame build: 2–3 hours, filling: 1–2 hours) Cost $40–$120 depending on bed size and how much bagged soil you buy Tools Needed Drill, countersink bit, skill saw, measuring tape, level, pitchfork, wheelbarrow Skill Required Beginner The first raised bed I filled, I bought nine bags of bagged garden soil and still ran short. I hadn’t accounted for settling, I’d mixed in too much fresh grass clippings, and by week three, the whole thing had sunk three inches and smelled faintly sour. The fix was simple once I understood how diy raised garden bed layers actually work: rough organic material at the bottom, finished soil at the top, and nothing wet or green piled in thick. A layered raised bed costs less to fill because you’re not buying premium soil from the bottom board to the top. You’re using what you have: branches, dry leaves, compost, and putting the good stuff only where roots actually live. The result is a bed that drains better, settles less chaotically, and feeds itself as the lower layers break down over time. Below is the layer order, the right approach by bed height, five filling methods ranked by cost and setup time, and the step-by-step build sequence I’d use today. What Shapes Your Layer Plan Before You Start Before you add the first shovel of soil, take a minute to check your bed depth, budget, and planting timeline. These three choices shape the whole fill plan. A shallow bed needs more finished soil because roots have less room to spread, so bulky filler can quickly get in the way. A deep bed gives you more space to use safe lower materials, such as branches, leaves, straw, or compost, without crowding the top growing area. Your budget matters too. If bagged soil feels too costly, layering it can reduce how much you need to buy. Timing is just as important. If you want to plant right away, keep more finished compost and soil near the top. If you can wait, lasagna-style layers can settle first. The goal is simple: keep rough material low and keep the root zone soft, clean, and ready for planting. Once you know your bed depth and planting timeline, the next step is to stack the layers in the right order. The Right Order for Raised Bed Layers A raised bed works better when you build it from the bottom up instead of mixing everything together. After a few messy fills, you learn fast that each layer needs one job. The bottom creates a base, the middle adds bulk, and the top gives roots the clean growing space they need. Base layer: Add cardboard or newspaper first when the bed sits over grass or weedy soil. This gives you a cleaner starting point before the rest of the materials go in. Pest layer: Use hardware cloth only if digging pests are common in your yard. It belongs under the fill, not mixed into the soil. Filler layer: Place logs, branches, or sticks low in deep beds. This helps fill the space without using bags of soil from the top to the bottom. Brown layer: Add dry leaves, straw, or shredded paper on top of the filler. These materials create a light bulk and support slow breakdown. Compost layer: Spread finished compost or aged manure above the rougher materials. This brings better nutrition closer to the growing area. Growing layer: Finish with planting soil at the top, then add mulch after planting. This keeps roots in the cleanest and softest part of the bed. The main rule is simple: keep rough materials low and finished soil high. That one habit prevents most raised bed problems, from sinking too fast to roots hitting sticks too soon. Next, match this order to your bed height so you do not add bulky filler where roots need space Layer Choices by Bed Height Not every raised bed has enough room for the same materials. After working on small and deep beds, you learn that height changes everything. A short bed needs to stay simple because roots need most of that space. A taller bed gives you more room to use lower filler without wasting money on soil from the bottom to the top. Once the basic order is clear, check the bed height before choosing how much filler to use. Bed Height Safe Filler Amount Best Use What to Skip 8 to 12 inches Little to none Herbs, lettuce, spinach, and leafy greens Logs, thick branches, heavy filler 12 to 18 inches Light filler only Small vegetables, herbs, mixed greens Large wood and packed grass clippings 18 to 24 inches Moderate lower filler Most vegetables and budget-filling Premium soil from bottom to top 24+ inches More lower filler Tall beds, deep boxes, larger garden builds Loose gaps around wood and raw waste near roots This keeps the choice simple: the shorter the bed, the less filler you use. The deeper the bed, the more room you have to save soil with lower materials. After that, you can choose the filling method that fits your budget and your planting timeline. Five Cost-Effective Methods to Fill Raised Garden Beds This is where the real savings happen. Instead of asking, “What should I put in my raised bed?” it helps to ask, “Which filling method fits my bed depth, budget, and materials?” I use different methods depending on what I have around the yard. Method 1: Lasagna Gardening Method Lasagna gardening works best when you are not rushing to plant right away. It uses organic materials that break down slowly, so the bed becomes better over time. This method is a good fit for medium- or deep-raised beds where you want to save money and build healthier soil. Here’s how to think about this method before using it: Common materials: This method uses items that many gardeners already have, such as cardboard, dry leaves, straw, grass clippings, plant trimmings, and compost. That makes it useful when you want to fill the bed without buying too many bags of soil. Lower cost: Organic layers occupy the lower part of the bed, so you do not need to fill the entire frame with an expensive soil mix. It works especially well when the bed has enough depth for materials to settle. Long-term soil: As the layers break down, they add organic matter and improve the bed season after season. This makes lasagna gardening better for gardeners who want a slow soil-building method, not just a quick fill. Note: I’d use the lasagna method for medium or deep beds when the goal is to save soil and build better material over time. Skip it for heavy root crops if you’re planting right away, since fresh layers need time to settle and break down Method 2: Hugelkultur-Style Base Method A hugelkultur-style base is useful for deep raised beds, where the lower space can be filled with woody material rather than additional soil. It works best when the bed is high enough to keep rough wood away from the main growing area. Use this method when the bed is deep, and you want a lower fill that lasts: Wood placement: Put the largest pieces at the very bottom, then use smaller sticks around them. This keeps the heaviest material low and gives the bed a steadier base before lighter layers are added. Gap filling: Add leaves, straw, or loose soil between wood pieces so large empty pockets do not collapse later. This step helps the bed settle more evenly after watering. Top separation: Cover the woody base with compost and planting soil before anything goes in the bed. Young roots should start in soft, finished material, not against logs or rough branches. Method 3: Compost-and-Soil Layering Method The compost-and-soil method is best when the bed needs to be ready soon. It suits shallow beds, herb beds, and small vegetable beds because it does not rely on bulky filler or long breakdown time. Use this method when you want a clean, fast setup: Few supplies: You only need finished compost, topsoil, and cardboard if weeds are present. This keeps the project simple and easier to control, especially for a smaller bed. Smooth surface: The upper layer remains loose and even, which facilitates direct sowing, transplanting, and watering. This is useful for herbs, lettuce, and other shallow-root crops. Less settling: Since the fill is already finished, the bed will not sink as much as one packed with fresh leaves, grass, or rough yard waste. Note: For smaller planter boxes or shallow herb beds, this is the cleanest choice. You spend a little more than you would with yard waste, but you get a planting surface that feels ready right away instead of waiting on buried materials to settle. Method 4: Yard-Waste Layering Method Yard-waste layering is useful when you already have clean garden material. It is a budget-friendly choice, but it needs balance so the bed does not become wet, sour, or packed too tightly. Use this method when your yard gives you enough safe material: Brown first: Dry leaves, straw, and shredded paper should make up most of the fill. They help the bed stay lighter and stop fresh scraps from clumping together. Small greens: Grass clippings and soft plant trimmings should be added in thin amounts. A light spread breaks down better than a thick wet pile. Safe only: Keep out diseased plants, seed heads, pet waste, and oily food scraps. Free material is only helpful when it does not bring pests, weeds, or plant problems. Method 5: Hybrid Budget Method The hybrid budget method works best for tall raised beds where you want to lower soil costs while still keeping the planting area dependable. It combines different materials without making the bed too messy or slow to use. Choose this method when you want savings with better control: Lower support: Sticks or small branches can sit in the lowest part of the bed to take up space. This keeps expensive soil where it actually helps the plants. Middle body: Leaves, straw, or similar dry material can be placed around the lower layer to reduce large air gaps. This helps the bed settle more evenly after watering. Top quality: Finished compost and planting soil should stay near the surface. That gives roots a cleaner growing area while the lower materials slowly break down underneath. DIY Raised Garden Bed Layers Step by Step Raised beds let you grow fresh vegetables even if your soil is rocky, compacted, or full of tree roots. With a few affordable materials and a simple weekend project, you can build a productive growing space that is easy to maintain and harvest from. Whether you have a small backyard or need more room for your favorite crops, the steps below show you how to build and fill a sturdy raised bed garden from start to finish: Material Required: 3 untreated 2×10 boards, 8 feet long 3 untreated 2×4 boards, 8 feet long extra 2×4 scrap or one 8-foot 2×4 for cleats 3-inch deck screws cardboard or contractor paper, optional peat moss black leaf mulch homemade compost drill countersink bit skill saw measuring tape or marking tool level pitchfork wheelbarrow Step 1: Find a Spot That Works for Your Garden Before picking up any tools, take a good look at the space available in your yard. You may have an area where plants struggle because of tree roots, poor soil, or limited sunlight. A raised bed can solve many of these problems without requiring major changes to the ground below. In this project, the bed replaced a tree that was no longer thriving due to heavy shade. If you’re working with a similar situation, choosing the right location now will save you a lot of frustration later and give your vegetables a much better start. Step 2: Measure, Cut, and Prepare the Wood Once your materials are ready, start preparing the wood for the raised bed frame. For this build, the bed size is four feet by eight feet, which provides enough growing space while remaining easy to reach from both sides. Use untreated lumber for a safer vegetable garden, and check each board for bends, twists, or cracks before cutting. If cutting wood feels difficult, most home improvement stores can cut the boards for you when you provide the measurements. After the boards are cut, clear the garden spot before assembling the frame, so you do not have to move the heavy bed later Step 3: Build a Strong Frame Now comes the exciting part where your raised bed starts taking shape. Assemble the frame in the exact spot where it will stay because moving it later can be difficult. Using outdoor deck screws helps create a sturdy structure that can withstand years of exposure to the elements. Pre-drilling the holes is a small step that makes a big difference by preventing the wood from splitting. As you connect each piece, check that the corners remain square. A little extra attention here will give you a stronger and more professional-looking garden bed. Step 4: Add Support Rails for Comfort and Stability This step may seem optional, but it’s one of those small upgrades you’ll appreciate every time you garden. Adding top rails strengthens the bed while also creating a convenient place to sit as you plant, weed, or harvest. Once the rails are attached, check that the entire structure sits level on the ground. Instead of raising low spots, removing excess soil from higher areas often creates a more stable foundation. Taking the time to level the bed properly now will make watering easier and help your garden look neat and well planned. Step 5: Create Rich Soil That Helps Plants Thrive For this specific build, peat moss was mixed with leaf mulch first, then compost was added as the final layer. That combination holds moisture better than topsoil alone and doesn’t compact as quickly after watering. If you’re using yard-waste layers below, add them first and compress each 6-inch layer before adding the next. Save your best compost and planting mix for the top 10 to 12 inches; that’s where the roots live. For weekend builds with basic tools, filling the bed is genuinely the easiest part of the whole project. Quick Soil Calculation: Multiply bed length × width × soil depth to estimate how much planting mix you need. A 4 ft × 8 ft bed with a 12-inch top layer needs 32 cubic feet of soil. One 1.5 cubic foot bag covers about 2.25 square inches at 8-inch depth, buy more than you think you need on the first fill. Watch the video for a step-by-step tutorial: What Not to Put in Raised Garden Bed Layers? Some free materials are not worth using in a raised bed. The wrong filler can cause drainage issues, bring pests, spread weeds, or make the soil unsafe for vegetables and herbs. Check every material before it goes into the frame. Use this list as a quick safety check before filling the bed: Coated materials: Avoid treated wood, painted wood, glossy cardboard, and plastic sheets. These materials can break down poorly, block drainage, or bring unwanted chemicals into the bed. Problem plants: Keep out diseased plants and seeded weeds. Diseased material can carry trouble into the next crop, while weed seeds may sprout after watering. Unsafe waste: Do not add pet waste, meat, dairy, or oily scraps. These can smell bad, attract animals, and make the bed unsafe for food crops. Heavy fresh greens: Thick piles of fresh grass clippings can mat together, heat up, and turn sour. Use only thin amounts mixed with dry material. Unknown scraps: Skip anything you cannot clearly identify as clean and garden-safe. Random wood, coated paper, old debris, or questionable yard waste can create more problems than they solve. When in doubt, leave it out. Clean leaves, straw, plain cardboard, finished compost, and healthy plant trimmings are the safe baseline for every raised bed, if you’re building a larger outdoor DIY project or a single small bed off a concrete patio. Can You Plant Right After Filling a Raised Bed? Yes, you can plant right after filling a raised bed if the top layer is finished, the soil is loose, and the lower layers are not packed with fresh green material. The safest setup is a compost-and-soil top layer because roots can settle into it without coming into contact with scraps, clumped grass, or half-broken-down yard waste. If you used lasagna layers, lots of leaves, or fresh plant trimmings, water the bed well and give it 1 to 3 weeks to settle before planting. New layers often sink after the first few waterings, so check the soil level and add more compost or topsoil if needed. For the first planting, choose easy crops like lettuce, herbs, beans, peppers, or tomatoes. Save carrots, beets, and radishes for beds with deeper, smoother soil because their roots need fewer lumps and less resistance. Common Mistakes to Avoid When Layering a Raised Bed Most raised bed problems start before the first seed goes in. These are the mistakes I see most often when beds sink, smell, dry out, or grow poorly fast later. Use this table as a quick check before planting. Mistake Why It Causes Trouble Better Move Building the bed too wide You may step into the soil and compact it Keep the width easy to reach Skipping the level check Water and soil can shift to one side Level the frame before filling Using logs in shallow beds Roots lose needed growing space Save wood filler for deep beds Adding thick fresh grass It can mat, heat, and smell sour Use thin green layers only Forgetting cardboard in weedy areas Grass may grow through the bed Overlap plain cardboard at the base Adding too little topsoil Roots hit rough material too soon Keep enough soft soil at the surface Planting before watering Air pockets may collapse later Water first, then top off low spots Catch these issues early, and the bed becomes easier to water, fill, and plant. I always check the frame, base, and soil before the first planting day of the season. How to Maintain Layered Raised Beds A layered bed settles over time, so maintenance is mostly about topping up, feeding, and keeping the soil protected. You don’t need to rebuild the layers each season. The goal is to keep the top growing layer loose, rich, and covered while the lower organic layers slowly break down underneath. Add compost yearly: Spread a thin layer of finished compost before planting each season. This refreshes nutrients, improves soil texture, and helps replace what heavy-feeding vegetables used during the last growing cycle. Top off sinking soil: Add compost, topsoil, or raised bed mix when the soil level drops. Some settling is normal as leaves, sticks, and other buried materials break down inside the bed. Mulch the surface: Straw, dry leaves, bark, or untreated grass clippings over bare soil hold moisture, reduce surface temperature, and suppress weeds between plants. If you’re also building other backyard DIY projects, wood chip mulch from those builds works well here too. Avoid stepping inside: Keep your feet out of the bed so the growing layer stays light and loose. Compacted soil makes it harder for roots, water, and air to move through the bed. Loosen the top only: If the surface gets crusty or hard, gently fluff the top few inches with a hand fork. Avoid deep digging because it can disturb the layered structure below. Water deeply: Raised beds can dry out faster than in-ground beds, especially in warm weather. Check the moisture with your finger, and water slowly so it reaches the root zone rather than just wetting the surface. Cover rough filler: If sticks, leaves, or coarse material start showing near the top, add more finished compost or soil. Plant roots should grow in loose, finished soil, not directly through rough filler. Maintenance is not about starting over. It is about adding back what the plants and the breakdown process use up. A little care each season keeps the bed productive, easier to plant, and better prepared for the next crop. Frequently Asked Questions What is the best soil mix for raised garden beds? A mix of roughly 60% topsoil, 30% compost, and 10% perlite or coarse sand works well for most vegetables. Straight topsoil compacts too fast; straight compost dries out and shrinks. The combination drains well, holds moisture without waterlogging, and gives roots the loose structure they need to spread. How deep should a raised garden bed be? Twelve inches is the practical minimum for most vegetables. Eighteen to 24 inches works better for deeper-rooted crops like tomatoes, peppers, and squash. Anything shallower than 8 inches limits you to herbs and leafy greens with very compact root systems. Can I use treated lumber for a raised garden bed? Many gardeners prefer untreated cedar, redwood, or pine for vegetable beds. If you do use treated boards, line the inside of the frame with heavy plastic before filling. This keeps soil from sitting directly against the wood and extends the frame life without the concern of chemical contact with crops. Can I build a raised garden bed on concrete or a patio? Yes, you just need to plan for drainage. Water must exit the bed rather than sit at the base. A deeper bed helps because roots can’t reach ground soil below. This setup works well on patios, driveways, and balconies. For tight spaces or rented properties, a smaller planter box built from 2×6 boards is a practical alternative that still uses the same layering approach. How often should I water a raised garden bed? In mild weather, two to three times per week is usually enough. In heat above 85°F, daily watering may be needed. Push your finger one inch into the soil; if it’s dry, water. Aim for the base of plants, not the leaves, and water slowly enough that it soaks in rather than running off the sides. What vegetables grow best in a shallow raised bed? Lettuce, spinach, chard, green onions, radishes, most herbs, and compact greens do well in beds under 12 inches deep. Save tomatoes, carrots, potatoes, and beets for deeper beds, their root systems need more than a shallow frame allows. How long before a lasagna garden bed is ready to plant in? Two to four weeks after building, once the layers have settled and the initial heat from decomposing greens has dissipated. If you top the lasagna layers with a 4 to 6 inch layer of finished compost, you can plant annual transplants immediately into that top layer and let the lower layers break down beneath them. Bottom Line DIY raised garden bed layers can make the whole project easier, cheaper, and more practical. You do not have to fill the entire bed with expensive soil. Instead, you can use safe organic materials in the lower layers and save your best mix for the top, where young roots need it most. Your bed may settle over time, and that is completely normal. Just add more compost, refresh the top layer, and keep adjusting as each season teaches you what works best. The right method depends on your bed depth, what materials you have, and how soon you want to plant. Start small, keep the growing zone clean, and choose layers that support healthy plant growth. A well-filled raised bed can save money, reduce waste, and give your plants a stronger start. For more simple garden ideas, raised bed tips, and DIY growing guides, read the other blogs and keep building a garden that works for your space.
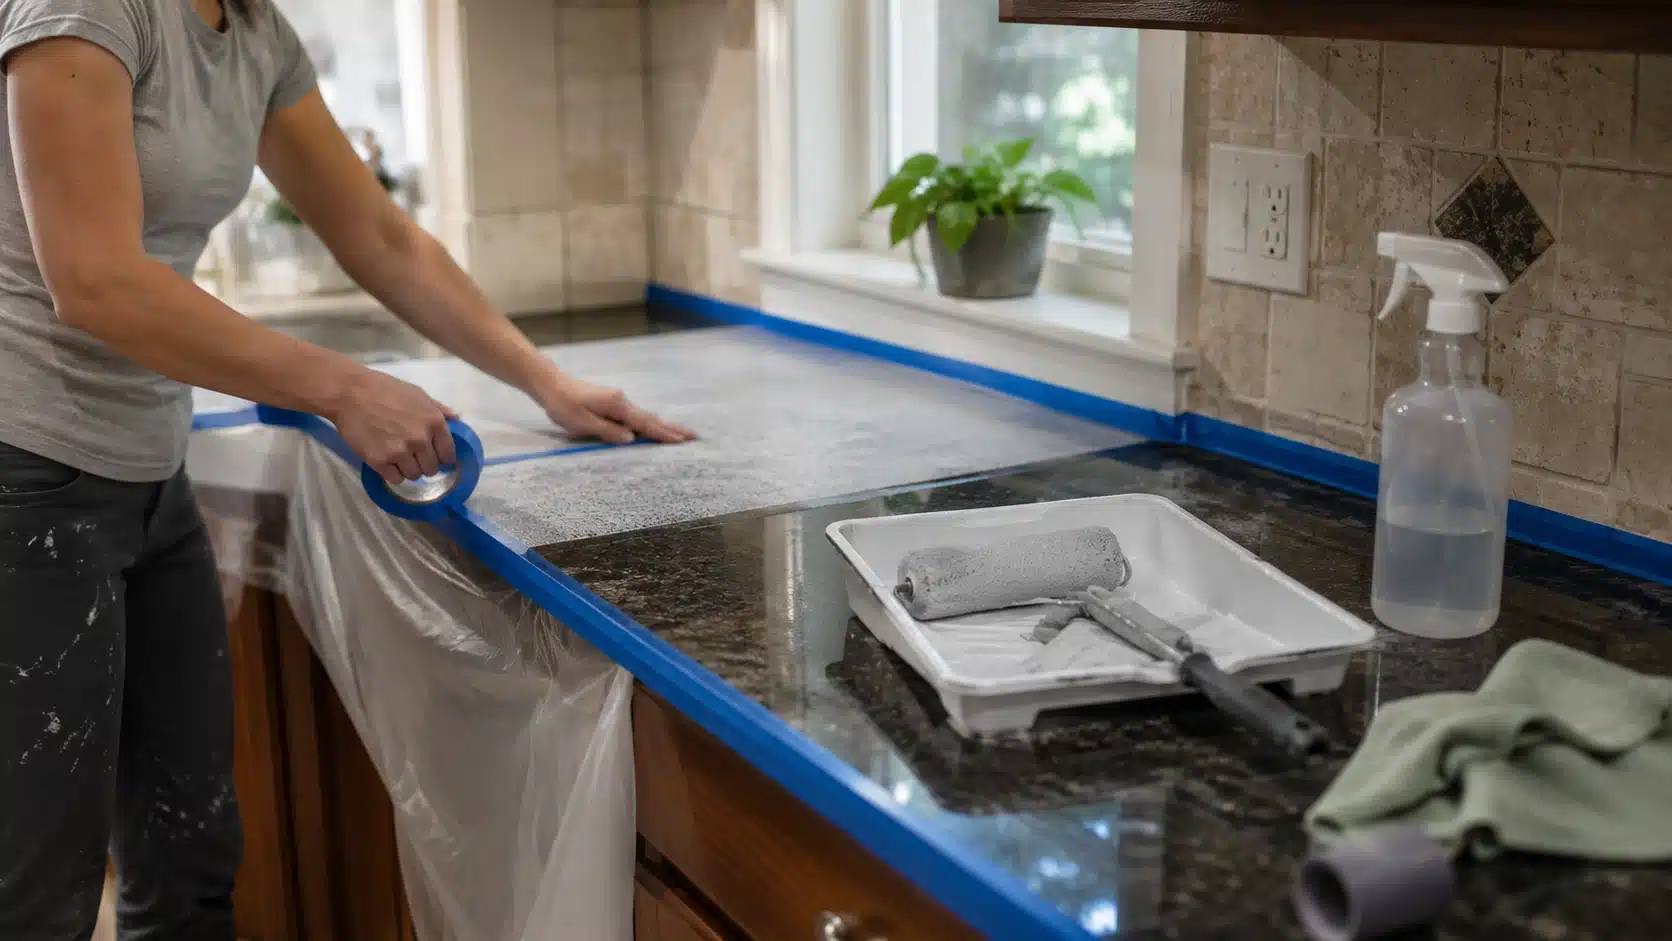
Frustrated by dull or dated granite countertops? I’ve been there, staring at a beautiful stone surface that just feels worn out. The problem is simple: granite is slick, non-porous, and naturally resistant to paint. If you’ve tried coating it without the right prep, you already know how quickly peeling and chipping happen. I’m going to show you how to paint a granite countertop properly so it lasts and looks professional. You’ll learn the exact prep steps, which primers and paints actually work, how to create a faux marble effect, and how to protect your investment during the curing process, all with materials you can get today. Can You Paint Granite Countertops? The first time I painted a countertop over real granite, I skipped the bonding primer. Within three weeks, the finish was peeling near the sink. That is the mistake this article is built around. Yes, you can paint granite countertops, but the surface is slick and dense. Regular paint will not hold without the right prep. What follows is the full process, the cost breakdown, what goes wrong, and when painting is not the right call for your kitchen. Difficulty 3 out of 5 — patience and timing matter more than skill Time 1 full day of active work, plus 7 days of cure time Cost $200 to $500 for most kitchens Tools Needed Scrubbing pad, bonding primer, paint kit, epoxy resin and activator, rollers, painter’s tape, plastic tarp, spray bottle, gloves Skill Required Beginner to intermediate — the epoxy stage benefits from a helper Cost Note: Figures in this article are estimates based on national averages. Actual costs vary by region, kit brand, counter size, and project scope. Run through the full supply list before buying — most people underestimate what they need beyond the kit itself. What Goes Wrong When People Paint Granite Countertops Before walking through the steps, here is where this project actually fails. Granite is naturally polished and smooth, which means paint has almost nothing to grip. Every failure I have seen starts before the first coat goes on. Skipping deep cleaning: Grease near the stove and oils around the sink are invisible once dry. Primer applied over either will peel within weeks, not months. Using the wrong primer: Wall primer and cabinet primer do not bond to polished stone. Only a bonding primer rated for slick, non-porous surfaces will hold. Check the label — not every product listed as “multi-surface” covers actual granite. Ignoring kit instructions: Some systems require fine-grit sanding or chemical etching before priming. These are not optional steps. Skipping them breaks adhesion at the base, and no topcoat fixes that. Rushing the epoxy stage: Epoxy has a limited working window. If you mix it without having the counter fully taped, primed, and dry, you will be making decisions under pressure. That is when coverage gets uneven. Pulling tape too late: Tape left past the product’s window can bond into the cured finish and tear it when removed. Using the counter too soon: Seven days is not a suggestion. Placing dishes, water, or appliances on the surface before full cure will mark and weaken the finish permanently. Keep these in mind as you work through the steps below. Most of them are not recoverable once the epoxy cures. What Tools and Products You Need Prep tools and protection materials matter as much as the coating. A paint kit covers the main finish, but you still need cleaning supplies, tape, plastic, rollers, and epoxy ready before you start. Running short on any of these mid-project is stressful — the epoxy especially does not wait. Cleaning supplies: Brillo pad or firm scrubbing pad, strong surface degreaser, and dry cloths. Cooking oil and grease must be fully removed before primer goes on. Protection supplies: Painter’s tape and a plastic tarp for cabinet fronts, sink edges, walls, floors, and appliance openings. Epoxy drips — full coverage is not optional. Bonding primer: The white base primer included in most kits, or a standalone bonding primer rated for slick, non-porous surfaces. Confirm your kit specifies granite as an approved surface. Veining supplies: Gray paint, a spray bottle of water, and a sponge or soft brush to soften marble-style lines. Epoxy supplies: Resin, activator, a stir stick, a foam roller, and gloves. Mix only after the counter is completely ready. Optional prep items: Fine-grit sandpaper or a chemical etching product, depending on what your specific kit requires. Read the instructions before deciding this step does not apply. How to Paint Granite Countertops Step by Step The process is not complicated, but the order matters. Timing between stages matters just as much as the steps themselves. Plan meals and counter access before you start, especially if this is your main kitchen. Step 1: Remove Fixtures and Protect the Kitchen Remove the cooktop and, if you can do it safely, the faucet. Tape sealed around a faucet can get trapped under cured epoxy and become nearly impossible to remove cleanly. Then tape off walls, cabinets, floors, sink edges, and appliance openings. Lay plastic tarp under the counter edges, epoxy will drip. Pro Tip: Remove the faucet before taping, not after. Epoxy cured around a faucet base becomes a permanent bond, removing it later chips the finish. Step 2: Scrub the Granite Clean and Let It Dry Completely Use a Brillo pad or strong degreaser and scrub the full surface, paying extra attention to the area near the stove and around the sink. These zones collect cooking oils that are easy to miss. Wipe away all cleaner residue and let the granite dry fully before moving on. The same failure mode shows up when people try painting bathroom tile floor, any greasy or damp residue left behind stops adhesion regardless of how good the primer is. Safety Note: Do not prime over any moisture, cleaner residue, or greasy film. Even a surface that looks clean can retain cooking oils. If in doubt, scrub a second time and wait another 30 minutes before priming. Step 3: Apply Two Thin Coats of Bonding Primer Start at the edges so the original granite color does not show through later, then roll the first coat across the full surface in a thin, even layer. Let it dry for about one hour, or as directed by your kit. Apply the second coat the same way. Thick primer layers cure unevenly, leave ridges, and make the final epoxy look less smooth, thin and even is always right. The same bonding primer logic applies when painting shower tile, polished granite and glazed tile share the same non-porous surface challenge, and the solution in both cases is identical. Pro Tip: Do the edges first on both primer coats and on the epoxy pour. Edges are easy to miss when you are focused on the main surface — doing them first means they get proper coverage. Step 4: Plan and Paint the Marble Veining Sketch a rough layout on paper before touching the counter. Loose, slightly diagonal lines look more natural than anything straight or symmetrical. Use gray paint to draw the veins over the white base, mist the lines lightly with a spray bottle, then soften with a sponge or brush. Wait 30 to 45 minutes before applying epoxy. Pro Tip: Practice on paper first, not on the counter. Soft, irregular lines look realistic. Heavy, repeated, or symmetrical lines look painted. Step 5: Mix the Resin and Activator Mix epoxy resin and activator according to your kit’s instructions. Stir slowly and thoroughly — typically around three to four minutes, so the clear coat cures correctly. Do not mix until the counter is already taped, primed, and dry. Once the resin and activator are combined, the working window is limited. Safety Note: Do not start mixing epoxy until everything else is ready. The working time after mixing is fixed. Starting before the surface is prepared forces rushed decisions and uneven coverage. Step 6: Pour and Roll the Epoxy Pour the mixed epoxy across the countertop in a slow S-shaped pass. This distributes the product more evenly before you roll. Use the foam roller with light pressure to guide epoxy across the surface, self-leveling epoxy needs direction, not force. Watch for dry spots, thick patches, and missed edges as you work. Step 7: Smooth Drips and Pull Plastic at the Right Time Epoxy runs over the counter edges. Smooth the underside with the roller before it sets, and check every corner. Then remove the plastic tarp before it bonds to the underside of the cabinets. Cured epoxy in plastic is a mess to deal with, pull it while the epoxy is still working. Safety Note: Pull the plastic tarp while the epoxy is still in its working window. Once cured, removing bonded plastic can pull chunks of the finish with it. Step 8: Work With a Helper During the Epoxy Stage One person mixes and prepares while the other rolls and checks coverage. A helper can spot drips, thin areas, and missed edges faster than one person can manage alone. The epoxy window is not forgiving, two people make a real difference in how the finish comes out. Step 9: Let the Countertop Cure for Seven Days After the epoxy is finished, keep the surface completely clear and dry for a full seven days. No dishes, no appliances, no water near the edges. This is the step most people rush and the one that determines how long the finish actually holds up under daily use. Safety Note: Do not place anything on the surface during the cure period. The finish may feel dry to the touch within 24 hours but it is not fully hardened. Early contact leaves permanent marks. The faster-the-second-time lesson here is this: tape your faucet base, not around it. I lost two hours the first time chipping cured epoxy off a chrome base I should have just removed. It takes ten minutes to pull a faucet. It takes much longer to fix the finish if you do not. What Does It Cost to Paint Granite Countertops? For most kitchens, expect to spend between $200 and $500 as a DIY project. The kit price is not the full number. Budget for prep supplies, protection materials, and enough product to cover the whole surface without running short on the epoxy pour. Cost Item Typical Range Notes Countertop paint kit $100 to $250 Some kits cover around 35 sq. ft. — measure first Epoxy kit or topcoat $75 to $300 Higher cost for larger counter footprints Bonding primer $20 to $60 Only if not included in the kit Tape, tarp, rollers, gloves $30 to $80 Routinely left out of the initial budget Degreaser and cleaning supplies $10 to $25 Non-negotiable prep item Extra supplies or small mistakes $25 to $100 Touch-up paint, sandpaper, extra brushes Likely DIY total $200 to $500 Varies by kitchen size and product choices Running short on epoxy halfway through a pour is one of the more stressful DIY situations — and it is preventable. Measure the square footage of your counters before you buy, not after you open the kit. Pros and Cons of Painting Granite Countertops Painting granite countertops can make a dated kitchen feel cleaner for less money, but it changes how the surface must be treated every day. This is not a like-for-like swap for stone. Pros Cons Costs far less than replacement Less durable than natural stone Covers dated or busy granite patterns Can chip or scratch under daily use Creates a faux marble finish at low cost Hot pans damage the painted layer Doable as a weekend DIY project Prep is time-consuming and unforgiving Good short-term cosmetic update Difficult to reverse cleanly if needed later Works well on bathroom vanities May affect resale perception Products widely available at hardware stores Counter is out of use during the 7-day cure If a short-term visual update is the goal and you are comfortable with the maintenance rules that come after, paint can work. If low maintenance and long-term durability are the priority, look at the alternatives below first. How to Care for Painted Granite Countertops Gentle Cleaning: Use mild dish soap and water only. Avoid abrasive scrubbers, bleach, or heavy-duty cleaners that can damage the epoxy finish or dull the topcoat over time. Protect Surfaces: Always use cutting boards, trivets, and pads under hot pots, pans, or appliances. Avoid cutting or placing extreme heat directly on the countertop to prevent chips and marks. Topcoat Awareness: Understand the difference between satin and semi-gloss finishes, as the sheen affects durability and wear patterns. Choose the appropriate finish for your kitchen’s daily use. Immediate Spill Management: Wipe up water and spills promptly, especially around faucets or sink edges. Early attention prevents staining, moisture damage, and potential lifting of the painted surface. Early Chip Repair: If small chips appear, touch them up immediately. Addressing them early prevents the exposed area from spreading and ensures your painted granite maintains a uniform, durable finish. How Long Do Painted Granite Countertops Last? There is no honest universal number because conditions vary too much. In a high-use kitchen with daily cooking, the finish near the stove, sink rim, coffee station, and primary prep area shows wear first. In those zones, chips and dullness can appear within a few months in the most demanding kitchens. In a bathroom vanity or a lighter-use countertop, the same finish maintained correctly can hold up significantly longer. What is consistent across every version of this project is this: strong prep and a full cure period will always outperform a rushed job, regardless of how long the timeline ends up being. What Are Better Alternatives to Painting Granite? If painting granite countertops does not fit the situation — wrong budget, heavy kitchen use, or granite with real resale value — the counter is not always the problem. These alternatives are worth running through before opening a paint kit. Deep clean and re-polish: A countertop that looks dull often just needs a proper deep clean and reseal. That alone can change the feel of the whole kitchen without touching the stone. Change the cabinet color: Painting the cabinets can make dark or busy granite feel calmer without touching the stone at all. The counters rarely look as dated once the rest of the kitchen aligns with a coherent minimalist kitchen design. Update the backsplash: A simpler backsplash reduces visual noise around a patterned slab and modernizes the kitchen quickly at lower cost than counter replacement. Professional refinishing: A pro may offer surface treatments or resurfacing options that are more durable than DIY paint and leave the stone in recoverable condition. Countertop overlay systems: Some overlay products sit over the existing surface and offer more structural stability than a painted layer. DIY marble countertops use a similar faux-finish approach but with different adhesion demands than epoxy on stone. Replace only the high-use zone: An island or a short counter run may be worth replacing while less-used sections stay as they are. Paint is one way to deal with granite that is no longer working. If the stone is high quality or the kitchen gets heavy daily use, changing the surrounding finishes is almost always the smarter first step. Frequently Asked Questions These are the questions I hear most from people who are standing in front of dated granite trying to decide whether to paint it or live with it. Can you paint granite countertops white? Yes, with the right bonding primer and a countertop-rated paint or epoxy system. White shows crumbs, scratches, and dust more than darker finishes, so daily cleaning and a careful topcoat matter more. A faux marble design with soft gray veining hides surface wear better than a flat white alone. Can you paint granite countertops without sanding? Only if your product label explicitly permits it. Many systems require sanding, etching, or a bonding primer to create grip on polished stone. A surface that stays glossy through prep will cause peeling within weeks regardless of how good the topcoat is. How long does paint last on granite countertops? It depends on prep quality, product used, kitchen use intensity, and whether cure time was followed. In a high-use kitchen, wear near the sink and stove can appear within months. In a bathroom or low-use counter, the finish can hold for years with proper daily care. Can you put hot pans on painted granite countertops? No. The epoxy and paint layer can discolor, soften, or mark under high heat. Use trivets or heat pads every time. Real granite handles heat well; the coating applied over it does not. Is painted granite safe for food prep? After full curing, yes — but food should not be cut directly on the surface. Use cutting boards, follow the kit’s care instructions, and choose a topcoat that the manufacturer explicitly rates for countertop use near food. Can painted granite countertops be reversed? Removing cured epoxy or paint from granite is difficult and can permanently dull or scratch the stone. If the original granite has value or may be needed in its natural state, think carefully before painting. Returning to the original surface is not reliably possible. What kind of paint do you use on granite countertops? A countertop-specific paint kit with an epoxy topcoat, not wall paint, not chalk paint. The kit must list granite or non-porous surfaces as approved applications. A bonding primer rated for slick surfaces is required, not a standard latex wall primer. Does painting granite countertops affect home resale value? It can. Buyers who notice a painted countertop may factor in replacement cost or question what is underneath. In a kitchen that is already dated overall, the visual improvement may offset this. In a kitchen with higher-end finishes, it is more likely to raise questions than help. Final Thoughts Now you know that painting a granite countertop isn’t just about brushing on color, it’s a careful process of prep, priming, and epoxy application. I’ve covered why cleaning and degreasing matter, how to use a bonding primer, the best way to create marble veining, and the importance of a full seven-day cure. Following these steps ensures your painted countertop looks great and holds up under daily use. You can confidently choose the right kit, protect surrounding areas, and maintain the surface properly afterward. Try these methods on your countertop, and let me know how your finished project turns out. Careful prep really does pay off.
A plain fence can make even a nice yard feel unfinished. You may want more privacy, but you may also want the space to feel warm, open, and useful. I get why choosing a fence can feel tricky because it is not only a boundary. It affects how the whole outdoor area feels, from the patio and garden to the windows and the street. That is where the right DIY fence ideas can help. A fence should do more than mark a boundary. It should fit your yard size, budget, weather, skill level, and the amount of privacy you actually need. I like starting with the main problem first, then narrowing the choice by material, upkeep, and how the fence will look from inside the home. This list focuses on real fence, screen, wall, and boundary ideas instead of small styling tips passed off as full projects. You will find options for modern yards, small patios, garden corners, renters, privacy screens, low-cost builds, and mixed-material designs. Best Wood Types for DIY Fence Projects The right wood depends on your budget, weather, finish, and how much maintenance you want. Here is a simple comparison before you choose boards for your DIY fence. Wood Type Best For Pros Keep in Mind Pressure-treated pine Budget privacy fences, basic backyard fences, and slat fences Affordable, easy to find, and useful for many DIY builds Needs sealing or staining to reduce rot, warping, and cracking Cedar Patios, garden fences, privacy screens, and modern slat fences Naturally handles outdoor use better than basic lumber and has a warm look Costs more than pine and still needs care to protect the color Redwood Visible backyard areas, privacy fences, and outdoor living spaces Rich color, durable feel, and a higher-end finish More expensive, so it may not suit large low-budget fences Pallet wood Low-cost garden fences, rustic fences, and casual backyard zones Very affordable if sourced safely and useful for rustic projects Must be checked for safety, nails, damage, rough edges, and chemical treatment Reclaimed wood Rustic fences, eco-friendly builds, and mixed-board designs Adds character and can lower material costs Board quality varies, so weak or rotting pieces should be removed Choose wood that matches the fence style, not just the lowest price. For wet yards, avoid wood touching soil. For sunny yards, use stain or sealer to slow fading. For windy spots, strong posts and proper fasteners matter as much as the boards. Wood DIY Fence Ideas These wood fences work best when you want privacy, warmth, and a buildable material that can be cut, stained, or sealed. The same outdoor wood choices that matter for furniture also matter here: rot resistance, fastener strength, and finish upkeep. 1. Horizontal Wood Slat Fence A horizontal wood slat fence suits modern yards, patios, pool areas, and side spaces. The clean lines feel updated, while the board gaps let you control privacy, airflow, and light. I would choose the gap size before buying boards, because even a small change in spacing can make the fence feel either private or too exposed. Best For: Modern yards, patios, pool areas, and side yardsDIY Difficulty: ModeratePrivacy Level: Medium to highApprox. Material Cost: $8-$20 per linear ft 2. Classic Vertical Wood Privacy Fence A classic vertical wood privacy fence is a strong choice when you want full backyard coverage. Close board spacing blocks direct views, making it useful for family yards, patios, and shared boundaries. Treated lumber, cedar, and redwood can all work, but the posts and rails matter just as much as the boards. Best For: Backyards, shared boundaries, and high-privacy areasDIY Difficulty: ModeratePrivacy Level: HighApprox. Material Cost: $10-$30 per linear ft 3. Wood Overlay Fence A wood overlay fence works when an existing fence is sturdy but looks worn, uneven, or too open. New boards can add privacy and create a cleaner face without full replacement. I would only use this idea if the old posts and rails are still sound, because fresh boards can add more weight than expected. Best For: Updating an old but sturdy fenceDIY Difficulty: ModeratePrivacy Level: Medium to highApprox. Material Cost: $6-$15 per linear ft 4. DIY Wood Slat Privacy Screen A DIY wood slat privacy screen is useful when you only need coverage in one spot, such as beside a dining area, deck, hot tub, or seating corner. It uses fewer materials than a full fence and keeps the yard open. For small patios, I usually prefer this over closing every side because it solves the view problem without boxing in the space. Best For: Patios, decks, seating areas, and hot tubsDIY Difficulty: Easy to moderatePrivacy Level: Medium to highApprox. Material Cost: $10-$25 per linear ft 5. Redwood or Cedar Privacy Fence A redwood or cedar privacy fence gives a warmer, higher-quality look than basic lumber. It works well near decks, patios, outdoor kitchens, and yards with natural landscaping. These woods are often chosen for outdoor use, but I would still seal cut ends and keep the finish consistent so the fence ages evenly. Best For: Visible backyard areas, decks, and patiosDIY Difficulty: ModeratePrivacy Level: HighApprox. Material Cost: $18-$45 per linear ft 6. Semi-Open Wood Slat Fence A semi-open wood-slat fence provides privacy without making the yard feel fully closed in. The gaps break sightlines while allowing light and airflow, which helps small patios, warm climates, and side yards feel more comfortable. It is a good middle choice when a solid privacy fence feels too heavy for the yard. Best For: Small yards, warm climates, patios, and side yardsDIY Difficulty: ModeratePrivacy Level: MediumApprox. Material Cost: $8-$22 per linear ft 7. Board-and-Batten Fence Wall A board-and-batten fence wall uses wide vertical boards with narrow battens over the seams, creating a solid and finished surface. It works best for patios, fire pits, and outdoor living areas where privacy matters more than airflow. I like it best when the yard already has simple lines, because the flat face can look intentional rather than busy. Best For: Outdoor living areas, patios, and fire pitsDIY Difficulty: Moderate to hardPrivacy Level: HighApprox. Material Cost: $15-$40 per linear ft Budget and Reclaimed Fence Ideas These options help reduce material costs while still providing a real boundary, privacy screen, or rustic fence. The main tradeoff is prep time: cheaper materials usually need more sorting, sanding, sealing, and checking before they look finished. 8. Simple Pallet Fence A simple pallet fence is one of the cheapest options when you can find clean, safe pallets. Whole pallets can be fastened between posts or connected for a casual garden boundary. I would keep this for gardens, compost areas, or informal zones rather than a main front-facing fence. Best For: Gardens, compost areas, and casual backyard zonesDIY Difficulty: EasyPrivacy Level: MediumApprox. Material Cost: $1-$4 per linear ft 9. Deconstructed Pallet Wood Fence A deconstructed pallet-wood fence looks cleaner than a full-pallet fence while still keeping costs low. Take the pallets apart, remove nails, sort boards by size, and reuse the slats vertically or horizontally. The extra prep is worth it if you want a budget fence that feels designed rather than temporary. Best For: Low-cost custom wood fencesDIY Difficulty: ModeratePrivacy Level: Medium to highApprox. Material Cost: $2-$8 per linear ft 10. Reclaimed Wood Fence A reclaimed wood fence uses salvaged boards, leftover lumber, old fencing, or weathered planks to create a rustic boundary. Keep the layout intentional with repeated direction, spacing, or color so it does not look random. Remove nails, reject weak boards, sand rough spots, and seal the wood before it goes outside. Best For: Rustic yards, eco-friendly builds, and low-cost projectsDIY Difficulty: ModeratePrivacy Level: Medium to highApprox. Material Cost: $3-$12 per linear ft 11. Bamboo Roll Fence A bamboo roll fence is quick, lightweight, and useful for patios, balconies, rental spaces, and garden corners. It gives soft screening instead of heavy security, so it works best where you want privacy without a major build. I would treat it as a screen, not a permanent structural fence, especially in harsh sun, rain, or wind. Best For: Patios, balconies, rentals, and garden cornersDIY Difficulty: EasyPrivacy Level: MediumApprox. Material Cost: $4-$8 per linear ft 12. Wattle, Brush, Split Rail, or Dry Stone Natural Fence Natural fence styles work well for rustic gardens, homesteads, rural yards, and low-cost builds. Wattle uses flexible branches woven between posts, brush fences stack trimmed branches, split rail creates an open boundary, and dry stone uses stacked stone. These make the most sense when the material already belongs in the landscape. Best For: Rustic gardens, homesteads, and rural yardsDIY Difficulty: Moderate to hardPrivacy Level: Low to mediumApprox. Material Cost: $2-$25+ per linear ft Low-Maintenance and Mixed-Material Fence Ideas These fence ideas suit yards where durability, cleaner upkeep, and stronger materials matter more than a basic wood build. They can look more polished, but they usually need better planning before installation. 13. Vinyl Picket Fence A vinyl picket fence gives a clean front-yard or garden boundary with less maintenance than painted wood. It allows plenty of light and airflow, so it is better for separation than full privacy. It works best when the home already has a neat, simple exterior because the bright white finish can stand out. Best For: Front yards, garden borders, and cottage-style homesDIY Difficulty: Easy to moderatePrivacy Level: Low to mediumApprox. Material Cost: $15-$35 per linear ft 14. Black Metal Privacy Fence A black metal privacy fence works for patios, pools, side yards, and contemporary homes that need a sleek boundary. Solid panels give stronger screening, while perforated panels allow more light and airflow. Metal can feel sharp visually, so I would soften it with planting, gravel, wood accents, or warm outdoor furniture. Best For: Modern patios, pools, and side yardsDIY Difficulty: Moderate to hardPrivacy Level: Medium to highApprox. Material Cost: $20-$50 per linear ft 15. Modern Wood and Concrete Fence A modern wood-and-concrete fence combines a strong base with warmer wood details. Concrete, stucco, or block adds visual weight, while wood slats keep the design from feeling too cold. This style works for modern homes, pool areas, and street-facing yards where the fence is part of the architecture, not just the boundary. Best For: Modern homes, pools, and street-facing yardsDIY Difficulty: HardPrivacy Level: HighApprox. Material Cost: $25-$60+ per linear ft 16. Cinder Block and Wood Fence A cinder block and wood fence works when you already have a masonry base but need more height, warmth, or privacy. The block adds strength, while wood slats or panels create a softer upper section. Before adding anything to an existing wall, I would confirm that it is stable enough for the extra load. Best For: Urban backyards, patios, pools, and masonry basesDIY Difficulty: HardPrivacy Level: HighApprox. Material Cost: $20-$55 per linear ft Garden, Green, and Small-Space Fence Ideas These ideas add privacy without making compact patios, garden corners, balconies, or narrow side yards feel too closed in. They work best when the planting, screening, and furniture layout are planned together. 17. Square Trellis Panel Fence A square trellis panel fence is light, airy, and useful for patios, balconies, cottage gardens, and narrow spaces. It gives low privacy at first, then more coverage as vines grow in. Choose the climbing plant carefully because the wrong vine can become heavier and harder to control than the trellis itself. Best For: Gardens, patios, balconies, and narrow spacesDIY Difficulty: Easy to moderatePrivacy Level: Low to mediumApprox. Material Cost: $8-$20 per linear ft 18. Raised Planter Fence Wall A raised planter fence wall combines planting and privacy in one structure. Planter boxes with tall boards, trellis, or screens behind them work well for patios, balconies, small yards, and garden corners. A sturdy DIY planter box approach helps because soil, water, and mature plants add more weight than many people expect. Best For: Small yards, patios, balconies, and garden cornersDIY Difficulty: ModeratePrivacy Level: Medium to highApprox. Material Cost: $20-$60 per linear ft 19. Tall Fence With Hedges A tall fence with hedges creates a clean boundary while adding softer greenery. The fence gives structure right away, while shrubs, grasses, or hedges add texture and privacy as they fill in. This is one of my favorite approaches for outdoor rooms because the hard fence line feels less flat once the planting matures. Best For: Pools, hot tubs, side yards, and family backyardsDIY Difficulty: ModeratePrivacy Level: Medium to highApprox. Material Cost: $20-$50 per linear ft 20. Living Hedge Fence A living hedge fence uses shrubs or small trees to create a natural privacy boundary. It can block views, soften wind, and support birds or beneficial insects over time. The main thing to remember is time: a hedge can look thin at first, so it may need a temporary screen while it fills in. Best For: Natural privacy, garden-heavy yards, and softer boundariesDIY Difficulty: Easy to moderatePrivacy Level: Medium to high over timeApprox. Material Cost: $10-$30 per linear ft 21. Pergola and Fence Combination A pergola-and-fence combination creates a more defined outdoor room with shade, structure, and privacy. Place a pergola against a fence or wall, then add side panels, climbing plants, or matching wood details. A simple pergola plan can also keep the posts, proportions, and roof structure from looking like an afterthought. Best For: Patios, dining areas, lounges, and fire pitsDIY Difficulty: HardPrivacy Level: Medium to highApprox. Material Cost: $35-$100+ per linear ft Front Yard and Special Yard Fence Ideas These fence styles work for visible areas, sloped lots, and yard layouts that need more careful planning than standard backyard fencing. Since these fences affect the curb appeal, I would keep the design quieter and more consistent with the home’s exterior. 22. Scalloped Picket Fence A scalloped picket fence creates a decorative front-yard or garden boundary without blocking too much light. The curved top works well along walkways, flower beds, and cottage-style spaces. It is better for marking an edge than adding security, so use it where charm and definition matter more than privacy. Best For: Front yards, walkways, flower beds, and gardensDIY Difficulty: Easy to moderatePrivacy Level: LowApprox. Material Cost: $12-$30 per linear ft 23. Front Yard Privacy Wall A front yard privacy wall helps homes facing streets, sidewalks, or close neighbors feel more protected. It can be made from stucco, concrete, masonry-style panels, wood, or mixed materials. I would keep the gate, house color, planting, and wall finish cohesive so the wall feels like part of the entrance rather than a barrier. Best For: Street-facing homes and exposed front yardsDIY Difficulty: HardPrivacy Level: HighApprox. Material Cost: $30-$80+ per linear ft 24. Mixed-Height or Stepped Fence A mixed-height or stepped fence works for slopes, uneven lots, and yards with changing privacy needs. Taller sections can block views near patios, while lower sections keep the rest of the yard open. This design looks best when the height changes feel intentional, not like the fence was patched together after a mistake. Best For: Sloped yards and changing privacy needsDIY Difficulty: Moderate to hardPrivacy Level: Varies by sectionApprox. Material Cost: $12-$35 per linear ft DIY Fence Tips for a Better-Looking, Longer-Lasting Fence Small details can make a DIY fence look cleaner and last longer. Focus on spacing, finish, drainage, and the order of decisions so the fence feels planned instead of patched together. Plan Board Spacing: Narrow gaps give more privacy, while wider gaps allow better airflow and light. For small yards, semi-open spacing can keep the fence from feeling too heavy. Use One Finish: A single paint or stain color can make budget wood, mixed boards, or older fence sections look more intentional. Seal Cut Ends: Freshly cut wood absorbs moisture faster than the board surface. Sealing those ends helps reduce swelling, cracking, and rot. Keep Soil Away: Mulch, wet leaves, and soil pressed against wood can shorten the fence’s life. Leave space near the bottom so the boards can dry properly. Plan Gates Early: Decide the gate width, swing direction, latch height, and walkway clearance before setting posts. This helps avoid sagging, awkward access, or blocked paths. Add Details Last: Plants, lighting, toppers, hooks, shelves, and wall art can improve the look, but they should come after the main fence is strong, level, and secure. These small choices help a simple fence feel more finished without turning paint, decor, or small add-ons into full fence ideas. What to Check Before Building a DIY Fence Before building a DIY fence, check the details that affect placement, safety, cost, and durability. Confirm the property line using a survey, plat map, deed, or local records instead of guessing from an old fence, hedge, or neighbor’s layout. Review local rules, permits, HOA guidelines, height limits, front-yard visibility rules, and pool barrier codes if needed. Call your local utility marking service before digging so you do not hit gas, water, electric, cable, drainage, or irrigation lines. Also, consider the weather and the yard’s shape. Windy yards may need deeper posts, wet soil needs better drainage, and slopes may need stepped sections. Plan the gate width, swing direction, latch height, and walkway clearance before installing posts. Before You Dig: Confirm your property line, check local fence rules, and contact your utility marking service before setting posts. Frequently Asked Questions What side of the fence should face my neighbor? Many areas expect the finished side of a fence to face outward or toward the neighbor, but rules vary by city, HOA, and shared boundary agreements. Check local requirements before ordering materials so the rails, posts, and finished face are planned correctly. Can I build a DIY fence in sections over time? Yes, you can build a fence in sections if the layout is planned from the start. Set the post spacing, height, finish, and gate locations first so that later sections match rather than look like separate projects. What fence color works best for a small backyard? Soft wood tones, muted browns, warm grays, and dark stains often work well in small backyards because they sit quietly behind plants and furniture. Very bright colors can make the fence feel closer and more noticeable. How do I make a fence match my patio or deck? Repeat one or two details from the patio or deck, such as the wood tone, metal finish, board direction, planter style, or lighting. Matching everything can look flat, but repeated details make the outdoor area feel connected. Conclusion A good fence should make your yard feel more private, useful, and complete without adding stress. With the right DIY fence ideas, you can choose a design that fits your space, budget, climate, and skill level. I like starting with the main goal first, then narrowing the choice by material, privacy, airflow, cost, and maintenance. That is the same design lens I use for outdoor projects: solve the function first, then make the fence feel like it belongs with the patio, planting, and house exterior. Start with the area where you need the most privacy, choose one design that fits your skill level, and build from there. A simple fence can still look thoughtful when the material, spacing, finish, and placement all work together.
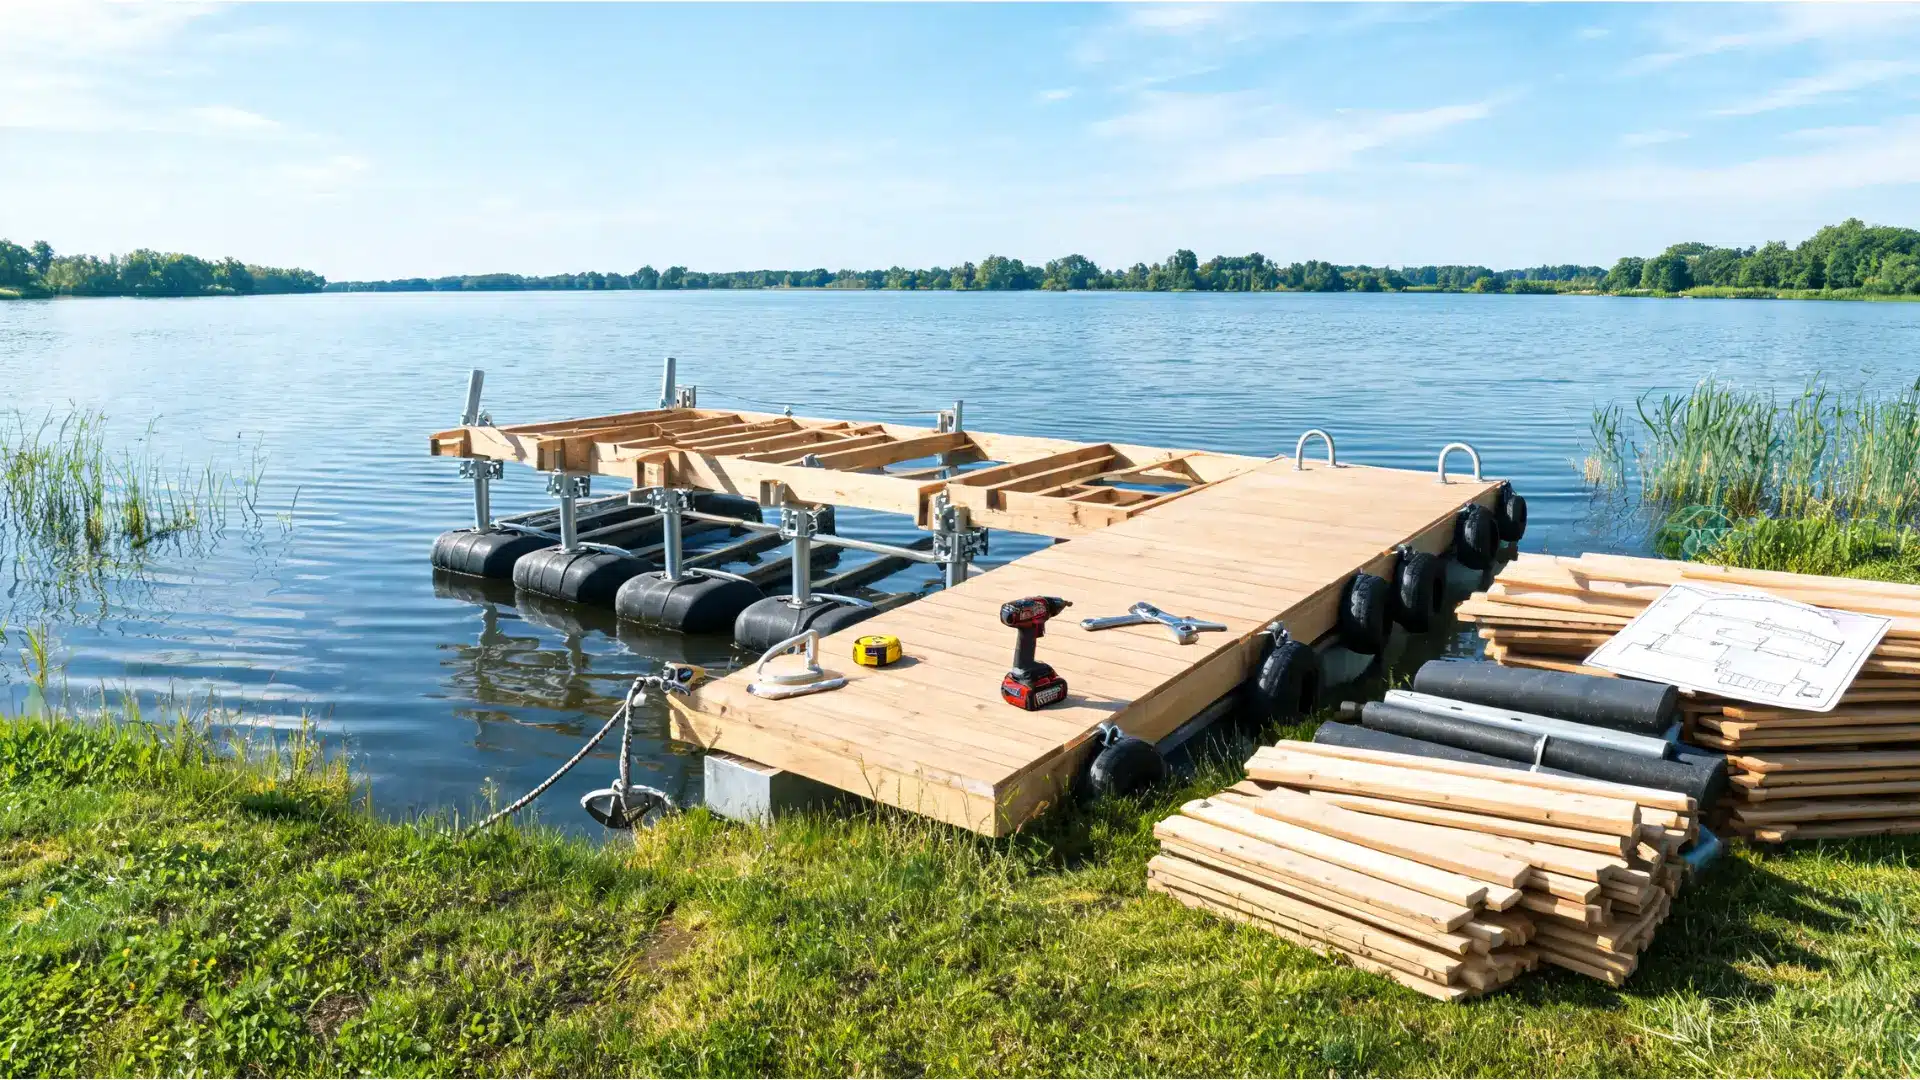
Cost Note: Figures in this article are estimates based on national averages. Actual costs vary significantly by region, contractor, materials, and project scope. Always get at least three quotes before committing to any project above $1,000. The first thing I evaluate on any dock project is what the water is doing two seasons after the build. Post rot. Fastener corrosion. Floats that have shifted under weight and never quite leveled out again. Pressure-treated pine posts driven into sandy lakebeds tend to wobble loose within three to five years if they weren’t set deep enough at the start, and most first-time builders don’t go deep enough because the soil feels firm at four feet. Go to six. Learning how to build a dock that lasts comes down to three decisions made before you touch a single board: what type of dock fits your water conditions, what materials will still be serviceable after two Wisconsin winters or a Florida hurricane season, and whether your posts, pipes, or floats are actually sized for the load you’re putting on them. Get those three right and the construction itself is straightforward. Project Type Pipe-leg fixed dock with wood frame and decking Difficulty 3/5 — manageable for two people with basic construction experience Time 1–2 weekends for a basic 8×16-foot section Cost Range $1,500–$4,000 DIY depending on size and materials Key Tools Drill/impact driver, level, string line, tape measure, saw, sledgehammer Permit Required? Almost always — check with your local municipality before starting Before diving into the build sequence, a quick note on permits: waterfront construction is one of the most regulated DIY categories in the US. The Army Corps of Engineers, your state’s environmental agency, and your local municipality may all have jurisdiction, depending on the type of water body. A dock built without the right permits can be ordered removed at your expense. Check before you buy lumber. Fixed Dock vs. Floating Dock: Which One Holds Up in Your Conditions The dock type that works best is determined entirely by your water — not your budget preference or what you saw on a lake house tour. Each type has a specific failure mode in the wrong conditions, and that’s what you need to weigh before committing. Dock Type Best Conditions What Fails After Two Seasons Estimated Cost (DIY, basic section) Fixed (post/pile) Calm water, stable water levels, firm sandy or clay lakebed Posts loosen in soft soil; ice heave lifts them in cold climates $2,000–$5,000+ Floating Variable water levels, deeper water, soft or muddy bottoms Under-sized anchors drag; floats rated for the wrong load list or bounce $1,500–$4,500 Pipe-leg Shallow water (under 5 ft), seasonal use, firm bottom Legs shift in sand over time; exposed to ice damage if left in $800–$2,500 Crib Heavy permanent use, high-traffic boat docks, stable water Expensive upfront; requires permits almost everywhere; not DIY-friendly $5,000–$20,000+ The pipe-leg dock is where most DIY beginners should start, it’s the most forgiving design for shallow-water installs, can be pulled out seasonally before ice sets in, and doesn’t require pile-driving equipment. That’s the build sequence this guide covers in detail. If your water runs deeper than five feet at the dock end or your levels fluctuate significantly by season, a floating dock is the smarter choice despite the added complexity of anchoring. Choosing Dock Materials That Actually Last Materials are where people cut corners and pay for it two winters later. The wrong lumber choice isn’t always obvious; a dock built with above-ground-rated pressure-treated lumber instead of ground-contact-rated wood might look fine for a couple of seasons before the rot sets in at the waterline. The right call depends on what part of the structure you’re building. Material Best Use Rough Cost Real-World Lifespan Ground-contact PT lumber (UC4B) Posts, joists, framing in or near water $0.80–$1.50/linear ft 20–30 years with maintenance Composite decking Walking surface — no splinters, no annual sealing $3–$7/linear ft 25–30 years, minimal upkeep Aluminum frame Saltwater or high-corrosion environments Higher upfront, very low maintenance 30+ years Galvanized hardware Freshwater docks — bolts, brackets, pipe clamps Standard cost 10–15 years before replacement Stainless steel hardware Saltwater or harsh-weather docks 2–3× the cost of galvanized 25+ years The one thing I’d tell anyone building their first dock: don’t put standard above-ground pressure-treated lumber into posts or framing that contacts the water or wet soil. You need UC4B ground-contact-rated lumber for anything below or at the waterline. The spec is printed on the tag at the lumber yard — check it before you load the truck. Pro Tip: Brush cut-end wood preservative on every board end immediately after cutting. Pressure treatment doesn’t penetrate the full thickness of the lumber — saw cuts expose untreated wood, and those exposed ends are where rot starts first. Planning the Dock Size and Location Walk your shoreline before you finalize anything. The best-looking dock location on paper is often the worst on the ground — soft mud, submerged rocks, exposed to the prevailing wind line, or sitting directly in the path of boat traffic. What you’re looking for is a spot with consistent water depth, firm bottom conditions, protected exposure, and clear access from land. Measure water depth at three points: at the shoreline, midway out, and where the dock will end. Do this at seasonal low water — the worst-case scenario. For a boat dock, you need at least 2.5 to 3 feet of clearance at the bow end at low water to avoid hull contact. A fishing or swimming dock has more flexibility in depth, but anything under 5 feet at the end point means a pipe-leg fixed design will work. Deeper than that, and you’re in floating dock territory. Keep the dock width practical. A walkway section needs to be at least 4 feet wide to move comfortably with a gear bag. A platform or boat dock end section works best at 8–10 feet wide. For a combined walkway-plus-platform layout, plan a T or L shape at the end rather than extending the full width from shore, it’s cheaper, structurally simpler, and gives better access on both sides of a moored boat. If your outdoor layout is still taking shape, it’s worth thinking about how the dock connects back to the rest of your waterfront space, including any deck structure near the shoreline. Step-by-Step Guide: Installing a Wood Dock with Pipe Legs Before you start the installation, make sure you have all the required hardware, tools, and safety gear ready. Having everything prepared in advance will make it easier to assemble the dock sections, install the pipe legs, level the structure, and secure the dock properly in the water. Tools and Materials Needed Before starting the dock build, gather the main tools, lumber, fasteners, and safety items. Having everything ready helps you work more safely and avoid stopping halfway through the frame setup. Saltwater splash-rated pressure-treated lumber Pressure-treated posts Crossmember boards Joists Blocking boards Standard deck boards Cut-end wood preservative Paintbrush for applying preservative Garden hose for water jetting posts Sledgehammer Sacrificial wood cap or steel plate for post tops String line for alignment Line level Tape measure Temporary construction screws Drill or impact driver 10-inch, 1/2-inch carriage bolts Lag bolts Ratchet strap Saw for cutting lumber Level Work gloves Safety glasses Helper for handling long posts and boards Optional: concrete form cylinders if setting posts in concrete After gathering these items, start by treating the cut board ends, setting the posts, checking alignment, and using temporary screws before final bolts. Step 1: Choose Saltwater-Rated Lumber Start with lumber that can handle outdoor moisture, splash exposure, and changing weather. Standard untreated boards are not a good choice for dock framing because they can rot, weaken, or absorb moisture too quickly. Use saltwater splash-rated lumber or properly pressure-treated boards designed for wet outdoor conditions. Keep cut-end wood preservative nearby while you work. Every time you cut a board, brush preservative onto the exposed end so water has a harder time entering the wood. Step 2: Set the Dock Posts in Place The dock posts form the foundation, so set them carefully. Use water pressure from a hose to loosen the soil around each post location. As the soil softens, twist the post back and forth while working it into the ground. Set each post deep enough to stay secure under weight, movement, and water pressure. Avoid striking the top too hard with a sledgehammer because this can split the wood. If heavy hammering is needed, use a protective cap or steel plate to protect the post top. Step 3: Keep the Posts Straight and Aligned As each post goes into place, check that it stays straight and plumb. Use string lines to keep the dock running in a clean path from the shoreline to the end of the structure. Check every post from more than one angle before moving forward. A crooked post may not seem like a big problem at first, but it can make crossmembers, joists, blocking, and deck boards harder to install later. Good alignment now saves time during framing. Step 4: Set the First Crossmember Height After the posts are set, attach the first crossmember at the planned height for the dock frame. This board becomes the reference point for the rest of the structure, so place it carefully. Use temporary screws first instead of permanent bolts. This lets you adjust the height before locking the frame into place. Once you know the crossmember is sitting at the right level, you can move forward with stronger hardware. Step 5: Double-Check Level Before Final Fastening Before adding lag bolts or carriage bolts, check the frame height in more than one way. A string level can help, but it should not be your only reference. Compare the frame against the waterline and use a reliable level where possible. Temporary screws make it easier to correct small mistakes. Do not fully fasten the frame until it is straight, level, and properly aligned with the rest of the dock layout. Step 6: Install Joists and Add Blocking Once the crossmembers are level, install the joists that will support the dock boards. Place crowned boards with the crown facing upward when possible so the boards settle more naturally under load. For longer spans, add blocking between joists. Blocking stiffens the frame, helps spread weight across the structure, and reduces movement underfoot. This step is especially useful on docks that will hold people, gear, coolers, or boat-related equipment. Step 7: Avoid Pulling Posts Loose Be careful when using straps or heavy force to adjust crowned, twisted, or uneven boards. Too much tension can pull a post upward or loosen it from the ground. If any post shifts during the build, stop and reset it before continuing. The posts need to remain deep, stable, and secure before crossmembers, joists, blocking, or decking are added. A loose post can affect the safety of the whole dock. Step 8: Use Temporary Screws Before Final Hardware Temporary construction screws are useful while adjusting the dock frame. Use them to hold boards in place while you check alignment, height, spacing, and level. Once the frame is straight and secure, reinforce or replace the temporary setup with permanent hardware. Use carriage bolts, lag bolts, washers, and exterior-rated fasteners that can handle moisture and movement. Do not rely on temporary screws as the final connection. Step 9: Plan the Final Dock Section Carefully Plan the final dock section with extra care, especially if it connects to a gangway, floating section, or deeper water. The end of a dock often handles more movement, walking weight, and possible uplift during storms or flooding. Deeper water may require longer posts, stronger bracing, better anchoring, or extra help during installation. Before framing this section, check the height, water depth, post stability, and how the final deck boards will meet the rest of the dock. Step 10: Prepare for Deck Boards and Final Fastening Before installing deck boards, inspect the full frame. Check that the posts, crossmembers, joists, blocking, and long board joints are secure. Look closely at corners and any areas that may need extra bracing. Once the frame feels firm and properly aligned, add the final bolts, lag screws, washers, and exterior-rated fasteners. After that, install the deck boards with proper spacing for drainage and expansion. Keep the surface even, secure, and safe for walking. This creates a stronger walking surface and helps reduce movement in the finished docks. What Fails Two Winters Later The failure modes I see most often on fixed docks built without enough planning are predictable: post rot at the waterline (where wet soil meets air), fastener corrosion that works loose before the wood fails, and ice heave in northern climates that lifts posts out of the ground over successive freeze-thaw cycles. If you’re in a climate that gets sustained ice cover, your fixed dock needs to come out of the water each fall — or be designed with ice-rated crib foundations, which is a different project altogether. A pipe-leg dock is the right choice specifically because the pipes and frame can be removed seasonally. The wood frame stores under cover; the pipes stay in the ground or get pulled depending on how deep the frost line runs in your area. Floating docks have their own failure modes: under-sized anchors that drag in storms, floats rated for a lower load than what’s actually put on them, and hinge connections between sections that corrode and seize. Size anchors to 1.5× the expected wind and wave load. Check float ratings before you buy — most residential dock floats are rated between 500 and 1,500 pounds per float. Know your deck area and expected load before ordering. Cost Breakdown: Building a Basic Dock Line Item Low End High End What Drives Variation Lumber (frame + posts) $400 $1,200 Size of dock, lumber grade, regional pricing Decking material $250 $900 Composite vs. PT wood, deck area Hardware (bolts, brackets, fasteners) $150 $400 Stainless vs. galvanized, connection count Pipe or post material $100 $350 Pipe diameter, count, and depth Floats (floating dock only) $200 $600 Float capacity, number of sections Anchors and chain (floating dock only) $100 $400 Anchor type, water depth, chain length Permit fees $50 $500+ State and local jurisdiction requirements Tools and consumables $100 $300 What you already own Total (DIY, no labor) $1,350 $4,150 Size, materials, and location are the main levers Cost estimates based on national average lumber and hardware pricing, 2025. Verify current material costs locally before budgeting — lumber prices shift significantly by region and season. The biggest variable most people underestimate is hardware. Stainless fasteners cost two to three times what galvanized costs, but in a saltwater or high-humidity environment, they’re not optional — they’re the difference between a dock that’s structurally sound in year ten and one that has loose connections you can’t tighten because the bolts are corroded solid. If you’re building in a freshwater lake in a moderate climate, galvanized hardware is fine. Coastal or Great Lakes builds warrant stainless throughout. For projects near the water, the structural framing considerations are similar to what goes into a well-built outdoor pergola; material choice at the start determines the maintenance burden years later. Dock Maintenance After the Build Inspect the dock twice a year — once in spring before it goes back into service, once in fall before it comes out or winter sets in. The spring check should cover post movement, fastener tightness, decking surface condition, and any float or anchor shifts. The fall check is primarily about what the summer season has done — loose boards from heavy use, weathered sealant on wood decking, and any hardware that’s showing early corrosion. Clean algae off the deck surface before it builds up. Algae on composite or wood decking turns slippery within days of the first warm spell, and that’s a safety issue, not just an aesthetic one. A stiff brush and a diluted deck cleaner appropriate for your decking material handle most buildup without running harsh chemicals into the water. Wooden dock surfaces may need sealing or staining every two to three years depending on sun and water exposure. Check the manufacturer’s recommendation for your specific lumber or composite product. Any coating you apply near the water should be labeled safe for aquatic environments. Common Mistakes That Cost Money Later Skipping the permit. Unpermitted docks get ordered removed. The cost of removal exceeds the cost of the permit by a significant margin. Using above-ground rated lumber in ground-contact locations. Check the lumber tag for UC4B before buying posts or framing that will touch soil or water. Under-sizing posts or anchors. A post driven 3 feet into sand isn’t a post — it’s a stake. Go deeper or change your foundation approach. Ignoring ice. In any climate with sustained freeze, fixed docks need to come out in fall. If they don’t, ice heave will move the posts. Tight-spacing deck boards. No gap means no drainage, and standing water accelerates rot even in treated lumber. Using indoor or standard exterior hardware. Marine environments are hard on metal. Use galvanized or stainless throughout — no exceptions at the waterline. Building cleats into weak framing. A cleat handles serious lateral load when a boat is tied up in wind. Back it with solid blocking and use lag bolts into the main frame. Frequently Asked Questions About Building a Dock These are the questions that tend to come up once the permit is approved and the lumber is on site — the ones that don’t show up in the planning guides. How long does it take to build a dock by yourself? A basic pipe-leg dock section (8×16 feet) takes two people one to two weekends. Solo builds take longer and introduce safety issues when handling long posts and heavy frame sections near water. Two people isn’t optional for the post-setting step. What wood is best for dock framing? UC4B ground-contact pressure-treated lumber — typically Southern Yellow Pine — is the standard for framing. For decking, composite or UC4A treated boards are the practical choice. Cedar and tropical hardwoods work but cost significantly more per board foot. Do I need a permit to build a dock on my own lake property? Almost certainly yes. Waterfront construction triggers federal, state, and local jurisdiction in most US states. Contact your state environmental agency and local building department before starting. The answer varies significantly by state, water body type, and dock size. How deep should dock posts be set? At minimum, one-third of the post length should be below the lakebed surface. In sandy or soft soil, go deeper — 5 to 6 feet of depth is not excessive for posts supporting a permanent structure. Shallower than that and you’re relying on the soil to do work it can’t sustain under load and wave action. What is the best dock decking for bare feet? Composite decking with a textured surface is the best choice for comfort and safety. It doesn’t splinter, doesn’t require annual sealing, and stays cooler than dark-colored wood in direct sun. Look for products specifically rated for wet-environment use. Can I build a dock in winter? In theory, yes. In practice, frozen ground, icy water surfaces, and cold-weather lumber issues make winter builds impractical in most northern US climates. Spring — once water levels stabilize from snowmelt — is the best window for post-setting and installation. How do I stop my dock from wobbling? Wobble almost always comes from one of three sources: posts not set deep enough, inadequate cross-bracing in the frame, or hardware that’s loosened over time. Check post depth first. Add diagonal blocking between joists. Then go over every bolt with a wrench before assuming the structure itself needs rebuilding. How much does a contractor charge to build a dock? Professional dock construction typically runs $150–$300 per linear foot installed, not counting permit fees or specialty hardware. A 30-foot dock with a platform end runs $6,000–$12,000 or more with labor. DIY saves significantly but only if you have the right tools and can handle the physical work involved. Final Verdict Creating a safe and durable waterfront structure starts with good planning and smart decisions. I’ve found that success comes from understanding your site, choosing the right dock type, following local rules, and using materials built to handle water and weather. When you learn how to build a dock, each step matters, from measuring depth and building a strong frame to adding secure supports, decking, and safety features. These details help you avoid costly mistakes and create a dock that works well for years. With the right approach, you can build with more confidence and get better results. Have questions or tips of your own? Share your thoughts below and check out my related dock-building guides. Sources:U.S. Army Corps of Engineers, “Permits for Work in Waterways.” https://www.usace.army.mil/American Wood Protection Association, “Treated Wood for Marine Use.” 2024. https://www.awpa.comAngi/HomeAdvisor, “Dock Building Cost Estimates.” 2024. https://www.angi.com
A good home update should solve a real problem, not create a bigger one. This list of diy home projects and home diy projects helps you choose work by Estimated Cost, skill, and space, so the next step feels clear. Some ideas take less than an hour. Others need a calm weekend and a better plan. My rule is simple: start with the thing that bothers you most, such as poor lighting, cluttered counters, loose hardware, or worn finishes. Pick one task, gather supplies, and finish it well. You get a cleaner, safer, more useful space without taking on more than your budget or schedule allows, right now, inside your own home. Cost Note: All cost ranges below reflect supply costs only, not tool rentals or contractor labor. Projects marked Advanced often benefit from a second pair of hands. Always get at least three quotes before hiring out any work above $1,000. Types of DIY Home Projects to Compare Before You Start Before you choose a project, it helps to know what kind of change your home needs. Some updates fix small daily problems, while others improve style, storage, outdoor use, or long-term function. Use this table to compare the main project types before buying supplies or setting aside a weekend. Project type Best for Typical Estimated Cost range Skill level Small repairs and maintenance Fixing daily irritations, worn spots, odors, loose hardware, and basic upkeep $0–$100 Beginner Room updates Making a room feel cleaner, more finished, or less dated $30–$500 Beginner to advanced Storage fixes and larger weekend builds Reducing clutter, adding hidden storage, or improving busy spaces $10–$1,000 Beginner to advanced Outdoor work Improving curb appeal, garden areas, patios, porches, and exterior function $20–$500 Beginner to intermediate Estimated Cost means the rough supply range, not tool rentals or pro labor. Skill Level shows how much measuring, cutting, drilling, prep, or help the task may need. Best Fit indicates whether the project works best indoors, outdoors, or in either setting. Before sanding or disturbing old paint, check the EPA’s lead-safe renovations for DIYers , especially if your home was built before 1978. Start Small: Home DIY Projects That Fix Daily Irritations Best for quick wins: these beginner-friendly updates help when a room feels messy, worn, or harder to use than it should. My pick is to start with the item you notice every morning or every night. 1. Deep Clean the Dishwasher and Disposal Clean the filter, gasket, spray arm, and disposal flap, then run a hot vinegar cycle. This small kitchen maintenance task helps with odors, cloudy dishes, and slow draining. Keep vinegar, baking soda, a cloth, and an old toothbrush nearby so the job stays simple and quick for my monthly reset. Estimated Cost: $0-$20| Skill Level: Beginner |Best Fit: Indoor 2. Patch Small Wall Holes Fill nail holes, anchor marks, and small dents with spackle. Sand lightly, then add matching paint once the patch dries. This wall repair is useful before painting, moving furniture, or hanging new art. My tip is to keep leftover paint labeled by room in my kit for fast fixes later. Estimated Cost: $5-$25| Skill Level: Beginner| Best Fit: Indoor 3. Refresh Sink or Tub Caulk Cut out old caulk, clean the seam, let it dry, then apply a fresh line. This bathroom repair helps seal gaps around sinks and tubs. If water is leaking behind the wall or beneath the fixture, pause the work and fix the leak before adding caulk to ensure a lasting seal. Estimated Cost: $10-$30| Skill Level: Beginner| Best Fit: Indoor 4. Change Cabinet Knobs or Pulls Swap dated knobs or pulls on cabinets, vanities, dressers, or built-ins. Measure hole spacing before buying new hardware. This budget update can make a kitchen or bath feel cleaner fast. Keep old screws and handles in a labeled bag, especially if the home is rented for a later swap back. Estimated Cost: $15-$75| Skill Level: Beginner| Best Fit: Indoor 5. Add Door and Entry Hooks Install hooks where bags, coats, towels, keys, hats, or leashes usually land. This entry storage fix works best when it matches real habits. Use wall anchors when studs are not available. Mount a lower row for kids so cleanup becomes easier for the whole family at home every day, too. Estimated Cost: $10-$40| Skill Level: Beginner| Best Fit: Indoor 6. Add Drawer Dividers Use dividers for utensils, makeup, tools, office supplies, or junk drawers. Measure width, length, and depth before buying. This drawer organization idea works when each section has one job. My rule is simple: if the item has no clear slot, it soon becomes clutter again inside the drawer. Estimated Cost: $15-$60| Skill Level: Beginner| Best Fit: Indoor 7. Replace a Shower Head Choose a fixed, rain, or handheld model based on how the shower gets used. Wrap threads with plumber’s tape, hand-tighten, then test for drips. This bathroom upgrade can quickly improve comfort. Avoid forcing the connection because overtightening can crack parts or cause small leaks after the first full shower test. Estimated Cost: $25-$100| Skill Level: Beginner| Best Fit: Indoor 8. Add Battery Under-Cabinet Lights Stick rechargeable strips or puck lights under kitchen cabinets, inside closets, or near pantry shelves. Place them near the front edge so light falls on the work surface. This lighting update requires no hardwiring and helps make dark corners feel safer and easier to use at night, without calling an electrician. Estimated Cost: $25-$80| Skill Level: Beginner| Best Fit: Indoor Room Style Fixes With a Clear Payoff Best for visible change, these interior room updates work well when the space functions fine but looks flat, dated, or unfinished. Use them after the small repairs are done. 9. Paint One Accent Wall Choose the wall behind a bed, sofa, desk, or dining table. Test paint in daylight and lamp light before buying a full gallon. This paint project feels manageable because only one wall changes. Tape carefully, roll two coats, and let the color dry before moving furniture back into place. Estimated Cost: $30-$100| Skill Level: Beginner| Best Fit: Indoor 10. Add Peel-and-Stick Wallpaper in a Small Spot Use a closet wall, a shelf back, a powder room wall, or a laundry corner. Clean the surface, mark a level line, and smooth bubbles as you go. This removable wallpaper idea works best in small areas where the pattern adds interest without taking over the whole room or making removal harder later on. Estimated Cost: $40-$150| Skill Level: Beginner| Best Fit: Indoor 11. Upgrade a Bathroom Mirror Swap a flat mirror for a framed one, add a frame kit, or build a simple wood frame around it. Measure width, height, faucet clearance, and light clearance first. This bathroom update can make the room feel more finished without replacing tile, flooring, or the vanity, which keeps Estimated Costs easier to control. Estimated Cost: $50-$200| Skill Level: Beginner to Intermediate| Best Fit: Indoor 12. Paint a Bathroom Vanity Remove doors, clean grease, sand lightly, prime, and use cabinet paint. Let the finish cure before heavy use. This vanity makeover is cheaper than replacement and works well with new hardware. My tip is to label hinges and doors, so reassembly stays simple when the final coat is fully dry. Estimated Cost: $75-$200| Skill Level: Intermediate| Best Fit: Indoor 13. Paint Interior Floor Tile Use this in powder rooms, laundry rooms, or low-moisture areas. Clean well, scuff the tile, prime, paint, add a stencil if desired, then seal. This floor paint project needs patience. Avoid shower floors and wet zones, as standing water can break down the finish, even after all coats have fully dried. Estimated Cost: $100-$250| Skill Level: Intermediate| Best Fit: Indoor 14. Add Wall Frame Molding Plan the layout with painter’s tape before cutting the trim. Keep spacing even, attach molding, fill nail holes, caulk seams, and paint. This trim project suits dining rooms, bedrooms, and halls. Measure twice before each cut, since small errors show up fast in repeated boxes across each wall section, and later overall. Estimated Cost: $100-$300| Skill Level: Intermediate| Best Fit: Indoor 15. Install Floating Shelves Mark studs, check weight limits, and choose shelf depth before drilling. Floating shelves work for dishes, towels, books, office items, or plants. This wall storage idea looks best when heavy items sit low and daily items stay easy to reach without crowding the shelf for a cleaner daily setup overall. Estimated Cost: $75-$250| Skill Level: Intermediate| Best Fit: Indoor 16. Create a Gallery Wall With Paper Templates Trace the frames on paper, tape the layout to the wall, then adjust the spacing before drilling holes. Keep one center line or edge consistent. This wall art layout method saves time and reduces the number of extra nail marks. Mix frame sizes, but keep colors consistent for a cohesive look from across the room at home. Estimated Cost: $75-$250| Skill Level: Intermediate| Best Fit: Indoor 17. Make a Fabric Headboard Cut plywood to size, add foam, wrap batting, then staple fabric tightly on the back. Mount it to the bed frame or wall. This bedroom project adds softness behind the bed. Use washable fabric if kids, pets, or guests will lean against it often at the end of the day. If you want to know more about different builds before committing to fabric, there are several upholstered and wood headboard styles worth comparing first. Estimated Cost: $100-$300| Skill Level: Intermediate| Best Fit: Indoor 18. Add Peel-and-Stick Backsplash Clean the wall, plan the first row, and cut carefully around outlets. Use a heat-safe product near a stove and seal edges near water. This kitchen backsplash project provides a cleaner cooking zone without grout, tile saws, or a long work schedule, and makes cleanup easier after dinner. Estimated Cost: $75-$250| Skill Level: Intermediate| Best Fit: Indoor 19. Add a Wood Slat Feature Wall Mark studs, set even spacing, cut slats, and finish with paint or stain. Limit the work to one wall behind a bed, desk, or TV. This wood wall idea has a strong look, so careful spacing matters more than adding extra pieces. Sketch placement in my room notes first, then carefully. Estimated Cost: $150-$500| Skill Level: Intermediate to Advanced| Best Fit: Indoor 20. Replace a Ceiling Fan or Light Fixture Pick the right size for the room and ceiling height, then turn off the power at the breaker. This fixture update can change both the light and the airflow in one step. If the wiring looks old, crowded, or unclear, hire a licensed electrician instead of guessing, even for a quick room change today. For electrical work, review the NFPA electrical safety checklist, then hire a licensed pro when the work goes past a simple fixture swap. A good project should match your tools, budget, time, and comfort level before it starts. Estimated Cost: $100-$400| Skill Level: Intermediate| Best Fit: Indoor 21. Add Shiplap to a Small Wall Use a powder room, mudroom, or bed wall for a contained job. Mark studs, keep rows level, fill seams, caulk edges, and paint. This wall paneling project works best when you plan outlet cuts before the first board goes up, so the cuts stay clean and the final wall sits flat. A shiplap half wall is also worth considering if a full wall feels like too much for a first attempt. Estimated Cost: $150-$500| Skill Level: Intermediate to Advanced| Best Fit: Indoor Storage and Function Fixes for Busy Spaces Best for daily order: these storage ideas suit rooms where clutter keeps coming back. My favorite ones give every item a clear place, then make that place easy to reach. 22. Install a Closet System Measure the closet before buying shelves, rods, drawers, or bins. Sort by item type, then keep daily pieces at eye level. This closet organization project works when the layout matches how you get dressed, not how the store displays looks. Check your own morning routine before you buy anything new. Estimated Cost: $100-$400| Skill Level: Intermediate| Best Fit: Indoor 23. Add Pull-Out Trash and Recycling Bins Measure cabinet width, depth, and height before buying a slide kit. A pull-out bin clears floor space and hides waste behind a door. This kitchen storage fix works best near the sink or prep area, where trash gets used most. Busy nights feel easier when the floor stays clean, are too. Estimated Cost: $75-$250| Skill Level: Intermediate| Best Fit: Indoor 24. Set Up Pantry Zones Group snacks, breakfast, baking, cans, grains, and backstock in clear zones. Use bins and labels only where they help. This pantry organization plan should match how you cook and shop, so daily items stay easy to grab. Place heavy cans low and snacks where kids can reach safely without climbing. Estimated Cost: $50-$250| Skill Level: Beginner| Best Fit: Indoor 25. Build a Laundry Folding Shelf Add a wood shelf above front-load machines or along an open wall. Anchor brackets into studs and keep baskets nearby. This laundry room storage idea gives clean clothes a landing spot, helping prevent top piles from piling up on beds or chairs. Wash days feel calmer in my house each week. Estimated Cost: $75-$250| Skill Level: Intermediate| Best Fit: Indoor 26. Add a Peg Rail in an Entry A peg rail handles bags, jackets, hats, umbrellas, and keys in one clean line. Mount it level and choose a finish that matches nearby trim. This entryway storage fix feels more planned than random hooks and still stays easy to use. It helps during school mornings, workdays, and rainy afternoons. Estimated Cost: $50-$200| Skill Level: Beginner to Intermediate| Best Fit: Indoor 27. Build a Mudroom Bench With Cubbies A mudroom bench works best in an entry where shoes, bags, coats, and sports gear already pile up. Plan the bench around those habits first, then decide how many cubbies, hooks, baskets, and shelves the space can actually hold. Before cutting wood, measure the wall, baseboards, door swing, and walking path. The bench should give people a place to sit without blocking the entry. I would use durable paint or a wipeable finish here, because this area takes more scuffs, dirt, and daily use than a decorative built-in. Estimated Cost: $250–$800| Skill Level: Advanced| Best Fit: Indoor 28. Add a Garage Tool Wall Use pegboard, French cleats, shelves, hooks, bins, and labels. Mount heavy items into studs and keep sharp tools high. This garage organization project saves time because you can see tools at a glance instead of digging through boxes. Repairs can start faster when tools stay visible in my garage today. Estimated Cost: $100-$500| Skill Level: Intermediate| Best Fit: Both 29. Build a Window Seat With Storage Use a bedroom, playroom, or reading corner. Plan seat depth, cushion height, hinged lids, drawers, and trim before building. This built-in storage project adds seating and hidden storage, so toys, blankets, or books can stay close yet be covered. The room gains storage without adding extra bins or baskets nearby, too. Estimated Cost: $250-$900| Skill Level: Advanced| Best Fit: Indoor 30. Create Toy Rotation Storage Store extra toys in labeled bins and keep a smaller set out. Rotate on a simple schedule that suits your family. This toy storage method cuts visible clutter without buying more furniture, and it helps kids notice what they already have. Kids may ask for new things less often, too. Estimated Cost: $50-$250| Skill Level: Beginner| Best Fit: Indoor 31. Add Over-Toilet Storage Use shelves or a slim cabinet for towels, paper goods, and bath supplies. Anchor tall units to the wall and keep heavy items low. This small bathroom storage idea uses vertical space when a room has no linen closet. Daily items stay within reach after a morning shower, too. Estimated Cost: $50-$250| Skill Level: Beginner to Intermediate| Best Fit: Indoor 32. Build a Breakfast Nook Bench Use a kitchen corner or dining wall. Plan seat height, depth, storage lids, cushion thickness, and table clearance. This banquette seating project adds extra seats and hidden storage, but it requires careful measuring to ensure people can sit comfortably. Good spacing prevents knee bumps at breakfast at home each morning, too. Estimated Cost: $300-$1,000| Skill Level: Advanced| Best Fit: Indoor Outdoor Refreshes and Larger Weekend Builds Best for curb appeal and outdoor use, these weekend builds work for porches, patios, gardens, garages, and yards. Check the weather, drying time, and local rules before starting. 33. Paint the Front Door Clean, sand, prime, and use exterior paint made for doors. Remove the hardware if possible, and start early so the door dries before the night air sets in. This curb-appeal task gives the entry a cleaner look and uses a modest supply list. It is my favorite low-Estimated Cost exterior fix for my home this season. Estimated Cost: $40-$150| Skill Level: Beginner| Best Fit: Outdoor 34. Make a Modern House Number Sign Use sealed wood, metal numbers, and sturdy mounting hardware. Place the sign where it is clear from the street. This front entry update helps guests, drivers, and emergency crews find the house more quickly, making it both useful and neat. No one has to search for the entrance twice. Estimated Cost: $25-$100| Skill Level: Beginner| Best Fit: Outdoor 35. Power Wash a Walkway or Patio Clean concrete, pavers, porch steps, or patio surfaces with the right pressure setting. Test a hidden spot first. This outdoor cleaning task removes dirt quickly, but excessive force can damage wood, soft stone, loose mortar, or old surfaces. Move slowly and protect nearby plants before starting outside. Estimated Cost: $0-$150| Skill Level: Beginner| Best Fit: Outdoor 36. Build a Simple Window Box Build a box with drainage holes, add a liner, and mount it with strong brackets. Fill it with plants that match the sun level. This window box project works on front windows, sheds, garages, fences, or balcony rails. It uses fewer tools than a full garden build requires outside, too. Estimated Cost: $50-$150| Skill Level: Beginner to Intermediate| Best Fit: Outdoor 37. Stain a Small Deck or Porch Clean the wood, let it dry fully, sand rough spots, then stain in mild weather. Do not start before rain or high heat. This deck-care task helps keep wood looking cleaner and lasting longer with consistent seasonal upkeep. Wait for dry weather so the finish cures well afterward each year. The same prep and grain-reading rules apply if you are staining wood furniture or railings in the same session. Estimated Cost: $100-$400| Skill Level: Intermediate| Best Fit: Outdoor 38. Build a Raised Garden Bed Use lumber, metal kits, or blocks to make a simple growing bed. Keep the width easy to reach from both sides. This garden project suits vegetables, herbs, or flowers, and it keeps soil contained in small yards. You can grow more without tearing up extra lawn at home this season. Estimated Cost: $75-$300| Skill Level: Intermediate| Best Fit: Outdoor 39. Hang Outdoor String Lights Use outdoor-rated lights, guide wire, hooks, and safe outlets. Keep cords away from walking paths and water. This patio lighting project makes outdoor seating easier to use after sunset. Hire an electrician for hardwired power or new outlets. A safe setup matters most during regular use outdoors on dry nights. Estimated Cost: $50-$250| Skill Level: Intermediate| Best Fit: Outdoor Common Mistakes to Avoid With DIY Home Projects Even simple diy home projects can go wrong when you rush, skip prep, or choose the wrong task for your space. Use these reminders before buying supplies or starting work. Starting without first checking the estimated cost, time, tools, and skill level. Skipping surface prep before painting, caulking, staining, or peel-and-stick work. Picking a project because it looks nice, not because it fixes a real problem. Buying supplies before measuring the space twice. Ignoring safety steps for wiring, lead paint, ladders, sharp tools, or heavy materials. Taking on advanced builds without a helper, a plan, or a clear stopping point. Using cheap hardware where weight, moisture, or daily use matters. Forgetting drying, curing, or setup time before using the finished space. Relying on trend-based choices that may not Best Fit your home or habits. Leaving small repairs unfinished, which makes the room feel messier. A good project should make your home easier to use, not harder to manage. Start small, finish cleanly, and save larger work for days when you have enough time. Frequently Asked Questions How do I know if a project needs a permit? Check your local building department before changing structure, plumbing, wiring, windows, decks, fences, or exterior openings. Permit rules vary by city and project type. A quick check can prevent fines, failed inspections, or problems when selling the home later. What should renters ask before starting with updates? Renters should ask what changes are allowed, what needs written approval, and what must be removed before moving out. Paint, mounted shelves, lighting swaps, adhesive products, and outdoor updates can all cause issues if the lease does not allow them. Should I photograph before starting a DIY project? Take photos of the entire space, close-ups of damage, measurements, product labels, hardware placement, and anything you remove. These photos help with reassembly, returns, touch-ups, and showing the original condition if a repair or replacement becomes more complicated. How do I stop a small DIY from turning into a bigger job? Set a clear stopping point before you begin. Decide what you are fixing and what you are leaving alone. Keep supplies in one area, clean as you go, and avoid starting another update until the first one is fully finished. Closing Thoughts The best diy home projects and home diy projects are not always the largest ones. A small finished task can change how your home works each day, especially when it clears clutter, fixes a worn spot, adds safer lighting, or makes a busy room easier to use. My advice is to pick one space, one problem, and one budget before buying supplies. Start with the idea that feels useful right now, then build a skill one project at a time. When each task has a clear Estimated Cost, skill level, and Best Fit, you can plan with less stress and finish with more confidence without turning every free hour into extra work again. Drop a comment below if you have any further questions.
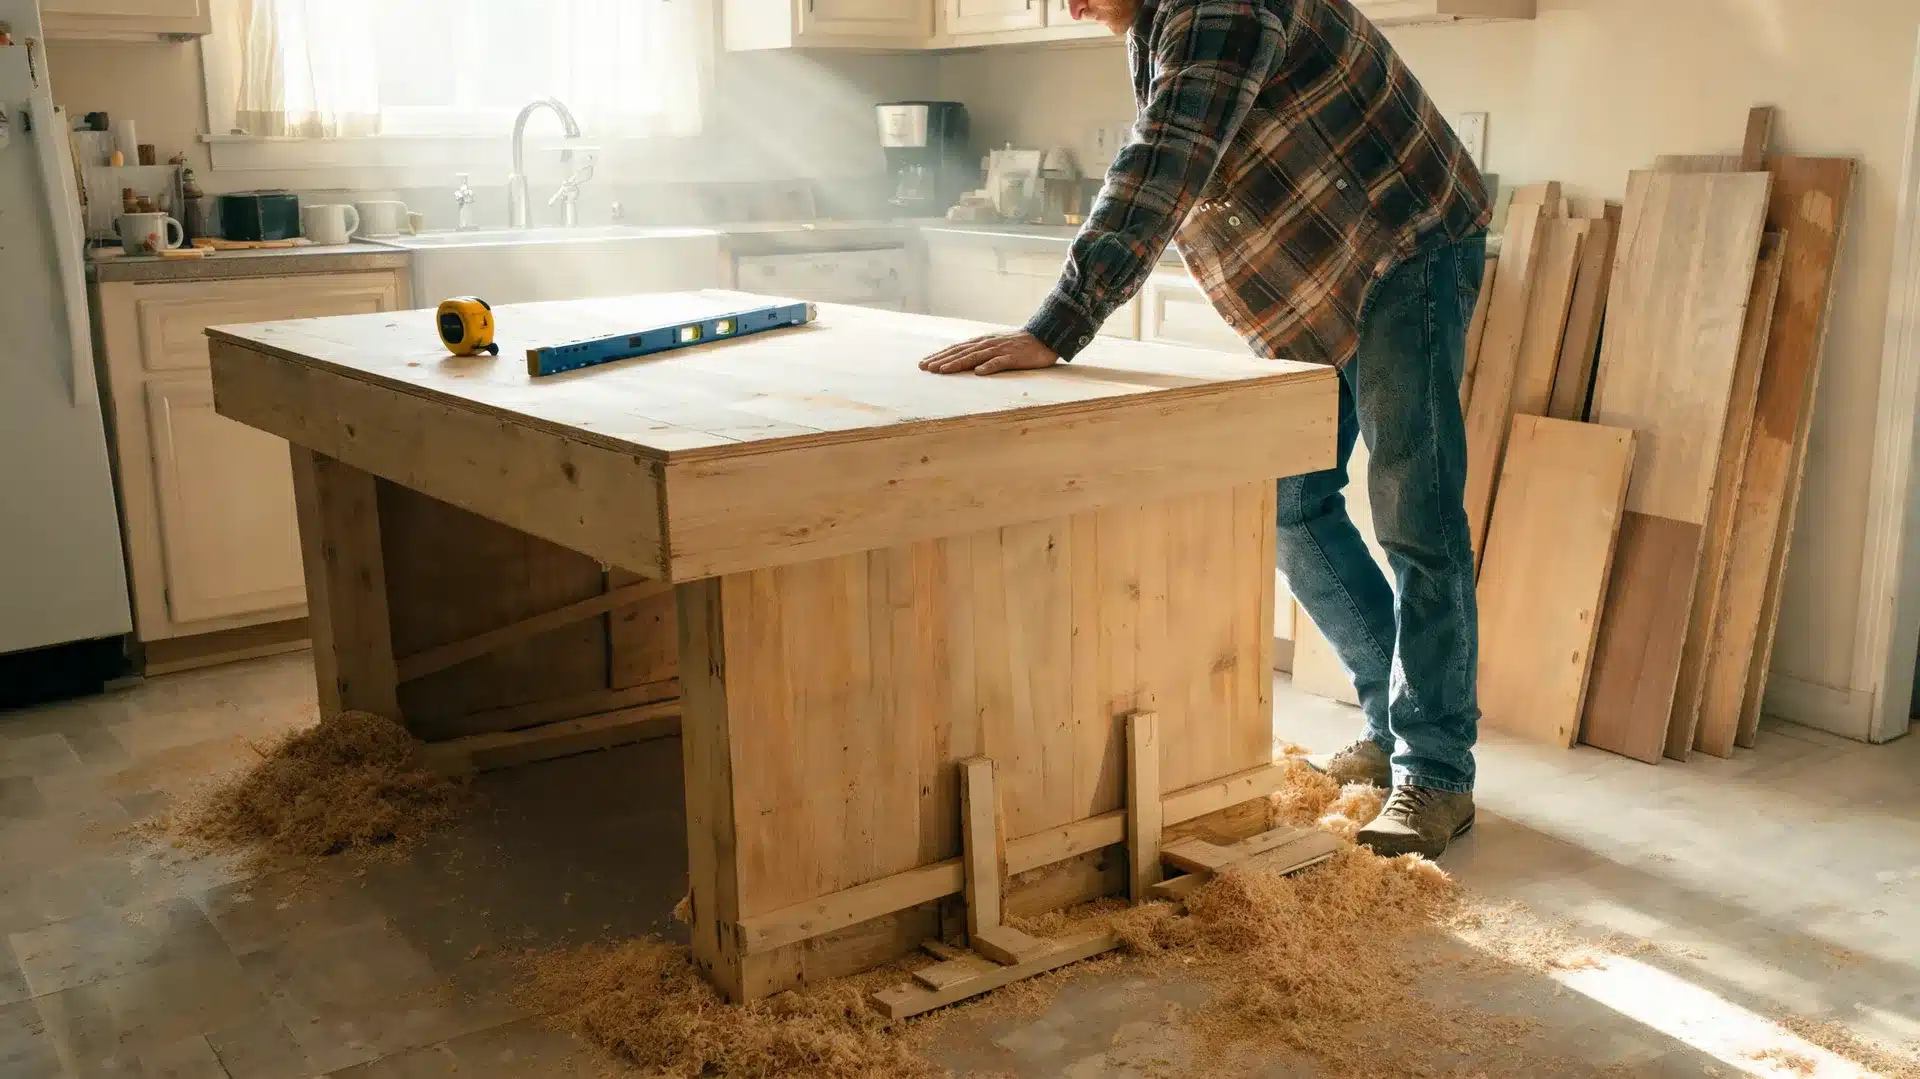
Need more counter space without paying for a full kitchen remodel? I get why a kitchen island feels like the perfect fix, but the build can seem confusing once you start looking at cabinets, lumber, countertops, and clearances. A diy kitchen island can be simple if you choose the right method before buying anything. You might use stock cabinets, a wood frame, IKEA cabinets, a movable base, or even a solid secondhand dresser. This guide helps you compare each option, choose the right size, gather materials, follow safe build steps, and avoid mistakes that make an island wobbly, crowded, or hard to use. Can You Actually Build a Kitchen Island Yourself? Yes, you can build a DIY kitchen island yourself without hiring a contractor or owning a workshop full of tools. The real question is which method fits your skill level, space, and budget — and whether you pick that method before you spend a dollar. I like this project because you can keep it simple or build it out over time. Stock cabinets, a wood frame, IKEA cabinets, or even a solid secondhand dresser all work. What changes is the build order, the tools you need, and how much a mistake costs you mid-project. A basic storage island is a weekend build. One with a sink, cooktop, wiring, or a heavy stone top is a different project entirely. This guide walks through the version that is genuinely within reach: a level base, a rigid structure, a countertop that is properly supported, and a finished result you will actually use. Difficulty 2/5 (stock cabinets or repurposed furniture) to 3/5 (wood frame) Time One weekend for most builds Cost $50 (repurposed furniture) to $4,000 (stock cabinet build with stone top) Tools Needed Drill, level, clamps, circular saw or jigsaw, measuring tape, shims Skill Required Beginner to intermediate, depending on the method Is a DIY Kitchen Island the Right Project for You? The mistake I made on my first build was not picking the wrong method. It was not known ahead of time where the method would break down. Stock cabinet islands look simple until you are shimming a crooked floor at 11 pm and questioning every decision. Here is the honest scope check before you commit. This stays in DIY territory when the island adds prep or counter space, drawers or cabinet storage, seating or a breakfast bar, a butcher block or laminate top, or casters for a movable setup. The project moves out of DIY territory once a sink, cooktop, gas line, or heavy stone countertop enters the plan. Outlets on a permanent island fall under local electrical code in most US states and need a licensed electrician for installation. If your island stays within that list, you have a project that is well within reach on a weekend. Safety Note: Outlets on a permanently installed kitchen island require a licensed electrician and a permit in most US jurisdictions. Check your local building department requirements before starting any permanent installation. Choose Your Build Method Before You Buy Anything Most people pick a build method based on a photo. The real question is which method holds up given your floor space, storage needs, skill level, and tools. Cabinets carry the load through box frames. Wood frames carry it through legs and rails. Repurposed furniture needs reinforcement before it can handle countertop weight. Getting this right upfront saves you from a wobbly island six months in. Build Method Best For Skill Level Typical Cost (USD) Stock cabinets Storage-heavy builds Beginner to Intermediate $600 – $4,000 Wood frame Open, table-style islands Intermediate $150 – $1,200 Repurposed furniture Fast, budget builds Beginner $50 – $600 IKEA cabinets Modular, customizable islands Beginner to Intermediate $300 – $1,800 Movable island Small kitchens, renters Beginner $100 – $800 Once the method is clear, the materials follow naturally. The next section covers what each build requires from the first cut to the last check before you load the drawers. How to Build a Kitchen Island: Step-by-Step by Method The method determines the build order. Here is how each build moves from start to finished island, with a check at each critical point before moving forward. Pre-Use Safety Checklist: Push firmly from each corner and check the level across the countertop in both directions. Sit on any seating overhang or apply equivalent weight before using. Open every drawer and door fully. Confirm nothing contacts the stove, refrigerator, or dishwasher door. If outlets are planned, hire a licensed electrician and pull the required permit. Method 1: Stock Cabinet Island Materials you need: Base cabinets, 2x4s for the toe-kick frame, side panels, back panels, trim, molding, countertop, cabinet screws, corner brackets, shims, glue, nails, and a butcher block or laminate top. Step 1: Confirm Dimensions. Measure your kitchen floor space, then compare it with the cabinet sizes before you order anything. Mark the island footprint with painter’s tape, open nearby doors and drawers, and make sure the planned island leaves enough clearance for walking and appliance access. Step 2: Build the Base Frame. Build a 2×4 toe-kick frame that matches the cabinet layout. Square the corners, check the level, and shim where needed. Once everything sits flat, fasten the frame securely to the floor so the island has a stable base. Step 3: Set the Cabinets. Place the base cabinets on the toe-kick frame and check that each one sits level. Clamp the cabinet boxes together before drilling. Keep the fronts flush, line up the tops, and adjust with shims before fastening anything permanently. Step 4: Fasten Cabinets Together. Drive screws through the inside cabinet frames to connect all boxes into one solid unit. Work slowly so the cabinet faces stay even. After fastening, check for gaps, rocking, or twisting before adding panels or countertop support. Step 5: Add Side and Back Panels. Cut the side and back panels to fit the exposed cabinet ends. Use glue and finish nails to secure them neatly. These panels hide unfinished cabinet backs and sides while giving the island a cleaner, built-in look from every angle. Step 6: Install Trim and Molding. Attach toe-kick trim, seam molding, and edge trim where needed. This covers gaps, panel seams, and exposed edges. Keep cuts tight and even. A clean trim job is what makes a stock cabinet island look like it was built for the room. Step 7: Install the Countertop. Set the countertop in place and check that it sits level on the cabinet frames. Fasten it from below through the cabinets, not down through the top. Make sure any overhang is supported before using the island for seating or prep. Check before moving on: Does the countertop sit level? Do all drawers open fully without catching? Does anything rock when pushed? Method 2: Wood Frame Island Materials you need: 2x4s for lighter builds, 2x6s for wider builds, plywood for shelves, pocket-hole screws, structural brackets, sandpaper, wood filler, countertop, fasteners, wood finish, and figure-eight fasteners or cleats. Step 1: Cut the Lumber. Measure your planned island size, then cut the legs, top rails, lower rails, and shelf supports to length. Label the pieces before assembly. Accurate cuts matter here because a small error can make the frame twist or sit unevenly. Step 2: Assemble and Square the Frame. Join the legs and rails with pocket-hole screws, structural brackets, or both. Check the frame for square before tightening every joint. Measure diagonally from corner to corner. If the numbers match, the frame is square and ready. Step 3: Add the Lower Shelf. Cut plywood to fit between the legs and rest on the lower rails. Secure it firmly so it does not shift or rattle. The shelf adds storage, but it also helps strengthen the frame and reduce side-to-side movement. Step 4: Sand and Finish Before the Top. Fill screw holes, dents, or open gaps with wood filler. Sand all surfaces smooth before the countertop goes on because corners become harder to reach later. Your finish choice depends on the wood species and uses — some take oil well, others need a sealer first. Let it dry fully before moving on. Step 5: Attach the Countertop. Place the countertop on the frame and center the overhang on all sides. Use figure-eight fasteners or cleats so the top can move slightly with seasonal wood changes. Do not lock solid wood too tightly in place. Check before moving on: Push each leg firmly. Any diagonal rack in the frame means you need a cross brace added before the countertop goes on. Method 3: Repurposed Furniture Island Materials you need: A solid wood dresser, table, or cabinet, interior bracing, metal corner brackets, 2×2 braces, kitchen-grade primer, paint, sealer, countertop, replacement knobs or pulls, screws, and sandpaper. Step 1: Remove Weak Components. Take out sagging drawers, thin shelves, loose backs, or decorative tops that add height but not strength. Keep only the solid parts of the furniture body. This gives you a stronger base before adding countertop weight or storage. Step 2: Check and Reinforce the Body. Push the sides, back, and top frame firmly. If anything flexes, add corner brackets or 2×2 braces inside the body. A furniture island needs extra support because it was not always built to hold a heavy countertop. Step 3: Sand, Prime, and Paint. Sand the outside so primer can grip the surface. Apply a bonding primer, then use a kitchen-grade paint that can handle cleaning and daily touch. Let each coat dry before adding the countertop or reinstalling hardware. Step 4: Fit and Fasten the Countertop. Cut the countertop to match the furniture body, including any planned overhang. Set it in place, check the balance, and fasten it from inside the cabinet or dresser frame. Avoid driving screws down through the visible top surface. Step 5: Seal and Add Hardware. Seal surfaces that may contact food-prep tools, cleaning products, or moisture. Add new pulls, knobs, or handles if the old ones feel loose or dated. Then load the drawers slowly and check that nothing sags or shifts. Check before moving on: Load the drawers with weight and check for sag. Add more internal bracing if anything moves. Method 4: IKEA Cabinet Island Materials you need: IKEA SEKTION cabinet units, cover panels, island support brackets, leveling legs, connecting hardware, cabinet connector bolts, toe-kick strips, countertop, screws, shims, and any doors, drawers, or hardware needed. Step 1: Measure Before Ordering. Measure your kitchen floor space, then compare it with the SEKTION cabinet depth, width, and height. Include countertop overhang in your plan. IKEA cabinets have set sizes, so your island footprint should be confirmed before placing the order. Step 2: Assemble the Cabinet Units. Build each cabinet unit by following the IKEA instructions closely. Keep every box square as you assemble it. Check the corners, tighten the hardware, and make sure the cabinets sit flat before connecting them into one island body. Step 3: Install Island Support Brackets. Attach the island support brackets to the cabinet units as required. These brackets help keep the island stable and secure. Check that each bracket is aligned correctly before fastening, because crooked support affects the countertop and cabinet layout. Step 4: Fasten Cabinets Together. Clamp all cabinet units flush at the front and bottom. Use cabinet connector bolts to pull the boxes together tightly. Check the cabinet faces as you work so the doors and drawers line up cleanly across the full island. Step 5: Add Cover Panels on Exposed Sides. Cut and attach cover panels to any side that will be visible. These panels hide the unfinished cabinet backs and ends. Keep the panels straight, secure them firmly, and make sure all exposed sides look finished before adding the top. Step 6: Install Leveling Legs and Toe-Kick. Snap the leveling legs into place and adjust them until the island sits evenly. Use a level across the cabinet tops in both directions. Once everything is steady, add the toe-kick strips along the base for a finished look. Step 7: Install the Countertop. Place the countertop on the assembled cabinet base and check for full support. Fasten it from below through the cabinet structure. Do not screw through the top surface. Add support where needed if the edges or overhang flex. Check before moving on: Are all cabinet fronts flush with each other? Do doors and drawers open without catching? Is the countertop fully supported with no flex at the edges? Method 5: Movable Island Materials you need: A small cabinet base or wood frame, 2×4 base frame, heavy-duty locking casters, screws, brackets, butcher block or laminate countertop, fasteners, shims, and a finish or sealer if using wood. Step 1: Keep the Footprint Small. Plan a compact island that is usually 24 to 36 inches wide. A movable island needs enough room to roll, turn, and park safely. Keep the size practical so it does not block cabinets, appliances, or walking paths. Step 2: Choose the Right Casters. Use heavy-duty locking casters rated above the estimated loaded weight of the island. Include the countertop, cabinet body, stored items, and anything placed on top. Better casters make the island safer and easier to move when needed. Step 3: Mount Casters to a Solid Base. Attach the casters to a 2×4 base frame, not thin cabinet floor panels. A strong base spreads the weight better and keeps the wheels from tearing loose. Check that every caster is tight before standing the island upright. Step 4: Pick a Lighter Countertop. Choose butcher block or laminate for a movable island because both are easier to handle than stone. A lighter top reduces tipping risk and strain on the casters. Make sure the top is fastened well before moving the island. Step 5: Test All Four Casters. Set the island upright and confirm all four casters touch the floor evenly. Lock each wheel, then push gently from every side. If the island rocks, tips, or rolls while locked, fix the base before adding storage. Check before moving on: Lock all four casters and push hard from one side. A movable island should not rock or tip under pressure. Every method follows the same core logic: a level base, a rigid structure, and a countertop that is properly supported. What changes is the starting material. The checks at each stage stay the same no matter which route you take. Getting the Size Right Before You Order Anything Sizing is where the whole project can go wrong before a single board is cut. The National Kitchen and Bath Association recommends at least 42 inches of clearance for single-cook kitchens and 48 inches for kitchens with more than one person working in them. Get this wrong and every step after it pays for the mistake: cabinet selection, frame cuts, countertop order, and seating layout. Mark the layout on the floor with painter’s tape first, then walk around it with all appliances fully open. If it feels tight with tape, it will be worse with a real island in place. Plan seating and overhang carefully, allowing 12 to 15 inches of countertop overhang per stool, with brackets underneath to prevent sagging. Check storage and door swing by adding cabinet door and drawer swing distances to your clearance measurements before finalizing the footprint. Every material order and every cut that follows depends on getting these numbers right before a single board is bought. Best Countertop Options for a DIY Kitchen Island The countertop affects cost, durability, maintenance, and style, so choose it before finalizing the island size. A light top is easier for a DIY install. A heavy one may need extra support and an extra set of hands. The edge shape is part of this decision too — different countertop edge profiles carry different visual weights and finishing requirements. Match the surface to how you actually cook and clean, not just the look you found online. 1. Butcher Block Butcher block is one of the easiest countertop choices for a DIY kitchen island because it is lighter than stone and easier to cut and install. It adds warmth and works well for prep space, casual kitchens, and cabinet-based islands. The main care needs are sealing, wiping spills quickly, and regular oiling to prevent stains, cracks, and moisture damage. 2. Laminate Laminate keeps the island lightweight and budget-friendly. It comes in many colors, patterns, stone looks, and wood looks, so it works with different kitchen styles. It is easy to clean and a good choice for rentals or small kitchens. The trade-off: it can chip, scratch, or burn if handled roughly. 3. Plywood with Sealer Plywood with sealer is a low-cost option for rustic, utility, or farmhouse-style kitchen islands. It is easy to cut, sand, stain, and customize. The key is sealing the top, bottom, and edges carefully. Without proper sealing, plywood can absorb moisture, swell, or stain quickly from daily kitchen use. 4. Stone or Quartz Remnant A stone or quartz remnant gives a DIY kitchen island a polished, high-end look with strong durability. If you want a marble look without the slab weight and cost, DIY marble countertops are a realistic middle ground worth considering. For a real stone install, the base must be level, strong, and fully supported, and you may need help with lifting and safe fastening. 5. Stainless Steel Stainless steel handles heat, moisture, and frequent cleaning well and gives the island a clean, professional look. It works especially well in modern or utility-style kitchens. The downside is that it shows scratches, dents, fingerprints, and water marks more easily than softer-looking surfaces. For most DIY builds, butcher block, laminate, or sealed plywood is the easier path. Heavy stone, quartz, or steel may need more planning, lifting help, and stronger cabinet support. Mistakes to Avoid and Final Safety Checks Most problems with a finished kitchen island started in planning or base work, not during cutting or assembly. Catching them early saves time, materials, and a lot of frustration. Building too large a block blocks the work triangle and makes drawers hard to reach. Test the footprint with tape before ordering anything. Skipping leveling and shimming creates countertop gaps, misaligned trim, and drawers that hang at the wrong angle. Forgetting overhang support is a common one: seating overhangs past 12 inches will sag and crack over time without brackets, corbels, or support legs. Picking the wrong method for your skill level matters too — wood frame builds need accurate cuts and solid joinery, and that gap shows on a finished island. Finally, ignoring local code can turn a finished project into a permit problem. Some jurisdictions require permits or outlets on permanently installed islands, so check with your local building department before starting. A finished island that passes these checks will hold up through daily use. Fix anything that moves, flexes, or catches before loading it with cookware or putting weight on the seating overhang. Frequently Asked Questions These are the questions I hear most often from people who are partway through their build and hit a decision they did not expect. Can you build a kitchen island without cabinets? Yes. A wood frame, table-style base, or repurposed furniture all work without cabinets. Open shelving and a clean countertop are fully achievable. The frame just needs to be square, level, and strong enough for the countertop weight. What is the cheapest way to build a kitchen island? Repurposing a solid wood dresser or table and adding a new countertop is usually the lowest-cost route. A wood frame island is also affordable if you already own basic tools. Avoid plumbing, wiring, and stone tops if budget is the main constraint. Can I add wheels to any kitchen island? Only if the base is solid enough to hold them. Casters must attach to a solid wood frame, not thin cabinet panels. Use locking casters rated above the total island weight, including the countertop and anything stored inside. How tall should a DIY kitchen island be? Most kitchen islands are 36 inches tall, matching standard countertop height. Bar-style seating typically calls for 42 inches. If you go taller, make sure the stools and knee clearance match that height before you finalize the build. Can I use a dresser as a kitchen island? Yes, if it is solid wood and structurally sound. Reinforce weak areas, add a durable countertop, seal the surface, and use kitchen-safe paint or finish. Avoid particleboard dressers — they will not hold up under daily kitchen use. Does a kitchen island need to be attached to the floor? Permanent islands with cabinets, outlets, or seating overhangs are usually floor-anchored for stability. Movable islands do not need floor attachment, but locking casters and a stable base are non-negotiable. What countertop is easiest to install on a DIY island? Butcher block and laminate are the easiest. Both are lighter than stone, easier to cut, and simpler to fasten from below. Butcher block needs sealing; laminate requires less maintenance and is usually more budget-friendly. How much countertop overhang is safe for seating? 12 inches is the standard minimum; 15 inches gives more knee room. Anything longer needs brackets, corbels, or support legs. Check for flex before using the island — unsupported overhangs sag and pull loose over time. Final Verdict Upgrading your home with a custom layout is entirely within your reach when you focus on a straightforward design. By selecting a method that matches your current skill level and tools, you can avoid common pitfalls like uneven frames or cramped walkways. I always emphasize that measuring your floor clearance and securing a level base are the most critical steps for long-term success. Now that you know how to build a kitchen island using stock cabinets, a wood frame, or repurposed furniture, you can confidently choose the perfect countertop and finishes for your daily needs. What style are you planning to create? Drop a comment below to share your DIY plans or ask a question before you start building.
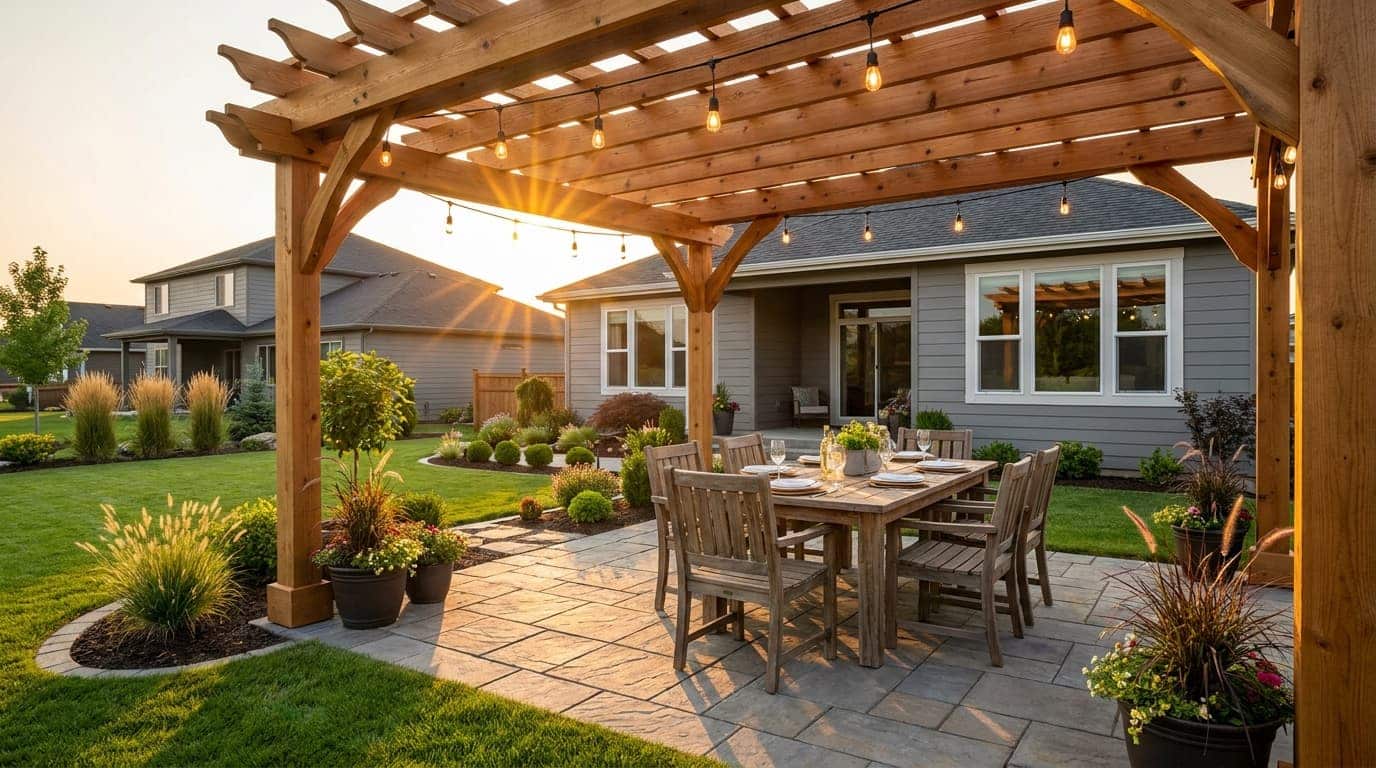
A DIY pergola is one of the best ways to upgrade your backyard without building a full outdoor room. It gives your patio, garden, or deck a clear focal point while adding shade, comfort, and style. If you enjoy weekend projects, learning how to build a pergola can be a smart and rewarding choice. The best part is that you do not need to be a professional builder to get started. With the right pergola plans, basic tools, strong materials, and careful measuring, you can build a structure that looks clean and lasts for years. Here you will find planning, materials, tools, building steps, costs, mistakes, and maintenance, so you can start your project with more confidence. Is Building a DIY Pergola Worth the Effort? A DIY pergola is worth it if you want to save money and control the final look. When you build it yourself, you can choose the size, wood type, stain, height, width, and extra features that fit your yard. You also avoid high labor costs, which makes this project a smart choice if you enjoy using tools and have some free time. Still, DIY is not right for every project. You may want to hire a professional if your pergola is large, attached to your home, or built on uneven ground. A pro can help with permits, safety, measurements, and heavy lifting. Before you decide, be honest about your skill level, tools, and time. A simple freestanding pergola is usually the easiest option. Planning Your Pergola Before You Build Good planning makes your pergola project easier and safer. Before buying lumber, decide on the location, size, style, and layout that best fit your yard. Choose the location: Pick a useful spot, like apatio, deck, garden path, or dining area. Check the sunlight so the space gets enough shade. Decide the size: Common sizes are 10×10 or 12×12 feet. Measure your furniture and leave room to walk around. Check permits: Some pergolas need local permits, especially attached ones or structures near property lines. Call utilities before digging. Pick the style: A freestanding pergola works in open yards. An attached pergola connects to your home and needs extra care. Once your plan is clear, the build feels smoother. A few smart choices now can help you avoid wasted materials, permit issues, and expensive fixes later. How to Build a DIY Pergola Step by Step Before you start building, understand the full process from layout to final checks. These steps follow the video and keep the project clear, safe, and organized. Materials and Tools Needed Before you start building, gather all the materials and tools you need in one place. This helps you avoid delays, incorrect purchases, and extra trips to the store. Item What You Need Quantity Purpose Lumber 6×6 posts, beams, rafters, and cross slats As per the plan Builds the main pergola frame and roof pattern Anchoring supplies Concrete mix, gravel, post anchors, or metal post bases As needed Secures the pergola and keeps it stable Fasteners and hardware Outdoor screws, bolts, washers, brackets, and joist hangers As needed Connects posts, beams, and rafters strongly Measuring tools Tape measure, level, and speed square 1 each Helps with accurate layout, spacing, and straight cuts Cutting and drilling tools Circular saw and drill 1 each Cuts lumber and fastens pieces together Digging tools Post hole digger or auger 1 Digs holes for pergola posts Holding and tightening tools Clamps and socket wrench 1 set Holds boards in place and tightens bolts Access and safety gear Ladder, gloves, eye protection, and hearing protection 1 set Helps you work safely while cutting and installing With the right lumber, hardware, tools, and safety gear, your DIY pergola project becomes easier, safer, and more organized from start to finish. Step 1: Plan the Size and Layout Plan the size of your pergola before starting any work. In the video, the builder chose a 12×20 ft pergola to fit neatly within the patio slab. He wanted the structure to remain within the paver area so it would look custom and balanced. Marking the layout first helps you avoid spacing mistakes before digging, cutting, or buying final materials. Step 2: Remove Pavers and Mark Footings Remove only the pavers needed for the post footings. The builder traced around the concrete forms so he did not cut away too much of the paver grid. This helped keep the patio clean and made it easier to place the surrounding pavers back later. Careful marking also keeps each footing in the right spot. Step 3: Dig Footing Holes Below Frost Line Dig each footing hole deep enough to pass the frost line. In the video, the builder first used an auger, then widened the holes by hand because the tubes were larger. This step matters because shallow footings can shift during winter freeze-and-thaw cycles. Strong footings help keep the pergola stable for years. Step 4: Add Gravel and Adjust Spacing Add gravel at the bottom of each footing hole to improve drainage. The builder also had to adjust the post spacing because his boards were not long enough for the planned overhang. This is a good reminder to check lumber lengths before concrete work. An early layout fix can prevent bigger problems later. Step 5: Pour Concrete and Set Anchors Pour concrete into the footing forms and set the metal post anchors while the mix is still wet. The builder used a string line to keep all anchors facing the same direction. This helps the posts line up cleanly when installed. Take time here because crooked anchors can make the rest of the pergola harder to build. Step 6: Cure Footings and Seal Lumber Let the concrete cure overnight before installing the posts. While waiting, seal or stain the lumber before assembly. The builder used a transparent wood sealer to protect the boards and avoid drips on the patio later. Pre-sealing also makes it easier to coat edges and surfaces before the lumber is raised overhead. Step 7: Cut and Install Posts Choose your final pergola height before setting the posts. The builder started with 12-ft posts but cut them down to 10 ft because they looked better with the house. Each post was placed into its anchor, checked with a level, and secured. Level anchors make this step much easier and help the frame stay straight. Step 8: Install Main Beams Cut decorative ends from the main beams for a cleaner custom look. The builder used large 2×10 beams and secured them with strong 5-inch lag bolts. These beams form the main support layer of the pergola. Make sure they are straight, level, and tightly fastened before adding the upper rafters. Step 9: Add Cross Rafters and Top Layer Install the 2×6 cross rafters across the main beams, spacing them evenly. In the video, the spacing was around 9–10 inches apart for shade and style. Then add the final 2×4 top layer. Leave small gaps where boards meet so the wood can expand and contract without buckling later. Step 10: Add Braces and Final Check Add decorative braces between the posts and beams using long lag bolts. These braces add detail and can help reduce side-to-side movement. Once they are installed, tighten all hardware, check alignment, and inspect the full pergola. In the video, the total project cost came to around $1,500, including lumber, concrete, hardware, and stain. Once the pergola is built, review every connection, post, and board. A careful final check helps your structure stay strong, clean, and ready to use. DIY Pergola Cost Breakdown Building a DIY pergola can fit many budgets, from simple backyard projects to large custom outdoor spaces. Understanding the main costs helps you plan smarter before buying materials. Pergola Cost Type Estimated Cost Best For Main Cost Drivers Basic DIY Pergola $800–$1,500 Small pergolas and simple designs Pressure-treated lumber, basic hardware, no add-ons Mid-Range DIY Pergola $1,500–$3,000 10×10 or 12×12 pergolas Better wood, stronger hardware, stain or sealer Large DIY Pergola $3,000–$5,000 Bigger backyard pergolas Longer beams, more rafters, extra supports Professional Pergola Build $3,000–$8,000+ Large, attached, or complex builds Labor, permits, design work, structural needs Extra Add-Ons $100–$1,000+ Comfort and style upgrades Lights, curtains, privacy screens, shade covers, plants Your final pergola cost depends on the size, wood type, hardware, and extra features you choose. A clear budget plan helps avoid overspending and unexpected project delays later Pergola Design Ideas for Your Backyard After the structure is built, design details can make your pergola feel like a real outdoor living space. Keep the style simple and useful. 1. Pergola With String Lights String lights are one of the easiest ways to upgrade a pergola and instantly change its mood. When placed along beams, rafters, or wrapped around posts, they create a soft, warm glow that works well for evenings. Choose outdoor-rated, weatherproof lights so they last longer in rain and heat. Secure the wiring neatly to avoid sagging or safety issues. This setup is perfect for dinners, casual seating, or relaxing nights outside. 2. Pergola With Climbing Plants Climbing plants bring a natural, living feel to your pergola while also improving shade over time. Popular choices include wisteria, jasmine, roses, and grapevines because they grow well and look attractive. However, it’s important to match plants with your local climate and ensure they don’t become too heavy for the structure. Regular pruning is needed to control growth and prevent damage. Over time, they can turn your pergola into a green, shaded retreat. 3. Pergola With Curtains Outdoor curtains add both style and function by making your pergola feel more private and comfortable. They help block harsh sunlight, reduce wind, and create a cozy, enclosed space when needed. Always use weather-resistant fabric that can handle outdoor conditions without fading or tearing. Strong rods or cables are necessary to support movement. This setup works especially well for patios, seating corners, or hot tub areas where privacy and shade are important. 4. Modern Minimal Pergola A modern minimalist pergola focuses on clean structure, simple lines, and uncluttered design. Instead of heavy decoration, it relies on shape, proportion, and material finish. Dark wood stains or neutral paint tones often work best for this style. Furniture and lighting should stay simple and functional to maintain a balanced look. This design fits well with contemporary homes and creates a calm, organized outdoor space without feeling overly decorated or busy. How to Maintain Your DIY Pergola A DIY pergola needs simple care to stay strong, clean, and good-looking. Regular cleaning and quick checks can help prevent damage over time. Clean it regularly: Wash the pergola once or twice a year with mild soap, water, and a soft brush. Remove debris: Clear leaves, dirt, vines, and buildup from the top so moisture does not sit on the wood. Check for damage: Inspect posts, beams, bolts, and rafters for cracks, rot, rust, or loose fasteners. Tighten hardware: Tighten loose bolts, screws, and brackets as needed to keep the structure stable. Reseal the wood: Apply stain or sealer when the wood looks dry, faded, or weather-worn. Trim plants: Cut back climbing plants before they get too heavy or start pulling on the pergola. Control water exposure: Keep sprinklers from spraying the posts every day to reduce moisture damage. A little maintenance helps your DIY pergola last longer and look better. If you care for it annually, you can avoid more extensive repairs later. Common Pergola Building Mistakes to Avoid Small mistakes can make yourDIY pergola weaker, uneven, or harder to maintain. Knowing what to avoid helps you build safer and cleaner from the start. Skipping permit checks: Always check local permits, property lines, and utility locations before digging. Skipping this can lead to fines, delays, or forced changes later. Using weak posts: Thin posts may wobble under weight or wind. For most backyard pergolas,6×6 posts are stronger than 4×4 posts. Poor post depth: Shallow posts can shift after rain, frost, or strong winds. Follow local depth rules to create a stable base. Uneven rafter spacing: Mark rafter positions before installing them. Even spacing gives your pergola a cleaner roof pattern and better finished look. Avoiding these common mistakes keeps your pergola stronger, safer, and better looking. A little prep before building can save time, money, and repairs later. Frequently Asked Questions Can you build a pergola on grass? Yes, you can build a pergola on grass, but the posts still need strong footings. Do not place posts directly on soil. Use concrete footings or approved anchors to keep the structure level, stable, and protected from ground moisture. What direction should pergola rafters face? Pergola rafters should usually run in the direction that gives the shade you want most. If you need afternoon shade, first study how the sun moves across your yard. The right rafter direction can make the space more comfortable. Can a pergola handle strong winds? A pergola can withstand wind if it is well anchored, built with strong posts, and secured with proper hardware. Open roofs allow some wind to pass through, but weak footings or loose connections can make the structure unsafe during storms. Can you add a roof to a pergola later? Yes, you can add a roof later, but the pergola must be strong enough to carry the extra weight. Solid panels, shade covers, or clear roofing may need stronger framing. Always check the structure before adding anything heavy. How long does a wooden pergola last? A wooden pergola can last many years if it is built with outdoor-rated lumber and maintained well. Regular cleaning, sealing, and hardware checks help extend its life. Weather, moisture, insects, and sun exposure all affect how long it lasts. Final Thoughts A pergola can turn a plain outdoor spot into a space you actually want to use. I like that you can plan it around your yard, budget, and skill level instead of forcing a design that does not fit. You now know how to choose the right plan, gather materials, lay a strong foundation, build the frame, avoid common mistakes, estimate costs, and maintain it over time. These steps matter because a DIY pergola should not only look good, but also stay safe and useful for years. When you take your time and follow each part carefully, the whole project feels easier. Try these tips in your own build, and check out more related blogs for extra ideas.
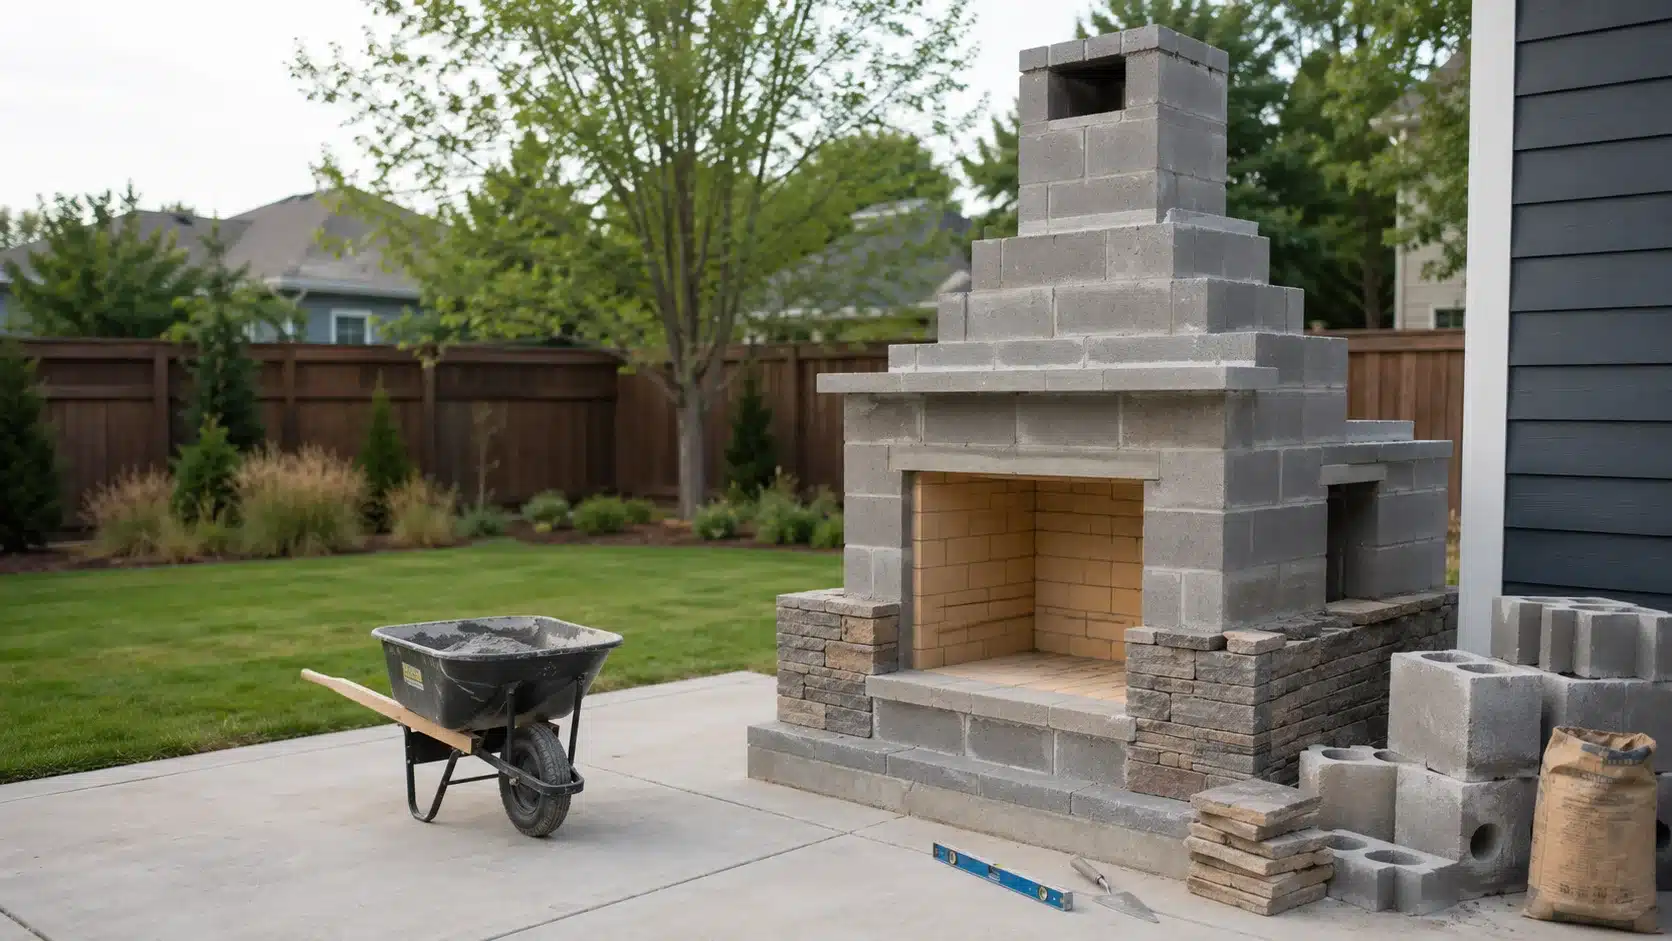
Cost Note: Figures in this article are estimates based on national averages. Actual costs vary significantly by region, contractor, materials, and project scope. Always get at least three quotes before committing to any project above $1,000. If you want to know how to build an outdoor fireplace that actually draws well and holds up past the second winter, start with the footing, the firebox, and the chimney height, in that order. Every problem I’ve seen in outdoor fireplace builds traces back to one of those three things being wrong. The finished work on top doesn’t matter if the base shifts or the smoke rolls into the seating area. I bring to you the full build sequence: what to check before you break ground, which materials withstand direct heat without cracking, how the foundation and firebox work together, where a DIY build makes sense, and when the smart move is to call a mason. I’ll also give you real cost ranges so you’re not surprised at the lumber yard. Can You Build an Outdoor Fireplace Yourself? The short answer is yes, if the design is a prefab kit or a simple dry-stack system, you’re comfortable with concrete work, and your site is flat with no drainage issues. The moment you’re building full masonry from scratch, adding a gas line, or working near a roofline, the complexity multiplies fast. Factor DIY-Friendly Hire a Pro Skill level Intermediate, comfortable with concrete and basic masonry Beginner masonry skill Build type Prefab kit or simple dry-stack Full custom masonry with chimney Time 2–5 days for a kit, plus curing time Faster with a crew Site Level yard, good drainage, easy access Sloped ground, soft soil, tight access Fuel Wood-burning kit with clear instructions Gas line, propane, or complex venting Risk level Lower if the plan is simple and code-approved Close to structures, trees, or rooflines A prefab kit is the right starting point for most first-time builders. The firebox dimensions and chimney layout are already engineered; you’re handling the footing, the outer shell, and the finish. A scratch-built masonry fireplace is a different project: it needs a mason’s understanding of firebox geometry, smoke shelf placement, and chimney draw. Getting the firebox shape wrong means the fireplace smokes badly even when the outside looks finished. How an Outdoor Fireplace Differs from a Fire Pit The structural difference is more significant than it looks. A fireplace has a contained firebox and a chimney that directs smoke upward. A fire pit is open, so smoke drifts in all directions with the wind. That changes where you can put it, how you seat people around it, and what kind of base it needs. Feature Outdoor Fireplace Fire Pit Main structure Tall firebox with chimney Open bowl, ring, or low wall Smoke path Directed upward through the flue Moves with wind, no fixed direction Build difficulty Higher: footing, firebox, and chimney required Lower to moderate: depending on size Base requirements Reinforced concrete footing Gravel, pavers, or lighter base Heat direction Focused toward the front opening Radiates around all sides Seating layout Facing the opening Surrounding the pit Permits More likely to require review Varies, sometimes required A fire pit is the simpler build. An outdoor fireplace requires more work but offers better smoke control, a taller focal point, and a more defined seating arrangement. Once you’ve made that choice, the planning below applies specifically to the fireplace build. What to Plan Before You Build an Outdoor Fireplace The decisions you make before the first shovel goes in set the difficulty, cost, and long-term performance of the whole project. Here’s what to nail down first. 1. Check Permits and Local Rules Call your local building office before buying materials. Ask about permits, setbacks from structures and property lines, chimney height minimums, burn restrictions, and fuel type limitations. HOA rules apply separately; check those too. Skipping this step can mean tearing out work you’ve already paid for. 2. Mark the Location Carefully Use stakes or spray paint to mark the full footprint, including clearance paths, wood storage, and seating. Keep at least 10 feet of clearance from fences, structures, and overhead branches. Check the prevailing wind direction; you want smoke moving away from the house and your seating area, not into them. The placement at the opening matters as much as the location itself. A well-thought-out outdoor seating plan around the fireplace opening will save you from repositioning furniture every night by the fire. 3. Study the Ground Look for soft spots, areas that stay wet after rain, visible tree roots, and drainage patterns. Clay soil expands when wet and contracts when dry, on clay, widen footings by 6 inches and go 8 inches thick rather than 4. Weak or unstable ground will shift the base over time, and a leaning chimney is not a small repair. 4. Choose Your Fuel Type Wood gives you the real fire experience, but it also means ash cleanup, storing wood within 20 feet of the fireplace (which creates a fire risk if it’s too close), and occasional chimney checks. Gas is cleaner and easier to start, but it requires a licensed contractor to run the line in most jurisdictions, which adds cost and scheduling time to the project. 5. Decide on the Build Method Choose between a prefab kit, a contractor kit (unfinished block system), or a full scratch-built masonry design before buying anything. Each significantly changes the tool list, the required skills, and the final cost. If you’re working on an existing concrete surface, check its thickness and load capacity before treating it as the base. Most residential patios are poured for foot traffic, not the dead weight of a full masonry fireplace. Your patio surface material also affects layout, weight limits, and how the structure ties in at the base. How to Build an Outdoor Fireplace: Step-by-Step Each phase of this build depends on the one before it being solid and cured. Rushing any stage, especially the foundation and firebox- creates problems that show up later as cracks, smoke issues, or structural movement that can’t easily be fixed from the outside. Phase 1: Foundation What you need: Shovel, spade, wheelbarrow, level, hand tamper, concrete forms, steel mesh or rebar, concrete mix, hose, gloves, safety glasses. Dig the footing. Excavate to at least 18 inches deep in most climates, deeper if you’re in a freeze-thaw zone and the frost line in your region goes lower. The excavation widens near the firebox area to distribute the load. Your local building code sets the minimum; use that as your floor, not your target. Compact and set forms. Tamp the soil firmly, set your concrete forms to the correct footprint, and check the level in both directions. Add reinforcement and pour. Place rebar or steel mesh before pouring, even where code doesn’t require it, reinforcement helps the footing resist freeze-thaw cracking. Pour, screed level, and keep the concrete moist during curing. Wait a full 48–72 hours before applying any weight to it, and don’t stack blocks until the slab has fully cured. Pro Tip: Don’t guess on footing depth. Frost line depth, soil type (clay vs. sandy vs. loam), and total fireplace weight can each change what your base needs. A concrete footing that moves is the most expensive fix in any outdoor fireplace build. Phase 2: Firebox What you need: Masonry trowel, rubber mallet, level, angle grinder with masonry blade, mixing bucket, fire brick, refractory mortar, sand, gloves, safety glasses. Build the block support base. Once the footing has cured, lay concrete block as the support platform for the firebox. Keep it dead level; the firebox sits directly on top, and any tilt here multiplies as you build higher. Lay the fire brick floor and walls. Fire brick is non-negotiable in the firebox. It’s engineered to handle temperatures up to 2,000°F; regular brick cracks under that kind of repeated heat. Use refractory mortar throughout, not standard mortar. Dry-lay the first course before mortaring so you can see spacing and cuts before they’re permanent. Shape the firebox geometry. The sidewalls should angle outward slightly, with the front wider than the back. The back wall angles forward slightly at the top. This geometry directs smoke upward into the flue rather than letting it spill forward into the seating area. Get a piece of paper, sketch the cross-section, and understand the shape before laying the first fire brick. Add the smoke shelf. If your design includes one, and it should for wood-burning builds, the smoke shelf sits just above the firebox opening. It catches downdrafts and prevents outside air from pushing smoke back out the front. Safety Note: The firebox is the one phase where hiring a mason is worth considering, even if you’re handling the rest yourself. A firebox built with the wrong geometry will smoke badly regardless of how good the chimney is. There’s no easy fix once it’s mortared in. Phase 3: Outer Shell and Chimney What you need: Masonry trowel, 4-foot level, rubber mallet, angle grinder, brick hammer, mortar tub, CMU blocks, brick, angle iron, plywood, 2x4s, flue liner, gloves, safety glasses. Build the outer shell. Stack concrete blocks and bricks around the firebox to form the main structure. Stagger the seams on every course, spread mortar on the edges, not just the face shells, and check plumb and level after every 2–3 courses. A small lean at the base becomes a significant offset by the time you reach chimney height. Support the opening. The masonry above the firebox opening needs a proper lintel. Cut angle iron to span the opening and set it in mortar before laying the courses above. This is a structural element, not an optional detail; without it, the opening will eventually crack or fail. Form the arch (if applicable). Build a plywood-and-2×4 template to the arch profile, lay cut brick over it, let the mortar set to initial cure, then remove the form. If you’re working from a kit that has a flat lintel instead, follow the kit design; don’t improvise an arch into a system that wasn’t designed for one. Install the flue liner. Set the flue liner above the firebox before filling in the surrounding block. The flue is what determines smoke draw. Chimney height matters: a taller chimney creates a stronger draft. Most outdoor fireplaces perform best at a total height of 10–12 feet, and local code will specify a minimum. Follow both your plan and the code, whichever is more demanding. Build the chimney to a height. Check level and plumb every 3–4 courses. The earlier you catch the deviation, the less cutting and relaying later. Pro Tip: A chimney that’s slightly out of plumb near the bottom looks dramatically worse at 8 feet. Check it often. Use a 4-foot level and check in both directions, front-to-back and side-to-side, at every course. Phase 4: Finish and Hearth What you need: Masonry trowel, mortar bag, wire brush, angle grinder, veneer stone, mortar, hearthstones, capstone, level, gloves, and safety glasses. Build seating and hearth areas. If your design includes built-in bench seating or a hearth extension, build those after the fireplace body is roughed in. A lightweight CMU block works for a bench structure; brick shapes more easily for the curved hearth profile if that’s part of your design. Lay the stone veneer. Start at the firebox opening, the most visible focal point, and work outward. Back-butter each piece, press it firmly into the mortar, and vary the stone sizes so the joints don’t align in repetitive patterns. Manufactured stone veneer is lighter than natural stone and easier to handle on a block shell. Natural stone costs more and adds load; confirm your base can handle it before you order. Fill the joints. Use a piping bag or grout bag to fill mortar joints once the veneer has set enough to hold position. Slightly overfill, let it firm to thumbprint hardness, then smooth with a wire brush. Don’t let it fully harden before tooling; it gets brittle and cracks. Set hearthstones and capstone. Use exterior-rated stone or pavers for any horizontal surface that will hold water. The capstone at the chimney top helps deflect sparks and keeps rain from entering the flue. A metal chimney cap is an even better solution; it extends liner life and prevents debris nesting. Pro Tip: Every finish material needs to be exterior-rated. Outdoor fireplaces cycle through heat, rain, freezing, and UV exposure. Indoor stone or standard mortar will fail faster than you expect. Apply an exterior masonry sealer after the finish has fully cured, and plan to reapply it every 3–5 years, depending on your climate. Phase 5: First Fire Test Wait for a full cure. Let all concrete, mortar, fire brick, and finish materials cure completely before lighting anything. The minimum is 7 days from the last mortar joint. 14 days is better. Heat applied to uncured mortar creates steam pockets that crack the joints from the inside. Light a small fire. Burn a small amount of clean, dry hardwood, oak, maple, hickory, or ash. Watch where the smoke goes. A well-built outdoor fireplace cleanly draws smoke upward through the flue. If smoke rolls out the front, stop and diagnose before building a larger fire. Check the draw. Smoke rollout points to three possible causes: firebox geometry is off, the chimney is too short to create adequate draft, or wind is pushing into the opening. Identify which one before making any changes. Safety Note: Never use accelerants to start the fire. Keep a garden hose, a bucket of water or sand, and a fire extinguisher within reach during the first burn. Do not light if the mortar still looks damp, if any visible cracks have appeared in the firebox or foundation, or if a burn ban is active in your area. How Much Does It Cost to Build an Outdoor Fireplace? Cost depends heavily on build type, site conditions, finish material, and whether you’re hiring any labor. A prefab kit with a basic concrete base and standard veneer sits at the lower end. A custom masonry fireplace with built-in seating, premium stone, and gas work is a different budget conversation entirely. If the fireplace area also needs new hardscape, factor in paver installation costs before you finalize any budget; treating them as an afterthought creates cost surprises mid-project. Line Item Low End High End What Drives the Variation Prefab kit installed $1,500 $9,000 Kit size, finish level, and labor market Contractor kit (unfinished) $1,000 $4,000 Block system size before finishing work Custom masonry installed $6,000 $20,000 Size, chimney height, stone type, and labor Site prep $500 $2,000 Clearing, grading, and drainage corrections Permits $50 $500 Varies significantly by municipality Mason labor $70/hr $100/hr Region, complexity, access Gas line installation $350 $2,000 Distance from source, buried vs. surface run Stone veneer materials $11/sq ft $18/sq ft Manufactured vs. natural, thickness For a mid-size DIY outdoor fireplace built from a kit, with a concrete base, basic masonry work, and a veneer finish, budget $2,500 to $6,000 in total. Add a 15–20% buffer for waste, extra mortar, cut losses, delivery fees, and the small fixes that show up in every masonry project. Prices based on 2024–2025 national averages; verify current material costs with local suppliers before finalizing your budget. How to Finish an Outdoor Fireplace The finish work happens after the structure is fully cured and solid. This phase is about protecting the shell, closing exposed surfaces, and giving the fireplace its final look. The finish can’t rescue weak masonry — but it can significantly extend the life of a good build. 1. Stone and Brick Veneer Manufactured stone veneer is the most common choice for block-shell fireplaces. It’s lighter than natural stone, bonds well to a prepared CMU surface, and comes in profiles that closely resemble the real thing. Natural stone adds weight and cost but gives a denser, longer-lasting surface. Confirm your footing can carry it before ordering. Brick veneer suits a more traditional look and is easier to lay in consistent patterns than random stone, but it still needs proper surface prep, consistent joint depth, and exterior-rated materials throughout. 2. Stucco Stucco is a reasonable choice for a simpler outdoor fireplace build. Apply it in proper coats over a prepared masonry surface, and use exterior-rated stucco formulated for temperature variation. It’s less forgiving than veneer if the base moves, any crack in the substrate shows through stucco faster than through stone. 3. Hearth and Capstone Surfaces Any horizontal surface, hearth extension, bench top, chimney cap, needs to handle standing water, frost, and heat cycling. Use exterior-rated stone, brick, or concrete pavers. A metal chimney cap is worth adding at the top; it keeps rain out of the flue, reduces liner deterioration, and prevents animals from nesting in the chimney between seasons. 4. Sealing Apply a penetrating exterior masonry sealer after all finish materials have fully cured, usually 28 days after the last mortar joint. Sealer reduces water absorption, which is the primary driver of freeze-thaw spalling in outdoor masonry. Reapply every 3–5 years or whenever water no longer beads on the surface. Safety Checks Before the First Fire Check What to Do Why It Matters Full cure Wait at least 7 days, 14 is better, before any fire Heat on uncured mortar creates steam pockets that crack joints Clear the area Remove furniture, cushions, leaf debris, and any stored wood within 10 feet Embers travel further than expected Overhead clearance Check for low branches, rooflines, or covered patio overhangs above the chimney Rising heat and sparks need a clear path Smoke direction Light a small fire and watch the drawing for 10 minutes Smoke rollout is a structural signal, not just a comfort issue Safety gear Keep a hose, fire extinguisher, sand, or water bucket nearby First burns are the highest-risk burns Do not light if the mortar still looks damp, if visible cracks have appeared in the firebox or foundation, if a burn ban is active, if wind is pushing directly into the fireplace opening, or if flammable materials are too close to the structure. Common Mistakes That Show Up Later Most outdoor fireplace problems I’ve seen weren’t caused by bad materials; they were caused by decisions made in the first two phases of the build. The footing and the firebox are where the damage happens, even when the finish looks clean. Footing too thin or too small. A base that can’t carry the load cracks and shifts. Pour a reinforced concrete slab over compacted gravel. Minimum 4 inches thick, 6–8 inches for full masonry builds on clay or soft soil. Using regular brick in the firebox. Standard brick cracks under repeated exposure to direct heat. Fire brick and refractory mortar are required for any surface that comes into contact with the flame. No lintel over the opening. Masonry above the firebox opening needs structural support. Angle iron or a reinforced concrete lintel is mandatory; without it, the opening eventually cracks or drops. Chimney too short for the draft. A short chimney doesn’t generate enough draft to pull smoke cleanly. Follow your fireplace plan’s height spec and your local code minimum, whichever is taller. Skipping the permit check. Local rules affect setback, fuel type, chimney height, and spark control. Getting caught after the build is more expensive than the permit. Building too soon after pours. Concrete and mortar that haven’t fully cured can crack when subjected to load or heat. The waiting time feels wasteful, the repair cost doesn’t. Ignoring wind direction. The opening faces the wrong direction, and smoke rolls into the seating area all season. Walk the site on a calm day and check the direction of the prevailing breeze before you stake the location. For decks and outdoor deck layouts, wind direction affects where the fireplace fits relative to seating zones. Frequently Asked Questions About Building an Outdoor Fireplace These are the questions that come up most often once people have a plan in hand and start getting into the actual build details. Can I build an outdoor fireplace on an existing concrete patio? Only after checking the slab’s thickness, reinforcement, and condition. Most residential patios are poured at 3–4 inches for foot traffic, not for a structure that can weigh several tons. If the slab is thin, uneven, or cracked, pour a separate footing rather than loading the existing surface. What is the best material for an outdoor fireplace firebox? Fire brick laid with refractory mortar. Fire brick is engineered for temperatures up to 2,000°F. Standard brick and standard mortar crack under repeated heat cycling. Don’t substitute, even on budget builds; firebox repairs are expensive. Why is my outdoor fireplace smoking? Three likely causes: the firebox geometry is wrong (opening too wide relative to the flue), the chimney isn’t tall enough to generate draft, or prevailing wind is pushing into the opening. Diagnose which one to modify before anything, each has a different fix. Can I use an outdoor fireplace under a covered patio? It depends on overhead clearance and local code. The chimney must clear any overhead structure, and most codes require a minimum distance between the chimney top and any combustible overhead surface. A masonry fireplace under a covered patio almost always requires a permit review; don’t skip it. Final Verdict For most outdoor spaces, yes, if you start with a plan that matches your skill level and your site. A prefab kit build on a flat yard with a good concrete base is a project an experienced DIYer can finish in a long weekend and get right. A custom masonry outdoor fireplace on an irregular lot, or anything involving a gas line, is a different scope: budget accordingly, pull the permit, and hire a mason for at least the firebox phase. The foundation, firebox geometry, and chimney height are what determine whether this thing draws cleanly and lasts. Get those three right, and the finish is straightforward. Before you buy materials, check your local permit requirements and measure the clearances; those two steps alone prevent most of the expensive mistakes I’ve seen when learning how to build an outdoor fireplace.
A room can sound fine until one recording exposes every echo. If you are researching diy acoustic panels, you probably want more than a list of supplies. You want to know what actually works in real rooms before spending money, cutting wood, or wrapping insulation in fabric. I get that, because small choices like panel thickness, breathable cloth, core material, and wall placement can change the result fast. The sections ahead keep the focus on practical decisions people discuss in forums every day: what to build first, what to avoid, where panels should go, and how to test the difference. By the end, you will have a clearer plan for a room that sounds controlled, not overdone. Difficulty 2 out of 5, simple build, but clean fabric wrapping and safe insulation handling need care Time 1–2 hours per panel for beginners; faster if the wood is pre-cut Cost $30–$100+ per panel, depending on core material, fabric, frame wood, and mounting hardware Tools Needed Staple gun, drill/driver, saw, measuring tape, square, scissors, clamps, safety gloves, mask, eye protection Skill Required Beginner-friendly, basic measuring, cutting, drilling, and stapling; a helper is useful for larger wall or ceiling panels What Do Acoustic Panels Do, and Are They Worth It? Acoustic panels control sound inside a room by absorbing echoes, reverb, and sharp reflections from hard surfaces. They are not made to block outside noise or fully soundproof walls, so that difference matters before starting. If your voice recordings sound hollow, video calls feel echoey, or speakers sound harsh, DIY panels can be worth making at home. The main value comes from using the right absorbing material, breathable fabric, and proper placement. A homemade panel can work well when it is built with enough thickness and placed where sound first bounces. The real benefit is control: you can choose the size, fabric, cost, and design that fit your room. For many small studios, offices, and gaming rooms, that makes the project practical and useful. Methods of Building an Acoustic Panel and Which is Right for You? The right acoustic panel method depends on how much time, budget, and finish quality you want. If you are building your first panel, a simple framed design is usually the safest choice. If the panels will stay visible in a living room or home theater, a decorative border may be worth the extra effort. For renters, freestanding panels make more sense because they avoid wall damage. The goal is to pick a method that matches your room, tools, and comfort level, not the most complicated design. Building Method Best For Skill Level Main Benefit Keep in Mind Basic wood frame panel Beginners, bedrooms, offices, small studios Easy Simple, affordable, and reliable Finish may look basic without trim Two-part frame panel Cleaner builds and larger panels Medium Stronger frame with less bowing Takes more cutting and assembly time Decorative border panel Home theaters, living rooms, visible walls Medium Looks more polished and furniture-like Costs more and needs careful fitting Frameless panel Quick builds and lightweight panels Easy Fast, cheap, and simple Less durable and harder to hang neatly Freestanding panel Renters, podcasts, movable setups Medium No wall mounting needed Takes up floor space Ceiling cloud panel Studios, desks, mixing spots, theaters Medium to hard Reduces ceiling reflections well Needs very secure mounting If you want the most balanced option, choose the basic wood frame panel. It gives you good sound control, simple construction, and enough flexibility for most rooms. How to Build DIY Acoustic Panels: Step by Step Building DIY acoustic panels becomes easier when the steps follow a clear order. This process covers sizing, framing, fabric wrapping, insulation, finishing, and mounting. Materials and Tools Cost Table Before buying anything, it helps to separate must-have materials from tools you may already own. The total cost can look higher on paper because items like a drill, saw, or staple gun are usually one-time purchases. For the actual panel, the main cost comes from the absorbing core, wood frame, fabric, and mounting hardware. Material or Tool Quantity Estimated Cost Purpose Mineral wool or rigid fiberglass 1 board per panel $8–$20 Main sound-absorbing core Recycled denim insulation 1 board per panel $12–$25 Alternative sound-absorbing core Pine boards or plywood strips 4 pieces per panel $12–$30 Builds the panel frame Breathable fabric Enough to cover front, sides, and back edges $8–$25 Covers the panel neatly Backing fabric 1 piece per panel $3–$10 Covers the rear side Screws 8 to 12 per panel $3–$8 Joins the frame corners Wood glue 1 small bottle $4–$8 Strengthens the frame joints Staples 30 to 50 per panel $3–$8 Holds fabric in place Staple gun 1 $10–$25 Attaches fabric to the frame Saw 1 $20–$80 Cuts the wood pieces Drill 1 $40–$120 Makes pilot holes and drives screws Measuring tape 1 $5–$15 Measures wood, fabric, and wall space Gloves 1 pair $3–$10 Protects hands while handling insulation Mask 1 $2–$10 Protects from dust and loose fibers Eye protection 1 pair $5–$15 Protects eyes during cutting and handling French cleats, Z-clips, or brackets 1 set per panel $5–$20 Mounts the panel on the wall Ceiling anchors 2 to 4 per ceiling panel $5–$15 Secures ceiling cloud panels This table provides a realistic starting point, but the final cost depends on panel size, material quality, and the number of tools already available. Step 1: Plan the Panel Size Around the Insulation Start with the size of your acoustic insulation. In the transcript, the insulation came in a 4 x 2 ft size, so the frame was designed around that instead of cutting the insulation down. Add a small amount of extra space to the frame. The builder added about 1/8 inch to the length and width for easier fitting, plus a little extra depth so the insulation would not press tightly against the fabric. Step 2: Cut, Assemble, and Strengthen the Frame Use 3/4-inch birch plywood for the frame because it is straight, smooth, strong, and less likely to warp. The builder made a two-part frame: one section held the insulation, and the other helped support the fabric and outer trim. If you enjoy working with plywood and want to put the same grain-matching and edge skills to use on a smaller scale, the wood inlay beginner guide covers exactly that kind of close-tolerance work. Join the frame pieces with wood glue and brad nails. The glue adds strength, while the nails hold everything in place as it dries. Let the frame cure overnight if possible before moving on. Step 3: Sand the Frame and Prepare the Surface Sand all edges where the fabric will touch the frame. This is important because sharp plywood edges can snag or tear thin stretch fabric. Use 220-grit sandpaper, then wipe the frame with a damp cloth to remove dust. A smooth frame makes the fabric easier to wrap and helps the finished panel look cleaner. Step 4: Choose and Wrap the Front Fabric Pick a thin, breathable fabric that allows sound to pass through. The builder used polyester stretch fabric because it was light, smooth, and less likely to wrinkle. Wrap the front by starting with one long side. Secure it lightly with fabric tape, then staple it. Move to the opposite long side and stretch the fabric toward yourself before stapling. Finish with the two short sides, folding the corners neatly and trimming extra fabric. Step 5: Add the Acoustic Insulation and Close the Back Place the rigid acoustic insulation inside the frame. warns against using regular loose home insulation because it may sag and will not give the same neat finish. After the insulation is in place, wrap the back with another piece of fabric. Staple it flat and keep the edges clean. Make sure no staples stick out, especially if you plan to add a wood border. Step 6: Build and Finish the Optional Wood Border For a more finished look, cut strips from 3/4-inch oak plywood to create an outer border. Test-fit one strip first, then use it as a guide for the rest. The border should fit snugly around the panel. Sand the border, add edge banding if needed, then stain and seal it. Let the finish dry overnight before attaching it to the panel. The same stain-and-seal process is covered in detail in the barn door building, which walks through surface prep and finish coats for exposed oak and pine. Step 7: Attach the Border and Mounting Hardware Slide the finished oak border around the panel and secure it with brad nails. The builder used one nail on each side to hold the border tight. Then install low-profile French cleats on the back of the panel and on the wall. These help the panel hang flat and secure. Use stronger anchors for heavier panels or ceiling-mounted panels. Step 8: Hang the Panels and Test the Room Hang the panels in the room and listen for the change. In the transcript, the builder installed 10 panels in a small home theater room and noticed a clear drop in room noise. Conversations and movie dialogue became easier to hear. Start with the most important wall areas first, then test before adding more panels. This keeps the room controlled without making it feel too dull. Once the panels are hung, test the room before building more. Small placement changes can improve clarity without making the space feel too flat. Here’s the detailed video overview: Where to Place DIY Acoustic Panels Panel placement matters as much as the build itself. A few well-placed DIY acoustic panels can make a room sound clearer without covering every wall. Placement Area Where to Put Panels Why It Helps Best For First reflection points Side walls where the speakers first bounce sound. Use the mirror trick to find the spot. Reduces early reflections and improves clarity. Music, mixing, gaming, and home theater Behind speakers Front wall behind speakers, monitor, or desk. Controls front-wall reflections and softens harsh sound. Studios, desk setups, speaker rooms Behind the listening position Wall behind your chair, sofa, or mixing seat. Reduces rear-wall bounce, especially in small rooms. Home theaters, studios, small rooms Ceiling cloud Above a desk, studio chair, or main listening seat. Cuts reflections between the floor and the ceiling. Studios, offices, podcast rooms Corners and bass traps Room corners, especially near speakers or bass-heavy areas. Controls low-end buildup better than flat wall panels. Music rooms, theaters, bass-heavy rooms Start with the strongest reflection points, then test the room. Good placement helps you use fewer panels while still getting cleaner sound. Real Community Questions About DIY Acoustic Panels Reddit users explain that DIY acoustic panels are not as mysterious as they may seem. In this discussion, builders point out that standard panels or gobos are usually insulation placed inside a wood frame and covered with cloth. Several comments push back against the idea that branded acoustic treatment is always special, since many companies use the same or similar insulation materials that DIYers can buy themselves. The thread also adds useful nuance around bass traps. Some users say corner traps can be built using the same basic idea, while others note that certain designs, such as membrane resonators, limp mass panels, and diffusers, are more complex. Overall, the advice supports DIY panels when design, materials, and placement are handled properly. How to Test Your Panels After Installation Testing shows whether your DIY acoustic panels are actually helping. Use simple checks first, then adjust placement before building or buying more panels. Clap test: Stand in the room and clap once. Listen for ringing, flutter echo, or a sharp bounce after the clap. Voice recording test: Record the same sentence before and after installing panels. Check if your voice sounds clearer and less hollow. Speaker listening test: Play familiar music or movie dialogue. Notice if voices sound cleaner and harsh reflections feel softer. Video call test: Join a call or record a short sample. Listen for reduced echo and better speech clarity. Before-and-after phone recording: Use the same phone, same spot, and same distance so the comparison stays fair. Room measurement software: Use this only if you want more detail about reflections, reverb, or frequency issues. Do not judge the panels by looks alone. A quick sound test helps you place them smarter and avoid over-treating the room. Common Mistakes Acoustic Panels DIY Builders Make Most DIY acoustic panel mistakes come from rushed choices. The wrong fabric, a weak frame, or poor placement can cause a good panel to perform poorly. Common Mistake Why It Matters Better Approach Using the wrong core material Loose or soft insulation can sag and lose shape. Use rigid mineral wool, rigid fiberglass, or acoustic insulation boards. Choosing a non-breathable fabric Thick or coated fabric can block sound before it reaches the core. Use fabric that lets air pass through easily. Making panels too thin Thin panels may reduce sharp echo but leave the room sounding boxy. Use thicker panels when space allows. Skipping surface prep Rough frame edges can snag, wrinkle, or tear the fabric. Sand the frame before wrapping. Wrapping fabric poorly Uneven tension can create wrinkles, bumps, and loose corners. Secure one side first, then stretch evenly. Placing panels randomly Panels may miss the spots where reflections cause the most problems. Start with the first reflection points and test the room. Using weak mounting hardware Panels can loosen, tilt, or fall over time. Match brackets, cleats, or anchors to the panel weight. A better build comes from simple care at each stage. Choose the right materials, wrap cleanly, and place panels where the sound actually needs help. Tips for Better DIY Acoustic Panels A few smart habits can make your panels cleaner, safer, and more useful. These tips help you avoid wasted time and extra cost. Build one test panel first: Check the size, fabric tension, core fit, and hanging method before making a full set. This same test-before-committing approach pays off in any multi-piece build. It is the same reason most people start with a single prototype on projects like these, whiskey barrel furniture builds, where sizing can vary between barrels. Use insulation size as your guide: Build the frame around the board to avoid rough cuts and waste. Leave slight frame space: Let the core sit flat without pressing hard against the fabric. Use fabric tape before stapling: Hold the cloth in place so wrinkles are easier to fix. Keep staples flat: Neat staples help the backing, trim, and mounting parts sit properly. Add an air gap when possible: A small wall gap can improve absorption. Test before building more: Move panels around and listen before adding extra panels. Use stronger hardware overhead: Ceiling panels need safer anchors because they hang above people. Good panels are not just about what you buy. Careful sizing, clean wrapping, safe mounting, and testing make the final result much stronger. Frequently Asked Questions How long do DIY acoustic panels usually last? Well-built DIY acoustic panels can last for years if the fabric stays tight, the frame remains dry, and the core does not sag. Check them once in a while for dust, loose staples, fabric fading, or frame movement issues, too. Can humidity affect DIY acoustic panels? Yes, humidity can affect the frame, fabric, and some core materials over time. Use straight plywood or sealed wood, keep panels away from damp walls, and avoid installing them in basements with moisture problems unless the room is controlled properly. Should DIY acoustic panels be fire-resistant? Fire safety is worth thinking about, especially in studios with lights, cables, or electronics nearby. Choose safer materials when possible, avoid placing panels against heat sources, and check local fire rules if panels are used in commercial or shared spaces. Can acoustic panels be cleaned? Yes, but clean them gently. Use a soft brush, a lint roller, or a low-suction vacuum. Avoid soaking the fabric, because moisture can affect the core or frame. Removable fabric covers make cleaning easier in dusty rooms or pet areas. Should panels match the room layout symmetrically? For listening rooms, symmetry usually helps because both ears receive more balanced reflections. Place matching panels on the left and right sides when possible. For voice recording, exact symmetry matters less than treating the strongest echo around the microphone area. Final Thoughts A better-sounding room usually comes down to smart choices, not complicated gear. I would start with the basics: choose the right core material, use breathable fabric, build a solid frame, and place each panel where reflections actually happen. You also saw why testing matters, because a small placement change can improve clarity before you spend more money. DIY acoustic panels are worth the effort when you want better voice recordings, cleaner calls, clearer movie dialogue, or a calmer studio setup. The best part is that you can shape the build around your room and budget. Try the tips, test your space, and share your results or questions in the comments.
Project Type DIY wall shelves (5 methods) Difficulty Range Beginner to Intermediate Time Per Shelf 2–6 hours, depending on the method Cost Range $10–$180 depending on method and materials Tools Needed Drill, saw, level, stud finder, sandpaper, measuring tape Skill Required Beginner-friendly; no professional experience needed Learning how to build wall shelves is one of the most practical weekend projects you can tackle, and one of the few DIY jobs where a beginner can get a clean, useful result without owning a truck full of tools. I’ve built all five methods in this guide. The first time I built bracket shelves, I drilled into a stud and had a level shelf up in an afternoon. The fifth time, I was cutting 30-degree angles for hexagons and wishing I’d started simpler. Start with the method that matches where you are right now. There are five distinct approaches to building DIY wall shelves here, from basic scrap wood brackets to simple DIY floating shelves to honeycomb display shelves, with step-by-step instructions, a cost comparison, and the mistakes that trip people up most on their first build. Is Building Your Own Wall Shelves Worth It? If you want shelves that fit a specific wall, hold a specific load, and match a specific finish, yes. Store-bought shelves are built for average spaces. DIY wall shelves are built for you. You choose the depth, the length, the wood species, the color, and how the brackets look. For a first project, a simple bracket shelf can cost under $30 and be done in a Saturday. That said, not every situation calls for DIY. Very heavy shelves above beds, shelves on tile or masonry, or shelves in rental units where wall damage isn’t an option, those deserve a harder look at whether building is the right call. For most rooms, a well-mounted bracket shelf is the safest and most beginner-accessible starting point. Choose the Right Method Before You Buy Anything Most people pick a shelf style because it looks good in a photo. The better question is whether that method suits your wall type, the weight you plan to put on it, and your current skill level. Here’s a direct comparison before you spend a dollar on materials: Method Best For Skill Level Cost Range Scrap Wood Bracket Shelf Beginners, books, everyday storage Beginner $10–$60 No-Hardware Dowel Floating Shelf Clean modern rooms, bathrooms, and light storage Beginner to Intermediate $10–$80 Floating Corner Shelf Small rooms, offices, unused corners Beginner to Intermediate $40–$150 Picture Ledge Shelf Frames, art, kids’ books, family photos Beginner $30–$120 Hexagon / Honeycomb Shelf Wall decor, plants, candles, light display items Intermediate $40–$180 The method you choose shapes every decision after it, what wood to buy, which hardware to use, and how long the project realistically takes. Once that’s settled, everything else becomes a checklist. Planning Your Wall Shelves Before You Build Good planning makes your DIY shelf project easier and safer. Before you buy wood or start drilling, decide where the shelf will go, what it will hold, and how much support it needs. Choose the location: Pick a useful wall in your living room, kitchen, bedroom, bathroom, office, or garage. Make sure the shelf will not block doors, windows, switches, or walkways. Decide the size: Measure the wall space before choosing the shelf length and depth. A small shelf may be 24 inches wide, while a larger shelf may be 36 to 48 inches wide. Think about weight: Light decor needs less support. Books, dishes, tools, and storage baskets need stronger brackets and better wall support. Check the wall: Use a stud finder before drilling. Wall studs provide the shelf with greater strength than drywall alone. Plan the spacing: If you are building more than one shelf, leave enough space between them for books, baskets, plants, or decor. Once your plan is clear, the project feels much easier. A few careful choices at the start can help you avoid crooked shelves, weak support, and wasted materials. Materials by Method: What You Actually Need to Buy The materials list stays simple when it matches the shelf type. Here is what each wall-shelf method requires. Basic Bracket Shelf: Use a wood board, two or more shelf brackets, screws, wall anchors, sandpaper, wood filler, paint or stain, and a clear sealer if needed. This is the best first project for most beginners. Floating Shelf: Use a shelf board or shelf box, hidden floating-shelf brackets, or a wood cleat; long screws, wall anchors if needed, sandpaper, wood filler, paint, stain, or sealer. Floating shelves need strong hidden support to avoid sagging. Corner Shelf: Use two shelf boards or one corner-cut board, small brackets or cleats, screws, anchors, wood glue, sandpaper, and finish. Measure carefully because corner walls are not always perfectly square. Picture Ledge Shelf: Use a back board, bottom board, front lip, wood glue, brad nails or screws, sandpaper, and paint or stain. This is great for frames, books, and small decor, but not heavy storage. Heavy-Duty Shelf: Use thick boards or plywood, heavy-duty brackets, long structural screws, washers, wall studs, anchors if needed, and a strong finish. This shelf type is best for garages, laundry rooms, and pantries. Once you have the materials matched to the shelf type, the build steps become much easier. The next section walks through each method from the first measurement to the final check. How to Build Wall Shelves: Step-by-Step Guide by Method The shelf method decides the build order. Each method below follows the same basic idea: measure carefully, find strong support, install level hardware, and test the shelf before loading it. Pre-Use Safety Checklist: Level and wobble: Push the shelf gently from the front and sides. Check the level across the shelf. Tighten any loose screws. Wall support: Confirm that heavy shelves are mounted to studs when possible. Drywall alone should not carry heavy loads. Bracket or cleat strength: Check that brackets, cleats, or hidden hardware do not move under pressure. Weight check: Add items slowly. Do not place heavy books, dishes, or tools on the shelf until you know it is secure. Method 1: Scrap Wood Bracket Wall Shelf Materials you need: 1x boards, 1×2 pieces, wood screws, pocket-hole screws, 5/8-inch brad nails, 1 1/4-inch wood screws, wall anchors if needed, primer, paint, drill, saw, countersink bit, level, safety gear, and sandpaper. Step 1: Cut the Shelf Boards and Bracket Pieces: Cut your 1x shelf boards to the needed length. This project used one 1×6 board and one 1×4 board. Then cut 1×2 bracket pieces. Use 2 1/2-inch and 3 1/4-inch pieces for the narrow shelf, and 5-inch and 6-inch mitered pieces. Step 2: Dry-Fit and Assemble the Brackets: Lay the bracket pieces under each shelf before fastening. Check the cuts, angles, and fit first. For the wider shelf, join the 5-inch and 6-inch pieces at a 90-degree angle with wood screws. Use a countersink bit so screw heads sit flush and neatly. Step 3: Sand, Prime, and Paint the Shelves: Sand shelf boards and bracket pieces before mounting. Smooth the edges, corners, and cut ends so they feel clean and safe. Wipe away dust, then prime and paint. The shelves were painted black, while the brackets stayed natural wood. Let each coat dry. Step 4: Attach the Brackets to the Shelves: Attach larger brackets under the wider shelf using 1 1/4-inch wood screws. For the narrow shelf, attach brackets to the back edge with pocket-hole screws. Keep each bracket straight and tight, and make sure screws do not poke through the top. Step 5: Mount the Shelves to the Wall: Hold each shelf against the wall and mark screw spots. Use a level before drilling so the shelves sit straight. For a wider shelf, drive screws through each support piece. Use wall anchors without studs. For the narrow shelf, screw into studs when aligned. Step 6: Add the Mitered Supports and Check the Shelf: Attach the mitered angled pieces with 5/8-inch brad nails to complete the bracket shape. These pieces add a handmade look. After installing both shelves, check that they are level, tight, and secure. Push gently, then tighten anything that moves Method 2: No-Hardware Dowel Floating Shelves The cleanest-looking method in this list. The shelf slides onto wall-mounted dowel pins with no visible hardware on the face. It takes more preparation than a bracket shelf, but the finished look is worth it for modern rooms and bathrooms. Step 1: Cut Boards and Dowels: Start with one 2x8x8 board, remove any damaged corners, and cut it into three shelf pieces, each just under 31 inches long. Use a speed square as a saw guide. Cut a 36-inch oak dowel into nine 4-inch pins, giving each shelf three supports total. Step 2: Mark and Drill Dowel Holes: Mark three dowel points on each shelf: one in the center and two about two inches from each outside edge. Find the center of each line. Tape the 1/2-inch bit to set depth, clamp the board, and drill all nine holes carefully and cleanly. Step 3: Rip and Label Back Supports: Rip a 1 1/2-inch strip from each shelf board to create the back wall support. Use a circular saw guide, or a table saw if available. Mark each shelf-and-support pair before separating them, so the dowel holes stay aligned during final assembly. Step 4: Sand Dowels and Shelf Pieces: Test each dowel in the holes. The back support side should fit tightly, but the shelf side should slide on smoothly. Sand the exposed dowel ends by spinning them in a drill with sandpaper. Sand all shelves and round edges for a cleaner finish. Step 5: Install Dowels and Lock Supports: Line up each shelf with its matching back support. Hammer dowel pins into the back support holes. Add glue if needed, though a tight fit may hold well. Clamp the pieces, pre-drill, countersink, and add one screw through the middle dowel for stability. Step 6: Stain and Seal the Shelves: Apply pre-stain conditioner to prevent blotchy absorption. Let it dry, sand lightly, then wipe on the stain and remove excess. Light woods like maple and pine behave differently under stain; a maple stain color chart helps you pick a tone before committing to a full board. Finish with two or three coats of spray polyurethane, sanding lightly between coats. Step 7: Mount and Secure the Shelves: Level each back support on the wall and mark studs. Drill holes, then screw into studs or strong wall anchors. Slide the shelves onto their dowel pins, use scrap wood to ensure even spacing, and add a safety screw so the shelves cannot slide off. Method 3: DIY Floating Corner Shelves Materials you need: Shelf boards, small brackets or cleats, screws, anchors, wood glue, drill, level, stud finder, sandpaper, paint, stain, or sealer. Step 1: Cut the Frame and Shelf Pieces: Cut the 2×4 frame pieces to length, then cut the 1/4-inch plywood for the top and bottom faces. Keep each shelf’s parts together so nothing gets mixed up. Use clean, straight cuts along the wall sides and front edges, as these areas remain visible. Step 2: Assemble the Shelf Frames and Add Supports: Build each corner shelf frame with one long 2×4 and shorter side pieces. Add two middle supports inside each frame, using a scrap spacer to keep them even. Countersink the screw holes, drive in 3-inch screws, then nail one plywood face onto the frame. Step 3: Sand, Fill, Trim, and Paint: Sand the rough edges, plywood faces, and exposed 2×4 areas until smooth. Fill nail holes, screw holes, and small gaps with wood filler or joint compound. Add decorative trim if needed, cut the visible corners at 45 degrees, then paint the shelves and trim before mounting. Step 4: Mark the Wall and Mount the Frames: Set the first shelf on scrap spacers at your chosen height. Use a level, mark the wall, and find studs where possible. Drill pilot holes through the frame, then use screws into studs or strong wall anchors to secure each shelf firmly. Step 5: Attach the Bottom Face and Front Trim: After the frame is mounted, attach the front 2×4 edge with countersunk screws. Nail the bottom plywood face in place, then install the painted molding along the exposed edges. Use brad nails for the trim, and check that every shelf fits tightly before finishing. Step 6: Caulk, Touch Up, and Final Check: Caulk the back edges where the shelves meet the wall, especially if the corner is not perfectly square. Let it dry, then touch up the paint on the shelf and wall. Once everything is dry, load the shelves slowly and check for movement, sagging, or loose screws. Method 4: DIY Picture Ledge Shelves Materials you need: Poplar board, table saw, nail gun, wood glue, clamps, wood putty, sandpaper, stain, spar urethane, screws, drill, level, stud finder, tape measure, and safety gear. Step 1: Cut the Shelf Boards: Start with a wide poplar board and cut it slightly longer than the final shelf size. For this project, the final ledges were 60 inches long, so the boards were first cut to 61 inches. Rip three pieces for each shelf: 2 inches, 3 inches, and 4 1/2 inches. Step 2: Dry-Fit the Shelf Pieces: Gather the three boards for one ledge and dry-fit them before adding glue or nails. This helps you check that the pieces line up well. The 3-inch board forms the base, the 4 1/2-inch board becomes the back, and the 2-inch board creates the front lip. Step 3: Glue and Nail the Back Board: Clamp the 3-inch board flat on the workbench to keep it straight. Run wood glue along the bottom edge of the 4 1/2-inch board. Attach it to the 3-inch board, nail both ends first, then check that everything is flush before adding more nails. Step 4: Attach the Front Lip: Add the 2-inch piece to the front edge of the ledge the same way. Use wood glue first, then nail both ends to hold it in place. Check that the front lip is straight and flush with the base before nailing across the full length. Step 5: Trim the Ends and Fill Holes: Cut one end of the ledge clean, then measure 60 inches from that fresh edge and cut the other end. This gives the shelf smooth, flush sides. Fill all nail holes with wood putty using your finger, then let the putty dry fully before sanding. Step 6: Sand, Stain, and Seal: Sand off any excess wood putty and smooth the entire ledge before finishing. Apply the stain evenly, wipe off the excess, and let it dry for 24 hours. After that, add spar urethane to protect the wood and give the picture ledge a clean finished surface. Step 7: Mount and Style the Ledges: Measure the wall so the picture ledges hang centered. Since they may hold frames and artwork, screw them into wall studs for stronger support. Once mounted, place frames and art on the ledges, stand back, rearrange, and keep adjusting until the display looks balanced. Method 5: DIY Hexagon or Honeycomb Shelves Materials you need: Lumber, miter saw or circular saw, stop block, painter’s tape, wood glue, brad nailer, 1 1/2-inch brad nails, sander, sandpaper, router with 45-degree bit, polyurethane, drill, screws, stud finder, and safety gear. Step 1: Cut Matching Hexagon Pieces: Choose lumber like pine, walnut, or ash. For eight-inch sides, use about 50 inches of board per shelf. Cut each piece at a 30-degree angle, flipping the board after each cut. Use a stop block so all six pieces stay the same length. Step 2: Sand and Tape the Pieces: Sand each cut piece before assembly to remove saw marks and rough edges. Smooth the faces and angled ends so the joints fit tightly. Lay all six pieces side by side, press the joints together, and run painter’s tape across them to hold the layout in place. Step 3: Glue, Fold, and Nail the Shelf: Flip the taped pieces so the inside joints face up. Apply wood glue to each angled joint, then fold the strip into a hexagon shape. Press the corners tight, wipe away glue squeeze-out, and add 1 1/2-inch brad nails for extra strength if needed. Step 4: Let It Dry and Fix the Joints: Let the shelf dry overnight before removing the tape. Check every joint for gaps or loose areas. If nail tips stick out, trim them first, then sand them down. Sand raised joints, glue marks, and uneven spots until the full shelf feels smooth. Step 5: Add Bevels and Finish: If you want a cleaner edge, use a router with a 45-degree bit to bevel the outside edges. Then apply clear satin polyurethane or your chosen finish. Let it dry, sand lightly with 220-grit sandpaper, and add extra coats for better protection. Step 6: Mark, Mount, and Secure: Choose your wall layout, then mark stud locations on the shelf and wall. Drill countersunk holes where screws will sit. Drive screws into studs, leaving them slightly proud. Hang the shelf on the screws, check that it feels secure, then style it with light decor. These shelf methods give you several ways to match your skill level, room style, and storage needs while keeping the project practical and customizable. What Each Method Actually Costs These figures reflect material costs at a standard home improvement store. Your total will shift depending on wood species, finish quality, and whether you already own the tools. Method Estimated Cost Main Cost Drivers Scrap Wood Bracket Shelf $10–$60 1× boards, 1×2 brackets, screws, paint No-Hardware Dowel Floating Shelf $10–$80 2×8 lumber, oak dowel, stain, polyurethane Floating Corner Shelf $40–$150 2×4 frame, plywood faces, trim, paint Picture Ledge Shelf $30–$120 Poplar board, glue, nails, stain, spar urethane Hexagon / Honeycomb Shelf $40–$180 Lumber species choice, miter cuts, finish, and hardware The single biggest cost variable across all five methods is wood species. Pine sits at the low end. Walnut, ash, and hardwood poplar add $20–$60 to the same build. The same poplar boards that work well for picture ledges also translate directly to a painted DIY bookshelf once you’re comfortable with the cuts. The hardware itself, brackets, anchors, and screws, is usually under $15 per shelf, regardless of method. Common DIY Shelf Mistakes to Avoid Small errors during measuring, mounting, or finishing can weaken your shelves. Watch for these common mistakes so your project stays straight, safe, and useful. Skipping the level: Always use a level before drilling, because even a small tilt can make the shelf look uneven. Not finding studs: Heavy shelves should be mounted to studs when possible, since drywall alone cannot safely hold heavy loads. Using weak anchors: Choose wall anchors that match your wall type and the total weight your shelf will carry. Choosing thin wood: Thin boards may bend or sag over time, especially when holding books, dishes, or storage baskets. Making shelves too deep: Deep shelves need stronger brackets because extra depth puts more pull on the wall support. Overloading the shelf: Stay within the hardware weight limit and keep heavier items close to the wall. Painting after mounting: Cut ends, and undersides are hard to reach once the shelf is on the wall. Finish the shelf completely before installing it. If you’re starting with a stained board and want a painted finish, painting over stained wood needs different prep than bare pine does. Touching up the wall is fine; fully painting after the fact is a frustration. Ignoring hidden wires or pipes: Check carefully before drilling, especially near outlets, switches, kitchens, bathrooms, and shared plumbing walls. Avoiding these mistakes helps your DIY shelves stay secure, level, and clean-looking while reducing the chance of wall damage or future repairs. Keeping Wall Shelves in Good Shape After Installation A well-built shelf can last decades. These habits help. Let the finish cure fully before placing items on the shelf; most paint and polyurethane products need 24–72 hours of full cure before they can be handled without contact. Lift items rather than dragging them; dragging leaves scratches that are hard to fix without refinishing. Add felt pads under anything ceramic, glass, or metal to protect the surface. In bathrooms, use sealed wood and keep the room ventilated. Unsealed wood in a humid bathroom will absorb moisture and eventually warp. Check the shelf brackets and screws every 6–12 months. Wood expands and contracts with seasonal humidity changes, and fasteners can loosen over time in ways that aren’t visible until something shifts. When things go wrong, a screw starts to pull, a bracket creaks, fix it immediately rather than waiting. A loose anchor is a 10-minute fix. A shelf that falls and damages the wall, floor, or whatever was on it is not. Frequently Asked Questions How do you build floating wall shelves without visible brackets? Use the dowel method in Method 2 above: a back support mounts to the wall with screws, wooden pins extend from it, and the shelf slides over the pins. The result is a shelf with no visible hardware on the face or underside. What wood is best for DIY wall shelves? For most builds, 3/4-inch pine or poplar boards from a home improvement store work well and stay affordable. For heavier loads or a higher-end look, 3/4-inch birch plywood or hardwood boards like oak hold up better and resist sagging over wider spans. How do you mount wall shelves without studs? Use toggle bolts or snap toggles rather than standard plastic expansion anchors. Toggle bolts distribute load across a larger area of drywall and hold considerably more weight. Avoid drywall-only mounting for shelves that will hold books, dishes, or anything above 20 lbs. How deep should DIY wall shelves be? 6 to 8 inches for decor and small plants. 8 to 10 inches for books. 10 to 12 inches for storage baskets. Beyond 12 inches, the leverage on the wall mount increases significantly; you’ll need stronger brackets or a cleat system mounted to multiple studs. How do you build corner wall shelves? Use the 2×4 frame method in Method 3. Build the L-shaped frame, attach plywood faces, paint before mounting, then drive screws into studs or anchors on both walls. Caulk the back edges after mounting; corners are almost never perfectly square, and a thin bead of caulk closes the gap cleanly. Can I build wall shelves as a beginner with no woodworking experience? Yes, with Method 1 or Method 4. Both use straight cuts with standard lumber sizes and visible hardware that’s forgiving to install. A miter saw helps, but a circular saw with a guide gets the same result. Allow extra time on the first build; the second one always goes faster. How do you keep wall shelves level? Mark the bracket or cleat locations with a spirit level before drilling any holes. Don’t rely on eyeballing it; even a 1/4-inch tilt is obvious once items are on the shelf. For shelves wider than 36 inches, check the level at both ends and the center before committing to screw positions. Final Thoughts Wall shelves can turn empty space into useful storage when you plan the build with care. I like this project because you can choose a simple bracket shelf, a clean floating style, a corner shelf, a picture ledge, or a hexagon design based on your room and skill level. You have seen how to choose materials, compare costs, cut and finish boards, mount supports, avoid common mistakes, and keep shelves safe over time. Knowing how to build wall shelves helps you save money, use your walls better, and create storage that fits your home. I would start with one easy shelf first, then try another method once you feel ready. Share your results or questions below.





