


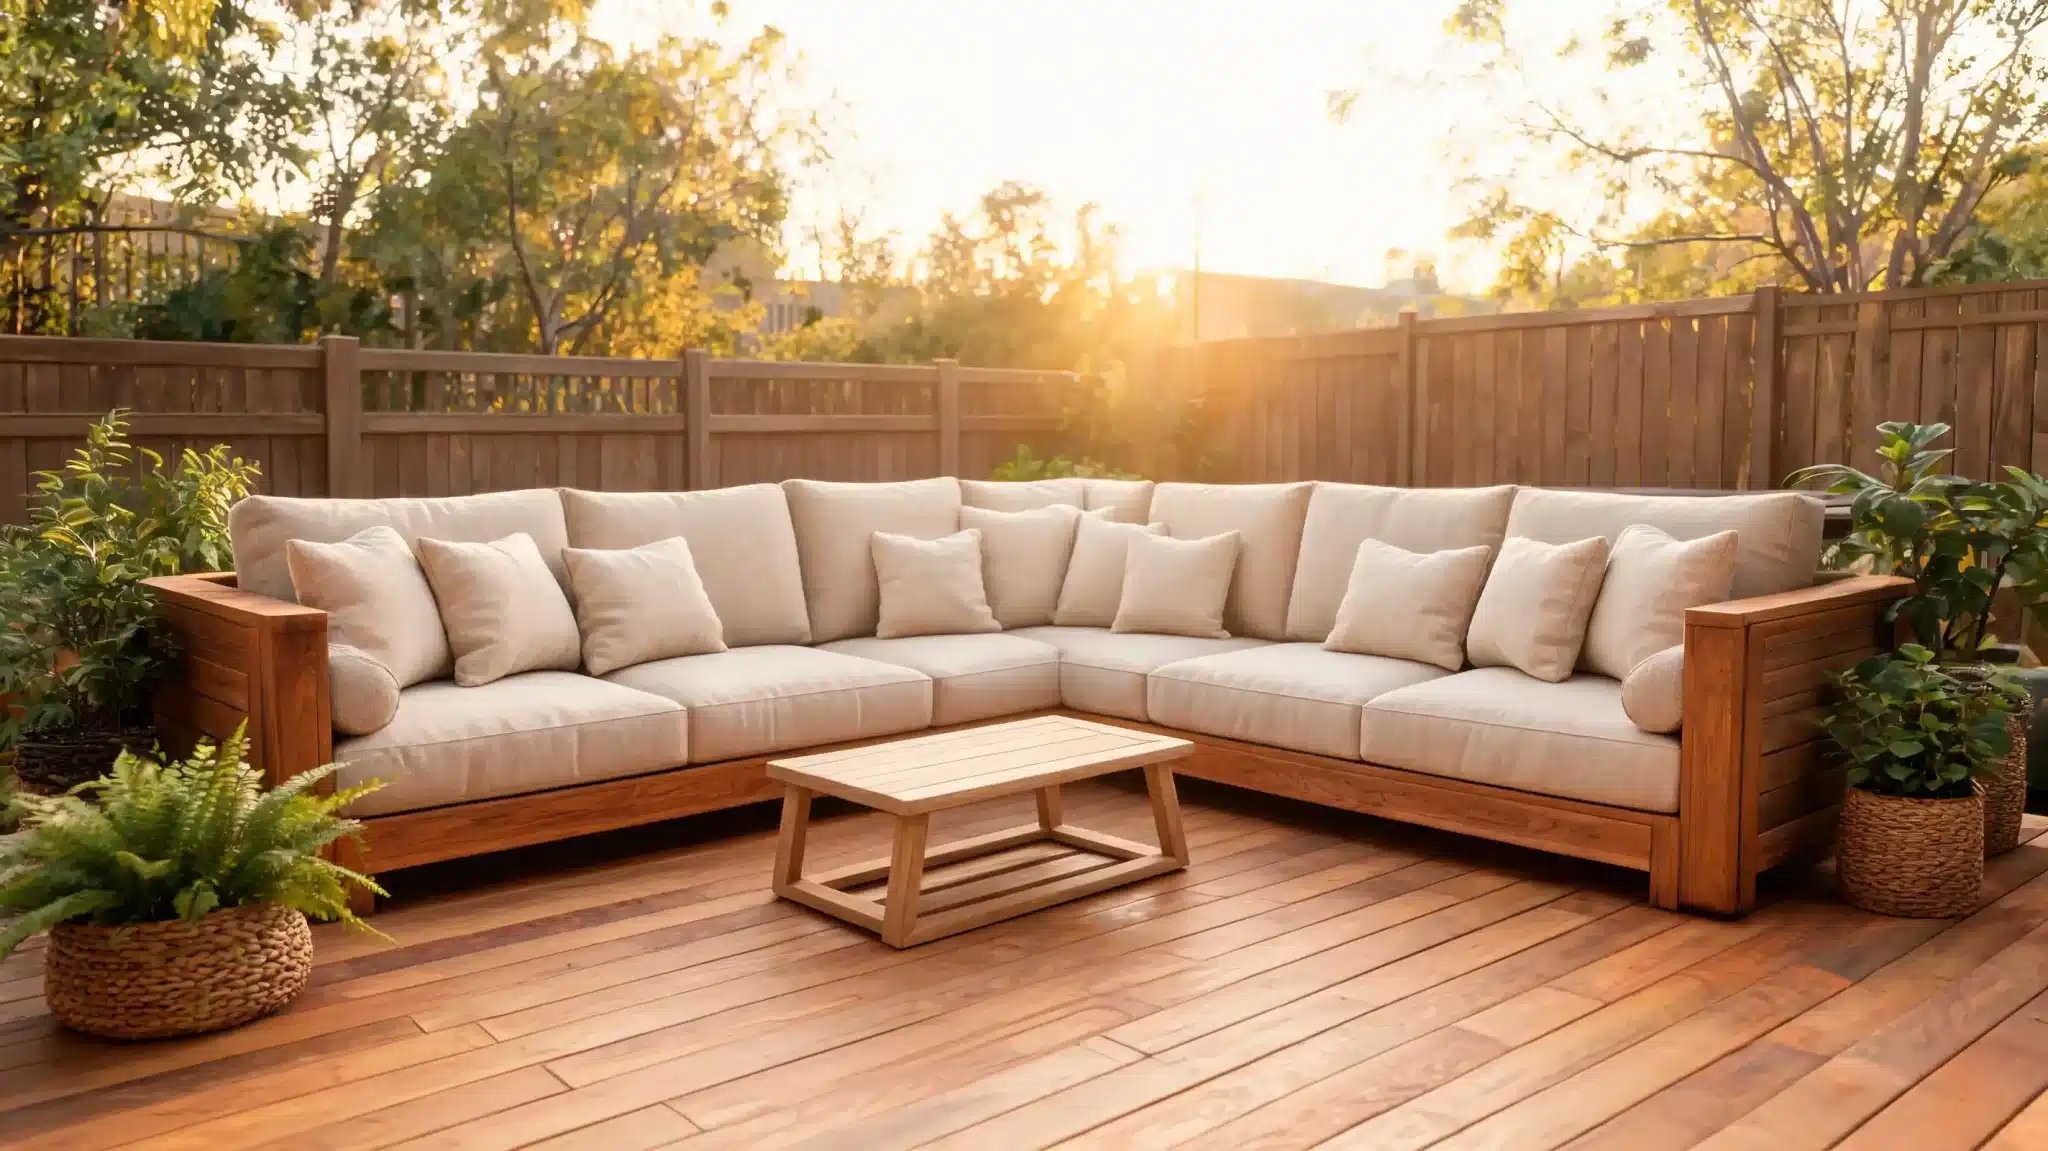
A diy outdoor sectional built from standard 2×4 lumber is one of the more durable patio projects you can tackle on a weekend budget, but only if the frame is squared properly, the wood is sealed before the first rain, and the joints are fastened with exterior-rated hardware. Skip any one of those, and you’ll be replacing boards by year two. Most failed builds come down to the same three mistakes: indoor screws that rust out, no center support on a long span, and a finish coat that didn’t cover the cut ends. This guide covers material selection, frame construction, weatherproofing, design layouts, and the failure points most tutorials skip. If you’re planning an L-shaped sectional for a corner patio or a modular setup you can store seasonally, the steps below will get you a frame that holds up. Cost Note: Figures in this article are estimates based on national averages. Actual costs vary by region, lumber pricing, cushion sourcing, and hardware. Always check current material costs at your local lumber yard before finalizing your budget. Difficulty 3/5 — Basic woodworking skills are enough, but square cuts and consistent measurements matter on every section. Time 1 to 2 weekends for framing, sanding, and assembly, plus additional drying time for stain or sealer. Cost $400 to $800 in materials, depending on wood species, cushion choice, finish type, and hardware. Tools Needed Circular saw or miter saw, drill/driver, clamps, level, tape measure, speed square, orbital sander. Skill Required Beginner to intermediate — comfortable measuring, cutting, drilling, and fastening boards square. The project card above is a realistic starting point. Labor and finish coats will push the upper end of that range if you’re working with cedar or adding decorative rope details. What Fails After Two Winters on a DIY Outdoor Sectional Before the build plan, it’s worth knowing exactly what breaks down on outdoor sectionals that weren’t built for real weather. These are the failure modes I see most often on lumber-framed builds. Joint failures from indoor screws: Standard interior screws corrode within one season of outdoor exposure. The rust expands, splits the surrounding wood, and loosens the joint. Use only exterior-rated screws — 2.5-inch ACQ-compatible deck screws for structural joints, stainless steel where visible. Seat sag on long spans: Any frame section longer than 48 inches without a center support will deflect under load. The seat boards bow downward, the joints work loose, and the frame eventually racks. Add a center leg and mid-span brace before you add a single seat board. Wood rot at unfinished cut ends: Factory-milled lumber has sealant on the surface. The moment you cut it, the end grain is exposed and unprotected. Cut ends absorb moisture at roughly ten times the rate of the face grain. Seal every cut end with exterior stain or end-grain sealer before assembling the frame. Cushion mold from trapped moisture: Seat boards installed without gaps trap water under the cushions. Leave consistent 3/16-inch spacing between slats, use a standard drill bit as a spacer. That gap drains rain and lets the frame dry between uses. White stain yellowing: White or light exterior stain on exposed lumber yellows in UV within one full season. If you want a light finish, choose a higher-grade exterior product rated for UV resistance, or go with a medium-tone stain that hides weathering better over time. Choosing the Right Wood for an Outdoor Sectional Frame The wood decision determines how much maintenance you’ll be doing every year. The table below covers the most practical options for a DIY sectional frame. Wood Type Best Use Cost Range Durability Notes Pressure-treated 2×4 Frame, legs, braces $0.80 to $1.20/lf Very high Needs 90 days drying time before staining. Not ideal for exposed seat surfaces. Western red cedar Seat slats, armrests, visible surfaces $2.50 to $4.00/lf High Naturally rot-resistant. Lighter weight. Takes stain well. Best visible-surface choice at reasonable cost. Douglas fir 2×4 Frame and bracing $0.90 to $1.40/lf Moderate Strong and available. Needs full sealing. Not as naturally rot-resistant as cedar. Teak Entire frame and surface $12.00 to $20.00/lf Excellent Best long-term outdoor performer. Overkill for a first build. Better suited for a premium second project. Each of these species behaves differently once it’s outside for a full year, the wood types for furniture guide goes deeper on grain behavior, finish absorption, and what each species looks like after weathering. For most first-time builds, a pressure-treated frame with cedar seat slats is the most practical combination. You get structural durability from the PT lumber and a clean, stainable surface from the cedar. Why Build a DIY Outdoor Sectional Instead of Buying One Store-bought sectionals are a valid option, but they solve a standard problem. A diy outdoor sectional solves your specific problem — an oddly shaped corner, a patio that’s three inches too narrow for a standard sofa, cushions you already own. That’s the practical argument for building. Factor DIY Outdoor Sectional Store-Bought Outdoor Sectional Cost $400 to $800 for a full L-section with cushions $1,000 to $3,000+ for comparable size and quality Fit Built to your exact patio dimensions Limited to manufacturer sizes Style Full control over finish, cushion, and layout Limited to available product designs Time 1 to 2 weekends of build time Faster to unbox and assemble Repairs Replace a single board or screw, you know the frame Proprietary hardware often unavailable after a few years Best for Unusual patio dimensions, modular needs, budget builds Standard patios, quick setup, low DIY interest If your patio is a standard rectangle and time is the constraint, a store-bought option is the honest answer. If you have a corner space, a tight budget, or specific cushions already purchased, building makes more sense. Choosing Your Layout and Measuring Your Space Get the layout decision done before you buy a board. Changing the shape mid-build wastes lumber and time. Measure the space first Check the available floor area, walking clearance (36 inches minimum behind the sofa), door swing room, and the distance to any grill, fire pit, or railing. A sectional that seats six people comfortably needs roughly 100 to 120 square feet of floor space, including clearance paths. Pick the shape based on your corner or wall An L-shape fits corner spaces and creates a natural seating zone with minimal footprint. A U-shape works on larger patios where you want a full conversation area. A modular layout, individual identical units, is the best choice if you need to move or store pieces seasonally. A chaise-side sectional adds one extended section for reclining without committing to full lounge furniture. Choose cushions before you frame This is the single most important pre-build step. Standard outdoor seat cushions come in 20×20, 21×21, and 24×24 inch sizes. The cushion width sets the seat depth, and the cushion thickness (typically 4 to 5 inches) determines how high your seat surface needs to sit. Buy or select the cushions first, then build the frame around their dimensions. Rebuilding a frame because the cushions don’t fit costs more time than the cushions themselves. Tools and Materials You’ll Need Gather everything before the first cut. Stopping mid-build to buy screws or clamps slows the work and risks dried glue joints. Item Quantity Purpose Pocket hole jig 1 Cleaner frame connections, especially on arm joints Circular saw or miter saw 1 Cuts lumber to length and angle Drill/driver 1 Drives exterior screws Clamps 4 to 6 Holds boards flush and square while fastening Tape measure 1 Frame and spacing measurements Speed square 1 Checks square corners before tightening screws Orbital sander 1 Smooths exposed edges before finishing 120-grit sandpaper As needed Initial surface prep for stain 2×4 lumber Multiple boards Main frame, cross braces, arm supports, backrest 2×6 lumber Optional Wider armrests or additional backrest support 2.5-inch exterior screws 2 to 3 lbs Structural fastening throughout Exterior wood glue 1 bottle Reinforces joints before screwing Decking boards Per seat section Seat surface Exterior stain or sealer 1 quart minimum UV and moisture protection for the frame Outdoor cushions As needed Seat and backrest padding Rubber feet or glides Per leg Keeps legs off wet ground Every fastener, glue, and finish product you use needs to be rated for exterior use. Indoor equivalents will fail, and the failures usually start at the joints where water collects. Step-by-Step DIY Outdoor Sectional Build These steps follow the build sequence from the frame up. Complete each one before moving to the next, the frame needs to be square before the arms go on, and the arms need to be level before the seat boards are cut to length. Step 1: Build the main sofa frame Cut the long outer frame boards and shorter cross pieces for the main sofa base. Join them into a rectangular box frame using a pocket-hole jig, exterior wood glue, and 2.5-inch exterior screws. Check the frame for square before the glue sets, measure diagonally corner to corner. Both measurements should be identical. A frame that goes in crooked produces problems at every step that follows. Once the outer box is secured, add interior cross braces spaced evenly across the frame. These carry the seat board load and resist any lateral flex in the long section. Step 2: Add center support for long sections Any section longer than 48 inches needs a center leg and additional mid-span brace. Install both before adding any seat boards. Place the center leg directly under the mid-span brace, and fasten it with exterior screws from above and through the brace from the side. This is a ten-minute step that prevents the seat sag that collapses most long-span builds within a year of regular use. Step 3: Build and attach the arm frames Build each arm frame from vertical uprights, a bottom board, and a center blocking piece that gives the main frame a solid landing surface. Clamp the main frame between both arm assemblies and check that the top edges are flush and the corners are level before driving any screws. The arms set the finished height of the sectional, getting this level at this stage avoids shimming problems with cushions later. Step 4: Install the seat boards Cut the seat boards to length and start the first board flush with the front frame edge. Use a consistent spacer — a 3/16-inch drill bit works well — between each board to keep the drainage gaps even across the full seat depth. Leave the rear portion of the frame open for the backrest pieces. Fasten each board with two screws per frame contact point, pre-drilling to prevent splitting. Step 5: Build the angled backrest Install the long back rail first, then cut one template for the angled backrest pieces. A 12.9-degree miter cut on both ends of each piece, at approximately 1 foot 8 inches long, produces the right lean angle for comfortable seating. Cut one piece, test the fit, and adjust the template before cutting the full set. Fasten each backrest board with screws at the top and bottom rail. Step 6: Build the smaller L-section The second section uses the same frame method as the main sofa. One side gets a standard arm, while the connecting side is modified to fit flush against the main section for the L-layout. Install seat boards with the same spacing and use the same backrest template for consistent angles across both pieces. Step 7: Sand and clean the wood If the lumber has been stored outdoors or is rough from the mill, power-wash the frame first and let it dry fully before sanding. Work through the arm tops, corners, seat board edges, and any surface people will regularly touch. Sand at 120-grit with an orbital sander, then wipe clean before applying any finish. A smooth surface lets the stain penetrate evenly rather than pooling in rough spots. Step 8: Apply exterior finish Apply an outdoor-rated stain, paint, or penetrating sealer to both sections. Pay extra attention to cut ends — brush stain directly onto the end grain and let it soak in before the face coat goes on. Light-colored exterior stain tends to yellow in UV within one season. A medium or dark-toned exterior stain hides weathering better and holds its color longer without annual touch-ups. Step 9: Add decorative details and cushions Once the finish has cured fully, add any decorative rope wrapping or trim details, then place the cushions. The angled backrest creates a small gap at the rear, the seat cushions cover it and the visual reads as intentional. Check every joint and fastener for tightness before putting the sectional into regular use. DIY Outdoor Sectional Design Layouts The frame method is the same regardless of layout. What changes is how many sections you build and how they connect. Start with the layout that matches how the space actually gets used, not how it looks on a product page. 1. Small Patio Sectional Two short sofa sections and one corner connector give you adequate seating on a smaller patio without crowding the walking path. Keep the arm profiles narrow, wide arms eat into the seating width fast on a compact build. A slim side table at one end handles drinks without a separate furniture piece. 2. L-shaped Outdoor Sectional The L-shape is the most practical layout for corner patios and deck edges. One long side handles the main seating load, while the shorter return creates a natural boundary for the space. This design pairs well with a central coffee table and works for both conversation and fire pit setups. If you’re considering how the sectional integrates with your broader deck skirting ideas, the L-shape gives you clean lines along two edges simultaneously. 3. Modular Outdoor Sectional A modular build uses individual identical seat units that can be arranged in any configuration and stored separately during winter. Each unit is standalone — no connecting hardware required. This is the right choice for renters, for patios that double as entertaining space, and for anyone who wants to add sections later without rebuilding from scratch. 4. Outdoor Sectional with Chaise One section is extended to full chaise length, typically 60 to 70 inches, while the rest of the sectional uses standard seat depth. The longer section works alongside a pool, garden edge, or shaded wall. Use thicker cushions (5 to 6 inches) on the chaise section to compensate for the flatter angle. 5. Sectional with Built-in Storage The seat frame height on a standard 2×4 sectional leaves 10 to 12 inches of usable space beneath the seat boards. Add hinged seat panels or open-front cubbies to store cushions, throws, and covers. Keep the storage area ventilated — a gap at the front or back prevents moisture from building up around stored fabric. Weatherproofing for Long-Term Durability A sectional that isn’t finished properly will need board replacements within three to four years. These steps extend the frame lifespan to a decade or more. Sand before you seal: Rough wood doesn’t hold finish. Sand all exposed surfaces to 120-grit, clean off the dust, and then apply stain or sealer within 24 hours of sanding so the wood doesn’t reabsorb ambient moisture. Use a penetrating exterior oil or stain: Film-forming finishes like standard exterior paint sit on top of the wood and peel when the wood moves seasonally. A penetrating oil or deck stain moves with the wood and doesn’t peel. Two thin coats outperform one heavy coat every time. Raise the legs off wet surfaces: Rubber glides or adjustable foot levelers keep the leg bottoms out of standing water. Even pressure-treated lumber will rot at the base if it sits in a puddle for weeks at a time. Four-dollar rubber feet per leg are the cheapest long-term maintenance decision on this build. Re-seal every two years: Check the finish condition each spring. If water no longer beads on the surface, the finish has worn down and needs a fresh coat. This takes less than an hour per section and prevents the full refinishing job that comes when bare wood absorbs a full winter’s worth of moisture. Store or cover cushions: Quick-dry foam cushions with removable covers are the most practical choice for outdoor use. Store them under the sectional in the built-in cubbies, or bring them inside during extended rain. Even water-resistant cushions left out for weeks will eventually absorb enough moisture to mold. Common Mistakes to Avoid on a DIY Outdoor Sectional These are the problems that show up most often on first-time builds. None of them are difficult to avoid — they just need to be caught before the mistake becomes load-bearing. Buying cushions after the frame is built. The frame dimensions follow the cushion. Build the frame first and you’ll be cutting new boards to match a cushion that doesn’t fit. Choose cushions before the first measurement goes on paper. Skipping the center support on long sections. A 72-inch sofa section without a center leg sags under two adults. Add the support before the seat boards go on, retrofitting it afterward means removing every board you just installed. Not checking for square at each stage. A frame that’s two degrees out of square produces a backrest that doesn’t sit flush and seat boards that need to be scribed to fit. Check with a speed square at the outer corners before tightening any joint. Using standard interior screws. They’ll hold for one season and start pulling out by the second. Exterior-rated deck screws are the same price at most hardware stores, there’s no reason to use anything else on an outdoor build. Closing up the seat gaps. Gaps between seat slats are not a design choice, they’re a drainage function. Without them, water pools under the cushion and rot begins from the center of the frame outward. Rushing the finish coat. Stain applied to damp or dusty wood doesn’t adhere properly. It peels within a season and leaves the end grain exposed. Sand, clean, let the wood dry fully, and then apply finish in dry weather above 50 degrees Fahrenheit. Frequently Asked Questions About DIY Outdoor Sectionals These are the questions that come up most often once someone is mid-build or planning their second section. What is the best wood for a DIY outdoor sectional? Pressure-treated lumber for the frame and cedar for the seat slats is the most practical combination. Cedar is naturally rot-resistant and takes stain well. Pressure-treated framing gives structural durability at a lower cost. Avoid untreated pine outdoors — it rots within two seasons without heavy maintenance. How deep should the seat be on a DIY outdoor sectional? Match the seat depth to your cushion. Standard outdoor seat cushions are 20 to 24 inches deep. Add 1 to 2 inches to the frame depth for overhang at the front edge. Most comfortable outdoor seating ends up between 22 and 26 inches of total frame depth. What height should a DIY outdoor sectional be? Seat height for outdoor sectionals typically runs 15 to 18 inches from the floor to the top of the seat board, before cushions. Adding a 4-inch cushion brings the seated height to 19 to 22 inches — low enough for a relaxed lounge feel, high enough to stand up from without difficulty. How do I keep the sectional pieces from sliding apart? Furniture connector bolts or sectional clips fasten the sections together at the frame. Two connectors per joint — one at each end of the connecting side — are enough for daily use. For modular builds that separate seasonally, removable pin connectors work better than fixed hardware. Can I build a DIY outdoor sectional without a pocket hole jig? Yes. A pocket hole jig produces cleaner joints and hides the fasteners, but the same frame can be built using through-bolts or face screws at each joint. The result is structurally equivalent. Pre-drill pilot holes to prevent splitting, and countersink the screw heads so they sit flush. How much does it cost to build a DIY outdoor sectional? An L-shaped sectional in pressure-treated lumber with cedar seat slats and standard outdoor cushions typically runs $400 to $800 in materials. Cedar throughout, custom cushions, and a higher-grade exterior finish can push the total toward $1,000 to $1,200. Either figure is still well below comparable store-bought quality. Is a DIY outdoor sectional renter-friendly? A modular build is the best option for renters. Individual seat units can move without anchoring to the patio, store indoors during winter, and disassemble for a move. Avoid permanent anchors or fastening the sectional to the deck surface. Final Verdict Building outdoor seating gets much easier when you start with a clear plan instead of guessing through each step. I’d focus first on your space, cushion size, layout, and materials, because those choices shape the whole build. You also want strong supports, exterior screws, drainage gaps, and a proper finish so the sectional holds up outside. Adiy outdoor sectional gives you control over comfort, size, style, and cost, which is why it works so well for tricky patio spaces. You do not need to make it perfect on the first try. Start simple, measure carefully, and improve the design as needed. Try these tips on your build, and share what layout you’re planning.
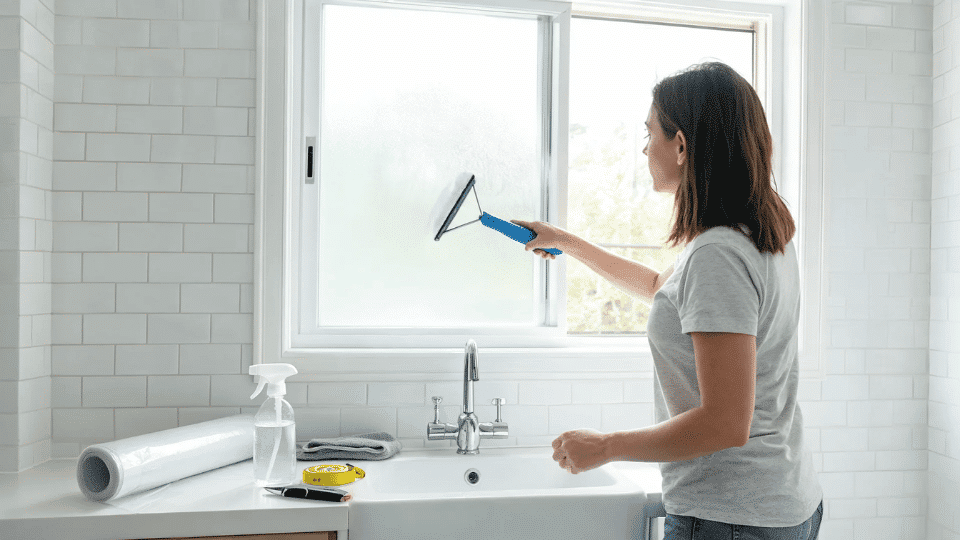
Difficulty 2/5, No specialist tools needed, but film application takes patience Time 30 minutes (film) to 2–3 hours (etching cream with prep and cure) Cost $8–$40 depending on method and pane size Tools Needed Glass cleaner, squeegee, utility knife, straight edge, painter’s tape Skill Required Beginner, most methods are forgiving if you work slowly Frosted glass is one of those small changes that quietly change a space. It softens the light, adds privacy without making a room feel closed off, and gives even the most ordinary window a more finished look. I first got curious about it when I moved into a place with a bathroom window that faced directly into the neighbor’s garden. Not ideal. Turns out, learning how to frost glass is easier than I expected, and there are more options than most people realize. Here I’ll cover the most practical DIY frosted glass methods, which ones are temporary, which ones are permanent, and when it makes more sense to call a professional. What Frosted Glass Actually Does? Frosted glass works by scattering light rather than letting it pass through cleanly. You still get natural light, but the view from either side becomes blurred or completely opaque, depending on how heavily the glass is treated. That’s why you’ll find it in bathrooms, entry doors, sidelights, office partitions, cabinet inserts, mirrors, and decorative panels. Not every frosting method works the same way. Some are removable. Some are permanent. Some hold up in wet rooms; others do not. The right choice depends on how much privacy you need, whether the space gets moisture or heavy cleaning, and whether you rent or own. Different Ways to Frost Glass at Home Here’s a quick look at all the main methods side by side. Some of these are proper privacy solutions, and some are more craft-project territory. Method Best For Finish Type Removable? Difficulty Frosted window film Windows, doors, rentals Smooth privacy layer Yes Easy Frosted glass spray Small panes, mirrors, cabinet glass Semi-transparent coating Difficult Easy, Medium Glass etching cream Small permanent designs Permanent etched surface No Medium Cornstarch and tissue paper Temporary privacy Papered privacy finish Yes Easy Glue or Mod Podge Craft glass, jars, vases Cloudy handmade finish Sometimes Easy Epsom salt crystallization Seasonal decor Icy crystal effect Yes Easy Sandblasting Permanent glass frosting Abraded matte surface No Advanced/Pro Acid-etched glass Professional privacy glass Smooth permanent finish No Professional Patterned obscure glass Renovations and showers Textured privacy glass No Professional The top five DIY methods are the ones worth covering in detail. The rest get a shorter mention further down. Method 1: Frosted Window Film Frosted window film is one of the easiest ways to add privacy without permanently changing the glass. It works well for bathroom windows, sidelights, glass doors, and rental-friendly projects. The film creates a smooth frosted layer that softens the view while still letting natural light through. Materials Frosted window film Glass cleaner Microfiber cloth Spray bottle with water Squeegee or smoothing tool Measuring tape or ruler Utility knife Straight edge Step 1: Clean the Glass Thoroughly Clean the glass thoroughly with glass cleaner and a lint-free cloth. Wipe away all grease, fingerprints, and dust, paying attention to the edges and corners. Any residue left on the surface will show through the frosted coating once it dries. Leave the glass to dry completely before moving on. Step 2: Measure and Cut the Film Measure the glass carefully, then cut the frosted window film slightly larger than the pane. Use a ruler or straight edge to keep the cut neat. A little extra film gives you room to adjust during installation. You can trim the excess cleanly once the film is in place. Step 3: Apply the Film to Wet Glass Spray the glass lightly with water so the film can slide into position. Peel the backing away, then place the film onto the wet pane. Start from one side and guide the film across the glass slowly. Adjust the corners until the sheet sits straight inside the frame. Step 4: Smooth and Trim the Film Use a squeegee to push air bubbles and water toward the edges. Work from the center outward so the film settles evenly. Once the surface looks smooth, trim the excess film along the frame with a sharp utility knife. Keep the blade steady for cleaner edges. Step 5: Let the Frosted Window Set Leave the window undisturbed so the film can settle and bond properly. Wipe away any remaining moisture from the frame or sill. The finished glass should look smooth, softly blurred, and evenly frosted. Avoid heavy cleaning for at least a day so the edges stay secure. Watch out for: dust and rushed trimming. Tiny specks can create bumps under the film, and a dull blade can drag or tear the edges. Method 2: Using Frosted Glass Spray Frosted glass spray works best for smaller decorative jobs, cabinet inserts, mirrors, vases, jars, and small glass panels. It creates a semi-transparent coating that softens the surface and diffuses light, but it’s not as durable as film and doesn’t hold up well in bathrooms where it’ll be cleaned regularly. If you’re updating cabinet glass as part of a broader refresh, the same painter’s tape and masking approach applies, whether you’re spraying a frosted finish or working through a bathroom tile painting project; clean surfaces and thin coats are everything. You will need: frosted glass spray paint, painter’s tape, newspaper or a drop sheet, glass cleaner, a clean lint-free cloth, gloves, and a well-ventilated space. Application Method Clean the glass with glass cleaner and a lint-free cloth. Remove grease, dust, and fingerprints, especially near the edges and corners. Let the glass dry completely. Any moisture left behind can make the spray dry patchy or uneven. Tape around the frame, edges, or design areas you want to protect. Press the tape down firmly to stop spray bleeding underneath. Cover nearby surfaces with newspaper or a drop sheet. Overspray can travel farther than expected. Shake the spray can well, then hold it about 30 cm from the glass. Apply the first coat in slow, steady strokes, moving in one direction only. Keep the can moving to avoid drips. Let the coat dry according to the product label, usually around 10 to 15 minutes. Apply a second light coat in the opposite direction. This helps fill thin spots and gives a smoother finish. Remove the tape slowly while the final coat is still slightly tacky. Leave the glass undisturbed for at least 24 hours before touching or cleaning it. Watch out for: spraying one thick coat. Heavy coats can drip, streak, and dry with a rough texture. Several thin coats always look cleaner and more controlled. Method 3: Etching Cream Glass etching cream permanently frosts glass by chemically roughening the surface. It becomes part of the glass rather than a coating on top, which means no peeling, no bubbling, and no wear over time. It’s ideal for cabinet glass, decorative mirrors, stencil designs, and anywhere you want a finish that looks deliberate and professional. I’ve used it most on cabinet door inserts, paired with a dark cabinet paint like Greenblack, the frosted glass panel creates a contrast that looks genuinely custom rather than DIY. You will need: glass etching cream, nitrile gloves, eye protection, a stencil or painter’s tape, a foam brush or small paintbrush, a timer, running water nearby, and glass cleaner. Application Method Put on your gloves and eye protection before opening the etching cream. Clean the glass thoroughly with glass cleaner and let it dry completely. Any grease or fingerprints will cause the cream to react unevenly. Apply your stencil or painter’s tape to the glass, pressing down all edges firmly so no cream can seep underneath. Apply the etching cream in a thick, even layer over the stenciled area using a foam brush. Work quickly and cover the area completely. Set a timer for the time shown on your etching cream packaging. Most products require 1 to 5 minutes. Do not leave it longer than recommended. When the timer goes off, rinse the glass under running water immediately. Hold the glass under the tap and let the water fully wash the cream away. Do not wipe it, just rinse. Remove the stencil or tape while the glass is still under running water. Continue rinsing the entire glass surface for at least 30 seconds after all the cream is gone. Dry the glass with a clean cloth and check the result. Watch out for: skipping the test patch. Etching cream can react differently depending on the glass type. Test on a small hidden corner before committing to the full pane, and remember that etching is permanent and cannot be undone. Other Frosted Glass Methods Worth Knowing These methods are still worth knowing, but not all belong on the main DIY list. Some work better for decorative projects, while others need professional equipment, safety control, or proper glass replacement. 1. Cornstarch and Lace Cornstarch and lace create a temporary privacy layer that works well for renters, kids’ rooms, craft spaces, or short-term window fixes. The paste helps the paper stick to clean glass and can usually be removed with water later. It is affordable and forgiving, but moisture, condensation, and frequent cleaning can make it lift or wrinkle. Best detail to know: Rice paper or tracing paper usually looks cleaner than thin tissue or thick lace because it wrinkles and clumps less and gives a smoother, softer finish. 2. Glue or Mod Podge Glue or Mod Podge creates a soft, cloudy handmade finish on jars, vases, lanterns, and craft panels. It can look charming when the glass is decorative, textured, or intentionally imperfect. I would not use it for serious window privacy because it may show brush marks, soften when wet, or wear unevenly during regular cleaning. Best detail to know: A sponge brush gives a softer finish than a bristle brush, which can leave visible lines once the glue dries. 3. Epsom Salt Crystallization Epsom salt crystallization creates an icy, crystal-style pattern as the solution dries on the glass. It looks striking on jars, mirrors, and seasonal panels, especially when you want a wintery effect. The finish is fragile, though. Moisture, wiping, and condensation can break it down quickly, so it belongs in decor territory rather than practical privacy. Best detail to know: This method looks best when light hits it from behind, so it suits windows, candle jars, and backlit decor pieces. 4. Sandblasting Sandblasting permanently abrades the glass surface to create a matte frosted finish. It suits architectural panels, commercial glass, and custom designs that need durability, crisp masking, or a professional-grade finish. Because it requires equipment, dust control, masking skills, and safety gear, this method is usually better handled by a trained professional. Best detail to know: Sandblasting is useful for crisp patterns because masked areas stay clear while exposed glass turns permanently matte. 5. Acid-Etched Glass Acid-etched glass gives a smooth, permanent frosted finish for doors, showers, office partitions, and premium privacy projects. It usually looks more controlled than DIY etching cream and can suit larger panes better. If you are planning a longer renovation and want the glass to hold up for years, this option is worth considering. Best detail to know: Acid-etched glass often has a smoother feel than sandblasted glass, which can make it easier to clean in busy spaces. 6. Patterned or Obscure Glass Patterned or obscure glass includes reeded, fluted, rain, ribbed, and other textured privacy styles. These are not DIY frosting methods, but they solve the same problem with a more permanent design finish. They work especially well for bathrooms, showers, entry doors, and renovations where replacing the glass is already part of the plan. Best detail to know: Reeded or fluted glass gives privacy while adding vertical texture, so it can feel more designed than plain frosting. Common Mistakes to Avoid Most frosted glass projects go wrong for simple, avoidable reasons. These are the ones that come up most often. Skipping the test patch. Some finishes react differently depending on the glass type. A quick test on a small corner saves a lot of grief. Using permanent methods in rentals. Etching cream and sandblasting cannot be undone. Film is almost always the right call when you don’t own the glass. Applying film over dust. Tiny specks create visible bubbles and bumps that won’t smooth out no matter how much you squeegee. Spraying too heavily. Thick coats drip, streak, and dry unevenly. Thin coats built up slowly are always better. Choosing craft methods for wet rooms. Glue, tissue, and salt effects do not handle moisture well. Bathrooms and kitchens will destroy them. Ignoring nighttime privacy. Frosted glass blurs details during the day, but with a light on inside at night, shadows can still show clearly from outside. Cleaning too soon. Dry to the touch is not the same as cured. Coatings and adhesives often need 24 to 48 hours before they can be handled. The best finish is the one that survives everyday use in the space it’s meant for. Choosing based on your actual conditions beats choosing based on what looks best in a product photo. When DIY Is Not the Best Choice? DIY frosting works well for rentals, small panes, cabinet glass, craft projects, and low-risk privacy upgrades where mistakes are easy to fix. For bathroom windows, sidelights, or interior cabinet doors, one of the five methods above usually gives a solid result. Professional work makes more sense for large shower screens, commercial partitions, exterior glass, custom entry doors, or expensive glass. The DIY learning curve has a cost, and on a statement piece, that cost is not always worth it. For help, search for decorative window film installers, glass etching services, sandblasting services, architectural glass suppliers, or shower glass companies. Frequently Asked Questions Does frosted window film work on all types of glass? Static-cling film works on most smooth glass surfaces. It doesn’t adhere well to textured, patterned, or heavily tinted glass. Check the product specifications before buying; most brands list compatible surfaces on the packaging. Which side of the glass should I frost? The interior face is the better choice for most DIY methods. The outside surface takes weather, UV exposure, and more aggressive cleaning, all of which degrade spray coatings and film adhesives faster. Frosting the inside gives the finish a longer life. Can you frost only the bottom half of a window? Yes, and it often looks more intentional than full-pane frosting. A lower-third or lower-half treatment gives privacy at eye level while leaving the top clear for light and sky. Use painter’s tape or a pre-cut film template to get a straight horizontal line. How long does frosted window film last? Quality static-cling film typically lasts 5 to 10 years with normal use. Self-adhesive films may last longer but are harder to remove. Heat, humidity, and frequent cleaning with harsh products will shorten the lifespan of any film. Is frosted glass hard to clean? Film-based and factory-etched glass clean easily with mild soap and a soft cloth. Spray coatings are more delicate; wipe gently, and avoid abrasive cleaners. Craft finishes like Mod Podge or Epsom salt shouldn’t be scrubbed at all. Can you use frosted film on a shower screen? Yes, but use a film rated for wet environments. Standard window film degrades faster in steam and high humidity. Check that the product is explicitly rated for bathroom or shower use before applying. How do you remove frosted glass film? Static-cling film peels off cleanly from most glass. Self-adhesive films may leave residue, apply rubbing alcohol or a commercial adhesive remover and work slowly with a plastic scraper. Avoid metal blades, which scratch the glass surface. Wrap Up Knowing how to frost glass gives you more choices than it might at first seem. Film is best for clean, removable privacy. Spray works well for smaller decorative pieces. Etching cream suits permanent designs. Cornstarch, paper, and glue are better for quick, temporary fixes. My own preference is a half-panel approach: frost the bottom half and leave the top clear. You get privacy without blocking the sky, and it looks intentional rather than improvised. Try a test pane first, choose what your space actually needs, and comment with your project if you have tried one of these methods.
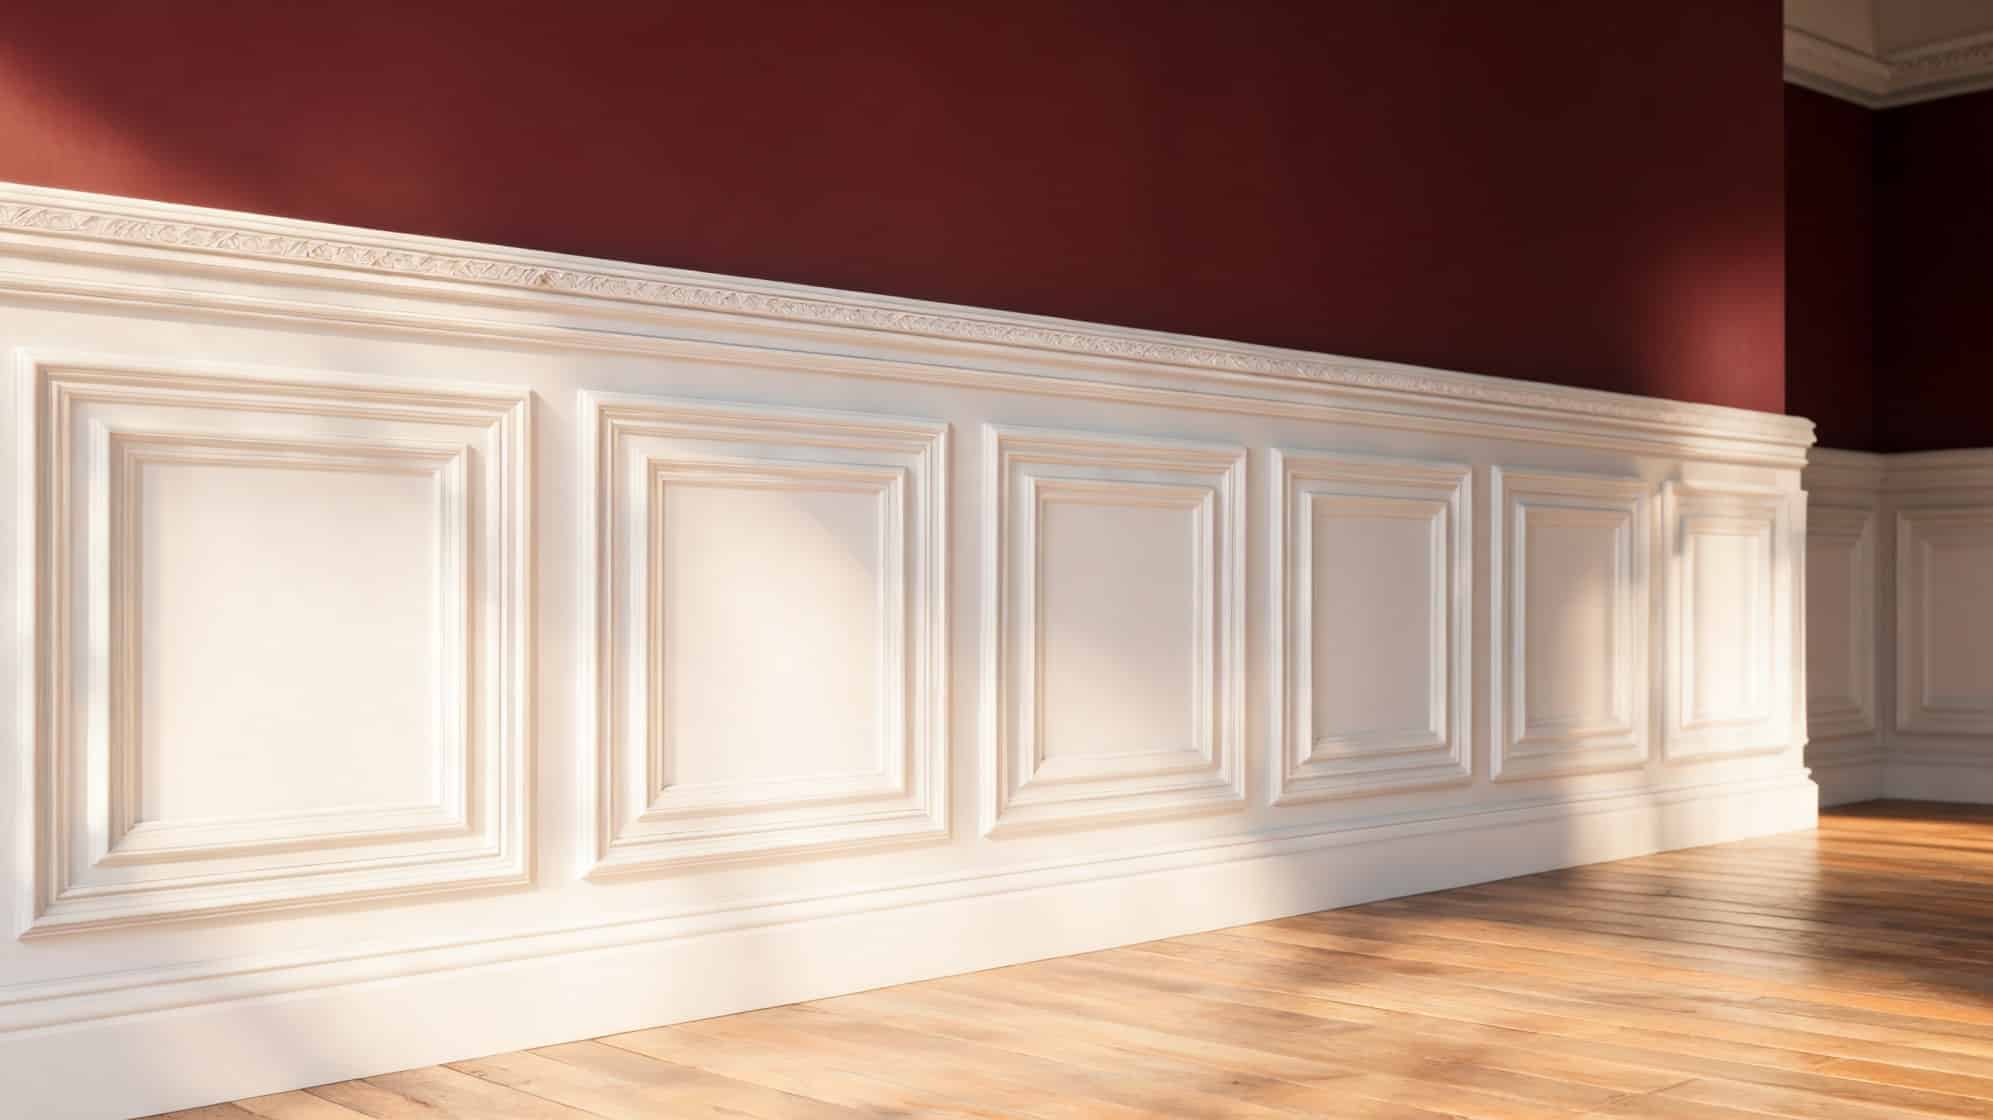
Difficulty 2/5, Beginner to intermediate; patience with measuring matters more than skill Time One full weekend (6–8 hours across two days) Cost $80–$250 depending on room size and material choice Tools Needed Tape measure, pencil, long level, miter saw or circular saw, nail gun or hammer, caulk gun, sanding block, paintbrush, small roller Skill Required Beginner, if you can measure twice and nail straight, you can finish this project DIY wainscoting is one of the few wall projects where the before and after speak for themselves. A plain wall, maybe scuffed from furniture, maybe just flat and unfinished, becomes something that looks intentional. The room feels more built-out, more considered, without you having to change a single piece of furniture. The mistake most people make before starting is assuming they need to hire it out. You don’t. Wainscoting with MDF boards and basic trim is a beginner project if you take it one step at a time. I’ve done this in a hallway and a bedroom, and the second time went faster than the first, not because I got smarter, but because I knew which shortcuts were worth it and which ones came back to bite me. Here’s what I’d tell you before you buy a single board. What is Wainscoting Used for? Wainscoting is decorative wall paneling typically installed along the lower part of a wall. You have probably seen it in dining rooms, hallways, bathrooms, bedrooms, and entryways. It can be made with wood, MDF, beadboard, or trim pieces. Some styles look simple and modern, while others feel more classic and detailed. One of the main reasons people add wainscoting is style. A plain wall can feel flat or unfinished. Wainscoting adds shape, texture, and detail without changing the whole room. It adds depth to the wall and makes the space feel more planned. Even a basic room can look more custom once the panels are added and painted. Wainscoting also helps protect your walls. The lower part of a wall often gets the most wear. Chairs, shoes, bags, pets, and kids can leave marks or scuffs. Wainscoting adds an extra layer of protection to that area. This makes it a smart choice for busy spaces like hallways, mudrooms, dining rooms, and entryways. Types of Wainscoting You Can DIY There are several wainscoting styles you can try at home. Some are simple and beginner-friendly, while others need more skill and careful cutting. The best choice depends on your room, budget, and the look you want. Picture Frame Wainscoting: This style uses trim pieces to create box shapes on the wall and is one of the easiest DIY wainscoting options. Board and Batten Wainscoting: This style uses vertical boards, called battens, placed along the wall and works well in farmhouse, modern, and casual rooms. Beadboard Wainscoting: This style has narrow vertical grooves and is often used in bathrooms, cottages, mudrooms, and cozy spaces. Raised Panel Wainscoting: This style has a more formal, classic look, but it is more challenging for beginners because it requires more detailed cuts and careful fitting. If you are new to DIY projects, picture frame wainscoting or board-and-batten is usually the best place to start. Both styles can give your room a clean, finished look without making the project too hard. How to Do Wainscoting Step by Step A good wainscoting DIY project depends on careful measuring, straight lines, and smooth finishing. Even if you are new to this, you can get a neat result by moving slowly and checking your work as you go. Materials Needed Tape measure, pencil, long level, paper or notepad, painter’s tape Drop cloth or floor covering, cleaning cloth or sponge 1×3 MDF board for the top rail, MDF boards or trim pieces for upright boards Construction glue, finish nails, nail gun, or hammer Wall filler or spackle, wood filler, paintable caulk, caulk gun, small putty knife, damp cloth Sanding block or sandpaper Primer if needed, satin, semi-gloss, or gloss paint, paintbrush, small paint roller, touch-up brush Safety glasses Step 1: Measure and Plan the Wall Start by measuring the wall from side to side and from the floor up to where you want the top board. In the video, the top line is about 36 inches high, which works well for many rooms. Use a long level and a pencil to draw a straight line across the wall. Then plan where each upright board will go. Keep the gaps even so the wall looks balanced. Write the numbers down before you cut anything, and check the plan one more time. Step 2: Paint the Wall Clear the space so you can work safely. Move furniture away, take down wall decor, and remove anything that blocks the wall. Wipe the wall clean, so the glue and paint can stick well. Fill small holes if needed, then let the filler dry. It also helps to paint the lower wall before adding the boards. This gives you a cleaner finish later, especially in the small spaces between boards where a roller may not reach easily. Let the paint dry before moving on. Step 3: Install the Top Board Cut the top board to match the full width of the wall. The video uses a 1×3 MDF board, but you can use a similar flat board that paints well. Add a thin line of construction glue to the back. Place it on the pencil line you marked earlier. Check it with a level before you fasten it. Once it is straight, attach it to the wall with small finish nails or a nail gun. Wipe away extra glue right away. Step 4: Add the Upright Boards Now cut the upright boards to fit between the baseboard and the top board. Measure each piece before cutting because floors and walls are not always perfect. Put glue on the back of each board, press it onto the wall, and check that it stands upright. Use your spacing plan to keep every gap even. Once each board looks right, nail it in place. Step back often to make sure the pattern still looks balanced from across the room. Step 5: Fill Holes and Seal Gaps After all boards are on the wall, fill the nail holes and small cracks. Use wood filler for nail holes if you want a smooth face on the boards. Use paintable caulk where the boards meet the wall, baseboard, and top board. Smooth the caulk with a damp finger or caulk tool. This step may seem small, but it makes the whole project look much cleaner. Let everything dry completely before sanding or painting, or the finish may smear. Step 6: Sand and Paint the Wainscoting Once everything is dry, lightly sand any rough spots with 220-grit paper. Wipe away dust with a tack cloth or slightly damp rag. If you’re using raw MDF, prime it first; MDF absorbs paint aggressively and will look uneven without a primer coat. Then paint. Use a brush for edges, corners, and tight gaps. Use a small roller for board faces and the flat wall areas between verticals. For finish choice, satin holds up well in most rooms; semi-gloss gives you a slightly harder, more wipeable surface that works particularly well on trim. The difference between satin and semi-gloss comes down to sheen level and how much traffic the wall sees. Use a brush for edges, corners, and the tight gaps between boards. Use a small roller for the board faces and the flat wall areas between vertical boards. Two thin coats hold better than one thick one. Semi-gloss or satin paint cleans more easily than flat and holds up better in high-traffic rooms, hallways, mudrooms, and dining rooms, especially. Step 7: Clean Up and Touch Up When the paint is fully dry, remove the painter’s tape if you used it. Check the wall closely for missed spots, rough lines, or small gaps that still need attention. Touch up those areas with a small brush. Clean the floor, put tools away, and move your furniture back into place. Rehang any decor only after the paint has hardened enough to avoid leaving marks. Your finished wainscoting wall should now look neat, clean, and more custom, without making the project too hard. For more details, refer to the video below: Best Material for DIY Wainscoting The material you choose can make your wainscoting project feel easier. Some materials are cheaper and easier to paint, while others are stronger or better for damp rooms. Here are the most common choices for a wainscoting DIY project. MDF: MDF is smooth, affordable, and easy to paint, which makes it a great choice for simple indoor wainscoting projects. Pine: Pine is stronger than MDF and works well for trim, but it may have knots that need filling or sanding before painting. PVC: PVC is a smart choice for bathrooms, laundry rooms, and other damp areas because it handles moisture better than wood or MDF. For most beginner DIY projects, MDF is often the easiest option because it is smooth, budget-friendly, and simple to work with. But if you are adding wainscoting in a bathroom or another wet space, PVC may be the safer choice. Wainscoting vs. Board and Batten Wainscoting and board-and-batten are often confused because both add detail to the lower part of a wall. The main difference is that wainscoting is a broad term for decorative wall paneling, while board-and-batten is a specific style of wall treatment. Feature Wainscoting (general) Board and Batten Look Ranges from formal (raised panel) to simple (picture frame), depending on the style chosen Clean vertical pattern; reads as farmhouse, transitional, or modern depending on paint color Common Styles Picture frame, beadboard, raised panel, board and batten Flat boards with vertical battens spaced evenly; simple cap board on top DIY Difficulty Depends on style; picture frame and beadboard are beginner-friendly, but the raised panel is not Beginner-friendly, all cuts are straight, and the layout is straightforward to plan Best For Dining rooms, hallways, bedrooms, bathrooms, and entryways Bedrooms, mudrooms, hallways, bathrooms, and casual living spaces In simple terms, board-and-batten can be a type of wainscoting. So, when you add board-and-batten to the lower part of a wall, you are still doing a wainscoting-style project. Common Wainscoting DIY Mistakes to Avoid DIY wainscoting can look clean and polished, but small mistakes can make the final wall look uneven. A little planning before you start can save you time, money, and extra work later. Here are the most common mistakes to watch for. Not Planning the Layout First: Poor spacing can make the panels look uneven, so measure the wall and plan each section before cutting. Forgetting About Outlets: Outlets can interrupt your trim or panels, so mark them early and adjust your layout around them. Not Using a Level: Walls, floors, and ceilings are not always straight, so use a level often to keep boards lined up. Skipping Caulk: Caulk fills small gaps between the trim and the wall, giving your wainscoting a clean, finished look. Painting Too Soon: Let wood filler, caulk, and primer dry fully before painting so the finish stays smooth and neat. Taking time with these details can make your wainscoting DIY project look much better. The goal is not to rush. Plan first, check your lines, and let each layer dry before moving to the next step. Where to Add Wainscoting in Your Home Wainscoting can work in many areas of the home. It adds style, protects walls, and helps plain spaces feel more finished. The best room depends on the look you want and how much wear the walls get. Room Why It Works Dining Room Wainscoting gives a dining room a classic and more formal look, especially when paired with a chair rail or trim detail. Hallway It adds interest to long, plain walls and helps protect busy areas from marks, scuffs, and daily traffic. Bathroom Wainscoting can add charm and texture, but it works best when you use moisture-friendly materials like PVC or sealed wood. Bedroom It adds warmth and character behind a bed or around the room, making the space feel cozier and more finished. Entryway or Mudroom Wainscoting helps protect walls from bags, shoes, and coats, as well as everyday wear and tear, while adding a clean, organized look. If you’re doing this project for the first time, a single accent wall in a bedroom or a hallway run is the right place to start. You get the full experience of the process, planning, installation, and finishing, without committing the entire room before you’ve worked out your rhythm. For bedroom placement specifically, wainscoting behind the bed works best when the rest of the room is kept intentional and uncluttered. These cozy minimalist bedroom ideas show how that balance looks in practice. Staircases are a logical next step once you’re comfortable, though they introduce angled cuts and longer runs; the stair makeover covers those specifics in detail. Tips for Making DIY Wainscoting Look Professional Wainscoting can look high-end when the small details are done well. You do not need expert skills, but you do need careful measuring, clean lines, and a smooth finish. These simple tips can help your project look more polished. Keep Spacing Even: Measure each section before you install the boards so the panels look balanced across the wall. Use Quality Trim: Choose straight, smooth trim pieces, as bent or rough boards can make the finished wall look messy. Caulk Every Seam: Add caulk where the trim meets the wall so gaps disappear and the design looks clean. Sand Before Painting: Lightly sand over filled nail holes and rough spots to ensure the paint goes on smoothly. Use Paintable Caulk: Make sure your caulk can be painted, or the paint may not stick well over the seams. Choose a Durable Paint Finish: Use satin or semi-gloss paint, as it wipes clean more easily and works well on trim. Match the Style to the Room: Pick a wainscoting style that fits the space, whether it feels modern, classic, simple, or cozy. Take Your Time with Corners and Cuts: Careful cuts help the trim fit better and make the whole project look more professional. The projects that look best are almost always the ones where the builder slowed down during filling, sanding, and caulking, not the installation itself. The boards going up are the fast part. The finishing is where the quality is made. Once your wainscoting is painted, the color above the rail matters just as much. If you’re still deciding, these wall and trim color combinations are worth looking at before you commit. Frequently Asked Questions What is the golden rule for wainscoting height? Aim for one-third of the wall height as your starting point. In a standard 8-foot room, that’s around 32 inches. Thirty-six inches is also common and works well for most rooms. Go higher only if you have tall ceilings to balance against. Do you glue or nail wainscoting to the wall? Both. Construction adhesive holds the boards flat while the glue cures; finish nails hold the boards in position while the glue sets. Using only nails risks board movement before adhesion; glue alone risks boards that aren’t flush. Use both for a solid result. How much does DIY wainscoting cost? A typical single-wall project using MDF costs $80–$150 in materials. A full room runs $200–$400, depending on wall length and the style chosen. Raised panel styles cost more because they require more material; picture frame and board-and-batten are the most budget-friendly. Is wainscoting outdated in 2025? No. Simple, clean styles, picture frame and board-and-batten in particular, are actively popular in modern and transitional interiors. The styles that look dated are overly ornate raised-panel versions in rooms that don’t call for a formal look. Keep it simple, and it reads current. Does wainscoting make a room look bigger or smaller? Lower wainscoting (under 36 inches) in a light paint color tends to make walls feel taller. Dark wainscoting installed high, above 42 inches, can make a small room feel compressed. When in doubt, go lighter and lower. What is the best wainscoting style for beginners? Board and batten or picture frame wainscoting. Both use straight cuts, require no special joinery, and produce clean results when the spacing is planned carefully. Avoid raised panel as a first project, the fitting complexity isn’t worth it at that stage. Can you do wainscoting over existing painted walls? Yes, with a caveat. The wall behind the boards needs to be clean and reasonably flat. Wipe it down thoroughly; grease, dust, and fingerprints all reduce adhesion, and fill any deep holes or texture peaks before you start. If you’re unsure how to clean painted walls without lifting the existing paint, that’s worth reading before you prep. Heavily textured walls can cause board gaps; skim coating those areas first produces a better result. Final Thoughts Learning how to do wainscoting is easier when you take it one step at a time. Start by planning your layout so the spacing looks even. Then measure carefully before you cut any trim. Once your pieces are ready, install them slowly and check that everything stays level. After the trim is in place, fill the nail holes, caulk the seams, and sand any rough spots. Then finish the project with primer and paint for a clean, smooth look. A wainscoting DIY project does take patience, but the result is worth it. With careful work, you can turn a plain wall into a more finished space that feels custom and more expensive.
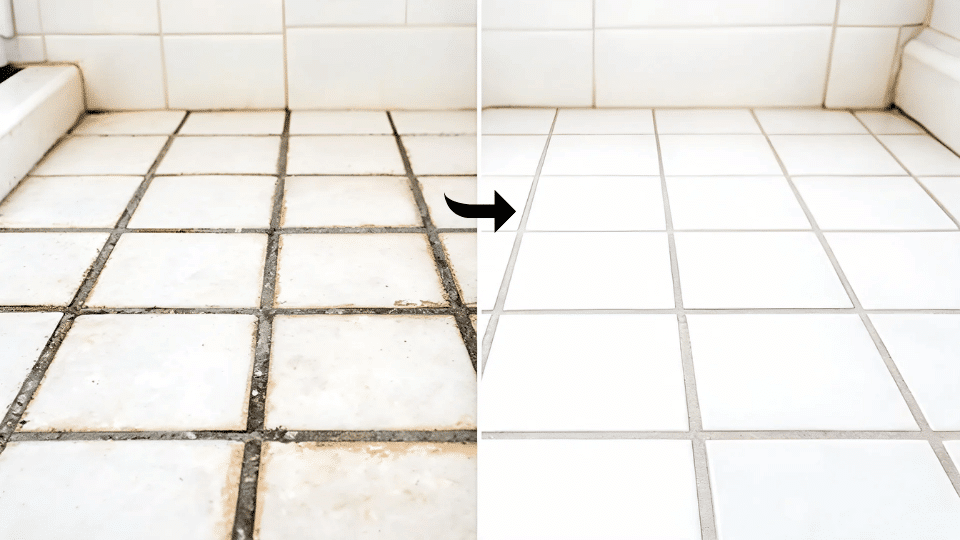
Difficulty 2 out of 5, straightforward scrubbing, no tools beyond a brush Time 30–90 minutes, depending on floor size and stain depth Cost $0–$15 for DIY methods; $10–$25 if you need a store-bought cleaner Tools Needed Nylon grout brush, microfiber cloths, small bowl, broom, or vacuum Skill Required Beginner, the method matters more than the effort Dirty grout can make clean tile look older than it is, and I know how frustrating that feels after mopping. The trick to cleaning grout lines is not starting with the strongest cleaner. It is figuring out what kind of dirt is sitting in the grout first. Bathroom moisture, kitchen grease, floor grime, and cleaner residue all need different fixes. My goal is to make cleaning grout feel easier by matching each grout issue with a clear method, the right materials, and a realistic cleaning process that doesn’t turn into a full-day project. The Mistake That Makes Grout Cleaning Twice as Hard The most common failure I see, and the one I made myself the first time, is adding moisture before removing dry debris. If you wet dirty grout before sweeping, the dust and crumbs turn into a muddy slurry that gets pushed deeper into the porous surface. You end up cleaning what you just cleaned. Always sweep or vacuum first. Always. That one step cuts scrubbing time in half on floor grout. The second mistake is using a cleaner that’s too broad for the problem. Bleach on greasy kitchen grout doesn’t cut grease; it brightens the surface while the oil stays underneath, and the grout darkens again within days. Dish soap on mildewed bathroom grout misses the mildew entirely. Before you mix anything, look at where the grout is and what it smells like. That tells you more than the color alone. Match Your Grout Problem to the Right Fix Before reaching for any cleaner, spend 30 seconds identifying what’s actually going on. This table is the shortcut I wish I’d had on day one. What You See Likely Cause Best Method Light gray floor grout Dust, mop residue, surface dirt Baking soda and warm water paste Dark bathroom grout Moisture, soap scum, mild mildew Baking soda and hydrogen peroxide Yellow or sticky kitchen grout Grease and cooking residue Baking soda and dish soap Very dark floor grout Years of dirt in porous grout Store-bought grout cleaner Grout looks dull after cleaning Cleaner residue left behind Warm water rinse and dry Grout gets dirty again fast Unsealed or worn grout surface Clean, dry fully, then seal Find your row and jump straight to that method. You don’t need to read all six, just the one that matches your floor. How to Clean Grout Lines Based on the Problem Choose the section that matches your grout issue. Each method gives the materials and steps together, so you do not have to piece together advice from different places. 1. For Light Gray Floor Grout This method works best when the floor grout looks dusty, gray, or lightly dirty but not deeply stained. It is a gentle starting point for ceramic or porcelain tile floors. Materials: Baking soda, warm water, nylon grout brush, microfiber cloth, clean towel. Sweep or vacuum the floor first: Remove dry dust, hair, and crumbs before adding any moisture. If loose dirt mixes with water, it can turn into muddy streaks that settle deeper into the grout lines. Make a simple paste: Add warm water to the baking soda until it forms a soft paste. It should spread easily over the grout without running across the tile. Apply the paste to the grout lines: Use your finger, a small spoon, or the brush tip to place the paste directly on the dirty lines. Scrub in short strokes: Move the brush along the grout line instead of scrubbing wide circles across the tile. This keeps the pressure where the dirt is sitting. Wipe with clean warm water: Rinse the cloth often so you lift away the paste, not spread it across the floor. Dry before checking the result: Grout can look darker while wet. Let it dry before deciding whether the floor needs another pass. 2. For Dark Bathroom Grout Use this method for bathroom floors, shower grout, and grout lines that look gray, dark, or lightly mildewed. It works well when plain baking soda and water are not enough, but you still want to start with a homemade cleaner before using anything stronger. Materials: Baking soda, 3% hydrogen peroxide, dish soap, nylon grout brush, sponge, microfiber cloth, and gloves. Test a hidden grout line first: Hydrogen peroxide can lighten some colored grout. Try it behind a door, near a back corner, or under a vanity edge before using it across a visible area. Mix the paste: Combine two parts baking soda with one part hydrogen peroxide. Add only a tiny drop of dish soap if the grout feels slick from soap or body oil. Spread it over the stained grout: Cover the lines without coating the full tile surface. This keeps cleanup easier and prevents extra residue. Let it sit for 10 to 15 minutes: Give the paste time to loosen soap scum, light mildew stains, and bathroom buildup before scrubbing. Scrub with steady pressure: Use small strokes and keep the brush inside the grout line. Do not press so hard that the old grout starts to crumble. Rinse twice: Wipe once with warm water, rinse the cloth, then wipe again. Baking soda can leave a white film if it is not removed fully. Dry the area well: Use a towel or microfiber cloth, especially in showers where moisture can quickly settle back into the grout. 3. For Greasy Kitchen Grout Kitchen grout often needs grease-cutting more than brightening. Use this method for backsplashes, tile near the stove, and floor grout that feels sticky instead of dusty. Materials: Baking soda, dish soap, warm water, small bowl, nylon brush, microfiber cloth, and clean towel. Wipe the tile surface first: Remove crumbs, splatter, and surface dust so the cleaner can reach the grout rather than sitting on kitchen grime. Mix a soft cleaning paste: Combine baking soda with warm water, then add a small drop of dish soap. Too much soap makes rinsing harder. Apply the paste where grease collects: Focus on grout near the stove, sink, food-prep area, or any area that feels slightly sticky. Let it sit for 5 to 10 minutes: Grease needs a little time to loosen before scrubbing. Do not let the paste dry completely. Scrub a few lines at a time: Work in small sections so the soap stays manageable and does not spread over the whole backsplash or floor. Rinse until the surface feels clean: If the grout or tile still feels slippery, there is soap left behind. Dry and buff the tile: A clean towel helps remove dull streaks, especially on glossy backsplash tile. 4. For Old or Neglected Floor Grout Use this method when grout is deep brown, heavily stained, or still dirty after gentler cleaning. A store-bought grout cleaner can save effort, but it needs careful testing and rinsing. Materials: Commercial grout cleaner, gloves, face mask, nylon grout brush, electric scrub brush, bucket, warm water, sponge, mop, and old towel. Read the product label first: Check whether the cleaner is safe for your tile type. Be extra careful with natural stone, colored grout, or older floors. Test a hidden area: Strong grout cleaners can discolor grout or dull sensitive tile finishes. Wait until the test spot dries before continuing. Protect nearby surfaces: Keep an old towel near cabinets, baseboards, thresholds, or metal trim so splashes can be wiped quickly. Work in a small section: Apply cleaner to about a 2 ft. x 2 ft. area instead of coating the entire floor. The Ashley French method also uses small sections to keep the process controlled. Scrub according to the label: Some cleaners work quickly and do not need a long wait time. Use a grout brush or electric scrub brush to loosen the buildup. Rinse with warm water: Use a sponge or mop, then rinse again with fresh water. Strong cleaner left behind can dull tile or attract new dirt. Dry the floor with a towel: Once dry, check whether the grout needs one more small pass. Avoid repeating cleaning on areas that already look clean. Wait before sealing: If you plan to seal the grout, let it dry fully. The reference method suggests waiting 24 hours before applying the sealer. 5. For Hazy or Dull Grout After Cleaning If grout looks better while wet but dries dull, chalky, or cloudy, leftover cleaner may be the issue. This can happen after using baking soda, dish soap, or stronger grout cleaners. Materials: Warm water, microfiber cloths, a clean mop, a bucket, and a dry towel. Do not add another cleaner yet: More product can make the residue worse and leave the grout looking cloudy again after it dries. Wipe with warm water: Use a damp microfiber cloth and work in small sections. Focus on lifting the residue rather than scrubbing aggressively. Change the rinse water often: If the water turns cloudy, it is picking up leftover cleaner. Fresh water prevents residue from re-entering the grout. Mop the floor with clean water: For larger areas, a final mop helps remove cleaner from the tile surface around the grout lines. Dry the area completely: If the grout dries clearer, the residue was the problem. If it stays dark, the issue may be staining rather than a lack of light. Repeat the rinse once if needed: Two careful, clean-water rinses are usually better than adding another chemical too soon. 6. For Grout That Gets Dirty Again Fast If the grout cleans up fine but turns gray or patchy within a week or two, the surface isn’t sealed, or the old sealer has worn through. Cleaning without sealing just resets the clock. This is the step that actually makes the job last. It matters most in high-moisture areas: shower floors, tiled shower walls, and bathroom floors where grout lines stay damp regularly. If you’re working in a tiled shower and thinking about the space more broadly, the small bathroom shower designs show how tile choice and grout line width affect long-term maintenance. Smaller tiles mean more grout lines, which means sealing matters even more. Materials: Matching cleaner from above, clean water, microfiber cloth, towel, grout sealer, and sealer applicator. Clean the grout first: Use the method that fits the stain. Sealer should go over clean grout, not dirt, soap, or leftover paste. Rinse until the grout is residue-free: Any cleaner left behind can get trapped under the sealer, making the lines look uneven. Let the grout dry fully: Wait at least 24 hours, or follow the sealer label if it asks for more time. Apply sealer only to the grout lines: Move slowly and keep the applicator on the grout, not on the tile. Wipe excess sealer from the tile: Do this before it dries, especially on glossy tile where sealer marks can show. Let the sealer cure: Follow the label before showering, mopping, or walking heavily on the floor. This section does the main job of the blog. You can identify the grout issue, choose one method, and follow a complete process without bouncing between steps. The Tools That Make Grout Cleaning Easier The cleaner matters, but the tool decides how tiring the job feels. A good brush can save more effort than a stronger formula. Tool Best For Why It Helps Grout brush Most floors and showers Fits into the line better than a sponge or mop Old toothbrush Corners and small touch-ups Gives control in tight areas, but is slow for floors Electric scrub brush Large floors or wrist fatigue Reduces hand scrubbing and speeds up bigger areas Steam cleaner Chemical-free cleaning Uses heat to loosen dirt without mixing cleaners Microfiber cloth Rinsing and drying Picks up residue instead of pushing it back into the grout Mop Final floor rinse Clears leftover cleaner after detailed scrubbing This helps you choose a realistic tool before starting. It also gives room for product choices without turning the job into a shopping list. When a Store-Bought Grout Cleaner Makes More Sense A commercial grout cleaner is a backup, not a starting point. It makes sense when grout has years of dirt embedded in porous cement-based joints, or when DIY methods have been tried and genuinely haven’t worked. Products like Zep Grout Cleaner can handle that level of buildup, but they need to be tested first, used with gloves and ventilation, and rinsed thoroughly twice. They are not the right choice for natural stone tile, colored grout, or grout that hasn’t been checked for cleaner compatibility first. Strong cleaners that aren’t rinsed completely can leave a residue that attracts new dirt faster than the original buildup did. If you’re also considering refreshing the paint on your bathroom tile floor, clean the grout first; paint won’t adhere to grout with cleaner residue or old soap scum in the joints. What Not to Use on Grout Some shortcuts can make grout look cleaner for a day, but create damage later. These are the methods I would treat carefully. Toilet bowl cleaner: It may create a dramatic before-and-after, but it is too harsh for regular grout cleaning and can damage grout over time. Bleach as a routine cleaner: Bleach may temporarily brighten stains, but frequent use can weaken grout and leave a residue that attracts dirt. Ammonia-based cleaners: These can be too aggressive for grout and should never be mixed with bleach or other cleaning chemicals. Metal scrapers or sandpaper: These can scratch tile and damage the grout filler, especially if the grout is already worn or cement-based. Vinegar on natural stone: Vinegar can etch marble, limestone, travertine, and other stone surfaces, even if it seems safe for ceramic tile. Strong acidic cleaners without testing: Acidic formulas may work on some grout stains, but they can discolor grout or dull sensitive tile finishes. Cleaner left to dry in the grout line: Any cleaner that dries in the grout line can leave residue, dullness, or a sticky surface that attracts new dirt. Knowing what not to reach for first is just as useful as knowing the right method, especially on tile you can’t easily replace. If your grout cleaning project is part of a larger bathroom update, the same logic applies to painting shower tile; prep and material compatibility matter more than product strength. Frequently Asked Questions Can I clean grout lines without getting on my knees? Yes. A long-handled grout brush gets into the joint better than a mop and keeps you upright. For large floors, a steam cleaner with a detail nozzle or an electric scrub brush attachment reduces bending significantly and speeds up the whole job. Why does my grout stay dark even after cleaning? Check whether the grout is still wet; wet grout looks darker than it is. Let it dry fully first. If it’s still dark when dry, the staining is below the surface. At that point, grout colorant, resealing, or replacing damaged sections works better than repeating the same cleaner. Is hydrogen peroxide safe to use on colored grout? Not without testing first. Hydrogen peroxide can lighten some colored grout, especially with longer contact times or repeated use. Test a hidden line and check the dry result before applying it to a visible area. If the color shifts, switch to a pH-neutral cleaner labeled safe for colored grout. How often should grout be deep-cleaned? It depends on location and foot traffic. A dry hallway may need a deep clean once or twice a year. Shower grout, kitchen backsplashes, and busy floors often need it more frequently. Clean sooner if you see mildew, sticky grease buildup, or dirt settling back into the lines within days of a regular mop. Should I use a grout pen after cleaning? Only on clean, dry, undamaged grout. A grout pen adds color, but it doesn’t fix cracked, loose, or moldy grout underneath. If the grout is damaged below the surface, a pen hides the problem instead of addressing it. What’s the best homemade grout cleaner for tile floors? For most floor grout, two parts baking soda to one part hydrogen peroxide works well. For greasy kitchen floors, replace the peroxide with warm water and add a small drop of dish soap. Match the recipe to the stain type rather than using one formula across the whole house. Does steam cleaning damage grout? Standard steam cleaning is safe on most sealed grout. The risk is that steam can strip old or worn grout sealer, which means you’ll need to reseal sooner. Check whether your grout is sealed before steam cleaning, and plan to reapply sealer once the floor dries. Wrap Up The easiest way to clean grout is to match the method to the problem. Light floor dirt needs a gentle paste, bathroom buildup often needs hydrogen peroxide, greasy kitchen grout needs dish soap, and old floor grime may need a stronger cleaner. Once the cleaner fits the stain, the job becomes more manageable: scrub with the right brush, rinse well, dry fully, and seal if the grout keeps staining. If you are deciding how to clean grout lines at home, my advice is to start with the gentlest fix that matches the issue. Share what worked in your space.
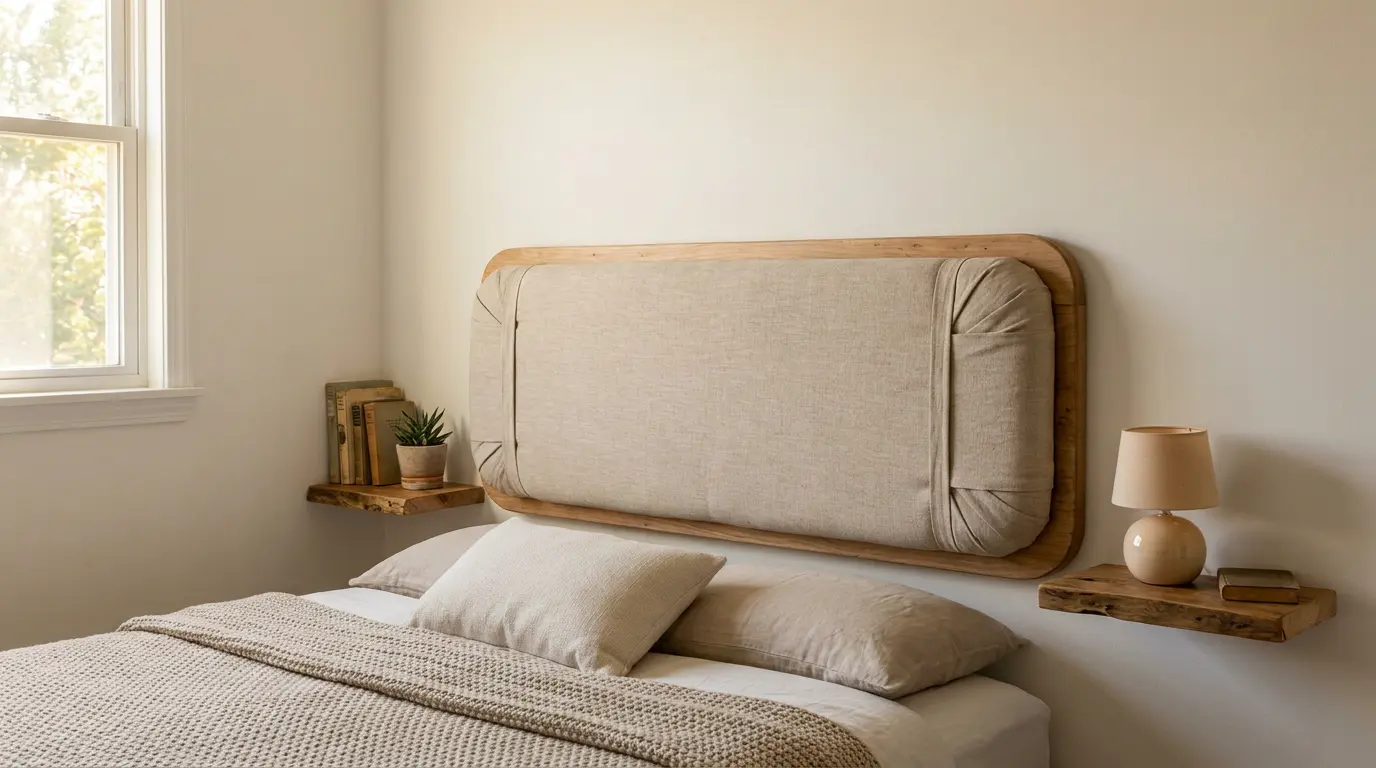
Learning how to make a headboard is a genuine weekend project: figure on 4–6 hours of build time, a material cost of $40–$90 depending on your fabric choice, and a difficulty level that sits at a solid 2 out of 5. If you can use a staple gun and a drill, you can finish this. The step that trips people up the most isn’t cutting; it’s getting the fabric taut without wrinkles at the corners. I’ll tell you exactly how to avoid that before we get there. Difficulty 2/5, Beginner-friendly with basic tools Time 4–6 hours (single headboard) Cost $40–$90, depending on fabric Tools Needed Drill, staple gun, craft knife, tape measure, hammer Skill Required Beginner The most common failure point is skipping the wadding layer and going straight from foam to fabric. You’ll see every bump and ridge through the fabric. Add the wadding; it takes five extra minutes, and it’s the difference between a store-quality finish and a lumpy mess. Things to Plan Before Building a Headboard Planning a wooden headboard project starts with understanding space, materials, and finish choices. Careful preparation helps you avoid mistakes, control spending, and make the build go more smoothly, even if you’re handling tools at home for the first time. Plan these things before building: Space Planning: Measure bed and wall area carefully to avoid fitting issues and ensure balanced headboard placement in the bedroom space Style Choice: Select headboard design style and choose wood type based on durability, look preference, and daily bedroom use needs Budget Planning: Decide between painted, stained, or natural finish while setting a clear budget to control material and tool expenses early Mounting Choice: Choose a wall-mounted or bed frame-mounted design depending on stability needs, room layout, and installation effort required How to Make a Headboard: Step by Step I’ve found that taking it step by step makes building a headboard feel much easier. If you follow these stages carefully, you can create a strong, custom piece that fits your bedroom perfectly. Materials you’ll need 11mm OSB board (headboard + mattress slip) Timber batten strips (for three sides) Wood glue & screws 4× M8 T-nuts & bolts Headboard struts (bed-specific) 2-inch upholstery foam Spray adhesive Polyester wadding Upholstery fabric (cut generously) Fiber backtack strip Calico lining fabric Staple gun & staples Drill & drill bits Stanley/craft knife Tape measure, pencil, ruler Hammer Step 1: Cut Your Board to Size Before you dig in, grab your tape measure and get your cuts right; everything you build from here depends on these first precise dimensions. Cut your OSB board to 3ft wide and 2ft tall for a single headboard. Cut a separate piece for the mattress slip, 25cm deep; this sits behind your mattress and tucks down. Tip: Measure twice, cut once; even a centimeter off can affect how your headboard fits against the bed Step 2: Attach the Batten Frame Now that your board is cut, you’re ready to build the frame that gives your headboard its structure, depth, and that all-important flush fit against your wall. Apply wood glue to your batten strips and fix them along both sides and the top of your headboard; leave the bottom edge completely free. Set the board on top and screw it down firmly. The battens add depth to your headboard and create the essential gap your struts need to slide comfortably into. Tip: Don’t rush the glue; let it grip before screwing for a stronger, longer-lasting frame Step 3: Drill Holes for The Struts This step connects your headboard to your bed, so take your time; a few careful measurements here will save you from a wobbly finish later. Hold your headboard strut against the board, align its groove with the bottom edge, and mark your four drill hole positions, usually 6 inches in from each side. Drill carefully on both sides, then hammer your M8 T-nuts firmly into each hole. These threaded inserts are what the bolts will screw into during mounting. Tip: Always measure your own bed base first; strut spacing varies between different bed manufacturers Step 4: Cut and Glue the Foam Here’s where your headboard starts to feel real. This is the layer that gives it that satisfying softness and rounded shape you’ll love against your wall. Measure your foam to overhang the board by about 1cm on the sides and top, for a single headboard, roughly 94cm × 61cm. Cut it using an old kitchen knife in a smooth slicing motion. Spray adhesive onto both the board and the foam, press them together firmly, then staple along the side edges to secure. Tip: Work quickly after spraying adhesive; it bonds fast, and repositioning gets difficult once contact is made Step 5: Add the Polyester Wadding You’re making great progress. This quick but important layer is what separates a flat, stiff headboard from one that looks and feels beautifully plush and professional. Cut a piece of polyester wadding large enough to cover the entire front of your headboard over the foam. This layer adds a soft, smooth surface that helps your fabric sit beautifully without any lumps or bumps showing through. Lay it over the foam and trim it neatly before you begin pulling your main fabric over. Tip: Don’t skip the wadding, it’s what gives your finished headboard that plush, professional upholstered look. Step 6: Cut and Attach the Main Fabric This is your big moment, the fabric you choose is what everyone will see, so take your time pulling it tight and getting it perfectly smooth. Cut your fabric generously, around 31 by 45 inches works well for a single headboard. Draw a guideline an inch below the board’s bottom edge on the back. Start with a temporary staple in the center of the bottom, then work outward. Repeat on the top edge, pulling the fabric taut and smooth throughout. Tip: Always use temporary staples first so you can remove and re-tension the fabric without leaving marks Step 7: Pleat the Corners Neatly Don’t rush this step; the corners are what people notice first, and a neat pleat here is what gives your headboard that crisp, tailored finish. Corners require extra care and tension from you. As you staple toward each corner, increase your pull on the fabric. This creates a natural, tight pleat. Fold the fabric neatly underneath to form a sharp, clean edge, then staple it firmly in place. If wrinkles appear, work the fabric slightly away from your guide line. Tip: Take your time at corners. This one step separates a professional-looking headboard from an amateur finish Step 8: Cover the Mattress Slip Almost there, this piece slots behind your mattress and gives your headboard a clean, finished look all the way down to where it meets your bed. Measure fabric to run from the front of the mattress slip all the way underneath, approximately 14cm × 41cm. Flip it face-down, tack along your guideline starting in the middle, then use a fiber backtack strip along the 25cm mark to create a clean folded edge. Pull the fabric over and staple outward from the center. Tip: The fiber backtack strip is key; it gives you a crisp, straight edge that fabric alone can’t achieve Step 9: Line the Back with Calico The back of your headboard deserves just as much care. A neat calico lining keeps everything tidy and gives your build a truly professional, finished quality. Flip your headboard face down and trim away all excess fabric for a neat, flat back. Cut calico a couple of inches oversized all around. Starting in the middle of one end, staple outward on each side in turn, applying firm tension as you go. Use a craft knife to carefully cut away calico over each T-nut. Tip: Stapling outward from the center on every side prevents the calico from pulling unevenly or buckling Step 10: Attach to Your Bed You’ve done the hard work; this final step is the most rewarding of all. It’s time to put your headboard where it belongs and enjoy the result. Push your bolts through the headboard straps and screw them securely into the T-nuts you installed earlier. Slide the struts underneath the headboard so the board sits flush and level against the wall. Stand back and admire your finished, fully upholstered headboard, professionally made by your own hands from start to finish. It looks fantastic! Tip: Check that all four bolts are equally tightened; an uneven fit can cause the headboard to wobble over time Check out the video for a more detailed overview: How to Build Floating Shelves to Match Your Headboard Following a clear step-by-step process makes building floating shelves easier and more reliable. Careful preparation, proper finishing, and correct installation help create strong shelves that stay secure and look clean in any bedroom space. Step 1: Clean and sand the wood to remove dirt, rough patches, and uneven areas, creating a smooth base that ensures better lacquer adhesion and a professional, even finish. Step 2: Spray an even first layer of pre-catalyzed lacquer to seal and protect the wood. Maintain steady hand movement to prevent thick spots or uneven buildup. Step 3: Lightly sand the dried lacquer with 320-grit paper to remove bumps or dust particles, improving adhesion for subsequent layers and ensuring a smooth, flawless headboard surface. Step 4: Apply two additional coats for durability, depth, and a polished finish. Allow each layer to dry fully before proceeding to maintain a long-lasting, professional result. Step 5: Locate wall studs, measure carefully, and securely attach the headboard and shelves using strong fasteners. Use a level to ensure everything sits straight, stable, and properly aligned. Step 6: Make any design adjustments, install extra shelves if needed, and check all screws, joints, and fittings to confirm the headboard is secure, aligned, and ready for everyday use. Watch the video for the step-by-step procedure: DIY Wooden Headboard Ideas to Try at Home I always find it easier to pick a headboard style when I can see simple ideas first. These DIY options help you choose a design that fits your space, tools, and comfort level without complicating things. 1. Rustic Reclaimed Wood Headboard This headboard uses old wooden planks joined together to form a strong and natural bed back piece. The mix of marks, grain, and color gives it a raw look that feels warm and personal in any bedroom space. Smooth Sanding: Light sanding removes sharp edges from old wood so it feels safe while keeping its natural, worn surface look intact for a simple finish Random Layout: Place planks in mixed order to avoid uniform patterns, giving the headboard a more relaxed, handmade feel that suits basic bedroom setups 2. Modern Slatted Wood Headboard This design uses straight wooden strips with equal gaps for a clean, simple bed backdrop. It fits well in small or large rooms and can be made using basic cutting and measuring tools at home. Gap Spacing: Use a small spacer between each slat to keep an equal distance and avoid uneven lines during installation on the wall or bed frame Dark Finish: Apply dark paint or wood stain to give slats a stronger visual impact and match different room color themes easily 3. Plywood Headboard With Built-In Shelf This headboard is made from a single plywood sheet with a small shelf added at the top. It is useful for keeping small items like books or glasses close to the bed without needing extra furniture. Top Support: Add a fixed strip along the top edge to create a stable shelf strong enough to hold light bedside items safely Extra Storage: Shelf space helps keep small daily items within reach while reducing clutter on side tables or floor areas around the bed 4. Upholstered Wooden Headboard This headboard combines a wooden base with soft padding and fabric covering. It gives a comfortable surface for leaning while sitting in bed and also adds a softer look to the sleeping area. Soft Layer: Foam padding under fabric makes the headboard more comfortable for resting back while reading or using a mobile in bed Strong Frame: Wooden base keeps the structure firm, so it does not bend or move even after adding thick fabric and padding layers 5. Pallet Wood Headboard This design uses old pallets, stacked or arranged, to form a simple back panel for a bed. It is low-cost and works well for quick home projects, where style stays raw and simple without extra finishing work. Basic Cleaning: Remove nails and dust from pallets before fixing them to avoid damage and keep the surface safe for bedroom use Layer Build: Adding two pallet rows can create a deeper look and make the headboard feel more solid against the wall 6. Floating Headboard With LED Lighting This headboard is fixed slightly above the wall and includes soft lighting behind it. It creates a gentle glow around the bed area and works well for night use without needing strong room lights. Hidden Wiring: Place LED strips behind the wood so wires are not visible and lighting stays clean and evenly spread behind the headboard Wall Fixing: Strong wall support keeps the headboard stable in a floating position while leaving space underneath for light to spread evenly 7. Headboard With Matching Floating Shelves A central headboard panel with shelves fixed at matching height on each side. Keep both shelves exactly level; even a few millimeters off reads as crooked once the bed is in place. Use the same wood and finish across all three pieces. If you’re already thinking through how to style your shelves, plan what you’ll put on them before deciding on the depth. 8 inches is usually enough for a lamp and small items. Tips to Maintain and Clean a Wooden Headboard Keeping a wooden headboard in good shape is not complicated. With a few simple habits like gentle cleaning, checking loose parts, avoiding scratches, and controlling moisture, you can keep it strong and looking fresh. Gentle Cleaning: Wipe painted or stained wood using a soft cloth and mild cleaner, avoiding harsh chemicals that damage the finish surface easily Scratch Care: Avoid dragging objects on the headboard surface and use soft padding to reduce marks, dents, and long-term visible wear damage Firm Checkups: Regularly tighten screws, joints, and wooden boards to maintain stability, prevent wobbling, and keep the structure strong over time use Moisture Control: Keep the headboard away from water exposure and dust buildup by wiping regularly and ensuring proper bedroom airflow in a daily routine These small steps fit easily into daily bedroom care and help you maintain the headboard for a long time without extra effort. Common Mistakes to Avoid During a DIY Headboard Project DIY headboard work often looks simple, but small errors can affect strength, fit, and finish. Paying attention to basic steps like measuring, material choice, surface prep, and safe fixing helps avoid rework and keeps the final result stable and clean. Mistake Area What Goes Wrong Better Approach Wrong Measurements Uneven fit or gaps between the bed and the wall Measure carefully and use a level tool before fixing Weak Wood Choice Frame bends or feels unstable Use solid, straight, dry wood for strong support No Sanding Rough finish and poor coating Sand properly before painting or staining Poor Wall Fixing The headboard becomes loose or unsafe Use wall studs and strong anchors for support Complex Design Hard to build, more errors Start with simple designs for easier assembly Avoiding these common mistakes makes the DIY process smoother and helps the headboard stay strong, safe, and visually clean for everyday bedroom use. How to Keep Material Costs Down The difference between a $40 headboard and a $120 one is usually fabric choice and whether you’re buying pre-cut wood. Neither spending level produces a better result, just different constraints. Reclaimed or scrap wood: Salvage yards, Facebook Marketplace, and the offcut bin at most lumber yards are the right places to look. Reclaimed wood for a headboard doesn’t need to be structurally graded; it just needs to be flat and dry. Pre-cut boards: Most hardware stores will cut sheet goods to your dimensions at low or no cost. This eliminates the need for a table saw and removes the most common source of measurement error. Reused furniture: Old cabinet doors, solid-core interior doors, and pew backs from estate sales all work as headboard bases. The profile is already there; you’re just finishing and mounting. Simple shapes: Every curve and routed edge adds time and tool requirements. A clean rectangle with good fabric costs less and photographs just as well. The DIY furniture makeover offers more budget-first approaches that still produce polished results. Frequently Asked Questions Can you make a headboard without power tools? Yes. A handsaw, hammer, and staple gun are enough for the upholstered build in this guide. Ask the hardware store to make your OSB cuts, most do it at low or no cost. The only step that genuinely benefits from a power tool is drilling the T-nut holes, and a hand drill works fine for that. What height should a DIY headboard be? Most headboards read well between 24 and 48 inches above the top of the mattress. Low-profile beds suit the 24-inch end. Taller ceilings and statement rooms benefit from 36–48 inches. Use painter’s tape on the wall to test your chosen height before cutting. How do I stop a wooden headboard from wobbling? Wobble almost always comes from two bolts being tighter than the other two, or from the strut spacing not matching the bed frame exactly. Loosen all four bolts, re-seat the struts, and tighten evenly in a diagonal sequence, same logic as tightening wheel nuts. What is the cheapest way to make a headboard? Pallet wood mounted directly to the wall is the cheapest build at near-zero material cost. If you want an upholstered look, reclaimed plywood with a discounted fabric remnant keeps the total under $30 in most markets. What type of wood is best for a DIY headboard? OSB or 3/4-inch plywood for an upholstered build, both are dimensionally stable and take staples without splitting. For an exposed-wood look, pine is the most forgiving to work with; oak gives a harder, more durable surface. See the wood types for furniture for a full species comparison. How do you attach a DIY headboard to a bed that has no headboard brackets? Two options: mount the headboard directly to the wall using a French cleat rated for the weight, or retrofit metal headboard brackets to your bed frame. Most bed frame side rails have pre-drilled holes for standard brackets, measure the bolt spacing before ordering struts. Can you make a headboard for a king-size bed with basic tools? Yes, with one adjustment: a king headboard (typically 76–80 inches wide) requires two OSB sheets joined at the center. Join them with a batten strip on the back, keep the seam behind the center pillow position, and it won’t be visible once the bed is dressed. Final Wrap Building your own headboard is less about complicated tools and more about simple planning, patience, and choosing a design that fits your space. Once you understand the basic steps, from measuring and cutting wood to finishing and installing, the whole process feels much more doable than it first seems. I’ve seen how even small DIY changes can make a bedroom feel more personal and comfortable, and you can experience the same shift in your own space. When you start learning how to make a headboard, you also open up ideas for storage, shelves, and better room use without spending too much. Try one of the ideas shared here and see what works for your setup. You can also share your thoughts or check other DIY guides for simpler home projects.
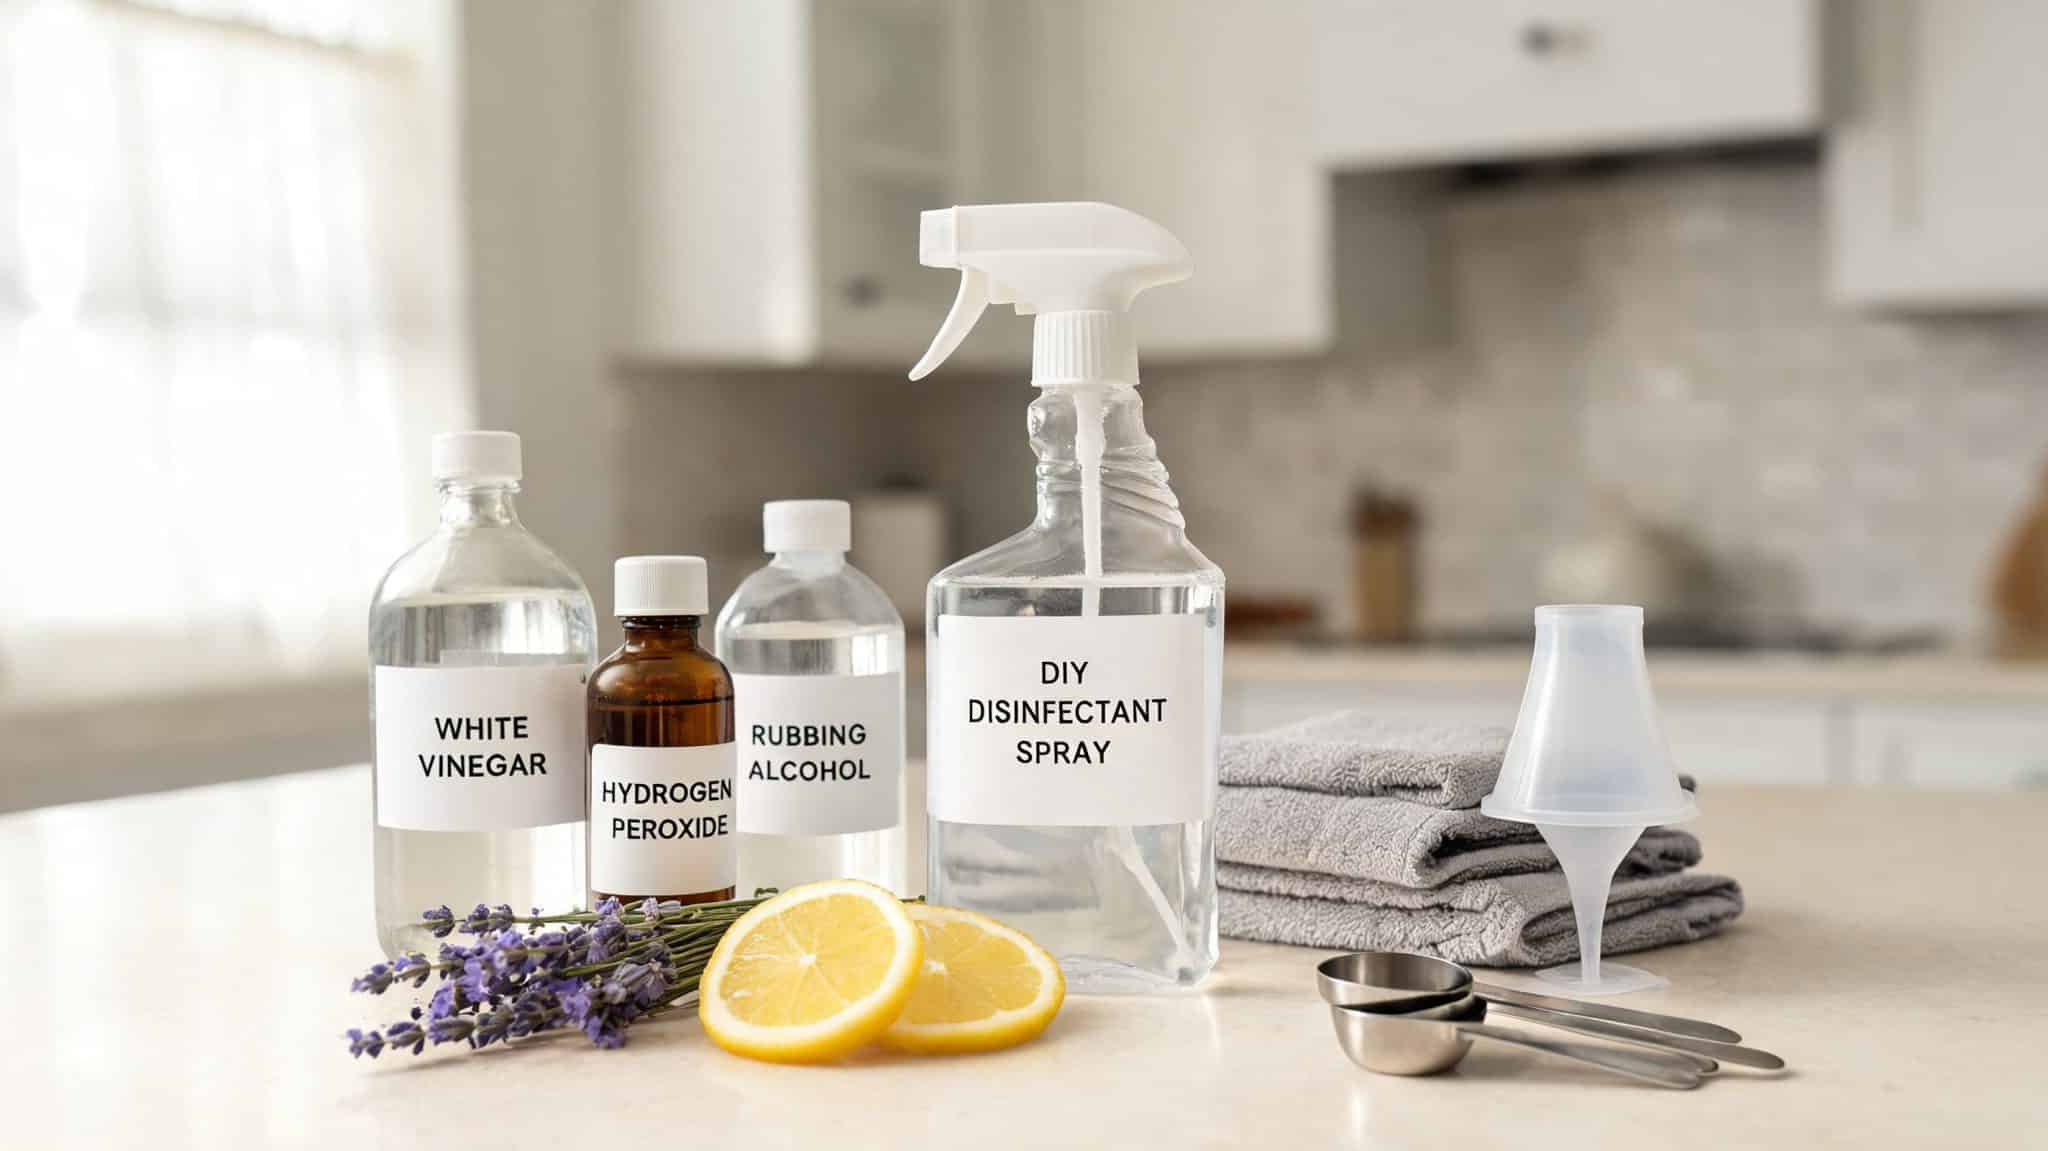
A DIY disinfectant spray takes about 5 minutes to mix, costs under $5 per bottle using ingredients you likely already have, and lands at a difficulty of 1 out of 5. The harder part is knowing which recipe fits which surface; pick the wrong one, and you’ll either damage the finish or end up with something that barely cleans at all. Difficulty 1 out of 5, measuring and mixing only Time 5 minutes per bottle Cost $2–$5 per bottle, depending on recipe Tools Needed Glass spray bottle, funnel, measuring cup, measuring spoon, waterproof label, marker, microfiber cloths Skill Required Beginner, no prior experience needed, but label every bottle The most common mistake I made the first time was using the same spray everywhere. I used my vinegar mix on a granite countertop, and the acid slowly dulled the polish. The second time, I matched each recipe to its surface and kept a label on every bottle so there was no guessing mid-clean. Why Switch to a Natural Disinfectant Spray? Store-bought disinfectants can work well, but some come with strong smells, harsh ingredients, and labels that feel hard to trust. Ingredients like chlorine bleach, quaternary ammonium compounds, and synthetic fragrance may irritate the skin, lungs, or eyes, especially in homes with kids, pets, or people with asthma. A homemade spray gives you more control. You can choose the ingredients, adjust the scent, and make small batches when needed. It can also help reduce single-use plastic bottles and save money when basic ingredients are bought in larger amounts. The key is using the right recipe for the right surface, so the spray stays useful, simple, and safer for daily cleaning. Cleaning vs Sanitizing vs Disinfecting These three words sound similar, but each one has a different job. Knowing the difference helps you choose the right spray and use it safely. Term What It Means When It Helps Most Cleaning Removes dirt, crumbs, grease, dust, and many germs from a surface. Soap, water, scrubbing, and a clean cloth can do a lot. Best for daily home care, counters, tables, sinks, and surfaces with visible mess. Sanitizing Reduces germs to a safer level based on public health standards. It does not always kill every germ. Useful for food areas, schools, shared spaces, and surfaces that need a lower germ level. Disinfecting Kills many germs left behind after cleaning. It works best on a clean surface. Best when someone is sick, a risky spill happens, or a surface needs stronger germ control. Spraying a dirty surface and wiping it right away is not enough. Clean first, then use the right spray for the surface and situation. What Can Go Wrong First? Before you mix anything, there are a few failure points worth knowing. The first is surface damage. Vinegar and hydrogen peroxide are both acidic; they will dull granite, marble, and some sealed stone if you use them repeatedly. Alcohol can strip the finish on some painted surfaces and certain lacquered wood. Spot test in a hidden area on any new surface before committing to a full wipe-down. The second failure is dangerous mixing. Some ingredient combinations produce harmful vapors, bleach and vinegar, bleach and ammonia, hydrogen peroxide and vinegar in one bottle. None of the recipes below use bleach, but it’s worth naming clearly: do not combine these, even if you think it will make the spray stronger. The third is pet and baby safety. Essential oils, particularly tea tree, eucalyptus, and peppermint, can be toxic to cats and dogs even at low concentrations. Recipe 6 below skips oils entirely for that reason. If pets or babies are in the space, use that one. Equipment You’ll Need Before You Start You only need a few basic tools to make a homemade disinfectant spray safely. A clean setup helps the recipe work better and lowers the chance of mistakes. You’ll need: Clean spray bottle Funnel Measuring cup Measuring spoon Waterproof label Marker Microfiber cloths Gloves, if your skin gets irritated easily With the right tools ready, making your spray becomes quicker, safer, and much easier to manage. DIY Disinfectant Spray Recipes for Different Home Needs Each recipe below is built for a specific surface or use case. The mistake I made early on was treating one spray as an all-rounder. Pick the one that matches your surface, and keep a separate labeled bottle for each area. Recipe 1: Classic All-Purpose Cleaning Spray This vinegar-based mix works well for sinks, tile, appliance fronts, and toilet exteriors. It handles light grime and odors well. It is better for routine daily cleaning than for serious disinfecting in high-traffic areas. Ingredients: 1 cup distilled water; 1 cup white vinegar; 2 tablespoons 70% isopropyl alcohol; 20 drops lemon essential oil; 20 drops tea tree essential oil Instructions: Add all ingredients to a glass spray bottle using a funnel. Close the bottle and shake well. Shake again before each use; oils separate between uses. Spray, wait 60 seconds, then wipe with a microfiber cloth. Pro Tip: Use this as a daily cleaning spray. It is not the strongest disinfecting option; for higher-risk surfaces, move to the alcohol or peroxide recipes below. Recipe 2: Alcohol-Based Disinfectant Spray High-touch spots, doorknobs, light switches, cabinet handles, phone cases, remotes, toilet flush handles, need a faster-drying option. The alcohol base makes this the most effective homemade disinfectant spray for hard surfaces that can handle it. Keep it away from heat sources and open flames. Ingredients: 1½ cups 70% isopropyl alcohol; ½ cup distilled water; 10 drops lavender essential oil (optional) Instructions: Pour alcohol and distilled water into a glass spray bottle. Add lavender oil only if safe for your household. Close and shake gently. Spray, let air dry, or wait 30 seconds before wiping. Pro Tip: For electronics, spray the cloth first, then wipe gently. Never spray directly onto screens or ports. Recipe 3: Natural Lysol-Style Spray Bathroom counters, toilet seats, bathtub edges, and door handles often need something stronger than a vinegar spray. The higher alcohol concentration makes this recipe more effective for hard bathroom surfaces. This is the one I reach for after someone in the house has been sick. Ingredients: 1½ cups 70% isopropyl alcohol; ¾ cup distilled water; 15 drops lavender essential oil; 15 drops lemon essential oil Instructions: Add all ingredients to a glass or metal spray bottle. Close and shake well. Spray on a pre-cleaned hard surface. Let it sit for 1 to 2 minutes, then wipe. Pro Tip: Skip essential oils if pets or babies use the bathroom regularly. The alcohol base still works without them. Recipe 4: Citrus Kitchen Cleaning Spray Kitchen sinks, stovetops, appliance exteriors, trash can lids, and washable non-stone counters collect grease and odor fast. This citrus mix handles everyday kitchen messes when the surface is vinegar-safe. Skip it on granite and marble; the acid in vinegar etches the finish over time. If you’re dealing with painted cabinet doors and need something gentler, the cleaning of painted cabinets without damaging the finish walks through surface-specific approaches in more detail. Ingredients: 1 cup distilled water; ½ cup white vinegar; ¼ cup 70% isopropyl alcohol; 20 drops lemon essential oil; 10 drops orange essential oil; 10 drops grapefruit essential oil Instructions: Add all ingredients to a glass spray bottle. Close and shake well. Shake again before each use. Spray, wait 60 seconds, then wipe with a clean cloth. Pro Tip: Skip fresh citrus peel if the spray will sit for more than a few days; it molds in the bottle. Stick to essential oils for shelf stability. Recipe 5: Hydrogen Peroxide Disinfectant Spray Hydrogen peroxide is the right tool for shower tiles, grout lines, toilet areas, cutting boards, and mildew-prone spots. It works best after visible dirt has been cleaned off first, and the bottle must be stored away from light, or it loses potency fast. If you’re thinking about refreshing the tiles themselves rather than just cleaning them, the painting shower tile covers when a surface refresh makes more sense than deep cleaning alone. Ingredients: 1 cup 3% hydrogen peroxide; 1 cup distilled water; 15 drops tea tree essential oil (optional) Instructions: Pour hydrogen peroxide and distilled water into a dark amber glass bottle. Add tea tree oil only if safe for your household. Close and shake gently. Spray, wait 2 to 3 minutes, then wipe clean. Pro Tip: For grout buildup, let the spray sit a little longer and scrub with an old toothbrush before wiping. This pairs well with the regular cleaning routine you’d do before painting a bathroom tile floor; a clean, dry surface makes all the difference. Recipe 6: Pet and Baby Area Cleaning Spray Pet and baby areas need the simplest recipe with the fewest ingredients. This vinegar-and-water spray works for high chairs, hard baby toys, changing tables, pet mats, play mats, and washable nursery surfaces. No essential oils, many are unsafe for pets, even at trace amounts. Ingredients: 2 cups distilled white vinegar; 2 cups distilled water Instructions: Add vinegar and distilled water to a clean spray bottle. Close and shake gently. Spray the surface and wipe thoroughly. Rinse any mouth-contact surfaces with clean water, then let them dry fully before use. Safety Note: Do not add essential oils to this recipe. Tea tree, eucalyptus, and peppermint oils can be toxic to cats and dogs, even in small amounts. The vinegar-water base is effective and safe without them. Recipe 7: Vodka-Based Fabric Spray Soft items, such as sofas, curtains, mattresses, gym bags, and car interiors, need light misting rather than heavy spraying. High-proof vodka freshens fabric without leaving a vinegar smell behind. The key word is “lightly”, over-saturating fabric causes moisture to get trapped in padding, which leads to mildew. Ingredients: 1 cup high-proof vodka or Everclear (at least 60% alcohol); ½ cup distilled water; 15 drops lavender essential oil; 10 drops peppermint essential oil Instructions: Add all ingredients to a glass spray bottle. Close and shake well. Lightly mist fabric from about 12 inches away. Let the fabric air dry fully before use. Pro Tip: Test in a hidden spot first; some fabrics, particularly dark upholstery, can lighten with repeated alcohol contact. Quick Reference: All Recipes at a Glance Use this table to match the spray to the surface without having to re-read each recipe each time. Recipe Main Ingredient Works Well On Main Caution Classic all-purpose Vinegar, water, alcohol Sinks, tile, appliance fronts Avoid stone and unsealed wood Alcohol-based 70% isopropyl alcohol Handles, switches, remotes Keep away from heat and flames Natural Lysol-style 70% alcohol, lavender, lemon Bathroom hard surfaces Skip oils near pets or babies Citrus kitchen Vinegar, alcohol, citrus oils Sinks, stovetops, trash lids Avoid granite and marble Hydrogen peroxide 3% hydrogen peroxide Grout, shower tiles, cutting boards Store in a dark bottle Pet and baby Vinegar and water High chairs, pet mats, hard toys Rinse mouth-contact surfaces Vodka fabric High-proof vodka Sofas, curtains, gym bags Test fabric first, mist lightly Each recipe has a clear lane. Crossing them, using the citrus kitchen spray on bathroom grout, or the peroxide spray on a painted wall, is where surface damage usually starts. How to Use a Homemade Disinfectant Spray the Right Way The recipe is only half of it. The other half is the order of operations. Clear and clean first: Remove visible dirt, crumbs, and grease using soap and water or a damp cloth. A disinfectant spray applied to a dirty surface is blocked by the debris, it cannot reach the surface properly. Pick the right spray for the surface: Use the quick reference table above rather than defaulting to one bottle for everything. Spray and wait: Mist lightly and let the spray sit before wiping. For vinegar sprays, 60 seconds. For alcohol, 30 seconds or air dry. For peroxide, 2 to 3 minutes. Do not soak the surface. Use a clean microfiber cloth: A dirty cloth moves grime around instead of removing it. Keep a separate cloth per area if possible. Rinse when needed: Food prep areas, cutting boards, high chairs, pet mats, and anything that goes near a mouth should be rinsed with clean water after spraying and wiped dry. What Not to Mix Keeping recipes simple protects you from ingredient combinations that create harmful vapors. These are the ones worth knowing. Bleach and vinegar release chlorine gas that irritates the eyes, throat, and lungs. Bleach and ammonia create toxic fumes. Ammonia appears in some glass and bathroom cleaners. Bleach and rubbing alcohol produce unsafe vapors and should never be combined. Hydrogen peroxide and vinegar in the same bottle create peracetic acid, which can irritate skin, eyes, and lungs. You can use them on the same surface sequentially, just not mixed together in one spray bottle. Different store-bought cleaners combined can create fumes, residue, or surface damage, even when neither seems particularly harsh on its own. A safe DIY disinfectant spray does not need many ingredients. One recipe at a time, rinsed when needed, clearly labeled. Common Mistakes to Avoid Common Mistake Why It Matters Using the wrong spray on the wrong surface Alcohol, vinegar, and peroxide can damage stone, unsealed wood, fabric, and painted finishes. Adding too many ingredients More ingredients add complexity without improving cleaning, and increase the risk of surface reactions. Ignoring pet and baby safety Essential oils and strong sprays can irritate or harm pets and young children. Storing peroxide in clear bottles Light degrades hydrogen peroxide within days, making it ineffective. Skipping the spot test A 60-second test in a hidden spot can prevent permanent staining or finish damage on a new surface. Most of these mistakes happen in the first few uses, before you know how your surfaces respond. The spot test habit alone prevents the majority of finish damage. Storage Best Practices For DIY Disinfectant Spray Homemade sprays stay effective longer when stored with a little care. Label every bottle with the recipe name, ingredients, and date made. Use glass for essential oil blends and dark amber or cobalt glass for peroxide recipes. Keep caps tightly closed; loose caps let alcohol evaporate and reduce effectiveness. Store away from heat and sunlight, under the sink or in a cabinet, away from stoves and windows. Keep every bottle out of reach of children and pets. Most vinegar and alcohol sprays stay effective for 2 to 3 months. Hydrogen peroxide starts breaking down sooner, so make smaller batches and use them within 30 days. The Faster Way the Second Time The biggest time sink when I first started was making a new batch every time I ran out. The shortcut I figured out: pre-measure each recipe into a small glass jar labeled with the ratio (not the volume), so you can scale up or down without re-reading the recipe each time. I also set up a small “cleaning kit” shelf under the bathroom sink, one bottle per area, already labeled, all ready to refill. Mixing a new batch went from 10 minutes of hunting for measurements to 2 minutes of pouring. The same discipline that goes into labeling and organizing your cleaning sprays applies to keeping surfaces clean before you spray them. A well-organized cleaning routine, similar to what you’d build around any other DIY project in the home, means fewer frantic deep-clean sessions and less cleaner used overall. If you’ve recently started tackling other DIY projects around the house, building a painted bookshelf is a beginner-friendly weekend project worth looking at next. Frequently Asked Questions Does a DIY disinfectant spray actually kill germs? Alcohol-based sprays made with at least 60–70% isopropyl alcohol are effective against many bacteria and viruses on hard, clean surfaces. Vinegar-only sprays clean and deodorize, but do not meet the germ-kill threshold for disinfection. Hydrogen peroxide at 3% concentration has proven disinfecting action on hard surfaces when given adequate contact time (2–3 minutes). Is white vinegar a disinfectant? White vinegar is a mild acid that cleans and deodorizes well, but the CDC does not classify it as a registered disinfectant. It reduces some bacteria but does not consistently kill pathogens at the concentrations used in homemade cleaners. For actual disinfection, use the alcohol or peroxide recipes. Can I use a homemade disinfectant spray on all surfaces? No. Vinegar and peroxide can etch granite, marble, and some stone finishes. Alcohol can strip certain lacquered wood, painted surfaces, and some plastics. Match the recipe to the surface and test in a hidden area first. The pet-and-baby spray is the gentlest option for surfaces where damage is a concern. How long does a DIY disinfectant spray last? Vinegar and alcohol sprays stay effective for 2–3 months when kept sealed and away from heat. Hydrogen peroxide degrades faster, make small batches, and use within 30 days. Essential oils do not go bad quickly, but they can separate; shake before each use. Is hydrogen peroxide or alcohol better for disinfecting? Both work well on hard, clean surfaces. Alcohol (70% isopropyl) dries faster and is better for electronics and high-touch items. Hydrogen peroxide (3%) works better on grout, porous surfaces, and mildew-prone areas. They should not be combined into one bottle; use them separately based on the surface. What essential oils are safe to use around pets? Most essential oils carry some risk for cats and dogs. Tea tree, eucalyptus, clove, cinnamon, and citrus oils are among the most commonly flagged. If pets use the space, skip oils entirely and use the vinegar-and-water recipe (Recipe 6) instead. When in doubt, consult your vet before introducing any new scent into a shared space. Can I make a homemade carpet cleaner with similar ingredients? Yes, vinegar, baking soda, and dish soap handle most common carpet stains well. The process and ratios are different from surface sprays, and using too much dish soap is the most common mistake. The homemade carpet cleaning solutions cover the right ratios and stain-specific approaches in detail. Final Thoughts Making your own cleaner is less about using every natural ingredient and more about choosing the right mix for the job. I’d keep it simple: clean the dirt first, match the spray to the surface, let it sit long enough, and rinse areas that come into contact with food, pets, or babies. You also need to avoid risky mixes, label each bottle, store peroxide away from light, and skip strong scents when they are not safe. A diy disinfectant spray can make daily cleaning feel easier, cheaper, and less harsh when you use it with care. You get more control without turning every wipe-down into guesswork. Try the tips in your next clean, then share in the comments what worked for you.
If you want to know how to build a treehouse for kids without turning it into a multi-year nightmare, start with this: difficulty is a 3 out of 5, the build runs 3–6 weekends with a helper, and the total cost lands between $1,200 and $2,500 for a platform with railings, ladder, and sloped roof. That range is real. I went in expecting a long weekend project. It took four. The design here is an 8×8 post-supported platform; four 6×6 ground posts carry the weight, and the tree passes through the deck without bearing the structural load. That one decision keeps the whole build manageable for a first-timer. No complex branch attachment, no TAB hardware, no arborist consultation required. The tree is there for character, not for carrying the house. Difficulty 3 out of 5 — framing and post-setting require patience; roofing requires a helper Time 3–6 weekends (beginner with helper); 2–4 weekends (experienced DIYer) Cost $1,200–$2,500+ for the full build with roof Tools Needed Circular saw, drill/driver, level, socket wrench, post-hole digger, tape measure, square, clamps, ladder Skill Required Beginner — but not a solo project. A second person is non-negotiable. Cost Note: Figures in this article are estimates based on national averages as of 2025. Lumber prices fluctuate significantly by region and season. Actual costs vary based on local footing requirements, roof panel choice, railing style, and hardware. Get at least two material quotes before buying. The Failure Point Nobody Warns You About The post stage is where most beginner treehouse builds quietly fall apart. Not during construction — six months later, when one post has shifted, and the whole frame is no longer level. The fix after the fact is brutal. Here’s what goes wrong: people don’t let the concrete fully cure before loading the frame, or they skip the temporary bracing and let the posts drift while the footing sets. Even a half-inch of lean at the base becomes two inches of problem by the time you reach the roof frame. Set the posts, brace them hard, and leave them alone for at least 48 hours before touching the frame boards. The second failure point is tree clearance. I see this in almost every online build thread. People frame the trunk opening too tightly, the tree moves or grows, and within a year, the deck boards are pressing into the bark. Leave 2–3 inches of clearance around the trunk on every side, more for larger trees. The tree will move in the wind even if it doesn’t grow much. If you frame it snug, you’ll be back out there with a saw. Safety Note: Check local building permit requirements before digging post holes or starting construction. Height, size, and setback rules vary by municipality. A treehouse platform over 200 square feet or above 8 feet may require a permit in many US jurisdictions. Using a healthy, mature hardwood tree, oak, maple, beech, or Douglas fir, with no rot, cracks, or dead limbs above the build zone, is a non-negotiable starting point. How to Build a Treehouse for Kids: Step-by-Step Work through these steps in order. The early layout work is the least exciting part and the most important. A sloppy start means every step after it is a workaround. Materials and Tools Buy everything before you start. Running to the lumber yard mid-build while posts are propped and braced is how mistakes happen. The quantities below cover the standard 8×8 platform with a 9×9 sloped roof. Buy 10% extra on lumber for cuts and mistakes. Item Amount / Measurement Item Amount / Measurement 6×6 posts (pressure-treated) 4 pieces, 10 ft 2×8 boards 4 pieces, 8 ft 2×6 boards (floor joists) 7–9 pieces, 8 ft Deck boards (cedar or PT) Enough for 64 sq ft 4×4 posts (roof/railing) 4–6 pieces 2×4 boards 15–25 pieces Corrugated roof panels Enough for 9×9 ft Joist hangers + exterior screws Per joist count Platform height 4–6 ft from ground Railing height 36 inches minimum Joist spacing 16 inches on center Tree clearance 2–3 inches minimum Roof slope 8–12 inches rise Ladder width 18–24 inches Gravel or concrete Per footing depth Roofing screws with rubber washers Per panel count Beyond lumber and panels, you’ll need: a tape measure, a pencil, a level, a square, a drill/driver, a circular saw, a socket wrench, a post-hole digger, clamps, two ladders (one for each side during roof work), gloves, safety glasses, structural screws or carriage bolts, and exterior deck screws. Do not substitute indoor screws; they rust and the threads strip under the seasonal expansion and contraction of outdoor wood. Step 1: Choose the Tree, Clear the Area, and Mark the Layout Start with the tree selection. A mature hardwood, oak, maple, beech, or Douglas fir, is the right call. Softer species like pine can work, but they need closer inspection for rot. Walk around the tree and look up: no dead branches directly above the build zone, no visible cracks, no fungal growth at the base. If anything looks uncertain, have an arborist look before you start. Clear rocks, weeds, and debris from the ground around the tree. Mark an 8 ft × 8 ft square around the trunk using stakes and string. Place corner stakes where the four main posts will go. Measure both diagonals; they should match. Adjust until they do. Mark one side clearly as the ladder entry opening. Step 2: Dig and Set the Four Main Posts This is the step that decides whether your treehouse is still level in three years. Go slow here. Dig four post holes to your local frost depth, check your municipality’s requirement; most US regions need 24–48 inches. Add 4–6 inches of gravel at the bottom of each hole for drainage. Set one 6×6 pressure-treated post in each hole. Brace each post with temporary 2×4 diagonal braces screwed into stakes in the ground, two directions per post. Check plumb from two sides with a level before the concrete goes in. Pour concrete and let it cure fully, minimum 48 hours, 72 hours if the weather is cool, before any framework. Step 3: Mark Platform Height and Build the Outer Frame Four to six feet off the ground is the right range for a beginner build. High enough to feel like a treehouse, low enough to frame safely from the ground, and a step ladder. Mark the same height on all four posts using a laser level or water level, a string level introduces too much sag error over 8 feet. Cut the posts to the height at the marked line. Attach the four 2×8 outer frame boards to the posts using carriage bolts, two per connection minimum. Check the level on every side before fully tightening. Measure diagonally across the frame to confirm the square. Step 4: Install Floor Joists and Frame the Tree Opening The floor joists spread the weight across the platform and transfer it down to the posts. Frame the tree opening at the same stage, don’t leave it for later, or you’ll be cutting joists you already fastened. Run 2×6 joists across the outer frame, 16 inches on center. Attach each joist with joist hangers and exterior-rated fasteners on both ends. Plan the tree opening before placing any joists that would need to be cut. Box out the opening with short framing pieces, a doubled header and a doubled sill, same as a window rough opening. Leave at least 2–3 inches of clearance around the trunk on every side. Measure from the bark, not the center. Step 5: Add Diagonal Bracing A raised platform without bracing has a noticeable sway when kids move around. It won’t fail, but it feels wrong, and over time the fasteners loosen under the repetitive lateral movement. The same principle applies to any raised deck structure — if you’ve built or plan to build a standard deck alongside this treehouse, the deck skirting guide covers how to close off the underside neatly once the frame is solid. Cut 2×6 diagonal braces to fit from the post to the outer frame at roughly a 45-degree angle. Add bracing on at least two opposite sides of the platform. If any sway remains, brace the remaining two sides as well. Fasten with structural screws or bolts, not small nails. Step 6: Install the Deck Boards Lay deck boards perpendicular to the joists, working from one end toward the tree opening. This lets you plan the cut-around before you’re committed. If you’re thinking about what the finished platform could look like with furniture and surrounding outdoor elements, the outdoor deck ideas guide covers platform styling that scales from a simple raised deck to a full backyard setup. Leave 1/8-inch gaps between boards for drainage; a 16-penny nail used as a spacer works perfectly. Cut boards carefully around the tree opening, maintaining the clearance gap. Keep all screw heads flush; proud screw heads are a trip hazard on bare feet. Use exterior deck screws throughout. Two screws per board per joist. Step 7: Build the Railings and Attach the Ladder Railings go up before anyone stands on the platform. No exceptions. This isn’t an aesthetic choice; it’s a build sequence rule. Set 4×4 railing posts at each corner and at intervals no wider than 6 feet along open sides. Keep the top rail at least 36 inches above the finished deck surface. Space balusters no more than 3.5 inches apart is a standard requirement to prevent a child’s head from passing through. Leave one controlled opening only, at the ladder entry point. Build the ladder using two 2×4 side rails with 2×4 rungs spaced 10–12 inches apart. Bolt the ladder at the top to the platform frame and stake or anchor it at the bottom. A floating base shifts and slides. Step 8: Build the Square Sloped Roof Frame A square sloped roof is the right call for a first build. No ridge board, no rafter angle calculations, no complicated cuts. One side sits 8–12 inches higher than the other; that’s the entire design. Build the roof frame 9 ft × 9 ft for a 6-inch overhang on each side. Set 4×4 roof posts on the deck, tied into the railing posts where possible. Make one side of the roof frame 8–12 inches higher than the opposite side. Run 2×4 rafters from the high side down toward the lower side, 24 inches on center. Fasten the roof frame to the posts, not to the deck boards directly. Step 9: Install the Roof Panels Lightweight corrugated polycarbonate or metal panels are easier to handle solo than traditional roofing. Install them so the ridges run down the slope, water follows the ridge lines, so they need to point toward the drip edge, not across it. Overlap each panel by at least one corrugation, follow the manufacturer’s overlap spec for that specific panel type. Use roofing screws with integrated rubber washers. These compress to create a seal around the fastener hole. Don’t overtighten polycarbonate panels; they crack. Snug, not torqued. Trim or file any sharp panel edges before the build is considered done. The Faster-Second-Time Tip: Pre-assemble as much as possible on the ground before lifting. The roof frame, ladder, and railing sections can all be built flat on the ground, then lifted into position. I built mine in place the first time and spent twice as long fighting gravity. Build down here, lift up there. Before Kids Use It: Finish and Final Check The build isn’t done when the last roof screw goes in. Run through this before anyone climbs up. Sand rough edges on the ladder rungs, railing tops, deck boards, and the tree opening trim. Seal or stain all exposed wood with an exterior-rated finish. Unsealed lumber starts showing surface checks and moisture damage within one season. Pull on every railing post and ladder rung. Nothing should move. If it does, add a fastener or replace the connection. Check all roof panels; every fastener should be fully seated, with no lifted edges. Confirm the tree clearance gap is still clear all the way around the trunk. Walk the platform yourself before the kids get on it. Feel for flex, listen for creaks at the post connections. Mistakes to Avoid I made several of these. Most are fixable. A few are expensive. Building the platform too high. Above 6 feet, everything gets harder: framing, inspecting, and inspecting again in three years. Stay at 4–6 feet for a first build. Using wet or untreated lumber for structural parts. Wet lumber warps as it dries. Untreated lumber rots from the inside out. Pressure-treated for posts and framing, cedar or treated for deck boards. Framing the tree too tightly. Already covered above, but worth repeating. 2–3 inches minimum. The tree moves, it grows, and the deck boards don’t. Skipping railings until later. Later never comes fast enough, and someone’s on the platform before the railings are in. Build the railings in sequence, not as an afterthought. Building the roof completely flat. A flat roof is a bathtub. Even a small slope — 8 inches over 9 feet — keeps standing water off the panels. Using small nails for structural connections. Carriage bolts and structural screws for anything load-bearing. Nails work for siding, not for joints that hold kids in the air. Building alone. Posts need to be held plumb while the bracing is attached. Roof panels need to be held in place while the screws go in. This is not a solo project for a beginner. What Real Builders Say A post in the Treehouse Builders Facebook group, a parent showing his starting build for his daughter, got useful responses that go beyond the tutorial books. The consistent thread was this: leave more room around the trunk than you think you need, and treat the structure as something you’ll be inspecting every single season. Several experienced builders in the thread flagged that even a lightweight platform feels different to a tree than it looks. The posts carry the load, but the tree still moves underneath the deck, and that clearance gap is what keeps the two from fighting each other. A treehouse that looked fine at installation can put real pressure on the bark within two or three growing seasons if the trunk gap was cut close. The other note, and this matches my own experience, is that treehouses tend to grow. You finish the platform and immediately want walls. You add walls, and then you’re looking at a pulley system. Budget and timeline for what you’re building now, and leave the additions for when the main structure has been inspected through one full winter. The same scoping discipline applies to any permanent outdoor structure. The sunroom addition cost guide is a useful reference for understanding how scope creep adds up on outdoor-to-indoor builds. Cost and Time Breakdown These figures reflect lumber and hardware costs. Prices vary by region and by whether your local footing requirements need concrete vs gravel alone. If this treehouse is part of a broader outdoor upgrade, the backyard remodel cost breakdown covers how to budget across multiple projects without letting one line item blow the whole plan. Build Version Estimated Cost Basic 8×8 platform only $500–$900 A platform with railings and a ladder $800–$1,500 Full build with sloped roof $1,200–$2,500+ Skill Level Time Experienced DIYer with a helper 2–4 weekends Beginner with a helper 3–6 weekends Beginner alone Not recommended The biggest time variable isn’t skill, it’s the post-cure wait. Budget a full week between post-setting and frame-building if you want to be safe about it. Trying to compress that window is how the post-shift problem starts. Seasonal Inspection Checklist One inspection per season, or at a minimum twice a year, once in spring after the freeze-thaw cycle, once in fall before winter loads the structure. Check each item below before letting kids back on the platform after any long break. Posts: no visible lean, no soft spots at ground level, no new cracking Post-to-frame connections: bolts still tight, no rust staining on the wood below Diagonal braces: fasteners tight, no bowing or cracking in the lumber Deck boards: no soft spots, no lifted screws, no significant gapping Railings: all posts solid when pushed hard, no wobble at connections Ladder: top and bottom attachments secure, no rung movement Roof panels: no lifted edges, no cracked sections, no fasteners backing out Tree clearance: bark still clear of all framing and deck trim Frequently Asked Questions These are the questions that come up in every build thread I’ve read, and the ones I had myself when I started. What kind of wood is best for a kids’ treehouse? Pressure-treated lumber for posts, framing, and any wood near or in the ground. Cedar or redwood for deck boards and visible trim, both resist decay naturally and are safer for bare-skin contact than pressure-treated surfaces. Avoid untreated pine for any structural or outdoor-exposed part. How much space do you need around the tree trunk? At minimum 2–3 inches of clear gap between the trunk and any framing, decking, or trim on every side. Larger trees with faster growth rates may need 4–6 inches. The gap accounts for both growth and the natural sway the tree produces in the wind. Can one person build a kids’ treehouse alone? An experienced builder can manage some stages solo, but a beginner should not attempt this alone. Post-setting, frame lifting, roof panel installation, and railing work all require a second person for safety and accuracy. Working alone also means no one is spotting errors from the ground. Do you need a permit to build a backyard treehouse? It depends on your municipality. Many US jurisdictions don’t require a permit for structures under a certain height and square footage, but rules vary widely. Check with your local building department before starting — finding out after the fact is a much worse conversation. How do I make a treehouse safe for kids? Keep the platform low (4–6 feet), use 36-inch railings on every open side, space balusters no more than 3.5 inches apart, secure the ladder top and bottom, add diagonal bracing, and inspect all connections before use. Sand rough edges and seal the wood. Adult supervision is part of the safety system — it doesn’t replace structural integrity, but it catches problems before they become incidents. What should I inspect each season in a treehouse? Posts, post-to-frame connections, diagonal bracing, deck boards, railings, ladder attachments, roof panels, and the tree clearance gap. Look for rust, rot, soft spots, loose fasteners, cracked lumber, and any contact between the structure and the bark. One missed loose bolt at a railing post is how injuries happen. How high should a kids’ treehouse platform be? 4–6 feet from the ground is the right range for a beginner build and for children’s safety. Above 6 feet, the framing and inspection work becomes significantly harder, and fall consequences increase. Expert recommendations from licensed contractors consistently land in the 6–8-foot maximum range, even for professionally built structures. Final Verdict: A safe build starts with a clear plan, not complicated features. The platform height, post support, diagonal bracing, railing height, tree clearance, and roof slope each do real structural work in this design. Getting those right matters far more than any decorative detail. Once the main frame is solid and inspected, small upgrades can make the treehouse feel special without overloading it. This DIY tree house plan is my practical starting point for anyone learning how to build a treehouse for kids, structured enough to follow, simple enough to actually finish. Try each step carefully, and drop your questions or photos in the comments below.
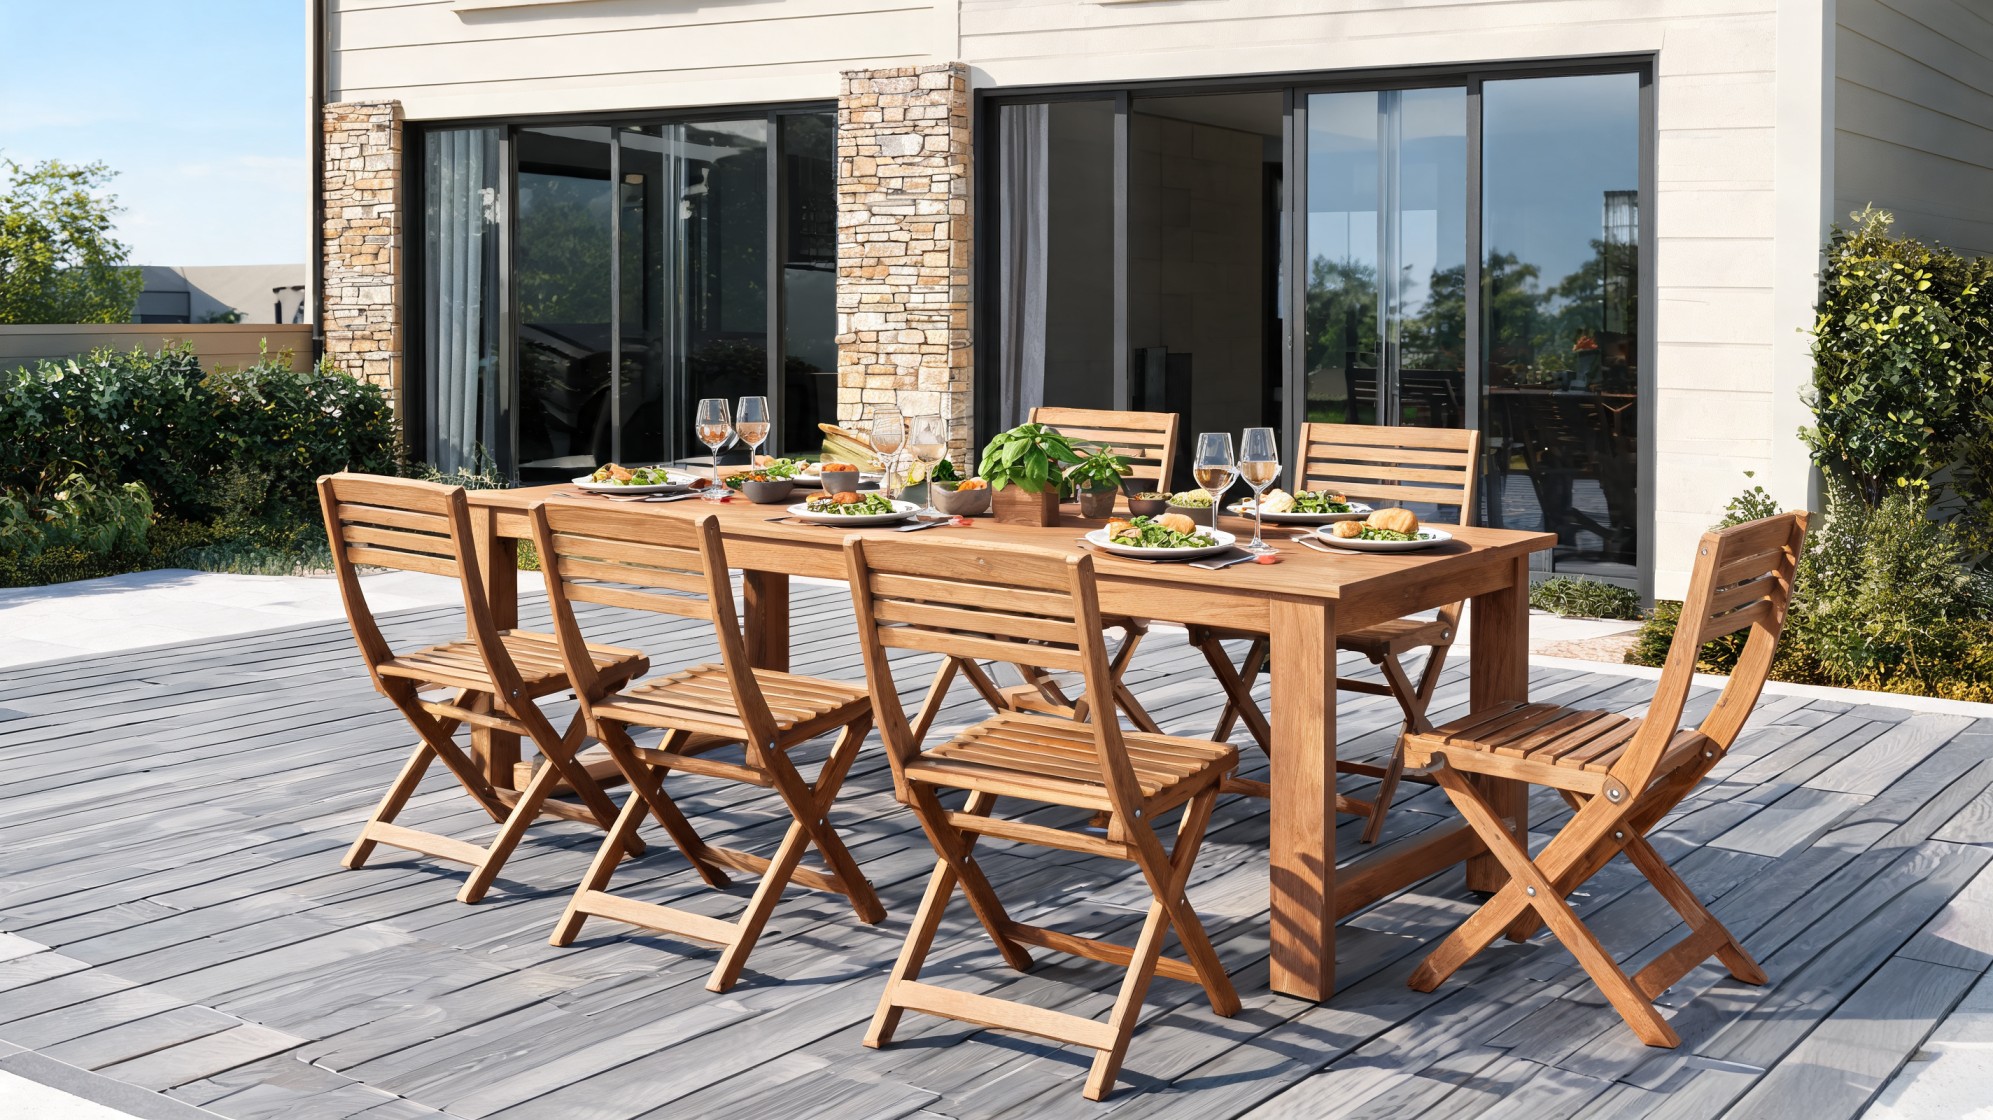
DIY outdoor furniture is a beginner-friendly project that costs $150–$300 in materials, takes one to two weekends, and gets harder to justify skipping once you’ve seen what patio chairs cost at a furniture store. I’ve built this chair-and-table set twice, once badly, and once much better, and everything I learned the second time is in this guide. The build uses 2x4s, basic screws, and a drill. No router, no biscuit joiner, no specialist tools. Difficulty 2/5, straight cuts, basic joinery, no angles required for this build Time 1–2 weekends (build day 1, finish day 2) Cost $150–$300, depending on wood species and whether you add cushions Tools Needed Circular saw, or miter saw, drill, square, tape measure, clamps, sandpaper Skill Required Beginner, if you can measure and drive a screw straight, you can finish this Before cutting a single board, measure your cushions. That one step prevents the most common mistake in this build — a seat that’s too narrow or too deep for the cushion you buy later. Where Most DIY Outdoor Furniture Builds Go Wrong First The failure point isn’t the joinery. It’s the cushion problem. People cut the seat boards, assemble the frame, and only then discover that the 20 x 20-inch seat cushion they ordered online doesn’t fit a seat that ended up 18 inches wide. You’re either sanding everything apart or buying different cushions. Measure the cushion before you cut anything, and use that measurement to set your seat board length and chair width. Everything else in this build flows from that number. The second thing that goes wrong is the use of indoor screws. Outdoor furniture needs exterior-rated, coated deck screws — the kind that won’t rust out and stain the wood after the first wet season. The price difference is minimal. The performance difference over two years is not. Best Wood for DIY Outdoor Furniture The choice of wood matters more than most first-timers expect, not just for durability but also for how easily it takes screws and how it behaves when it gets wet and dries out repeatedly over the summer. Cedar, redwood, pressure-treated lumber, and pine all behave differently outdoors; the types of wood for furniture cover how each species holds up over time, which is worth reading before you buy anything. Cedar: My first choice for this project. It’s naturally rot-resistant, takes screws cleanly without splitting badly, and smells great while you’re cutting it. Expect to pay $1.50–$2.50 per linear foot for 2x4s at most lumber yards. It’s worth it. Redwood: Better looking and longer-lasting than cedar in wet climates, but harder to find and more expensive, often $3–$5 per linear foot. Worth it for a long-term piece you plan to keep for a decade. Pressure-treated lumber: The cheapest option and easy to find at any home improvement store. Sand it well and seal it before use, the surface is rough and the chemicals used in treatment mean you want a barrier coat before anyone sits on it regularly. Pine: Works fine if you seal every surface, including the cut ends. Unsealed pine will absorb water at the end grain and swell, which eventually splits the joints. If you’re building for a covered patio and you’re on a tight budget, pine is acceptable. If the furniture is left outside year-round without cover, skip it. Other DIY Outdoor Furniture Projects to Build Next Once you’ve finished this chair-and-table set, you have the core skills for almost everything else on this list. The tools are the same. The decision-making, measuring before cutting, piloting before screwing, and sealing every surface is identical. These aren’t full tutorials; they’re the next things worth planning. 1. Outdoor Bench A bench is the easiest next project after this build. The frame logic is the same, two side assemblies connected by cross supports, with no armrests to fit. Plan around the bench length first, then set leg angle and seat height. A slight backward lean on the backrest, if you add one, makes a bench feel like a place people actually want to sit rather than a surface for setting down bags. 2. Patio Coffee Table A coffee table is the most useful addition after the chair set; it pulls the seating area together and gives you somewhere to put drinks without having to hunt for a flat surface. Build it from leftover 2x4s or 2x6s if you have them. Keep the design simple: four legs, a rectangular frame, and a slatted top. Plan the height around the chair armrests; a table that sits 2–3 inches below the armrest height is the most comfortable. 3. Outdoor Sofa An outdoor sofa is essentially two or three of these chair builds merged into a single wide frame. Plan around cushion size first — buy the cushions or measure them before cutting a single board. Seat depth and back height drive the whole layout; get those right, and the rest of the build is straightforward. 4. Outdoor Sectional A modular sectional is the best choice for a large patio where the layout changes seasonally. Build individual units, corner, armless, left-arm, right-arm, that can be rearranged rather than one fixed piece. Plan each unit size around a standard outdoor cushion and keep all seat heights identical so the units sit flush when pushed together. 5. Adirondack Chair An Adirondack chair is a step up from this build in terms of planning; the angled back, wide arms, and curved seat slats all need more careful layout than a straight-cut chair. It’s a weekend project for someone who has first finished one or two simpler builds. The comfort payoff is worth the extra planning work. 6. Picnic Table A picnic table is a heavier build, with more boards, more screws, and the leg bracing needs to be solid because picnic tables take a lot of use. The payoff is that you get seating and a table in one project. Keep the diagonal leg braces tight; that’s the part that determines whether the table will wobble in two years or still sit flat. 7. Outdoor Dining Table A full outdoor dining table is the right project once you’re comfortable with this chair build. Plan for the number of people first; a table width of 24 inches per seat is the minimum. Here’s a cleaner rewrite: If you already have an indoor dining table that feels worn but still has a solid frame, refinishing may be better than replacing it. The same sanding, staining, and sealing steps used in dining table makeover ideas can also apply to outdoor furniture projects. 8. Garden Chair A garden chair is lighter and simpler than the patio chair in this guide, with a smaller footprint, lower weight, and easier to move. Cedar or sealed pine both work well here. Focus on seat angle, back height, and keeping the overall width small enough to fit through a gate without turning it sideways. 9. Potting Bench A potting bench is more functional than decorative; the worktop height matters most, and it should be at a comfortable working height of around 34–36 inches for most people. Add a lower shelf for pots and soil bags and a back rail with hooks for hand tools. Pressure-treated lumber is fine here since you’re not sitting on it. 10. Outdoor Storage Bench A storage bench gives you seating and a weatherproof box in one build. The lid needs to carry body weight without flexing, and the hinge placement determines whether it opens cleanly or fights you every time. Leave small ventilation gaps in the box walls so cushions and pool gear don’t come out smelling like a sealed cooler. 11. Outdoor Bar Cart A bar cart is a fun project if you host outside regularly. Add locking casters so it stays put when you want it to and rolls when you don’t. Keep the footprint narrow enough to pass through a standard 32-inch door opening; it lives permanently on the patio, whether you want it there or not. If you’re drawn to repurposing materials rather than building from scratch, the whiskey barrel project ideas show a different approach to the same serving-station concept. 12. Hammock Stand A hammock stand is the one project on this list where I’d say don’t skimp on the hardware. The base length determines stability, most hammock stands need a minimum of 13–15 feet to resist tipping under an adult’s weight. Use the heaviest exterior hardware you can find for the hooks, and check it before every use in the first season. Tools and Materials 2×4 boards (cedar or pressure-treated) 2×6 boards (for seat boards and armrests) Exterior-rated deck screws (2-inch and 3-inch) Pocket hole screws (optional, but speeds up assembly) Outdoor wood glue 80-grit and 120-grit sandpaper Outdoor stain or deck sealer Patio cushions (measure these before buying lumber) Cut List: Chair-and-Table Set for Two This cut list assumes a seat depth of approximately 18 inches and a seat width that matches a standard 20 x 20-inch seat cushion. Adjust widths if your cushions differ. Cut matching pieces to the same length so they stay identical in length. The most common assembly problem comes from pieces that are 1/8 inch off. Board Size Quantity Part Name 2×4 4 Chair front and back legs 2×4 4 Lower seat supports 2×4 4 Upper side frame supports 2×4 or 2×6 3–5 Seat boards 2×4 2–3 Back support boards 2×6 2 Chair armrests 2×4 4 Table legs 2×4 4 Table frame boards 2×4 or 2×6 3–5 Tabletop boards Group the chair pieces and table pieces in separate piles before you start drilling anything. On my first build, I mixed them and ended up with two armrests that belonged in the table frame. Label each piece with masking tape if that helps. Step-by-Step: Building the Chairs Follow these simple steps to build sturdy deck chairs, from cutting the wood to assembling, sanding, and finishing each piece. Step 1: Measure and Cut the Wood Mark every cut with a pencil and a square, not by eye. Lay matching pieces side by side and cut them together where you can; this keeps paired legs, supports, and boards the same length without measuring twice. After cutting, set each group in its own pile before touching the drill. Step 2: Build the Chair Side Frames Lay out one side frame flat on the workbench: front leg, back leg, lower seat support, upper arm support. Use a square to check each corner before drilling anything. Clamp the pieces if they shift. Drill small pilot holes first, this prevents splitting, especially in cedar, then drive the screws. Build the second side frame using the first as a template; hold them up together before moving on and check that the legs are identical in height. Step 3: Attach the Seat Boards and Back Support Run the seat boards across the lower supports with a 1/4-inch gap between each board. That gap is not decorative,, it’s where rainwater drains instead of pooling on the wood surface. Set the cushion on top before driving any screws to confirm the width is right. Then attach the back boards, checking the lean before you commit. A slight backward angle, around 5 degrees if you want to measure it, makes a real difference in comfort over a two-hour session outside. Step 4: Connect the Chair Frames Stand both side frames upright and connect them front and back with the cross supports. Check the seat opening against your cushion width one more time before driving the final screws. This is the last easy moment to adjust. If the frame feels twisted when you sight down it, loosen the last screw, press the frame flat, and re-drive. Step 5: Attach the Armrests The armrests are the widest parts of the chair, and they complete the overall look. Align each one with the front of the frame and the top of the back leg, check that both sides sit at the same height before driving screws, and sand the top edges smooth before or immediately after attaching them. You’ll rest your forearms there constantly, and rough edges get noticed fast. Step-by-Step: Building the Table Build a sturdy outdoor table by cutting, assembling, sanding, and finishing each part for a clean, long-lasting deck setup. Step 6: Cut and Lay Out the Table Pieces Cut the table legs, side frames, and top boards from the same lumber as the chairs. The table height should sit even with or just slightly below the finished chair armrest. Hold the assembled chair beside your table mock-up and check before cutting. Keep the table pieces in a separate pile from the remaining chair parts. Step 7: Build the Table Frame Build two side frames first: two legs connected by a side support board. Then stand them up and connect the front and back. Use your square at every corner and check for wobble before the glue sets. Pilot holes are especially important on table legs because you’re driving screws near the end grain, which is where splits happen. Step 8: Add the Tabletop Boards Lay the top boards across the frame with the same 1/4-inch gap between them that you used on the seat. Check that the front edge is flush before driving screws. Run your hand across the finished surface; any raised corner or rough edge will catch cups and plates. The shape of the tabletop edge also affects how comfortable the table feels in daily use; different table edge profiles and styles suit different builds, and a simple eased or chamfered edge is usually the right call for outdoor lumber. Sand it flat before calling it done, then set the table between the chairs to check the height and spacing. Step 9: Finish the Furniture This is the step people rush through, and it’s the one that determines how long the furniture actually lasts. Sand everything to 120-grit before applying any finish, including the undersides and the ends of the boards, which soak up moisture fastest. Apply the finish in thin coats and let each coat dry fully before adding another. Don’t skip the second coat to save an afternoon. Faster the second time: On my first build, I applied the stain the same day I finished assembly. The screws were still off-gassing, and the wood hadn’t fully dried after the light rain two days earlier. The stain bubbled in one spot on a seat board, and I had to sand it back and redo it. Wait at least 24–48 hours after final assembly before applying any finish coat, and check the forecast. For a video walkthrough of the complete build process, the embedded tutorial below covers the key assembly steps from frame to finish. Best Finishes for DIY Outdoor Furniture The right finish depends on the wood, the climate, and how much maintenance you’re willing to do in year two. Here’s a straight comparison so you can pick before you buy anything. Finish Type Best For Reapplication Frequency Outdoor stain Cedar, pine, pressure-treated; shows the grain Every 1–2 years Exterior paint Any wood; hides grain; adds color Every 3–5 years with light sanding Clear outdoor sealer Redwood, cedar; preserves natural look Annually in wet climates Deck sealer Heavy-use pieces; maximum water protection Every 1–2 years Clear sealer is the most maintenance-intensive option in wet climates; it keeps the natural look but wears through faster than pigmented stain does. If you’d rather do a touch-up every two to three years instead of every year, a semi-transparent outdoor stain is a better long-term choice for most builds. How to Choose the Right Project for Your Skill Level The table below is honest about where each project sits in terms of difficulty. If you’ve never built anything before, start at the top. The skills compound quickly once you’ve finished one build. Skill Level Best Project Ideas Why It Fits Beginner Bench, coffee table, simple 2×4 chair Straight cuts, basic shapes, fewer pieces — the margin for error is forgiving. Intermediate Adirondack chair, sectional, dining table More pieces, tighter tolerances, some angles — worth attempting after one successful beginner build. Advanced Curved designs, folding furniture, storage bench with a hinged lid Moving parts, shaped cuts, and fit-and-finish details that punish rushed work. If a project on this list feels just slightly beyond where you are right now, that’s usually the right one to attempt. The ones that feel obviously too easy won’t teach you anything new. DIY Outdoor Furniture Budget: What Things Actually Cost The numbers below reflect 2025 lumber prices at national home improvement retailers. Cedar costs roughly $1.50–$2.50 per linear foot for 2x4s; pressure-treated runs about $0.80–$1.20 per linear foot. Cushions and hardware can add $50–$150 depending on quality. Budget Level Project Ideas Rough Material Cost Low ($50–$100) Simple bench, garden stool, basic side table Pressure-treated pine, no cushions Mid ($150–$300) Chair-and-table set, storage bench, coffee table Cedar, exterior screws, one set of cushions Higher ($400–$700+) Outdoor sectional, dining table set, Adirondack set Cedar or redwood, full cushion set, stain or paint Cost Note: Figures above are estimates based on 2025 national lumber averages. Actual costs vary by region, retailer, and whether you need to buy tools. Verify current lumber prices at your local home improvement store before budgeting. Free vs. Paid DIY Outdoor Furniture Plans Free plans work well for benches, coffee tables, and basic rectangular builds where the geometry is simple. Paid plans earn their cost on chairs, sectionals, Adirondack builds, and anything with angles — the detailed cut lists and 3D diagrams prevent the expensive mistakes that come from a vague schematic. If the project involves any piece that isn’t a straight rectangle, a paid plan usually costs less in the end than the lumber you’d waste figuring it out yourself. Common Mistakes to Avoid Skipping the cushion measurements: Buy the cushions first, or measure the ones you plan to use. This single step prevents the most common rebuild in this project. Using indoor screws: They rust out and stain the wood within one wet season. Exterior-rated deck screws cost almost the same and last years longer. Not sealing the end grain: The cut ends of boards soak up water faster than the face grain. Seal them with an extra coat and the wood will last significantly longer. Skipping drainage gaps: Quarter-inch gaps between seat and tabletop boards let rain run off. Without them, water pools and rots the wood from below. Rushing the finish: One thin coat applied in a hurry performs worse than two thin coats applied with 24 hours between them. Wait for full drying before the second coat. These questions come up most often once people are partway through the build — here are the answers that would have saved me an afternoon on my first attempt. Frequently Asked Questions Is it cheaper to build your own outdoor furniture? Usually yes — a two-chair-and-table set in cedar typically costs $150–$300 in materials, compared to $500–$1,000+ for comparable store-bought pieces. The savings increase on larger projects like sectionals or dining sets. What is the easiest DIY outdoor patio furniture to build? A simple bench or a basic 2×4 side table. Both use straight cuts, require no angles, and can be finished in a single afternoon with a drill and a saw. What is the best wood for DIY outdoor furniture? Cedar is the best all-around choice for most climates — naturally rot-resistant, easy to work with, and takes stain or sealer well. Pressure-treated pine is the budget alternative if you seal it thoroughly before use. How do I waterproof DIY patio furniture? Sand all surfaces to 120-grit, then apply outdoor stain or deck sealer in two thin coats, including on the undersides and cut ends of each board. Let each coat dry fully between applications. Can you leave DIY outdoor furniture outside in the rain? Well-sealed cedar or pressure-treated builds can handle rain, but they’ll last longer if you cover cushions and keep furniture off wet ground. Check screws and the finish coat at the start of each season. How long does DIY outdoor furniture last? A cedar build that’s well sealed and maintained with a fresh coat of stain every 1–2 years can last 10–15 years. Unsealed pressure-treated pine in a wet climate may show significant wear in 3–5 years. What screws should I use for outdoor furniture? Exterior-rated, coated deck screws — either stainless steel or ACQ-compatible coated screws. Standard zinc-coated screws corrode in outdoor conditions, stain the wood, and eventually work loose. How do I build a 2×4 patio chair? Build two side frames, connect them front and back with cross supports, add seat boards with 1/4-inch drainage gaps, attach back boards at a slight lean, then mount the armrests. Sand everything and seal before use. Final Verdict: Is This Chair-and-Table Set Worth Building? If I were doing this project again — and I have — the one thing I’d change is measuring the cushions before buying a single board, not after. Everything else in this build is forgiving. The cushion fit is not. Start there, build the chair frames around that measurement, and the rest of the project is genuinely manageable in a weekend. The finished set costs a fraction of what comparable store-bought patio furniture runs, and it fits your specific space rather than the showroom floor. The same weekend-project thinking translates well indoors too — the painted DIY bookshelf build on this site uses the same beginner-level approach at a similar cost. About the Author: Ava Brooks has been doing home improvement projects for over 8 years, learning most of what she knows by doing them herself, making the mistakes, and finding the faster way the second time. Her focus is on projects real people can finish on a weekend, without specialist tools or a contractor on speed dial.
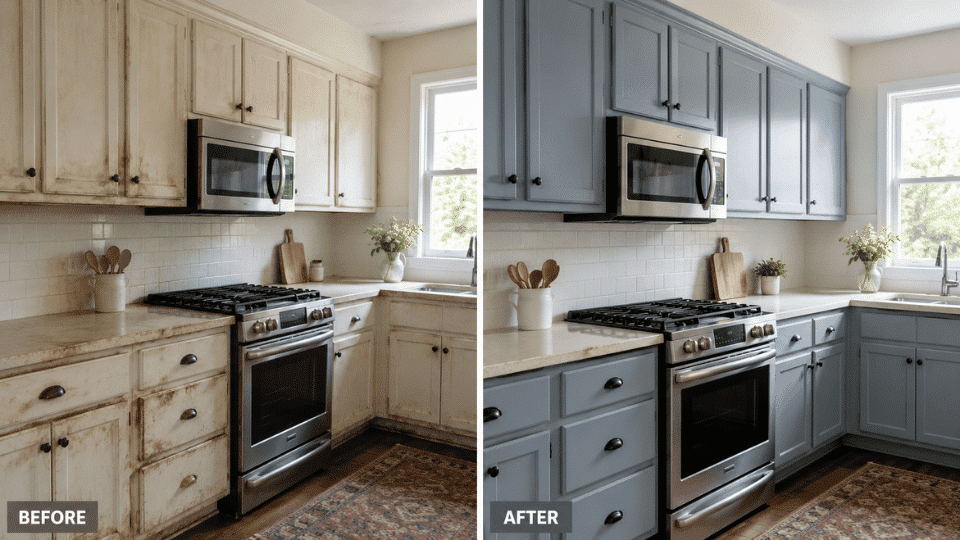
The first time I cleaned our kitchen cabinet doors with a Magic Eraser, I thought I was being efficient. I came away with a dull, flat patch right in the center of the door that looked nothing like the surrounding finish. That patch is still there. Knowing how to clean painted cabinets the right way starts with understanding what painted surfaces can and can’t handle, because most of the damage people cause happens before the grease is even gone. This is a low-difficulty task, but it’s easy to do wrong. Here’s what the whole job involves before you start: Difficulty 1 out of 5 — patience matters more than skill Time 10 minutes for a quick wipe-down; 30–45 minutes for a full deep clean Cost $5–$20 for supplies most people already have at home Tools Needed Microfiber cloths, mild dish soap, warm water, white vinegar (optional), soft detail brush Skill Required Beginner — no experience needed beyond knowing how to wring out a cloth properly The steps below follow one rule: start with the gentlest method, check whether it worked, and only move to something stronger if it didn’t. That order protects the finish every single time. What Goes Wrong Before You Even Start Most finish damage on painted kitchen cabinets happens in the first 60 seconds of cleaning. These are the three failure points worth knowing before you pick up anything. Using the wrong tool. Magic Erasers are a very fine abrasive. On matte or eggshell painted finishes they dull the sheen and can strip thin layers of paint with almost no pressure. Rough sponges and regular dishcloths can leave visible scratch patterns on softer finishes. Microfiber cloths only — this is non-negotiable. Leaving the surface wet. Painted wood doesn’t respond well to moisture sitting on it for even a few minutes. The wood underneath can swell, the paint can soften at the edges, and corners begin to peel. Every single cleaning step in this guide ends with a dry cloth. That step is not optional. Jumping straight to strong cleaners. Bleach, ammonia-based sprays, and oven cleaners can strip or discolor a painted finish in one use. The instinct when you see heavy grease is to reach for something powerful — but dish soap and warm water will handle most of it. Degreaser only comes in when that fails. How to Clean Painted Kitchen Cabinets: Step-by-Step Different problems need different levels of cleaning. Work through these in order and stop as soon as the problem is resolved. Escalating to something stronger than you need is how most finish damage happens. 1. Everyday Marks and Fingerprints Fresh fingerprints and light marks on painted cabinet doors come off with the lightest method first. Step 1: Dampen a microfiber cloth with warm water. Wring it well — damp, not dripping.Step 2: Wipe the marked area in small, even strokes without pressing hard or scrubbing in the same spot repeatedly.Step 3: If the mark stays, mix a few drops of mild dish soap into warm water until it lightly suds.Step 4: Wipe again with the soapy cloth, then remove any soap residue with a second cloth dampened with clean water only.Step 5: Dry the painted surface immediately with a dry cloth. Do not let any moisture sit. Pro Tip: Avoid scrubbing back and forth in the same spot. Short strokes in one direction reduce friction on the painted finish and protect the sheen over time. 2. Grease Buildup on Painted Cabinet Doors Grease needs something that cuts residue without being harsh on the paint. Dish soap handles most of it — reach for vinegar only if soap doesn’t work after one attempt. Step 1: Mix a few drops of mild dish soap into warm water until it lightly suds.Step 2: Wipe the greasy cabinet area gently with a damp microfiber cloth. Pay attention to the area around handles and directly below hinges, where buildup concentrates first.Step 3: Rinse with a second cloth dampened with clean water only — this removes soap residue that can dull the finish if left behind.Step 4: Dry the surface immediately with a soft dry cloth.Step 5: For sticky grease that didn’t respond, try a 50/50 mix of warm water and white vinegar. Apply, wipe, rinse, and dry right away. Pro Tip: Test vinegar on a hidden area first — inside the door frame or behind a lower cabinet — and wait 5 minutes before applying it more broadly. Some painted finishes react to the acidity. 3. Yellowing on White or Light-Painted Cabinets Yellowing on painted cabinets is two different problems that need an honest look before you start scrubbing. Surface yellowing from grease film and cooking residue is cleanable. Paint that has chemically yellowed from age, heat, smoke, or sunlight is not fixable through cleaning — no product will reverse it. Before you start, run a fingertip across the surface. If it picks up a slight waxy or oily film, cleaning will help. If the surface is smooth but still yellow, that’s the paint itself. Step 1: Wash the yellowed area with warm water and mild dish soap on a damp microfiber cloth.Step 2: Wipe in small sections. Keep the cloth damp, not soaking wet.Step 3: Rinse with a clean, damp cloth to remove soap and any loosened residue.Step 4: Dry immediately before moisture settles into the edges or seams of the cabinet door.Step 5: If the yellow is still visible after drying, try diluted white vinegar on the same area. Rinse and dry right away. Note: If the paint has yellowed from age, prolonged heat near the stove, or smoke, cleaning will not restore it. Touch-up paint or a full cabinet repaint is the honest next step. If you’re weighing whether it’s worth the cost, see our breakdown of the cost to paint kitchen cabinets before deciding. 4. Stubborn Buildup That Needs a Cabinet Degreaser If the painted surface near the stove is tacky, visibly darkened, or has a thick film that doesn’t respond to soap or vinegar, you’re dealing with baked-on grease. This is the last escalation before repainting, and the product and dilution both matter. Original Krud Kutter, diluted at roughly one part product to three parts water, is the one I’d use here. Apply it to the cloth first — never directly to the cabinet. Work in small sections, follow with a rinse cloth, and dry immediately. Never let any degreaser sit on a painted surface without wiping it off quickly. Pro Tip: Always test a diluted degreaser on a hidden spot — the inside face of a lower cabinet door works well — and give it 5 minutes before applying to a visible area. Even gentle degreasers can dull certain painted finishes. The Faster Way to Clean Painted Cabinets After the First Time Here’s what I figured out after doing this a second time: most of the hard cleaning only needs to happen once. What actually keeps painted kitchen cabinets clean long-term is wiping them down quickly — about 30 seconds with a lightly dampened microfiber cloth — twice a week around handles and below the stove hood. Grease that’s been sitting for three days comes off easily with water and soap. Grease that’s been baking on near the stove for three months is the cleaning problem that sends people looking for degreasers and wondering whether the cabinets need repainting. A dedicated microfiber cloth kept near the stove, used specifically for cabinet wipe-downs, makes this automatic. You don’t need soap every time — warm water on the cloth and a quick pass over the high-touch areas is enough between deeper cleans. The full dish-soap routine becomes a monthly task instead of a weekly emergency. Products Worth Using (and What to Skip) The best cleaner for painted kitchen cabinets is almost always the simplest one you have available. Moving to something stronger only makes sense when the gentler option has genuinely failed — not just because the grease looks bad. What I’d Use Dawn Dish Soap — A few drops in warm water handles most everyday grease and fingerprints on painted cabinet surfaces. This is the first tool, not a last resort. Original Krud Kutter — Useful for heavy, baked-on grease near the stove. Always dilute it well (1:3 with water) and test on a hidden spot before using it broadly on painted cabinetry. Distilled White Vinegar — Mixed 50/50 with warm water, a good step up from dish soap for greasy film on painted wood cabinets. Rinse and dry immediately after every use. E-Cloth or Scotch-Brite Microfiber Cloths — The only cloths worth using on painted cabinetry. Rough sponges and regular dishcloths leave micro-scratches that accumulate over time and dull the finish. OXO Soft Detail Brush — Useful for cleaning around hardware, hinges, and trim grooves where a cloth won’t fit without applying awkward pressure. What I’d Skip Some of these look like reasonable cleaning choices. On a painted wood surface, they cause more damage than the grease they were meant to remove. Magic Eraser: A very fine abrasive. Dulls or visibly strips painted finishes, especially on matte and eggshell cabinet paint. I found this out the hard way — that dull patch is still there. Steel wool or abrasive scrub pads: Will scratch and roughen the painted surface permanently. Bleach or ammonia-based sprays: Too harsh for most painted finishes — risk of discoloration and chemical damage to the paint layer. Oven cleaner or powdered abrasive cleaners: Made for completely different surfaces. These will damage cabinet paint quickly and visibly. Oil polish or wax: Leaves a film that attracts dust and creates a maintenance cycle that makes the cabinetry harder to clean over time, not easier. Keeping Painted Cabinets Clean: Do’s and Don’ts These habits are worth more than any deep clean you’ll do twice a year. Grease wiped off within 24 hours takes 30 seconds. Grease baking near the stove for six months is the cleaning problem that tests every method in this guide. Do Don’t Wipe spills the same day they happen Let water sit on the cabinet doors Use a soft microfiber cloth Use rough scrub pads or a Magic Eraser Wipe around handles twice a week Wait until the grease turns tacky and dark Dry cabinet surfaces after every cleaning Leave soap or vinegar residue on the surface Test any new cleaner on a hidden area first Apply a strong product directly to a visible area Keep steam and heat away from cabinet doors Position appliances so heat blows onto the cabinetry Do quick, frequent wipe-downs Skip regular maintenance until buildup forces a deep clean The entry that matters most is wiping the area around handles and directly below the stove hood twice a week. That single habit catches grease before it has time to bond to the paint. Everything else on the list is supporting maintenance. Frequently Asked Questions These are the questions that come up most once people have already tried dish soap and are wondering what to do next. What is the best way to clean painted kitchen cabinets? Warm water and a few drops of mild dish soap on a microfiber cloth, applied gently, rinsed with a second damp cloth, and dried immediately. This handles most everyday cleaning on painted kitchen cabinets without any risk to the finish. Move to vinegar or a diluted degreaser only if that doesn’t work. What to clean painted cabinets with to avoid damaging the paint? Microfiber cloths, mild dish soap, warm water, and diluted white vinegar are the safest options in that order. Avoid Magic Erasers, abrasive pads, bleach, ammonia-based cleaners, and anything oil-based. The cloth type matters as much as the product you use. How do I clean painted kitchen cabinets with grease buildup? Start with dish soap and warm water. If that doesn’t remove the grease, try a 50/50 vinegar and water solution, rinse, and dry right away. For heavy, baked-on buildup near the stove, use Original Krud Kutter diluted 1:3 with water — always test on a hidden area first. How do I clean white painted cabinets that have yellowed? Wash with dish soap and warm water first. If the yellowing improves, it was surface grease or residue. If it doesn’t change after cleaning and drying, the paint has chemically yellowed from age, heat, or smoke. No cleaner reverses that — touch-up paint or a full repaint is the realistic fix. What to use to clean painted kitchen cabinets without stripping the finish? Dish soap, warm water, and a microfiber cloth. Keep the cloth damp rather than wet, use light pressure, and dry immediately after cleaning. Avoid bleach, Magic Erasers, and concentrated degreasers on any painted wood cabinet surface. How do you clean painted wood cabinets near the stove? Wipe them down with a damp cloth after every few cooking sessions — that’s the actual answer. For existing buildup, use diluted white vinegar or a diluted degreaser, test first, and dry immediately. Preventing grease from baking on causes far less finish damage than cleaning it after the fact. How do you remove sticky residue from painted cabinets? Start with warm water and dish soap. If stickiness persists after cleaning and drying, try diluted vinegar. Note that newly painted cabinets can feel tacky for up to 30 days while the paint finishes curing — that stickiness is normal and will resolve on its own without cleaning. How often should you clean painted kitchen cabinets? A quick wipe-down around handles and near the stove twice a week with a barely-damp cloth. A full soap-and-water clean once a month. Cleaning with soap more frequently than that accelerates finish wear. Frequent light wipe-downs are a better habit than infrequent heavy cleans. Final Verdict If I were starting this again, the Magic Eraser wouldn’t come anywhere near our cabinet doors. Dish soap and warm water on a microfiber cloth solves most of what you’ll actually encounter when learning how to clean painted cabinets. Grease that doesn’t respond to that gets a 50/50 vinegar solution, rinsed and dried right away. Heavy, baked-on buildup near the stove and only that gets a diluted degreaser, tested on a hidden spot first. If you’re dealing with yellowing that doesn’t lift after cleaning, the paint has aged past what any cloth can fix; at that point, understanding what painting cabinets actually involves is a more useful next step than buying another cleaning product. Start gentle, dry everything immediately, and stop before you reach for something that can’t be undone.
Learning how to build a bookshelf is a useful project because it gives you storage, display space, and room to play with color. This DIY bookshelf is a small wooden piece with open shelves and a bold two-color painted pattern, made for a pop maximalist bedroom. I’m keeping the structure simple, but the finish will feel fun, expressive, and personal. My version uses basic boards, screws, glue, primer, and paint. You’ll get the final size, supplies, cut list, build steps, paint plan, beginner tips, design variations, and common questions before starting. What You’re Getting Into Before You Build a Bookshelf This DIY bookshelf takes a weekend, costs $70–$100 in materials if you already own a drill, and sits at a solid beginner level. I’ll be straight with you: the build itself is not hard. The part that trips people up is the paint pattern at the end, and only because they rush it. Get that right, and you’ll have something that looks intentional, not just assembled. The finished piece is 36 inches high, 28 inches wide, and 10 inches deep, with two fixed middle shelves giving you three open storage bays. It’s sized for a bedroom reading corner or desk area, not a wall-to-wall statement, but a real, practical piece you can actually fill. Difficulty 2 out of 5, straight cuts, basic joinery, beginner-friendly Time One weekend (4–6 hours build, drying time between) Cost $70–$100 with tools already owned; $150–$200 if buying a drill and clamps Tools Needed Drill, saw or store cutting service, measuring tape, speed square, clamps, sandpaper, paintbrush or small roller, painter’s tape Skill Required Beginner, no joinery experience needed The most common failure point with this build is buying warped boards and not checking them before you leave the hardware store. Look down each board lengthwise before it goes in your cart. A twisted side panel will fight you at every step. That’s the thing I’d go back and tell myself first. Tools and Materials Needed to Build a Bookshelf You only need basic supplies for this build. Keep the wood simple, use the same board depth throughout, and let paint create the main personality. Supplies and Tools Item Why You Need It Measuring tape To measure boards and shelf placement Pencil To mark cuts, shelf lines, and screw spots Saw or store cutting service To cut the boards to size Drill To make pilot holes and drive screws Speed square To keep shelf lines and corners straight Clamps To hold boards steady while attaching them Paintbrush or small roller To apply primer, paint, and pattern details Painter’s tape To create clean color blocks or stripes Wood glue To strengthen the joints Wood screws To hold the bookshelf together Wood filler To cover screw holes before painting Sandpaper To smooth cut edges and fill holes Primer To help paint cover evenly Interior paint To create the two-color maximalist finish Clear topcoat Optional, for extra protection Lumber and Paint Quantities For this build, you need three 6-foot 1×10 pine boards. From those three boards, you’ll cut: two side panels at 36 inches, one top and one bottom panel at 28 inches each, and two middle shelves at 26.5 inches. The middle shelves are shorter because they sit inside the two side panels — account for this before you cut. The back panel is thin plywood cut to fit the full rear of the frame. Material Quantity Size or Notes 1×10 pine boards 3 boards 6 feet long each Side panels 2 pieces 36 inches each Top panel 1 piece 28 inches Bottom panel 1 piece 28 inches Middle shelves 2 pieces 26 1/2 inches each Wood screws 1 box 1 1/4-inch screws Primer 1 small can Enough for one thin coat Paint color 1 1 quart Main bookshelf color Paint color 2 1 sample pot or small can Pattern or accent color Pine is the right call for a first build: it’s widely available, easy to cut, and takes paint well. Just know that softer pine dents more easily than plywood under heavy loads. If you’re planning to store a full collection of hardbacks across all three shelves, plywood panels would give you more sag resistance over time. For the mix of books, decor, and boxes that most bedroom shelves hold, pine handles it well. To learn more about how different wood species behave under load over time, the guide to the best types of wood for furniture breaks it down by species. How to Build a Bookshelf Step by Step This tutorial keeps the build simple but provides enough detail for beginners to avoid guessing. Follow the order carefully so the frame stays correct, the shelves sit level, and the painted finish looks intentional. Step 1: Cut and Label the Boards Cut the boards using the cut list, or ask the hardware store to cut them for you. You’ll need two side panels, one top panel, one bottom panel, two middle shelves, and one thin plywood back panel. Once the pieces are ready, label each one with a pencil on the inside face. Mark the side panels, top, bottom, shelves, and back panel. This keeps the build organized and prevents mixing up similar pieces during assembly. Step 2: Mark the Shelf Placement Lay both side panels next to each other on a flat surface, with the bottom ends lined up. Use a measuring tape to mark the positions of the bottom, top, and two middle shelves. Draw straight guide lines across both panels with a speed square. Marking both side panels together helps the shelf heights match. Keep the shelf openings close to 10 inches so the finished bookshelf can hold books, boxes, and decor. Step 3: Drill Pilot Holes Drill pilot holes through the side panels where the top, bottom, and middle shelves will attach. Line the holes up with the center of each board end, and keep them away from the very edges. Pilot holes help guide the screws and reduce splitting, which is helpful when working with pine. They also make assembly easier because the screws will pull the boards together more smoothly and with less force. Step 4: Build the Outer Rectangular Frame Attach the top and bottom boards between the two side panels to create the outer rectangular frame. Add a thin line of wood glue at each joint, then drive screws through the side panels into the ends of the top and bottom boards. Work on the floor or a large table so the frame stays steady. Tighten the screws slowly, and make sure the board edges stay flush as the rectangle comes together. Pro Tip: Measure both diagonals of the outer frame after the screws are in. If they match, the frame is square. If they don’t, loosen the screws slightly, nudge the frame until the diagonals are equal, then re-tighten. Step 5: Attach the Middle Shelves Slide the first middle shelf into place along the marked guidelines. Add wood glue to both ends, then hold or clamp the shelf to prevent it from shifting. Drive screws through the side panels and into the shelf ends. Repeat the same process for the second shelf. Before fully tightening the screws, check that each shelf lines up with the pencil marks. Wipe away extra glue with a damp cloth before it dries. Step 6: Attach the Plywood Back Turn the bookshelf carefully so the back side faces up. Place the thin plywood back panel over the rear of the frame and line it up with the outside edges. Attach it with small screws or finishing nails around the outer frame and into the shelf backs. This back panel helps the bookshelf feel more finished and reduces side-to-side movement. Make sure the panel sits flat before adding the last few fasteners. Step 7: Fill, Sand, and Prime the Bookshelf Fill screw holes, nail holes, and small gaps with wood filler. Let it dry fully, then sand those areas smooth. Sand the cut edges and any dried glue marks. Wipe dust off with a dry cloth. Apply one thin coat of primer across the entire piece, sides, shelves, front edges, and plywood back- and let it dry completely before painting. Skipping primer on bare pine usually shows up as uneven coverage on the first paint coat, especially on end grain, and it matters even more if the wood has any prior stain or finish, since paint over stained wood behaves differently than bare pine. Step 8: Paint the Main Color and Add the Pattern Paint the bookshelf with your main color first. Use two thin coats instead of one heavy coat, and let each coat dry before adding the next. Once the base color is dry, add the second-color pattern. You can use painter’s tape for wide stripes, checkerboard blocks, or clean shelf borders. For waves or arches, draw a light pencil guide first. Keep the pattern bold but controlled, so the final piece feels playful and intentional. Step 9: Seal, Cure, and Place the Bookshelf A clear topcoat is optional, but worth adding on a bedroom shelf that will hold books with sharp spines or boxes that slide in and out regularly. Apply in thin layers and let each cure fully. After painting, give the piece at least 24–48 hours before loading it. Fresh paint scuffs even when it feels dry to the touch. When placing it, put the heavier books on the bottom shelf for stability, use a wall anchor if children or pets are in the room, and take your time when you decorate the finished shelves. The styling is what makes the paint pattern pay off. How Much Does It Cost to Build a Bookshelf? The cost depends mostly on whether you already own a drill and clamps. The materials alone, including wood, fasteners, primer, and paint, run about $70–$100 for this size. Add $50–$80 if you need to buy basic tools. Line Item Low End High End What Drives the Variation Pine boards (3 boards, 6 ft) $25 $45 Grade, knot count, and regional lumber pricing Plywood back panel $10 $20 Whether you buy a full sheet or a cut-off Screws, glue, and wood filler $10 $18 Brand and whether you already have some Sandpaper $4 $8 Pack size Primer $8 $15 A small can is enough for one thin coat Paint (2 colors) $15 $30 A quart for the main color, a sample pot for the accent Clear topcoat (optional) $10 $25 Brand and finish type Estimated total (tools owned) $82 $161 Lower end is realistic if you already own a drill The biggest variable most guides skip: store cutting fees. If you don’t own a saw and the hardware store charges per cut, budget an extra $5–$15 depending on the number of pieces. Most big-box stores cap the fee or offer the first few cuts free — it’s worth asking before you assume you need to buy a saw for a single project. Beginner Tips for a Better Bookshelf These tips are not extra steps. They are simple checks that help the bookshelf come together cleaner, straighter, and safer. Choose straight boards. Look down each board before buying it. Avoid boards that twist, curve, or have deep cracks. Keep the design one size. Use the same board depth for the whole build. This makes measuring and assembly much easier. Mark both side panels together. This keeps the shelf lines even and helps prevent one side from sitting higher than the other. Do not skip pilot holes. They reduce splitting and make screws easier to drive straight, especially near board ends. Use glue and screws together. Glue adds strength, while screws hold the bookshelf firmly in place as it dries. Paint in thin coats. Thick paint can drip, stay tacky, or hide your pattern edges. Thin coats look cleaner. Let the paint cure before styling. Books can scratch fresh paint, even when the surface feels dry. Keep heavy items low. Put larger books and storage boxes on the bottom shelf so the bookshelf feels more stable. Design Variations for the Same Bookshelf These ideas use the same basic bookshelf build, but the finish and styling change the mood. Not every version needs to be maximalist. 1. Literature-Heavy Bookshelf For a book-focused version, use a deep color like forest green, oxblood, navy, or warm brown. Keep the paint finish more classic, with maybe one contrast color on the shelf edges or inside panels. Style it with novels, poetry, essays, annotated paperbacks, brass bookends, and a small reading lamp. This version feels full and personal, but more library-inspired than loud or playful. 2. Mystic Bookshelf For a mystic version, choose a dark base color like plum, midnight blue, charcoal, or black-green. Add small painted details, such as moons, stars, arches, or soft waves, using gold, silver, lilac, or teal. Style it with tarot decks, candles, crystals, astrology books, incense holders, and metallic frames. This version feels moody, layered, and calm rather than bright pop maximalist. 3. Pop Maximalist Bookshelf For the main pop maximalist look, use a bold base color and a strong second-color pattern. Try hot pink with orange waves, cobalt with lime stripes, or lilac with red checkerboard corners. Style it with graphic novels, colorful book spines, glossy decor, framed postcards, and patterned boxes. This version should feel playful, bright, and expressive while maintaining a single clear paint pattern. 4. Soft Colorful Bookshelf For a softer version, choose colors like butter yellow, sage, coral, powder blue, or warm cream. Add a small painted detail, such as scalloped edges, shelf-border lines, or a contrast interior. Style it with journals, romance novels, ceramics, plants, framed photos, and woven baskets. This version still feels creative, but it is gentler and easier to blend into a calm bedroom. Common Mistakes to Avoid These mistakes are easy to make during a first build. Checking them early can save time and make the finished bookshelf feel sturdier. Mistake Why It Causes Problems Better Choice Buying warped boards Shelves may not sit evenly Choose straight pine boards Skipping pilot holes Wood can split near the edges Drill before adding screws Not checking the square The frame can lean or twist Measure both diagonals Using too many paint ideas The design can look messy Choose one clear pattern Painting too thickly Paint may drip or stay sticky Use thin coats Loading shelves too soon Fresh paint can scratch Let the paint cure first A beginner bookshelf does not need to look machine-made. It should feel sturdy, smooth enough to use, and finished with care. Frequently Asked Questions How much weight can this DIY bookshelf hold? This bookshelf can hold regular books and small decor, but it is not meant for very heavy loads. Spread weight across the shelves, and keep the heaviest items near the bottom. Can I build this bookshelf in a rental apartment? Yes, but protect the floor with a drop cloth while building and painting. If you cannot drill into the wall, use removable furniture safety straps where allowed. How do I clean a painted bookshelf? Use a soft, dry cloth for dust. For marks, wipe gently with a slightly damp cloth and mild soap. Avoid rough scrubbers because they can dull the paint. Happy Reading A painted bookshelf is a useful way to practice measuring, drilling, assembly, and finishing without taking on a huge project. Once you learn how to build a bookshelf, you can change the color, pattern, or shelf size in later builds. This DIY bookshelf keeps the wooden structure simple, while the two-color paint makes it feel bold and personal. I like that it works as storage and decor at the same time. My best advice is to choose straight boards, check the frame before adding shelves, and let the paint cure well. Try the build, then make the pattern your own.
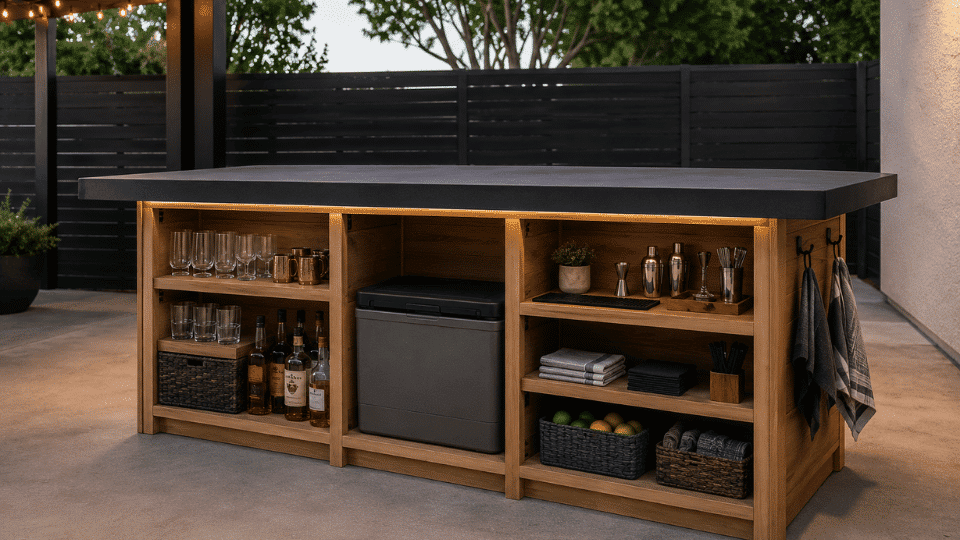
A well-built DIY outdoor bar runs about $400–$800 in materials for a freestanding 72-inch unit, more if you use premium cedar throughout, less if you stick to pressure-treated framing with cedar slats only on the visible faces. I’ve seen homeowners spend twice that by skipping the planning stage and buying the wrong lumber twice. The build I’m walking through here avoids that. It uses a strong exterior-grade frame, vertical wood slats over dark backing panels, a sealed countertop, open back storage, and warm under-counter LED lighting. Done right, this is a bar that survives real weather and still looks intentional two winters later. Cost Note: Figures in this article are estimates based on national averages as of 2026. Actual costs vary significantly by region, lumber prices, and material choices. Always price your cut list at a local lumber yard before committing to the build. Difficulty 3/5 — Basic carpentry, no specialist skills needed Time 1–2 weekends (build) + 1 day (finish and cure) Cost $400–$800 in materials depending on wood choice Tools Needed Circular saw or miter saw, drill/driver, clamps, level, tape measure, speed square, sander Skill Required Intermediate — confident measuring, cutting, and driving screws square What This Build Creates The finished bar is freestanding, approximately 72 inches wide, 24 inches deep, and 42 inches high, proper bar height for standard stools with a 28–30-inch seat. The front and sides have a warm, vertical wood-slat finish over dark backing panels. The countertop overhangs the frame slightly and is finished with a thick front edge so it reads as a solid slab. The back is open for storage, with two shelves and one open bay sized for a cooler or storage bin. Under-counter LED strip lighting and a black foot rail finish the build. It sits on a patio, deck, or paved area. It does not belong on grass, more on that under mistakes to avoid. The One Failure Mode to Know Before You Start The most common reason DIY outdoor bars look rough after one season: unsealed wood. Not just the faces but the cut ends, the undersides, the corners, the hidden frame members. Raw end grain is the first place water gets in, and once it’s in, it works fast. Seal everything before assembly where you can, and again after final assembly where you can’t reach it earlier. That’s the step most people skip because it’s tedious and invisible. It’s also the step that determines whether this bar looks good in year three or starts delaminating by year two. Pro Tip: Pre-seal all cut ends with a penetrating outdoor wood sealer before assembly. Once the frame is together, you won’t reach half these surfaces. A foam brush and five minutes per board before you build saves you a resealing job next spring. Materials and Cut List The quantities below are based on the 72 × 24 × 42-inch finished size. Buy 10–15% extra on lumber for trimming, ripped pieces, and spacing adjustments. Pressure-treated lumber is the right call for the hidden frame. It handles ground moisture and repeated wet/dry cycles without degrading. Cedar is the better choice for the visible slats because it takes stain well, has natural rot resistance, and looks warmer than treated wood. Material Cut Size Qty Use 2×4 pressure-treated or exterior-grade lumber 72 in 4 Long sides of top and bottom frames 2×4 exterior-grade lumber 21 in 8 Short sides of top/bottom frames and side rails 2×4 exterior-grade lumber 40½ in 8 Corner posts and mid-span support posts 2×4 exterior-grade lumber 69 in 3 Front and back horizontal support rails 1×2 or 1×3 lumber Custom 4–6 Back shelf support cleats Exterior plywood (¾ in) 72 × 38 in 1 Front backing panel Exterior plywood (¾ in) 24 × 38 in 2 Side backing panels Exterior plywood or sealed boards Custom 2 shelves Lower and middle back shelves Cedar slats (1×2 or 1×3) 38 in tall 40–45 Front slatted finish Cedar slats (1×2 or 1×3) 38 in tall 24–30 Side slatted finish Countertop base (2× lumber or ¾ in plywood laminated) 76 × 29 in 1 Main countertop base Countertop edge trim 76 in front, 29 in sides 3 Thick countertop edge profile The countertop base is the one place to spend more time than you think it needs. A single layer of ¾-inch plywood will flex over a 76-inch span. Either laminate two layers or use solid 2× material ripped and glued side by side. The edge trim is what makes it look like a slab, add a 1½-inch thick face on the front and sides, and nobody will know it’s plywood underneath. Hardware, Finishes, and Accessories Category What to Buy Fasteners Exterior-grade coated screws (2½ in for frame, 1¼ in for slats and panels) Countertop finish Dark charcoal, black, or concrete-look outdoor coating — apply 2 coats minimum Wood finish for slats Warm exterior stain + outdoor sealer rated for UV exposure Backing panel finish Black or charcoal exterior paint before slats go on Lighting Outdoor-rated warm white LED strip (2700–3000K) with weatherproof power supply Foot rail Black tubular steel foot rail kit, mounted to the lower front frame Optional hardware Bottle opener, side hooks, magnetic bar tool holder The LED strip color temperature matters more than most people realize. Warm white at 2700–3000K reads like candlelight and makes the cedar slats glow at night. Anything above 4000K pushes into cool white territory, and the whole setup starts looking like a work light instead of a bar. Step-by-Step DIY Outdoor Bar Build Step 1: Mark the Footprint Mark a 72 × 24-inch rectangle on the patio, deck, or pavers where the bar will live. Keep the front — the slatted side — facing the seating area. Confirm the surface is flat with a long level. A half-inch of slope across 72 inches is manageable with shims; more than that and the frame will rack. Step 2: Build the Main Timber Frame Build the bottom rectangle first using the 72-inch and 21-inch 2×4s. Set it flat on the ground and confirm it’s square — diagonal measurements should match within ⅛ inch. Build an identical top rectangle. Then stand the eight vertical posts between them: four corners and four mid-span supports. Screw everything tight, recheck square and level, and brace it diagonally with a clamp across the frame while the structure sets. At this stage you should have a rigid open box. If it flexes when you push it, the problem is easier to fix now than after panels go on. Step 3: Add Horizontal Support Rails Run the three 69-inch horizontal rails across the front and back of the frame at mid-height and at the shelf positions. Add 21-inch side rails at matching heights. These rails carry the panel weight, give the shelves something to land on, and eliminate flex in the long front span. A 72-inch frame without mid-span support will visibly bow over time as wood moves through seasons. Step 4: Attach the Dark Backing Panels Cut and fit the exterior plywood panels to the front and both sides of the frame. Before you screw them in, paint them black or dark charcoal on the face side. The dark color shows through the gaps between slats and is what gives the finished front its depth. Skip this step and the gaps will expose raw plywood, which looks unfinished and holds water. Two coats of exterior paint is enough — the slats protect the panel face from direct weather. Step 5: Install the Vertical Cedar Slats Start at the center of the front panel and work outward, using a consistent spacer — a ¼-inch scrap of plywood works fine — between each slat. Starting from the center keeps the pattern symmetrical even if the last slat on each end needs to be ripped slightly. Continue the same treatment around the sides. Use 1¼-inch exterior screws through the slat face into the backing panel and into any support rail behind it. This is the step where the bar starts to look like something. The warm cedar grain against the dark backing is most of the visual result. Step 6: Add the Back Shelves Screw the shelf support cleats to the inside of the back frame rails. Set the lower shelf 6–8 inches from the ground — high enough to clear puddles, low enough for a full-size cooler in the open bay beside it. Set the middle shelf at whatever height your bottles and glassware need. Keep one bay at least 18 inches wide and 15 inches clear for the cooler. Seal all shelf boards on all six sides before installing them. Shelves in outdoor builds take the most moisture abuse of any part of the structure. Step 7: Install the Countertop The countertop base is 76 × 29 inches, overhanging the 72 × 24-inch frame by 2 inches front and back and 2 inches per side. Attach the 1½-inch thick edge trim flush to the bottom of the base on the front and both sides to create the slab profile. Secure the assembly from underneath using screws up through the top frame into the countertop base. At 42 inches tall with the countertop in place, the bar is at proper serving height. Step 8: Finish All Surfaces Sand the cedar slats to 120 grit, knock off the sharp corners on the slat edges, then apply two coats of warm exterior stain. Apply the dark countertop coating in two coats, feathering the edges over the trim. Seal everything from countertop face and edges, slat faces and any unsealed backs, the top of the frame underneath the counter where water will pool. Give the sealer 48 hours to cure before use. Once the finish is dry, mount the LED strip on the underside of the countertop lip. Route the wire down the back corner of the frame to the power supply. Mount the black foot rail 6–8 inches from the ground on the front lower frame using the included hardware. Step 9: Style the Finished Bar Two or three stools spaced 24 inches apart work well for a 72-inch bar. Set a tray, a few glasses, an ice bucket, and one or two bottles on the counter just enough to look ready, not enough to look crowded. Add a small potted plant or two at one end. The bar does the heavy visual lifting already; the styling just activates it. Outdoor Bar Ideas to Personalize the Build The base build is the structure. These additions change how the bar is used and how it reads in the space — each one is a one-day job once the main build is done. Add a Wall Shelf Behind the Bar A narrow wall-mounted shelf behind the bar gives bottles and glasses a home and creates a proper backdrop. Useful if the bar sits against a fence or exterior wall. Keep it shallow like 6–8 inches deep, so it doesn’t compete with the counter workspace. Seal it the same way as the main build. Use a Removable Ice Bucket A removable ice bucket avoids the plumbing and drainage problems of a built-in sink while giving the bar a functional serving feature. Stainless steel holds cold better than plastic alternatives. It sits on the counter during use and goes in the back shelf bay when the bar is idle. Add a Narrow Backsplash Ledge A 4-to-6-inch ledge running the full back width of the countertop adds a small display shelf without reducing usable counter space. Useful for bottles, garnishes, or a few candles. Seal the ledge with the same countertop coating so it handles spills the same way the main surface does. Style With Potted Herbs Mint, rosemary, and thyme in terracotta pots beside the bar serve two functions: they look right against the warm cedar, and they’re actually useful at a bar. Keep them on the counter only if you have counter space to spare — they’re better placed on an adjacent surface or the ground beside a stool. Match Your Stools to the Build For a 42-inch bar, you need stools with a seat height of 28–30 inches, any lower and the counter is in your armpits. Black metal stools read modern and clean against the cedar slats. Woven stools push the look warmer and more casual. What to avoid: anything plastic, anything with a seat height labeled for a 36-inch counter, anything that won’t survive being left outside. If you want stools that hold up the same way the bar does, look for aluminum or powder-coated steel frames with a weather-rated seat material. The outdoor bar stools at Minimal & Modern include weather-rated options in the right height range. Add Lighting Around the Bar Zone The under-counter LED handles the bar itself. String lights above define the zone. Solar lanterns on the ground or on nearby surfaces add layers of light at different heights. The goal is a warm ambient glow, not a single bright source. If you’re building on a covered patio or under a pergola, a wall-mounted fixture at the back of the bar zone completes the setup and adds task light for pouring. Mistakes That Show Up Two Winters Later Most of these aren’t obvious at build time. They’re the kind of failure you notice a year or two in, when it’s already a bigger fix than it should have been. Building on grass or soil: Wood that sits on ground contact wicks moisture from below continuously. The base frame rots from the bottom up, and you won’t notice until it’s structural. Use a paved or composite base, or set the bar on adjustable post bases that keep the frame off the surface. Skipping exterior-grade fasteners: Standard interior screws rust through in one season in a wet climate. Exterior-coated screws cost a few dollars more per box. Use them on every single connection. Leaving raw end grain exposed: End grain absorbs water 40–50 times faster than face grain. Seal cut ends with penetrating sealer before or immediately after cutting, every piece. A countertop that’s too thin across the span: A single ¾-inch plywood panel over 76 inches will deflect visibly over time. Either laminate two layers or use solid 2× material and add the thick edge trim. LED strip visible from the front: Mount it under the countertop lip recessed at least 1½ inches, not flush to the front edge. If you can see the strip from the seating position, it’s poorly positioned — move it back. No airflow around a mini-fridge: If you plan to add a mini-fridge in the open bay, leave 2–3 inches of clearance on the sides and back. A fridge with no airflow runs hot and fails early. Unsupported long front span: A 72-inch front frame needs at least two mid-span posts and two horizontal rails to stay rigid. One post at center is not enough over time as wood expands and contracts seasonally. Frequently Asked Questions About DIY Outdoor Bars These are the questions that come up most often once the build is underway, usually when someone is at the lumber yard or halfway through the frame. What is the standard height for a DIY outdoor bar? 42 inches is the standard. That matches most bar stools with 28–30-inch seat heights and puts the counter at a comfortable working height for standing adults. A 36-inch counter requires shorter stools and reads more like a table, usable, but not a bar. What wood is best for an outdoor bar build? Pressure-treated lumber for the hidden frame, it handles moisture and ground proximity without degrading. Cedar for the visible slats, it takes stain well, resists rot naturally, and looks better than treated wood. Seal both regardless of species. How cheap can you build a DIY outdoor bar? A basic version using pressure-treated framing and construction-grade cedar slats comes in around $400 for a 72-inch unit. The cost climbs to $600–$800 if you use clear-grade cedar throughout, a commercial foot rail kit, and a pre-made concrete countertop coating rather than painted plywood. Can I leave a DIY outdoor bar outside year-round? Yes, if properly sealed and placed on a solid surface. A covered patio or pergola significantly extends the finish life. In harsh freeze-thaw climates, a fitted outdoor cover over winter will protect the countertop seams and any exposed end grain from moisture intrusion. Do I need outdoor bar plans before I start? A dimensioned sketch is enough for this build — you don’t need formal plans. Draw the frame members with labeled lengths, mark your shelf positions, and note the countertop overhang. Print the cut list from this article. That’s all the planning a straightforward freestanding bar needs. How do I stop an outdoor bar from wobbling? Build the frame square from the start, drive every screw tight, and include all mid-span posts and horizontal rails. If the bar still moves after assembly, add a diagonal brace inside the back panel — a 2×4 running corner to corner kills the racking immediately. Does an outdoor bar countertop need to be waterproof? Yes. Rain, spills, condensation from ice buckets, and cleaning all attack an unsealed top. Apply a waterproof exterior coating to the top surface, all four edges, and any seams. Reapply annually or whenever the surface shows signs of wear — water beads on a sealed top, soaks in when it needs recoating. Final Verdict For $400–$800 in materials and two weekends of work, this outdoor bar build delivers something that costs $1,500–$2,500 if you bought it pre-made. And most of what’s available pre-made won’t hold up outdoors as well as a properly sealed frame-and-cedar build. The design is not complicated. The sealing is not complicated. What trips most people up is skipping steps, usually the sealing and the mid-span supports. If you build the frame square, seal every cut end before assembly, and add the horizontal rails where the instructions say to, this diy outdoor bar will still look right in year four. Before you buy anything, price your cut list at a local lumber yard because cedar prices vary significantly by region, and knowing your actual materials cost before you start avoids the most common budget surprise.
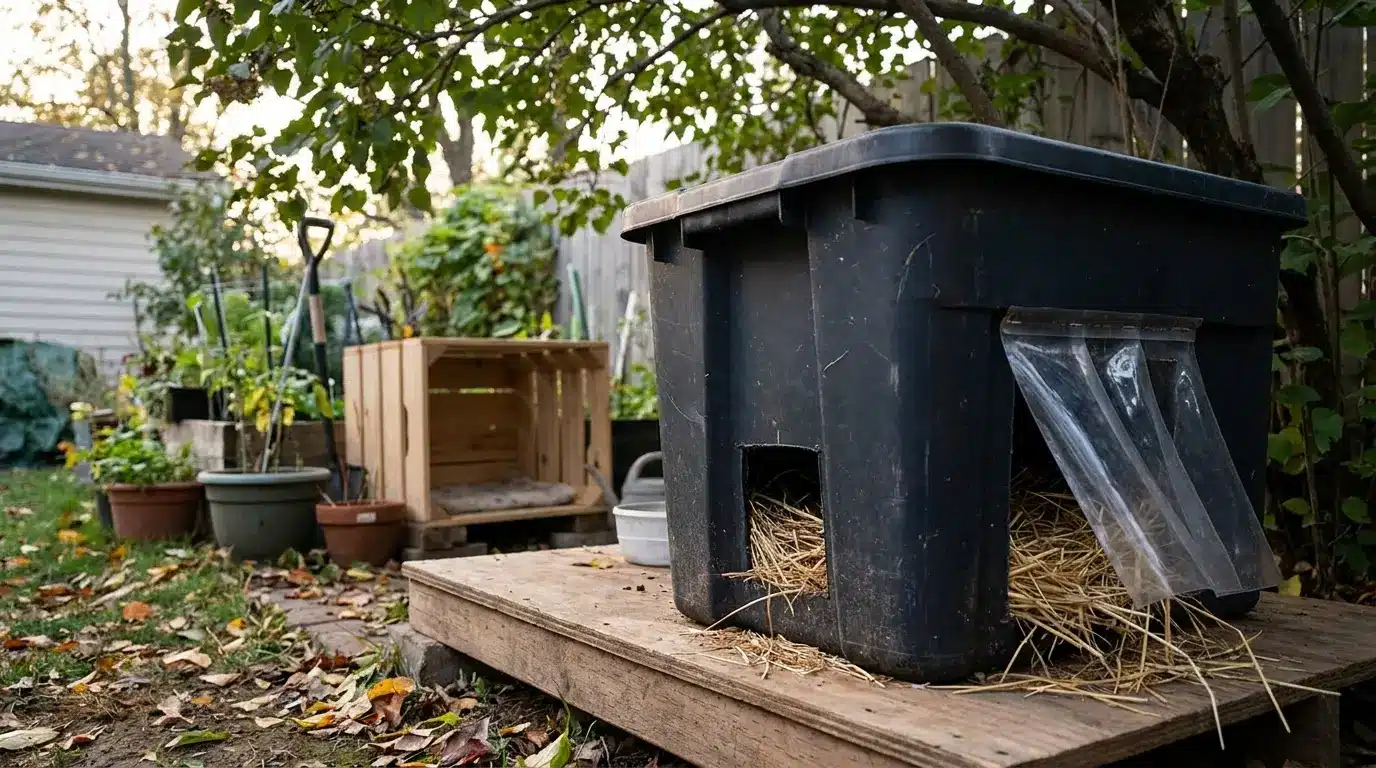
A DIY outdoor cat house that keeps rain out and holds warmth sounds simple. In practice, most first builds fail at the same three points: the bedding gets wet from the bottom up, the entrance lets cold air pour straight in, and the shelter sits directly on ground that pulls heat away all night. Fix those three things before you cut anything, and the rest falls into place. This guide covers the double plastic bin build that most people should start with, plus a full wooden build for anyone who wants something that lasts more than one winter. You’ll get the steps, the supplies, the sizing logic, and the honest mistakes to skip the first time around. Difficulty 2/5 – straightforward cuts and assembly, no advanced tools needed Time 1–3 hours (bin build) or a full weekend (wooden build) Cost $15–$40 (bin build) or $80–$180 (wooden build) Tools Needed Box cutter or jigsaw, tape measure, duct tape or staple gun, marker Skill Required Beginner – the bin build genuinely needs no prior experience Before picking a build type, understand what the shelter actually needs to do. A feral cat shelter should trap body heat, shed rain, resist wind, stay clean to maintain, and sit above cold or wet ground. Every decision below traces back to those five requirements. Which DIY Outdoor Cat House Build Is Right for Your Situation There are three real options. The bin build is right for most people. The wooden build is right if you want something that survives two winters without replacement. The foam cooler option is a short-term emergency fix, not a long-term solution. Build Type Best For Cost Range Durability Build Time Double plastic bin Most readers – first build, multiple cats $15–$40 1–2 seasons with care 1–2 hours Wooden insulated shelter Year-round use, long-term colony care $80–$180 3–5+ years sealed well Full weekend Foam cooler shelter Emergency cold weather, same-day setup $10–$20 One season – cracks under UV 30 minutes A foam cooler shelter gets a cat through a cold night, but the material degrades quickly outdoors and isn’t worth rebuilding. Use it to buy time while you build something more solid. How to Build a DIY Outdoor Cat House: Double Plastic Bin Method This is the build I’d start with if I were doing it now. You need two bins – one large to act as the outer shell, one smaller to sit inside as the sleeping chamber – plus foam insulation to fill the gap between them. The layered design is what makes it work: the outer bin blocks wind and rain, the insulation layer traps warmth, and the inner bin keeps the sleeping area snug and easy to clean. Supplies for the Bin Build One large plastic storage bin (18–25 gallon) with a lid – Rubbermaid or HDX polypropylene hold up better in cold than Sterilite, which tends to crack One smaller plastic bin or styrofoam cooler to fit inside the large bin with a 2-inch gap on all sides Rigid foam insulation board (or bubble insulation like Reflectix) cut to fill the gap Loose straw for bedding – not hay, not blankets, not towels (see below) Box cutter or jigsaw Heavy duct tape or Gorilla tape Marker and ruler Two bricks, wooden blocks, or a small pallet to raise the shelter Optional: a short length of vinyl or rubber to make a door flap Pro Tip: Straw, not hay. Hay absorbs moisture and turns cold and moldy. Loose straw stays drier and lets cats burrow down into it, which is exactly how they hold body heat through a cold night. Alley Cat Allies and the Feral Cat Coalition of Oregon both make this the first rule of outdoor cat shelter bedding. Step 1. Mark and Cut the Entrance On the large outer bin, mark an entrance rectangle on one of the short ends. Keep it 5 to 6 inches wide and 5 to 7 inches tall, positioned about 2 inches up from the bottom edge – the slight height keeps rain from pooling at the threshold and blowing straight in. Cut with a box cutter; if the plastic is thick, heating the blade briefly with a lighter makes the cut cleaner. Make the same size cut in the smaller inner bin, aligned to match the outer opening. Both cuts need to line up when the bins are stacked. Step 2. Cut and Fit the Insulation Measure the floor, walls, and lid of the inner bin, then cut rigid foam or bubble insulation to fit each surface. Foam board works better than bubble wrap because it won’t compress over time and lose its insulating value. Tape each piece into place inside the outer bin before nesting the inner bin in. The goal is a snug layer on all sides, with no large air gaps. Air gaps feel like insulation but actually let cold circulate. Step 3. Nest the Inner Bin Place the inner bin inside the outer bin so the two entrance holes line up. If the inner bin sits too low, add a piece of foam under it as a floor pad. Pack any remaining gaps around the sides with cut foam offcuts – this is where most of the warmth gets lost if it’s left loose. Don’t worry about a perfect finish; the cats don’t care. Focus on blocking air movement. Step 4. Tape the Seams and Lid Run a strip of duct tape around the joint where the outer bin’s lid meets the body. The lid on most bins doesn’t seal tightly enough to keep rain out through a storm. Don’t seal the lid permanently – you need to open the shelter to replace bedding. The tape here is weatherproofing, not bonding; it peels away for cleaning and goes back on afterward. Step 5. Add the Door Flap A loose flap cut from a vinyl placemat, heavy rubber mat, or thick plastic sheeting reduces the cold air entering through the entrance. Tape it across the top of the hole on the outside so it swings freely. This is the step most people skip and then wonder why the shelter feels drafty. One catch: some cats won’t use a shelter with a flap until they’ve checked it out. Tape the flap open for two or three days when you first set the shelter out, then let it fall into place once the cat is used to going in and out. Step 6. Add Straw Bedding and Raise the Shelter Fill the inner bin with 3 to 4 inches of loose straw – enough for the cat to push down into it, not so much that the space feels cramped and the cat can’t turn around. Set the shelter on two bricks, a pallet, or a stack of wooden boards. Getting it 3 to 4 inches off the ground is enough to stop cold from wicking up through the base and to keep the underside dry after rain. How to Build a Wooden DIY Outdoor Cat House The wooden build takes longer and costs more, but it holds up in a way that plastic doesn’t. A well-sealed timber frame with OSB sheathing, foam insulation, plywood interior lining, and roofing felt on top should last several winters without the lid cracking or the sides warping. This is the build to choose if you’re caring for a colony long-term. Before choosing your lumber, it’s worth knowing how different boards behave outdoors – our guide to the best types of wood and their uses covers how species and engineered boards like OSB and plywood hold up over time. Here’s the material list based on the cat shelter build: Scrap 2×4 boards for the main frame 2×6 or 2×8 boards, ripped down if needed Extra siding pieces for the outside walls Foam board insulation for added warmth Plywood pieces for panels or support areas 1-inch wood strips for smaller framing parts Particle board for covering sections, if available Old pallet wood or other spare boards Deck railing spindles or thin wood pieces for roof supports A strong ridge beam, such as poplar or maple Ondura roofing panels for the roof Wood stain or weatherproof sealer Blankets, straw, or bedding for the inside Screws or nails to hold everything together Optional plastic strips for the door openings Most of the shelter can be made from leftover wood and spare materials, so you do not need everything to match perfectly. The main goal is to make it strong, dry, and safe for outdoor cats. 1. Plan a Safe Outdoor Cat Shelter Start by deciding what the shelter needs to do. It should give outdoor cats a dry, quiet, and protected place to rest. Since it will stay outside, it needs to handle cold air, rain, snow, and other animals. A simple plan makes the build easier. Think about the size, where the doors should go, and how the cats will move through the shelter before you start cutting wood. 2. Build a Simple Frame with Two Doors A rectangular frame works well because it is easy to build and gives the cats enough room inside. Add one entrance and one exit so the cats never feel trapped. This is especially helpful for outdoor cats because they like having a quick way out if another animal comes close. The frame does not have to be perfect, but it should be strong enough to hold the walls and roof. 3. Use Baffles to Block Wind and Cold Inside the shelter, add small divider walls near the doors. These baffles let the cats walk in and out, but they stop wind from blowing straight into the sleeping area. This makes the shelter warmer and more comfortable without making it hard for the cats to use. It is a simple idea, but it adds a lot of protection. Small details like this can make the space feel much safer. 4. Finish the Inside for Comfort Once the frame is ready, make the inside cozy and easy to use. Add blankets, bedding, or soft material where the cats can curl up and rest. If there are small raised spots or ledges, cats may enjoy sitting there too. Keep the inside dry and simple so it is easy to clean later. A good shelter should feel safe, warm, and calm without being crowded or hard to maintain. 5. Add the Roof and Set It Up Finish the shelter with a strong roof that keeps rain and snow out. Overlap the roofing pieces so water runs off instead of leaking inside. A small overhang above the doors can also help keep the entrances dry. After that, place the shelter in a quiet outdoor spot and let the cats find it at their own pace. Food nearby may help, but patience matters most Watch the video for a step-by-step walkthrough of the full wooden build: How Big Should an Outdoor Cat House Be? Smaller is warmer. A shelter that fits one or two cats snugly traps far more body heat than a large box with a lot of empty air. The cat should be able to walk in, turn around, and lie down – but it shouldn’t be able to stand up fully with space to spare. That extra height is dead air the cat has to heat all night. Cat Count Best Setup Why It Works 1 cat Small insulated bin, roughly 14″ x 16″ interior Body heat fills the space quickly 2 cats Slightly larger inner chamber, 16″ x 20″ or similar Cats share warmth; snug still beats spacious 3+ cats Two or three separate shelters rather than one large one Multiple small shelters are warmer than one large shelter and reduce territorial conflict Not all feral cats in the same colony will share a shelter willingly, even when they feed together. Building two smaller shelters is usually more effective than building one large one. Where to Place a DIY Outdoor Cat Shelter Placement determines whether the shelter gets used. Cats are more likely to accept a new shelter if it sits near a path or resting spot they already use. A corner against a wall or fence works better than an open location – the solid backing reduces the number of directions a cat has to watch, which matters for skittish ferals. This is the same logic behind positioning any outdoor structure: tucking it against an existing feature in the yard rather than floating it in open space. Our outdoor deck ideas guide covers how to use existing structures to anchor outdoor projects – worth reading if you’re thinking about making the cat shelter part of a larger yard setup. Keep the entrance facing away from prevailing wind and not directly toward the main human foot traffic area. Avoid spots where rainwater pools. Raising the shelter on bricks helps, but a persistently wet location stays wet through and around the base regardless. The shelter should sit somewhere that drains cleanly after rain, has some natural cover overhead if possible, and gives the cat at least one clear exit direction from the entrance. Weather Setup: Cold, Rain, Wind, and Snow The same shelter behaves differently depending on the weather coming at it. These adjustments take a few minutes and make a real difference in how warm the interior stays. Cold weather: Pack the straw full enough that the cat disappears into it when it lies down. If the shelter has a flap, make sure the flap is in place. Insulation does more work when the air gap around it is sealed. Rainy weather: Angle the shelter entrance slightly downward at the front edge – just enough that any water that enters runs out rather than pooling at the threshold. Check the seam tape after heavy rain; once the tape fails, water follows the seam into the insulation layer, and the shelter loses most of its warmth. Windy weather: Turn the entrance to face away from the wind direction. Add weight – a flat stone or brick on top of the lid – to stop the shelter from shifting or tipping. A shelter that moves when a cat is inside will not get used twice. Snowy weather: Check the entrance daily during snowfall. Snow packs into the entrance and can trap a cat inside or lock it out. A short tube entrance – a cylinder cut from a plastic container taped to the bin opening – keeps snow from blocking the hole from the outside. Mild weather: Keep the shelter shaded so it does not overheat during the day. Check for ants, fleas, and rodents more frequently when food is placed nearby, and replace the straw if it feels even slightly damp – mild weather doesn’t dry it out the way cold nights do. Maintaining the Shelter Through the Season A shelter that hasn’t been checked in three weeks is often wet inside and useless. The bedding absorbs moisture from the cat’s breath, condensation on the plastic walls, and any small leaks at the seams. Replace straw whenever it feels damp or compressed – compressed straw has no insulating value left. The Humane Society recommends shelters small enough to retain body heat, while the Hundred Cat Foundation recommends removing all old straw in late spring, letting the shelter air out fully, then refilling with fresh dry straw before the first cold nights in fall. That seasonal reset also gives you a chance to check the foam for compression, the tape for failures, and the plastic for cracks. A cracked bin base will let water in from the ground no matter how well you seal the lid. Check Interval What to Check Weekly Straw dryness, lid seal, entrance blockage, pests near the shelter After every storm Seam tape, base position, bedding wetness, entrance clearance Each season change Full straw replacement, foam condition, lid fit, plastic integrity Replace the shelter If you find mold, soaked insulation, cracked base, or a lid that no longer seals Maintenance is the part most guides skip. A wet shelter is worse than no shelter – a cat that curls up in cold damp straw loses body heat faster than one sleeping in a dry exposed spot. Troubleshooting: When the Shelter Isn’t Working Most problems have a straightforward fix once you know where to look. If a cat has stopped using the shelter or refuses to start, run through this list before rebuilding. Problem Likely Cause Fix Cat won’t enter Flap feels unfamiliar or the shelter is in a new location Tape the flap open for 3–5 days; place a small amount of catnip near the entrance, not inside Straw is wet Water entering through seam, base, or entrance; shelter too low Re-tape all seams, raise the base, angle the entrance slightly downward at the lip Shelter feels cold inside Too much empty space, foam has compressed, or there’s an air gap Add more straw, replace compressed foam, seal any gaps around the lid and entrance edges Water enters at the doorway Entrance faces rain or wind direction Rotate the shelter so the entrance faces away from prevailing weather; add a short covered tunnel extension if needed Shelter shifts or tips Wind, uneven base, or no weight on the lid Place a flat stone or brick on top of the lid; re-level the base blocks Insects or rodents Food placed too close, or damp bedding is attracting pests Move feeding station at least 10 feet away; replace straw and let shelter air out before refilling If a cat stopped using a shelter that was working, check the bedding first. Damp or soiled straw is almost always the reason before any structural problem is. When a DIY Cat House Isn’t Enough An outdoor cat shelter helps healthy adult cats manage cold nights and wet weather. It doesn’t replace veterinary care for sick or injured cats, it can’t protect kittens in extreme cold, and it doesn’t help in flood-prone areas where the ground itself becomes the problem. If a cat appears weak, injured, or unable to stay warm despite a dry shelter, contact a local rescue group, TNR program, or vet rather than modifying the shelter further. If a cat can safely come indoors – even to an enclosed porch, basement, or garage – that’s a better option than an outdoor shelter for any cat that’s already showing signs of cold stress. Frequently Asked Questions About DIY Outdoor Cat Houses Here are the questions I hear most often from people who’ve got materials on the workbench and a skeptical feral cat watching from twenty feet away. How do you build an outdoor cat house for winter? Use a double-bin design with rigid foam insulation between the layers, a small 5–6 inch entrance, loose straw bedding inside the inner chamber, and the whole shelter raised on bricks or a pallet. The layered insulation and small entrance are what make the difference in cold weather – not the size of the bin. How do you make an outdoor cat house out of wood? Build a timber frame, sheath it with OSB, fill the wall cavities with 25 mm foam insulation, line the interior with 6 mm plywood, cover the roof with felt on top of OSB, and seal all exterior joints. Fit a cat flap to the front opening and seal the cladding and roof edges before the first rain hits. How do you insulate an outdoor cat house? Rigid foam board is the most reliable option. It doesn’t compress over time, doesn’t absorb moisture, and provides consistent R-value even when the temperature drops sharply. Fill all gaps – a few loose foam offcuts in an air gap do almost nothing useful. How do you heat an outdoor cat house without electricity? Insulation and body heat together are enough for healthy adult cats in most US climates. A snug shelter with straw bedding, rigid foam insulation, a flap-covered entrance, and no unnecessary air space inside will hold a cat’s body heat effectively through most cold nights without any powered heating. What do you put in an outdoor cat house? Loose straw only. Not hay, not blankets, not towels, not fleece. Fabric and hay both absorb moisture and get cold. Loose straw compresses slightly under the cat’s weight and stays dry much longer. Replace it when it starts to feel damp or flat – it loses its insulating value quickly after that point. Should an outdoor cat house have one door or two? One door holds warmth better. Two doors make sense if predator activity in your area is high – a second exit prevents a cat from being cornered inside. If you add a second entrance, keep both openings small to limit drafts and reduce access for larger animals. Final Verdict Yes – if you do it right and actually maintain it. The double-bin diy outdoor cat house is one of the most effective cold-weather options for community cats, and I say that having seen what happens when it’s built well versus when it’s slapped together with a single bin and a fleece blanket inside. The wooden build is worth the extra weekend if you’re caring for a colony year-round and want something that doesn’t need replacing every spring. Start with the bin version, get the sizing and bedding right, raise it off the ground, and check the straw after every storm. That’s the build that keeps working. If you’re new to this, cut the entrance hole in a spare bin first to get the feel of it – then build the real one.





