


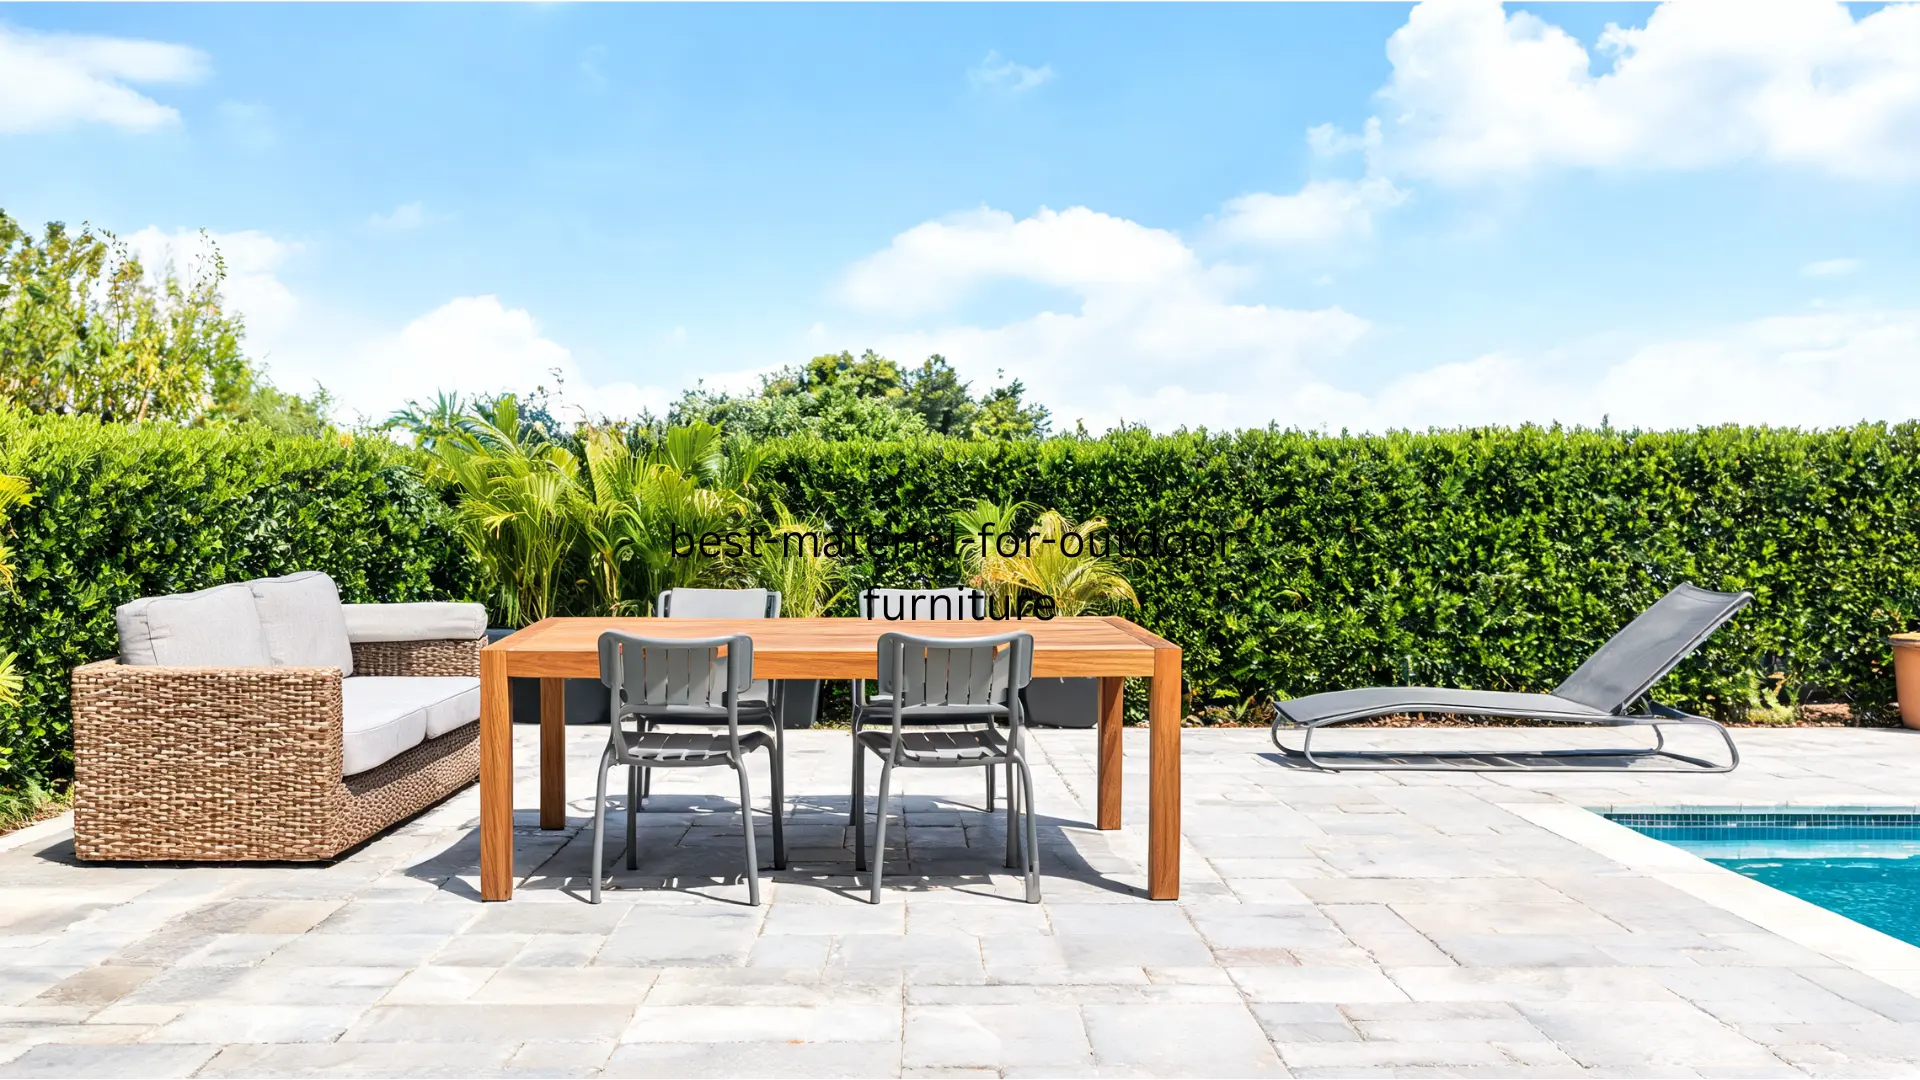
Outdoor furniture looks easy to buy until the weather ruins the wrong material. I know how frustrating it feels when a patio set fades, rusts, cracks, or feels worn out after only one season. The best material for outdoor furniture depends on your climate, budget, maintenance comfort, and where the furniture will sit. A sunny deck, rainy patio, coastal yard, and covered porch all need different choices. This guide helps you compare teak, aluminum, HDPE, resin wicker, steel, fabrics, and other common options. By the end, you’ll know which materials last longest, which ones need care, and what to avoid before you buy. What is the Best Material for Outdoor Furniture? The best material for outdoor furniture depends on your climate and how much maintenance you want. For most people, teak, aluminum, and HDPE/poly lumber are the safest long-term choices because they handle outdoor exposure well and work across many patio styles. Teak is one of the best wood options because it naturally resists moisture and decay. Aluminum is lightweight, rust-resistant, and easy to move. HDPE/poly lumber is very low-maintenance and holds up well against rain, sun, and daily use. If you want the best outdoor furniture for a specific setting, match the material to your weather. Coastal areas need rust-resistant materials. Hot sunny decks need fade-resistant options. Rainy climates need materials that do not swell, rot, or hold water. Comparing the Most Common Outdoor Furniture Materials Not all outdoor materials perform the same way. Some are built for coastal air. Some are fine in a covered porch but fail fast in full sun. Use this table to narrow the field before reading the detail sections below. Material Best For Main Benefit Maintenance Level Powder-coated aluminum Most patios, decks, and poolside spaces Rust-resistant, lightweight, durable Low Teak Premium wood furniture, open patios Long-lasting, naturally weather-resistant Medium Resin wicker Classic patio seating, covered spaces Woven look with better outdoor durability than natural wicker Low Steel Strong outdoor frames Sturdy and durable Medium Wrought iron Windy areas and garden furniture Very heavy and stable High Sling / Textilene Pool loungers and dining chairs Breathable, quick-drying, easy to clean Low HDPE / Polywood-style Coastal, rainy, and snowy climates Resists moisture, insects, cracking, and fading Low Acacia Affordable wood furniture Warm wood look at a lower price than teak Medium-high Eucalyptus Natural outdoor seating Durable hardwood with natural oil content Medium Ceramic Outdoor tabletops Heat-resistant, stain-resistant, easy to clean Low For most outdoor spaces, powder-coated aluminum gives you the best combination of durability, low maintenance, and weather resistance. Teak earns its premium price on open decks where wood aesthetics matter. Ceramic is worth noting for tabletops specifically; it’s heat-resistant and easy to clean, and the table edge profiles available on ceramic tops vary significantly in how they hold up to outdoor use. Everything else depends on your climate, which is where the real decisions start. Best Outdoor Furniture Materials by Weather Climate should drive the material choice before style does. A covered porch has very different demands than a south-facing deck or a coastal yard 100 feet from the water. Weather Condition Best Materials Full sun HDPE, aluminum, teak, solution-dyed acrylic fabric Heavy rain Teak, aluminum, HDPE, resin wicker Humidity Aluminum, HDPE, teak, stainless steel Coastal salt air Aluminum, HDPE, teak, marine-grade stainless steel Windy areas Wrought iron, steel, heavy teak Cold winters HDPE, teak, aluminum Covered patio Wicker, wood, cushioned seating, aluminum The table above is a starting point. The sections below break down each material by how it actually behaves over time, not just how it looks in the showroom. The Best Outdoor Furniture Materials, Ranked by Real-World Performance 1. Powder-Coated Aluminum Powder-coated aluminum is the most reliable all-around outdoor furniture material for most US climates. Aluminum doesn’t rust. The powder coating adds a protective layer that handles moisture, UV, and poolside chemical exposure without flaking or chipping under normal conditions. It’s light enough to rearrange on a deck, but substantial enough to feel solid. Where it earns its place is versatility. Coastal air, humid summers, rainy springs, and full-sun patios all put aluminum through its paces without the rust and corrosion problems you get from untreated steel. The frame won’t swell, crack, or need seasonal sealing. Durability: High Climate: Rainy, humid, coastal, sunny, poolside Budget: Mid-range; strong long-term value Best uses: Sofas, dining chairs, coffee tables, loungers, balcony furniture Watch for: Surface scratches that expose bare aluminum — touch up the coating before moisture gets in If you’re choosing one material for a patio and want to stop thinking about it, powder-coated aluminum is the right call. 2. Teak Teak is the benchmark outdoor wood species because it contains naturally occurring oils that resist moisture, rot, and insects without any finish applied. After a rainy season, the surface stays sound where acacia or pine would show swelling or gray streaking. The trade-off is cost and upkeep expectations; teak isn’t no-maintenance; it’s low-maintenance if you understand what it does over time. Left untreated, teak turns silver-gray. That’s not damage, it’s the natural patina the wood develops as the surface oils oxidize. If the golden color matters to you, plan to oil it once a season. If you don’t mind the silver look, you can leave it alone and the structural integrity stays intact. Durability: Very high Climate: Open patios, decks, uncovered gardens, rainy regions Budget: Premium — the price premium over acacia is real, and usually justified Best uses: Tables, benches, chairs, sofas, loungers Watch for: Grade A vs. Grade B teak varies significantly in oil content and lifespan — verify the grade before buying 3. Resin Wicker Resin wicker gives you the classic woven patio look without the weather problems that natural wicker or rattan bring. The synthetic polyethylene fiber resists water, UV, and decomposition far better than organic alternatives. For best durability, pair it with an aluminum frame rather than steel — the frame material under the weave matters as much as the wicker itself. It performs well in mild-to-moderately humid climates and on covered porches. In extreme coastal conditions or full-sun exposure for years at a stretch, the weave can loosen or fade. Good-quality resin wicker from a reputable manufacturer outperforms budget versions significantly in this department. Durability: Medium to high Climate: Mild, dry, partly covered, moderately humid Budget: Budget to mid-range Best uses: Patio sofas, lounge chairs, conversation sets, covered porch furniture Watch for: Cheap versions unravel at stress points within two seasons — look for tight, even weave and a solid frame 4. Steel and Wrought Iron Steel and wrought iron are the right call when weight is an asset specifically in windy areas where lightweight chairs become a liability. A wrought iron bistro set doesn’t blow over. Neither does a heavy steel dining table. The mass is the feature. Steel is more practical for modern outdoor furniture because it’s strong but lighter than wrought iron. Wrought iron has more decorative potential and a traditional look, but it demands more rust maintenance. In wet climates, chips in the coating expose bare metal fast. Inspect the paint finish before buying and check that the hardware is stainless or galvanized. Durability: High, with proper coating and regular inspection Climate: Windy, dry, covered outdoor spaces, avoid coastal areas without a marine coating Budget: Steel is mid-range; wrought iron is mid-range to premium Best uses: Garden benches, dining sets, bistro chairs, decorative accent pieces Watch for: Rust at the feet and joints first — these areas collect water and are the first to fail 5. Solution-Dyed Acrylic Solution-dyed acrylic is the right fabric for outdoor cushions, upholstered seating, and umbrellas. The difference from standard outdoor fabric is in how the color is applied: the dye runs through the entire fiber rather than sitting on the surface. That’s what makes it genuinely fade-resistant in strong sun rather than just marketed as such. It also handles moisture better than indoor fabric, resisting mold and mildew in humid conditions. Pair it with quick-dry foam and removable cushion covers to maximize lifespan. Sunbrella is the most recognized brand in this category, but any solution-dyed acrylic from a reputable manufacturer gives you the same core protection. Durability: High Climate: Sunny, humid, rainy, poolside Budget: Premium fabric — the cost difference vs. standard outdoor fabric is real and worth it Best uses: Cushions, pillows, upholstered sofas, umbrellas, shade covers Watch for: Even high-quality acrylic breaks down faster if cushions are left soaking wet for extended periods — bring them in during multi-day rain 6. HDPE / Polywood-Style HDPE lumber is dense recycled plastic shaped to mimic wood proportions. It doesn’t absorb moisture, so rain and snow can’t degrade it the way they work on real wood grain. Insects can’t damage it. It won’t crack from freeze-thaw cycles. For uncovered pool decks, lakefront docks, and coastal yards where real wood would need seasonal sealing and inspection, HDPE is the lower-effort, longer-lasting alternative. It’s heavier and more expensive than basic plastic furniture, and that gap in quality is where it earns its price. The color runs through the board rather than sitting on the surface, so fading is much slower than with painted or coated alternatives. The trade-off is that it doesn’t accept stains or develop the natural patina that real wood does. For buyers who want the look and feel of actual wood that weathers and takes oil finishes, HDPE vs. real wood is a different comparison than it first appears. Durability: High Climate: Rainy, humid, coastal, sunny, snowy Budget: Mid-range to premium; significantly better long-term value than basic plastic Best uses: Adirondack chairs, benches, dining chairs, coastal furniture 7. Acacia Acacia is a dense, affordable hardwood that gives you a warm wood look without the price of teak. It performs respectably in dry or partly covered spaces but needs more active maintenance than teak if it’s exposed to regular rain or direct sun. Plan on sealing or oiling it every few months if it lives outside uncovered. The wood varies in quality by source. Some acacia comes well-dried and tight-grained; some is cheaper stock that checks and cracks within two seasons. Pay attention to the finish quality on the piece itself rather than just the species name. Durability: Medium to high (with maintenance) Climate: Dry, sunny, covered, and partly covered spaces Budget: Budget to mid-range Best uses: Dining sets, benches, coffee tables, lounge chairs Watch for: Acacia that ships wet or poorly dried will check and crack regardless of how well you maintain it 8. Eucalyptus Eucalyptus sits between acacia and teak in terms of outdoor performance and price. Its natural oil content helps it resist moisture and insects better than most cheaper hardwoods. It gives a rich, warm wood look and usually costs meaningfully less than teak. Like acacia, it performs best when cleaned and oiled on a regular schedule. Left untreated in full-sun, rainy conditions, it will gray and eventually crack. In covered or partly shaded outdoor spaces, it holds up well with moderate care. Durability: Medium to high Climate: Sunny, mild, covered, moderately humid Budget: Mid-range Best uses: Dining sets, lounge chairs, benches, patio tables 9. Stainless Steel Stainless steel has a clean, modern look and better corrosion resistance than regular painted steel. It works well for dining table frames, contemporary chairs, and modern patio furniture where a sleek metal finish is part of the design intent. In harsh coastal environments, even stainless steel can show surface rust marks if salt and grime accumulate without regular cleaning. Marine-grade (316) stainless holds up better than standard (304) in direct ocean proximity. Either way, wipe it down regularly in coastal conditions and you’ll get many years of clean performance. Durability: High Climate: Sunny, dry, covered, and modern patio spaces; coastal with regular cleaning Budget: Premium Best uses: Dining tables, table bases, modern chair frames, contemporary patio sets What Actually Makes an Outdoor Furniture Material Last Outdoor furniture faces conditions that indoor furniture never encounters: UV exposure, rain, humidity, temperature swings, pollen, bird droppings, and in coastal areas, constant salt air. The materials that hold up are the ones engineered for those conditions, not just marketed as “weather-resistant.” Before choosing, think through these factors against your specific outdoor space: Weather resistance: The material should handle your actual climate — not just fair-weather conditions. Rust and corrosion resistance: Metal furniture needs protective coatings, especially near water. Check what happens to the hardware too, not just the frame. UV protection: Strong sunlight fades fabric, weakens plastic, and dries out wood. UV-stable materials last substantially longer in full-sun positions. Weight and stability: Lightweight furniture is easy to move. Heavier pieces stay put in the wind. Match the weight to the exposure. Maintenance reality: Some materials need wiping down twice a year. Others need oiling, rust inspection, and seasonal sealing. Be honest about what you’ll actually do. Lifespan vs. upfront cost: Cheap furniture replaced every two to three years usually costs more over a decade than mid-range furniture that lasts ten years with basic care. Maintenance Guide by Material Even the most durable outdoor furniture lasts longer with the right maintenance routine. The good news is that most materials only need basic care — the problems happen when maintenance gets skipped entirely. Material What to Do How Often Key Tip Powder-coated aluminum Wash with mild soap and water Every few weeks Touch up any coating scratches before rust gets in Teak Clean with a soft brush; oil only if preserving the golden color Seasonally Letting it turn silver-gray is fine structurally — it’s a natural process Acacia and eucalyptus Clean and oil or seal regularly Every few months Cover or bring in during extended rain Resin wicker Dust between the weave; wash gently with mild soap Monthly Avoid stiff-bristle brushes that can snag the weave Steel and wrought iron Clean and touch up chips or rust spots promptly Monthly in wet climates Use furniture covers during rainy seasons HDPE / Polywood-style Wash with soap and water As needed Avoid abrasive cleaners that can dull the surface Sling and Textilene Rinse, wipe with mild soap, dry fully Every few weeks Check manufacturer guidance before using bleach A consistent basic routine, wiping down before dirt builds up, covering during extended harsh weather, and storing cushions during long inactive periods add years to any material’s lifespan. Outdoor Furniture Materials to Avoid Some materials look fine at purchase and start showing problems within a season or two. These are the ones worth avoiding or treating with caution: Natural wicker: Absorbs moisture, dries out in strong sun, cracks, sags, and unravels. It may hold up on a fully covered porch, but not on an open patio. Choose resin wicker over an aluminum frame instead. Untreated wood: Without a protective finish, it swells, warps, cracks, rots, and attracts insects. Choose teak, sealed acacia, eucalyptus, or cedar instead. Cheap steel: When the paint or coating chips, rust spreads fast. It stains patios, weakens frames, and makes the furniture increasingly difficult to maintain. Choose powder-coated steel, stainless steel, or aluminum instead. Low-grade plastic: It fades, cracks, and becomes brittle in strong UV. It also blows around easily in wind. Choose HDPE, Polywood-style furniture, or powder-coated aluminum instead. Common Buying Mistakes Most outdoor furniture failures trace back to decisions made before the purchase. A few things to check before committing: Mistake What to Check Instead Ignoring the frame material Choose powder-coated aluminum, teak, HDPE, or sealed hardwood Choosing the wrong cushion fabric Choose outdoor-rated fabric like solution-dyed acrylic or olefin Buying poor-quality wicker Choose outdoor-grade resin wicker over an aluminum frame Forgetting about furniture weight Choose heavier frames like teak, steel, or wrought iron for windy spaces Not checking the hardware Choose stainless steel, galvanized, or corrosion-resistant screws and bolts Hardware is the detail most buyers overlook. A solid aluminum frame with cheap zinc screws will show rust at every joint within a couple of seasons. The frame material gets the attention; the hardware is what actually determines whether the piece holds together. Frequently Asked Questions Can outdoor furniture be left outside all year? Powder-coated aluminum, teak, HDPE, and resin wicker handle year-round exposure better than untreated wood or cheap steel. Even so, furniture covers and cushion storage during extended harsh weather meaningfully extend the lifespan of any material. What outdoor furniture material works best for apartments and balconies? Powder-coated aluminum, resin wicker, and compact HDPE pieces work best for balconies. They’re easier to move, fit small spaces, and need minimal maintenance. Avoid heavy wrought iron unless the balcony has a confirmed weight capacity for it. Which outdoor furniture material stays coolest in the sun? Sling and Textilene fabrics stay cooler than dark metal frames or thick cushions. Metal frames heat up significantly in direct sunlight, especially darker finishes. Light-colored cushions and shade structures make a larger practical difference than material alone in hot climates. Is HDPE better than regular plastic for outdoor furniture? Yes. HDPE is thicker, denser, and far more weather-resistant than low-grade plastic. It resists cracking, peeling, UV fading, and insect damage. Regular plastic is cheaper upfront but often needs replacing within three to four years under full sun. Do outdoor furniture cushions need to be stored indoors? Not always, but storing them during heavy rain, winter, or long periods of inactivity extends their lifespan considerably. Solution-dyed acrylic fabric handles moisture well, but extended saturation — weeks of damp storage — breaks down even quality fabric faster than necessary. What hardware should I look for in outdoor furniture? Stainless steel, galvanized, or specifically coated corrosion-resistant hardware at every joint and connection point. Poor hardware fails even when the frame material is solid, particularly in coastal, humid, and poolside environments. Is heavier outdoor furniture always better? No. Heavy furniture stays put in the wind, which is valuable in exposed spaces. But it’s harder to move, store, and clean. Aluminum is a better choice for balconies, small patios, and flexible layouts where you rearrange frequently. Final Verdict Choosing outdoor furniture becomes much easier when you match the material to your real weather, not just the style you like. I would start with your climate first, then compare maintenance, weight, cushion fabric, hardware, and long-term value. The best material for outdoor furniture may be powder-coated aluminum for low-maintenance patios, teak for a premium wood look, HDPE for wet or coastal spaces, or heavier metal for windy areas. You also need to check cushions, screws, coatings, and cleaning needs before buying. A smart choice now can save you money and repairs later. Share your patio setup or check related outdoor furniture guides before you decide.
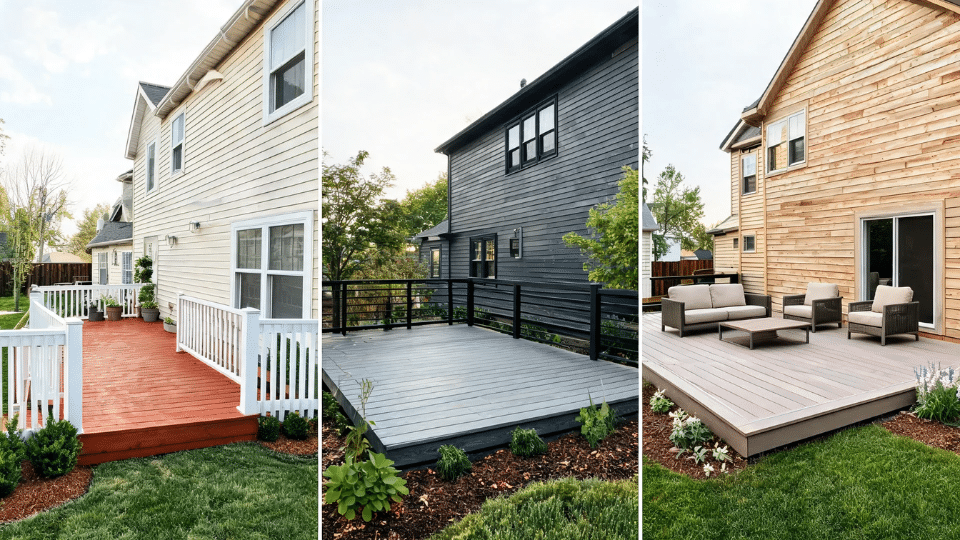
Cost Note: Figures in this article are estimates based on national averages. Actual costs vary significantly by region, contractor, materials, and project scope. Always get at least three quotes before committing to any project above $1,000. Choosing the right deck color ideas can make your outdoor space feel more finished, comfortable, and connected to your home. I like looking past a single sample board because sunlight, siding, trim, railings, furniture, and plants can all change how a color appears outside. The best deck color schemes are complete looks, not isolated shades. They combine boards, borders, fascia, stairs, railings, and decor into a single cohesive style. My aim here is to help you compare warm, cool, light, dark, natural, and modern combinations before you commit to a deck color that lasts. What Makes a Deck Color Combination Work? The deck should read as part of the home’s exterior without copying it. When boards and siding are the same color, everything flattens — there’s no definition, no sense that the deck is a separate space. A clear contrast, even a subtle one, makes both surfaces look more intentional. Railings, fascia, and stairs are the framing. They decide whether the main board color reads as finished or unfinished. A great board color with mismatched trim often looks worse than a mediocre board color with clean, consistent framing around it. Sun exposure is a practical constraint, not just an aesthetic one. Dark deck boards, charcoal, espresso, and mahogany absorb significantly more heat in full sun. On an uncovered south-facing deck in summer, that translates to uncomfortable surface temperatures underfoot. Lighter mid-tones and natural wood colors reflect more heat and hide routine dirt better than either extreme. Color Tone Heat in Full Sun Maintenance Level Best Climate Whitewashed / Pale Low High, shows dirt fast Covered, coastal, shaded decks Natural Oak / Cedar / Light Brown Low to medium Medium, forgives dust and scuffs Most climates, exposed decks Greige / Taupe / Driftwood Gray Medium Low to medium, hides everyday dirt well Most climates, mixed sun and shade Walnut / Mid-Brown Medium Medium, needs sealing to hold depth Most climates, works covered or open Charcoal / Espresso / Mahogany High Medium to high, shows pollen, fading Covered decks, northern climates, shaded yards That table is where to start before you look at any specific combination. Know your sun exposure and your appetite for cleaning before you fall in love with a shade that won’t work for your site. Deck Color Ideas: Combinations That Hold Together Each combination below covers the board color, accent framing, what it pairs with on the house exterior, and what the maintenance reality actually looks like two seasons in. 1. Warm Cedar Boards With White Railings Cedar with white railings is the deck color combination that ages best with the fewest regrets. The boards bring warmth underfoot without tipping into orange; white railings frame the perimeter cleanly and make the space feel larger than it is. It works across seasons because the neutral framing handles almost any furniture color you put against it. One real-world note: white railings accumulate pollen and dust faster than the cedar boards do. Budget a seasonal wipe-down into your maintenance plan. Pairs with house colors: White, beige, cream, sage green, red brick Best for: Traditional homes, farmhouse exteriors, family decks Maintenance: Medium — boards hide dust well, but railings need regular attention 2. Driftwood Gray Boards With Black Railings Driftwood gray is the most low-maintenance of the gray deck stain colors in real outdoor conditions. It reads as weathered and natural rather than painted, which means it doesn’t look tired when it fades slightly. Black railings add definition without weight — this combination works particularly well when the house has dark window frames or a charcoal roof line, because the railing ties those details together. Pairs with house colors: White, navy, light gray, blue-gray, stone exteriors Best for: Modern homes, coastal decks, townhomes, updated ranch houses Maintenance: Low to medium — gray boards hide light dirt, black railings show pollen faster 3. Walnut Boards With a Dark Picture-Frame Border Two-tone deck board colors in walnut and a darker border are the move on larger platforms where a single flat shade makes the deck look like a slab. The walnut surface brings warmth; the border defines zones and edges without requiring a second railing color. This is one of the better composite decking color combinations because composite holds two tones consistently in ways that natural wood sometimes doesn’t over time. Pairs with house colors: Cream, tan, brick, stone, warm white exteriors Best for: Large decks, dining zones, craftsman-style houses Maintenance: Medium, border hides edge scuffs, walnut surface needs sealing to avoid dullness 4. Light Gray Boards With White Trim and Fascia Light gray boards with white trim are the right house and deck color combination for small spaces or shaded decks that would absorb a darker tone. The gray keeps the surface visually recessive; it doesn’t compete with planters, furniture, or landscaping — while white fascia sharpens the perimeter. On a north-facing or tree-shaded deck, this combination keeps the space from going dark and heavy in low light. Pairs with house colors: Navy, white, pale gray, soft blue, cool-toned siding Best for: Small decks, coastal homes, modern farmhouse exteriors, shaded spaces Maintenance: Medium to high, light colors show mud, leaves, and stains sooner 5. Charcoal Decking With Warm Wood Furniture Charcoal deck boards look intentional and current, but they need the right conditions to hold up. Cover is the biggest one — on an uncovered south-facing deck, dark composite absorbs heat to the point of being uncomfortable in July. On a covered deck or in a northern climate, charcoal works well paired with warm teak or acacia furniture, which prevents the space from reading as cold and industrial. Keep decor simple: cream cushions, natural fiber rugs, understated lighting. Pro Tip: If you’re set on a dark deck color but concerned about heat, look for composite boards with lighter-colored flecks or multi-tonal grain. They absorb less heat than solid-dark boards and hold their color better over time. Pairs with house colors: White, black, light gray, stone, warm wood accents Best for: Covered decks, modern homes, evening entertaining spaces Maintenance: Medium, hides some stains but shows pollen and heat marks in sunny areas 6. Natural Oak Deck With Black Metal Accents Natural oak is the deck color that does the most without trying. It reads as warm and honest, it doesn’t compete with landscaping, and it ages gradually rather than abruptly. Black metal railings or balusters give it a modern edge without switching the whole register of the space to gray. This combination is the right answer for anyone who wants a house and deck color combination that looks updated without looking trendy. For the furniture pairing, look at natural teak or powder-coated black frames — both hold up and extend the palette. Pairs with house colors: White, beige, soft gray, black trim, cream siding Best for: Transitional homes, modern farmhouse decks, mixed wood-and-metal designs Maintenance: Medium — lighter wood tones need cleaning where dirt gathers around railing bases 7. Greige Boards With Dark Brown Fascia Greige is the deck stain color that earns its keep in mixed-material exteriors. Stone foundations, cedar shingles, stucco panels, greige reads as warm or cool depending on what’s beside it, which means it doesn’t fight with either undertone. Dark brown fascia grounds the perimeter and stops the boards from looking washed out. This is a genuinely low-drama combination that holds up across furniture changes and seasonal decor shifts. Pairs with house colors: Beige, taupe, cream, stone, warm gray exteriors Best for: Transitional homes, medium decks, mixed-material exteriors Maintenance: Low to medium — greige hides dust well, dark fascia disguises edge scuffs 8. Espresso Brown Deck With Cream or White Railings Espresso deck boards work best when the deck gets some shade and the house exterior is lighter. The dark surface grounds the space, while cream or white railings prevent it from reading as a single heavy mass. On an open south-facing deck, espresso will absorb significant heat and show fading faster than mid-tone brown options. Under a pergola or in a canopy-heavy yard, it holds its depth and creates a rich contrast against a cream or beige house. Pairs with house colors: Cream, white, beige, tan, pale stone exteriors Best for: Traditional homes, shaded decks, formal outdoor seating areas Maintenance: Medium to high — espresso shows dust, heat marks, and scratches faster in full sun 9. Coastal Blue-Gray Deck With White Furniture Coastal blue-gray is a specific kind of deck board color, not quite gray, not actually blue, but with enough of a cool undertone to feel connected to water, sky, or bleached wood. It reads differently at different times of day: cooler in the morning, warmer in the afternoon light when the undertone shifts. White furniture sits cleanly against it without creating glare. This deck color combination belongs on cottage, lake house, or cape-style exteriors; it reads as forced on a suburban colonial with tan brick. Pairs with house colors: White, pale blue, soft gray, weathered wood, light stone Best for: Coastal homes, lake houses, cottage decks Maintenance: Medium — muted blue-gray hides light dirt, but white furniture needs more frequent wiping 10. Brown Deck Boards With Black Railings and Fascia This is the deck paint color combination that updates a traditional ranch or colonial exterior without replacing the material. Brown boards keep the warmth and familiarity that those house styles depend on; black railings and fascia sharpen everything and tie in dark window frames or a metal roof. The contrast reads as current without requiring a full exterior overhaul. It also pairs well with almost any outdoor furniture choice, which gives you more flexibility down the line. Pairs with house colors: White, cream, tan, brick, warm gray exteriors Best for: Traditional homes, ranch houses, mixed classic-modern styles Maintenance: Medium — boards hide daily wear, black railings and fascia show dust or pollen 11. Soft Sage Deck With Natural Wood Accents Sage deck boards are not for every yard, they earn their place when the surrounding landscape does some of the work. Mature trees, dense planting, or a garden bed running along the deck edge make sage read as intentional and organic. In a bare, concrete-bordered yard, the same color looks out of place. Natural wood furniture, slatted privacy screens, or cedar planters anchor the color and prevent it from looking like it belongs indoors. Keep the palette to three elements: sage boards, natural wood accents, and one neutral (cream or white) for cushions or trim. Pairs with house colors: Cream, white, beige, natural wood, cottage-style exteriors Best for: Garden decks, cottage homes, shaded yards, plant-heavy outdoor spaces Maintenance: Medium — sage can hide light dust, but green undertones look dull if cleaning is skipped 12. Taupe Deck With White Railings and Stone Details Taupe sits between brown and gray without committing fully to either, which makes it one of the more versatile outdoor deck color schemes for homes with mixed exterior materials. It reads as warm next to cream siding and neutral next to gray stonework. White railings keep the structure from getting heavy. Where stone steps, a stone column, or a stone foundation wall are already in place, taupe deck boards tie the materials together in a way that plain brown or plain gray often doesn’t manage. Pairs with house colors: White, cream, beige, stone, warm gray exteriors Best for: Small to medium decks, patios with stonework, relaxed seating areas Maintenance: Low to medium — taupe hides dust and footprints well, white railings need regular wiping 13. Gray Main Boards With a Charcoal Border Gray boards with a charcoal border are a two-tone composite decking color combination that reads as designed rather than defaulted to. The main field stays soft and usable; the border defines the footprint and guides the eye. This approach works particularly well on rectangular decks where a single flat color emphasizes the plainness of the shape. The charcoal border also masks edge wear — scuffs and dents along the perimeter are the first signs of aging on any deck, and a darker border color absorbs that damage quietly. Pairs with house colors: White, light gray, navy, black trim, cool-toned exteriors Best for: Modern homes, townhomes, rectangular decks Maintenance: Medium — gray boards hide light dirt, charcoal border shows dust in high-pollen areas 14. Mahogany Finish With Bronze or Black Details Mahogany’s red-brown depth earns its premium price point only when the surrounding materials support it. Cream siding, warm stone, or traditional brick creates the contrast the color needs to read as rich rather than heavy. Bronze hardware and railing details add warmth at the joints; black details are a sharper, more modern take on the same combination. The failure mode for mahogany deck boards is neglect; without regular cleaning and sealing, the red undertones fade to a washed-out brown. If the original stain has already broken down, understanding whether you can paint over stained wood changes what the remediation options actually are. Pairs with house colors: Brick, cream, beige, stone, warm white exteriors Best for: Traditional homes, formal decks, covered porches Maintenance: Medium to high, shows fading and scratches without regular sealing 15. Whitewashed Deck With Soft Neutral Decor Whitewashed boards reflect light better than any other deck paint color, which is exactly why they belong on covered decks where the ceiling would otherwise make the space feel dim. Beige cushions, cream umbrellas, and woven furniture in natural fiber extend the palette without adding busyness. On an open, uncovered deck, pale finishes show every leaf stain, tracked footprint, and pollen bloom, which means cleaning stops being optional and becomes weekly. For high-traffic family decks, whitewash is the wrong direction regardless of how good it photographs. Pairs with house colors: White, pale gray, soft blue, beige, coastal-style exteriors Best for: Covered decks, small decks, coastal homes, shaded outdoor lounges Maintenance: High — shows dirt, mud, leaf stains, and furniture marks fast How to Choose the Right Deck Color for Your Home Start with the exterior before you start with the deck. Pull up photos of your siding, trim, roof line, and any stonework or brick near the deck. The deck color ideas that hold together long-term are the ones chosen in context, not in isolation at a showroom. Work through these four questions in order: 1. What is the undertone of your siding? Warm siding (cream, tan, yellow-beige, red brick) pairs better with warm board colors (cedar, walnut, oak, brown). Cool siding (gray, white with blue or green undertones, stone) pairs better with cool-toned boards (driftwood gray, light gray, taupe, coastal blue-gray). Clashing undertones make a deck look like it was chosen separately from the house — because it was. 2. What direction does your deck face? South-facing decks in full sun get hot. Dark deck boards that look dramatic in a photo become a practical problem in July. North-facing or tree-shaded decks can carry darker tones without the heat penalty and actually benefit from them since lighter colors can look washed out in low light. 3. How is the deck used? High-traffic family decks with kids, dogs, and frequent entertaining need mid-tone forgiving colors — walnut, taupe, greige, driftwood gray. Low-traffic spaces or covered entertaining areas can handle pale or very dark finishes without the maintenance becoming a problem. 4. Have you tested samples in real light? The step most people skip. Get physical samples, hold them against your actual siding, and check them at 8 a.m., noon, and 6 p.m. Board colors that look balanced in morning and afternoon light are almost always safer picks than ones that only shine in one condition. For anyone still weighing which structure makes the most sense for their outdoor space before finalizing colors, the outdoor deck ideas cover layouts, materials, and how to design for the way you actually use the space at different times of day. Common Deck Color Mistakes Worth Avoiding The most expensive mistakes are the ones made before the first board goes down. These are the ones I see most often on decks that looked fine on paper. Picking the board color before the full palette. Railings, fascia, stairs, furniture, and planters all affect the final result. Choose the system, not just the boards. Matching the deck too closely to the house. Slight contrast reads as intentional. Exact match reads as flat. Even a one-tone shift in value between siding and boards is enough to give the deck its own presence. Going dark without accounting for heat. Charcoal, espresso, and mahogany all absorb heat. On an exposed deck in a warm climate, surface temperatures on dark boards can be significantly higher than the surrounding air temperature on a sunny afternoon. Using three or more deck board colors at once. One main color, one framing or border color, and one accent from the furniture or railings is the ceiling. More than that competes with itself. Testing samples only indoors or only on the chip. Outdoor light shifts undertones. A sample that looks purely gray indoors may read as blue or green outside. A brown that looks neutral in the showroom may pull orange against your specific siding. If you’re planning skirting alongside the color, the deck skirting ideas that include finishes and materials that hold up under the deck, and how to match them to the board color you’ve chosen above. Frequently Asked Questions What is the most popular deck color? Gray and brown remain the most widely chosen deck board colors in the US. Within gray, driftwood and light gray lead; within brown, natural oak and walnut tones are the most common. Multi-tonal composite boards that mimic natural wood grain have gained significant share because they hold color better than solid single-tone options. Should a deck be lighter or darker than the house? Either works, but the contrast needs to be deliberate. A darker deck grounds a pale house and gives the structure weight. A lighter deck softens a dark exterior and opens up the space visually. Matching exactly — same tone, same saturation — is the outcome to avoid, because it flattens both surfaces. What deck color goes with a white house? Nearly any deck board color works against white siding, which is why white houses give you the most flexibility. Warm wood tones (cedar, oak, walnut) are the most traditional pairing. Gray tones (driftwood, light gray, taupe) give a more modern or coastal result. Black or charcoal boards against white siding create maximum contrast for a contemporary look. What deck color works best with black railings? Cedar, walnut, natural oak, taupe, light gray, and brown all work well against black railings. The board color needs enough warmth or lightness to contrast the railing without darkening the whole deck. Avoid pairing black railings with dark espresso or charcoal boards — the combination loses definition, and the railing disappears. Can I mix composite deck colors? Yes, and for larger decks, it often produces a better result than a single flat color. Use one color for the main field and a second for the border, stairs, or fascia. Keep the undertones in the same family — mixing warm and cool tones across the same deck platform rarely resolves cleanly, even if both colors look fine individually. What deck color is easiest to maintain? Greige, taupe, and driftwood gray are the most forgiving in real-world conditions. They sit between the extremes that cause maintenance problems — pale enough not to absorb excessive heat, mid-tone enough to hide routine dirt, dust, and pollen without requiring frequent cleaning. What is the best deck color for a small deck? Light to mid-tone colors make small decks read as larger. Light gray, natural oak, and taupe all reflect enough light to keep a compact space from feeling enclosed. Dark boards on a small platform emphasize the confined footprint. If you want a darker accent, limit it to the border or fascia, not the main field. Does deck color affect home resale value? Neutral, well-maintained deck board colors in natural wood tones and mid-range grays generally show better at resale than highly specific or trendy choices. According to Remodeling Magazine’s Cost vs. Value Report, a wood deck addition typically recoups 50 to 75% of its cost at resale — how the deck looks and how well it was maintained matter more than the specific color chosen. Final Verdict The best deck color ideas come from planning the entire outdoor space, not from choosing a single attractive shade. Boards, borders, railings, fascia, furniture, sunlight, and cleaning habits all shape the final result. Warm wood combinations feel classic, gray-and-black pairings look sharper, and softer tones like sage, taupe, and blue-gray create a calmer mood. I always trust the color that looks balanced beside the real house, not just the sample card. If these deck color schemes helped you narrow your choices, comment with your exterior color, and I’ll suggest a pairing worth testing. Sources Remodeling Magazine, Cost vs. Value Report (2024) — deck addition resale value data TimberTech composite decking product documentation — color and heat performance specifications Benjamin Moore Woodluxe Exterior Stain product line — stain color references

An outdoor wedding has a charm that a ballroom just cannot copy. You get sunlight, fresh air, and a setting that already feels sweet before you add a single flower. The best outdoor wedding ideas let your venue carry the mood while you add smart touches that make guests feel cared for. Think cute seating, soft lighting, pretty tables, shade, drinks, and weather plans that don’t ruin the vibe. I have grouped the ideas by location, theme, budget, and weather, so you can pick what fits your day and leave the rest. Because yes, your wedding can look dreamy and still feel easy for everyone. What Are Outdoor Wedding Ideas? Outdoor wedding ideas are the decor, layout, comfort, and planning decisions made for open-air wedding spaces. They differ from indoor planning because every element has to perform against sun, wind, uneven ground, heat, insects, sound, and possible rain. A centerpiece that sits flat inside will tip on a hillside. Fabric that looks beautiful in a showroom blows across a beach aisle. That is why site conditions come first. Once you understand the ground, the exposure, and the shade pattern, you can choose flowers, seating, lighting, signage, and guest comfort details that actually fit the space. The National Weather Service Event Ready Guide notes that outdoor events should account for hazards including lightning, wind, and heat, not just aesthetics. Strong outdoor wedding planning makes the day look good and keeps everyone safe from start to finish. Outdoor Wedding Ideas by Location Your venue sets the tone for every decision that follows. Location determines what wind speeds to plan for, what ground surface you are dealing with, what permits apply, and how much the natural backdrop does for you before you spend a dollar on decor. Work through these by site type and pick what fits. 1. Backyard Wedding Under a Statement Tree A large tree is one of the strongest natural ceremony backdrops available. Hang fairy lights or lanterns from the branches, line the aisle with scattered petals or an outdoor rug, and the space largely styles itself. Keep decor light so the tree remains the focal point and the area stays open for guests to move through. Pro Tip: Check the root area before placing chairs. Surface roots and uneven ground are the two most common trip hazards at backyard tree ceremonies. Walk the site with chairs in position at least a day before. Best for: Small, intimate backyard weddings with a built-in natural focal point. 2. Garden Wedding Aisle With Potted Plants Lining the aisle with potted flowers, herbs, or trailing greenery is more practical than it looks. No single-use cut florals, and every pot pulls double duty across the day. Herbs like rosemary and lavender add scent as guests walk to their seats. Move pots to reception tables afterward or hand them out as living favors. Repot into matching terracotta beforehand for a consistent look. Best for: Spring and summer garden weddings that feel intentional rather than assembled day-of. 3. Beach or Lakeside Ceremony With Low Decor Low floral pieces, driftwood, shells, woven baskets, and soft draped fabric all hold their own near water. Tall structures tip in coastal breezes, so keeping everything ground-level is not just an aesthetic choice — it is the practical one. Stake or weigh every structure into the sand before the ceremony starts. Coastal winds test anything unsecured within the first ten minutes. Best for: Coastal ceremonies where the water view should stay front and center. 4. Forest or Woodland Reception With Long Tables Long wooden tables between the trees, moss accents, candles in glass covers, earthy linens, and soft pathway lighting are what make this setting work. Glass candle covers are not optional — open flames and forest-floor debris are a fire risk. Mark pathways with solar lanterns so uneven woodland ground stays visible once light drops after dinner. Best for: Nature-focused couples who want rustic outdoor reception ideas with a dinner-party feel. 5. Vineyard or Farm Wedding With Natural Backdrops Whiskey barrel display ideas translate naturally to farm and vineyard settings, where barrels, wood farm signage, wildflowers, and linen runners already belong. The venue delivers the visual backdrop on its own; restraint is the smartest decor move you can make. Add lighting for the evening and let the landscape carry the rest. Keep decor minimal so vine rows or open barn structure stay visible throughout the day. Best for: Rustic countryside receptions where the scenery does the heavy lifting. 6. Park or State Park Ceremony With Picnic-Style Details Picnic blankets, folding chairs, simple florals, and light catering make a park wedding feel considered rather than improvised. It is one of the most budget-friendly settings available — the location fee is low or free, and natural surroundings replace most of the decor budget. Check permit requirements and noise rules early. Many parks have specific restrictions on setup times, staking, and amplified sound that will change your plan if you find them late. Best for: Couples planning an outdoor wedding on a budget that still feels relaxed and personal. 7. Rooftop or Terrace Wedding With Skyline Views Cocktail-style seating, minimal florals, clear acrylic signage, and low centerpieces all suit rooftop spaces. Wind is the main challenge at height, so choose heavy bases for every structural element and test signage stability before the day. Confirm elevator access, load limits, and a nearby indoor rain backup before signing a venue contract. The city skyline at golden hour costs nothing extra and does more visual work than almost any decor you could bring in. Best for: Modern couples who want city-light photography and a clean outdoor setting. 8. Courtyard Wedding With Stone, Fountain, or Arch Details A stone courtyard with a fountain, archway, or decorative gate provides built-in structure most outdoor venues lack. Candlelight reflects off stone well in the evening and does most of the styling work without additional spend. Courtyard outdoor wedding decor works best when you lean into the architecture rather than covering it. Use candles and climbing greenery to warm up hard surfaces and make the space feel welcoming rather than austere. Best for: Formal-feeling outdoor decoration in a compact space with built-in character. Outdoor Wedding Ideas by Theme Theme is the visual language of the day. The ideas below cover the most common outdoor wedding aesthetics, with the specific elements that make each one work at a real venue rather than a styled shoot. 9. Rustic Wood and Wildflower Setup Wooden benches, wildflower jar centerpieces, burlap-style runners, stacked crates, and handwritten signs read as rustic without effort. This style works at every budget level because the materials are simple and the natural setting adds most of the texture. The same open-barn aesthetic that defines good barndominium interior design translates directly to a farm wedding layout — exposed wood, honest materials, nothing covering what the structure already gives you. Use seasonal flowers so colors fit the space and costs stay low. Best for: A relaxed, natural look without a significant floral budget. 10. Garden Party Wedding With Floral China and Lawn Games Floral plates, pastel linens, parasols, croquet sets, bocce balls, and a lemonade bar give a garden party wedding its character. This format works best when shade covers enough of the space to keep guests comfortable during longer social hours. Add shade umbrellas near lawn game areas so guests actually use them through the afternoon rather than retreating early. Best for: Daytime summer celebrations where guests can roam, mingle, and play freely. 11. Boho Outdoor Lounge With Rugs and Low Seating Outdoor rugs, poufs, rattan chairs, pampas grass, macrame hangings, and layered textiles give a boho lounge its warm, collected feel. Placement matters as much as the pieces themselves. A lounge zone far from the action becomes a quiet corner only a few guests use. Position clusters near the bar or dance floor to keep them active throughout the evening. Mix rug patterns and textures but hold to one color palette so the look reads intentional. Best for: Relaxed receptions where guests should feel comfortable enough to stay into the evening. 12. Modern Minimalist Outdoor Wedding White chairs, clear acrylic signage, single-color florals, sleek table surfaces, and deliberate negative space define this style. The rule here is simple: adding more is almost always wrong. Pick one strong focal point — the arch, the arrangement, or the floral piece — and let everything else support it without competing. This look requires more discipline than budget. Best for: Couples who want a clean, considered look where every element earns its place. 13. Candlelit Night Wedding String lights overhead, lanterns on tables and pathways, hurricane candles on chairs, and lit garden paths build atmosphere after dark that no daytime decor can replicate. Outdoor wedding lighting like this shifts the entire feel of a space once the sun drops. Use enclosed glass holders or LED candles in windier spots, and check venue flame rules before finalizing any lighting plan. Best for: Evening outdoor weddings where lighting is the primary design element. 14. Mediterranean Citrus and Herb Tablescape Lemons, oranges, olive branches, rosemary, terracotta pots, blue glass, and white linens all work together in this palette. Real fruit and herbs add color alongside flowers, so you need fewer florals overall — making this one of the more affordable long-table setups. Source citrus in bulk from a wholesale market the week before to keep costs low. It works especially well at afternoon receptions where natural light picks up every detail on the table surface. Best for: Summer outdoor table decor that uses produce and herbs as part of the design. 15. Vintage Picnic Wedding With Mismatched Seating Mismatched chairs, picnic baskets, lace cloths, bud vase centerpieces, and retro drink stations make this style feel personal rather than assembled wholesale. Thrift stores, Facebook Marketplace, and family attics are the best sources for this kind of setup. Check every chair for stability before guests sit, particularly on uneven grass or gravel surfaces where legs can rock unexpectedly. Best for: DIY outdoor wedding ideas that feel personally assembled rather than rented. 16. Eco-Friendly Outdoor Wedding Decor Rented decor, potted plants, reusable signage, compostable tableware, locally sourced flowers, and plastic-free favors all reduce waste without dropping visual quality. Eco-friendly wedding decor has improved significantly, and the best rental options now look as good as anything bought new. Explore the rental market early — quality pieces book out fast during peak season. Best for: Couples whose planning choices should match the outdoor setting they chose for a reason. Outdoor Wedding Ideas by Budget A tighter budget does not mean a smaller result — it means being specific about where the money goes. These ideas show exactly which investments read as intentional and which ones you can skip without the room noticing. 17. DIY Ceremony Arch With Fabric and Greenery A rented metal frame, soft draped fabric in one color, and a mix of greenery with a few statement florals at the corners will photograph well and hold up on a modest budget. If you are already working on other DIY mirror frame projects for the reception, the same framing and finishing skills transfer directly to arch construction. Use ground stakes or weighted bases to secure the arch, particularly in open or wind-exposed areas. Best for: Budget-conscious couples who need the ceremony backdrop to look full and finished. 18. Create a Rug-Lined Ceremony Aisle A rug-lined aisle makes a simple outdoor ceremony feel planned without heavy floral work. Layer two or three outdoor rugs down the aisle, or place one larger rug at the altar. Add small flower pieces or lanterns along the edge to define the space without covering the ground entirely. Use rugs with non-slip backing so they stay flat on grass, gravel, or packed soil when guests walk the aisle. Best for: Budget ceremonies that need shape, color, and a clear walkway without floral spend. 19. Use String Lights as the Main Decor String lights over dining tables, wrapped around trees, framing the dance floor, and lining garden paths give a backyard space a finished look at genuinely low cost. This outdoor wedding lighting investment lifts the atmosphere of a whole venue without a large spend and works in almost every setting. Use outdoor-rated cables and test all lighting runs at night before the wedding day — what looks adequate in the afternoon can run dark once the sun drops. Best for: Backyard receptions where lighting coverage across a large space is the priority. 20. Wooden Crates and Barrels for Displays Stacked wooden crates work well for cake displays, welcome drink stations, program holders, favor tables, and dessert bars. Stack at mixed heights so the display reads styled. Barrels anchor larger stations and add warm, rustic texture at very low cost. Sand and seal raw crates beforehand so they don’t snag linens or catch on clothing when guests reach across the display. Best for: Rustic budget setups where height variety adds visual interest without extra spend. 21. Simple Printed Signage Instead of Custom Builds Welcome signs, seating charts, bar menus, and directional arrows can all be printed, framed, and placed on stands for a fraction of the cost of hand-lettered alternatives. Printed outdoor wedding signage looks clean when typography is clear and framing is consistent across all pieces. Laminate any outdoor-facing signs before the day — it is a small step that prevents a lot of weather-related stress mid-ceremony. Best for: DIY outdoor wedding planning where signage needs to look polished without high spend. 22. Long Tables With Runners Instead of Full Linens Exposed wood table surfaces with a gauze or linen runner down the center, a few candles, and small florals give most of the impact of a fully draped table at much lower cost. The exposed wood adds warmth and texture that a full linen cover would hide. It reads as a deliberate design choice rather than a cost-cutting one — particularly at farm, vineyard, and backyard settings where the wood surface is part of the look. Best for: Affordable outdoor reception styling that still looks genuinely pulled together. 23. Thrifted Bud Vase Centerpieces Thrifted glass bottles, single-stem flowers, and grouped vases at mixed heights spread floral color across a table without large arrangements. Knowing how to cut flowers for vases properly extends display life significantly; a diagonal cut and clean water changes every two days keep stems fresh through a full-day outdoor event. Group more vases with fewer stems each so the spread reads fuller across the whole table surface. Best for: Small outdoor weddings where floral coverage across multiple tables is the priority. 24. Budget-Friendly Food Stations Taco bars, pasta stations, picnic boxes, lemonade stands, and dessert tables all work well outdoors and typically cost less per head than a plated dinner. Food stations encourage guests to get up, circulate, and mingle in a way a seated meal doesn’t. Keep cold food in coolers with ice throughout service — food safety at warm-weather outdoor events requires active management, not just a plan on paper. Best for: Casual outdoor receptions where guests can eat, move, and mingle freely. Outdoor Wedding Ideas by Weather Weather is the one variable you cannot control, and designing around it is not optional — it is the job. These ideas cover heat, rain, wind, and cold so the day holds up whatever the conditions turn out to be. 25. Shade-First Ceremony Layout Position chairs under existing trees, inside a tent, or under sail shades during the ceremony window. Shade reduces sun exposure risk significantly, and that matters especially if the ceremony runs longer than planned. A shade-first seating layout is the single most effective summer comfort move you can make. Check the shade pattern at your venue at the exact ceremony time — morning and afternoon shade differ significantly from what you see when you visit at noon. Best for: Summer ceremonies where direct sun is the biggest guest comfort problem to solve. 26. Stylish Tent or Sailcloth Canopy Sailcloth tents with translucent fabric tops, clear-top tents that preserve the outdoor feel, and garden canopies with soft side draping all give coverage without the industrial look of a standard event tent. Book the tent as part of the original design brief, not as a last-minute weather call. Guests should never be able to tell it was added as a backup. A well-chosen sailcloth tent is a design element on its own — style it that way from the start. Best for: Outdoor tent coverage and rain backup plans that need to look intentional, not reactive. 27. Rain-Ready Aisle and Flooring Wood platforms, rented event flooring, gravel paths, and outdoor rugs with non-slip backing all prevent the muddy-shoes-and-sinking-heels situation that follows unexpected rain. Outdoor wedding flooring defines the ceremony or dance floor space with a clean, finished edge while solving the ground surface problem underneath. Covered walkways between ceremony, dining, and restroom areas matter as much as the flooring itself. Rent flooring early — it books out quickly for spring and fall seasons. Best for: Rain backup plans where grass is the main surface and mud is a real risk. 28. Heat-Friendly Welcome Station A welcome table stocked with water, hand fans, sunscreen, cold towels, and electrolyte drinks handles guest comfort from the moment they arrive. This detail gets noticed and remembered more than most floral arrangements. Plan specifically for elderly guests and young children, who are at higher risk in extreme heat. A summer wedding welcome station at a midday or early afternoon event is not a nice-to-have — it is basic guest care. Best for: Summer ceremonies where guests arrive already warm before the ceremony begins. 29. Wind-Proof Decor Plan Weighted signage, low centerpieces, staked arches, heavy candle holders, and fabric clips all reduce the risk of decor becoming hazardous or chaotic mid-ceremony. A wind-proof wedding decor plan is one of the most important steps for open-air venues. Test every element at the actual site before the day. Hand out programs right before the ceremony starts so they don’t scatter across the lawn beforehand. Best for: Beach, rooftop, hilltop, and open-field ceremonies where wind is a consistent factor. 30. Cool-Weather Comfort Baskets Blankets, pashminas, hand warmers, hot drinks, patio heaters, and a fire pit give guests the warmth to stay comfortable and keep celebrating into the evening. Group heaters near seating and the dance floor so guests feel the benefit without hunting for it. These are the details guests mention afterward because they felt looked after. Check fire pit and heater rules with the venue early — restrictions vary significantly between spaces. Best for: Fall, late evening, mountain, and early spring weddings where temperatures drop after sunset. 31. Bug-Control and Evening Comfort Station A small basket near the entrance or bar stocked with bug spray, citronella candles, and personal fans lets guests manage without making it feel like anyone needs to make an announcement about it. Choose unscented bug spray and keep all food covered with screened displays once service begins. Citronella torches placed around the perimeter add atmosphere while doing double duty as pest deterrents. It takes minimal budget and advance planning, and it makes the whole evening feel more considered. Best for: Garden, lake, farm, and backyard receptions where insects are most active after dark. How to Choose the Best Outdoor Wedding Ideas for Your Venue Start with the venue before choosing colors, flowers, or rentals. The right outdoor wedding ideas solve real site problems first, then add style that fits around them. Venue Type Primary Planning Focus Backyard Lighting, flooring, portable restrooms, parking, neighbor noise Garden Florals, shade, clear pathways, guest flow between areas Beach Wind, sound, sand-friendly footwear options, permit rules Park Venue rules, restroom access, trash disposal, setup times, available power Rooftop Wind, elevator access, rain backup, city-view photo timing Farm or Vineyard Ground surfaces, guest transport, post-sunset lighting, food service logistics When the site plan comes first, every detail has a purpose. You spend less on items that fight the space, and guests can move, sit, hear, eat, and relax without confusion. Season-Smart Outdoor Wedding Picks Each season brings different light, weather, and guest needs. Match your outdoor wedding setup to the season before you finalize any decor or vendor decisions. Season Decor and Setup Ideas Key Planning Tip Spring Potted flowers, pastel linens, garden arches, parasols, covered walkways Plan for rain with firm flooring and a covered ceremony option Summer Shade stations, cold drinks, fans, parasols, sunscreen, late afternoon ceremony Avoid peak summer heat unless the venue has full shade or a tent booked early Fall Warm blankets, amber lights, wood tables, seasonal fruit, fire pits, deep-toned florals Add lighting from 5 pm onward — daylight fades earlier and guests notice the gap Winter Heated tents, fire pits, hot drinks, velvet textures, early sunset lighting Use a fully enclosed tent with proper heating — comfort is not negotiable in cold weather Pick the season first, then shape the setup around the specific conditions it brings. When comfort is built in early, decor can sit on top of it without doing structural work it wasn’t designed for. Planning Details That Catch People Off Guard Most outdoor wedding planning focuses on decor, but logistics decide how the day actually feels. Build in a weather backup plan that looks intentional, not reactive. Confirm portable restrooms for backyard or remote venues, steady power for lights, music, catering equipment, and fans, and a clear sound system so every guest can hear the vows from the back row. Add flooring for muddy ground or uneven surfaces, food temperature management through service, bug control after sunset, and a parking plan that guides guests clearly from the road. Confirm setup and teardown staffing, permits, venue rules, and local noise limits before finalizing any vendor bookings. The National Weather Service recommends a clear lightning safety plan for any organized outdoor event, including a designated shelter and a 30-minute wait after the last thunder before returning outside. Build that into the day-of timeline and share it with vendors so everyone knows the plan before the sky turns. Common Outdoor Wedding Mistakes to Avoid Outdoor wedding mistakes typically come from overlooked details rather than bad ideas. Address these early and the setup runs smoother for everyone involved. Check venue rules before finalizing decor — particularly stakes, candles, sound limits, and setup timing windows. Plan for wind, bugs, heat, and rain based on the venue’s actual daily conditions, not best-case assumptions. Test lighting after sunset. Daytime setups can run too dark once dinner starts and the ambient light drops. Always use microphones, shaded seating, enough restrooms, and safe food coverage for basic guest comfort. Make the rain backup feel planned, not like a rushed second-choice layout assembled under pressure. Good outdoor wedding planning protects the look and the guest experience at the same time. Once logistics are handled, decor can feel purposeful rather than patched together. Frequently Asked Questions How do I make a backyard wedding look well put together? Focus on three things: lighting, table layout, and one strong focal point. String lights overhead, consistent runners on tables, and a clear ceremony backdrop do most of the visual work. Portable restrooms and flooring for the dance area are the two most common practical gaps in backyard settings. What is the 50 30 20 rule for weddings? A budget framework: 50 percent for major costs like venue and catering, 30 percent for flexible priorities like decor and photography, and 20 percent held as contingency. It is a starting point — most couples adjust the split based on what matters most to them personally. What is the 30-5 rule for weddings? Tasks estimated at 5 minutes on a wedding day often take 30. Getting dressed, moving guests between spaces, and transitioning between timeline items all run long. Build buffer time into every transition point to reduce stress for the couple and every vendor on site. How do you plan a cheap outdoor wedding? Choose a low-fee location such as a state park, family property, or public garden. Keep the guest count manageable. DIY signage, repurpose ceremony flowers for reception tables, and use string lights as the primary lighting investment. Renting or borrowing decor is the most reliable way to cut cost without losing visual quality. How do you keep an outdoor wedding cool in summer? Schedule the ceremony for late afternoon. Provide shade for ceremony seating. Set up a welcome station with water, fans, and cold towels. Tent coverage over the reception dining area helps significantly, and portable fans at table level make a noticeable difference throughout the evening. What are some good outdoor wedding decor ideas that hold up in the wind? Weighted signage, low centerpieces, staked arches, heavy candle holders, and fabric clips are the core wind-proof decor tools. Test every element at the actual site before the day. Beach and rooftop venues require the most aggressive anchoring plan of any outdoor setting. What flooring works best for an outdoor wedding reception? Wood platforms, rented event flooring, and compacted gravel paths are the most reliable options for grass or uneven ground. Book flooring early for spring and fall seasons — it runs out faster than most couples expect. Any dance floor on grass needs a solid base to prevent sinking under foot traffic. Final Verdict The best outdoor wedding ideas do two things well at the same time: they look considered, and they actually work on the day. A beautiful arch that tips in the wind, a centerpiece that wilts in the afternoon heat, or a dance floor that turns muddy after a brief shower can undo a lot of careful planning very quickly. Start with the setting, protect guest comfort throughout, and then layer in decor that fits the space rather than fighting it. That is the version of an outdoor wedding guests talk about long after the day is over, and from my perspective, that is what makes all the planning genuinely worth it. Drop a comment below and let me know how your wedding turned out.
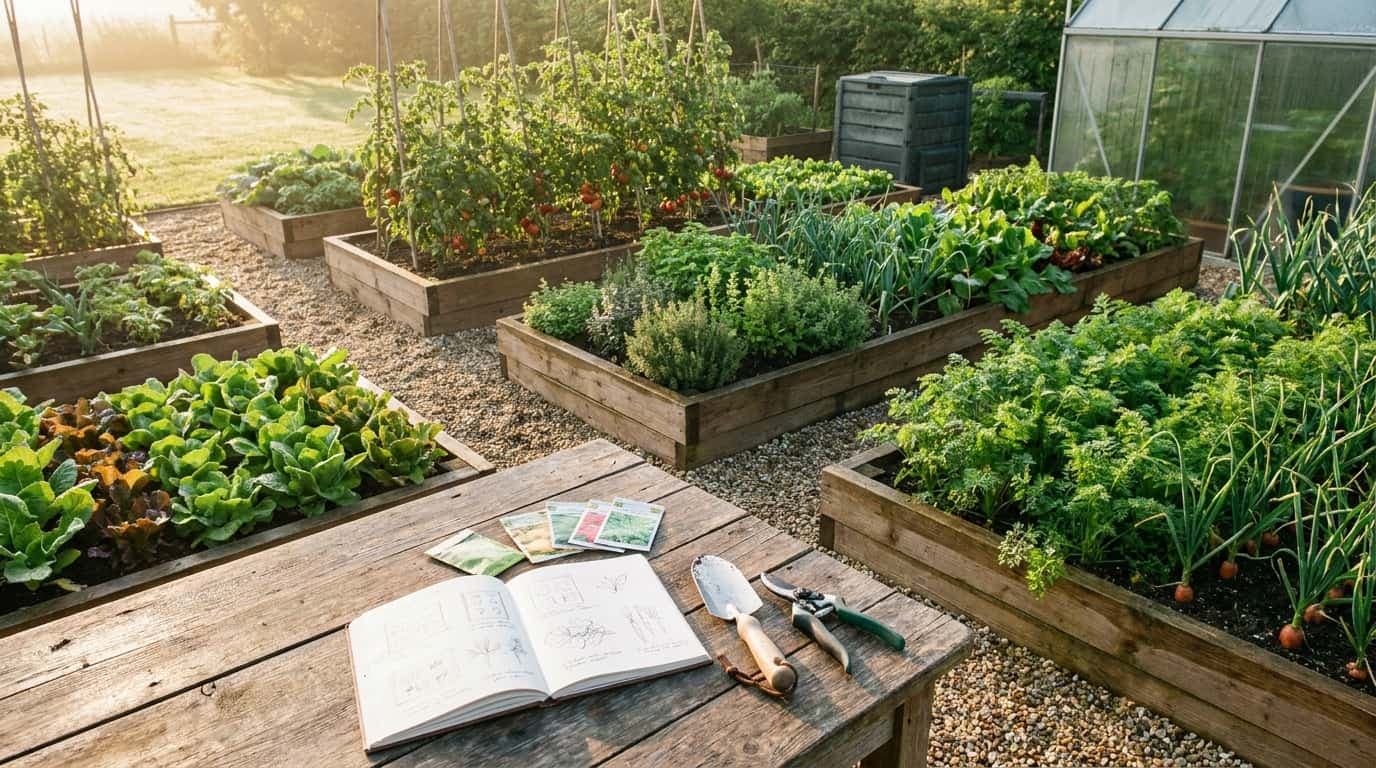
A vegetable garden can look simple online, but then feel confusing the moment you start measuring your own space. I get why it feels hard to know where tomatoes, lettuce, herbs, paths, and trellises should actually go. The right vegetable garden ideas can help you plan before you plant, so you avoid crowded beds, shaded crops, and wasted space. You will learn how to choose a layout, match crops to your sunlight, use small spaces better, plan spacing, and create a garden that is easier to water, weed, and harvest. I’ll keep it practical so you can start with a clear plan. Why Planning Your Vegetable Garden Layout Matters Most vegetable gardens fail in the planning, not the planting. The moment you put a tomato where it will shade your lettuce, or cram zucchini into a 4-foot bed with three other crops, the season is already harder than it needs to be. A clear vegetable garden layout solves these problems before seeds go in. Planning is especially useful in small gardens, where every square foot has to earn its place. Once you know your sunlight, available space, and crop list, choosing the right layout and planting schedule becomes straightforward. By accounting for sunlight, spacing, soil, water access, and seasonal timing before you plant, you avoid the most common mistakes and give each crop a realistic shot at a full harvest. How to Plan Your Vegetable Garden A clear plan makes planting easier because you know what fits, where each crop belongs, and how to avoid crowded beds before a single seed goes in. Check sunlight and water access first. Choose a spot that gets at least 6 hours of direct sun each day. Proximity to a water source matters more than most beginners expect, especially once summer heat arrives. Measure the space and choose a layout type. Write down the length and width, then pick a format that fits: raised bed, container garden, row garden, or vertical garden. The layout choice should come from your measurements, not a photo you liked online. Select vegetables you actually eat. Grow crops that land on your table regularly, such as tomatoes, lettuce, peppers, carrots, beans, herbs, or spinach. Match each crop to the right season before you buy seeds. Plan spacing and plant placement before you dig. Give each crop room for roots, leaves, and airflow. Keep tall plants where they will not block sunlight from shorter crops. Crowding at planting leads to problems that are difficult to fix later. Add paths, supports, and access points. Leave 18 to 24 inches to walk, weed, water, and harvest. Add cages, stakes, or trellises for tomatoes, beans, cucumbers, and other climbing plants. Sketch the final layout before you start. Draw a simple plan with crop names, spacing, paths, supports, and target planting dates. Graph paper or the GrowVeg app both work well for this. Vegetable Garden Layout Options The right layout depends on your available space, soil quality, budget, and how much time you can realistically spend maintaining the garden. Use the table below as a starting point. Garden Layout Best For Why It Works Good Crops Raised bed Beginners, poor soil, small yards Clear layout, full soil control, easier access Tomatoes, lettuce, carrots, peppers, herbs Square-foot Tight spaces and organized planting Uses small grid blocks with clear spacing rules Spinach, radishes, onions, lettuce, basil Container Patios, balconies, rentals Flexible, portable, and easy to adjust Herbs, cherry tomatoes, peppers, greens Vertical Narrow spaces and fence lines Uses height instead of ground footprint Beans, cucumbers, peas, climbing squash In-ground rows Larger yards with good native soil Low cost, simple, and easy to expand Corn, beans, potatoes, squash L-shaped bed Corners and small backyards Uses unused edges and fence lines efficiently Tomatoes, herbs, greens, root crops Tiered planter Patios and decks Stacks crops into a compact footprint Lettuce, herbs, strawberries, spinach Each layout has a real trade-off. Raised beds cost more to set up but give you the fastest payoff on poor ground. In-ground rows cost almost nothing but require soil that is already worth planting in. Choose based on your actual conditions, not what looks good in a photo. Vegetable Spacing for a Healthy Garden Layout Spacing is where most beginner gardens go wrong. Each crop needs room for roots, leaves, airflow, and harvest access. The numbers below are the working minimums, not the ideal-world maximums. Vegetable Plant Spacing Row Spacing Best Placement Lettuce 6 to 12 inches 12 to 18 inches Front rows, containers, raised beds Radish 2 to 4 inches 8 to 12 inches Edges, square-foot beds, small gaps Carrot 2 to 3 inches 12 to 18 inches Loose soil beds, front rows Spinach 4 to 6 inches 12 to 18 inches Cool-season beds, containers Green onion 2 to 4 inches 6 to 12 inches Edges, narrow rows, containers Pepper 18 to 24 inches 24 to 36 inches Middle rows, raised beds, pots Tomato 24 to 36 inches 36 to 48 inches Back rows, cages, trellis areas Cucumber 12 to 24 inches 36 to 48 inches Trellis side, fence line Bush beans 4 to 6 inches 18 to 24 inches Rows, blocks, raised beds Zucchini 24 to 36 inches 36 to 48 inches Open corners, larger beds Leave walking space around beds as well as plant space inside them. Small gardens can manage with 18-inch paths; larger plots are easier to work with 24 to 36 inches between beds. Paths are not wasted space. They are what make the rest of the space usable. Vegetable Garden Plans: Step-by-Step Layouts These sample plans show how to arrange crops by height, space, and harvest access. Use them as starting points and adjust based on your climate, plot size, and eating habits. The layout logic is more useful than the exact crop list. How to sketch your plan: Use graph paper or the GrowVeg app. Measure the full space. Mark the direction of strongest sun. Place tall crops on the north side. Group plants by water needs. Keep paths at least 18 inches wide. Plan 1: 4×4 Vegetable Garden Plan Layout: Back row — 1 caged tomato | Middle rows — lettuce, carrots, radishes | Front row — basil, green onions This beginner layout keeps the tomato at the back and smaller crops near the front, where they are easy to thin, water, and harvest without stepping over anything. In a 4×4 bed, one tomato plant is genuinely enough. Plan 2: 4×8 Raised Bed Garden Plan Layout: Back row — tomatoes, cucumbers on trellis | Middle rows — peppers, bush beans, herbs | Front row — lettuce, carrots, onions, radishes A 4×8 bed allows more crop variety while still keeping everything reachable from one side. Trellising cucumbers at the back saves ground space for peppers, beans, herbs, and greens in front. This is the layout I would recommend to most people starting their first real vegetable garden. Plan 3: 10×10 Backyard Vegetable Garden Plan Layout: Back section — corn, pole beans, tomatoes | Center section — peppers, eggplant, squash, bush beans | Front section — lettuce, carrots, onions, herbs This plan works for a larger backyard plot where you have room to grow warm-season crops alongside cool-season greens. Taller crops sit at the back, while medium and low crops stay toward the front for access. If you are planning a broader outdoor project alongside the garden, a backyard remodel cost breakdown can help you budget the full scope before you break ground. Plan 4: Patio Vegetable Garden Plan Layout: Large pots — tomatoes, peppers, cucumbers | Medium pots — lettuce, spinach, herbs, green onions | Wall or fence — peas or beans on a trellis This setup works on patios, balconies, and paved corners. Match pot size to each crop: tomatoes need at least a 15-gallon container, while herbs and greens do fine in a 6-inch pot. The trellis keeps climbing crops off the ground and out of the traffic path. Plan 5: Family Vegetable Garden Plan Layout: Growing beds — cherry tomatoes, carrots, peas, beans, strawberries, lettuce, herbs | Pathways — 18-inch access paths | Extras — labeled stakes per crop Choose quick-maturing, familiar crops so kids can see progress within weeks rather than months. Cherry tomatoes, carrots, and snap peas all produce fast enough to keep younger gardeners interested. Labeled stakes help everyone track what is planted where without digging up a seedling to find out. Vegetable Garden Ideas for a Practical Home Garden A productive vegetable garden should feel useful, be manageable week to week, and suit the space you actually have. These vegetable garden ideas each solve a specific layout problem. 1. Raised Bed Vegetable Garden Raised beds are one of the most productive ways to grow vegetables because you build the growing environment from the ground up. You control the soil quality, drainage, and depth rather than inheriting whatever is under your lawn. Raised beds warm up faster in spring, which extends the growing window at both ends of the season. They also reduce bending and kneeling, which matters more as the season goes on. Best for: Beginners, families, and anyone dealing with poor native soil or limited yard space. Ideal crops: Tomatoes, peppers, lettuce, carrots, radishes, herbs, and spinach. 2. Square-Foot Garden Square-foot gardening divides the bed into a grid of one-foot squares, with each square dedicated to a specific crop based on size. A single square holds 1 tomato, 4 lettuce plants, 9 spinach plants, or 16 radishes. The method removes the guesswork from spacing, reduces weeds by leaving no bare soil between plants, and squeezes more variety into a small footprint. Best for: Small-space gardeners, beginners, and those who want high yield with minimal waste. Ideal crops: Spinach, beans, onions, radishes, lettuce, basil, and beets. 3. Companion Planting Garden A companion planting garden arranges crops so neighboring plants help each other. Some pairings deter pests. Others improve flavor, fix nitrogen in the soil, or attract pollinators. Rather than planting in single-crop rows, you mix vegetables, herbs, and flowers in combinations that support the whole bed. It takes more planning upfront but produces a more resilient garden that depends less on intervention. Best for: Organic gardeners, eco-conscious growers, and anyone dealing with recurring pest problems. Ideal pairings: Tomatoes with basil, carrots with onions, cucumbers with beans, and marigolds alongside most vegetables. 4. Keyhole Garden A keyhole garden is a circular raised bed with a narrow wedge-shaped path cut into the center, shaped like a keyhole from above. A composting basket sits at the center. Every time you water it, nutrients move outward into the surrounding soil. The design lets you reach every part of the bed from one standing position, with no stepping inside the planting area. Particularly useful if bending or walking distances are a daily limitation. Best for: Gardeners with mobility limitations, drought-prone regions, and those wanting a self-feeding, low-maintenance system. Ideal crops: Kale, Swiss chard, tomatoes, peppers, herbs, and leafy greens. 5. Lasagna Garden (No-Dig Method) A lasagna garden is built by layering cardboard, compost, straw, aged manure, and topsoil directly on top of existing ground with no digging required. The layers break down over one to two seasons into rich, loose soil that root vegetables can penetrate easily. It is one of the most cost-effective ways to start a garden on patchy grass or compacted ground, because you are building fertility rather than fighting what is already there. Best for: First-time gardeners, budget-conscious growers, and anyone starting on grass or compacted soil. Ideal crops: Zucchini, pumpkins, potatoes, tomatoes, and deep-rooted vegetables. 6. Themed Vegetable Garden A themed garden organizes planting around a specific culinary goal. Instead of growing a random mix, you design the bed around meals you already cook. The crop list and layout flow from one central purpose, which makes planning faster and harvesting more satisfying because everything on the plate came from one place. Best for: Food-focused households, families with kids, and gardeners who want a purpose-driven layout. Ideal crops by theme: Pizza garden — tomatoes, basil, oregano, peppers. Salad garden — lettuce, cucumbers, radishes. Stir-fry garden — bok choy, garlic, ginger, beans. 7. Seasonal Rotation Garden A seasonal rotation garden divides the space into distinct zones and moves crop families through those zones each season or year. This breaks pest and disease cycles that build up when the same crop grows in the same spot year after year. With a clear four-zone rotation, there is always something growing and always something being prepared for the next planting. Best for: Experienced gardeners, year-round growers, and anyone committed to long-term soil health. Zone rotation order: Legumes, brassicas, root vegetables, and fruiting crops, cycled through four defined zones across successive seasons. Small Vegetable Garden Ideas for Tight Spaces Small spaces can still grow plenty when layout, containers, height, and timing are planned carefully. These ideas make every corner more productive without requiring more ground. 8. Vertical Trellis Garden A trellis built into or behind a raised bed adds vertical growing space without expanding the footprint. A 6-foot cedar or galvanized conduit trellis anchored to the back wall of a 4×8 bed adds effective growing area for beans, cucumbers, and peas without shading the rest of the bed, provided it runs along the north or east face. The same structural principles that apply to a DIY pergola build apply when attaching a heavy trellis to a raised bed frame: post anchoring, span limits, and load-bearing connections all matter. A trellis on the south face creates a sun block that cuts light to everything in front of it. 9. Window Box Herb and Salad Garden Window boxes work well for shallow-rooted crops: herbs, baby greens, and compact lettuce varieties. Place them where they get steady direct light and are easy to water daily. South- or east-facing exposures are the most reliable. Best for: Apartment residents, renters, and anyone with a south or east-facing window or balcony. Ideal crops: Basil, coriander, mint, parsley, arugula, baby spinach, and compact lettuce varieties. 10. Tiered Garden Planter A tiered planter stacks multiple growing levels into one compact, stair-stepped structure, delivering the capacity of several separate beds in a single footprint. Each tier can hold a different category of vegetable, which makes organization and harvesting straightforward. Use the top tiers for herbs and strawberries, the middle tiers for greens, and the deeper bottom tiers for crops with larger roots. Tiered planters work well on outdoor decks and patios where ground space is limited but vertical real estate is available. Best for: Patio and deck gardeners, small backyard owners, and those who want an attractive garden structure. Ideal crops: Strawberries and herbs on top tiers, lettuce and spinach in the middle, and root vegetables or tomatoes on the lowest, deepest level. 11. L-Shaped Corner Bed An L-shaped bed works well along fences, patios, or unused corners that would otherwise sit empty. Place tall crops or a trellis in the corner, then use the two side runs for herbs, greens, and root vegetables. The corner position often catches full sun from two directions, which is worth checking before you plant. Best for: Small backyards, courtyard gardens, and anyone wanting to garden along the perimeter of their outdoor space. Ideal crops: Tomatoes or trellised cucumbers at the corner, herbs and leafy greens along the shorter arm, root vegetables along the longer arm. 12. Succession Planting Micro Garden Successional planting is not defined by shape or structure but by strategy: sow small quantities of the same crop every two to three weeks to get a continuous, manageable harvest rather than a single glut. Even in the smallest raised bed or container setup, this approach keeps the garden producing without overwhelming the kitchen. It is particularly effective with fast-growing crops that mature in 30 to 45 days. Best for: Small-space gardeners, solo growers, and anyone who wants steady harvests without waste. Ideal crops: Lettuce, radishes, spinach, bush beans, arugula, and coriander. Seasonal Vegetable Garden Planting Schedule A seasonal planting schedule matches crops to the temperatures they actually grow in. Check your local frost dates first, then use this table as a planning base. Planting times shift by two to four weeks depending on your region, so the frost date is the anchor, not the calendar month. Season Best Crops to Plant Garden Focus Early Spring Lettuce, spinach, peas, radishes, carrots, onions, kale Start cool-season crops that grow well in mild weather. Plant in small batches for steady harvests. Late Spring Tomatoes, peppers, cucumbers, beans, basil, eggplant, squash Add warm-season crops after the last frost date. Give larger plants enough space and support from day one. Summer Beans, okra, cucumbers, squash, herbs, heat-tolerant greens Focus on deep watering, mulching, pruning, and regular harvesting during hot weather. Fall Lettuce, spinach, kale, carrots, radishes, turnips, beets Plant a second round of cool-season vegetables 6 to 8 weeks before the first hard frost. Winter Garlic in mild areas, cover crops, compost, seed planning Use the season for soil care, tool cleaning, seed ordering, and next-year layout planning. Fall is the most commonly skipped season in home vegetable gardens. A second planting of lettuce, spinach, and kale in late August often yields better than the spring round because pest pressure is lower and temperatures are cooling rather than rising. Soil, Watering, and Basic Care for Any Garden Setup Healthy soil produces stronger roots and makes plants more resilient to heat and drought. For raised beds, use a loose mix of topsoil, compost, and drainage material. In-ground gardens benefit from adding 2 to 3 inches of compost before each planting season, worked into the top 8 to 10 inches of soil. Water deeply but less often. Most vegetables do well with 1 to 2 inches of water per week. Containers dry out faster than in-ground beds and need checking daily during summer heat. Mulch, such as straw or wood chips, slows moisture loss, moderates soil temperature, and reduces weeds. Feed plants every two weeks during peak growing season with a balanced liquid fertilizer. Test soil pH once a year. Most vegetables prefer a slightly acidic range of 6.0 to 6.8. A test kit from any garden center runs about $15 and gives you a baseline before you add any amendments. Common Vegetable Garden Mistakes to Avoid These are the problems that show up most often in first and second-year gardens, and all of them are avoidable with a bit of advance planning. Not thinning seedlings. Some seeds sprout too close together. Thin early so the strongest plants have room to develop properly. Leaving crowded seedlings in place stunts all of them. Skipping plant labels. Young vegetable plants look similar before they size up. Labels track crops, planting dates, and varieties without confusion later in the season. Using fresh manure. Fresh manure can burn plants and may carry harmful bacteria. Use only aged manure or finished compost, which has broken down for at least 90 days. Forgetting wind exposure. Strong wind dries soil faster, damages young plants, and breaks tall stems. A fence, screen, or sheltered position makes a measurable difference in exposed sites. Adding fertilizer without a reason. Too much fertilizer drives leaf growth at the expense of fruit and root development. Feed based on what the plants and soil actually need, not on a fixed schedule. Practical Tips for a Better Vegetable Garden A few consistent habits make more difference than any single product or technique. Harden off indoor seedlings over 7 to 10 days before moving them outside permanently. Set them out for 2 to 3 hours the first day and increase the exposure gradually. Keep a garden notebook. Record planting dates, harvest times, crop problems, and which varieties performed well. The notes from this season are the most valuable planning tool for next season. Choose disease-resistant varieties for problem-prone crops, especially tomatoes, cucumbers, squash, and peppers. Seed packets and plant tags usually list resistance codes. Remove dead leaves, diseased stems, and finished crops promptly before pests or disease spread to neighboring plants. Frequently Asked Questions Can seeds and transplants be used in the same vegetable garden? Yes, and most productive gardens use both. Start tomatoes and peppers from transplants, since they take too long to mature from seed in most US climates. Sow radishes, lettuce, beans, and carrots directly, since they establish quickly and dislike root disturbance. How can vegetables be protected from rabbits, birds, or squirrels? Use barriers before damage starts. A low fence with the bottom 6 inches buried handles most rabbit problems. Netting works for birds. For squirrels, cover soil with hardware cloth mesh until plants are established enough that pulling them up takes effort. How deep should a raised vegetable garden bed be? Most raised beds should be at least 8 to 12 inches deep. Leafy greens manage in 6 inches. Tomatoes, peppers, and most root crops need a minimum of 12 inches. Carrots and parsnips need 16 to 18 inches of loose soil to develop a full root. What vegetables grow well in a small space vegetable garden? Lettuce, radishes, spinach, bush beans, green onions, herbs, and cherry tomatoes all perform well in tight spaces. Avoid sprawling crops like full-sized pumpkins, standard corn, or indeterminate squash varieties unless you have a vertical structure to train them on. When should I start planning my vegetable garden for spring? Six to eight weeks before your last frost date is the practical starting point for indoor seed starting. Layout planning can happen any time during winter. Most US gardeners in temperate zones start seeds in late February and plant outdoors in late April or May. Do vegetable gardens need full sun all day? Most fruiting vegetables, including tomatoes, peppers, squash, and cucumbers, need a minimum of 6 hours. Leafy greens and herbs tolerate 4 hours and can benefit from afternoon shade in hot climates. Root vegetables fall in the middle, preferring 6 hours but tolerating less. Can a vegetable garden be started without buying many supplies? Yes. A small in-ground bed, good soil amended with compost, seeds, water, and basic hand tools is enough. Reuse containers when safe. Add trellises, cages, or raised bed frames only when the garden has outgrown the basics. Final Thoughts A productive garden starts with a layout that fits your real space, not just a pretty photo. I would begin by measuring your area, checking sunlight, choosing crops you actually eat, and giving each plant enough room to grow. The best vegetable garden ideas are the ones that make planting, watering, weeding, and harvesting easier week after week. Raised beds, containers, vertical trellises, square-foot layouts, and seasonal planting plans can all work when they match your yard or patio. Start with one simple sketch, adjust after your first season, and let your garden improve as you learn what works best for you.
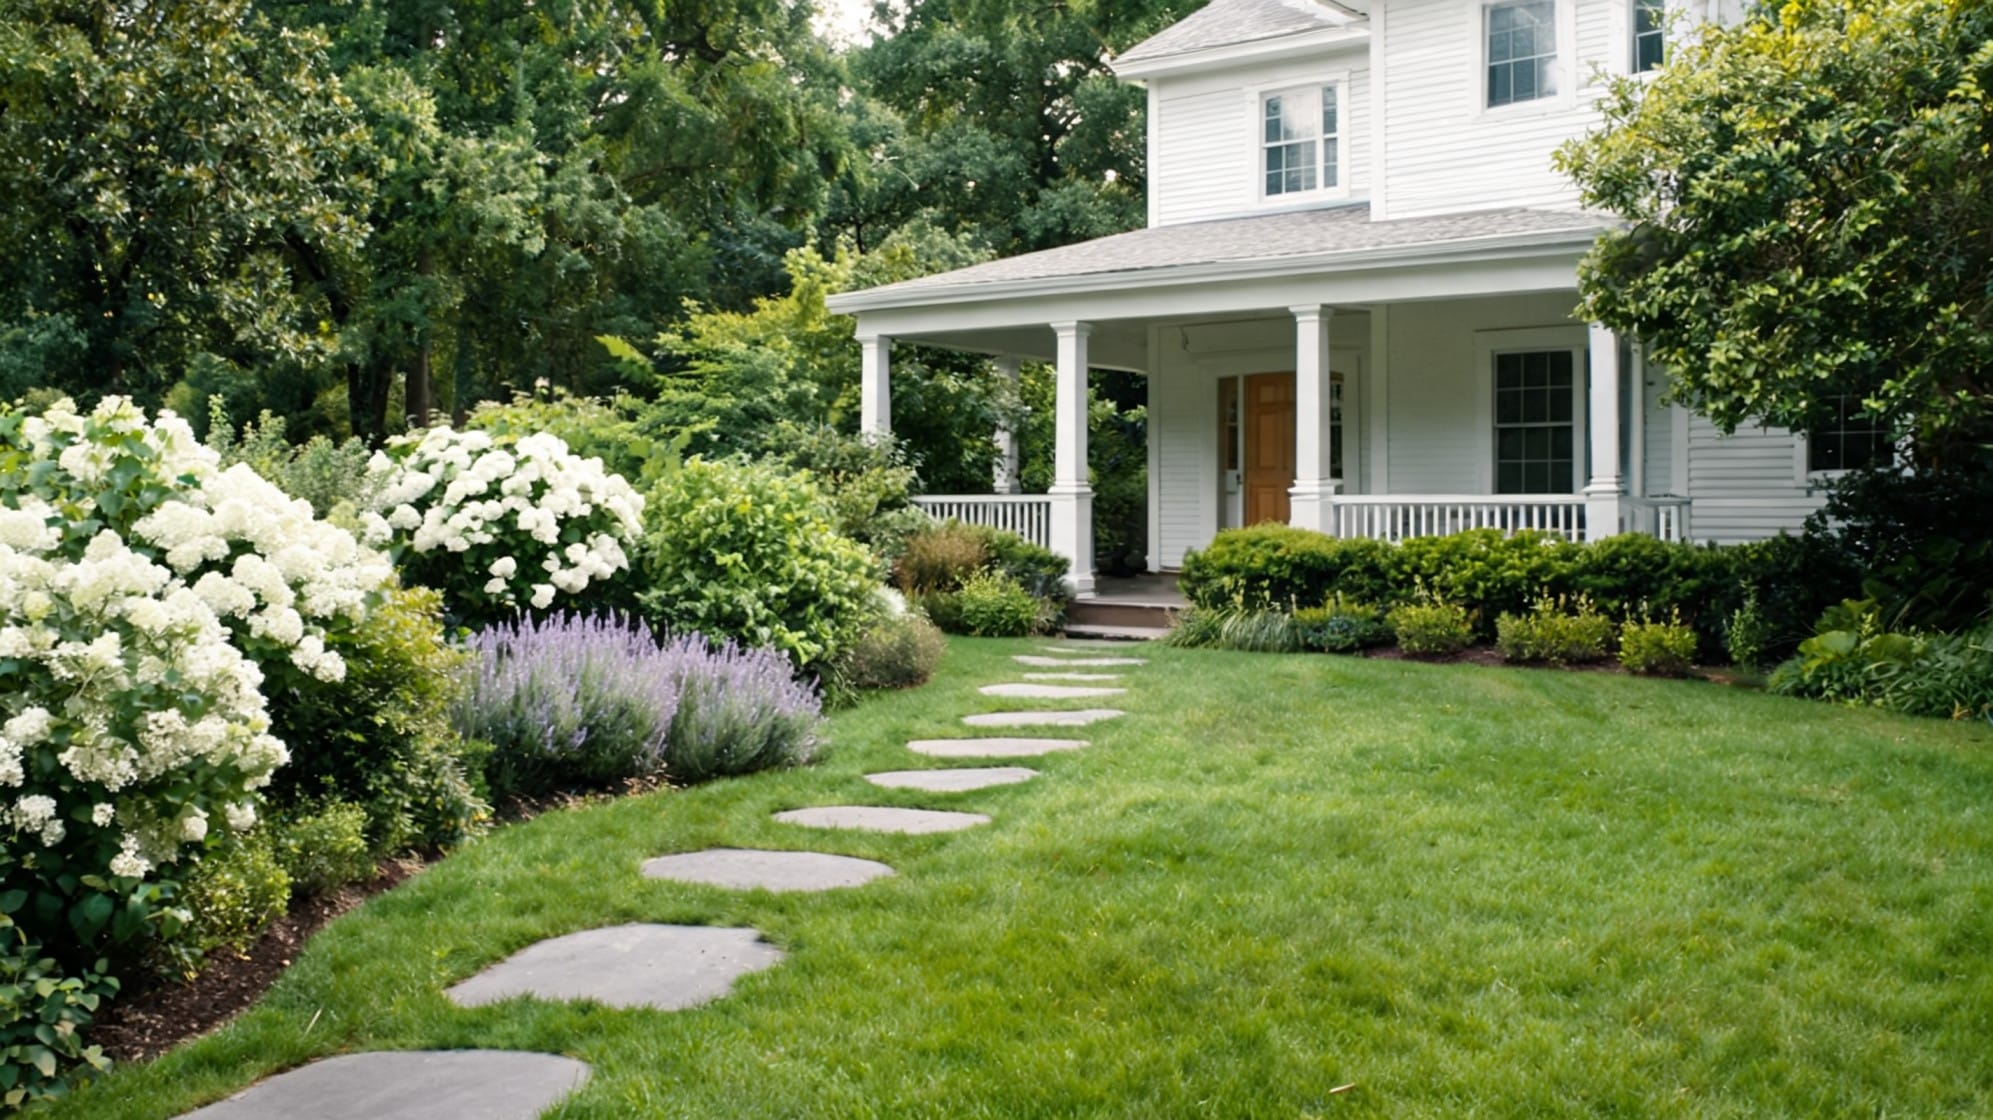
Does your front yard look fine for two days, then need work again? I get why that feels tiring. Grass grows fast, weeds show up, and some plants seem to need attention every time you walk outside. That is whylow-maintenance front yard landscaping can make a big difference, and why getting the approach right matters more than just picking pretty plants. The goal is not to make your yard plain. It is to make it easier to care for, with smart choices that still look clean from the street. I’ll walk you through simple ideas such as mulch beds, native plants, rock gardens, ground covers, drip irrigation, and lawn alternatives. You’ll also see how to choose the right materials, avoid common mistakes, and match ideas to your yard type. By the end, you’ll have practical ways to cut mowing, watering, and weeding without giving up a front yard you feel good about. Simple Front Yard Layout Formulas A low-maintenance front yard is easier to plan when you start with a simple layout. Pick one clear style, use fewer plant types, and repeat the same materials so the yard looks clean without needing constant work. Modern front yard: Use a gravel bed, a concrete or stone path, 3 evergreen shrubs, 2 ornamental grasses, 1 small tree, and drip irrigation. Cottage front yard: Use mulch beds, perennials, compact flowering shrubs, a stepping stone path, and one trellis near the entry. Drought-tolerant front yard: Use a gravel or rock base, succulents or native plants, boulders, drip irrigation, and no traditional lawn. Family-friendly front yard: Use a small lawn or lawn alternative, mulch beds along the edges, a durable path, low-growing shrubs, and no thorny plants near walkways. These formulas keep the design simple and easy to manage. You can adjust the plants and materials based on your climate, budget, and the amount of yard work you want to avoid. Basic Maintenance Plan Keep the front yard care on a simple schedule, so you do not have to think about it every weekend. Even a low-maintenance yard needs a little attention, but the work becomes much easier when you split it into monthly, seasonal, and yearly tasks. Schedule What to do Monthly Pull small weeds before they spread, check drip lines, sweep gravel or paths, and trim plants blocking walkways. Seasonally Refresh mulch where it looks thin, cut back ornamental grasses, lightly prune shrubs, and replace dead plants with better-suited options. Yearly Review plant spacing, add compost if needed, check edging, and adjust the irrigation schedule for the season. The goal is not to avoid yard care completely. It is to keep the work small, steady, and simple, so your front yard stays clean without taking over your free time. Low-Maintenance Front Yard Landscaping Ideas I’ve found that the easiest front lawn ideas usually start with one simple change: less grass and fewer fussy plants. You don’t need to redo the whole yard at once. Start with one area, make it easier to care for, then build from there. 1. Trees with Mulch Beds Grass is often the main reason a front yard feels like work. It needs mowing, watering, trimming, and clean edges. The idea here is to remove grass from small, hard-to-maintain areas and turn them into mulch beds. You can use mulch around trees, along walkways, under shrubs, or near the front wall of your home. Add shrubs, perennials, or small plants before mulching if you want color. Mulch helps the soil stay moist, protects plant roots, and makes it harder for weeds to grow. Tip: Use shredded bark, pine bark, cedar mulch, or composted mulch. Avoid: Piling mulch against stems or tree trunks. Best for: Flower beds|Shrub borders|Tree rings Pro Tip: A 3-inch mulch depth is the working minimum. Less than 2 inches, and weeds push through. More than 4 inches around shrubs, and you risk crown rot in wet seasons. 2. Native Blooms That Fit Your Climate Native plants are plants that already grow well in your area. They are accustomed to the local weather, soil, and rainfall patterns, so they usually require less care once they settle in. The idea is to choose plants that fit your yard rather than picking them only because they look good in photos. For a contained native planting without committing to in-ground beds, a DIY planter box offers the same climate-matching flexibility with easier drainage control. Native plants can also support birds, bees, and butterflies, which makes your front yard feel alive without adding much extra work. Tip: Water native plants well during the first growing season. Avoid: Mixing dry-loving plants with plants that need frequent watering. Best for: Natural|Low-water front yards 3. A Classic Evergreen Shrub Border Evergreen shrubs are a smart base for a low-maintenance front yard because they keep their shape and leaves through most or all of the year. The idea is to use them as the steady structure of the yard. Even when flowers are not blooming, the front yard still looks planned and tidy. Use them along the house, driveway, walkway, or front fence. Repeating the same shrub makes the design look cleaner and easier to care for. Choose compact shrubs near windows so you do not have to keep cutting them back. Tip: Leave enough space between shrubs so they can grow naturally. Avoid: Planting large shrubs too close to windows, doors, or walkways. Best for: Neat|Year-round front yards 4. A Multi-Season Perennial Flower Bed A perennial flower bed gives you color without replanting the whole area every year. Perennials return each growing season, making them easier to grow than annual flowers. The idea is to mix steady plants with seasonal color, so the bed does not look empty when one plant stops blooming. A simple formula works well: use 40% evergreen shrubs for shape, 40% perennials for flowers, and 20% seasonal color or ornamental grass for extra interest. This keeps the bed balanced, full, and easier to manage through the year. Tip: Repeat the same plants in small groups for a cleaner look. Avoid: Filling the whole bed with annual flowers that need replacing often. Best for: Colorful|Easy-care front yards 5. A Rock Garden for Sunny Areas A rock garden is a good choice when grass struggles or the yard gets strong sun most of the day. The idea is to use rocks, gravel, and drought-tolerant plants to create a front yard area that needs very little watering or mowing. Start with large rocks first because they give the space shape. Then fill the open areas with gravel or pea stone. Add plants in small groups, not one by one everywhere. This keeps the design clean and easy to manage. Leave some open space between rocks and plants so the yard does not look crowded. Tip: Use different rock sizes for a more natural look. Avoid: Filling every empty space with plants. Best for: Dry|Sunny front yards 6. Gravel and Pebbles Pathway Bare soil can quickly turn into a weed patch, muddy spot, or dusty area. Gravel and pebbles help cover the ground while keeping the front yard neat and easy to care for. The idea is to use them around pavers, along walkways, under seating spots, or between planting areas. The same edging logic applies when gravel meets a driveway follow identical containment rules at the boundary. For areas with weeds, place landscape fabric under the gravel where needed. Choose smaller gravel for walking areas and larger pebbles for decorative spaces where people will not walk often. Tip: Use smaller gravel near walkways for easier walking. Avoid: Using loose gravel on steep slopes. Best for: Paths|Side yards|Dry planting beds 7. A Stepping Stone for a Walkway Stepping stones give your front yard a clear path without adding much upkeep. The idea is to guide people from the driveway, sidewalk, or street to the front door in a simple and clean way. Place the stones where people naturally walk, then set them at a comfortable distance apart. Larger stones are safer because they give more room for each step. You can fill the gaps with gravel, mulch, or low ground cover to reduce bare soil and weeds. This also helps the walkway blend into the yard rather than look like a random line of stones. Tip: Use larger stones for a safer and cleaner path. Avoid: spacing stones too far apart. Best for: Entry paths|Small front yards|Lawn breaks 8. Style Sunny Spots with Succulents Succulents are useful for low-maintenance front yards because they store water in their leaves and do not need frequent watering. The idea is to use them in sunny areas where the soil drains well. They work well near gravel, boulders, stone borders, and raised beds. Before planting, check your soil. If it stays wet for too long, succulents may rot. Wet clay soil needs improvement before planting, or you can use raised beds with a better soil mix. Succulents are great for dry climates, but they are not the best choice for every yard. Tip: Pair succulents with gravel, boulders, stone borders, or raised beds. Avoid: Planting succulents in wet clay soil without fixing drainage. Best for: Dry|Sunny front yards 9. Grass Fairy Garden with Evergreen Weeds A full grass lawn can take a lot of water, mowing, and care. If you still want a soft green look, try drought-tolerant grass or a lawn alternative instead. The idea is to keep the front yard open and neat without using a traditional high-maintenance lawn. You can use clover, native grass, Kurapia, creeping thyme, sedges, artificial turf, or gravel with planting islands. Choose based on your climate, foot traffic, and how much mowing you want to avoid. Some options feel like a lawn, while others create a cleaner, planted look with very little upkeep. Choose a softer option like clover or native grass if kids or pets use the yard. Option Water use Mowing needs Best climate Clover lawn Low to moderate Low Mild to warm areas Native grass Low once settled Low Local climate zones Kurapia Low Very low Warm, dry areas Creeping thyme Low Very low Sunny, dry areas Sedges Low to moderate Very low Shade or mixed sun Artificial turf None for growth None Most areas, but it can get hot Gravel with planting islands Very low None Dry or sunny areas Avoid: Picking artificial turf for very hot spots without considering heat and drainage. Best for: Low-water|No-mow front yards 10. Cutesy Smart Watering System Hand watering can make even a simple front yard feel like a chore. Drip irrigation or smart watering helps you care for plants without dragging a hose around every few days. The idea is to send water straight to the roots, where plants need it most. Use drip lines in flower beds, around shrubs, and near foundation plants. Add a smart timer so the system waters on a set schedule. Some timers can even adjust for rain. For better results, group plants with similar water needs together so each area gets the right amount. Tip: Check drip lines once a month for clogs or leaks. Avoid: Watering all plants the same way if they have different needs. Best for: Flower beds|Shrubs|Busy homeowners 11. Ornamental Grasses for Movement and Texture Ornamental grasses are a great way to make a front yard feel full without adding much work. They bring height, soft movement, and texture, especially when planted near gravel, mulch, boulders, or perennials. Many types need little water once they settle in, and most only need trimming once or twice a year. The idea is to use them as simple accent plants rather than filling the yard with flowers that require regular care. Plant them in groups of 3, 5, or 7 so they look planned and balanced. Tip: Pair grasses with gravel, mulch, boulders, and perennials. Avoid: Planting large grasses too close to paths or windows. Best for: Modern|Natural|Low-water yards 12. Charming No-Mow Mailbox Garden The area around a mailbox or driveway often looks messy because it is hard to mow and easy to ignore. A no-mow border fixes that small problem area and makes the front yard look cleaner. The idea is to remove grass from the tight strip, then replace it with edging, mulch, gravel, or low plants. Keep the design simple. Use one small shrub, one ground cover, and one accent plant for a planted look. Keep everything low so your house numbers, mailbox, and driveway view stay clear. Tip: Use low plants so the mailbox and house numbers stay visible. Avoid: Tall, thorny, or fast-spreading plants near the driveway. Best for: Mailbox areas|Driveway edges|Narrow grass strips 13. Slopes Covered in Easy Ground Covers Ground covers are low-growing plants that spread across the soil. They are useful in places where grass is hard to mow or does not grow well. The idea is to replace difficult grass areas with plants that cover the ground, reduce weeds, and help hold soil in place. This works well on sloped front yards, narrow strips near sidewalks, under trees, between stepping stones, and around boulders. On slopes, ground covers can also help reduce soil washout after rain. Choose a type that suits your sun, shade, and water needs. Tip: Use ground covers between stepping stones for a softer look. Avoid: Fast-spreading plants that can take over nearby beds. Best for: Slopes|Sidewalk strips|Under trees 14. Dry Creek Bed for Beauty and Drainage A dry creek bed is a shallow stone channel that helps guide rainwater through the yard. It looks like a natural stream bed, but it stays dry most of the time. The idea is to place it where water already flows or where puddles form after rain. Use river rock as the main base, then add larger stones along the edges to define the shape. Make the creek bed curve rather than run in a straight line, so it looks more natural. Add drought-tolerant plants along the sides to soften the stone and improve curb appeal. Tip: Mix small river rock with larger stones for a natural look. Avoid: Placing a dry creek bed where it sends water toward the house. Best for: Drainage|Muddy spots|Sloped front yards 15. Frame the Yard with Natural Stone Edging Natural stone edging helps a front yard look neat with very little ongoing care. The idea is to create clear lines between different areas, such as lawn and mulch, gravel and plants, or a walkway and flower bed. This keeps materials from spreading and makes the yard easier to maintain. You can use stone along a front path, around a tree ring, at the edge of a planting bed, or on a small slope as a low retaining edge. Stone also lasts longer than many thin plastic borders and gives the yard a finished look. Tip: Use similar stone colors across the yard for a cleaner design. Avoid: Using loose stones where people may trip. Best for: Lawn edges|Walkways|Planting beds 16. A Small Ornamental Tree to Steal the Attraction A small ornamental tree can make a simple front yard feel planned without adding much work. The idea is to use one tree as the main focal point instead of filling the yard with too many small plants. Choose a tree that fits the space when fully grown, not just when it is young. Keep it away from the foundation, roofline, driveway, and utility lines. After planting, add a mulch ring around the trunk to protect the roots and reduce mowing around the trunk. You can also add low plants around the base for a finished look. Tip: Check the mature height and width before buying. Avoid: Planting large trees too close to the house. Best for: Entry areas |Open lawns|Front yard corners 17. Cohesive and Calm Repeated Plant Pattern A low-maintenance front yard should not feel packed or confusing. The idea is to use fewer materials and repeat the same plants so the yard looks neat and is easier to care for. Too many plant types can mean different watering, pruning, and cleanup needs. A simple formula works better: pick one path material, one mulch or rock type, and 3 to 5 main plant types. Repeat those plants in groups rather than placing one of each across the yard. Leave open space between plants so they can grow without crowding each other. Tip: Repeat colors, shapes, and materials for a cleaner look. Avoid: Adding too many one-off plants just to fill empty space. Best for: Clean|Easy-care front yards How to Choose the Right Low-Maintenance Plants The right plant makes the whole yard easier to care for. I always suggest choosing plants based on your yard first, then picking the ones you like from that smaller list. Choose plants for your climate first: Pick plants that can handle your local heat, cold, rain, and dry seasons. Match plants to sun or shade: Use sun-loving plants in open areas and shade-friendly plants under trees or near covered spaces. Check mature size before planting: Choose plants that fit the space when fully grown, so you do not have to keep trimming them back. Pick drought-tolerant plants where water is limited: Use plants that can handle dry spells if your area gets little rain or has watering limits. Use more perennials and shrubs than annuals: Perennials and shrubs come back year after year, while annuals usually need replacing each season. Group plants with similar water needs: Keep dry-loving plants together and water-loving plants together to keep watering simple. Use native plants where possible: They often require less care because they are well-suited to your local soil and weather. Avoid invasive vines and fast-spreading plants: These can take over beds, climb into unwanted areas, and create more work later. A low-maintenance plant is only low-maintenance when it fits the place you plant it. Choose for climate, light, size, and water first, and your yard will be much easier to manage. Installation: What You Can DIY and What You Shouldn’t If the project extends to the back, concrete patio and deck combinations involve the same material-selection decisions covered here. DIY-appropriate: Mulch bed installation, gravel path laying, ground cover planting, drip irrigation on existing water supply, stepping stone paths, ornamental grass planting, dry creek bed construction. Hire a licensed contractor for: Any irrigation work that requires a connection to the main water line or backflow preventer (permits required in most jurisdictions). Retaining walls over 4 feet tall (structural permit and engineering typically required). Any work that involves regrading toward the house or redirecting water toward a neighboring property. On cost: A basic mulch bed installation runs $300–$600 for a 200-square-foot area (materials plus labor). A full front-yard gravel-and-native-plant conversion typically costs between $2,500 and $7,000, depending on yard size and whether irrigation is included. Drip system installation for a standard front yard: $800–$2,000 professionally installed, or $300–$500 DIY with a weekend of work. Landscaping Materials: Quick Comparison The material you choose can make your front yard easier or harder to care for. Compare the basics first so you can pick what fits your space, budget, and level of upkeep. Material Best use Main benefit Watch out for Mulch Beds and tree rings Fewer weeds, better moisture Needs topping up Gravel Paths and dry beds No mowing, good drainage Can move without edging River rock Dry creek beds Handles runoff Can heat up in full sun Flagstone Walkways Long-lasting Higher upfront cost Pavers Paths and patios Clean look Weeds can grow in gaps Artificial turf No-mow lawn look No mowing or watering Can get hot Compost Soil improvement Helps plant health Must be worked into the soil The best choice depends on where you use it. Mulch is great around plants, gravel works well for dry paths, and stone gives the front yard a clean shape with very little upkeep. Common Mistakes to Avoid Choosing plants before checking sun and soil: Pick plants only after you know how much light the area gets and how well the soil drains. Filling the whole yard with small plants that need trimming: Too many small plants can create more pruning, watering, and cleanup work. Using too many plant types: Stick to a few repeat plants so the yard looks cleaner and is easier to manage. Skipping edging around gravel or mulch: Edging keeps materials in place and stops them from spreading into the lawn or walkway. Planting shrubs too close to the house: Give shrubs room to grow so they do not block windows, vents, doors, or paths. Using annuals as the main flower bed: Annuals need replacing often, so use them only for small seasonal color. Choosing thirsty plants for a dry yard: Pick drought-tolerant plants if your yard gets strong sun or limited water. Installing artificial turf without considering heat and drainage: Turf can get hot and may require proper drainage beneath it. Leaving bare soil exposed: Bare soil invites weeds, dust, mud, and erosion, so cover it with mulch, gravel, or plants. Forgetting walkway safety and lighting: Keep paths flat, clear, and well-lit so the front yard stays safe and easy to use. Frequently Asked Questions Do HOA rules typically restrict front-yard materials like gravel or artificial turf? Many do, and the restrictions are rarely in the welcome packet. Gravel-only front yards, artificial turf, and the removal of all lawn grass are commonly restricted in HOA communities, sometimes requiring approval from the architectural committee, even for changes to mulch depth. Pull the CC&Rs before buying any hardscape materials. Fines for non-compliant front yard changes can run $100–$500 per month in active HOAs. How do I handle a front yard that gets reflected heat from a light-colored driveway or concrete wall? Reflected heat from concrete or light stone can raise surface temperatures 15–30°F above air temperature in the adjacent planting bed, killing plants rated for your zone. In those microclimates, skip standard USDA zone guidance and choose plants rated for two warmer zones. Desert willow, agave, and most salvias tolerate this. Most ornamental grasses and standard evergreen shrubs do not grow without supplemental irrigation. Will a low-maintenance front yard actually reduce my water bill, and by how much? A full lawn-to-native-plant conversion typically reduces outdoor water use by 50–70%, according to EPA WaterSense data. In dollar terms, a homeowner irrigating a 1,500-square-foot front lawn in a warm climate can save $200–$600 annually depending on local water rates. Gravel alone, without plant replacement, saves roughly 30–40% because it eliminates irrigation but doesn’t replace the evapotranspiration benefit that plants provide. To Sum Up Low-maintenance front yard landscaping ideas work best when you make simple choices that save time each week. You do not need a full yard makeover to see a change. Start with one problem spot, like too much grass, bare soil, messy edges, or plants that need too much water. I suggest choosing plants that fit your climate, using mulch or gravel to control weeds, and adding clear paths or borders to keep the yard neat. Small changes like drip watering, ground covers, native plants, and repeated shrubs can make your front yard easier to care for. The goal is a yard that looks clean without asking for constant work. When you match the design to your space, sun, soil, and budget, your front yard becomes easier to enjoy and easier to maintain through every season.
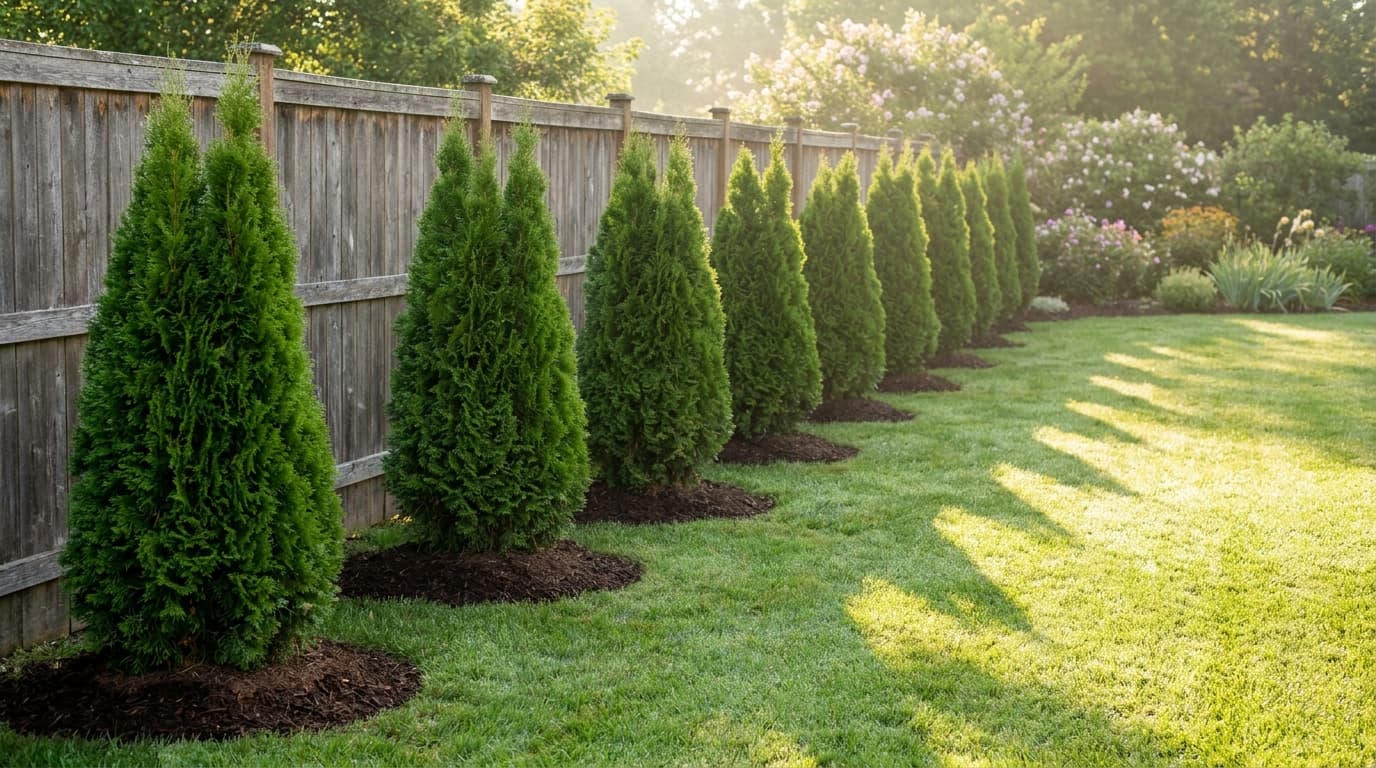
Emerald Green Arborvitae spacing is the one decision that determines whether a privacy row holds up or turns into a patchy, overcrowded mess five years from now. Get it wrong at planting, and you’re either pruning constantly or filling gaps with expensive replacement trees. Get it right, and these things run themselves. The short answer: 2 to 3 feet apart for a tight privacy hedge, 3 to 4 feet for a balanced screen, and 5 to 6 feet for individual specimens. But the right number depends on your yard size, the goal of the planting, and how much airflow the row needs in the long term. What follows covers each scenario specifically. Botanical Name Thuja occidentalis ‘Smaragd’ Mature Height 10 to 15 feet Mature Width 3 to 4 feet Growth Rate 6 to 9 inches per year (slow to moderate) USDA Hardiness Zones Zones 3 to 7 Soil pH 6.0 to 8.0, well-drained Sunlight Full sun to partial shade (6+ hours direct sun preferred) Hedge Spacing 2 to 3 feet center-to-center Screen/Windbreak Spacing 3 to 5 feet center-to-center Individual Specimen 5 to 6 feet from other plants or structures What Is Emerald Green Arborvitae? Emerald Green Arborvitae is a narrow, upright evergreen, with the botanical name Thuja occidentalis ‘Smaragd, native to eastern North America in its parent species form and reliably cold-hardy through USDA Zone 3. That cold tolerance is part of why it shows up on so many property lines across the upper Midwest and Northeast. It handles hard winters without the dieback you’d see from something like Leyland cypress in a zone-4 climate. At maturity, it reaches 10 to 15 feet tall and 3 to 4 feet wide with a consistent pyramidal form. That narrow footprint is what makes it useful for tight situations. A 4-foot-wide tree planted 3 feet from a fence gives you a screen without eating up the whole yard. Growth rate runs 6 to 9 inches per year in good conditions. It’s not fast, which means spacing mistakes compound slowly, but they still compound. Why Emerald Green Arborvitae Spacing Is the First Decision Before the first hole is dug, Spacing affects three practical things: how quickly the row fills in, how much air moves through the hedge, and whether each tree has enough room to keep its lower branches or start declining from the inside out. Tight spacing gets you coverage faster. It also puts root systems in direct competition and cuts airflow down the center of the hedge where moisture sits longest. Even fill-in requires consistent spacing: Trees planted at uneven intervals don’t meet the same way. Some sections close fast, others stay open for years. Measure center-to-center, not branch tip to branch tip. Airflow prevents inner browning: Dense Thuja foliage holds moisture. Without airflow, the inner canopy browns out. This isn’t cosmetic; once the inner branches die back, they don’t recover. Root competition slows the row: At tighter spacing, expect more pruning and closer watering attention. The trees that lose that competition thin out. You end up with an uneven row that needs replacement trees mid-hedge. Structure integrity over time: Emerald Green holds its pyramidal shape without heavy pruning when given the right spacing. Crowd it, and you spend every spring cutting it back to keep the form. Note: Year one after planting, expect minimal height gain. These trees put energy into root development first. If yours aren’t growing much upward in the first 12 months, that’s normal — not a spacing or soil failure. By year two, with consistent watering and good drainage, height gain becomes visible. How Far Apart to Plant Emerald Green Arborvitae by Use Case The right spacing changes based on what the planting is supposed to do. A privacy hedge and an open windbreak have different requirements, and treating them the same is the most common mistake I see. 1. Privacy Hedge: 2 to 3 Feet Apart For a solid privacy screen, plant center-to-center at 2 to 3 feet. At that spacing, branches meet within 3 to 4 years, and the row closes into a continuous wall. I’d use 3 feet as the default, close enough to get coverage without pushing the trees into each other’s root zones. Go tighter than 2 feet, and you’re asking for pruning problems and inner dieback as the hedge matures. At close spacing, plan to trim once a year to keep the hedge tight and maintain airflow. 2. Windbreak or Open Screen: 4 to 5 Feet Apart A windbreak doesn’t need to be a wall. At 4 to 5 feet apart, each tree has room to develop a full canopy without fighting its neighbors. Coverage takes longer, figure 5 to 7 years before the row reads as a solid screen, but the trees will be healthier and need less maintenance once established. This spacing also works along long property lines where cost per tree matters; you’re using fewer trees to cover the same run. 3. Standalone Specimen: 5 to 6 Feet From Other Plants or Structures As an individual specimen, 5 to 6 feet of clearance from neighboring plants, fences, and walls gives the tree room to hold its natural pyramidal shape without trimming. Crowd a standalone specimen, and it starts growing asymmetrically toward the light; the side pressed against a fence or structure stays thin while the open side fills out. That’s hard to correct without heavy pruning, which usually makes it worse. 4. Foundation Planting: At Least 3 Feet From Walls The minimum clearance from a wall or foundation is 3 feet, and that’s tight. A mature Emerald Green runs 3 to 4 feet wide, which means at 3 feet from the house, the outer branches are just clearing the siding when the tree is fully grown. More clearance is better if the access corridor allows it. Also check for utility vents, AC units, and basement windows. Planting too close creates structural moisture problems over time, the same kind that drives up foundation repair costs years down the line. Blocking airflow to those areas causes maintenance issues unrelated to the tree itself. Matching spacing to the intended use of the planting removes most of the guesswork. The spacing numbers above are starting points; the next section refines them by yard type. Emerald Green Arborvitae Spacing by Yard Size Yard dimensions add another variable. A 4-foot spacing that works perfectly along a 200-foot property line is too generous for a 20-foot side yard. Here’s how to adjust. 1. Small Backyard: 3 Feet Apart In a small backyard, 3 feet center-to-center balances privacy and airflow without the row taking over the space. It fills in well near patios and seating areas within 3 to 5 years. Don’t go tighter than this in confined spaces — the trees won’t have enough root room and the inner canopy will suffer. 2. Narrow Side Yard: 2 to 3 Feet Apart Side yards make this tree earn its keep. At 2 to 3 feet apart, a row fits into corridors where most plants can’t function as a screen. Use 3 feet where the run is long enough to allow it. At 2 feet, expect to trim once a year minimum; the hedge needs management to stay healthy at that density. Also keep the row pulled away from both the fence and the house wall by at least 18 inches so you can walk the corridor when you need to. 3. Medium Backyard: 3 to 4 Feet Apart Three to 4 feet is the most balanced range for a mid-sized yard. It gives enough density for a real privacy screen while keeping the row healthy over time. Trees at this spacing need less regular trimming than a tight 2-foot hedge and fill in fully within 5 to 7 years. For yards where the hedge sits behind a patio and deck ideas layout, this is typically the spacing that lets the seating area breathe while still delivering solid coverage. 4. Large Yard or Open Property: 4 to 5 Feet Apart On large properties, 4 to 5 feet gives each tree enough space to develop fully without competing. The row reads as a softer, more natural screen rather than a clipped hedge. Along long runs, this spacing also reduces cost — you’re buying fewer trees to cover the same footage while getting a healthier result long-term. 5. Front Yard or Accent Areas: 5 to 6 Feet Apart In front yards or accent plantings where the tree is part of the visual design rather than a privacy barrier, give each one 5 to 6 feet of clearance. At this spacing, each tree holds its distinct pyramidal shape and contributes to the composition as an individual specimen rather than disappearing into a hedgerow. Single Row vs. Staggered Row: Which Layout Delivers Better Coverage Most residential privacy hedges use a single row. Staggered rows are better when you have the yard depth and need to close gaps faster without pushing the trees closer together. Layout Recommended Spacing Best For What to Expect Single row 2 to 3 ft apart Tight privacy hedge Fuller screen faster; requires annual trimming Single row 3 to 4 ft apart Balanced privacy screen Healthy spacing; fills in over 5 to 7 years Single row 4 to 5 ft apart Open screen or windbreak Natural look; minimal trimming needed Staggered (2 rows) 3 to 4 ft in each row Maximum gap coverage Layered screen; closes sight lines faster than single row Staggered (2 rows) 3 to 4 ft between rows Wider planting footprint Needs 6 to 8 ft of total planting depth A staggered row offsets the gaps in the front row with trees in the back row. The result is faster visual coverage without requiring the tight spacing that causes inner dieback. The trade-off is planting depth: you need at least 6 to 8 feet of available yard space to run two rows without crowding the fence or wall behind them. Growth Rate by Year: What to Expect as the Hedge Establishes Slow growth in years one and two is normal. These trees front-load their energy into root development, which means the visible gains come later — but they come steadily once the root system is established. Year After Planting Approx. Height Approx. Width What to Expect At planting 2 to 5 ft 1 to 2 ft Young, narrow; not yet filled out Year 1 2.5 to 5.5 ft 1 to 2 ft Root establishment phase; minimal height gain Year 2 3 to 6 ft 1.5 to 2.5 ft Starts filling out with consistent watering Year 3 3.5 to 7 ft 2 to 3 ft Begins forming a visible screen Year 5 5 to 8.5 ft 2.5 to 3.5 ft Dense; reads as an established hedge Year 10 8 to 12 ft 3 to 4 ft Full privacy screen at proper spacing Mature 10 to 15 ft 3 to 4 ft Upright, dense, evergreen year-round The jump from year 3 to year 5 is usually when spacing decisions become visible. Trees planted too close start competing visibly at this stage — inner branches thin out, the base of the hedge opens up. Trees with adequate spacing continue filling in evenly from base to top. Emerald Green vs. Green Giant and Techny: Choosing the Right Tree Not every privacy hedge calls for Emerald Green. If you have the yard space and want faster coverage, other arborvitae varieties outperform it. The comparison below covers what each option actually delivers at maturity. Variety Mature Size Growth Rate Spacing Need When to Choose It Emerald Green 10–15 ft tall, 3–4 ft wide 6–9 in/year 2–4 ft for hedges Limited yard space; formal, narrow hedge; zones 3–7 Green Giant 30–50 ft tall, wider footprint 3–5 ft/year 6–8 ft minimum Large property; fast coverage needed; zones 5–8 Techny 15–20 ft tall, wider than Emerald Moderate 4–6 ft Cold climates; denser hedges; more horizontal space available Emerald Green is the right call when space is tight and the hedge needs to stay manageable without constant trimming. Green Giant covers ground faster but eventually outgrows residential yards unless it’s kept pruned — and at 30 to 50 feet mature height, that becomes a real maintenance commitment. Techny splits the difference for cold-climate plantings where you need something hardier and denser but can give the row more lateral room. How to Lay Out and Plant the Row Correctly Layout is where spacing decisions either hold or fall apart. A marked row that looks straight on paper can still end up uneven if the center-to-center measurements drift. Here’s how to do it correctly from first stake to final mulch. Decide spacing before buying trees: Know whether this is a 2-foot hedge or a 4-foot screen before purchasing. Buying trees and then figuring out placement leads to compromised spacing to make the count work. Mark center-to-center, not tip-to-tip: Young trees vary in branch spread. Measure trunk center to trunk center — that measurement stays consistent regardless of how full the nursery stock is. Set the first and last stake, then fill in: Anchor both ends of the row, run a string line between them, then place intermediate stakes at the correct interval. Pull the line tight — it’s the only way to keep the row straight. Check clearance from structures before digging: Walk the marked line and confirm distance from fences, walls, sidewalks, driveways, and property lines. Adjusting stakes costs nothing. Moving a planted tree is expensive and stressful to the root system. Review from multiple angles: Walk away from the marked row and look at it from the patio, from the neighbor’s side, and from the house. Spacing errors that don’t show up from one angle are obvious from another. Dig wide, not just deep: The hole should be twice as wide as the root ball but no deeper than it — the top of the root ball should sit level with the surrounding ground. Setting it too deep is the single most common planting mistake and leads to slow decline over 2 to 3 years. Water immediately and deeply: Fill the hole, then water until the soil is saturated around the full root zone. For the first 48 hours after planting, these trees need consistent moisture at the root level to begin establishment. Don’t rely on rain for that first watering. Mulch correctly: Two to 3 inches of mulch over the root zone keeps moisture in and soil temperature stable. Keep it a few inches away from the trunk — mulch piled against the bark traps moisture and invites rot and pest damage. Pro Tip: For a staggered double row, set the back row first, then place the front row stakes in the gaps. It’s much easier to adjust the front row position relative to established back stakes than to try to offset both rows simultaneously from a center line. Planting and Care After the Row Is in the Ground Spacing gets the hedge off to the right start. What happens in the first two growing seasons determines whether it actually thrives. Sunlight requirement: Full sun means 6 or more hours of direct light daily. Partial shade works, but hedges in full sun grow denser and hold that deep emerald color better through winter. A row planted along a north-facing fence that never sees direct afternoon light will be thin by comparison. Soil pH and drainage: These trees want soil pH between 6.0 and 8.0 — they’re not picky, but they won’t tolerate standing water. If the planting area drains poorly, amend with coarse material or regrade before the trees go in. Planting into wet soil and hoping it drains is how you end up with root rot two years later. Watering schedule: Deep, infrequent watering beats frequent shallow watering every time. Soak the root zone thoroughly, then let the top few inches dry before watering again. During the first growing season, that typically means once or twice a week in dry weather. Pruning frequency: At 2 to 3 foot spacing, plan for one annual trim in early spring to keep the hedge tight and maintain airflow. At 3 to 5 foot spacing, light trimming every 2 to 3 years is usually enough to maintain the pyramidal shape. Winter prep: Water deeply in late fall before the ground freezes. Dry roots heading into winter is the most common cause of winter burn — the foliage desiccates because the frozen root zone can’t move water to the canopy. Heavy snow: Brush accumulation off branches before the weight bends them. A limb that stays bent under snow for a week rarely springs fully back. Warning Signs to Watch, and What They Actually Mean Most problems with Emerald Green Arborvitae come back to one of three causes: water, airflow, or spacing. Here’s what each warning sign is telling you. Problem Signs Likely Cause Fix Browning foliage Brown tips or patches Dry soil or winter burn Water deeply; water before first freeze Yellowing foliage Pale or yellow growth Overwatering or poor drainage Let soil dry; improve drainage Thin inner canopy Sparse inside branches Too-close spacing, reduced airflow Prune lightly; consider removing one tree from the row if chronic Bagworms Small hanging bags on branches Pest infestation Hand-remove bags in fall/winter; treat in late spring when larvae are young Spider mites Fine webbing, dusty or dull foliage Hot, dry weather Spray foliage with strong stream of water; inspect weekly in dry spells Root rot Wilting; slow, ongoing decline Saturated soil, too-deep planting Improve drainage; avoid overwatering Winter burn Brown outer foliage in spring Cold wind, dry roots before freeze Late fall deep watering; windbreak protection for exposed rows Snow damage Bent or split branches Heavy wet snow accumulation Brush off snow gently with a broom before it sets The one on that list that spacing directly controls is thin inner canopy. If the inner branches on your established hedge are dying back, it’s an airflow problem. You can prune to open the canopy, but if the spacing is too tight, that’s a band-aid. The long-term fix is giving the row more room — which in an established planting sometimes means removing every third tree and accepting a temporary gap that fills in over 2 to 3 years. Common Planting Mistakes and How They Play Out Over Time The mistakes below aren’t immediately obvious — they show up 3 to 7 years after planting, which is why they keep getting made. Planting too close based on nursery size, not mature width: A 3-foot-wide nursery tree planted 2 feet from its neighbor looks fine at installation. At year 5, when both trees are 3.5 feet wide, the root zones are in full competition and the inner canopy is dying. Measuring branch tip to branch tip: Young trees come in varying sizes from the nursery. Measuring tips means the spacing varies with the size of individual trees rather than staying consistent. Trunk center to trunk center is the only reliable measurement. Planting flush against a structure: A tree 12 inches from a fence looks natural as a 2-foot sapling. At maturity, it can’t develop evenly and needs constant trimming to keep it from growing into the fence. Poor drainage and hoping for the best: These trees look fine in the first year in wet soil. Root rot takes 2 to 3 years to manifest, and by then the tree is usually too far gone to save. Address drainage before planting. Inconsistent watering in year one: The establishment period is when these trees are most vulnerable. Letting the soil dry out completely during the first summer — even once — can set back establishment by a full season. Mulch against the trunk: A mulch volcano looks tidy. It’s slowly killing the root collar. Keep mulch 3 to 4 inches away from the bark. Landscaping Ideas That Put the Spacing to Work Emerald Green Arborvitae does more than one job in a yard, and the spacing approach changes slightly depending on which role you’re asking it to play. 1. Living Privacy Wall Behind a Patio Behind a patio, space these trees at 2.5 to 3 feet for a full screen within 3 to 4 years. Keep the row back at least 4 feet from seating areas so the branches don’t encroach into the usable space as the hedge matures. If the surface underneath is still undecided, the stamped concrete vs pavers comparison is worth reading before you lay anything permanent. 2. Entry Framing Along a Walkway or Gate One tree on each side of an entry or gate works best with matching specimens from the same nursery lot — size variation between the two flanking trees becomes more obvious as they mature. Position them so their eventual 3- to 4-foot width doesn’t crowd the walkway clearance. 4. Green Backdrop for a Perennial Bed At the back of a perennial bed, 3 to 4 feet apart gives enough density for a solid backdrop without overwhelming the plantings in front. The year-round green structure keeps the bed from looking bare in winter when the perennials are dormant. 5. Corner Softening in a Small Backyard A group of three in a corner, planted in a loose triangle with 4 to 5 feet between them, softens the hard geometry of a fence corner without becoming a full hedge. This works in smaller yards where a full row isn’t needed, but the corner needs vertical interest. 6. Driveway Border Along a driveway, keep the row at least 4 feet from the pavement edge. Car doors open 2 to 3 feet and drivers need clearance to step out. A tree planted 18 inches from the concrete is a problem within 3 years. The modern driveway ideas guide covers how surface material and border plantings work together, which is worth considering if the driveway itself is also part of the project. Frequently Asked Questions These are the questions that come up most often once someone is standing in the yard with a row staked out and a flat of trees waiting to go in. How far apart should I plant emerald green arborvitae for privacy? Two to 3 feet center-to-center for a solid privacy hedge. At 2 feet, the row closes fastest but needs annual trimming. At 3 feet, it takes a bit longer but stays healthier with less maintenance long-term. How many emerald green arborvitae do I need for 100 feet? At 3-foot spacing, plan for 34 trees. At 4-foot spacing, 26 trees. At 5-foot spacing, 21 trees. Always add 10% to account for nursery variability and any trees that don’t establish. Do emerald green arborvitae grow better with closer or wider spacing? Wider spacing produces healthier individual trees with better airflow and root development. Closer spacing produces faster privacy but requires more maintenance and risks inner dieback as the hedge matures. Can emerald green arborvitae be planted 2 feet apart? Yes, but expect to trim once a year minimum. At 2 feet, the hedge fills in fast, but the inner canopy needs airflow management to stay healthy. It’s the right call for tight side yards where faster coverage matters more than long-term ease. How close to a fence can I plant emerald green arborvitae? Keep at least 2 to 3 feet between the trunk and the fence. At maturity, the 3- to 4-foot canopy width needs somewhere to go. A tree pushed against a fence grows asymmetrically and becomes difficult to maintain without heavy pruning. How long does it take for emerald green arborvitae to fill in? At 2 to 3 foot spacing, a privacy screen reads as solid around year 3 to 4. At 4 to 5 foot spacing, expect 5 to 7 years. Full maturity at either spacing is a 10-year picture. Can emerald green arborvitae be planted in clay soil? Not without amendment. Clay holds water, and these trees need drainage. Amend with coarse material and organic matter before planting, or build a slightly raised planting bed. Planting into heavy clay without addressing drainage leads to root rot within a few years. Are emerald green arborvitae deer resistant? No. Deer browse Thuja heavily in winter when other food is scarce. Young trees under 4 feet are most vulnerable. Use deer fencing or a repellent spray from November through March if deer pressure is high in your area. Final Verdict If the planting area is tight, the yard is a standard residential lot, and the goal is a hedge that stays manageable without turning into a maintenance project, Emerald Green Arborvitae spacing at 3 feet center-to-center is the most reliable starting point. It delivers solid privacy coverage, keeps root competition at a reasonable level, and produces a hedge that doesn’t require annual trimming to prevent it from overrunning the space. For yards with more room and less urgency around coverage speed, push to 4 feet and let these trees develop at their own pace. The single most important step before anything goes in the ground: set your stakes, measure center-to-center, and walk the line from a distance before you dig. Adjusting a stake takes 30 seconds. Moving a planted tree takes a full day and sets the root system back by a season.
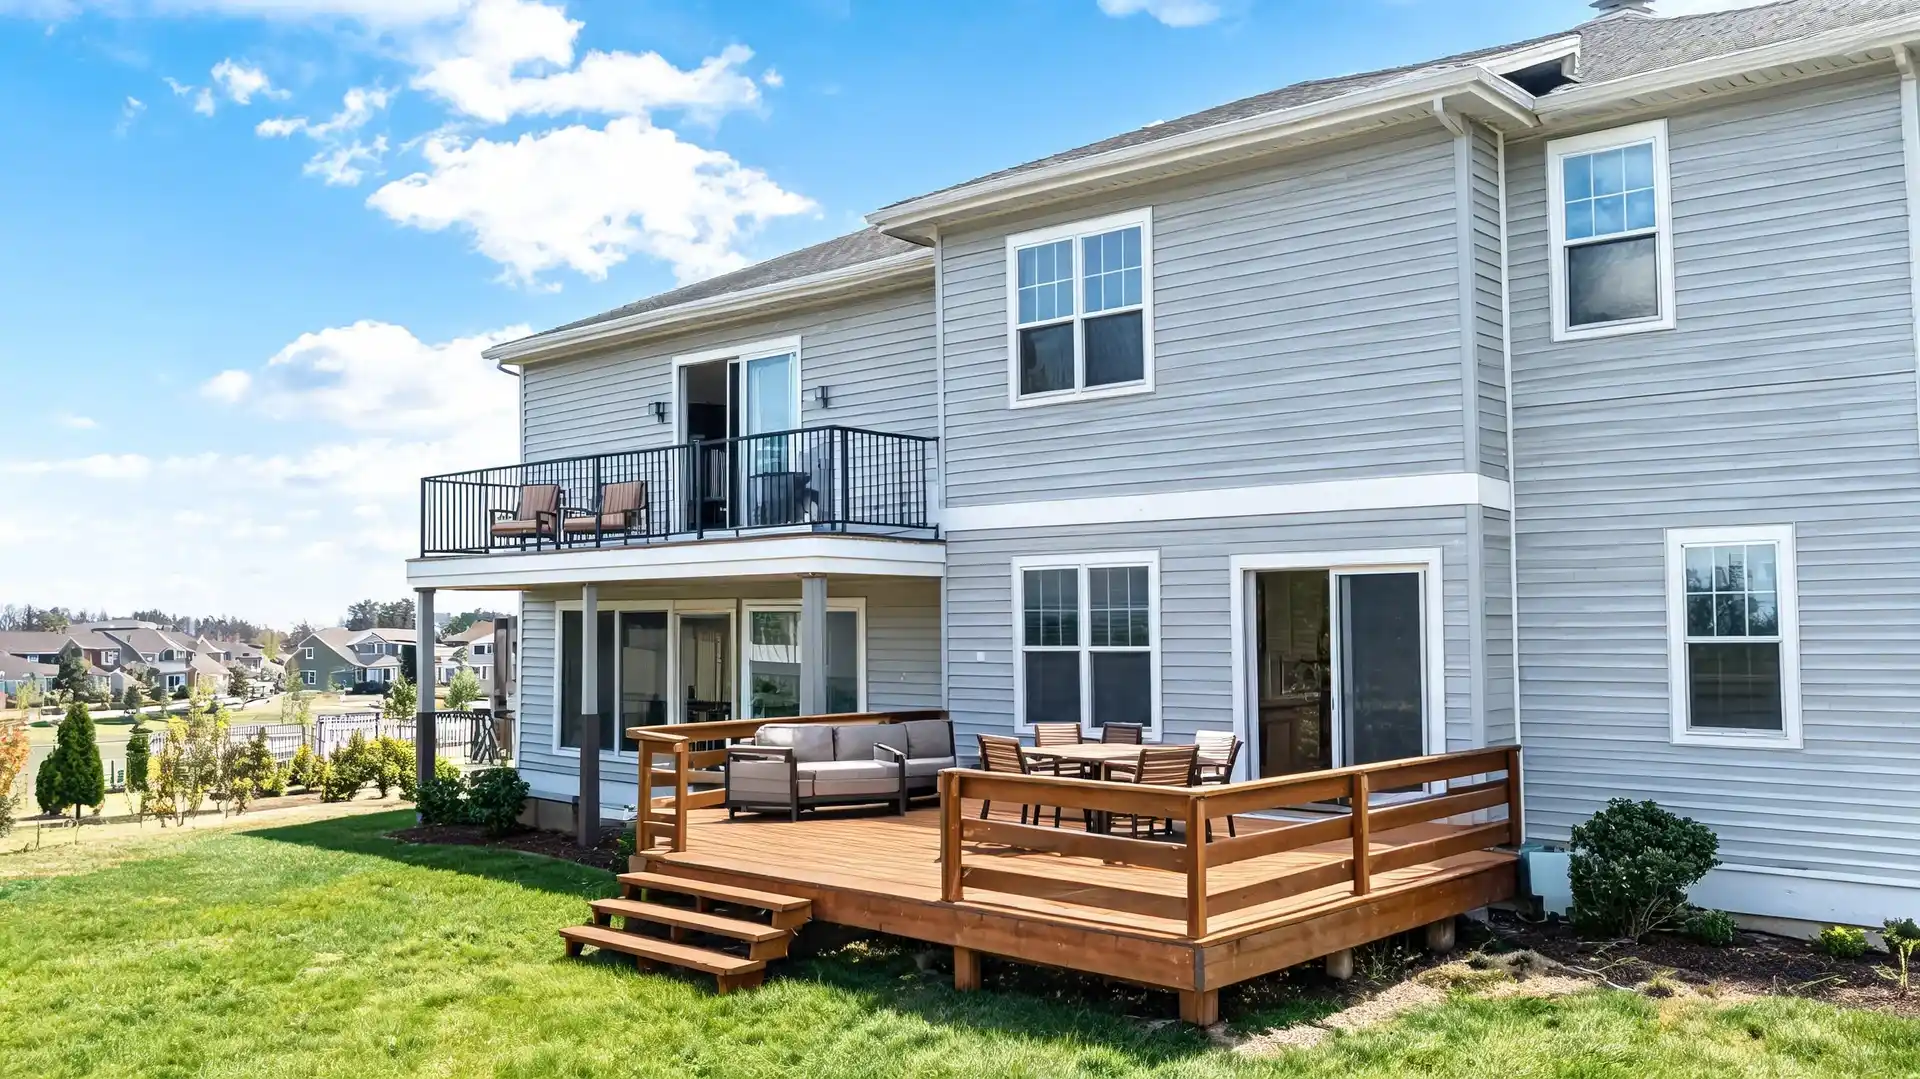
Structure Deck Balcony Location Ground level or slightly raised, attached to back or side of home Second floor or higher, projecting from exterior wall Access Ground-floor door, yard stairs, or direct from backyard Interior room only, bedroom, living room, or upper hallway Typical Size 200–400 sq ft 40–80 sq ft Support Posts, beams, and concrete footings anchored to the ground Cantilevered from building frame or supported by columns Avg Cost $4,340–$12,589 installed $8,000–$25,000 installed Maintenance Surface sealing, board checks, drainage Waterproofing, railing checks, wall-connection seal Best For Groups, grilling, outdoor dining, yard access Private sitting, views, upper-floor rooms If you care about how your home feels outside, the words you use matter more than you may think. I have seen people point to an upper-floor platform and call it a deck, while others call the same thing a balcony. That small mix-up can change the quote, the permit, and the safety checks. So let’s make this simple. If you are planning a new outdoor space, updating an old one, or just trying to understand what your home already has, this balcony vs deck comparison will help. I will walk you through how each one is built, where it sits, how you use it, what can affect cost, and how it compares with patios, porches, verandas, and other outdoor spaces. By the end, you will know what to call your space and how to plan it with more confidence. Cost Note: Figures in this article are estimates. Actual costs vary significantly by region, contractor, materials, and project scope. Always get at least three quotes before committing to any project above $1,000. What Is a Deck? A deck is a flat outdoor platform usually attached to the back or side of a home. It sits at or slightly above ground level, though homes on sloped lots may have decks raised 8 to 12 feet. It is still a deck when it uses posts, beams, and footings and connects through a ground-floor door or stairs. Decks are common in single-family homes because they provide open access to the yard and enough space for a grill, dining table, chairs, and guests. They are often built from pressure-treated wood, composite decking, cedar, or hardwood. The average deck costs about $8,250, with most projects ranging from $4,340 to $12,589. Pressure-treated wood runs $25 to $40 per square foot installed, while composite decking runs $20 to $45 per square foot for material alone. Best for: Grilling, large seating groups, outdoor dining, yard access, and family use. Common deck types: Attached decks, freestanding decks, ground-level decks, raised decks, multi-level decks, wraparound decks, and rooftop decks. What Is a Balcony? A balcony is a small, elevated platform projecting from the exterior wall of a building, typically on the second floor or higher. It is reached from inside, usually through a bedroom, living room, or hallway door. That upper-floor, inside-only access is the main clue. Most balconies are smaller than decks, often around 40 to 80 square feet. That is enough for two chairs, a small table, and a planter. Some balconies are purely decorative, while others serve as private outdoor seating areas. A balcony can be cantilevered from the building frame or supported by posts and beams. Both types need careful planning because load, drainage, waterproofing, and wall connections are more complex than a ground-level build. Building a balcony costs $8,000 to $25,000, with an average of about $14,000. Per square foot, expect $30 to $90, depending on materials, support type, waterproofing, and railing specs. Best for: Views, fresh air, private sitting, and upper-floor access in apartments, condos, and multi-story homes. Common balcony types: Cantilevered balconies, supported balconies, Juliet balconies, recessed balconies, stacked balconies, and wraparound balconies. Balcony vs Deck: Differences Across Every Factor This is where the balcony vs deck comparison gets practical. Each of the factors below can be shown visually, and each one affects how you build, what you spend, and how you use the space. 1. Location and Floor Level A deck sits at or near ground level, typically behind or beside a single-family home. It connects directly to the yard and the ground floor of the structure. A balcony always sits on the second floor or higher, projecting from the exterior wall above an open space. That floor-level difference is not just about height. It changes what you see, how you enter, who can access it, and what the structure below it must handle. 2. Access and Entry Point A deck can be reached in multiple ways: through a ground-floor door, down a staircase, or directly from the yard. This open-access design makes decks practical for gatherings, outdoor cooking, or frequent trips between the house and yard. A balcony has a single access point: through the door of the room it connects to. Usually, that is a bedroom, master suite, or upstairs living area. Nobody enters a true balcony from the street, yard, or a staircase off the ground. Takeaway: Decks support group movement and outdoor hosting. Balconies are personal, accessed by the one or two people in the connected room. 3. Size and Furniture Space A standard family deck covers 200 to 400 square feet. That fits a six-seat dining table, a grill station, lounge chairs, and enough clearance between them that people aren’t constantly shuffling around each other. Larger lots push decks to 600 square feet or more. A balcony averages 40 to 80 square feet. Two chairs and a side table fill it. A 100-square-foot balcony gives a bit more room, but large furniture sets don’t work, and anything over 80 pounds per square foot needs a structural review before you bring it up. 4. Structure and Support A deck’s structural system starts in the ground. Posts are embedded in concrete footings; beams span between the posts; joists run across the beams; and decking boards lie on top. The IRC Chapter 5 (R507) covers deck structural requirements, including ledger attachment, post sizing, and footing depth. A balcony attaches to the building’s structure rather than the ground. A cantilevered balcony uses joists that extend through the exterior wall and are locked into the building’s frame. A supported balcony uses columns or posts running to the ground. Both methods require careful load analysis because the support point is an upper wall or floor system rather than the earth. Takeaway: A deck builds up from the earth. A balcony builds out from the building. Different engineering paths, different inspection requirements, different costs. 5. Safety, Railings, and Load Under IRC Section R312.1.2, guardrails are required on any elevated walking surface that is 30 inches or more above grade. This applies to both decks and balconies, but the safety stakes are higher for balconies because of the open space below. Balcony railings must meet load-bearing tests and attachment requirements that account for outward and downward force. Balcony floors also need waterproofing and a drainage slope to prevent water from tracking back into the wall connection or pooling under the flooring system. Decks need railing when elevated, plus stair guards and proper footing depth. But a structural failure on a deck at ground level carries less risk than a failure on a balcony 20 feet up. Takeaway: Both need proper railings, but balcony safety requirements include upper-floor load attachment and waterproofing, which decks do not always require. 6. Cost and Build Complexity A standard ground-level deck of 200 square feet, built with pressure-treated wood, runs roughly $5,000 to $16,000 installed. Composite material pushes that to $10,000 to $18,000 or more. Deck cost scales mostly with size, material, and the complexity of stairs and railings. A 60-square-foot balcony can cost $8,000 to $25,000, depending on the support method, waterproofing needs, railing specifications, and whether it is new construction or an addition to an existing structure. Cantilevered designs and post-construction balcony additions on existing homes run toward the higher end. Line Item Deck (200 sq ft) Balcony (60 sq ft) What Drives Variation Materials $2,500–$9,000 $2,000–$8,000 Wood vs composite; railing spec Labor $1,500–$5,000 $3,000–$10,000 Upper-floor tie-in adds hours on balconies Waterproofing Not always required $500–$2,000 Mandatory on balconies; membrane + slope Permits & Engineering $300–$800 $500–$2,500 Structural calcs required for balconies Total Range $5,000–$16,000 $8,000–$25,000 Balcony costs more per sq ft, less in total sq ft 7. Maintenance and Water Control Wood decks need cleaning, sealing, and staining every 1 to 3 years. Composite decks are low-maintenance but still require periodic cleaning and occasional board checks. Drainage on a deck mostly means water running off the sides or through the deck board gaps. Balconies require a more controlled approach to water. The floor must slope toward a drain or outward edge, and the wall connection must be sealed with a waterproof membrane. Water that pools on a balcony or sits against the wall connection can work into the building’s framing over time. Railing posts and balusters also need periodic tightening and corrosion checks, especially in coastal climates. The framing beneath the deck surface should also be properly finished; the deck skirting options chosen affect both airflow under the structure and how effectively debris and pests are kept out. Takeaway: Decks need surface upkeep. Balconies need a surface, waterproofing, a drainage slope, and wall-connection maintenance. 8. Construction and Materials Decks are usually built with pressure-treated wood, cedar, hardwood, composite boards, or PVC decking. The frame often uses treated lumber for posts, beams, and joists, along with concrete footings. Material choice affects cost, maintenance, heat, slip resistance, and the surface’s longevity. Balconies use a wider range of structural and finish materials because they are attached to the building. The frame may include steel, reinforced concrete, treated wood, or engineered supports. The walking surface may be tile, concrete, waterproof decking, or a coated system. Waterproofing matters more on a balcony because water can move into the wall or floor structure if the surface fails. Pros and Cons: Balcony vs Deck Before choosing between a balcony and a deck, it helps to see the trade-offs side by side. One gives you more space and yard access. The other offers privacy, views, and upper-floor access. This table makes the choice easier to compare. Factor Deck Balcony Space Large, flexible layouts Small, compact footprint Access Open, yard, and ground-floor Private, inside room only Use Groups, grilling, dining Personal sitting, views, fresh air Cost to Build Lower per sq ft, higher total Higher per sq ft, lower total Privacy Moderate, visible from the yard Higher, reached from inside Views Ground level or slightly raised Elevated, better long-range views Maintenance Surface, boards, drainage Waterproofing, railing, and wall seal Safety Rules Railing when 30 in+ above grade Railing plus load and seal requirements Resale Impact Strong for single-family homes Adds value in multi-story, city homes Best For Families, entertaining, yard life Individuals, couples, upper-floor rooms A deck usually wins for space, hosting, and family use. A balcony works better when you want a smaller, private outdoor spot connected to an upper room. Once you know your main use, the better option becomes much clearer. Balcony vs Patio vs Deck vs Porch vs Veranda: What Is the Difference? The difference between a patio and a balcony is one of the most-searched questions in this category, and it is easy to answer once you understand the floor level. A patio is always at ground level and paved. A balcony is always elevated, attached to an upper floor, and reached from inside. They serve entirely different homes, rooms, and use cases. Here is a plain breakdown of all seven outdoor structures that regularly get mixed up: Structure Floor Level Roof Access Best For Deck Ground to slightly raised Open Ground floor or yard Groups, grilling, yard access Balcony Second floor or higher Open or partial Interior room only Views, private sitting Patio Ground level, paved Open Ground floor or yard Casual seating, low-cost outdoor space Porch Ground level or slightly raised Always covered Entry or front of home Shade, curb appeal, entry Veranda Ground level Covered, wraps around home Multiple sides Shaded outdoor living Terrace Rooftop or raised grade Open Rooftop or hillside access Urban homes, hillside builds Lanai Ground level Covered, often screened Ground floor Florida and tropical climates The difference between patio and balcony goes beyond materials. A patio sits on the earth and can be added to almost any home without structural work. A balcony requires upper-floor attachment, structural load analysis, waterproofing, permits, and is closer to a room addition than a ground-level pour. If you’re also weighing a covered entry structure, the deck vs porch comparison covers the resale and structural differences in detail. If a contractor or real estate listing uses any of these terms and you’re unsure what structure is actually described, ask them to confirm the floor level, the access point, and whether a roof is included. Those three facts identify the structure without ambiguity. Pro Tip: Before signing any contract, confirm the floor level, access point, and structural support method with your contractor in writing. These three details determine the permit category, the engineering requirements, and ultimately what the project costs. A verbal description and a written scope are not the same thing. Which Is Better for Your Home: Balcony or Deck? Neither option is better for every home. The right choice in the balcony vs deck decision depends on your home type, floor level, yard space, budget, and how you plan to use it. Choose a deck if: You have a single-family home with a yard. You want space for grilling, dining, or hosting. You need easy access from the house to the backyard. You want room for larger furniture. Your budget favors a lower cost per square foot. Choose a balcony if: You want outdoor access from an upper floor. You live in an apartment, condo, or townhouse. You want a private sitting spot. You care more about views than a large space. You only need room for chairs, plants, or a small table. On hillside lots, either can work. A raised deck connects better to the main floor when the grade drops away from the back door, and on flatter ground, a concrete patio and wood deck pairing often handles the yard transition better than either structure alone. A balcony can make more sense off an upper bedroom when the slope is severe enough that a raised deck would require significant post height and structural complexity. Confirm all permits and HOA requirements with your local building office before finalizing any design. You can find your local permit authority through USA.gov’s permit guidance. Common Mistakes When Comparing a Balcony and Deck Small wording mistakes can lead to wrong quotes, wrong permits, and extra work later. Before you price anything, make sure you are naming the structure correctly and thinking through the parts that affect safety, water, and approvals. Calling every raised platform a deck: A raised platform attached to an upper floor and reached from inside is a balcony, not a deck. Using the wrong term can lead to the wrong quote, permit category, and material plan. Ignoring water drainage on balconies: A flat balcony can hold water and send it toward the wall connection. Every balcony needs a clear drainage plan, so water moves away from the building, not into it. Assuming smaller means simpler: A small balcony can cost more than a larger deck because upper-floor support, waterproofing, and load checks add complexity. Skipping Permit or HOA Checks: Both structures require permits in most US jurisdictions. Balconies may also trigger HOA rules in condos, townhomes, and planned communities. These mistakes are easy to avoid when you start with the right name, check local rules early, and ask your contractor how the structure will handle support, drainage, railing, and long-term wear. According to the U.S. Department of Housing and Urban Development (HUD), major structural additions, including outdoor platforms, must comply with local safety and building codes. Starting without a permit can create problems when you sell the home or file an insurance claim. Frequently Asked Questions Can you add a balcony to an existing house? Yes, but it is often more complex than adding a deck. A contractor must check the wall framing, floor structure, waterproofing, railing support, and door opening. It may also need engineering approval, permits, and HOA permission before any exterior work can begin safely on site. Can you put a grill on a balcony? Sometimes, but many apartments, condos, HOAs, and fire codes restrict grills on balconies. Open-flame grills are often not allowed, especially on covered or small balconies. Check local fire rules and building policies first. A deck usually offers safer grill placement and clearance around nearby walls. Which lasts longer, a balcony or a deck? A well-built deck can last 10 to 30 years, depending on material, climate, and upkeep. Wood usually needs more care than composite. A balcony can also last decades, but its waterproofing, railing connections, and wall attachment must be inspected regularly to prevent damage over time. Can you enclose a balcony or deck? You may be able to enclose either one, but approval matters. Enclosing a deck can turn it into a screened room or porch. Enclosing a balcony can affect airflow, drainage, load, and exterior appearance, so condos and HOAs often have stricter rules for this work. Does a deck or balcony add more resale value? It depends on the home type. A well-built deck adds $10,000 to $20,000 in resale value for single-family homes with usable yards, where outdoor entertaining space is expected. A balcony adds value in multi-story and urban homes where upper-floor outdoor access is otherwise unavailable. Neither adds value if it was built without permits. Should you tell insurance before adding a balcony or deck? Tell your home insurance provider before adding a balcony or deck. A new outdoor structure can affect replacement value, liability risk, and coverage needs. If it is built without permits or proper inspections, future claims may be harder to settle after damage or injury later. Final Thoughts The balcony vs. deck choice becomes much easier when you stop looking at photos and start considering how you will use the space. I always tell homeowners to begin with four things: floor level, access, structure, and daily use. The right answer follows the structure of your home, not a preference for one look over another. If you have a single-family home with a yard and you want space for people, a grill, and a dining setup, a deck built from pressure-treated lumber or composite will do that for $5,000 to $16,000 with far less engineering complexity. If you have an upper-floor room and no yard access, a balcony is the only way to get outdoor space from that room. At $8,000 to $25,000, that access comes at a real cost, so make sure the waterproofing and structural tie-in are done right the first time. Before you call anyone, get the floor level, access point, and drainage plan confirmed in writing. That’s the single most important step before any money changes hands.
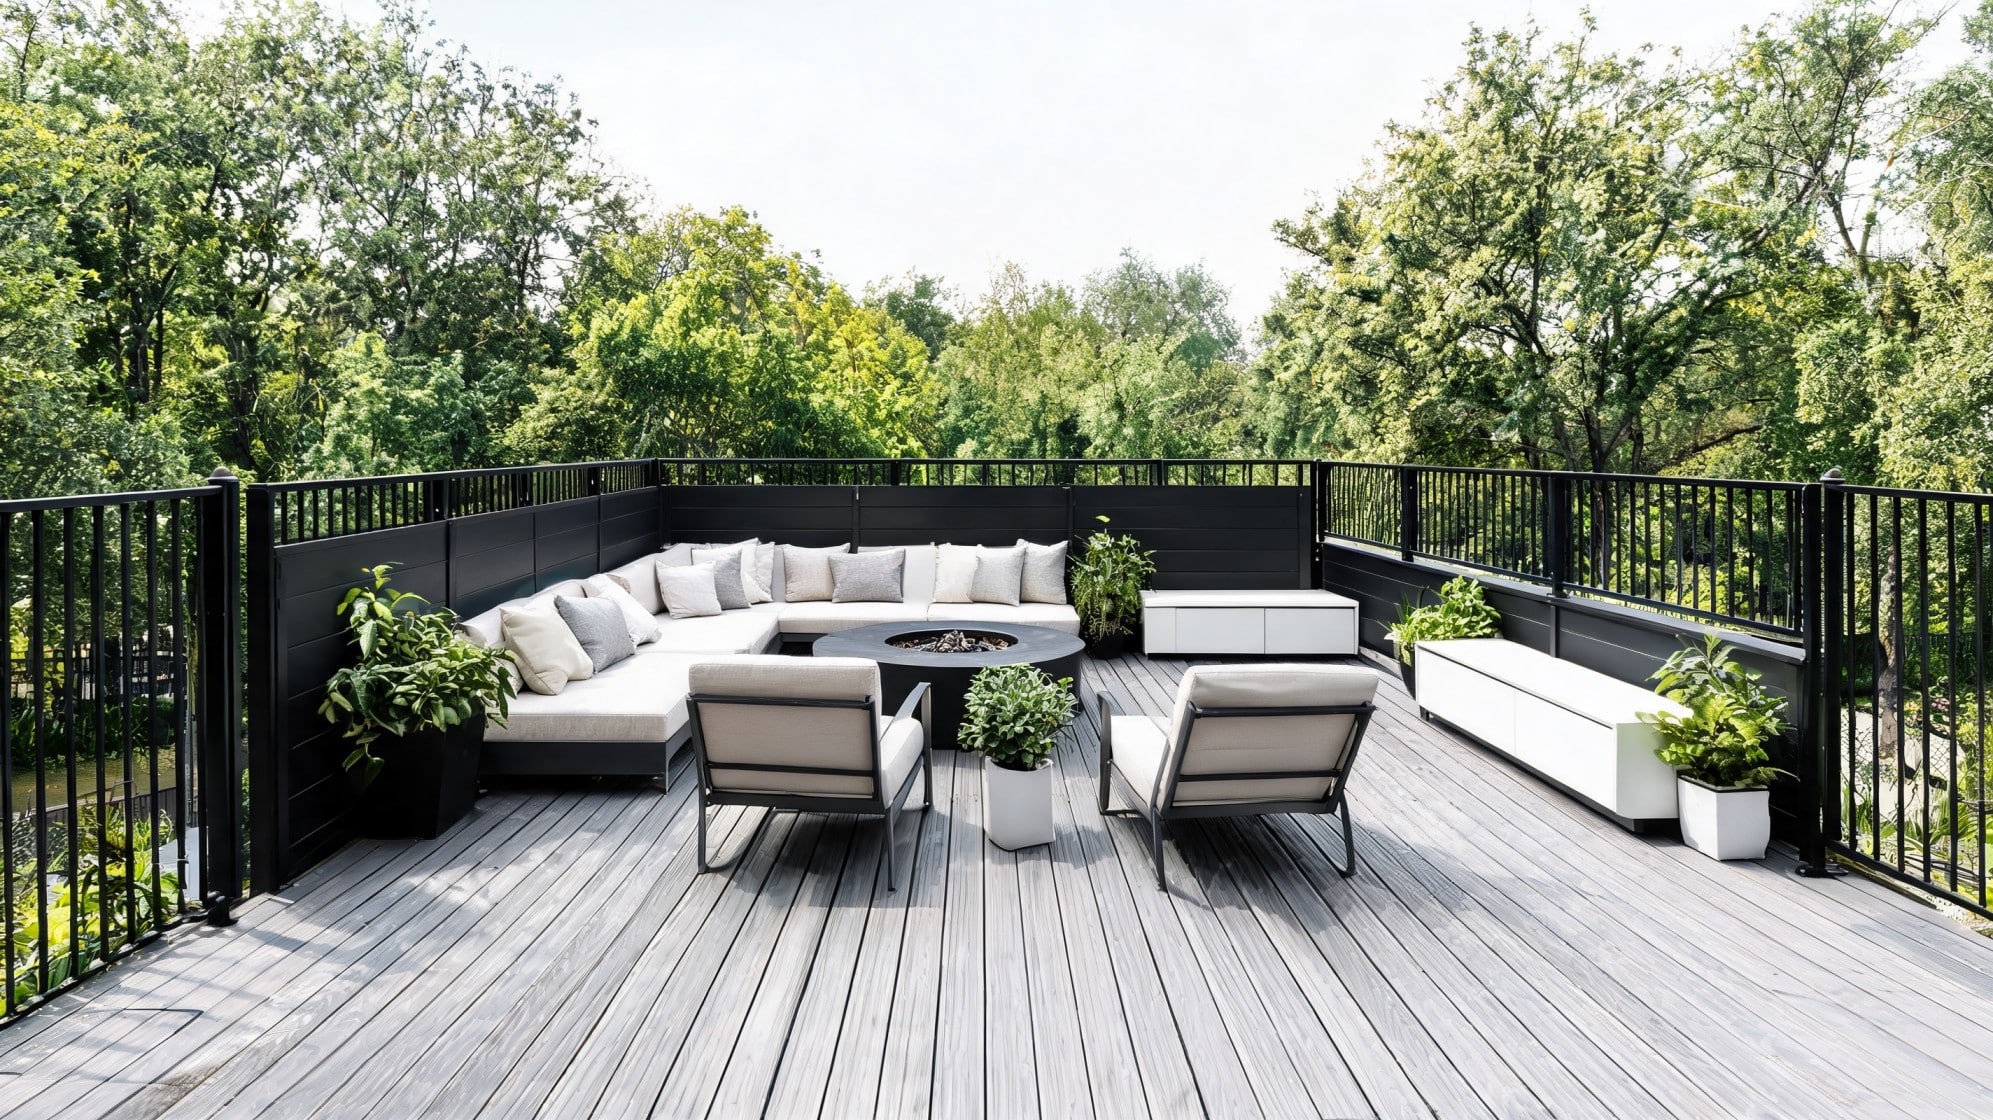
Before you buy a single piece of deck furniture, you need to know what the space will actually do to it. Resin wicker fades in two seasons on a south-facing deck. Powder-coated metal rusts at the feet if water pools on wood decking. Teak holds up in almost any climate but needs annual oiling if you want it to stay honey-brown rather than silver-grey for a full breakdown of how each outdoor wood species behaves over time, that comparison covers what the material labels on furniture tags rarely tell you. These deck furniture ideas are organized around what holds up, what fits, and what you will actually use every day, not just what photographs well on a showroom floor. Material Cost Range Lifespan (avg) Maintenance Climate Suitability Teak $$$-$$$$ 20-30+ years Annual oiling (optional); weathers to silver without it All climates; excellent in coastal and high-humidity Powder-coated aluminum $$-$$$ 10-20 years Wash annually; touch up chips before rust sets in at feet Most climates; watch feet contact points in wet regions Resin wicker (all-weather) $$-$$$ 5-10 years Minimal; keep out of prolonged direct UV with a cover Covered decks best; UV degrades weave faster than most sellers admit HDPE (poly lumber) $$-$$$ 20+ years Soap and water; no sealing or staining needed All climates; does not splinter, crack, or absorb moisture Acacia wood $$ 5-10 years outdoors Seal every 6-12 months; will crack and grey faster than teak Dry climates best; avoid coastal or high-humidity without consistent sealing Sling / mesh fabric $-$$ 5-8 years Rinse clean; replace slings when sagging Excellent for pool decks; dries fast, no mildew in fabric Use that table before you read another word. The ideas below only hold their value if the furniture you pick is matched to the climate your deck actually lives in. What to Know Before You Choose Deck Furniture Measure the usable space first, not the footprint. Account for the door swing, stairs, railing edge, grill clearance, and any umbrella you plan to open. I mark furniture zones with tape on the deck surface before ordering anything. It shows you immediately where the space feels open and where it feels tight. Standard clearances that keep a deck safe to walk through: 30 to 36 inches for main paths, 18 inches between a coffee table and sofa, 3 feet behind dining chairs so people can push back without hitting a wall or railing. Keep stairs and door swings fully clear. Fire pits and fire tables need at least 3 feet of clearance from railings, walls, furniture legs, and any cushion fabric. Then match the furniture type to how you actually use the deck: Lounging: Sofa, loveseat, chairs, and ottoman for a relaxed seating area with deep cushions. Dining: Table, chairs, or bench seating for outdoor meals. Hosting: Sectional, bar cart, or fire pit table with room for 4 to 8 people to sit comfortably. Relaxing alone: Chaise lounge, egg chair, or hammock chair for quiet time outside. Family daily use: Storage bench, rounded edges, washable cushion covers, and furniture that cleans fast after meals. Small Deck Furniture Ideas Small decks require discipline. Every piece earns its place by doing more than one job, or it does not belong. Here is what works when the square footage is tight. 1. Folding Bistro Set A folding bistro set is the most flexible piece you can put on a tight deck. It gives you a table and two seats, and when you need open floor space you fold the chairs flat and lean them against the railing. Round tables work better than square on narrow decks because they are easier to walk around and do not catch your hip on the corner. On a wood or composite deck, check the feet on powder-coated metal bistro sets before you buy. Rubber or plastic glides on the feet prevent the rust marks that bare metal leaves on sealed decking after one wet season. Materials that hold up: Powder-coated steel with rubber foot caps, teak, or all-weather resin. 2. Railing Bar Table A railing bar table mounts to the railing or sits flush against it, which means it uses zero floor space except for the two bar stools that tuck underneath it when not in use. This idea works on any deck where the view or the light is the reason you are outside. You eat at the railing, keep the center of the deck open, and the whole setup breaks down in about 60 seconds if you need the space for something else. One thing most people overlook: check that your railing can handle the lateral load before you mount anything to it. Most residential deck railings are built to code for a 200-pound horizontal force, so a clamping bar table is generally fine, but a sagging or loose railing is not the right anchor for furniture people lean on. Materials that hold up: Powder-coated steel, aluminum, or sealed composite surfaces. 3. Storage Bench A storage bench placed along a wall or railing gives you seating and a place to store cushions, throws, and small gear without adding a separate deck box. On small decks, that trade matters. The lid doubles as a seat and keeps cushions dry so you are not pulling out damp fabric every time you sit down. Look for a bench with a lid that stays propped open on its own, drainage holes in the bottom, and a seal on the lid edge. HDPE and resin benches last longest because they do not absorb moisture. Untreated or poorly sealed wood benches can rot from the inside out within two or three seasons in wet climates. Materials that hold up: HDPE poly lumber, resin, or teak with a sealed lid edge. 4. Compact Outdoor Loveseat A two-seat outdoor loveseat gives you a cozy lounge area without the footprint of a full sofa. Push it against the house wall or the railing edge to preserve walking space, and put a glass-top or lightweight aluminum coffee table in front. The glass top keeps the visual space open on a small deck because it does not block sight lines the way a solid wood surface does. If the deck gets full afternoon sun, check the cushion fabric rating before you buy. Fabrics with a UV fade rating below 1,000 hours of direct sun exposure will look washed out in two seasons. Solution-dyed acrylic fabric (the category name most sellers list) holds color significantly longer. Materials that hold up: Aluminum frame, high-quality resin wicker, teak, and solution-dyed acrylic cushion fabric. 5. Stackable Chairs Stackable chairs let you keep four or six seats available without dedicating floor space to all of them every day. They stack in a corner or go into storage, and you pull them out when guests arrive. The ones worth buying are light enough for one person to carry but solid enough that they do not flex or rack when someone sits hard into them. Avoid chairs with hollow aluminum legs that are unsealed at the bottom. Water gets in and sits, and the leg rusts from the inside over one or two winters without any visible warning on the outside surface until it gives way. Materials that hold up: Solid aluminum, resin, or powder-coated steel with capped or sealed legs. Large Deck Furniture Ideas A large deck that is furnished without a plan ends up feeling scattered. Think in zones before you think in pieces. One zone for dining, one for lounging, one for quiet or reading. Each zone gets its own anchor piece, and the rest of the furniture is placed around it. The ideas below are the ones that work hardest in a large-deck layout. 6. Outdoor Sectional Sofa A sectional sofa is the anchor piece for a large deck lounge zone. An L-shape works for corners; a U-shape works when you want conversation seating for eight or more. Either way, the sectional needs to be paired with an outdoor rug underneath it, or the zone just looks like furniture sitting on a deck rather than a space someone designed. The frame material matters more than people realize. Resin wicker over a steel frame is the standard at mid-price points, and the steel frame is where problems start. An unpainted or poorly coated steel frame corrodes at the welds within three to five years in coastal or humid climates. Pay more for an aluminum frame, or buy wicker over powder-coated steel and plan to cover it through wet seasons. Materials that hold up: Aluminum frame, high-grade resin wicker weave, solution-dyed acrylic cushions with removable covers. 7. Chaise Lounge Zone Two or three chaise lounges placed where the sun hits best create a dedicated sunbathing and reading zone on a large deck. Put a small side table between every pair of lounges for drinks and sunscreen. Adjustable backs matter more than most people expect: fixed-flat lounges are fine for napping but frustrating when you want to sit up and read without propping cushions behind you. Near a pool, sling-fabric chaises are the better long-term call. Quick-dry mesh or sling fabric does not hold water in the weave and does not develop the mildew smell that thick cushion foam builds up when it stays damp for weeks at a time. Materials that hold up: Aluminum frame with sling fabric for pool-adjacent decks; teak or HDPE for dry-climate decks away from water. 8. Long Outdoor Dining Table A long dining table on a large deck changes how the whole space gets used. It gives you enough room for a full family dinner or a cookout without running a second table out every time. Figure 24 inches of table length per person seated, plus at least 36 inches on the long sides for chair pull-back and server clearance. On a wood deck, use furniture pads or glides under all four legs and under any cross-stretcher that contacts the surface. Metal or rough-cut wood edges leave permanent marks in composite and wood decking that no amount of sanding fully removes. Materials that hold up: Teak, aluminum, HDPE, or powder-coated steel with a sealed or powder-coated surface finish. 9. Outdoor Bar With Stools An outdoor bar table with stools earns its place on a large deck when the deck is close to a grill or kitchen. It keeps guests out of the cooking zone while still close to the action. Stools with footrests matter here: bar-height seating without a footrest forces people to brace their legs constantly, and most will migrate to lower chairs within 20 minutes. A freestanding bar table is more practical than a built-in one for most homeowners because you can reposition it for different events. Built-ins look sharp but commit you to a layout that may not suit everything you do on the deck across the seasons. Materials that hold up: Powder-coated aluminum, teak, HDPE, or stainless steel for bar surfaces that get heavy wet-glass use. 10. Deep Seating Set With Outdoor Rug Deep seating with thick cushions and an outdoor rug underneath turns a section of a large deck into a space that people actually want to sit in for two hours, not just visit for a few minutes. The rug is doing structural work here: it defines the zone, ties the pieces together visually, and reduces the hollow sound that furniture makes on an open deck surface. Choose cushions with removable, machine-washable covers. After a season of regular use, outdoor cushion covers hold bird droppings, sunscreen, food, and pollen. If you cannot wash them easily, they either get thrown away or they stay dirty, and neither outcome is acceptable for furniture you want to keep for five or more years. Materials that hold up: Aluminum frame, high-grade resin wicker, solution-dyed acrylic cushions with zip-off covers, and a polypropylene outdoor rug that drains and dries fast. Covered Deck Furniture Ideas A covered deck changes the calculus on material selection because direct rain and UV exposure are reduced. That does not mean you can use indoor furniture outside, but it does mean softer fabrics, tighter weaves, and lighter frames hold up better than they would on an open deck. What kills furniture on a covered deck is usually condensation, not rain: trapped humidity with poor airflow will mildew cushions and corrode metal joints just as thoroughly as direct weather, just more slowly. 11. Rocking Chairs With a Side Table Two rocking chairs with a small side table between them is the most durable covered-deck arrangement there is. Nothing mechanically complicated, nothing that fails. Place them where they have enough room to rock without the rear legs catching on the wall or railing edge: most rocking chairs need 12 to 18 inches of clear space behind the back legs when at full extension. Add seat cushions with ties so they stay put as the chair moves. Non-tied cushions slide forward on every forward rock and end up on the floor within 10 minutes of anyone actually sitting in the chair. Materials that hold up: Teak, HDPE poly lumber, or acacia with a quality sealant and cushion ties. 12. Hanging Egg Chair A hanging egg chair gives a covered deck a focal point and a dedicated spot for someone to sit away from the main conversation area. Freestanding models are the smarter choice for most homeowners because they do not require a structural assessment of the ceiling joists. If you go ceiling-mounted, have the mounting point load-rated by whoever built your deck cover. The chairs plus a 200-pound person plus the dynamic swing load is more force than people expect, and a failed mount pulls the ceiling material with it. Materials that hold up: Steel or aluminum freestanding frame; resin wicker seat with a cushion that ties in at the base. 13. Lantern Side Tables Overhead lighting on a covered deck rarely gives you the kind of light that makes the space feel worth sitting in after dark. Lanterns at table height, around chairs, and at the edges of the deck create warm pools of light that overhead fixtures never match. A lantern table pulls double duty: it gives you a surface for drinks and warm directional light without running a cord from the house to a floor lamp. For anything electric on a covered deck, confirm the fixture is UL-listed for damp or wet locations. “Indoor-rated” fixtures will corrode at the sockets inside two seasons of covered outdoor exposure, even without direct rain. Materials that hold up: Powder-coated metal or aluminum lanterns rated for outdoor damp locations; aluminum or teak table surface. 14. Wicker Conversation Set A wicker conversation set on a covered deck works well because it gets the UV and direct rain protection it needs to hold its color and weave integrity for longer. The standard layout is a loveseat or small sofa, two matching chairs, and a coffee table between them sized so the person at the far end of the sofa can still reach it. That usually means 18 to 24 inches from sofa edge to table edge. Keep the layout tight enough that people can actually talk at a normal volume. If the chairs are more than 7 feet apart, the conversation stops working and the zone feels like a waiting room. Materials that hold up: Resin wicker over an aluminum frame; outdoor-performance fabric cushions with removable covers. 15. Outdoor Daybed An outdoor daybed in a shaded corner of a covered deck gives the space something that chairs and sofas cannot: room to lie fully flat outside. Useful for naps, reading, or just watching the yard from a horizontal position without going back inside. Place it against a wall or privacy screen so it does not block foot traffic across the deck. The frame and mattress support need to be genuinely rated for outdoor use, not just listed as “weather-resistant.” Fully enclosed foam with no drainage will stay damp after any moisture exposure and grow mildew inside the cover within a season. Look for a mattress insert with drainage channels or an open-cell foam that dries from the inside out. Materials that hold up: Teak, resin wicker over aluminum, or powder-coated steel frame with a drainage-designed outdoor mattress insert. Deck Dining and Serving Furniture Ideas Dining and serving furniture is where layout and material decisions overlap most directly. The wrong table placement forces awkward traffic around every meal, and the wrong materials mean you are resanding or replacing a dining surface long before the frames wear out. 16. Bar Cart A bar cart on a deck serves a different function than a fixed serving station: it goes where you need it for each event and rolls back into a corner when the meal is over. The locking wheel is not optional on a deck with any slope. A cart without locked wheels on a slightly pitched surface will migrate into the backs of people’s chairs over the course of an evening. If a more permanent outdoor bar structure interests you, the whiskey barrel project ideas show how to build a functional bar surface from reclaimed materials at a low cost. For outdoor use, stick to metal or teak shelving. Painted MDF or untreated wood shelves on outdoor carts fail quickly when drinks spill repeatedly into them across a summer of use. Materials that hold up: Powder-coated metal or stainless steel frame with teak, aluminum, or sealed tile shelving. Deck Lounge Furniture Ideas Every deck benefits from at least one piece of furniture that is built for sitting longer, not just stopping by. These ideas are for the lounge corner, the reading spot, and the end-of-day seat that makes the deck worth coming back to. 17. Hammock Chair A hammock chair fills a corner without requiring as much floor clearance as a rocking chair. Freestanding models work on any deck surface and do not require drilling into a beam or a ceiling. The rope or fabric seat keeps air moving underneath you, which matters on a warm evening in a way that upholstered seats do not. Check the weight rating of the freestanding frame before buying, not just the chair itself. The combined dynamic load of a person settling hard into the chair plus swinging exceeds the static weight rating. A 250-pound dynamic rating on a freestanding frame is generally adequate for most adults; a 200-pound rating is too close to the line for daily use. Materials that hold up: Powder-coated steel freestanding frame; cotton-blend or polyester rope seat; weather-safe fabric cushion with insert ties. 18. Outdoor Poufs Outdoor poufs are the most flexible piece of furniture on this list. They work as a footrest, extra seat, or side table with a tray on top, and they weigh almost nothing, so rearranging the deck layout for a party takes about 90 seconds. Firm poufs hold shape through a season of daily use; soft-fill ones flatten permanently within a few weeks. Cover poufs or store them inside during extended rain. The fabric itself can handle moisture, but the fill does not dry quickly and will mildew if left saturated for several days in a row. Materials that hold up: Solution-dyed polyester or olefin outer cover; firm foam or compressed fill insert; waterproof inner liner. 19. Compact Corner Sofa A corner sofa seats four or five people in a compact L-shape and converts a dead corner into the most-used part of a small or mid-size deck. Low-back styles preserve sight lines across the deck and into the yard; high-back styles give more wind and privacy protection but make the corner feel enclosed. Modular corner sofas that connect with standard hardware are easier to clean and transport than single-moulded sectionals. Being able to separate the pieces and wash or replace individual cushion covers without dismantling the whole frame is worth paying for if you plan to use the deck year-round. Materials that hold up: Aluminum frame, resin wicker, or teak with solution-dyed acrylic cushion covers. 20. Nesting Side Tables Nesting side tables solve the problem of having somewhere to put drinks without adding a table that sits in the middle of the traffic path every day. They stack together on quiet days and pull apart when you need the surface area. Round shapes move around tight spaces more easily than rectangular ones. For outdoor use, avoid glass-top nesting tables unless the legs lock together when stacked. A set of nested glass tables that tips in the wind ends up with at minimum a cracked top and at worst an injury. Aluminum, teak, or resin tops are the practical call here. Materials that hold up: Aluminum, teak, or resin tops with powder-coated or corrosion-resistant leg bases. 21. Adirondack Chairs Adirondack chairs are one of the oldest outdoor furniture designs still in production because the geometry works. Wide armrests at the right height for resting a drink, a reclined seat angle that is comfortable for two or three hours, and a slatted back that sheds rain without trapping it. They suit fire pit areas, lake decks, cabin decks, and any outdoor space where the point is to sit and not do anything urgent. HDPE poly lumber Adirondacks are the practical choice for most homeowners. They will not splinter, crack, warp, or need painting or staining. Wood Adirondacks look better for the first two years but require consistent maintenance to stay that way. If you are not going to seal or paint them annually, buy the HDPE and save yourself the work. For a full overview of outdoor deck ideas beyond furniture, including material choices and layout planning for the deck structure itself, that resource covers the broader context around where these furniture decisions sit. Materials that hold up: HDPE poly lumber for low-maintenance use; teak or cedar for those who will commit to annual maintenance. What Fails Two Winters Later This is the section most deck furniture roundups skip, so here it is plainly. Steel frames under resin wicker corrode at the welds first, usually at the bottom where moisture pools. By the time you see rust on the surface, the joint is already compromised. The wicker weave itself looks fine until the frame fails beneath it. Fix: buy aluminum frames, or plan to replace mid-range wicker sets every five to seven years. Acacia dining tables sold as outdoor furniture at budget price points will crack along the grain within two seasons in any climate with seasonal humidity swings. The species is not the problem; insufficient thickness and inadequate sealing at the factory are. A properly finished, thick-slab acacia table can last years. A 1-inch slab with one coat of outdoor oil on it will not. Cushion foam without drainage fails even on covered decks. Morning condensation, the occasional spilled drink, and the first time the covers run through the wash leave damp foam that never fully dries. Mildew follows. Fix: buy cushions with drainage channels in the foam insert, or use thin quick-dry cushions and store them inside when the deck is not in use. Umbrella bases rated for 25 to 50 pounds are not adequate on a deck that gets afternoon wind. A standard 9-foot market umbrella generates 40 or more pounds of horizontal force at 15 mph. A base that is too light tips the umbrella into the furniture or off the deck entirely. Fix: use a 75-pound or heavier base, or anchor the umbrella through the center of a table with an adequately weighted table base. Budget Level Deck Furniture Ideas Not every deck needs the same investment, and the right budget decision depends on how much use the deck gets, how long you plan to stay in the home, and how much maintenance you are willing to do. This table maps budget levels to the furniture that makes sense at each. Budget Level Best Deck Furniture Ideas Best For Affordable Folding bistro set, HDPE Adirondack chairs, stackable chairs, storage bench, outdoor rug, solar lighting Small decks, renters, short-term use Mid-range Aluminum-frame loveseat set, fire pit table, dining set with benches, chaise lounges, storage deck box Family decks, weekend hosting, 5 to 10-year use High-end Teak dining set, modular aluminum sectional, outdoor bar with built-in counter, outdoor daybed, built-in benches Large decks, permanent setups, long-term ownership Start with the pieces you use every day and add the extras when the budget allows. A good dining table and four durable chairs will serve you better than a full eight-piece set where the frame quality was compromised to hit a price point. Deck Furniture Layout Ideas by Style Once the material decision is made, the style direction narrows what you actually look at. Pick one of these before you start shopping and the whole process moves faster. Modern: Black powder-coated aluminum frames, neutral cushions, low-profile silhouettes, and glass or concrete side tables. Coastal: Teak furniture with white or washed-out fabric, rope detailing, and light natural fiber rugs. Rustic: HDPE or cedar Adirondack chairs, reclaimed-look wood tables, iron lanterns, and warm-toned cushions. Boho: Rattan or resin wicker seating, layered outdoor rugs, patterned throw pillows, and a lot of container plants. Minimalist: Fewer pieces, clean lines, one anchor piece per zone, and consistent material across the full deck. Luxury: Teak or high-grade aluminum sectionals, fire table, outdoor kitchen or bar, and premium cushion fabric throughout. Repeat two or three materials and two or three colors across the deck and the space reads as intentional rather than assembled from different purchases over the years. Best Furniture for Different Deck Types The deck surface and structure affect which furniture choices make sense long-term. Deck Type Best Furniture Choices Key Consideration Wood deck Teak, aluminum, resin wicker with rubber foot caps Glides or pads on all legs; bare metal leaves permanent marks Composite deck Aluminum pieces with rubber or HDPE foot pads; no fire tables without a heat-rated mat underneath Composite surfaces scratch and soften under direct heat; protect accordingly Pool deck Sling chairs, aluminum chaise lounges, quick-dry cushions Everything gets wet constantly; choose material and fill that drains and dries in under 24 hours Rooftop deck Low-profile aluminum seating, heavy or anchored tables, no lightweight décor Wind load matters; avoid anything that can become a projectile at 20 mph Narrow deck Railing bar table, folding bistro chairs, slim benches placed along one edge Keep all furniture on one side; the walking path needs to stay clear the full length Match the furniture to the deck type before you match it to a style. A beautiful teak sectional on a rooftop deck with regular 20 mph gusts needs to be weighted and anchored or it will move, scratch the surface, and eventually damage something. Deck Furniture Mistakes to Avoid Buying before measuring: A sectional or dining set that looked right in a product photo can block the door or leave no clear walking path once it is actually on the deck. Blocking doors or stairs: The deck should be easy to walk through in the dark, carrying food or drinks, without squeezing past furniture. Oversizing for the space: One piece too large for a small deck makes the whole area feel unusable. Forgetting walkway clearance: Leave 30 to 36 inches for main paths and 3 feet behind every dining chair. Bare metal legs on wood or composite: Use pads, glides, or rubber caps on every contact point. No cushion storage plan: If cushions live outside in all weather without covers or storage, they last two seasons instead of six or eight. Ignoring sun and wind conditions: Lightweight furniture on a windy deck and dark-colored metal furniture in full afternoon sun are problems that become obvious immediately after purchase. Fire pit too close to furniture or railings: Keep all fire features at least 3 feet from fabric, wood surfaces, and railings. Indoor furniture moved outside: MDF, particleboard, untreated fabric, and standard indoor foam are not rated for outdoor humidity and will fail within one season. No lighting plan: A deck that is not usable after dark gets half the use of one that is. Solar lights, wall-mounted fixtures, and lanterns do not require electricians and add significant evening functionality. Frequently Asked Questions What is the best material for outdoor deck furniture? Teak and HDPE poly lumber are the two most durable choices. Teak handles almost every climate and lasts 20 to 30 years with basic maintenance. HDPE requires no maintenance at all and holds up equally well. Powder-coated aluminum is the best value option if you are not ready to spend on teak. What deck furniture holds up best in rain? HDPE poly lumber is the single best choice in consistently wet climates because it does not absorb moisture, crack, or develop mildew. Teak is close behind and recovers quickly from rain. Avoid acacia and standard powder-coated steel with unsealed joints in high-rainfall areas. How do I arrange furniture on a small deck? Push all major pieces to the perimeter, leave the center open for walking, and use furniture that folds or stacks when not in use. A folding bistro set or a compact corner sofa along one edge typically gives you seating without blocking the main path. What is the most durable outdoor furniture for sun exposure? Aluminum frames with solution-dyed acrylic cushions handle direct sun best. The fabric’s color stays stable for 1,000-plus hours of UV exposure before visible fading. Resin wicker degrades faster in full direct UV; keep it shaded or covered when not in use to extend its lifespan. What patio furniture is best for a pool deck? Sling-fabric or mesh chaise lounges on aluminum frames. They dry in under two hours, do not hold mildew in the fill, and resist pool chemical exposure better than thick-cushion alternatives. Save deep-seating cushions for the deck area away from the pool edge. How much should I spend on outdoor deck furniture? A practical mid-range setup for a standard 12 by 16-foot deck runs $800 to $2,500 depending on how many pieces you need. HDPE or aluminum furniture at the mid-range lasts 10 or more years. Budget sets under $400 often need full replacement within three to four seasons, which costs more over time. What is trending in deck furniture right now? Curved sectional seating, modular layouts that can be rearranged easily, earthy and natural tones, and outdoor furniture that mimics indoor living room comfort are the current directions. Sustainable materials including recycled aluminum and HDPE made from reclaimed plastic are also growing in the market. Should I cover deck furniture when not in use? Yes, for anything with cushions or with steel frame components. Good outdoor furniture covers extend cushion life by two to four seasons and prevent the rust at feet and joints that starts invisibly and becomes structural. Teak and HDPE can go uncovered year-round without meaningful degradation. Final Verdict Choosing the right layout and materials changes how you experience your outdoor living space. I want you to step onto your deck and feel relaxed, not stressed by upcoming maintenance or cramped walkways. By measuring your actual usable clearance and matching your materials to your specific climate, you avoid the costly replacements that catch most homeowners off guard. If you opt for space-saving railing tables or a durable teak sectional, your setup should work hard for your daily lifestyle. Take these practical layout strategies, check your local weather patterns, and build an outdoor oasis that remains both functional and beautiful for many seasons ahead.
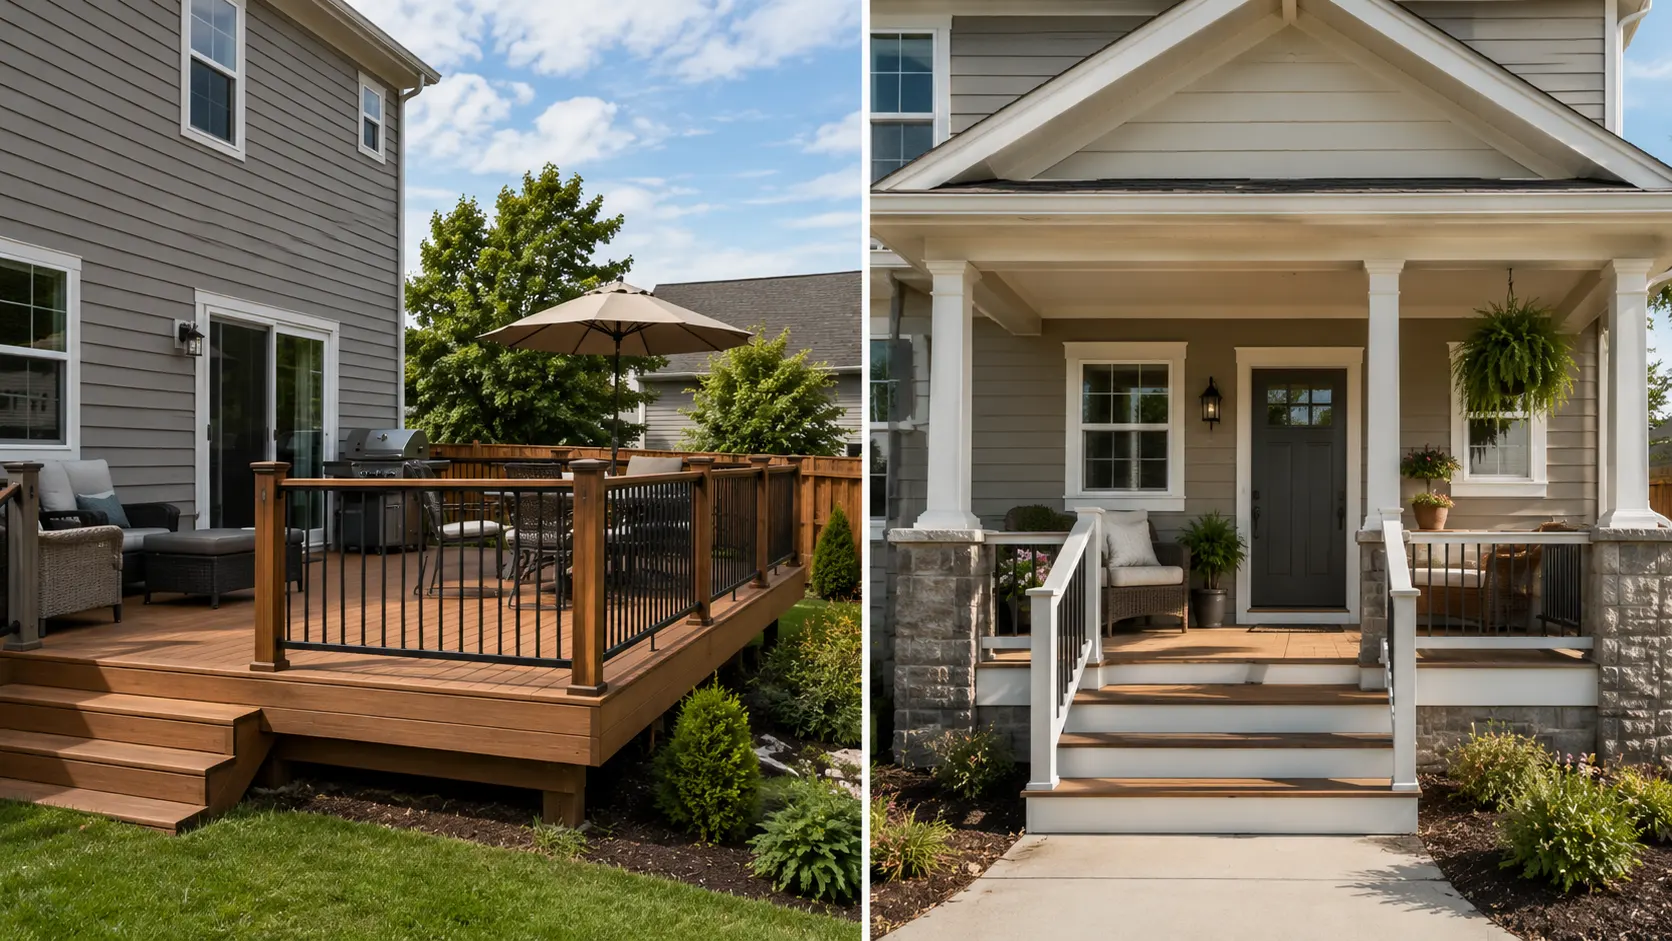
Structure Roof Typical Location Cost (16×20 ft) Best Use Deck None, open-air Backyard or side yard $6,700–$22,700 Grilling, hosting, yard access Porch Permanent overhead cover Front, side, or back entry $16,000–$30,400 Sheltered seating, entry presence, year-round use If you’re trying to decide between a deck and a porch, the first thing to understand is that they solve different problems. One holds up well in full sun and gives you open backyard access. The other gives you cover, keeps you dry in the rain, and frames your entry. Choosing between them based on looks alone is how projects go sideways. Here’s what each structure actually involves: the materials, the costs, the failure modes, and the questions to settle before you hire anyone. What Is a Deck? A deck is a raised, open-air platform attached to the back or side of a house, or occasionally freestanding in the yard. It sits above grade on posts, beams, and joists. It has no roof. That exposure is both its defining characteristic and its main liability: every surface on a deck takes full sun, rain, freeze-thaw cycles, and UV all year long. Most decks are built from pressure-treated pine (the entry point, around $6 per square foot for materials), cedar or redwood (more stable, better appearance, $8–$14/sq ft), or composite decking ($20–$45/sq ft, significantly lower maintenance). The sub-frame is almost always pressure-treated lumber, regardless of what goes on top. When you add railings, stairs, footings, and labor, a 16×20-foot deck typically runs $6,700 to $22,700 installed, with composite material choices and multi-level builds pushing toward the top of that range. What fails on a deck two winters in? Wood boards check and cup if they aren’t kiln-dried to the right moisture content or if the installation didn’t leave enough spacing for drainage. End grain on cut boards wicks water and rots from the inside if it isn’t sealed. Ledger connections — where the deck bolts to the house framing, are the most common structural failure point and the one inspectors flag most often. If you’re looking at outdoor deck ideas for your backyard, the material decision you make upfront directly determines how much remediation work you’re doing five years from now. What Is a Porch? A porch is a covered outdoor area attached to the home, most commonly the front entry, though back and side porches are common too. What makes a porch a porch is the roof. That overhead structure is permanently connected to the home’s roofline, which is what makes a porch more expensive to build, more involved structurally, and more usable year-round. Porches can be open (railing only on the sides), screened-in, or partially enclosed with windows. Because of that roof, the floor surface on a porch sees significantly less direct weather than a deck, which means wood and composite flooring hold up longer with less maintenance than the same material on an exposed deck. The trade-off is cost. Roofing structure, shingles or standing seam, ceiling framing, and columns push the average 16×20-foot porch to $16,000–$30,400 installed, with screened versions adding another $3–$7 per square foot for framing and mesh. What fails on a porch? The roof-to-wall connection is the first place to check every few years, where the porch roof ties into the main structure, is where water infiltration starts if flashing gets compromised. Columns on older homes are often hollow wood and rot from the bottom up if water pools at the base. Porch ceilings in beadboard or tongue-and-groove pine look good at install and start telegraphing moisture problems within two seasons if the roof above isn’t draining properly. Deck vs. Porch: Material and Structure Side by Side Factor Deck Porch Overhead cover None, fully exposed Permanent roof, rain, and sun blocked Elevation Often significantly raised; requires footings and posts Ground-level or slightly elevated; ties to home foundation Floor materials Pressure-treated pine, cedar, composite, PVC, aluminum Same options, plus concrete, brick, stone, tile Roof structure Not included; pergola or awning optional add-ons Required: rafters, sheathing, roofing material, flashing Structural tie-in Ledger bolted to the house rim joist Roof connects to home’s roofline, more complex Privacy Low, open on all sides and above Higher, enclosed on three sides naturally Seasonal use Warm months primarily Year-round in most US climates Maintenance load High for wood; lower for composite Moderate, roof and trim add inspection points Permit required Yes, especially if elevated above 30 inches Yes, roof attachment triggers structural review The table above clarifies the hard structural differences. What it doesn’t capture is how those differences play out in actual use, which is where most people make the wrong call. Location and Purpose: Two Structures That Don’t Compete A deck and a porch aren’t really competing for the same job. Knowing which job you need done makes the choice straightforward. Where Each Structure Belongs Decks are built for backyard living, where the space opens onto a yard, garden, or pool. They’re designed as private outdoor platforms, away from street view. If your goal is grilling space, outdoor dining, a place to set up a fire pit, or somewhere to watch the yard with a drink in hand, you’re describing a deck. Porches belong at entries — most commonly the front, but side and wraparound configurations are common too. They create transition space between inside and outside, give guests cover at the door, and add visible presence to the front of the house. A back porch works well when the home’s layout has a rear entry or when the backyard needs a sheltered seating area rather than an open platform. Weather and Daily Use This is the decision most people underestimate. If you want to sit outside in light rain, drink your coffee before the sun is fully up, or use the space through the shoulder seasons, a porch is the structure that makes that routine possible. A deck in the same conditions means wet furniture, damp wood, and a surface that only gets used when the weather fully cooperates. If weather isn’t a constraint, a warm, dry climate, or a homeowner who genuinely only sits outside in good conditions, the open-air deck delivers more square footage per dollar and more layout flexibility than a porch of equivalent cost. Privacy and Visibility Decks, positioned in backyards, offer more privacy by default. Porches, facing streets and neighbors, trade privacy for curb appeal and guest presence. A screened porch splits the difference; it adds bug protection and visual separation while keeping the covered-entry function of a traditional porch. If you want to understand the full range of deck finishing and enclosure options, the structural choices available for skirting and screening apply to both decks and porches. Cost Breakdown: What You’re Actually Paying For Line Item Deck — Low End Deck — High End Porch — Low End Porch — High End Framing and structure $2,000 $4,500 $3,000 $6,000 Decking/flooring material $1,900 (PT pine) $14,400 (composite) $1,900 $10,000 (tile/stone) Roof structure and roofing N/A N/A $4,000 $9,000 Railings and stairs $1,200 $3,500 $1,200 $3,500 Columns and trim N/A N/A $1,500 $4,000 Permits and inspections $350 $1,800 $350 $1,800 Labor $1,200 $4,000 $4,000 $8,000 Total (approx.) $6,700 $22,700 $16,000 $30,400 The gap between deck and porch cost is almost entirely explained by two items: the roof structure (rafters, sheathing, roofing material, flashing) and the labor that comes with it. A porch roof on a 16×20-foot structure adds $4,000–$9,000 in materials alone before anyone picks up a hammer. That’s the line item to understand before you compare bids. Contractors who quote a porch at deck pricing are either leaving out the roof complexity or they haven’t done this before. Cost Note: Figures above are estimates based on national averages for a 16×20-foot structure. Actual costs vary significantly by region, materials selected, site conditions, and contractor. Labor rates in the Northeast and Pacific Coast run 20–40% higher than national averages. Always get at least three quotes before committing to any project above $1,000. Permits: What Triggers a Review and What to Expect In most US jurisdictions, a permit is required any time you build a structure attached to the house or elevated above 30 inches. That covers most decks and virtually all porches. Building without one is the most expensive mistake homeowners make, not because of the permit fee itself ($350–$1,800 in most counties), but because unpermitted structures have to be disclosed at sale, can complicate homeowner’s insurance claims, and sometimes have to be torn down if an inspector flags them. For decks, the permit review typically covers footing depth and diameter, ledger connection method, joist sizing, and railing height (42 inches minimum in most residential codes for decks over 30 inches off the ground). For porches, the roof attachment is what triggers a structural review; the inspector needs to confirm that the existing wall framing can handle the roof load and that the tie-in to the main structure meets code. Timeline: expect two to four weeks for most residential permits, longer in dense urban areas or waterfront properties where additional setback and drainage reviews apply. Deck vs. Porch: Which One Holds Up Longer? A well-built porch with proper roof drainage and sound flashing will outlast a comparable wood deck by a meaningful margin. The roof does a lot of protective work, floor boards that aren’t exposed to direct sun and rain simply don’t degrade at the same rate. Composite decking narrowed this gap significantly. A composite deck with no maintenance obligation on the surface material can hold up 25–30 years without the rot and cupping issues that plagued wood decks in earlier decades. The honest material ranking for longevity: Composite decking or PVC on a deck: 25–30 years on surface materials; sub-frame in pressure-treated lumber needs inspection every 5–7 years for joist and post condition Covered porch floor (wood or composite): 20–30+ years, with less UV and moisture stress than an open deck Pressure-treated pine deck: 15–25 years with staining and sealing every 2–3 years; skipping maintenance shortens this to 10–12 years Cedar or redwood deck: 15–25 years, naturally more rot-resistant than pine, but still requires regular sealing What shortens both structures faster than anything else: poor drainage design, inadequate footing depth for the frost line in your climate, and ledger or roof connections that weren’t done to code. Cosmetic problems are expensive but manageable; structural connection failures are the ones that require full rebuilds. How to Choose Between a Deck and a Porch Decision Checklist: Do I want front entry presence, or backyard living space? Do I need weather cover to use the space regularly, or is open air enough? What’s my realistic budget, including permits and labor, not just materials? How much maintenance will I actually do each year? Do I want privacy, or is street-facing visibility acceptable? Does my local code or HOA restrict structure height, setback, or roofline attachment? Will I use this space year-round or only during warm months? The answers to those questions map directly to a structure. Front entry plus weather cover equals a porch. Backyard living plus open air plus lower budget equals a deck. If the checklist comes out split, the tiebreaker is almost always budget — a deck gives you functional outdoor space at a lower entry cost, and you can add a pergola or shade sail later if you want partial cover. Entertaining and Hosting A deck handles larger groups better than most covered porches. The open layout accommodates furniture in multiple configurations, and there’s no roof clearance issue for a free-standing umbrella or offset shade structure. If you regularly host ten or more people outdoors, a deck gives you more usable square footage per dollar than a porch of equivalent cost. Daily Sitting and Morning Coffee If your primary outdoor habit is sitting outside for an hour or two, especially earlier in the day when dew is on everything, a porch is the more reliable structure. The roof means the furniture is dry, the floor isn’t slippery, and light rain doesn’t end the session. A deck in the same conditions is a wet chair and a damp floor until midmorning. Screened Porch Option If bug pressure is high in your area, a screened porch solves that problem in a way no deck can. Screening adds $3–$7 per square foot to the porch cost and requires proper framing; this isn’t a retrofit you add informally. Plan for it at the design stage, not as an afterthought after construction starts. Deck vs. Porch and the Other Structures You Might Be Confusing Them With Structure What It Is Key Distinction Deck Raised, open-air platform, backyard, no roof Elevated, exposed, flexible layout Porch Covered, roofed area at an entry, front, side, or back Roof is mandatory; entry-connected Patio Ground-level, concrete, brick, stone, or pavers; no elevation At grade, no framing required Balcony Elevated platform on an upper floor; smaller; railing-enclosed Upper-floor access only; not ground-entry Screened porch A porch with screen panels on open sides Bug protection; partial enclosure; same roof requirement as porch Pergola Open-framed overhead structure; no solid roof Provides partial shade, not weather protection The term that causes the most confusion in contractor quotes is “porch.” Some contractors use it loosely to describe any covered outdoor structure, including pergolas with polycarbonate roofing. A pergola is not a porch; it doesn’t have a waterproof roof, and the permit and structural requirements are different. If a quote says “porch” and you’re not sure what roof type is included, ask before you sign anything. What Adds More Home Value: Deck or Porch? Neither structure produces a guaranteed return — anyone citing a specific ROI percentage for deck or porch additions without a current local source is guessing. What the data consistently shows is that condition matters more than type. A structurally sound, code-compliant deck in decent cosmetic shape adds value. An unsafe or unpermitted deck — regardless of the materials — creates a liability in a home sale disclosure. Porches add visible curb appeal that buyers register from the street. That front-facing presence is worth something in markets where first impressions drive initial offer behavior. Decks add square footage of outdoor living space that buyers in family-oriented markets tend to value, especially if a yard isn’t large enough to compensate for the absence of a dedicated outdoor structure. The single most important factor for resale value: permits pulled and inspections passed. Unpermitted outdoor structures have become a common deal-killer in real estate transactions. A buyer’s inspector will flag it, their lender may not finance around it, and you may end up crediting the buyer for removal cost. The $350–$1,800 permit fee is one of the better investments in a project of this scale. Questions to Ask Your Contractor Before Signing Will you pull the permit, or am I responsible for that? If a contractor asks you to pull your own permit, that’s a flag — licensed contractors handle their own permitting. What footing depth are you specifying? Should meet or exceed the local frost line. Shallow footings are the most common long-term failure point on both decks and porches. How is the ledger connection being made? Lag screws through flashing into the rim joist is the code-compliant standard. Through-bolts are stronger. Any contractor vague on this detail needs a follow-up. What is the joist spacing? 16 inches on center is standard for most residential decks. 12-inch spacing adds material cost but produces a stiffer, more solid-feeling floor — worth it for composite decking and tile porch floors. What warranty do you provide on workmanship? Material warranties come from the manufacturer. Workmanship warranty covers installation failures — get the duration and scope in writing. Frequently Asked Questions These are the questions I hear most often from homeowners who are a few weeks from breaking ground and suddenly not sure they’ve made the right call. Is a deck cheaper to build than a porch? Yes, consistently. A 16×20-foot pressure-treated deck typically runs $6,700–$22,700 installed. The same-sized porch runs $16,000–$30,400. The roof structure accounts for most of the difference — it adds $4,000–$9,000 in materials before labor. Does a deck or porch add more value to a home? Both can add value when they’re permitted, structurally sound, and well-maintained. Porches improve curb appeal; decks add functional backyard square footage. Unpermitted structures of either type can reduce value or complicate a sale — the permit matters more than the structure type. Can I add a roof to an existing deck to make it a porch? Possibly, but it requires a structural review first. Most deck frames aren’t engineered for roof load. Posts, beams, and footings typically need to be upgraded before any roofing structure goes up. Get an engineer or experienced contractor to evaluate the existing frame before planning the conversion. What is the difference between a porch and a veranda? A veranda is a porch that wraps around two or more sides of a home. The structural difference is minimal — same roof requirement, same permit process. Veranda is the regional term used in parts of the South and in Colonial-era architecture; most modern contractors use porch for both. Do deck or porch additions increase property taxes? Frequently, yes. Permitted additions trigger reassessment in most US counties. A 320-square-foot deck or porch addition can increase taxable square footage or assessed structure value. Check with your local assessor’s office before finalizing scope — the tax impact should be part of the budget conversation. How long does a deck last compared to a porch? A covered porch floor typically lasts longer because the roof limits UV and moisture exposure. Composite decking has closed much of the gap — a well-maintained composite deck can reach 25–30 years. A pressure-treated wood deck without regular sealing may need significant repair in 10–12 years. Do I need a permit for a deck or porch? Almost always yes. Most US jurisdictions require a permit for any attached structure or anything elevated above 30 inches. Porch roofs trigger a structural review in virtually every municipality. Build without one and you risk fines, forced removal, and a disclosure problem when you sell. Final Verdict The deck vs. porch decision comes down to one question before anything else: Do you need cover? If you want a space that works in rain, extends through shoulder seasons, and gives your home entry presence, build a porch and budget for the roof. If you want open backyard access, flexibility for grilling and hosting, and a lower entry cost with the option to add shade later, a deck is the right structure. What I’d tell any homeowner before they start: pull the permit, specify the footing depth for your frost line, and get the ledger or roof connection in writing before anything goes in the ground. That’s where projects either hold up for thirty years or start falling apart in five. Cost estimates in this article are based on national averages. Verify current pricing with local contractors and suppliers before budgeting. Material and labor costs vary significantly by region. Sources U.S. Census Bureau American Housing Survey — census.gov/programs-surveys/ahs International Residential Code (IRC) — railing height, footing, and structural requirements for residential decks and covered porches NAHB Cost of Construction Survey — labor and material rate benchmarks
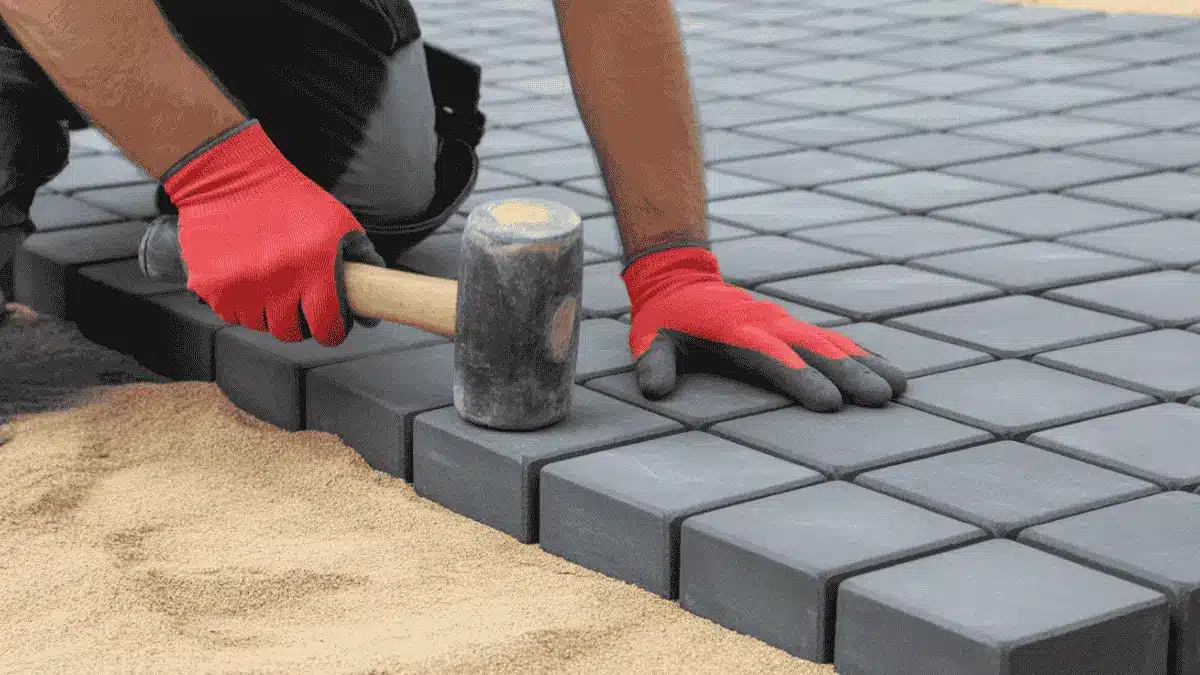
When I first started designing outdoor spaces for clients, paver pricing was the question I was asked most often. I’ve planned and overseen dozens of patio and driveway installations over the years, and honestly, even with experience, every quote can feel confusing without a clear framework to read it. I quickly realized that the total cost depends on several factors, including the size of the space, the type of pavers, and the amount of prep work required. I’ll break everything down in simple terms. You’ll learn the average cost per square foot, how much patios and driveways usually cost, what affects labor prices, and how to estimate your own project. All costs are estimated US averages. Your actual numbers will vary by location, project size, materials, and contractor. Where are Pavers Commonly Installed? Pavers are installed in many outdoor areas because they are durable, versatile, and visually appealing. Most homeowners use pavers for patios, driveways, and walkways. Patios create comfortable outdoor living spaces, while driveways require a strong base to support vehicle weight. Pavers are also popular for pool decks, garden paths, courtyards, and entryways. Some homeowners install them around fire pits or outdoor kitchens to create a finished look. Because pavers come in different styles and materials, they work well in both modern and traditional designs, making them a flexible choice for many landscaping projects. What Goes Into the Cost of Paver Installation? The cost of paver installation includes materials and labor, with labor usually the largest expense at 50-70% due to the need for specialized equipment, skills, and time for proper base preparation. The excavation process alone takes 1-2 days, depending on soil conditions and site accessibility, followed by precise grading, multiple compaction layers, and careful leveling to create a stable, long-lasting foundation. Contractors typically charge $50 to $80 per hour for labor, or $4 to $11 per square foot, and a standard 300 sq. ft. patio averages 35 to 40 labor hours to complete professionally. The materials component includes the pavers themselves, ranging from $4 to $30+ per square foot by type and quality, plus essential base materials such as gravel, bedding sand, edge restraints, and joint sand. Additional expenses like drainage, removing old concrete, or soil stabilization add $500 to $5,000+ to your project. Knowing these costs helps you estimate budgets and compare quotes effectively. 1. Average Paver Installation Cost Most homeowners spend $10 to $30 per square foot, similar to broader construction cost-per-square-foot estimates used across home projects. The national average for standard patio projects typically ranges from $12 to $25 per square foot. Here’s how that breaks down: Low-end projects: $8 to $12 per sq. ft. (basic concrete pavers, simple layout) Mid-range projects: $15 to $25 per sq. ft. (better materials, standard patterns) High-end projects: $25 to $40+ per sq. ft. (natural stone, detailed designs) Understanding these average paver installation costs helps you set realistic expectations, compare contractor quotes confidently, and plan your patio or driveway project without surprise expenses. 2. Project Size Examples Here are real-world project size examples to help you understand how square footage directly affects total installation cost and overall budget expectations. Here’s what homeowners typically spend: Small patio (10×10 – 100 sq. ft.): $1,000 to $2,500+ Medium patio (20×20 – 400 sq. ft.): $4,000 to $12,000+ Driveway (around 1,000 sq. ft.): $10,000 to $30,000+ Pool deck (600–800 sq. ft.): $9,000 to $24,000+ Walkway (150–250 sq. ft.): $1,500 to $6,000+ Outdoor living area with fire pit (200–300 sq. ft.): $3,000 to $9,000+ As project size increases, total cost rises significantly, similar to how the cost of adding a roomscales with square footage and complexity. 3. Material Cost Per Square Foot Material choice plays a major role in determining your total installation cost, as different paver types vary widely in price and appearance. Concrete pavers: $4 to $10 per sq. ft. (materials only) Brick pavers: $5 to $15 per sq. ft. Natural stone or flagstone: $10 to $30+ per sq. ft. Porcelain pavers: $12 to $25+ per sq. ft., a growing choice for modern outdoor spaces. Porcelain is highly resistant to stains, UV fading, and moisture, which makes it popular for pool decks and contemporary patios. The tradeoff is that it requires more precise cutting and handling during installation, which raises labor time. I’ve started recommending porcelain more often for clients in wetter climates, it doesn’t absorb water the way natural stone does, which means it holds up significantly better through freeze-thaw cycles. The material cost is higher, but the long-term maintenance savings are real. Factors That Affect The Installation Cost Several important factors influence the cost of installation, and understanding these variables helps you estimate your project budget more accurately and avoid unexpected expenses. Size of the Area: More square footage means more materials and labor. A small patio costs less overall than a large driveway, but the per-foot rate may stay similar. Site Preparation: If your yard needs grading, drainage correction, or removal of old concrete, costs increase. Base preparation is one of the most important parts of the job. Design Complexity: Simple grid patterns cost less than detailed layouts, such as herringbone or custom inlays. Borders and decorative edges also add labor time. Type of Pavers: Concrete is affordable. Natural stone costs significantly more due to the material price and installation time. Local Labor Rates: Contractor rates vary by region. Urban areas with higher living costs usually charge more than rural areas. Reviewing these cost factors carefully helps plan more effectively, make smarter material choices, and set more realistic expectations before starting any patio, driveway, or walkway installation project. Professional vs. DIY Installation Costs I know many homeowners consider installing pavers themselves to save money. Here’s how the numbers compare. Cost to Install Pavers Professionally Professional installation includes excavation, materials, equipment, and labor. Category Price (USA) Details Total Installed Cost $10 to $30 per sq. ft. Full job from prep to finish Labor Portion $4 to $15 per sq. ft. Excavation, base, laying Materials $4 to $20+ per sq. ft. Depends on paver type Equipment Included Compactors, saws, tools Warranty Often included Coverage varies by contractor Hiring professionals means less stress and better long-term durability. Proper base work prevents sinking and shifting later. DIY Installation Cost Breakdown DIY looks cheaper because you skip labor, but you still pay for materials and tools. Category Price (USA) Details Pavers $4 to $15 per sq. ft. Based on type Base & Sand $1 to $3 per sq. ft. Gravel and bedding Tool Rental $100 to $400 Compactor and saw Total DIY Range $3 to $8 per sq. ft. (materials only) Excludes your time Extra Costs Varies Mistakes or rework DIY can save thousands in labor, but it requires physical work, careful measuring, and proper compaction. Is Installing Pavers Worth the Cost? Compared to plain concrete slabs, pavers usually cost more upfront. However, they last longer and are easier to repair. If one section cracks, you can replace individual pavers instead of redoing the whole surface. Pavers also boost curb appeal and can increase property value. Research from the landscaping and remodeling industry suggests that a well-installed paver patio can recoup 50–75% of its cost in added home resale value, a meaningful return compared to most other outdoor upgrades. Natural stone and high-end finishes tend to push toward the higher end of that range. Many homeowners choose them because they look better and handle freeze-thaw cycles well. If your yard or driveway needs an upgrade, pavers often deliver strong long-term value. Tips to Save Money on Paver Installation Saving money on paver installation is absolutely possible with careful planning, smart material choices, and a few strategic decisions before construction even begins. Choose standard concrete pavers instead of premium stone. Keep the design simple to reduce labor time. Get 3–5 contractor quotes to compare pricing. Prep the site yourself if possible, such as by clearing grass or debris. Order roughly 10% more pavers than your square footage calculation, cutting waste and breakage are real, and buying a second batch later can mean a color or texture mismatch. Install during the off-season (late fall through early spring in most of the US) when contractor demand drops, I’ve seen clients save 10–15% on labor costs simply by scheduling a November or February install instead of peak summer. By planning ahead and focusing on long-term durability instead of shortcuts, you can lower upfront costs while protecting your investment for years to come. That’s a Wrap Now you have a clear understanding of what paver installation costs and what influences those numbers. After years of designing outdoor spaces, I’ve found the biggest mistake isn’t choosing the wrong material; it’s skipping proper base prep to save money, only to pay more later for repairs. Whether it’s a small patio or a large driveway, use this guide to set a realistic budget, ask the right questions, and compare quotes confidently. A properly installed paver surface can last for decades and transform your outdoor space. Start by measuring your area and getting a few local quotes. If this guide helped, check out other cost breakdowns for smarter planning and spending.
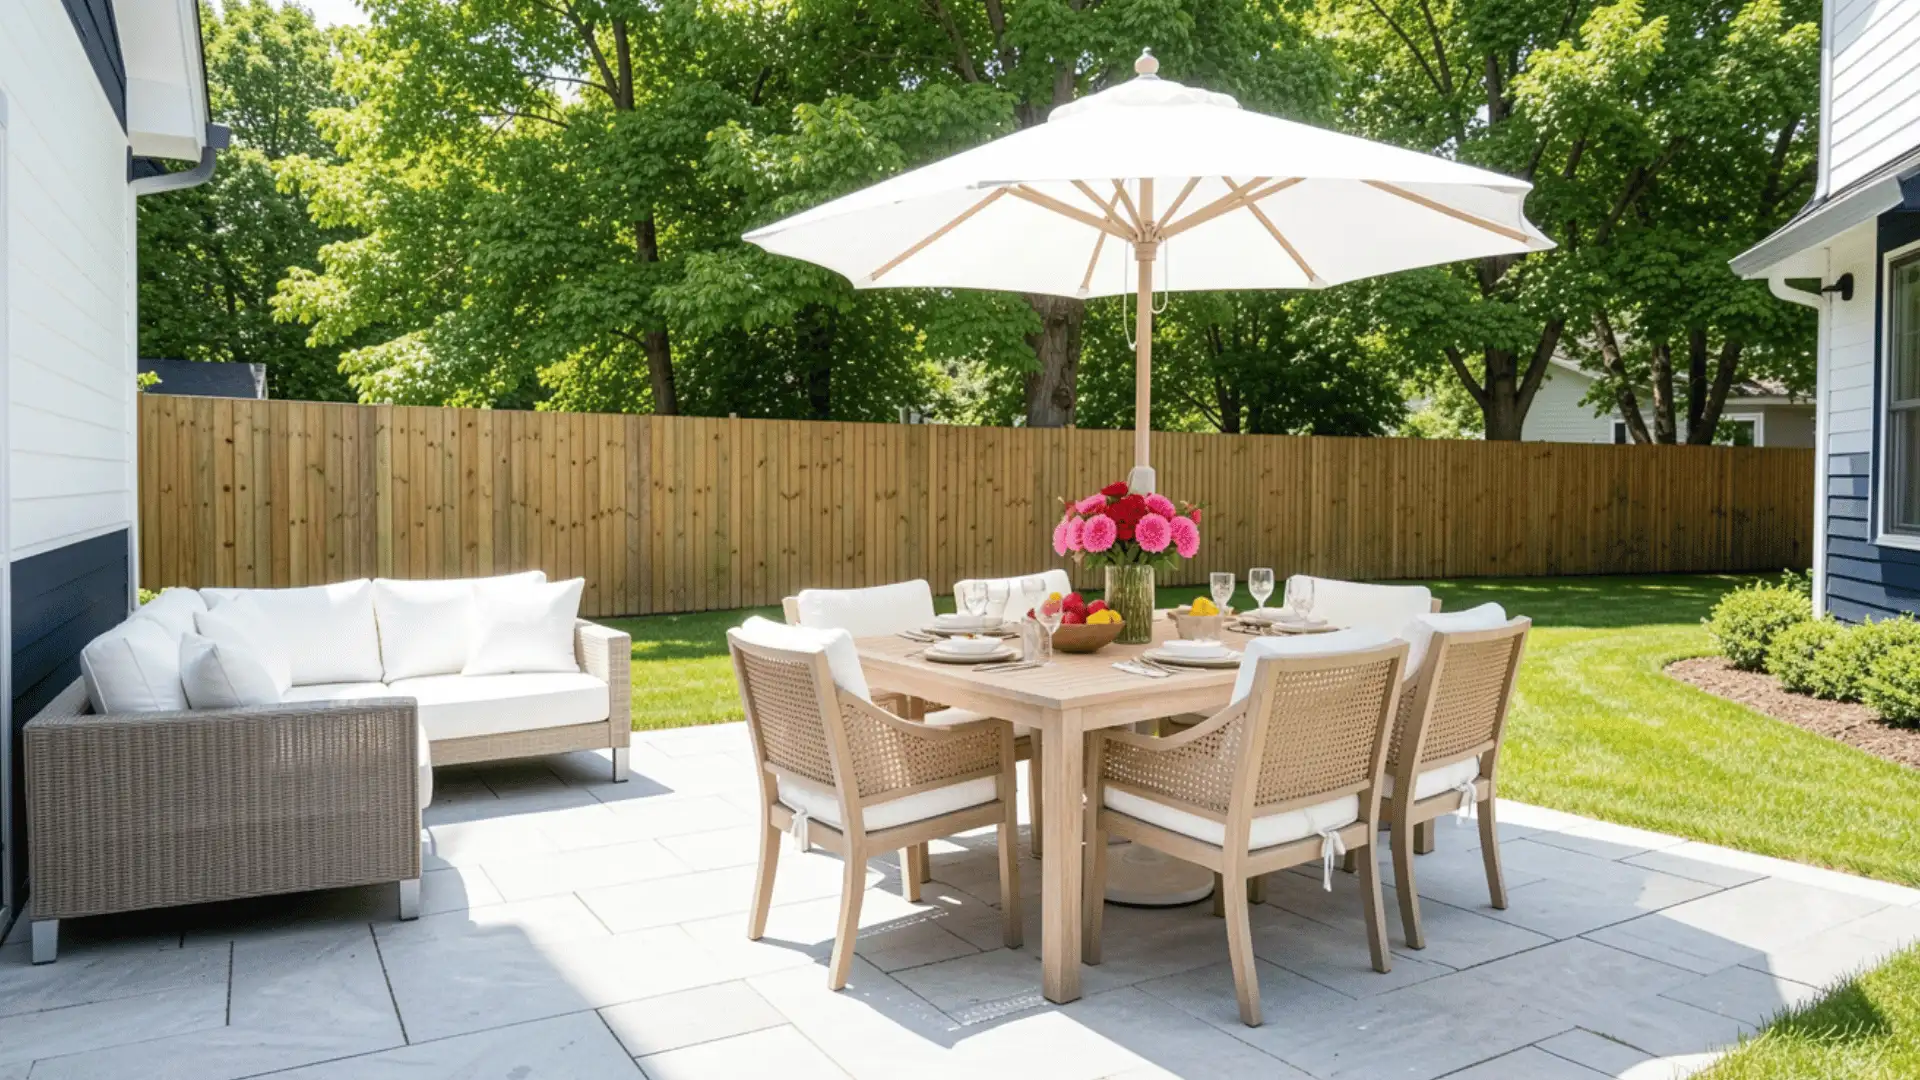
Does your backyard feel unfinished, even when everything is technically there? I’ve had that feeling too, and that’s exactly why outdoor deck ideas matter more than most people think. You want a space that looks good, feels comfortable, and actually fits the way you live, but a lot of deck inspiration is either too expensive, too impractical, or too generic to use. That’s where the right ideas make a difference. A thoughtful deck can give you a place to relax, host, eat, or simply enjoy being outside more often. Here, you’ll find creative setups, garden-friendly designs, styling tips, material guidance, and budget ideas to help you shape a deck that feels right for your home. The Importance of Outdoor Decks A deck is more than just a wooden platform outside your home; it’s an extra living space. Think of it as another room, but with fresh air and sunshine. A well-built deck gives you a place to eat, relax, and spend time with family and friends outside. It also makes your home look more beautiful and can even raise its value. According to Remodeling Magazine’s Cost vs. Value Report, a wood deck addition recoups around 50–75% of its cost at resale, making it one of the more financially sound outdoor improvements you can make Buyers love a great outdoor space! Beyond looks and money, a deck simply makes life better. You get to enjoy nature without giving up your comfort. If you’re sipping your morning coffee or hosting a summer barbecue, your deck becomes the heart of your outdoor lifestyle. It connects your home to your garden in the most natural, enjoyable way possible. Note: One thing I tell every client before we sketch a single line: think about how you’ll use it at 7 a.m., at noon, and at 9 p.m. A deck that only works for summer evening entertaining is a deck you’ll use 12 times a year. Design for all three moments, and you’ll use it year-round Innovative Garden Deck Ideas to Blend with Nature Create a seamless connection between your deck and garden with ideas that combine greenery, structure, and natural elements. If you love the open-concept feel of an interior barndominium, these creative ways to blend your deck into your outdoor surroundings will help you achieve that same airy flow. 1. Deck with Succulent Rock Garden Surround your deck with a rock garden packed with colorful succulents for an effortlessly modern look. Succulents are low-maintenance, drought-tolerant, and come in stunning shapes and shades. The rocks add texture and structure, creating a clean, polished border. This combo works great for busy homeowners who want beautiful outdoor curb appeal without spending hours on weekly garden upkeep. I installed this exact border for a client in a dry-summer climate who didn’t want irrigation. Two years in, the rockscape still looks immaculate with zero watering beyond the first season. 2. Deck with Raised Flower Beds and Pathways Build raised flower beds along the sides of your deck and connect them using stone or gravel pathways. This creates a structured, organized garden design that feels intentional and stylish. The pathways guide guests naturally through the space, while the flower beds add bursts of seasonal color. It’s a simple way to make your deck feel like part of a larger, well-planned landscape. 3. Deck with Outdoor Bathtub and Garden Views Upgrade your deck into a private spa retreat by adding an outdoor bathtub with direct views of your garden. There’s something incredibly relaxing about soaking in warm water while surrounded by nature. Use wooden or copper tubs for a rustic, luxurious feel. Add potted plants or flower borders nearby to complete the look and make every bath feel like a five-star outdoor experience. 4. Deck with Fruit Tree Overhead Canopy Plant fruit trees near or above your deck to grow a natural canopy that offers both shade and beauty. As the trees mature, they create a lush, living ceiling above your outdoor space. In season, you’ll enjoy fresh fruit right from your deck. It’s a sustainable and beautiful design choice that combines practicality with natural beauty, making your deck feel like a hidden garden escape. Pro tip: Choose semi-dwarf varieties like dwarf apple or patio peach if you want canopy coverage within 3–5 years without roots that heave your decking boards later. 5. Deck with Mosaic Tiled Flooring and Planters Add personality to your deck with colorful mosaic tile flooring that catches the eye and sets a vibrant mood. Accent the tiles with bold, overflowing planters along the deck’s edges for a Mediterranean or bohemian feel. Your deck floor becomes a standout feature with this approach. It works especially well in smaller spaces where one standout design choice can make the whole area feel stunning, similar to the ornate detailing found in modern Spanish-style homes. 6. Deck with Lavender Hedge Surround Plant a fragrant lavender hedge around the perimeter of your deck to create a calming, aromatic retreat. Lavender’s purple blooms are visually stunning and naturally repel insects, making outdoor time more enjoyable. The gentle scent promotes relaxation and sets a peaceful tone for your outdoor space. It’s a low-maintenance, high-impact planting choice that adds both beauty and function to any deck design. 7. Deck with Sunken Lounge Area A sunken lounge area within your deck creates an intimate, cozy feeling that standard flat decks simply can’t match. By dropping a section of the deck a few inches below the main level, you define a natural gathering space. Add plush cushions, low tables, and surrounding plants to enhance the cozy vibe. It’s a unique architectural detail that gives your outdoor space real personality and depth. One thing to plan for: sunken areas need excellent drainage. I always route a small drain channel beneath the sunken platform before framing, you end up with a puddle after rain. 8. Deck with Tree Bench Around Trunk Build a circular wooden bench that wraps around an existing tree trunk on or near your deck. This clever design uses nature as the centerpiece while adding extra seating for guests. It creates a beautiful focal point in your garden and makes great use of space. The bench can be stained or painted to match your deck, giving everything a cohesive, polished, and thoughtful look. Important: Leave 2–3 inches of clearance between the bench and the trunk so the tree can grow without the structure constraining it. 9. Deck with Living Fence of Ivy Use ivy or other climbing plants to grow a lush living fence around your deck for natural privacy. As the plants grow, they form a thick green wall that softens the look of any hard fence or railing. It’s an eco-friendly privacy solution that also adds incredible beauty. Over time, the ivy creates a cottage-like, enchanting atmosphere that makes your deck feel like a secret garden hideaway. 10. Deck with Mossy Stone Path and Seating Nook Connect your deck to the garden with a winding mossy stone pathway that leads to a small, tucked-away seating nook. This design creates a sense of journey and discovery in your outdoor space. The nook, surrounded by greenery and soft lighting, becomes a perfect spot for quiet reading or morning coffee. Together, the path and nook make your backyard feel larger and more thoughtfully designed. 11. Deck with Outdoor Yoga Space Dedicate a section of your deck to a peaceful yoga and meditation zone. Use bamboo flooring for a natural, grounding feel underfoot. Add rolled mats, a small water feature, and garden views to complete the calming atmosphere. Morning yoga sessions become something you’ll genuinely look forward to every day. This idea is perfect for wellness-focused homeowners who want their outdoor space to nurture both body and mind. 12. Deck with Vegetable Planter Boxes Line the edges of your deck with planter boxes filled with fresh vegetables, herbs, and edible plants. This turns your deck into a functional kitchen garden right outside your back door. Tomatoes, peppers, lettuce, and herbs thrive in raised planters with good sunlight. It’s a rewarding, practical, and beautiful addition that brings the joy of homegrown food to your daily outdoor living experience. One of mine replaced a full railing run with cedar planter boxes at the same height. She now harvests salad greens from her deck rail three seasons a year. The structural impact is basically zero, and the visual payoff is enormous. 13. Deck with Pergola and Curtain Drapes Install a wooden or metal pergola over your deck and hang soft, flowing curtain drapes for shade and style. The drapes can be pulled open or closed depending on the weather or privacy needs. This design adds a resort-like, romantic feel to any outdoor space. Pair with string lights and potted plants for maximum impact. It’s one of the easiest ways to elevate a plain deck dramatically. Material note: Use solution-dyed acrylic fabric (brands like Sunbrella are the industry standard) for drapes that resist fading and mildew. Canvas and standard outdoor polyester both degrade quickly in UV-heavy climates. 14. Deck with Multi-Tiered Water Feature Add a cascading, multi-tiered water feature beside or within your deck to bring soothing sounds and movement to your space. The gentle sound of flowing water naturally creates a calming atmosphere perfect for unwinding after a long day. Water features also attract birds and add a luxurious focal point. Choose stone, wood, or modern metal finishes to match your overall deck style and garden aesthetic. 15. Deck with Greenhouse Attached Attach a small greenhouse directly to your deck to create a seamless indoor-outdoor growing experience. This setup lets you tend to plants year-round regardless of the weather outside. The glass walls of the greenhouse add architectural beauty and allow natural light to flood both spaces. Walk straight from your deck into your growing space; it’s a dream setup for plant lovers and avid gardeners alike. 16. Deck with Hanging Lanterns and Forest Vibe String hanging lanterns across your deck and surround the space with dense, lush plants to create a magical forest atmosphere. As the lanterns glow at dusk, the whole deck upgrade into an enchanting, storybook setting. Mix different plant heights and textures to build a layered, immersive look. This idea works beautifully for evening entertaining or simply creating a personal outdoor retreat you’ll never want to leave. 17. Deck with Wood and Rope Details Incorporate natural wood and rope into your deck’s railings, furniture, or decorative details for a rustic, nautical-inspired aesthetic. A thick rope wrapped around posts or used as a railing adds organic texture and a coastal charm. Paired with weathered wood tones, this look feels relaxed, warm, and genuinely unique. It’s a great fit for beach houses, lakeside cottages, or anyone who loves that laid-back, seafaring design style. 18. Deck with Vertical Herb Garden on the Wall Mount vertical herb garden panels or pocket planters on the walls of your deck for a space-saving, functional display. Grow basil, mint, rosemary, thyme, and more within arm’s reach of your outdoor dining area. Fresh herbs are always available for cooking, making this both a practical and beautiful addition. The lush greenery also softens hard walls, adding life and color to every corner of your deck. 19. Deck with Tropical Bamboo Fencing Install bamboo fencing around your deck to create an instant tropical, zen-inspired atmosphere. Bamboo is durable, eco-friendly, and grows incredibly fast, making it a sustainable fencing choice. The natural golden tones of bamboo pair beautifully with wooden decking and tropical plants. Add a few large leafy plants inside the fence line, and you’ll feel like you’ve escaped to a private resort every time you step outside. 20. Deck with Built-In Outdoor Bar with Greenery Build a stylish bar directly into your deck’s structure and surround it with trailing plants, herbs, or flower boxes. A built-in bar saves space, looks polished, and instantly makes your deck the go-to spot for entertaining. Add bar stools, pendant lighting, and a small drink fridge to complete the setup. The greenery softens the look and keeps the bar area feeling fresh, lush, and connected to your garden. 21. Deck with Elevated Walkway to Secret Garden Build a raised wooden walkway that extends from your deck and leads guests to a hidden garden tucked away in your backyard. The element of discovery makes this design incredibly special and memorable. Line the walkway with lanterns, flowers, or hanging plants for a dramatic, fairy-tale effect. This is a wonderful way to use unused backyard space while adding depth, character, and a real sense of adventure to your outdoor area. 22. Deck with Living Roof and Solar Panels Top your deck’s pergola or cover with a green living roof planted with sedum or other hardy ground covers, and integrate solar panels for an eco-forward design. The living roof insulates, reduces rainwater runoff, and looks stunning from above. Solar panels offset your energy use, making the whole setup sustainable and forward-thinking. This is the perfect choice for environmentally conscious homeowners who want beauty and responsibility in one design. 23. Deck with Colorful Outdoor Rugs and Potted Plants Layer bright, patterned outdoor rugs across your deck and scatter a variety of potted plants throughout the space for instant texture and vibrancy. This is one of the most affordable ways to refresh a tired-looking deck without any construction. Mix bold colors with trailing greenery for a playful, welcoming atmosphere. Change the rugs seasonally to keep things fresh and new throughout the year without a major renovation investment. 24. Deck with Wooden Swing and Garden Surround Hang a sturdy wooden swing from a pergola or overhead beam on your deck, surrounded by a lush, flowering garden. There’s a timeless, nostalgic joy to swinging gently outdoors while being surrounded by nature. This idea works for families, couples, or anyone who wants a relaxed, whimsical touch in their outdoor space. Pair with climbing roses or jasmine nearby to add fragrance and old-world garden charm to the whole area. 25. Deck with Privacy Walls of Tall Grasses Use tall ornamental grasses or dense bamboo plantings to create natural privacy walls along the edges of your deck. Unlike wooden fences, living walls breathe, move in the breeze, and evolve beautifully with the seasons. Varieties such as pampas grass and fountain grass offer incredible texture and height. This design gives you seclusion without making the space feel enclosed, keeping your deck feeling open, organic, and connected to the surrounding landscape. 26. Deck with Wooden Slat Partitions and Hanging Planters Install wooden slat partitions to create zones or visual separation on your deck, then hang planters filled with colorful flowers or fresh herbs from the slats. The partitions add architectural interest and a modern, clean aesthetic. The hanging planters bring life, color, and fragrance to the vertical space you might otherwise leave empty. Together, this pairing creates a layered, thoughtful design that feels curated, cozy, and genuinely inviting. 27. Deck with Interactive Garden Sculptures Place eye-catching garden sculptures or interactive art installations near your deck to add an artistic, playful dimension to your outdoor space. Sculptures can be made from metal, stone, driftwood, or recycled materials, giving you endless style options. Interactive pieces like wind chimes, kinetic spinners, or water sculptures engage the senses and spark conversation. Inspiring Backyard Deck Ideas for Every Style and Budget No matter your taste or budget, your backyard deck can become your favorite spot at home: here are 26 inspiring ideas to help you design a space that’s completely your own. Multi-level decks deserve a special mention. Across the dozens of decks I’ve designed, multi-level layouts consistently get the most use. Separating dining from lounging, even by just a single step, dramatically changes how people move through and inhabit the space. If your yard has any natural grade change, use it. 28. Cozy Corner Deck with Fire Pit A small corner deck with a built-in fire pit is one of the most inviting outdoor setups you can create. Arrange comfortable seating in a circle around the fire for a warm, intimate gathering space. It doesn’t need to be large to feel special. Even a compact corner changes into the perfect evening hangout spot where family and friends love to gather, relax, and connect. Gas vs. wood-burning: Gas fire pits offer instant, clean flames and are simpler for HOA-regulated neighborhoods. Wood-burning pits deliver that campfire smell and crackling sound that guests genuinely love, but check your local ordinances first. 29. Deck with Outdoor Kitchen and Dining Area Take your entertaining to the next level by combining a fully equipped outdoor kitchen with a generous dining area on your deck. Install a grill, countertop, sink, and storage for a setup that rivals your indoor kitchen. Add a long dining table nearby for family-style meals under the open sky. This design makes hosting easy, fun, and incredibly memorable for every guest you invite over. Material tip: Use composite decking specifically around cooking zones. It resists grease stains and doesn’t require annual re-sealing the way pressure-treated wood does. 30. Deck with Retractable Roof and Dining Set A retractable roof gives you the best of both worlds: open sky on sunny days and solid cover when the weather turns. Pair it with a stylish outdoor dining set for a space you can use year-round. No more canceling outdoor dinners because of unpredictable weather. This smart, flexible design is ideal for homeowners who want to get the most out of their deck in every season. 31. Deck with Outdoor Reading Nook Carve out a quiet corner of your deck as a dedicated reading nook. Use a built-in bench or a deep armchair, add thick cushions, a small side table for your drink, and a little shade overhead. Surround it with potted plants for a cozy, private feel. This simple setup turns any unused deck corner into a peaceful personal sanctuary you’ll look forward to every single day. 32. Deck with Spiral Staircase to Rooftop Lounge Add drama and function to your home with a spiral staircase that winds up from your deck to a rooftop lounge area. The upper level offers a private escape with elevated views of your neighborhood or garden. It’s a bold architectural feature that adds real wow factor to your home. Furnish the rooftop with comfortable seating and soft lighting for a truly stunning outdoor retreat. Before you build: rooftop decks almost always require a structural engineering review to confirm your home’s roof or flat surface can bear the live load. This is non-negotiable; work with a licensed contractor. 33. Deck with Wooden Bar and Entertainment Zone Build a stylish wooden bar into your deck to create a dedicated entertainment zone for hosting guests. Add bar stools, pendant lighting, a mini fridge, and open shelving for drinks and glassware. This setup makes every gathering feel like a special occasion. Whether it’s a summer party or a casual Friday night, your outdoor bar becomes the natural gathering point everyone gravitates toward all evening long. 34. Deck with Elevated Lounge and Floor Cushions Raise a section of your deck to create an elevated lounge platform and fill it with oversized floor cushions for a relaxed, bohemian feel. Low seating encourages people to kick back and truly unwind. Mix warm-toned fabrics, lanterns, and trailing plants to improve the laid-back atmosphere. This design feels effortlessly cool and works beautifully for casual outdoor evenings with close friends and family. 35. Deck with LED-Lit Steps and Railing Install LED strip lighting along your deck’s steps and railings to create a modern, polished look that also improves nighttime safety. The soft glow adds depth and style to the entire space after dark. Choose warm white for a cozy ambiance or cool tones for a sleek, contemporary feel. It’s a relatively affordable upgrade that completely changes how your deck looks and functions in the evenings. In my experience, post-cap lights and under-rail LED strips give the most impact per dollar. Stair riser lighting is the single best safety upgrade on decks with more than three steps, particularly for households with older family members or young children. 36. Deck with Hammock and Tropical Surround Hang a wide, comfortable hammock between deck posts or a pergola frame and surround the area with lush tropical plants. Palms, banana trees, and large-leafed plants instantly create a vacation-like atmosphere right in your backyard. It’s the ultimate relaxation setup perfect for lazy afternoons, afternoon naps, or simply disconnecting from a busy day. This idea brings resort-style comfort to your everyday outdoor living space. 37. Deck with Floating Wooden Slats and Integrated Seating Use floating wooden slats as the primary design element of your deck for a sleek, modern aesthetic. The horizontal lines create a clean, architectural look that feels fresh and current. Integrate built-in seating benches along the edges to keep the space streamlined and clutter-free. This minimalist approach is ideal for homeowners who love contemporary design and want a deck that feels curated, intentional, and effortlessly stylish. 38. Deck with Poolside Lounge and Umbrellas Design your deck as a poolside lounge by lining it with comfortable reclining chairs and large umbrellas for shade. Use weather-resistant materials that can handle splashes and constant sun exposure. Add a small side table between each chair for drinks and sunscreen. This classic setup turns your pool area into a resort-worthy retreat where family and guests can relax, sunbathe, and enjoy the water all day. Material note for pool decks: lighter-colored decking materials stay noticeably cooler underfoot in full sun. Darker composite boards can become uncomfortably hot, especially for bare feet on a poolside deck. 39. Deck with Built-In Sofa and Fire Pit Build a permanent L-shaped or U-shaped sofa directly into your deck structure and center a fire pit in the middle of the seating arrangement. This creates a symmetrical, polished look that’s also incredibly functional. The built-in nature of the seating means no furniture to move or store. It’s a design that works beautifully year-round, especially on cool evenings when the fire brings everyone naturally together. 40. Deck with Sliding Glass Doors to Backyard Install wide sliding glass doors between your indoor living area and your deck to create a seamless indoor-outdoor connection. When the doors are open, the two spaces become one expansive area perfect for entertaining or family life. Natural light floods your interior, and the transition between inside and outside feels effortless. This architectural upgrade significantly enhances the functionality and perceived size of your overall living space. 41. Deck with Raised Platform and Outdoor Dining Area Elevate your dining experience by building a raised deck platform dedicated entirely to outdoor meals. The slight elevation separates the dining space from the rest of the yard, giving it a defined, intentional feel. Add a large table, comfortable chairs, and overhead string lights to complete the look. Whether it’s a weeknight family dinner or a weekend gathering, this setup makes every outdoor meal feel like a special occasion. 42. Deck with Swinging Lounge Chair Install a hanging swinging lounge chair from a pergola beam or sturdy overhead structure on your deck. It’s a playful, eye-catching piece that doubles as the most popular seat in the house. Adults love the gentle rocking motion as much as kids do. Choose a cushioned, weather-resistant swing chair in a bold color or natural tone to complement your deck’s overall design and make the space feel uniquely yours. 43. Deck with Stone Wall and Modern Lighting Build a dramatic stone feature wall along one side of your deck, then pair it with sleek, modern light fixtures for a bold design statement. The rugged texture of stone contrasts beautifully with clean, contemporary lighting. This combination of natural and modern elements creates a sophisticated outdoor atmosphere that feels high-end without being overdone. It’s a striking backdrop for outdoor dining, lounging, or simply enjoying a quiet evening outside. 44. Deck with Transparent Glass Railings Replace traditional wooden or metal railings with frameless glass panels to maintain unobstructed views of your garden or landscape. Glass railings create an open, airy feel and give your deck a sleek, upscale appearance. They’re also incredibly durable and easy to clean. This is a particularly smart choice for decks with beautiful views that you don’t want interrupted. The result is a modern, polished outdoor space that feels open and expansive. 45. Deck with Built-In Pizza Oven and Barbecue Take outdoor cooking seriously by incorporating a built-in pizza oven and barbecue station directly into your deck design. These permanent fixtures make outdoor entertaining effortless and genuinely impressive. Add counter space, a prep area, and bar seating nearby so guests can watch and participate in the cooking experience, turning every gathering into a fun, memorable event. 46. Deck with Pet-Friendly Area and Fence Design a dedicated section of your deck specifically for your pets by adding a secure fence, non-slip flooring, and a shaded resting spot. Pets deserve to enjoy the outdoors safely, and a fenced deck area gives them freedom without the worry. Include a water bowl station and a comfortable bed or mat. This thoughtful addition makes your outdoor space work for the whole family, furry members included. 47. Deck with Gravel Pit and Outdoor Seating Surround your deck with a decorative gravel pit that visually grounds the structure and adds a natural, textured border. Place weather-resistant chairs and a low table within or around the gravel area for casual outdoor seating. The gravel reduces maintenance, improves drainage, and creates a clean, polished look. This low-cost landscaping technique gives even the simplest deck a well-designed, intentional appearance that ties the whole backyard together beautifully. 48. Deck with Outdoor Lounge Chairs and Table Keep it simple and functional with a spacious deck furnished with multiple lounge chairs and a central outdoor table. This straightforward setup is perfect for everyday use, morning coffee, afternoon reading, or casual outdoor dining. Choose comfortable, weather-resistant furniture in neutral tones for a timeless look. Sometimes the best deck design is the one that prioritizes comfort and ease of use above all else, and this delivers exactly that. 49. Deck with Custom Tile Flooring and Planters Upgrade your deck’s visual appeal with custom-designed tile flooring in a pattern or color that reflects your personal style. Tiles are durable, easy to clean, and completely change the look and feel of an outdoor space. Add decorative planters around the edges filled with seasonal flowers or greenery to soften the hard surfaces. Together, custom tiles and lush planters create a deck that feels both polished and inviting. 50. Deck with Enclosed Screen Porch and Dining Area Add a screened enclosure to your deck to create a protected outdoor dining area that keeps bugs and harsh weather at bay. This setup extends the usable season of your deck significantly, perfect for humid climates or areas with heavy insects. Furnish it with a dining table, comfortable chairs, and soft lighting to create a cozy, enclosed space that still feels connected to the outdoors. 51. Deck with Vintage Garden Furniture Give your deck timeless charm by furnishing it with vintage-style garden pieces like wrought-iron chairs, ornate tables, and classic benches. Pair with floral cushions, string lights, and potted topiaries for a romantic, old-world garden atmosphere. Vintage furniture pieces are often incredibly durable and only get more beautiful with age. This design aesthetic is perfect for homeowners who love classic style and want their outdoor space to feel warm and storied. 52. Deck with Large Decking Tiles and Planters Use large-format decking tiles in stone, porcelain, or composite materials to give your deck a sophisticated, high-end appearance. The oversized tiles create a seamless, expansive look underfoot that instantly elevates the entire space. Place statement planters at key points around the deck to bring in natural greenery and contrast with the clean tile surface. It’s a simple yet impactful design formula that works across many different outdoor styles. 53. Deck with Spiral Pathway to a Garden Sanctuary Design a curved or spiral pathway that begins at your deck and winds through your backyard to a secluded garden sanctuary. This creates a sense of journey and quiet discovery in your outdoor space. Line the path with lanterns, low-growing plants, or stepping stones for a magical, intentional feel. The sanctuary at the end, whether a bench, a fountain, or a garden nook, becomes your personal place of peace. How to Style and Decorate Your Outdoor Deck Styling your deck is just as important as building it: these 5 practical tips will help you turn any deck into a beautifully decorated outdoor living space. Choose Right-Sized Furniture: Always match furniture scale to your deck size. Oversized pieces overwhelm small decks, while tiny furniture makes large decks feel empty and incomplete. Layer Your Lighting: Combine string lights overhead, LED strip lighting along railings, and lanterns at ground level to create a warm, multi-dimensional ambiance after dark. Add Planters Strategically: Place tall planters at corners and smaller ones along edges to frame the space, add natural color, and soften hard structural surfaces beautifully. Use Outdoor Rugs to Define Zones: Lay an outdoor rug under your seating or dining area to anchor the space and make your deck feel like a cozy indoor room. Accessorize with Weatherproof Pillows: Add bold, patterned weatherproof cushions and throw pillows to instantly inject personality, comfort, and a pulled-together style into your deck. A well-styled deck doesn’t require a big budget or a complete redesign: even small decorative changes can completely change the way your outdoor space looks and feels every day Essential Deck Materials: Which One is Right for You? Before you start building your dream deck, having the right materials on hand makes all the difference: here are 7 essential materials you’ll need to get started. Decking Boards: The main surface material of your deck, available in wood, composite, PVC, or tile options. Deck Framing Lumber: Structural beams and joists that form the skeleton and support the entire deck. Concrete or Footings: Used to anchor deck posts securely into the ground for long-lasting stability. Deck Screws and Fasteners: Weather-resistant hardware that holds all your decking boards and frame together firmly. Deck Posts and Railings: Vertical supports and safety railings that define the deck’s edges and add style. Waterproof Sealant or Stain: A protective coating applied to wood surfaces to prevent moisture damage and fading. Gravel or Drainage Material: Placed beneath the deck to improve drainage and prevent ground moisture from rising. Wind Up Creating a space you enjoy outside comes down to simple choices that match how you live. I’ve seen how the right layout, seating, lighting, and materials can turn even a basic deck into something you use every day. These outdoor deck ideas go beyond looks. They help you build a space for relaxing, hosting, or spending quiet time. When you focus on what you need instead of copying trends, the result feels more natural and useful. I’ve learned that starting with how you want to use the space makes planning easier. Take a few ideas from this list, test them in your space, and see what works. If something stands out, try it and keep improving your setup over time.
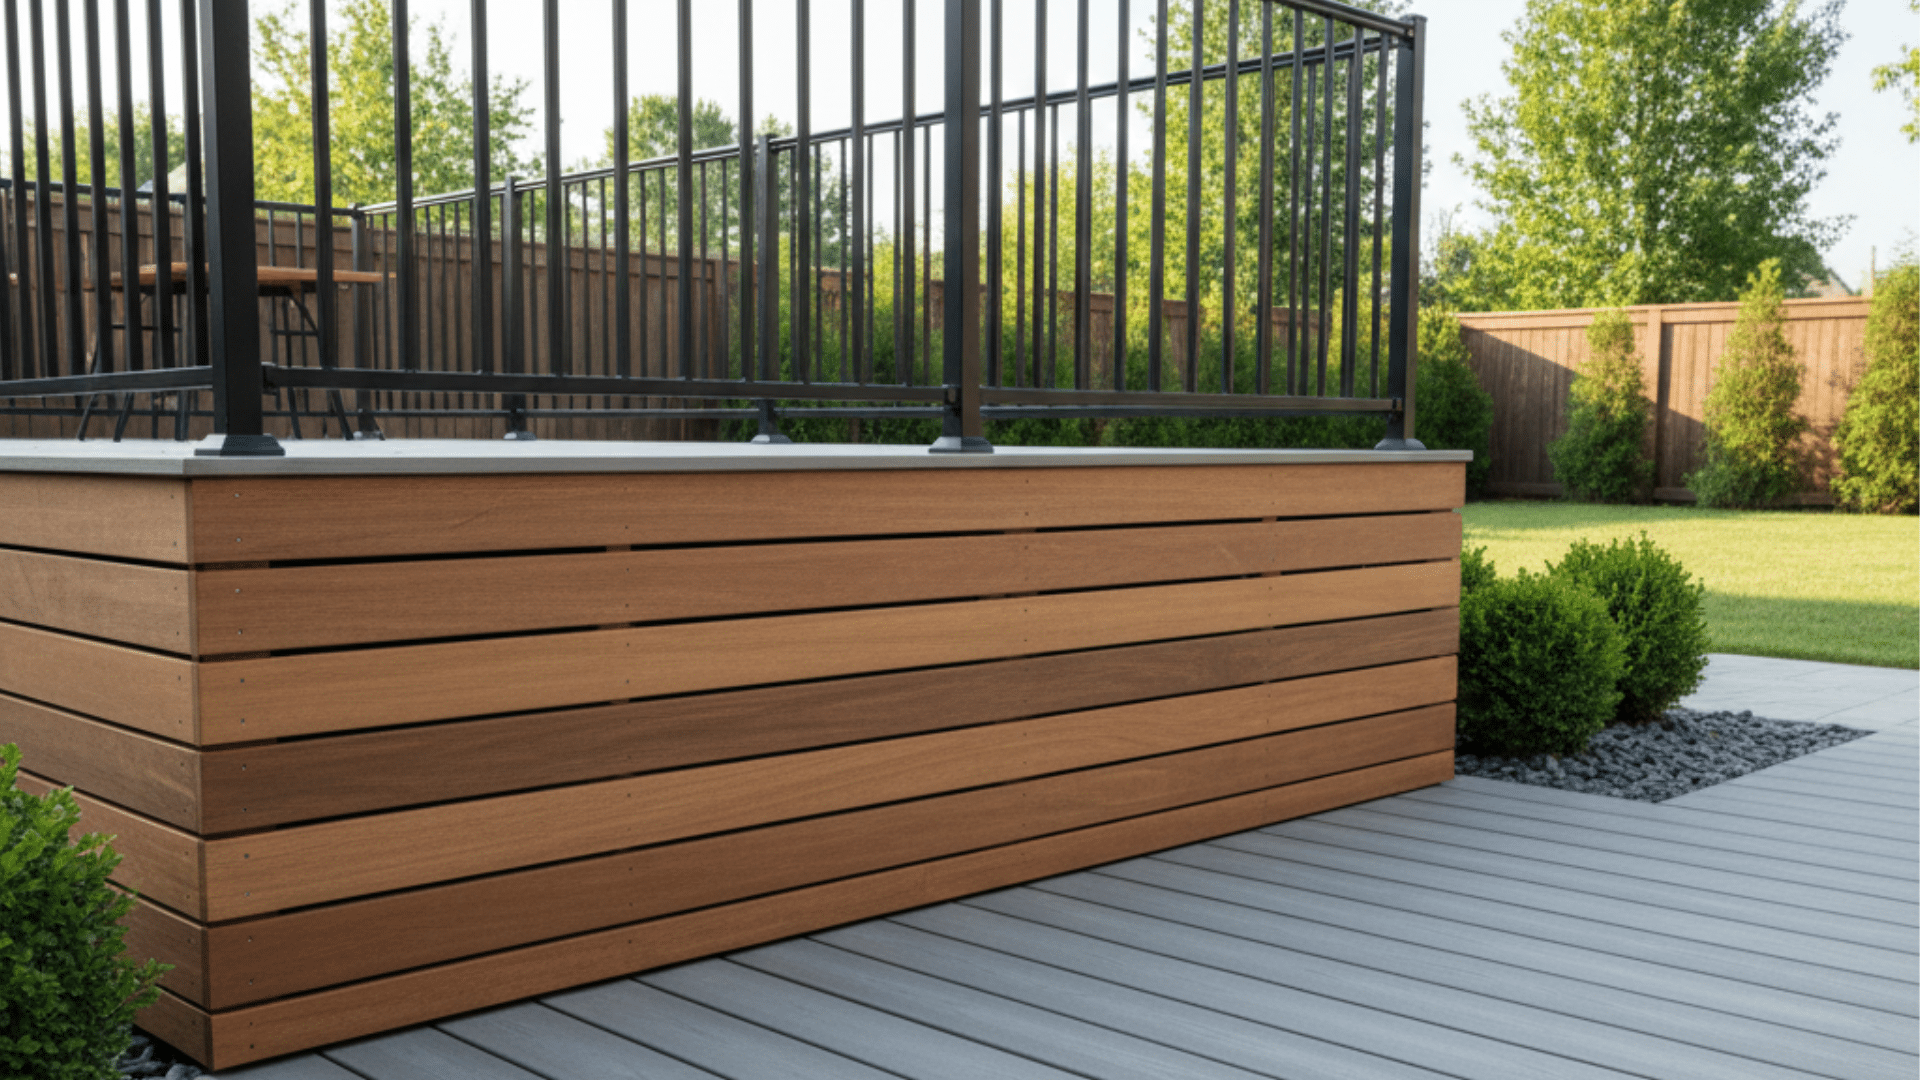
I used to think the space under a deck didn’t matter, but it does. Once you notice uneven boards, open gaps, or random storage piling up, it becomes hard to ignore. If you’re facing the same thing, you might be searching for modern deck skirting ideas that actually help your space look clean. Good skirting can hide clutter, support airflow, and match the style of your home. It also helps your deck feel more finished without adding extra work. In this guide, I’ll share modern deck skirting ideas that keep things simple, clear, and easy to manage. So let’s start with the options that make the biggest difference. What Makes Deck Skirting Look Modern Modern deck skirting uses clean lines, simple shapes, and smooth finishes. Most updated designs avoid busy patterns and lean toward straight boards or panels. Dark colors like black or charcoal create a sharp look, while light tones keep things bright and neat. Materials such as composite, PVC, metal, and well-finished wood work well because they stay uniform and hold up over time. Modern skirting also keeps the space under the deck organized. Even spacing, trimmed edges, and a clear layout help the whole deck look fresh and intentional. How to Choose the Right Modern Skirting Use this quick guide to match your deck skirting to your home, climate, budget, and upkeep needs without stress today. Match the skirting style to your deck height, railing style, and home design. Pick a material that fits your climate and upkeep needs. Plan for steady airflow under the deck to prevent moisture issues. Add access panels or doors if you store items or need utility entry. Set a budget early so you can compare wood, composite, PVC, and metal. Check the ground slope to avoid gaps or uneven lines during installation. Modern Deck Skirting Ideas Modern deck skirting ideas use clean lines, simple boards, and smooth panels to update your deck. These options help you hide gaps, add style, and keep upkeep low. You’ll also see several inexpensive deck skirting ideas here that work well when you have a small budget. 1. Horizontal Cedar Slats Horizontal cedar slats give your deck a clean and updated look. The warm tone of the wood pairs well with many siding colors, and the straight lines keep the style simple. You can change the spacing between boards to control airflow and privacy. Cedar is light, easy to cut, and holds stain well, which helps you keep it looking fresh through the seasons. This option works for most deck heights and remains a good pick if you want a natural finish. 2. Black Composite Panels Black composite panels create a sharp and smooth look that suits many modern homes. The panels stay steady in rough weather and only need light cleaning during the year. Because composite stays uniform, you don’t deal with knots or twists. You can choose full sheets or plank styles, depending on how much detail you want. This option also works well if you want a long-lasting setup without regular repairs. The dark tone hides dirt and gives your deck a simple, strong finish. 3. Vertical Narrow Slats Vertical narrow slats add height to your deck and give the space a tidy layout. This style works well if your siding or fence also uses straight lines. The narrow boards create a steady pattern without feeling heavy. You can stain the slats in light or dark tones depending on your home’s look. This setup also helps with airflow because the slim gaps keep air moving under the deck. It’s a flexible choice that fits many outdoor layouts and needs little upkeep. 4. Metal Grid Panels Metal grid panels offer a simple way to update your deck with strong, clean lines. The grid layout keeps the look neat while still allowing good airflow under the deck. These panels handle rough weather, resist bugs, and hold their shape well over time. You can paint them black or charcoal for a sharper finish or leave them coated in a neutral metal tone. This choice works well for both tall and low decks and pairs nicely with metal railings or simple wood trim. 5. PVC Panels in Matte White PVC panels in matte white keep your deck bright and tidy while giving you a smooth finish that holds up to moisture and sun. The panels do not warp, swell, or split, which makes them a steady choice for many climates. They also clean quickly with a simple wash. The matte surface helps the panels blend with trim, siding, and railings. If you want a clean, quiet look without much upkeep, this option offers a simple and long-lasting solution for your deck. 6. Wood Slats with Black Frame Wood slats with a black frame create a clean outline that helps the skirting stand out in a simple way. The wood adds warmth, while the dark frame keeps the setup sharp. You can install the slats horizontally or vertically based on your layout. This style works well when your home already uses black accents on windows or railings. The frame also helps keep the boards aligned, giving you a neat finish. It’s a good pick for decks that need both structure and style. 7. Composite Boards Installed Horizontally Composite boards installed horizontally give your skirting a steady, smooth layout that stays clean with very little work. The boards resist fading, cracking, and bending, which helps them last longer than many wood options. The horizontal lines make the deck feel wider and more open. You can match the boards to your deck surface or choose a new shade for contrast. Because the composite holds its shape, the final look stays even and simple through the seasons, making this a strong choice for busy homeowners. 8. Smooth Concrete Base with Wood Trim A smooth concrete base with wood trim gives your deck a steady and grounded feel. The concrete keeps pests and moisture away from the underside of the deck, while the wood trim softens the look. This mix works well for homes that use both stone and wood elements. You can stain the trim to match your deck boards, which helps the whole setup feel connected. The concrete stays firm over time, and the simple trim line gives the skirting a clean border. 9. Perforated Metal Sheets Perforated metal sheets provide steady airflow and a clean finish. The small holes help with ventilation while keeping the deck looking neat and simple. These sheets stand up well to rough weather, making them a good pick for many climates. You can choose round or square holes depending on your style. A dark-coated finish works well with wood decks, while lighter tones match bright trim. This option suits both low and raised decks and requires little more than a basic wash for upkeep. 10. Black Vinyl Lattice in A Clean Frame Black vinyl lattice in a clean frame gives you an updated look at a low cost. The dark tone helps the lattice feel simple and modern, not busy. The frame keeps the panels tight and straight, which improves the final result. Vinyl holds up to rain and sun without much upkeep and stays light enough for easy cutting. This style also gives good airflow, which helps protect the deck. It’s a budget-friendly choice when you want a neat look without extra work. 11. Slatted Wood with Gravel Base Slatted wood with a gravel base gives your deck a tidy and steady layout. The gravel helps with drainage, keeps mud away from the boards, and reduces moisture under the deck. The wood slats sit slightly above the gravel, which prevents early wear and keeps the lines clean. You can stain the boards in light or dark tones based on your deck style. This setup works well for raised decks that need airflow and a clear barrier at ground level. It stays easy to maintain year-round. 12. Reclaimed Wood Slats Reclaimed wood slats offer a low-cost way to update your deck while keeping a simple look. The boards already have character, so you can sand them lightly and apply a clear coat or stain. When installed with even spacing, the layout feels clean without looking rough. This approach works well if you want to save money while still getting a strong result. Reclaimed wood is easy to cut and replace, making it practical for DIY work. It’s a steady choice for decks that need airflow and warmth. 13. Composite Panels with Hidden Fasteners Composite panels with hidden fasteners give your deck a smooth surface with no visible screws or nails. This creates a steady, uninterrupted look that suits many updated outdoor spaces. Composite holds its shape through different seasons, so you won’t deal with bending or splitting. The panels come in several colors, allowing you to match your deck boards or create a contrast. Because the fasteners stay out of sight, the final layout feels clean and direct. You also get a setup that needs very little upkeep. 14. Metal + Wood Combo Panels Metal and wood combo panels give you a strong, balanced look that works with many deck styles. The metal provides a firm base and resists weather, while the wood adds warmth. You can run the wood boards horizontally or vertically, depending on your layout. This mix works well when your railing or trim already uses metal. The panels hold up well over time and only need basic cleaning. This option also helps you manage airflow while creating a clear border around the deck. 15. Solid Privacy Composite Walls Solid privacy composite walls give full coverage under your deck and remove any open spaces. This style works well if you want a simple, protected area with no gaps. Composite stays strong through heat, rain, and cold, so the panels remain uniform over time. You can choose smooth or lightly textured surfaces to match your deck boards. The walls also help block pests and reduce clutter under the deck. This option fits well for tall decks or backyards that need more privacy or storage. 16. Horizontal Shiplap-Style Boards Horizontal shiplap-style boards give your deck a clean and even layout. The slight overlap between boards helps block gaps while keeping the lines straight. You can use natural wood or composite, depending on your upkeep needs. This style fits homes with simple siding or smooth trim. The boards sit neatly in a frame, which helps them stay aligned through changing seasons. It’s a practical pick if you want something easy to clean and steady in appearance without extra detail or patterns. 17. Minimal Acrylic Panels Minimal acrylic panels offer a clear, simple finish that pairs well with updated outdoor spaces. These panels can be frosted for privacy or left clear to match open layouts. Acrylic stays light, easy to cut, and resists moisture, making it steady in wet or sunny climates. You can frame the panels with wood or metal for a neat border. This style works well for low decks or areas where you want a clean look without solid boards. A quick wash keeps them looking fresh. 18. Deck Skirting with Led Strip Lighting Deck skirting with LED strip lighting gives your deck a clean glow at night while keeping the layout simple during the day. LED strips can run along the top or bottom edge of the skirting to highlight straight lines or add soft ground lighting. You can use wood, composite, or metal panels as the base material. The lights stay low-energy and easy to control with timers. This setup works especially well for decks used in the evening and helps guide foot traffic safely. 19. Black Aluminum Panels Black aluminum panels provide a strong and simple finish that holds up well in many climates. Aluminum resists rust and keeps its shape through heat and cold. The dark tone helps the skirting blend with black railings or window trim. Panels come in smooth or lightly vented styles, depending on your airflow needs. They are light enough for easy handling, yet firm enough to protect the underside of the deck. This option keeps upkeep low while giving your deck a steady, updated look. 20. Clean Stucco Finish A clean stucco finish gives your deck a solid, smooth surface that works well with many home styles. Stucco covers gaps fully and offers a uniform look that stays steady through weather changes. You can match the color to your home’s siding for a connected layout. Stucco also blocks pests and protects the underside of the deck from debris. This option works best for raised decks with strong framing. Once installed, it only needs light cleaning to stay fresh through the seasons. 21. Bamboo Slat Skirting (Inexpensive + Modern) Bamboo slat skirting gives your deck a clean and natural look at a low cost. The slim slats create steady lines that work well with many outdoor styles. Bamboo is light, easy to cut, and holds up well when sealed. You can mount the slats in tight rows for more coverage or leave small gaps for airflow. This option works for both low and raised decks and offers a simple way to freshen the space without high material costs. It stays easy to maintain throughout the year. 22. Modern Brick-Look Panels Modern brick-look panels give your deck a solid appearance without the weight of real brick. These panels install quickly and stay steady through weather changes. You can choose darker or lighter tones depending on your siding or trim. The panels fit well under taller decks and help block clutter from view. They also resist pests and keep their shape better than many natural materials. If you want a firm, simple finish that needs little upkeep, this option helps create a clear base for your deck. 23. Angled Slat Skirting Angled slat skirting uses boards set on a steady diagonal, which helps the deck stand out while keeping the layout simple. The angle creates smooth lines that work well with both wood and composite boards. You can change the angle based on your deck height and airflow needs. This setup works well when you want more coverage than straight slats but still want good ventilation. Staining or painting the boards gives you full control over the final look. It’s a flexible pick for many homes. 24. Slatted Privacy Fence Style A slatted privacy fence style gives full coverage under your deck while keeping the lines straight and neat. The boards sit close together, blocking clutter and creating a steady screen. You can run the slats horizontally or vertically, depending on your layout. This design works well for homes with simple railings or clean siding lines. It also helps reduce wind under the deck while still allowing small gaps for air movement. The finished look stays tidy with basic cleaning and light seasonal checks. 25. Charcoal Fiber-Cement Panels Charcoal fiber-cement panels offer a firm, smooth surface that handles heat, rain, and moisture well. The dark color blends easily with many deck designs and hides dirt between cleanings. These panels stay flat over time and resist dents, making them useful for busy outdoor spaces. You can install them with slim trim boards for a clean border. Fiber-cement fits tall decks especially well, giving the base a steady appearance. Once in place, the panels need only occasional washing to stay in good shape. 26. Simple Plywood Panels Painted Black Simple plywood panels painted black give your deck a clean look without a high price. When trimmed neatly, they create a steady, uniform surface that hides open spaces under the deck. Exterior-grade plywood handles weather better and takes paint evenly. The black finish blends with many railing and trim styles while hiding small marks or dirt. This is a helpful choice if you want a fast solution that still looks tidy. A light wash and touch-up paint keep the panels looking fresh. 27. Live-Edge Wood Skirting (Simple Cut Edges) Live-edge wood skirting uses boards with natural edges to give your deck a warm, simple look. The edges keep slight shape changes, but the skirting stays clean when trimmed to the same height. You can mount the boards close together or leave small gaps for airflow. A clear coat highlights the grain and protects the wood from weather damage. This style works well with decks that already feature wood surfaces or natural landscaping. It offers a steady finish while keeping a natural feel. 28. Horizontal 2×2 Slat Style A horizontal 2×2 slat style creates short, even gaps that help with airflow while still giving good coverage. The slim boards line up neatly and stay light enough for simple installation. You can stain or paint them to match your deck. This style works for low and raised decks because the pattern stays steady across different heights. The small slats also help reduce warping when sealed well. It’s a tidy option when you want straight lines without heavy boards or complex framing. 29. Minimal Stone Veneer Skirting Minimal stone veneer skirting gives your deck a firm and clean base without the weight of full stone. The panels attach easily to a support surface and stay steady through weather changes. You can choose smooth or lightly textured finishes based on your siding. Stone veneer helps block pests and offers full coverage for stored items under the deck. It works best for raised decks with strong lower framing. A light rinse during the year keeps the surface looking clean and even. 30. Wood Slats with Hidden Storage Doors Wood slats with hidden storage doors give you a neat layout while providing access to the space under the deck. The doors blend with the slats, so the surface looks smooth from a distance. Hinges and latches stay inside or behind the boards to keep the front clean. This setup works well for storing outdoor tools, cushions, or seasonal items. You can adjust the slat spacing for airflow while still keeping the storage area protected. It’s a practical choice for small yards or busy families. 31. Mixed-Width Horizontal Boards Mixed-width horizontal boards give your deck a steady look with a bit of variety. By using two or three board sizes, you create a clean pattern without making the skirting feel busy. The boards line up in straight rows, which keeps the layout calm and simple. You can stain all boards one color or use slight shade changes for a soft contrast. This style works well for wider decks because the lines help anchor the base. Upkeep stays manageable with seasonal cleaning and sealing. 32. Modern Trellis-Style Panels Modern trellis-style panels use larger openings and firm framing to keep the look simple and updated. Unlike older trellis designs, this version avoids thin strips and uses sturdy material with clean spacing. The panel layout allows strong airflow while still giving good coverage. You can choose wood, composite, or metal depending on your upkeep needs. This style works well for low and raised decks and matches many railing designs. A quick wash keeps the panels looking fresh through the seasons. 33. Corrugated Metal Painted Black (Inexpensive) Corrugated metal painted black offers a low-cost way to give your deck a bold, steady finish. The black surface hides marks and blends well with many trim colors. Corrugated panels stand up to rain, heat, and direct sun, making them reliable in tough climates. They also install quickly using basic tools. This style works especially well for raised decks where you want full coverage. The simple lines of the metal keep the layout clean, and light yearly washing helps it stay in good shape. 34. PVC Slats in Natural Wood Tone PVC slats in a natural wood tone give your deck a warm look without the upkeep of real wood. The slats resist moisture, insects, and fading, which helps them stay steady over time. Their uniform shape keeps the layout neat and simple. You can install the slats horizontally or vertically, depending on your deck height. This style works for many outdoor spaces because it matches common deck colors while staying easy to maintain. A quick wash brings the surface back to a clean finish. 35. Concrete Block Skirting with Smooth Finish Concrete block skirting with a smooth finish gives your deck a firm base that stays steady for many years. The blocks create full coverage and help protect the underside from pests and debris. Once the surface is coated or sealed, it takes on a clean, uniform look that matches many home styles. This option works best for raised decks with strong framing. You can add a simple trim along the top to connect the skirting to the deck structure. Seasonal rinsing keeps it looking neat. Maintenance Tips for Long-Lasting Modern Skirting Keep your skirting in good shape with simple checks, steady airflow, clean surfaces, and small repairs that prevent bigger issues over time. Wash panels or boards once or twice a year to remove dirt and buildup. Check for loose screws, warped boards, or shifting panels. Clear leaves and debris from the ground to maintain airflow. Re-seal wood when it starts to fade or feel dry. Inspect vents and gaps to ensure steady airflow under the deck. Fix small problems early to avoid costly repairs later. Final Thoughts You’ve seen how small changes under a deck can update the whole area. Clean lines, steady materials, and simple upkeep can make your outdoor space feel more organized and easier to use. The ideas you’ve read through can help you fix problem spots, hide clutter, and give your deck a more complete look. You don’t need a large project to see progress. You just need one clear plan that fits your space. As you think through these modern deck skirting ideas, I hope you’ll try one and see how much it helps. If you want more outdoor guidance, feel free to explore my other blogs for added support.





