


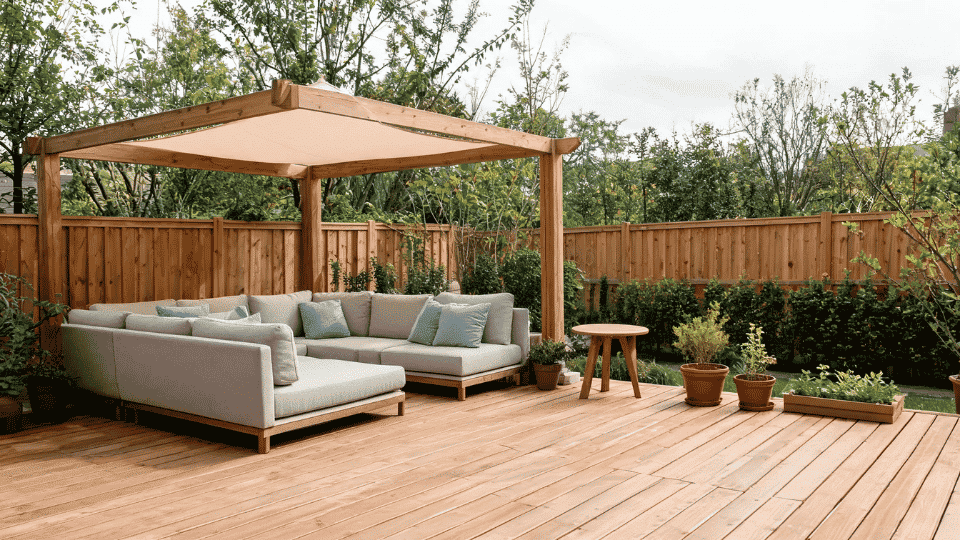
A bare deck can look inviting yet go unused when the sun is harsh, rain blows in, or the seating area feels too exposed. Covered deck ideas on a budget are not about grabbing the cheapest cover first. They are about solving the right outdoor problem without wasting money. I like starting with the worst hour of the day because that usually shows what the deck really needs. My goal here is to help you compare shade, rain cover, privacy, airflow, and design details before you make a purchase. These covered deck ideas can make a simple deck feel useful again. Cost Note: Figures in this article are estimates based on national averages. Actual costs vary significantly by region, contractor, materials, and project scope. Always get at least three quotes before committing to any project above $1,000. Start With the Cover Your Deck Actually Needs Before choosing a cover, think about what makes your deck uncomfortable. Shade, rain, wind, privacy, and heat all need different fixes. A fabric sail can cool a sunny corner, but it will not work like a sloped roof during steady rain. A freestanding cover may be better for an older deck because it avoids adding stress to weak framing. An attached cover can look cleaner, but it needs stronger mounting and careful water control. If your deck only needs shade, keep the solution light. If you need rain protection, plan for slope, drainage, and support from the start. Deck Situation Best Budget Direction Why It Works Harsh afternoon sun Shade sail, umbrella, or pergola These options cool the main sitting area without the cost of a full-framed roof. Light rain near the door Small lean-to cover or panel roof A limited roof protects the entry without covering parts of the deck that stay open. Exposed neighbors Curtains, lattice, or screen panels Side coverage adds privacy while also helping with low-angle sun and wind. Older deck frame Freestanding cover beside the deck This avoids adding unnecessary weight to framing that may already need repair. Dining area only Partial roof or fabric canopy The budget goes toward the zone that gets used most often, not the full deck. Rental or temporary setup Umbrella, removable canopy, or sail These choices add comfort without making permanent changes to the property. What to Check Before Adding a Budget Deck Cover Even a simple cover changes how the structure handles water, wind, and weight. Getting these checks wrong can turn a budget cover into an expensive repair. Understanding deck build cost ranges before you start helps avoid the situation where a cheap cover ends up costing more to repair than it saved. Check the frame first: Look at joists, beams, posts, and boards before adding anything that catches wind or adds overhead weight. Inspect the ledger area: Any cover attached near the house needs a sound ledger, clean siding details, and proper water management. Think about wind uplift: Fabric sails, umbrellas, and canopies can pull hard on weak anchors during gusts. Plan for runoff: Rain-ready covers need slope, panel overlap, and a clear path to move water away from the house. Check local rules early: Permanent roofs, attached covers, and larger structures may need permits, HOA approval, or setback clearance. Match weight to support: A heavy gazebo or panel system should not sit on an older deck without checking support below. A budget cover should reduce problems, not hide them. If the deck frame is weak, repair it first or place the cover beside the deck on its own footings. Covered Deck Ideas on a Budget The right cover should match how the deck is used, not just how it looks. These ideas focus on comfort, cost control, and practical outdoor use. 1. Cantilever Umbrella Deck Corner A cantilever umbrella creates a shaded corner without posts, drilling, or permanent framing. The offset design keeps the pole away from the furniture, so the seating area feels more open. Choose a sturdy base, weather-rated fabric, and a canopy that can tilt as the sun moves during the day. Budget: Low, especially if you already have outdoor seating and only need focused shade. Situation: Best for sunny decks with light to moderate wind and strong afternoon glare. Deck size: Works well on small decks, balconies, and compact seating corners. 2. Sail-Shaded Dining Nook A shade sail gives a dining area a clean, modern cover without a full roof. The fabric stretches between strong anchor points, creating a lighter look than heavy framing. Keep the sail tight, angled, and properly secured so it does not sag or collect water after summer rain. Budget: Low to mid, depending on sail quality, posts, and stainless hardware. Situation: Best for sunny decks that need overhead shade but still need airflow. Deck size: Works well on small to medium decks with one clear dining zone. 3. Freestanding Canvas Canopy Deck A freestanding canvas canopy gives seasonal coverage without attaching anything to the house. It can create a soft outdoor room over furniture and can be removed when the weather changes. Choose outdoor-rated fabric, a stable frame, and secure tie-downs so the canopy feels planned rather than temporary. Budget: Low to mid, depending on frame material and fabric quality. Situation: Best for sunny or mildly exposed decks where a removable cover makes sense. Deck size: Works well on medium decks with enough room for a separate frame. 4. Manual Wall Awning Setup A manual wall awning adds shade when you need it and folds back when you want open sky. It is simpler than a motorized option and can look neat when the mounting is done correctly. The brackets must fasten into solid framing, not just siding, trim, or thin fascia boards. Budget: Mid, usually cheaper than motorized awnings or built-in roof structures. Situation: Best for sunny attached decks with a strong wall for mounting. Deck size: Works well on small to medium decks connected directly to the house. 5. Simple Slatted Wood Pergola A slatted wood pergola gives the deck structure, filtered shade, and a more finished outdoor feel without completely blocking the sky. Use straight lumber, clean spacing, and simple hardware so the finished frame looks intentional. If you want to take it further, it is possible to build a simple pergola from scratch with basic tools and a weekend, which keeps costs well below a contractor-built structure. Budget: Mid, with pressure-treated lumber keeping the cost lower than premium wood. Situation: Best for sunny decks where shade matters more than rain protection. Deck size: Works well on medium decks or larger decks with one main seating zone. 6. Vine-Covered Garden Pergola A vine-covered pergola adds natural shade and a softer garden feel. It takes time to fill in, but the result can feel more relaxed than fabric or metal. Choose plants suited to your climate, and keep growth away from gutters, siding, roof edges, and any place where moisture can collect. Budget: Low to mid after the pergola is built, since plants are usually affordable. Situation: Best for sunny decks where long-term natural shade is the goal. Deck size: Works well on medium decks and garden-facing backyard decks. 7. Reed Mat Pergola Cover Reed, bamboo, or willow mats can be laid over pergola rafters to create warm, filtered shade. The texture gives a relaxed, casual look without the cost of solid roofing. Secure the material neatly along the edges so it does not curl, sag, or flap when the weather changes. Budget: Low to mid, depending on mat quality and pergola size. Situation: Best for sunny, dry, or mild climates where heavy rain is not the main concern. Deck size: Works well on small to medium pergola-covered decks. 8. Outdoor Curtain Cabana Deck Outdoor curtains can turn a basic cover into a softer, more private sitting area. They work especially well when the top is already covered, but the sides feel exposed. Use weather-resistant fabric, strong rods or cable, and enough clearance so the fabric does not drag across wet boards. Budget: Low, especially when added to an existing roof, pergola, or frame. Situation: Best for decks with side sun, close neighbors, or light wind exposure. Deck size: Works well on decks ranging from small to large, with a defined covered section. 9. Lattice-Screened Covered Corner A lattice-screened corner adds privacy, filtered light, and a sense of enclosure without closing the whole deck. It can support climbing plants, frame a bench, or soften a seating nook near a property line. For raised decks, adding clean skirting options below the screen makes the area feel fully finished rather than cut off mid-structure. Budget: Low to mid, depending on panel material and post requirements. Situation: Best for decks with low-angle sun, nearby homes, or exposed seating corners. Deck size: Works well on small decks, townhome decks, and raised decks. 10. Polycarbonate Panel Roof Polycarbonate panels create a rain-friendly cover while still letting daylight reach the deck. They work well over a pergola, doorway, or dining area when you want shelter without a dark roof. Install the panels with proper slope, overlap, closure strips, and fasteners made for outdoor expansion and contraction. Budget: Mid, usually less than a fully finished roof but more than fabric shade. Situation: Best for rainy decks that still need natural light. Deck size: Works well on small to medium covered zones and partial roof areas. 11. Corrugated Metal Shade Roof Corrugated metal gives the deck a stronger shade and a more durable overhead surface. It can suit rustic, cabin, farmhouse, or industrial outdoor styles. Because it blocks more light than clear panels do, plan the area below for airflow, furniture placement, and lighting so the space does not feel heavy. Budget: Mid, depending on panel quality, framing, and fastening details. Situation: Best for sunny or rainy decks where full overhead shade is preferred. Deck size: Works well on medium decks or partial sections of larger decks. 12. Lean-To Doorway Cover A lean-to doorway cover protects the transition between the house and deck. It can keep the threshold drier, reduce the risk of slippery boards near the door, and make everyday use easier. Keep the shape simple and make sure any house connection is flashed correctly so water does not get behind the siding. Budget: Mid, since framing and water control matter more than size. Situation: Best for rainy decks or doors that get direct weather exposure. Deck size: Works well on narrow decks, small decks, and entry-focused layouts. 13. Freestanding Post-and-Beam Cover A freestanding post-and-beam cover gives a built-in feel without relying on the house wall. It works well when siding, brick, windows, or rooflines make attachment difficult. The frame still needs proper footings, bracing, and clean proportions so it looks permanent rather than temporary. Budget: Mid to high, depending on post size, roof material, and footing work. Situation: Best for decks where attaching the house would create water or structural concerns. Deck size: Works well on medium to large decks with room for independent posts. 14. Grill Station Mini Roof A grill station mini roof protects the cooking area without covering the entire deck. It can make weeknight grilling easier during light rain or strong sun. Keep all fabric, trim, and low framing safely away from heat. Use materials and clearances that allow smoke, steam, and grease to move safely. Budget: Low to mid, depending on whether the roof is framed or canopy-based. Situation: Best for decks where cooking is the main outdoor activity. Deck size: Works well on small to medium decks with a dedicated grill corner. 15. Pop-Up Canopy Lounge Zone A pop-up canopy can help test where shade is needed before you commit to a permanent cover. It also works for parties, summer weekends, or rental spaces. Choose one with a strong frame, secure weights, and outdoor fabric. Treat it as a temporary cover, not a structure for daily wind exposure. Budget: Low, especially for short-term shade or seasonal use. Situation: Best for temporary setups, calm weather, and flexible outdoor seating. Deck size: Works well on medium decks with enough open floor space. 16. Fabric Gazebo Seating Area A fabric gazebo creates a soft outdoor room without the need for custom framing. It can hold a sofa set, a small dining table, or a reading area while giving the deck a more complete shape. Look for vented tops, sturdy posts, and fabric that can handle sun exposure without fading quickly. Budget: Mid, usually less than a wood pavilion or a fully built roof. Situation: Best for sunny decks with moderate weather and enough space for a frame. Deck size: Works well on medium to large decks with a clear seating layout. 17. Hardtop Gazebo Beside Deck A hardtop gazebo placed beside the deck can create a covered room without loading the deck framing. This works well when the deck is older or too small for a roof. The gazebo can sit on a patio pad, a gravel base, or a proper foundation while still feeling connected to the deck. Budget: Mid to high, depending on kit size and foundation needs. Situation: Best for rainy, sunny, or mixed-weather yards needing stronger coverage. Deck size: Works well beside small decks or next to large open deck layouts. 18. Covered Alcove Seating Bay A covered alcove gives one small seating area a cozy, sheltered feel. Instead of covering the entire deck, it focuses the budget on the spot where you actually sit. Add a bench, two chairs, or a compact table, then frame the space with lighting or planters. Budget: Low to mid, because only one focused area needs coverage. Situation: Best for decks where one corner gets used more than the rest. Deck size: Works well on small decks, side decks, and narrow backyard decks. 19. Privacy Screen With Overhead Slats A privacy screen with overhead slats handles both exposure and overhead sun. The side panel blocks views from nearby homes or streets, while the slats create filtered light above. Keep the screen height balanced so the deck feels private without feeling boxed in or too closed. Budget: Mid, depending on post depth, slat material, and screen height. Situation: Best for decks with neighbors nearby, side glare, or street-facing exposure. Deck size: Works well on small to medium decks, especially narrow layouts. 20. Outdoor Roller Shade Cover Outdoor roller shades help when an existing cover does not stop glare from the side. They can mount under a roof, awning, pergola, or framed structure. Solar shades keep some visibility, while privacy shades block more of the view. Use exterior-rated hardware so the rollers hold up outdoors. Budget: Low to mid, depending on shade size and fabric quality. Situation: Best for west-facing decks, covered porches, and glare-heavy seating areas. Deck size: Works well on any deck with an existing top cover or frame. 21. Shade Cloth Wood Frame A shade cloth roof on a simple wood frame gives light coverage in a practical, affordable way. It is easier to remove than solid roofing and can cool the surface underneath. Pull the cloth tight, finish the edges cleanly, and use rust-resistant hardware so the cover does not look temporary. Budget: Low, especially when the frame is simple and the fabric is standard size. Situation: Best for hot, dry decks where rain protection is not the main goal. Deck size: Works well on small to medium decks with a simple rectangular layout. 22. Tree-Framed Deck Cover Existing trees can reduce how much artificial cover the deck needs. Instead of covering the whole area, use a smaller shade sail, pergola, or canopy to fill the gaps the branches leave. Avoid damaging trees with permanent hardware, and keep branches trimmed so leaves do not overload fabric or panel roofs below. Patio and deck combinations in yards with mature trees often benefit most from this mixed approach. Budget: Low to mid, because natural shade reduces the size of the added cover. Situation: Best for decks with mature trees nearby and uneven sun patterns. Deck size: Works well on medium to large decks with partial natural shade. 23. Half-Covered Deck Layout A half-covered layout keeps part of the deck protected while leaving part open. This can feel more balanced than covering every board, especially when you want both shade and sun. Use the covered side for dining or seating, then leave the open side for plants, lounging, or flexible furniture. Budget: Mid, since covering less area reduces material and labor needs. Situation: Best for decks that need mixed shade, sun, and open-air space. Deck size: Works well on medium to large decks with more than one activity zone. 24. Rafter-Only Rustic Cover A rafter-only cover gives the deck structure, rhythm, and partial shade without solid roofing. It can support lights, hanging plants, or seasonal fabric while keeping the sky visible. This is a shade feature, not a rain solution. Keep the rafter spacing even so the final result feels built with purpose. Budget: Mid, depending on lumber size, post support, and finish quality. Situation: Best for sunny decks where style and filtered shade matter most. Deck size: Works well on medium decks and rustic backyard layouts. 25. Pergola With Built-In Bench Cover A pergola with a built-in bench works well when the deck needs both shade and seating, but loose furniture can make the layout feel crowded. The bench can sit along one side of the deck, with the pergola frame built above it to create a small covered nook. This keeps the footprint tight and gives the space a planned, custom feel. Budget: Mid, because the same framing can support both the bench area and the overhead shade. Situation: Best for sunny decks where seating, shade, and structure need to fit within a single compact zone. Deck size: Works well on small to medium decks, especially narrow layouts where movable furniture wastes space. How to Make a Budget Deck Cover Look More Expensive A simple deck cover looks better when the finish details feel planned. These upgrades help affordable materials blend with the house and outdoor furniture. Use one finish color: Paint or stain posts, beams, brackets, and visible framing in one tone so the cover feels designed. Match fabric to trim: Choose sails, curtains, or awnings that connect with the house trim, door color, or furniture fabric. Keep hardware consistent: Use black, bronze, or stainless hardware throughout so screws, straps, and brackets do not look mismatched. Hide rough fabric edges: Use hems, battens, or clean seams so shade cloth and canvas do not look unfinished. Add warm outdoor lighting: Use string lights, sconces, or solar fixtures to make the covered zone feel useful after sunset. Ground the seating area: Add an outdoor rug under the covered zone so the furniture feels connected to the structure. Soften posts with planters: Place planters near posts or screens so budget framing does not feel bare or abrupt. Limit mixed materials: Avoid combining too many woods, metals, fabrics, and colors, as clutter makes a cheap cover look even cheaper. The cover does not need to look expensive. It needs to look clean, balanced, and connected to the rest of the outdoor space. Attached vs. Freestanding Deck Covers Both cover types can work, but the safer choice depends on support, water control, and how much you want to change the house. Factor Attached Cover Freestanding Cover Best fit Works when the house wall can support safe mounting. Works when the cover can stand beside or over the deck. Cost risk May need flashing, permits, and siding work. May need posts, footings, and bracing. Water control Needs careful sealing where it meets the house. Keeps runoff away from the wall connection. Better choice Choose it for a clean built-in look. Choose it for fewer house-related risks. If both options solve the same problem, choose the one with simpler support, cleaner drainage, and fewer long-term repair risks. Small Finishing Details That Help the Whole Deck Feel Planned A covered area looks better when the rest of the deck supports it. These small choices can help the cover feel connected rather than added later. Repeat one material nearby: Match the cover frame to railings, furniture legs, or planter boxes to make the deck feel more cohesive. Keep the furniture scale right: Oversized furniture can make a budget cover feel cramped, especially on smaller decks. Thinking through furniture that fits the deck before buying saves money and floor space. Use plants to soften edges: Tall planters can make posts, privacy screens, and simple frames feel less harsh. Add one practical surface: A small side table, storage bench, or serving cart makes the covered area more useful. Choose simple accents: A few small style upgrades can do more than crowded decor or mismatched accessories. When the covered zone connects with the furniture, plants, and lighting, even a budget-friendly cover can feel like part of the original deck. Frequently Asked Questions Can a covered deck make the inside of my house darker? Yes, a solid cover near windows or patio doors can reduce indoor light. Clear panels, lighter fabrics, slatted pergolas, or partial covers help control glare while keeping rooms brighter. Check how sun moves past the house before choosing a fully solid cover near any window. How do I make a budget deck cover look permanent? Use outdoor-rated materials, consistent finishes, clean hardware, and a cover shape that follows the deck layout. Sagging fabric, rough edges, and random anchor points are what make cheap covers look temporary, not the price of the materials. Should a deck cover match the house or contrast with it? Both work when the choice feels considered. Matching trim gives a softer, built-in look. A contrasting frame can read as modern when it connects with railings or planters nearby. The problem is adding a new color with no visual connection to anything else on the property. Can I add a cover if my deck boards need repair? Repair weak, soft, loose, or rotting boards first. A cover reduces future exposure but should not hide existing damage. Check the surface and framing before deciding which cover the deck can safely support. What cover works best for a windy backyard? A properly braced pergola, strong freestanding frame, or professionally mounted awning performs better in windy yards than loose fabric. Shade sails need strong anchors and correct tension. Lightweight pop-up canopies should not be treated as permanent structures in gusty conditions. What is the cheapest way to cover a deck? A shade sail, shade cloth on a simple wood frame, or a pop-up canopy are the lowest-cost starting points. Each requires proper anchoring to hold up over time. For shade only, these options work well. For rain cover, budget more for slope, framing, and drainage. Do I need a permit to add a cover to my deck? It depends on your location and what you are building. Fabric and removable covers usually do not require permits. Permanent roofs, attached structures, and anything that changes the home’s footprint often do. Check with your local building department before starting any framed cover project. Final Takeaway The best covered deck ideas on a budget start with the problem you need to solve. A sail can fix glare, curtains can add privacy, and panels can help with rain. The right choice depends on your deck structure, weather, and the area you use most. I would rather create one strong covered zone than stretch money across a weak full-deck build. My advice is to begin with the biggest comfort issue, then upgrade in layers. If these covered deck ideas helped, share the deck problem you are trying to solve in the comments.
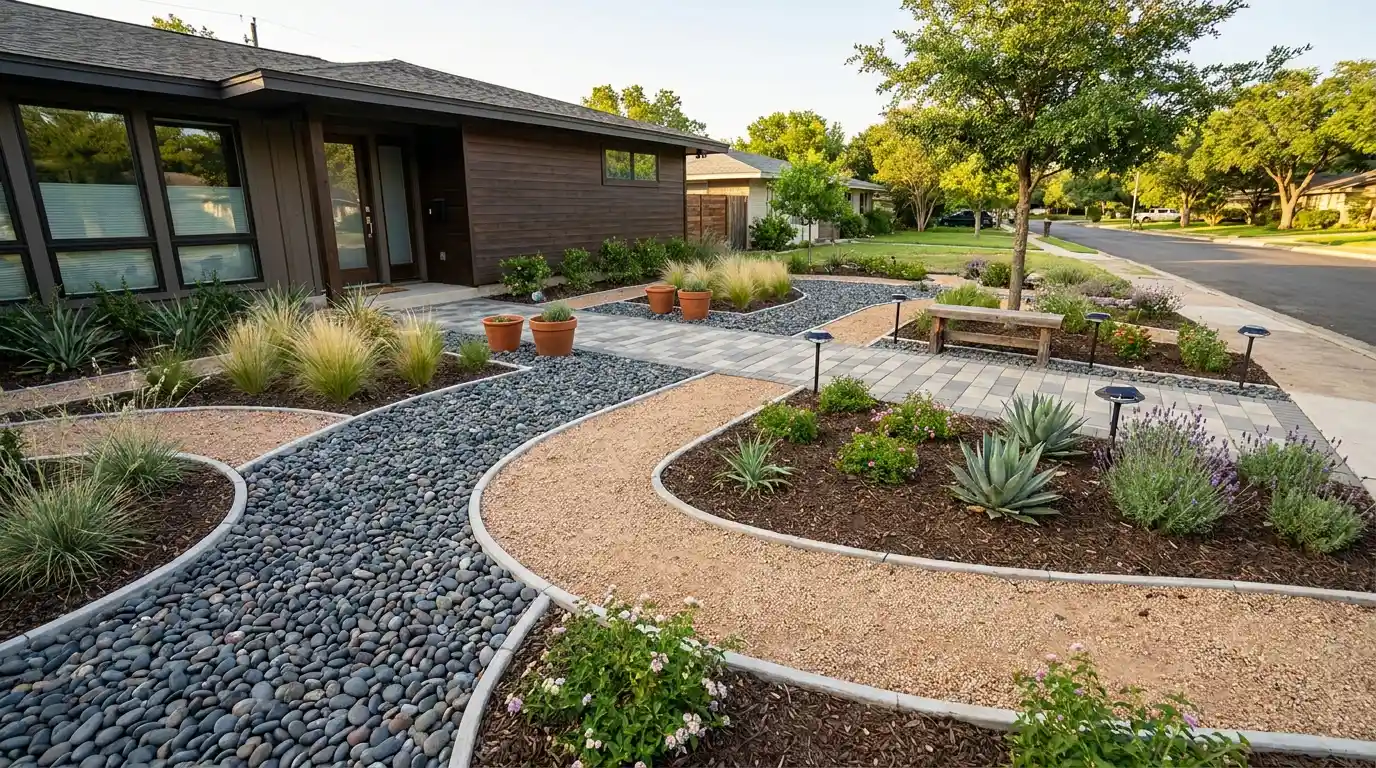
Gravel holds, mulch shifts, decorative concrete stays flat for decades if it’s sealed properly, and cracks if it isn’t. That’s what I’ve seen after years of evaluating front yard materials through freeze-thaw cycles, hard rains, and summers that bake surfaces to 140 degrees. Cheap no grass front yard ideas aren’t hard to find. What’s harder to find is honest information about which ones still look good two winters from now and which ones require you to start over. This article covers materials, costs, failure modes, and the decisions that matter before you spend anything. If you’re replacing a lawn you’re tired of maintaining, here’s what I’d actually tell a homeowner standing in their driveway trying to figure out where to start. Material Comparison: No Grass Front Yard Options Before choosing a material, understand its real-world performance, not just what it costs per bag at the hardware store. These figures reflect installed costs for a standard 500–800 square foot front yard in the US. Regional labor rates can shift costs by 20–40% in either direction. Material Installed Cost (per sq ft) Lifespan Maintenance Climate Suitability Pea gravel $1.50–$3.50 Indefinite with top-ups Low: re-rake 1–2x per year All climates; avoid on slopes Decomposed granite $1.00–$3.00 3–5 years before refresh Low: compacts well, minimal drift Excellent in dry climates; muddies in wet Organic bark mulch $0.50–$2.00 1–2 years per layer Medium: annual refresh required All climates; avoid in standing water zones Concrete pavers $8.00–$20.00 25–50 years Low: occasional re-sanding of joints All climates; needs proper base in freeze zones Stamped concrete $8.00–$18.00 25+ years if sealed Low: reseal every 2–3 years Good in mild climates; cracks in heavy freeze-thaw Artificial turf $5.00–$20.00 8–15 years Low: rinse and rake periodically Heat-prone without cooling fill; not for very wet climates Succulents + rock bed $3.00–$8.00 Plants 10+ years with right species Low: water twice monthly in summer Zones 8–11; frost kills most varieties Creeping thyme or ground cover $2.00–$5.00 Perennial, self-spreads Very low: trim once or twice yearly Zones 4–9; handles foot traffic and drought well Pea gravel and mulch have the lowest sticker price but aren’t always the cheapest over five years once annual refresh costs are factored in. That’s the math most homeowners miss when pricing out a no-grass yard. Cheap No Grass Front Yard Ideas That Hold Up These aren’t decoration ideas. They’re real installations I’ve seen survive multiple weather cycles. Cheap to install is not the same as cheap to own, and I’ll flag the difference where it exists. Pea Gravel with Weed Barrier Pea gravel installed over commercial-grade landscape fabric is the lowest-cost no-grass setup that actually stays put. Budget $1.50–$3.50 per square foot installed, plus edging. Skip the fabric, and you’ll be pulling weeds out of the gravel within one season. Use steel or aluminum edging along all borders, not plastic, which buckles in summer heat and heaves in freeze-thaw zones. On flat ground, this is a solid DIY project. Spread the gravel 2–3 inches deep and rake it level. The failure I see most often: people put down too little gravel, the fabric shows through, and the yard looks unfinished within a year. Minimum depth is 2 inches; 3 inches is better on a front-facing surface. Pro Tip: Use ¾-inch crushed gravel near the path you walk most often. Pea gravel is round and rolls underfoot. Crushed angular gravel locks in place and handles foot traffic far better over time. Rock Garden with Drought-Tolerant Plants A layered rock garden with drought-tolerant plants costs $3.00–$8.00 per square foot depending on stone sourcing. The bigger expense is plant selection: native and drought-adapted species cost more up front but stop needing supplemental water within two growing seasons, while cheap nursery plants often need irrigation for years. Grade the ground before setting the stone. The biggest failure mode with rock gardens isn’t aesthetics. It’s water pooling near the foundation because nobody graded the bed away from the house. A 2% slope (roughly ¼ inch per foot) directed away from the house solves this. Any contractor can handle regrading; a homeowner with basic tools can too if the slope change is minor. Paver Pathway Yard Concrete pavers are the highest upfront cost in this list, but the lowest long-term cost per year. Installed at $8–$20 per square foot, a properly laid paver surface with a compacted gravel base and sand joint fill will outlast the house. A 4-inch compacted gravel base under pavers prevents settling in freeze-thaw zones. Skip the base and individual pavers tip and crack within three winters. Fill joints with polymeric sand, not regular sand. Regular sand washes out, letting weeds take root between pavers within a season. Polymeric sand sets firmly when wet and effectively locks out weed seeds. Mulch Beds with Defined Edging Mulch is the cheapest per square foot but requires the most ongoing investment of any material here. Budget $0.50–$2.00 per square foot installed, then expect to refresh 1–2 inches every 12–18 months. Organic bark mulch breaks down and feeds the soil, which is genuinely useful around plants, but it disappears faster than homeowners expect. The thing that makes or breaks a mulch yard is edging. Sharp metal edging separating mulch from the driveway and walkway is not optional if you want the yard to look clean for more than one season. Without it, mulch drifts, the edge blurs, and the whole design reads as neglected within a few months. For a low-maintenance front yard landscaping setup, mulch works best when paired with a defined plant structure, not spread across open ground. Desert-Inspired Xeriscaping Xeriscaping is drought-tolerant landscaping that minimizes or eliminates the need for supplemental irrigation. It’s the most climate-appropriate option for homeowners in USDA zones 8–11 and most of the Southwest. The EPA WaterSense program estimates that replacing a 1,000-square-foot lawn with xeriscaping can reduce outdoor water use by 50–70%, which translates to $200–$600 annually in warm climates where lawn irrigation runs spring through fall. The setup: compacted decomposed granite as the base surface, boulders and decorative rock for structure, and species like agave, salvia, ornamental grasses, or native shrubs for planting pockets. Installed cost ranges from $3.00 to $8.00 per square foot, depending on plant density. Avoid using the same xeriscape design in a Zone 5 or 6 yard. Most desert-adapted species won’t survive the first winter, and the gravel base will hold water without the drainage that warmer, sandier soils provide. For a broader look at how climate affects material choices across regions, the garden landscaping guide by region covers what actually works zone by zone. Succulent Front Yard Succulents work in the right climate and fail badly in the wrong one. In Zone 9 or warmer, a succulent bed over fast-draining sandy amended soil is genuinely low effort after establishment: water twice monthly in summer, less in winter, and the plants largely take care of themselves. Mix shapes deliberately: flat rosette types (Echeveria, Sempervivum), upright varieties (Aloe, Agave), and trailing ground cover types (Sedum, Delosperma) create the visual variation that keeps the front yard from looking flat. In Zone 7 or colder, limit succulents to containers you can move inside for winter. Ground-planted succulents at those latitudes freeze out, and replacing them each spring costs more than the design is worth. Artificial Turf Zones Artificial turf costs $5–$20 per square foot installed, depending on pile height, backing type, and infill material. The range is wide because quality varies enormously. Budget turf bought off Amazon at $2 per square foot looks fine on day one and starts looking matted, faded, and plastic-like by year three. Mid-grade turf from a reputable installer, with a UV-stabilized backing and silica sand or crumb rubber infill, realistically lasts 10–15 years. Heat is the issue nobody mentions when they’re browsing turf samples. Black-backed turf in direct sun can reach 150–180°F on a summer afternoon. For a front yard facing south or west in a warm climate, specify light-colored infill or heat-reflective backing. Using turf only in select zones along a walkway or near an entry keeps costs manageable while still reducing the lawn area that needs mowing. Pair it with gravel or pavers for the rest of the yard rather than going all-turf, which maximizes surface heat. Flower Bed-Focused Layout Structured flower beds replacing a full lawn are mid-range in both cost and maintenance. The budget is roughly $2–$5 per square foot for mulch and edging, plus plant costs that vary widely by species. Annual flowers need replanting every season, which adds cost and time. Perennial beds come back on their own once established and require only a spring cleanup and occasional division. Group plants by water needs, not just by color. Putting drought-adapted lavender next to thirsty impatiens means one of them is always wrong. Defined stone or metal edging between bed sections is what keeps a multi-species layout looking intentional rather than overgrown. Without it, root systems compete, and the defined planting zones blur within a growing season. Japanese-Inspired Minimal Yard The appeal of a Japanese-inspired minimal front yard is restraint: a small number of materials, placed deliberately, with clear negative space between them. Done well, this holds up for years with almost no intervention. Done poorly, it looks like a gravel lot with a few rocks thrown in. The elements that make this work: Decomposed granite or fine gravel raked to a consistent surface 2–3 large feature stones (not a dozen small ones) One structural plant such as a Japanese maple, ornamental pine, or compact boxwood as the focal point Maintain the raked surface monthly to keep the pattern defined. The design fails when homeowners add too many elements, trying to make it look “fuller.” It’s supposed to be spare. For a modern landscape design approach where fewer materials do more work, this is one of the strongest examples in a front-yard context. Gravel and Planter Combination A gravel base with large planters is the most flexible setup for renters, people who move frequently, or anyone not ready to commit to a permanent design. The gravel base costs $1.50–$3.50 per square foot installed; containers range from $30 for basic terracotta to several hundred dollars for powder-coated steel or large glazed ceramic. Every container needs drainage holes. A planter sitting on gravel without drainage will waterlog plant roots and rot them within one season. Use containers at least 12 inches deep for shrubs or ornamental grasses, and at least 8 inches for annuals and succulents. Large ceramic planters filled with saturated soil can weigh 80–100 pounds and damage a gravel surface if you need to move them. Lightweight fiberglass containers in large sizes are worth the price difference if repositioning matters. Creeping Thyme Ground Cover Creeping thyme is the most overlooked grass replacement in this list. At $2–$5 per square foot installed for plugs spaced 6–12 inches apart, it fills in within one growing season, handles moderate foot traffic, suppresses weeds once established, and requires no mowing. A once-yearly trim keeps it from going woody. It’s a perennial across Zones 4–9, which means it covers most of the US, including climates that would kill succulents over winter. It takes one full growing season to cover the ground, so your front yard will look like sparse plugs for the first summer. Use temporary mulch around the plugs to suppress weeds during establishment. After that first year, it spreads on its own, and maintenance drops to close to zero. It’s the most honest answer to “cheap no grass front yard” in a temperate climate, with a lower annual cost than gravel once refresh cycles are factored in. Mixed Texture Landscape Design A mixed-texture approach combines gravel in the open areas, mulch around plantings, pavers for pathways, and rock accents at borders. It’s how most well-executed no-grass yards are actually built because no single material does everything well. Gravel provides drainage and low-maintenance, low-cost options. Mulch feeds the soil around plants. Pavers provide durable walking surfaces. Rock adds visual weight where structure is needed. Every material needs a clear zone. Gravel paths, mulch beds, and paver areas need defined edging between them, or the boundaries blur within one rainy season, and the yard looks like it wasn’t planned. Sketch the layout before ordering anything, because the edging requirements between zones are what drive installation cost up when homeowners skip this step. Vertical Garden Front Yard Wall-mounted or fence-mounted planters take the planting off the ground entirely, which works well for yards with very small footprints, poor soil, or privacy fencing that needs softening. Installed systems run $20–$50 per linear foot for modular wall planters; a basic DIY trellis with hanging pots costs significantly less. The maintenance reality of vertical plantings: watering frequency increases because containers dry out faster than in-ground plantings, and root zones are smaller. A drip irrigation line running along the mounting rail, with emitters at each planter, is the only way to manage a vertical setup at scale without constant hand-watering. That adds $200–$600 to the project cost but makes the system actually sustainable. Without irrigation, most vertical gardens look good for a few weeks and then suffer from inconsistent watering. What Fails Two Winters Later Most no-grass front yards that look bad after a few years have one of four problems. None of them are design failures. They’re installation shortcuts that show up on a delay. Gravel without edging Round gravel migrates onto the driveway, lawn, and sidewalk within one season without steel or aluminum restraint edging. Reinstalling edging after gravel is spread costs significantly more than doing it right the first time. The edging needs to be set 2–3 inches into the ground and pinned with landscape stakes every 18–24 inches. Mulch without fabric Skip the weed barrier under mulch, and you’ll be pulling weeds through it every few weeks. Use commercial-grade non-woven landscape fabric, not the thin woven kind sold in home improvement stores. The woven type lets fine soil wash through over time and eventually provides a seed bed for weeds right on top of the barrier. Paver base on inadequate gravel Concrete pavers set on a 1-inch sand base over native soil will start heaving and tipping within two to three winters in freeze-thaw climates. The correct base is 4–6 inches of compacted gravel, then 1 inch of bedding sand, then pavers. Shortcuts here are expensive to correct after the fact: fixing it requires pulling up all the pavers and rebuilding the base. Wrong plants for the climate A front yard designed around succulent species planted in Zone 6 will lose most of its plants in the first hard freeze. Verify hardiness zone compatibility before buying plants, not after. The USDA Plant Hardiness Zone Map is the reference for this, and it’s free online. A front yard that loses its primary plant material in year one is not a cheap option, regardless of what the plants cost at the nursery. Cost Breakdown and Installation Guide Cost Note: Figures in this article are estimates based on national averages. Actual costs vary significantly by region, contractor, materials, and project scope. Always get at least three quotes before committing to any project above $1,000. A 600 square foot front yard conversion typically falls into one of three cost tiers. Understanding which tier fits your yard and budget before you start prevents the most common planning mistake: choosing a design that looks right but costs twice what you expected. Line Item Low End High End What Drives the Variation Sod/grass removal $0 (DIY) $600–$1,200 Sod depth, root systems, disposal cost Grading/leveling $200 $800–$2,000 Slope correction, drainage rerouting Landscape fabric $50–$100 $200–$400 Coverage area and fabric grade Edging (steel/aluminum) $100 $400–$800 Linear footage and material type Primary surface material (gravel, mulch, pavers) $300–$900 $4,800–$12,000 Material choice; pea gravel is cheapest, pavers most expensive Plants $50–$300 $800–$3,000+ Species, maturity size, quantity Labor (if contracted) $0 (full DIY) $800–$3,500 Project scope and regional labor rates The DIY ceiling on this work is real but limited. Spreading gravel, laying landscape fabric, setting stepping stones, and planting are all well within a capable homeowner’s range with no specialized skills or equipment needed. The two situations that require a licensed contractor: any irrigation work connected to the main water line (backflow prevention requirements vary by jurisdiction), and retaining walls or regrading projects that affect drainage toward a neighboring property. For design principles that connect the front yard to the rest of the property’s outdoor system, the deck skirting and foundation guide cover how exterior transitions affect the overall look at ground level. HOA and Permit Considerations Before converting a front yard from grass, check two things: your HOA covenants and your local municipality’s front-yard ordinances. Both can restrict material type, plant height, coverage percentage of hardscape versus landscaping, and whether gravel or artificial turf is permitted in the front yard at all. HOA restrictions vary widely. Some prohibit decomposed granite because it can drift onto sidewalks; others require a minimum percentage of “live vegetation” in front yard landscaping. Most municipalities don’t require permits for surface material changes unless they involve grading, retaining walls over a set height (often 18–24 inches), or connections to irrigation infrastructure. Call your local building department before starting any grading or drainage-redirect work; the call takes five minutes and can save a costly correction order. Frequently Asked Questions These are the questions I hear most often once someone has decided to replace the lawn but isn’t sure which direction to go. What is the cheapest way to replace a front yard lawn? Pea gravel over landscape fabric is the lowest installed cost at $1.50–$3.50 per square foot, followed by bark mulch at $0.50–$2.00. Both require steel edging to hold properly. Creeping thyme ground cover is cheaper long-term than gravel once annual refresh costs are factored in, but it requires one full growing season to establish. How do I keep weeds out of a no-grass front yard? Commercial-grade non-woven landscape fabric under any loose surface material (gravel, mulch, decomposed granite) is the primary weed barrier. Top it with a minimum of 2–3 inches of material. Treat any gaps in edging or at plant bases with a pre-emergent herbicide in early spring. Avoid woven landscape fabric: it breaks down faster and provides a seed bed once soil filters through it. Does a no-grass front yard add or reduce home value? Professionally installed hardscape and drought-tolerant landscaping generally hold or improve curb appeal and resale value, particularly in drought-prone markets. Poorly maintained gravel, faded artificial turf, or patchy mixed installations can reduce curb appeal. The NAR landscape impact report estimates that quality front yard landscaping adds 5–11% to perceived home value. What looks good as a grass alternative that isn’t gravel or concrete? Creeping thyme fills like a lawn, handles light foot traffic, and requires no mowing. It’s suitable for Zones 4–9. Low-growing buffalo grass or native ground covers work in warm, dry climates. Clover lawns are legal in most areas and require minimal care. Each of these is a living surface that performs similarly to turf but at far lower maintenance cost once established. How long does it take to install a no-grass front yard? A single-material gravel or mulch install on a 600 square foot yard takes one to two weekends for a capable DIYer, once grass removal is complete. Paver installations take longer: two to three weekends for the same area including base preparation. Hiring a landscape contractor typically reduces that to one to two days of crew time. Do I need to remove the grass before installing gravel or mulch? Yes. Laying gravel or mulch directly over living grass will result in the grass growing through the material within one to two seasons. Either sod-cut and remove the turf (rent a sod cutter for $60–$100 per day), apply a non-selective herbicide and wait two weeks before installing, or use sheet mulching (cardboard over the grass, covered with 4–6 inches of wood chips) for a slower, no-herbicide method. Is artificial turf a good, cheap option for a front yard? Budget artificial turf ($2–$4 per sq ft materials only) is not a good long-term value. It fades within 3–5 years and sheds microplastics. Mid-grade turf from a reputable installer ($8–$12 per sq ft installed) lasts 10–15 years with proper maintenance and is a reasonable trade-off against lawn upkeep costs. Avoid any turf without UV stabilization: it’s the single biggest quality differentiator. Summing Up The most durable cheap no grass front yard ideas are the ones that treat material performance as the first decision, not appearance. Pea gravel and landscape fabric hold for years if the edging is right. Pavers last a generation if the base is built correctly. Creeping thyme outperforms every other option on long-term cost in a temperate climate once it’s established. The failure modes, migrating gravel, weed-infested mulch, heaving pavers, almost always trace back to a skipped installation step, not the material itself. Before you order anything, check your climate zone, verify what your HOA permits, and decide whether the surface change requires any regrading. If the yard needs regrading toward the street or away from the foundation, get that done first. It’s the one step that’s nearly impossible to fix after the surface material is in place.
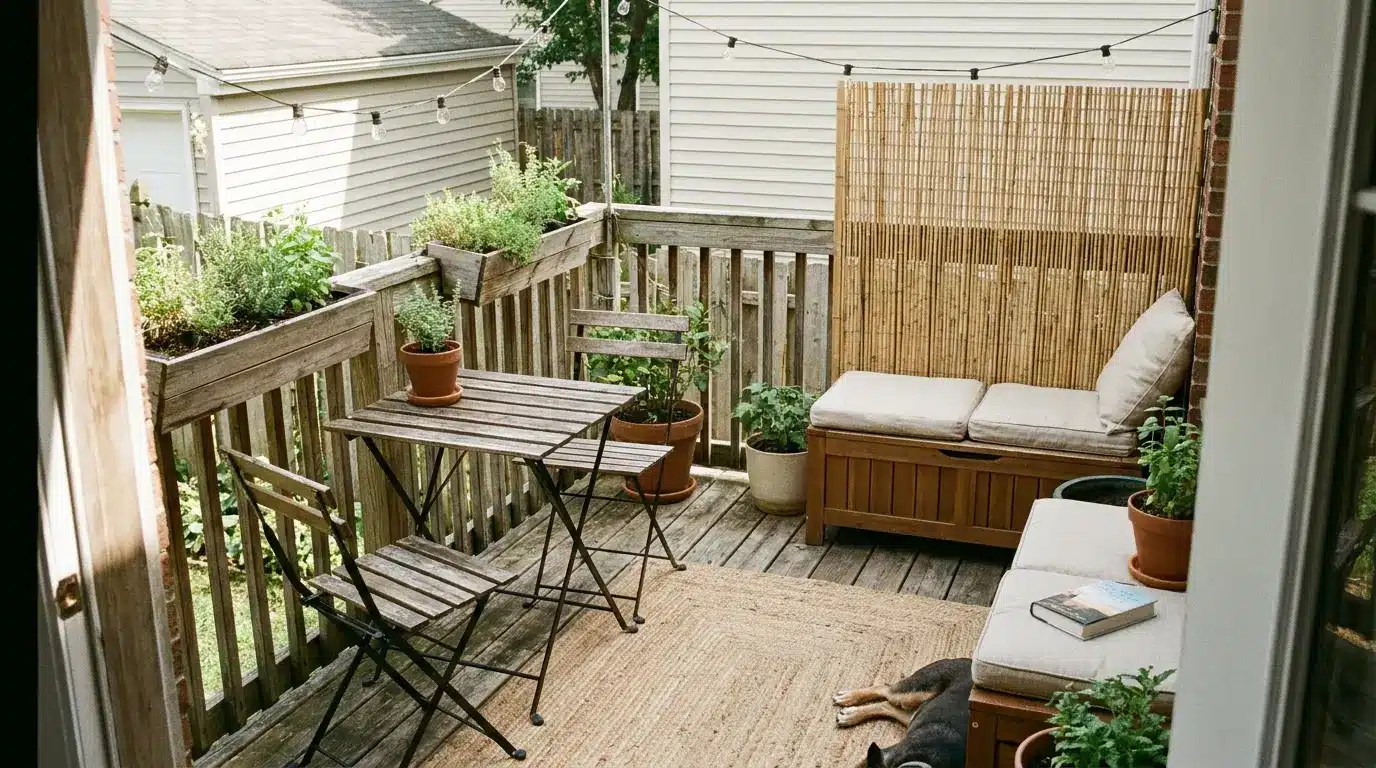
A small deck can feel tricky when every chair, pot, and table seems to take up too much room. If you are searching for small deck ideas on a budget, the real goal is simple: make the space useful, comfortable, and good-looking without buying more than needed. I like starting with one clear purpose, then choosing pieces that earn their spot. A tiny deck can hold a coffee corner, a compact seat, a bit of privacy, soft lighting, or a few plants when everything has a reason to be there. The ideas ahead focus on low-cost setups that look planned, save space, and still feel easy to live with. The best part is how small changes can shift the whole deck. Why Small Decks Are Actually an Advantage Small decks can be easier to work with than large outdoor spaces because every update feels more focused. You do not need dozens of furniture pieces, large rugs, or expensive decor to make the area feel complete. A smaller footprint also means lower material costs, faster cleaning, and less upkeep throughout the year. Even simple DIY projects, like adding railing planters, staining the floor, or building a small bench, take less time and use fewer supplies. The size also creates a warm, close setting for morning coffee, reading, or quiet evenings outside. Instead of trying to fill a large empty area, you can shape a single useful corner that feels personal and comfortable. With smart choices, a small deck can look finished without feeling crowded or costly. Planning Your Small Deck on a Budget Before spending on furniture or décor, plan the deck as if it were a small room. A clear plan helps avoid wrong sizes, wasted money, and cluttered corners. Planning Step What to Do Why It Matters Measure the deck first Measure the full space and mark doors, stairs, railings, and walking paths. It helps you choose furniture that fits without blocking movement. Set a clear budget Split the budget into furniture, décor, lighting, plants, and small repairs. It keeps spending focused on seating, shade, and safety first. Choose one style Pick a simple look like boho, modern, rustic, or minimalist before shopping. It stops colors, furniture, and décor from feeling mixed or random. Plan the layout for free Use graph paper, a notes app, or a free room planner to test placement. It helps you avoid buying pieces that crowd the deck. Note: Keep the first version of the deck simple. Buy only the essentials first, then add décor slowly after using the space for a few days. This helps you understand what the deck actually needs. A little planning makes every purchase more useful. Once the size, budget, style, and layout are clear, the deck becomes easier to decorate well. Small Deck Ideas on a Budget That Feel Easy to Try A small deck can feel useful and inviting without a full renovation. These small deck ideas on a budget focus on floors, seating, lighting, privacy, and plants. 1. Interlocking Deck Tiles Interlocking deck tiles are one of the easiest ways to refresh an old deck floor without tools or permanent changes. They snap together over flat wood, concrete, or balcony surfaces, so renters can use them safely. Choose wood-look tiles for warmth or composite tiles for easier cleaning. Measure first, then buy a few extra pieces for corners, edges, and future replacements. Budget: $2-$4 per tile. Costs remain flexible because you buy tiles only for the exact deck area. Best for: Perfect for renters because the tiles lift easily without damaging the surface. Time required: A small deck can usually be covered within a relaxed afternoon. 2. Outdoor Area Rug An outdoor area rug gives a small deck structure without changing the floor itself. It covers stains, faded boards, or plain concrete while making the seating area feel like a real room. Choose polypropylene because it dries fast and handles outdoor moisture better. Pick a size that sits under the front legs of chairs so the layout feels connected and neat. Budget: Most good outdoor rugs cost $25 to $60 for small deck spaces. Best for: Hiding worn floors and instantly creating a finished deck look. Time required: Takes about 5 minutes to unroll, place, and adjust properly. 3. Stenciled Porch Paint Stenciled porch paint turns a plain deck floor into a patterned feature without paying for tile. Clean the surface first, then use porch paint and a reusable stencil to build the design slowly. Geometric and Moroccan patterns work well because small mistakes blend into the repeat. Add a clear outdoor top coat so the design holds up under shoes, rain, and sun. Budget: Paint and stencil supplies usually cost around $15 to $25 total. Best for: Old wood or concrete floors needing color, pattern, and personality. Time required: Set aside one weekend for painting, drying, and sealing. 4. Free Pallet Wood Planks Pallet wood planks can give a small deck a rustic floor for very little money, but the wood must be chosen carefully. Use only clean, heat-treated pallets, then sand every board until smooth. Seal the planks before placing them outside. This takes more effort than a rug or tiles, but it adds texture, warmth, and a handmade feel. Budget: Pallets are often free, with $10 needed for basic outdoor sealant. Best for: Rustic, farmhouse, and handmade deck styles with natural texture. Time required: Expect one weekend for sanding, sealing, drying, and placing planks. 5. Peel and Stick Outdoor Tiles Peel-and-stick outdoor tiles are useful when a small concrete deck or patio needs a cleaner finish fast. They come in stone, wood, and simple patterned looks, so the floor feels updated without grout or heavy tools. The surface must be dry, smooth, and clean before application. Press each tile firmly and keep extra pieces for later repairs. Start from one corner so every tile line stays straight. Budget: A small deck area usually costs $25- $35 in tile. Best for: Smooth concrete decks needing a fast, modern, tool-free floor refresh. Time required: Takes 1 to 2 hours on a clean, dry surface. 6. Bistro Set A bistro set gives a small deck an instant purpose without taking over the floor. Two chairs and one compact table are enough for coffee, snacks, reading, or a casual meal outside. Nothing more is needed to make the space feel used and complete. Choose armless chairs and a round table if the layout feels tight, because they are easier to move around and do not catch on each other. For a full comparison of how different outdoor furniture materials hold up season to season, that breakdown covers the key trade-offs before you buy. Budget: A compact outdoor bistro set usually costs around $50 to $80. Best for: Morning coffee, casual meals, and decks with very limited space. Time required: Assembly usually takes 15 to 30 minutes with basic tools. 7. DIY Pallet Sofa A DIY pallet sofa adds lounge seating without the cost of a full outdoor couch. Use clean, heat-treated pallets, sand all edges, and seal or paint the wood thoroughly before adding cushions. Keep the sofa low and place it against a railing or wall so the center stays open and passable. A single long cushion looks neater than several loose pieces on a small deck. If you want a larger or more configurable build, a DIY outdoor sectional uses the same pallet logic at a bigger scale. Budget: Expect $20 to $30 if pallets are free and cushions are reused. Best for: Casual, boho, and rustic decks needing low-cost lounge seating. Time required: Plan 3 to 4 hours for sanding, painting, and setup. 8. Foldable Chairs and Table Foldable chairs and a table are perfect for a deck that changes use through the day. Bring them out for meals, guests, or reading, then fold them flat when the deck needs more room. Lightweight metal, plastic, or bamboo sets are easy to move. It gives control without removing everyday open space outside. Budget: A full folding set usually costs around $40 to $70 online. Best for: Flexible decks that sometimes need seating and later need open space. Time required: Takes under 10 minutes to set up or fold away. 9. Storage Ottoman A storage ottoman helps a small deck stay tidy while adding another useful seat. Use it for cushions, candles, small tools, throws, or garden supplies that usually create clutter. Choose a weather-resistant piece with a tight lid, so stored items stay dry between uses. It is one compact piece that solves several small problems well. Budget: Weather-resistant outdoor storage ottomans usually cost $35 to $65. Best for: Small decks that need seating, storage, and a footrest all in one. Time required: Ready to use immediately, with no real setup needed. 10. Thrifted Furniture with Fresh Spray Paint Thrifted furniture can look fresh and planned with one simple paint color. Search for small outdoor chairs, metal tables, stools, or benches that feel sturdy and fit the deck measurements. Clean each piece well, sand rough spots, then use outdoor spray paint. Keeping every item in the same color family makes mixed finds look like a matching set. Budget: Thrifted pieces and spray paint can cost $10 to $30 total. Best for: Low-cost makeovers where mismatched furniture needs a clean, cohesive look. Time required: 2 to 3 hours, including cleaning and drying. 11. Built-In Bench Along the Railing A built-in bench along the railing saves floor space by using the deck edge for seating. It works well on narrow decks where loose chairs block movement. Keep the bench simple, sturdy, and sealed for outdoor weather. Add one cushion or a few pillows for comfort. If possible, include storage below for small items that need to be hidden. It turns empty edge space into seating that feels truly planned. Budget: Basic lumber and brackets usually cost around $35 to $50. Best for: Narrow decks needing permanent seating without blocking floor space. Time required: A beginner build usually takes 4 to 5 focused hours. 12. Solar String Light Canopy A solar string light canopy makes a small deck feel warm after sunset without wiring or higher electricity bills. Hang the lights from cup hooks, a fence, a pergola, or nearby posts. Warm white bulbs usually feel softer than bright white bulbs. Keep the lines slightly loose, not sagging, and secure them well so wind does not pull them down. It creates an evening mood without adding any floor clutter. Budget: Solar string light sets usually cost $12 to $20 online. Best for: Evening seating areas needing soft light without electrical work. Time required: Installation usually takes 45 to 60 minutes with hooks. 13. Solar Stake Lanterns Along Steps Solar stake lanterns are a simple way to light steps, edges, and nearby planters without cords. They charge during the day and turn on by themselves at night. Place them where people walk first, then add extra lanterns for looks. Warm tones feel cozy, while cooler tones can suit a cleaner modern deck style with simple furniture. Budget: Each solar stake lantern usually costs around $5 to $15. Best for: Deck steps, edges, and paths that need safer night visibility. Time required: Takes under 10 minutes to place and adjust each light. 14. Mason Jar Candle Lanterns Mason jar candle lanterns add a soft glow with supplies that cost very little. Pour sand into the bottom of each jar, place a tea light inside, and set them along railings or tables. Battery candles are safer near curtains, plants, and wood. Tie wire around the rim if the jars need to hang from hooks. Budget: Jars, sand, and candles can cost less than $5 total. Best for: Rustic, farmhouse, and boho decks needing a warm glow. Time required: A full set usually takes about 15 minutes to assemble. 15. LED Fairy Lights in Glass Globes LED fairy lights inside glass globes create gentle accent lighting without taking much space. Battery strands are easy to move, and the glass spreads the light softly around the deck. Hang globes at different heights or place them on shelves for depth. Budget: Each glass globe setup usually costs around $8 to $15. Best for: Modern, boho, and mixed-style decks needing soft accent lighting. Time required: Hanging a small display usually takes 20 to 30 minutes. Layering a few small lights creates a better mood than one bright fixture. Keep lights safe, outdoor-rated, and positioned to support real use. 16. Bamboo Reed Privacy Screen A bamboo reed privacy screen can cover exposed railings quickly without building a full wall. Attach it with zip ties or outdoor wire along the railing posts, then trim the edges neatly for a finished look. The natural texture adds warmth while blocking direct views from neighbors or nearby paths. For other approaches to outdoor privacy, DIY fence and screen ideas cover permanent and semi-permanent options at different skill levels. Budget: Each bamboo privacy panel usually costs around $20 to $40. Best for: Fast privacy when railings or open sides feel too exposed. Time required: Installation usually takes under 1 hour with simple zip ties. 17. Tall Potted Plants as a Living Wall Tall potted plants create privacy while making the deck feel greener and softer. Use ornamental grass, compact bamboo, or leafy plants in sturdy containers along the most open side. Place plants in a staggered row for fuller coverage and leave enough space for watering and walking. This gives privacy, color, and movement without adding a fixed screen at all. Budget: A small row of tall plants usually costs $30 to $60. Best for: Decks needing privacy, softness, greenery, and movable screening. Time required: Positioning and arranging plants usually takes 30 to 45 minutes. 18. Hanging Outdoor Curtains Hanging outdoor curtains brings privacy, shade, and softness to a small deck in one move. Hang them from a rod, curtain wire, pergola beam, or posts set in heavy planters. Choose outdoor fabric or drop cloths that can handle sun and moisture. Tie them back during the day so the deck still feels open. Budget: Curtains and hanging supplies usually cost around $20 to $35. Best for: Soft, adjustable privacy that also adds shade and movement. Time required: Setup usually takes 30 to 45 minutes, including rod placement. 19. DIY Lattice Panel with Climbing Plants A DIY lattice panel gives privacy without making the deck feel boxed in. Place it on the side with the clearest view from neighbors, then paint it to match the railing or trim. Add climbing plants at the base if there is enough sun. Over time, the mix of wood and greenery feels natural and soft. Budget: A basic lattice panel usually costs around $25 to $40. Best for: Garden-style decks needing privacy without blocking all natural light. Time required: Installation takes 2 to 3 hours, while plants fill slowly. 20. Vertical Crate Wall Shelving Vertical crate wall shelving adds display space without using the deck floor. Mount wooden crates on a wall or fence, then use them for small plants, lanterns, candles, or garden items. Sand and paint the crates in one color so they feel connected. Grouping three crates usually looks balanced on a small deck wall without feeling crowded. This keeps decor vertical, organized, and easy to change every season with ease. Budget: Old crates are often free, with $15 needed for paint. Best for: Rustic or industrial decks needing vertical storage and display space. Time required: Mounting and painting usually take about 1 to 2 hours. 21. Dollar Store Painted Planters Dollar store planters can look much more expensive with a simple paint plan. Choose two or three colors that match the rug, pillows, or furniture. Paint the pots, seal them, then group them in odd numbers for a more natural display. Use different heights by placing smaller pots on stands, crates, or upside-down pots. Budget: A full small planter set usually costs around $5 to $10. Best for: Adding cheap color, plant groupings, and easy seasonal changes. Time required: Painting and drying usually take about 1 hour total. 22. Macrame Wall Hanging A macrame wall hanging adds texture to a bare deck wall without taking up floor space. It works especially well on covered decks where rain will not hit it directly. Choose one larger piece instead of several small ones so the wall feels calm. Natural cotton, cream tones, and simple knots pair well with plants and wood. Budget: A simple macrame piece costs $15 to $25, or free DIY. Best for: Boho, coastal, and relaxed decks needing soft wall texture. Time required: Hanging takes 10 minutes, while DIY versions take longer. 23. Repurposed Ladder Plant Stand A repurposed ladder plant stand turns vertical space into a useful display. Lean a wooden ladder safely against a wall, then place small pots across the steps or hang them with hooks. Sand and seal the ladder before outdoor use. It is practical, decorative, and easy to move when plans change later. Budget: Use a free old ladder, or thrift one for under $20. Best for: Small decks that need plant height without sacrificing much floor space. Time required: Sanding, sealing, and positioning usually takes about 30 minutes. 24. Outdoor Throw Pillow Covers Outdoor throw pillows can change plain seating without replacing the furniture. Choose weather-resistant covers and washable inserts so they can handle regular use. Mix one solid color with one simple pattern to keep the deck from looking busy. Store pillows inside during heavy rain or use a storage ottoman to keep them clean and extend their lifespan. Budget: A full set of covers usually costs around $15 to $30. Best for: Refreshing plain seating with color, pattern, and added comfort. Time required: Swapping pillow covers takes about 5 minutes once purchased. 25. Railing Herb Garden A railing herb garden adds fresh greenery to a small deck without using floor space. Clip-on planters can hold basil, mint, rosemary, parsley, or small flowers if the railing gets enough light. Keep the herbs close to the door if they are used for cooking. Water regularly, but avoid filling each planter too tightly. Budget: Planters, soil, and herbs usually cost around $15 to $25. Best for: Small decks used for cooking, hosting, or fresh greenery. Time required: Setup usually takes 30 to 45 minutes from start to finish. 26. Vertical Shoe Organizer Herb Wall A vertical shoe organizer can become a budget herb wall when floor space is limited. Hang it on a sunny wall or railing, then fill each pocket with soil and a small plant. Choose lightweight herbs so the organizer does not sag. Water slowly to prevent overflow, and place a tray below if needed. Budget: A basic hanging shoe organizer usually costs around $8 to $12. Best for: Empty deck walls that need plants without shelves or stands. Time required: Hanging and filling the organizer takes under 10 minutes. 27. Propagated Plants in Repurposed Glass Jars Propagated plants in glass jars are nearly free and easy to display on a small deck. Take cuttings from plants like pothos, spider plant, or tradescantia, then root them in water. Line the jars on a shelf, crate, or railing where they get gentle light. Once roots grow, move some into soil or keep them in water. Budget: This idea can be completely free using cuttings and saved jars. Best for: Minimalist, boho, and zero-waste decks needing gentle greenery. Time required: Roots usually appear after 2 to 3 weeks in water. Start with the area that bothers you most, then add one affordable update at a time. Small changes can make the deck feel planned, comfortable, and personal. Common Mistakes to Avoid When Decorating a Small Deck Small deck decorating works best when every choice has a purpose. Avoiding these mistakes helps the space feel open, durable, and worth the money Mistake Why It Hurts the Deck Better Choice Too much furniture Blocks movement and makes the deck feel cramped. Use one main seating setup with foldable extras. No weatherproofing Materials fade, swell, rust, or wear out faster. Pick outdoor-rated fabric, paint, lights, and sealant. Poor-quality outdoor buys Cheap pieces may cost more when replaced often. Save on decor, but choose sturdy seating and shade. Skipping a rug The floor feels bare, worn, or visually disconnected. Add one outdoor rug to define the main zone. Ignoring vertical space The floor gets crowded with plants and storage. Use rail planters, hooks, shelves, and hanging baskets. Small mistakes can make a budget deck feel messy or short-lived. Choose fewer, stronger pieces and use walls, railings, and corners wisely. Small Deck Maintenance Tips and Hacks A small deck stays nicer for longer when maintenance feels easy. These simple habits prevent damage, reduce clutter, and save money on bigger repairs later. Clean the deck weekly: Sweep leaves, dust, and dirt before they trap moisture. Wash the surface with mild soap, warm water, and a soft brush when it starts looking dull or slippery. Check boards, screws, and railings: Look for raised screws, loose nails, soft boards, or shaky railings every few weeks. Quick fixes help prevent trips, damage, and bigger repair costs. Move planters and empty saucers: Shift heavy pots now and then so they do not leave stains or water rings. Empty plant saucers after watering to avoid standing water. Protect cushions, rugs, and fabrics: Store pillows during heavy rain and lift outdoor rugs sometimes to clean underneath. This helps prevent mildew, trapped dirt, and damp smells. Seal and protect wood surfaces: If water stops beading on a wood deck, it may need resealing. A fresh coat helps protect the surface from sun, rain, and daily wear. Trim plants around the deck: Cut back branches, vines, or bushes touching the deck. Better airflow helps reduce moisture, bugs, stains, and plant debris. Do seasonal safety checks: Before summer and winter, inspect stairs, railings, lighting, furniture, rugs, and deck boards. Repair weak spots before the season starts. Deck maintenance does not have to take much time. A few small checks each week can keep the space safer, cleaner, and easier to enjoy. Frequently Asked Questions How can I make a small deck pet-friendly on a budget? Choose washable cushions, non-toxic plants, and a low storage box for leashes or toys. Avoid sharp metal decor, loose cords, and small stones that can be chewed or swallowed. Add shade and a water bowl so pets can rest comfortably outside. Can I decorate a shared deck without disturbing neighbors? Keep shared deck updates quiet, removable, and easy to clean. Use compact furniture, contained plants, and battery lights instead of permanent fixtures. Avoid blocking walkways or shared railings. A neat, contained setup shows consideration while still making your corner feel personal. How often should I change small deck decor? Change small decor only when the season or daily use demands it. Swap pillow covers, plants, or table accents first. Keep larger pieces steady so the deck does not become wasteful, expensive, or visually messy chasing new trends. What if my small deck has no railing? Use furniture placement to create soft visual edges when there is no railing. Keep seating away from drop-offs, use low planters as boundaries, and leave clear walking space. For raised decks, check local safety codes before decorating or adding any furniture near edges. Can a small deck work for kids without feeling cluttered? Give children one small activity zone instead of spreading toys across the deck. Use a lidded bin, washable mat, and soft seating that adults can reuse. Rotate outdoor toys weekly so the space stays open and easy to reset between uses. How do I make a small deck look bigger without spending much? Keep furniture low and against the edges. Use one outdoor rug sized just under the main seating arrangement. Choose light, consistent colors for furniture and decor. Vertical plants and wall-mounted storage keep the floor open. Mirrors rated for outdoor use also reflect light and add perceived depth. Is it worth building a deck versus using a patio? It depends on the ground level, access, and how you plan to use the space. For a direct comparison of structure, cost, and use cases, the balcony vs deck breakdown covers which outdoor structure suits different home types. Final Thoughts Small decks can become some of the most useful outdoor spaces when every choice has a purpose. I like starting with the basics: measure the space, set a clear budget, choose one style, and keep furniture practical. Then you can layer in flooring updates, storage, lighting, privacy, plants, and simple decor without crowding the area. These small deck ideas on a budget help you spend less while making the space easier to use every day. You get more comfort, better flow, and a cleaner look without a full rebuild. Try one idea first, see how your deck feels, and share your favorite update in the comments, or read more outdoor decor blogs next.
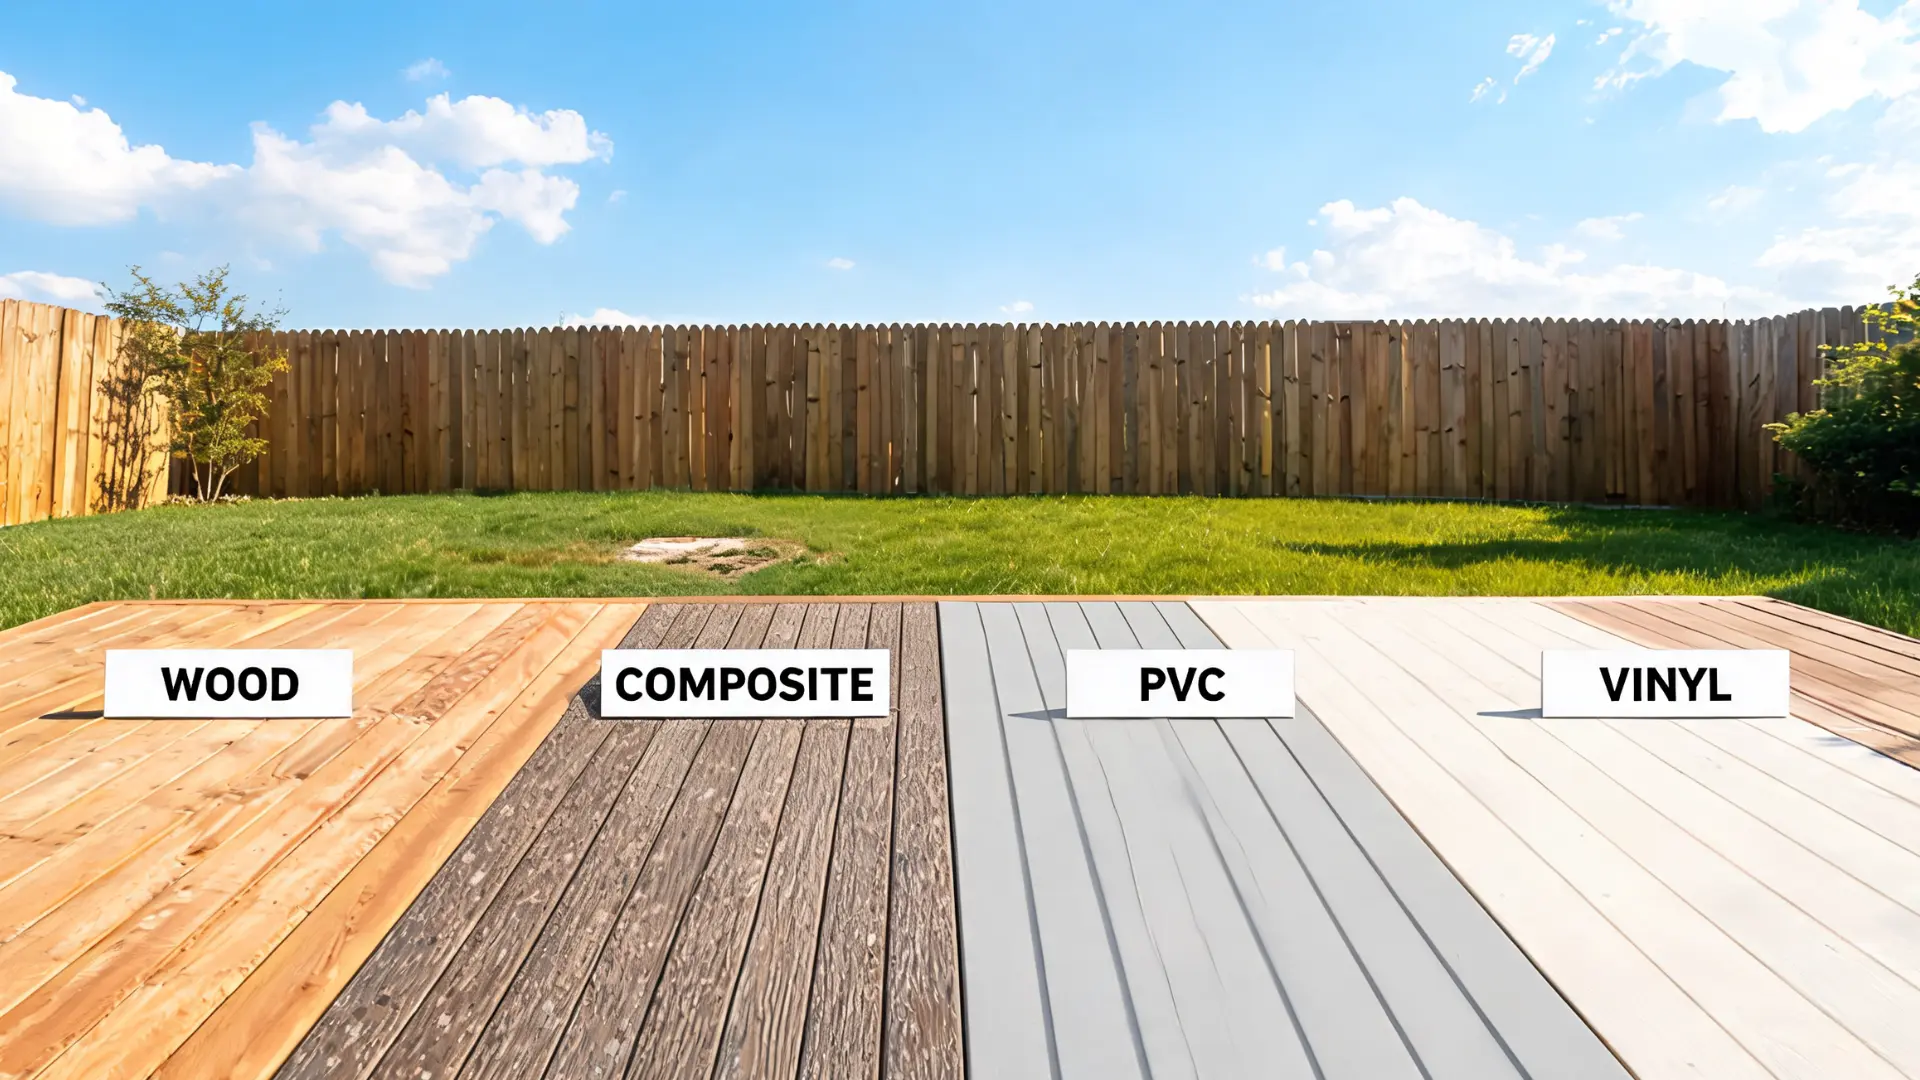
Your deck should hold up to real life, not become something you have to keep fixing. Choosing the best decking material can feel confusing when wood, composite, PVC, and hardwood all sound like smart choices. I know you want deck boards that fit your budget, look good, and will not turn into a maintenance headache. Some materials cost less upfront but need more work later. Others cost more but can save you time and repairs over the years. This guide compares each option by cost, lifespan, upkeep, climate, and comfort, so you can choose the right material for your home with fewer doubts. What Is The Best Decking Material? For many decks, capped composite is the strongest overall choice because it balances durability, low maintenance, long lifespan, and a wood-like look. It does not require the regular staining or sealing that wood does, which makes it easier to maintain over time. Still, the right decking material depends on your space, budget, climate, and how much upkeep you want. PVC is a better fit for wet areas, pool decks, hot tubs, and coastal homes because it handles moisture well. Pressure-treated wood works best when you need the lowest upfront cost. Cedar is a solid option if you want a natural wood feel. Ipe makes sense for a premium real-wood deck when cost and maintenance are less of a concern. Best Decking Material By Need Before comparing materials in detail, match your primary need to the right starting point. Most deck projects come down to one or two non-negotiables: budget, moisture exposure, heat, or maintenance, and those constraints eliminate most of the options before you’ve read a single spec sheet. Need Best Decking Material Why It Works Best Overall Capped Composite Balances durability, low maintenance, long lifespan, and a wood-like appearance without annual sealing. Lowest Upfront Cost Pressure-Treated Wood $3–$6 per sq ft for materials. The cheapest starting point, widely available at any lumber yard. Best For Wet Areas PVC No wood fiber means no rot pathway. Handles moisture, mold, and coastal humidity better than any wood product. Best Around Pools PVC Or Slip-Resistant Composite Handles standing water, cleans easily, and textured boards reduce slip risk on wet surfaces. Best For Full Sun Light-Colored Composite Or PVC Lighter boards absorb significantly less heat. Dark boards in direct sunlight can reach temperatures uncomfortable for bare feet. Best Natural Wood Look Cedar Or Ipe Real grain, real warmth, real character, no material can be fully replicated by composite. Best Long-Term Value Premium Composite Or PVC Higher upfront cost, but no annual sealing or staining labor, and lifespans of 25–30 years with basic cleaning. Lowest Maintenance PVC Soap and water. No staining, no sealing, no sanding. The closest thing to a zero-maintenance deck surface. Best For Families And Pets Composite Splinter-free, durable under foot traffic, and easier to keep clean than any natural wood option. Best Premium Look Ipe Dense grain, rich dark color, and a lifespan that genuinely reaches 40+ years when installed and oiled correctly. These categories are starting filters, not final answers. A deck in coastal Florida has different constraints than one in Minneapolis. Climate, foot traffic, and what’s below the deck, soil moisture, shade, drainage, all affect how each material performs two or three winters in. Decking Material Options Before choosing deck boards, think about your budget, climate, maintenance comfort, and how the deck will be used. The right material should fit your lifestyle, not just look good on installation day. Material Cost Per Sq Ft (Materials) Lifespan Maintenance Climate Fit Pressure-Treated Wood $3–$6 10–15 years (maintained) High, annual sealing, periodic staining Most climates: avoid high-humidity without diligent sealing Cedar $4–$8 15–20 years (maintained) Medium-High, sealing or staining every 1–3 years Moderate climates; performs well in dry or semi-humid regions Capped Composite $5–$14 25–30 years Low, occasional soap and water cleaning Most climates; check heat retention in full-sun applications PVC $5–$15 25–30+ years Very Low, soap and water only Best for wet, humid, or coastal environments Ipe / Hardwood $10–$20 40+ years Medium, periodic oiling with tropical hardwood oil All climates; pre-drilling required in colder freeze-thaw zones Aluminum $15–$25+ 50+ years Very Low, rinse and inspect fasteners periodically Coastal, fire-prone, or extreme weather environments 1. Pressure-Treated Wood Decking Pressure-treated wood is one of the most common choices because it is affordable, easy to source, and simple to install. It works well for large outdoor spaces or DIY projects where upfront cost is the priority, though it requires regular maintenance to stay durable. Pros: Pressure-treated wood is budget-friendly and easy to work with, making it ideal for large decks or tight budgets. You can cut, fasten, paint, or stain it with standard tools while still achieving a natural wood appearance. Cons: It requires ongoing care. Without regular cleaning, sealing, and staining, it can warp, crack, fade, rot, and splinter. Repairs and upkeep can reduce its long-term cost-effectiveness. Best Situation: Best for tight budgets or when upfront cost matters most, and you are willing to perform yearly maintenance. Cost Consideration: Upfront cost is low, but maintenance costs are high, so the long-term value is fair if properly maintained. 2. Cedar Decking Cedar offers a warm, natural look and softer feel than hardwoods, making it ideal for traditional homes, cabins, and garden-style decks. It requires regular maintenance to preserve its color and prevent splintering or cracking. Pros: Cedar provides rich color, authentic grain, and natural resistance to insects and decay. Its lighter weight makes it easier to work with than dense hardwoods, and it creates a classic, inviting outdoor appearance. Cons: Requires sealing or staining to maintain its surface. Neglect can cause fading, cracking, drying out, or splintering. Higher-grade boards last longer but cost more. Best Situation: Best for decks where a natural wood look is desired and regular upkeep is acceptable. Cost Consideration: Upfront cost is low to mid-range; maintenance is medium to high, offering good long-term value for natural style. 3. Capped Composite Decking Capped composite decking combines wood fibers and plastic with a protective outer layer, offering durability, low maintenance, and a wood-like look. It is ideal for family decks, busy households, or high-traffic areas, as it resists rot, splinters, insects, and fading. Pros: Resistant to rot, splinters, insects, and fading. Premium capped boards last decades with basic cleaning and come in multiple colors and grain patterns. Cons: More expensive upfront than pressure-treated wood. Dark boards can retain heat in sunlight, and scratches may appear depending on board quality. Best Situation: Best overall for most decks because it balances appearance, durability, low maintenance, and long-term value. The porch framing and material decisions matter here; composite over a poorly drained subframe still causes problems regardless of how good the boards are. Cost Consideration: Upfront cost is mid to high; maintenance is low, making it a strong long-term investment. 4. PVC Decking PVC decking is fully synthetic, giving excellent resistance to moisture, mold, insects, and rot. It is perfect for wet climates, coastal homes, pool areas, and other low-maintenance decks. PVC boards are easy to clean and generally require no sealing or staining, though the material can feel less natural than wood or composite. Pros: Handles water exceptionally well, does not require staining or sealing, and is easy to clean after rain, pool use, or exposure to dirt. Cons: Expensive and can feel less natural than wood or composite. Lower-quality PVC may appear plastic-like. Best Situation: Best for wet climates, pool decks, coastal homes, or areas where low maintenance is a priority. Cost Consideration: High upfront cost, very low maintenance, offering strong long-term value in wet areas. 5. Light-Colored Composite or PVC Light-colored composite or PVC boards are recommended for decks exposed to full sun. They absorb less heat, making walking barefoot more comfortable. These boards are suitable for hot, sunny climates where heat management and deck comfort are priorities. Pros: Lighter boards provide cooler surfaces for barefoot comfort and safer walking in sunny conditions. Cons: Darker boards can still become hot, and quality varies by brand. Testing samples outdoors is recommended. Best Situation: Best for decks in full sun where comfort and heat management are priorities. Cost Consideration: Upfront cost is mid to high; maintenance is low, providing good long-term value for sunny locations. 6. Slip-Resistant Composite or PVC Slip-resistant composite or PVC is ideal for pool decks or other moisture-prone areas. They provide better traction, reduce the risk of slips, and are easier to clean and maintain in wet environments. These boards handle water exposure effectively and support safety around pools. Pros: Provide better traction and water resistance, reducing the risk of slips and making poolside areas safer. Cons: The level of slip resistance can vary between brands and product lines, and lower-quality boards may underperform. Best Situation: Best for poolside decks where moisture, safety, and easy cleaning are important. Cost Consideration: Mid to high upfront cost, low maintenance, strong long-term performance in wet areas. 7. Ipe and Other Hardwood Decking Ipe and other hardwoods are dense, durable, and visually luxurious. They work best for high-end decks where beauty and long-term strength are priorities over cost or ease of installation. Hardwood requires specialized tools and skilled labor for installation and may require oiling to maintain its color. For more details on how Ipe performs compared to other dense species, the hardwood species ranked by strength and use covers the performance data in detail. Pros: Rich color, tight grain, and natural durability; resistant to insects, rot, and heavy foot traffic. Cons: Expensive, heavy, difficult to cut and install, often requires pre-drilling, special tools, and oiling to maintain color. Best Situation: Best for premium real-wood decks where durability and appearance outweigh cost and installation effort. Cost Consideration: High upfront cost, medium maintenance, offering strong long-term value if installed properly. 8. Aluminum Decking Aluminum decking is a specialty material used for docks, wet areas, or fire-prone zones. It is extremely durable, low-maintenance, and resistant to rot, splitting, and insects. However, it does not provide the warmth or natural look of wood, making it less ideal for standard backyard decks. Pros: Will not rot, splinter, crack, or attract insects; requires minimal maintenance. Cons: Expensive and industrial-looking; less natural appearance than wood, composite, or PVC. Best Situation: Best for specialty decks needing extreme durability in challenging environments. Cost Consideration: High upfront cost, low maintenance, strong long-term value for specialty use. If I were picking my own deck, I’d go for high-quality Ipe, PVC, or premium composite for lasting performance. I’d avoid dark boards in full sun, test samples in my yard, and add shade where my family and pets walk barefoot. Wood vs Composite vs PVC vs Vinyl When deciding between wood, composite, PVC, and vinyl, it helps to compare them side by side. This table summarizes the main considerations for each material, helping you quickly see which choice fits your budget, maintenance comfort, and deck environment. Material When To Choose Key Benefits Considerations Wood Upfront cost matters, want a real wood surface Affordable initially, natural appearance, DIY-friendly Requires regular maintenance, prone to warping, rot, and splinters Composite Balanced style, durability, and maintenance Low-maintenance, wood-like look, long lifespan Higher upfront cost, dark boards can get hot, scratches are possible PVC Deck near water, damp climates, lowest maintenance Extremely moisture-resistant, minimal upkeep High cost, may feel less natural, quality varies by product Vinyl Pool decks, wet climates, easy care Moisture and mold resistant, low maintenance, variety of colors Can look artificial, higher upfront cost, limited natural wood appearance This table is a quick guide to help you match the right material to your deck. While wood is cheaper upfront, composite, PVC, and vinyl often save time and effort over the long term, depending on your climate, usage, and lifestyle. Decking Material Concerns and Tips Every decking material has potential challenges. Heat, fading, scratches, moisture, and splinters can affect comfort, safety, and durability. Knowing these common issues helps you choose the right boards and plan proper maintenance to keep your deck looking and performing its best. Heat: Dark composite and PVC boards absorb sunlight, making the surface uncomfortable to walk barefoot on hot days. Pool decks or sunny patios are especially affected, so using lighter colors or adding shaded areas helps improve comfort and usability. Scratches: Daily use, moving furniture, pets, or grills can scratch composite or PVC boards. While these materials are generally durable, cheaper or uncapped options are more prone to visible surface marks that may affect their appearance over time. Slipping: Wet surfaces, algae, and shaded areas can make decks slippery, particularly smooth composite or PVC boards. Using textured or slip-resistant materials reduces this risk, making poolside and shaded areas safer for children, pets, and barefoot walking. Fading: All decking materials lose color gradually due to sunlight and weather exposure. Premium capped composite and PVC boards resist fading better, while wood fades faster if not sealed or stained. Regular maintenance prolongs the color and appearance of wood decks. Maintenance: Wood decks require cleaning, sanding, sealing, and staining to prevent rot, mold, and warping. Composite and PVC boards need minimal upkeep, usually occasional washing with soap and water, which saves time while keeping the deck looking fresh. Warping and Splinters: Wood can warp, cup, or split due to moisture or sunlight, creating splinters that are hazardous when barefoot. Proper installation, sealing, and regular maintenance can minimize these issues and help the deck remain safe and attractive. If your deck borders a landscaped area or connects to outdoor living zones, the material you choose affects what works alongside it. Composite and PVC pair well with structured outdoor furniture and defined hardscape edges. For ideas on how decking connects to the broader yard, the outdoor deck layout ideas cover how different surfaces, plants, and borders work together at the material level. Note : Real homeowners report composite decks are low-maintenance but may get hot or scratch. Wood is affordable and has natural appeal but requires frequent care. PVC handles moisture well but can feel less natural and is more expensive. Hardwood like Ipe looks premium and lasts long, but is costly and harder to install. Real-World Opinions From Homeowners and Experts On Reddit, many users shared firsthand experiences with decking materials, highlighting the trade-offs between wood, composite, PVC, and specialty boards. One Redditor noted that while plastic decking like Trex or TimberTech can maintain its structural integrity for decades, it often fades, scratches, or warps over time, and its patterns repeat unnaturally, making it feel artificial. Others praised hardwoods such as cedar or Ipe for their natural beauty, durability, and ability to develop unique grain patterns over time, though they require regular maintenance and can be costly. Homeowners also emphasized the importance of climate, sun exposure, and foot traffic, with composite and PVC performing better in wet or high-use areas. Some recommended testing samples in real conditions and paying attention to framing and installation for long-term stability. Overall, Reddit users suggested balancing aesthetics, maintenance, and longevity based on personal needs and local conditions. If I were picking a deck for my backyard, I’d go with capped composite for low maintenance and durability, but I’d still test samples in my sunniest spots. I love the look of real wood like cedar or Ipe, though I’d accept extra upkeep and cost for that natural feel. Frequently Asked Questions What is the most durable decking material? Ipe hardwood has the longest documented lifespan at 40 or more years when properly installed and oiled. For synthetic options, premium capped composite and cellular PVC are rated at 25–30 years with low-maintenance upkeep. Aluminum outlasts all of them structurally, but is a specialty material for demanding environments. What is the most low-maintenance decking material? PVC or cellular PVC decking requires the least maintenance, soap, water, and occasional brushing to prevent biofilm in shaded areas. No staining, sealing, or sanding at any point. Premium capped composite is a close second, with the same basic cleaning requirement and no annual chemical treatment needed. How long does composite decking last? Premium capped composite from established manufacturers typically carries a 25-to-30-year warranty on fade and structural performance. Real-world lifespan with basic maintenance often matches or exceeds those figures. Uncapped or lower-quality composite can degrade faster, particularly in high-UV or high-moisture environments. Is composite decking worth the cost over wood? Over a 15-to-20-year period, yes, for most homeowners. The higher upfront cost of composite is partially offset by the elimination of annual sealing and staining costs. At $200–$600 per year in maintenance materials and labor for a wood deck, the savings compound quickly. The break-even point varies by deck size and local labor rates. What decking material is best for a pool deck? PVC or textured slip-resistant composite. Both handle standing water without rot or mold risk. PVC is preferred for permanent wet exposure. Textured boards reduce slip risk on wet surfaces. Avoid untreated wood or low-quality composite without a protective cap layer near pools. What is the cheapest decking material? Pressure-treated wood at $3–$6 per square foot for materials is the lowest upfront cost option. Factor in ongoing maintenance costs before assuming it’s the cheapest long-term choice. Properly maintained pressure-treated wood lasts 10–15 years. Skipped maintenance significantly shortens that window. What decking material is best for hot climates? Light-colored composite or PVC in hot climates. Lighter boards absorb less solar heat than dark ones — the surface temperature difference matters for comfort. In consistently sunny environments, choose boards with heat-dissipating formulations (some brands label these specifically) and plan for shade coverage over high-traffic barefoot areas. Can I install decking over an existing concrete slab? Yes. Composite, PVC, and aluminum can be installed over concrete using a pedestal or sleeper framing system that provides ventilation and drainage. Wood typically requires sleepers for airflow to prevent moisture accumulation underneath. Check that any existing concrete slab drains properly before installing any material over it. Is there an eco-friendly decking material? A capped composite that incorporates recycled wood fiber and post-consumer plastics is the most practical sustainable option at scale. Bamboo decking is renewable and grows rapidly, though it requires more maintenance than composite in most climates. FSC-certified Ipe and cedar from verified sustainable sources are also legitimate options for buyers who want real wood. What decking material is safe for dogs? Capped composite or PVC. Both are splinter-free surfaces, which is the main concern for dogs walking and lying on a deck. Avoid rough-cut or untreated wood that can develop splinters as it dries and ages. Darker-colored boards that get hot in the sun are also worth avoiding for dogs that spend extended time on a sunny deck. Wrap Up Choosing the right decking material can make a big difference in how you enjoy your outdoor space. I’ve shared how wood, cedar, composite, PVC, Ipe, and aluminum perform in terms of durability, maintenance, cost, and comfort. You now know which materials work best for sunny decks, wet areas, pools, or premium finishes, and how to test samples and avoid common mistakes. Understanding the pros, cons, lifespan, and real owner insights helps you pick a deck that lasts and stays enjoyable for years. By focusing on your budget, climate, and lifestyle, you can make a confident choice for the best decking material. Share your thoughts or experiences in the comments below.
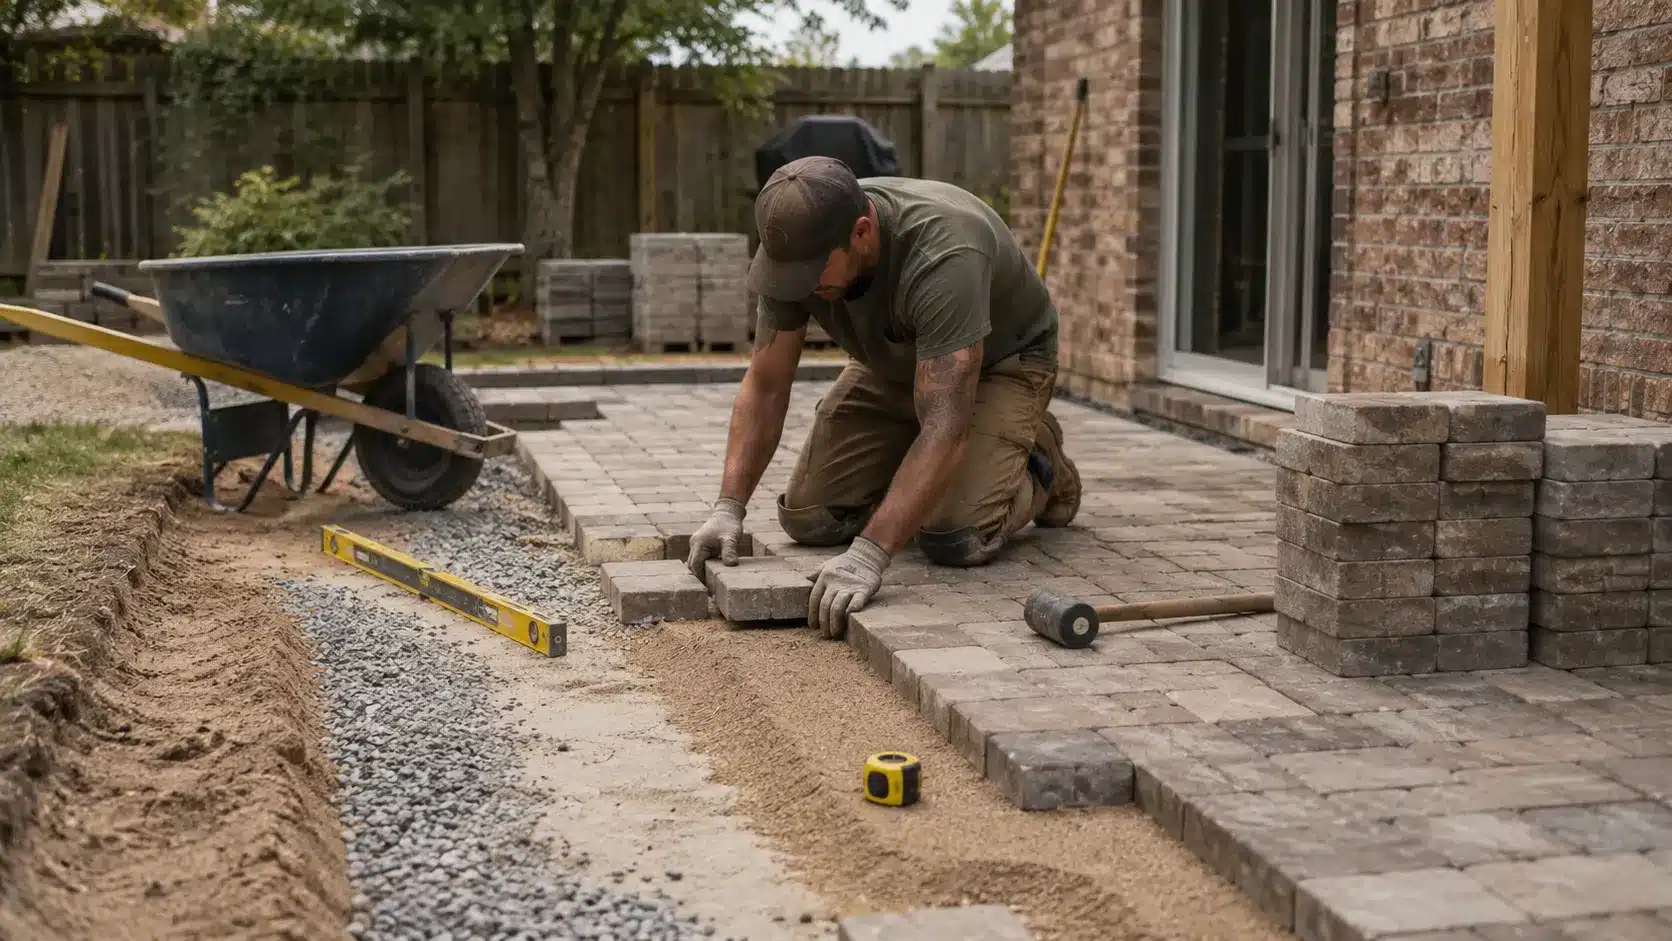
A paver patio sounds simple when someone gives you a square-foot price. Then the quote arrives, and that number suddenly includes gravel, grading, hauling, cutting, delivery, drainage, edge restraint, cleanup, and labor. That is why the paver patio cost is hard to judge from one online average. A flat backyard with wide access is one job. A wet yard with clay soil, roots, tight access, and a curved border is another. After years around outdoor builds, I care less about the prettiest paver sample and more about what is under it. The foundation work, pitch, packed stone, and edge system determine how the patio looks after rain, during winter, and under furniture weight. This article breaks down pricing, 20 x 20 patio math, cost factors, quote checks, and real homeowner feedback. Average Paver Patio Cost Overview A paver patio usually costs about $10 to $40 per sq. ft. installed. Basic concrete pavers with easy access and a simple shape may sit closer to the lower-middle range. Premium stone, difficult excavation, poor access, drainage work, deeper ground preparation, or complex patterns can push the price higher. The Concrete Masonry & Hardscapes Association lists those steps as part of interlocking concrete pavement construction, which is why a patio quote should cover more than the top layer. For homeowners, the number should not be judged by square footage alone. Two 400 sq. ft. patios can be priced very differently if one needs drain tile, root removal, deeper excavation, retaining edges, or more hauling. Material prices also shift over time, and the U.S. Bureau of Labor Statistics tracks producer prices because construction inputs do not remain fixed. Recommendation: If a bid is far below the others, ask what ground preparation, stone depth, edge system, water management, and joint sand are included. Low price often shows up later as sinking, spreading, or standing water. How Much Does a 20 x 20 Paver Patio Cost? A 20 x 20 patio is 400 sq. ft. If the installed price runs from $10 to $40 per sq. ft., the broad installed range is $4,000 to $16,000. Many standard concrete or brick paver patios land somewhere around $4,000 to $10,000, but premium materials, site issues, and extra build features can push the number higher. If the question is how much a 20×20 paver patio costs, the useful answer is usually $4,000 to $16,000 installed, with the final quote depending on the yard, base work, material, pattern, and labor market. Here is the simple math: 400 sq. ft. x $10 per sq. ft. = $4,000 400 sq. ft. x $25 per sq. ft. = $10,000 400 sq. ft. x $40 per sq. ft. = $16,000 DIY material-only cost can be much lower, but that does not mean the job is easy. Excavation, base hauling, grading, compaction, cutting, and paver placement take real time and strength. On a 400 sq. ft. patio, a $10 per sq. ft. difference changes the total by $4,000. That is why bid details matter. Cost Summary by Line Item This breakdown reflects a typical installed paver patio in the 300 to 500 sq. ft. range. Line items shift depending on yard conditions, material choice, and contractor scope. Line Item Low End High End What Drives the Variation Excavation and grading $300 $1,500+ Soil type, depth, root removal, slope Gravel base (4–8 in. compacted) $400 $1,200 Required depth by frost zone, soil drainage Bedding sand layer $100 $300 Area size and screeding method Pavers (material only) $600 $6,000+ Material type: concrete vs. natural stone Edge restraint $150 $400 Perimeter length, restraint type Joint sand (polymeric) $80 $200 Area and application method Labor $1,500 $7,000+ Region, crew skill, access, design complexity Drainage (if needed) $0 $3,000+ Yard grade, clay soil, existing pooling Hauling and disposal $100 $800 Volume of excavated soil, access, and disposal fees Total (installed, 400 sq. ft.) $4,000 $16,000+ Material, site, region, design Labor typically accounts for 50 to 70 percent of the total installed cost on a standard patio. That share rises when site access is tight, patterns are complex, or the ground needs significant prep work before the first paver goes down. What Homeowners Say About Real Paver Patio Quotes A useful homeowner discussion on Bogleheads shows why patio quotes can feel surprising. The original poster had about 900 sq. ft. of patio and sidewalk work quoted at roughly $30 per sq. ft., or about $30,000, in Baltimore County, Maryland. Several replies said that the number felt high but not impossible once location, contractor demand, grading, materials, access, and labor were considered. The thread is helpful because it includes more than sticker shock. One homeowner said they paid about $25 per sq. ft. for a 450 sq. ft. patio in 2021. Another shared a 20 x 20 DIY patio with about $2,400 in materials, but also described digging, grading, root removal, gravel, bedding sand, compaction, and paver placement by hand. That is the part many cost calculators miss. The clearest takeaway is to get at least three bids and ask for details. A fair price is not just one flat rate. It reflects the subsurface prep, water control, materials, crew skill, and full scope of work behind the patio. Paver Patio Cost by Material and Size The easiest way to estimate the cost is to look at both the material and the size. Material affects the price per square foot, while size shows the total budget impact. These ranges are planning numbers, not a replacement for a local quote. Paver Material Typical Installed Cost per Sq. Ft. Best For Concrete pavers $10 to $25 Standard patios, tighter budgets, many shape options Brick or clay pavers $12 to $30 Traditional patios, smaller spaces, walkways Porcelain pavers $18 to $40 Higher-end patios, stain resistance, modern layouts Travertine pavers $18 to $40 Warm climates, pool areas, premium outdoor spaces Bluestone or flagstone $20 to $45+ Natural stone patios and premium hardscape work Permeable pavers $15 to $35+ Drainage-focused installs and stormwater control The U.S. Environmental Protection Agency notes that permeable paving allows rain and snowmelt to filter through the surface into soil and gravel below, reducing runoff. That drainage benefit makes permeable systems worth considering on wet sites, but they need a properly designed stone reservoir underneath and regular maintenance to keep water moving through. If your yard already has a drainage issue, the drainage strategies behind regional landscaping apply directly to what goes under the patio, too. Patio Size Square Feet Estimated Installed Cost 10 x 10 100 sq. ft. $1,000 to $4,000 12 x 12 144 sq. ft. $1,440 to $5,760 12 x 16 192 sq. ft. $1,920 to $7,680 16 x 20 320 sq. ft. $3,200 to $12,800 20 x 20 400 sq. ft. $4,000 to $16,000 20 x 30 600 sq. ft. $6,000 to $24,000 30 x 30 900 sq. ft. $9,000 to $36,000 These tables show why patios feel expensive fast. Once the size passes 300 or 400 sq. ft., small changes in material, base work, or labor rate can move the total by several thousand dollars. Note: Use these numbers for planning only. A real quote should include excavation depth, base material, bedding layer, edge restraint, joint sand, drainage, hauling, cleanup, and warranty terms. Key Factors That Affect Paver Patio Cost Paver patio costs change because the visible pavers are only one part of the job. The real price comes from digging, foundation depth, grading, water control, access, cutting, labor, and site cleanup. Those details decide whether the patio stays flat after real weather. 1. Patio Size and Square Footage Larger patios cost more overall, but the price per square foot may drop slightly once setup, delivery, and equipment are already on site. A 150 sq. ft. patio can feel expensive per foot because the crew still has to mobilize. A 900 sq. ft. patio needs more material and labor, but some fixed costs are spread across a larger area. 2. Paver Material Concrete pavers are usually the standard budget choice. Brick, clay, porcelain, travertine, bluestone, and other natural stone options cost more and may need different handling. Material choice also affects cutting time, waste, delivery, and edge details. A premium paver is not just a higher-priced product. It can add labor too. 3. Foundation Depth and Soil Conditions Wet soil, clay, frost-prone areas, poor drainage, and soft or unstable ground all push the base requirements higher. More excavation, deeper gravel, more compaction passes, or drain tile, each adds cost. This is not padding. Weak base work shows up as sunken pavers, uneven edges, and water sitting where it shouldn’t. The base is where long-term paver patio cost either pays off or fails. Total backyard remodel cost often hinges on what the ground underneath needs before anything goes on top. 4. Site Access and Hauling Easy access keeps labor costs lower. Tight side yards, steps, fences, slopes, and long hauling distances slow the crew down. If gravel, sand, pavers, or removed soil must be moved by wheelbarrow instead of machine, hours rise quickly. Access is one reason two patios with the same square footage can get very different quotes. 5. Design Shape and Cutting Simple square and rectangular patios are usually cheaper to install than curved patios, borders, circles, inlays, and angled patterns. Every cut takes time and can create waste. A chevron, herringbone, or detailed border may look better, but it is not the same labor as laying a basic running pattern across a rectangle. 6. Drainage, Slope, and Existing Grade A patio needs a proper slope so water moves away from the house and does not sit on the surface. If the yard drains poorly, the contractor may need grading, a drain pipe, extra base work, or soil correction. That cost can feel invisible, but drainage is one of the first things that shows when skipped. 7. Labor Market and Season Local labor rates can change the quote more than the paver choice. High-cost metro areas, busy seasons, fuel prices, and contractor demand all affect pricing. A contractor with a trained crew, proper equipment, insurance, and a full schedule will not price the same as a casual weekend installer. The right bid should explain these factors, not hide them behind one total. If a contractor can show foundation depth, materials, edge restraint, drainage plan, labor scope, and cleanup, the quote becomes easier to compare. What Should Be Included in a Paver Patio Quote? A good quote is a scope document, not just a number. Before signing anything, every line below should either be answered in the contract or answered directly by the contractor. This is where the per-square-foot breakdown by material type also becomes useful for checking whether material costs in a bid are reasonable. Square footage: The quote should include the measured patio area and any walkways, borders, steps, or seating walls. Excavation depth: Ask how deep the crew will dig and why that depth fits the soil, frost level, and use. Base material: Gravel type, depth, and compaction method should be clear. Bedding layer: Sand or setting-bed details should be included. Drainage plan: The patio should slope away from the house and avoid low spots. Edge restraint: The quote should specify what keeps the pavers from spreading. CMHA says perimeter restraints are required where pavers meet another surface or open edge, and soil backfill should not be treated as a proper edge restraint through CMHA edge restraint guidance. Paver brand and style: Product line, color, size, pattern, and border pieces should be listed. Cutting and waste: Curves, borders, and patterns may affect labor and material waste. Hauling and disposal: Soil, old concrete, grass, or debris removal should not be vague. Warranty: Ask what is covered if pavers settle, edges move, or water ponds. If two quotes are close in price, choose the one with the clearer scope. If one quote is much cheaper, compare the base, drainage, and edge details before assuming it is the better deal. Tips to Save Money Without Sacrificing Quality Saving money on a paver patio should not mean thinning the base or skipping edge restraint. Those shortcuts create expensive repairs later. The better savings come from simplifying the shape, choosing practical materials, reducing waste, and doing limited prep work when it makes sense. Cost-Saving Move Why It Helps What Not to Cut Choose a simple shape Rectangles and squares reduce cutting, waste, and labor Do not skip the proper slope Use standard concrete pavers Good value for many patios Do not choose weak base materials Limit borders and patterns Detailed cuts add labor Do not remove edge restraint Prepare access Clear paths reduce hauling time Do not rush compaction Ask about partial DIY Cleanup, sealing, or finish work may save money Do not DIY grading if unsure Buy local materials Local supply can reduce delivery costs Do not buy mismatched pavers Get three bids Similar bids show the local market Do not pick only by price Build in phases Patio first, walls and lighting later Do not leave drainage for later Avoid oversizing A smaller patio may fit the yard better Do not make it too small to use The best savings come from reducing complexity, not weakening the build. Keep the base, slope, edge restraint, and compaction right. Cut costs from shape, extras, size, and finish choices first. Maintenance, Longevity, and Long-Term Value A paver patio can last for decades when the base is properly built and the surface is properly maintained. The value comes from repairability, drainage performance, and long-term use. The weak points usually come from poor base prep, joint sand loss, weeds, and edge movement. Expected lifespan: A well-built paver patio can last 25 years or more, depending on material, base, climate, and use. Repairability: Individual pavers can be lifted and replaced, which is a major advantage over poured slabs. Joint sand: Sand may need topping up, especially after pressure washing, heavy rain, or ant activity. Settling: Low spots usually point to base or compaction issues, not the paver itself. Weeds and ants: Proper joint sanding and maintenance reduce problems, but they do not remove them forever. Sealing: Some patios benefit from sealing, but it adds cost and repeat care. Winter performance: Freeze-thaw areas need the right base depth and drainage to reduce heaving. If the patio is near an outdoor fireplace or fire pit, factor in the added heat and load on the surrounding paver surface. The outdoor fireplace cost and base requirements affect the patio design around it, particularly at the perimeter where foot traffic and heat cycling are highest. Recommendation: Spend money on base prep before spending money on the fanciest paver. The surface matters, but the base decides how the patio ages. Should You Choose Pavers or Stamped Concrete? Stamped concrete typically costs less per square foot than pavers on a straightforward, flat patio. The gap narrows when the paver pattern is simple and the concrete design is custom. The full picture changes when you factor in repair costs over time. A cracked stamped concrete slab is difficult to repair invisibly. The patched section rarely matches the original stamped finish, and the sealer fades unevenly around it. A damaged or settled paver is a different problem; pull the affected area, reset the base, and drop in a matching paver. Done. For cold climates, wet yards, or soil that moves seasonally, pavers handle ground shift better than a solid slab. Concrete can accommodate lower initial budgets and simple flat installs. Pavers are harder to damage irreparably. The full comparison of stamped concrete vs. pavers across cost and longevity breaks this down in more detail, worth reviewing before committing to either surface. The decision comes down to budget, climate, and what repair looks like in 10 years. Compare the full build, base, drainage, labor, and maintenance, not just the surface price. Do You Need a Deck Instead? Some homeowners price out a paver patio and realize a deck is actually closer to what the yard needs, especially on sloped lots, soft ground, or where elevation change is significant. Decks and patios solve different problems. A patio sits at grade. A deck works where the grade won’t. The installed cost of a deck build at the same square footage overlaps with mid-range paver patio pricing, so both should be in the conversation before committing. Frequently Asked Questions How much does a 20×20 paver patio cost with labor included? A 20×20 patio is 400 sq. ft. At $10 to $40 per sq. ft. installed, the total range is $4,000 to $16,000. Most standard concrete paver patios with full base work, edge restraint, and drainage land between $5,000 and $10,000, depending on yard conditions and region. Is stamped concrete cheaper than pavers? Usually yes, upfront. Stamped concrete typically costs $8 to $18 per sq. ft. installed, while pavers run $10 to $40. Over 15 to 20 years, maintenance and repair costs often narrow that gap, especially in freeze-thaw climates where concrete cracks more readily. How long does a paver patio last? A properly built paver patio lasts 25 to 50 years depending on material, base quality, and climate. Individual pavers can be replaced without removing the whole surface, which is the main longevity advantage over poured concrete. Do paver patios need a permit? Many do not, but some jurisdictions require permits when a patio affects lot coverage, drainage, or is adjacent to a retaining wall or property line. Rules vary by city and county. Check with the local building or zoning office before the contractor starts. Can pavers be installed over an existing concrete patio? Sometimes, but only if the existing slab is stable, crack-free, and properly sloped. If the concrete is sinking or draining toward the house, laying pavers over it hides the problem rather than fixing it. Get a site-specific recommendation before assuming it is an option. What time of year is best for paver patio installation? Spring through fall in most US regions. Frozen or saturated ground slows excavation and compaction. Booking before peak season, late winter or early spring, can also help with contractor scheduling and sometimes pricing. Should I choose permeable pavers? Permeable pavers make sense when runoff, drainage, or local stormwater ordinances are a factor. They require a proper stone reservoir and periodic maintenance to keep water from infiltrating through the joints. Upfront cost runs higher, but they address drainage at the source rather than redirecting it. Final Check Paver patio cost is not just a square-foot number. It includes material, foundation prep, slope planning, labor, hauling, access, and local pricing. That is why one homeowner may see $17 per sq. ft. while another sees $35 per sq. ft. for work that sounds similar. If the quote feels high, ask what is included before rejecting it. Stone depth, packed base layers, water management, edge restraint, and cleanup matter more than a low number on paper. For a 20 x 20 patio, plan around $4,000 to $16,000 installed, then narrow it with local bids. If you are asking how much does a 20×20 paver patio cost, start with the size math, then compare yard conditions and build quality. Before hiring, use the quote checklist above to review each estimate line by line. Have you received a paver patio quote recently? Share the size, price, and location in the comments to help other readers compare real numbers.
Tuscan interior design brings warmth, natural textures, and old-world charm inspired by Italian countryside homes, but today’s approach feels lighter and more updated. I often find people are drawn to this style for its cozy character, yet are unsure how to adapt it without making the space feel dark or outdated. Modern Tuscan interiors solve this by combining traditional materials like stone, wood, and plaster with softer neutrals, open layouts, and natural light. The result feels grounded but not heavy, rustic but still current. In this guide, I’ll walk through how Tuscan design has evolved, what key elements define its modern version, and how to apply it in real homes without losing balance. You’ll also see practical ideas for colors, materials, furniture, and layout choices that make the style work in everyday living spaces What Mediterranean Kitchen Design Actually Means Mediterranean kitchen design keeps failing in American homes for one specific reason: people pick the tiles first. They find a patterned Spanish backsplash, fall for it, then build backward from there. By the time the hood, cabinets, and counters are chosen, the kitchen is fighting itself. The way to avoid that is to decide on the feeling before you decide on the finishes. The style draws from homes across Spain, Italy, Greece, and nearby coastal regions where kitchens were built around natural materials, real cooking, and daily use. You see textured walls, ceramic tile, stone surfaces, wood details, soft curves, iron or brass accents, and colors pulled from sun, clay, sea, and earth. What holds it together is not any single material but how calm and connected the room feels despite having a lot of layers. Choose Your Mediterranean Kitchen Direction First Before you choose tile or cabinet colors, decide which type of Mediterranean kitchen you want. This one decision prevents the most common mistake I see in real projects: a kitchen that starts with coastal tile, adds Tuscan cabinets, Spanish lighting, and modern counters until each piece is nice, but together they feel confused. If you are still figuring out which broader design style fits your home, the interior design styles, how Mediterranean sits alongside other directions, and what separates each one. These four paths give you a starting point: Clean modern Mediterranean: Warm whites, soft beige, light wood, simple cabinets, and handmade-looking tile. Works well in apartments, newer homes, and smaller kitchens because it feels open without looking cold. Rich Spanish Mediterranean: Patterned tile, arched shapes, iron details, terracotta tones, and deeper wood tones. More drama, which means it needs quiet walls or counters to stay balanced. Warm Tuscan-inspired Mediterranean: Rustic wood, stone-look counters, bronze hardware, and soft beige walls. Keep the lighting simple or it tips toward dated. Bright Greek or coastal Mediterranean: White walls, blue tile, light wood, open shelves, and functional ceramics. Fresh, relaxed, and easier to pull off in smaller spaces. Once you pick the direction, every next choice gets easier. The tile, cabinets, counters, lighting, and decor start working together instead of pulling the room apart. Mediterranean Kitchen Design Ideas Mediterranean kitchen design works best when each idea has a clear role. Start with choices that shape the room first, then layer smaller details around them. That keeps the kitchen useful, balanced, and easy to live with. Use the ideas below as separate design moves, not as a checklist you must follow all at once. 1. Build Your Mediterranean Kitchen Around Sun-Washed Neutrals One thing that stands out in Mediterranean homes is how calm the background feels, even when the room includes patterned tile, natural stone, and handcrafted details. The reason is almost always the same: a warm neutral foundation set before anything decorative was chosen. Soft creams, sandy beiges, and sun-washed whites reflect light well and give every other material room to read clearly. These are not trendy colors. They are tones pulled from limestone walls, coastal villages, and sunlit courtyards that have worked for centuries in this climate. Starting with a warm neutral palette makes future decisions easier because nearly every Mediterranean material works alongside it. Light Reflection: Cream and warm white surfaces bounce daylight around the room, helping smaller kitchens feel brighter without looking clinical. Material Connection: Sand and beige tones naturally bridge wood, stone, metal, and tile, preventing the kitchen from feeling like separate finishes placed together by accident. Long-Term Flexibility: Neutral cabinets and walls make it easier to update hardware, lighting, or decor later without creating color conflicts. 2. Warm Up the Room With Small Terracotta Moments Terracotta appears across southern Spain, parts of Italy, and the Greek countryside in planters, pottery, roof tiles, and handcrafted objects because the color is native to the landscape. In a kitchen, it works best in small doses. Small touches often create a stronger Mediterranean feeling than covering large surfaces. The goal is to introduce warmth in places that feel natural and useful rather than turning clay tones into the room’s main feature. Use terracotta where it can quietly enrich the space: Natural Pairing: Terracotta looks most authentic beside olive greens, natural wood, cream walls, or aged metals that soften its earthy color. Functional Pieces: Bowls, utensil holders, pitchers, and plant pots feel more natural than purely decorative objects because they support everyday routines. Targeted Warmth: Small accents add visual warmth to cooler kitchens without darkening the room the way large terracotta surfaces can. 3. Make Patterned Tile the Star of Your Backsplash Patterned tile gives a Mediterranean kitchen a clear focal point without making the whole room feel heavy. A backsplash works well because it sits where the eye naturally lands, especially near the range or sink. The tile brings color, movement, and old-world character while the rest of the kitchen stays soft and grounded. This works best when the backsplash feels intentional rather than like something added at the end. To keep the look balanced, focus on where the tile goes and what surrounds it: Range Focus: Place the patterned tile behind the stove to create a strong center point, then pair it with a clean hood so the area feels framed. Light Balance: Use it on a sink wall if the kitchen gets good daylight, since natural light helps the colors and small details read clearly. Small Accent: A framed panel or short backsplash run gives character without covering too much wall space. 4. Use Handmade Tile When the Kitchen Needs Quiet Texture Handmade-looking tile is the choice I trust when a Mediterranean kitchen needs warmth without looking busy. Its uneven surface catches light in a soft way, which gives the wall movement without adding extra decor. This makes it useful for small kitchens, modern layouts, and spaces where the cabinets already carry color. Use it where the room needs texture, light, or softness without adding visual weight: Soft Shine: Choose zellige-style tile for a backsplash when you want the wall to reflect light in a gentle, natural way. Modern Texture: Use textured subway tile in cleaner kitchens to keep the space from feeling flat. Muted Color: Cream, pale blue, or glazed ceramic works when the kitchen needs warmth or freshness without a bold pattern. 5. Turn the Range Wall Into the Heart of the Kitchen A range wall can set the whole mood of a Mediterranean kitchen because it gives the room one clear place to gather around. Treat this wall like a built-in feature, not just a spot for the stove. When it has the right mix of shape, scale, and useful detail, the kitchen feels settled. The strongest range walls do not need too many parts, they need one clear idea that guides the rest of the room. Hood Shape: Choose a curved plaster hood, wood-trimmed hood, or clean chimney style to give the wall structure before adding smaller details. Side Lighting: Add sconces on both sides when there is enough wall space, so the cooking zone feels framed without needing extra decor. Useful Ledge: A narrow ledge above the backsplash keeps olive oil, salt, or small pottery pieces within reach while looking natural. 6. Let Cabinet Color Set the Whole Mediterranean Mood Cabinet color sets the mood faster than almost anything else because it covers so much visual space. This is the choice that decides whether the room feels coastal, rustic, earthy, modern, or old-world. Warm white, cream, olive, muted blue, and soft beige all work, but each one needs the right tile, counter, and hardware around it. A cabinet color should feel settled before the smaller finishes are chosen. For specific colors that hold up over time and avoid the most common pairing mistakes, the timeless kitchen cabinet colors piece directions age well, and which ones date fast. Warm Whites: Pair warm white or cream cabinets with handmade tile, aged brass, and soft stone when the goal is a clean Mediterranean look that still feels warm. Earthy Greens: Use olive or muted green in kitchens with natural wood, limestone-look counters, or clay-toned accents so the room feels grounded instead of trendy. Coastal Blues: Choose muted blue when the space has strong daylight, light counters, and simple hardware, since deeper shadows can make blue cabinets feel heavy. 7. Bring in Natural Wood Where the Kitchen Feels Too Hard Natural wood makes a Mediterranean kitchen feel more relaxed when it appears in places people actually use. Designers rely on wood details when a kitchen has a lot of stone, tile, or painted cabinetry and needs something warmer to break it up. The best pieces look practical, not staged. Shelves, stools, beams, boards, or a pantry door can soften the room while keeping the main cabinet plan intact. Open Shelves: Wood shelves on a tiled wall break up hard surfaces and create space for everyday bowls, jars, or serving pieces. Island Seating: Oak, walnut, or honey-toned stools beside a stone island make the seating area feel warmer. Ceiling Detail: Add beams only when the room has enough height or width — heavy wood overhead crowds a smaller kitchen. 8. Give the Hood a Shape That Feels Built Into the Home A hood can make the range area feel built into the home instead of looking like a separate appliance. In Mediterranean kitchens, the strongest hoods have shape, weight, or texture that connects to the rest of the room. A curved plaster hood feels soft, a boxed hood feels cleaner, and an arched front leans more Spanish-inspired. The choice should depend on how much detail already exists nearby. Curved Form: Use a curved or arched hood when the kitchen has many straight cabinet lines and needs a softer center point. Plaster Finish: Choose a plaster-style hood when the walls, tile, or counters already have warm neutral tones, so the range wall feels connected. Clean Box: A boxed hood works in modern Mediterranean kitchens where the goal is structure without decorative detail. 9. Soften Sharp Kitchen Lines With Arches and Curves Curves are useful in Mediterranean kitchens because they reduce the boxy feeling that comes from cabinets, counters, and appliances. In older homes, curves show up through arches and openings. In newer kitchens, the same effect comes from smaller choices: rounded island corners, arched glass doors, curved shelves, or a built-in niche. The key is placement. A curve should improve how the room moves or feels, not look like a random decorative add-on. Entry Arch: An arched opening between the kitchen and a dining room or hallway creates a softer transition between spaces. Island Edge: A rounded island corner near walkways makes the layout feel smoother and less sharp in daily use. Built-In Niche: An arched niche on an empty wall works for pottery, oils, or cookbooks when the room needs character without more cabinets. 10. Pick Countertops That Let the Main Features Shine Countertops should help Mediterranean details feel connected instead of competing with them. In kitchens with patterned tile, keep the counter calmer so the backsplash leads. When the tile is plain, a surface with soft veining or a honed finish can add quiet movement. Warm beige, limestone-look, marble-look quartz, and honed stone all work when the color stays soft. Cold gray, high shine, or very bold veining pulls the room away from the warmer Mediterranean feeling. If budget is a constraint, the DIY marble countertops show how to get a stone-like surface for less than a full slab replacement. Plain Surface: A simple limestone-look or warm beige counter works when the backsplash has strong color, pattern, or handmade texture. Soft Movement: Gentle veining fills the gap when the cabinets and tile are quiet, keeping the kitchen from feeling flat. Honed Finish: A matte or honed surface in rustic kitchens feels softer and more natural than a polished counter. 11. Choose Flooring That Makes the Kitchen Feel Grounded Flooring has a quiet way of deciding how finished a Mediterranean kitchen feels. The floor is what makes the room feel settled before the tile, lighting, or decor even stands out. Terracotta, limestone-look tile, warm wood, and stone-look porcelain can all work, but the right choice depends on light, room size, and daily use. Terracotta Base: Use terracotta in larger kitchens where its color has enough breathing room and will not make the space feel closed in. Stone Practicality: Stone-look porcelain gives texture while staying easier to clean than natural stone — useful in busy homes. Light Foundation: Limestone-look tile works when the kitchen has limited daylight and needs a softer base under cabinets and counters. 12. Add Metal Details That Hint at Spanish, Tuscan, or Coastal Style Metal details can shift the whole style of a Mediterranean kitchen, even when they are small. In Spanish or rustic kitchens, iron rails and hooks make the room feel older and more grounded. In warmer modern kitchens, aged brass or bronze softens clean cabinets and stone counters. The mistake is using too many finishes at once. One main metal, repeated with care, makes the room feel planned rather than pieced together. Iron Accents: Use iron on pot rails, hooks, or lantern-style lights when the kitchen needs a stronger Spanish or rustic note. Aged Brass: Choose aged brass for pulls, faucets, or shelf brackets when you want warmth without making the hardware too shiny. Bronze Finish: Bronze works in kitchens with cream cabinets, clay tones, or darker wood because it adds depth without harsh contrast. 13. Use Layered Lighting to Make the Kitchen Glow at Night A Mediterranean kitchen should still feel good when daylight fades. One ceiling light cannot carry the whole room at 8pm. Layered lighting works better. Pendants, sconces, under-cabinet strips, and warm bulbs each do a different job. The cooking area needs clear light, while the island, wall corners, and shelves can hold a softer glow that makes tile, wood, and stone look richer. Island Glow: Rattan, ceramic, or warm metal pendants over the island make the center of the room feel relaxed at night. Wall Wash: Sconces near shelves, the range wall, or a blank side wall bring depth where overhead lighting feels flat. Task Clarity: Under-cabinet lights above prep zones keep the kitchen practical without relying only on bright ceiling fixtures. 14. Make Open Shelves Useful, Not Just Pretty Open shelving works best when it solves a real daily need. Shelves that hold pieces people reach for every morning are more useful than objects chosen only for display. They can make a Mediterranean kitchen feel relaxed, but they need space around each item. Too many bowls, jars, and plates will make the wall feel crowded. A useful shelf should look easy to live with, not hard to maintain. Prep Access: Everyday bowls, small plates, or oil bottles near the prep zone support cooking instead of just filling a wall. Drink Station: A short shelf near the coffee area for mugs or glasses works especially when upper cabinets would feel too heavy. Edited Display: Mix one useful item with one decorative piece, such as a jar beside a pitcher, so the shelf feels styled but still practical. 15. Style Handmade Ceramics As They Belong in Daily Life Handmade ceramics add the kind of character that feels natural in a Mediterranean kitchen because they belong around food, serving, and daily use. Where the main finishes are already fixed, ceramics are often the easiest way to bring in color, shape, and a personal touch without a bigger change. The best pieces repeat colors already found in the room. Use ceramics as working pieces, not loose decoration: Counter Bowl: A serving bowl on the counter for fruit, bread, or produce gives the color a purpose. Utensil Jar: A ceramic jar near the stove for wooden spoons adds warmth and function to the cooking area. Shelf Piece: One hand-painted plate or pitcher on an open shelf introduces a small pattern without another tile choice. 16. Design an Island People Naturally Gather Around A Mediterranean kitchen island works best when it feels useful before it feels decorative. In family homes, this is where people prep food, serve small plates, help with homework, or talk while dinner is cooking. That kind of use needs more than a pretty surface. The island should have clear walking space, deep storage, comfortable seating, and a top that can handle daily mess. Drawer Storage: Deep drawers for pans, serving bowls, or baking pieces let people reach items without bending into dark cabinets. Comfortable Seating: Leave enough knee space under the counter — stools only work well when people can sit without feeling squeezed. The standard kitchen island height is 36 inches for prep and 42 inches for bar seating. Clear Traffic: Keep 42 to 48 inches of walking clearance around all sides, especially near the fridge and stove, so the island helps movement instead of blocking it. 17. Give the Island Its Own Mediterranean Moment Rather than matching every cabinet, the island in a Mediterranean kitchen often carries a different material or finish that gives the room more depth. This approach works especially well when the surrounding cabinetry stays understated. A carefully chosen finish makes the island feel intentional rather than like another row of cabinets placed in the middle of the room. Textured Surface: Fluted wood or ribbed detailing introduces shadow and dimension without relying on color. Color Accent: A muted painted finish brings personality while staying easy to update in the future. Crafted Detail: Tile or plaster treatments add character that feels connected to Mediterranean architecture. 18. Add Built-In Details That Make the Kitchen Feel Older The most memorable Mediterranean kitchens are often defined not by expensive finishes but by thoughtful built-in features. Small niches, ledges, and recessed storage areas appear again and again in older Spanish and Italian homes because they blend beauty with practicality. These elements make a kitchen feel established, as though it evolved naturally over time rather than being installed all at once. Recessed Display: Turn an empty wall section into a niche for pottery, cookbooks, or olive oil bottles. Functional Ledge: A narrow stone shelf provides display space without taking up valuable countertop area. Traditional Storage: Plate racks offer visual interest while keeping frequently used dishes within reach. 19. Soften Stone and Tile With Woven Texture Stone, tile, metal, and wood are essential Mediterranean materials, but too much of any hard surface can leave a room feeling rigid. Woven elements appear so often in coastal Mediterranean regions because they introduce softness while keeping the palette natural. Instead of adding another decorative object, woven materials quietly improve how the room feels. Cane Seating: Cane or rush stools around stone islands soften the seating area and feel lighter than solid wood. Rattan Lighting: A woven pendant breaks up straight cabinet lines, but works best away from heavy steam or grease zones. Storage Baskets: Baskets are most useful on lower shelves, pantry corners, or breakfast areas for linens, produce, or bread. 20. Bring in Herbs, Olive Branches, and Fresh Greenery In Mediterranean homes, greenery rarely feels like decoration for its own sake. Fresh herbs, olive branches, and simple plants are tied directly to cooking and daily routines. This connection makes them feel natural within the kitchen environment. Rather than filling every corner, a few carefully chosen pieces introduce freshness while keeping maintenance manageable. Herb Placement: Rosemary, basil, and thyme need bright light. Keep them near a sunny window instead of deep inside the kitchen. Branch Height: Olive branches in a tall vase add height without taking up as much surface space as a large plant. Easy Care: One healthy plant in a sink corner or on a ledge beats several small pots that need constant moving and watering. 21. Use Wall Texture When the Kitchen Feels Too Flat Not every kitchen needs another tile pattern or decorative feature. Sometimes the room simply needs more visual depth. Textured walls solve that problem by changing how light interacts with the space. Limewash and plaster-inspired finishes appear often in modern Mediterranean interiors because they make plain walls feel richer while keeping the overall design calm and understated. Light Response: Limewash-style walls show their best movement when natural light hits them, so they work especially well near windows or open walls. Color Control: Warm beige, clay, or soft cream textures pair better with Mediterranean materials than cold gray finishes. Limited Use: One textured wall is usually enough in a kitchen because cabinets, tile, and counters already add several visual layers. 22. Create a Breakfast Nook That Feels Warm and Lived-In Some of the most inviting kitchens include a corner designed for slowing down. Whether it is used for morning coffee, casual lunches, or evening conversations, a breakfast nook creates a different rhythm from the main cooking zone. Mediterranean homes embrace these smaller gathering spaces because they encourage everyday moments that feel relaxed and unhurried. Bench Fit: A built-in bench works best in corners where loose chairs would block movement or make the kitchen feel crowded. Table Shape: A round table is easier to move around in tight spaces and creates a softer shape beside straight cabinet lines. Comfort Layer: Use washable cushions or linen seat pads because kitchen seating needs to handle crumbs, spills, and daily use. 23. Refresh a Plain Kitchen With Mediterranean Details Not every Mediterranean-inspired kitchen starts with a renovation. Some of the most effective transformations come from a handful of thoughtful updates. When a kitchen already functions well, changing what people notice first delivers the biggest impact. Light, texture, hardware, and styling details can shift the entire mood without removing a single cabinet. Lighting First: Replace cool white bulbs with warm bulbs before buying decor. Lighting changes how every color and finish reads, and a 2700K bulb costs almost nothing compared to a tile job. Hardware Upgrade: Aged brass, bronze, or iron pulls make flat cabinets feel more considered without repainting. The same logic applies to greige or neutral cabinets; the right pull changes the room’s personality, as the greige cabinet pairs with matte black and brass options side by side. Surface Edit: Remove random counter items first, then add one wood board, ceramic bowl, or herb pot so the room feels styled but still useful. Mediterranean Kitchen Design by Layout Layout decides where your style details should go. A galley kitchen needs different choices from an island kitchen. Look at movement first. Style should support how you cook, not block it. Layout Best Design Move What to Avoid Galley kitchen Keep one side visually lighter and use backsplash detail on one wall Heavy upper cabinets on both sides L-shaped kitchen Use the longest wall for the main feature Splitting strong details across both walls U-shaped kitchen Keep counters calm and add one detailed wall Pattern on every surface Island kitchen Let the island support prep, storage, and seating Oversized island with poor walking space Open-plan kitchen Repeat one finish outside the kitchen A kitchen that feels separate from the next room A good layout lets the room work before it asks the room to look pretty. Once movement, storage, and clear surfaces are handled, Mediterranean details feel natural. If the layout is wrong, even the best tile will not save the kitchen. Budget Planning Guide Cost Note: Figures in this article are estimates based on national averages. Actual costs vary significantly by region, contractor, materials, and project scope. Always get at least three quotes before committing to any project above $1,000. A Mediterranean kitchen budget should be planned on a scale, not on impulse. Small updates can adjust the mood, while larger projects change the structure, surfaces, and storage. Budget Level Rough Range Best Focus Low budget $300 to $1,500 Paint, bulbs, hardware, ceramics Light refresh $1,500 to $5,000 Faucet, shelves, runner, simple backsplash Medium update $5,000 to $15,000 Cabinet refinishing, tile work, selected surfaces Larger remodel $15,000 to $50,000+ Layout, cabinets, flooring, counters, built-ins The best spend is the one that fixes the weakest part of the room first. A limited budget should go toward visible changes. A medium budget can handle surface upgrades. A full remodel makes sense when the layout, storage, or main materials no longer support daily cooking. Costs rise quickly when plumbing, electrical work, custom cabinets, or structural changes are involved. Common Mediterranean Kitchen Design Mistakes to Avoid Most design mistakes happen when too many attractive details are used at the same time. Mediterranean kitchens already have many strong elements, so the room needs editing. Fewer choices often create a warmer, more natural space. Using too many patterns: Patterns should have one clear place in the kitchen. Use it on the backsplash, floor, or island, not all three. If one surface has a strong pattern, keep the nearby counters, cabinets, and hardware calmer so the room does not feel restless. Making the kitchen feel too dark: Warmth should not turn into heaviness. Dark wood, deep floors, and heavy finishes need balance from cream walls, light counters, better task lighting, or fewer upper cabinets. A kitchen should still feel open enough to cook in comfortably. Mixing too many Mediterranean styles: Spanish, Tuscan, coastal, and modern Mediterranean details each have their own mood. Pick one main direction, then use other influences only in small ways. If the room starts feeling confused, remove the strongest extra detail. Choosing decor over function: A kitchen still needs clear prep space, closed storage, and easy movement. Bowls, pitchers, boards, and jars are useful. Random decor makes the room harder to clean and less practical. Forgetting daily upkeep: Tile, stone, grout, open shelves, and textured finishes all need care. Before choosing them, think about cooking habits, cleaning time, and how often the kitchen is used. A beautiful finish should still fit daily life. Frequently Asked Questions How do you modernize Tuscan interior design without losing its character? Modernizing Tuscan design involves reducing heavy textures, using lighter neutral tones, and simplifying furniture shapes. Keep natural materials like wood and stone, but balance them with open layouts, softer lighting, and minimal décor to avoid a dated or overly rustic look. What is the difference between Tuscan and Mediterranean interior design? Tuscan design is a specific subset of Mediterranean style focused on Italian countryside aesthetics, using warm earthy tones and rustic materials. Mediterranean design is broader, including Spanish, Greek, and coastal influences with more variety in color palettes and architectural features. Can Tuscan interior design work in small apartments or modern homes? Yes, but it needs adaptation. In smaller spaces, use lighter wall colors, simplified furniture, and fewer heavy textures. Avoid dark wood overload and instead focus on subtle Tuscan accents like stone finishes, soft plaster walls, and minimal rustic décor. What lighting works best for modern Tuscan interiors? Warm layered lighting works best, combining natural light, soft pendant fixtures, and wall sconces. Avoid harsh white lighting, as it flattens textures. Warm 2700K lighting enhances stone, wood, and plaster surfaces commonly used in Tuscan design. How do you balance rustic and modern elements in Tuscan design? Balance comes from contrast control. Use rustic materials like wood beams or stone flooring with modern elements such as clean-lined furniture and neutral palettes. The goal is to let rustic textures stand out while keeping overall composition simple and uncluttered. Final Thoughts Tuscan interior design today is less about heavy rustic spaces and more about creating warm, balanced homes that feel open and calm. I’ve seen how small changes in tone, texture, and layout can completely shift how a room feels, and you can apply the same approach in your own space. Focus on lighter neutrals, natural materials, and simple furniture choices while keeping stone, wood, and plaster as your base. You also saw how lighting, color balance, and layout decisions work together to avoid a dark or outdated look. When you apply these ideas carefully, Tuscan interior design feels modern yet timeless. Try these tips in your home and see what works best for your space, or check out related interior design guides to refine your style further.
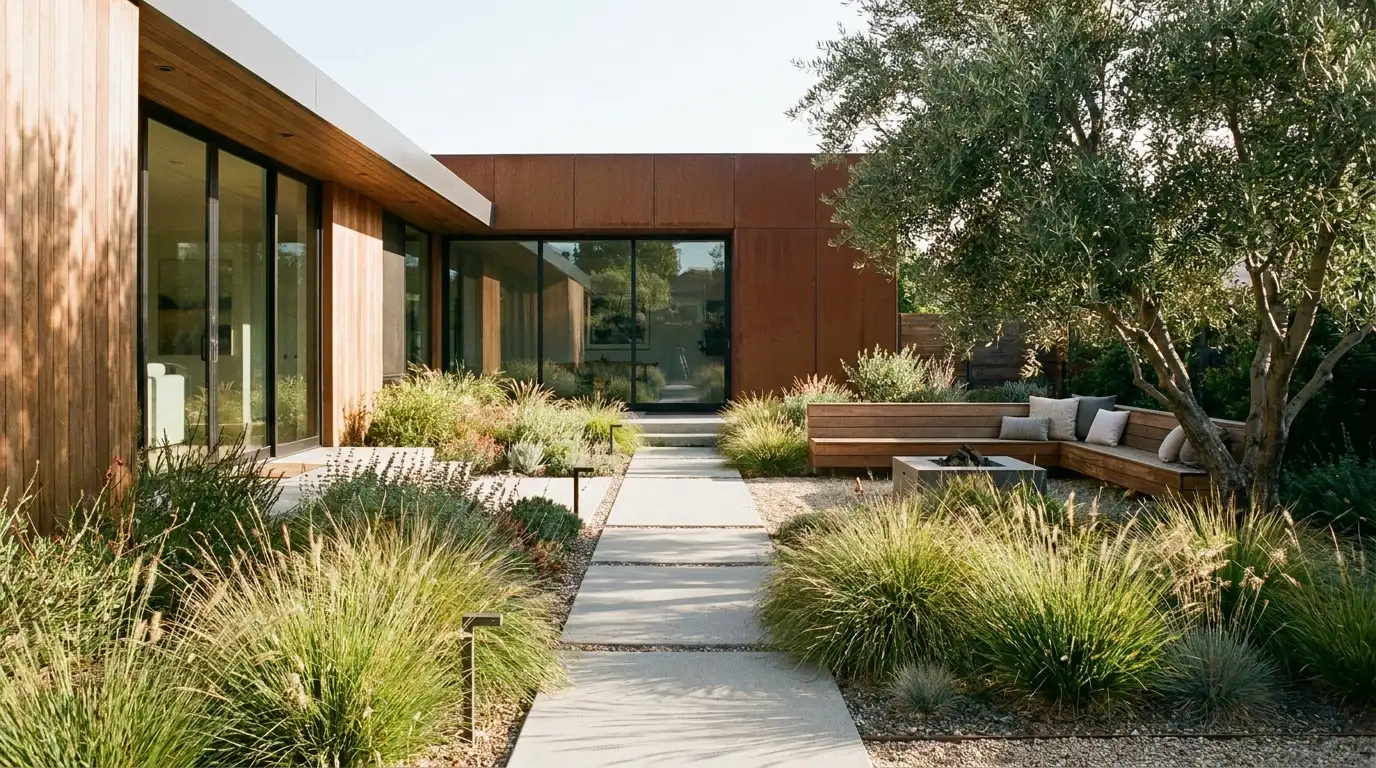
Most modern landscape designs look clean for about two seasons. Then the gravel migrates, the corten steel bleeds rust onto the concrete, and the ornamental grasses crowd out everything planted next to them. The design was chosen for how it looked in a photo, not for how it holds up in a real yard, through real weather, with real maintenance schedules. That’s the problem I run into most often. Modern landscaping done right starts with materials and function, then arrives at aesthetics. That means understanding what concrete, decomposed granite, permeable pavers, and corten steel actually do in your climate, and choosing plants that survive without constant intervention. The ideas below follow that order. Not style first, not trend first. Material first. Cost Note: Figures in this article are estimates based on national averages. Actual costs vary significantly by region, contractor, materials, and project scope. Always get at least three quotes before committing to any project above $1,000. 21 Modern Landscape Design Ideas Worth Building These are arranged by function: paths, planting, structures, water, and living zones. That order helps you identify which area of your yard needs work first, rather than picking ideas at random. 1. Floating Concrete Pathway With Groundcover Gaps Poured concrete slabs with 2-inch gaps planted with creeping thyme or mondo grass. The gaps do two things: they allow drainage, which matters much more than most people think when paving near a foundation, and they break up the visual weight so the path reads as designed rather than just laid. Keep individual slabs at 18 to 24 inches square and space them at 30-inch centers for a natural walking stride. Anything wider and the gaps look accidental. Anything narrower and you lose the softness that separates this from plain concrete. 2. Monochromatic White Garden With Textured Foliage A single-color palette works when texture carries the contrast. White blooms, silver foliage (lamb’s ear, artemisia, dusty miller), and soft feathery grasses create depth without competing colors. The risk is flatness. Avoid it by mixing plant forms deliberately: spiky agave or yucca against rounded mounding plants, with trailing groundcover at the base. This planting scheme performs consistently in south- and west-facing beds where direct sun would bleach saturated colors anyway. 3. Sunken Conversation Pit With Built-In Seating A sunken pit requires 18 to 24 inches of excavation and proper drainage below the seating surface. Skip the drainage layer and you’ll have a water feature you didn’t plan for. Poured concrete or cut stone walls work well. The built-in seating cap should be at least 16 inches wide to be comfortable, and 18 inches is better. Add a central fire feature or a low table. The sunken level naturally creates a sense of enclosure without fences or screens, which is why this works so well in exposed backyards where privacy planting would take years to establish. 4. Vertical Succulent Wall Panel Vertical planting panels only work in the long term with proper irrigation. Drip lines built into each pocket or channel are non-negotiable unless you’re in a climate with consistent rainfall. Manual watering on a vertical wall is unreliable, and plants dry out unevenly. Geo-textile pocket panels or welded wire frames with coco coir liner both work. Arrange plants in repeating geometric blocks for a modern look. Avoid random placement. It reads as messy within a single growing season as plants spread at different rates. 5. Gravel-Filled Dry Creek Bed With Native Boulders A dry creek bed is a drainage solution that doubles as a design feature. If your yard holds water after rain, run the creek from the wet zone to a lower drain point before worrying about aesthetics. Use three gravel sizes: large river rock at 4 to 6 inches for the outer edges, medium cobble at 2 to 3 inches through the middle, and pea gravel in the narrower sections. Single-size gravel looks like a filled trench. Vary the boulder sizes too. One large anchor boulder per 8 to 10 feet of run, with smaller stones between. Plant ornamental grasses and native sedges along the edges to complete the look. 6. Rectangular Reflecting Pool Reflecting pools are more maintenance than they look. Algae growth is the biggest ongoing issue, and a simple recirculating pump with UV sterilizer handles it without chemicals. Keep the pool shallow (12 inches is enough) and the surround clean. A black or dark gray interior finish creates the mirror effect; light-colored plaster bounces light back and kills the reflection. This feature works best when you frame it with simple, repeating elements: stone pavers, a single specimen tree, minimal planting. A busy mixed border competes for attention in the reflection and undermines the whole point. 7. Corten Steel Edging With Ornamental Grass Borders Corten steel develops its weathered orange-brown patina over 12 to 18 months and then stabilizes. It’s not actively rusting, just forming a sealed surface layer. In the first season, it will bleed rust stain onto adjacent concrete or pavers. Install it with a 2-inch clearance from any hardscape you don’t want stained, or accept the patina will transfer. At 3/16-inch thickness it holds a crisp edge for years without warping. Pair it with fountain grass, Karl Foerster, or blue oat grass. The warm rust tone plays well against both silver-blue and deep green foliage. 8. Geometric Hedge Alternatives Clipped boxwood is the obvious choice, but boxwood blight has made it unreliable in humid climates east of the Rockies. Japanese holly (Ilex crenata) or inkberry holly (Ilex glabra) are tougher alternatives that take the same tight shearing. For a looser geometric form, upright yew or ‘Sky Pencil’ holly creates vertical structure without constant trimming. Repeat the same plant in the same form. That repetition is what makes it read as designed rather than planted. One clipped sphere here and a cube there just looks like a nursery. 9. Decomposed Granite Courtyard With a Statement Tree Decomposed granite compacts well and drains fast, but it migrates into adjacent planted areas and needs a stabilizer added (about 3 to 4 percent by weight) to stay in place on slopes. At a 3-inch depth, it resists displacement from foot traffic. The statement tree does the visual work here: a multi-trunk olive, a Japanese maple, or a sculptural desert willow, depending on your region. One tree, centered or deliberately off-axis. Two trees and the composition loses focus. Keep furniture and accent pieces minimal. The point is that the tree reads as the main event in the yard. 10. Hidden Outdoor Kitchen Behind a Slatted Privacy Screen The screen material matters here. Ipe and teak hold up in outdoor conditions, but both are expensive. Aluminum slat panels are more practical: powder-coated, no seasonal maintenance, and they don’t shrink and warp through freeze-thaw cycles the way wood does. Space slats at 2 to 3 inches apart for partial screening that allows airflow around cooking equipment. A gas line and a small prep counter need to be accessible, so plan the screen with a clearance door or removable panel, not a sealed wall. 11. Layered Retaining Walls as a Terraced Garden Feature Any retaining wall over 4 feet in most jurisdictions requires a permit and engineering. Check before you build. Under 4 feet, dry-stacked concrete block or poured concrete with a battered face (1 inch back for every 12 inches of height) handles most residential slope conditions. The critical piece is drainage behind the wall: a perforated drain pipe in crushed stone at the base, sloped to daylight. Without it, hydrostatic pressure builds up and walls fail, usually in the third or fourth wet season. For sloped yards with significant grade changes, layering three or four smaller walls at 18 to 24 inches each is structurally safer than one tall wall and creates more planting opportunities between levels. 12. Black-Framed Pergola With Climbing Vines Steel pergola frames in a matte black powder coat hold their appearance indefinitely with minimal care. That’s a major advantage over painted wood, which needs recoating every three to five years in most climates. The vine selection changes the character over time. Wisteria is beautiful but aggressive and needs heavy annual pruning to stay manageable. Climbing hydrangea is slower to establish but lower maintenance. Jasmine works well in warmer zones. Train the vine in its first two seasons before it sets its own direction. Redirecting a mature vine that’s wrapped structural members is significantly harder. 13. Lawn-Free Front Yard With Permeable Paving Permeable pavers allow stormwater to pass through into a gravel sub-base, which matters in municipalities that charge for stormwater runoff or where impervious surface coverage is restricted. The system requires a 6-inch compacted gravel base minimum and maintenance to prevent the joints from filling with dirt and losing permeability over time. Design-wise, limit yourself to two or three materials: one paving material, one gravel or decomposed granite, and planting. More than three materials in a small front yard read as busy. Check paver installation costs per square foot before finalizing your material choice, because cost variation between paver types is significant. 14. Linear Fire Feature Built Into a Low Wall A linear gas fire feature runs on a dedicated gas line. This is not a DIY installation in most jurisdictions, and local code typically requires a licensed gas fitter for the connection. The burner trough is usually 6 to 12 inches wide and set into a concrete or block wall cap at a height of 18 to 24 inches, comfortable for both standing and seated viewing. Glass fire media (crushed tempered glass, not decorative rock) gives the cleanest look in a modern setting and holds up to outdoor conditions better than lava rock. Site the wall 6 to 8 feet from seating for comfort without singeing. For more fire feature options that don’t require a gas line, a cast concrete fire pit is a lower-cost alternative. 15. Edible Kitchen Garden in Raised Steel Planters Galvanized or Corten steel raised planters in 12 to 16-inch depth handle most annual vegetables and herbs. The steel heats the soil faster in spring, which is useful in shorter growing seasons, and the clean lines integrate better into a modern yard than timber boxes, which need replacing every eight to ten years. Arrange herbs closest to the door (within 10 feet of the kitchen entry if possible) and taller crops like tomatoes or beans at the back. A drip irrigation system through the planters reduces watering time significantly, especially in summer when daily watering would otherwise be necessary. 16. Nighttime Landscape Lighting as a Design Feature LED landscape lighting runs at 12 volts through a low-voltage transformer, typically DIY-installable unless you’re running new conduit or adding a circuit. Warm white (2700K to 3000K) reads better outdoors at night than cool white, which creates a clinical, commercial look. Prioritize three zones: step lighting for safety, uplighting for specimen trees or architectural features, and path lighting at 6 to 8-foot intervals. Avoid ground floods pointing straight up at every plant. It looks like a crime scene. Keep light sources below eye level wherever possible so the effect is ambient rather than blinding. 17. Japanese-Inspired Raked Gravel Garden The maintenance commitment here is real. Raking gravel after wind, leaf fall, or rain is a regular task, not an occasional one. Use angular granite or decomposed decomposed granite rather than river pebbles; round stones don’t hold the rake marks that make this feature visually distinctive. Install a landscape fabric barrier below the gravel to limit weed intrusion, though it won’t eliminate it entirely. This design works well in a small enclosed courtyard where wind and leaf fall are minimal. In an open backyard surrounded by trees, expect to rake weekly in autumn. 18. Smart Irrigation Zones Built Into the Design Zone irrigation matters more than controller sophistication. A basic timer with separate zones for grass (if any), shrub beds, and container plantings will outperform a smart controller running a single undifferentiated zone. Drip irrigation at 1 to 2 gallons per hour delivers water directly to root zones and cuts water use significantly compared to spray heads. Run the lateral lines under gravel or mulch to keep them invisible. If you’re redesigning the yard, install the irrigation infrastructure first. Retrofitting drip lines through established planting or under finished hardscape is more disruptive and expensive. 19. Outdoor Shower Framed by Privacy Planting Drainage is the practical concern most people skip. An outdoor shower needs a French drain or dry well within 6 feet to handle the volume. A standard shower runs at 2 gallons per minute, which adds up fast on surfaces that weren’t designed for runoff. A teak or composite platform over a gravel bed handles the drainage while keeping the surface clean underfoot. Privacy planting works best when it’s planted at 80 percent of full size. You want screening now, not in five years. Bamboo (in contained planters to prevent spreading), tall ornamental grasses, or dense arborvitae all establish fast enough to be useful in the first season. 20. Children’s Play Zone That Can Grow With the Yard The most common mistake is building a play structure that dominates the yard for eight years and then has no second use. A better approach: a level, well-drained area with a decomposed granite or engineered wood fiber surface, a simple timber frame structure, and enough open space around it that the furniture, structure, and fencing can be removed later without leaving a dead zone. Plan the zone at least 6 feet from any boundary, fence, or wall. When the play phase ends, the flat, well-drained area converts naturally to a seating zone, a raised planting area, or an extension of the main patio. 21. Pollinator Meadow Strip Along Fence Lines A meadow strip along a fence line reads as designed when it has a clean hard edge and a defined depth, typically 18 to 36 inches wide. Without that, it looks like something you meant to mow. A corten steel or black steel edging strip along the front line makes the difference. Plant in drifts of three to five plants of the same species, not individual specimens scattered randomly. Native wildflowers (coneflower, black-eyed Susan, little bluestem) establish faster and need less irrigation once rooted than exotic species. Year-one establishment requires consistent moisture; after that, most native plantings are self-sustaining in their adapted climate. How to Plan Modern Landscaping That Holds Up The design sequence matters as much as the materials. Most landscape projects that fail or need expensive rework skipped one of these steps, usually the drainage or the material compatibility check. Drainage first: Before choosing any surface material or planting bed location, map where water currently goes in a heavy rain. Every path, patio, and planting zone needs a clear outlet. Hardscaping that concentrates water toward a foundation or low point is a structural problem, not just a design problem. One anchor feature: Pick one primary element (a specimen tree, a patio, a water feature) and design everything else to support it. A yard without a clear focal point reads as a collection of individual purchases. Match materials to climate: Decomposed granite is excellent in dry western climates but migrates badly in areas with significant rainfall. Corten steel performs well in most climates but bleeds rust in wet or coastal conditions without proper clearances. Wood degrades at different rates depending on species, treatment, and humidity. Regional climate determines which materials are worth the investment. Build infrastructure before finishes: Irrigation lines, electrical conduit for lighting, and drainage pipes need to be in the ground before paving or gravel goes down. Retrofitting them later means tearing up finished surfaces. Leave room to grow: Plants at installation are a fraction of their mature size. Spacing that looks sparse in year one is correct spacing for year five. Overcrowded planting looks good briefly and then becomes a maintenance problem that undermines the design. Materials for Modern Landscaping: What to Expect Over Time This is where most landscaping guides go wrong. They list materials by appearance without telling you what they cost in maintenance two or three years out. Here’s a practical comparison of the surfaces and structural elements that define modern landscape design. Material Approx. Cost / sq ft installed Lifespan Maintenance Climate Watch Poured concrete $6–$12 30+ years Low; seal every 3-5 yrs Freeze-thaw cracking in northern climates without fiber reinforcement Permeable pavers $12–$20 25–30 years Medium; joints need clearing annually Excellent for high-rainfall areas; restricts in heavy clay soil Decomposed granite $2–$5 5–10 years before refresh Low; raking and top-up needed Migrates in heavy rain; not suited to slopes above 5% Corten steel edging $4–$8 per linear ft 20+ years None after patina sets (12–18 months) Avoid within 100 ft of saltwater; bleeds rust onto adjacent hardscape in year 1 Composite decking $8–$15 25–30 years Low; annual cleaning Thermal expansion in direct sun; gaps critical in hot climates Natural stone (bluestone, travertine) $15–$30 50+ years Seal annually; watch for efflorescence in wet climates Travertine slippery when wet; bluestone handles freeze-thaw better Cost estimates are US national averages based on HomeAdvisor data. Your actual figures will vary by region, labor rates, and project scale. Read a complete breakdown of paver installation costs before finalizing your hardscape budget. Plant Choices for Modern Landscaping by Climate The cleanest modern designs use plants that actually survive where you live. Here’s what performs reliably in each major US climate zone without constant intervention. Dry Western Climates (Southwest, California) Agave, blue fescue, ornamental bunchgrasses, desert willow, palo verde, and creosote. These tolerate long dry periods and look intentional in a modern composition. They have strong silhouettes and don’t require deadheading or seasonal replanting. Avoid plants that need supplemental summer irrigation once established. Humid Southeast and Gulf Coast Muhly grass, inkberry holly, southern magnolia, camellia, and native ferns. High humidity and summer heat eliminate many of the species that look good in western or Pacific Northwest landscaping. Boxwood blight is endemic here. Avoid it entirely. Focus on broad-leaf evergreens and grasses that handle both heat and periodic flooding. Temperate Pacific Northwest Japanese maple, hellebore, mondo grass, ferns, and bamboo (contained). This climate supports the widest range of ornamental plants, but slug pressure is significant. Avoid hostas and thin-leafed species in high-moisture zones. Corten steel performs well here without coastal salt exposure. Upper Midwest and Northeast Karl Foerster grass, catmint, switchgrass (Panicum), native coneflowers, and serviceberry. Freeze-thaw cycles are the primary material challenge in these zones. Focus on plants with good winter structure: seed heads and dried stems that hold form through snow rather than collapsing into mush by December. For more on landscaping choices by region, including what specific plants survive in northern climates, that guide covers regional conditions in detail. Modern Landscaping by Space Type Different yard types have different constraints that shape which modern landscape design approaches actually work. A sloped yard needs grading decisions before it needs design decisions. A small front yard needs fewer materials and more negative space, not more features. Use this table as a quick reference before committing to any specific idea. Space Type Primary Challenge Best Move What to Avoid Front yard Curb appeal with limited depth Clean entry path, one specimen plant, permeable paving Cluttering with too many plant types or decorative features Backyard Creating zones without it feeling divided Hardscape anchors, clear sightlines between zones, graduated screening Solid fencing that makes the space feel smaller; full lawn with no planting beds Small courtyard Avoiding visual clutter One material for the ground plane, vertical planting, single focal point Multiple paving types, too many planters, anything that breaks the sightline Sloped yard Drainage and usable flat area Layered retaining walls under 4 ft each, terraced planting, steps with drainage channels Single tall retaining wall without drainage; planting on unstabilized slopes above 30 degrees This table gives you a starting framework. Adjust every choice against your local soil, rainfall, and frost conditions before committing materials or signing any contracts. Common Modern Landscaping Mistakes That Show Up Two Years Later The mistakes that create the most damage in a modern landscape aren’t the obvious ones. They’re the decisions that look fine initially and then compound over time. Here are the four I see most often in residential landscapes. Skipping Drainage Planning Hardscaping without drainage planning is the most expensive mistake in landscaping. Improperly sloped patios channel water toward foundations. Planting beds without drainage hold moisture that rots root systems. Retaining walls without drainage fail within a few wet seasons. Fix grading and drainage before choosing any surface material or plant. It’s cheaper to solve before the landscape is installed than after. Choosing Plants by Appearance, Not Climate Modern landscaping photos are shot in ideal conditions, usually in temperate California or Pacific Northwest climates. The plants look clean and structural. Many of them don’t survive a humid summer in Georgia or a freeze in Minnesota. Research plant hardiness zones and actual mature sizes before purchasing. A 3-gallon Miscanthus grass looks perfect at installation. At three years it’s 5 feet wide and blocking the path. Overcrowding to Fill Space Immediately Newly planted beds look sparse for the first two seasons. That’s correct. Planting at 50 percent of the recommended spacing creates a full look immediately and a jungle two years later. The maintenance time and cost of managing overcrowded plants usually exceeds what was saved on additional plants at installation. Prioritizing Style Before Function A modern yard should handle water, movement, shade, and maintenance before it should look polished. A beautiful patio with no drainage, a path that floods after rain, or a planting scheme that requires weekly attention defeats the practical purpose of an outdoor space. The style follows when the function is working. If you’re adding a deck to your landscape, reviewing outdoor deck ideas alongside these landscaping principles helps ensure the built elements work together as one design. Frequently Asked Questions These are the questions that come up most when homeowners are deciding how to approach modern landscaping, before they’ve hired anyone or committed to materials. What does modern landscape design actually look like? It prioritizes clean lines, a limited material palette (usually two to three surfaces), structured planting with defined edges, and intentional negative space. It avoids ornate decoration, mixed plant styles, or busy borders. The result is a yard that reads as composed rather than accumulated. What plants are used for modern landscaping? Ornamental grasses, succulents, agave, yucca, native wildflowers, and clipped evergreen shrubs. Specific choices depend on climate. A modern Southwest yard uses agave and bunchgrasses; a modern Pacific Northwest yard uses Japanese maple, mondo grass, and ferns. Climate drives plant selection more than style does. What is the cheapest way to make a yard look modern? Add defined edging, resurface paths with decomposed granite or gravel, and reduce plant variety to two or three species planted in mass. Clean edges and reduced visual complexity have more visual impact per dollar than new structures or hardscape. Does modern landscaping require a lot of maintenance? Less than traditional landscaping when it’s designed correctly. Native plants in their climate zone, drip irrigation, gravel or decomposed granite surfaces, and defined edges all reduce ongoing maintenance. A lawn-heavy traditional yard typically requires more time and water than a well-planned modern one. What is mid-century modern landscaping called? Mid-century modern landscaping is sometimes called California modernist or ranch modern. It references the design vocabulary of the 1950s and 60s: clean concrete lines, low-maintenance planting, bold specimen plants, and the integration of indoor and outdoor living. It’s a specific subset of modern landscape design, not a separate category. How do I add privacy without making the yard feel closed in? Use slatted screens at 40 to 60 percent opacity, tall ornamental grasses, or a single row of columnar trees (Sky Pencil holly, Italian cypress) rather than a solid fence or dense hedge. Partial screening maintains spatial openness while blocking direct sightlines from adjacent properties or streets. What are the landscape design trends for 2026? Lawn removal and water-efficient planting, pollinator meadow strips, outdoor kitchen integration, and native plant landscaping are gaining consistent traction. Structurally, linear fire features, steel-framed pergolas, and permeable paving continue to define the clean-line modern look. Is modern landscaping good for small front yards? Modern design principles are better suited to small yards than traditional mixed planting. Fewer material types, more negative space, and one focal point make a small area feel larger. Restrict the plant palette to two species and let the hardscape carry the design. For specific ideas suited to smaller spaces, the modern deck skirting ideas guide includes approaches that help defined outdoor areas feel cohesive in compact yards. Final Words Done right, modern landscape design costs more upfront than patching a lawn or throwing down mulch, but it pays back in lower maintenance and longer material lifespans. The concrete pathway lasts 30 years. The Corten steel outlasts the house. The native planting needs no irrigation after year two. The investment question isn’t whether modern landscaping is expensive. It’s whether the materials and plants you’re choosing will hold up without constant attention in your specific climate. Start with drainage, pick one anchor feature, and select materials for your region before worrying about aesthetics. Get at least three contractor quotes for any work that involves hardscape or grading. That’s the honest sequence for a yard that still looks right a decade from now.
A front porch should do more than hold a wreath and a mat. It should make daily life easier, soften the entry, and give the house a clearer first impression. These front porch decorating ideas are built as complete setups, not loose styling tips. I focused on porches people actually live with: tiny stoops, baby gear, older adults, privacy needs, renters, plants, reading corners, and seasonal curb appeal. You will also find small front porch ideas that respect tight spaces rather than crowding them. The goal is simple: give you porch ideas that look good because they work. Cost Note: Figures in this article are estimates based on national averages. Actual costs vary significantly by region, materials, and project scope. Always get at least three quotes before committing to any project above $1,000. Before You Decorate, Decide What Your Porch Needs to Do A porch can look pretty and still fail if it blocks the door, crowds the steps, traps rainwater, or ignores how the household uses the entry. Good front porch decorating starts with the boring details first. Check the door swing, walking space, porch depth, weather exposure, light, and the path guests naturally take. A tiny stoop may only need one strong planter, a mat, a wreath, and better lighting. A deeper porch can handle seating, storage, layered plants, or a private corner. Once the function is clear, the decor feels intentional instead of random. That is where outdoor decor starts looking personal, not copied from a seasonal aisle. With that in mind, here are setups built for real situations. Front Porch Decorating Ideas for Privacy, Comfort, and Daily Life These porch ideas solve everyday problems first, then make the space beautiful through better placement, sizing, materials, and outdoor decor choices. 1. The Fog-of-War Privacy Screen Mount a horizontal cedar slat panel, about 6 ft wide and 4 ft tall, against your street-facing railing using angle brackets. Choose slats with half-inch gaps, so it breathes instead of walling you in. Angle it 10 degrees inward so it reads like a design choice, not a defensive fence. Flank the steps with two Areca palms in dark resin planters. The fronds should spill loosely over the top edge of the panel. From the chair, you see layered green against warm wood. From the pavement, there is nothing interesting to inspect. What you need: 2 Areca palms, two 14-inch dark resin planters, one pre-cut cedar slat panel, exterior angle brackets, and 4 railing mounting clamps. The non-obvious bit: The 10-degree inward angle signals intention rather than paranoia. Cost: $180 to $240, depending on palm size. 2. The Sit-and-Stay Porch for Older Adults Place a 48-inch bench with arms against the wall closest to the door, but not in the door swing. Choose a seat height between 17 and 19 inches, so sitting and standing feel easier. Add a side table on the dominant-hand side, about 18 inches wide, for glasses, keys, tea, or a book. Use a flat outdoor rug instead of a thick layered mat. Add two low-glare solar step lights and two heavy planters pushed tight to the porch corners. The porch should feel calm, steady, and easy to move through. What you need: 48-inch bench with arms, a flat 4 x 6 ft outdoor rug, an 18-inch side table, 2 solar step lights, and 2 heavy planters. The non-obvious bit: The arms matter more than the cushion because they help someone push up safely. Cost: $220 to $450, depending on bench quality. 3. The Package-Proof Porch Place a small weatherproof delivery cabinet on the right side of the porch, around 30 to 36 inches wide, so it sits off to the side and does not block the front door. Choose one with closed gray doors and a flat top, so it looks neat against the siding and blends in more like porch storage than a parcel bin. Add a simple “PACKAGE” sign above it so delivery drivers know exactly where to leave boxes. Put one medium planter beside the cabinet, so the setup feels styled while still keeping the entry steps and front door clear. What you need: A 30- to 36-inch weatherproof delivery cabinet, a package sign, a medium planter, and a slim outdoor tray or cushion for the cabinet top. The non-obvious bit: A clear package sign makes the drop-off spot obvious, while closed cabinet doors keep parcels hidden from the street. Cost: $150 to $320. 4. The Renter-Friendly Porch With No Drilling Use only freestanding pieces: a rollable outdoor rug, weighted planters, battery lanterns, a removable wreath hanger, and a folding chair if the porch is deep enough. Add height with a freestanding plant stand instead of mounted shelves. For privacy, place a trellis inside a heavy rectangular planter and grow jasmine, ivy, or faux outdoor greenery through it. Nothing permanently touches the wall, railing, or doorframe, but the porch still feels layered. What you need: Removable wreath hanger, outdoor rug, weighted planter, battery lanterns, folding chair, freestanding plant stand, or planter trellis. The non-obvious bit: Weight replaces drilling. Heavy planters let renters add height, privacy, and structure safely. Cost: $90 to $220. 5. The Working Doorstep for Tiny Porch Charm Use only one side of the door. Place a 24 x 36-inch coir mat underfoot, then set one narrow planter, no wider than 10 to 12 inches, on the side where the door does not swing. Add a small wreath, around 18 to 20 inches, and a clean house number plaque. Do not add chairs, baskets, layered rugs, or double planters. The goal is a finished entry that still leaves room for feet, packages, and the door. What you need: 24 x 36-inch mat, 10 to 12-inch planter, 18 to 20-inch wreath, house number plaque, compact light source. The non-obvious bit: One styled side looks more expensive than two cramped sides. Cost: $70 to $160. Front Porch Decorating Ideas for Plants, Hobbies, and Personality These ideas give the porch a stronger identity, whether the goal is greenery, herbs, reading space, vintage character, or a bolder aesthetic. Each one works because the decor choice has a function behind it. 6. The Cottage Herb Garden Porch Place a 3-tier plant stand near the kitchen-side door or the sunniest porch wall. Use 6 to 10-inch pots for rosemary, thyme, basil, parsley, oregano, and chives. Keep mint in its own pot because it spreads aggressively. Add a small stool for a watering can and snips. The porch now smells good, looks soft, and gives you something useful before dinner. What you need: 3-tier plant stand, 6 to 10-inch herb pots, plant markers, watering can, garden snips, rosemary, thyme, basil, parsley. The non-obvious bit: Put herbs near the door, not the prettiest corner, or they will not get used. Cost: $80 to $180. 7. The Front Porch Reading Nook Place one deep chair, at least 30 inches wide, in the quietest corner of the porch. Add an 18 to 22-inch side table on the hand you naturally reach with. Place a covered basket underneath for books, a throw, or bug spray. Use a small outdoor rug to frame the nook and a clip-on rechargeable lamp if there is no outlet. This should feel like a one-person retreat, not leftover patio furniture. What you need: 30-inch deep chair, 18 to 22-inch side table, covered basket, 4 x 6 ft rug, rechargeable lamp, cushion. The non-obvious bit: The table side matters because comfort depends on small repeated movements. Cost: $180 to $380. 8. The Symmetry Porch for Graceful Kept Spaces Place two matching planters on either side of the door, each 18 to 22 inches wide. Add matching lanterns in front of them, but keep them smaller than the planters. Center a 22 to 26-inch wreath on the door and align the mat with the doorframe. Use boxwood, olive trees, hydrangeas, or topiaries. This works best when every object has a twin or a clear center point. What you need: 2 matching planters, 2 matching lanterns, a centered wreath, an outdoor mat, and boxwood or topiary plants. The non-obvious bit: Symmetry only works when the mat is centered too; otherwise, the whole setup feels slightly off. Cost: $140 to $300. 9. The Salvage and Reclaimed Porch Start with one reclaimed anchor: a weathered bench, an old church pew, a vintage metal chair, or a wooden crate table. Add only two smaller vintage pieces, such as a galvanized planter and an old watering can. Keep cushions plain and modern, so the porch does not become a junk-shop display. The charm should come from age, texture, and patina, not from piling up every thrifted object. What you need: Reclaimed bench or chair, vintage crate, galvanized planter, old watering can, plain cushion, and one modern lantern. The non-obvious bit: One modern piece keeps reclaimed decor looking curated instead of accidental. Cost: $90 to $260, depending on what is thrifted. 10. The Maximalist Tropical Porch Use two oversized leafy plants, at least 4 to 5 ft tall, as the back layer. Add rattan or cane seating, a patterned outdoor rug, and cushions in two strong accent colors. Hang one basket overhead if the porch is covered. Keep the plants big and the accessories fewer. The porch should feel lush and vacation-like, not like every tropical print was used at once. What you need: 2 large leafy plants, a patterned outdoor rug, rattan seating, 2 to 3 cushions, a hanging basket, and a warm lantern. The non-obvious bit: Tropical style needs scale more than clutter; big leaves do the heavy lifting. Cost: $240 to $520. Seasonal Front Porch Decorating Ideas That Still Look Intentional These seasonal setups satisfy the aesthetic side without turning the entry into a pile of disposable decorations. The rule is the same as every other setup here: the entry still has to work when the decor goes up. 11. The Zero-Maintenance Winter Porch Fill two 18-inch planters with evergreen branches, cedar, pinecones, and birch logs. Use real greenery if the weather is cold enough to preserve it, or use high-quality faux stems on exposed porches. Add one lantern with a battery candle and a sturdy mat. For tiny porches, use one planter and one lantern. The look should feel wintery, not overly holiday-specific. What you need: 18-inch planters, evergreen branches, cedar stems, birch logs, pinecones, a lantern, and a battery candle. The non-obvious bit: Birch logs add height when flowers are out of season. Cost: $80 to $180. 12. The Spring Basket Porch Use two woven baskets as planters: a large one on the floor and a smaller one on a stool. Fill them with tulips, daffodils, pansies, hyacinths, or realistic faux spring stems. Add a grapevine wreath with only one ribbon color. Keep the flowers gathered near the door instead of spreading tiny pots everywhere. The porch feels fresh, not busy. What you need: 2 woven baskets, a small stool, spring flowers or faux stems, a grapevine wreath, and a light mat. The non-obvious bit: Baskets need hidden plastic liners, or watering will ruin them fast. Cost: $75 to $170. 13. The Summer Coastal Porch Start with a striped outdoor rug, then add one woven planter and either two compact chairs or one small bench. Use white, navy, tan, pale blue, or weathered wood. Add grasses, palms, or hydrangeas instead of beach signs. The porch should suggest summer through texture and color, not seashells, anchors, or word art. What you need: Striped rug, woven planter, compact chairs or bench, simple lanterns, grasses or hydrangeas, 2 cushions. The non-obvious bit: Coastal decor looks better when it avoids literal beach objects. Cost: $170 to $360. 14. The Fall Harvest Porch That Still Looks Neat Group three to five pumpkins in one corner, using a mix of sizes and soft color variations. Add one mum planter, one natural wreath, and one lantern. For a large porch, add corn stalks only if they can stand upright without brushing the walkway. Do not line every step with pumpkins. One controlled harvest cluster looks warmer and more expensive. What you need: 3 to 5 pumpkins, mum planter, natural wreath, lantern, optional corn stalks, warm pillow for seating. The non-obvious bit: A single cluster photographs better and keeps the steps usable. Cost: $70 to $180. 15. The Polished Halloween Porch Choose one spooky focal point: a skeleton in a chair, a crow-covered wreath, a ghost by the steps, or a webbed corner. Keep everything else restrained with black lanterns, matte pumpkins, dark greenery, and warm orange light. This porch feels festive without becoming a full haunted-house scene. It works especially well for homes that still want curb appeal in October. What you need: One Halloween focal piece, black lanterns, matte pumpkins, a dark wreath, battery lights, and optional faux webbing. The non-obvious bit: One focal scare is stronger than twelve scattered Halloween objects. Cost: $60 to $160. 16. The Classic Christmas Evergreen Porch Frame the door with evergreen garland if the porch is covered, then add a 22 to 26-inch wreath and two lanterns at the base. Use velvet ribbon in burgundy, navy, forest green, or deep red. Add birch logs or wrapped faux gifts only where they will not block the entry. For tiny porches, skip the garland and use one wreath, one planter, and one lantern. What you need: Evergreen wreath, garland, 2 lanterns, velvet ribbon, birch logs, warm white lights, and optional faux gifts. The non-obvious bit: Garland looks best when it has enough depth around the doorframe, not when it is squeezed flat. Cost: $120 to $300. How to Choose the Right Front Porch Idea for Your Home The right front porch decorating idea depends less on trends than on size, weather, privacy, household routines, and how often the entry is used. Four questions get you to the right setup faster than browsing photos. Use porch depth first. If the porch is under 5 ft deep, avoid chairs and benches. Focus on a mat, a slim planter, a wreath, a light, or vertical decor. Match the idea to your real life. Choose privacy if the porch faces neighbors, storage if packages pile up, and greenery if the entry feels hard or bare. Respect weather exposure. Covered porches can handle cushions, baskets, and layered rugs. Exposed porches need weatherproof planters, sturdy mats, and fewer soft pieces. Pick one main mood. A porch can be cottage, classic, tropical, moody, rustic, seasonal, or minimal. Too many moods make the outdoor decor feel confused. Start with the setup you can maintain. A porch designed for real life will always look better than one styled only for photos. Front Porch Decorating Mistakes That Make the Space Less Useful A decorated porch still needs to work as an entry, so the prettiest pieces can become problems when placed incorrectly. These are the mistakes that show up most often and are easiest to avoid. Choosing furniture that is too deep. Large chairs and benches can block the walkway, especially on narrow porches. Seating needs enough depth to feel natural without cutting the clearance path below 36 inches. Blocking the door swing. Planters, lanterns, baskets, and pumpkins should never sit where the door opens or where guests naturally step. Using too many tiny decorations. Small signs, mini pots, and scattered objects often look messy from the street. Larger, fewer pieces usually look cleaner. Forgetting nighttime lighting. Warm lighting near the door, steps, or seating makes the porch safer and more inviting after sunset. Using indoor pieces outside. Indoor rugs, untreated wood, and delicate fabrics fade, warp, or trap moisture quickly on exposed porches. Frequently Asked Questions About Front Porch Decorating What is the cheapest way to decorate a front porch? One clean doormat, one healthy plant, one door wreath, and better lighting cover the entry first and cost less than replacing the seating. Matching finishes, such as black metal or warm wood, also make budget pieces look more intentional. How do I decorate a small front porch without it looking crowded? Work one side of the door only. A 10 to 12-inch planter, a coir mat, and an 18-inch wreath are enough for a stoop under 4 ft deep. Every item you add after that should earn its place by replacing something, not sitting beside it. What plants work best on a covered front porch? Ferns, boxwood, and topiaries hold up well in covered low-light conditions. For color, impatiens and caladiums work in shaded spots. On sunny exposed porches, rosemary, ornamental grasses, and lavender handle heat and drought better than most flowering annuals. How often should front porch decor be changed? Keep permanent pieces such as planters, rugs, lanterns, and seating in place year-round. Swap smaller accents only: wreaths, flowers, ribbons, pillow covers, or pumpkins as the season changes. A full seasonal overhaul is rarely necessary. What colors work best for front porch decor? Brick exteriors pair well with cream, olive, black, and warm wood. White siding takes green, navy, terracotta, or charcoal. Gray homes usually look better with contrast such as black, burgundy, cedar, or soft yellow. Pull the secondary color from the front door, not from a seasonal trend. Can I decorate a front porch without plants? Yes. Use texture instead: a rug, wreath, lanterns, baskets, cushions, house numbers, or a painted door. If the porch gets poor light, high-quality faux greenery can also work when used sparingly. What is the best outdoor rug size for a front porch? For a typical 6 x 10 ft covered porch, a 4 x 6 ft rug works well. For a stoop or entry under 4 ft deep, a 24 x 36-inch coir mat is the safer choice. The rug should sit fully under any seating with at least 6 inches of clearance from the edge to the railing. Final Decor The best front porch decorating ideas begin with how the space is used, then build the style around that purpose. A porch can offer privacy, hold baby gear, help older adults sit safely, grow herbs, welcome packages, or create a quiet reading corner. Small front porch ideas can still feel complete when the scale is right and the walking path stays clear. I always trust a porch more when every piece has a reason to be there. My suggestion is to choose the setup that matches your space first, then adjust the colors, plants, and seasonal details around it.

Have you ever stepped into a cathedral and felt instantly lifted by the soaring ceilings and colorful light? If you’ve ever wondered what makes a Gothic cathedral special, it can feel overwhelming to understand the arches, buttresses, and stained glass. I know it’s hard to notice all the details while visiting or looking at photos. In this article, you’ll learn how to identify Gothic features like pointed arches, ribbed vaults, and flying buttresses. I’ll also explain how Gothic differs from Romanesque and Gothic Revival, highlight famous cathedrals, and give practical tips so you can appreciate both the engineering and artistry when you explore one yourself. What Are Gothic Cathedrals? Gothic cathedrals are major Christian churches built in the Gothic architectural style, which began in northern France in the mid-12th century. One key starting point was the rebuilding of the Basilica of Saint-Denis near Paris from around 1135 to 1144. From there, the style spread across Europe between the 12th and 16th centuries, changing how sacred buildings looked and felt. A cathedral is not called a cathedral only because it is large or famous. It is the main church of a bishop, making it an important religious seat for the region. In medieval towns, a Gothic cathedral often stood at the center of public life. People came for worship, teaching, festivals, pilgrimage, ceremonies, and moments that shaped the whole community. What makes these buildings so moving is the way faith and design meet. Earlier Romanesque churches often felt heavy, with thick walls, rounded arches, and smaller windows. Gothic builders wanted more height, more light, and more openness. That is why places like Notre-Dame de Paris, Chartres Cathedral, and Cologne Cathedral feel so powerful when you stand inside them. Key Features of Gothic Cathedrals The beauty of Gothic cathedrals comes from how stone, height, and light work together. Medieval builders used clever support systems to raise ceilings, open walls, and fill interiors with color. What looks delicate at first is actually careful engineering shaped into sacred space. Here are the key features that define Gothic churches: Pointed arches: These sharp arches helped carry weight downward and made taller walls and wider openings possible. They also give Gothic interiors their strong upward pull. Ribbed vaults: Stone ribs span the ceiling and direct weight to the columns. They make the roof feel lighter while adding dramatic patterns overhead. Flying buttresses: These outer supports carry pressure away from the walls. Because of them, builders could add bigger windows and higher interiors. Stained glass and rose windows: Colored glass filled the church with blue, red, gold, and violet light while telling sacred stories. Rose windows created a glowing focal point. The way color behaves in a space shifts dramatically depending on where and how light enters, something Gothic builders understood centuries before it became a design principle. Towers, spires, and vertical lines: These features made the church visible across the town and gave the space a lifted, spiritual feeling. Stone sculpture and gargoyles: Carvings taught religious stories through figures and symbols. Gargoyles also helped move rainwater away from the walls. Together, these features make a Gothic cathedral feel powerful, bright, and deeply atmospheric. The structure supports the space, while the glass and height make it feel alive centuries later. Why Gothic Churches Were So Important Gothic churches played a major role in medieval society and influenced far more than religious life. They served as places of worship, gathering spaces, and important landmarks that reflected the identity of a town or city. Building a Gothic church often required the efforts of skilled architects, craftsmen, artists, and local communities working together over many years. These impressive structures demonstrated advances in engineering and construction while showcasing beautiful sculptures, stained glass, and detailed stonework. They also represented the wealth and influence of religious institutions and local rulers. Beyond their spiritual purpose, Gothic churches became centers of culture, education, and community life, leaving a lasting impact on European history and architecture. Most Famous Gothic Cathedrals and Churches Around the World The finest Gothic cathedrals are not famous for one reason. Some changed architecture, some guarded royal history, and others shaped the skyline of entire cities. What makes them worth your attention is how each one tells a different story through stone, glass, height, and local memory. 1. Notre-Dame de Paris, France Notre-Dame de Paris began construction in 1163 and became one of the great symbols of French Gothic architecture. Built on the Île de la Cité, it watched Paris grow around the Seine for centuries. Its towers, sculpted portals, and rose windows made it a model for later Gothic churches. When you stand before it, the building feels both royal and deeply human. Here is what makes it stand apart: Western facade with strong balance: The front is arranged with three portals, twin towers, and a central rose window, creating a calm yet powerful rhythm. Famous rose windows: Its stained glass brings soft color into the interior and shows how Gothic churches used light as part of worship. Cultural memory of Paris: Beyond architecture, Notre-Dame appears in literature, art, music, and national life, making it more than a historic church. 2. Chartres Cathedral, Chartres, France Chartres Cathedral was mostly rebuilt after a fire in 1194 and became one of the clearest examples of High Gothic architecture. It is especially loved for its medieval stained glass, much of which still survives. The cathedral has a quiet power. From outside, it rises above the town; inside, the blue glass gives the space a calm, almost floating glow. These details give Chartres its lasting value: Chartres blue glass: The deep blue tones in its windows are among the most admired in medieval Europe. That particular shade of blue carries the same quality found in historically symbolic blue paints, where color was chosen not just for beauty but for the feeling it produced in a space. Pilgrimage importance: The cathedral became a major pilgrimage site because of its sacred relic and religious status. Unified Gothic design: Since much of it was rebuilt in a focused period, the building feels unusually complete and balanced. 3. Amiens Cathedral, Amiens, France Amiens Cathedral was begun in 1220 and is one of the grandest achievements of High Gothic design. Its builders created a vast interior that feels open, bright, and perfectly ordered. The nave rises with a confidence that makes you instinctively look up. It was not built only to impress; it was made to show how far Gothic engineering could go. Look closely at these features: Exceptional interior height: The nave reaches a striking height, creating one of the most powerful vertical effects in French Gothic architecture. Rich sculpted entrance: The west front is filled with carved figures that once helped teach religious stories to visitors. Clean structural rhythm: Columns, arches, and vaults align with rare clarity, making the interior feel calm rather than crowded. 4. Reims Cathedral, Reims, France Reims Cathedral was started in 1211 and became closely tied to the history of French kings. For centuries, it served as the coronation church of France, giving it a rare political and spiritual weight. Its facade is one of the most sculptural in Gothic Europe. The stone figures feel full of movement, as if the cathedral is speaking before you enter. Its importance comes through these details: Royal coronation setting: Many French kings were crowned here, giving the cathedral a central place in national history. Expressive sculpture: The famous carved figures, including smiling angels, make the facade feel lively and personal. High Gothic elegance: Its design shows the French Gothic love of height, order, and richly decorated entrances. 5. Cologne Cathedral, Cologne, Germany Cologne Cathedral began in 1248, paused for centuries, and was finally completed in 1880. That long story makes it one of Europe’s most remarkable church projects. Its twin spires rise above Cologne with a force you can feel even from a distance. The cathedral holds both medieval ambition and 19th-century completion in one unforgettable shape. These points make Cologne especially powerful: Towering twin spires: The spires dominate the skyline and make the cathedral one of Germany’s most recognizable landmarks. Long construction timeline: Its completion after more than 600 years gives it a rare link between medieval and modern Europe. Major pilgrimage role: The cathedral was built in part to honor important relics, which drew pilgrims and elevated Cologne’s status. 6. Burgos Cathedral, Burgos, Spain Burgos Cathedral began construction in 1221 and brought French Gothic ideas into a Spanish setting. Over time, later additions gave it a richer and more decorative look. Its sharp towers, carved details, and chapels create a layered experience. You feel the original Gothic frame, as well as the personality of Spain in its stonework. Here is what gives Burgos its character: Spanish Gothic identity: The cathedral adapts French Gothic forms while adding local details, making it feel distinct from northern examples. Decorative towers: Its lace-like spires give the exterior a refined and elegant profile. Layered artistic additions: Chapels, tombs, and later details show how the building continued to grow with changing tastes. 7. Seville Cathedral, Seville, Spain Seville Cathedral was built from 1401 on the site of the city’s former Great Mosque. This gives it a layered history unlike many other Gothic churches. Its scale is overwhelming, but what makes it memorable is the blend of Gothic ambition with traces of earlier Islamic architecture. You feel the meeting of cultures in the stone, tower, and open spaces. These details make Seville unique: Immense Gothic scale: It is one of the largest Gothic churches in the world, built to reflect the city’s power and faith. La Giralda tower: The bell tower began as a minaret, preserving part of the site’s Islamic past. Cultural layering: The cathedral tells a story of religious change, urban power, and architectural reuse in southern Spain. 8. Westminster Abbey, London, England Westminster Abbey took much of its present Gothic form under Henry III, beginning in 1245. It became one of England’s most important religious and royal spaces. Unlike some cathedrals known mainly for height or glass, Westminster is famous for ceremony, memory, and national identity. Walking inside feels like moving through England’s history in stone. Its value sits in these details: Royal ceremonial role: It has hosted coronations, weddings, and burials, making it central to British public life. Gothic interior rhythm: Pointed arches, tall vaulting, and long lines create a solemn but graceful setting. Historic memorials: Poets, monarchs, scientists, and public figures are remembered here, adding layers beyond architecture. 9. York Minster, York, England York Minster developed over several centuries, with major Gothic work from the 13th to 15th centuries. It is one of the greatest Gothic churches in northern Europe. The building feels broad, bright, and deeply English in character. Its glass is a major reason to visit, especially when daylight brings the windows to life. These features make York Minster stand out: Great East Window: This vast stained-glass window is one of the largest and most important medieval windows in England. Strong northern presence: Its size and setting made it a major religious landmark far from London. Mix of Gothic phases: Different parts show changing English Gothic styles across several centuries. 10. Milan Cathedral, Milan, Italy Milan Cathedral began in 1386 and took nearly six centuries to complete. It has a very different mood from French Gothic cathedrals. Instead of a dark, compact mass, it rises in pale stone with countless spires, statues, and fine details. From the roof, you can stand close to the carved stone and see Milan spread below you. These details give Milan Cathedral its appeal: Forest of spires: The roofline is filled with pinnacles and statues, creating one of the most detailed Gothic silhouettes in Europe. Italian Gothic character: It blends northern Gothic ideas with local tastes, resulting in a style that feels uniquely Milanese. Walkable roof terraces: Visitors can climb close to the stonework, making the architecture feel personal and touchable. 11. Canterbury Cathedral, Canterbury, England Canterbury Cathedral has roots going back to 597, but much of its famous Gothic character developed after the fire of 1174, when the choir was rebuilt in a new Gothic style. It became one of England’s most important pilgrimage sites after the murder of Thomas Becket in 1170. When you walk inside, the building feels layered, sacred, and deeply tied to English history. Here is what makes Canterbury worth including: Early English Gothic choir: The rebuilt choir helped bring Gothic ideas into England, making Canterbury important in the spread of the style. Pilgrimage legacy: Becket’s shrine drew medieval pilgrims for centuries, giving the cathedral a powerful religious and cultural role. Layered architecture: The building holds Romanesque and Gothic parts together, so visitors can see how church design changed over time. Parts of a Gothic Cathedral Cathedral terms can feel confusing at first, but you only need a few to understand what you are seeing. Once you know the main areas, the building starts to feel less like a maze and more like a planned sacred space. Use this table as a simple guide while reading, visiting, or looking at photos. Part What It Means Why It Matters Nave The main central space where people gather It gives the cathedral its long, grand interior view Transept The cross-section that cuts across the nave It often creates the church’s cross-shaped plan Choir Area used by clergy and singers It sits closer to the altar and carries ceremonial importance Apse Rounded or angled end near the altar It frames the sacred focus of the building West facade Main front entrance It often holds towers, portals, and sculptures Portals Decorated doorways They welcome visitors with carved religious stories Clerestory Upper wall with windows It brings daylight into the high interior Knowing these parts helps you slow down. Instead of only saying “This church is beautiful,” you can understand how the space leads you from entrance to altar, from shadow to light, and from street noise to stillness. How to Recognize a Gothic Cathedral You do not need to be an architecture expert to spot Gothic architecture. Step back first, then move closer slowly. Look at the outline from the street, the entrance from eye level, and the ceiling from inside. The style reveals itself through the way the building rises, opens, and pulls light into the space. Look for these signs when you visit or view photos: Sharp pointed arches: You will often see them above doors, windows, side aisles, and interior walkways. Their pointed shape gives the building a taller and more upward-looking profile than round-arched churches. High vaulted ceilings: Inside, look for ceilings that seem to stretch far above you with visible stone ribs. These ceilings often make the nave feel long, lifted, and carefully ordered. The same principle that makes a low ceiling feel oppressive is what Gothic builders reversed through ribbed vaults and vertical proportion. External buttresses: Walk around the outside if you can. Gothic cathedrals often have stone supports that step away from the walls, sometimes shaped like half-arches, holding the upper structure in place. Large stained-glass windows: Instead of small wall openings, you may see wide panels of colored glass. From inside, these windows soften the stone with shifting tones of blue, red, gold, and violet. Circular rose window: Check the main facade or the ends of the transept. A rose window usually appears as a large round design made of stone tracery and colored glass. Tall towers or spires: From a distance, Gothic churches often rise above the surrounding streets. Their towers and spires were made to be seen from across the town, not only from the doorway. Carved portals: Pause at the main entrance. Gothic doorways often have layered arches, sculpted figures, and scenes carved into the stone, turning the entrance into a visual story. Light-filled nave: Once inside, notice how the central space feels. Gothic naves often feel taller, brighter, and more open than earlier medieval churches, with light guiding your eyes toward the altar. Not every Gothic church has all of these signs. Some are modest, some have been rebuilt, and some blend styles from different centuries. But when you see height, pointed forms, colored glass, carved entrances, and a bright upward interior together, you are likely standing before a Gothic cathedral. Gothic vs. Romanesque and Gothic Revival Romanesque, Gothic, and Gothic Revival churches may look related, but each belongs to a different age. The easiest way to tell them apart is by noticing weight, light, and height. Romanesque feels grounded, Gothic feels lifted, and Gothic Revival brings the Gothic look into a later period. Style Main Look Common Features Time Period Best Way to Recognize It Romanesque Heavy, solid, fortress-like Round arches, thick walls, barrel vaults, small windows, sturdy towers Mainly 10th to 12th centuries Look for rounded forms, darker interiors, and a strong, weighty structure Gothic Tall, bright, upward-reaching Pointed arches, ribbed vaults, flying buttresses, stained glass, rose windows Mainly 12th to 16th centuries Look for height, colored light, pointed forms, and wide window openings Gothic Revival Medieval-inspired but newer Pointed arches, spires, tracery, stained glass, decorative stonework Mostly 18th to early 20th centuries Look for Gothic details in buildings from a much later historical setting This comparison helps you read a church with more confidence. A Romanesque church often feels enclosed and protective. A Gothic cathedral feels open, vertical, and full of colored light. A Gothic Revival church may look medieval, but its story is newer and inspired by the past. Tips for Visiting Gothic Cathedrals A Gothic cathedral is best experienced slowly. Before you move from one famous corner to another, give your eyes time to adjust. These buildings reveal themselves through height, shadow, glass, stone, and silence, so a slower visit often feels much richer. Keep these tips in mind when you visit: Start from the back: Stand near the entrance and look down the nave. This gives you the full sense of length, height, and direction before you focus on smaller details. Look up before moving on: The ribbed vaults are easy to miss if you only look straight ahead. Notice how the ceiling lines guide your eyes upward. Study the stained glass from inside: Colored windows are best seen with natural light behind them. Morning or late afternoon light can make the glass feel especially vivid. Walk around the outside: Flying buttresses, towers, portals, and carvings often make more sense from the exterior. The outside explains how the inside stands. Pause at the main doorway: Many Gothic entrances carry carved figures and symbolic scenes. They often prepare you for the sacred stories inside. Read a short history first: Even a few facts about the cathedral’s age, city, or patrons can make the visit feel more personal and meaningful. A quiet place to do that reading matters too; the same instinct that draws people to a cozy reading room is what makes a cathedral nave so compelling to sit in before the crowds arrive. Try not to rush your visit. Gothic churches were built for layers of attention, not quick glances. The more slowly you move, the more you notice: a carved face, a shaft of colored light, or a quiet corner that stays with you later. Frequently Asked Questions Why do cathedrals face the east? They follow “liturgical orientation.” The altar faces east toward the rising sun, symbolizing the resurrection of Christ and his promised return. Consequently, the main entrance (west facade) welcomes visitors moving from western darkness toward spiritual light. What are labyrinth floors used for? Many Gothic floors, like Chartres, feature circular stone mazes. Medieval pilgrims who could not travel to Jerusalem walked these intricate floor paths on their knees as a symbolic, meditative substitute for a holy pilgrimage. How did builders pay for cathedrals? Funding came from royal donations, wealthy merchants, church taxes, and the lucrative sale of indulgences (spiritual forgiveness). Shrines housing famous saint relics also drew massive crowds of pilgrims whose entry donations funded generations of masonry. Who actually built these churches? Traveling guilds of specialized Freemasons, stone cutters, sculptors, and master engineers did the heavy lifting. Local peasants provided basic manual labor, like hauling heavy stone blocks, often working as an act of religious devotion. Why are there clocks on the towers? Monks and townspeople needed to track structural prayer times (liturgical hours). As mechanical clocks advanced in the late Middle Ages, cathedral towers naturally housed them, turning the church into the town’s official timekeeper. Where did they get the stained glass? Artisans melted silica sand, potash, and lime at high temperatures. They added metallic oxides to the molten batch—like copper for rich red or cobalt for deep blue—to stain the glass before blowing it into sheets. What is the meaning of a crypt? A crypt is a stone basement chamber located beneath the elevated altar floor. It served as a secure burial vault for saints, bishops, and martyrs, preserving holy relics while providing a quiet space for private worship. Why do floor plans look like crosses? Gothic builders intentionally laid out foundations in a Latin cross shape (cruciform plan). The long nave forms the vertical beam, while the intersecting transept forms the horizontal arms, structurally mirroring the primary symbol of Christian faith. Wrapping Up Standing inside a Gothic cathedral is more than just admiring stone and glass; it’s about feeling history, design, and faith all around you. I hope you now understand how pointed arches, flying buttresses, ribbed vaults, and stained-glass windows work together to create height, light, and atmosphere. You also know how to recognize Gothic features, distinguish them from Romanesque or Gothic Revival, and appreciate the significance of famous cathedrals like Notre-Dame, Chartres, or Seville. This knowledge helps you see both engineering and artistry in a new way. Next time you visit a cathedral, take your time, observe details, and notice how space and light tell centuries-old stories.
Have you ever stood in front of an old American home and felt a kind of quiet order, as if everything were exactly where it should be? I noticed it the first time I walked through a preserved Federal-era neighborhood in Salem, Massachusetts. The homes weren’t grand or showy. They were composed. Every window, every roofline, every doorway sitting in perfect relationship to everything else. This guide explains the origins and design features of federal architecture, helping you easily recognize the style. What Is a Federal Style House? Before diving into details, it’s important to grasp what distinguishes Federal architecture as a style, not just a period. A Federal-style house is a building from the first architectural movement to arise in the newly independent U.S., and was popular from 1780 to 1830. Emerging from Georgian architecture, it incorporated Greek and Roman influences, resulting in a lighter, more elegant look with less ornamentation and precise proportions. Characterized by symmetrical facades, centered entrances, low-pitched roofs, fanlights, sidelights, and restrained details, it draws heavily on the work of Scottish architect Robert Adam, earning the nickname ‘Adam Style.’ Unlike Georgian, it’s a refined evolution: thinner moldings, delicate motifs, and a lighter touch. Historical Context and Evolution of Federal Architecture Federal architecture didn’t appear out of nowhere. It was a direct response to a political moment. After the Revolution, a young country needed buildings that projected confidence, stability, and civic identity, without borrowing too heavily from British traditions. Architects like Charles Bulfinch in Boston and Samuel McIntire in Salem shaped what that looked like in practice. Their work set the template that spread across New England, the Mid-Atlantic, and beyond. 1. Colonial Architecture (1600s–1770s): Practical above all else. Homes were built to function, using whatever local materials were available. Decorative detail was minimal.2. Georgian Architecture (1725–1800): More formal and symmetrical, with classical cornices and heavier ornamentation. A step toward grandeur, though still rooted in British influence.3. Federal Architecture (1780–1830): A lighter, more refined version of Georgian. Neoclassical motifs replaced heavy trim. Fanlights, elliptical details, and elegant entryways became the signature.4. Greek Revival Architecture (1830–1860): Bolder and more monumental. Columns, temple facades, and a heavier classical hand replaced Federal restraint. Federal sits in the middle of that arc, between the practicality of Colonial design and the drama of Greek Revival. That in-between quality is exactly what gives it its character. Characteristics of Federal Architecture A client asked why a Federal home “feels different” from other historic styles before understanding what to look for. I said: because every element is in conversation with every other; nothing is accidental. Here’s what to look for: 1. Symmetrical Facades The facade is where Federal design announces itself most clearly. Windows and doors are arranged in a balanced, centered layout, typically a five-bay configuration with the entrance at the middle. Unlike Georgian homes where symmetry feels imposed, Federal symmetry feels inherent. The proportions are worked out so precisely that the facade reads as a single composed unit. 2. Building Form and Massing Federal homes are usually two or three stories, square or rectangular in plan, with clean, uncluttered lines. The massing is deliberate, with no unnecessary projections and no decorative excess. The form itself carries the visual weight. 3. Entryway Design The front door is the focal point. Above it, a fanlight, semi-circular or elliptical, lets light into the entry hall. Narrow sidelights flank the door on either side, reinforcing the vertical axis and the home’s overall symmetry. Door surrounds are classical but never heavy. The detailing is precise without being fussy. This is one of the easiest ways to distinguish a Federal home from a Georgian one: the Georgian entry tends to feel more muscular; the Federal entry feels more refined. 4. Roof Styles Low-pitched side-gabled or hipped roofs are standard. Overhangs are minimal. The roofline remains quiet, keeping the eye on the facade. Chimneys, when present, are placed symmetrically. If you’re already familiar with hip roof construction, you’ll recognize the form immediately on many Federal homes; it was a practical and visually clean choice for the period. 5. Window Design Double-hung sash windows are most common, with thin muntins that create a lighter grid pattern than earlier multi-pane Georgian windows. More elaborate Federal homes may include Palladian windows or arched elliptical openings, particularly on upper floors or stair landings. Window placement is never arbitrary. Each opening is sized and spaced to reinforce the overall compositional order. 6. Decorative Motifs Federal ornament is neoclassical but restrained. Common motifs include swags, garlands, urns, medallions, sunbursts, eagles, and elliptical forms, references to ancient Greek and Roman design filtered through an American sensibility. The key word is restraint. These elements appear at doorways, cornices, and interior plasterwork, not everywhere at once. Federal Style House Features The residential version of Federal architecture translates all of these principles into livable spaces. What’s worth noting is how consistently the same values, order, proportion, restraint, carry from the street facade all the way through to the interior. Exterior: Materials and Facade Building Materials: Brick dominated in cities like Boston, Philadelphia, and Baltimore. Painted clapboard was more common across New England and rural areas. Stone appeared in regions where it was locally abundant. Facade Composition: Balanced proportions, smooth wall surfaces, centered entrance, and evenly spaced windows, all working together as a unified whole. Entryway Details: Fanlight above the door, sidelights on either side, and a classical door surround that draws attention without overpowering the facade. Roof and Chimneys: Low-pitched hipped or side-gabled roof with minimal overhang, chimneys placed to mirror each other. Windows and Trim: Double-hung sash windows with thin muntins; occasional Palladian or elliptical windows on grander homes; neoclassical motifs, swags, urns, eagles, used selectively on cornices and surrounds. Interior Features of a Federal Style House Step inside a Federal home and the exterior logic continues. Rooms are placed to either side of a central hallway, creating a clear axis through the house. Everything is planned around symmetry and formal sequence. Floor Plans: Central hallway with rooms arranged symmetrically on both sides, typically two rooms deep. The layout reflects both social convention and classical planning principles. Architectural Details: Refined staircases with delicate balusters, classical mantels framing fireplaces, plaster cornices and ceiling medallions, and door surrounds with pilasters or entablatures. Furniture and Decor: Federal interiors pair well with neoclassical American furniture, think Hepplewhite and Sheraton styles, that echo the same emphasis on lightness, proportion, and restrained ornament. Tip: To identify a Federal style house, look for the combination of a symmetrical five-bay facade, centered fanlight entry with sidelights, low-pitched roof, and thin-muntin sash windows. Neoclassical motifs, urns, swags, eagles, medallions, should appear selectively, not everywhere. The overall impression should be elegant and ordered, not ornate. Materials Used in Federal Style Houses Material choices in Federal homes were driven by what was locally available, what the climate demanded, and what the homeowner could afford. Despite those variables, the results shared a consistent character: durable, well-crafted, and visually clean. Brick: The material of choice in urban centers. Dense, formal, and long-lasting, well suited to the civic ambitions of Federal-period builders. Many surviving Federal townhouses in cities like Salem and Alexandria are brick. Clapboard Siding: Standard across New England. Wood-framed and painted white or light colors, clapboard Federal homes have a crisp, orderly look that holds up well in the historic streetscapes of towns like Newburyport and Portsmouth. Stone: Used regionally where quarried stone was accessible. Stone Federal homes are less common but retain all the characteristic proportions and detailing of the style. Wood Trim and Millwork: High-quality hardwood for doors, window casings, staircases, and interior moldings. The craftsmanship in Federal millwork is often extraordinary, thin, precise profiles that required skilled hands to execute. Plaster: Interior walls and ceilings were finished in plaster, which allowed for decorative work: ceiling medallions, friezes, and cornices that gave Federal interiors their characteristic refinement. Federal Style vs. Other Architectural Styles Federal architecture sits at a pivot point in American design history, after the Georgian period and before Greek Revival took over. That position shapes how it compares to each neighboring style. Feature Federal Style Georgian Colonial Colonial Revival Greek Revival Time Period 1780–1830 1725–1800 1600s–1770s 1880–1950s 1830–1860 Appearance Light, refined Formal, heavy Simple, functional Mixed traditional Bold, monumental Symmetry Strong Strong Moderate Strong Strong Ornamentation Delicate Heavy Minimal Moderate Bold Entry Design Fanlights, sidelights Simple classical Plain Revived historic styles Large columns, grand Roof Style Low-pitched Medium-pitched Steep/simple Varied Low-pitched Windows Sash, elliptical Multi-pane Small Larger, mixed Large, rectangular Columns Minimal Occasional Rare Sometimes used Prominent Motifs Swags, urns, eagles Classical trim Limited Mixed styles Greek temple forms The Federal style house occupies a specific lane: more polished than Georgian, less theatrical than Greek Revival. It’s the style that figured out how to be both civic and livable, which is probably why so many Federal homes have survived in such good condition. Common Mistakes to Avoid When Identifying a Federal Style House Even experienced observers misread Federal homes. Here’s where identification tends to go wrong: Confusing Federal with Georgian: Both are symmetrical, but Georgian homes carry heavier cornices, thicker moldings, and denser ornament. Federal homes feel lighter. If the detailing looks muscular, it’s probably Georgian. Relying on one feature: A fanlight alone doesn’t confirm Federal. Look for the full combination, fanlight, sidelights, low-pitched roof, five-bay facade, thin-muntin windows, before drawing a conclusion. Missing regional variation: A Federal brick townhouse in Baltimore looks quite different from a clapboard Federal home in coastal Maine. Same principles, very different materials and scale. Confusing Colonial Revival with original Federal: From the 1880s onward, Colonial Revival builders borrowed Federal details liberally. A home with Federal-looking features built in 1910 is almost certainly Colonial Revival, not Federal. Discounting altered homes: Replacement windows, added porches, and modernized facades are common on historic homes. Don’t dismiss a property based on surface changes, look at the underlying structure and proportions. Expecting grandeur: Many Federal homes were modest. Scale doesn’t determine the style, proportion and detail do. Where Federal Style Houses Are Best Preserved Federal residential streetscapes survive in greatest concentration along the northeastern seaboard, with a few notable clusters further south. These cities are worth knowing whether you’re visiting, researching, or evaluating a period property. City / Neighborhood State Notable Example Why It Stands Out Salem & Newburyport Massachusetts Gardner-Pingree House (1804) Samuel McIntire’s finest residential work, intact Federal streetscapes Beacon Hill Boston, MA Harrison Gray Otis House (1796) Dense concentration of Federal brick rowhouses; open to the public Old Town Alexandria, VA Lee-Fendall House (1785) Strong Mid-Atlantic Federal vernacular; primarily brick construction South End & Strawbery Banke Portsmouth, NH Moffatt-Ladd House (1763) Range of Federal scales from modest clapboard to formal commissions Historic District Charleston, SC Nathaniel Russell House (1808) Finest Southern Federal example: elliptical freestanding staircase Frequently Asked Questions How do I know if a historic home is actually Federal period or a later revival? Check the construction date first. Original Federal homes were built between roughly 1780 and 1830. A home built after 1880 with Federal-looking details is almost certainly Colonial Revival. Local historic registries and deed records can confirm the actual build date. Can a Federal-style house have an addition or renovation and still be considered Federal? Yes. Preservation standards focus on retaining the character-defining features, facade composition, entryway details, window placement, and interior trim. A well-executed addition that doesn’t compromise those elements doesn’t disqualify the home from its Federal classification. What exterior paint colors are typical for Federal-style homes? Off-whites, soft yellows, pale grays, and muted earth tones were most common. Brick homes were often left unpainted, with white trim. Bold or saturated colors are not consistent with the period’s restrained aesthetic. Is the Adam Style the same as Federal architecture? Largely yes. The Adam Style refers to the influence of Scottish architect Robert Adam, whose neoclassical vocabulary, elliptical motifs, delicate ornament, and refined plasterwork were the primary inspiration for American Federal architecture. In the U.S., “Federal” is the standard term, but both describe the same design tradition. Conclusion A federal-style house is what happens when a young country decides that how it builds reflects what it’s saying about itself. The symmetry wasn’t just aesthetic; it was a statement about order, reason, and civic ambition. Federal architecture managed something genuinely difficult: it created a distinctly American design language by refining, rather than copying, what came before it. Lighter than Georgian, more human-scaled than Greek Revival, it remains one of the most livable and visually coherent styles in the American residential canon. Whether you’re touring a historic district, evaluating a period property, or simply trying to make sense of what you’re looking at on a quiet New England street, knowing the federal house style gives you a new way to read the built environment around you.
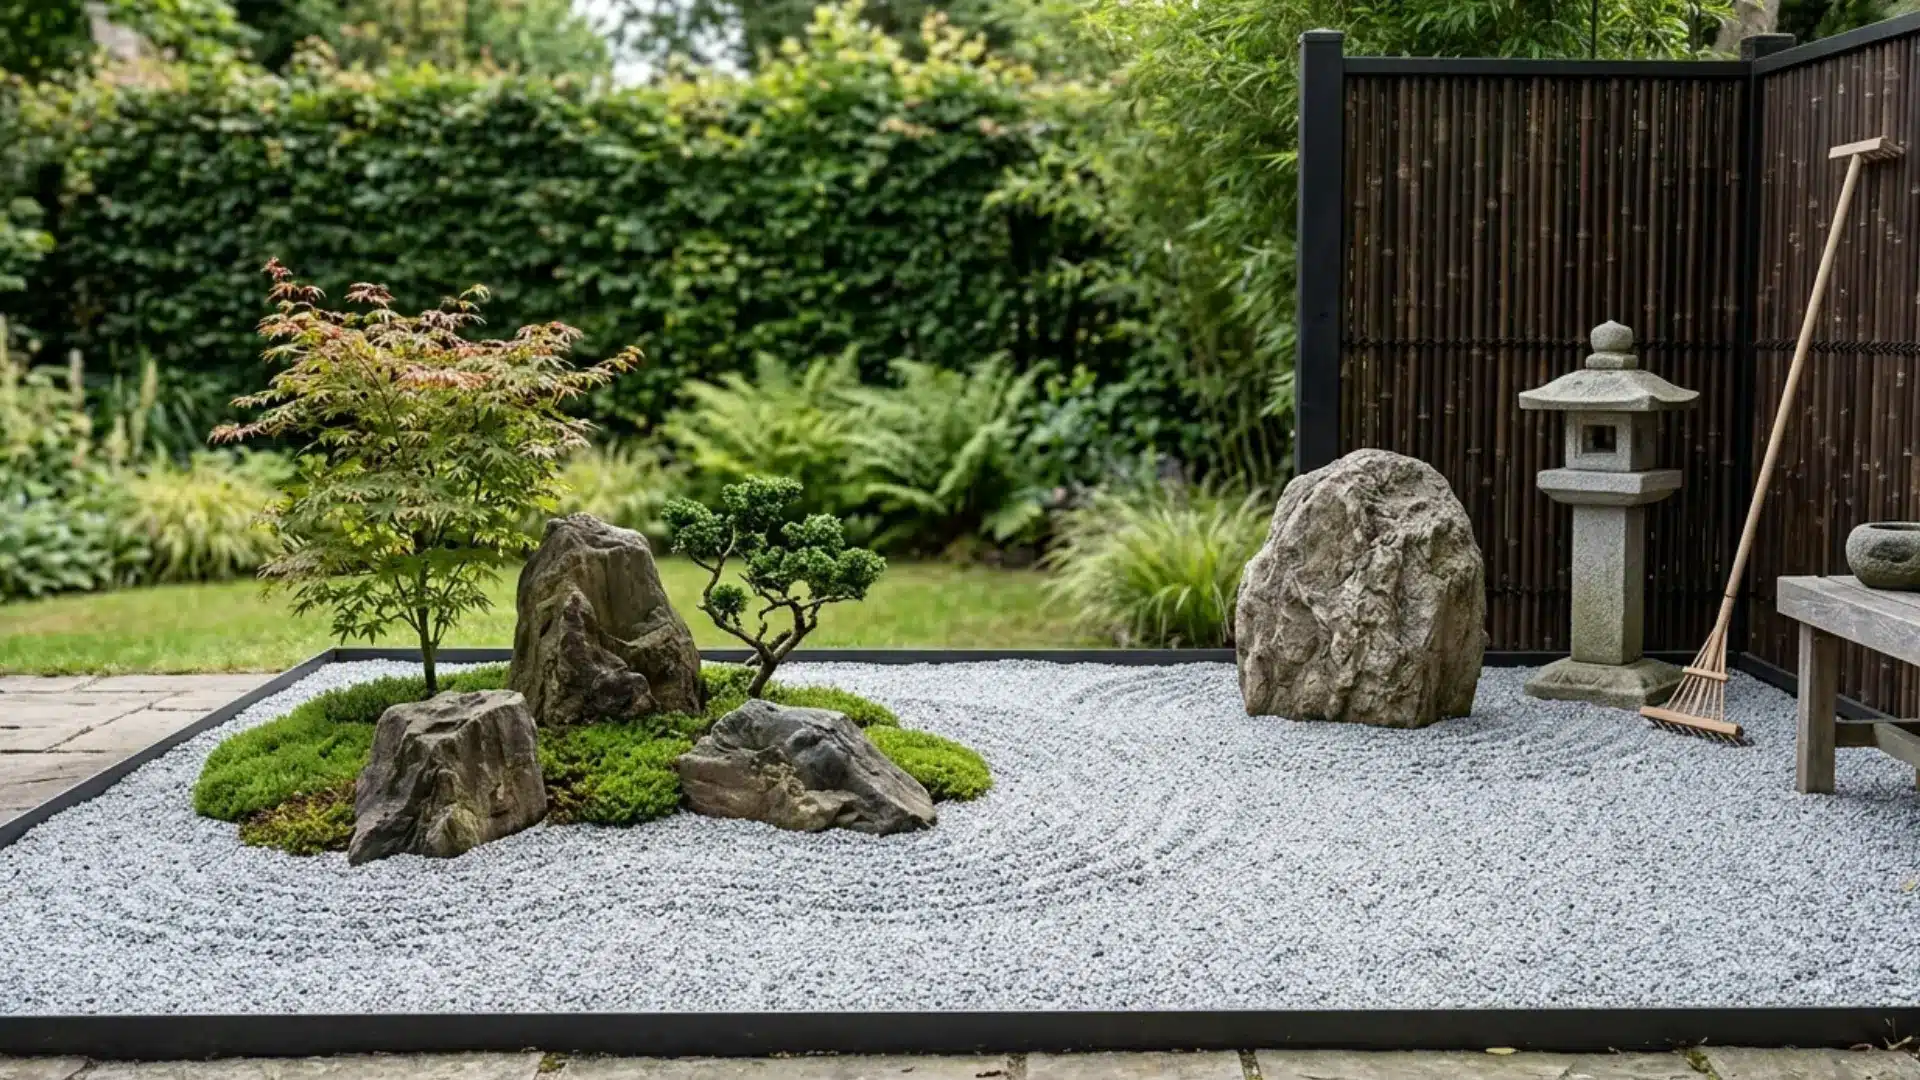
Gravel is cheap. Rocks look great on day one. But I’ve seen more “Zen corners” turn into weed patches and sunken gravel beds after one wet winter than I can count. The materials and the ground preparation are the whole game here. Get those right and a Zen garden is about as low-maintenance as outdoor landscaping gets. Get them wrong, and you’re re-raking mud and pulling grass through landscape fabric every spring. This guide covers what a Zen garden actually is, which materials hold up in real outdoor conditions, how to plan and build one from scratch, and what to do when the space is small or the budget is tight. Cost Note: Figures in this article are estimates based on national averages. Actual costs vary significantly by region, contractor, materials, and project scope. Always get at least three quotes before committing to any project above $1,000. Zen Garden Basics: What You’re Actually Building A Zen garden, known historically as karesansui, is a dry landscape built from rock, gravel, and sand, with minimal or no planting. The design came out of medieval Japanese Buddhist monasteries, where monks used raked gravel to represent water and large stones to represent mountains or islands. The philosophy is simple: open space and natural materials create calm. You’re not filling the garden, you’re editing it down until only what matters remains. Raked patterns in gravel or sand carry the same idea. They’re impermanent, easy to redo after wind or rain, and the act of raking them is itself part of the practice. A Zen garden doesn’t require any of this if you’re not interested in the meditative aspect. It can just be a clean, low-maintenance outdoor space with good bones and no clutter. Zen Garden Design Principles: What to Know Before You Start A Zen garden works best when restraint is built into the design from the beginning. The mistake most people make is treating the space like any other garden bed and filling it with too much. Here’s what the design logic actually looks like in practice: Keep the layout open. Empty space is a feature, not something to fix. Use natural materials: rock, sand, gravel, wood, bamboo, moss. No synthetic edging or colored mulch. Avoid symmetry. Odd-number groupings of rocks (3, 5, 7) look more natural than even arrangements. Stick to a tight color palette: gray stone, pale gravel, green moss, warm wood tones. Let rocks anchor the design. Plants are secondary. Use bamboo screens or hedges to separate the garden from surrounding noise and activity. Each element carries meaning if you want it to. Rocks represent mountains or islands. Raked gravel represents water. Moss adds age and softness. The same instinct toward balance and harmony shows up in other Japanese-influenced design traditions, but in a Zen garden, the tools are rock and gravel rather than furniture arrangement. Zen Garden Material Comparison: What Holds Up and What Doesn’t Before anything goes in the ground, the material selection determines how much work this garden will take two years from now. Here’s how the core options compare on the things that actually matter outdoors. Material Cost (approx.) Durability Maintenance Best Use Crushed granite $35–$55 per ton Excellent Low. Compacts well, holds patterns Main raking surface, paths Pea gravel $25–$45 per ton Good Moderate. Scatters easily, needs edging Accent fill, borders Decomposed granite $40–$65 per ton Good Low once settled. Can compact hard Paths, low-traffic areas Natural flagstone $2–$5 per sq ft Excellent Low. Heavy risk in freeze-thaw climates Stepping stones, edging Timber edging $1.50–$3 per linear ft Fair (untreated), Good (treated) Replace every 5–8 years, untreated Garden borders Metal edging (corten or galvanized) $3–$6 per linear ft Excellent Very low. Stays put for 15+ years Clean borders, long runs Bamboo screening $4–$8 per linear ft Fair Needs UV treatment; replace every 4–6 years Privacy screens, borders Crushed granite is the most reliable raking surface for a backyard Zen garden in most US climates. It compacts slightly, which keeps it from scattering like pea gravel, and it holds raked lines better than coarser materials. Pea gravel looks cleaner initially but spreads onto adjacent surfaces with foot traffic and any moderate wind. If the garden edges a lawn or paved area, use proper metal or stone edging, not plastic, it fails within two seasons in climates with freeze-thaw cycles. What Fails Two Winters Later Plastic edging buckles and pops out of the ground. Cheap timber edging rots from the bottom up in high-moisture areas and usually needs replacing within five years, often sooner near sprinkler lines. Untreated bamboo screening fades and splits when it is exposed to direct sunlight all summer. Landscape fabric works well at blocking weeds initially, but if it wasn’t installed flat and pinned properly, it creeps, bunches, and eventually shows through the gravel surface. Any of these problems are fixable, but they require redoing work you’ve already paid for once. The other common failure point is drainage. If the cleared area wasn’t leveled and tamped before gravel was laid, the surface develops low spots after the first heavy rain. Those spots collect water, the gravel sinks, and the flat, raking surface turns uneven. On clay-heavy soils, it’s worth adding an inch of coarse sand under the landscape fabric before the gravel layer to improve drainage. Step-by-Step: How to Build a Zen Garden at Home The following steps apply to a typical backyard corner, side-yard, or patio-edge Zen garden in the 50–200 square foot range. Larger spaces follow the same sequence but require more material and more precise ground preparation. Project Size 50–200 sq ft (typical backyard corner) Difficulty 2 out of 5 — beginner-accessible with basic tools Time 1–2 weekends depending on ground prep complexity Estimated Cost $200–$800 for a DIY build (materials only) Tools Needed Rake, garden tamper, utility knife, wheelbarrow, level, shovel Step 1: Choose the Right Spot Find a location that’s naturally separated from foot traffic and daily activity. A patio edge, side yard, or backyard corner all work. Place it where you can see it from a window or door; that sight line matters more than most people expect, since the garden gets used more as a visual anchor than as a space you actually sit in every day. Check the sun exposure before committing: moss and ferns need partial shade, while gravel-only gardens handle full sun without issue. Step 2: Clear and Level the Area Pull every weed, remove all grass and roots, and dig out any rocks that would create high spots under the fabric. Use a rake to break up the soil surface and then a tamper to firm the ground. A flat, compacted base is what keeps the gravel and rocks from shifting over time. Don’t skip the tamping step; it’s the most commonly skipped and the reason most DIY Zen gardens look uneven within a year. Step 3: Sketch the Layout Before You Touch a Rock Draw the design on paper first. Mark where the feature rocks go, where stepping stones will land, where any plants are placed, and which areas will be open, raking surface. The best Zen garden layouts are asymmetric and leave roughly 60 to 70 percent of the surface as open gravel. Avoid making every element the same size or spacing them at equal intervals; that reads as artificial, not natural. Step 4: Install the Edging Set your edging around the full perimeter before anything else goes in. Metal edging driven 3 to 4 inches into the ground is the most durable option and stays flush with the surface. Pressure-treated timber works if it’s staked every 3 feet, though softwood species rot faster than hardwood at ground contact. The edging keeps gravel contained and gives the garden a clean boundary against the adjacent lawn or paving. Don’t skip this on small Zen garden builds — loose edges make even good layouts look unfinished. Step 5: Place Feature Rocks First The largest rocks go in before any fabric or gravel. Partially bury them, about one-third of the rock below ground level, so they look settled rather than placed. Group in odd numbers, with the largest rock offset from the center. Once the rocks are positioned to your liking, walk away and come back the next day. Most people move them at least once after they’ve had time to look at the layout fresh. Step 6: Lay the Landscape Fabric Pin the fabric flat across the cleared area, cutting openings around any rocks or plants already set. Use landscape staples every 12 to 18 inches along the edges and wherever the fabric meets a rock. Overlapping seams by at least 6 inches prevents gaps where weeds push through. The fabric is the maintenance layer; install it sloppily, and you’ll be pulling weeds through your gravel for years. Step 7: Spread Gravel 2 to 3 Inches Deep Crushed granite at 2 to 3 inches is the right depth for a raking surface. Shallower than that, and the fabric shows through when you rake. Deeper than 3 inches, and the material cost jumps without much benefit. Spread and level with a rake, then check for low spots with a 4-foot level before finalizing. For a 100-square-foot garden, you’ll need roughly 1 to 1.5 tons of gravel. Step 8: Add Plants Sparingly Pick two or three plants maximum. Japanese maple, dwarf pine, ornamental grass, moss, or a single bamboo clump all work well depending on your climate and light conditions. Cut openings in the landscape fabric, add amended soil as needed for each plant’s requirements, and give them enough space from the edging and rock clusters that they don’t crowd the open surface over time. If you want occasional color without committing to flowering plants in the gravel, seasonal cut flowers in a simple stone vessel near the bench are easier to manage than anything planted in the ground. The garden should still read as mostly gravel and stone after planting. Step 9: Finish with One or Two Functional Details A stone lantern, a stepping stone path, or a low bench gives the garden a usable anchor point. A small water feature built from a repurposed barrel is worth considering if budget allows; the sound carries a lot of weight in a tight space. Keep the total number of decorative elements under three. The restraint is the point. Zen Garden Cost Breakdown Line Item Low End High End What Drives Variation Gravel / crushed granite (100 sq ft) $50 $120 Local stone availability, delivery charges Landscape fabric + staples $25 $60 Fabric grade (woven vs non-woven) Edging (metal, 40 linear ft) $80 $200 Material (plastic vs galvanized vs corten) Feature rocks (2–3 boulders) $30 $200 Rock type, size, local sourcing vs delivery Stepping stones $20 $100 Flagstone vs cast concrete Plants (2–3 specimens) $30 $150 Dwarf specimens vs mature stock Stone lantern or water feature $40 $300 Decorative stone vs cast resin; pump cost for water Total (DIY, materials only) $275 $1,130 Site prep and rock selection push most builds toward the higher end Most DIY Zen garden builds land in the $300 to $600 range for a 100-square-foot space when sourcing materials locally. The biggest cost variable is feature rocks. Boulders that look like they’ve been in the ground for decades can run $150 or more each at a landscape supplier, while sourced field stone from a local farm or stone yard can cost almost nothing if you’re willing to haul it yourself. Zen Garden Ideas for Different Spaces The design logic stays the same regardless of size, but the approach shifts based on what you’re working with. 1. Small Backyard Zen Garden Ideas for Tight Spaces In a tight yard, you don’t need sprawling acreage to establish a sense of calm. Implementing focused small zen garden ideas can transform an underutilized corner or a narrow side yard into a striking visual escape. Use a bamboo screen or an existing fence as the rear boundary, which does double duty for privacy. One large boulder, a compact gravel surface, and a single Japanese maple or dwarf pine are enough to anchor the space. Resist the urge to add more just because there’s room. 2. Zen Patio Ideas for an Existing Outdoor Living Area A patio edge is one of the easiest places to build a Zen-style border. Gravel between the patio surface and a rear garden bed softens the hard line between paving and planting. Add a potted bamboo clump near a corner wall for vertical structure. River stones around planters add texture without needing any additional ground prep. The whole thing can be done in a weekend without touching the existing patio. 3. Budget-Friendly Zen Garden Ideas If the budget is under $150, skip the water feature and the stone lantern entirely. Local field stone sourced yourself, bagged crushed granite from a home improvement store, and a single moss starter pack are all you need for a clean, functional small Zen garden. A tabletop version using a shallow tray, fine sand, and three small river stones costs under $30 and functions the same way at desk scale. How to Maintain a Zen Garden The maintenance list for a well-built Zen garden is genuinely short. These are the only regular tasks that matter: Rake the gravel surface after heavy rain or wind to restore the pattern and level any shifted material. Pull weeds while they’re small. Any weed that gets through the fabric is easiest to remove in the first two weeks before the root system establishes. Top up the gravel layer if it drops below 1.5 inches in any area. Thin spots show the fabric and look unfinished. Prune plants once a year to keep their shape simple. Japanese maples and dwarf pines tolerate light shaping well; don’t hard-prune either in summer. Inspect the edging each spring for heave or buckling. Metal edging rarely needs attention; timber edging should be checked for rot at the base every two to three years. Think of the raking as the ongoing maintenance, not a chore. A Zen garden maintained in 10-minute sessions every couple of weeks stays in better shape than one ignored for a month and then tackled all at once. Common Zen Garden Mistakes to Avoid Too many plants: Every plant added is a maintenance commitment. Three plants maximum for most backyard Zen gardens. Skipping the fabric: Weeds through gravel are harder to remove than weeds in soil. The fabric is worth the 30 minutes it takes to install it properly. Wrong gravel depth: Less than 1.5 inches and the fabric shows through when you rake. More than 4 inches and the material cost climbs without improving function. Plastic edging: It buckles in freeze-thaw conditions and degrades in UV. Metal or natural stone edging is the only long-term solution. Choosing plants for the wrong climate: Moss needs consistent moisture and partial shade. Bamboo spreads aggressively without a root barrier. Match the plant to your actual conditions, not the design inspiration photo. Overdecorating: A stone lantern and a bench. That’s the ceiling. Past two elements, the garden stops reading as calm and starts reading as cluttered. Frequently Asked Questions What is the best gravel for a Zen garden? Crushed granite is the most durable and easiest to rake. It compacts slightly and holds pattern lines better than pea gravel, which scatters with any foot traffic. Use a particle size between 3/8 inch and 5/8 inch for a surface that rakes cleanly and stays stable. How do I keep weeds out of a Zen garden? Install woven landscape fabric before laying gravel, pin it every 12 inches along all edges, and overlap seams by at least 6 inches. This eliminates most weed pressure. Pull any breakthrough weeds while small, before root systems establish through the fabric layer. How deep should gravel be in a Zen garden? Two to three inches is the functional range. Shallower than 1.5 inches and the fabric shows through when raking. Deeper than 4 inches wastes material without improving drainage or appearance. What plants work best in a backyard Zen garden? Japanese maple, dwarf pine, moss, ornamental grass, and bamboo (in a root barrier) are the most reliable choices. Pick based on your climate and light conditions. Moss needs partial shade and consistent moisture. Everything else on this list handles sun exposure reasonably well. How much does a Zen garden cost to build? A DIY build for a 100-square-foot space typically runs $275 to $800 in materials, depending on rock selection and edging choice. The biggest cost variable is feature boulders. Locally sourced field stone keeps costs at the low end. Can you build a Zen garden on a patio or concrete surface? Yes. On a concrete surface, use contained gravel beds with solid edging rather than in-ground installation. Feature rocks sit directly on the surface. Drainage becomes less of a concern, but containment matters more to prevent gravel migration onto the surrounding area. Do Zen gardens need water features? No. Traditional karesansui gardens have no water at all. The gravel surface represents water symbolically. A small recirculating fountain can add sound to the space if that matters to you, but it adds maintenance and is not a structural requirement. Final Verdict: Is a Backyard Zen Garden Worth Building? The best zen garden ideas do not have to start with a full backyard makeover. You can begin with one quiet corner, a patio edge, or a small side-yard space. I like this approach because it feels simple and doable, even if you are new to garden design. Focus on simple materials first. Rocks, gravel, sand, moss, and a few plants can create a calm look without much fuss. Keep the layout open, avoid clutter, and let each detail have space to stand out. Regular care matters too. Rake the gravel, remove leaves, and lightly trim plants. These small habits keep your garden peaceful. Pick one idea, gather your materials, and create a peaceful space you’ll enjoy every day.
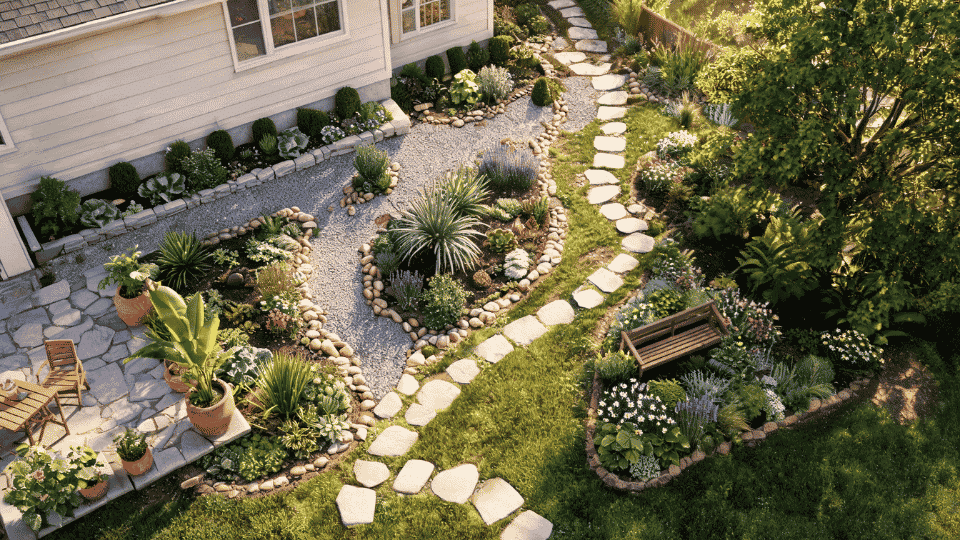
Garden landscaping looks simple in photos, but climate changes what works the moment you break ground. A dry Arizona yard, a soggy Pacific Northwest border, a humid Gulf Coast patio, a frost-heaved Midwest bed, and a mild coastal California edge all need different answers, different materials, different drainage strategies, and different plants. The ideas that hold up in one region fall apart in another, and that gap is almost never about budget. It is about reading the site before picking the style. My approach has always been site-first. I want to know where water collects, where frost sits the longest, what the ground feels like after rain, and how much maintenance the space can realistically absorb. That tells me which garden landscaping ideas belong there and which ones will need rescuing by June. The projects below are sorted by climate. Each one solves the most common failure mode in that region. Start with your climate, pick one project, and build from there. Cost Note: Figures in this article are estimates based on national averages. Actual costs vary significantly by region, contractor, materials, and project scope. Always get at least three quotes before committing to any project above $1,000. Start with the Site Before Choosing the Style Before settling on a garden style, spend time watching the space. Notice where the sun hits in the morning, where shade sits in the afternoon, and where water collects after rain. Check whether the yard slopes, whether wind dries out one corner, and whether the soil feels sandy, sticky, or compacted. Look at where the outdoor tap sits and how far the hose can reach. Also, be honest about how much maintenance you can manage after planting day. A style shapes the look, but the site decides what survives. One finished bed, path, or planting pocket almost always looks better than a large makeover that never gets completed. If you are also planning a seating structure to anchor the space, deck building costs are worth understanding before you commit to a layout. Why Climate Should Shape Your Garden Landscaping Plan Climate affects how a garden works, not just which plants belong in it. Climate Main design priority What usually goes wrong Dry Water control and shade Plants dry out, or the soil stays bare Rainy Drainage and raised roots Beds turn muddy, or plants rot Hot and humid Airflow and spacing Crowded plants get diseased Cold Winter structure The garden looks empty after summer Mild Editing and rhythm Too many plant choices create clutter I always think of climate as the first design rule. The same idea can succeed in one place and fail in another. A gravel bed in Arizona solves a water problem, while that same bed in a rainy yard may need a very different base and drainage plan. Garden Landscaping in Dry or Semi-Arid Regions Best for: Arizona, New Mexico, Nevada, Utah, Colorado, and dry inland California. Dry gardens need water management before anything else. Structure, shade, and smart plant zoning come first. Once those are in place, the garden starts to look finished. Plants and Aesthetic Direction for Dry Regions Plants to consider Aesthetic direction Lavender Silver foliage, soft scent, and a relaxed Mediterranean feel Russian sage Airy blue-purple color with a low-water, meadow-like look Agave Sculptural form that gives the bed a strong visual structure Desert marigold Bright seasonal color without heavy watering or constant care Apache plume Soft seed heads that add movement and desert texture Blue grama grass Fine texture that works well with gravel and stone Keep the palette edited. Silver, blue-grey, terracotta, gravel, and stone usually look stronger than too many colors fighting for attention. 1. Create a Hydrozoned Gravel Garden Bed A hydrozoned gravel bed works well in a sunny, exposed part of the yard where bare soil dries out fast. Choose one bed shape first. Use a curved shape for a softer desert look, or a straight edge for a modern feel. Group plants by water need, with thirstier plants closer to the drip line and tougher plants near the outer edge. Use cardboard under the gravel to reduce weeds, but cut open planting pockets so roots can settle into the soil. Keep gravel slightly away from plant crowns so moisture does not sit against the stems. Personalize it with: A Santa Fe-style pot A stone from an old garden project A color pulled from your house trim One sculptural plant from a past trip or yard 2. Add a Dry Creek Bed for Erosion Control and Shape A dry creek bed works best where water briefly rushes through the yard after heavy rain. It gives runoff a clear path, protects bare soil, and adds a natural line through the garden. Use larger stones at the edges and smaller river rock through the center. Best for: Slopes, side yards, and runoff lines after heavy rain. Main benefit: Controls erosion while adding movement and structure to the garden. Style fit: Works with desert, rustic, native, and Colorado-inspired gardens. Budget tip: Spend on edge stones because they hold the channel in place. 3. Build a Shade Island Around One Anchor Plant or Structure A shade island gives an exposed yard a cooler resting point without adding lawn. Start with one strong anchor, such as a drought-suited tree, large shrub, or pergola. Then surround it with gravel, decomposed granite, or low-water plants to make the area feel finished. Best for: Open yards that feel hot, flat, and exposed. Main benefit: Adds shade without expanding lawn or water demand. Style fit: Suits modern, native, and relaxed outdoor living spaces. Budget tip: Buy the anchor first, then fill around it simply. 4. Use Decomposed Granite Paths Between Planting Pockets Decomposed granite works well when a dry garden needs clear walking routes. It feels softer than concrete, suits informal layouts, and divides planting pockets without crowding the yard. Strong edging matters here, without it, the material drifts into beds within a season. If you want raised planting structure alongside the paths, building a simple planter box keeps the design looking deliberate rather than scattered. Best for: Side yards, front paths, and separated planting pockets. Main benefit: Provides access without sealing the ground like concrete does. Style fit: Works with desert, Mediterranean, rustic, and modern gardens. Budget tip: Invest in edging before upgrading the path material. Rainy or Damp Regions Best for: Pacific Northwest, wet coastal Northeast, and damp parts of the upper Midwest. Rainy gardens need water control before plant selection. The strongest ideas lift roots, slow runoff, and keep the ground usable through wet seasons. Plants and Aesthetic Direction for Rainy Regions Plants to consider Aesthetic direction Astilbe Soft flower plumes that brighten damp, shaded planting beds Japanese iris Elegant blooms that suit wet soil and cool palettes Ligularia Bold leaves that add drama to damp garden corners Ferns Layered green texture for woodland and shaded areas Sedges Grass-like movement that handles damp soil better than turf Creeping Jenny Low golden groundcover for softening wet bed edges Lean into layered greens, mossy tones, white flowers, pale pinks, stone, and timber. The garden can feel lush, but it still needs clear edges. 5. Build a Rain Garden in a Low Spot A rain garden turns a soggy patch into a planted bowl that catches runoff, slows it down, and helps it soak into the soil. Place it at least 10 feet from the house so water does not move toward the foundation. Shape the area as an oval, crescent, or kidney form so it looks intentional. The center should sit a few inches lower than the surrounding soil. Put moisture-loving plants in the lowest part and more flexible plants around the edge. Add stones where water enters to stop erosion. Personalize it with: A woodland-style plant palette A cottage garden colour mix Ferns inspired by a rainy walk or holiday A small stone feature from a previous garden job 6. Create Raised Planting Islands in Persistently Soggy Beds Raised planting islands help when the ground stays wet for too long after rain. Instead of forcing plants into saturated soil, build low mounds that lift the roots above the wettest layer. The garden gains shape, height, and better growing conditions without a full drainage overhaul. Best for: Heavy clay, wet borders, and flat, low-lying beds. Main benefit: Lifts plant roots above waterlogged soil and rot. Style fit: Suits cottage, woodland, and soft naturalistic gardens. Budget tip: Improve the soil on the mound before buying extra plants. 7. Add a Raised Timber Path Through Muddy Areas A raised timber path turns a wet, messy walking route into a useful garden feature. It keeps shoes cleaner, reduces soil compaction, and protects nearby planting edges. In damp gardens, timber often feels more natural than pavers and sits better over soft ground. Best for: Muddy side yards, woodland paths, and shaded routes. Main benefit: Keeps feet clean while reducing soil compaction damage. Style fit: Works with woodland, coastal, and natural garden styles. Budget tip: Choose thick timber over thin pavers in wet soil. 8. Turn a Damp Shaded Corner Into a Moss and Fern Feature A damp, shaded corner does not need to become a problem area. Treat it as a green texture feature instead. Ferns, mossy stones, sedges, and shade-tolerant groundcovers can make the space feel calm, intentional, and easier to maintain than a struggling flower bed. Best for: North-facing corners where flowering plants keep failing. Main benefit: Uses natural dampness instead of fighting the site. Style fit: Suits woodland, Japanese-inspired, and quiet green gardens. Budget tip: Use texture and stone instead of seasonal replanting. Hot and Humid Regions Best for: Florida, the Gulf Coast, the coastal Southeast, and humid parts of Texas. Hot, humid gardens grow fast. Without airflow and spacing, that growth can create disease and extra maintenance. Plants and Aesthetic Direction for Hot and Humid Regions Plants to consider Aesthetic direction Crinum lily Big leaves and flowers for a bold tropical feel Firebush Warm color that attracts pollinators and handles heat well Muhly grass Soft movement that balances heavy tropical foliage nearby Caladium Bright foliage for shade, pots, and humid corners Ginger lily Fragrant flowers with a lush, layered garden look Dwarf bougainvillea Strong color for containers, walls, and sunny edges Aim for tropical abundance with control. Use bold foliage, repeated shapes, and clean edges so the garden feels lush rather than chaotic. 9. Build an Airflow-Friendly Tropical Border An airflow-friendly tropical border gives you lush planting without creating a damp wall of crowded growth. Choose a fence line, patio edge, or side yard with decent air movement. Cut a clean front edge before planting. Use three layers: tall plants at the back, medium plants in repeated groups, and low plants along the front. Space everything by mature size, not nursery size. Mulch the bed, but keep mulch a few inches away from stems to reduce rot. Personalize it with: A plant color from a hotel garden you loved A bold leaf shape from a past client project A family courtyard memory A repeated red, white, or lime-green accent 10. Build a Container Cluster With Raised Drainage on a Humid Patio Container clusters are useful in humid climates because you control the soil, drainage, and spacing. Raise pots slightly so rainwater can drain rather than pool underneath. A few large containers usually look better than many small ones, especially when the pot material feels consistent. Best for: Paved patios, covered entries, and bare humid corners. Main benefit: Gives drainage control without planting in wet soil. Style fit: Suits tropical, modern, cottage, and coastal patios. Budget tip: Match pot finish, not every pot shape exactly. 11. Create a Wide Mulch Ring Under Trees Where Grass Fails Grass often struggles under mature trees in humid regions because shade, surface roots, and damp air work against it. A wide mulch ring solves the problem of repeated reseeding and makes the area look intentional. Add stepping stones or shade plants if the space needs more detail. Best for: Mature shade trees with thin, struggling turf below. Main benefit: Stops repeated reseeding and protects surface tree roots. Style fit: Works with tropical, relaxed, and naturalistic garden styles. Budget tip: Expand the ring slowly over two growing seasons. 12. Install a Hardscape Strip Near Downspouts and Rain-Splash Zones A hardscape strip is a small fix for places where rain hits the soil with force. Gravel, river stone, or pavers break the splash before it reaches walls, doors, or plant crowns. It keeps the area cleaner and helps reduce soil-borne disease around humid planting beds. Best for: Downspouts, thresholds, patio edges, and wall-side beds. Main benefit: Stops mud splash from hitting walls and plant crowns. Style fit: Suits clean, modern, tropical, and practical family gardens. Budget tip: Treat only true splash zones, not every bare patch. Cold or Snowy Regions Best for: Midwest, New England, northern mountain states, and the upper Great Plains. Cold gardens need structure that reads well through frost and snow, not just summer flowers. Plants and Aesthetic Direction for Cold Regions Plants to consider Aesthetic direction Siberian iris Upright leaves and spring flowers for cool-climate borders Black-eyed Susan Summer color and seed heads for late-season interest Karl Foerster grass Tall movement that keeps structure through winter weather Winterberry holly Red berries that stand out clearly against the snow Hellebore Early flowers that brighten shaded cold-region beds Snowdrop Small early blooms that signal the garden waking up A cold-region garden needs bones. Flowers help, but paths, edging, evergreens, bark, berries, and grasses carry the space in winter. 13. Build a Four-Season Foundation Bed A four-season foundation bed works best where you can see it from the street, front walk, or inside the house during winter. Cut a clear bed edge, improve the soil, and use stone, steel, or heavy timber edging that can withstand freeze-and-thaw. Plant evergreen anchors first because they hold the shape when everything else is dormant. Add hardy perennials in repeated groups. Choose plants with more than one season of interest, such as spring flowers, summer color, autumn seed heads, or winter berries. Mulch the bed to protect roots, but keep plants away from snow-dump zones. Personalize it with: Red berries near a window Grasses that move in snow Evergreens that remind you of an older family garden A stone edge inspired by a past front-yard job 14. Plant a Bulb-and-Perennial Layered Bed for Extended Season Color A bulb-and-perennial bed adds color to cold gardens without taking up more space. Spring bulbs bloom early, then perennial foliage rises and covers the fading leaves. This creates a smoother seasonal handoff and keeps the bed from looking empty between early spring and summer. Best for: Front beds, walkway borders, and foundation plantings. Main benefit: Adds early color before perennials fully wake up. Style fit: Works with cottage, traditional, and naturalistic gardens. Budget tip: Buy bulbs in bulk to reduce plant costs. 15. Use Gravel With Structural Edging for Freeze-Thaw Paths Cold-region paths need materials that can handle ground movement. Thin pavers may crack or shift after repeated freeze-thaw cycles, while gravel can move slightly without breaking. The key is strong edging, which keeps the path clean, contained, and easier to maintain. Best for: Informal side paths and access routes between beds. Main benefit: Handles ground movement better than thin concrete pavers. Style fit: Suits rustic, cottage, naturalistic, and classic gardens. Budget tip: Spend on edging before decorative gravel upgrades. 16. Create a Wind-Buffer Pocket to Protect an Exposed Bed A wind-buffer pocket helps protect plants in cold, exposed gardens. Use hardy shrubs, evergreens, or a short fence section on the windward side of the bed. Even a small buffer can reduce winter stress, slow drying winds, and make the area feel more sheltered. Best for: Windy corners, north-facing beds, and hillside gardens. Main benefit: Reduces winter wind stress and plant desiccation damage. Style fit: Works with four-season, traditional, and naturalistic gardens. Budget tip: One dense grouping can shelter a small area. Mild or Temperate Regions Best for: Southern coastal California, mild mid-Atlantic areas, and moderate parts of the Pacific Northwest. Mild climates offer more planting freedom, but that freedom can create unfocused gardens. Restraint, rhythm, and clear edges matter most here. Plants and Aesthetic Direction for Mild Regions Plants to consider Aesthetic direction Salvia Repeated color and pollinator-friendly movement through long seasons Gaura Airy flowers that soften structured beds and path edges Catmint Low, fragrant edging with a relaxed cottage-garden feel Dwarf pittosporum Evergreen structure that keeps mixed borders looking tidy Kangaroo paw Warm sculptural accents for sunny, mild-climate planting beds Society garlic Soft purple flowers with neat, grass-like foliage texture Choose two or three main colors and repeat plant shapes. A strong foreground, middle layer, and background layer will make the space easier to read. 17. Build a Layered Mixed Border With a Fixed Color Rhythm A layered mixed border works well along a fence, path, or long garden edge. Choose two or three main colors before shopping. This stops the border from becoming a random nursery haul. Set taller shrubs or upright plants at the back, medium plants in repeated drifts through the middle, and one low plant along the front edge. Leave space for mature size, even if the bed looks a little open at first. Mild-climate plants can fill out quickly. Personalize it with: A color rhythm from a previous garden A planting mix that reminds you of a favorite doorway A soft purple, silver, and cream palette A repeated flower color from a past job 18. Create an Edible Ornamental Border An edible ornamental border blends useful plants with a designed garden look. Herbs, compact vegetables, flowers, and fruiting shrubs sit together well when the layout feels repeated and tidy. Keep taller plants toward the back and use flowers or herbs to soften the front edge. For beginning builders who want to start with a defined planting structure, building outdoor furniture alongside raised garden frames in the same weekend makes the whole layout feel cohesive faster. Best for: Sunny, mild gardens with good soil and access. Main benefit: Combines harvest value with ornamental planting structure. Style fit: Suits cottage, Mediterranean, and casual modern gardens. Budget tip: Start with herbs because they are useful and decorative. 19. Add a Courtyard-Style Seating Pocket A courtyard-style seating pocket makes the garden usable rather than merely decorative. Mark a small floor area with gravel or pavers, add a bench or two chairs, and frame the space with planting. Even a compact pocket feels private when plants sit on two sides. Once the seating area is sorted, you can look at DIY outdoor sectional options to expand the space as the budget allows. Best for: Mild gardens with long outdoor living seasons. Main benefit: Turns the garden into a usable destination. Style fit: Suits Mediterranean, modern, cottage, and coastal gardens. Budget tip: Keep the floor small, finished, and easy to maintain. How to Keep Garden Landscaping Affordable Budgeting works better when it is tied to climate. The smartest spend is the one that prevents the most common failure in your region. Climate Spend on Save on Dry Drip irrigation, gravel, drought-suited plants Thirsty annuals and large lawn areas Rainy Drainage, raised soil, timber paths Plants that need dry soil Hot and humid Shade, spacing, mulch, drainage strips Dense planting that traps humidity Cold Frost-stable edging, hardy evergreens, and mulch Tender plants that die in winter Mild Edging, repeated plant groups, mature spacing Impulse plant buys The cheapest garden to run is one that suits its climate. Spending in the right place now saves money every season after. If you want to see how a well-planned outdoor structure anchors a garden layout, the DIY pergola build breaks down exactly where outdoor budgets go wrong at every stage. Common Garden Landscaping Mistakes to Avoid These mistakes make gardens fail early, cost more over time, and look worse even as the work increases. Mistake Why does it hurt the garden Copying a design from another climate Water, soil, frost, and humidity change what survives Shopping before planning Plant purchases turn into clutter Choosing the wrong surface Materials behave differently in heat, rain, frost, and humidity Planting too close Crowding causes weak growth, disease, and extra pruning Fighting the site The garden needs constant rescue Designing only for the peak season The space looks bare when flowers fade Every mistake on this list is easier to avoid before digging starts. A garden that suits its site improves faster and costs less. Frequently Asked Questions How do I make a small garden look properly landscaped? Use one clear bed shape, one path or edge, and a few repeated plant varieties. Small gardens lose focus when too many plants, pots, and materials compete. Every feature should have a job. What is the cheapest garden landscaping idea that still looks good? A defined planting bed with edging, mulch, and three or four repeated hardy plants is the lowest-cost option that still reads as intentional design. The edging does most of the visual work. Do straight or curved garden beds work better? Both can work. Straight beds suit modern homes, narrow spaces, and formal front gardens. Curved beds suit cottage gardens, irregular plots, and yards where the boundary already curves. How do I start landscaping without tearing up the whole garden? Begin with one visible edge, a front bed, fence line, or path border. Finish that area fully before starting another. A complete small project looks better than a half-finished large one. What garden landscaping ideas work in shady yards? Shade suits ferns, hostas, astilbe, and creeping Jenny. Layered groundcovers and mossy stones read well in low-light conditions. Work with what the site gives you rather than trying to force sun-lovers into deep shade. How often should I update my garden landscaping? Review the garden each season, but make big changes slowly. Replace plants that keep failing, widen paths that feel cramped, and edit crowded areas before adding more. Small updates typically work better than full redesigns. What garden landscaping ideas work for slopes? Dry creek beds, terraced beds, and ground-hugging native plants all handle slopes well. The goal is to slow water movement and anchor the soil before adding anything decorative. Final Takeaway Good garden landscaping starts with the place you already have. A dry yard needs different choices than a rainy, humid, snowy, or mild garden. I would rather build one climate-smart feature well than force a style that needs constant rescue. My best advice is to pick one visible area, solve the site problem first, then add beauty through plants, texture, and structure. When the garden landscape works with its climate, it becomes easier to maintain, more affordable, and much better to live with.





